Upgrade to Pro — share decks privately, control downloads, hide ads and more …

Kivy - Spaß mit Natural User Interfaces und Python

Kivy - Spaß mit Natural User Interfaces und Python

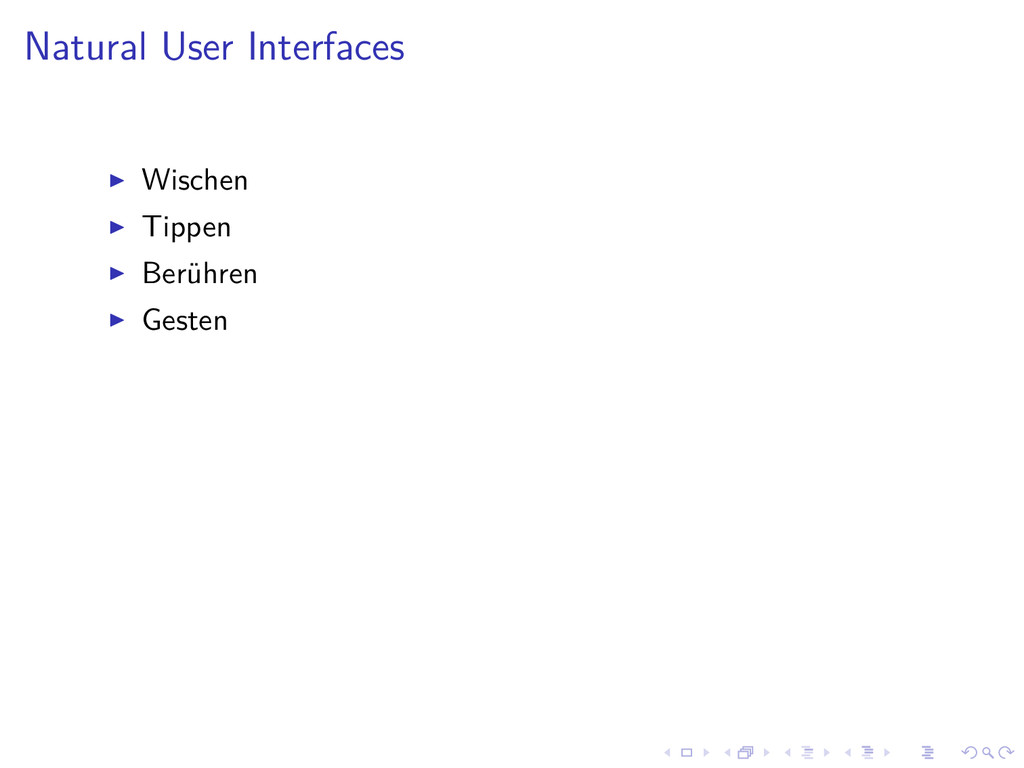
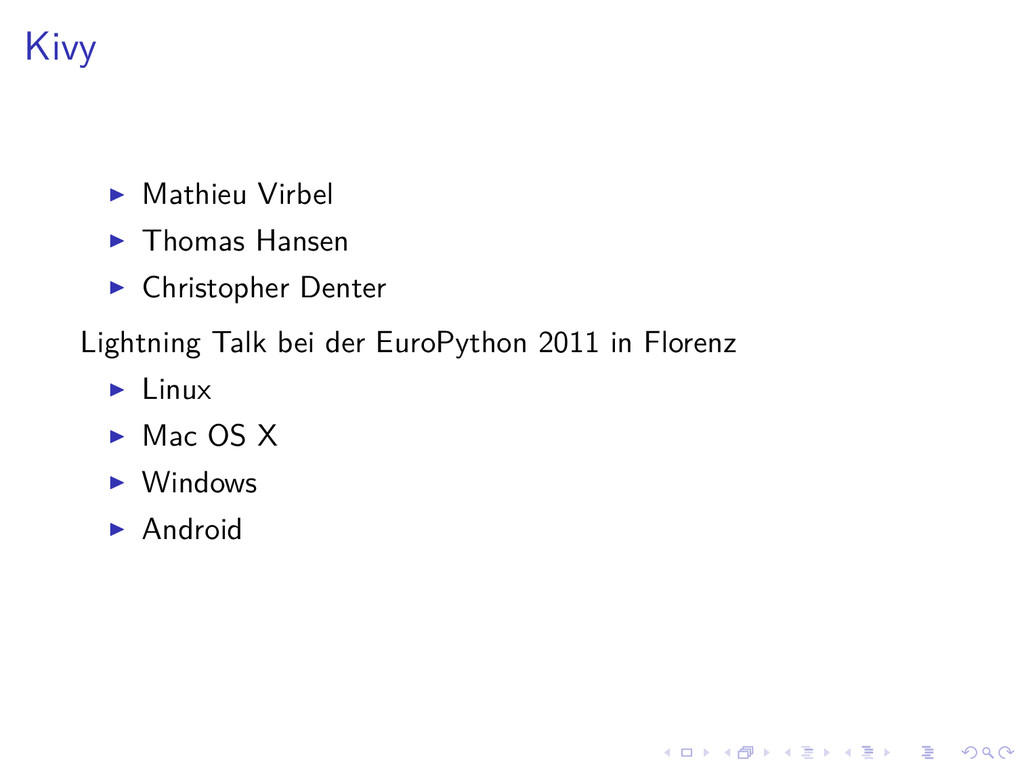
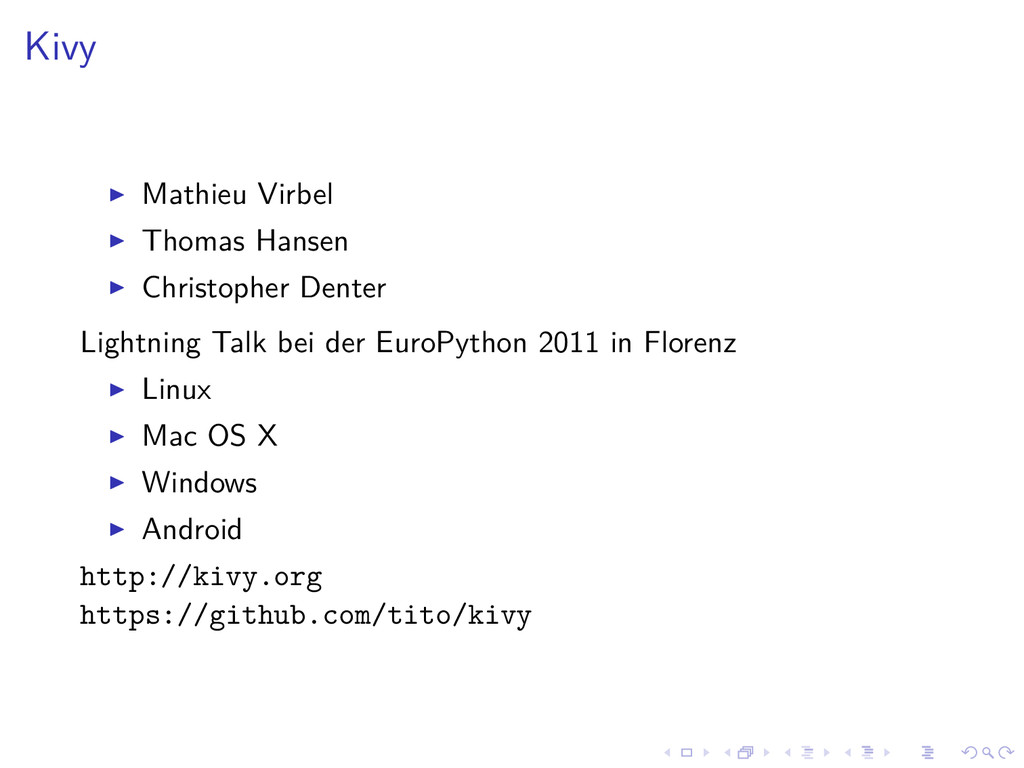
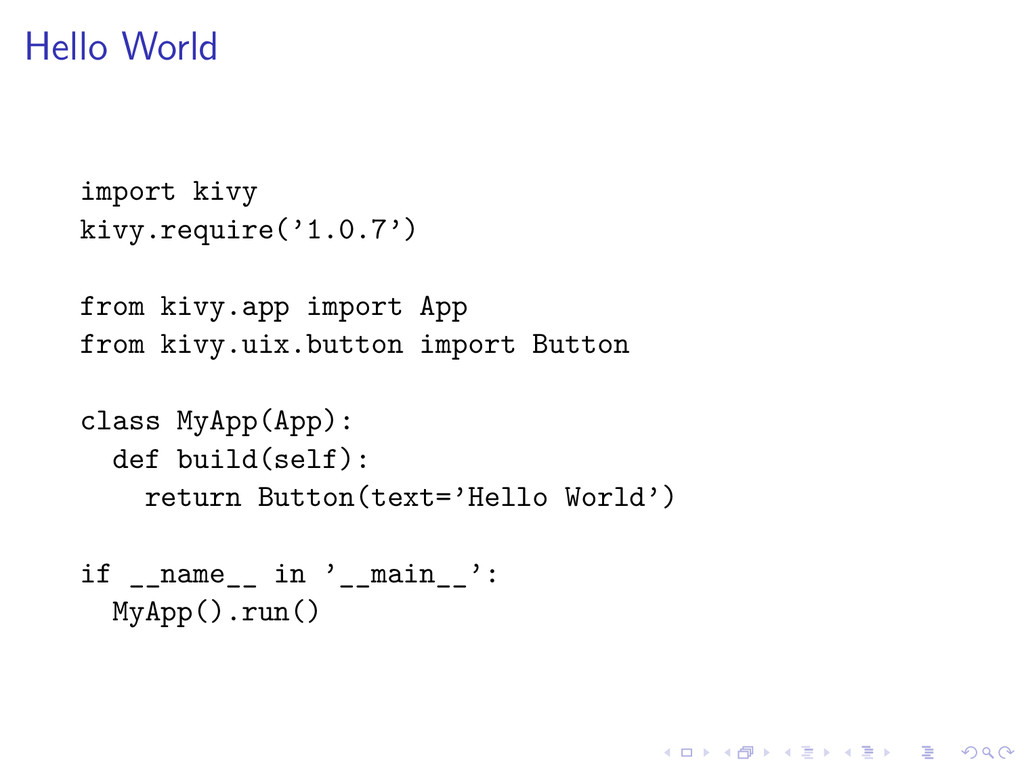
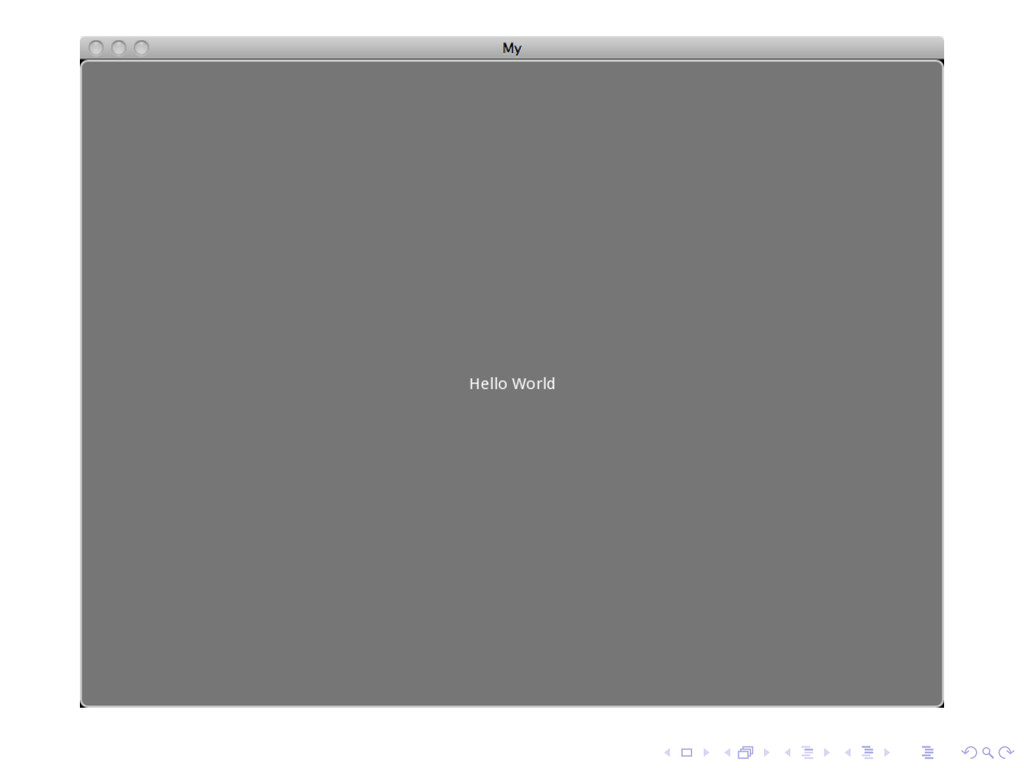
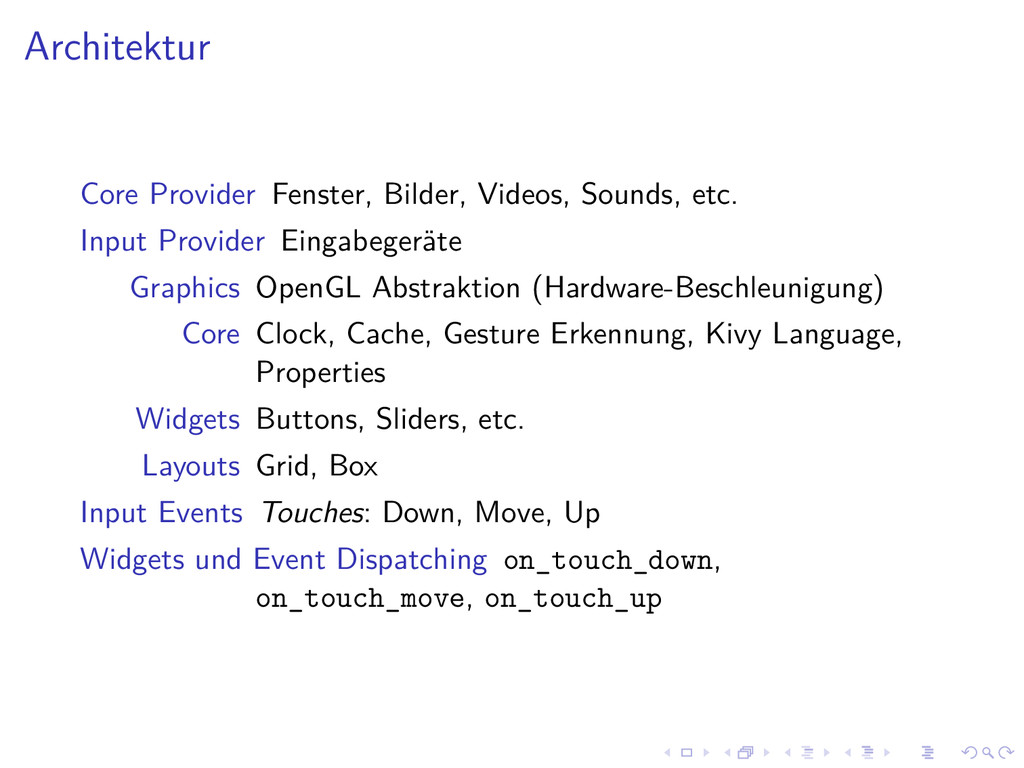
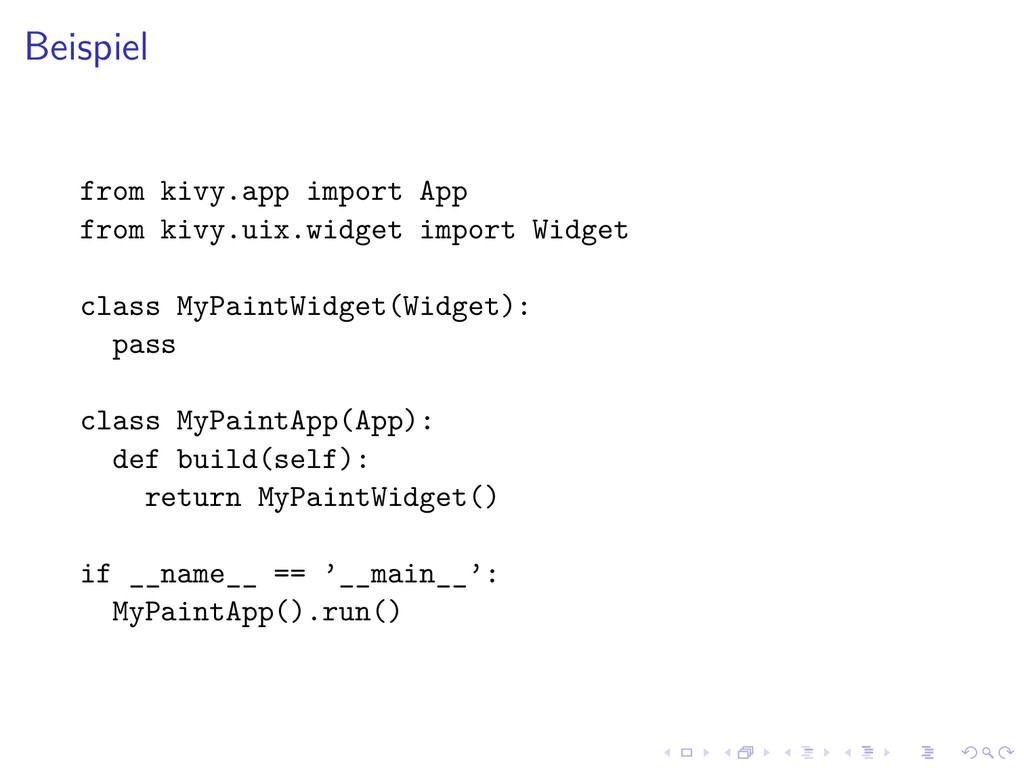
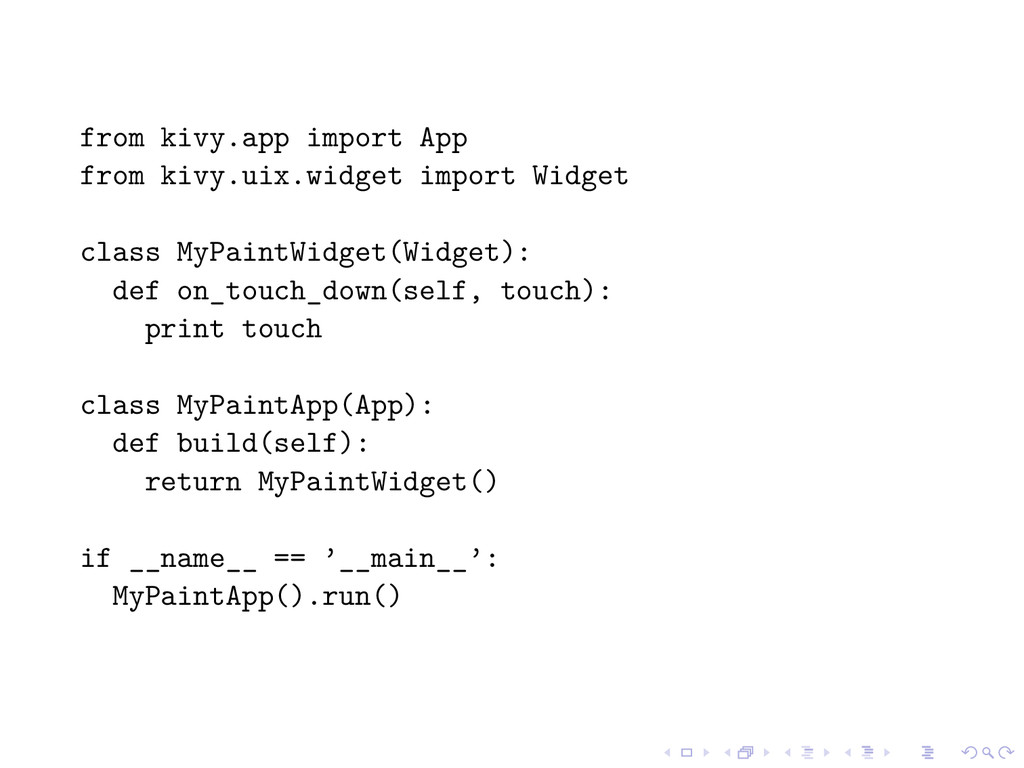
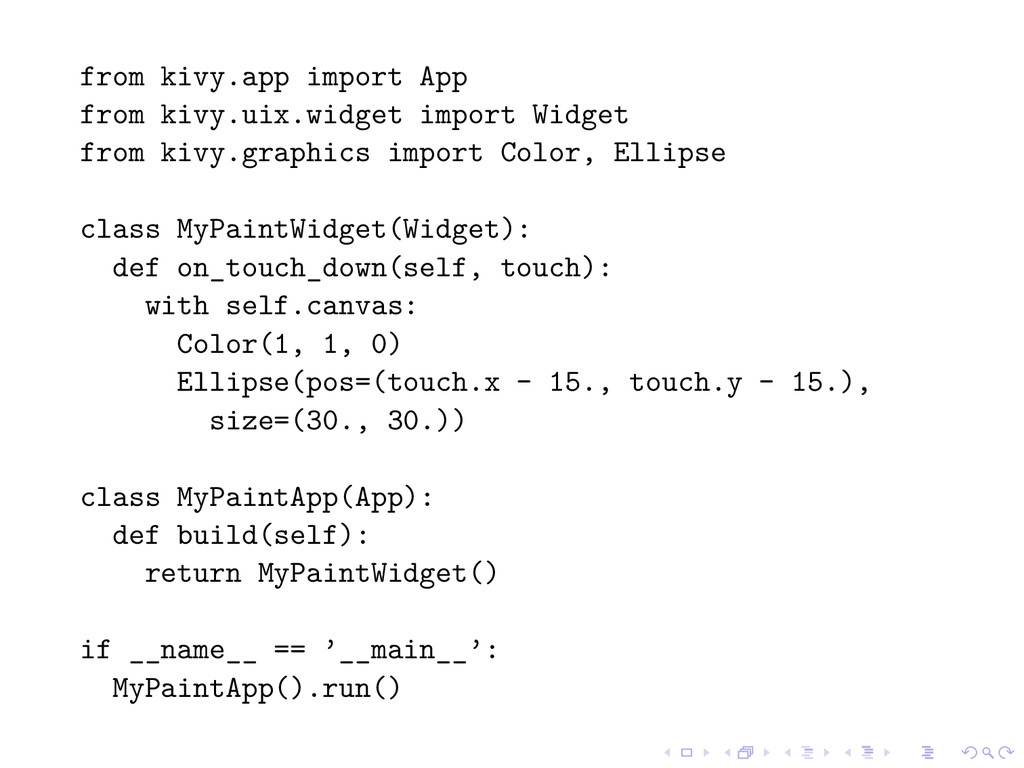
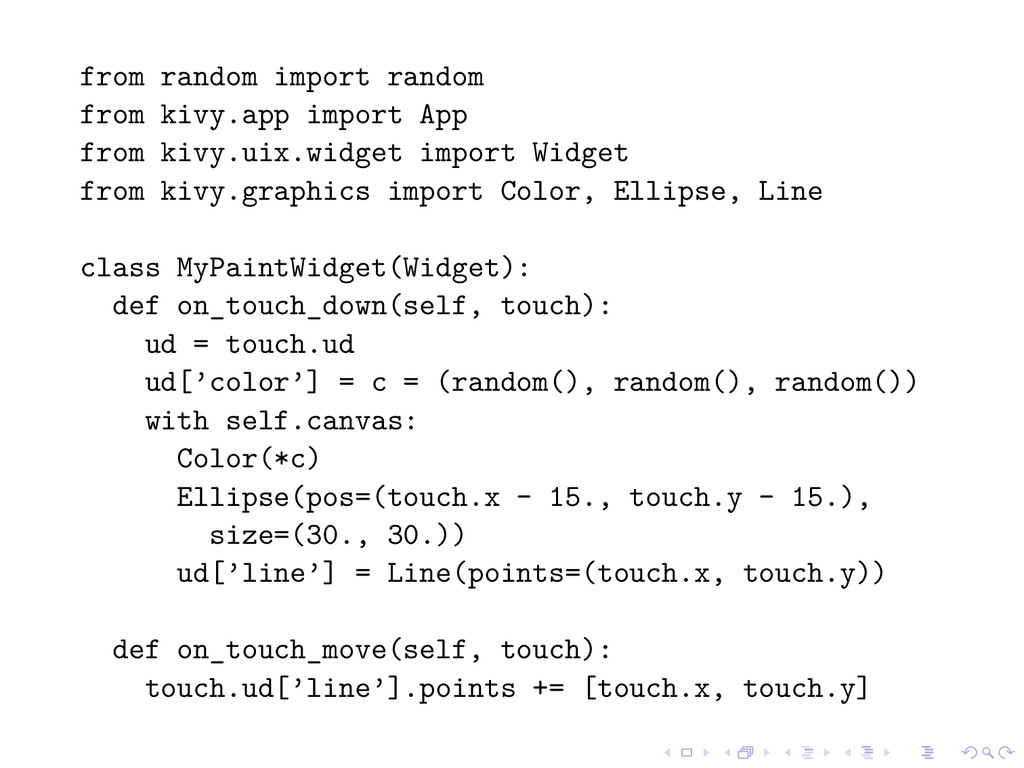
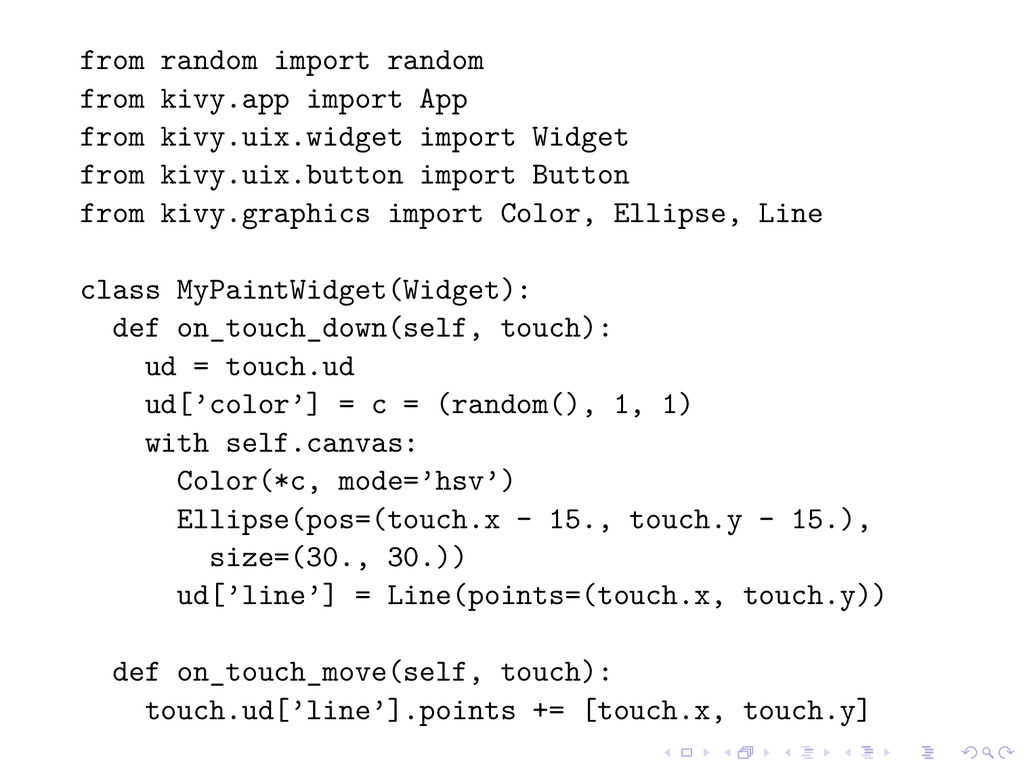
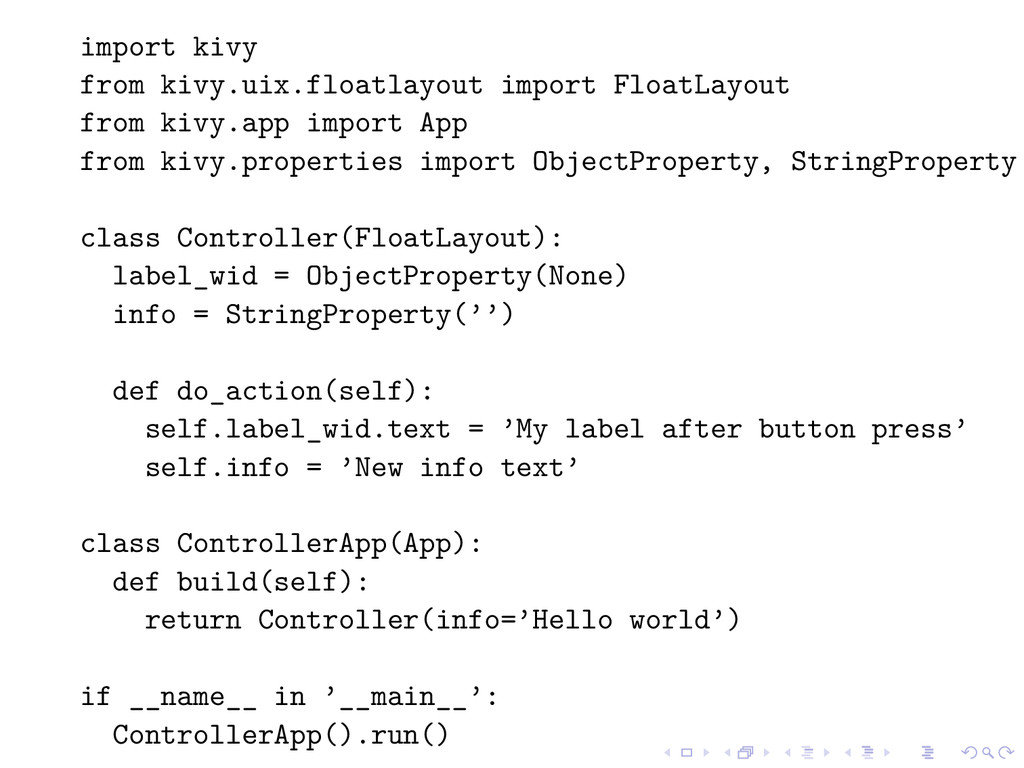
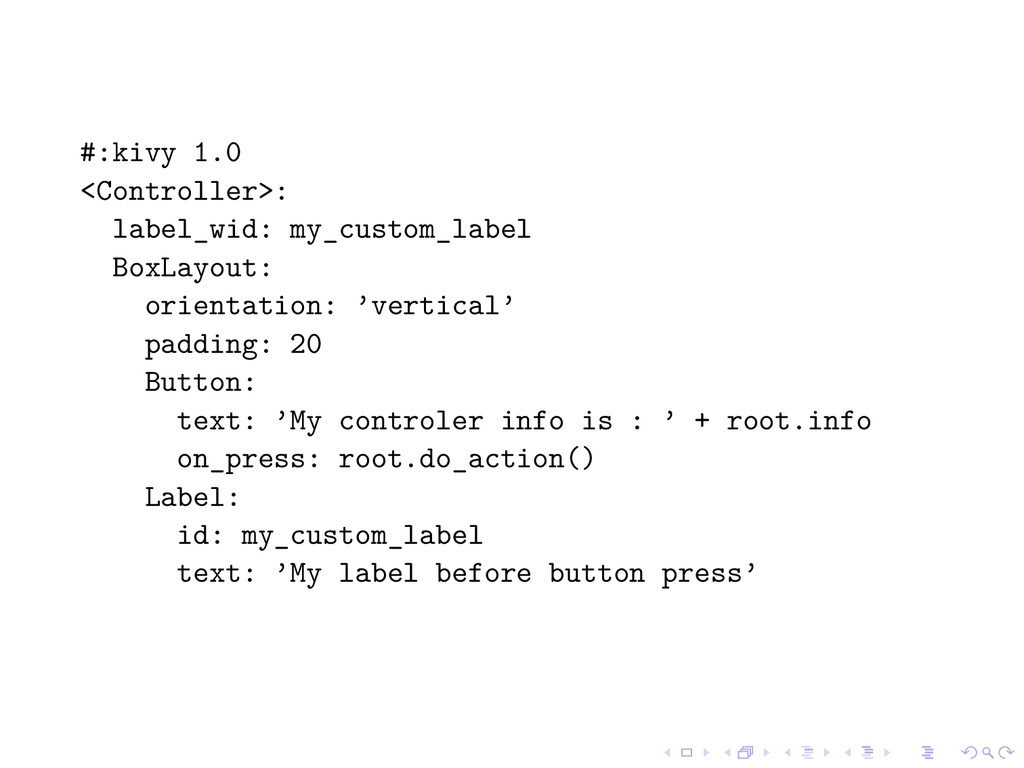
Kivy ist ein Framework zur schnellen Entwicklung von Natural User Interfaces, das vor kurzen auf EuroPython in Florenz präsentiert wurde. Kivy verfolgt einen neuen Ansatz was Eingabe-Events und Widgets betrifft. Es unterstützt Multi-Touch Eingabegeräte und ist dank Python plattform-unabhängig. Eine Kivy-Applikation läuft auf Linux, MacOS, Windows und Android, ohne etwas ändern zu müssen.

Ernesto Rico Schmidt

October 07, 2011
Tweet

More Decks by Ernesto Rico Schmidt

Other Decks in Programming

Transcript

  1. Inhalt Natural User Interfaces Kivy Das Projekt Installation Hello World

    Architektur Beispiel Zusammenfassung und Ausblick
  2. Natural User Interfaces Wischen Tippen Berühren Gesten Apple iPhone, iPad,

    iPod Touch, Mac Touchpad Microsoft Surface Xbox Kinect
  3. Natural User Interfaces Wischen Tippen Berühren Gesten Apple iPhone, iPad,

    iPod Touch, Mac Touchpad Microsoft Surface Xbox Kinect 1. Command-line interface 2. Graphical user interface 3. Natural user interface
  4. Kivy Mathieu Virbel Thomas Hansen Christopher Denter Lightning Talk bei

    der EuroPython 2011 in Florenz Linux Mac OS X Windows Android
  5. Kivy Mathieu Virbel Thomas Hansen Christopher Denter Lightning Talk bei

    der EuroPython 2011 in Florenz Linux Mac OS X Windows Android http://kivy.org https://github.com/tito/kivy
  6. Hello World import kivy kivy.require(’1.0.7’) from kivy.app import App from

    kivy.uix.button import Button class MyApp(App): def build(self): return Button(text=’Hello World’) if __name__ in ’__main__’: MyApp().run()
  7. Architektur Core Provider Fenster, Bilder, Videos, Sounds, etc. Input Provider

    Eingabegeräte Graphics OpenGL Abstraktion (Hardware-Beschleunigung) Core Clock, Cache, Gesture Erkennung, Kivy Language, Properties Widgets Buttons, Sliders, etc. Layouts Grid, Box Input Events Touches: Down, Move, Up Widgets und Event Dispatching on_touch_down, on_touch_move, on_touch_up
  8. Beispiel from kivy.app import App from kivy.uix.widget import Widget class

    MyPaintWidget(Widget): pass class MyPaintApp(App): def build(self): return MyPaintWidget() if __name__ == ’__main__’: MyPaintApp().run()
  9. from kivy.app import App from kivy.uix.widget import Widget class MyPaintWidget(Widget):

    def on_touch_down(self, touch): print touch class MyPaintApp(App): def build(self): return MyPaintWidget() if __name__ == ’__main__’: MyPaintApp().run()
  10. from kivy.app import App from kivy.uix.widget import Widget from kivy.graphics

    import Color, Ellipse class MyPaintWidget(Widget): def on_touch_down(self, touch): with self.canvas: Color(1, 1, 0) Ellipse(pos=(touch.x - 15., touch.y - 15.), size=(30., 30.)) class MyPaintApp(App): def build(self): return MyPaintWidget() if __name__ == ’__main__’: MyPaintApp().run()
  11. from kivy.app import App from kivy.uix.widget import Widget from kivy.graphics

    import Color, Ellipse, Line class MyPaintWidget(Widget): def on_touch_down(self, touch): ud = touch.ud with self.canvas: Color(1, 1, 0) Ellipse(pos=(touch.x - 15., touch.y - 15.), size=(30., 30.)) ud[’line’] = Line(points=(touch.x, touch.y)) def on_touch_move(self, touch): touch.ud[’line’].points += [touch.x, touch.y]
  12. from random import random from kivy.app import App from kivy.uix.widget

    import Widget from kivy.graphics import Color, Ellipse, Line class MyPaintWidget(Widget): def on_touch_down(self, touch): ud = touch.ud ud[’color’] = c = (random(), random(), random()) with self.canvas: Color(*c) Ellipse(pos=(touch.x - 15., touch.y - 15.), size=(30., 30.)) ud[’line’] = Line(points=(touch.x, touch.y)) def on_touch_move(self, touch): touch.ud[’line’].points += [touch.x, touch.y]
  13. from random import random from kivy.app import App from kivy.uix.widget

    import Widget from kivy.uix.button import Button from kivy.graphics import Color, Ellipse, Line class MyPaintWidget(Widget): def on_touch_down(self, touch): ud = touch.ud ud[’color’] = c = (random(), 1, 1) with self.canvas: Color(*c, mode=’hsv’) Ellipse(pos=(touch.x - 15., touch.y - 15.), size=(30., 30.)) ud[’line’] = Line(points=(touch.x, touch.y)) def on_touch_move(self, touch): touch.ud[’line’].points += [touch.x, touch.y]
  14. class MyPaintApp(App): def build(self): parent_widget = Widget() my_paint_widget = MyPaintWidget()

    clear_button = Button(text=’Clear’) parent_widget.add_widget(my_paint_widget) parent_widget.add_widget(clear_button) def clear_canvas(obj): my_paint_widget.canvas.clear() clear_button.bind(on_release=clear_canvas) return parent if __name__ == ’__main__’: MyPaintApp().run()
  15. import kivy from kivy.uix.floatlayout import FloatLayout from kivy.app import App

    from kivy.properties import ObjectProperty, StringProperty class Controller(FloatLayout): label_wid = ObjectProperty(None) info = StringProperty(’’) def do_action(self): self.label_wid.text = ’My label after button press’ self.info = ’New info text’ class ControllerApp(App): def build(self): return Controller(info=’Hello world’) if __name__ in ’__main__’: ControllerApp().run()
  16. #:kivy 1.0 <Controller>: label_wid: my_custom_label BoxLayout: orientation: ’vertical’ padding: 20

    Button: text: ’My controler info is : ’ + root.info on_press: root.do_action() Label: id: my_custom_label text: ’My label before button press’
  17. Zusammenfassung und Ausblick Natural User Interfaces Kivy Core Provider Input

    Provider Gesture-Erkennung Kivy Language Widget Layout http://kivy.org