team, responsible for the production and maintenance of several local news sites, thrived in a development environment dictated by journalism deadlines. For the sites — including LJWorld.com, Lawrence.com, and KUsports.com — journalists (and management) demanded that features be added and entire applications be built on an intensely fast schedule, often with only days’ or hours’ notice. Thus, Adrian and Simon developed a time-saving Web development framework out of necessity — it was the only way they could build maintainable applications under the extreme deadlines. In summer 2005, after having developed this framework to a point where it was efficiently powering most of World Online’s sites, the World Online team, which now included Jacob Kaplan-Moss, decided to release the framework as open source software. They released it in July 2005 and named it Django, after the jazz guitarist Django Reinhardt. Although Django is now an open source project with contributors across the planet, the original World Online developers still provide central guidance for the framework’s growth, and World Online contributes other important aspects such as employee time, marketing materials, and hosting/bandwidth for the framework’s Web site (http://www.djangoproject.com/). This history is relevant because it helps explain two key matters. The first is Django’s “sweet spot.” Because Django was born in a news environment, it offers several features (particularly its admin interface, covered in Chapter 6) that are particularly well suited for “content” sites — sites like eBay, craigslist.org, and washingtonpost.com that offer dynamic, database-driven information. (Don’t let that turn you off, though — although Django is particularly good for developing those sorts of sites, that doesn’t preclude it from being an effective tool for building any sort of dynamic Web site. There’s a difference between being particularly effective at something and being ineffective at other things.) The second matter to note is how Django’s origins have shaped the culture of its open source community. Because Django was extracted from real-world code, rather than being an academic exercise or commercial product, it is acutely focused on solving Web development problems that Django’s developers themselves have faced — and continue to face. As a result, Django itself is actively improved on an almost daily basis. The framework’s developers have a keen interest in making sure Django saves developers time, produces applications that are easy to maintain, and performs well under load. If nothing else, the developers are motivated by their own selfish desires to save themselves time and enjoy their jobs. (To put it bluntly, they eat their own dog food.) HOW TO READ THIS BOOK In writing this book, we tried to strike a balance between readability and reference, with a bias toward readability. Our goal with this book, as stated earlier, is to make you a Django expert, and we believe the best way to teach is through prose and plenty of examples, rather than a providing an exhaustive but bland catalog of Django features. (As someone once said, you can’t expect to teach somebody how to speak merely by teaching them the alphabet.) With that in mind, we recommend that you read Chapters 1 through 7 in order. They form the foundation of how to use Django; once you’ve read them, you’ll be able to build Django-powered Web sites. The remaining chapters, which focus on specific Django features, can be read in any order. The appendixes are for reference. They, along with the free documentation at http://www.djangoproject.com/, are probably what you’ll flip back to occasionally to recall syntax or find quick synopses of what certain parts of Django do. Required Programming Knowledge Readers of this book should understand the basics of procedural and object-oriented programming: control structures (if, while, and for), data structures (lists, hashes/dictionaries), variables, classes, and objects. Experience in Web development is, as you may expect, very helpful, but it’s not required to read this book. Throughout the book, we try to promote best practices in Web development for readers who lack this type of experience. Required Python Knowledge At its core, Django is simply a collection of libraries written in the Python programming language. To develop a site using Django, you write Python code that uses these libraries. Learning Django, then, is a matter of learning how to program in Python and understanding how the Django libraries work. Chapter 1: Introduction to Django 9
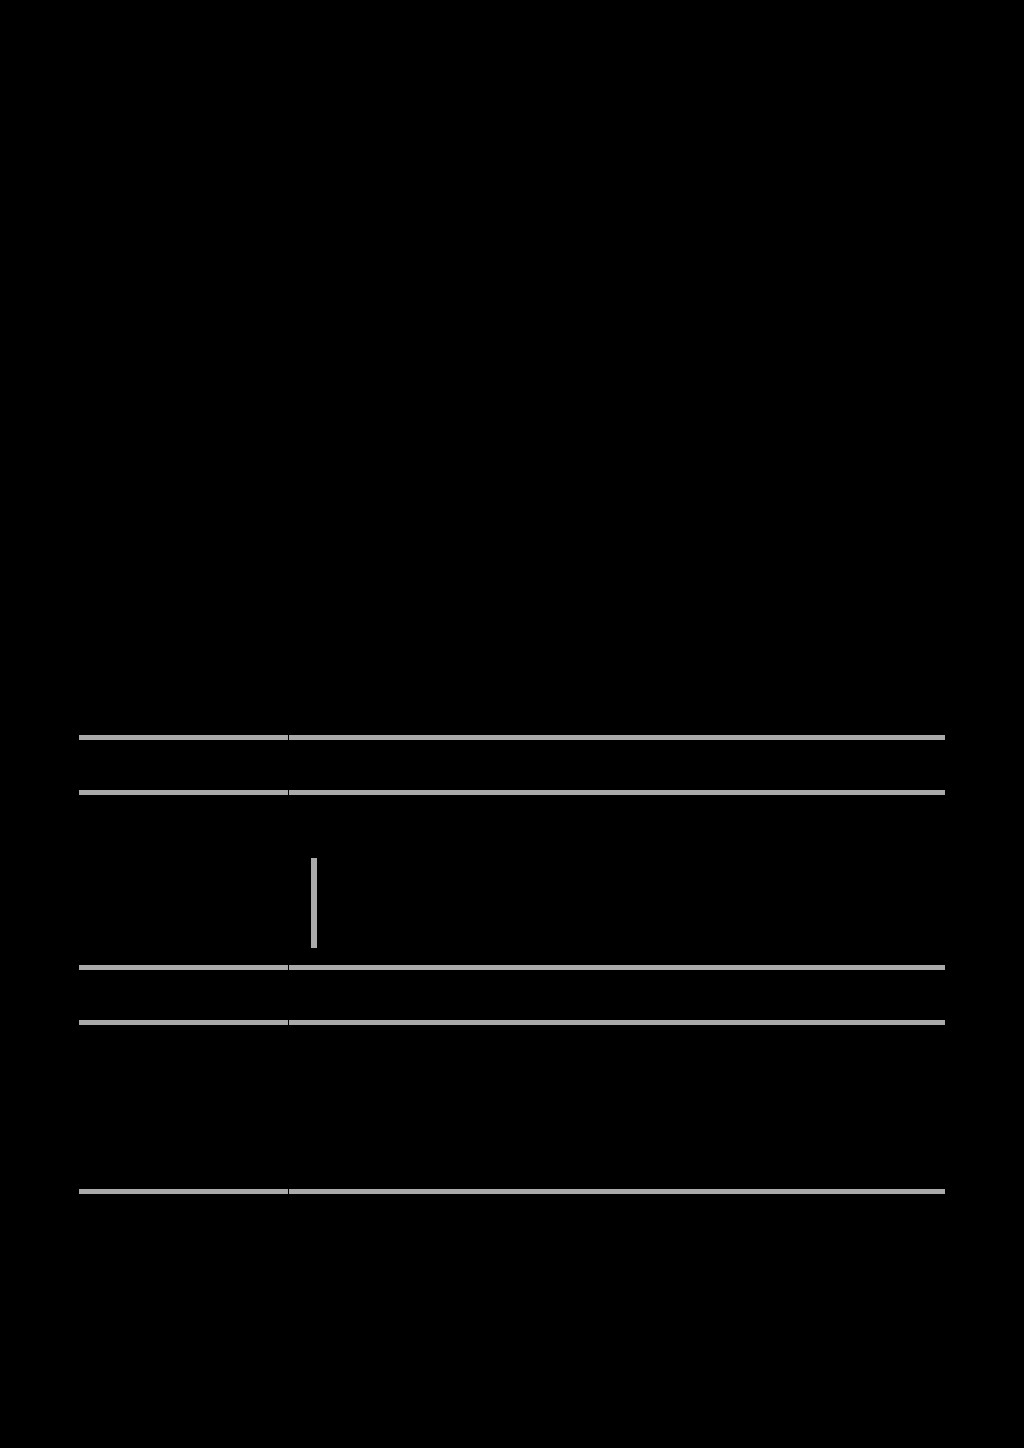
![>>> c['foo'] '' >>> c['newvariable'] = 'hello' >>> c['newvariable'] 'hello'](https://files.speakerdeck.com/presentations/9e6c1b889f0245e48096d69131ddb4ae/slide_34.jpg)
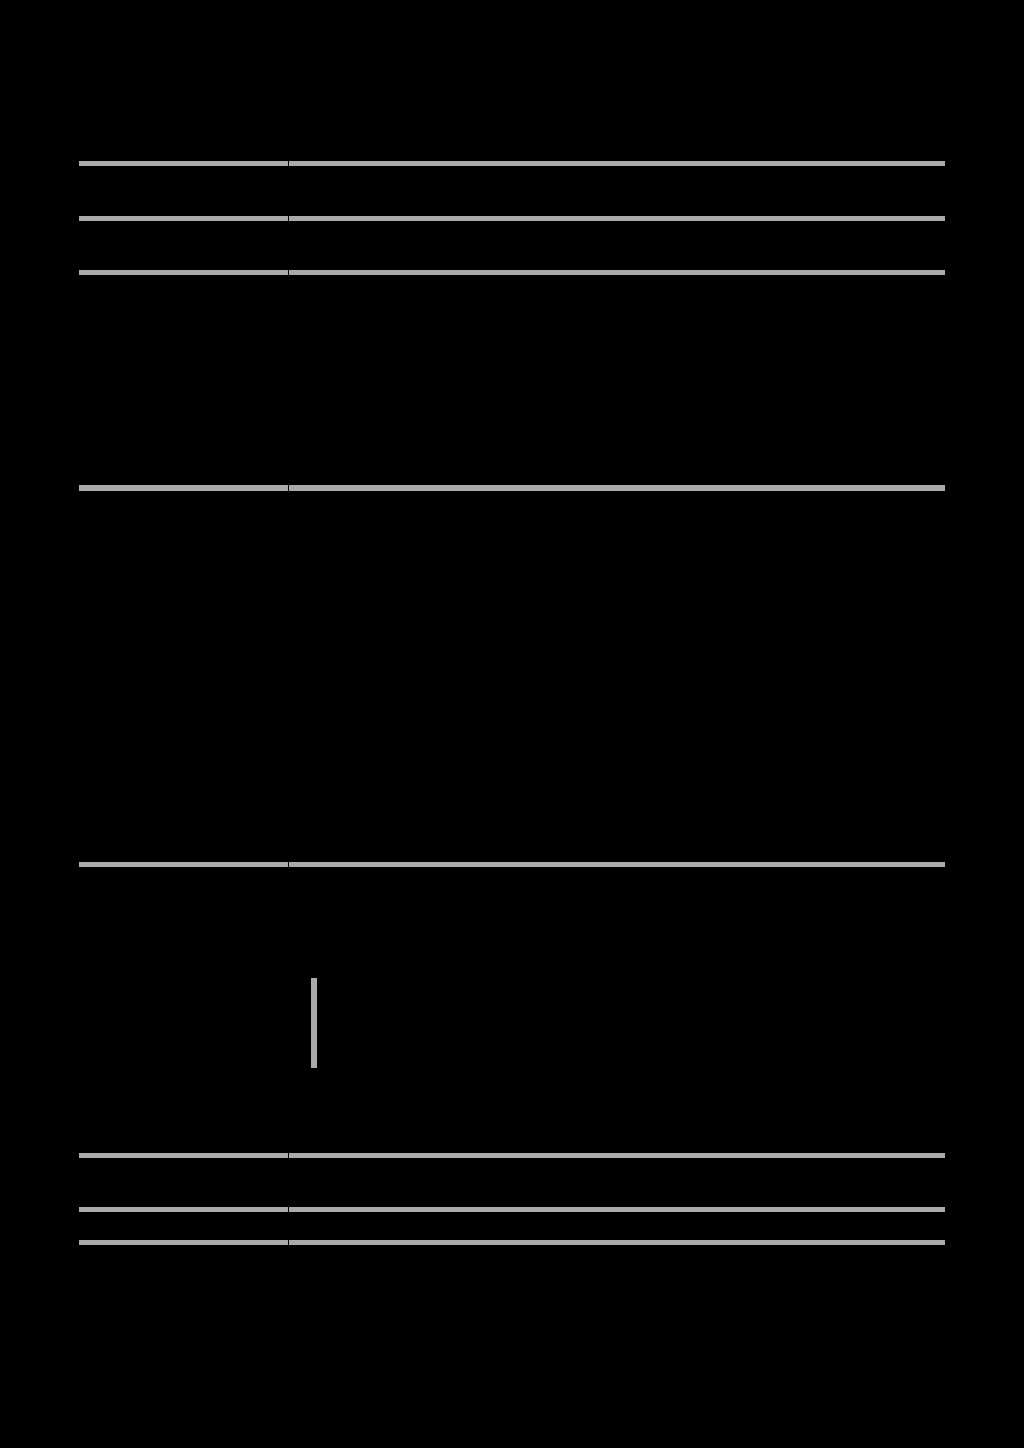
![>>> Publisher.objects.filter(country="U.S.A.", state_province="CA") [<Publisher: Apress Publishing>] Those multiple arguments get](https://files.speakerdeck.com/presentations/9e6c1b889f0245e48096d69131ddb4ae/slide_62.jpg)
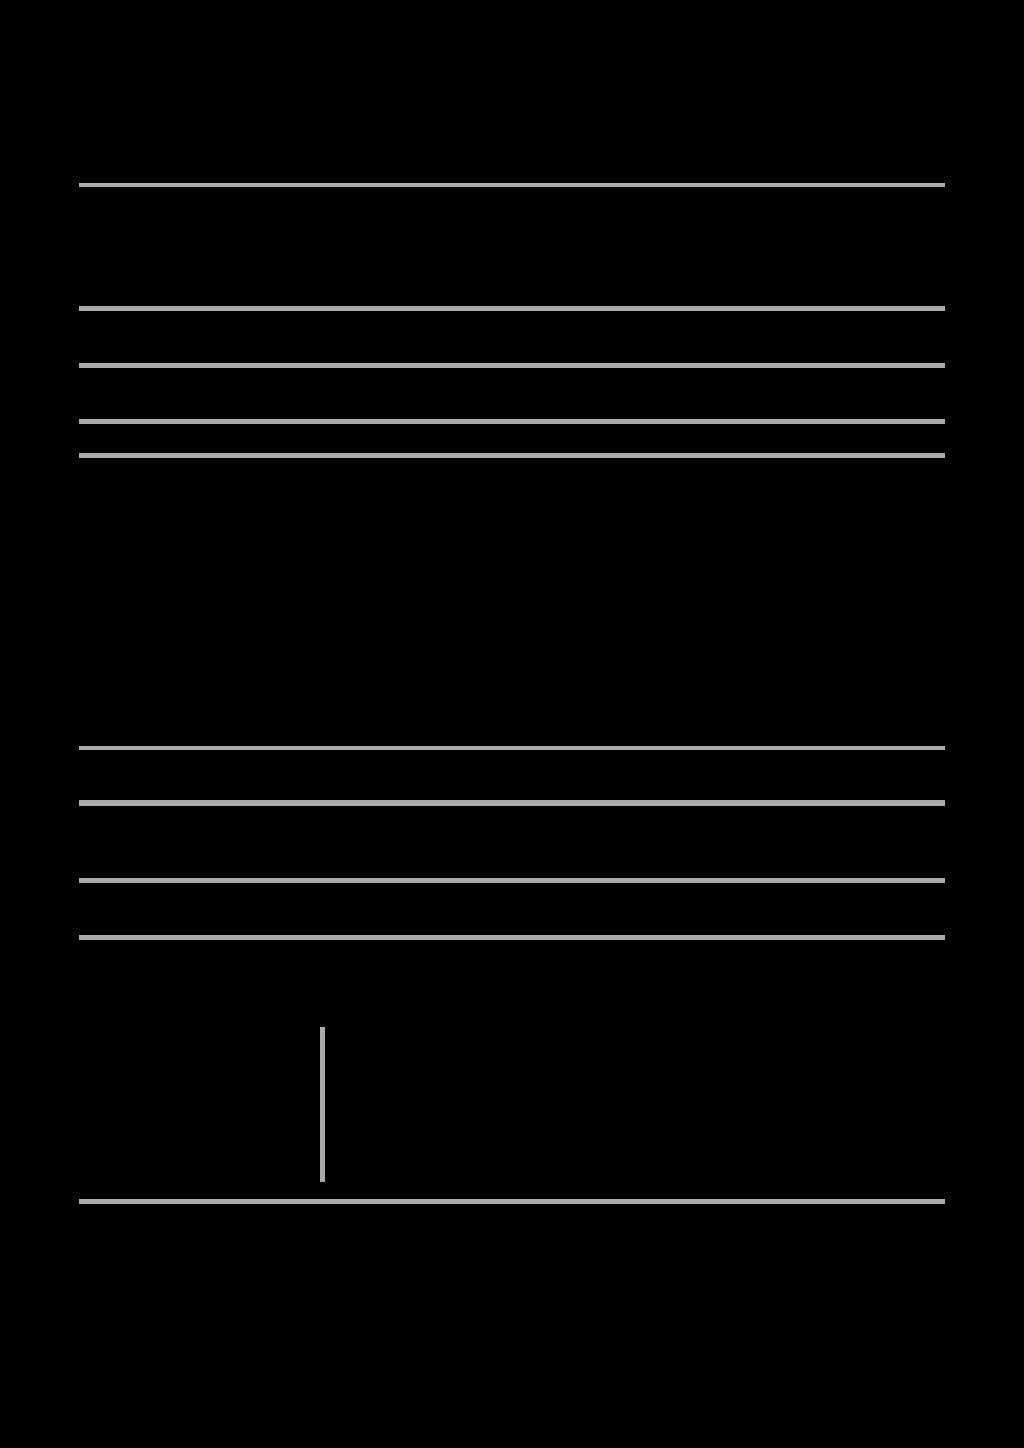
![urlpatterns = patterns('', (r'^/?$', 'mysite.views.archive_index'), (r'^(\d{4})/([a-z]{3})/$', 'mysite.views.archive_month'), (r'^tag/(\w+)/$', 'weblog.views.tag'), )](https://files.speakerdeck.com/presentations/9e6c1b889f0245e48096d69131ddb4ae/slide_94.jpg)
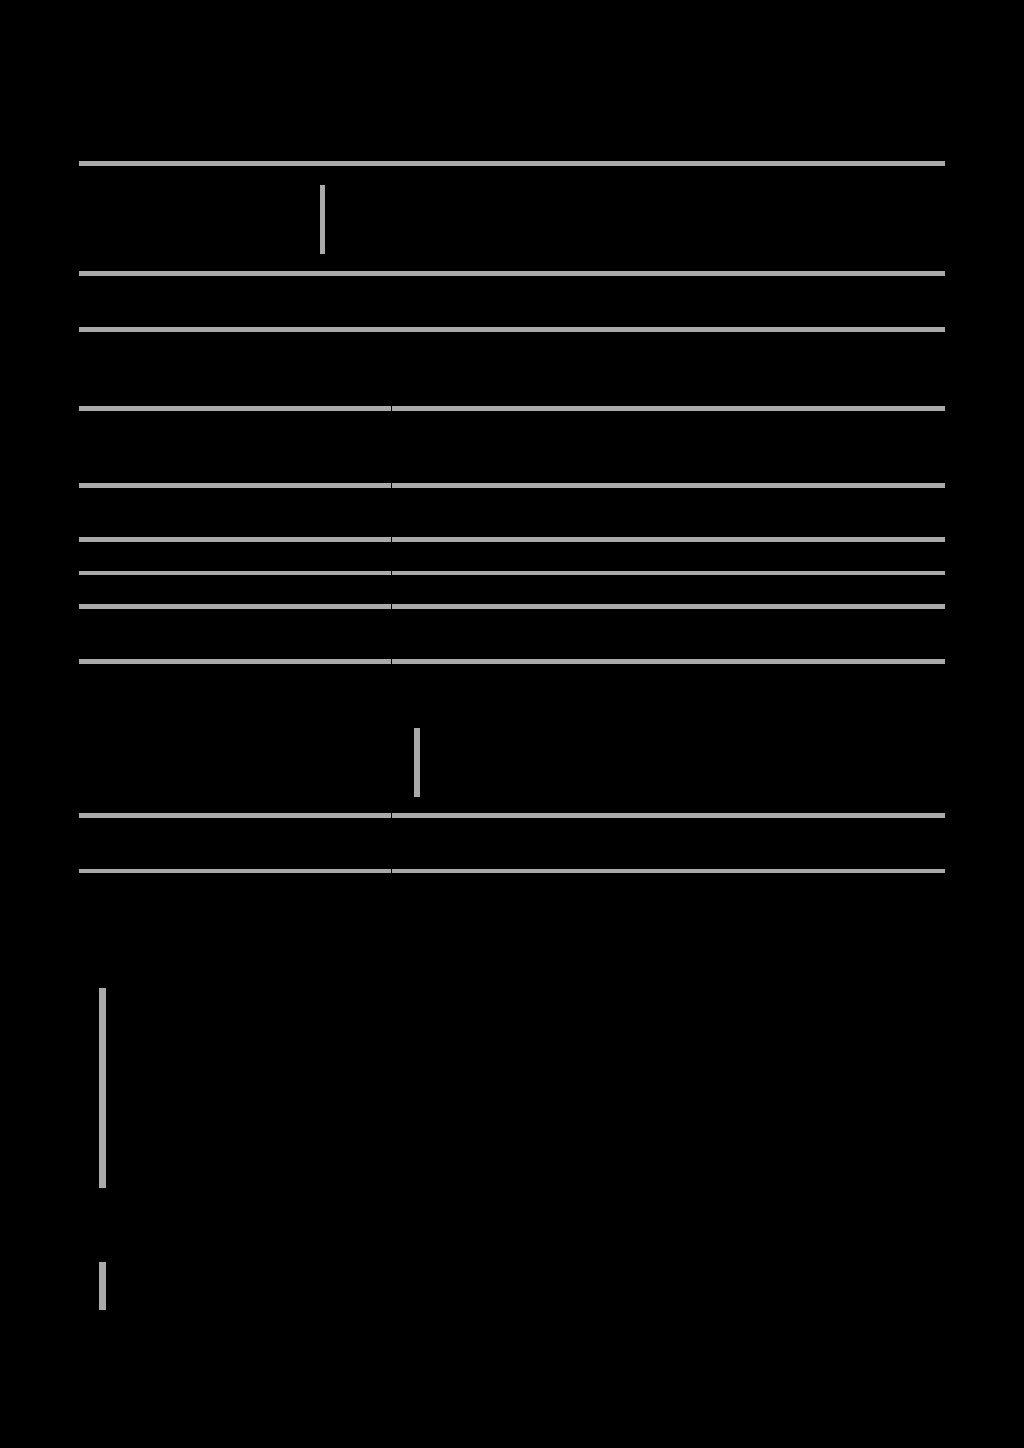
![def __str__(self): return self.name class Meta: ordering = ["-name"] class](https://files.speakerdeck.com/presentations/9e6c1b889f0245e48096d69131ddb4ae/slide_108.jpg)
![mimetype = "text/plain", template_name = "books/author_list.txt" ) response["Content-Disposition"] = "attachment;](https://files.speakerdeck.com/presentations/9e6c1b889f0245e48096d69131ddb4ae/slide_113.jpg)
![self.var_name = var_name def render(self, context): now = datetime.datetime.now() context[self.var_name]](https://files.speakerdeck.com/presentations/9e6c1b889f0245e48096d69131ddb4ae/slide_125.jpg)
![# os.chdir("/home/user/myproject") # Set the DJANGO_SETTINGS_MODULE environment variable. os.environ['DJANGO_SETTINGS_MODULE'] =](https://files.speakerdeck.com/presentations/9e6c1b889f0245e48096d69131ddb4ae/slide_235.jpg)
![>>> Entry.objects.extra(where=['id IN (3, 4, 5, 20)']) The select and](https://files.speakerdeck.com/presentations/9e6c1b889f0245e48096d69131ddb4ae/slide_282.jpg)
![( r'^(?P<year>d{4})/(?P<month>[a-z]{3})/(?P<day>d{2})/ (?P<object_id>[w-]+)/$', date_based.object_detail, book_info ), ) Required Arguments •](https://files.speakerdeck.com/presentations/9e6c1b889f0245e48096d69131ddb4ae/slide_308.jpg)
![TEMPLATE_DIRS = [ '/home/web-apps/myapp', '/home/web-apps/base', ] ) Pass configure() as](https://files.speakerdeck.com/presentations/9e6c1b889f0245e48096d69131ddb4ae/slide_315.jpg)
![adminindex [appname appname …] Prints the admin-index template snippet for](https://files.speakerdeck.com/presentations/9e6c1b889f0245e48096d69131ddb4ae/slide_346.jpg)
![sqlreset [appname appname …] Prints the DROP TABLE SQL, and](https://files.speakerdeck.com/presentations/9e6c1b889f0245e48096d69131ddb4ae/slide_350.jpg)
![>>> request.POST {'your_name': ['John Smith'], 'bands': ['beatles', 'zombies']} >>> request.POST['your_name']](https://files.speakerdeck.com/presentations/9e6c1b889f0245e48096d69131ddb4ae/slide_357.jpg)
![>>> response = HttpResponse() >>> response['X-DJANGO'] = "It's the best."](https://files.speakerdeck.com/presentations/9e6c1b889f0245e48096d69131ddb4ae/slide_358.jpg)