Upgrade to Pro — share decks privately, control downloads, hide ads and more …

iOS 7 Transition Guide

CocaTech
June 12, 2013
650

iOS 7 Transition Guide

CocaTech

June 12, 2013
Tweet

Transcript

  1. Contents Preparing for Transition 5 Before You Start 6 Characterizing

    Your App 8 Scope the Project 10 Things Every App Must Do 10 Things Every App Should Do 10 If You Must Continue to Support iOS 6 11 Supporting iOS 6 12 Using Interface Builder to Support Multiple App Versions 12 Supporting Two Versions of a Standard App 13 Managing Multiple Images in a Hybrid App 14 Loading Resources Conditionally 14 Updating the UI 16 Layout and Appearance 17 Using View Controllers 17 Using Tint Color 18 Using Fonts 19 Bars and Bar Buttons 21 The Status Bar 21 Navigation Bar 22 Search Bar and Scope Bar 23 Tab Bar 25 Toolbar 26 Bar Buttons 26 Content Views 28 Activity 28 Collection View 30 2013-06-10 | Copyright © 2013 Apple Inc. All Rights Reserved. Apple Confidential Information. 2
  2. Image View 30 Map View 31 Page View Controller 31

    Scroll View 32 Table View 33 Text View 35 Web View 35 Controls 37 Date Picker 37 Contact Add Button 38 Detail Disclosure Button 39 Info Button 39 Label 39 Page Control 40 Picker 40 Progress View 40 Refresh Control 41 Rounded Rectangle Button 41 Segmented Control 42 Slider 42 Stepper 43 Switch 43 Text Field 43 Temporary Views 45 Action Sheet 45 Alert 46 Modal View 46 Document Revision History 48 2013-06-10 | Copyright © 2013 Apple Inc. All Rights Reserved. Apple Confidential Information. 3 Contents
  3. Tables Bars and Bar Buttons 21 Table 5-1 Treatment of

    resizable bar background images 23 2013-06-10 | Copyright © 2013 Apple Inc. All Rights Reserved. Apple Confidential Information. 4
  4. Important: This is a preliminary document for an API or

    technology in development. Although this document has been reviewed for technical accuracy, it is not final. This Apple confidential information is for use only by registered members of the applicable Apple Developer program. Apple is supplying this confidential information to help you plan for the adoption of the technologies and programming interfaces described herein. This information is subject to change, and software implemented according to this document should be tested with final operating system software and final documentation. Newer versions of this document may be provided with future seeds of the API or technology. • “Before You Start” (page 6) • “Scope the Project” (page 10) • “Supporting iOS 6” (page 12) 2013-06-10 | Copyright © 2013 Apple Inc. All Rights Reserved. Apple Confidential Information. 5 Preparing for Transition
  5. Important: This is a preliminary document for an API or

    technology in development. Although this document has been reviewed for technical accuracy, it is not final. This Apple confidential information is for use only by registered members of the applicable Apple Developer program. Apple is supplying this confidential information to help you plan for the adoption of the technologies and programming interfaces described herein. This information is subject to change, and software implemented according to this document should be tested with final operating system software and final documentation. Newer versions of this document may be provided with future seeds of the API or technology. iOS 7 introduces many UI changes, such as borderless buttons, translucent bars, and full-screen layout for view controllers. Using Xcode 5, you can build a project for iOS 7 and run it in iOS 7 Simulator to get a first glimpse of the way the app looks with iOS 7 UI. For example, the only differences between the two versions of TheElements sample project shown below are the deployment target and the simulator. 2013-06-10 | Copyright © 2013 Apple Inc. All Rights Reserved. Apple Confidential Information. 6 Before You Start
  6. TheElements sample app in iOS 6 Simulator TheElements sample app

    in iOS 7 Simulator Note: iOS 7 Seed 1 is not available on iPad. It’s tempting to dive straight into the work of updating your app, but there are a few things to think about before beginning the process. As you interact with the built-in apps, it becomes clear that the changes in iOS 7 are both subtle and profound. Familiar UI elements are easily recognizable but look very different. Visual touches of physicality and realism are muted and refined, while realism in motion is enhanced. Before You Start 2013-06-10 | Copyright © 2013 Apple Inc. All Rights Reserved. Apple Confidential Information. 7
  7. Note: Although all UI elements look different in iOS 7—and

    many support new functionality—the UIKit APIs you’re familiar with remain mostly the same. As you continue to explore, you begin to discern the main themes of iOS 7: • Deference. The UI helps users understand and interact with the content, but never competes with it. • Clarity. Text is legible at every size, icons are precise and lucid, adornments are subtle and appropriate, and a sharpened focus on functionality motivates the design. • Depth. Visual layers and realistic motion heighten users’ delight and understanding. By bringing fundamental and pervasive changes to the iOS experience, iOS 7 provides a rare opportunity to revisit the way apps communicate their core purpose and functionality to users. Although you might not be prepared to take full advantage of this opportunity today, keep it in mind as you update your app to run in iOS 7. (If you are ready to revisit your app design—or you’re beginning a new project—read “Designing for iOS 7” for some guidance.) Characterizing Your App Whether you decide to redesign an app or update its current design, you need to know how the app’s characteristics can influence the process. First, use the following questions to help shape your strategy: • Did you use Auto Layout to design the app? If your app uses Auto Layout, your job is easier. In Xcode 5, Auto Layout can help an app accommodate new UI element metrics and respond appropriately to dynamic changes in text size. Auto Layout is particularly helpful if you’re transitioning an iOS 6 app or you need to support both iOS 6 and iOS 7. If you didn’t use Auto Layout, now may be the perfect time to start, especially if you need to support more than one version of an app. If you use manual or programmatic layout techniques, you're responsible for ensuring that the layout adjusts appropriately when text size changes. • Does the app need to support iOS 6? Remember that iOS users tend to be very quick to update their devices, and they expect their favorite apps to follow suit. If business reasons require you to support iOS 6, it’s still best to begin by updating the current app for iOS 7. Then—as much as possible—apply the design changes to the iOS 6 version of the app. For some details of this process, see “Supporting iOS 6” (page 12). Before You Start Characterizing Your App 2013-06-10 | Copyright © 2013 Apple Inc. All Rights Reserved. Apple Confidential Information. 8
  8. The next step in shaping a transition strategy is to

    examine the ways in which the app is customized. The amount of customization—and the specific customization techniques you use—impact the type of work you have to do. Think of app customization as being divided into the following three types: • Standard. The app contains only standard, uncustomized UI elements provided by UIKit. • Custom. The app presents a completely custom UI that doesn’t include any UIKit UI elements. • Hybrid. The app contains a mix of standard and custom elements, including standard elements that you customized using UIKit tinting and appearance-customization APIs. For a standard app, you need to decide whether your visual and user experience designs still make sense in the iOS 7 environment. If you decide to keep the current layout and interaction model, most of the work involves making minor adjustments and ensuring that the app handles the new systemwide gestures correctly. Custom apps—that is, apps that use no UIKit UI elements—require a more nuanced approach. For example, if you feel that the current UI and experience of the app is still appropriate, there may be very little to do. On the other hand, if you feel that the app’s personality and user experience should change in order to delight iOS 7 users, you have more work to do. Hybrid apps vary in the amount of work required, depending on the customizations you did and how you combined custom and standard elements. In addition to revisiting the overall design of a hybrid app, you need to make sure that your customizations still work well and look good when they’re integrated with standard elements. Note: An app that mimics standard iOS 6 UI in a completely custom way is likely to require a lot of work because it will simply look out of date. Before You Start Characterizing Your App 2013-06-10 | Copyright © 2013 Apple Inc. All Rights Reserved. Apple Confidential Information. 9
  9. Knowing your app’s compatibility requirements and customization characteristics gives you

    some idea of the path to take. Use the following checklists to fill in more details and to scope the project. Things Every App Must Do Update the app icon. In iOS 7, app icons are 120 x 120 pixels (high resolution). Update the launch image to include the status bar area if it doesn’t already do so. Support Retina display and iPhone 5 in all your artwork and designs, if you’re not already doing so. Things Every App Should Do Make sure that app content is discernible through translucent UI elements—such as bars and keyboards—and the transparent status bar. In iOS 7, view controllers use full-screen layout (to learn more, see “Using View Controllers” (page 17)). Redesign custom bar button icons. In iOS 7, bar button icons are lighter in weight and have a different style. Prepare for borderless buttons by moving away from supplying button background images and by reassessing your layout. Examine your app for hard-coded UI values—such as sizes and positions—and replace them with those you derive dynamically from system-provided values. Use Auto Layout to help your app respond when layout changes are required. (If you’re new to Auto Layout, learn about it by reading Cocoa Auto Layout Guide.) Examine your app for places where the metrics and style changes of UIKit controls and views affect the layout and appearance. For example, switches are wider, grouped tables are no longer inset, and progress views are thinner. For more information on specific UI elements, see “Bars and Bar Buttons” (page 21), “Controls” (page 37), “Content Views” (page 28), and “Temporary Views” (page 45). 2013-06-10 | Copyright © 2013 Apple Inc. All Rights Reserved. Apple Confidential Information. 10 Scope the Project
  10. Adopt Dynamic Type. In iOS 7, users can adjust the

    text size they see in apps. When you adopt Dynamic Type, you get text that responds appropriately to user-specified size changes. For more information, see “Using Fonts” (page 19). Make sure your app doesn’t respond inappropriately to the new Control Center gesture or to a navigation contoller’s swipe to go back gesture, especially if you perform custom touch handling. Revisit the use of drop shadows, gradients, and bezels. Because the iOS 7 aesthetic is smooth and layered—with much less emphasis on using visual effects to make UI elements look physical—you may want to rethink these effects. If necessary, update your app to best practices for iOS 6—such as Auto Layout and storyboards—and ensure that the app uses no deprecated API. Now that you have a better idea of the types of things you need to do, learn more about changes in view controllers, tinting, and fonts by reading “Layout and Appearance” (page 17). If You Must Continue to Support iOS 6 If you must support both iOS 6 and iOS 7, you can detect which OS version the app is running in and load the appropriate resources. For more information, see “Supporting iOS 6” (page 12). Scope the Project If You Must Continue to Support iOS 6 2013-06-10 | Copyright © 2013 Apple Inc. All Rights Reserved. Apple Confidential Information. 11
  11. If business reasons require you to continue supporting iOS 6

    or earlier, you need to choose the most practical way to update the app for iOS 7. The techniques you choose can differ, but the overall advice remains the same: Focus on redesigning the app for iOS 7 first. Then, bring the changes to the iOS 6 version as appropriate. Note: On a device running iOS 7, all of the system UI—such as alerts and notifications—uses the iOS 7 appearance, even if your app is currently using an earlier appearance. Using Interface Builder to Support Multiple App Versions Interface Builder in Xcode 5 includes new features that help you transition an app to iOS 7 while continuing to support earlier versions. Get a preview of how the UI updates you make affect an earlier version. Using the assistant editor, you can make changes to an iOS 7 storyboard or xib file on the canvas and simultaneously see how those changes look in the iOS 6 version of the file. Follow these steps to preview an earlier storyboard or xib file: 1. While viewing the iOS 7 storyboard or xib file on the canvas, open the assistant editor. 2. Open the Assistant pop-up menu. (The Assistant pop-up menu is the first item to the right of the back and forward arrows in the assistant editor jump bar.) 3. In the menu, scroll to the Preview item and choose the storyboard or xib file. 2013-06-10 | Copyright © 2013 Apple Inc. All Rights Reserved. Apple Confidential Information. 12 Supporting iOS 6
  12. Toggle between viewing app UI in iOS 7 and iOS

    6.1 or earlier. If your app needs to support iOS 6.1 or earlier, use this feature to make sure the UI looks correct in all versions of the app. Follow these steps to switch between two versions of the UI: 1. Open the File inspector in Interface Builder. 2. Open the “View as” menu. 3. Choose the version of the UI you want to view. For more information about new Interface Builder features in Xcode 5, see What's New in Xcode. Supporting Two Versions of a Standard App If both versions of a standard app should have a similar layout, use Auto Layout to create a UI that works correctly in both versions of iOS. To support multiple versions of iOS, specify a single set of constraints that Auto Layout can use to adjust the views and controls in the storyboard or xib files (to learn more about constraints, see “Constraints Express Relationships Between Views”). If both versions of a standard app should have a similar layout and you’re not using Auto Layout, use offsets. To use offsets, first update the UI for iOS 7. Next, specify values that define the origin, height, and width of each element in the earlier UI as offsets from the element’s new position in the iOS 7 UI. Supporting iOS 6 Supporting Two Versions of a Standard App 2013-06-10 | Copyright © 2013 Apple Inc. All Rights Reserved. Apple Confidential Information. 13
  13. To learn more about Auto Layout, see Cocoa Auto Layout

    Guide. Managing Multiple Images in a Hybrid App Hybrid apps often include custom image assets, such as bar button icons, and background views for bars or other controls. Apps can use one or more asset catalogs to manage these resources. (To learn more about asset catalogs, see Asset Catalog Help .) Note: An asset catalog contains resources that are displayed within an app; an asset catalog doesn’t hold the app icon, launch image, or any other image that an outside process needs to access. In a hybrid app that must support multiple versions of iOS, you manage the images yourself. Images that differ depending on an app’s version should have unique names; otherwise, you can use the same image in both versions. If your storyboard or xib file contains an embedded image, consider creating an outlet to the image view and loading the appropriate resource as needed. To learn how to load different assets in code, see “Loading Resources Conditionally.” Loading Resources Conditionally In some cases, you need to determine the iOS version your app is currently running in so you can respond appropriately in code. For example, if different versions of an app use significantly different layouts, you can load different storyboard or xib files for each version. You may also need to use different code paths to handle API differences, such using barTintColor instead of tintColor to tint a bar’s background. If you need to load different resources for different app versions—and you currently identify a storyboard or xib file in your Info.plist file—you can instead check the system version and load the appropriate resource in application:didFinishLaunchingWithOptions:. One way to find out whether an app is currently running in iOS 7 or earlier is to write a macro that checks the system version. The code below shows a way to check the system version and store the result so you can refer to it whenever you need to conditionally load resources or use different APIs. NSUInteger DeviceSystemMajorVersion(); NSUInteger DeviceSystemMajorVersion() { static NSUInteger _deviceSystemMajorVersion = -1; Supporting iOS 6 Managing Multiple Images in a Hybrid App 2013-06-10 | Copyright © 2013 Apple Inc. All Rights Reserved. Apple Confidential Information. 14
  14. static dispatch_once_t onceToken; dispatch_once(&onceToken, ^{ _deviceSystemMajorVersion = [[[[[UIDevice currentDevice] systemVersion]

    componentsSeparatedByString:@"."] objectAtIndex:0] intValue]; }); return _deviceSystemMajorVersion; } #define MY_MACRO_NAME (DeviceSystemMajorVersion() < 7) Supporting iOS 6 Loading Resources Conditionally 2013-06-10 | Copyright © 2013 Apple Inc. All Rights Reserved. Apple Confidential Information. 15
  15. • “Layout and Appearance” (page 17) • “Bars and Bar

    Buttons” (page 21) • “Content Views” (page 28) • “Controls” (page 37) • “Temporary Views” (page 45) 2013-06-10 | Copyright © 2013 Apple Inc. All Rights Reserved. Apple Confidential Information. 16 Updating the UI
  16. Important: This is a preliminary document for an API or

    technology in development. Although this document has been reviewed for technical accuracy, it is not final. This Apple confidential information is for use only by registered members of the applicable Apple Developer program. Apple is supplying this confidential information to help you plan for the adoption of the technologies and programming interfaces described herein. This information is subject to change, and software implemented according to this document should be tested with final operating system software and final documentation. Newer versions of this document may be provided with future seeds of the API or technology. iOS 7 brings several changes to how you lay out and customize the appearance of your UI. The changes in view-controller layout, tint color, and fonts affect all the UIKit objects in your app. Using View Controllers In iOS 7, view controllers use full-screen layout. At the same time, iOS 7 gives you more granular control over the way a view controller lays out its views. In particular, the concept of full-screen layout has been refined to let a view controller specify the layout of each edge of its view. The wantsFullScreenLayout view controller property is deprecated in iOS 7. If you currently specify wantsFullScreenLayout = NO, the view controller may display its content at an unexpected screen location when it runs in iOS 7. To adjust how a view controller lays out its views, UIViewController provides the following properties: • edgesForExtendedLayout The edgesForExtendedLayout property uses the UIExtendedEdge type, which specifies each of a rectangle’s four edges, in addition to specifying none and all. Use edgesForExtendedLayout to specify which edges of a view should be extended, regardless of bar translucency. By default, the value of this property is UIRectEdgeAll. • extendedLayoutIncludesOpaqueBars If your design uses opaque bars, refine edgesForExtendedLayout by also setting the extendedLayoutIncludesOpaqueBars property to NO. (The default value of extendedLayoutIncludesOpaqueBars is YES.) 2013-06-10 | Copyright © 2013 Apple Inc. All Rights Reserved. Apple Confidential Information. 17 Layout and Appearance
  17. • automaticallyAdjustsScrollViewInsets If you don’t want a scroll view’s content

    insets to be automatically adjusted, set automaticallyAdjustsScrollViewInsets to NO. (The default value of automaticallyAdjustsScrollViewInsets is YES.) In iOS 7, view controllers can support custom animated transitions between views. In addition, you can use iOS 7 APIs to support user interaction during an animated transition. To learn more, see UIViewControllerAnimatorTransitioningProtocolReference andUIViewControllerInteractiveTransitioningProtocol Reference. iOS 7 gives view controllers the ability to adjust the style of the status bar while the app is running. To enable this behavior, add the UIViewControllerBasedStatusBarAppearance key to an app’s Info.plist file and give it the value YES. A good way to change the status bar style dynamically is to implement preferredStatusBarStyle and—within an animation block—update the status bar appearance and call setNeedsStatusBarAppearanceUpdate. Using Tint Color In iOS 7, tint color is a property of UIView. iOS 7 apps often use a tint to define a key color that indicates interactivity and selection state for elements throughout the app. When you specify a tint for a view, the tint is automatically propagated to all subviews in the view’s hierarchy. Because UIWindow inherits from UIView, you can specify a tint color for the entire app by setting the window’s tint property using code like this: window.tintColor = [UIColor purpleColor]; If you don’t specify a tint for the window, it uses the system default color. By default, a view’s tint color is nil, which means that the view uses its parent’s tint. It also means that when you ask a view for its tint color, it always returns a color value, even if you haven’t set one. In general, it’s best to change a view’s tint color while the view is offscreen. To cause a view to revert to using its parent’s tint, set the tint color to nil. Layout and Appearance Using Tint Color 2013-06-10 | Copyright © 2013 Apple Inc. All Rights Reserved. Apple Confidential Information. 18
  18. Important: Setting tint color using the appearance proxy APIs is

    not supported in iOS 7. When an alert or action sheet appears, iOS 7 automatically dims the tint color of the views behind it. To respond to this color change, a custom view subclass that uses tintColor in its rendering should override tintColorDidChange to refresh the rendering when appropriate. Note: In iOS 6, tintColor tinted the background of navigation bars, tab bars, toolbars, search bars, and scope bars. To tint a bar background in iOS 7, use the barTintColor property instead. Using Fonts iOS 7 introduces Dynamic Type, which makes it easy to display great-looking text in your app. Layout and Appearance Using Fonts 2013-06-10 | Copyright © 2013 Apple Inc. All Rights Reserved. Apple Confidential Information. 19
  19. A message at the largest non Accessibility text size A

    message at the smallest text size When you adopt Dynamic Type, you get: • Automatic adjustments to weight, letter spacing, and line height for every font size. • The ability to specify different text styles for semantically distinct blocks of text, such as Body, Footnote, or Headline1. • Text that responds appropriately to changes in both the Dynamic Type and accessibility settings for user-specified text sizes. To take advantage of these features, use the UIFont method preferredFontForTextStyle to get a font, instead of specifying font names or sizes. iOS 7 optimizes this font for maximum legibility at every size. Layout and Appearance Using Fonts 2013-06-10 | Copyright © 2013 Apple Inc. All Rights Reserved. Apple Confidential Information. 20
  20. In iOS 7, the status bar is transparent, and other

    bars—that is, navigation bars, tab bars, toolbars, search bars, and scope bars—are translucent. As a general rule, you want to make sure that content fills the area behind the bars in your app. Most bars also draw a blur behind them, unless you provide a custom background image for the bar. iOS 7 introduces the barPosition property for identifying bar position, which helps you specify when a custom background image should extend behind the status bar. The UIBarPositionTopAttached value means that a bar is at the top of the screen and its background extends upward into the status bar area. In contrast, the UIBarPositionTop value means that a bar is at the top of its local context—for example, at the top of a popover—and that it doesn’t provide a background for the status bar. By default, all bar buttons are borderless. For details, see “Bar Buttons” (page 26). The Status Bar Because the status bar is transparent, the view behind it shows through. The style of the status bar refers to the appearance of its content, which includes items such as time, battery charge, and Wi-Fi signal. Use a UIStatusBarStyle constant to specify whether the status bar content should be dark or light: • UIStatusBarStyleDefault displays dark content. Use when light content is behind the status bar. • UIStatusBarStyleLightContent displays light content. Use when dark content is behind the status bar. In some cases, the background image for a navigation bar or a search bar can extend up behind the status bar (for details, see “Navigation Bar” (page 22) and “Search Bar and Scope Bar” (page 23)). If there are no bars below the status bar, the content view should use the full height of the screen. To learn how to ensure that a view controller lays out its views properly, see “Using View Controllers” (page 17). 2013-06-10 | Copyright © 2013 Apple Inc. All Rights Reserved. Apple Confidential Information. 21 Bars and Bar Buttons
  21. In iOS 7, you can control the style of the

    status bar from an individual view controller and change it while the app runs. To opt in to this behavior, add the UIViewControllerBasedStatusBarAppearance key to an app’s Info.plist file and give it the value YES. Navigation Bar A navigation bar helps users navigate through an information hierarchy and, optionally, manage screen contents. iOS 6 iOS 7 iOS 6 iOS 7 Opaque gradient blue (default) or opaque black. By default, the translucent property is NO. Translucent light (default) or translucent dark. By default, the translucent property is YES. Bar style A drop shadow appears at the bottom edge. A one-pixel hairline appears at the bottom edge. Appearance Use tintColor to tint the bar background. Use tintColor to tint bar button items. Use barTintColor to tint the bar background. Tinting The Back button is a bordered button that contains the title of the previous screen. The Back control is a chevron plus the title of the previous screen. * Back button * If you want to use a custom image to replace the default chevron, you also need to create a custom mask image. iOS 7 uses the mask to make the previous screen’s title appear to emerge from—or disappear into—the chevron during navigation transitions. To learn about the properties that control the Back button and mask image, see UINavigationBar Class Reference. iOS 7 makes it easy to add a search bar to a navigation bar. For details, see “Search Bar and Scope Bar” (page 23). Bars and Bar Buttons Navigation Bar 2013-06-10 | Copyright © 2013 Apple Inc. All Rights Reserved. Apple Confidential Information. 22
  22. If you create a background image for a navigation bar

    that uses the UIBarPositionTopAttached bar position—or for a navigation bar within a navigation controller—make sure the image includes the status bar area. Specifically, create a high-resolution background image that has a height of 128 points. The following table describes how iOS 7 treats resizable navigation bar background images of various heights. (To learn how to specify a resizing mode for an image, see UIImage Class Reference.) Table 5-1 Treatment of resizable bar background images Status bar background appearance Resizing treatment Height (high resolution) Black, if using UIBarPosition- TopAttached. Provided by the window background, if using UIBarPositionTop. Horizontally resized as appropriate (the image is not vertically tiled or stretched). 88 points Provided by the bar background. Vertically resized to 128 points if using UIBarPositionTopAttached or 88 points if using UIBarPositionTop. Horizontally resized as appropriate. Less than 88 points Provided by the bar background. Horizontally resized as appropriate. 128 points Provided by the bar background. Vertically resized to 128 points if using UIBarPositionTopAttached or if using a navigation controller. Vertically resized to 88 points if using UIBarPositionTop. Horizontally resized as appropriate. 1 point Avoid using an extra-tall background image to display a custom drop shadow below the navigation bar. This technique won’t work in iOS 7, because the extra height extends into the status bar area instead of below the navigation bar. If you want to add a drop shadow to your navigation bar, create a custom background image and use the shadowImage property to specify a custom shadow image. Search Bar and Scope Bar A search bar accepts users’ text, which can be used as input for a search. A search bar can have a scope bar attached below it. Bars and Bar Buttons Search Bar and Scope Bar 2013-06-10 | Copyright © 2013 Apple Inc. All Rights Reserved. Apple Confidential Information. 23
  23. iOS 6 iOS 7 iOS 6 iOS 7 Opaque gradient

    blue (default) or opaque black. By default, the translucent property is NO. Translucent light (default) or translucent dark. By default, the translucent property is YES. Bar style A drop shadow appears at the bottom edge. A one-pixel hairline appears at the bottom edge. Appearance Use tintColor to tint the bar background. Use tintColor to tint foreground elements. Use barTintColor to tint the bar background. Tinting If you create a background image for a search bar that uses the UIBarPositionTopAttached bar position, make sure the image height includes the height of the status bar. If you create a resizable background image, see Table 5-1 (page 23) for details on how iOS 7 resizes images of various sizes. In iOS 7, UISearchDisplayController includes the displaysSearchBarInNavigationBar property, which lets you put a search bar in a navigation bar, similar to the one in Calendar: A scope bar lets users define the scope of a search. Note: A scope bar can’t appear by itself; it must be attached to a search bar. iOS 6 iOS 7 Bars and Bar Buttons Search Bar and Scope Bar 2013-06-10 | Copyright © 2013 Apple Inc. All Rights Reserved. Apple Confidential Information. 24
  24. iOS 6 iOS 7 Opaque gradient blue (default) or opaque

    black. By default, the translucent property is NO. Translucent light (default) or translucent dark. By default, the translucent property is YES. Bar style A drop shadow appears at the bottom edge. A one-pixel hairline appears at the bottom edge. Appearance Use tintColor to tint the bar background. Use tintColor to tint scope button contents. Use barTintColor to tint the bar background. Tinting Tab Bar A tab bar gives people the ability to switch between different subtasks, views, and modes. iOS 6 iOS 7 iOS 6 iOS 7 Opaque gradient black (default). In iOS 6, the tab bar doesn’t include the barStyle or translucent properties. UITabBar includes the barStyle property. Translucent light (default) or translucent dark. By default, the translucent property is YES. Bar style Selection indicator image drawn behind the tab icon. The divider image is optional; if provided, a custom selection indicator image is used. Appearance Use tintColor to tint the bar background. Use tintColor to tint selected tab bar items. Use barTintColor to tint the bar background. Tinting If you create a custom icon for a tab bar item, you can also use the selectedImage property of UITabBarItem to specify a second icon that represents the selected state of the item. If you don’t provide a selected version of a custom icon, the same icon is used in both states. Bars and Bar Buttons Tab Bar 2013-06-10 | Copyright © 2013 Apple Inc. All Rights Reserved. Apple Confidential Information. 25
  25. Toolbar A toolbar contains controls that perform actions related to

    objects in the current screen or view. iOS 6 iOS 7 iOS 6 iOS 7 Opaque gradient blue (default) or opaque black. By default, the translucent property is NO. Translucent light (default) or translucent dark. By default, the translucent property is YES. Bar style A drop shadow appears at the top edge. A one-pixel hairline appears at the top edge. Appearance Use tintColor to tint the bar background. Use tintColor to tint bar button items. Use barTintColor to tint the bar background. Tinting – UIToolbarPosition constants are deprecated; use UIBarPosition constants instead. Related information If you create a resizable background image, see Table 5-1 (page 23) for details on how iOS 7 resizes images of various sizes. Bar Buttons In iOS 6, bar buttons are either bordered or borderless. In iOS 7, all bar buttons are borderless. Navigation bar buttons in iOS 6 Navigation bar buttons in iOS 7 For clarity, iOS 7 apps often use titles in bar buttons instead of graphical symbols. For example, Calendar in iOS 7 uses Inbox instead of a custom graphic: Bars and Bar Buttons Toolbar 2013-06-10 | Copyright © 2013 Apple Inc. All Rights Reserved. Apple Confidential Information. 26
  26. iOS 6 iOS 7 In earlier versions of iOS, custom

    bar button art was automatically treated as a template image. (A template image is used as a mask to create the final image.) In iOS 7, you can use the following UIImage properties to specify whether a custom graphic should be treated as a template image or be fully rendered: • UIImageRenderingModeAlwaysTemplate. The image should be treated as a template image. • UIImageRenderingModeAlwaysOriginal. The image should be rendered as is. If you don’t specify a treatment for your image—or you opt out of a treatment in a particular situation—the image receives the default treatment defined by the enclosing view. For example, by default bars use the template treatment, whereas by default a slider uses the fully rendered treatment. Note: A template image acquires the tint color of its parent (to learn more about tint color in iOS 7, see “Using Tint Color” (page 18)). If you don’t want a bar button item to receive tinting, set the UIImageRenderingModeAlwaysOriginal property for the image. Bars and Bar Buttons Bar Buttons 2013-06-10 | Copyright © 2013 Apple Inc. All Rights Reserved. Apple Confidential Information. 27
  27. Content views display custom app content. Because the look of

    most content views is not provided by the system, visual changes in iOS 7 have almost no effect on them. The main exception is the grouped-style table view, which has a significantly changed default appearance in iOS 7. Activity An activity represents a system-provided or custom feature that can act on the currently selected content. Users can access these features in the system-provided activity view controller that appears when they tap the Share button. System-provided activities can use either of two icon styles: • A style that looks like a fully rendered app icon—such as the Mail icon shown below • A style that looks similar to a bar button item—such as the Copy and Print items shown below 2013-06-10 | Copyright © 2013 Apple Inc. All Rights Reserved. Apple Confidential Information. 28 Content Views
  28. Third-party features always use the second style. To offer a

    service within your app, create a simple, streamlined template image that represents it and a short title that describes it. Follow these guidelines to create a template image that looks good in the activity view controller: • Use black or white with appropriate alpha transparency • Don’t include a drop shadow • Use anti-aliasing An activity template image should be centered in an area that measures about 70 x 70 pixels (high resolution). Content Views Activity 2013-06-10 | Copyright © 2013 Apple Inc. All Rights Reserved. Apple Confidential Information. 29
  29. Collection View A collection view manages an ordered collection of

    items and presents them in a customizable layout. In iOS 7, collection views support custom animated transitions between layouts. To learn more, see UICollectionViewTransitionLayout Class Reference. Photos uses collection views to display groups of photos and support transitions between them. Image View An image view displays one image or an animated series of images. In iOS 7, UIImageView includes the tintColor property. When the image view contains a template image—that is, an image that specifies the UIImageRenderingModeAlwaysTemplate rendering mode—tintColor is applied to the image. Content Views Collection View 2013-06-10 | Copyright © 2013 Apple Inc. All Rights Reserved. Apple Confidential Information. 30
  30. Map View A map view presents geographical data and supports

    most of the features provided by the built-in Maps app. Photos uses a map view to help users view location information for a photo. In iOS 7, use the new MKOverlayRenderer class to create an overlay to draw on top of a map view. To add a 3D appearance to a map view, assign a camera object—that is, an instance of MKMapCamera—to a map view’s camera property. To learn more, see MKMapView Class Reference. Page View Controller A page view controller manages multipage content using either a scrolling or page-curl transition style. Content Views Map View 2013-06-10 | Copyright © 2013 Apple Inc. All Rights Reserved. Apple Confidential Information. 31
  31. In iOS 7, use the pageViewControllerPreferredInterfaceOrientationForPresentation and pageViewControllerSupportedInterfaceOrientations methods to

    specify preferred and supported orientations, respectively. Below, you can see the default appearance of a page view controller in iOS 7 Simulator: Scroll View A scroll view helps people see content that is larger than the scroll view’s boundaries. The only visual difference in the scroll view between iOS 7 and iOS 6 is the appearance of the scroller. Content Views Scroll View 2013-06-10 | Copyright © 2013 Apple Inc. All Rights Reserved. Apple Confidential Information. 32
  32. iOS 6 iOS 7 In iOS 7, you can manage

    scroll view insets yourself by using the automaticallyAdjustsScrollViewInsets property of UIViewController. Table View A table view presents data in a single-column list of multiple rows. iOS 7 introduces several changes to the appearances of both plain and grouped table views. Content Views Table View 2013-06-10 | Copyright © 2013 Apple Inc. All Rights Reserved. Apple Confidential Information. 33
  33. iOS 6 (grouped table iOS 7 (grouped table) Appearance in

    iOS 7 Feature Separators in iOS 7 are thinner, narrower, and lighter in color than separators in iOS 6. By default, the separator is inset from the left edge of the table view when the cell contains text. Cell separator (both styles) By default, the section index includes a translucent white background (use the sectionIndexBackgroundColor property to specify a different color). Section index (plain style) By default, headers display text using all-capital letters; footers display text using sentence-style capitalization. You can use a custom UITableViewHeaderFooterView object to provide a different look. Header and footer text (both styles) Content Views Table View 2013-06-10 | Copyright © 2013 Apple Inc. All Rights Reserved. Apple Confidential Information. 34
  34. Appearance in iOS 7 Feature Each group extends the full

    width of the screen. Cell group (grouped style) Noninverted content on a subtle gray background. Cell selection appearance The background is a solid light gray. Background appearance (grouped style) Table-view elements also have a different appearance in iOS 7. Appearance in iOS 6 Appearance in iOS 7 Table-view element Checkmark Disclosure indicator Detail Disclosure button Row reorder Row insert Delete button control Delete button Text View A text view accepts and displays multiple lines of text. Be sure to use the UIFont method preferredFontForTextStyle to get the text for display in a text view. Web View A web view is a region that can display rich HTML content. Content Views Text View 2013-06-10 | Copyright © 2013 Apple Inc. All Rights Reserved. Apple Confidential Information. 35
  35. In iOS 7, UIWebView supports displaying content in a paginated

    layout. Content Views Web View 2013-06-10 | Copyright © 2013 Apple Inc. All Rights Reserved. Apple Confidential Information. 36
  36. Controls are UI elements that users either view (to get

    information) or interact with (to perform an action). All iOS 7 controls have an updated appearance, and most of them also have different metrics. Because UIControl inherits from UIView, you can use a control’s tintColor property to tint the control. For more information about tinting views, see “Using Tint Color” (page 18). By default, system-provided controls support system-defined animations and appearance changes that indicate highlighted and selected states. Date Picker A date picker displays components of date and time, such as minutes, hours, days, and years. The overall size of the date picker is the same in iOS 7 as it is in iOS 6, but the appearance is very different. iOS 6 iOS 7 2013-06-10 | Copyright © 2013 Apple Inc. All Rights Reserved. Apple Confidential Information. 37 Controls
  37. iOS 7 apps tend to embed date pickers within the

    content instead of displaying them in a different view. For example, Calendar dynamically expands a table row to let users specify a time without leaving the event-creation view: Contact Add Button A Contact Add button—that is, a UIButton of type UIButtonTypeContactAdd—lets users add a contact’s information to a text field or other text-based view. The size and appearance of the Contact Add button have changed in iOS 7. iOS 6 iOS 7 Controls Contact Add Button 2013-06-10 | Copyright © 2013 Apple Inc. All Rights Reserved. Apple Confidential Information. 38
  38. Detail Disclosure Button A Detail Disclosure button—that is, a UIButton

    of type UIButtonTypeDetailDisclosure—reveals additional details or functionality related to an item in a table or other view. In iOS 7, the Detail Disclosure button uses the same symbol as the Info button. The size and appearance of the Detail Disclosure button has changed in iOS 7: iOS 6 iOS 7 When a Detail Disclosure button appears in a table row, tapping elsewhere in the row doesn’t activate the button; instead, it selects the row item or triggers app-defined behavior. Info Button An Info button—that is, a UIButton of type UIButtonTypeInfoLight or UIButtonTypeInfoDark—reveals configuration details about an app, sometimes on the back of the current view. In iOS 7, the Info button uses the same symbol as the Detail Disclosure button. The size and appearance of the Info button have changed in iOS 7. iOS 6 (shown in Weather) iOS 7 Label A label displays static text. By default a label uses the system font, so it looks different in iOS 7 than it does in iOS 6. iOS 6 iOS 7 Controls Detail Disclosure Button 2013-06-10 | Copyright © 2013 Apple Inc. All Rights Reserved. Apple Confidential Information. 39
  39. Be sure to use the UIFont method preferredFontForTextStyle to get

    the text for display in a label. Page Control A page control indicates how many views are open and which one is currently visible. The size and appearance of the page control have changed in iOS 7. iOS 6 (control shown in Weather) iOS 7 (control shown in Weather) Picker A picker displays a set of values from which a user can choose. The overall size of a picker is the same in iOS 7 as it is in iOS 6; its appearance and behavior in iOS 7 are similar to the appearance and behavior of the date and time picker. iOS 6 iOS 7 Progress View A progress view shows the progress of a task or process that has a known duration. Controls Page Control 2013-06-10 | Copyright © 2013 Apple Inc. All Rights Reserved. Apple Confidential Information. 40
  40. The size and appearance of the progress view—shown here in

    the Mail toolbar—have changed in iOS 7. iOS 6 iOS 7 If you currently use the trackTintColor property to specify a tint for the progress view’s track, the track continues to use this tint in iOS 7. If you set trackTintColor to nil, the track uses the tint of its parent. Refresh Control A refresh control performs a user-initiated content refresh—typically, in a table. The size and appearance of the refresh control have changed in iOS 7. iOS 6 iOS 7 Rounded Rectangle Button The rounded rectangle button has been deprecated in iOS 7. Instead, use the system button—that is, a UIButton of type UIButtonTypeSystem. iOS 7 system buttons don’t include a bezel or a background appearance. A system button can contain a graphical symbol or a text title, and it can specify a tint color or receive its parent’s color. Controls Refresh Control 2013-06-10 | Copyright © 2013 Apple Inc. All Rights Reserved. Apple Confidential Information. 41
  41. iOS 6 rounded rectangle button iOS 7 system button Note:

    In iOS 7, UIButtonTypeRoundedRect has been redefined as UIButtonTypeSystem. An app that uses a rounded rectangle button in iOS 6 automatically gets the system button appearance when it links against iOS 7. If you need to display a button that includes a bezel, use a button of type UIButtonTypeCustom and supply a custom background image. Segmented Control A segmented control is a linear set of segments, each of which functions as a button that can display a different view. The size and appearance of the segmented control have changed in iOS 7. iOS 6 iOS 7 In iOS 7, the segmented control uses a single style, and the segmentedControlStyle property is unused. Slider A slider lets users make adjustments to a value or process throughout a range of allowed values. The size and appearance of the slider have changed in iOS 7. iOS 6 iOS 7 Controls Segmented Control 2013-06-10 | Copyright © 2013 Apple Inc. All Rights Reserved. Apple Confidential Information. 42
  42. iOS 7 continues to use the tints you specify for

    the minimum and maximum track images and for the thumb, using the properties minimumTrackTintColor, maximumTrackTintColor, and thumbTintColor. If you set the minimumTrackColor property to nil, the area uses the tint of its parent; if you set the maximumTrackTintColor or thumbTintColor properties to nil, both areas use their default color. Stepper A stepper increases or decreases a value by a constant amount. The size and appearance of the stepper have changed in iOS 7. iOS 6 iOS 7 In iOS 7, by default, a stepper treats custom increment and decrement images as template images. Switch A switch presents two mutually exclusive choices or states (typically used only in table views). The size and appearance of the switch have changed in iOS 7. iOS 6 iOS 7 iOS 7 continues to use the tints you specify for the on and off—or disabled—states and for the thumb, using the properties onTintColor, tintColor, and thumbTintColor. In iOS 7, by default, custom on and off images are ignored. Text Field A text field accepts a single line of user input. The size and appearance of the text field have changed in iOS 7. Controls Stepper 2013-06-10 | Copyright © 2013 Apple Inc. All Rights Reserved. Apple Confidential Information. 43
  43. iOS 6 (two text fields shown in Maps) iOS 7

    (two text fields shown in Maps) Be sure to use the UIFont method preferredFontForTextStyle to get the text for display in a text view. Controls Text Field 2013-06-10 | Copyright © 2013 Apple Inc. All Rights Reserved. Apple Confidential Information. 44
  44. Action sheets, alerts, and modal views are temporary views that

    appear when something requires people’s attention or when additional choices or functionality need to be offered. Although action sheets and alerts can display custom content, only a few modifications can be made to their appearance. For this reason, you have little to do to make sure these elements look good in your iOS 7 app. Because a modal view is just a view that’s presented modally, you may want to redesign the modal views in your app so that they look appropriate in iOS 7. Note: When a temporary view appears, iOS 7 automatically dims the color of the standard views behind it. You may need to adjust your code to handle this color change in custom views; to learn more, see “Using Tint Color” (page 18). Action Sheet An action sheet displays a set of choices related to a task the user initiates. In iOS 7, by default an action sheet has a translucent background and contains borderless buttons. iOS 6 iOS 7 The UIActionSheetStyle constants are unused in iOS 7. On an iOS 7 device, system-provided UI—such as an action sheet—uses the iOS 7 appearance regardless of the appearance of the currently running app. 2013-06-10 | Copyright © 2013 Apple Inc. All Rights Reserved. Apple Confidential Information. 45 Temporary Views
  45. Note that a potentially dangerous option in an action sheet—specified

    by the destructiveButtonTitle parameter in initWithTitle:delegate:cancelButtonTitle:destructiveButtonTitle:otherButtonTitles:—automatically uses the system red color. Alert An alert gives people important information that affects their use of the app or the device. The appearance of an alert has changed in iOS 7. iOS 6 iOS 7 On an iOS 7 device, system-provided UI—such as an alert—uses the iOS 7 appearance regardless of the appearance of the currently running app. If you supply a third button for an alert, this button is displayed above the two primary buttons at the bottom of the alert. Modal View A modal view—that is, a view presented modally—provides self-contained functionality in the context of the current task or workflow. System-provided modal views use the same appearances as other, similar views in iOS 7. Temporary Views Alert 2013-06-10 | Copyright © 2013 Apple Inc. All Rights Reserved. Apple Confidential Information. 46
  46. iOS 6 iOS 7 In iOS 7, you can use

    a custom animator object and an optional interactive controller object to manage modal presentation.Tolearnmoreaboutcustomviewcontrollertransitions,seeUIViewControllerAnimatorTransitioning Protocol Reference and UIViewControllerInteractiveTransitioning Protocol Reference. Temporary Views Modal View 2013-06-10 | Copyright © 2013 Apple Inc. All Rights Reserved. Apple Confidential Information. 47
  47. This table describes the changes to iOS 7 UI Transition

    Guide. Notes Date New document that describes how to transition the UI of an iOS 6 app to iOS 7. 2013-06-10 2013-06-10 | Copyright © 2013 Apple Inc. All Rights Reserved. Apple Confidential Information. 48 Document Revision History
  48. Apple Inc. Copyright © 2013 Apple Inc. All rights reserved.

    No part of this publication may be reproduced, stored in a retrieval system, or transmitted, in any form or by any means, mechanical, electronic, photocopying, recording, or otherwise, without prior written permission of Apple Inc., with the following exceptions: Any person is hereby authorized to store documentation on a single computer for personal use only and to print copies of documentation for personal use provided that the documentation contains Apple’s copyright notice. No licenses, express or implied, are granted with respect to any of the technology described in this document. Apple retains all intellectual property rights associated with the technology described in this document. This document is intended to assist application developers to develop applications only for Apple-labeled computers. Apple Inc. 1 Infinite Loop Cupertino, CA 95014 408-996-1010 Apple, the Apple logo, Cocoa, iPad, iPhone, and Xcode are trademarks of Apple Inc., registered in the U.S. and other countries. Retina is a trademark of Apple Inc. iOS is a trademark or registered trademark of Cisco in the U.S. and other countries and is used under license. Even though Apple has reviewed this document, APPLE MAKES NO WARRANTY OR REPRESENTATION, EITHER EXPRESS OR IMPLIED, WITH RESPECT TO THIS DOCUMENT, ITS QUALITY, ACCURACY, MERCHANTABILITY, OR FITNESS FOR A PARTICULAR PURPOSE. AS A RESULT, THIS DOCUMENT IS PROVIDED “AS IS,” AND YOU, THE READER, ARE ASSUMING THE ENTIRE RISK AS TO ITS QUALITY AND ACCURACY. IN NO EVENT WILL APPLE BE LIABLE FOR DIRECT, INDIRECT, SPECIAL, INCIDENTAL, OR CONSEQUENTIAL DAMAGES RESULTING FROM ANY DEFECT OR INACCURACY IN THIS DOCUMENT, even if advised of the possibility of such damages. THE WARRANTY AND REMEDIES SET FORTH ABOVE ARE EXCLUSIVE AND IN LIEU OF ALL OTHERS, ORAL OR WRITTEN, EXPRESS OR IMPLIED. No Apple dealer, agent, or employee is authorized to make any modification, extension, or addition to this warranty. Some states do not allow the exclusion or limitation of implied warranties or liability for incidental or consequential damages, so the above limitation or exclusion may not apply to you. This warranty gives you specific legal rights, and you may also have other rights which vary from state to state.
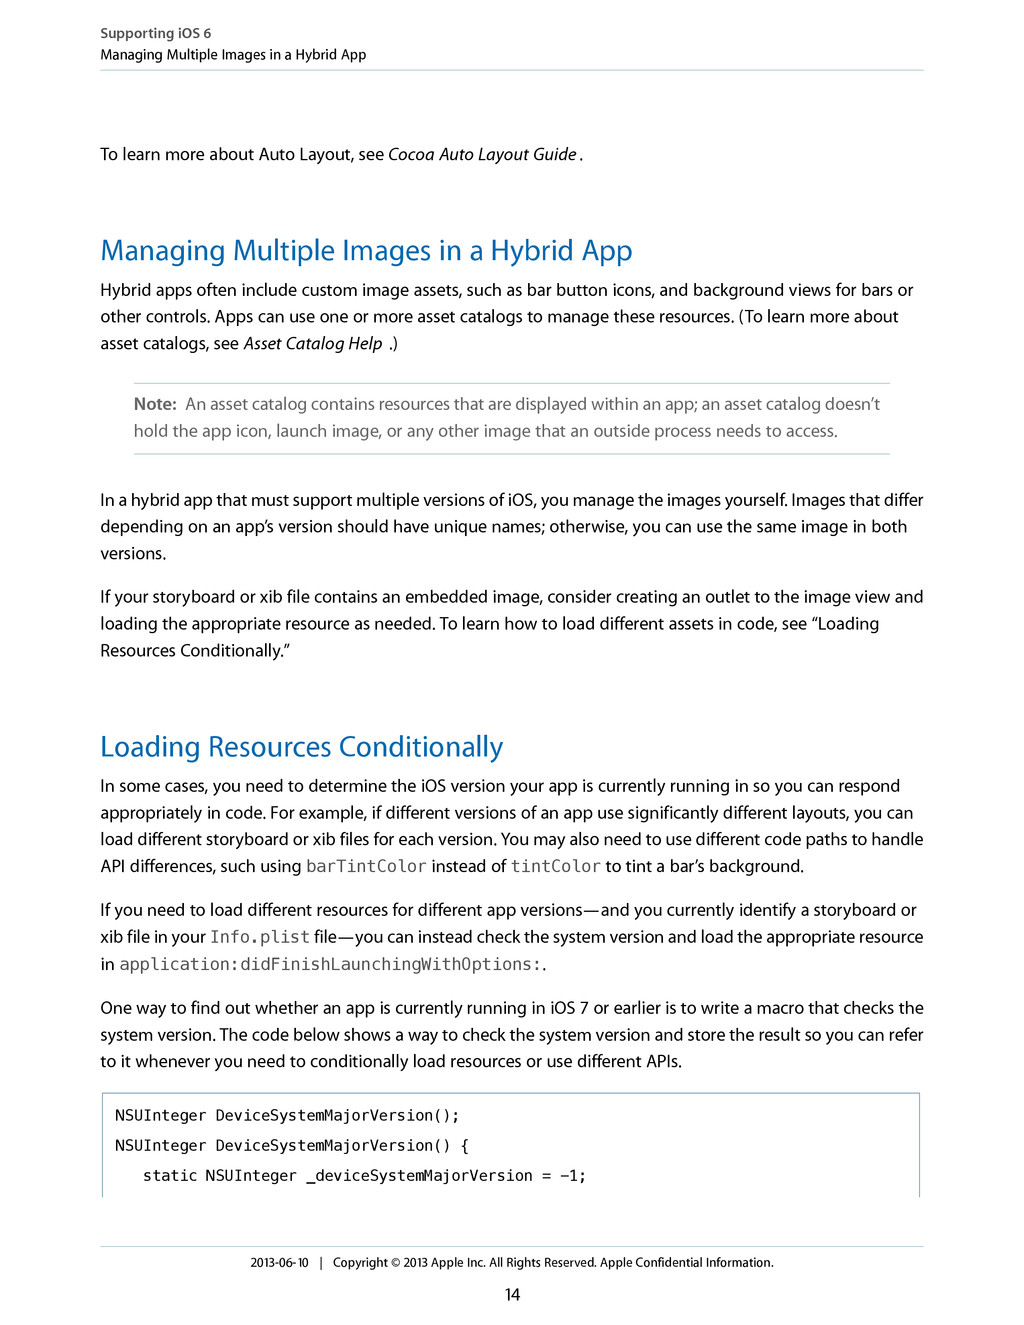