Upgrade to Pro — share decks privately, control downloads, hide ads and more …

Welcome to Web Components with Polymer

Welcome to Web Components with Polymer

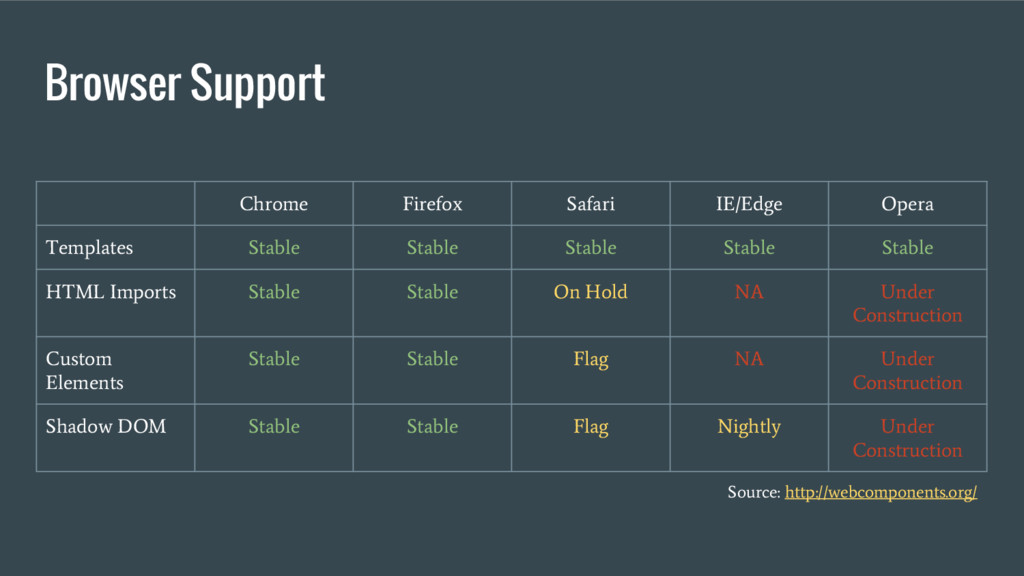
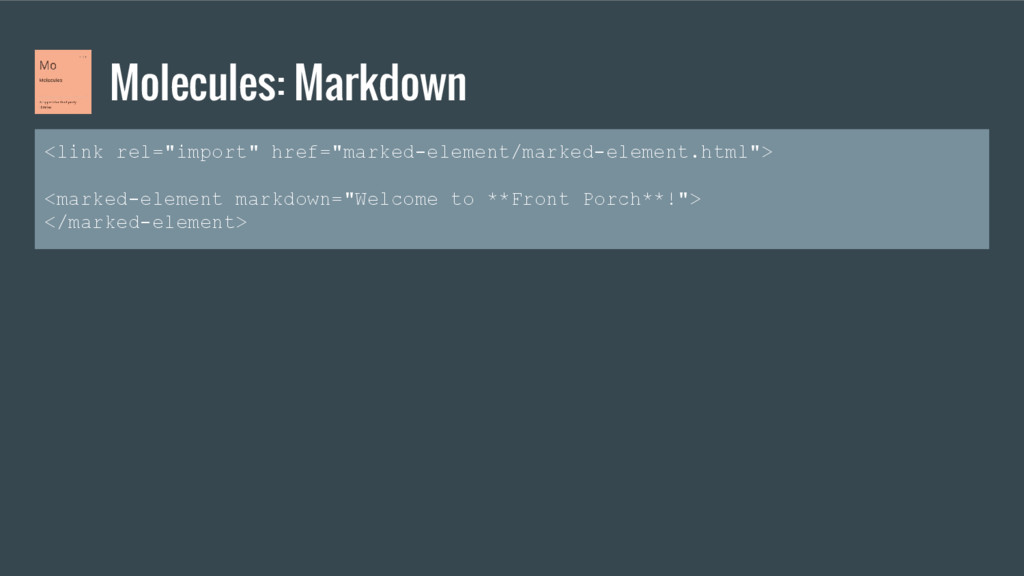
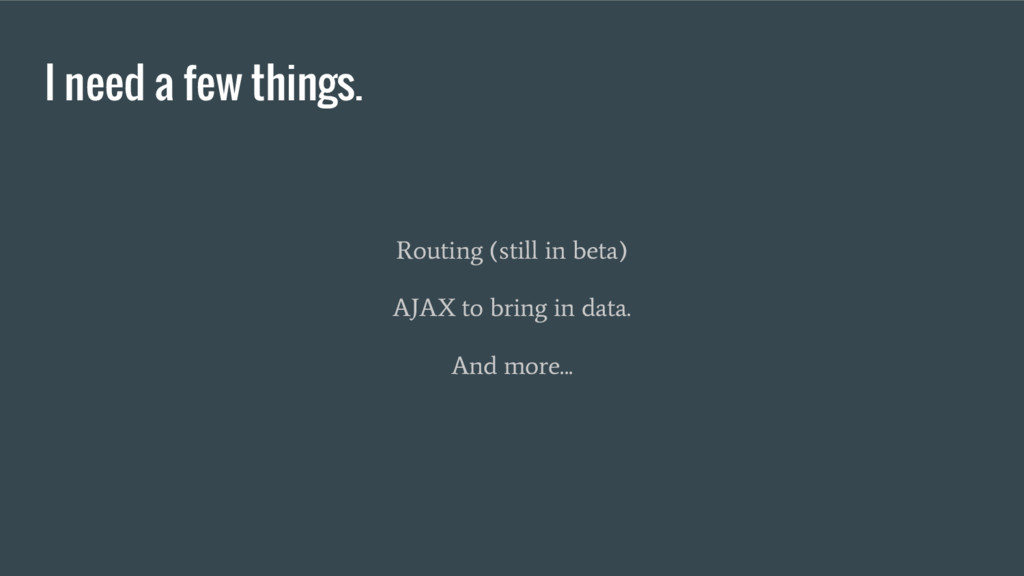
As web technology evolves, developers continue to look for ways to solve an ever growing list of problems. The best solutions are the ones that are already built into the software we use. Web Components are still far from being supported by all browsers but that doesn’t mean we can’t benefit from its advancements. That’s where Polymer comes in. Polymer gives developers the ability to use Web Components now. This talk will walk through the basics of Polymer and how easy it is to start using Web Components today.

Joshua Kemmerling

July 19, 2016
Tweet

Other Decks in Technology

Transcript

  1. Hello. My name is Josh. Architect at projekt202. ◦ Serious

    pizza addict. ◦ github.com/hellojosh ◦ hellojosh.com
  2. Browser Support Chrome Firefox Safari IE/Edge Opera Templates Stable Stable

    Stable Stable Stable HTML Imports Stable Stable On Hold NA Under Construction Custom Elements Stable Stable Flag NA Under Construction Shadow DOM Stable Stable Flag Nightly Under Construction Source: http://webcomponents.org/
  3. ◦ Registering elements ◦ Lifecycle callbacks ◦ Property observation ◦

    Local DOM template ◦ Data binding ◦ Events Features
  4. Enable Polymer on a Page Every page that Polymer is

    used on has to have: <script src="webcomponents-lite.js"></script> <link rel="import" href="polymer.html">
  5. Shadow DOM Not a ninja clan. DOM within a DOM

    providing style and DOM scoping. Scoped CSS selectors. template, style, script.
  6. DOM Scoping <style> .red { background: red; } </style> <dom-module

    id="red-box"> <template> <div class="red">This is also a red box.</div> </template> <style> .red { background: blue; } </style> <script> Polymer({ is: 'red-box' }); </script> </dom-module> <div class=”red”>This is a red box.</div> <red-box></red-box>
  7. Custom Elements <face-tag></face-tag> ◦ Use custom names in HTML. ◦

    Names have to contain a dash. ◦ All custom elements get display: inline by default.
  8. Simple Usage: Register Element <dom-module id="face-tag"> <template> This is a

    face tag. </template> <script> var faceComponent = Polymer({ is: 'face-tag' }); </script> </dom-module>
  9. Simple Usage: Register Element <dom-module id="face-tag"> <template> This is a

    face tag. </template> <script> var faceComponent = Polymer({ is: 'face-tag' }); </script> </dom-module>
  10. Simple Usage: JavaScript Use var elem = new faceComponent(); //

    or var elem = document.createElement(‘face-tag’); document.body.appendChild(elem);
  11. Custom Elements: Prototype and Lifecycle var faceComponent = Polymer({ is:

    'face-tag', alert: function () {}, created: function () { this.textContent = ‘projekt202’; }, createdCallback: function () { // same as created this.textContent = ‘projekt202’; } });
  12. <template> <content> <!-- this is where you Content will show

    up --> </content> </template> <face-tag> This is my face. </face-tag> <content>
  13. <template> <content select=”#address”></content> </template> <content> Select Template Component Usage <main-template>

    <div id=”fullname”>John Doe</div> <div id=”address”>1234 Hope Ln.</div> </main-template>
  14. <template> <content select=”#fullname”></content> <div>Lives at:</div> <content select=”#address”></content> </template> <main-template> <div

    id=”fullname”>John Doe</div> <div id=”address”>1234 Hope Ln.</div> </main-template> <content> Select
  15. Data binding, Nested templates, dom-repeat <dom-module id="user-list"> <template> <template is="dom-repeat"

    items="{{ users }}" as="user"> <div>{{ user.firstname }} {{ user.lastname }}</div> </template> </template> <script> Polymer({ is: 'user-list', ready: function () { this.users = Array; } }); </script> </dom-module> <user-list></user-list>
  16. Pass in dynamic data <dom-module id="user-list"> <template> <template is="dom-repeat" items="{{

    users }}" as="user"> <div>{{ user }}</div> </template> </template> <script> Polymer({ is: 'user-list', properties: { users: Array } }); </script> </dom-module> <user-list users='[ "Joshua", "Marshall" ]'></user-list>
  17. ◦ Use to load resources. ◦ Execution order is the

    same as normal HTML. ◦ Use templates to delay the execution of CSS, JS, img, etc. <link rel="import" href="component.html"> HTML Imports
  18. Execution Order index.html signup-form.html <link rel="import" href="signup-form.html"> // 1. <title>Import

    Example</title> <script src="script3.js"></script> // 4. <script src="js/script1.js"></script> // 2. <script src="js/script2.js"></script> // 3.
  19. App Elements: Localize <dom-module id="x-app"> <template>{{ localize('hello') }}</template> <script> Polymer({

    is: 'x-app', behaviors: [ Polymer.AppLocalizeBehavior ], properties: { language: { value: ‘en’ } }, attached: function () { this.loadResources(this.resolveUrl('locales.json')); } }); </script> </dom-module>
  20. App Elements: locales.json { "en": { "hello": "My name is

    Josh." }, "fr": { "hello": "Je m'apelle Josh." } }
  21. Neon Elements: Animate <script> Polymer({ is: 'red-circle', behaviors: [ Polymer.NeonAnimationRunnerBehavior

    ], properties: { animationConfig: { value: function () { return { name: 'scale-down-animation', node: this } } } }, attached: function () { this.playAnimation(); } }); </script>