Upgrade to Pro
— share decks privately, control downloads, hide ads and more …
Speaker Deck
Features
Speaker Deck
PRO
Sign in
Sign up for free
Search
Search
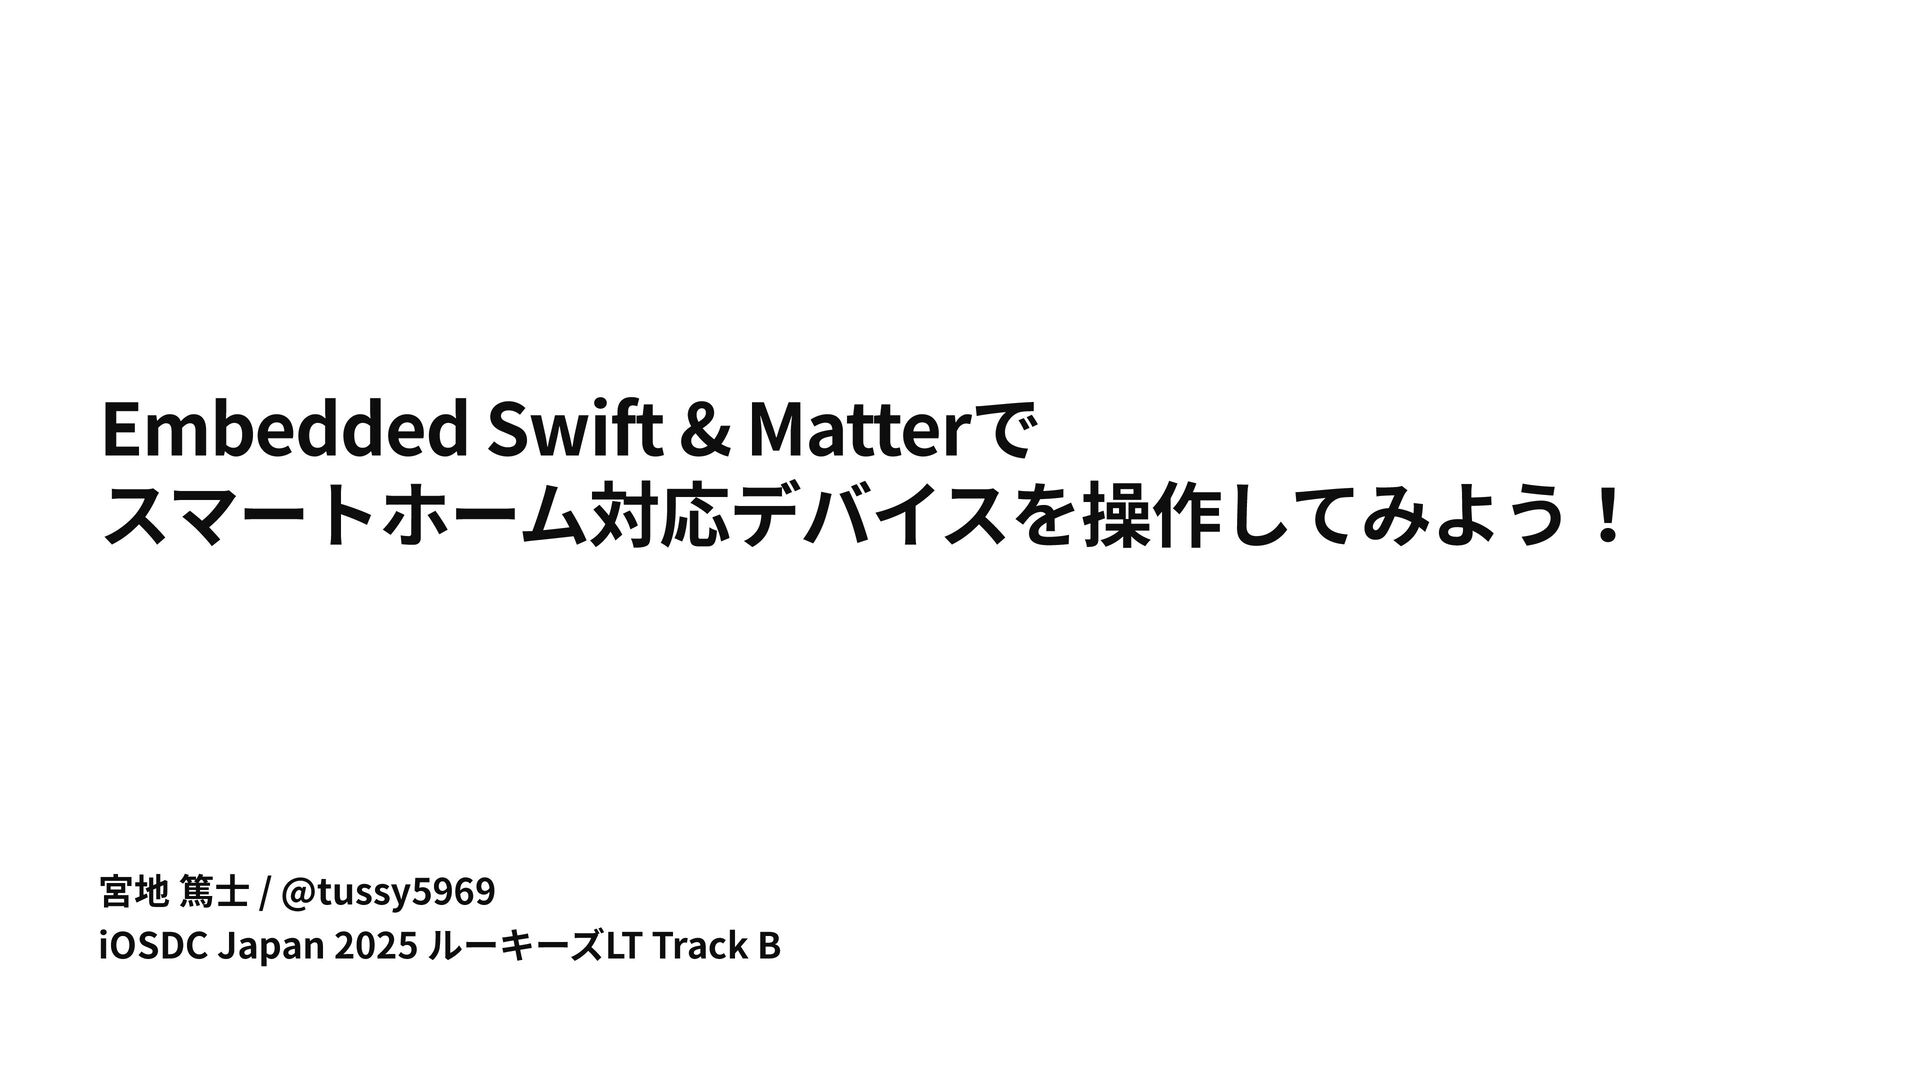
Embedded Swift & Matterでスマートホーム対応デバイスを操作してみよう!
Search
tussy5969
September 20, 2025
440
0
Share
Embed
Copy iframe code
Copy JS code
Copy link
Start on current slide
Embedded Swift & Matterでスマートホーム対応デバイスを操作してみよう!
tussy5969
September 20, 2025
More Decks by tussy5969
See All by tussy5969
Swiftで広がるIoTの世界:Embedded Swiftを試してみよう!
tussy5969
0
160
Featured
See All Featured
Become a Pro
speakerdeck
PRO
31
6k
Are puppies a ranking factor?
jonoalderson
1
3.7k
実際に使うSQLの書き方 徹底解説 / pgcon21j-tutorial
soudai
PRO
201
75k
The AI Revolution Will Not Be Monopolized: How open-source beats economies of scale, even for LLMs
inesmontani
PRO
3
3.7k
Design in an AI World
tapps
1
270
Unlocking the hidden potential of vector embeddings in international SEO
frankvandijk
0
880
Principles of Awesome APIs and How to Build Them.
keavy
128
18k
How to Talk to Developers About Accessibility
jct
2
440
Optimising Largest Contentful Paint
csswizardry
37
3.8k
Data-driven link building: lessons from a $708K investment (BrightonSEO talk)
szymonslowik
1
1.2k
Accessibility Awareness
sabderemane
1
160
Evolution of real-time – Irina Nazarova, EuRuKo, 2024
irinanazarova
9
1.5k
Transcript
宮地 篤⼠ / @tussy5969 iOSDC Japan 2025 ルーキーズLT Track B
Embedded Swift & Matterで スマートホーム対応デバイスを操作してみよう!
Swiftでもデバイス開発できるって知ってましたか?
Embedded Swift
Embedded Swift • デバイス開発向けのSwiftサブセット⾔語 • WWDC24のSwiftの新機能として紹介 • 去年、今年のiOSDCのトークでもいくつか取り上げられてる
そのデバイス、スマートホームアプリからも操作可能です!
Matter
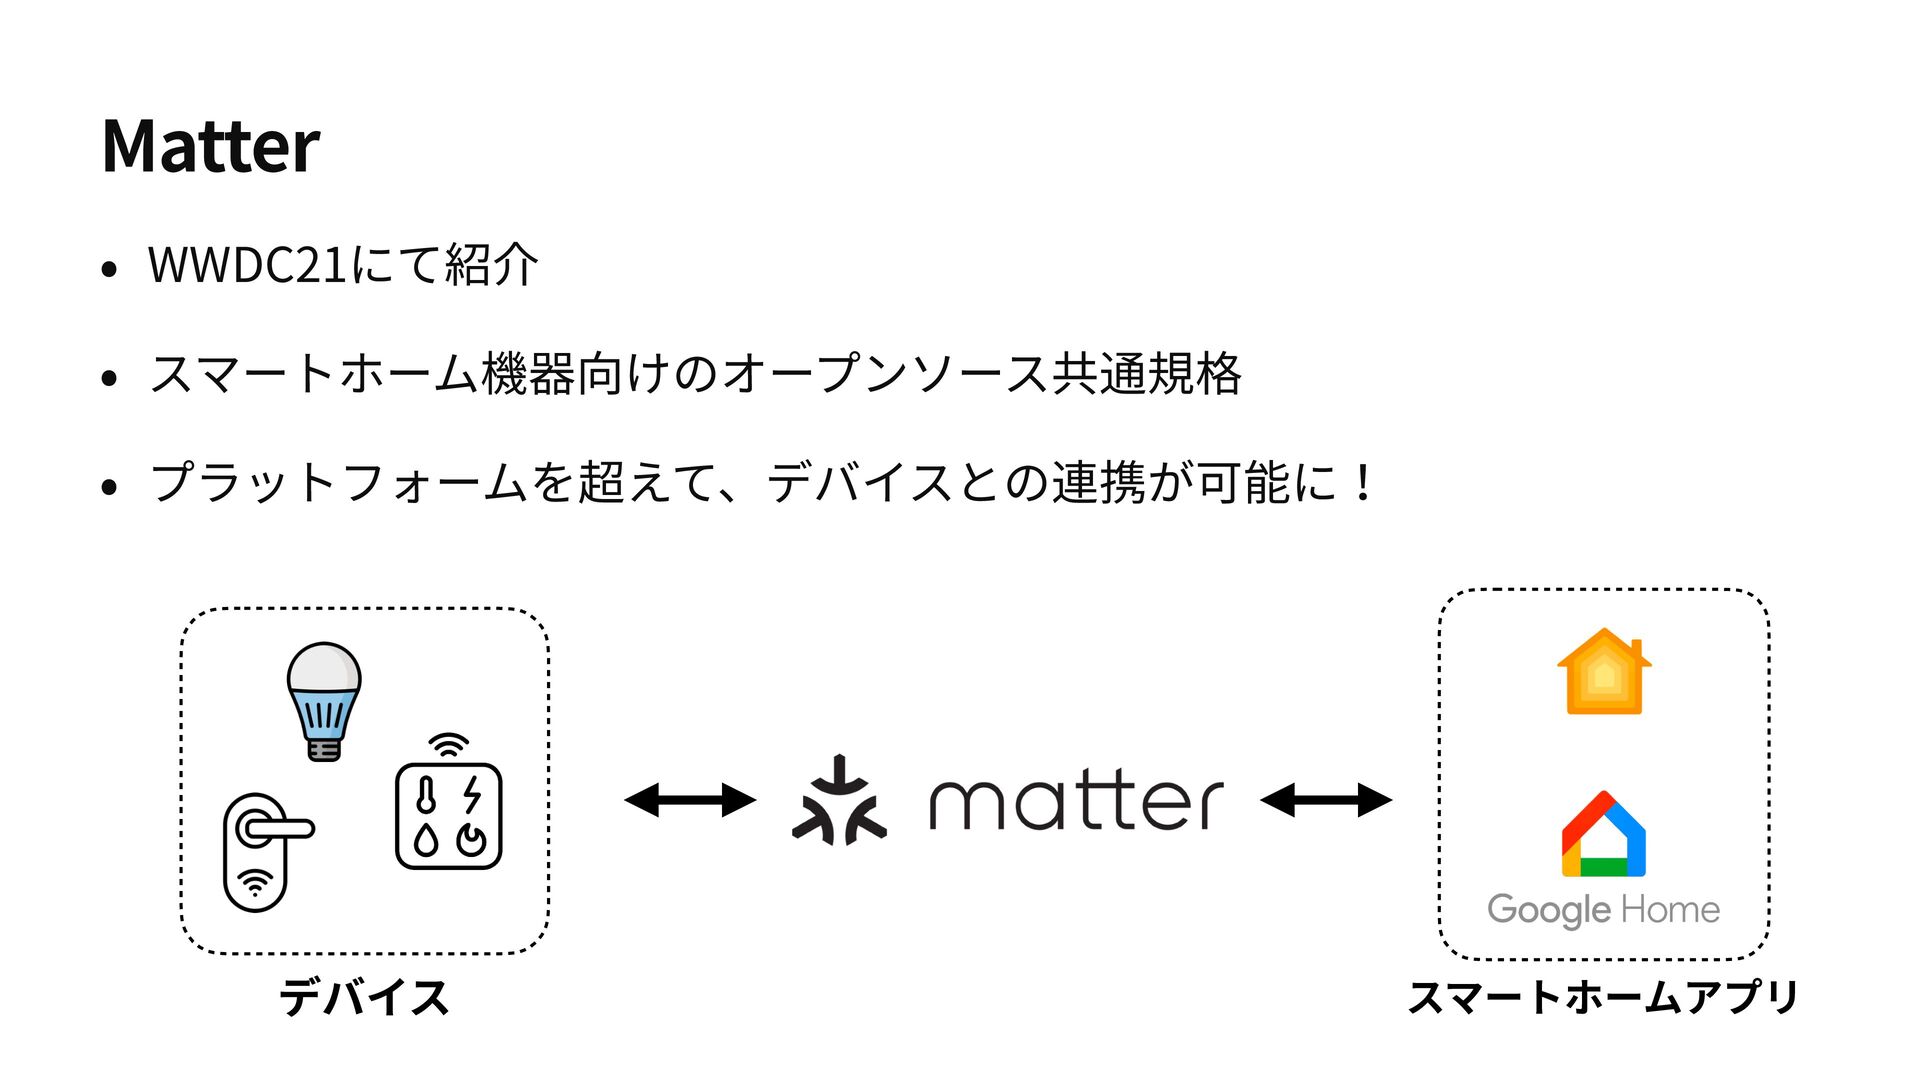
Matter • WWDC21にて紹介 • スマートホーム機器向けのオープンソース共通規格 • プラットフォームを超えて、デバイスとの連携が可能に! デバイス スマートホームアプリ
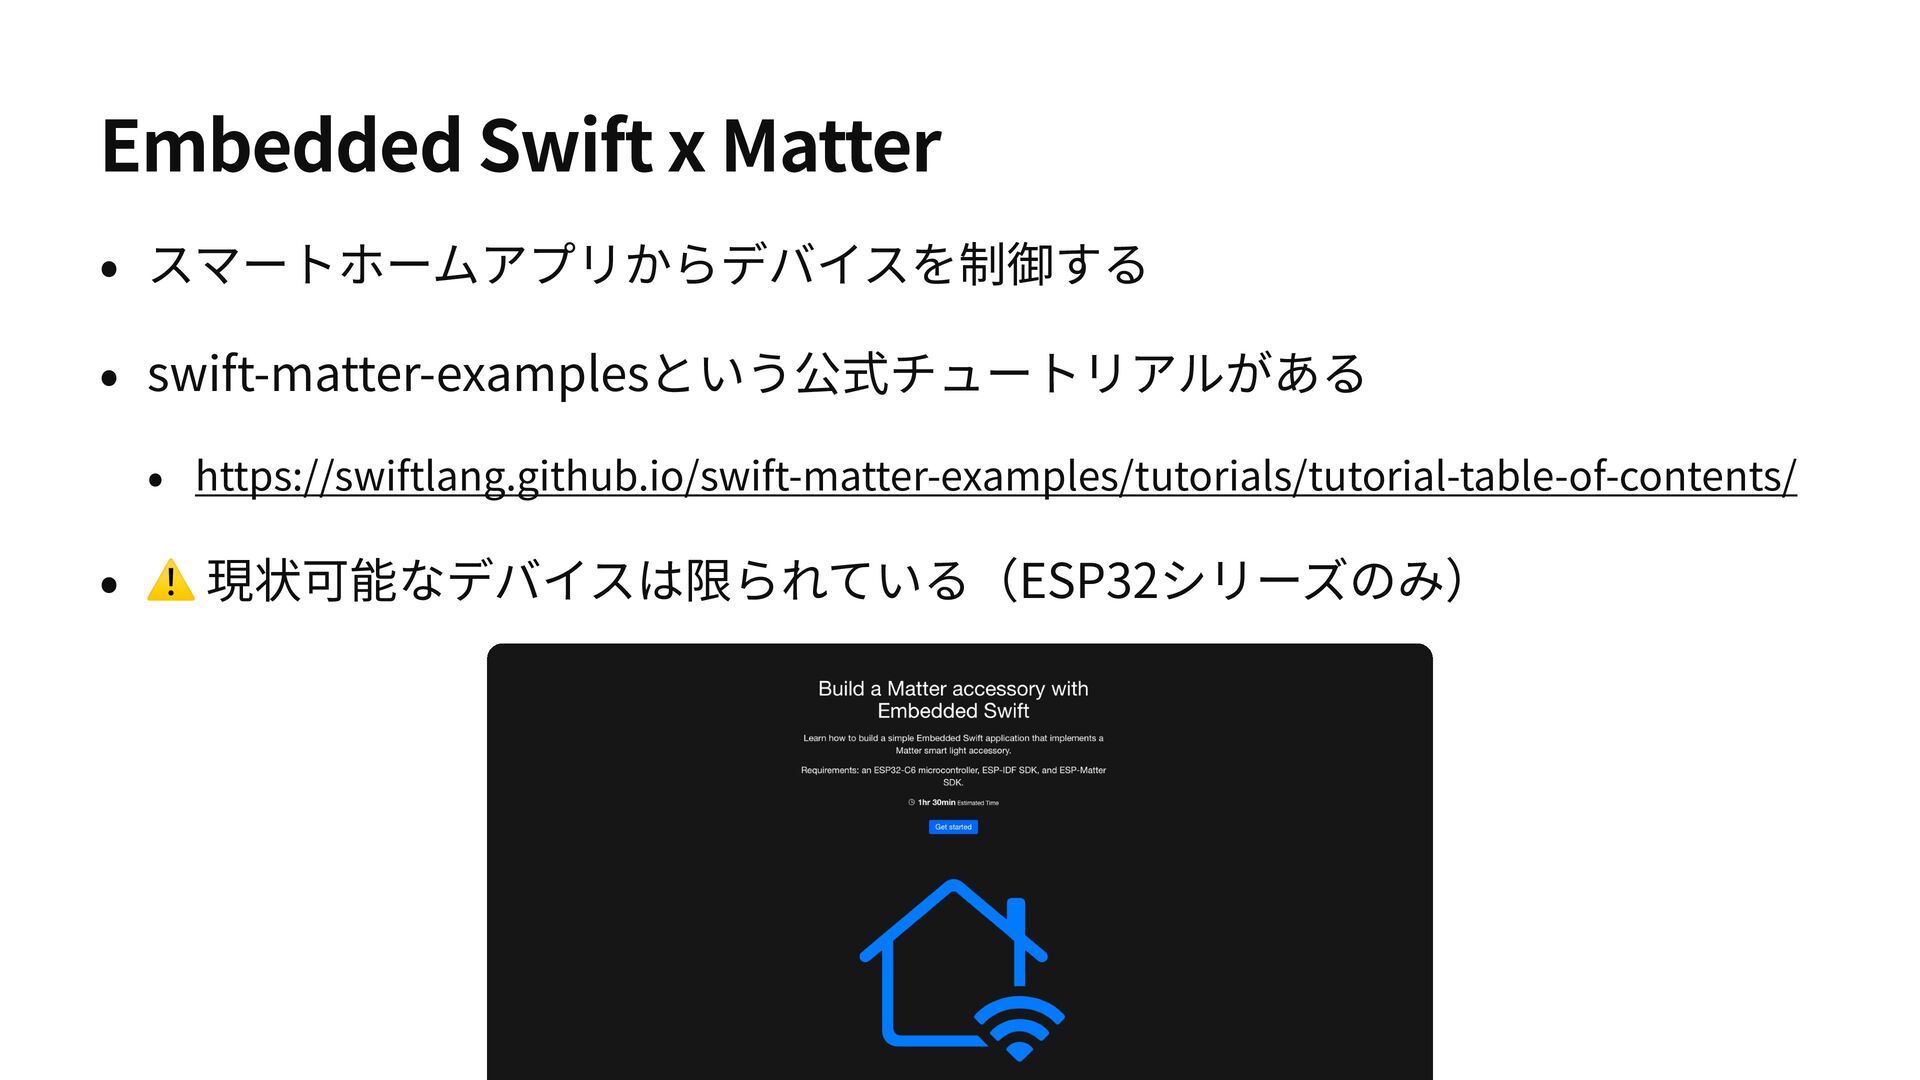
Embedded Swift x Matter • スマートホームアプリからデバイスを制御する • swift-matter-examplesという公式チュートリアルがある • https://swiftlang.github.io/swift-matter-examples/tutorials/tutorial-table-of-contents/
• ⚠ 現状可能なデバイスは限られている(ESP32シリーズのみ)
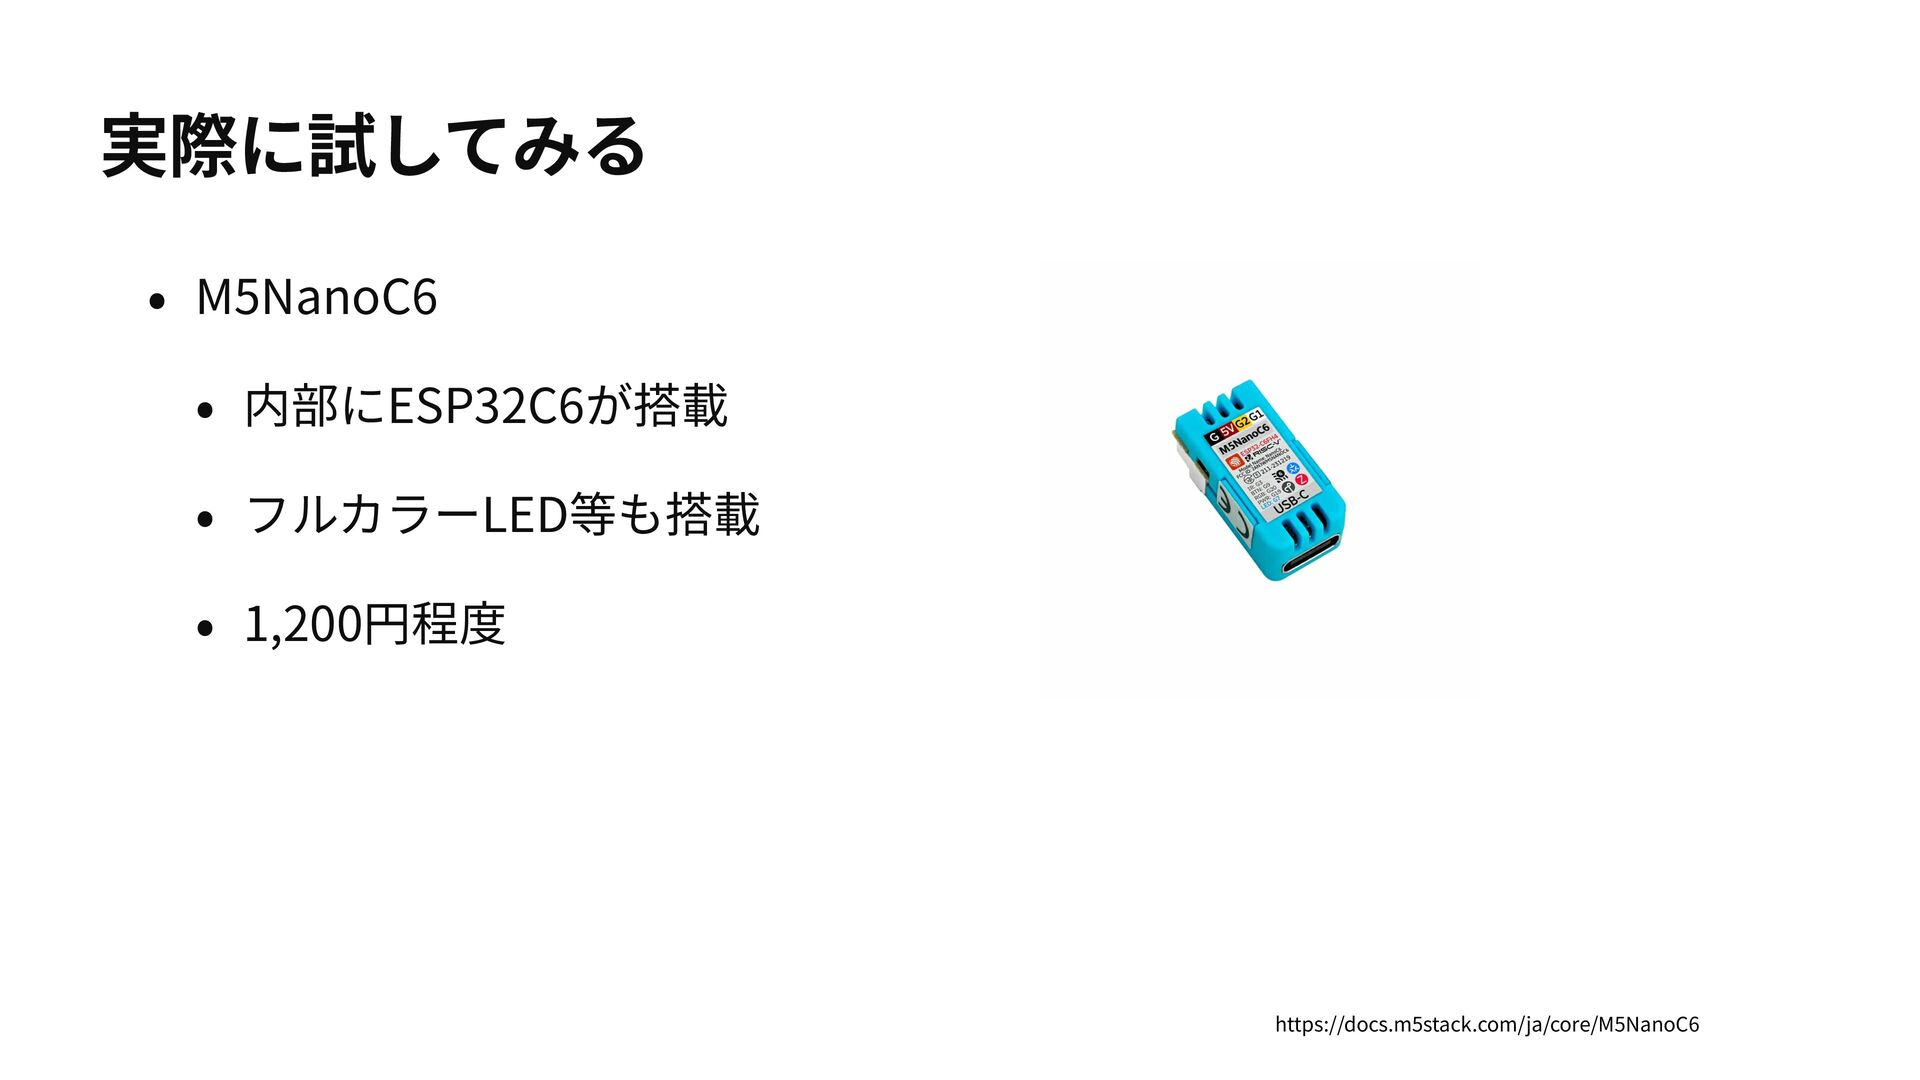
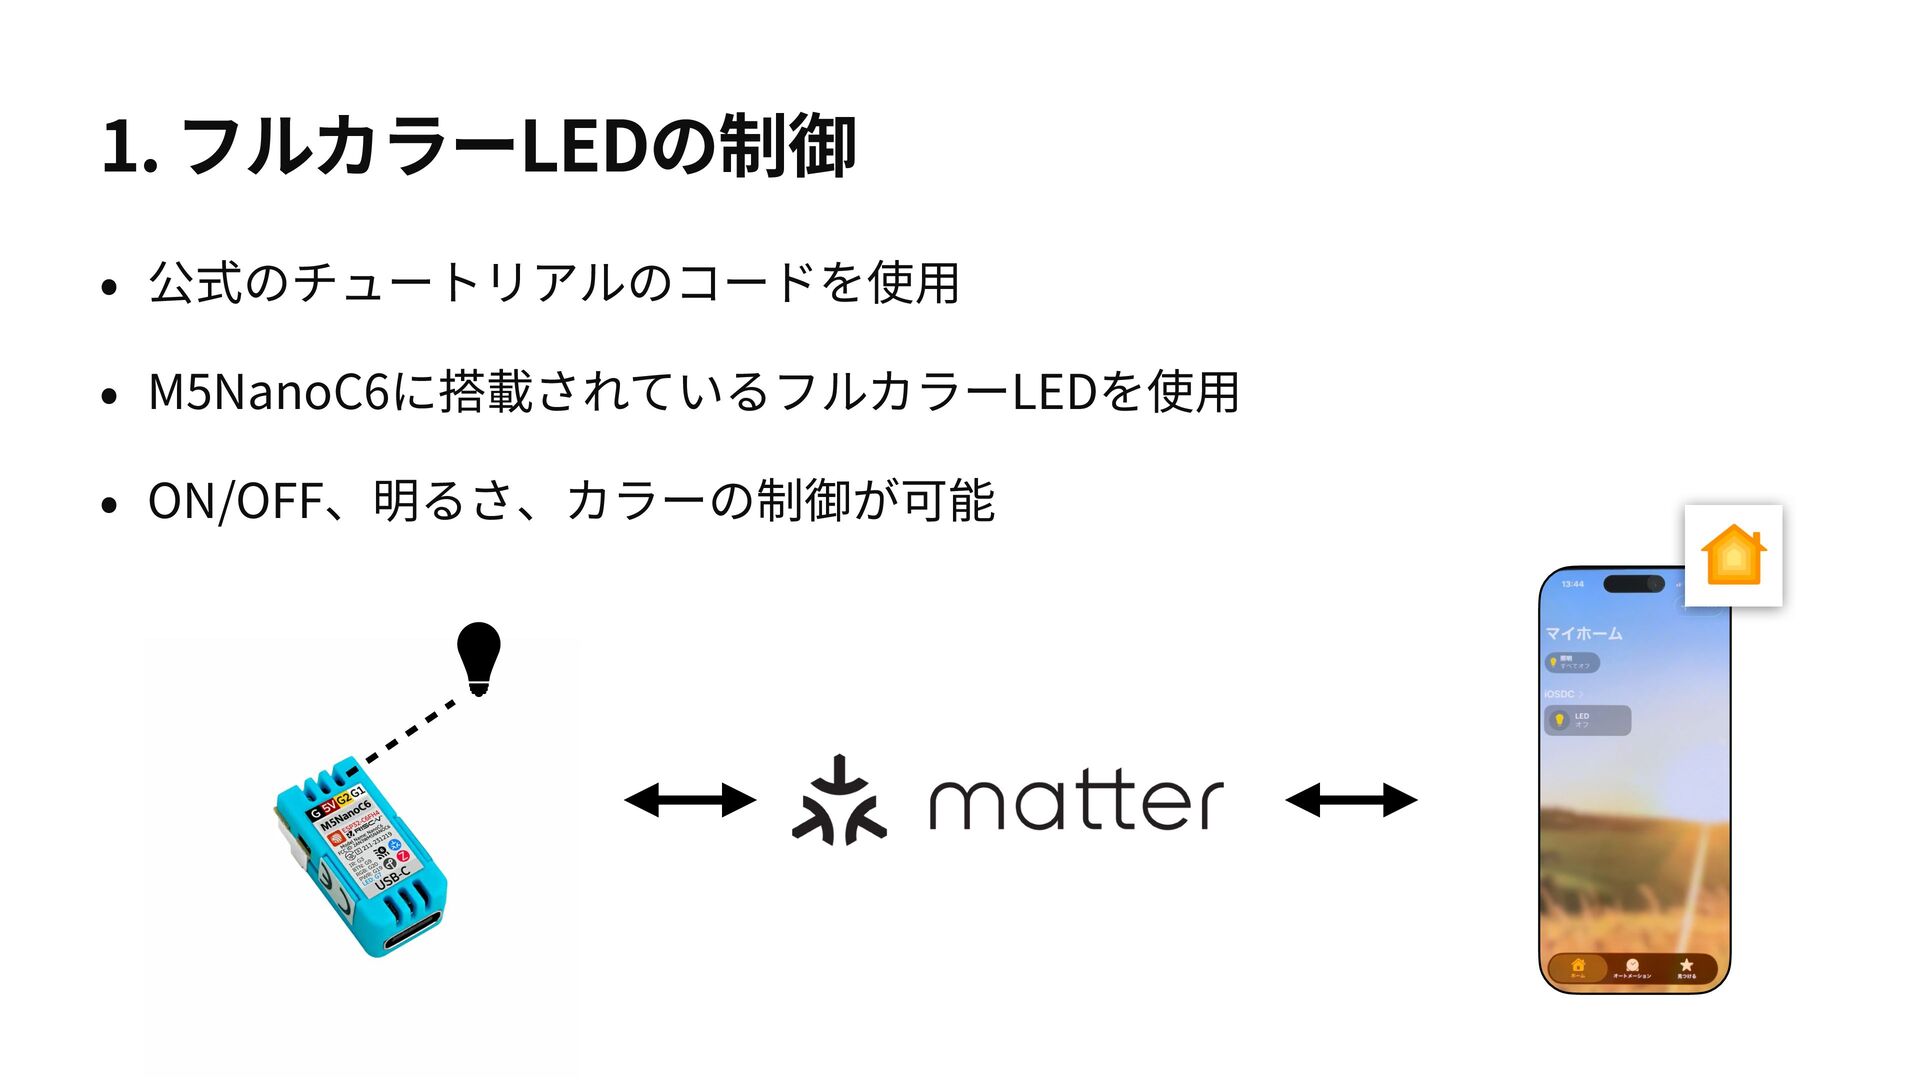
実際に試してみる • M5NanoC6 • 内部にESP32C6が搭載 • フルカラーLED等も搭載 • 1,200円程度 https://docs.m5stack.com/ja/core/M5NanoC6
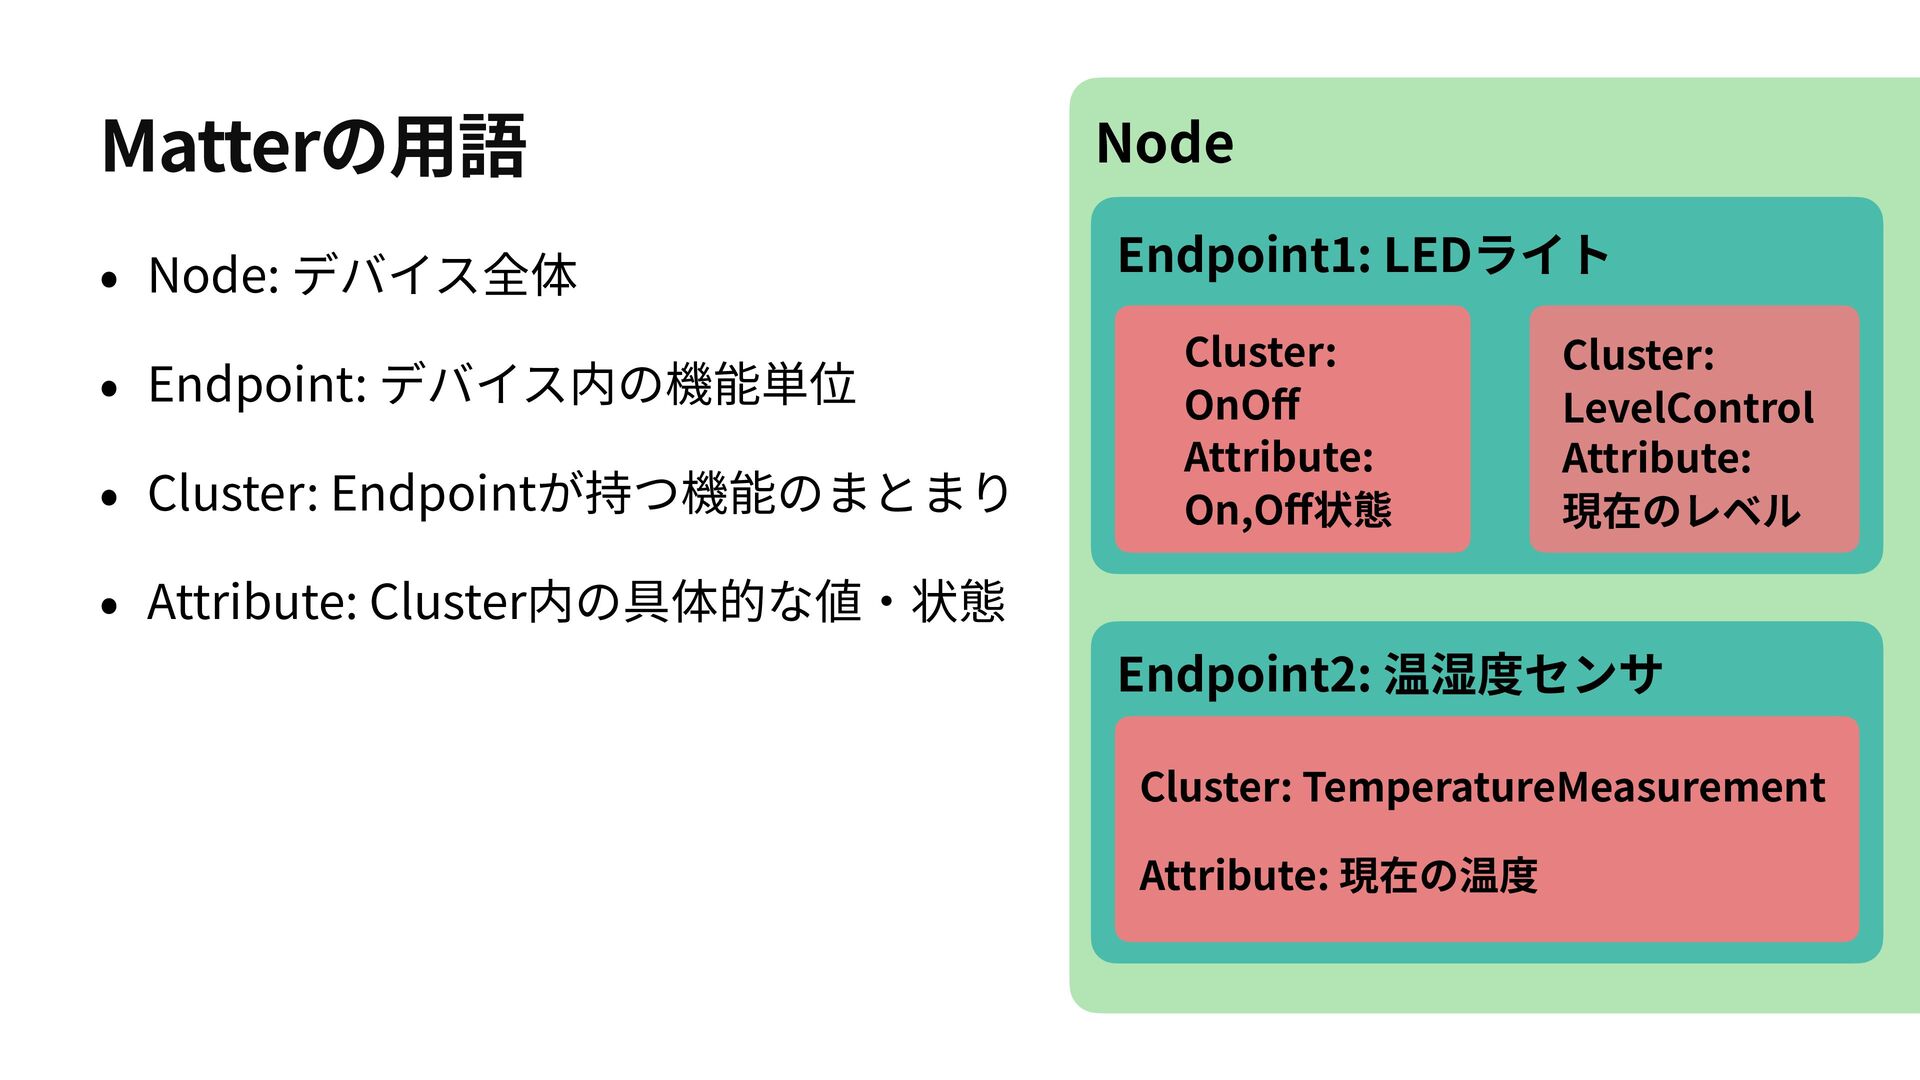
Matterの⽤語 • Node: デバイス全体 • Endpoint: デバイス内の機能単位 • Cluster: Endpointが持つ機能のまとまり
• Attribute: Cluster内の具体的な値・状態 Node Endpoint1: LEDライト Cluster: OnOff Attribute: On,Off状態 Cluster: LevelControl Attribute: 現在のレベル Endpoint2: 温湿度センサ Cluster: TemperatureMeasurement Attribute: 現在の温度
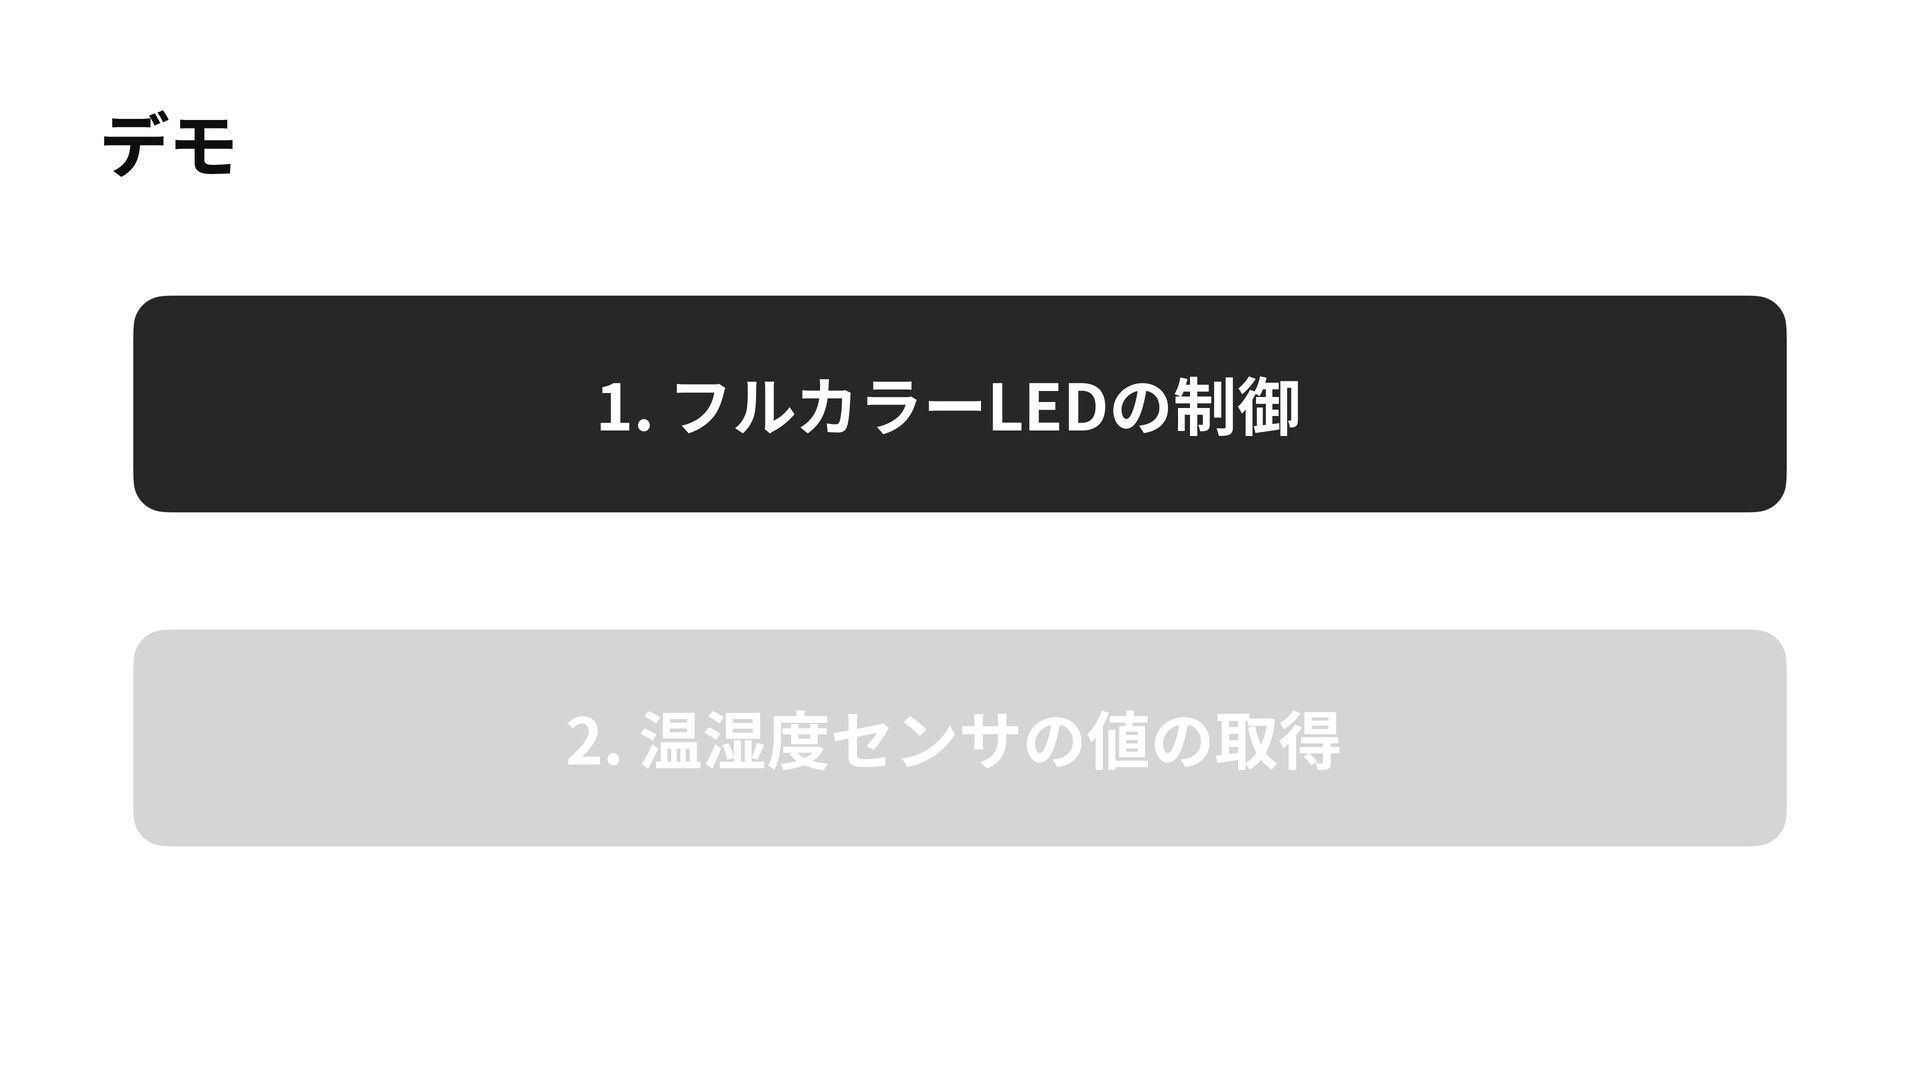
デモ 1. フルカラーLEDの制御 2. 温湿度センサの値の取得
デモ 1. フルカラーLEDの制御 2. 温湿度センサの値の取得
1. フルカラーLEDの制御 • 公式のチュートリアルのコードを使⽤ • M5NanoC6に搭載されているフルカラーLEDを使⽤ • ON/OFF、明るさ、カラーの制御が可能
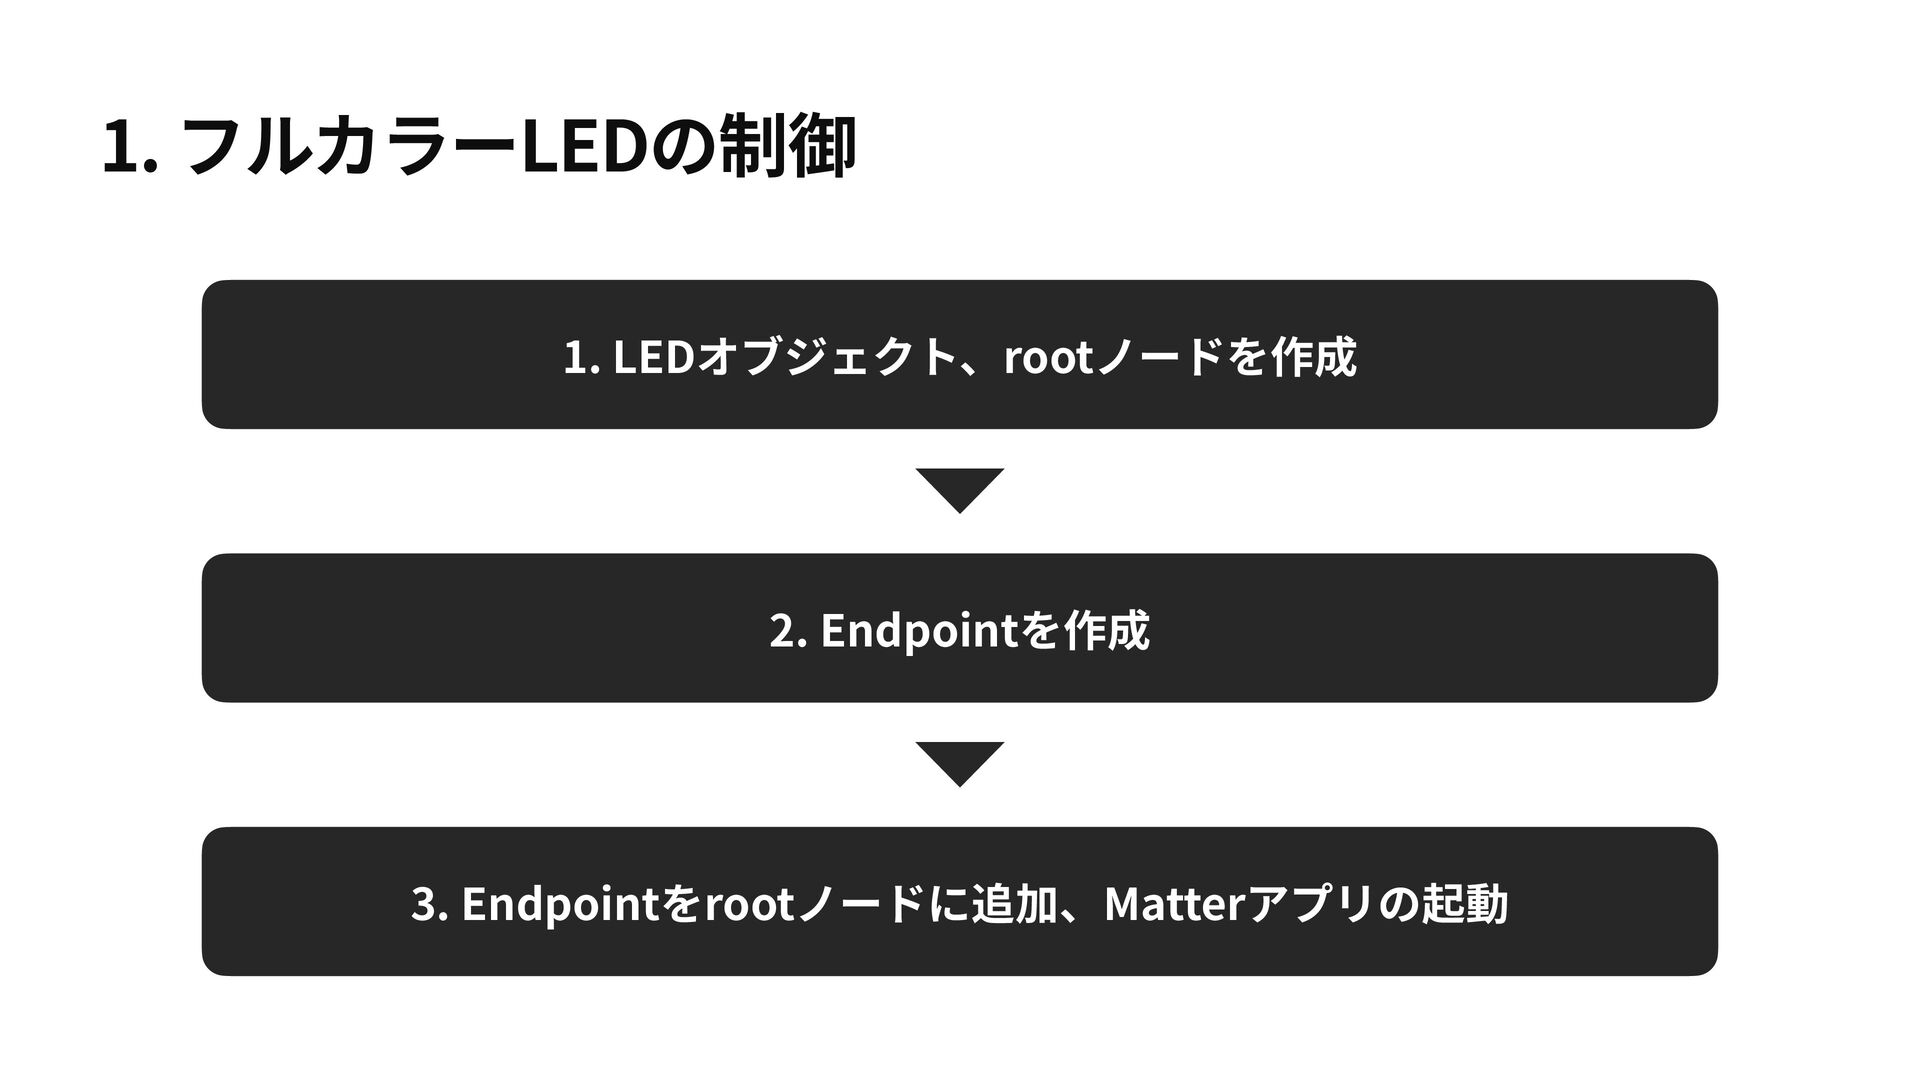
1. フルカラーLEDの制御 1. LEDオブジェクト、rootノードを作成 2. Endpointを作成 3. Endpointをrootノードに追加、Matterアプリの起動
1. LEDオブジェクト、rootノードを作成 1. フルカラーLEDの制御 let led = LED() let rootNode
= Matter.Node() rootNode.identifyHandler = { print("identify") } LEDオブジェクトの作成(GPIOの設定など) Matterプロトコルの rootノードを作成 Node
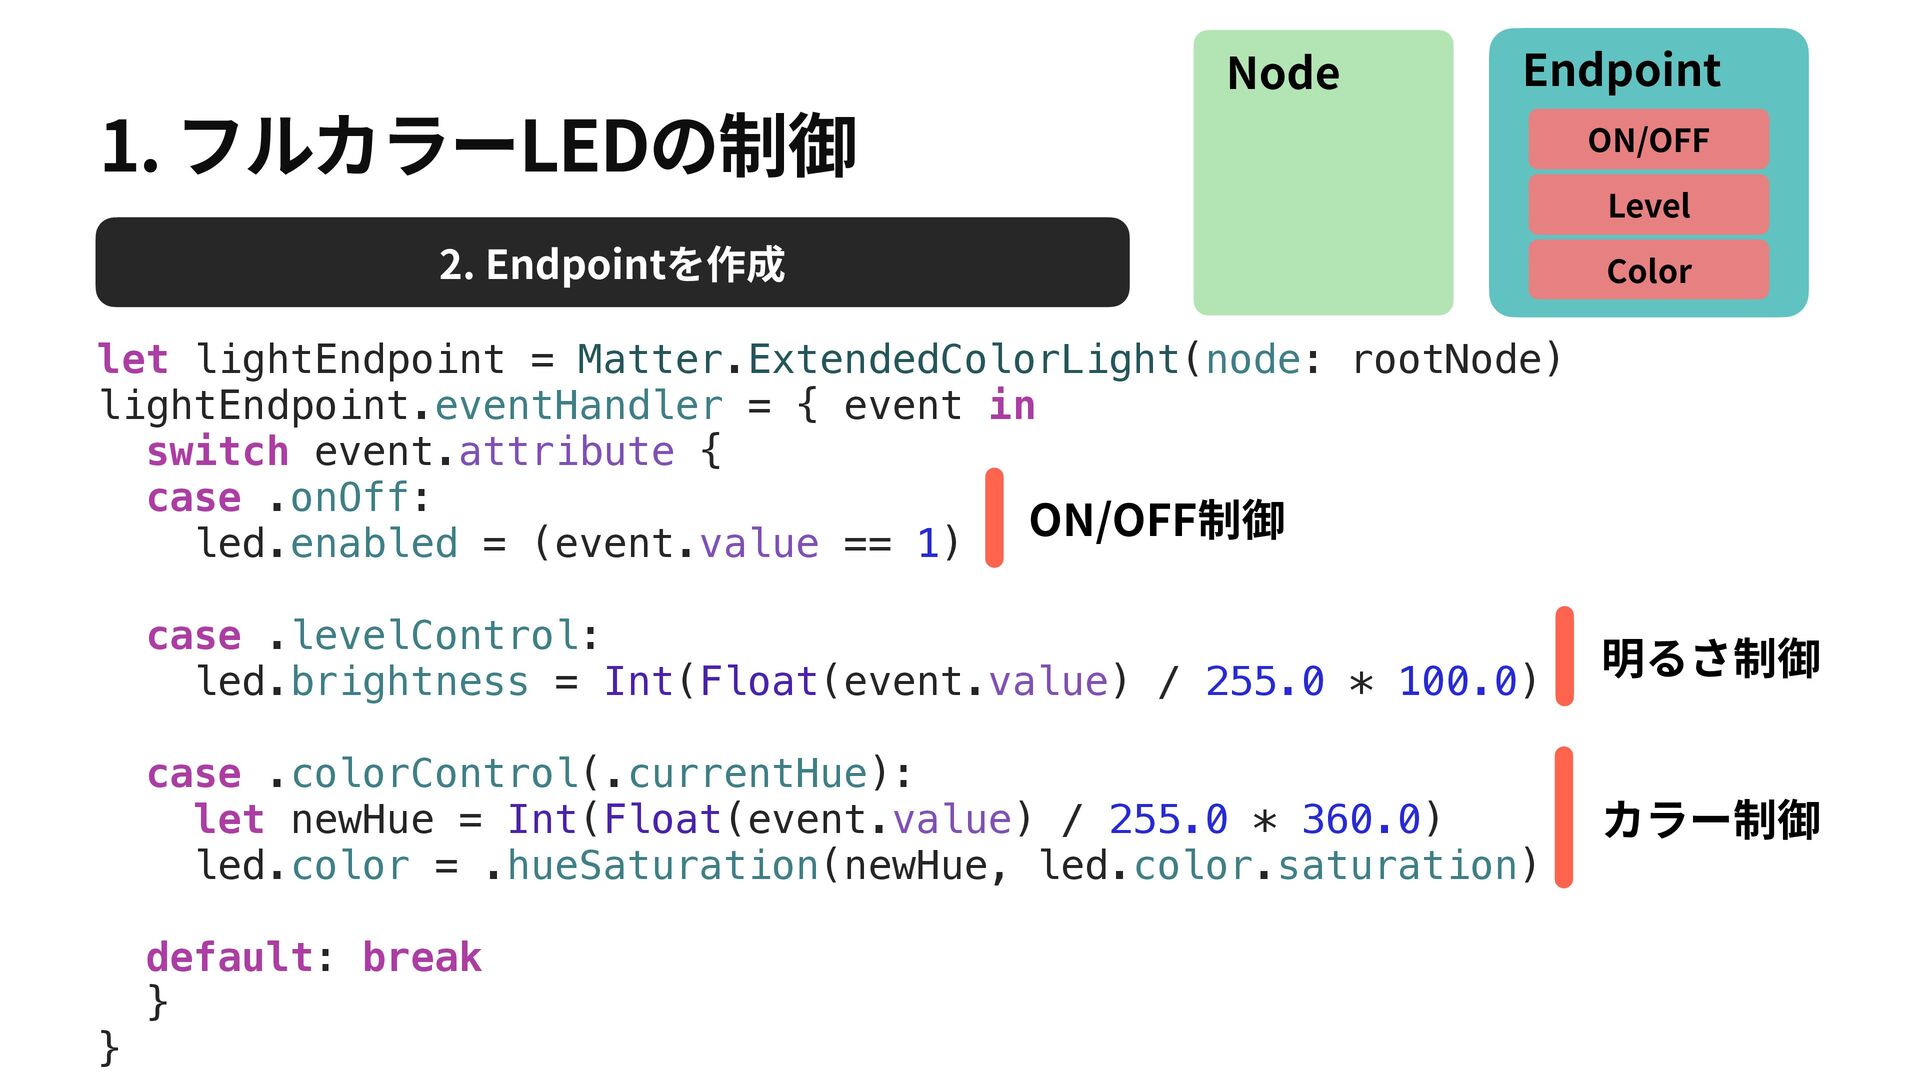
1. フルカラーLEDの制御 let lightEndpoint = Matter.ExtendedColorLight(node: rootNode) lightEndpoint.eventHandler = {
event in switch event.attribute { case .onOff: led.enabled = (event.value == 1) case .levelControl: led.brightness = Int(Float(event.value) / 255.0 * 100.0) case .colorControl(.currentHue): let newHue = Int(Float(event.value) / 255.0 * 360.0) led.color = .hueSaturation(newHue, led.color.saturation) default: break } } ON/OFF制御 明るさ制御 カラー制御 Node Endpoint ON/OFF Level Color 2. Endpointを作成
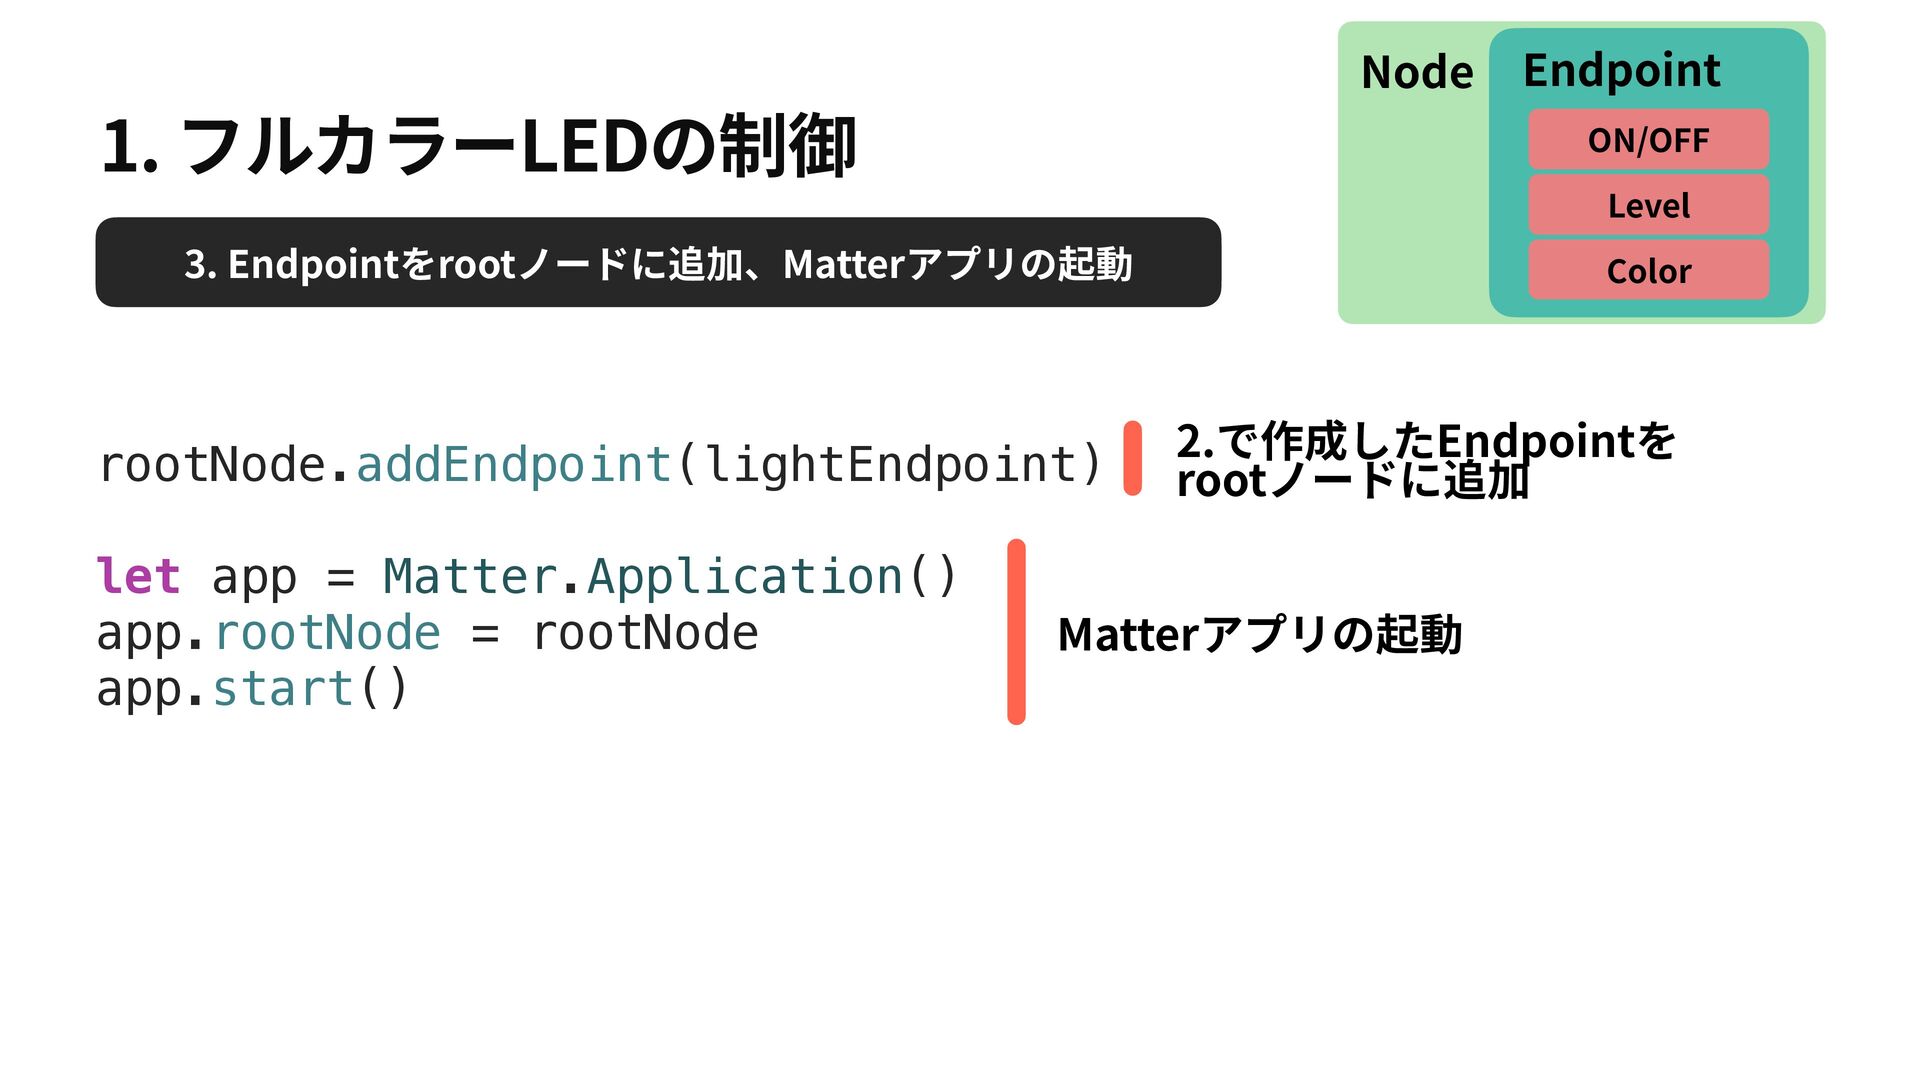
1. フルカラーLEDの制御 rootNode.addEndpoint(lightEndpoint) let app = Matter.Application() app.rootNode = rootNode
app.start() 2.で作成したEndpointを rootノードに追加 Matterアプリの起動 Node Endpoint ON/OFF Level Color 3. Endpointをrootノードに追加、Matterアプリの起動
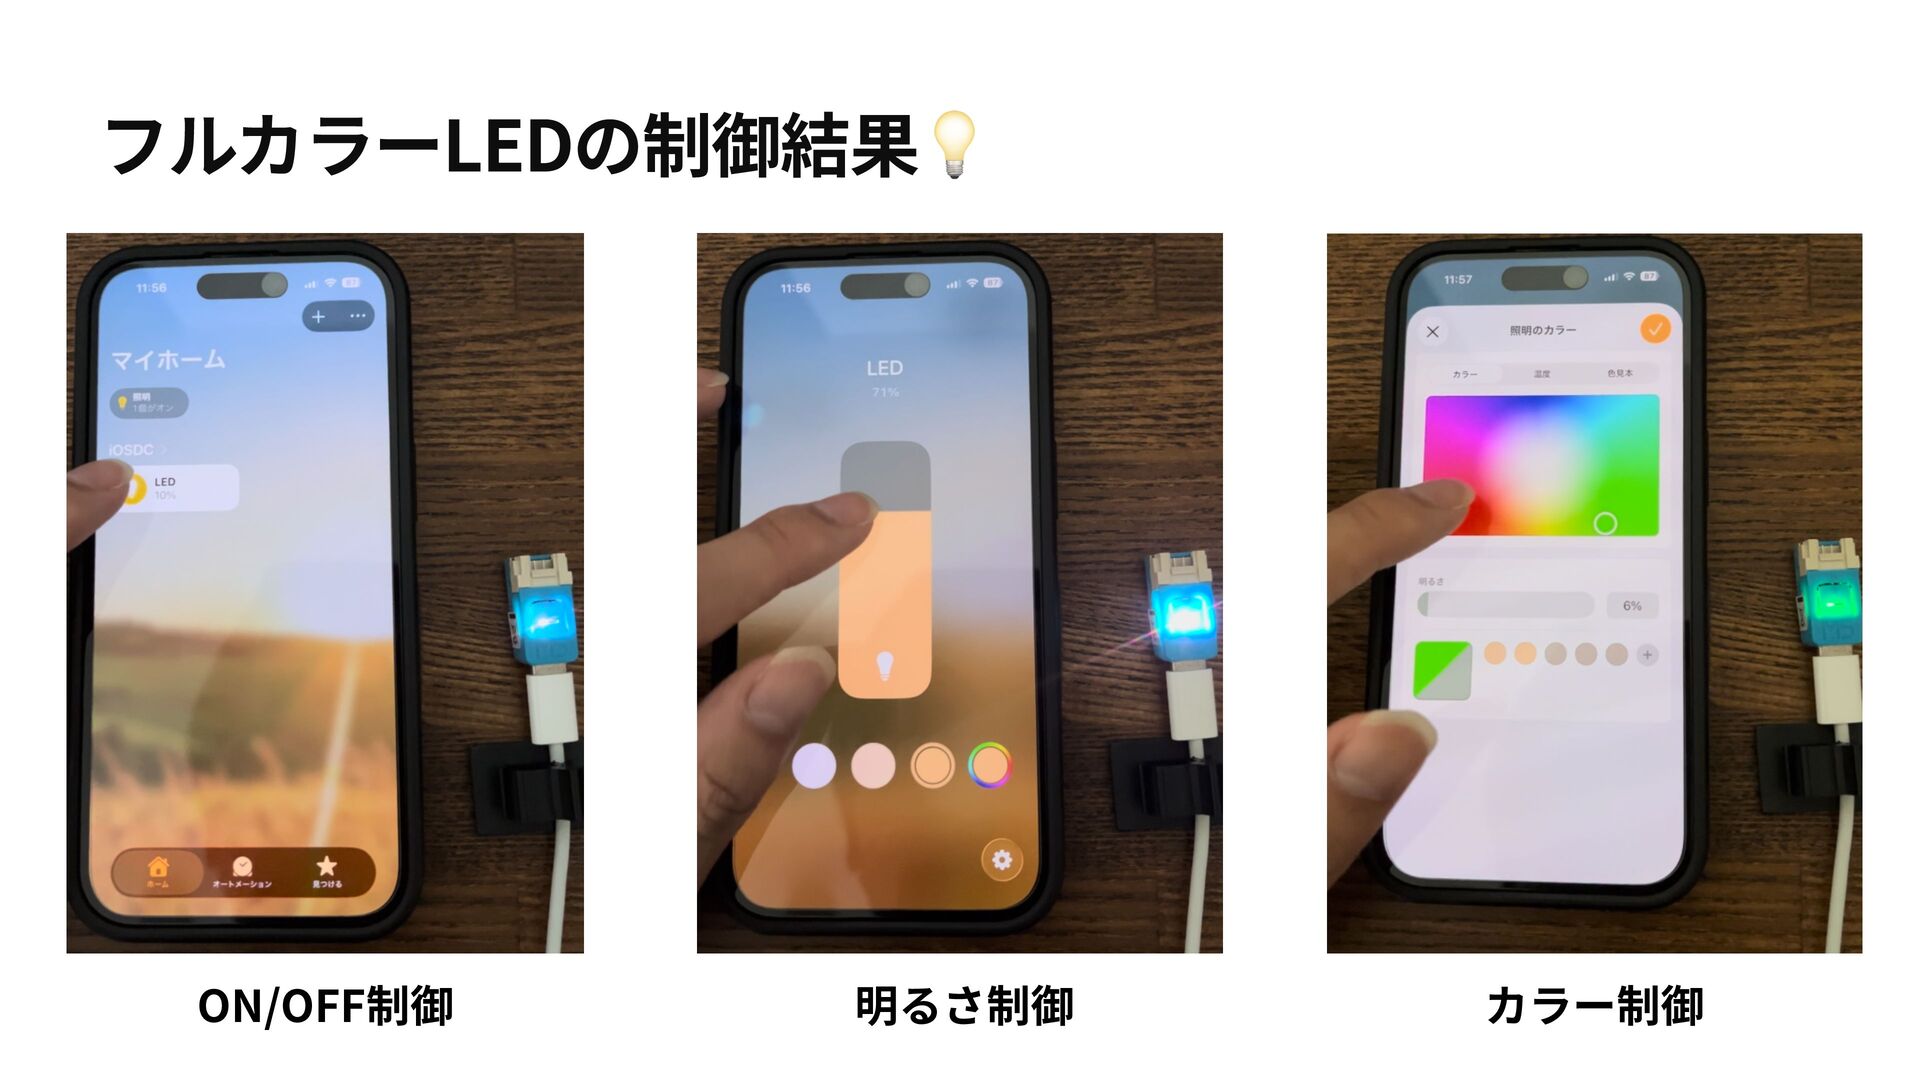
ON/OFF制御 明るさ制御 カラー制御 フルカラーLEDの制御結果"
デモ 1. フルカラーLEDの制御 2. 温湿度センサの値の取得
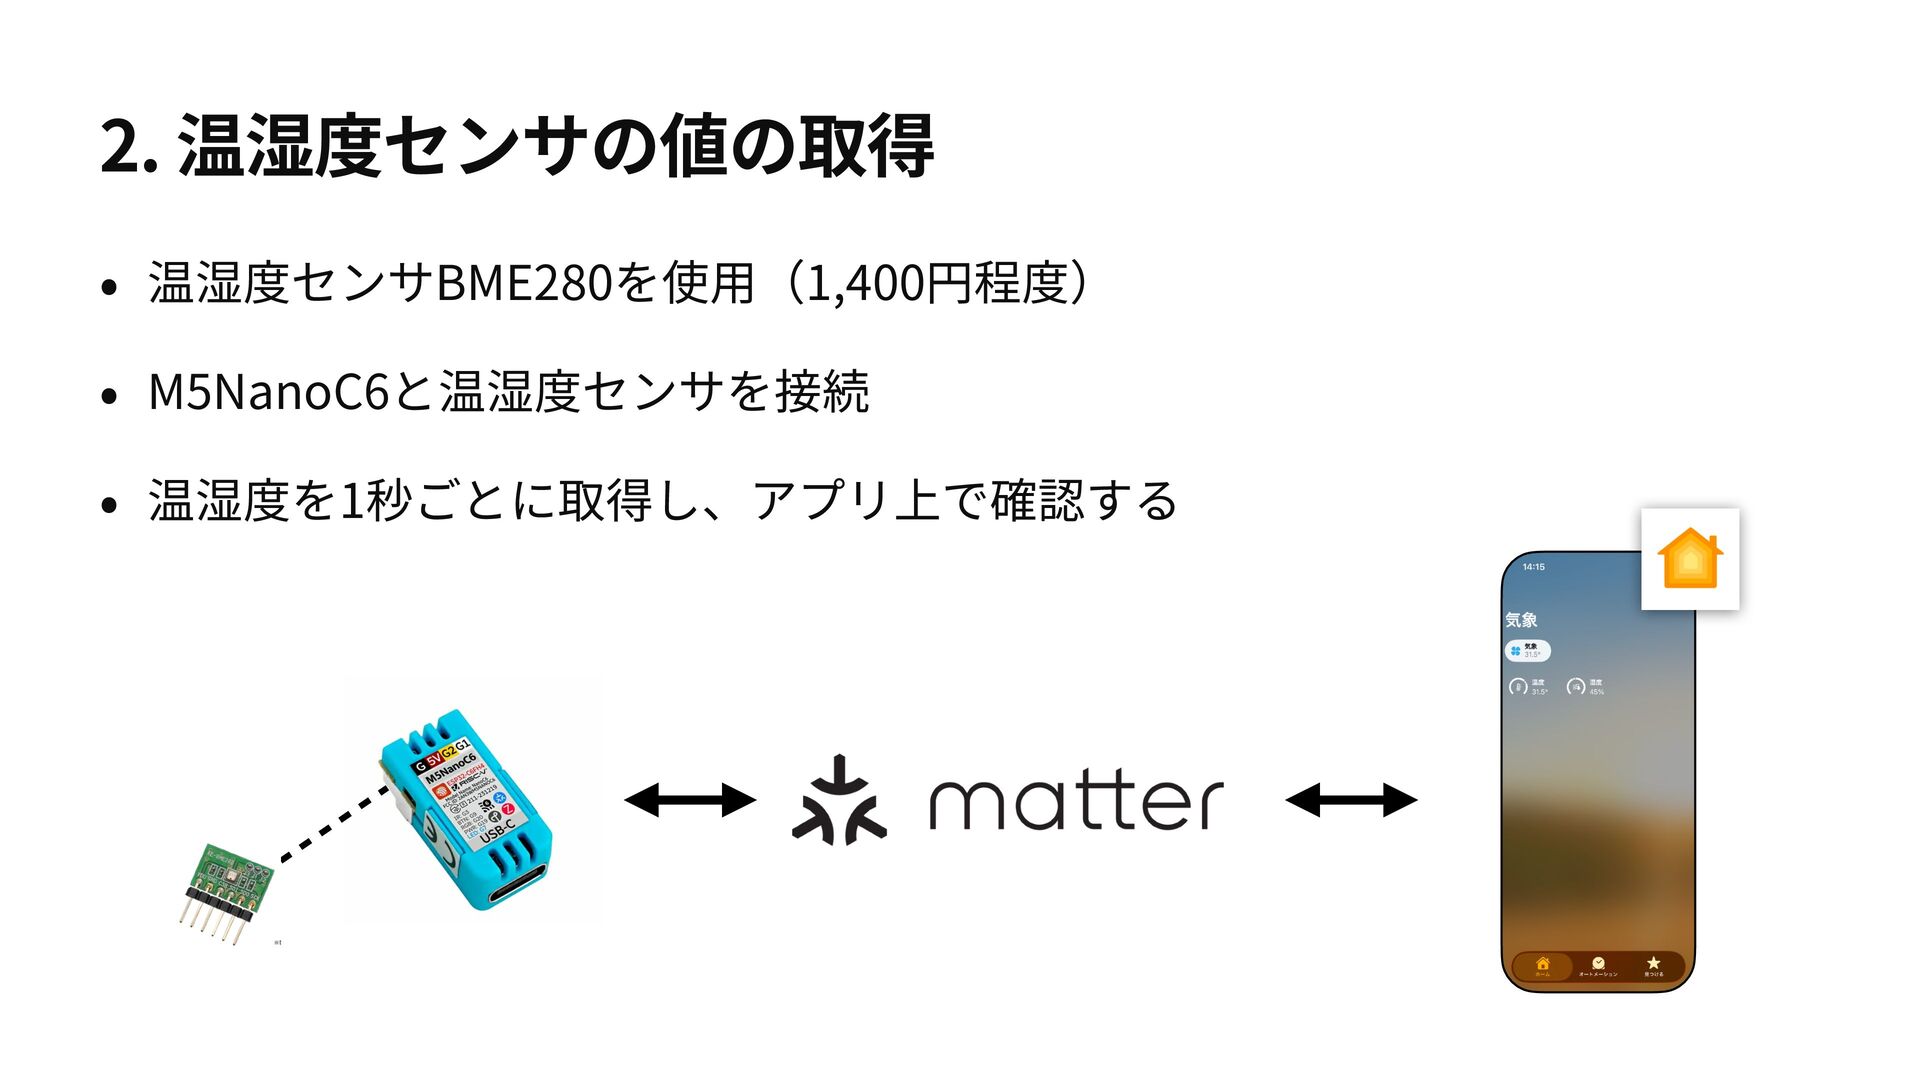
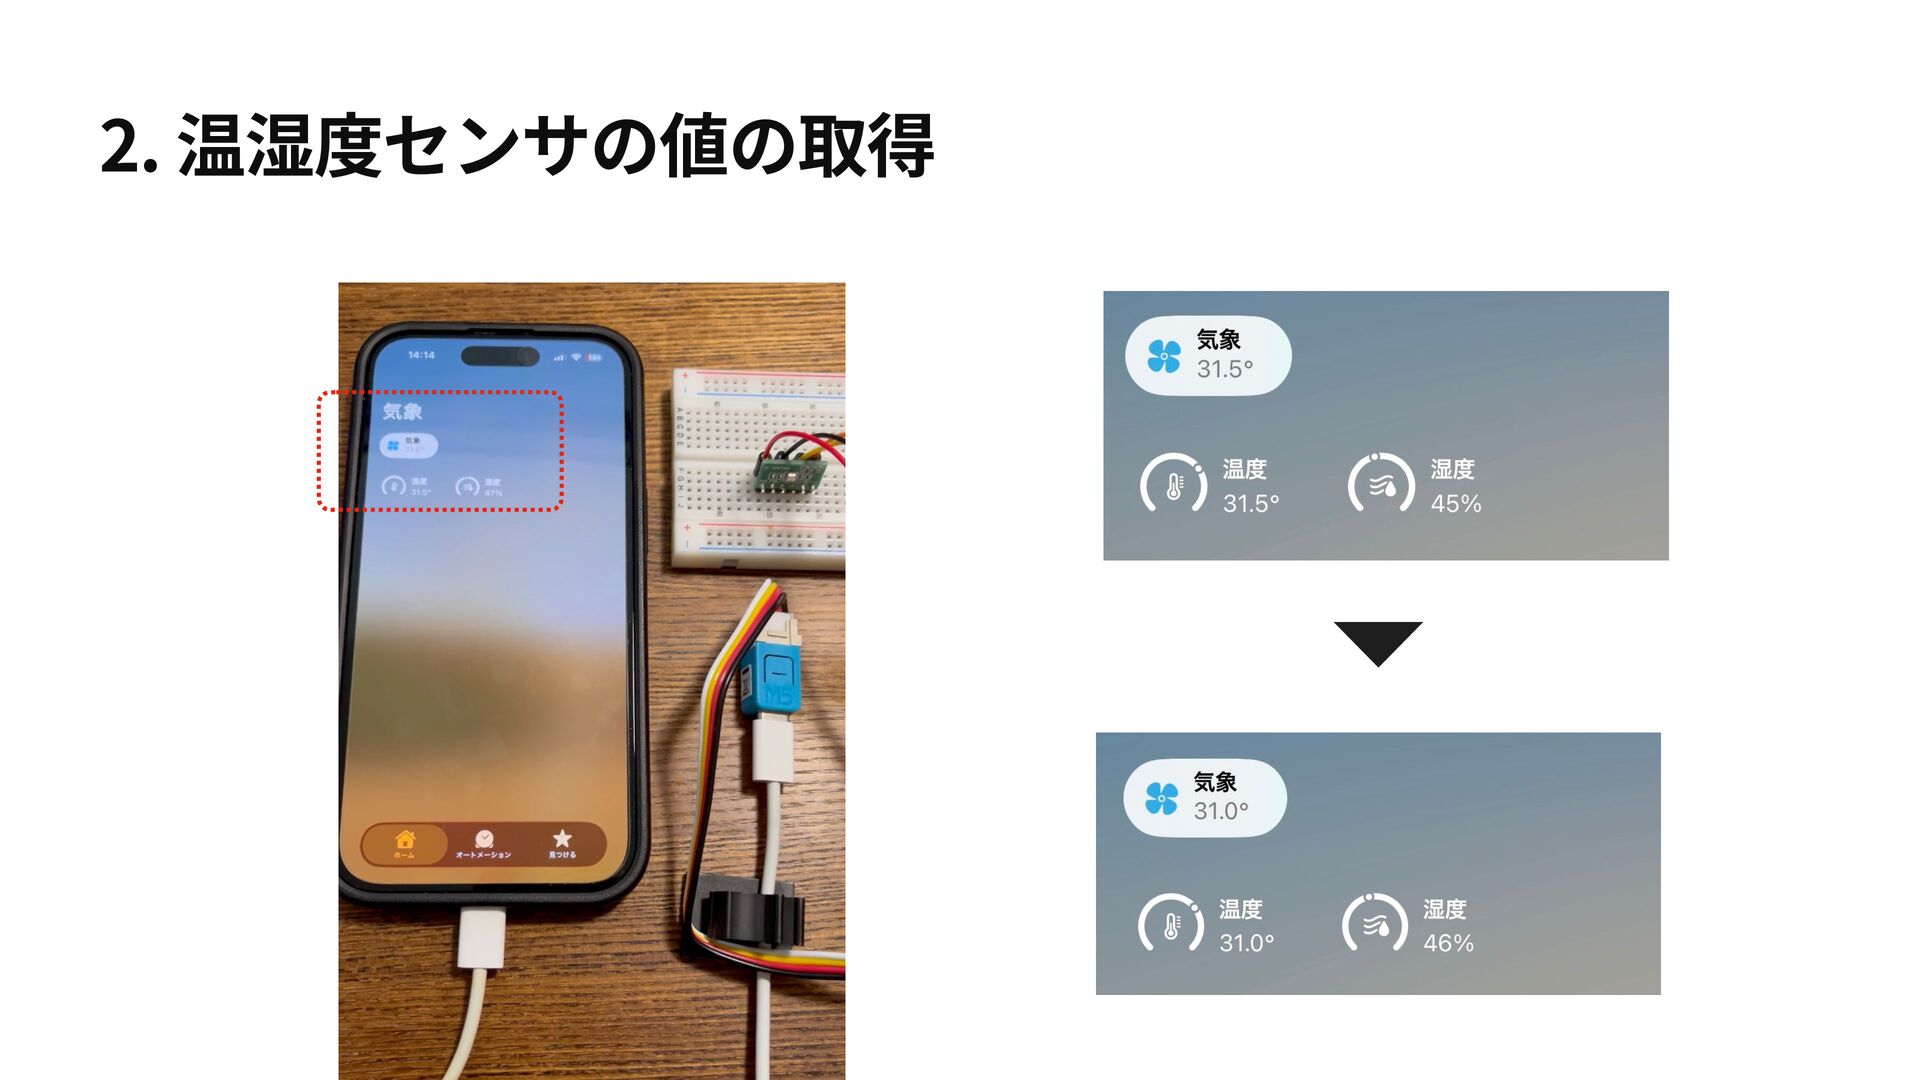
2. 温湿度センサの値の取得 • 温湿度センサBME280を使⽤(1,400円程度) • M5NanoC6と温湿度センサを接続 • 温湿度を1秒ごとに取得し、アプリ上で確認する
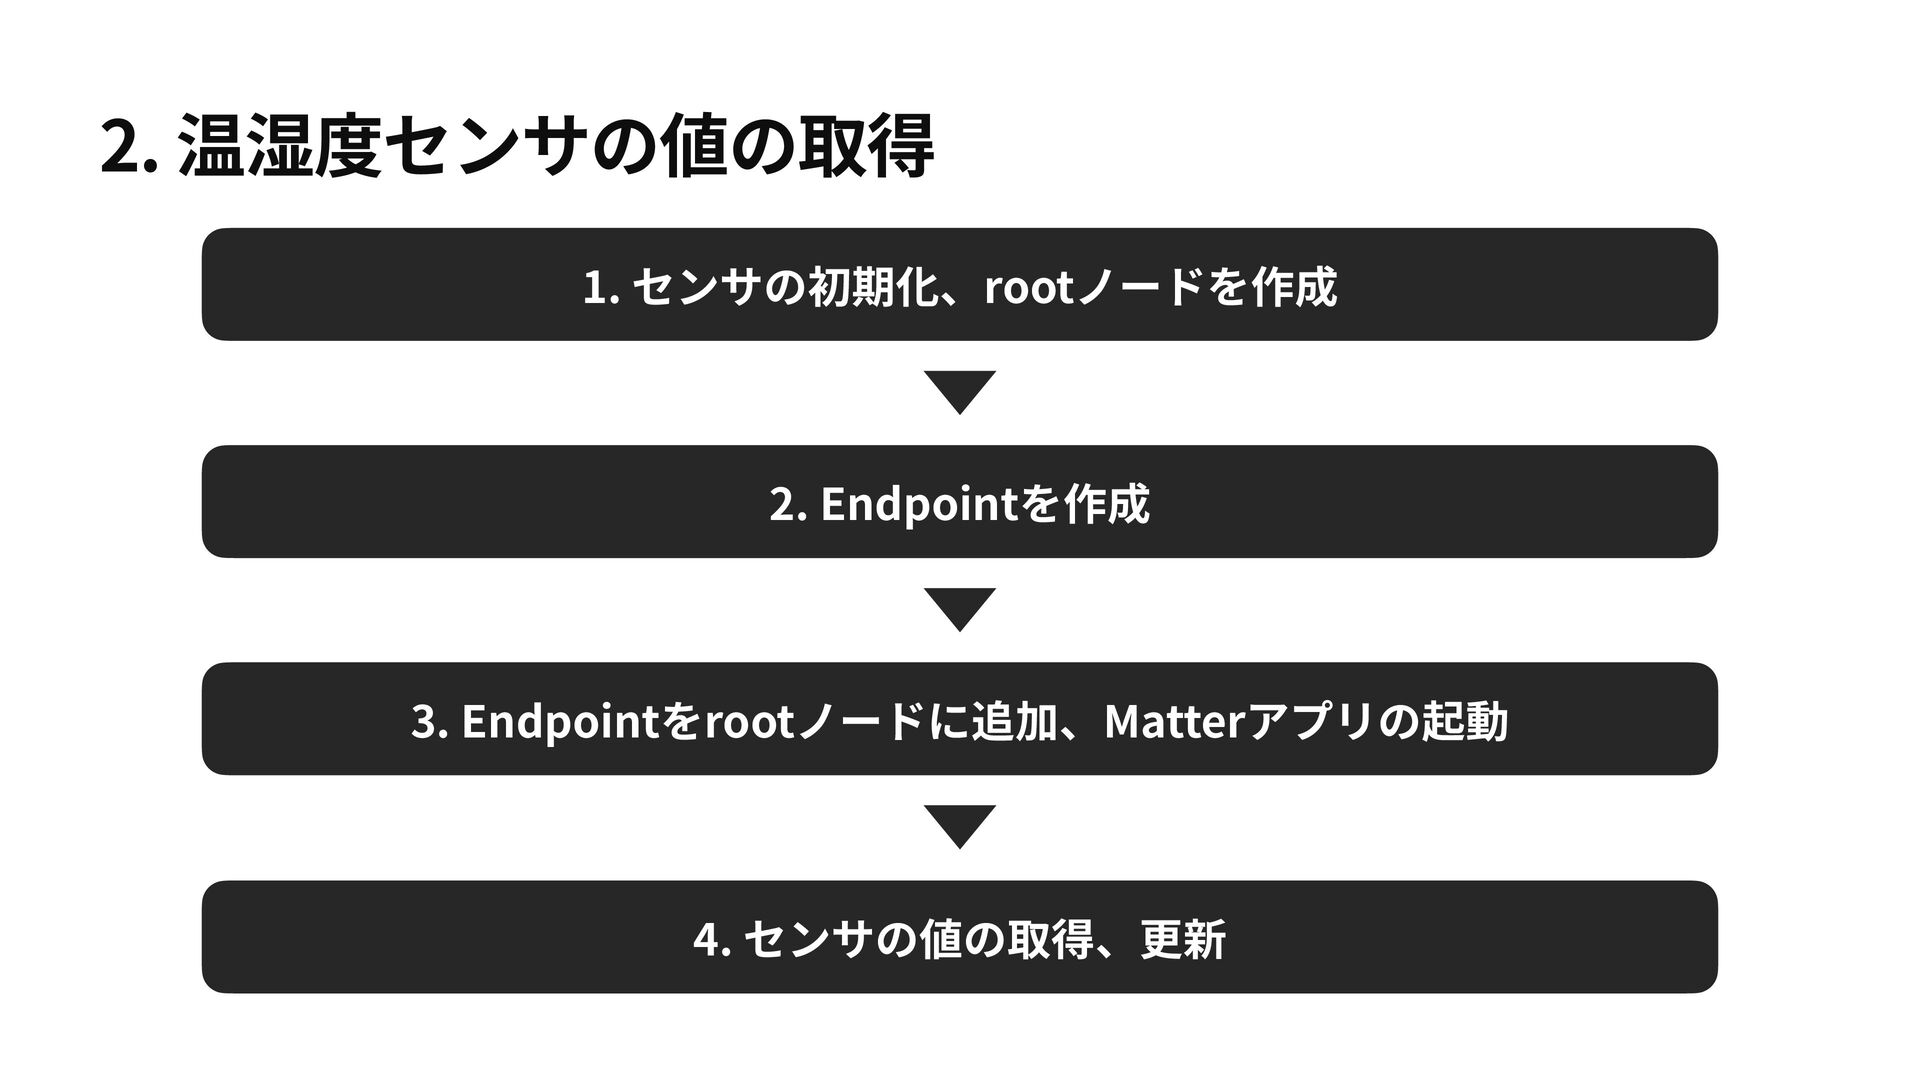
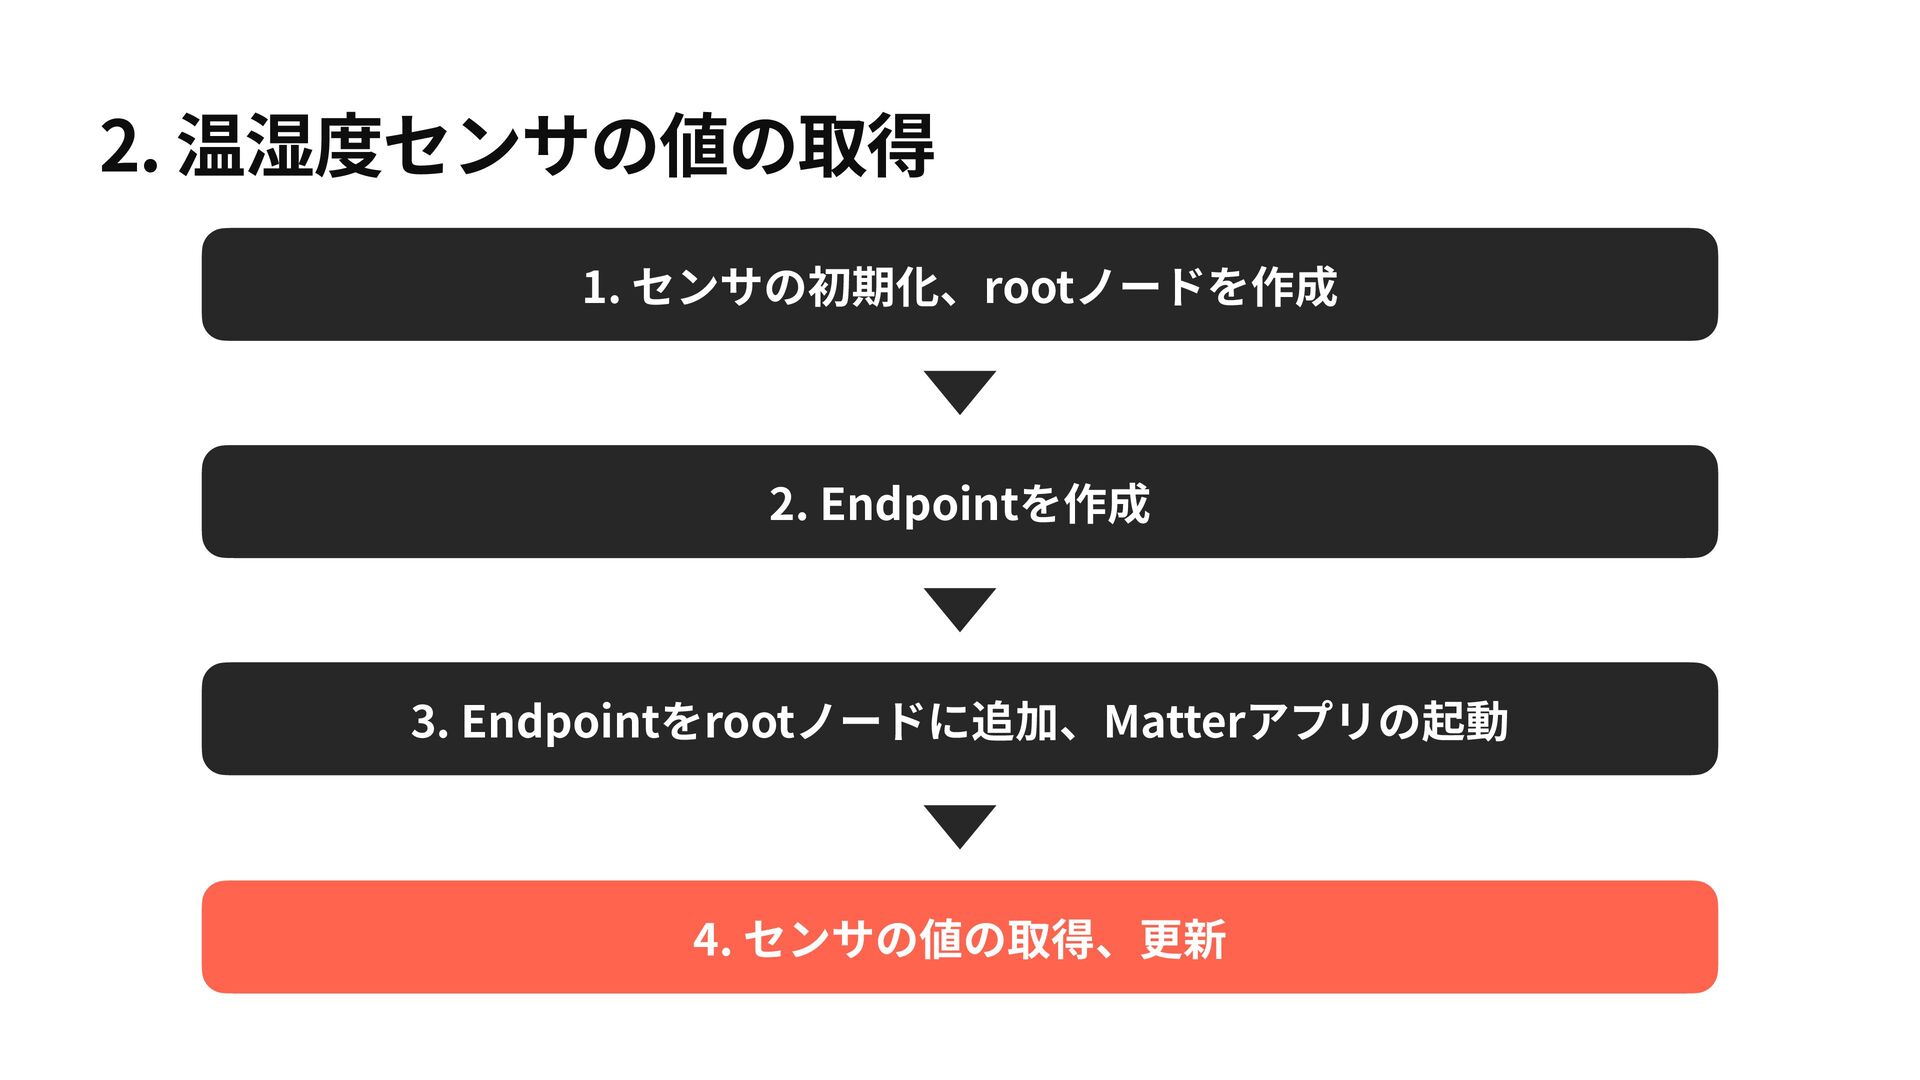
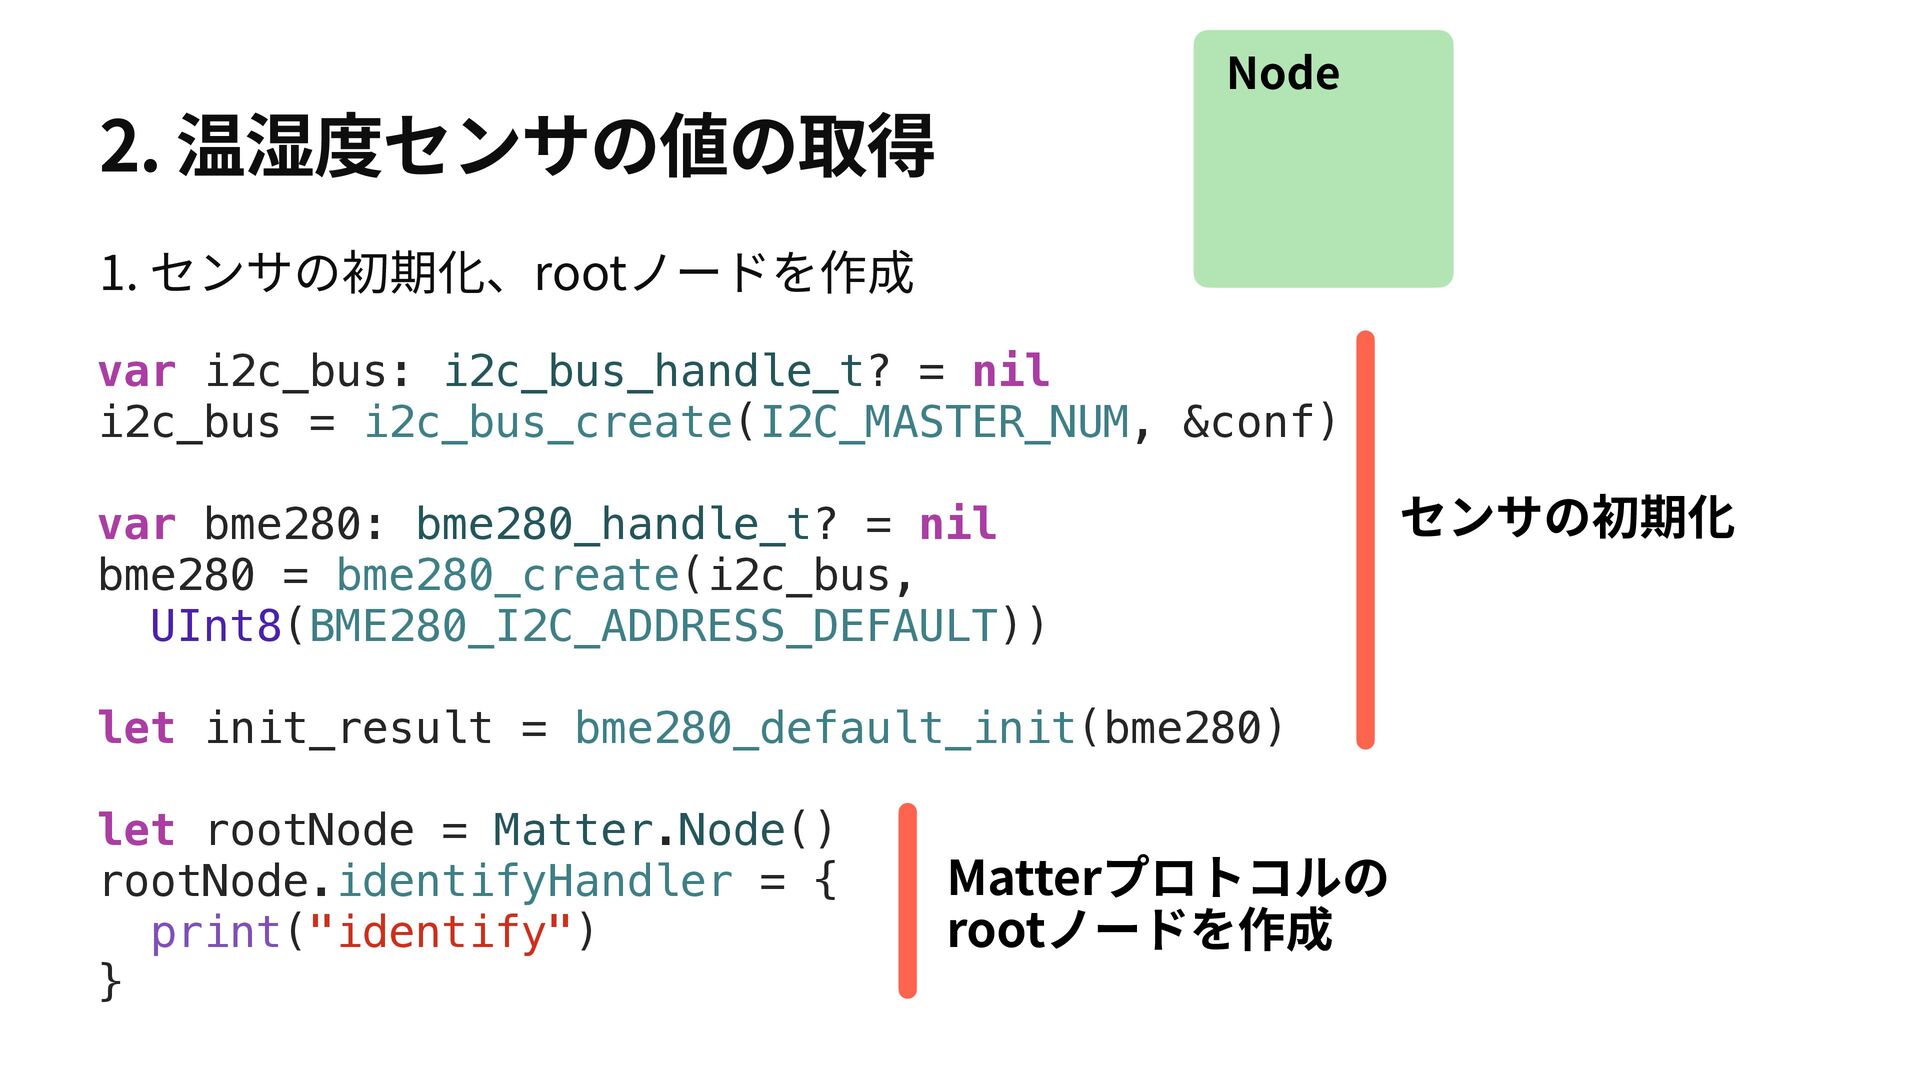
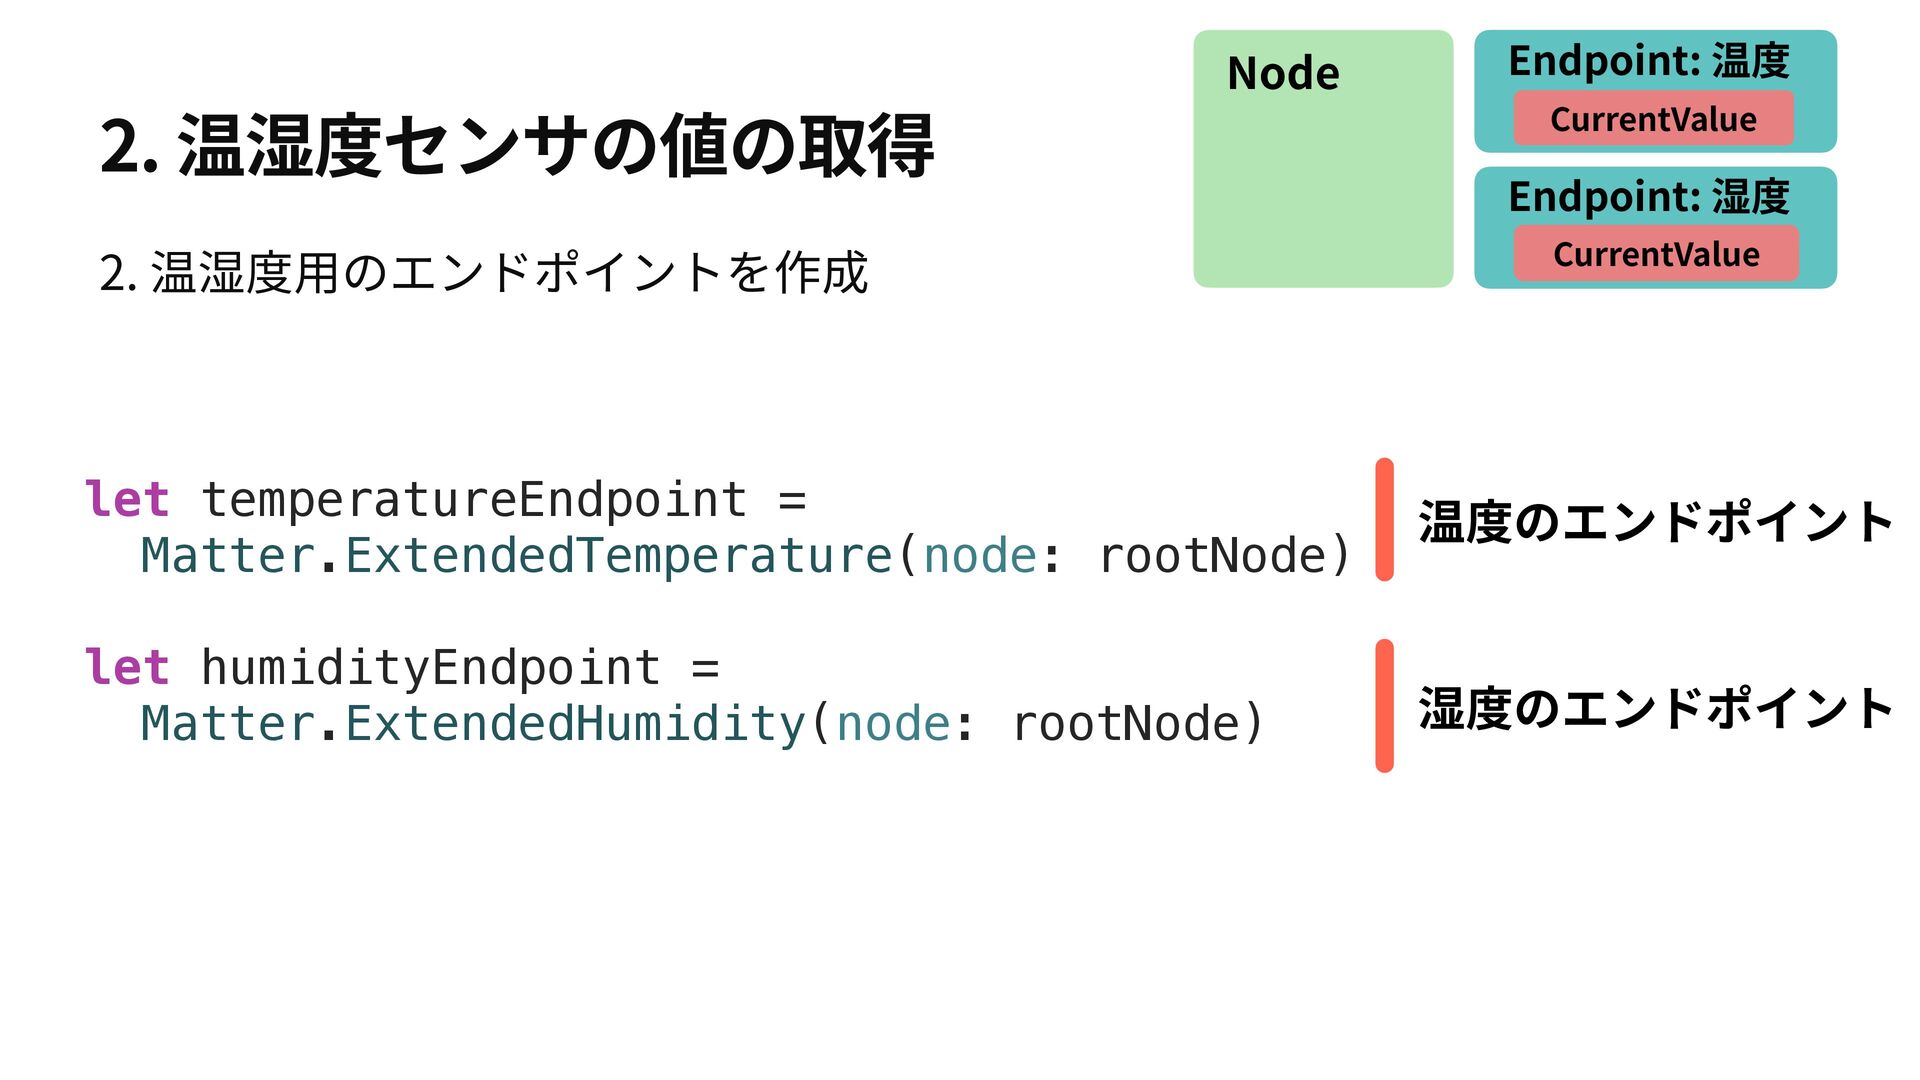
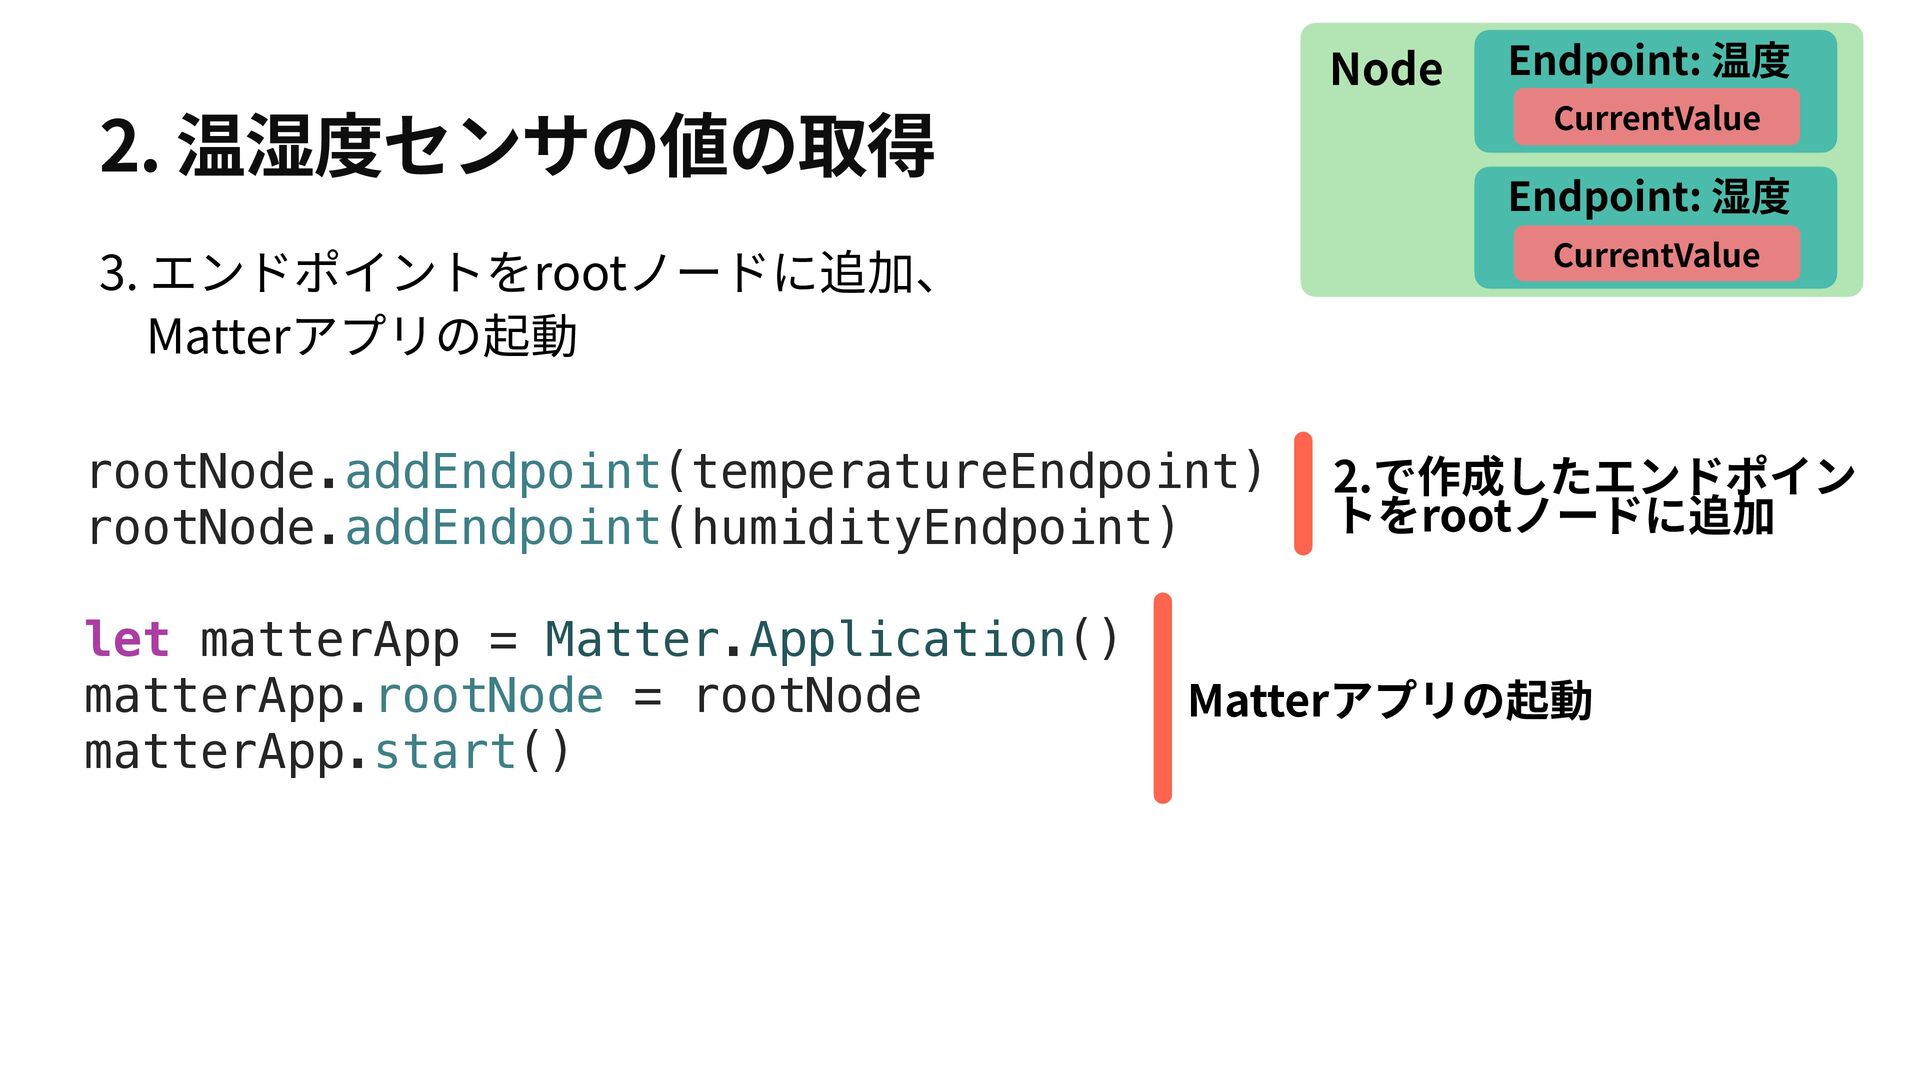
2. 温湿度センサの値の取得 1. センサの初期化、rootノードを作成 3. Endpointをrootノードに追加、Matterアプリの起動 2. Endpointを作成 4. センサの値の取得、更新
2. 温湿度センサの値の取得 1. センサの初期化、rootノードを作成 3. Endpointをrootノードに追加、Matterアプリの起動 2. Endpointを作成 4. センサの値の取得、更新
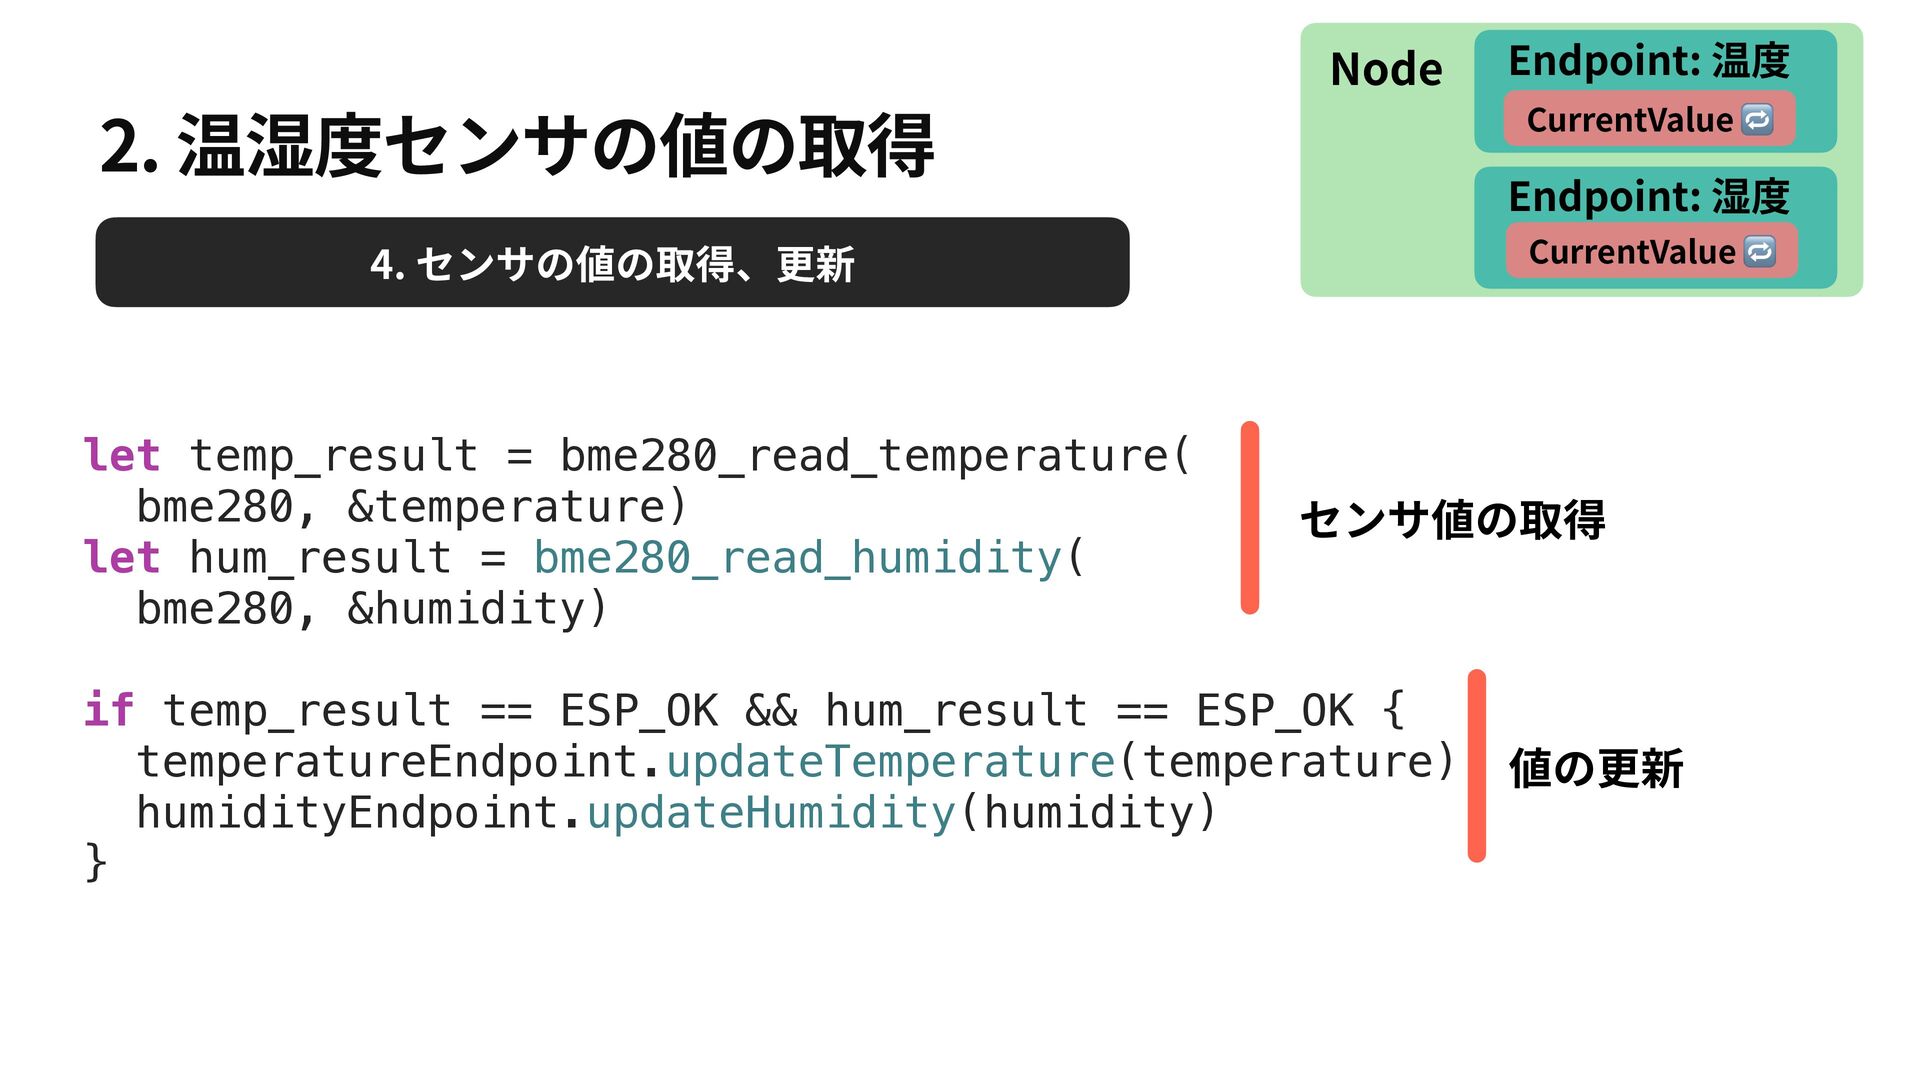
2. 温湿度センサの値の取得 let temp_result = bme280_read_temperature( bme280, &temperature) let hum_result
= bme280_read_humidity( bme280, &humidity) if temp_result == ESP_OK && hum_result == ESP_OK { temperatureEndpoint.updateTemperature(temperature) humidityEndpoint.updateHumidity(humidity) } Node Endpoint: 温度 Endpoint: 湿度 CurrentValue # CurrentValue # センサ値の取得 値の更新 4. センサの値の取得、更新
2. 温湿度センサの値の取得
Embedded Swiftで書くメリット • 普段親しんでいるSwiftの感覚で(ほぼ)書ける • 型安全性により、実⾏時のエラーを減らす • 可読性の向上 • Enum
• クロージャを使ってコールバックを書く
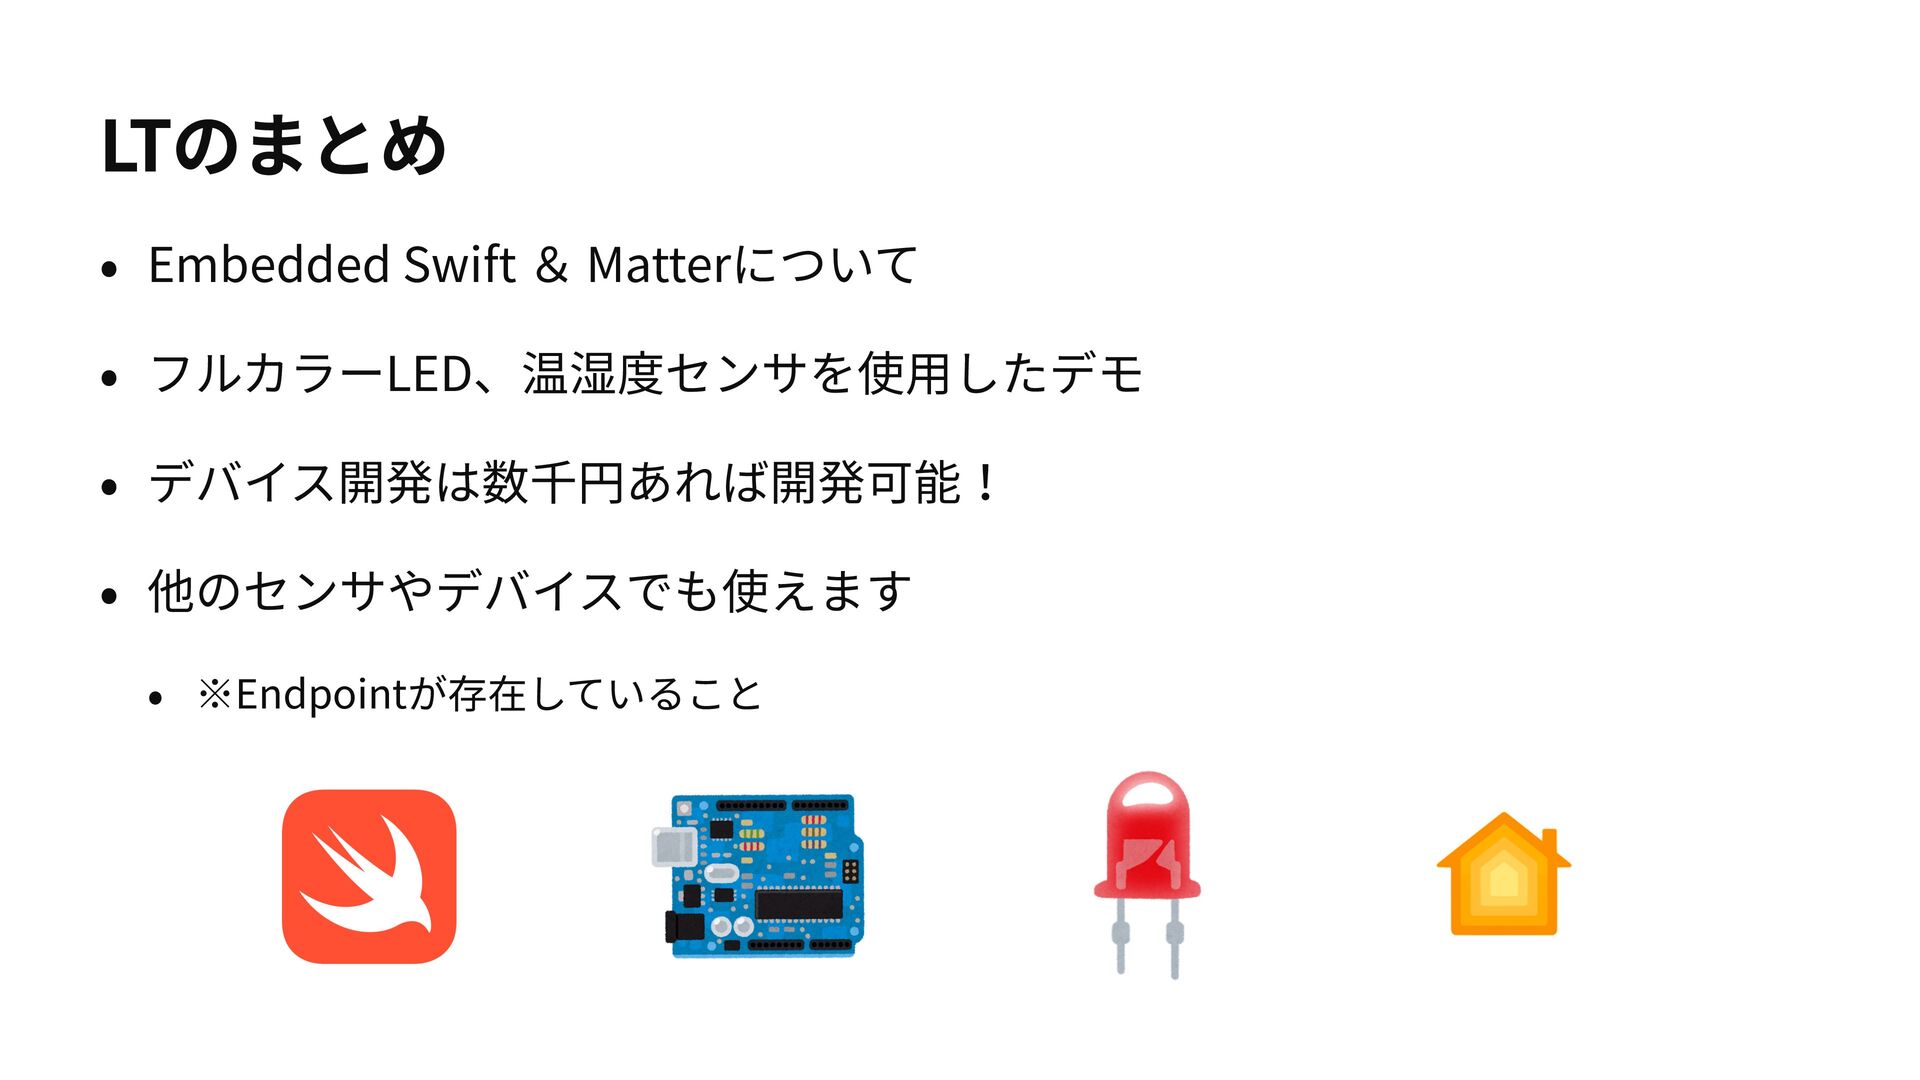
LTのまとめ • Embedded Swift & Matterについて • フルカラーLED、温湿度センサを使⽤したデモ • デバイス開発は数千円あれば開発可能!
• 他のセンサやデバイスでも使えます • ※Endpointが存在していること
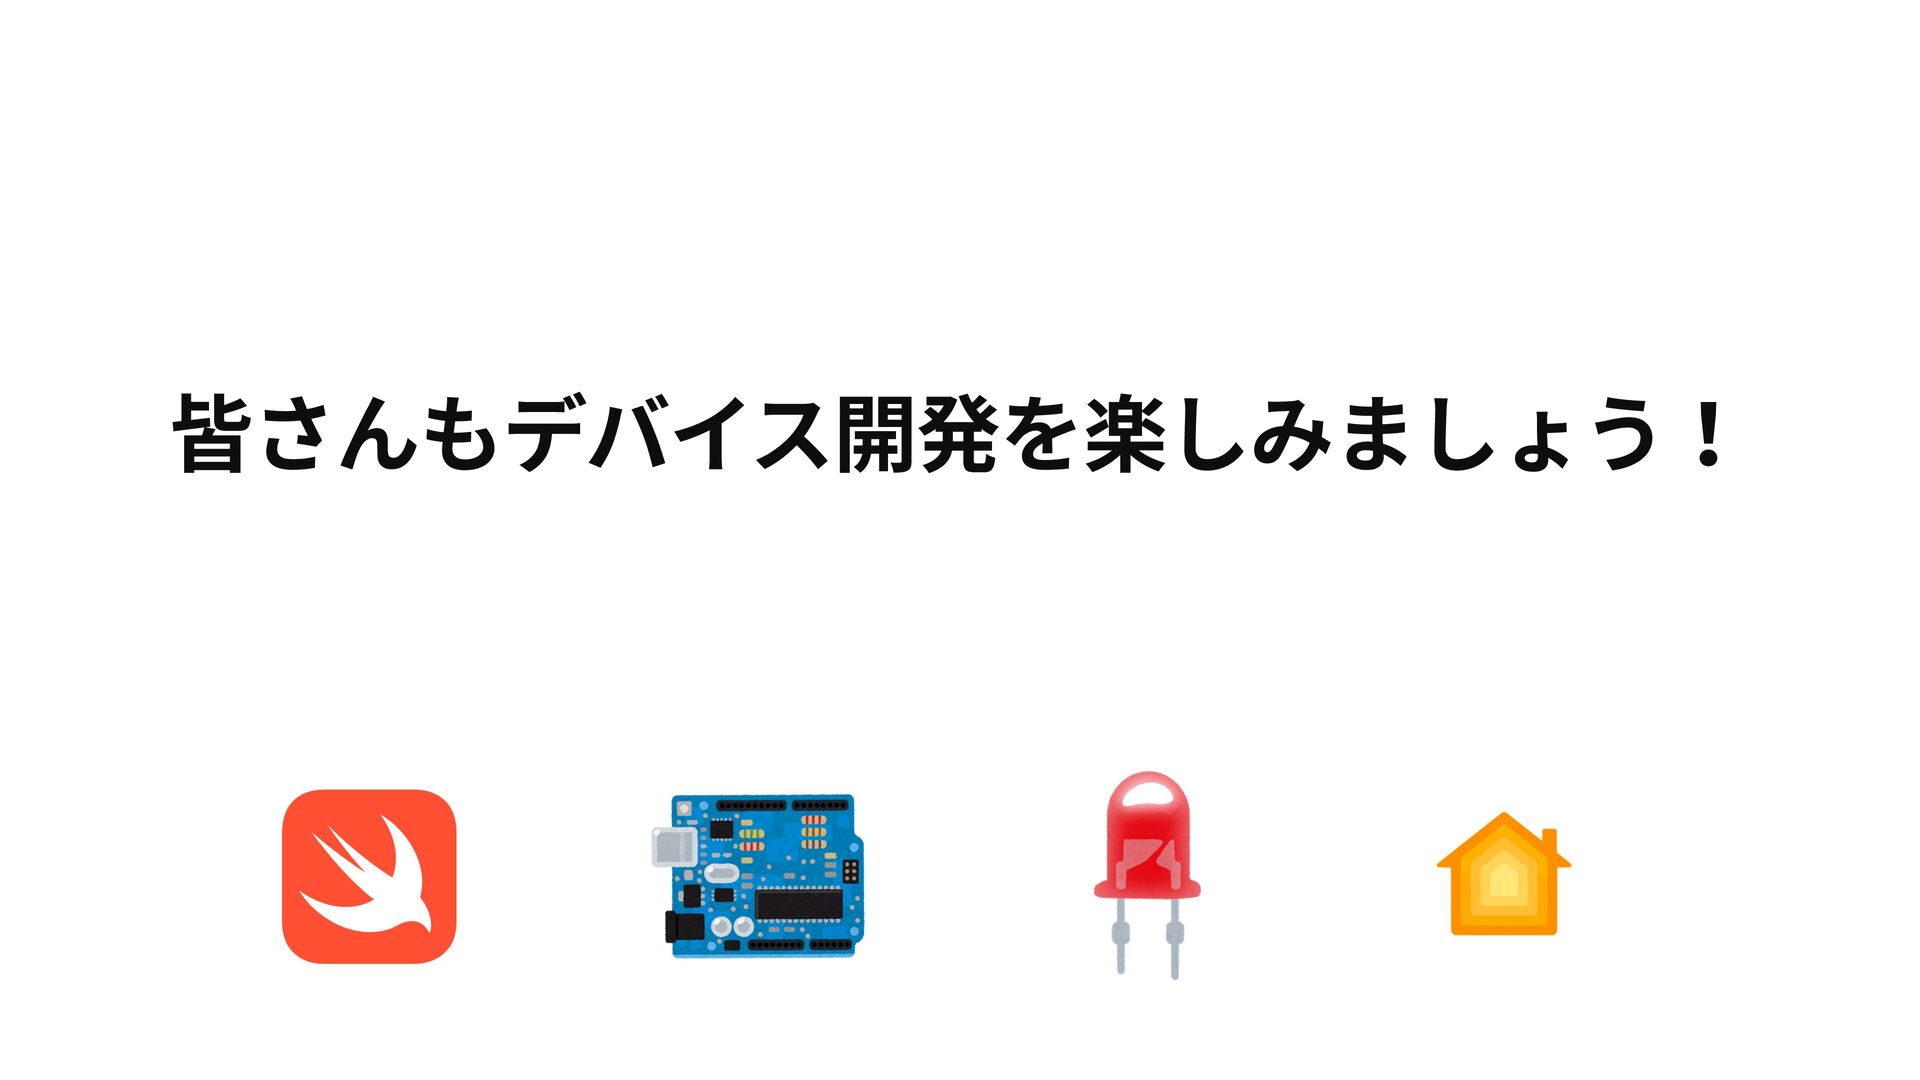
皆さんもデバイス開発を楽しみましょう!
詳細のコードはGitHubにあります 28 https://github.com/tussi5969/swift-matter-demo-samples
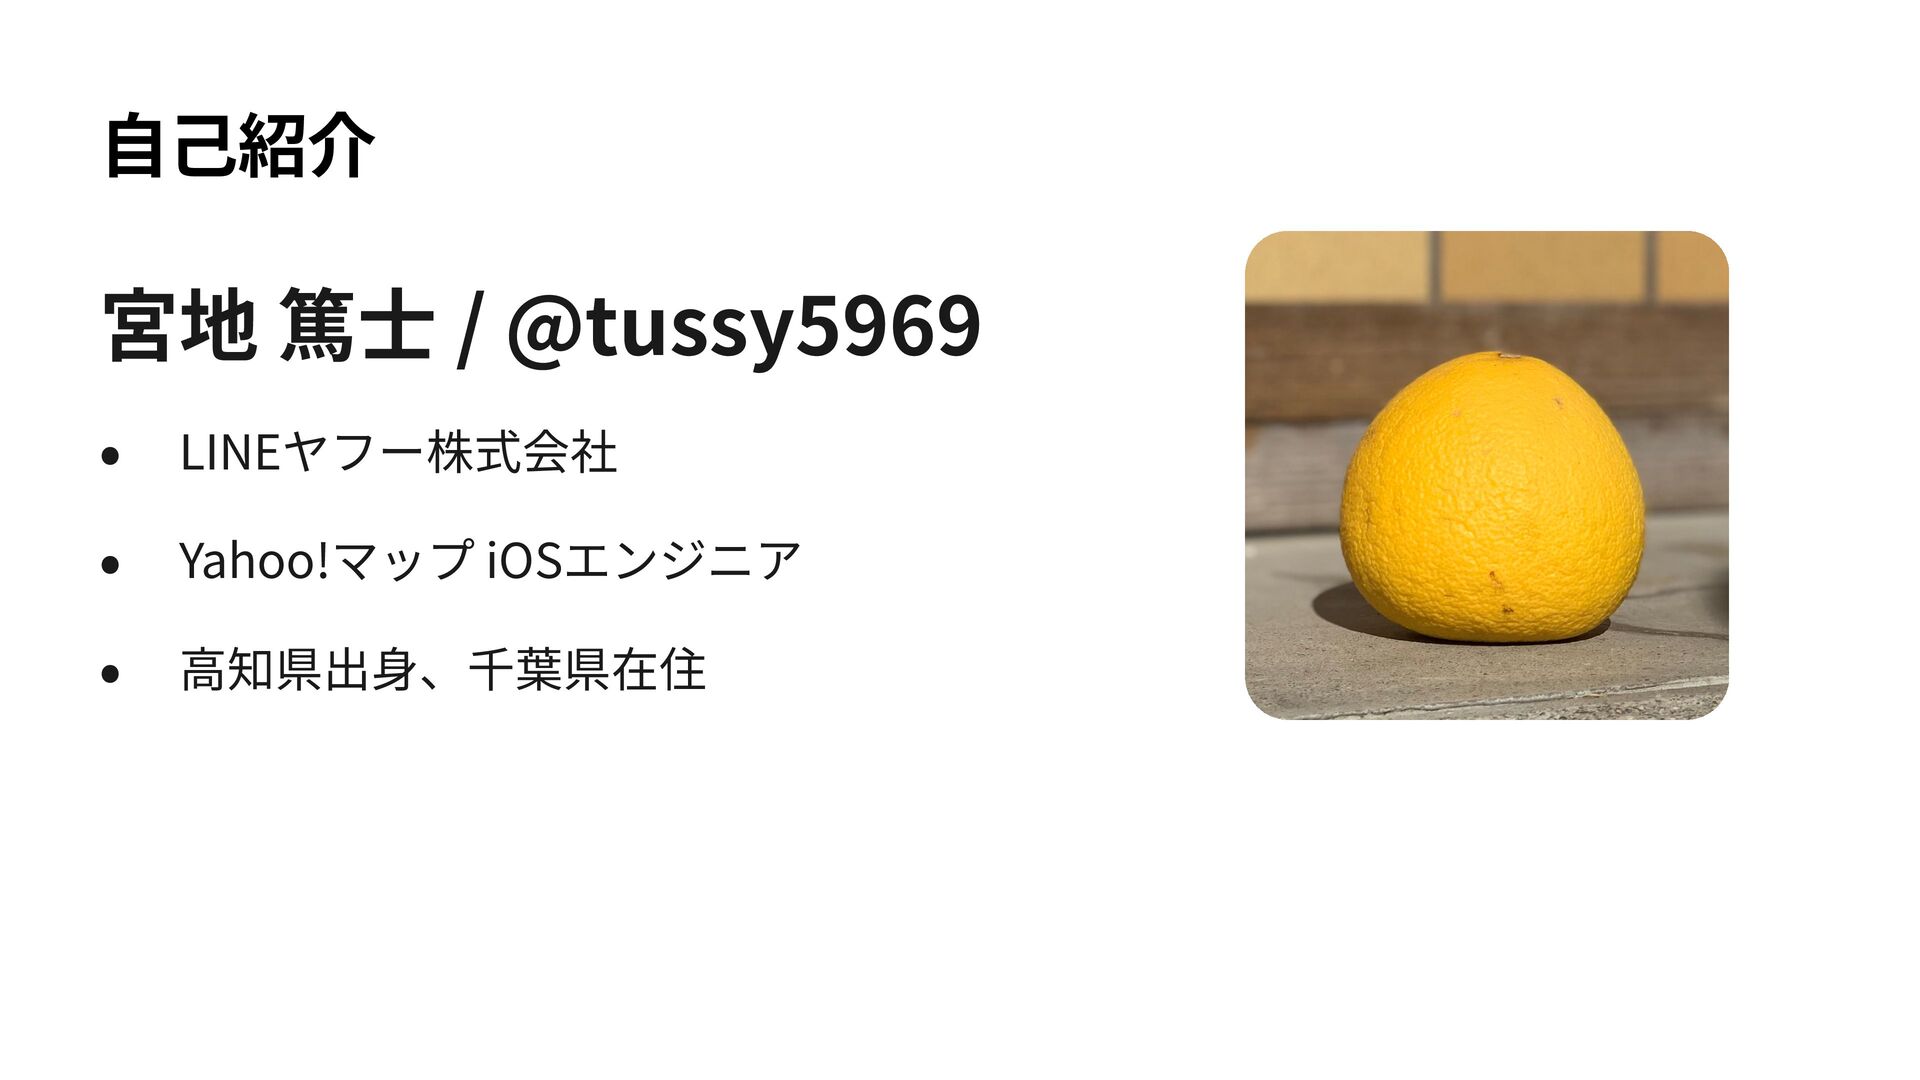
⾃⼰紹介 宮地 篤⼠ / @tussy5969 • LINEヤフー株式会社 • Yahoo!マップ iOSエンジニア
• ⾼知県出⾝、千葉県在住
補⾜
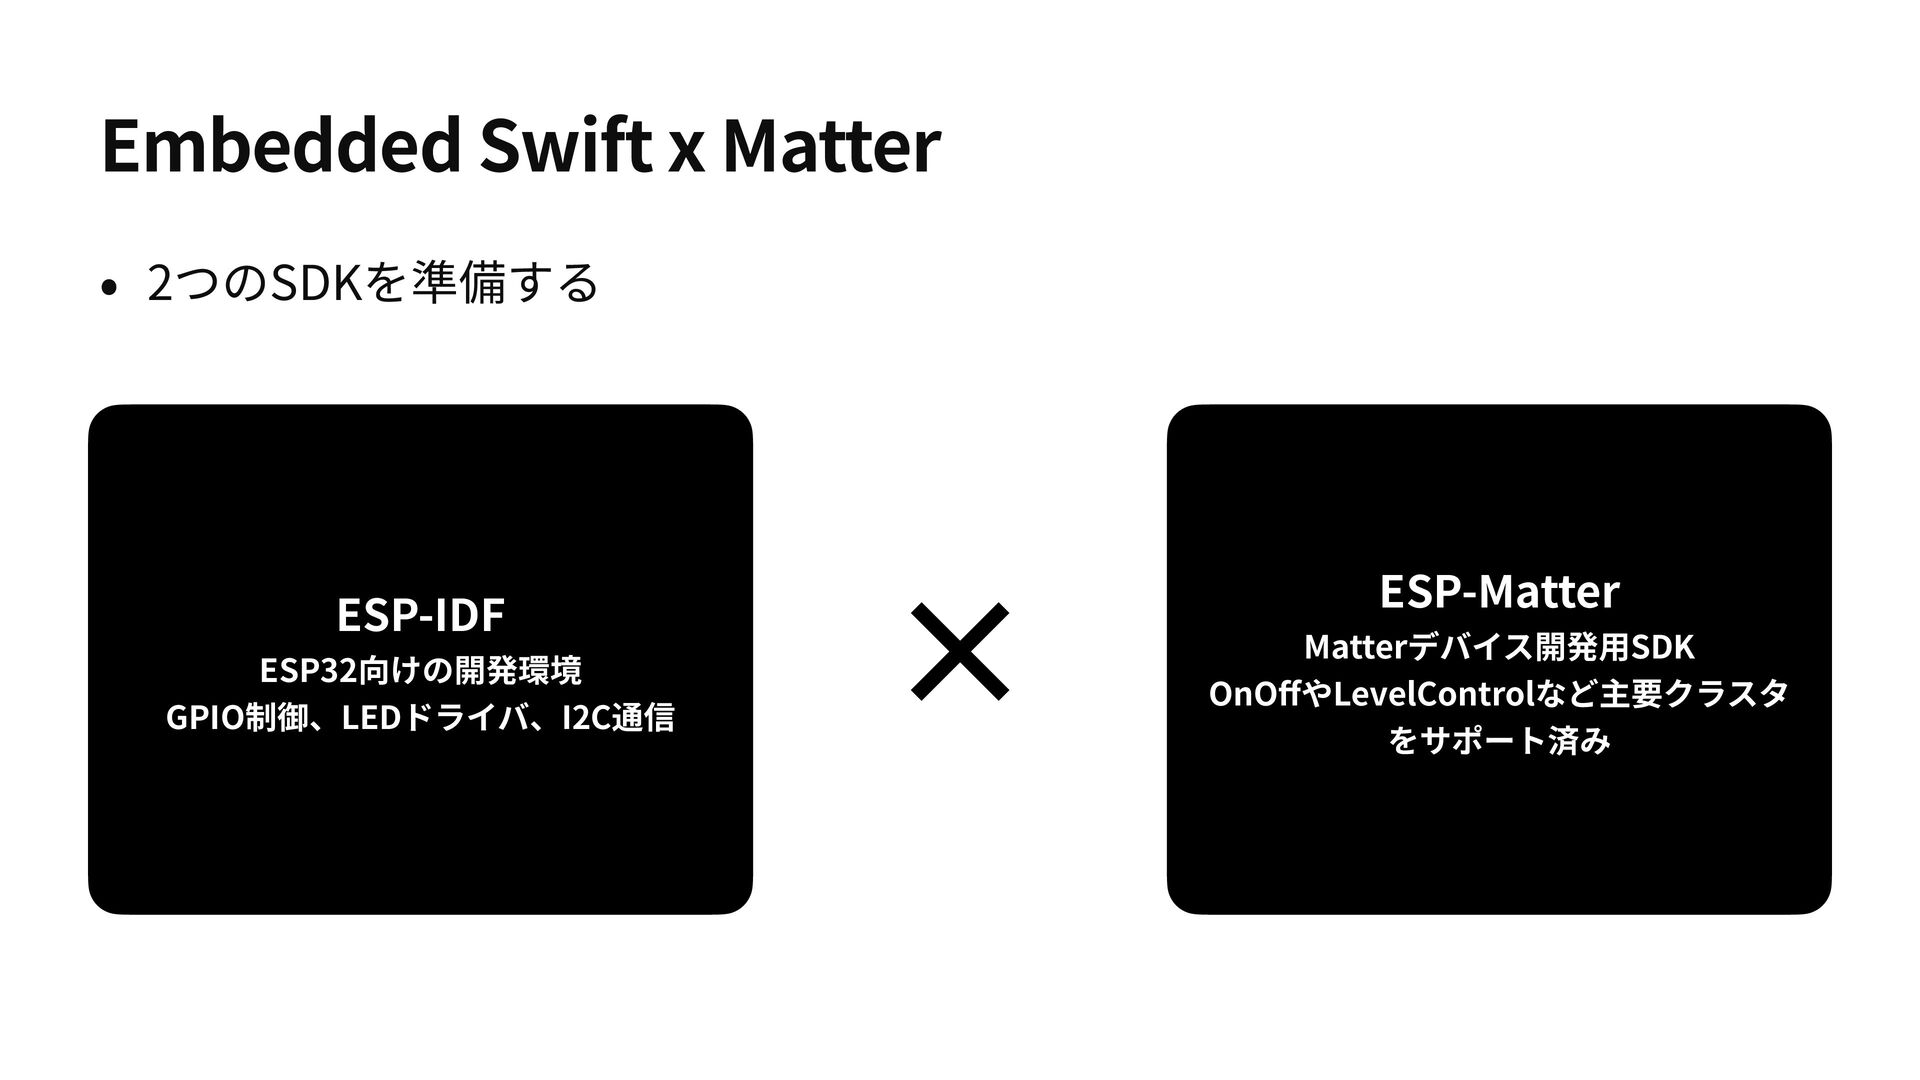
Embedded Swift x Matter ESP-IDF ESP32向けの開発環境 GPIO制御、LEDドライバ、I2C通信 ESP-Matter Matterデバイス開発⽤SDK OnOffやLevelControlなど主要クラスタ
をサポート済み × • 2つのSDKを準備する
1. センサの初期化、rootノードを作成 var i2c_bus: i2c_bus_handle_t? = nil i2c_bus = i2c_bus_create(I2C_MASTER_NUM,
&conf) var bme280: bme280_handle_t? = nil bme280 = bme280_create(i2c_bus, UInt8(BME280_I2C_ADDRESS_DEFAULT)) let init_result = bme280_default_init(bme280) let rootNode = Matter.Node() rootNode.identifyHandler = { print("identify") } Node 2. 温湿度センサの値の取得 センサの初期化 Matterプロトコルの rootノードを作成
2. 温湿度⽤のエンドポイントを作成 温度のエンドポイント Node 2. 温湿度センサの値の取得 let temperatureEndpoint = Matter.ExtendedTemperature(node:
rootNode) let humidityEndpoint = Matter.ExtendedHumidity(node: rootNode) 湿度のエンドポイント CurrentValue Endpoint: 温度 CurrentValue Endpoint: 湿度
2.で作成したエンドポイン トをrootノードに追加 2. 温湿度センサの値の取得 rootNode.addEndpoint(temperatureEndpoint) rootNode.addEndpoint(humidityEndpoint) let matterApp = Matter.Application()
matterApp.rootNode = rootNode matterApp.start() Matterアプリの起動 Node CurrentValue Endpoint: 温度 CurrentValue Endpoint: 湿度 3. エンドポイントをrootノードに追加、 Matterアプリの起動