Upgrade to Pro
— share decks privately, control downloads, hide ads and more …
Speaker Deck
Features
Speaker Deck
PRO
Sign in
Sign up for free
Search
Search
Structuring Your Python Project
Search
Matt Bachmann
January 20, 2016
Programming
4k
1
Share
Embed
Copy iframe code
Copy JS code
Copy link
Start on current slide
Structuring Your Python Project
For people who know some Python and want to structure their first project
Matt Bachmann
January 20, 2016
More Decks by Matt Bachmann
See All by Matt Bachmann
Property Based Testing: Hypothesis
bachmann1234
0
810
Diff-Cover
bachmann1234
1
280
Opening The Floodgates: Unicode Identifiers in Python
bachmann1234
0
360
Other Decks in Programming
See All in Programming
スマートグラスで並列バイブコーディング
hyshu
0
290
【SRE NEXT 2026 Lunch Session】一人目専任SREの立ち上げを加速する ― AIと進めたオンボーディングで2分を0.04秒にした話
pkshadeck
PRO
0
2.4k
その問い、本当に正しいですか?AI時代のエンジニアに必要な哲学と認知科学 / ai-philosophy-cognitive-science
minodriven
14
6.8k
AIエージェントで 変わるAndroid開発環境
takahirom
2
560
act2-costs.pdf
sumedhbala
0
110
なぜ関数型プログラミングで「型」と「証明」が語られるのか #fp_matsuri
kajitack
3
800
音楽のための関数型プログラミング言語mimiumにおける多段階計算の活用
tomoyanonymous
1
310
Honoでのサプライチェーン侵害対策 〜 3つのライブラリに学ぶ
yusukebe
7
1.8k
ビデオ通話が繋がる0.2秒で何が起きているのか
supurazako
2
140
symfony/aiとlaravel/boost
77web
0
120
壊れたパーサから始める関数型設計と構成的なパーサ #fp_matsuri
raiga0310
2
200
地域 SRE コミュニティ最前線 - ホンマでっかSRE勉強会
tk3fftk
0
220
Featured
See All Featured
Beyond borders and beyond the search box: How to win the global "messy middle" with AI-driven SEO
davidcarrasco
3
180
Evolving SEO for Evolving Search Engines
ryanjones
0
240
Practical Orchestrator
shlominoach
191
11k
Marketing Yourself as an Engineer | Alaka | Gurzu
gurzu
0
260
CoffeeScript is Beautiful & I Never Want to Write Plain JavaScript Again
sstephenson
162
16k
Are puppies a ranking factor?
jonoalderson
1
3.7k
Visualizing Your Data: Incorporating Mongo into Loggly Infrastructure
mongodb
49
10k
Building a Scalable Design System with Sketch
lauravandoore
463
34k
Chasing Engaging Ingredients in Design
codingconduct
0
230
Easily Structure & Communicate Ideas using Wireframe
afnizarnur
194
17k
A Soul's Torment
seathinner
6
3.1k
Information Architects: The Missing Link in Design Systems
soysaucechin
0
1k
Transcript
Structuring Your Python Project Matt Bachmann
Agenda • Directory Structure • Isolating Your Environment • Installing
Dependencies • Packaging Your Project • Releasing to the World
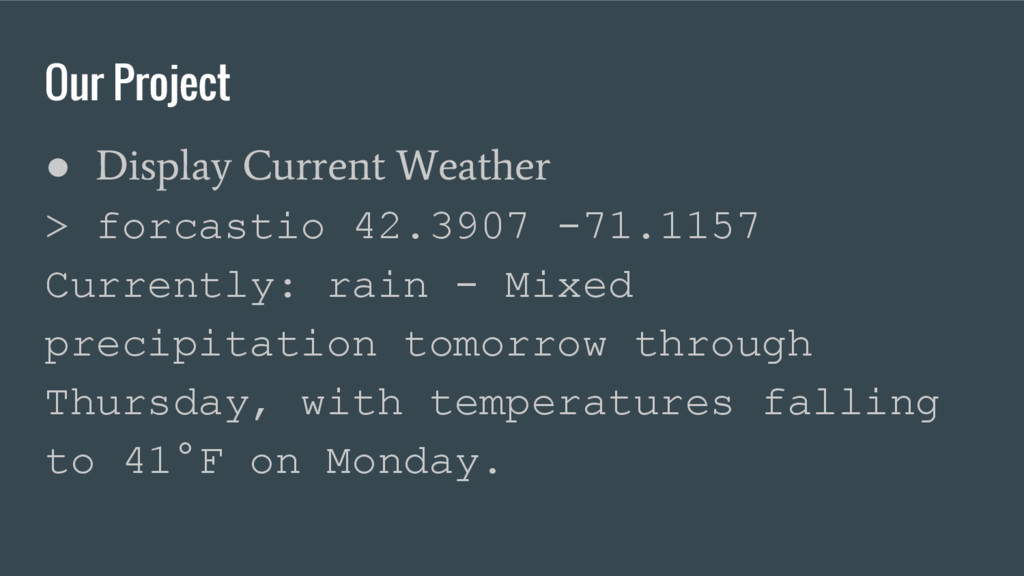
Our Project • Display Current Weather > forcastio 42.3907 -71.1157
Currently: rain - Mixed precipitation tomorrow through Thursday, with temperatures falling to 41°F on Monday.
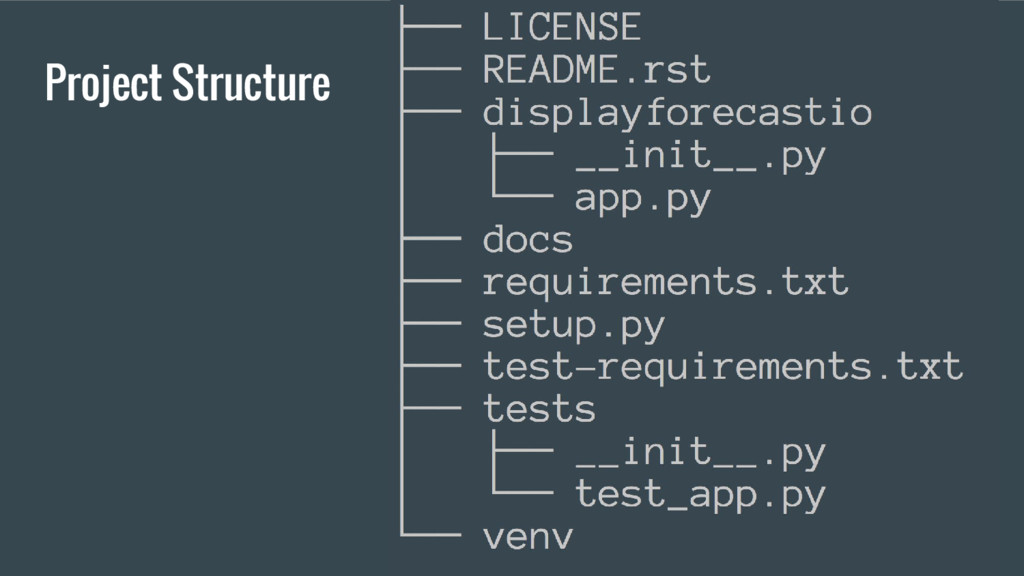
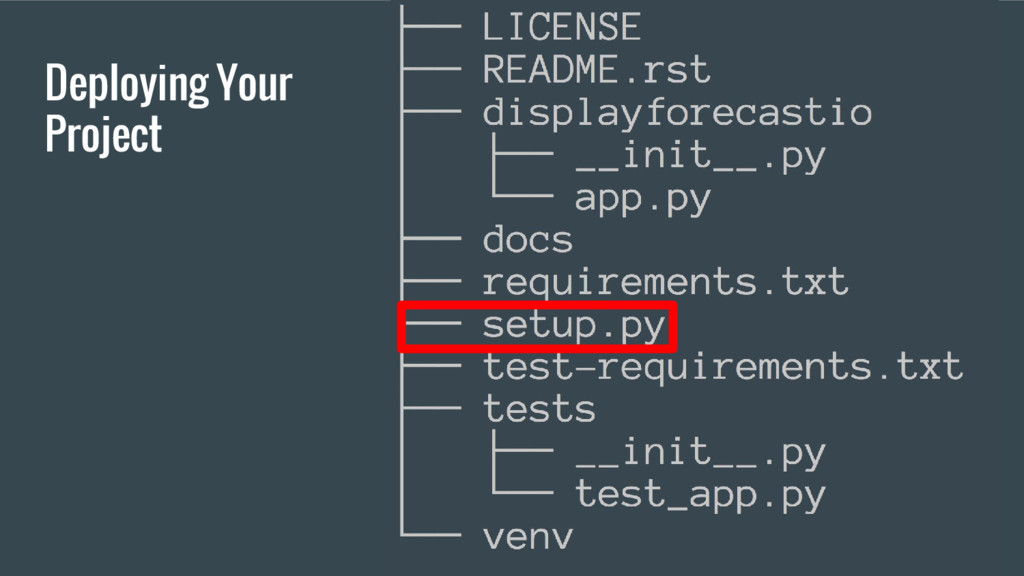
Project Structure
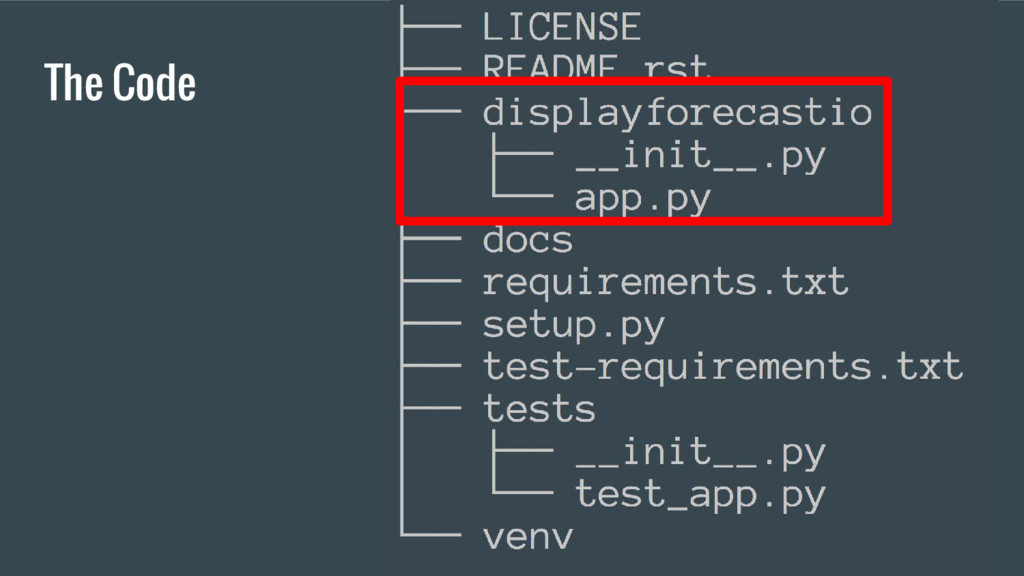
The Code
Style Checking Your Code
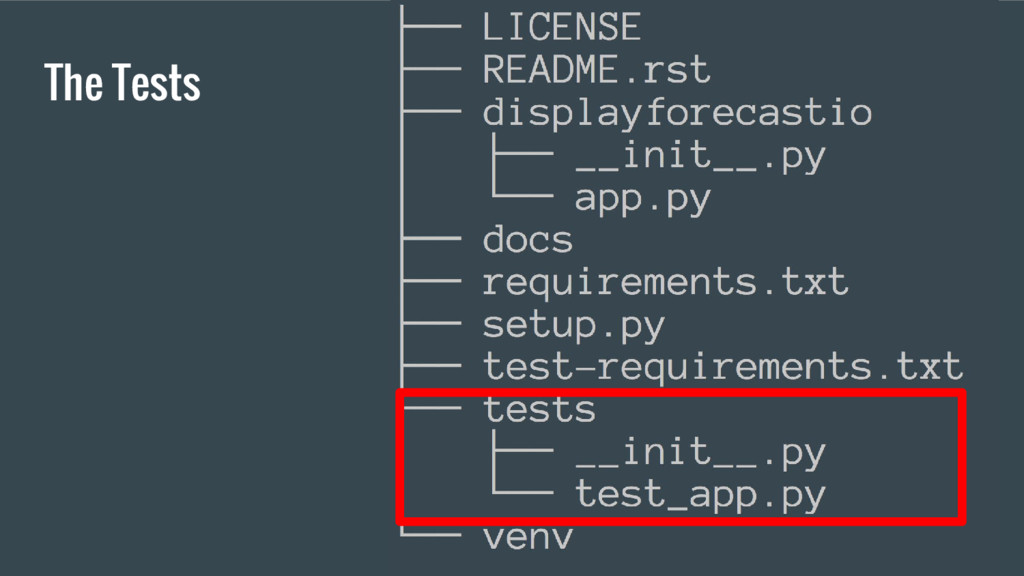
The Tests
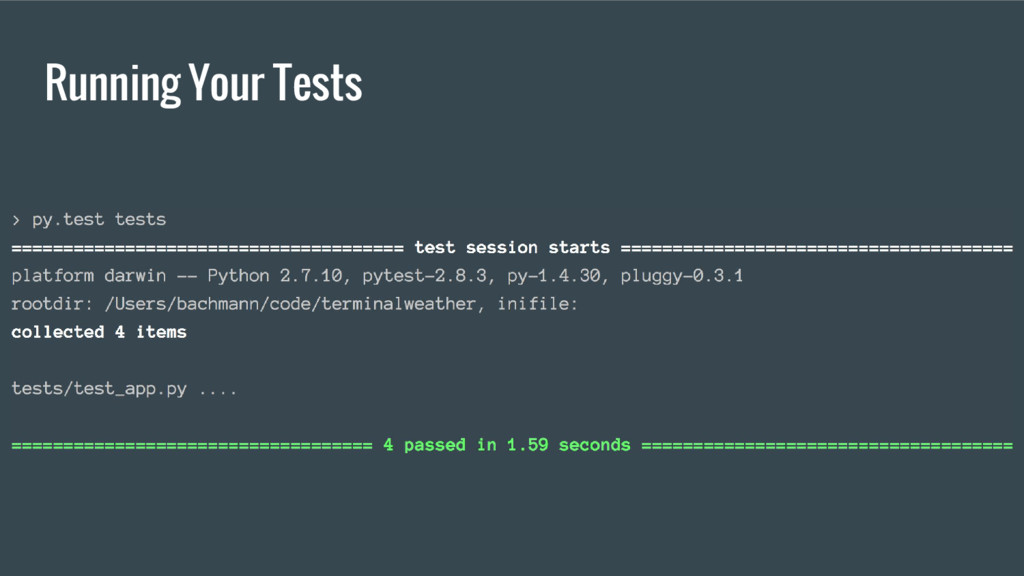
Running Your Tests
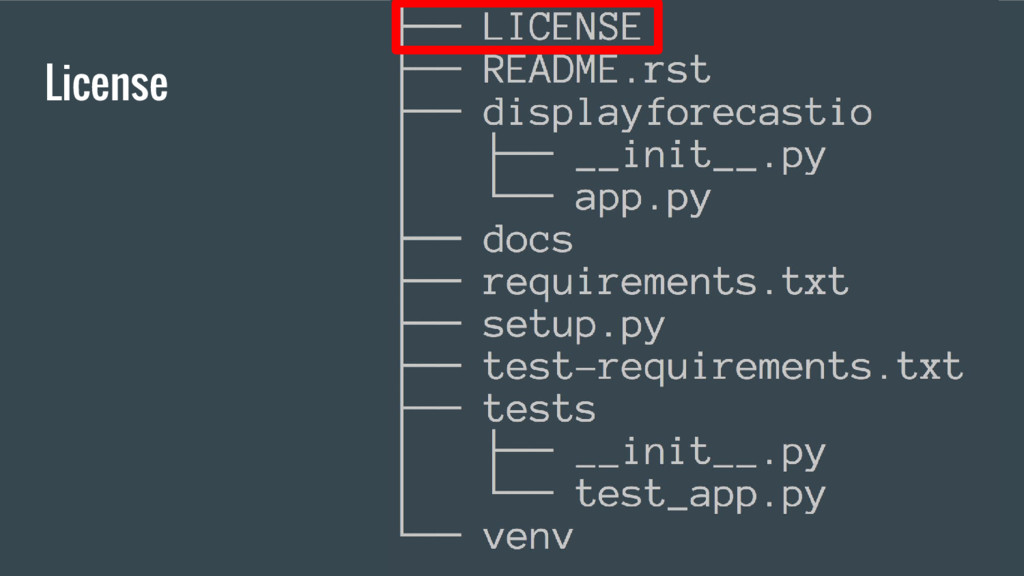
License
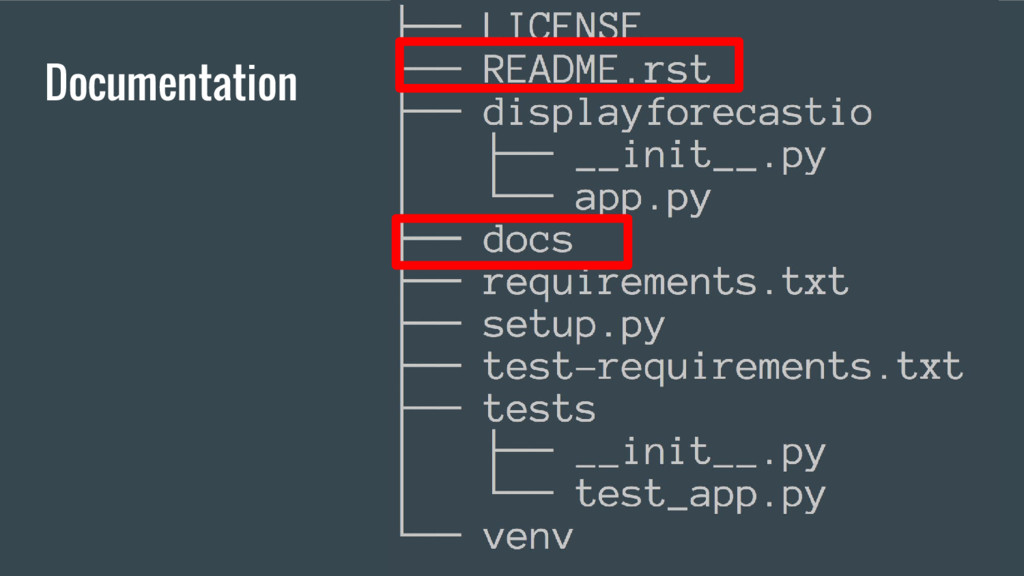
Documentation
Documentation • All projects should have a readme ◦ Description
◦ Installation ◦ Usage • Moving Beyond Readme! ◦ Sphinx • Write docs in reStructuredText ◦ Renders in Github and PyPi. PyPi does not support Markdown
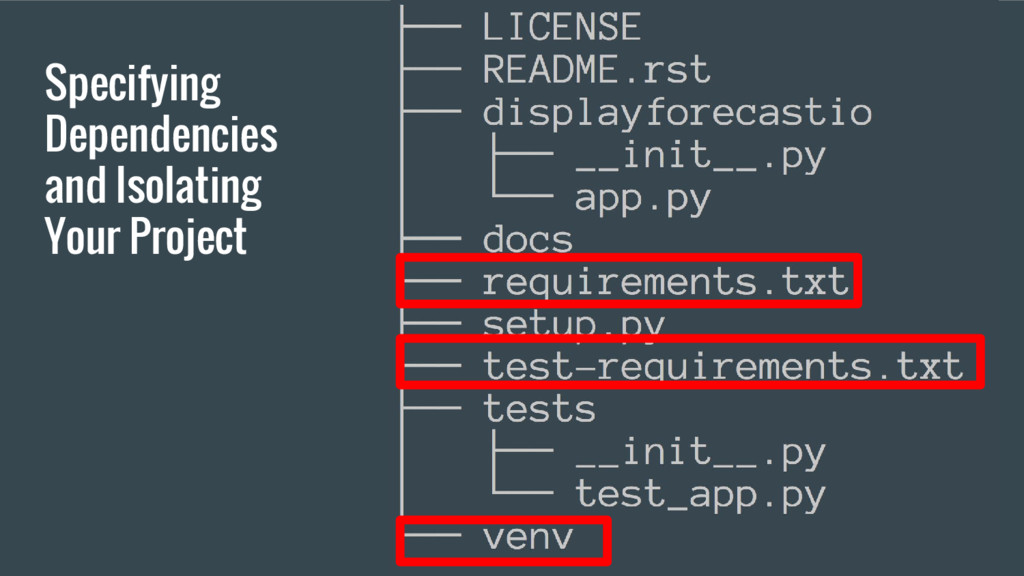
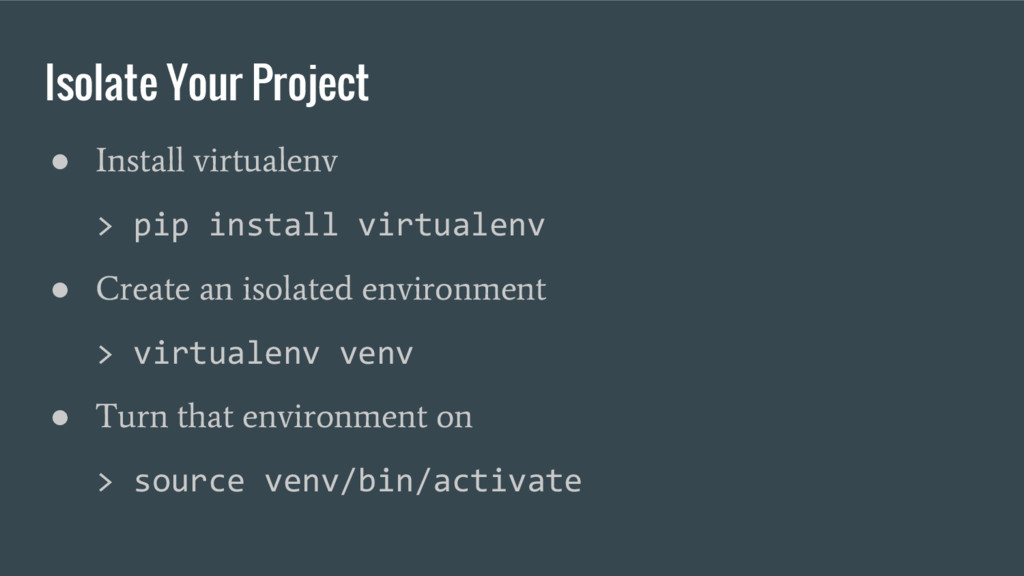
Specifying Dependencies and Isolating Your Project
Isolate Your Project • Install virtualenv > pip install virtualenv
• Create an isolated environment > virtualenv venv • Turn that environment on > source venv/bin/activate
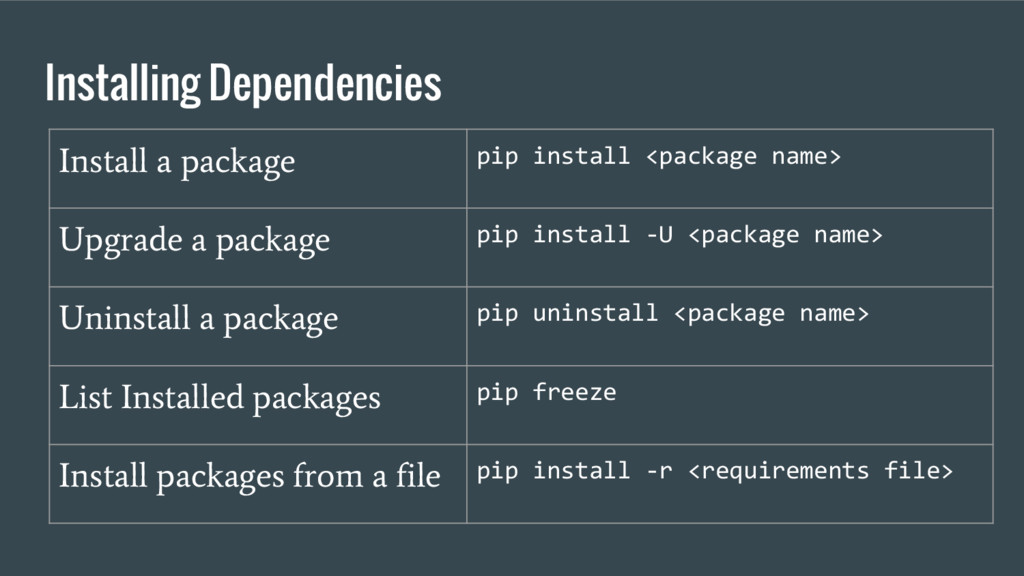
Installing Dependencies Install a package pip install <package name> Upgrade
a package pip install -U <package name> Uninstall a package pip uninstall <package name> List Installed packages pip freeze Install packages from a file pip install -r <requirements file>
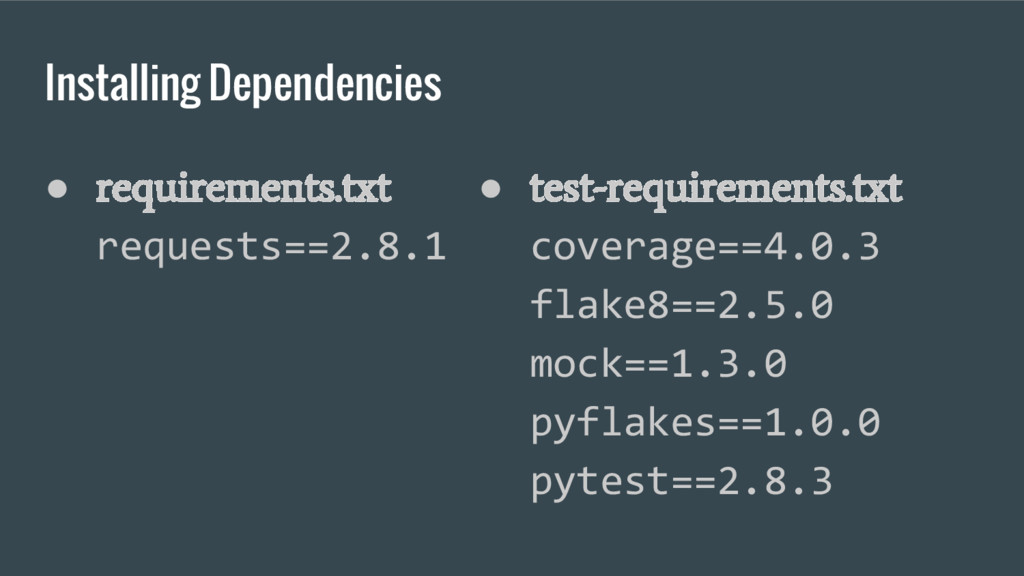
Installing Dependencies • requirements.txt requests==2.8.1 • test-requirements.txt coverage==4.0.3 flake8==2.5.0 mock==1.3.0
pyflakes==1.0.0 pytest==2.8.3
Deploying Your Project
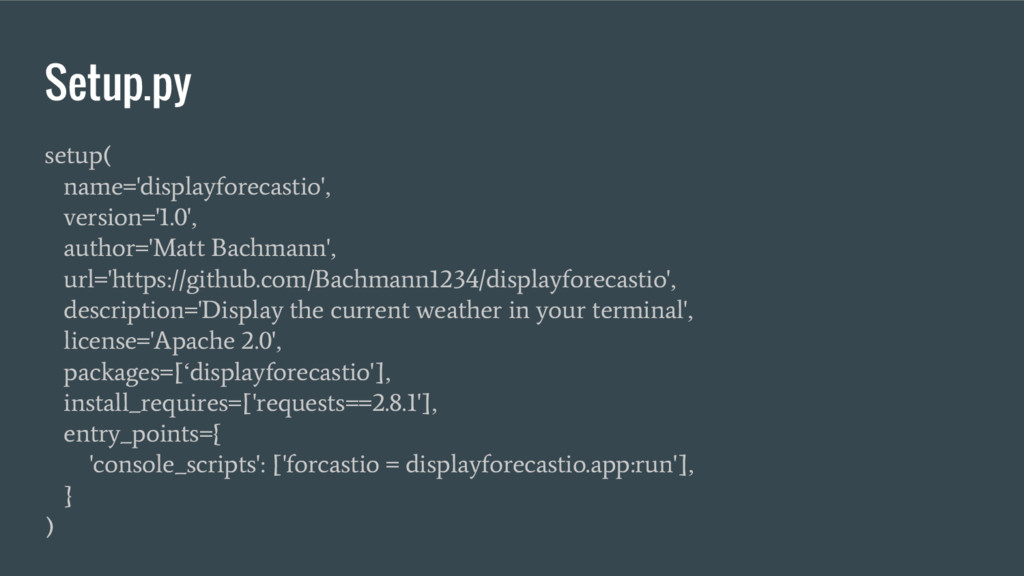
Setup.py setup( name='displayforecastio', version='1.0', author='Matt Bachmann', url='https://github.com/Bachmann1234/displayforecastio', description='Display the current
weather in your terminal', license='Apache 2.0', packages=[‘displayforecastio'], install_requires=['requests==2.8.1'], entry_points={ 'console_scripts': ['forcastio = displayforecastio.app:run'], } )
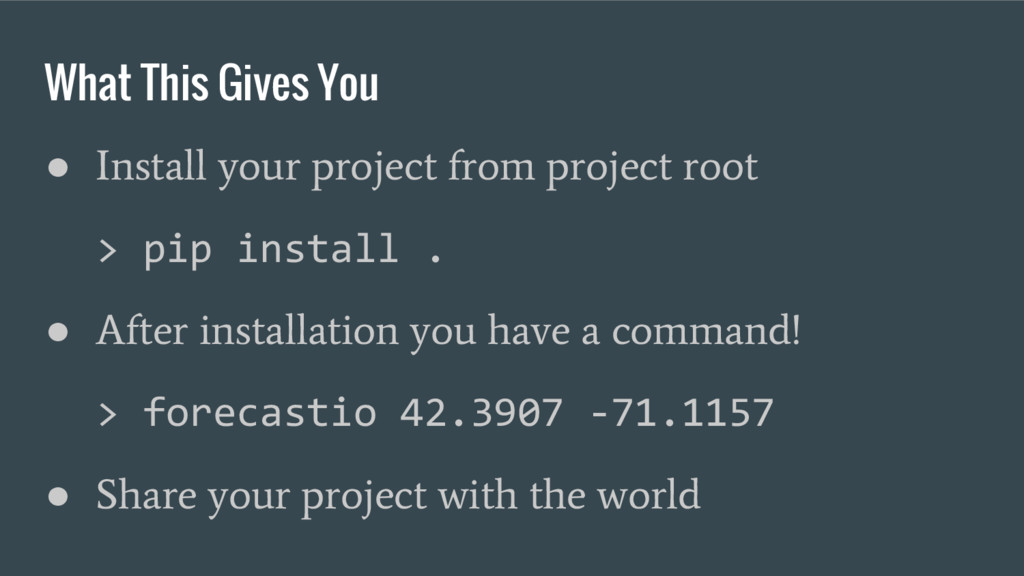
What This Gives You • Install your project from project
root > pip install . • After installation you have a command! > forecastio 42.3907 -71.1157 • Share your project with the world
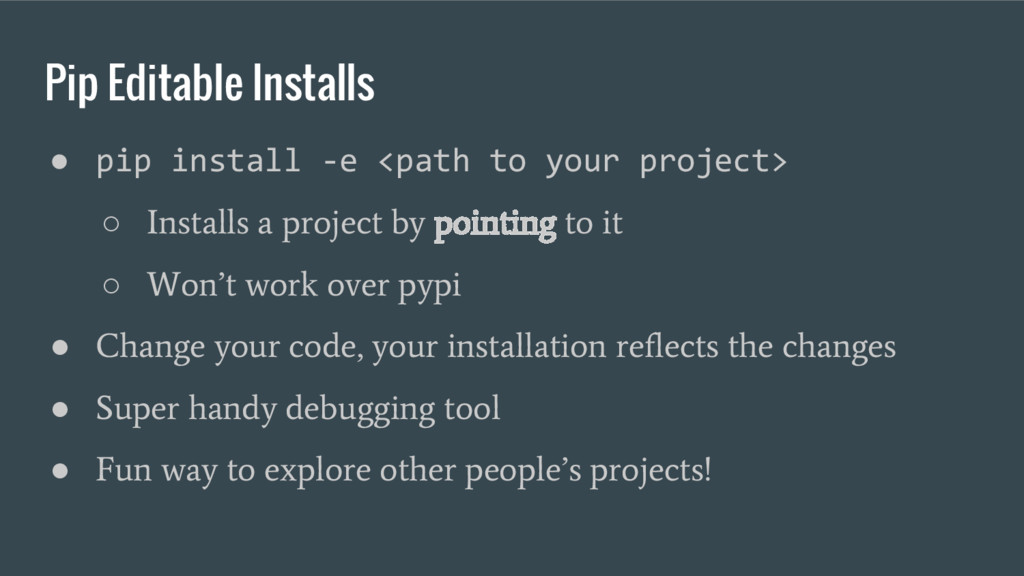
Pip Editable Installs • pip install -e <path to your
project> ◦ Installs a project by pointing to it ◦ Won’t work over pypi • Change your code, your installation reflects the changes • Super handy debugging tool • Fun way to explore other people’s projects!
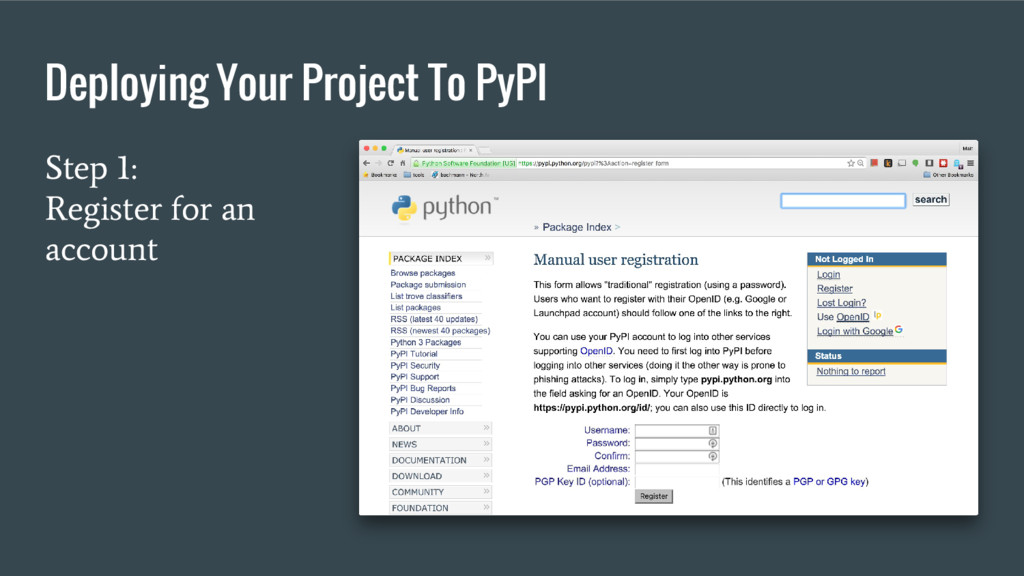
Deploying Your Project To PyPI Step 1: Register for an
account
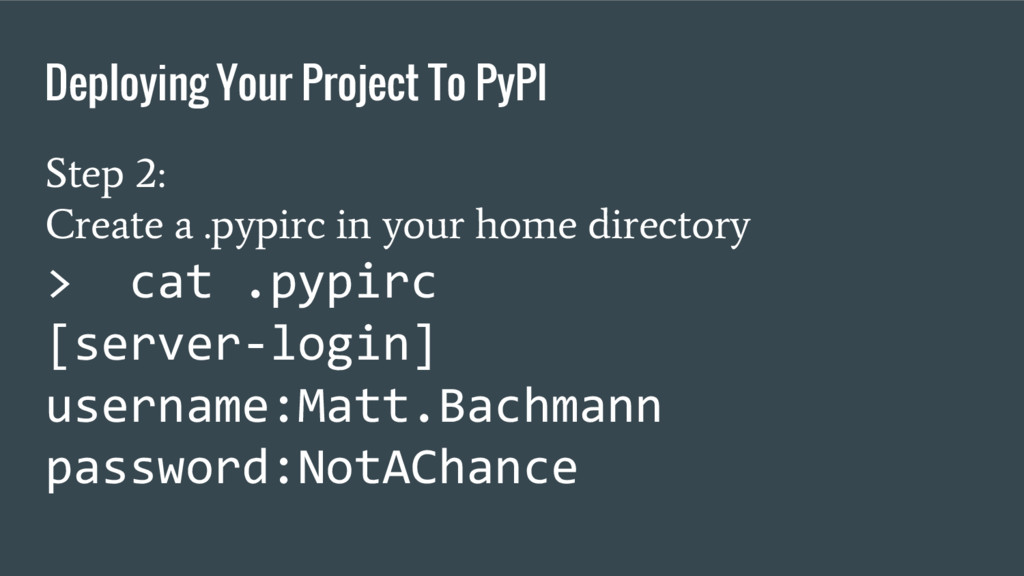
Deploying Your Project To PyPI Step 2: Create a .pypirc
in your home directory > cat .pypirc [server-login] username:Matt.Bachmann password:NotAChance
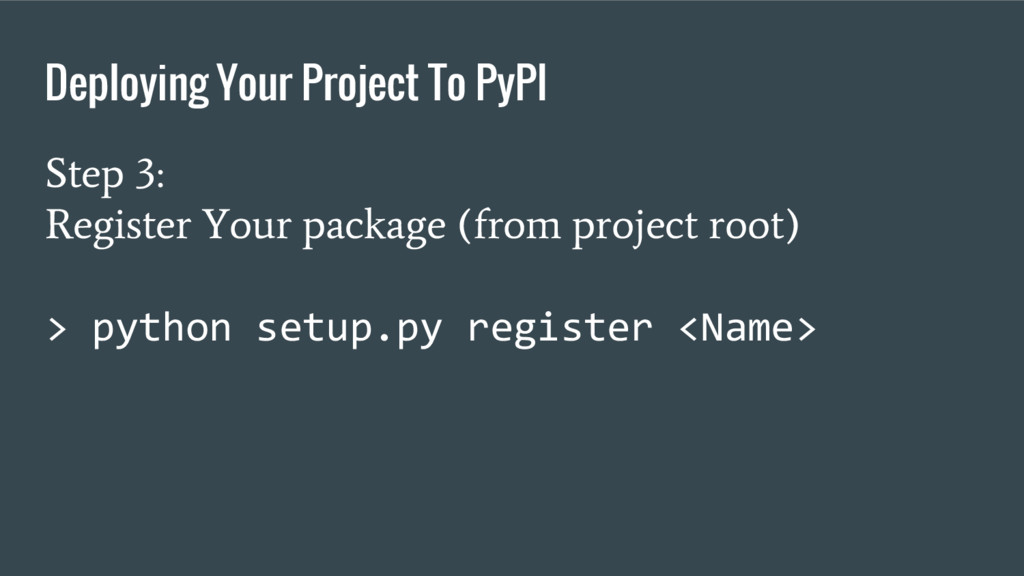
Deploying Your Project To PyPI Step 3: Register Your package
(from project root) > python setup.py register <Name>
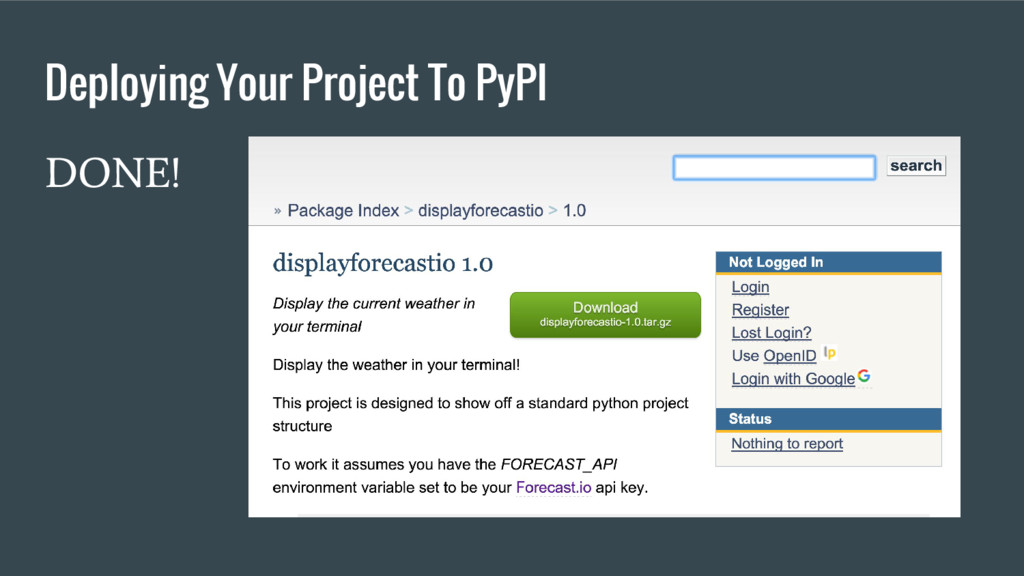
Deploying Your Project To PyPI DONE!
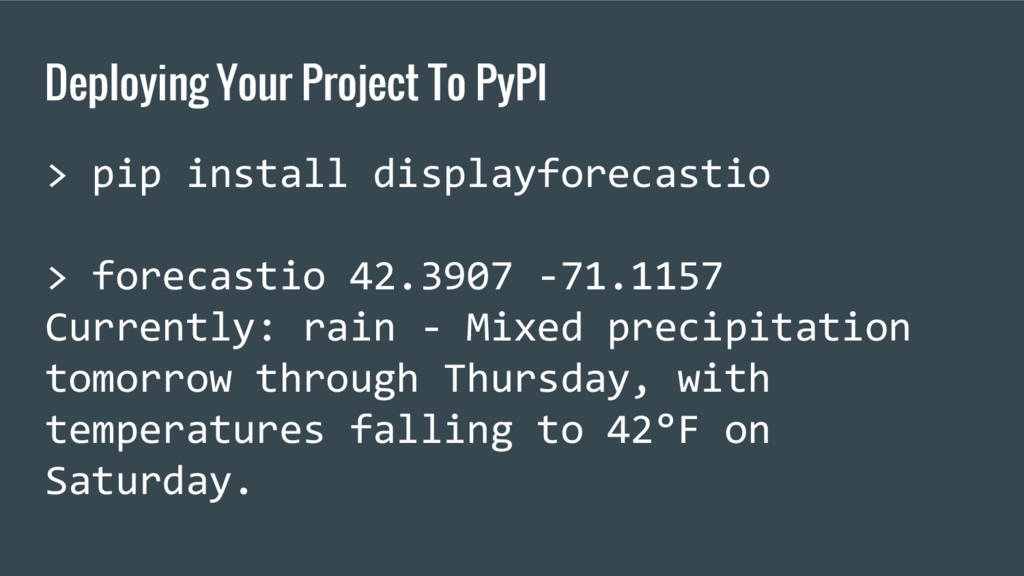
Deploying Your Project To PyPI > pip install displayforecastio >
forecastio 42.3907 -71.1157 Currently: rain - Mixed precipitation tomorrow through Thursday, with temperatures falling to 42°F on Saturday.
Deploying Your Project To PyPI • Deploying Updates ◦ After
updating the version in setup.py > python setup.py sdist upload
References • Documentation ◦ https://readthedocs.org/ ◦ http://sphinx-doc.org/contents.html • Example Projects
◦ https://github.com/Bachmann1234/terminalweather ◦ https://github.com/pypa/sampleproject • Flake8 ◦ https://flake8.readthedocs.org/en/latest/ ◦ https://www.youtube.com/watch?v=wf-BqAjZb8M (Not about flake8 but an important lesson for anyone caring about style) • Folder Structure ◦ http://learnpythonthehardway.org/book/ex46.html • Licensing ◦ http://choosealicense.com/ • Pip ◦ http://pip.readthedocs.org/en/stable/user_guide/
References • PyPi ◦ https://pypi.python.org • reStructuredText ◦ http://docutils.sourceforge.net/ •
Setup.py ◦ https://docs.python.org/2/distutils/setupscript.html • Virtualenv ◦ http://virtualenv.readthedocs.org/en/latest/userguide.html