Upgrade to Pro
— share decks privately, control downloads, hide ads and more …
Speaker Deck
Sign up for free
Menu
Search
Features
All features
Private URLs
Password Protection
Custom URLS
Scheduled publishing
Remove Branding
Restrict embedding
Deck Collections
Notes
Features
All features
Private URLs
Password Protection
Custom URLS
Scheduled publishing
Remove Branding
Restrict embedding
Deck Collections
Notes
Explore
Featured decks
Featured speakers
Programming
Technology
Storyboards
Explore
Featured decks
Featured speakers
Programming
Technology
Storyboards
Pricing
Search
Sign in
Sign up for free
Stripe Checkout 使ってみた
Search
HaruyaTaniguchi
January 17, 2024
70
0
Share
Embed
Copy iframe code
Copy JS code
Copy link
Start on current slide
Stripe Checkout 使ってみた
グーグルスライドからエクスポートしたデータを使用したところ日本語のフォントが変な感じになってしまいました。
HaruyaTaniguchi
January 17, 2024
More Decks by HaruyaTaniguchi
See All by HaruyaTaniguchi
面倒ミント〜クラウドを使って植物と会話したい@JAWS-UG 青森
haruya
0
41
Featured
See All Featured
Making Projects Easy
brettharned
120
6.8k
The Director’s Chair: Orchestrating AI for Truly Effective Learning
tmiket
1
330
sira's awesome portfolio website redesign presentation
elsirapls
0
460
Build your cross-platform service in a week with App Engine
jlugia
234
19k
Collaborative Software Design: How to facilitate domain modelling decisions
baasie
1
340
Building Adaptive Systems
keathley
44
3.3k
Statistics for Hackers
jakevdp
799
230k
Designing for humans not robots
tammielis
254
26k
The Curse of the Amulet
leimatthew05
3
16k
Digital Projects Gone Horribly Wrong (And the UX Pros Who Still Save the Day) - Dean Schuster
uxyall
1
3.4k
Designing for Performance
lara
612
70k
The AI Search Optimization Roadmap by Aleyda Solis
aleyda
2
6.3k
Transcript
Stripe Checkout 使ってみた 谷口晴哉
2 Stripe Checkout が 手軽すぎる!
3 今回作成したもの
まずはStripeのダッシュボードに商品を登録
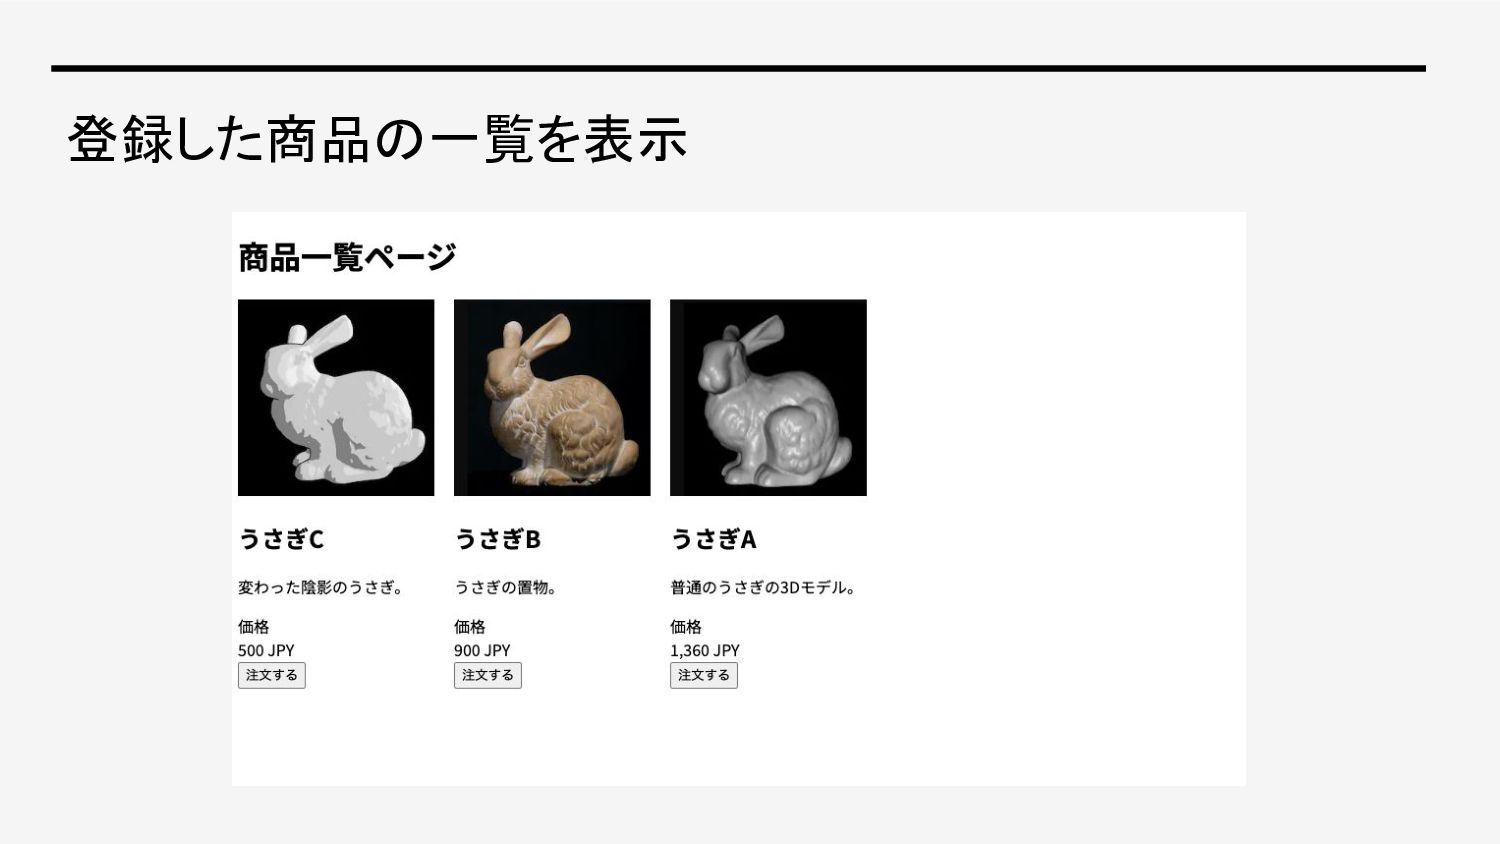
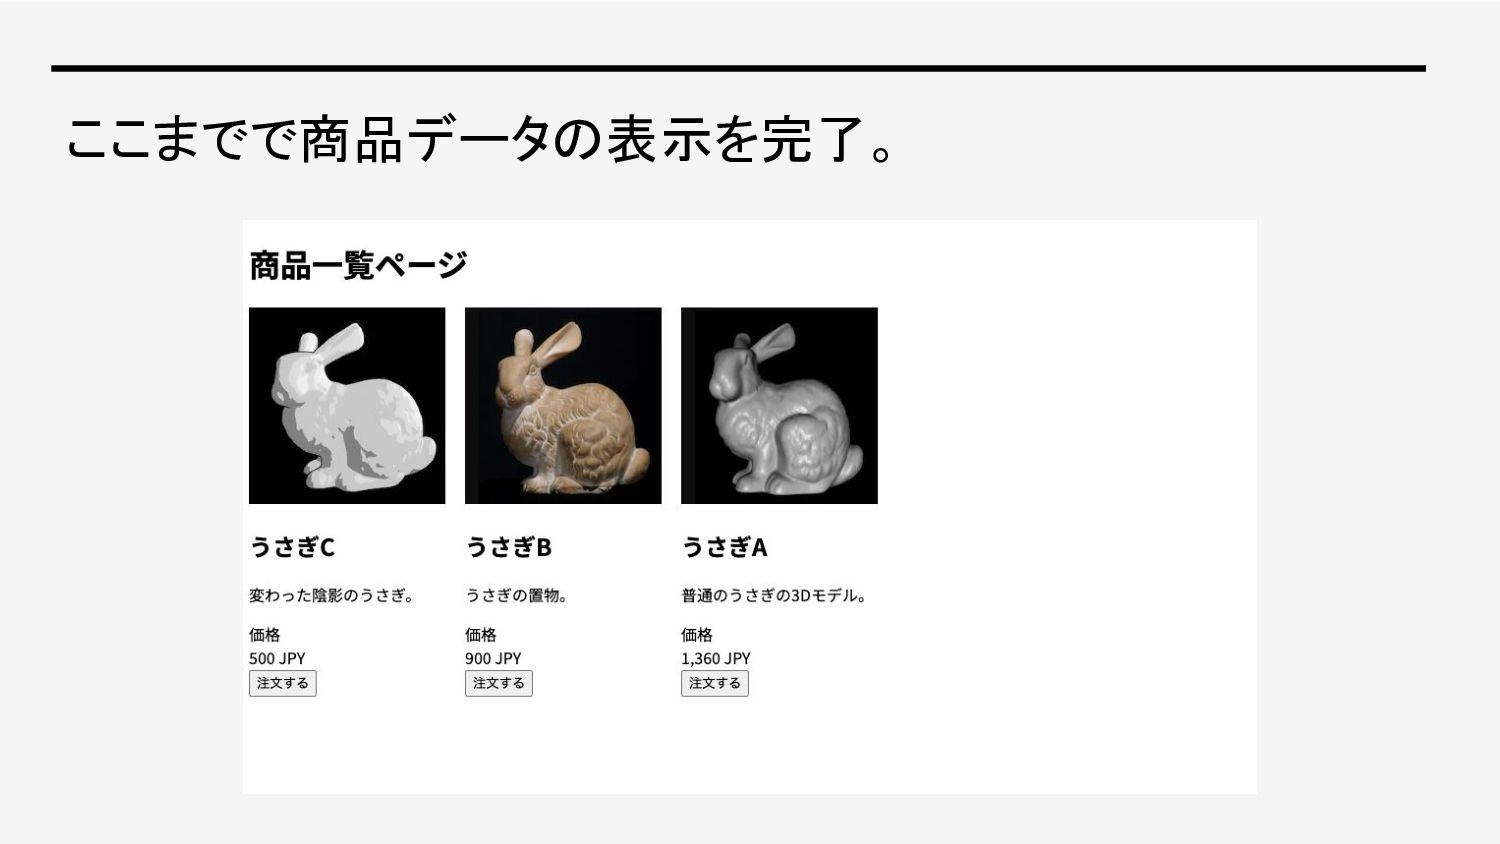
登録した商品の一覧を表示
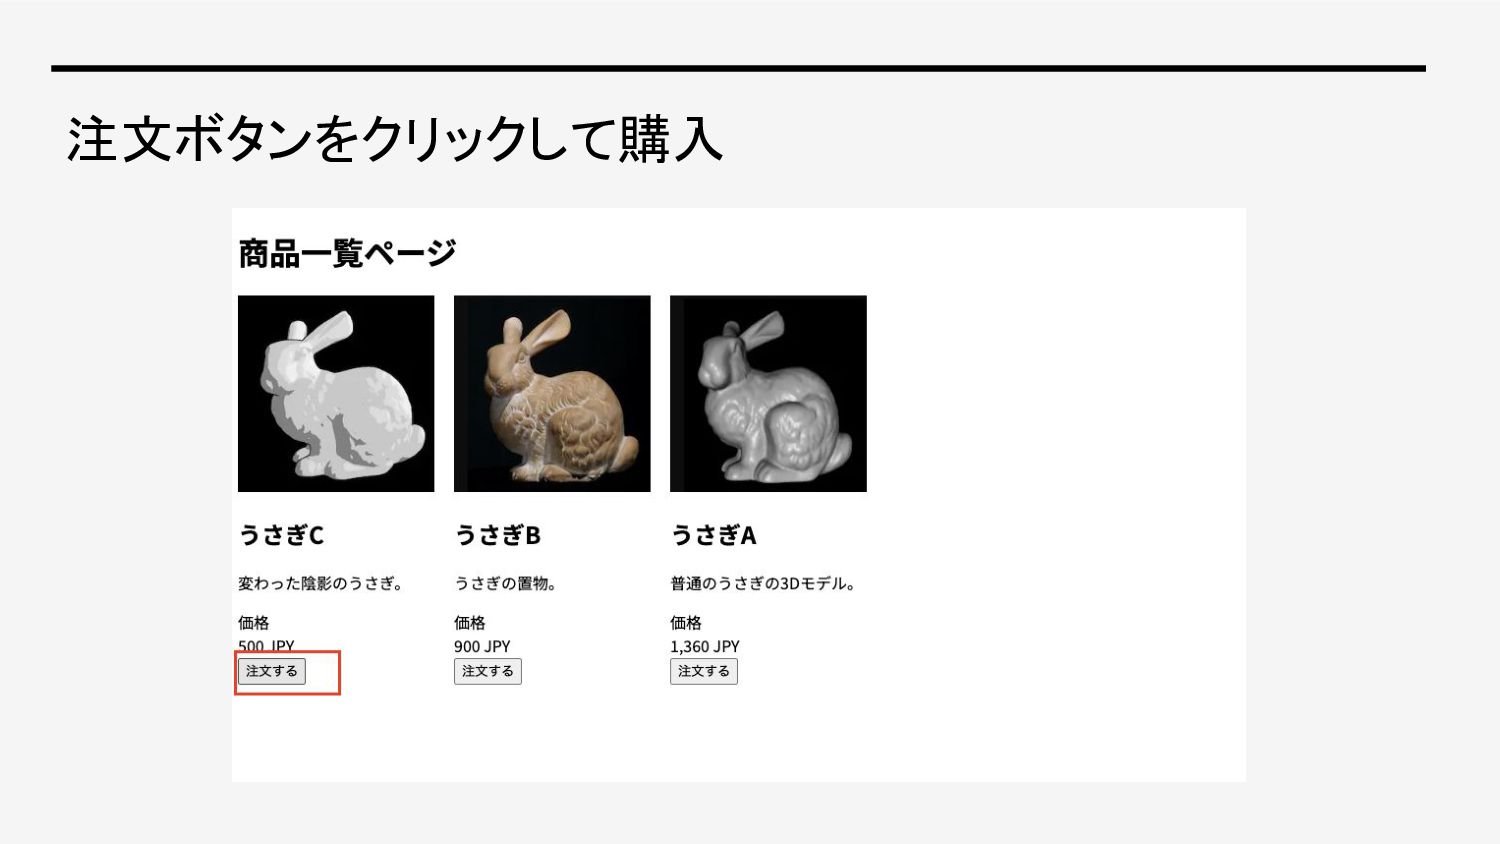
注文ボタンをクリックして購入
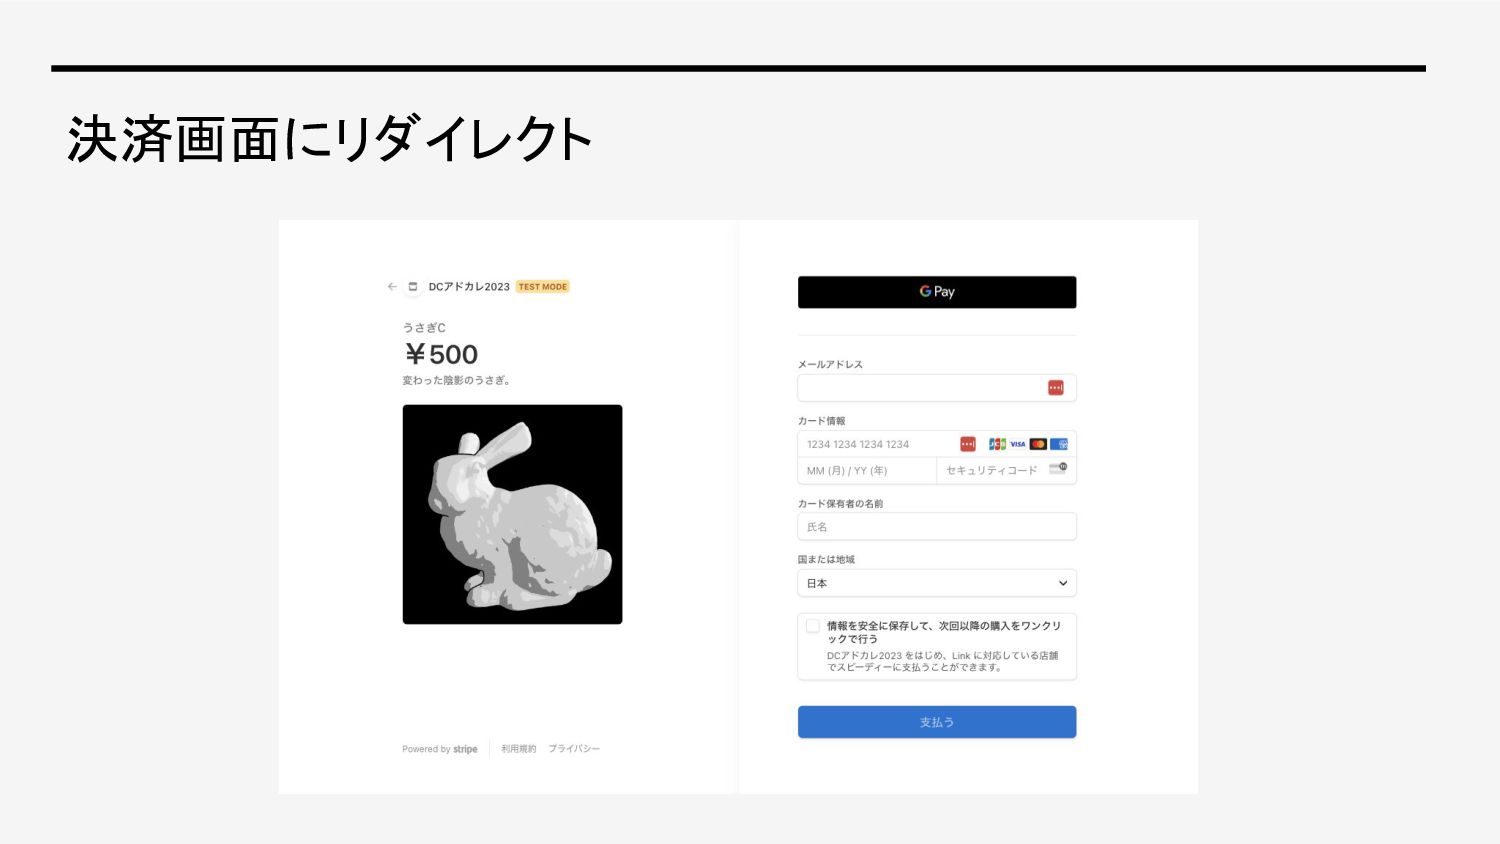
決済画面にリダイレクト
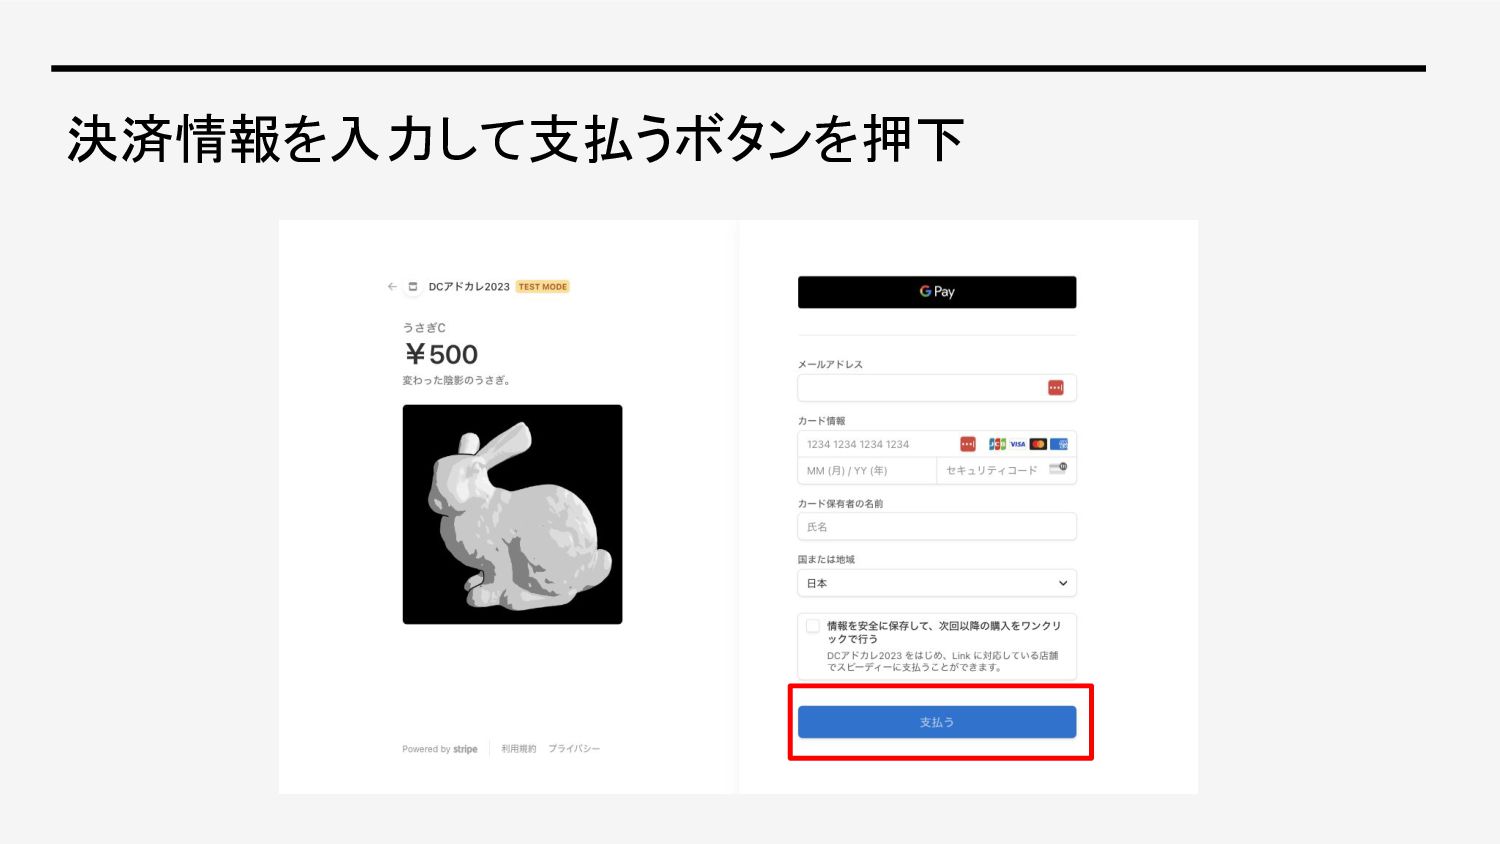
決済情報を入力して支払うボタンを押下
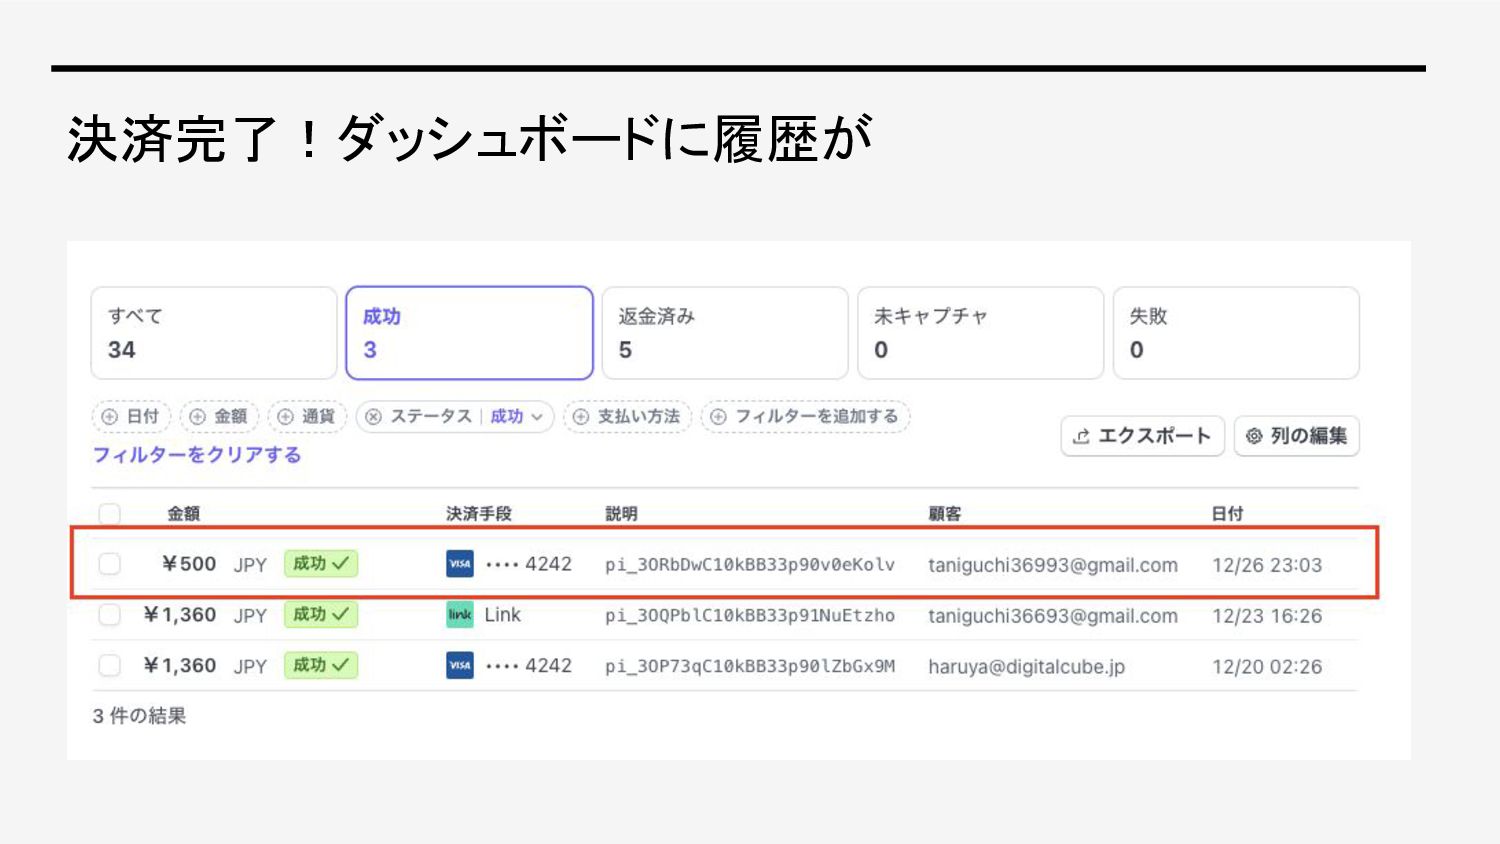
決済完了!ダッシュボードに履歴が
10 使用したもの
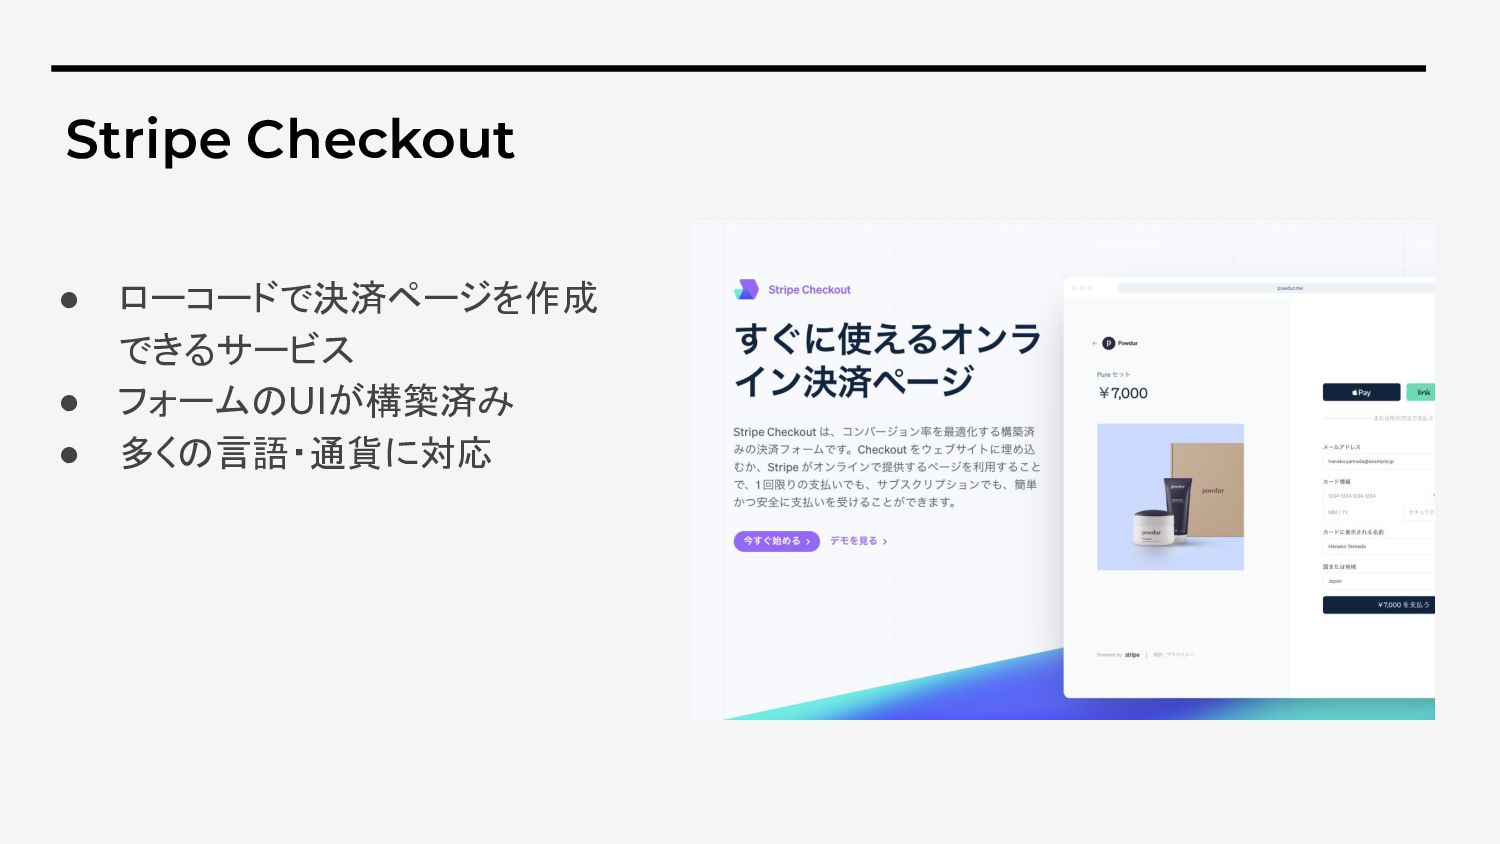
Stripe Checkout • ローコードで決済ページを作成 できるサービス • フォームのUIが構築済み • 多くの言語・通貨に対応
ライブラリ、フレームワーク • Next.js • Stripe SDK
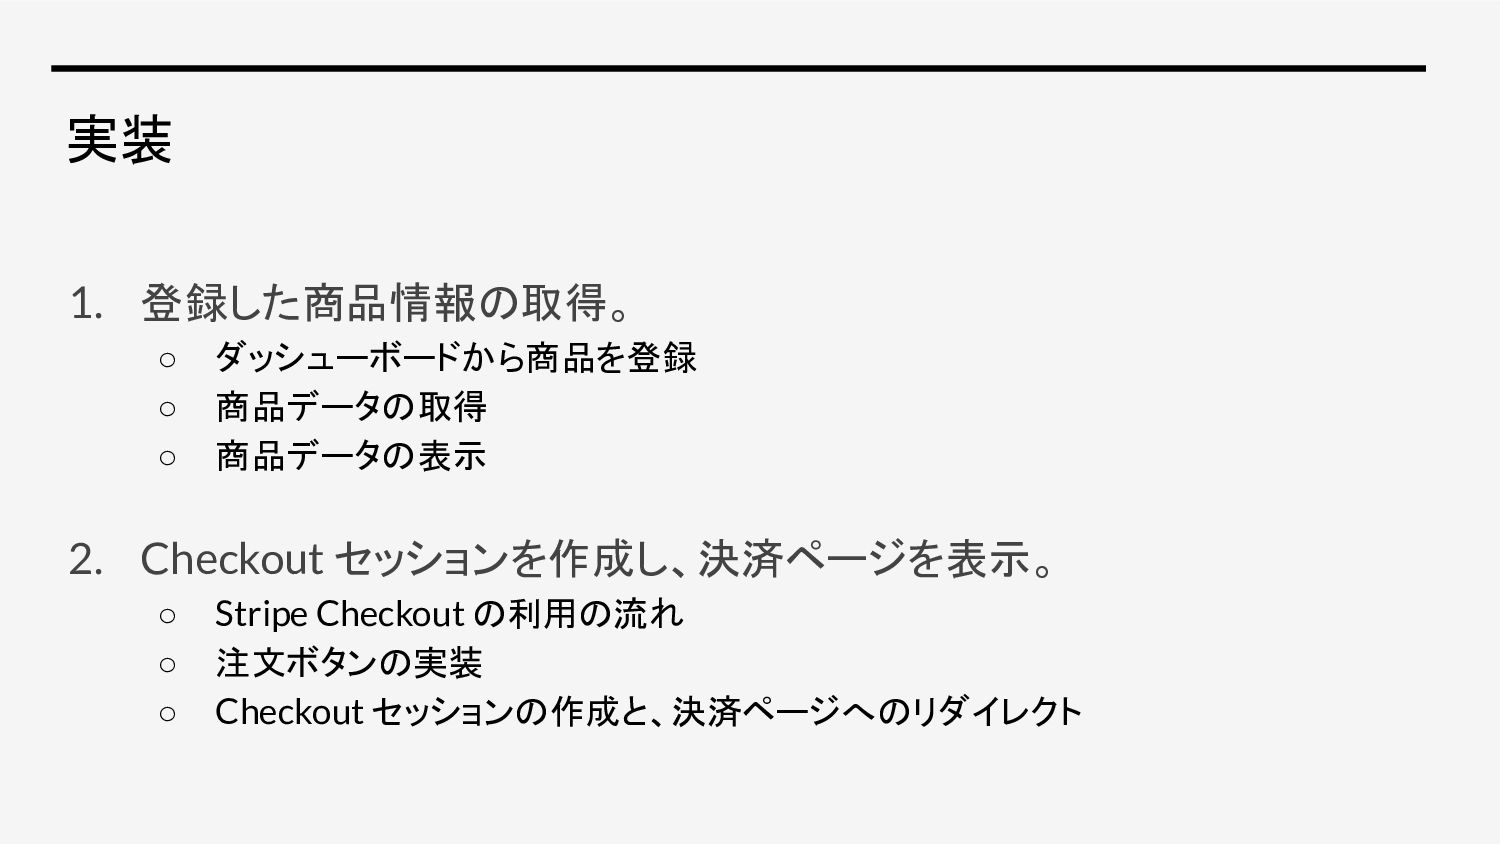
実装 1. 登録した商品情報の取得。 ◦ ダッシューボードから商品を登録 ◦ 商品データの取得 ◦ 商品データの表示 2.
Checkout セッションを作成し、決済ページを表示。 ◦ Stripe Checkout の利用の流れ ◦ 注文ボタンの実装 ◦ Checkout セッションの作成と、決済ページへのリダイレクト
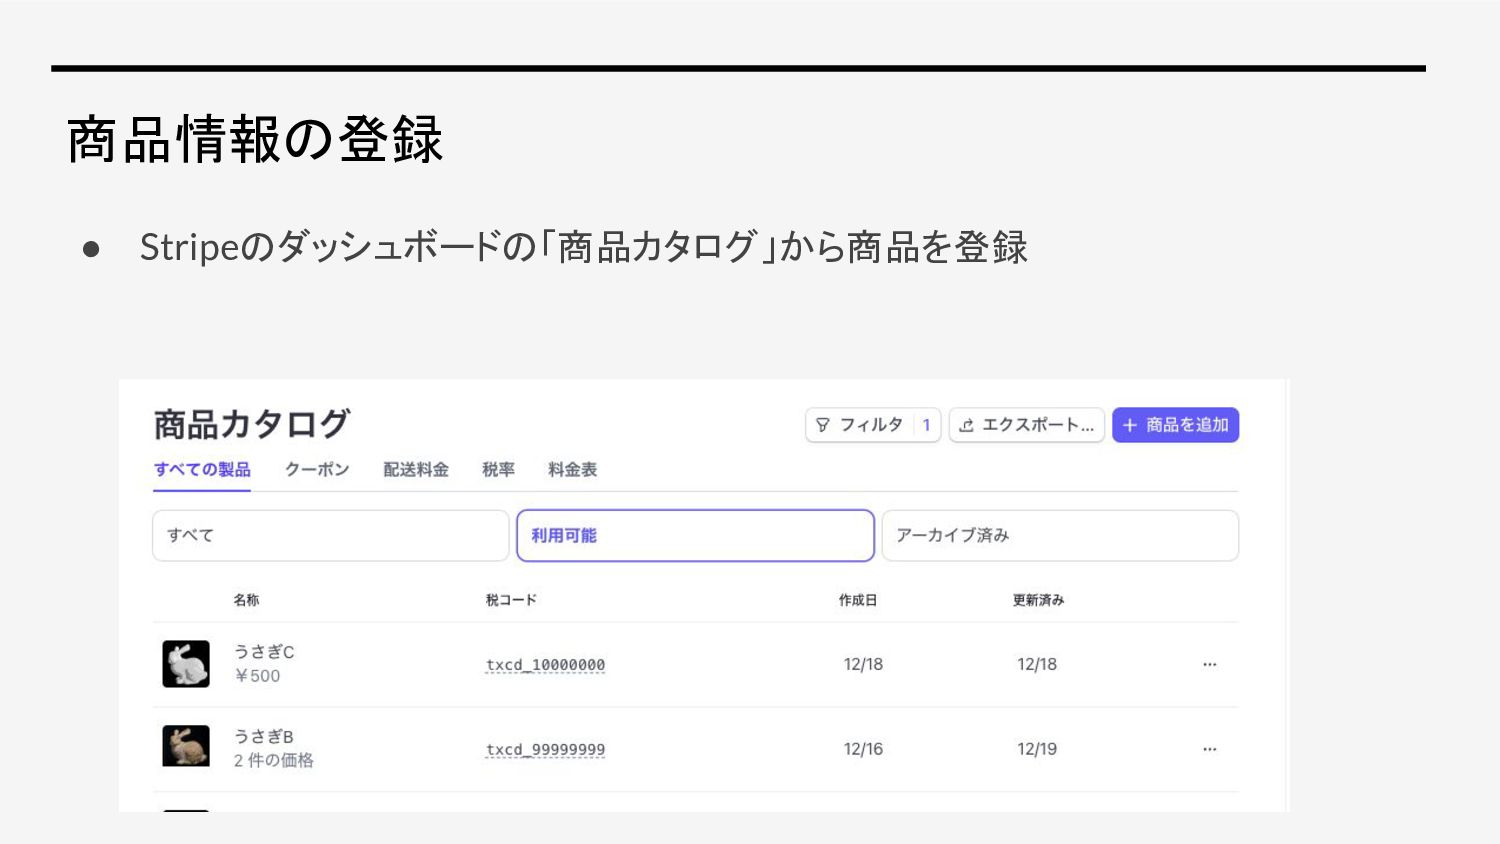
商品情報の登録 • Stripeのダッシュボードの「商品カタログ」から商品を登録
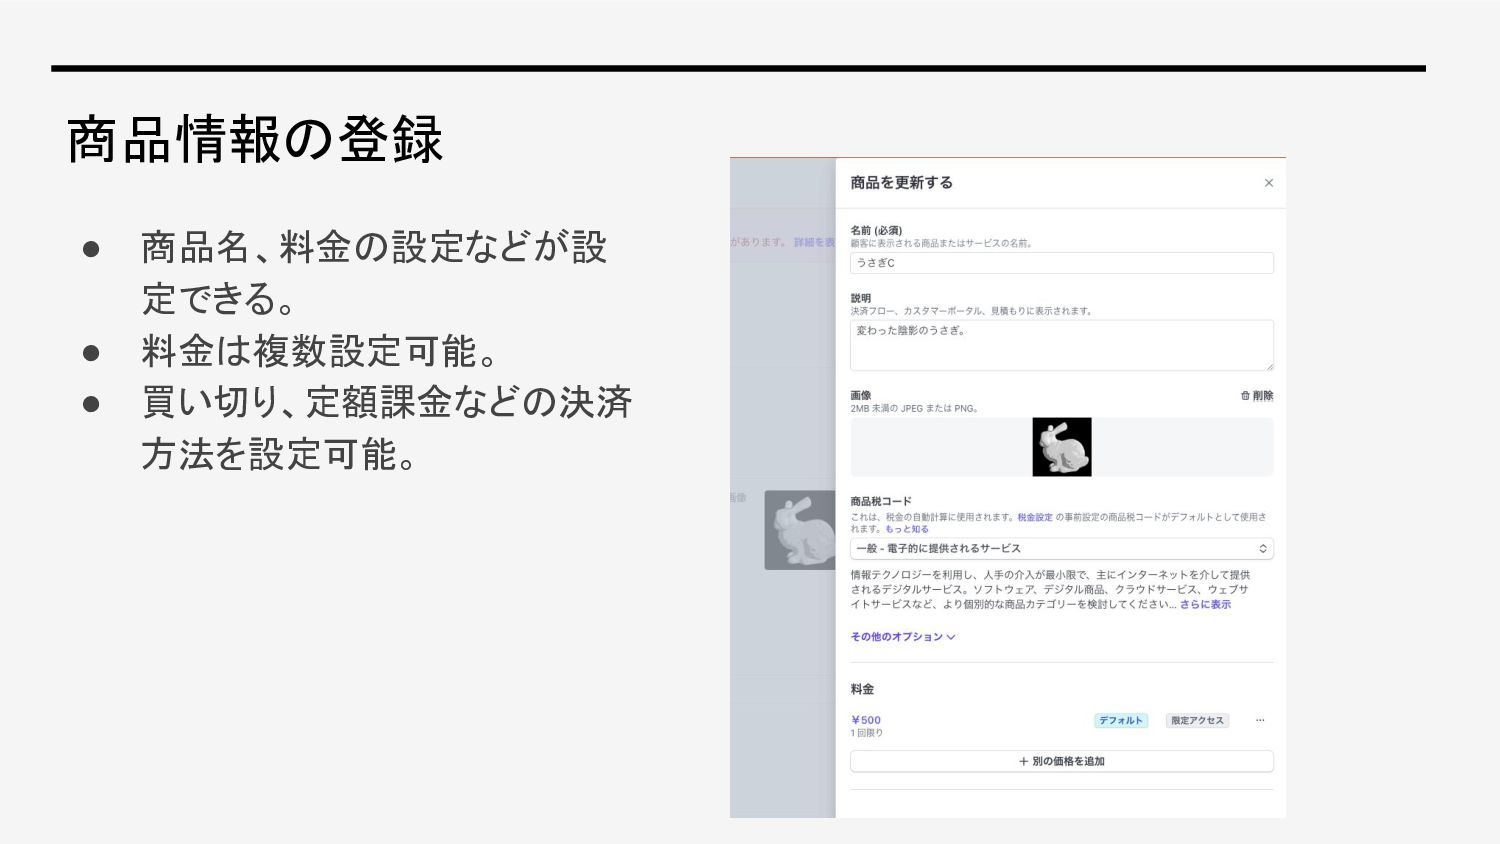
商品情報の登録 • 商品名、料金の設定などが設 定できる。 • 料金は複数設定可能。 • 買い切り、定額課金などの決済 方法を設定可能。
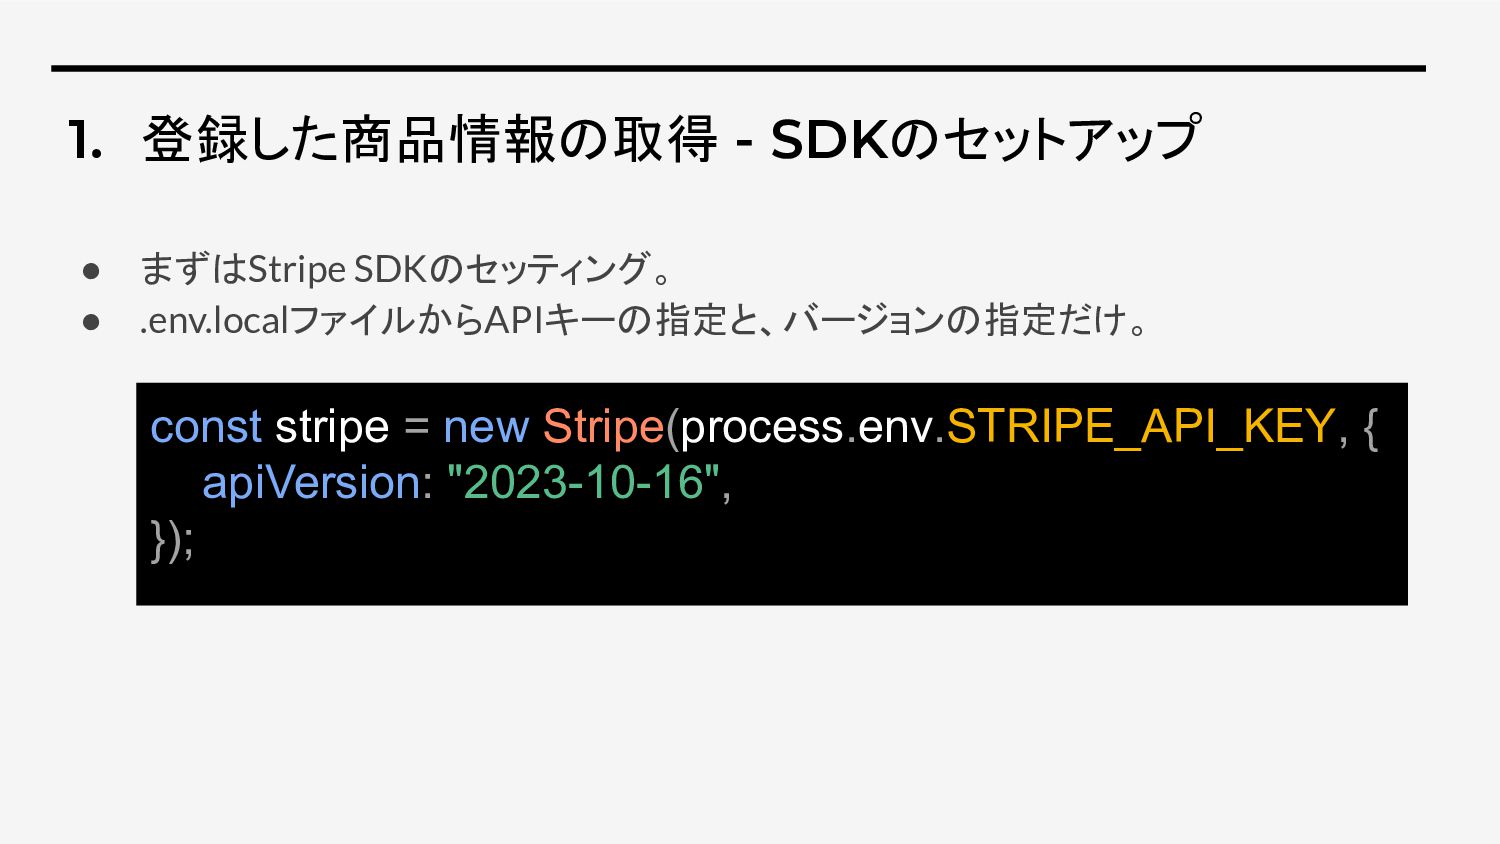
1. 登録した商品情報の取得 - SDKのセットアップ • まずはStripe SDKのセッティング。 • .env.localファイルからAPIキーの指定と、バージョンの指定だけ。 const
stripe = new Stripe(process.env.STRIPE_API_KEY, { apiVersion: "2023-10-16", });
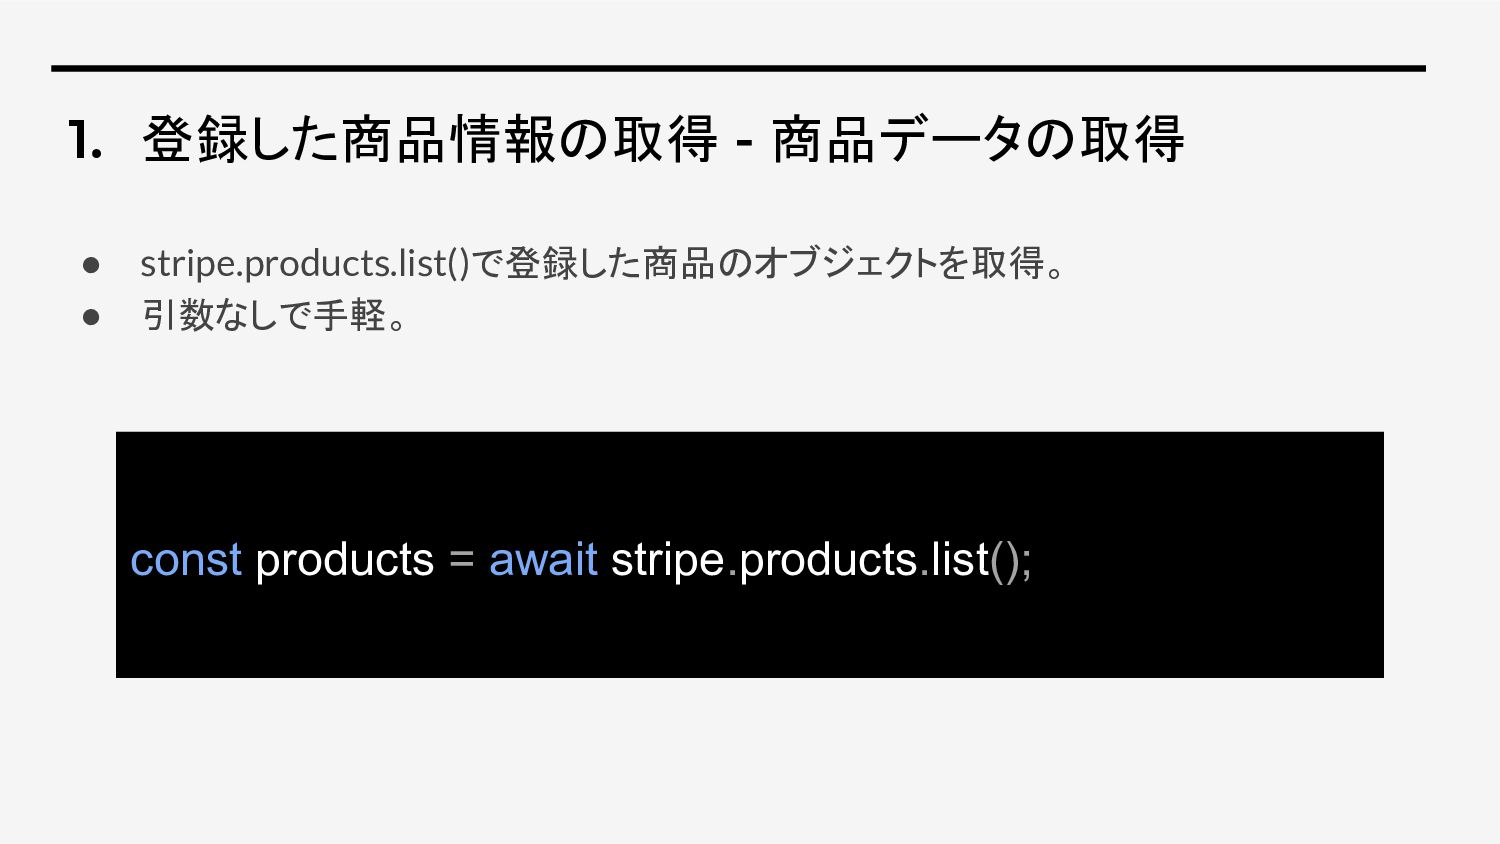
1. 登録した商品情報の取得 - 商品データの取得 • stripe.products.list()で登録した商品のオブジェクトを取得。 • 引数なしで手軽。 const products
= await stripe.products.list();
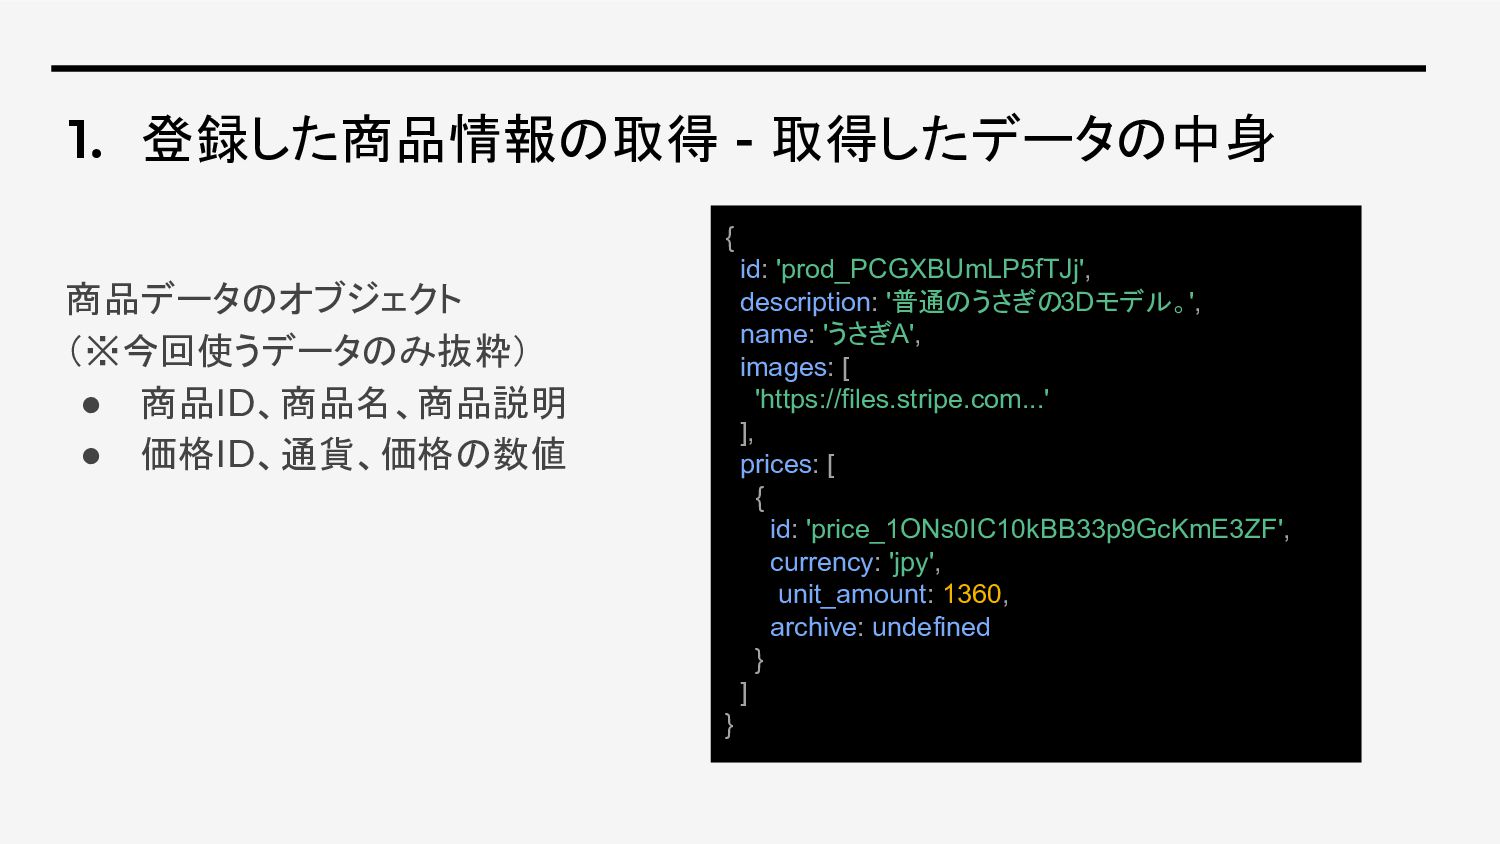
1. 登録した商品情報の取得 - 取得したデータの中身 商品データのオブジェクト (※今回使うデータのみ抜粋) • 商品ID、商品名、商品説明 • 価格ID、通貨、価格の数値
{ id: 'prod_PCGXBUmLP5fTJj', description: '普通のうさぎの3Dモデル。', name: 'うさぎA', images: [ 'https://files.stripe.com...' ], prices: [ { id: 'price_1ONs0IC10kBB33p9GcKmE3ZF', currency: 'jpy', unit_amount: 1360, archive: undefined } ] }
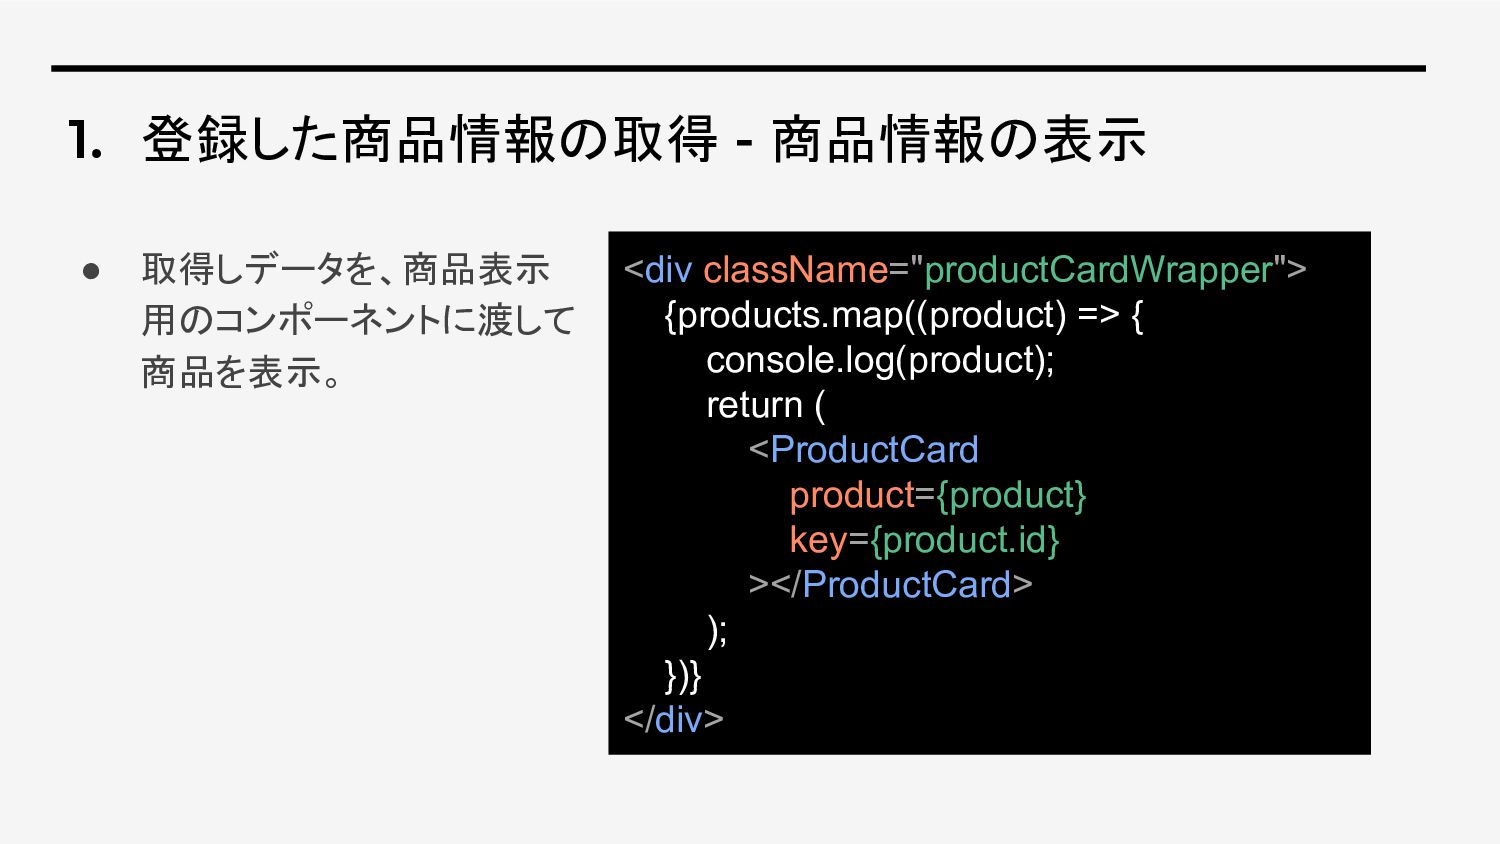
1. 登録した商品情報の取得 - 商品情報の表示 • 取得しデータを、商品表示 用のコンポーネントに渡して 商品を表示。 <div className="productCardWrapper">
{products.map((product) => { console.log(product); return ( <ProductCard product={product} key={product.id} ></ProductCard> ); })} </div>
ここまでで商品データの表示を完了。
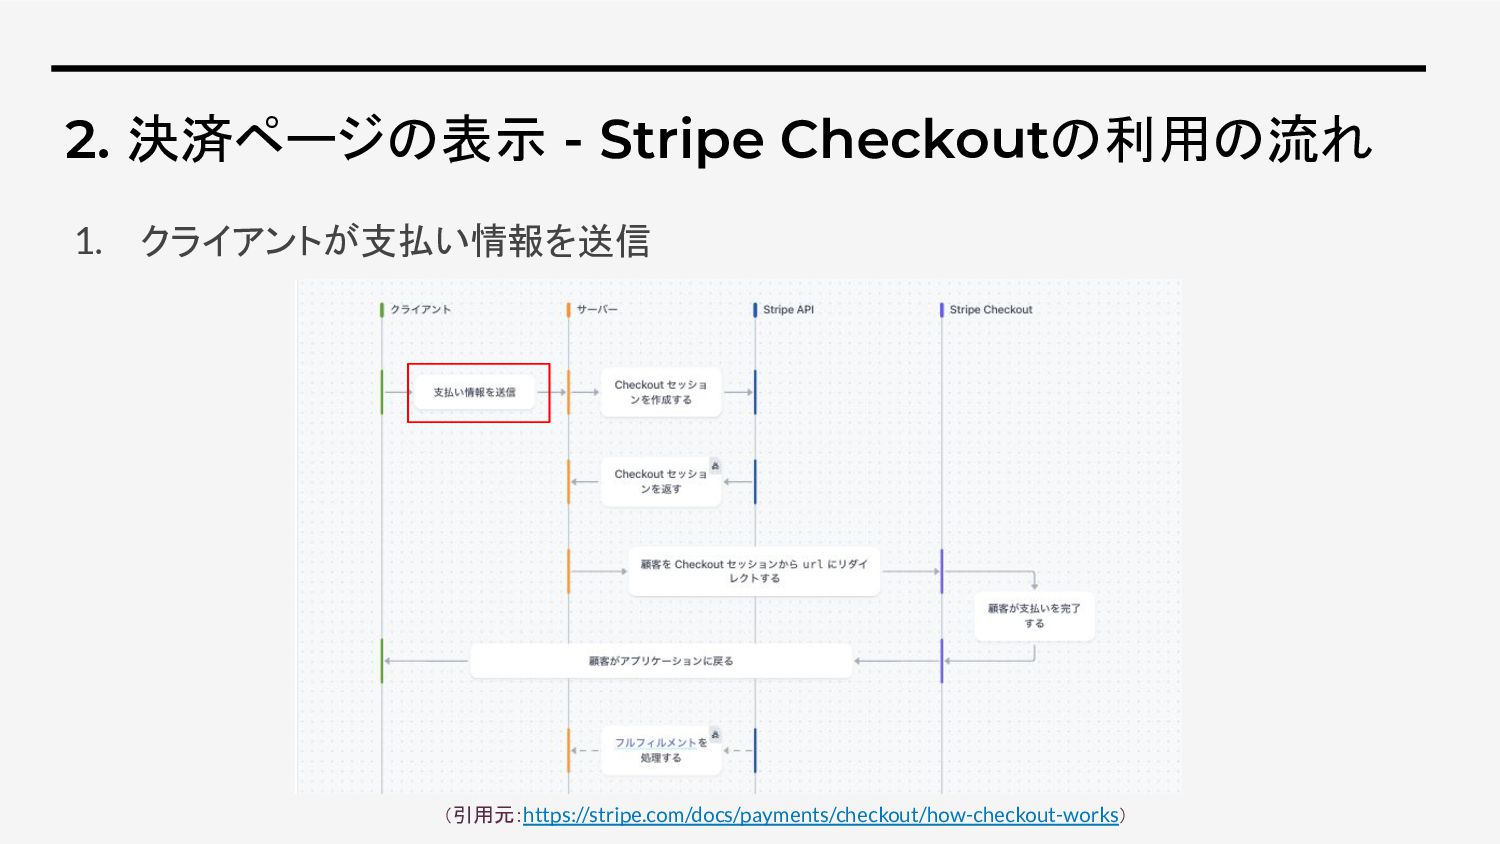
2. 決済ページの表示 - Stripe Checkoutの利用の流れ 1. クライアントが支払い情報を送信 (引用元:https://stripe.com/docs/payments/checkout/how-checkout-works)
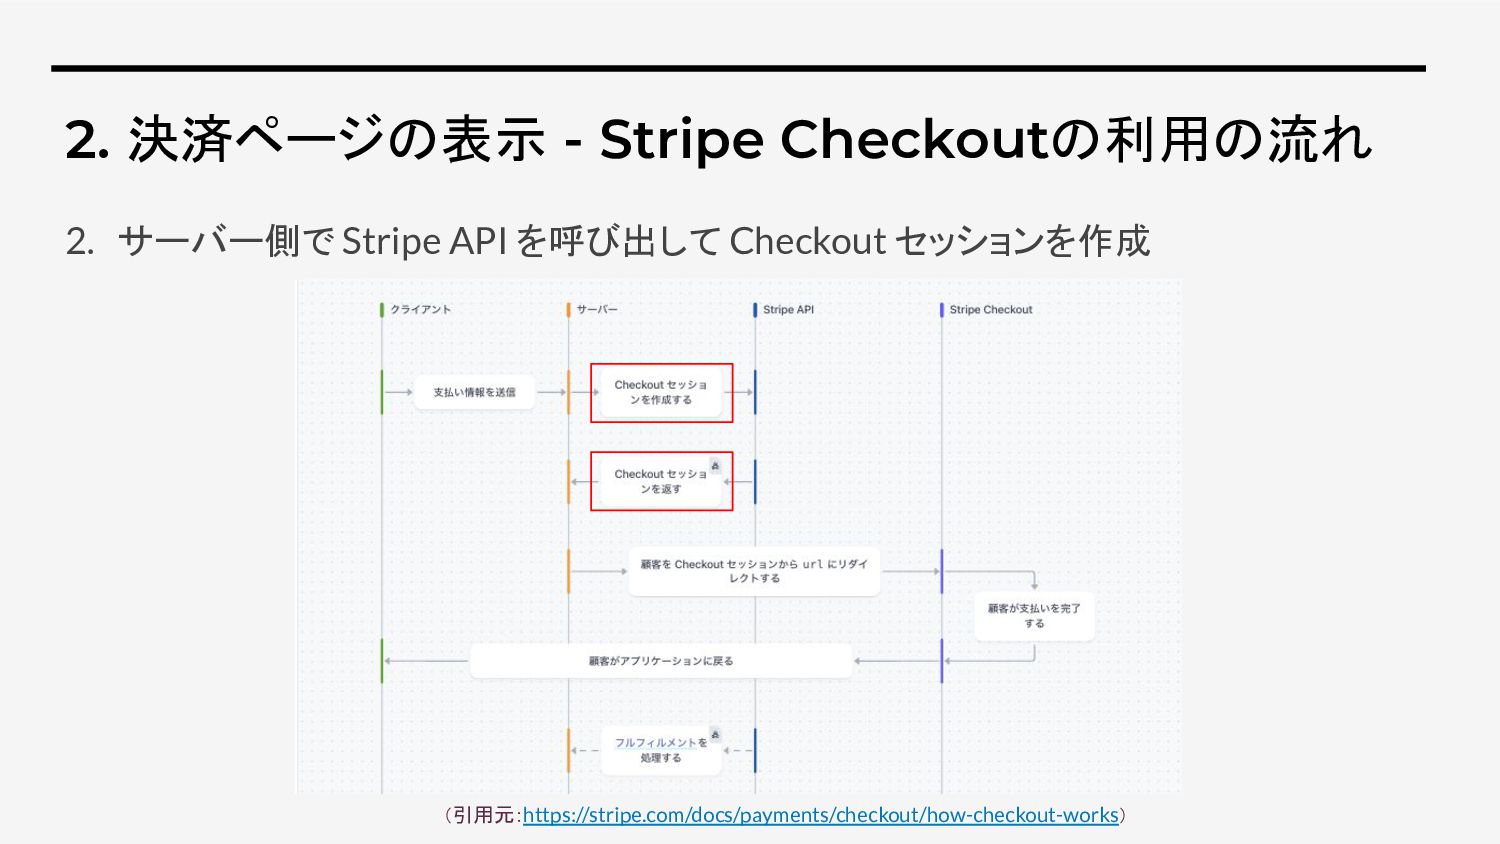
2. 決済ページの表示 - Stripe Checkoutの利用の流れ 2. サーバー側で Stripe API を呼び出して
Checkout セッションを作成 (引用元:https://stripe.com/docs/payments/checkout/how-checkout-works)
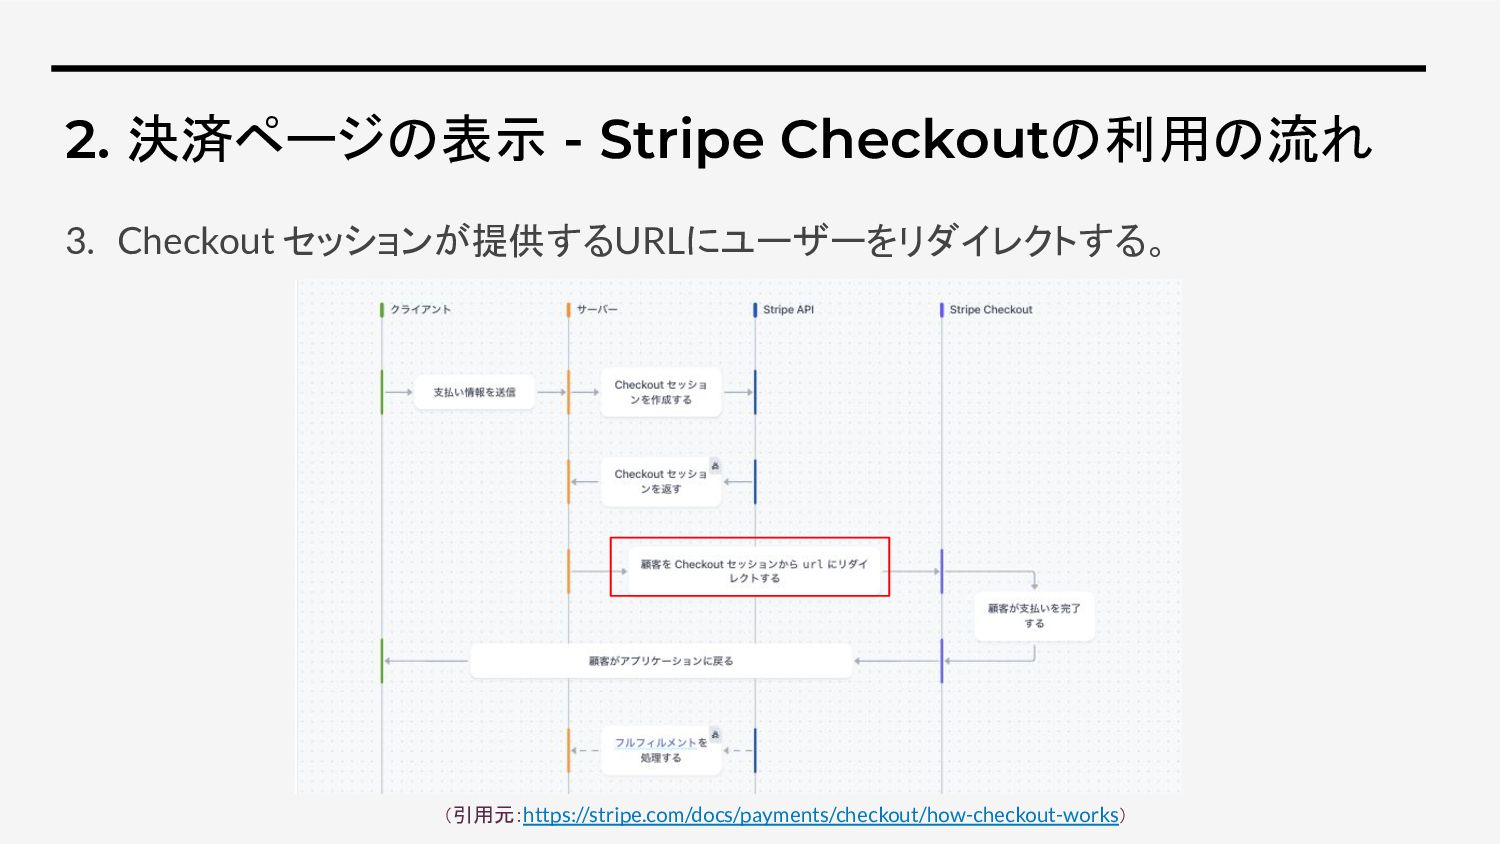
2. 決済ページの表示 - Stripe Checkoutの利用の流れ 3. Checkout セッションが提供するURLにユーザーをリダイレクトする。 (引用元:https://stripe.com/docs/payments/checkout/how-checkout-works)
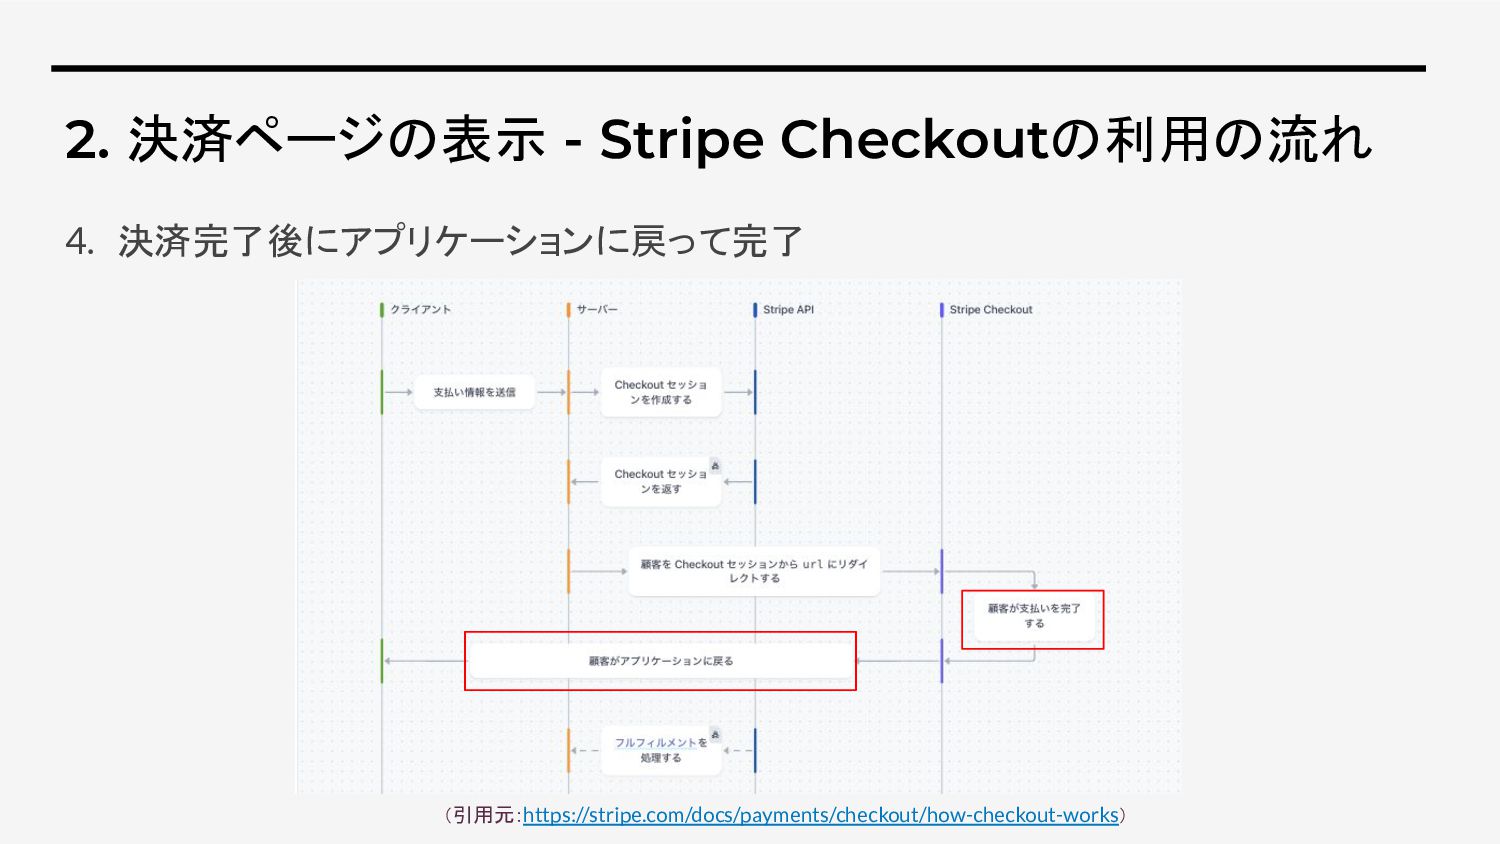
2. 決済ページの表示 - Stripe Checkoutの利用の流れ 4. 決済完了後にアプリケーションに戻って完了 (引用元:https://stripe.com/docs/payments/checkout/how-checkout-works)
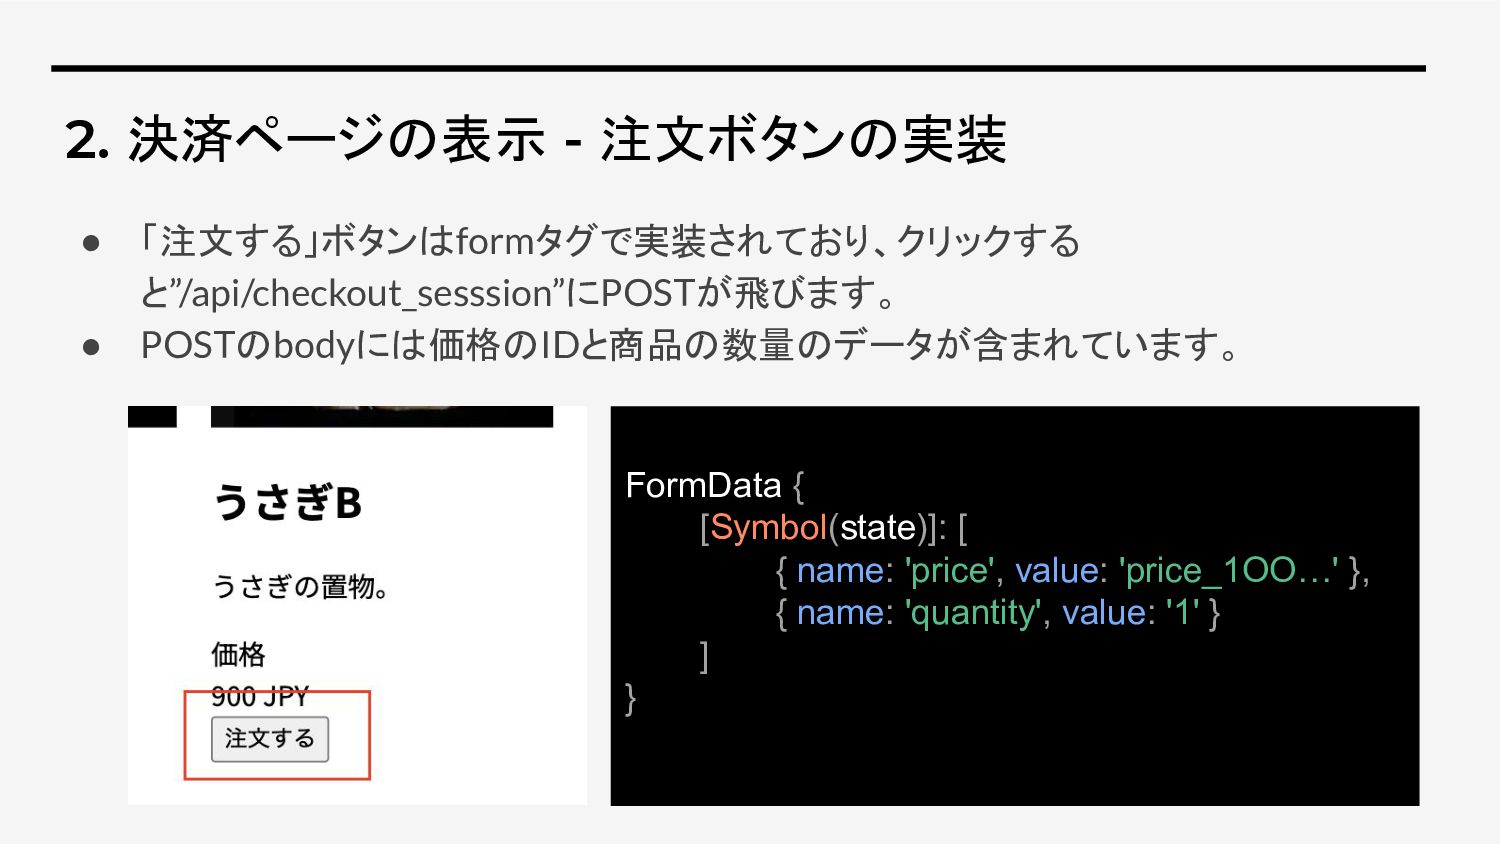
2. 決済ページの表示 - 注文ボタンの実装 • 「注文する」ボタンはformタグで実装されており、クリックする と”/api/checkout_sesssion”にPOSTが飛びます。 • POSTのbodyには価格のIDと商品の数量のデータが含まれています。 FormData
{ [Symbol(state)]: [ { name: 'price', value: 'price_1OO…' }, { name: 'quantity', value: '1' } ] }
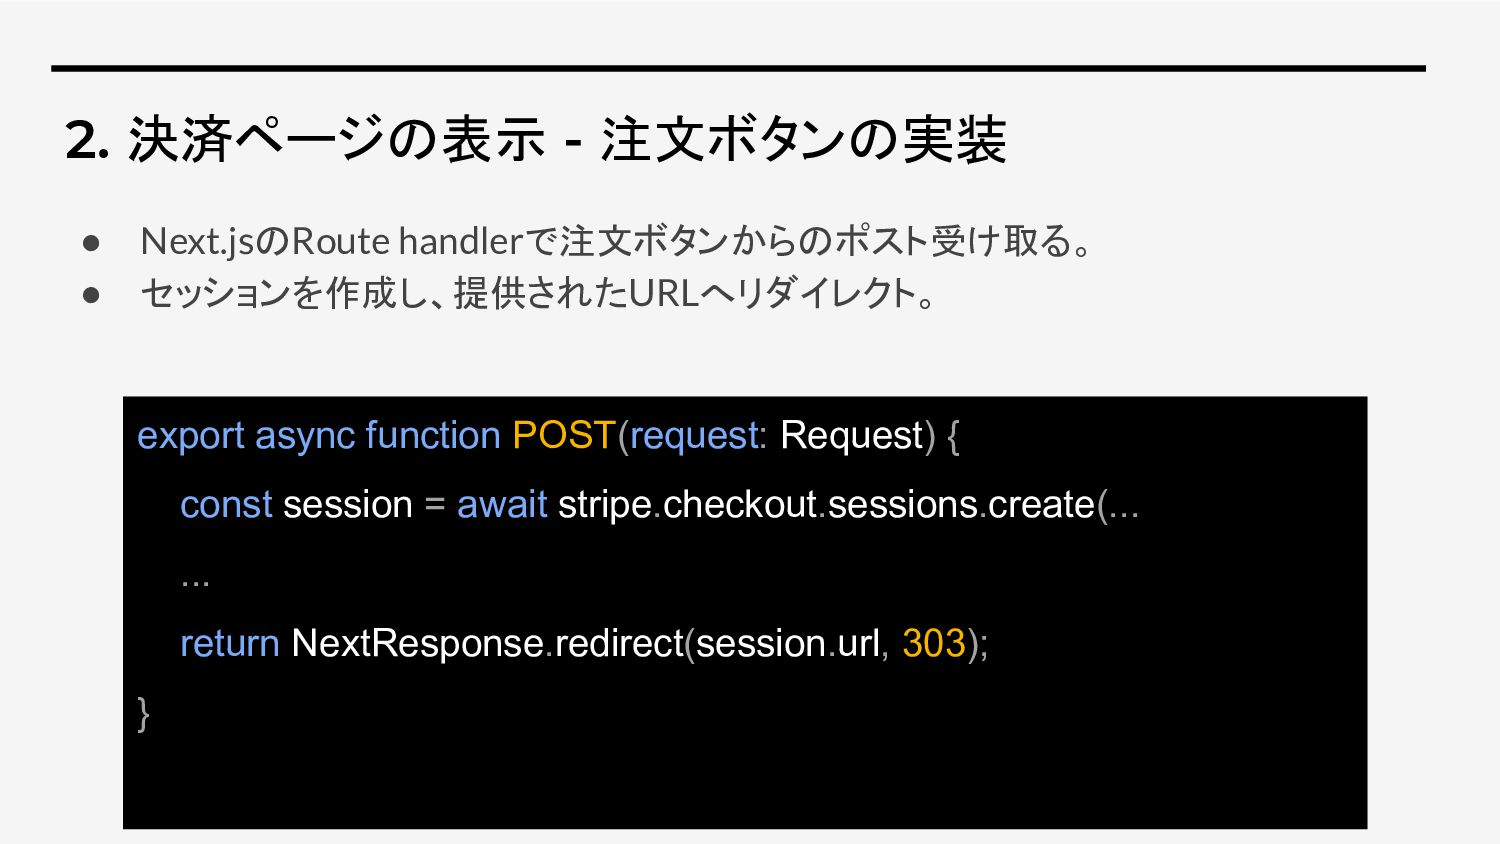
2. 決済ページの表示 - 注文ボタンの実装 • Next.jsのRoute handlerで注文ボタンからのポスト受け取る。 • セッションを作成し、提供されたURLへリダイレクト。 export
async function POST(request: Request) { const session = await stripe.checkout.sessions.create(... ... return NextResponse.redirect(session.url, 303); }
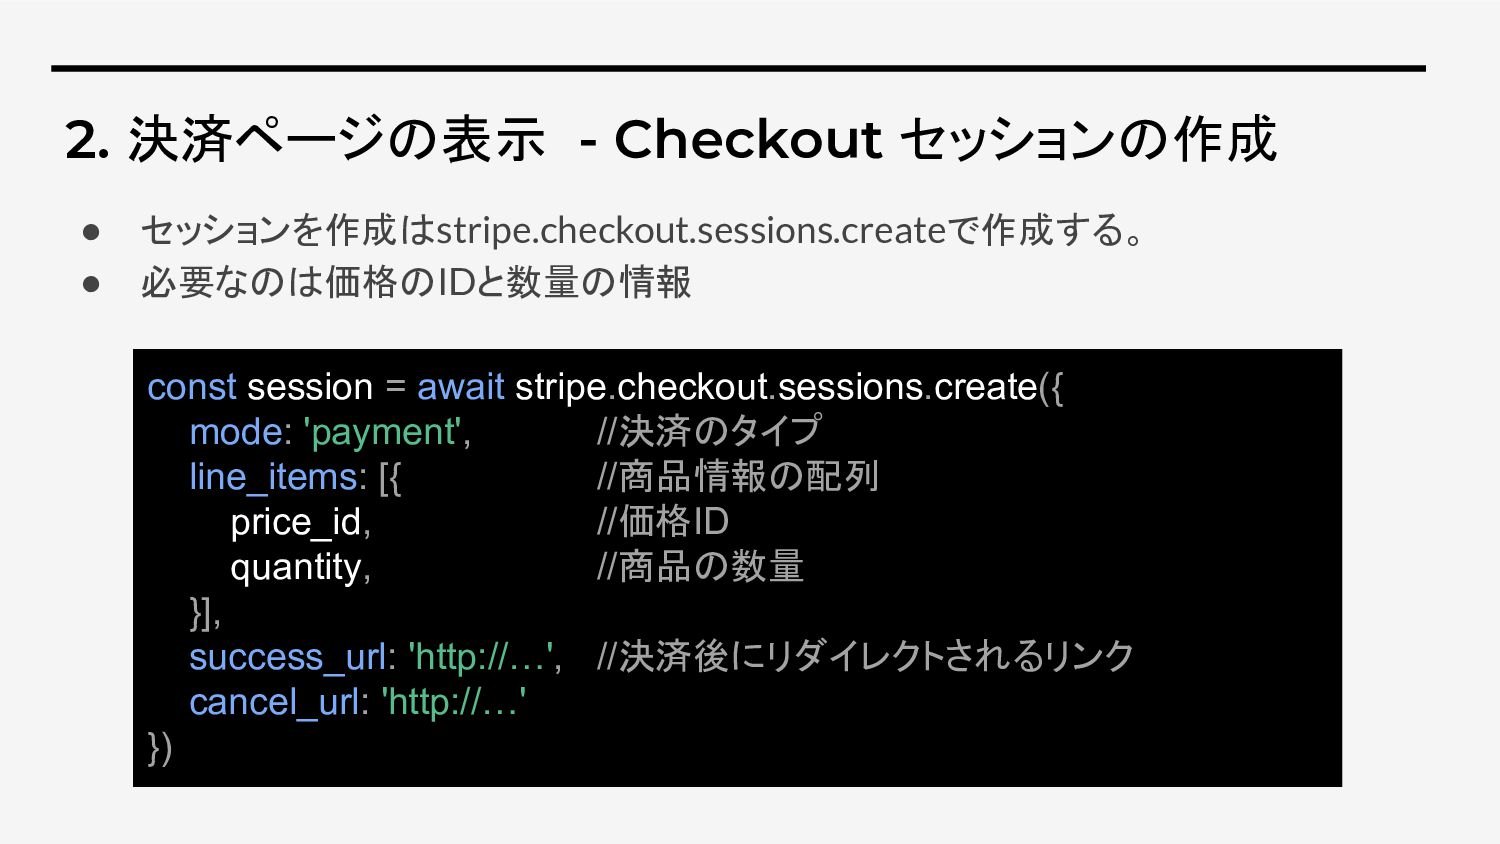
2. 決済ページの表示 - Checkout セッションの作成 const session = await stripe.checkout.sessions.create({
mode: 'payment', //決済のタイプ line_items: [{ //商品情報の配列 price_id, //価格ID quantity, //商品の数量 }], success_url: 'http://…', //決済後にリダイレクトされるリンク cancel_url: 'http://…' }) • セッションを作成はstripe.checkout.sessions.createで作成する。 • 必要なのは価格のIDと数量の情報
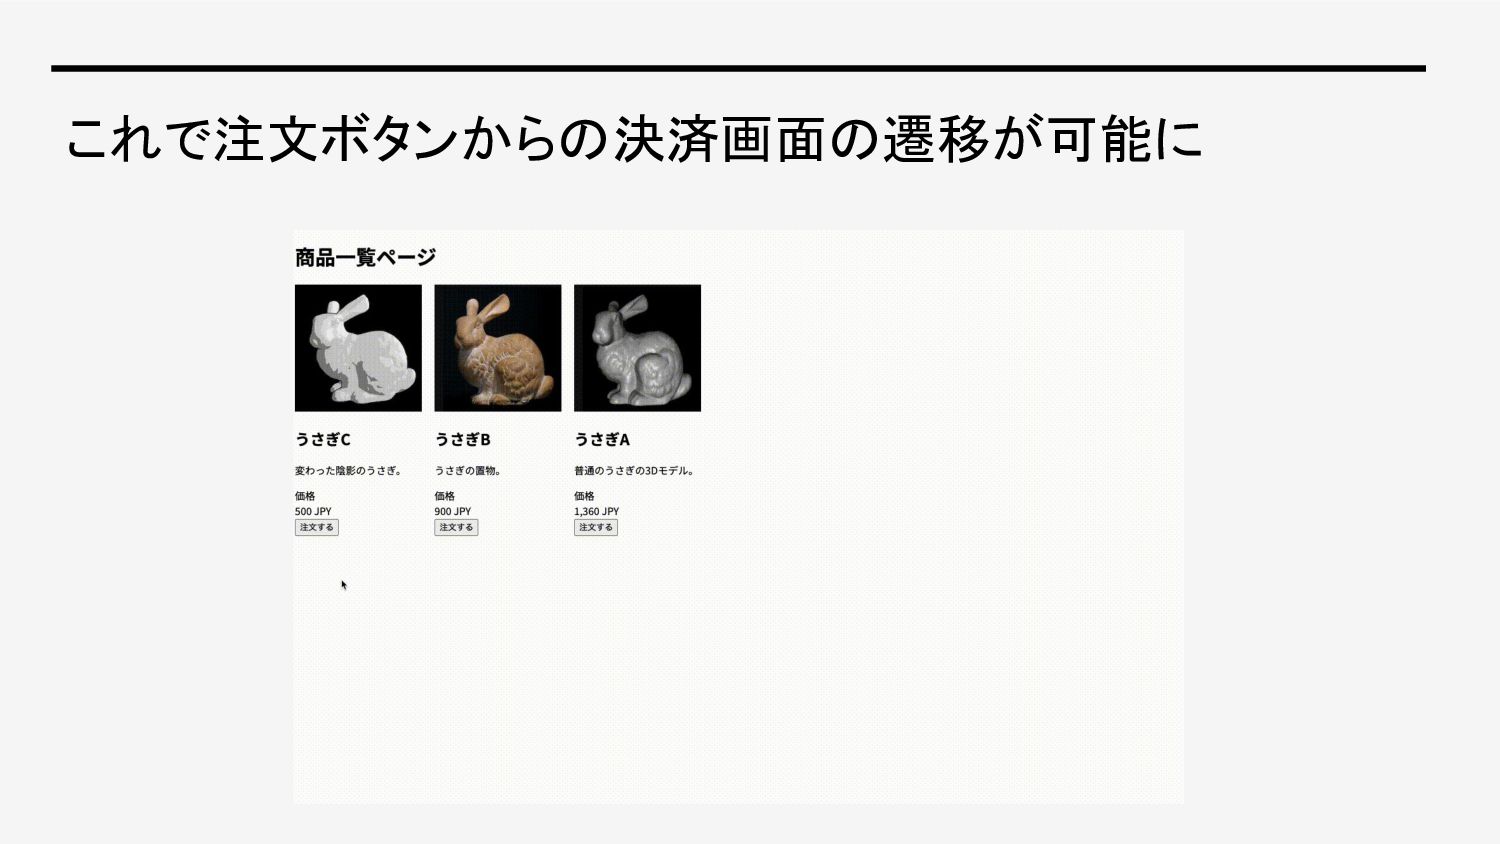
これで注文ボタンからの決済画面の遷移が可能に
29 完成!
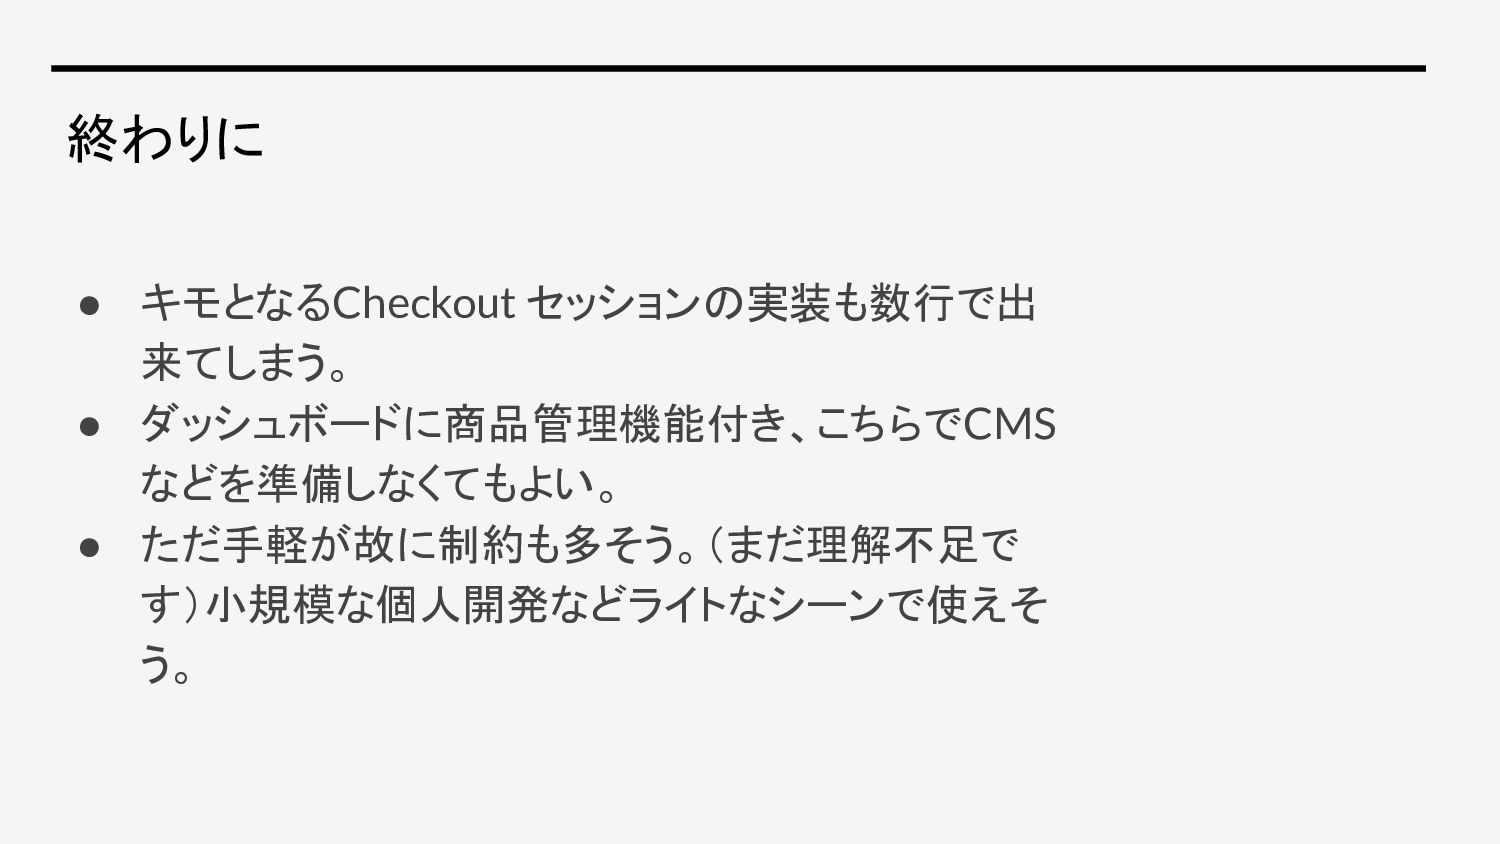
終わりに • キモとなるCheckout セッションの実装も数行で出 来てしまう。 • ダッシュボードに商品管理機能付き、こちらでCMS などを準備しなくてもよい。 • ただ手軽が故に制約も多そう。(まだ理解不足で
す)小規模な個人開発などライトなシーンで使えそ う。
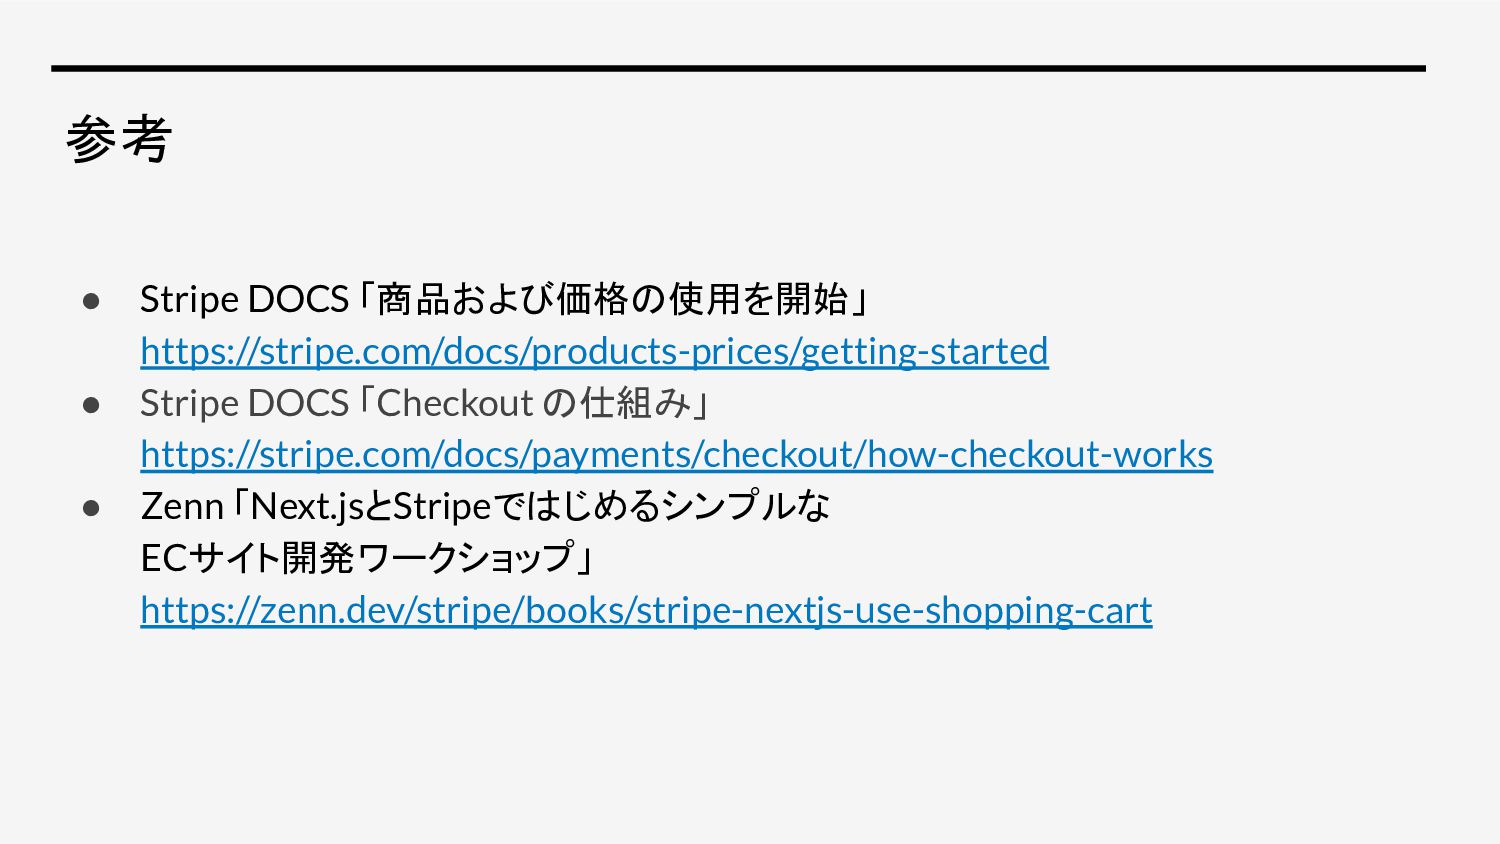
参考 • Stripe DOCS 「商品および価格の使用を開始」 https://stripe.com/docs/products-prices/getting-started • Stripe DOCS 「Checkout
の仕組み」 https://stripe.com/docs/payments/checkout/how-checkout-works • Zenn 「Next.jsとStripeではじめるシンプルな ECサイト開発ワークショップ」 https://zenn.dev/stripe/books/stripe-nextjs-use-shopping-cart


 haruya
 brettharned
 tmiket
 elsirapls
 jlugia
 baasie
 keathley
 jakevdp
 tammielis
 leimatthew05
 uxyall
 lara
lara
 aleyda