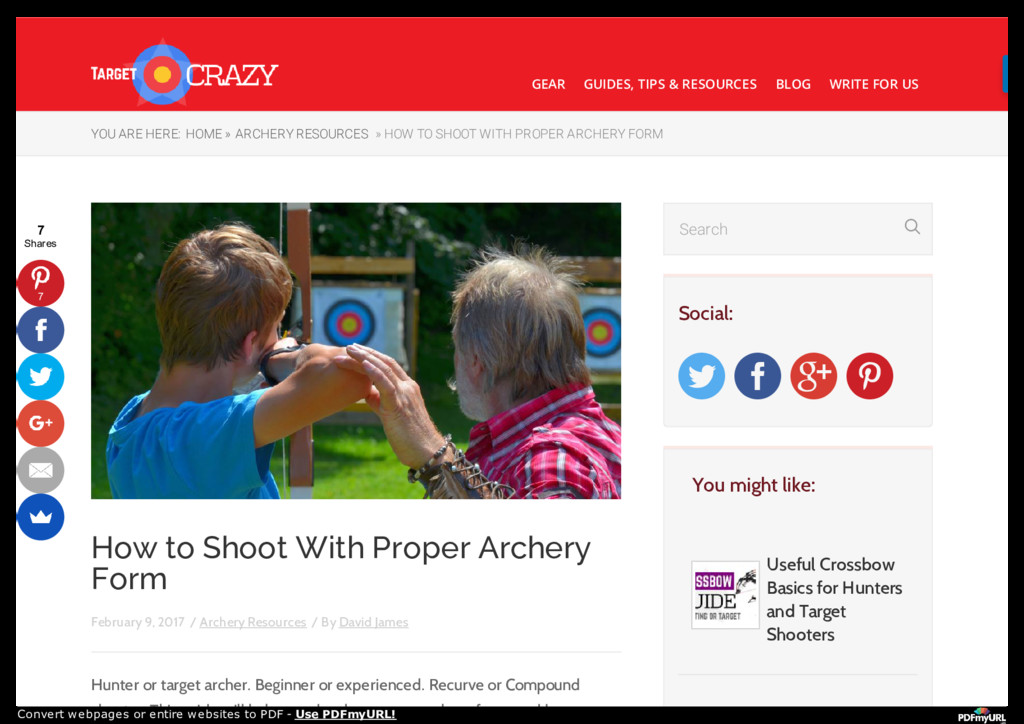
SHOOT WITH PROPER ARCHERY FORM GEAR GUIDES, TIPS & RESOURCES BLOG WRITE FOR US How to Shoot With Proper Archery Form Hunter or target archer. Beginner or experienced. Recurve or Compound shooter. This guide will help you develop proper archery form, and become a Search 1 Social: Useful Crossbow Basics for Hunters and Target Shooters Basics : A Guide You might like: February 9, 2017 / Archery Resources / By David James 7 Shares 7 Convert webpages or entire websites to PDF - Use PDFmyURL!
Open Stance Natural Stance Closed Stance Which Stance? Situational Stances Tips Infographic Bow Grip Bow Grip Bad Example The Correct Grip Good Example Tips Bowstring Finger Bowstring Finger Position Position 3 Under 1 Over 2 Under Deep vs Fingertip Grip Aids Tips Drawing Drawing Mock Shots / Dry Firing Bow Arm Elbow Rotation The Draw Aids Tips Anchor Points Anchor Points Side Anchor Follow Through Follow Through Tips The Result The Result Mental Game Mental Game Back To Basics Positive Mental Reinforcement Develop Your Own Develop Your Own Style Style shooter. This guide will help you develop proper archery form, and become a more accurate shooter. It covers all aspects of form from stance through to release. In each section we take you through the basics. Illustrate what you should and shouldn't be doing and offer helpful advice and tips. Quick Navigation Basics : A Guide to Compound Bows How to identify the parts of a compound bow! How do you convert ATA to ASTM arrow spine measurements? Useful Archery Links Our Glossary of Interesting Archery Terms Convert webpages or entire websites to PDF - Use PDFmyURL!
Release Release Archers Paradox Tips Foreword The key to technique in most sports, especially target sports, is not only good form. It is consistent repeatable form . You need to be able to perform the same actions again and again. And to perform them without thinking too much about it. You need to relaxed and be comfortable when you're shooting. Relaxed enough to allow you to enter 'your zone' or 'get your flow', whatever you want to call it. Getting to the place in your mind where everything comes together. No stress or unnecessary effort. Everything just works. That is where you want to be. One of the essential components to this is making sure you have a bow that feels comfortable to shoot. It won't be comfortable if your draw weight is too high. This doesn't apply as much to a compound bow as the draw weight is Subscribe to our Newsletter! Email Address... SUBSCRIBE Recent Posts Bear Wild Compound Bow Review » Bear Attitude Compound Bow Review » Convert webpages or entire websites to PDF - Use PDFmyURL!
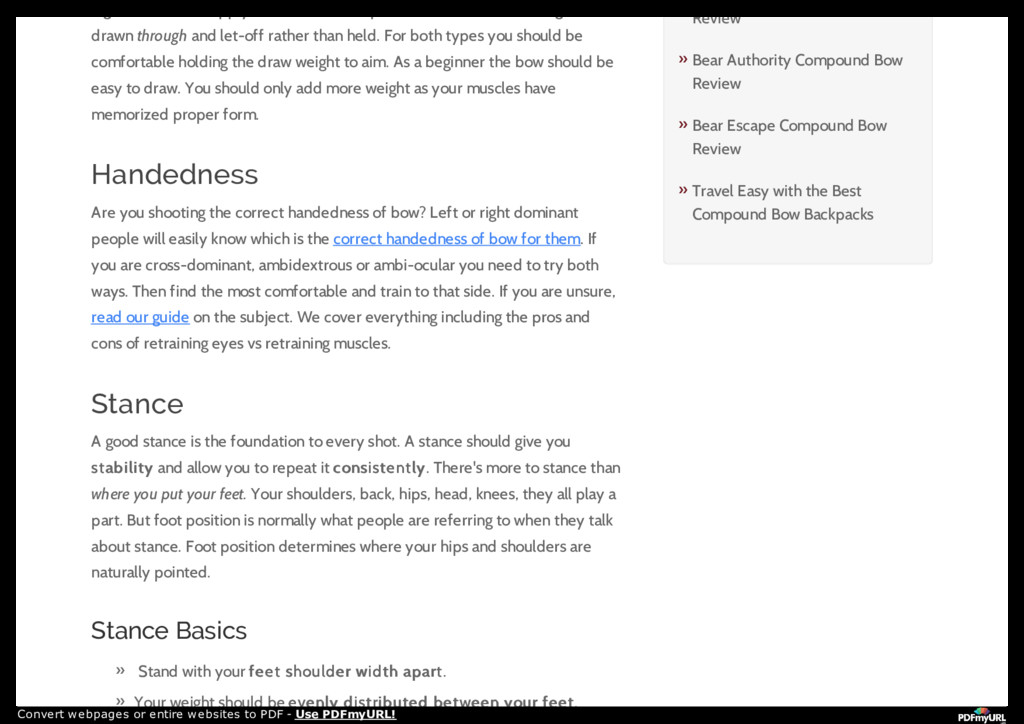
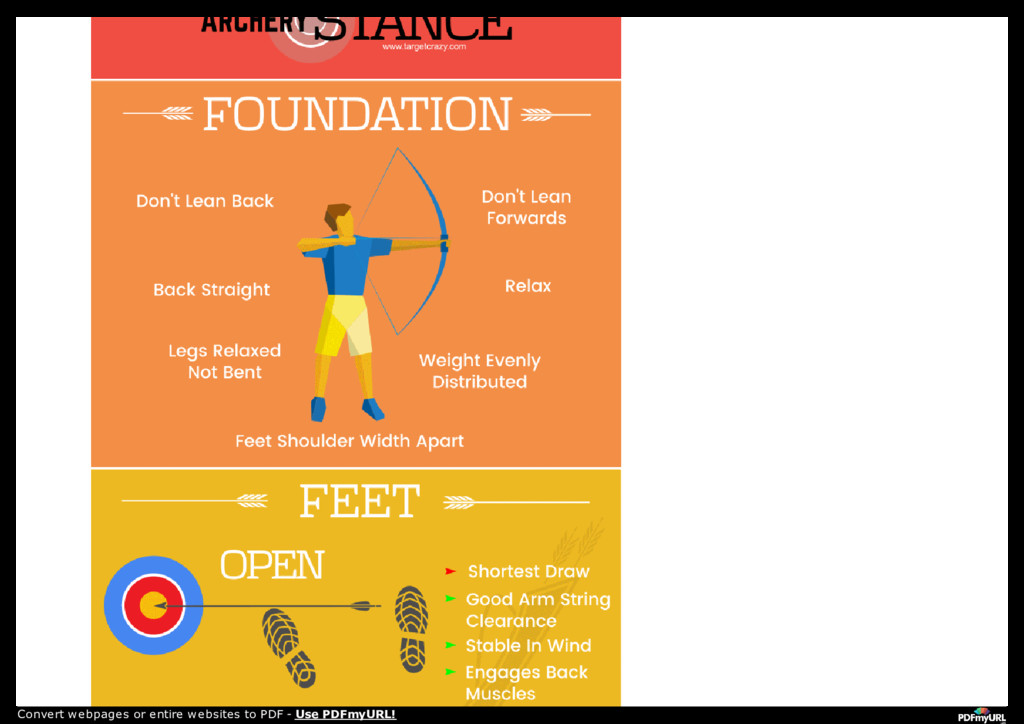
as the draw weight is drawn through and let-off rather than held. For both types you should be comfortable holding the draw weight to aim. As a beginner the bow should be easy to draw. You should only add more weight as your muscles have memorized proper form. Handedness Are you shooting the correct handedness of bow? Left or right dominant people will easily know which is the correct handedness of bow for them. If you are cross-dominant, ambidextrous or ambi-ocular you need to try both ways. Then find the most comfortable and train to that side. If you are unsure, read our guide on the subject. We cover everything including the pros and cons of retraining eyes vs retraining muscles. Stance A good stance is the foundation to every shot. A stance should give you stability stability and allow you to repeat it consistently consistently. There's more to stance than where you put your feet. Your shoulders, back, hips, head, knees, they all play a part. But foot position is normally what people are referring to when they talk about stance. Foot position determines where your hips and shoulders are naturally pointed. Stance Basics Review Bear Authority Compound Bow Review » Bear Escape Compound Bow Review » Travel Easy with the Best Compound Bow Backpacks » Stand with your feet shoulder width apart feet shoulder width apart. » Your weight should be evenly distributed between your feet evenly distributed between your feet. » Convert webpages or entire websites to PDF - Use PDFmyURL!
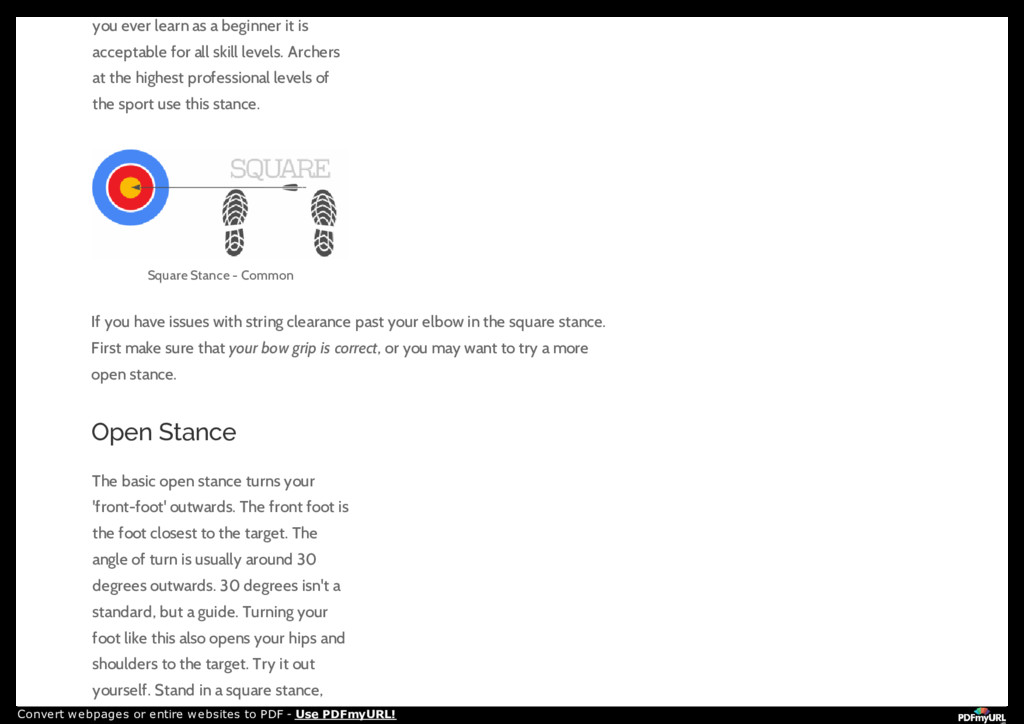
For each there will be slight variances depending on the individual involved. In the example diagrams below the archer is right handed, and is standing side on to the target. His or her left shoulder is also pointing towards the target. The bow is being held in the left hand and the string drawn with the right. Lets go through 4 foot positions and their pros and cons. Square Stance Standing side-on to the target, with your front foot nearest to it. Feet about shoulder width apart. Weight even, legs relaxed and feet both pointing perpendicular to the target face. This stance aligns your hips and shoulders side on to the target. Even though this is the first stance you ever learn as a beginner it is Your weight should be evenly distributed between your feet evenly distributed between your feet. » Stand with your legs relaxed legs relaxed . Your knees shouldn't locked out or be too bent, unless you have to crouch due to the nature of the shot, » Don't lean Don't lean forwards or backwards. Don't let the bow tilt you forwards. Don't compensate for bow weight by learning backwards. » Keep your back straight back straight. » Convert webpages or entire websites to PDF - Use PDFmyURL!
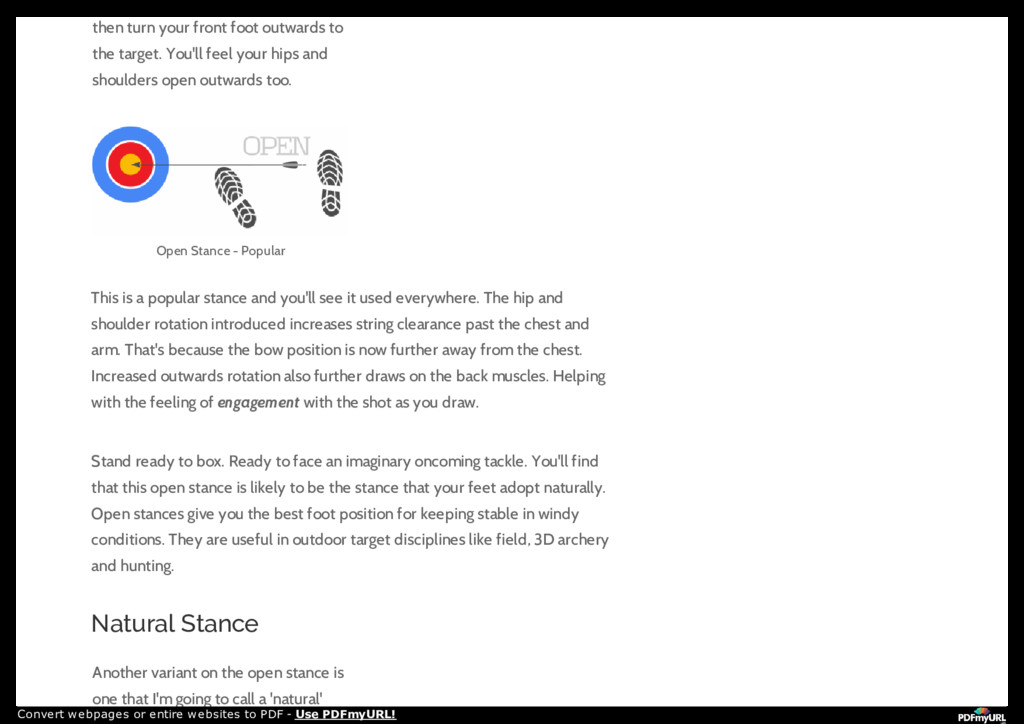
all skill levels. Archers at the highest professional levels of the sport use this stance. Square Stance - Common If you have issues with string clearance past your elbow in the square stance. First make sure that your bow grip is correct, or you may want to try a more open stance. Open Stance The basic open stance turns your 'front-foot' outwards. The front foot is the foot closest to the target. The angle of turn is usually around 30 degrees outwards. 30 degrees isn't a standard, but a guide. Turning your foot like this also opens your hips and shoulders to the target. Try it out yourself. Stand in a square stance, Convert webpages or entire websites to PDF - Use PDFmyURL!
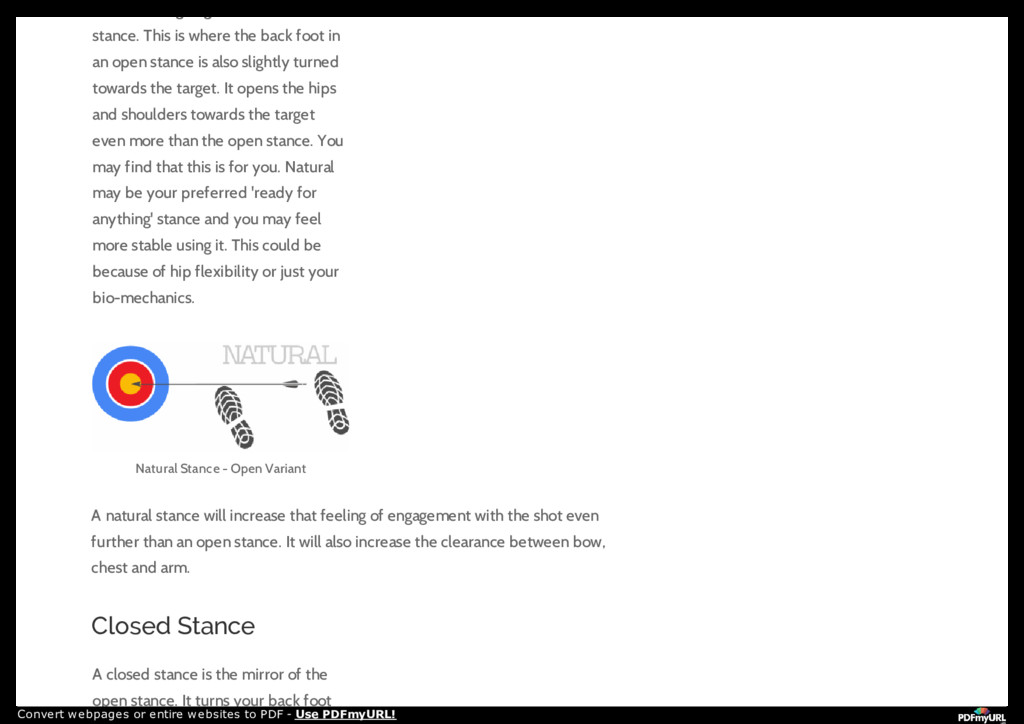
feel your hips and shoulders open outwards too. Open Stance - Popular This is a popular stance and you'll see it used everywhere. The hip and shoulder rotation introduced increases string clearance past the chest and arm. That's because the bow position is now further away from the chest. Increased outwards rotation also further draws on the back muscles. Helping with the feeling of engagement with the shot as you draw. Stand ready to box. Ready to face an imaginary oncoming tackle. You'll find that this open stance is likely to be the stance that your feet adopt naturally. Open stances give you the best foot position for keeping stable in windy conditions. They are useful in outdoor target disciplines like field, 3D archery and hunting. Natural Stance Another variant on the open stance is one that I'm going to call a 'natural' Convert webpages or entire websites to PDF - Use PDFmyURL!
is where the back foot in an open stance is also slightly turned towards the target. It opens the hips and shoulders towards the target even more than the open stance. You may find that this is for you. Natural may be your preferred 'ready for anything' stance and you may feel more stable using it. This could be because of hip flexibility or just your bio-mechanics. Natural Stance - Open Variant A natural stance will increase that feeling of engagement with the shot even further than an open stance. It will also increase the clearance between bow, chest and arm. Closed Stance A closed stance is the mirror of the open stance. It turns your back foot Convert webpages or entire websites to PDF - Use PDFmyURL!
target. But keeps your front foot perpendicular to it. This places your shoulders and hips in a natural position pointing away. It forces you to twist your torso towards the target to aim. A closed stance will bring the bow and string closer to your body than an open stance. It will lessen any clearance between the string and your chest, elbow and forearm. Closed Stance Some people find they feel they have more stability and strength using a closed stance. A closed stance may be useful to increase the draw length of an archer. This is because extra extension of the arms is required as you draw the bow around yourself. Which Stance? The best way to select the foot position for you is to try each of the basic 4, Convert webpages or entire websites to PDF - Use PDFmyURL!
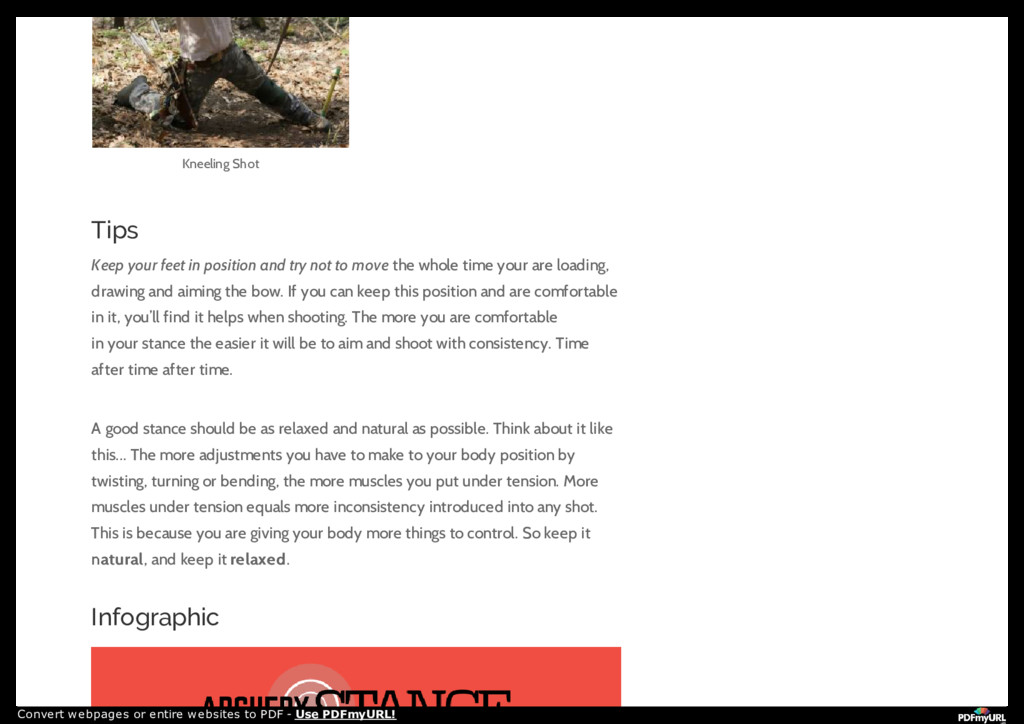
is to try each of the basic 4, square, open, natural and closed. Everyone is different and has a different bio-mechanical makeup. You must avoid incorrect stances altogether. Stances where your feet are too widely spread, or where both feet are too open or closed to the target. But don't let anyone tell you your foot position is 'wrong wrong' simply because it doesn't conform exactly to one of the 4 examples shown. Situational Stances Different eventualities will give rise to special situational stances. The feet may need to be close together in a hunters tree stand. You may need to crouch when hunting. As a 3D archer you may be taking a steep uphill or downhill shot and need to lower to one knee. In all these positions your hip position is critical. Hip position will determine your natural shoulder position. Convert webpages or entire websites to PDF - Use PDFmyURL!
not to move the whole time your are loading, drawing and aiming the bow. If you can keep this position and are comfortable in it, you’ll find it helps when shooting. The more you are comfortable in your stance the easier it will be to aim and shoot with consistency. Time after time after time. A good stance should be as relaxed and natural as possible. Think about it like this... The more adjustments you have to make to your body position by twisting, turning or bending, the more muscles you put under tension. More muscles under tension equals more inconsistency introduced into any shot. This is because you are giving your body more things to control. So keep it natural natural, and keep it relaxed relaxed. Infographic Convert webpages or entire websites to PDF - Use PDFmyURL!
the code below in the box below into the HTML of your page to show this infographic on your site. You're welcome! <p><a href='https://targetcrazy.com/archery/resources/proper-archery-form/'><img src='https://targetcrazy.com/img/ig-archery-stance.gif' alt='Archery Stance' width='750' border='0' /></a><br /><strong>Source: <a href='https://targetcrazy.com'>targetcrazy.com</a> </strong></p> Convert webpages or entire websites to PDF - Use PDFmyURL!
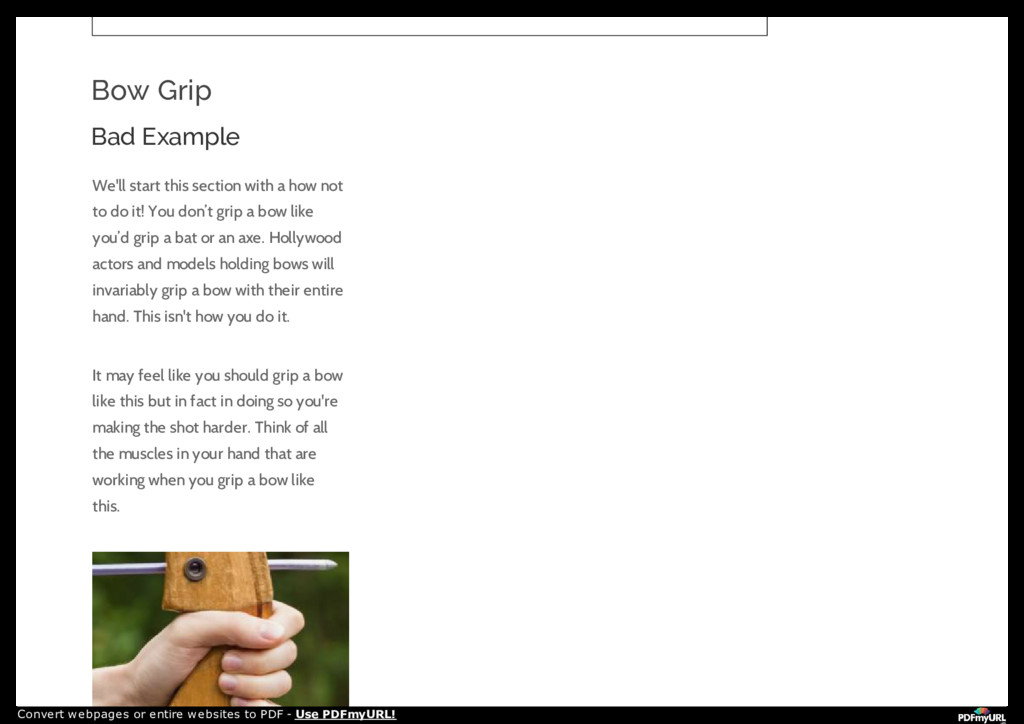
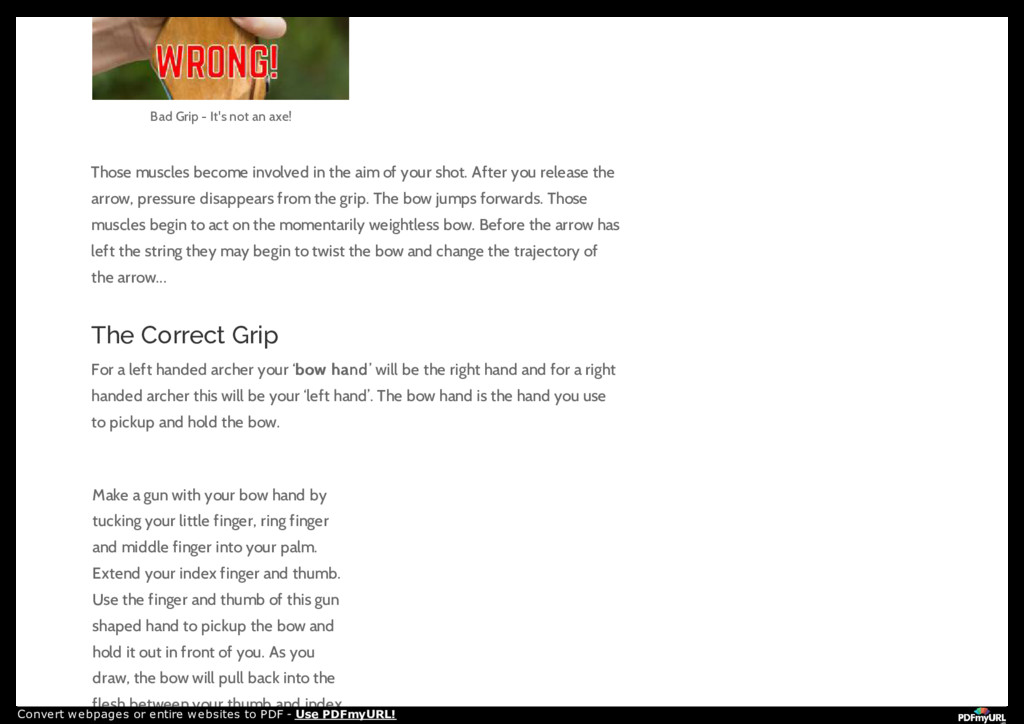
how not to do it! You don’t grip a bow like you’d grip a bat or an axe. Hollywood actors and models holding bows will invariably grip a bow with their entire hand. This isn't how you do it. It may feel like you should grip a bow like this but in fact in doing so you're making the shot harder. Think of all the muscles in your hand that are working when you grip a bow like this. Convert webpages or entire websites to PDF - Use PDFmyURL!
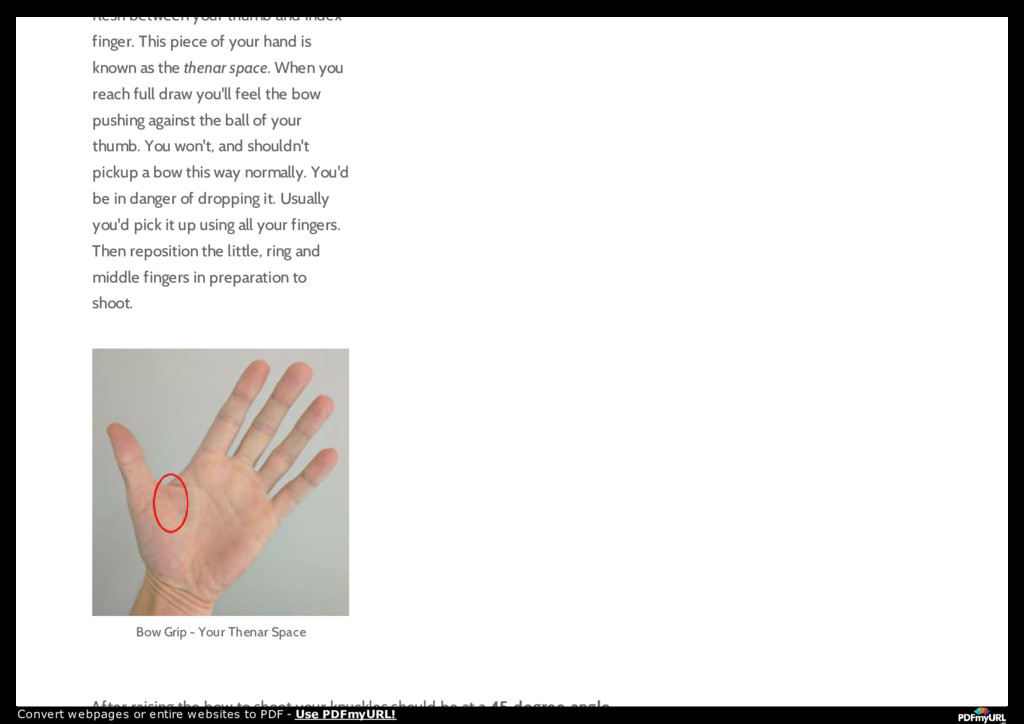
involved in the aim of your shot. After you release the arrow, pressure disappears from the grip. The bow jumps forwards. Those muscles begin to act on the momentarily weightless bow. Before the arrow has left the string they may begin to twist the bow and change the trajectory of the arrow... The Correct Grip For a left handed archer your ‘bow hand bow hand’ will be the right hand and for a right handed archer this will be your ‘left hand’. The bow hand is the hand you use to pickup and hold the bow. Make a gun with your bow hand by tucking your little finger, ring finger and middle finger into your palm. Extend your index finger and thumb. Use the finger and thumb of this gun shaped hand to pickup the bow and hold it out in front of you. As you draw, the bow will pull back into the flesh between your thumb and index Convert webpages or entire websites to PDF - Use PDFmyURL!
your hand is known as the thenar space. When you reach full draw you'll feel the bow pushing against the ball of your thumb. You won't, and shouldn't pickup a bow this way normally. You'd be in danger of dropping it. Usually you'd pick it up using all your fingers. Then reposition the little, ring and middle fingers in preparation to shoot. Bow Grip - Your Thenar Space After raising the bow to shoot your knuckles should be at a 45 degree angle 45 degree angle Convert webpages or entire websites to PDF - Use PDFmyURL!
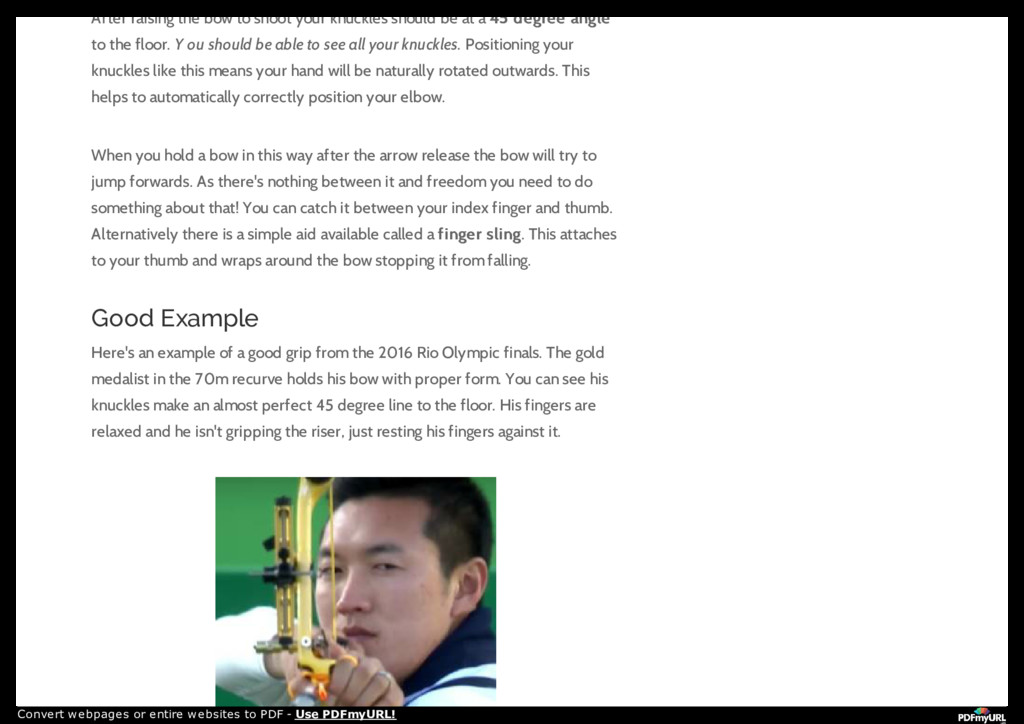
at a 45 degree angle 45 degree angle to the floor. Y ou should be able to see all your knuckles. Positioning your knuckles like this means your hand will be naturally rotated outwards. This helps to automatically correctly position your elbow. When you hold a bow in this way after the arrow release the bow will try to jump forwards. As there's nothing between it and freedom you need to do something about that! You can catch it between your index finger and thumb. Alternatively there is a simple aid available called a finger sling finger sling. This attaches to your thumb and wraps around the bow stopping it from falling. Good Example Here's an example of a good grip from the 2016 Rio Olympic finals. The gold medalist in the 70m recurve holds his bow with proper form. You can see his knuckles make an almost perfect 45 degree line to the floor. His fingers are relaxed and he isn't gripping the riser, just resting his fingers against it. Convert webpages or entire websites to PDF - Use PDFmyURL!
Don’t ever shoot a bow with the fingers of your bow hand open even to even to practice practice. This is a bad habit and if you ever want to hunt with a bow and shoot a sharpened broadhead you may just shoot off the top of your finger. Secondly shooting with your fingers open is actually using more muscles than with them in a relaxed position. The more muscles you use in a shot the more variables you introduce into the aim and the more inconsistent your shooting will be. The natural position for your fingers should be relaxed relaxed, they can be open and relaxed, just don't splay them ! You may find it easier to get your knuckles to the correct 45 degree position if you tuck your little, ring and middle fingers into the side of the riser. This will push your knuckles up towards the correct angle. Nocking Nock your arrow with the bow pointed down. Strings normally have either little brass rings or marks to show the nocking point (where an arrow should be nocked). Convert webpages or entire websites to PDF - Use PDFmyURL!
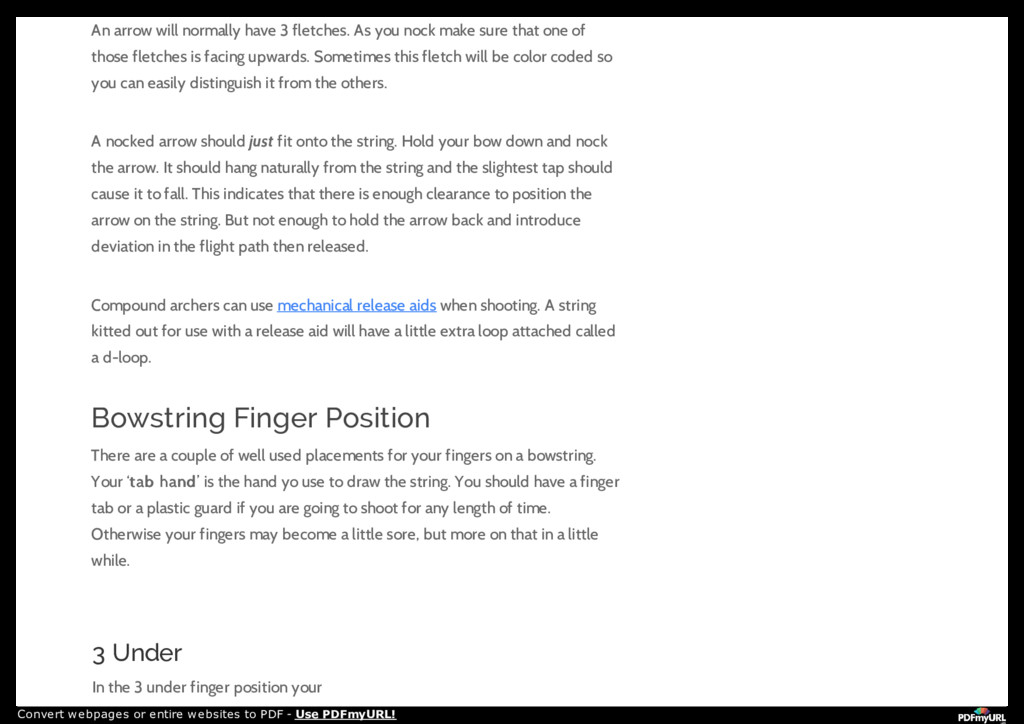
make sure that one of those fletches is facing upwards. Sometimes this fletch will be color coded so you can easily distinguish it from the others. A nocked arrow should just fit onto the string. Hold your bow down and nock the arrow. It should hang naturally from the string and the slightest tap should cause it to fall. This indicates that there is enough clearance to position the arrow on the string. But not enough to hold the arrow back and introduce deviation in the flight path then released. Compound archers can use mechanical release aids when shooting. A string kitted out for use with a release aid will have a little extra loop attached called a d-loop. Bowstring Finger Position There are a couple of well used placements for your fingers on a bowstring. Your ‘tab hand tab hand’ is the hand yo use to draw the string. You should have a finger tab or a plastic guard if you are going to shoot for any length of time. Otherwise your fingers may become a little sore, but more on that in a little while. 3 Under In the 3 under finger position your index finger, your middle and ring Convert webpages or entire websites to PDF - Use PDFmyURL!
the arrow. Your your little finger and thumb again just relax. The 3 under position can make it easier for beginners to get to grips with aiming the bow than 1 over 2 under. This is because this position makes it easier to elevate the arrow closer to the eye. Giving a better sight line down it when sighting using the tip. 3 under finger position 1 Over 2 Under Convert webpages or entire websites to PDF - Use PDFmyURL!
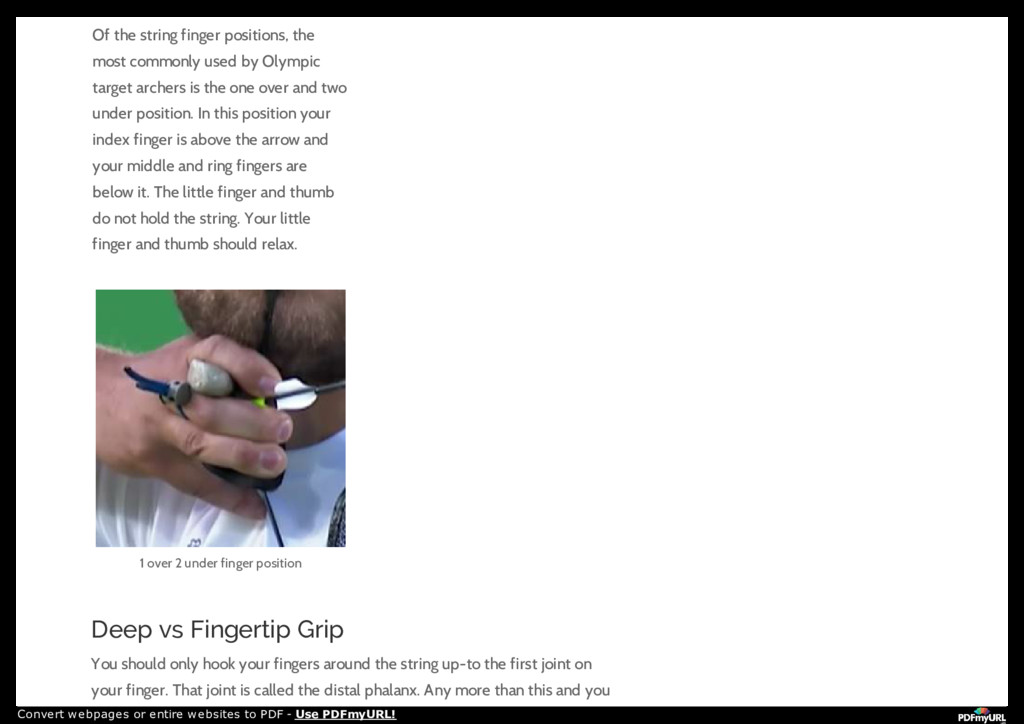
Olympic target archers is the one over and two under position. In this position your index finger is above the arrow and your middle and ring fingers are below it. The little finger and thumb do not hold the string. Your little finger and thumb should relax. 1 over 2 under finger position Deep vs Fingertip Grip You should only hook your fingers around the string up-to the first joint on your finger. That joint is called the distal phalanx. Any more than this and you Convert webpages or entire websites to PDF - Use PDFmyURL!
want to be able to see the knuckles on your tab hand. If you can you have curled your fingers too far round the string. Some people prefer to hold the string with more of a fingertip grip using less of their finger. This can be beneficial to accuracy as there is less of your finger to get out of the way of the string upon release. It does mean you to hold more tension in your fingers which can be counter productive to that aim. Aids Tabs and Gloves You can wear a special 3 fingered archery glove (our top picks here) to protect your fingers and hand. There are also devices call finger guards or 'tabs'. These only cover the necessary parts of the finger. More professionals tend to use tabs than gloves. Your preference may be to use nothing at all. This may depend on your draw weight and the size of your fingers. It is something you need to work out for yourself. Convert webpages or entire websites to PDF - Use PDFmyURL!
shooters and hunters prefer a mechanical release to their fingers. This increases accuracy. A mechanical release attaches to your wrist and hooks onto a loop on the string the string before the draw. The d- loop. A trigger is then used to release both string and the arrow. Recurve shooters can use release aids too. They don’t do this often because they aren't allowed in their competition rules. Tips Don’t rush your finger placement. If you aren’t using a mechanical release look at your fingers each time as you place them on the string. This will help ensure you get it right and become part of your shot preparation routine. If you are holding the string and not a release aid, there should be a small amount of space between your fingers and the arrow. You don't want your fingers interfering with the arrow trajectory. Tabs with finger separators are available to help with this. Drawing You're standing correctly, gripping the bow correctly and it is pointed down to the floor. Your fingers are positioned correctly on the string, now you need to draw, aim and fire. Lets cover the draw in more detail but before we do... Convert webpages or entire websites to PDF - Use PDFmyURL!
should be straight and not bent and should remain so until after the release. You don't need to fully lock out your elbow, especially if you are someone with overly bendy joints. This may cause your elbow to stick out and may put it in the path of the bowstring. It hurts when you get hit by the bowstring! The bow arm needs to be straight, but not rigid or tense and certainly not bent. If you bend your bow arm you aren't going to be consistent. A bent arm isn't as strong as a straight arm and will give you an inconsistent draw length. Elbow Rotation Grip the bow with your bow hand, making sure your knuckles are all visible to you and in a 40 to 45 degree line to the floor. This will help to position your Mock Shots / Dry Firing Before we get into proper archery form and start discussing technique that may lead you to want to pick up and bow and try things out. Please, please NEVER NEVER shoot your bow without an arrow. You can damage the bow and it may injure you. If you have a bow, it's fine to pickup and draw, don't release unless you have an arrow on the rest. If you don't have a bow, use your arms and visualize, that in itself is a good practice drill! Convert webpages or entire websites to PDF - Use PDFmyURL!
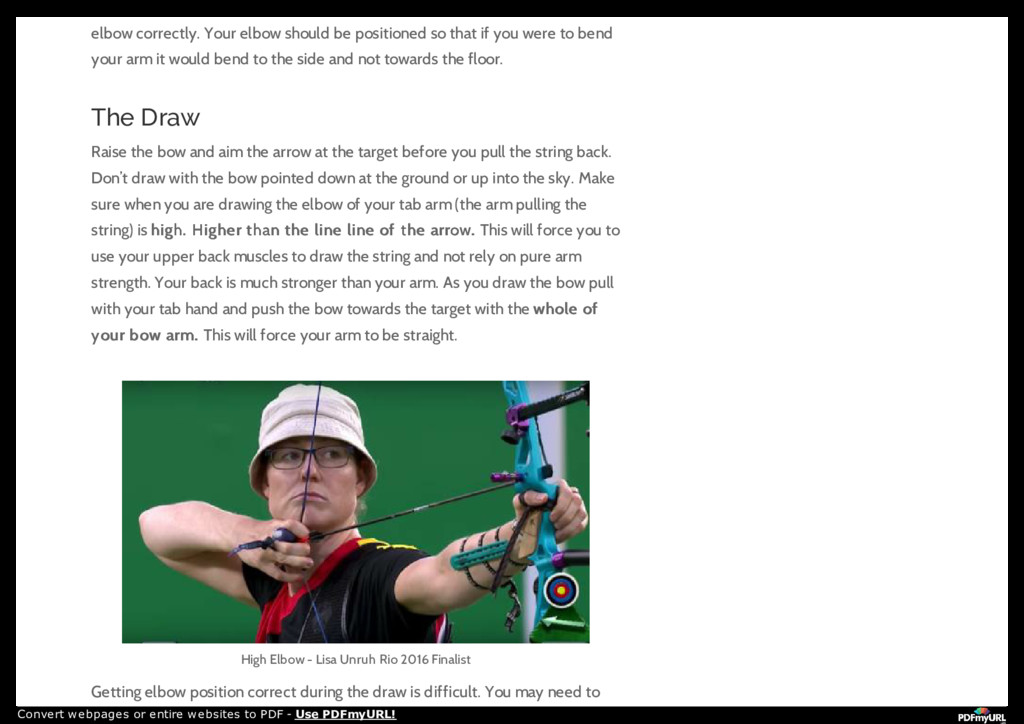
you were to bend your arm it would bend to the side and not towards the floor. The Draw Raise the bow and aim the arrow at the target before you pull the string back. Don’t draw with the bow pointed down at the ground or up into the sky. Make sure when you are drawing the elbow of your tab arm (the arm pulling the string) is high. Higher than the line line of the arrow. high. Higher than the line line of the arrow. This will force you to use your upper back muscles to draw the string and not rely on pure arm strength. Your back is much stronger than your arm. As you draw the bow pull with your tab hand and push the bow towards the target with the whole of whole of your bow arm. your bow arm. This will force your arm to be straight. High Elbow - Lisa Unruh Rio 2016 Finalist Getting elbow position correct during the draw is difficult. You may need to Convert webpages or entire websites to PDF - Use PDFmyURL!
a mirror a few times to check your form. You have to push with your bow arm and pull with your tab hand. You should be able to both push and pull without overly focusing on one or the other. You may have pusher focus pusher focus or puller focus puller focus. Which do you think? Try a few sessions at the range focusing on either the pulling or pushing aspect of your draw. Then switch your focus to the other aspect. A good archer has good push and pull but may only concentrate on one or the other during the process. Your drawing motion should be smooth. You can speed up the initial part of the draw. Then slow it down when you near full draw, to allow you to anchor consistently. Don't move your head or your body during the draw. A compound bow will have a backstop meaning that it can be drawn back only to a fixed point. It then won’t allow any further draw. For a compound shot, draw to the full extent of the bow before finding your anchor point. For a recurve bow you should draw back naturally into your anchor point. Aids Clickers Competitive and experienced recurve archers may use a device called a Convert webpages or entire websites to PDF - Use PDFmyURL!
a clicker. This simply clicks when an arrow is drawn back to the best length for that bow. One of the dangers with a clicker is that you can become distracted. Possibly forcing yourself to shoot early just because you hear it click. Mechanical Releases If you are using a mechanical release, make SURE you have your finger behind the trigger until you are ready to shoot. You don’t want the bow to shoot accidentally before you’ve aimed. Tips If you aren’t comfortably able to draw the bow back with the arrow pointed at the target, your draw weight is too high. Try lowering it. Don't let your shoulder creep up towards your ear. Keep it down, but not too low. Place it in a natural position. Practice pushing with your whole bow arm by placing your palm against a wall and pushing with your hand. Then your wrist. Now push with your forearm, your triceps and then your whole arm whole arm. Remember that whole arm feeling, that's how you want to be pushing. Anchor Points Your anchor points anchor points are the points to which you pull back the string to anchor it in place ready to aim your shot. An anchor point is a point of reference, or a Convert webpages or entire websites to PDF - Use PDFmyURL!
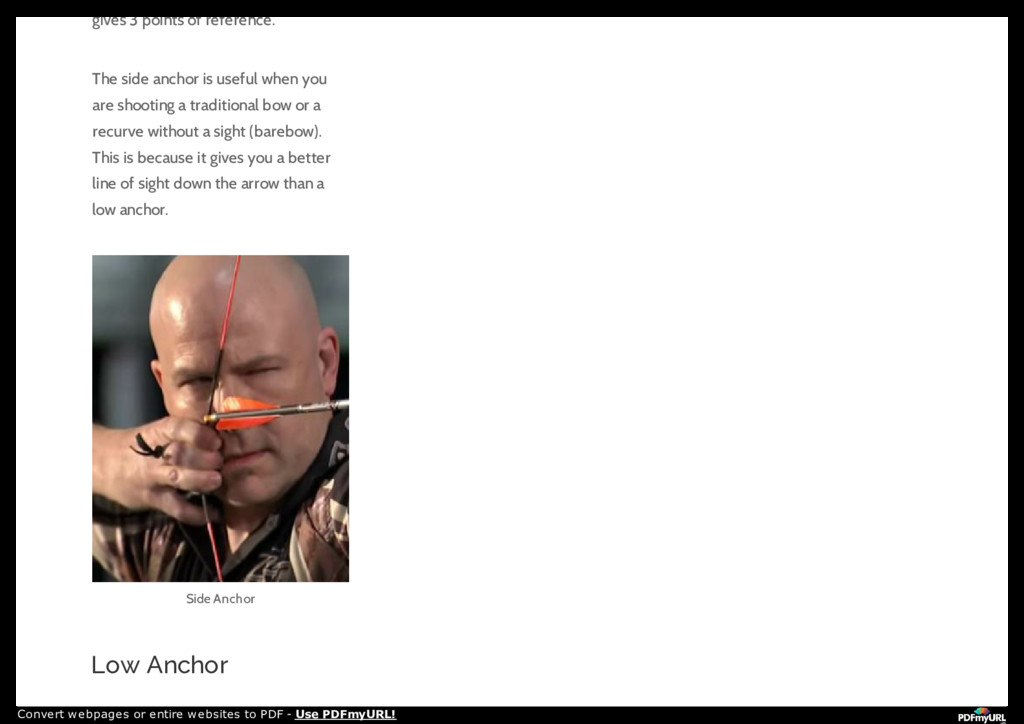
point is a point of reference, or a touch point on your face than you can feel. Somewhere that allows you to tell if the string is not aligned the way it needs to be. The way it always is. You need to have several of these touch points. Nose, cheek, lips, mouth, chin, neck they're all good candidates. More points of reference means more consistency. Different people use different anchor points. There are normally differences between the anchor points of traditional or barebow, recurve and compound archers. This can be due to the size of the bow, length of the draw and mechanical aids that may or may not be in use. Side Anchor One of the first anchor points you are taught when you go to an archery range will most likely be the side anchor. This involves drawing back the tab hand to the side of the face and tucking the tip of the index finger into the corner of your mouth. Your top finger then rests under your cheekbone and your thumb can tuck at the back of your jawbone. This gives 3 points of reference. Convert webpages or entire websites to PDF - Use PDFmyURL!
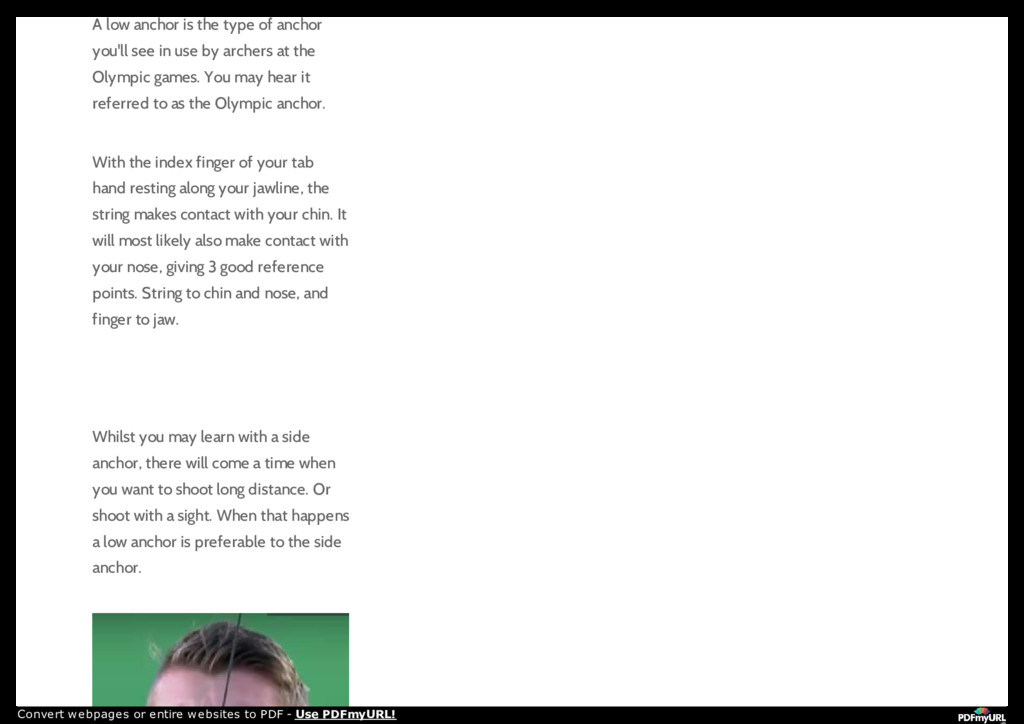
when you are shooting a traditional bow or a recurve without a sight (barebow). This is because it gives you a better line of sight down the arrow than a low anchor. Side Anchor Low Anchor A low anchor is the type of anchor Convert webpages or entire websites to PDF - Use PDFmyURL!
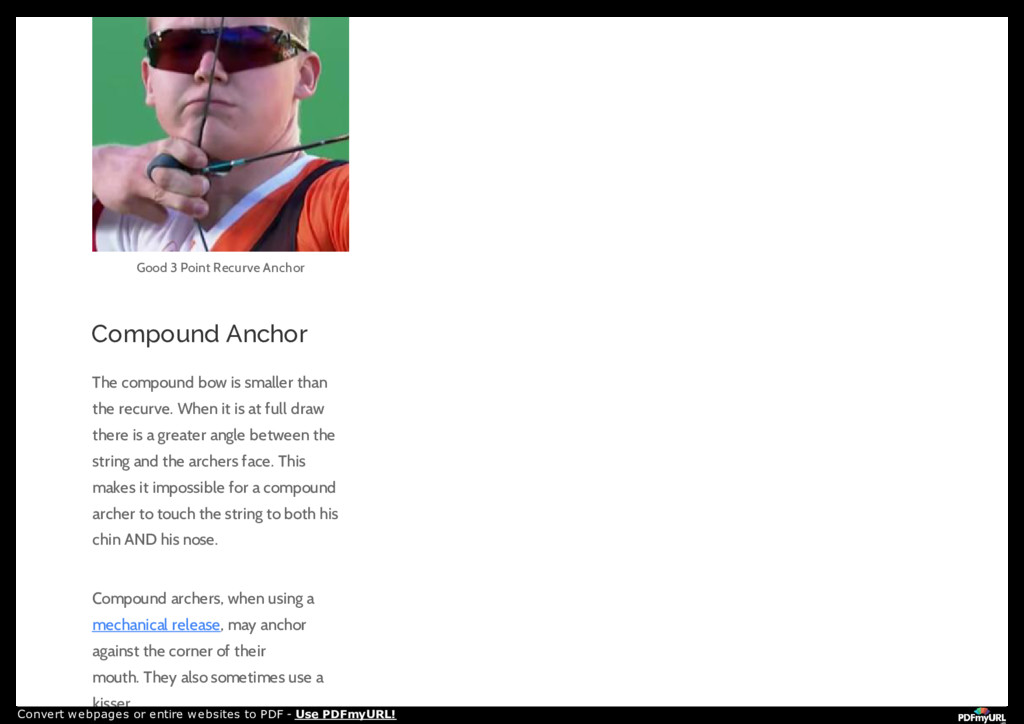
in use by archers at the Olympic games. You may hear it referred to as the Olympic anchor. With the index finger of your tab hand resting along your jawline, the string makes contact with your chin. It will most likely also make contact with your nose, giving 3 good reference points. String to chin and nose, and finger to jaw. Whilst you may learn with a side anchor, there will come a time when you want to shoot long distance. Or shoot with a sight. When that happens a low anchor is preferable to the side anchor. Convert webpages or entire websites to PDF - Use PDFmyURL!
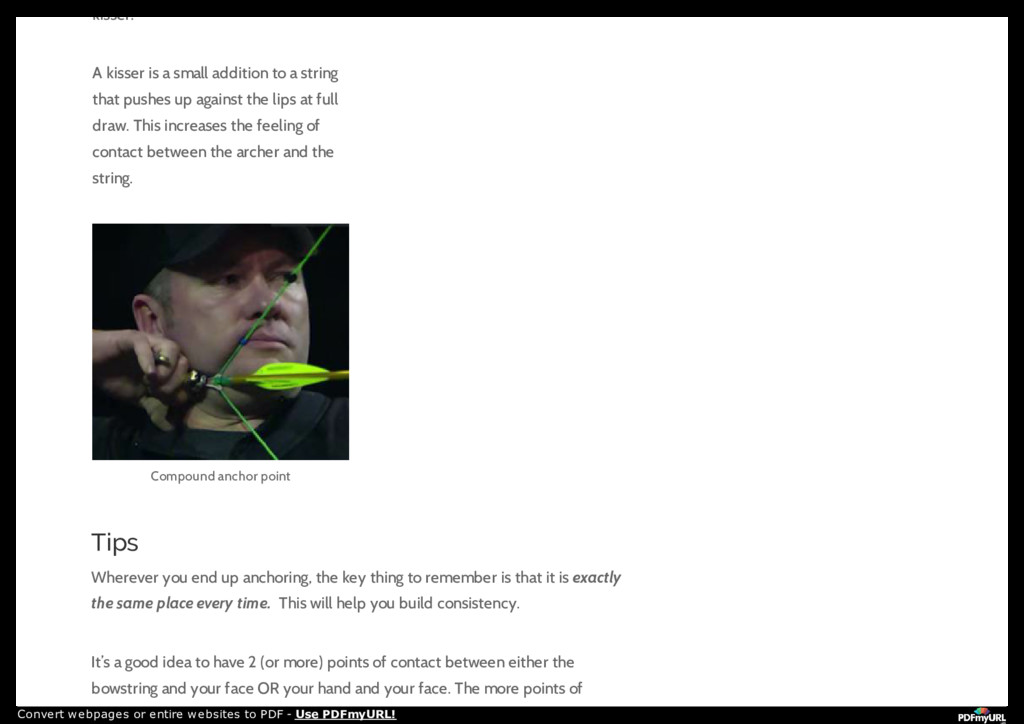
is smaller than the recurve. When it is at full draw there is a greater angle between the string and the archers face. This makes it impossible for a compound archer to touch the string to both his chin AND his nose. Compound archers, when using a mechanical release, may anchor against the corner of their mouth. They also sometimes use a kisser. Convert webpages or entire websites to PDF - Use PDFmyURL!
that pushes up against the lips at full draw. This increases the feeling of contact between the archer and the string. Compound anchor point Tips Wherever you end up anchoring, the key thing to remember is that it is exactly the same place every time. This will help you build consistency. It’s a good idea to have 2 (or more) points of contact between either the bowstring and your face OR your hand and your face. The more points of reference the more chances of a good repeatable anchor point. Convert webpages or entire websites to PDF - Use PDFmyURL!
Aiming If you aren't using a sight you'll need to use the tip of your arrow as a guide. If you are you'll have a pin in the sight to help you. Generally you need to aim an arrow slightly above where you want it to hit as arrows drop in flight. Now this may seem like a silly concept, but I'd encourage you NOT to actively aim. Don't try to continually force your aim onto the target, doing that will cause your aim to jump all over the place. You know where you want the arrow to go so just encourage your body to gently move where you want the arrow to go. If you've done this correctly you will see your sight (our guide to sights) float around the target. It will eventually align correctly. This is the point for arrow release. Keep your head straight and resist the urge to tilt it forward to aim. You’ll want to aim with your dominant eye, and close the other eye. Tips Don't stop pulling. Pull all the way through the aim. Don't put your muscles into a holding configuration this will tire them more quickly. Convert webpages or entire websites to PDF - Use PDFmyURL!
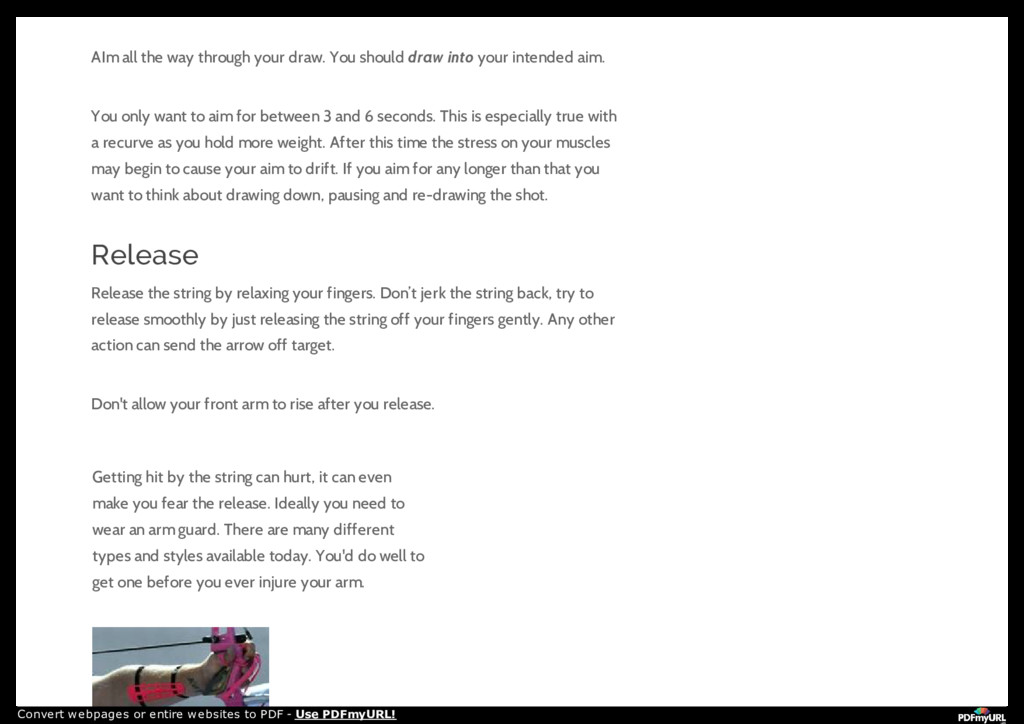
into your intended aim. You only want to aim for between 3 and 6 seconds. This is especially true with a recurve as you hold more weight. After this time the stress on your muscles may begin to cause your aim to drift. If you aim for any longer than that you want to think about drawing down, pausing and re-drawing the shot. Release Release the string by relaxing your fingers. Don’t jerk the string back, try to release smoothly by just releasing the string off your fingers gently. Any other action can send the arrow off target. Don't allow your front arm to rise after you release. Getting hit by the string can hurt, it can even make you fear the release. Ideally you need to wear an arm guard. There are many different types and styles available today. You'd do well to get one before you ever injure your arm. Convert webpages or entire websites to PDF - Use PDFmyURL!
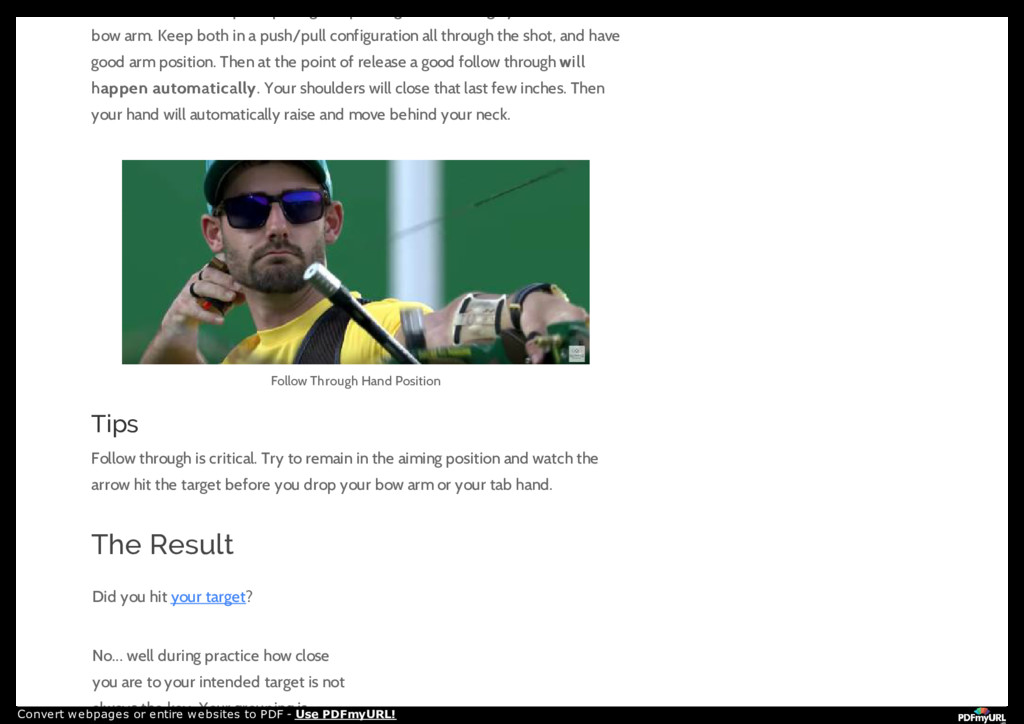
that you can't hit a target (with certain bows) by aiming directly at it. This is a subject for another article, but as you release the string it will move slightly around your fingers and then correct. The sheer weight of force imparted on the arrow will cause the arrow to flex. A release around the fingers only adds to the initial deflection of the arrow. Archers use mechanical aids for this reason. With a mechanical release aid there is no finger to overcome. This helps to mitigate the deflection introduction into the arrow flight. Tips You may find this difficult to achieve, but it is best to release at the same same point in the breathing cycle point in the breathing cycle each time. This makes sure your body is in exactly the same position each time you release. Follow Through After releasing the string your tab hand should finish behind your neck and not drop. Your bow will drop forwards if held correctly. Everything else should remain the same as if you were still aiming. You should never stop the pulling and pushing action through your back and Convert webpages or entire websites to PDF - Use PDFmyURL!
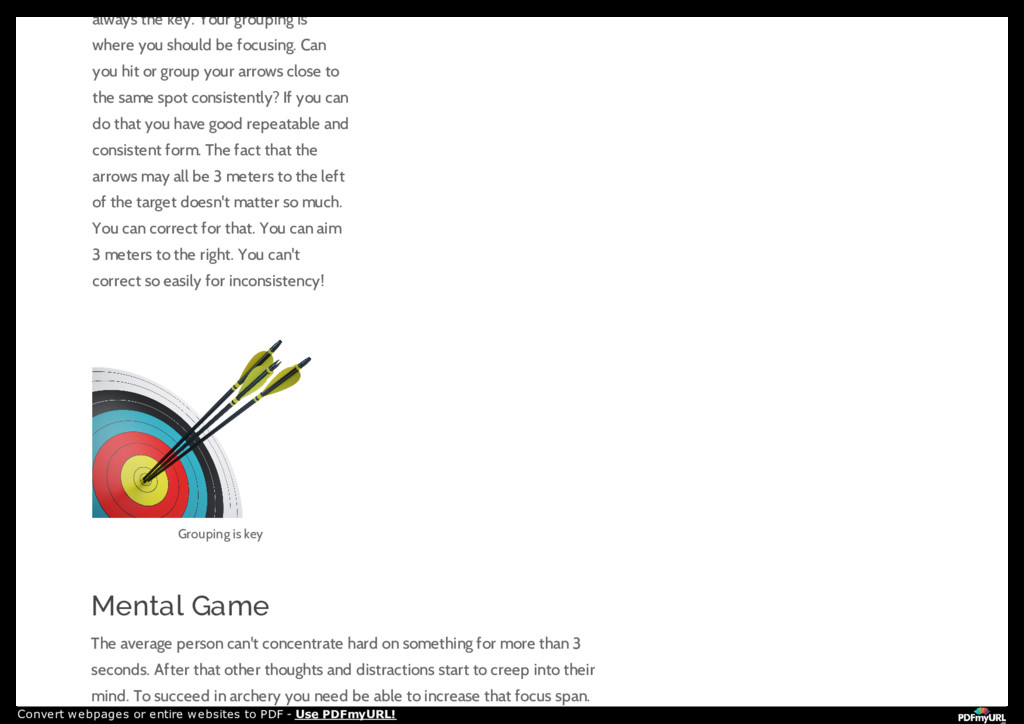
your back and bow arm. Keep both in a push/pull configuration all through the shot, and have good arm position. Then at the point of release a good follow through will will happen automatically happen automatically. Your shoulders will close that last few inches. Then your hand will automatically raise and move behind your neck. Follow Through Hand Position Tips Follow through is critical. Try to remain in the aiming position and watch the arrow hit the target before you drop your bow arm or your tab hand. The Result Did you hit your target? No... well during practice how close you are to your intended target is not always the key. Your grouping is Convert webpages or entire websites to PDF - Use PDFmyURL!
focusing. Can you hit or group your arrows close to the same spot consistently? If you can do that you have good repeatable and consistent form. The fact that the arrows may all be 3 meters to the left of the target doesn't matter so much. You can correct for that. You can aim 3 meters to the right. You can't correct so easily for inconsistency! Grouping is key Mental Game The average person can't concentrate hard on something for more than 3 seconds. After that other thoughts and distractions start to creep into their mind. To succeed in archery you need be able to increase that focus span. Convert webpages or entire websites to PDF - Use PDFmyURL!
From draw to aim to release. A good way to do this is get yourself into a meditative state whilst you are taking your shot. Be mindful of what is happening around you at that second. Feel the bow in your hand, the air in your lungs, and don't over analyse what is going on. Back To Basics If you've lost your mojo the best thing you can do is revert back to basics. Lower your draw weight and move the target closer to you. Take some time to just enjoy shooting for the fun of shooting. Remember what it feels like to make a good shot then begin to move back up the scale when you are ready. Positive Mental Reinforcement Shoot arrows in your mind. See yourself hitting the target whilst sitting down at work or on your lunch break. If you can do this (and don't look odd), actually carry out the motions of the shot without a bow in your hands. Every action you perform comes from your mind first. If your mind is well practiced in good form and hitting the target you'll find your body follows. When you talk to yourself, tell yourself you can can and will. will. Never tell yourself you that you shouldn't or can't. Develop Your Own Style Take any group of archers and they will all have a slightly different form and style. There is no 'best style' best style' that you absolutely have to adhere to. Convert webpages or entire websites to PDF - Use PDFmyURL!
absolutely have to adhere to. Hopefully in this article I've set out the basics and given you a good idea of what good archery form is. It's key for you to develop your own style that is repeatable time and time again. Draw, hold, follow through, draw, hold, follow through. Practice and repeat your style over and over again. Don't copy other people develop a style which is comfortable to you, get your flow and relax into your shot. About the Author David James Hi there! I'm Dave, the founder of targetcrazy.com. I'm a passionate bowman and a fan of all target sports in general. I created this site to share my knowledge with you and help you make more informed choices! Please let me know what you think of my work, comment, like, rant, speak up! Convert webpages or entire websites to PDF - Use PDFmyURL!
Review Mar 27, 2017 What’s the Best Survival Bow in 2017? Feb 08, 2017 What bow types are available to the archer and hunter? Feb 09, 2017 Help! Do I need a left or right handed bow? Popular posts About | Contact | Write For Us | Privacy Policy | RSS Recurve Bows Survival Bows Archery Resources Archery Resources Convert webpages or entire websites to PDF - Use PDFmyURL!
are a participant in the Amazon Services LLC Associates Program, an affiliate advertising program designed to provide a means for sites to earn advertising fees by advertising and linking to Amazon.com and affiliated sites. Amazon and the Amazon logo are trademarks of Amazon.com, Inc. or its affiliates. Convert webpages or entire websites to PDF - Use PDFmyURL!