Upgrade to Pro — share decks privately, control downloads, hide ads and more …

《嵌入式系统底层开发》实验2-Linux嵌入式开发-Linux命令及开发板使用

kinggolzu
November 26, 2015

 《嵌入式系统底层开发》实验2-Linux嵌入式开发-Linux命令及开发板使用

kinggolzu

November 26, 2015
Tweet

More Decks by kinggolzu

Other Decks in Programming

Transcript

  1. 系统制作以及SD启动方法 • 基本步骤如下: • 1. 准备工作,准备硬件工具 • 2. 下载 Arduino开发环境和开发板固件

    • 3. 连接开发板 • 4. 安装驱动和其它软件 • 5. 启动Arduino IDE 应用程序 • 6. 更新开发板固件 • 7. 选择开发板 • 8 选择端口 • 9.上传程序 • 10. 从SD 卡启动开发板 (必须WiFi支持)
  2. 下载 Arduino开发环境和开发板固件 • 1.下载最新IDE和固件 • https://communities.intel.com/community/makers/drivers • https://communities.intel.com/docs/DOC-22226 • 2.当解压压缩包时:由于文件名太长不能提取目录,推荐使用一个可以解压长文件名的

    工具 (for example,7-zip from http://www.7-zip.org/)。 • 3.特定的开发环境包,包含了串行外设接口(SPI)闪存更新: • − Intel_Galileo_Arduino_SW_1.5.3_on_Linux32bit_v0.7.5.tgz (72.2 MB) • − Intel_Galileo_Arduino_SW_1.5.3_on_Linux64bit_v0.7.5.tgz (73.5 MB) • − Intel_Galileo_Arduino_SW_1.5.3_on_MacOSX_v0.7.5.zip (54.3 MB) • − Intel_Galileo_Arduino_SW_1.5.3_on_Windows_v0.7.5.zip (104 MB) • 4.从SD卡启动开发板的文件(需WIFI支持) • − LINUX_IMAGE_FOR_SD_Intel_Galileo_v0.7.5.7z (36.7 MB) • Board Support Package (BSP) sources: • − Board_Support_Package_Sources_for_Intel_Quark_v0.7.5.7z (3.2 MB) • 5.BSP资源包括Yocto存档 • − Board_Support_Package_Sources_for_Intel_Quark_v0.7.5_full_yocto_archive.tar.gz (925 MB)
  3. 搭建开发环境 • Linux*下安装: • 1. 在根目录用相应的命令提取安装包 • tar -zxvf ~

    • 2. 避免干扰IDE,必须禁用调制解调器管 理器,精确的命令将依赖Linux的分配 • For example, the command, sudo apt-get remove modemmanager may work. • 3. 解压包将被下载到相同的目录,通过执 行。/adunino来启动IDE •
  4. 建立Galileo Linux系统的镜像 • 1.下载"Board Support Package Sources for Intel Quark"

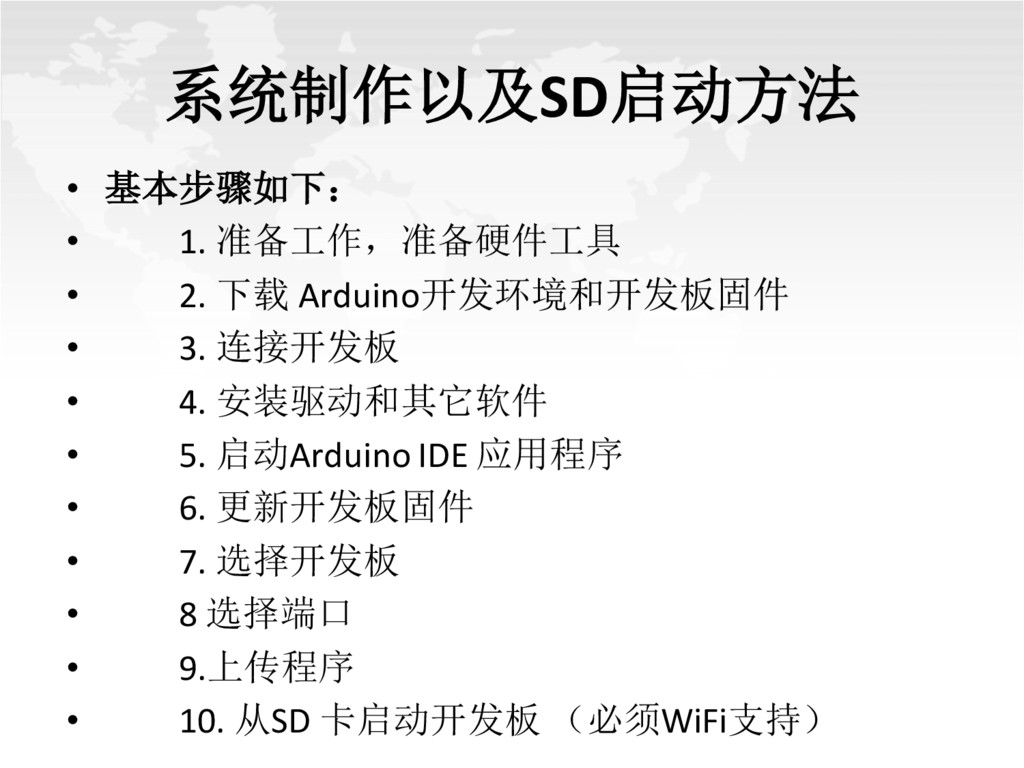
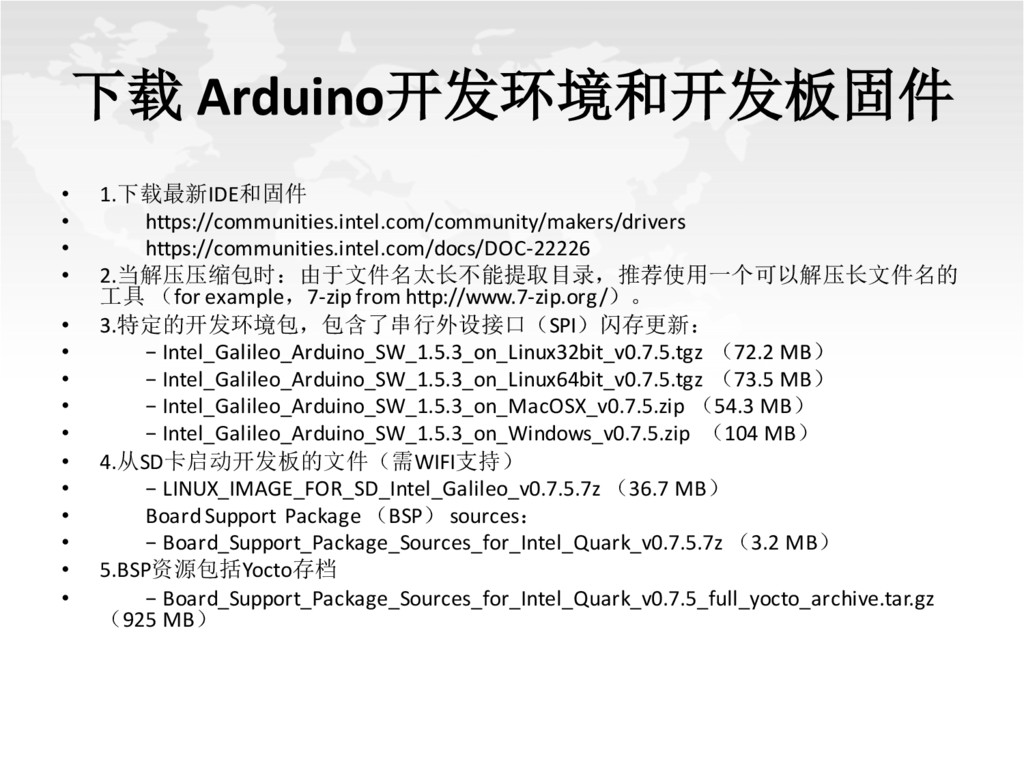
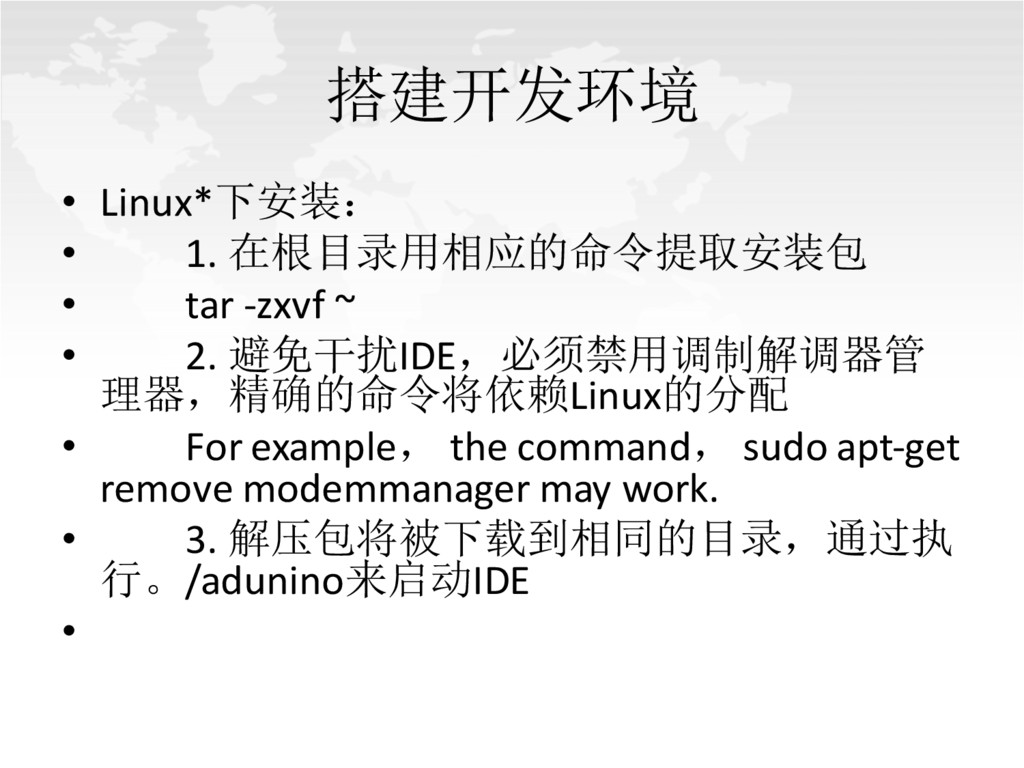
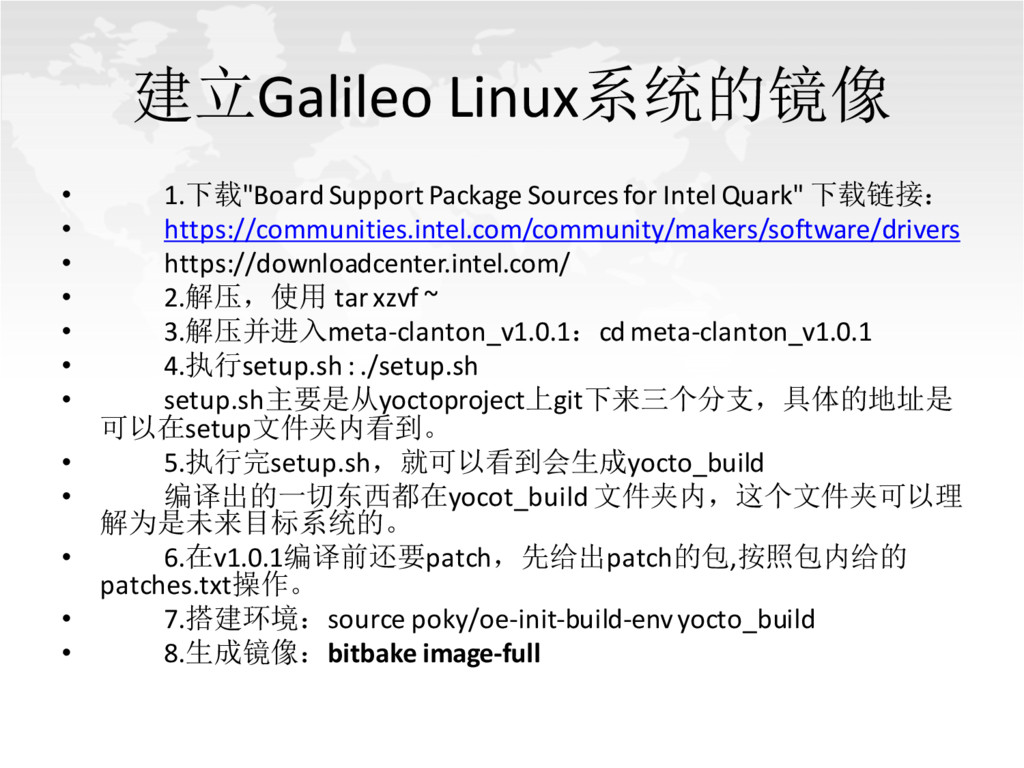
    下载链接: • https://communities.intel.com/community/makers/software/drivers • https://downloadcenter.intel.com/ • 2.解压,使用 tar xzvf ~ • 3.解压并进入meta-clanton_v1.0.1:cd meta-clanton_v1.0.1 • 4.执行setup.sh : ./setup.sh • setup.sh主要是从yoctoproject上git下来三个分支,具体的地址是 可以在setup文件夹内看到。 • 5.执行完setup.sh,就可以看到会生成yocto_build • 编译出的一切东西都在yocot_build 文件夹内,这个文件夹可以理 解为是未来目标系统的。 • 6.在v1.0.1编译前还要patch,先给出patch的包,按照包内给的 patches.txt操作。 • 7.搭建环境:source poky/oe-init-build-env yocto_build • 8.生成镜像:bitbake image-full
  5. SD卡启动 • (1)将SD卡格式化成 FAT 或 FAT32,SD卡小于32G • 需要在SD上增加一个启动分区。 在PC上执行如下步骤: •

    用管理员权限打开 cmd.exe • Run diskpart.exe 运行如下命令 • select vol <a> ; (where <a> = the drive letter of the SD card) • clean; • create part primary; • active; • format quick label=“BOOTME”; • exit • (2)拷贝复制bzImage、core-image-minimal-initramfs-clanton.cpio.gz、 image-full-galileo-clanton.ext3、boot到SD卡中。 • (3) 把SD卡插入伽利略板子,接上5V电源。观察板子正面左下角的SD LED灯,是否闪烁。