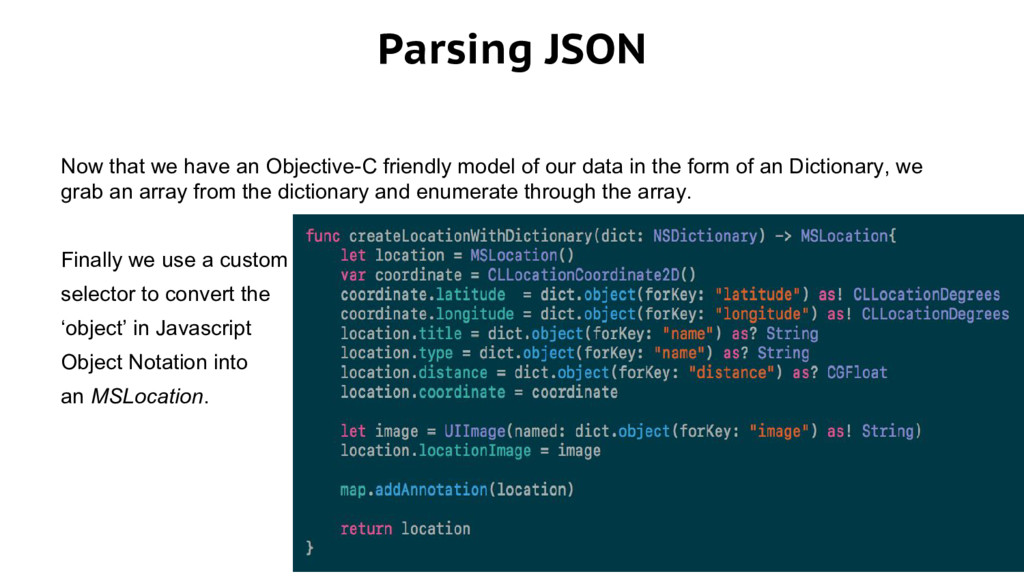
of our data in the form of an Dictionary, we grab an array from the dictionary and enumerate through the array. Finally we use a custom selector to convert the ‘object’ in Javascript Object Notation into an MSLocation.
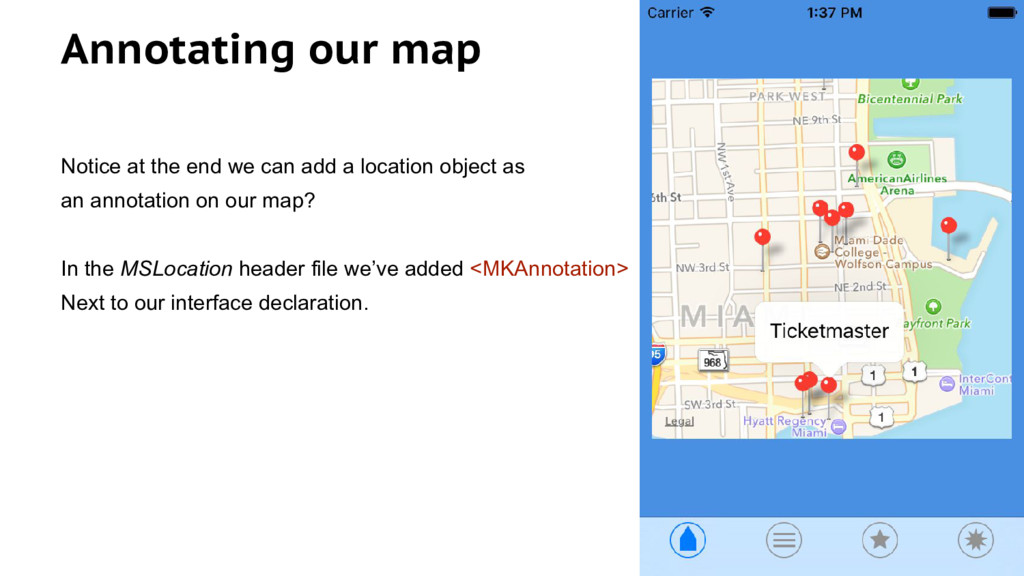
MKAnnotaion protocol. So as long as MSLocation follows certain rules (in this case setting a coordinate struct). The map will drop pins based on the coordinates that we set, and, if you tap on the pin, display the title string that we set.
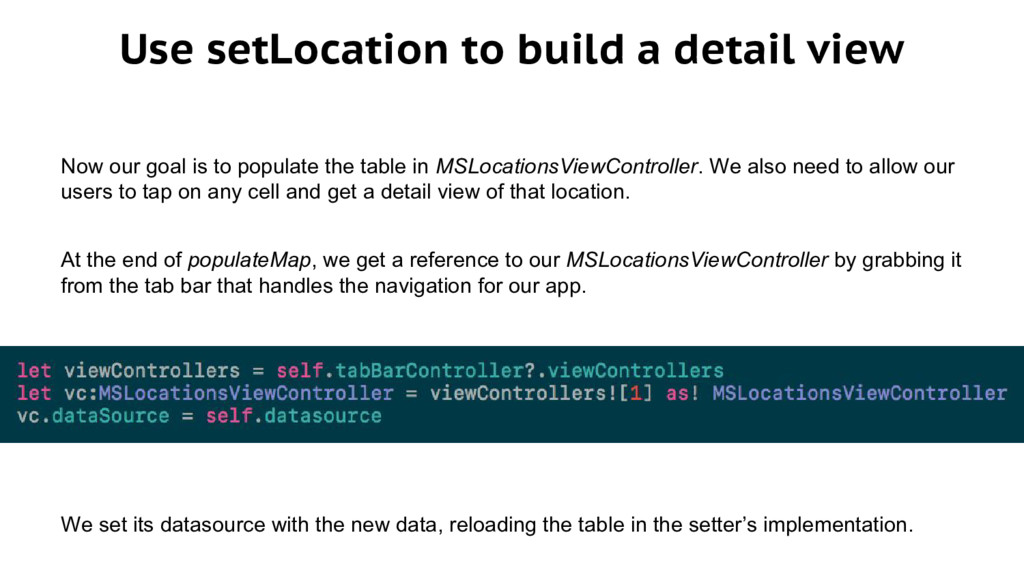
is to populate the table in MSLocationsViewController. We also need to allow our users to tap on any cell and get a detail view of that location. At the end of populateMap, we get a reference to our MSLocationsViewController by grabbing it from the tab bar that handles the navigation for our app. We set its datasource with the new data, reloading the table in the setter’s implementation.
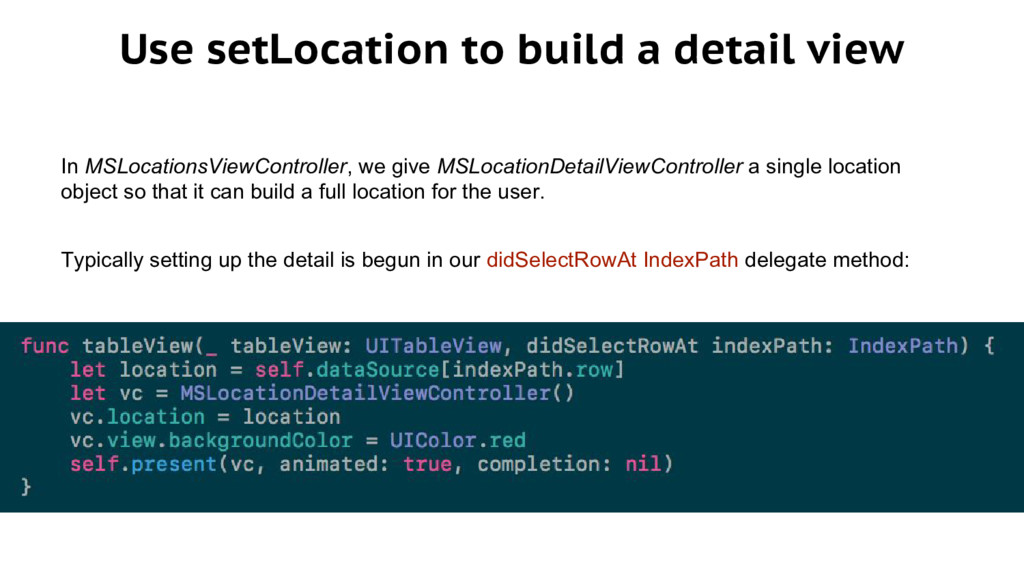
give MSLocationDetailViewController a single location object so that it can build a full location for the user. Typically setting up the detail is begun in our didSelectRowAt IndexPath delegate method:
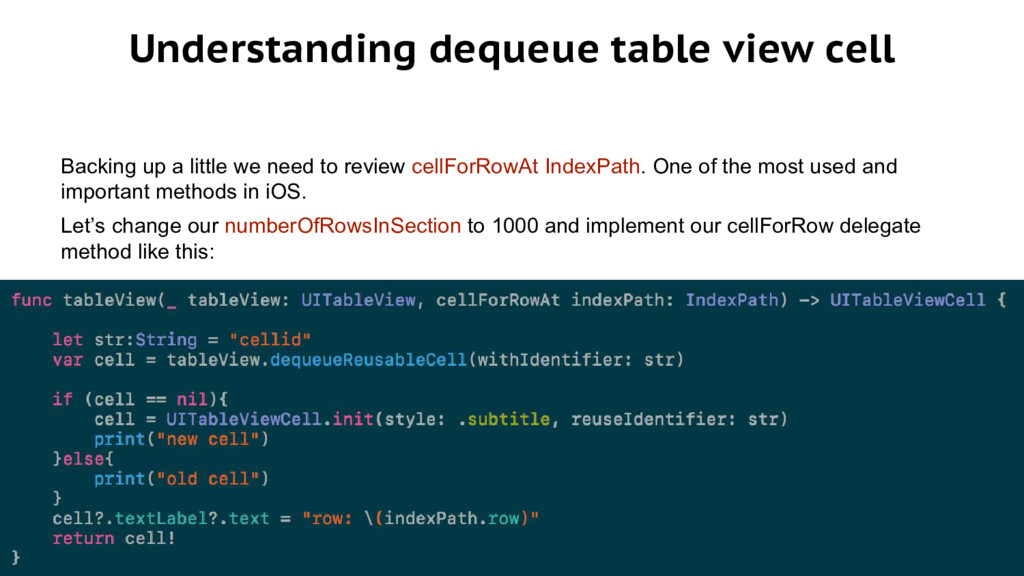
need to review cellForRowAt IndexPath. One of the most used and important methods in iOS. Let’s change our numberOfRowsInSection to 1000 and implement our cellForRow delegate method like this:
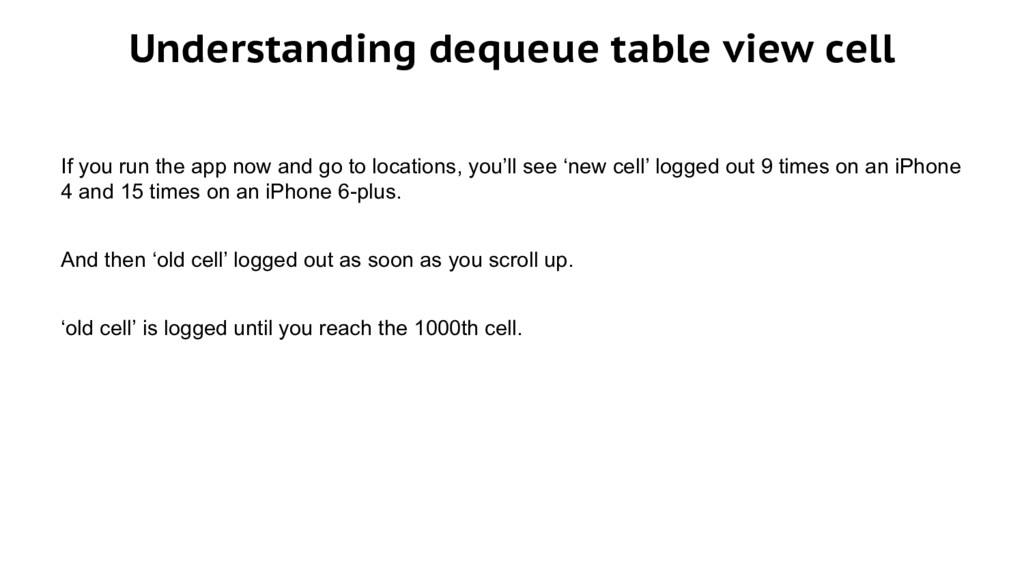
now and go to locations, you’ll see ‘new cell’ logged out 9 times on an iPhone 4 and 15 times on an iPhone 6-plus. And then ‘old cell’ logged out as soon as you scroll up. ‘old cell’ is logged until you reach the 1000th cell.
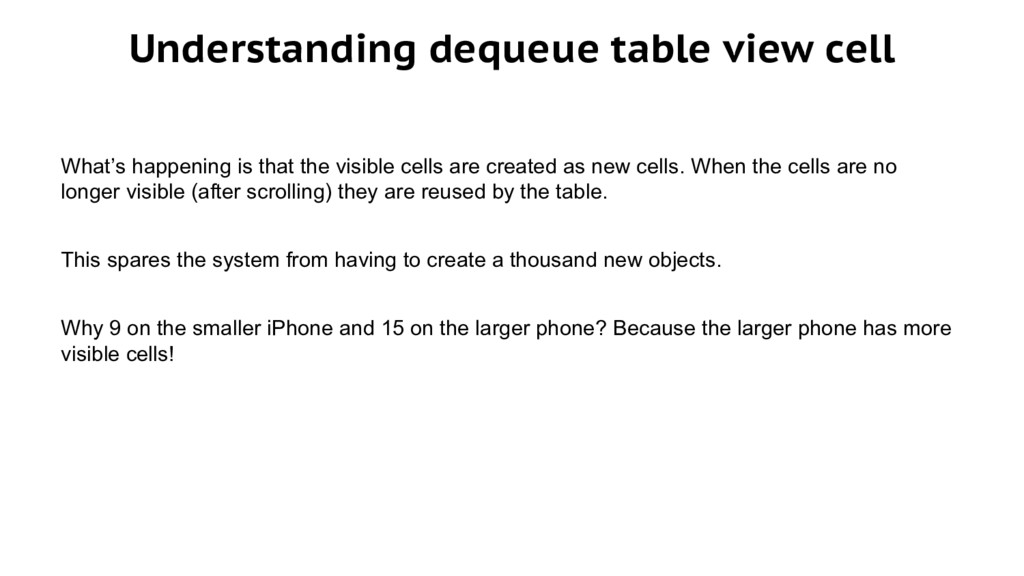
visible cells are created as new cells. When the cells are no longer visible (after scrolling) they are reused by the table. This spares the system from having to create a thousand new objects. Why 9 on the smaller iPhone and 15 on the larger phone? Because the larger phone has more visible cells!
the dequeueReusableCell instance method an identifier. The identifier tells the table view that we want the same type of cell to always be reused. A “cellid” cell in this case. If you had more than one TYPE of cell on your table, something besides a cell id’d as “cellid”, you would have to create another UITableViewCell object and give it a different identifier.
a single location object so that it can build a full location for the user. Upon tap, we call present(:, : , :) on our current view controller which will cause the detail view to present itself from the bottom of the device. (Make sure ‘animated’ is set to true).