Upgrade to Pro — share decks privately, control downloads, hide ads and more …

Get rid of controllers in angular 1.5.x start u...

Get rid of controllers in angular 1.5.x start using component directives

We can now build an AngularJS 1.5.x application by replacing controllers with components. That way we can prepare even better our old applications for their upgrade to Angular 2 and its components ways.

Avatar for Fakiolas Marios

Fakiolas Marios

February 28, 2016
Tweet

More Decks by Fakiolas Marios

Other Decks in Programming

Transcript

  1. Get rid of controllers in AngularJS 1.5.x Start using component

    directives Fakiolas Marios - [email protected] / @fakiolinho Frontend Developer at mist.io, creator of angularjs-recipes.com
  2. What are component directives in AngularJS 1.5 ? As of

    AngularJS 1.5.x release a new type of directives was introduced. These are component directives. A component directive is a component with directives flavor. This is a huge step which brings us closer to components logic even in AngularJS 1.5.x We can now build an AngularJS 1.5.x application by replacing controllers with components. So we can prepare even better our old applications for their upgrade to Angular 2 and its components ways.
  3. Let’s create a simple component directive // Create it angular

    .module('myApp') .component('userGreeting', { bindings: { user: '=' }, controller: function() { var self = this; self.welcome = 'Welcome ' + self.user.name + '!'; }, template: '<h1>{{$ctrl.welcome}}</h1>' }); // Use it <user-greeting user="{name: 'John Doe'}"></user-greeting> <user-greeting user="{name: 'Jane Doe'}"></user-greeting>
  4. Analyze a simple component directive name This is the name

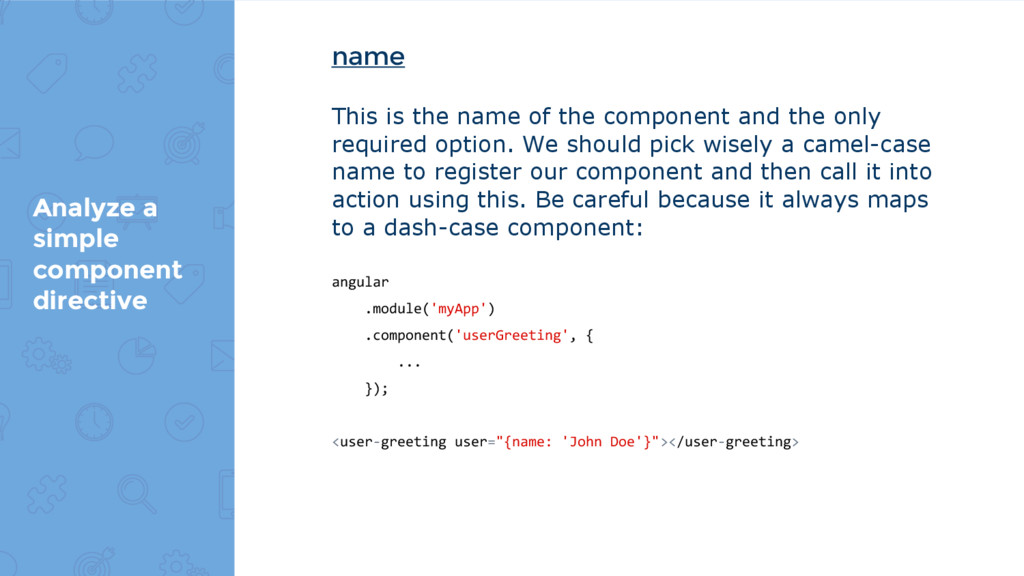
    of the component and the only required option. We should pick wisely a camel-case name to register our component and then call it into action using this. Be careful because it always maps to a dash-case component: angular .module('myApp') .component('userGreeting', { ... }); <user-greeting user="{name: 'John Doe'}"></user-greeting>
  5. Analyze a simple component directive bindings This an optional parameter

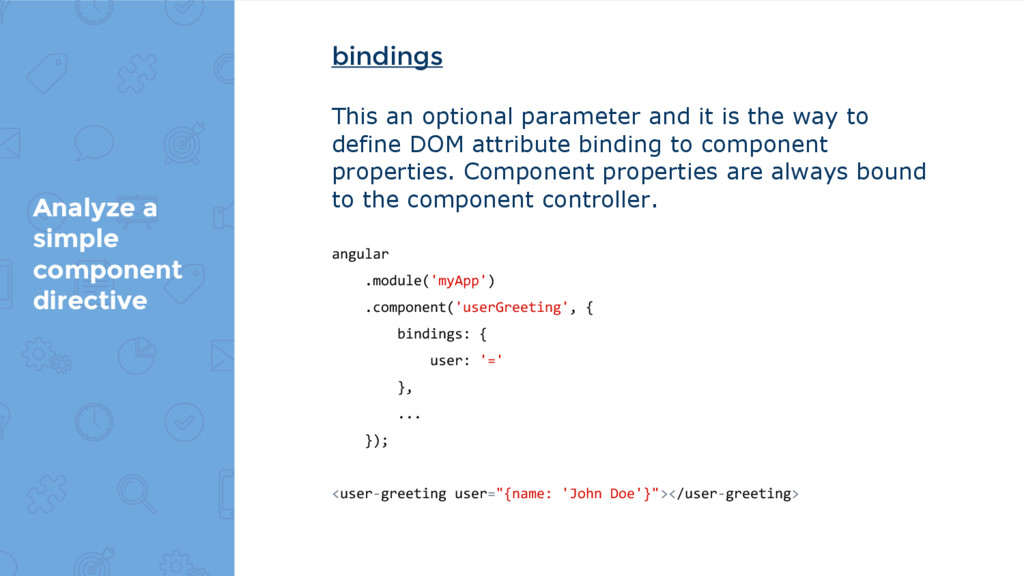
    and it is the way to define DOM attribute binding to component properties. Component properties are always bound to the component controller. angular .module('myApp') .component('userGreeting', { bindings: { user: '=' }, ... }); <user-greeting user="{name: 'John Doe'}"></user-greeting>
  6. Analyze a simple component directive controller This is an optional

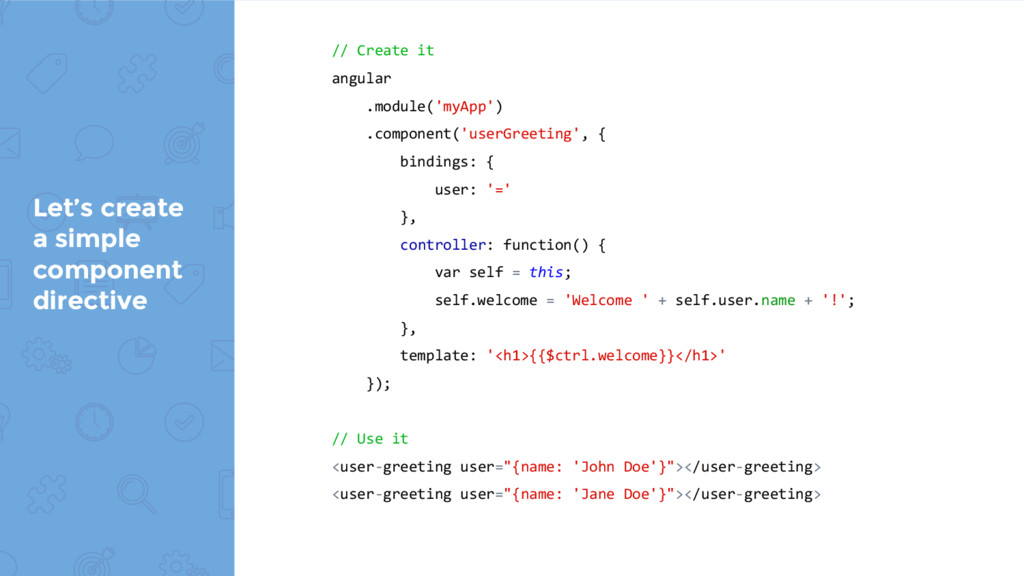
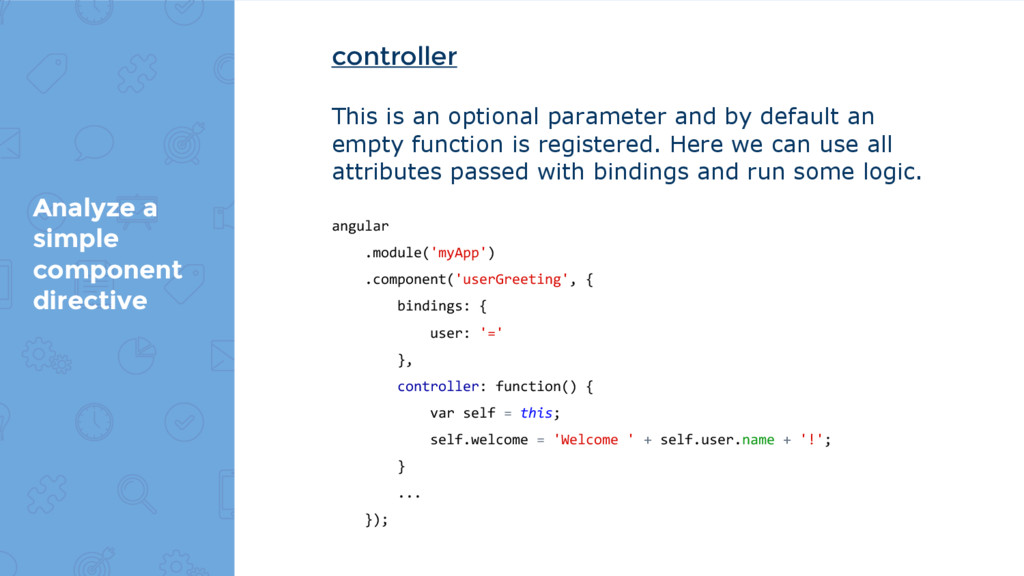
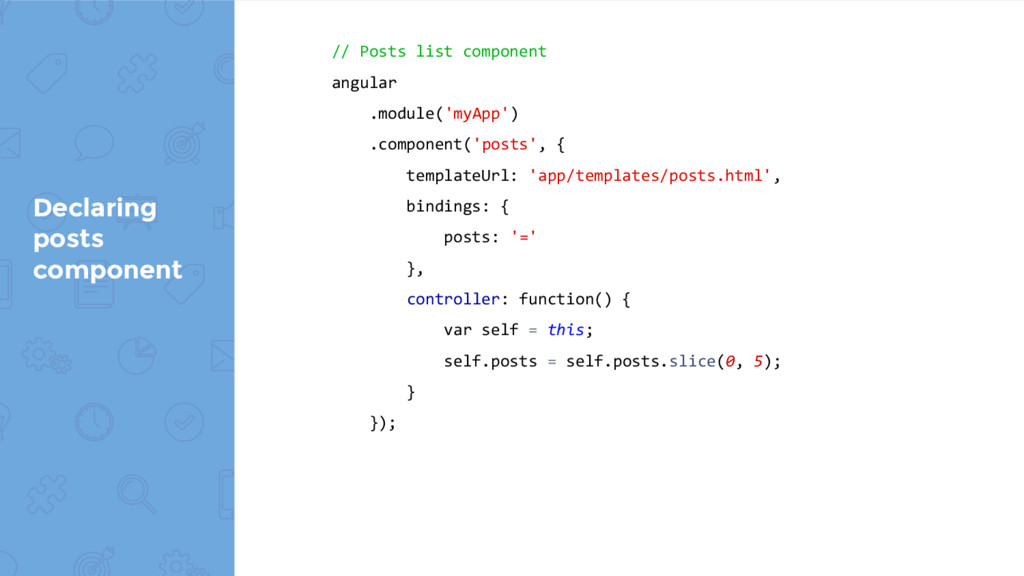
    parameter and by default an empty function is registered. Here we can use all attributes passed with bindings and run some logic. angular .module('myApp') .component('userGreeting', { bindings: { user: '=' }, controller: function() { var self = this; self.welcome = 'Welcome ' + self.user.name + '!'; } ... });
  7. Analyze a simple component directive template This is an optional

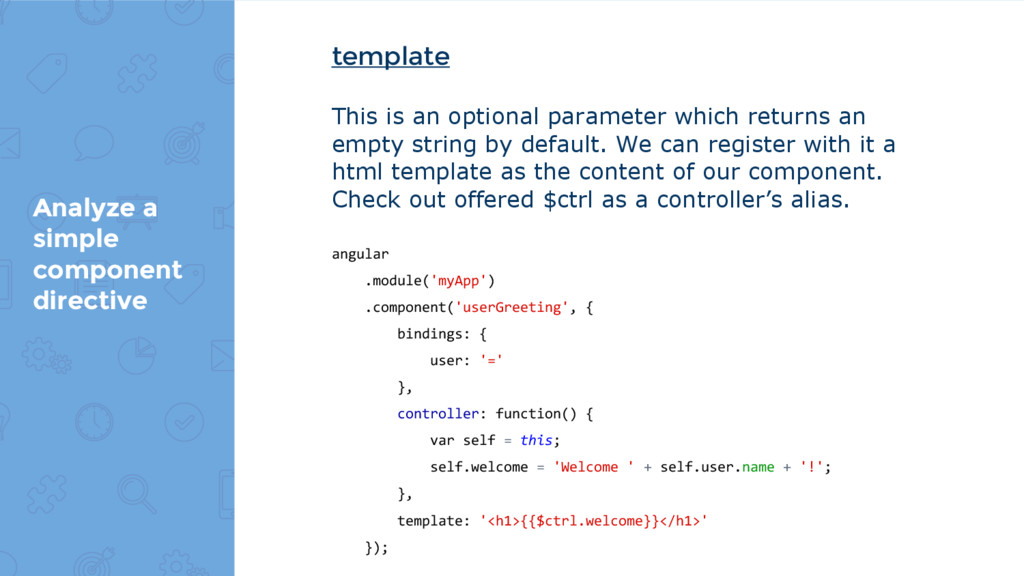
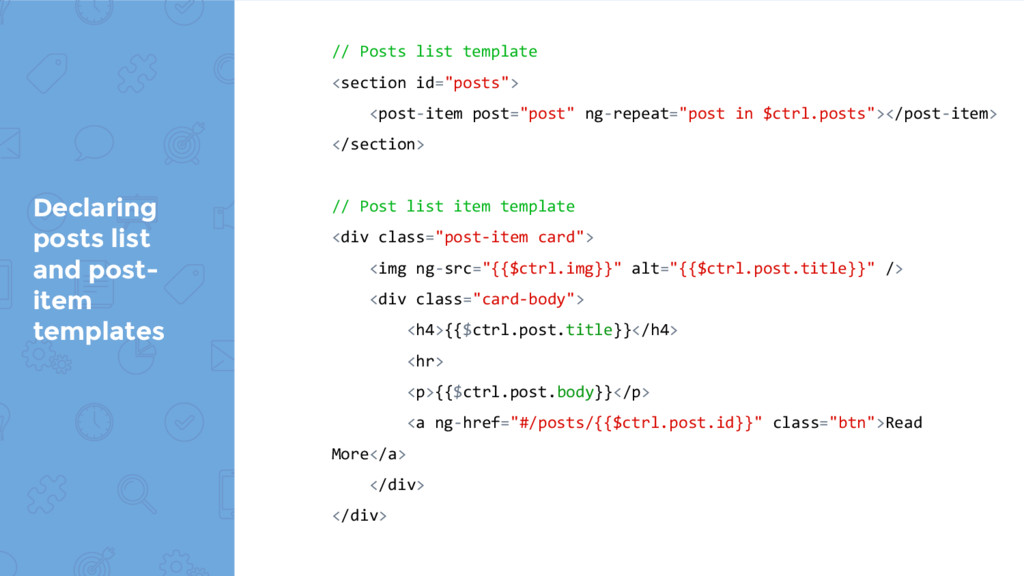
    parameter which returns an empty string by default. We can register with it a html template as the content of our component. Check out offered $ctrl as a controller’s alias. angular .module('myApp') .component('userGreeting', { bindings: { user: '=' }, controller: function() { var self = this; self.welcome = 'Welcome ' + self.user.name + '!'; }, template: '<h1>{{$ctrl.welcome}}</h1>' });
  8. Analyze a simple component directive templateUrl We could use this

    to call into action an external html file as our component’s template. angular .module('myApp') .component('userGreeting', { bindings: { user: '=' }, controller: function() { var self = this; self.welcome = 'Welcome ' + self.user.name + '!'; }, templateUrl: 'greeting.html' });
  9. Routing with component directives // Routing using components instead of

    controllers angular .module('myApp') .config(['$routeProvider', function($routeProvider) { $routeProvider .when('/', { resolve: { posts: function(Post) { return Post.all(); } }, template: '<posts posts="$resolve.posts"></posts>' }) ...
  10. Declaring posts component // Posts list component angular .module('myApp') .component('posts',

    { templateUrl: 'app/templates/posts.html', bindings: { posts: '=' }, controller: function() { var self = this; self.posts = self.posts.slice(0, 5); } });
  11. Declaring posts list and post- item templates // Posts list

    template <section id="posts"> <post-item post="post" ng-repeat="post in $ctrl.posts"></post-item> </section> // Post list item template <div class="post-item card"> <img ng-src="{{$ctrl.img}}" alt="{{$ctrl.post.title}}" /> <div class="card-body"> <h4>{{$ctrl.post.title}}</h4> <hr> <p>{{$ctrl.post.body}}</p> <a ng-href="#/posts/{{$ctrl.post.id}}" class="btn">Read More</a> </div> </div>
  12. Declaring post-item component // Post item component angular .module('myApp') .component('postItem',

    { templateUrl: 'app/templates/post-item.html', bindings: { post: '<' }, controller: function() { var self = this; self.img = 'http://lorempixel.com/600/300/city/'; } });
  13. Declaring Post factory // Posts factory angular .module('myApp') .factory('Post', ['$http',

    function($http) { var service = { all: all, get: get }; return service; function all() { return $http .get('http://jsonplaceholder.typicode.com/posts') .then(function(data) { return data.data; }); } ...
  14. Create even more components like social- icons // Declare the

    component angular .module('myApp') .component('socialIcons', { templateUrl: 'app/templates/social-icons.html' }); // Declare its template <ul class="social-icons"> <li> <a href="#"><i class="fa fa-twitter"></i></a> </li> ... </ul> // Use the component <social-icons></social-icons>
  15. Components bindings type does matter a lot bindings: { //

    Two way data-bindings (avoid usage) posts: '=', // One way data-bindings // Preferable for Objects (highly proposed) post: '<', // Preferable for simple Strings name: '@', // Outputs data-bindings onEdit: '&' }
  16. Components bindings type does matter a lot Ideally, the whole

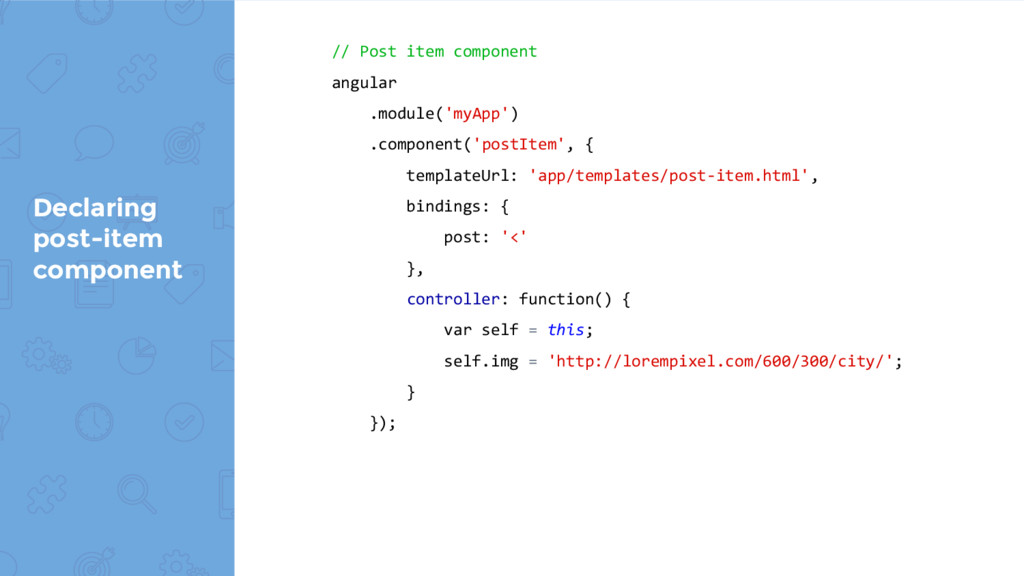
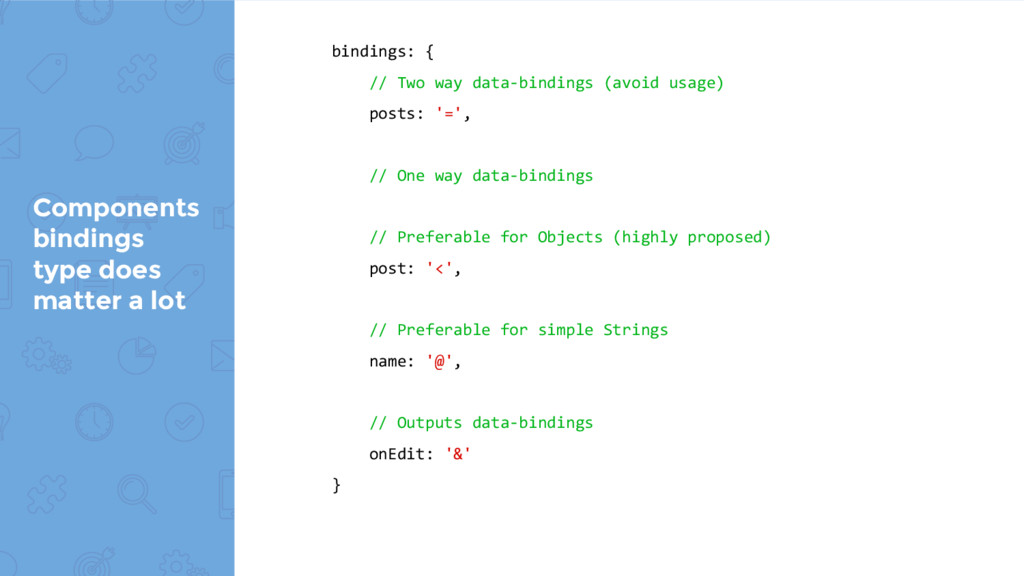
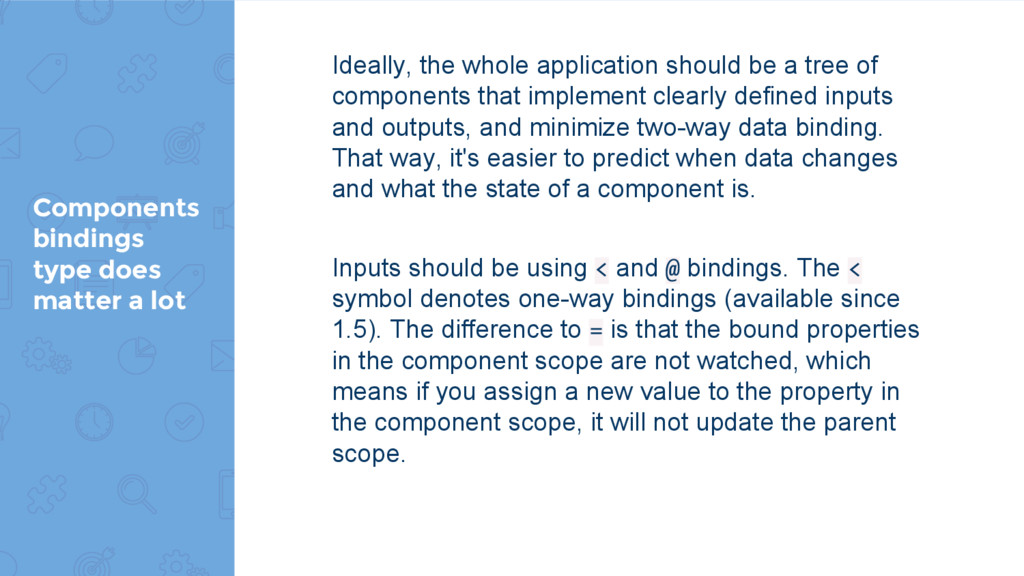
    application should be a tree of components that implement clearly defined inputs and outputs, and minimize two-way data binding. That way, it's easier to predict when data changes and what the state of a component is. Inputs should be using < and @ bindings. The < symbol denotes one-way bindings (available since 1.5). The difference to = is that the bound properties in the component scope are not watched, which means if you assign a new value to the property in the component scope, it will not update the parent scope.
  17. Components bindings type does matter a lot Note however, that

    both parent and component scope reference the same object, so if you are changing object properties or array elements in the component, the parent will still reflect that change. The general rule should therefore be to never change an object or array property in the component scope.
  18. Components cooperation Of course components have outputs too. These are

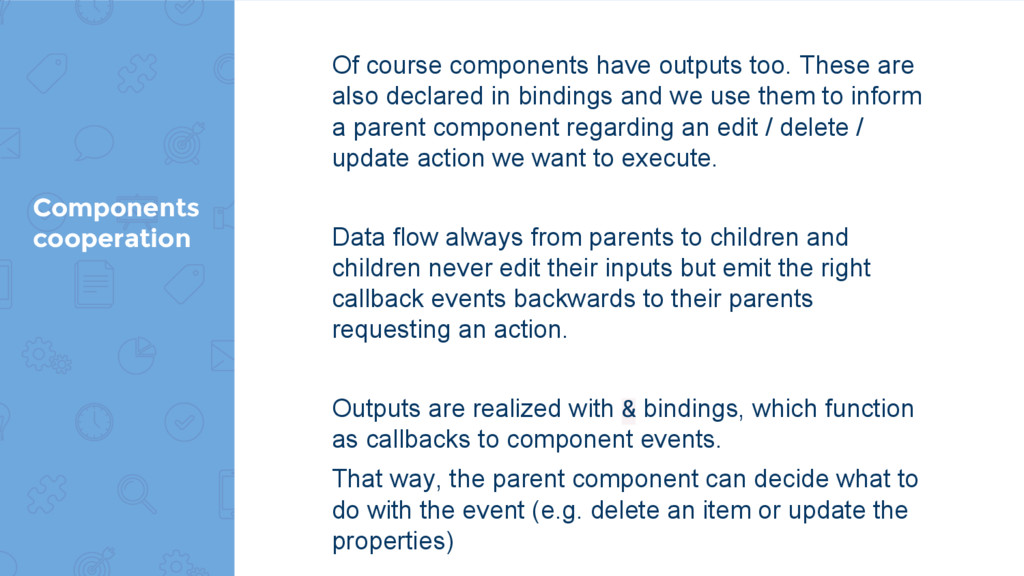
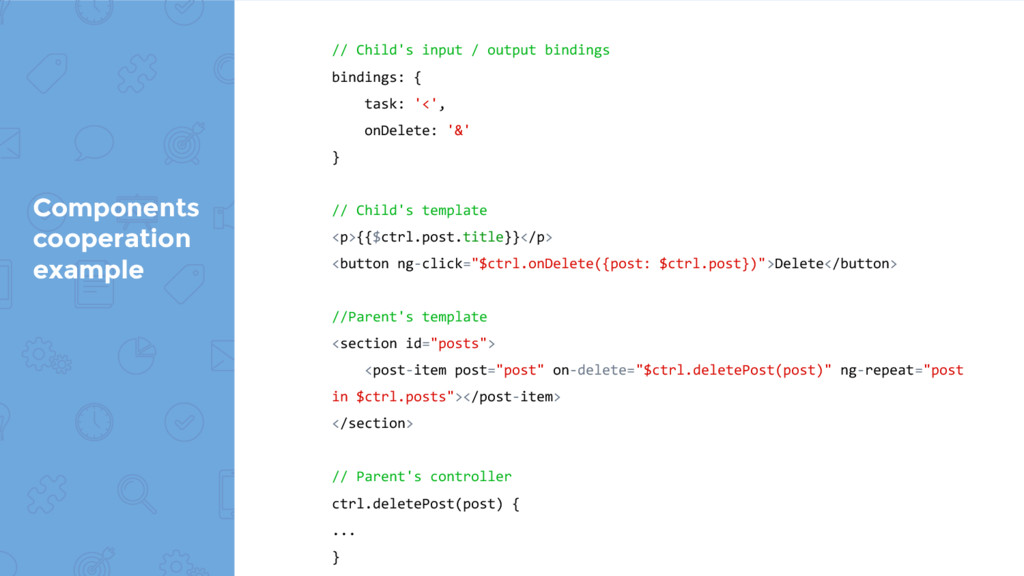
    also declared in bindings and we use them to inform a parent component regarding an edit / delete / update action we want to execute. Data flow always from parents to children and children never edit their inputs but emit the right callback events backwards to their parents requesting an action. Outputs are realized with & bindings, which function as callbacks to component events. That way, the parent component can decide what to do with the event (e.g. delete an item or update the properties)
  19. Components cooperation example // Child's input / output bindings bindings:

    { task: '<', onDelete: '&' } // Child's template <p>{{$ctrl.post.title}}</p> <button ng-click="$ctrl.onDelete({post: $ctrl.post})">Delete</button> //Parent's template <section id="posts"> <post-item post="post" on-delete="$ctrl.deletePost(post)" ng-repeat="post in $ctrl.posts"></post-item> </section> // Parent's controller ctrl.deletePost(post) { ... }