Upgrade to Pro — share decks privately, control downloads, hide ads and more …

aspidaで型安全にREST APIのバックエンドを呼び出したい

Avatar for higaki higaki
July 20, 2024
620

aspidaで型安全にREST APIのバックエンドを呼び出したい

Avatar for higaki

higaki

July 20, 2024
Tweet

Transcript

  1. こんなAPIがあったとします よくあるAPI GET: http://localhost/api/phpers PHPer一覧 GET: http://localhost/api/phpers/{id} PHPer詳細 POST: http://localhost/api/phpers

    PHPer登録 PUT: http://localhost/api/phpers/{id} PHPer更新 DELETE: http://localhost/api/phpers/{id} PHPer削除 GET: http://localhost/api/lunch-shops 神戸の美味しいランチのお店一覧 GET: http://localhost/api/lunch- shops/{id} 神戸の美味しいランチのお店の詳細
  2. APIを呼び出す前の準備 を実行した後のdirectoryを想定しています $ yarn create react-app frontend-fetch . ├── node_modules

    │ ├── ... ├── README.md ├── package.json ├── public │ ├── ... ├── src │ ├── App.ts │ ├── index.ts │ ├── ... └── yarn.lock
  3. aspidaを使わずに呼び出す(私のやっていたやり方) App.tsx APIを呼び出すフロントエンドのファイル ... export const App = () =>

    { const createPHPer = async () => { try { // FIXME ここでAPI呼び出す } catch (error) { // エラー処理 } }; return (...); }
  4. aspidaを使わずに呼び出す(私のやっていたやり方) うわ、色々ミスってるじゃん、、、 URL (誤)http://localhost/api/phper (正)http://localhost/api/phpers リクエストパラメータ (誤)phperName: "神戸 太郎", (正)familyName:

    "神戸", givenName: "太郎", レスポンス (誤)response.data.phperName (正)response.data.message const response = await axios.post(`http://localhost/api/phper`, { phperName: "神戸 太郎", email: "[email protected]", }); console.log(response.data.phperName);
  5. aspidaを使って呼び出す(自力ファイル作成編) ... export const App = () => { const

    createPHPer = async () => { try { // FIXME ここでAPI呼び出す } catch (error) { // エラー処理 } }; return (...); } App.tsx
  6. aspidaを使って呼び出す(自力ファイル作成編) aspidaクライアントを用いてAPIを呼び出します (作成方法は後述します) App.tsx import api from "./apiClient"; ... export

    const App = () => { const createPHPer = async () => {  try { // FIXME ここでAPI呼び出す } catch (error) { // エラー処理 } }; return (...); }
  7. aspidaを使って呼び出す(自力ファイル作成編) aspidaクライアントを用いてAPIを呼び出します (作成方法は後述します) App.tsx import api from "./apiClient"; // FIXME

    ここでAPI呼び出す ... export const App = () => { const createPHPer = async () => {  try { } catch (error) { // エラー処理 } }; return (...); }
  8. aspidaを使って呼び出す(自力ファイル作成編) 手順 1. aspida の インストール 2. aspida 設定ファイル作成 3.

    APIエンドポイントの型定義ファイル作成 4. ビルド 5. aspidaクライアントを作成
  9. aspidaを使って呼び出す(自力ファイル作成編) 手順 1. aspida の インストール 2. aspida 設定ファイル作成 3.

    APIエンドポイントの型定義ファイル作成 4. ビルド 5. aspidaクライアントを作成
  10. aspidaを使って呼び出す(自力ファイル作成編) 手順 1. aspida の インストール 2. aspida 設定ファイル作成 3.

    APIエンドポイントの型定義ファイル作成 4. ビルド 5. aspidaクライアントを作成
  11. aspidaを使って呼び出す(自力ファイル作成編) 2. aspida 設定ファイル作成 aspida.config.js を作成し、 input に (型定義のroot directory)

    を設定します 今回は src/api_type とします module.exports = { input: "src/api_type", }; │ ├── aspida.config.js . ├── ... │ ├── ... ├── src │ ├── App.ts │ ├── index.ts │ ├── ... └── yarn.lock
  12. aspidaを使って呼び出す(自力ファイル作成編) 手順 1. aspida の インストール 2. aspida 設定ファイル作成 3.

    APIエンドポイントの型定義ファイル作成 4. ビルド 5. aspidaクライアントを作成
  13. aspidaを使って呼び出す(自力ファイル作成編) 3. APIエンドポイントの型定義ファイル作成 型定義ファイルまでのディレクトリの階層構造がそのままAPI呼び出しのパスになります │ ├── api_type │ │ ├──

    lunch-shops │ │ │ ├── _id@number │ │ │ │ └── index.ts │ │ │ └── index.ts │ │ └── phpers │ │ ├── _id@number │ │ │ └── index.ts │ │ └── index.ts . ├── ... │ ├── ... ├── src │ │ ├── @types │ │ │ └── index.ts │ ├── App.ts │ ├── index.ts │ ├── aspida.config.js
  14. aspidaを使って呼び出す(自力ファイル作成編) 3. APIエンドポイントの型定義ファイル作成 GET, POST: http://localhost/api/phpers src/api_type/phpers/index.ts post: { status:

    201 resBody: { message: string } reqBody: { family_name: string given_name: string email: string attends?: { location: '北海道' | '関西' | '東京' | '小田原' | '香川 year: number }[] | null | undefined } } import type * as Types from '../@types' export type Methods = { get: { status: 200 resBody: Types.PHPerListResource[] // 説明省略 } // → に記載 post: { ... } }
  15. aspidaを使って呼び出す(自力ファイル作成編) 3. APIエンドポイントの型定義ファイル作成 GET: http://localhost/api/lunch-shops/{id} src/api_type/lunch-shops/_id@number/index.ts ※ パスパラメータは _ を先頭につける

    ※ @ で number 型 string 型を明示する( @ 以降をつけない場合は number|string ) import type * as Types from '../../@types' export type Methods = { get: { status: 200 resBody: Types.LunchShopShowResource // → に詳細記載 } } // src/api_type/@types/index.ts export type LunchShopShowResource = { id: string name: string zip_code: string prefecture: string city: string address: string floor?: string | null | undefined }
  16. aspidaを使って呼び出す(自力ファイル作成編) 手順 1. aspida の インストール 2. aspida 設定ファイル作成 3.

    APIエンドポイントの型定義ファイル作成 4. ビルド 5. aspidaクライアントを作成
  17. aspidaを使って呼び出す(自力ファイル作成編) 4. ビルド │ │ ├── $api.ts . ├── ...

    │ ├── ... ├── src │ ├── api_type │ │ ├── @types │ │ │ └── index.ts │ │ ├── lunch-shops │ │ │ ├── _id@number │ │ │ │ └── index.ts │ │ │ └── index.ts │ │ └── phpers │ │ ├── _id@number │ │ │ └── index.ts │ │ └── index.ts │ ├── App.ts │ ├── index.ts │ ├── aspida.config.js │ ├── ... └── yarn.lock
  18. aspidaを使って呼び出す(自力ファイル作成編) 手順 1. aspida の インストール 2. aspida 設定ファイル作成 3.

    APIエンドポイントの型定義ファイル作成 4. ビルド 5. aspidaクライアントを作成
  19. aspidaを使って呼び出す(自力ファイル作成編) 5. aspidaクライアントを作成 ビルドで作成された $api.ts を用いて aspidaクライアントを作成します baseURL にはAPI呼び出し先のURLを記載します apiClient.ts

    import api from './api_type/$api'; import aspida from '@aspida/axios'; import axios from "axios"; const apiClient = api( aspida(axios, { baseURL: 'http://localhost/api', }) ); export default apiClient;
  20. aspidaを使って呼び出す(自力ファイル作成編) 5. aspidaクライアントを作成 ビルドで作成された $api.ts を用いて aspidaクライアントを作成します baseURL にはAPI呼び出し先のURLを記載します apiClient.ts

    baseURL: 'http://localhost/api', import api from './api_type/$api'; import aspida from '@aspida/axios'; import axios from "axios"; const apiClient = api( aspida(axios, { }) ); export default apiClient;
  21. aspidaを使って呼び出す(自力ファイル作成編) 5. aspidaクライアントを作成 │ ├── apiClient.ts . ├── ... │

    ├── ... ├── src │ ├── api_type │ │ ├── $api.ts │ │ ├── @types │ │ │ └── index.ts │ │ ├── lunch-shops │ │ │ ├── _id@number │ │ │ │ └── index.ts │ │ │ └── index.ts │ │ └── phpers │ │ ├── _id@number │ │ │ └── index.ts │ │ └── index.ts │ ├── App.ts │ ├── index.ts │ ├── aspida.config.js │ ├── ... └── yarn.lock
  22. aspidaを使って呼び出す(OpenAPI経由編) 1. aspida の設定変更 aspida.config.js に openapi を追加し、OpenAPIのjson、yamlファイルを指定します ※ OpenAPIのjsonファイルを返却するURLの指定でも大丈夫です

    openapi: { inputFile: "./openapi.yaml" }, module.exports = { input: "src/api_type", baseURL: "http://localhost/api", }; openapi: { inputFile: "http://localhost/docs/api.json" }, module.exports = { input: "src/api_type", baseURL: "http://localhost/api", };
  23. aspidaを使って呼び出す(エンドポイント絞る編) 1. aspida の設定変更 aspida.config.js に outputEachDir を追加 outputEachDir: true,

    module.exports = { input: "src/api_type", baseURL: "http://localhost/api", openapi: { inputFile: "./openapi.yaml" }, };
  24. aspidaを使って呼び出す(エンドポイント絞る編) 2. ビルド 設定変更後に、ビルドをすることでそれぞれのディレクトリに $api.ts が作成されます $ yarn api:build │

    │ ├── lunch-shops │ │ │ ├── $api.ts │ │ └── phpers │ │ ├── $api.ts . ├── ... │ ├── ... ├── src │ ├── api_type │ │ ├── $api.ts │ │ ├── @types │ │ │ └── index.ts │ │ │ ├── _id@number │ │ │ │ └── index.ts │ │ │ └── index.ts │ │ ├── _id@number │ │ │ └── index.ts
  25. aspidaを使って呼び出す(エンドポイント絞る編) 3. エンドポイントを絞った aspida クライアントを作成 呼び出したいエンドポイントのdirectoryにある $api.ts を用いて aspidaクライアントを作成します apiLunchShopClient.ts

    import api from './api_type/lunch-shops/$api'; import aspida from '@aspida/axios'; import axios from "axios"; const apiClient = api( aspida(axios, { baseURL: 'http://localhost/api', }) ); export default apiClient;
  26. aspidaを使って呼び出す(エンドポイント絞る編) 3. エンドポイントを絞った aspida クライアントを作成 │ ├── apiLunchShopClient.ts . ├──

    ... │ ├── ... ├── src │ ├── api_type │ │ ├── ... │ ├── App.ts │ ├── index.ts │ ├── apiClient.ts │ ├── aspida.config.js │ ├── ... └── yarn.lock
  27. aspidaを使って呼び出す(エンドポイント絞る編) 4. API呼び出し App.tsx import lunchShopApi from "./apiLunchShopClient"; ... export

    const App = () => { const createPHPer = async () => { ... }; const fetchLunchShop = async () => { try { // FIXME ここでAPI呼び出す } catch (error) { // エラー処理 } }; return (...); }
  28. aspidaを使って呼び出す(エンドポイント絞る編) 4. API呼び出し App.tsx import lunchShopApi from "./apiLunchShopClient"; ... export

    const App = () => { const createPHPer = async () => { ... }; const fetchLunchShop = async () => { try { // FIXME ここでAPI呼び出す } catch (error) { // エラー処理 } }; return (...); }
  29. aspidaを使って呼び出す(エンドポイント絞る編) 4. API呼び出し App.tsx // FIXME ここでAPI呼び出す import lunchShopApi from

    "./apiLunchShopClient"; ... export const App = () => { const createPHPer = async () => { ... }; const fetchLunchShop = async () => { try { } catch (error) { // エラー処理 } }; return (...); }
  30. まとめ 👍 色々と型がついてくれるのは開発しやすい 👍 エンドポイント絞れるのも地味にありがたい エンドポイント多いと辿るのも大変だし 😭 aspidaクライアントに設定できる項目は適切ではないかも、、、 method 設定した場合、axiosだと無視されるがfetchだと無視されないなどがある

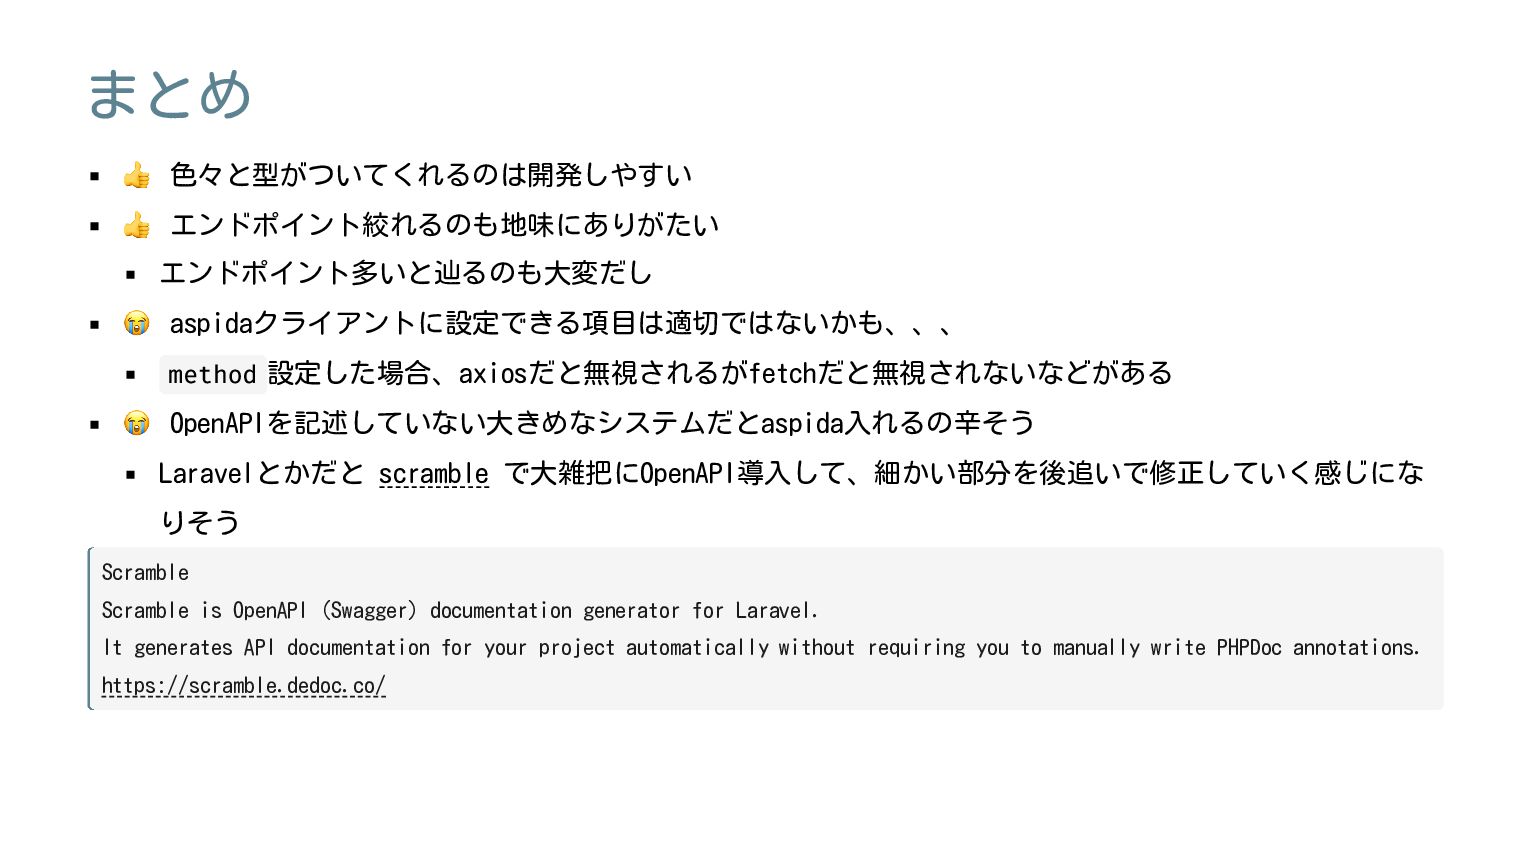
    😭 OpenAPIを記述していない大きめなシステムだとaspida入れるの辛そう Laravelとかだと scramble で大雑把にOpenAPI導入して、細かい部分を後追いで修正していく感じにな りそう Scramble Scramble is OpenAPI (Swagger) documentation generator for Laravel. It generates API documentation for your project automatically without requiring you to manually write PHPDoc annotations. https://scramble.dedoc.co/
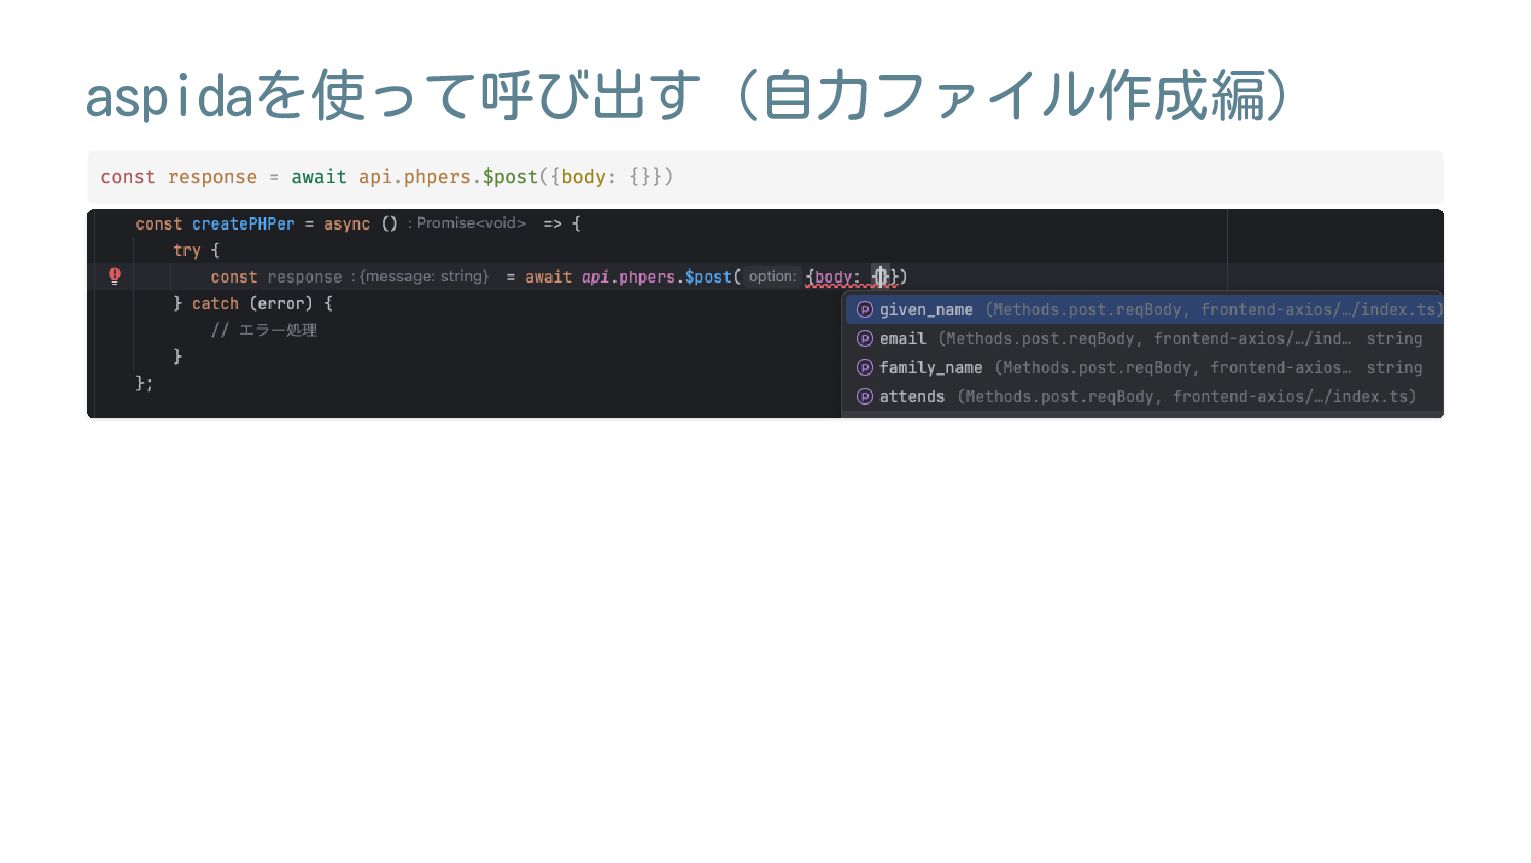