is Robolectric Native Graphics? 4. Roborazzi a. What is Roborazzi? b. How to use Roborazzi c. How to Leverage Roborazzi Effectively i. Component-based screenshot testing ii. Screen-based screenshot testing iii. UI testing debugging 5. What to test 6. Practices
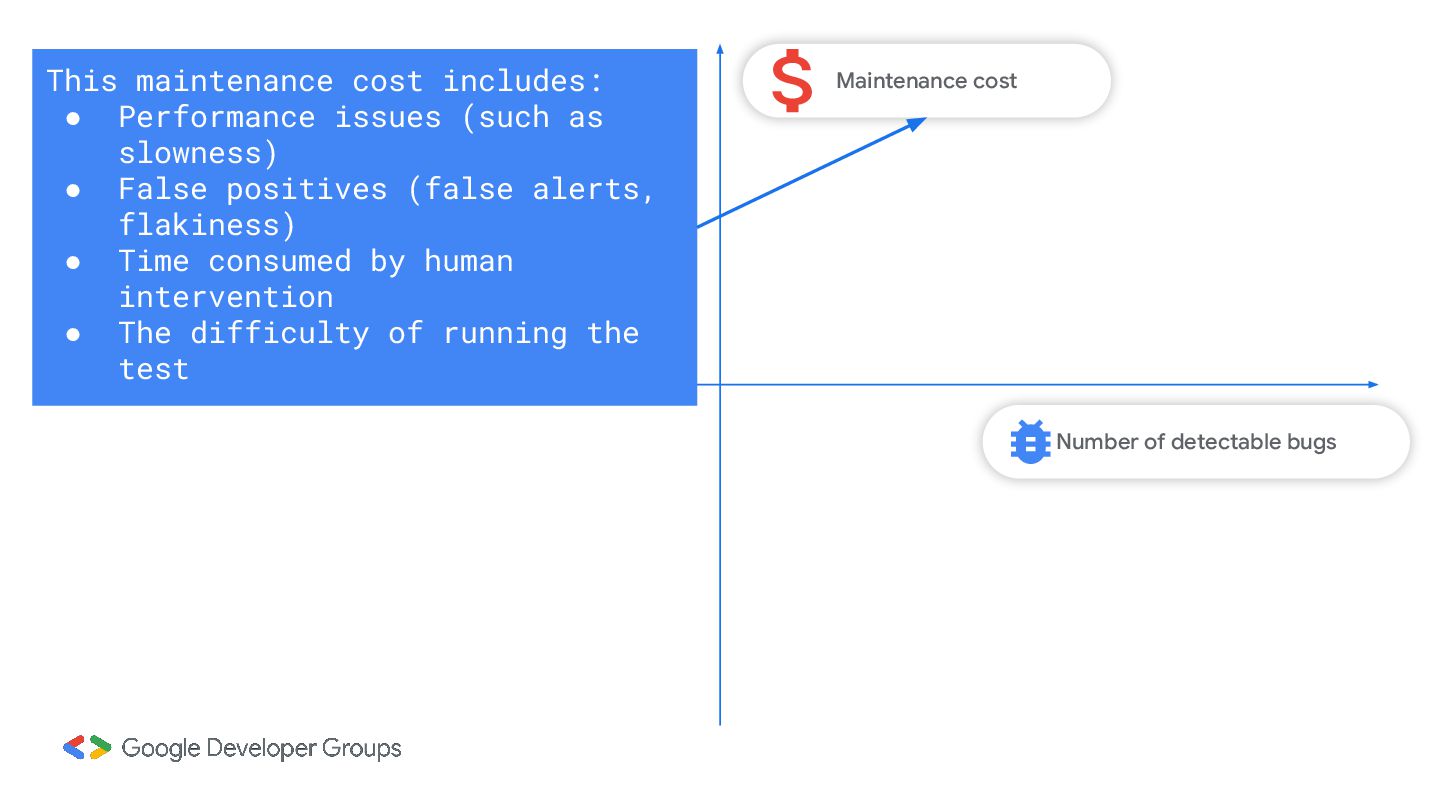
• Performance issues (such as slowness) • False positives (false alerts, flakiness) • Time consumed by human intervention • The difficulty of running the test
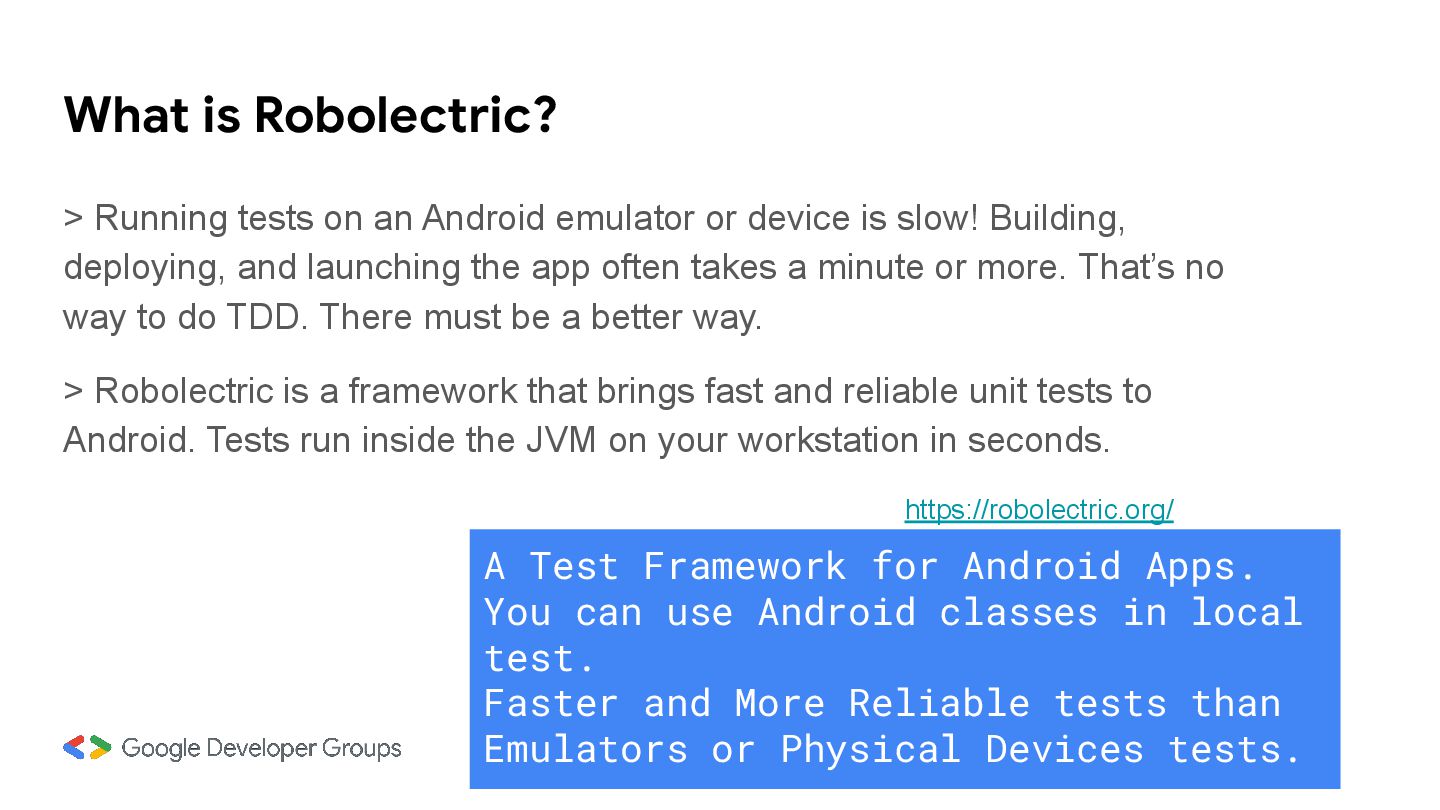
or device is slow! Building, deploying, and launching the app often takes a minute or more. That’s no way to do TDD. There must be a better way. > Robolectric is a framework that brings fast and reliable unit tests to Android. Tests run inside the JVM on your workstation in seconds. https://robolectric.org/ A Test Framework for Android Apps. You can use Android classes in local test. Faster and More Reliable tests than Emulators or Physical Devices tests.
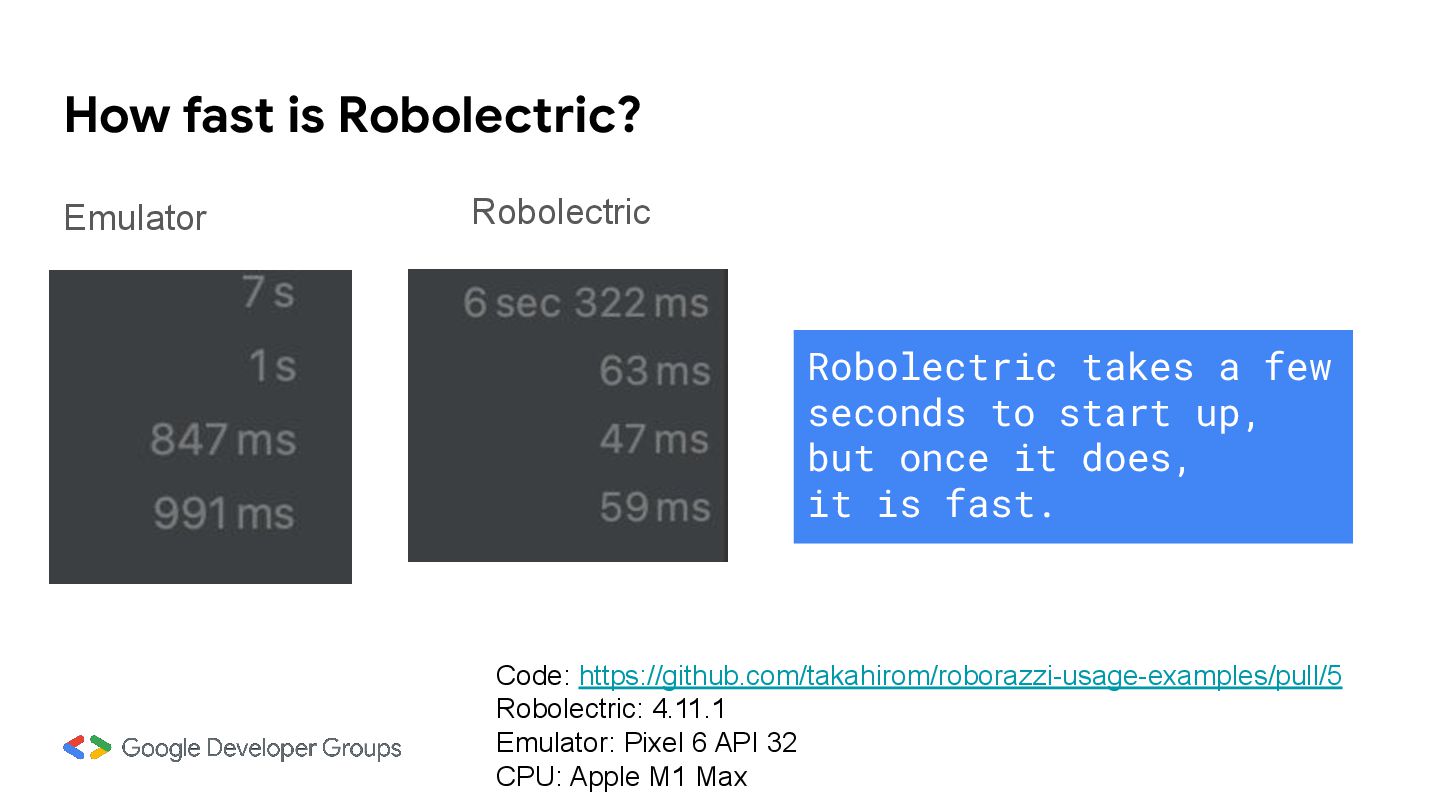
seconds to start up, but once it does, it is fast. Code: https://github.com/takahirom/roborazzi-usage-examples/pull/5 Robolectric: 4.11.1 Emulator: Pixel 6 API 32 CPU: Apple M1 Max
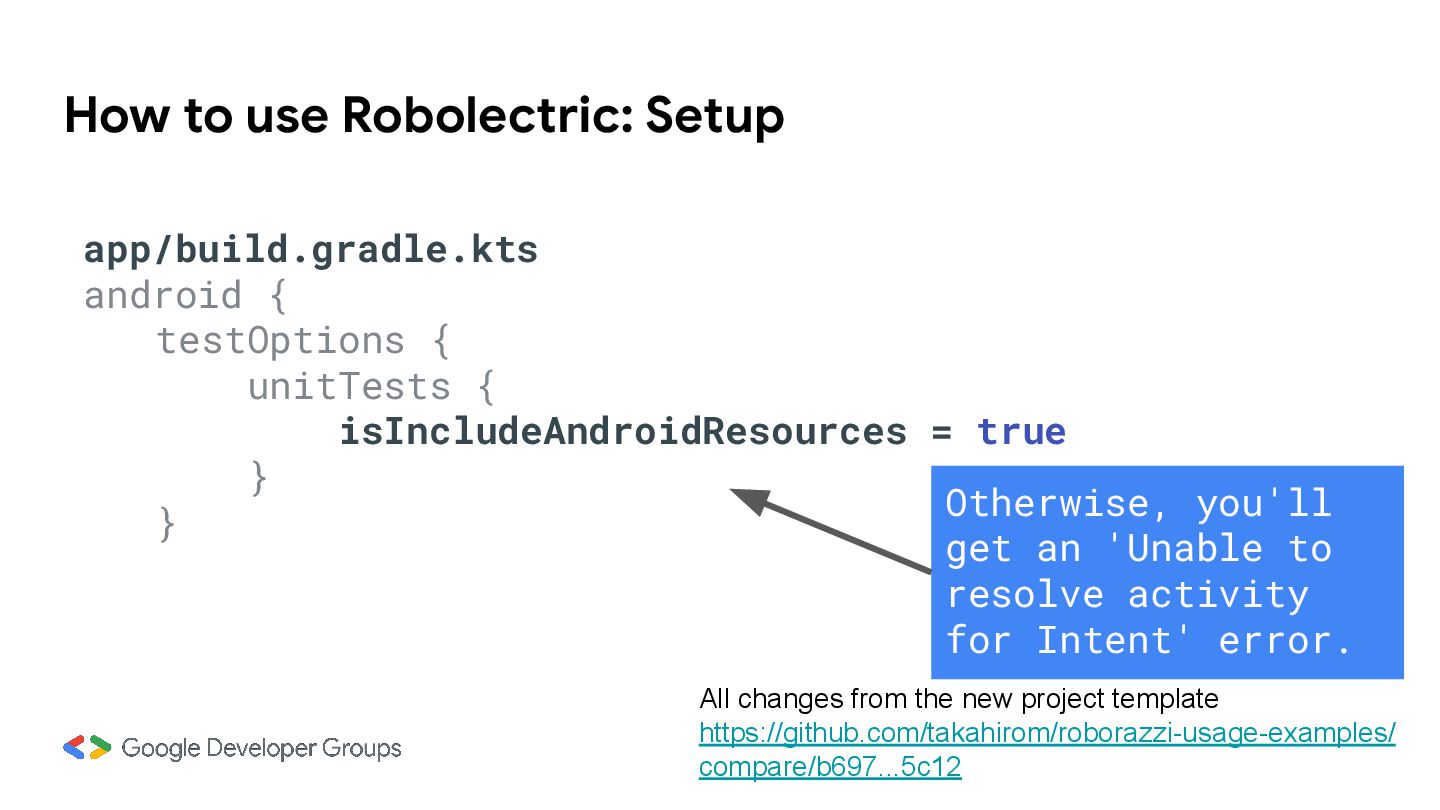
unitTests { isIncludeAndroidResources = true } } Otherwise, you'll get an 'Unable to resolve activity for Intent' error. All changes from the new project template https://github.com/takahirom/roborazzi-usage-examples/ compare/b697...5c12
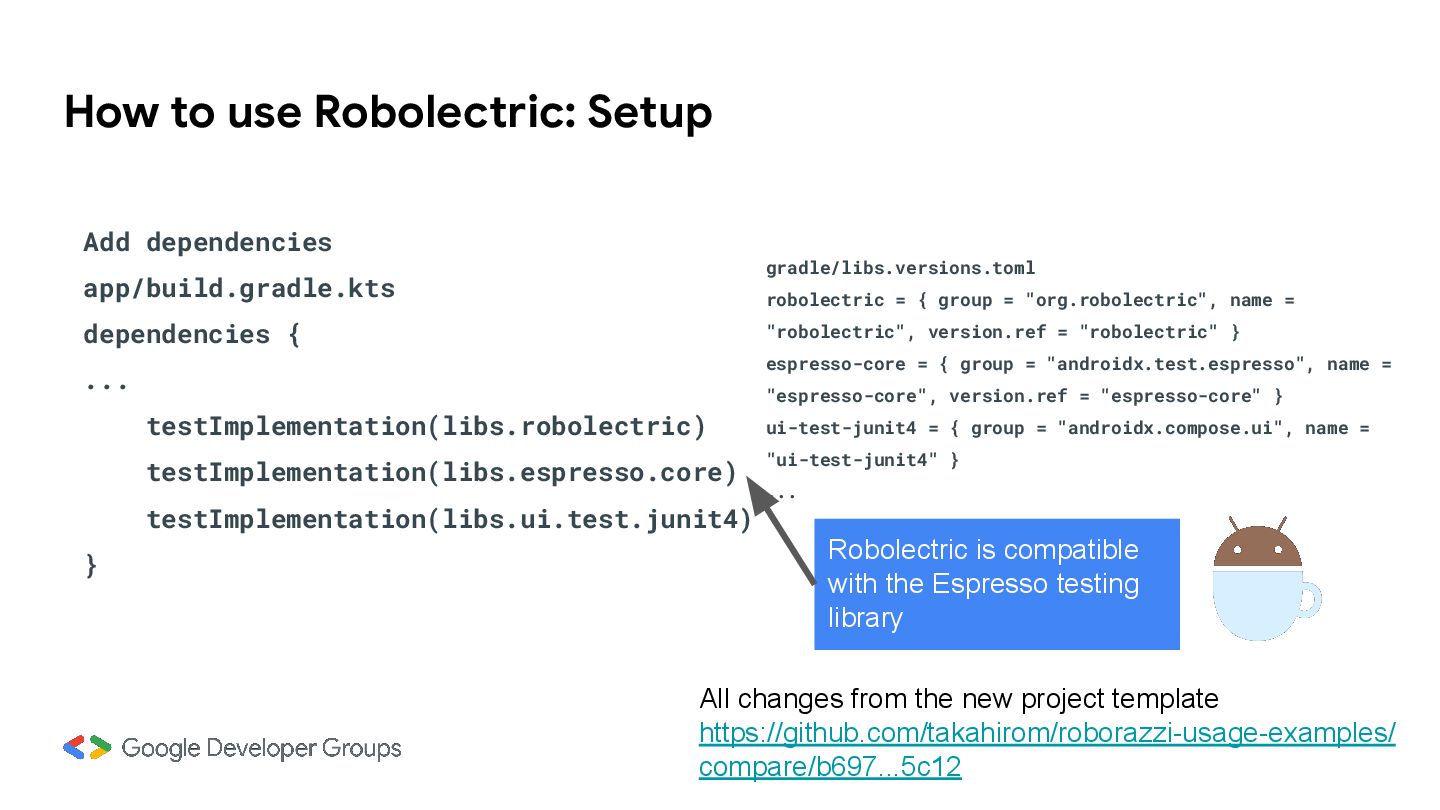
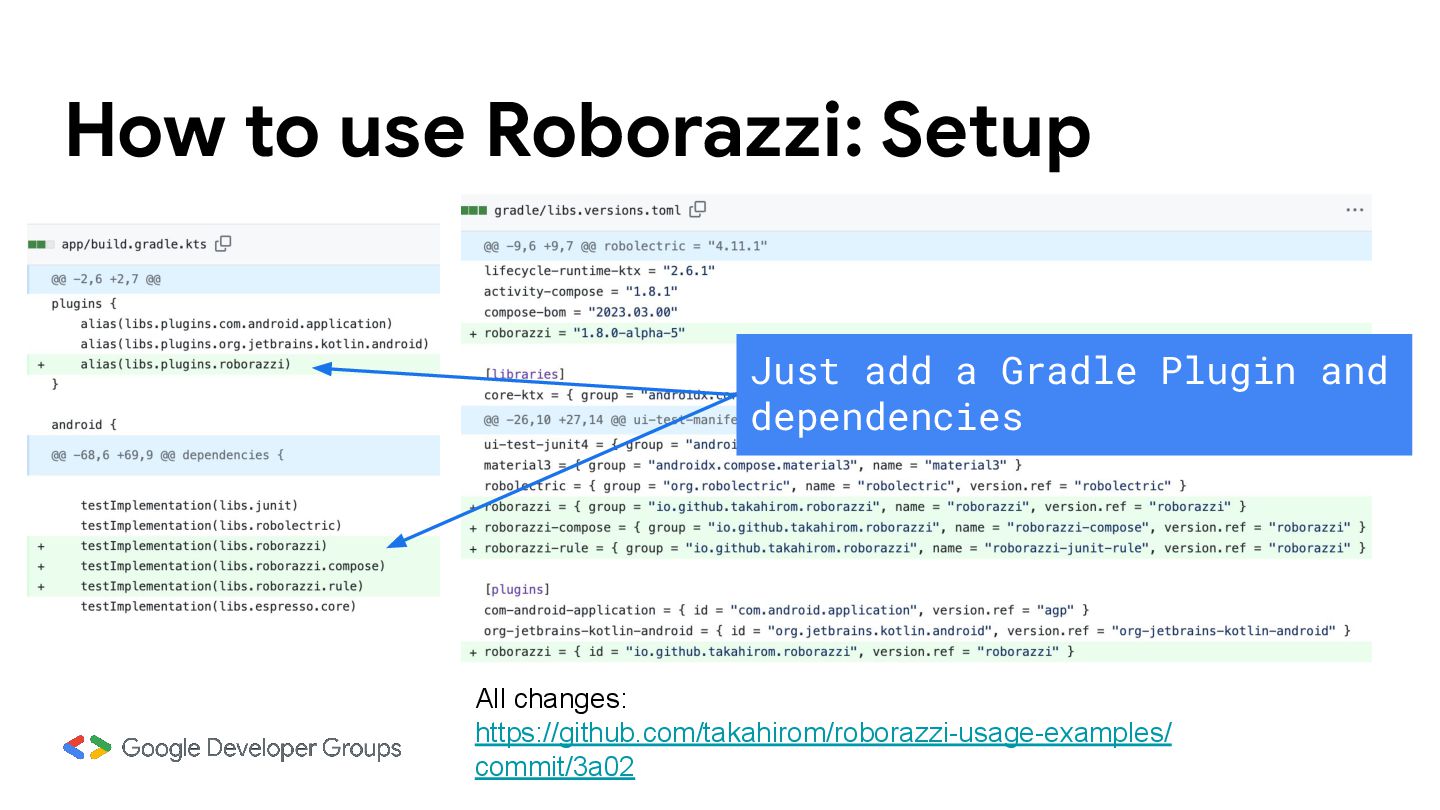
... testImplementation(libs.robolectric) testImplementation(libs.espresso.core) testImplementation(libs.ui.test.junit4) } All changes from the new project template https://github.com/takahirom/roborazzi-usage-examples/ compare/b697...5c12 gradle/libs.versions.toml robolectric = { group = "org.robolectric", name = "robolectric", version.ref = "robolectric" } espresso-core = { group = "androidx.test.espresso", name = "espresso-core", version.ref = "espresso-core" } ui-test-junit4 = { group = "androidx.compose.ui", name = "ui-test-junit4" } ... Robolectric is compatible with the Espresso testing library
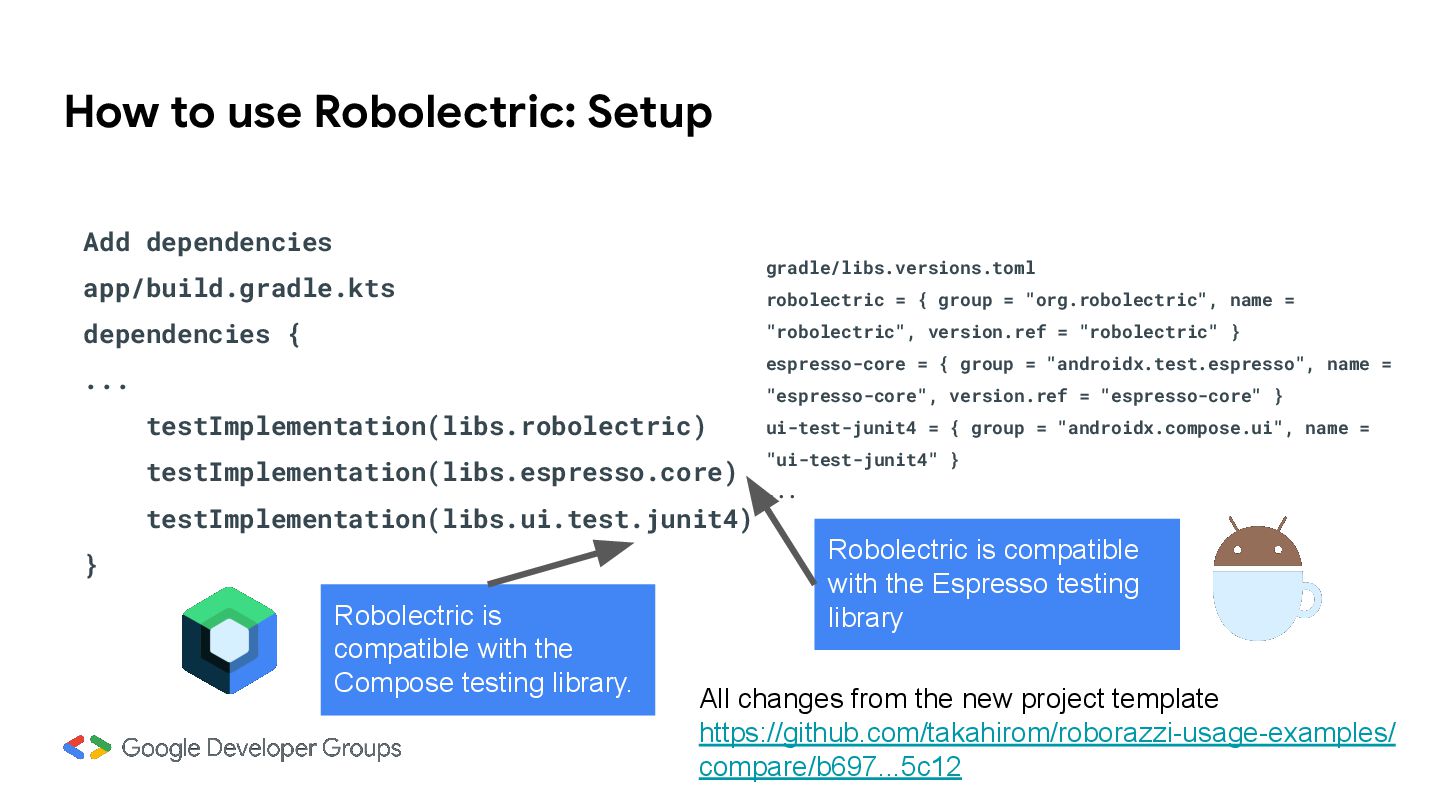
... testImplementation(libs.robolectric) testImplementation(libs.espresso.core) testImplementation(libs.ui.test.junit4) } All changes from the new project template https://github.com/takahirom/roborazzi-usage-examples/ compare/b697...5c12 gradle/libs.versions.toml robolectric = { group = "org.robolectric", name = "robolectric", version.ref = "robolectric" } espresso-core = { group = "androidx.test.espresso", name = "espresso-core", version.ref = "espresso-core" } ui-test-junit4 = { group = "androidx.compose.ui", name = "ui-test-junit4" } ... Robolectric is compatible with the Espresso testing library Robolectric is compatible with the Compose testing library.
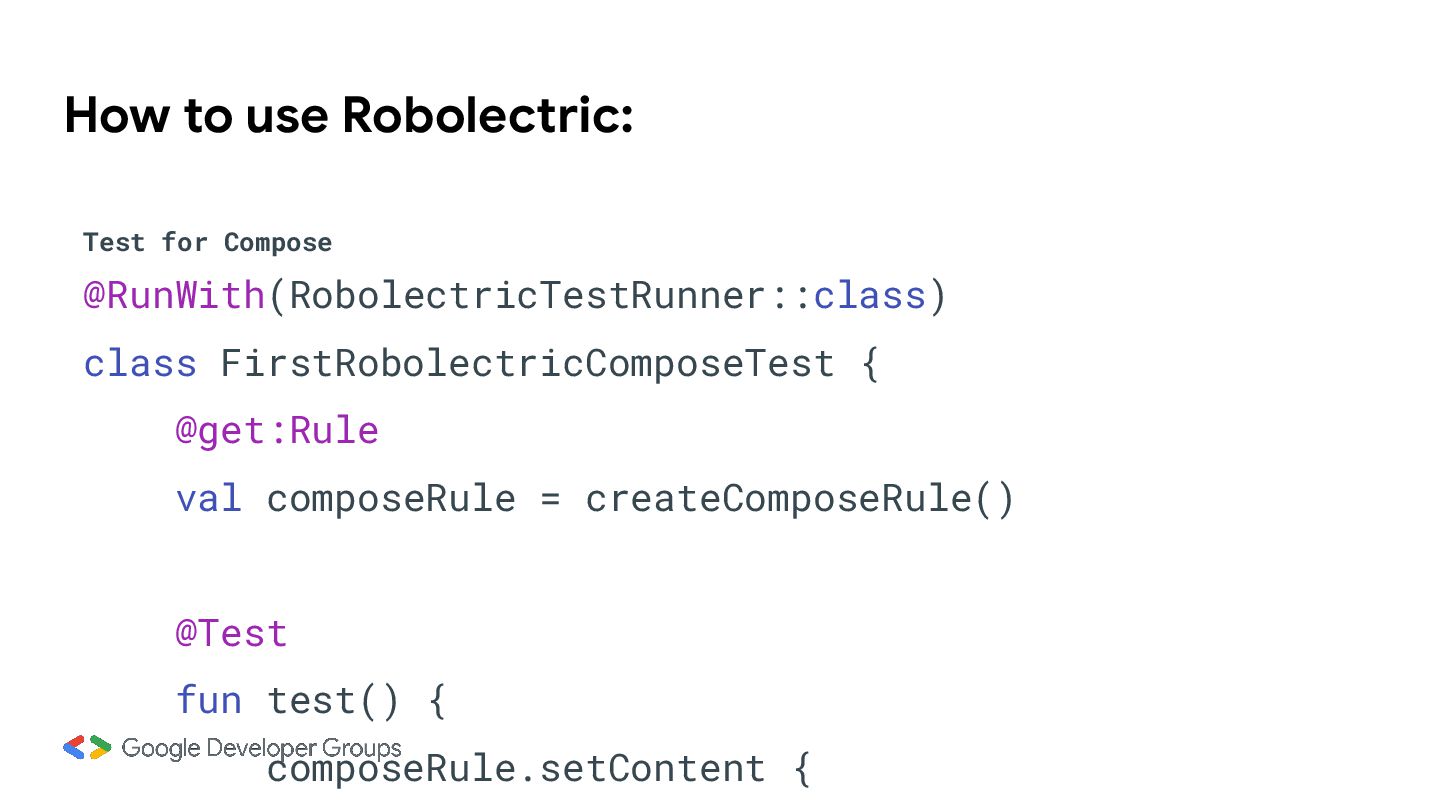
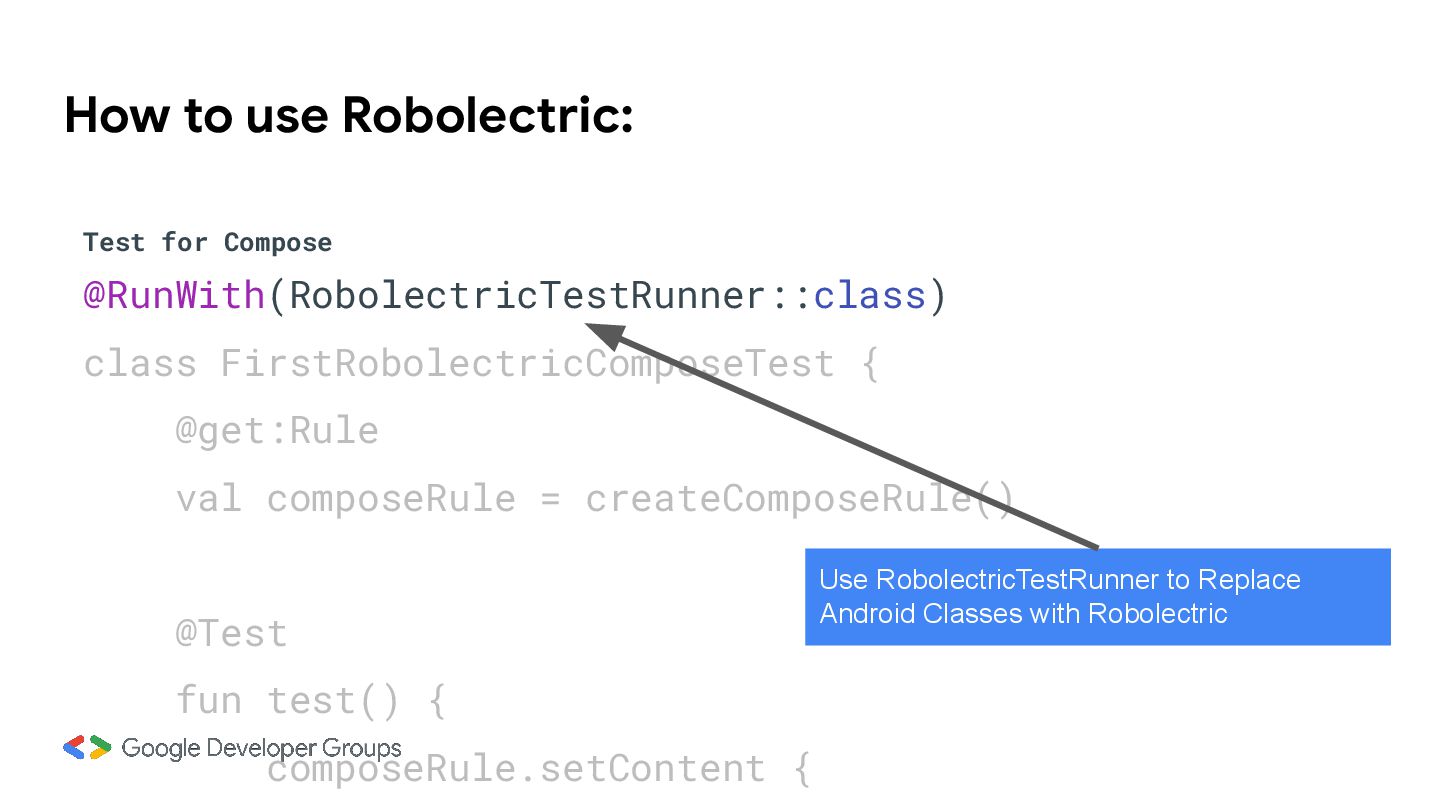
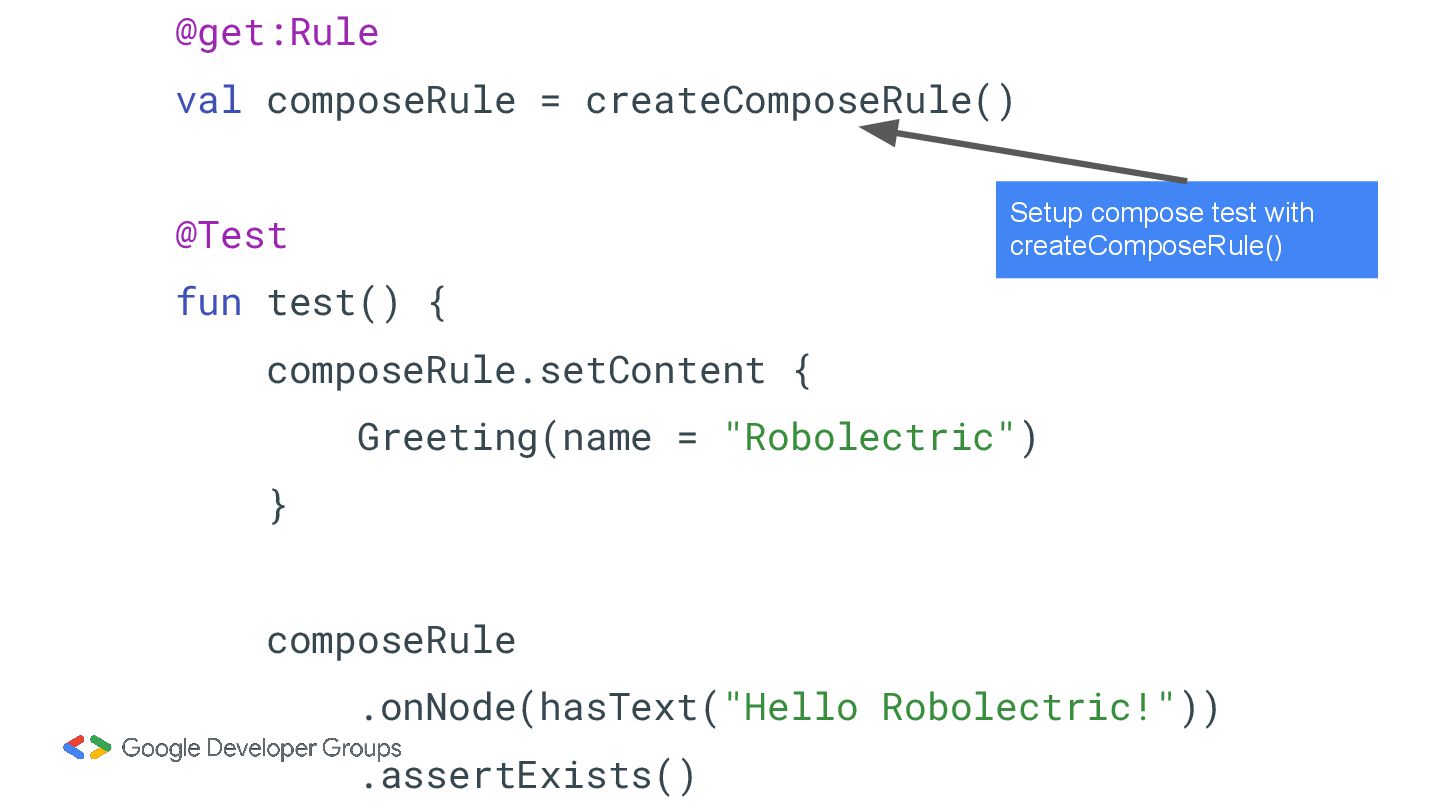
{ @get:Rule val composeRule = createComposeRule() @Test fun test() { composeRule.setContent { Use RobolectricTestRunner to Replace Android Classes with Robolectric
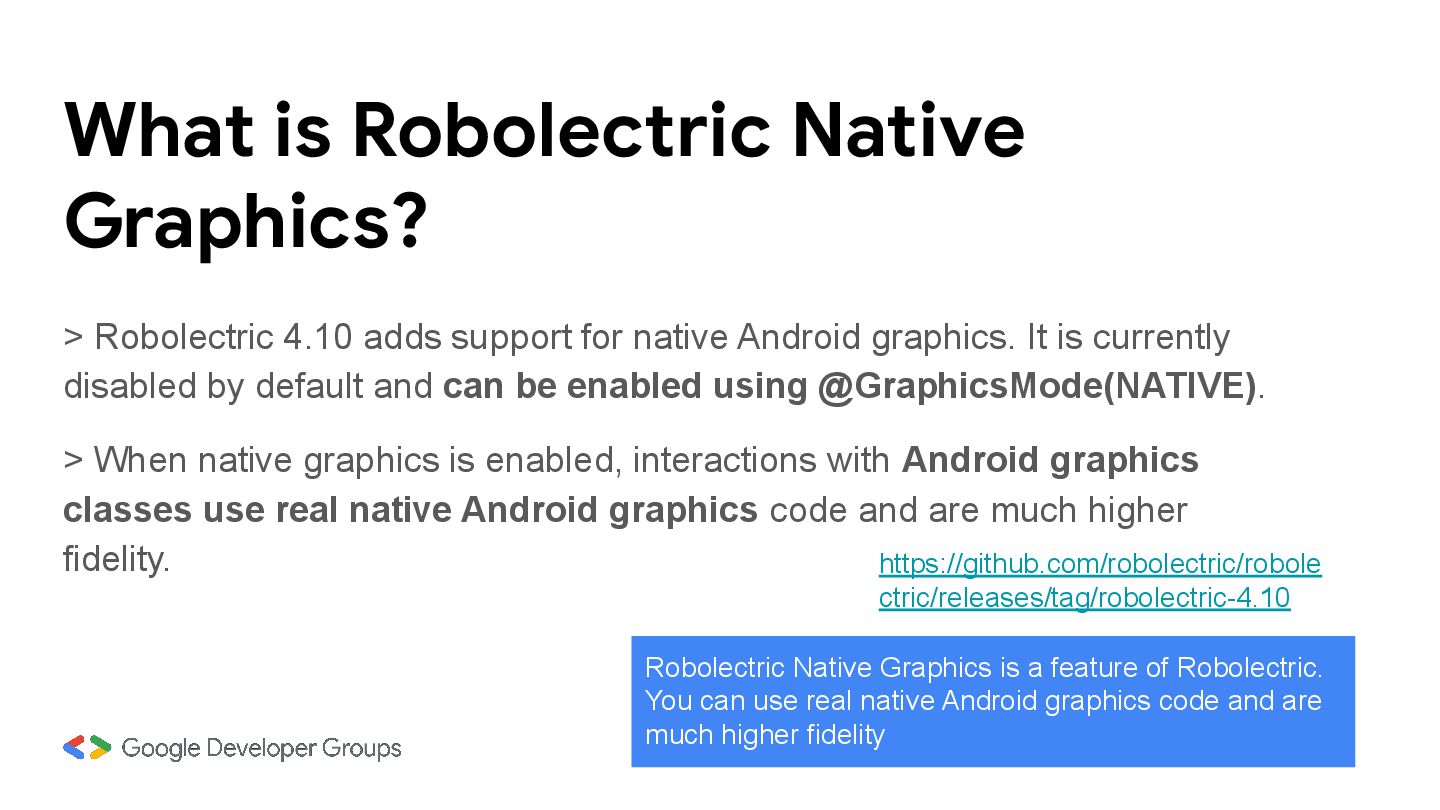
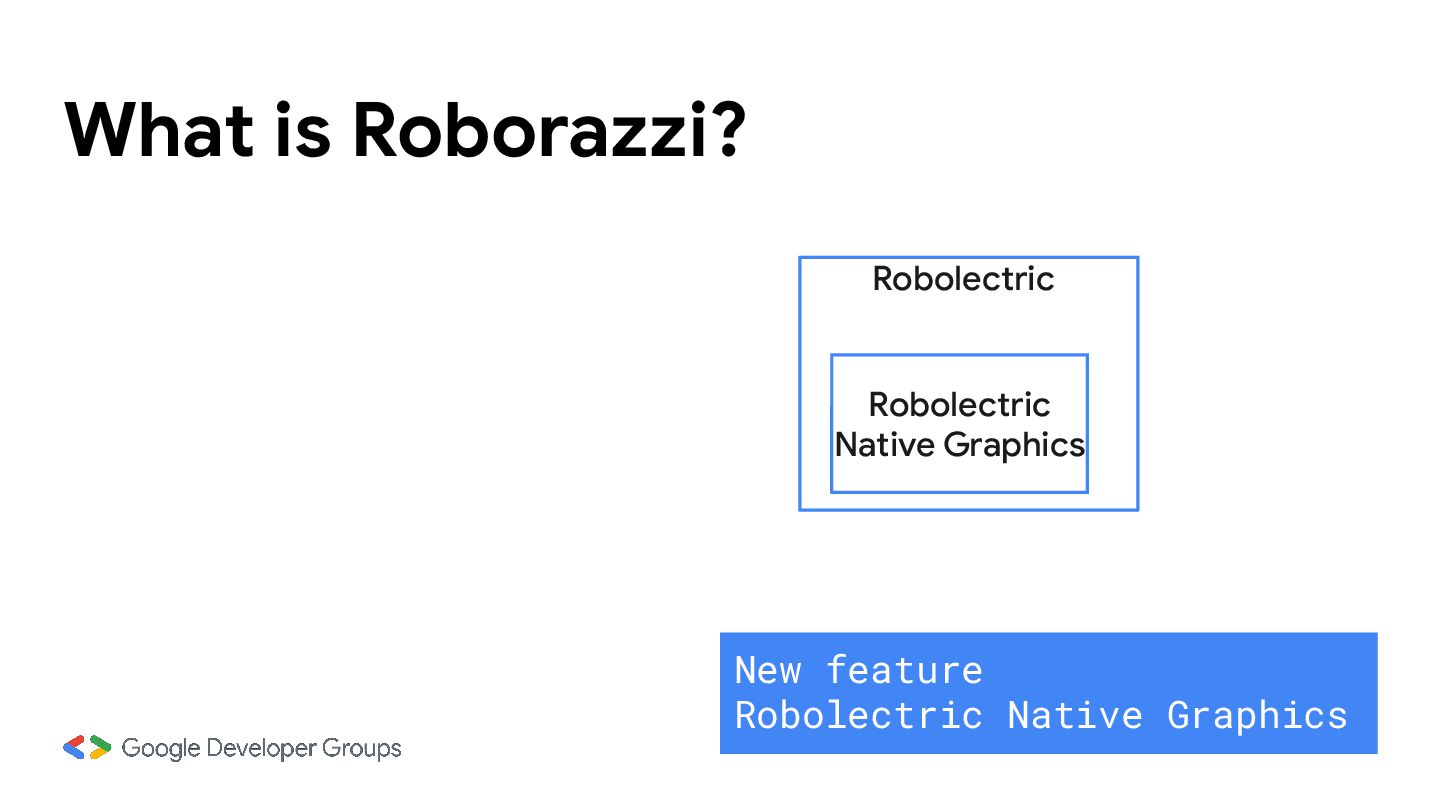
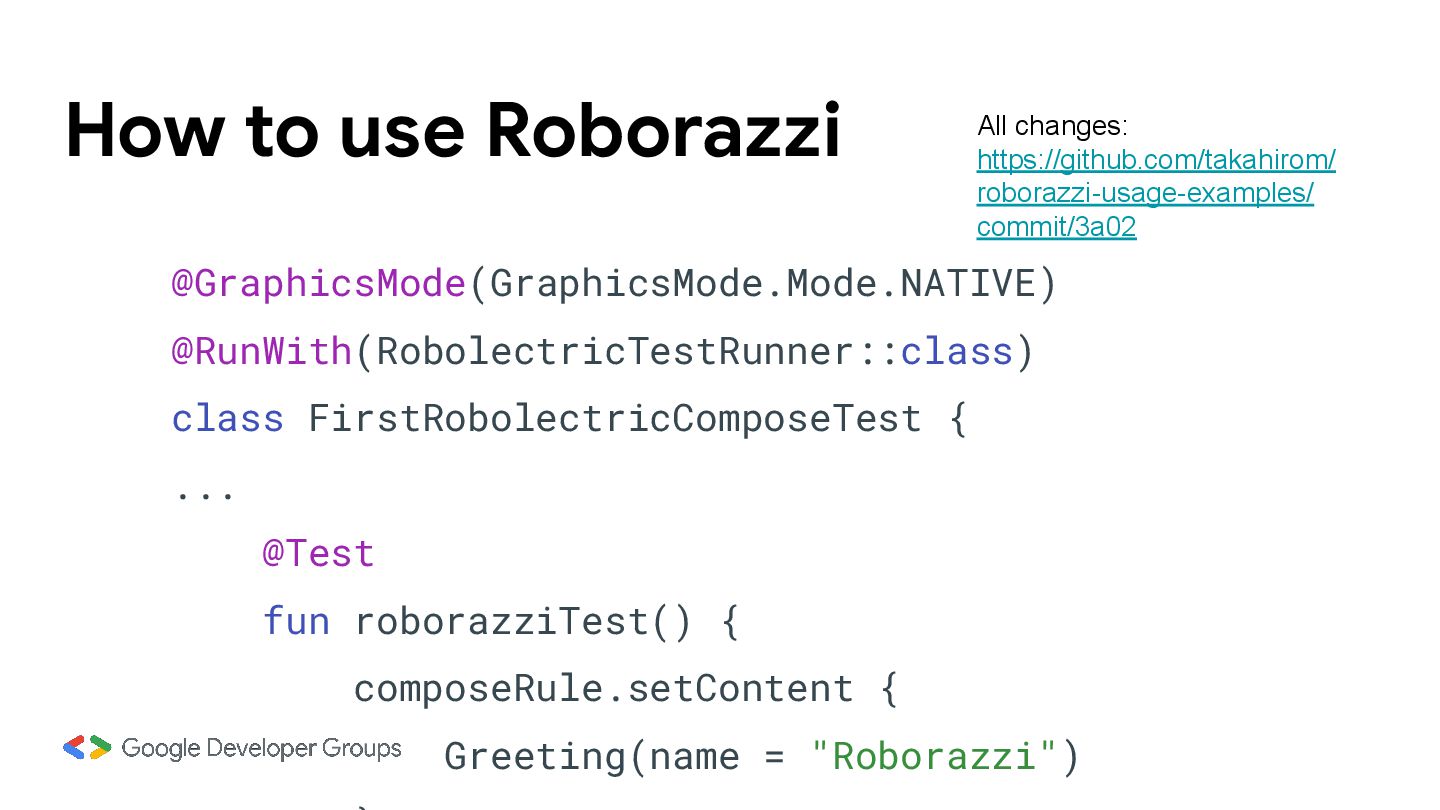
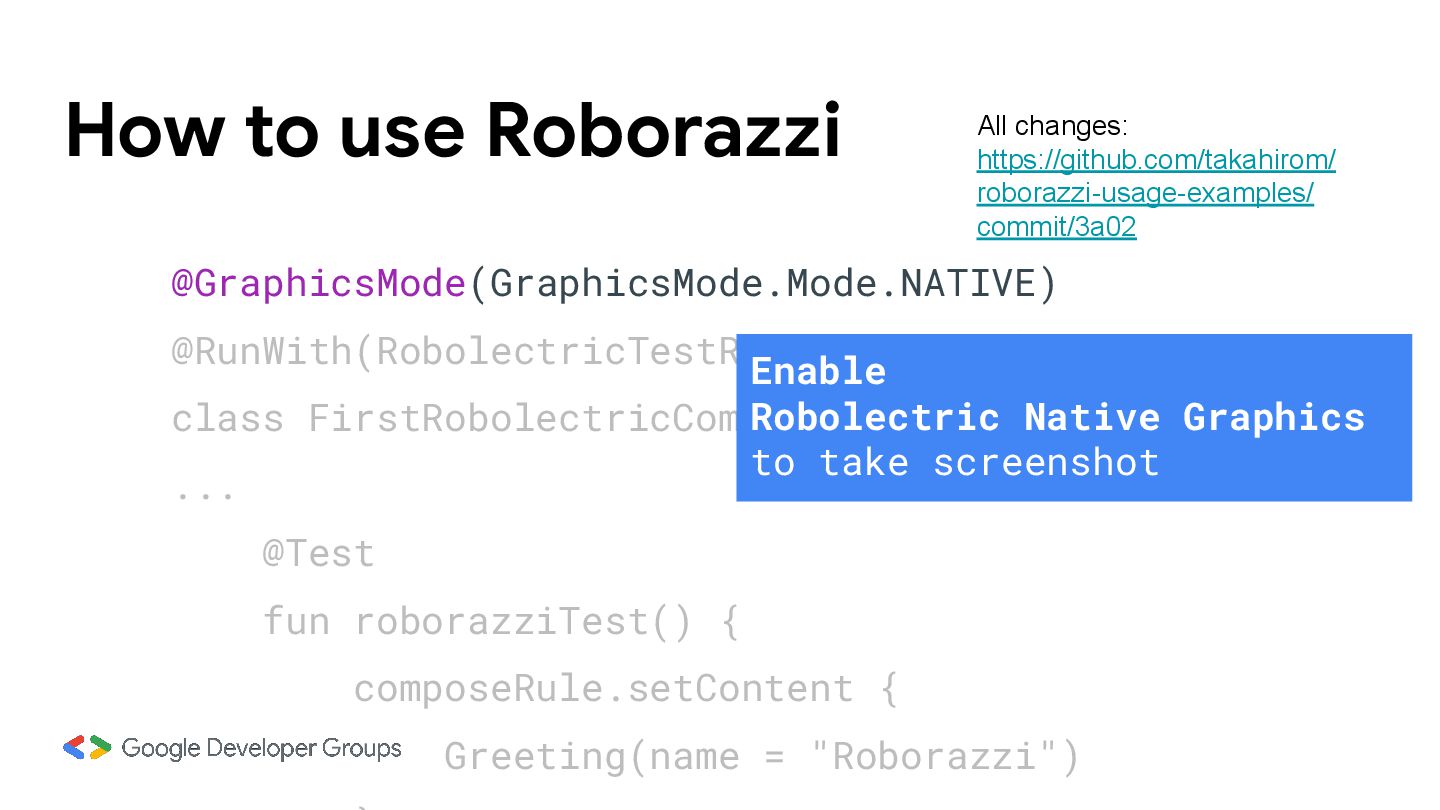
for native Android graphics. It is currently disabled by default and can be enabled using @GraphicsMode(NATIVE). > When native graphics is enabled, interactions with Android graphics classes use real native Android graphics code and are much higher fidelity. https://github.com/robolectric/robole ctric/releases/tag/robolectric-4.10 Robolectric Native Graphics is a feature of Robolectric. You can use real native Android graphics code and are much higher fidelity
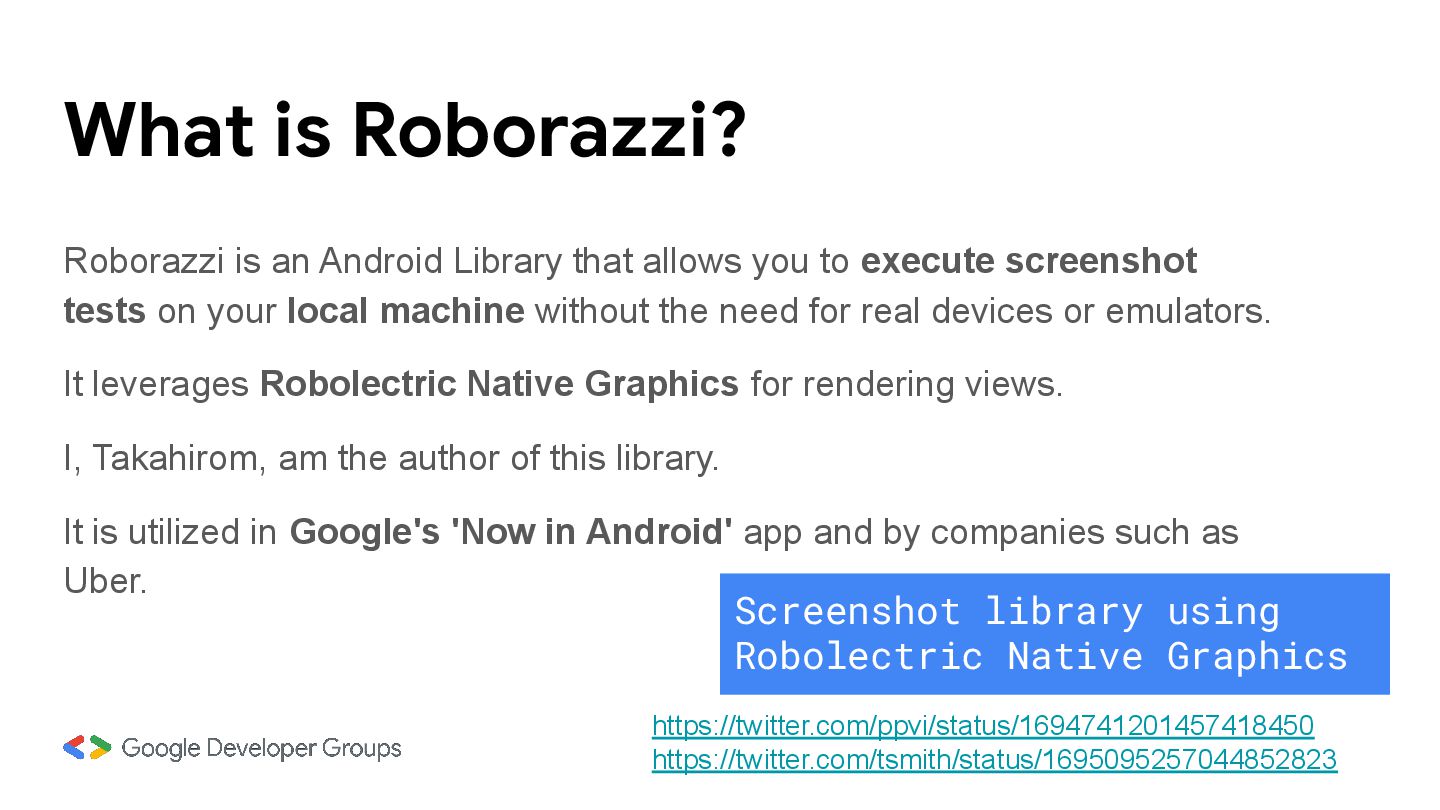
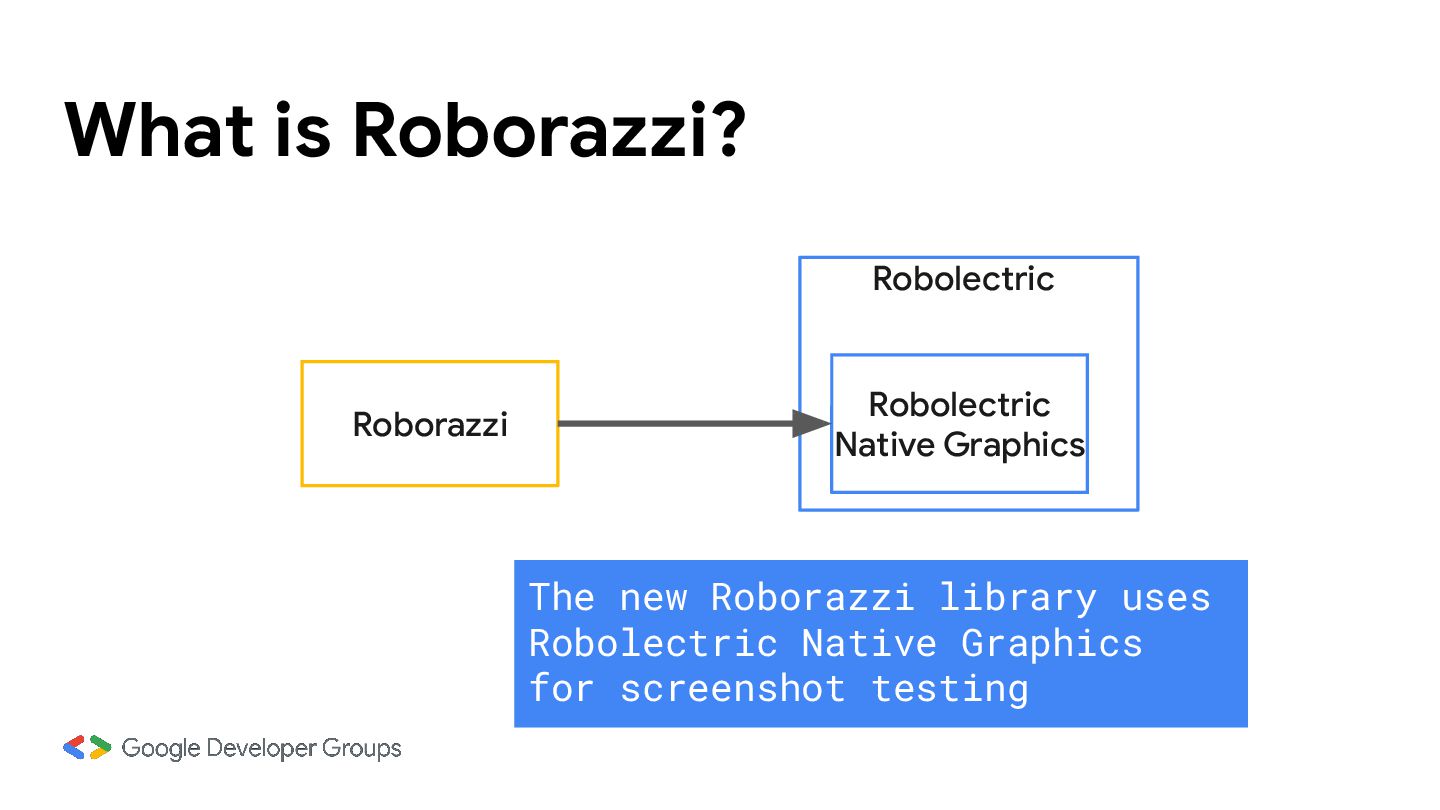
you to execute screenshot tests on your local machine without the need for real devices or emulators. It leverages Robolectric Native Graphics for rendering views. I, Takahirom, am the author of this library. It is utilized in Google's 'Now in Android' app and by companies such as Uber. https://twitter.com/ppvi/status/1694741201457418450 https://twitter.com/tsmith/status/1695095257044852823
you to execute screenshot tests on your local machine without the need for real devices or emulators. It leverages Robolectric Native Graphics for rendering views. I, Takahirom, am the author of this library. It is utilized in Google's 'Now in Android' app and by companies such as Uber. https://twitter.com/ppvi/status/1694741201457418450 https://twitter.com/tsmith/status/1695095257044852823 Screenshot library using Robolectric Native Graphics
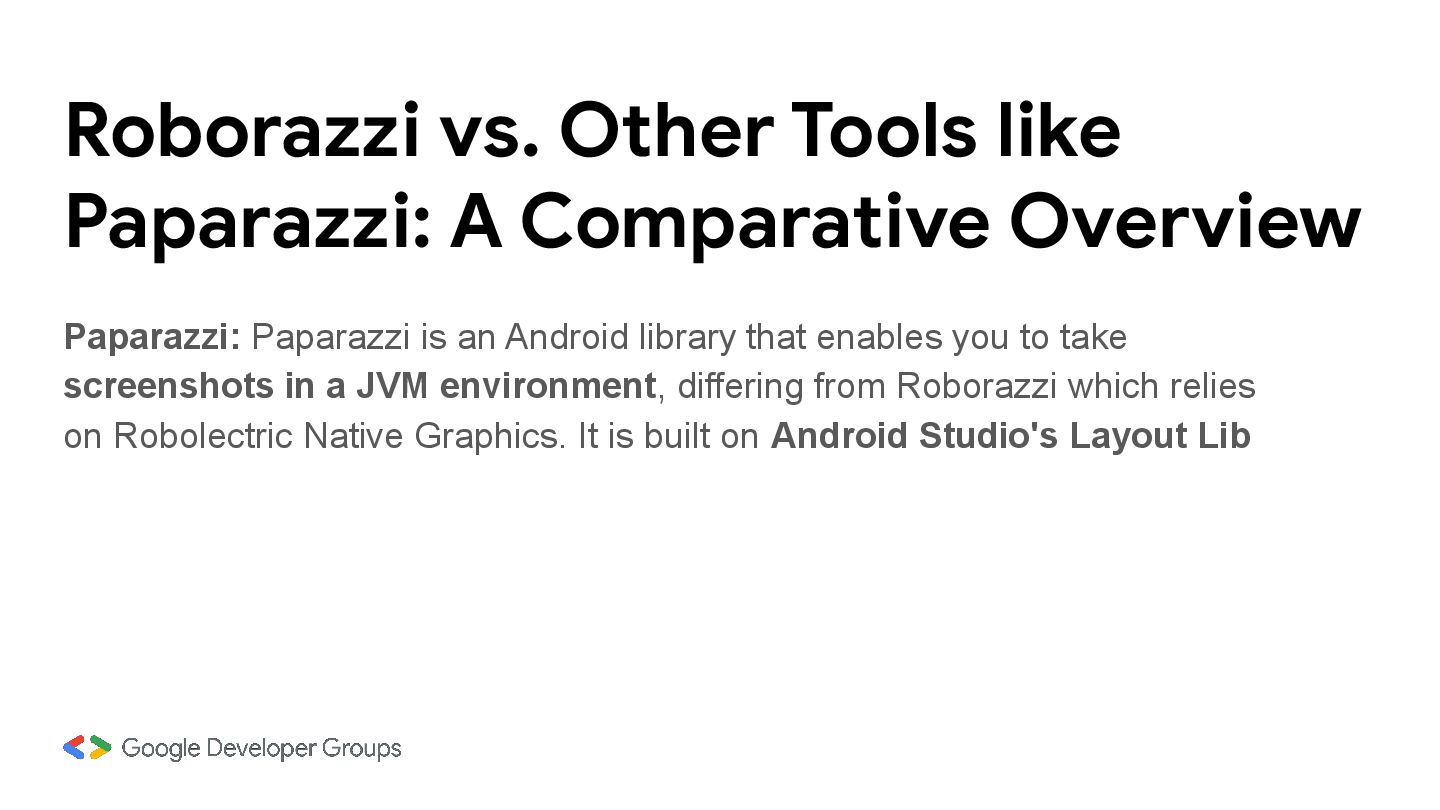
Paparazzi is an Android library that enables you to take screenshots in a JVM environment, differing from Roborazzi which relies on Robolectric Native Graphics. It is built on Android Studio's Layout Lib
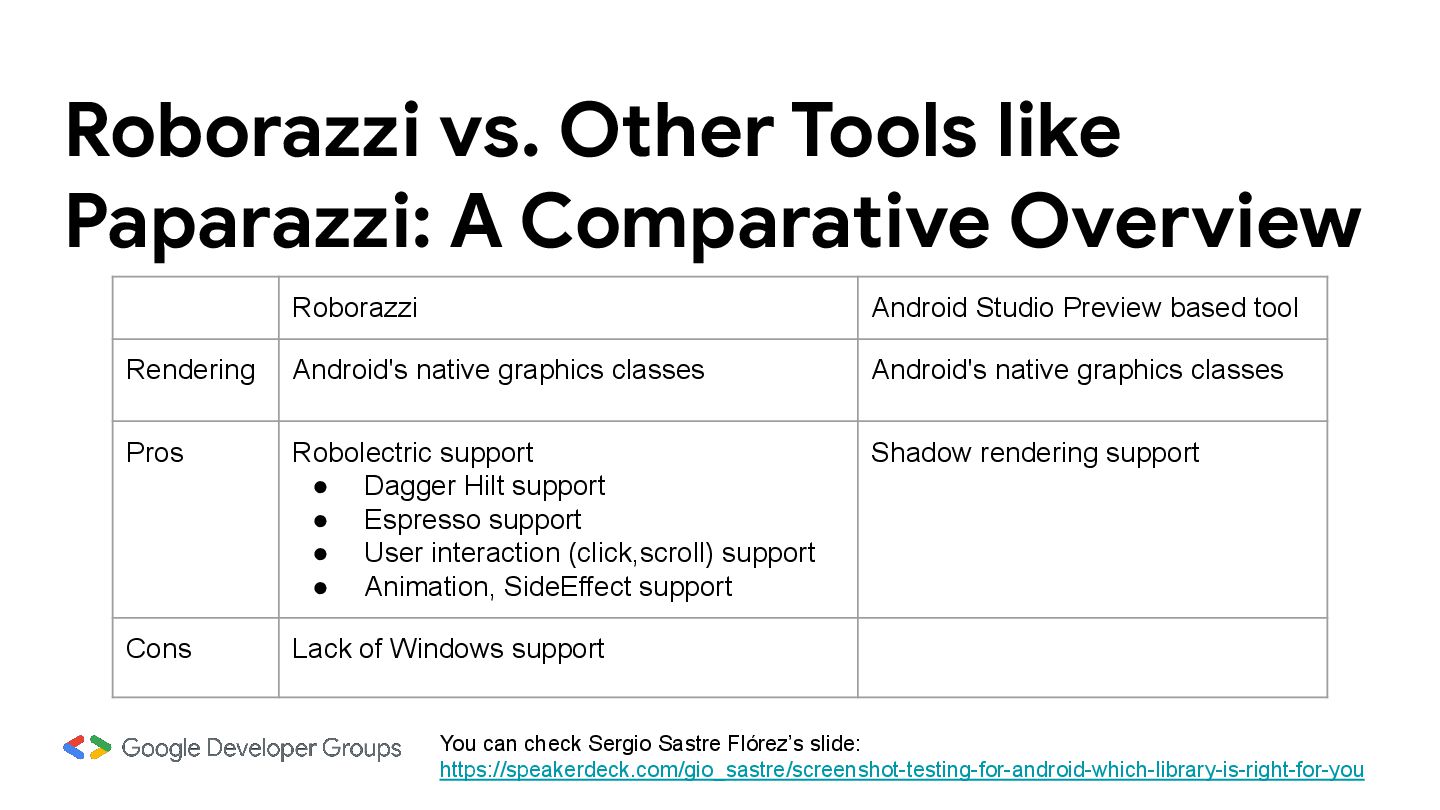
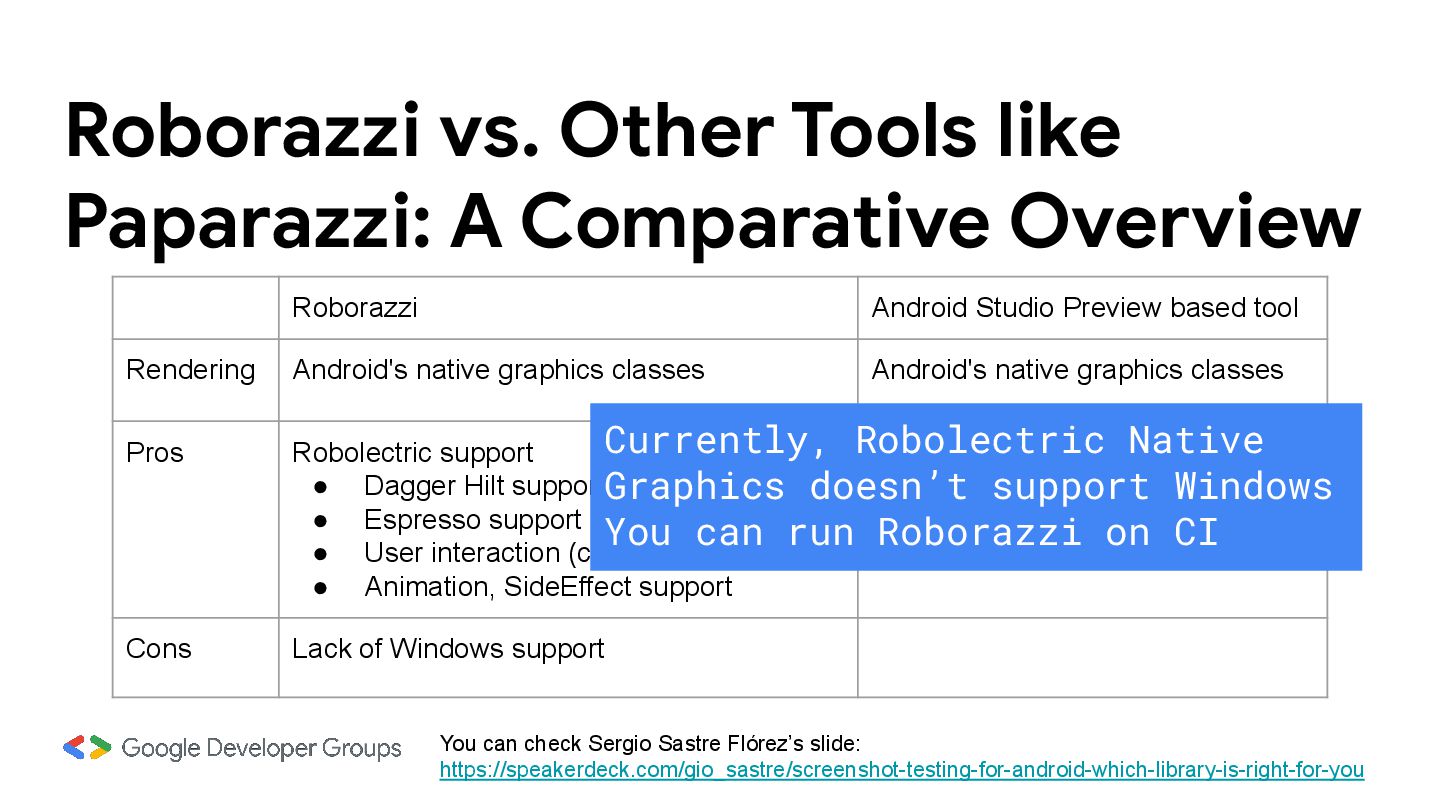
Android Studio Preview based tool Rendering Android's native graphics classes Android's native graphics classes Pros Robolectric support • Dagger Hilt support • Espresso support • User interaction (click,scroll) support • Animation, SideEffect support Shadow rendering support Cons Lack of Windows support You can check Sergio Sastre Flórez’s slide: https://speakerdeck.com/gio_sastre/screenshot-testing-for-android-which-library-is-right-for-you
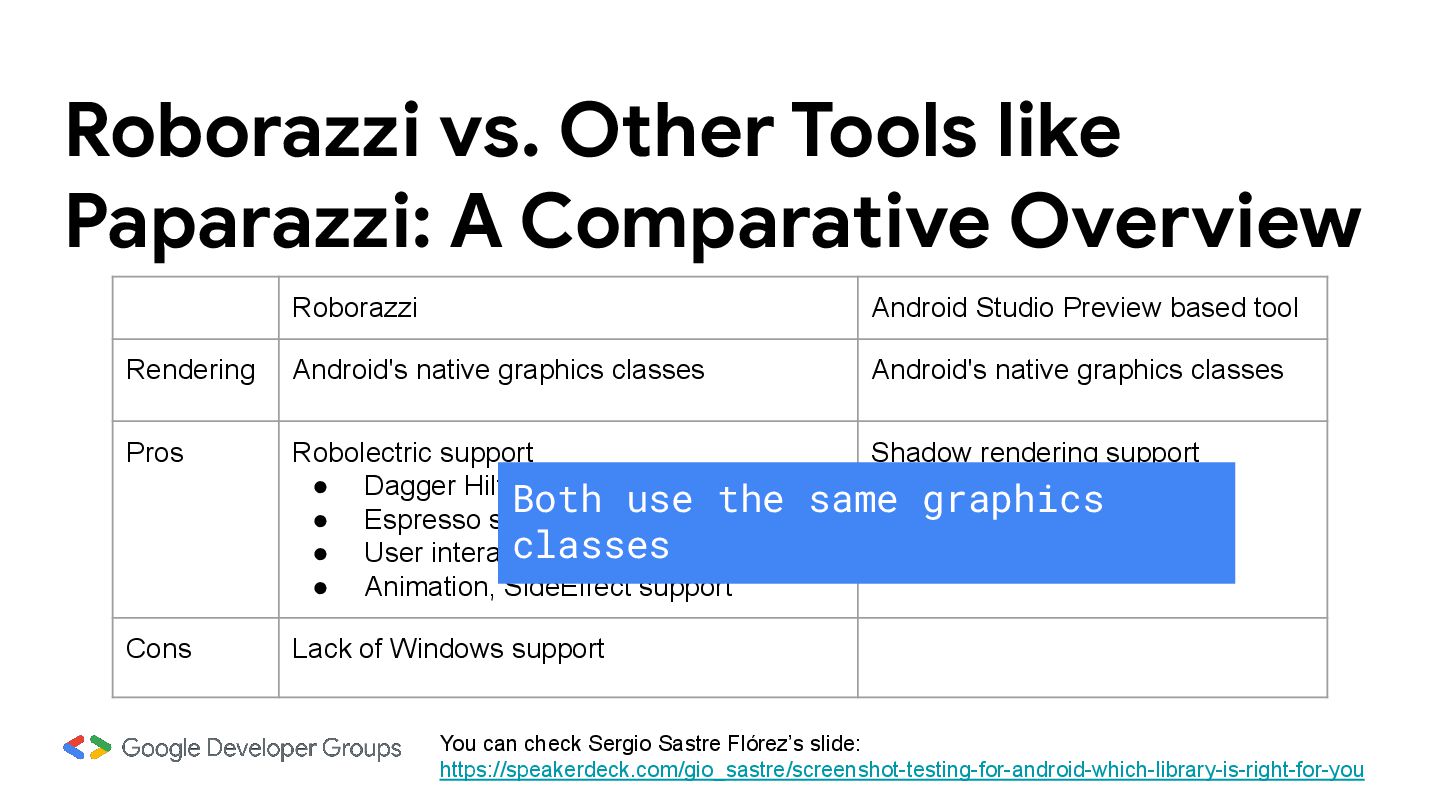
Android Studio Preview based tool Rendering Android's native graphics classes Android's native graphics classes Pros Robolectric support • Dagger Hilt support • Espresso support • User interaction (click,scroll) support • Animation, SideEffect support Shadow rendering support Cons Lack of Windows support You can check Sergio Sastre Flórez’s slide: https://speakerdeck.com/gio_sastre/screenshot-testing-for-android-which-library-is-right-for-you Both use the same graphics classes
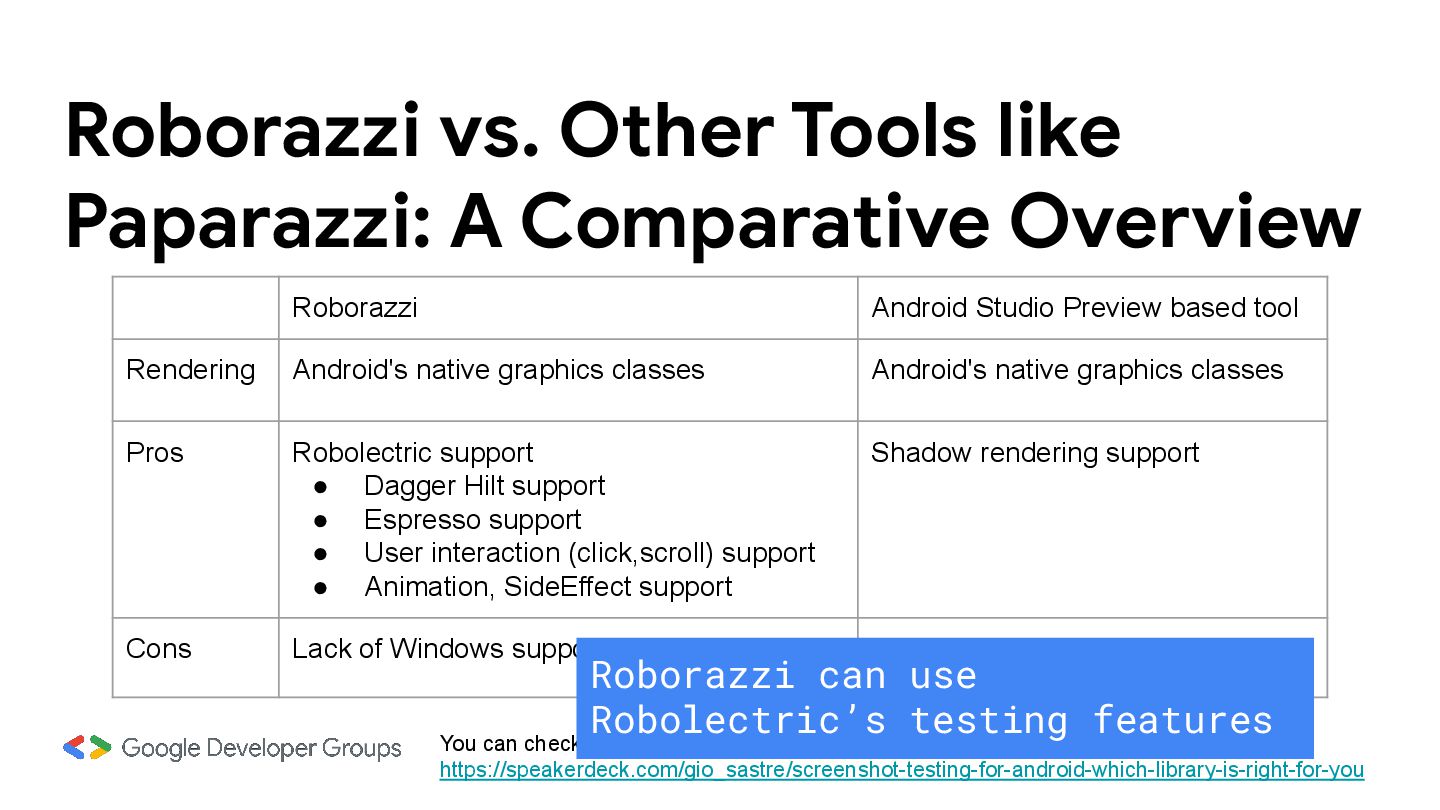
Android Studio Preview based tool Rendering Android's native graphics classes Android's native graphics classes Pros Robolectric support • Dagger Hilt support • Espresso support • User interaction (click,scroll) support • Animation, SideEffect support Shadow rendering support Cons Lack of Windows support You can check Sergio Sastre Flórez’s slide: https://speakerdeck.com/gio_sastre/screenshot-testing-for-android-which-library-is-right-for-you Roborazzi can use Robolectric’s testing features
Android Studio Preview based tool Rendering Android's native graphics classes Android's native graphics classes Pros Robolectric support • Dagger Hilt support • Espresso support • User interaction (click,scroll) support • Animation, SideEffect support Shadow rendering support Cons Lack of Windows support You can check Sergio Sastre Flórez’s slide: https://speakerdeck.com/gio_sastre/screenshot-testing-for-android-which-library-is-right-for-you Currently, Robolectric Native Graphics doesn’t support Windows You can run Roborazzi on CI
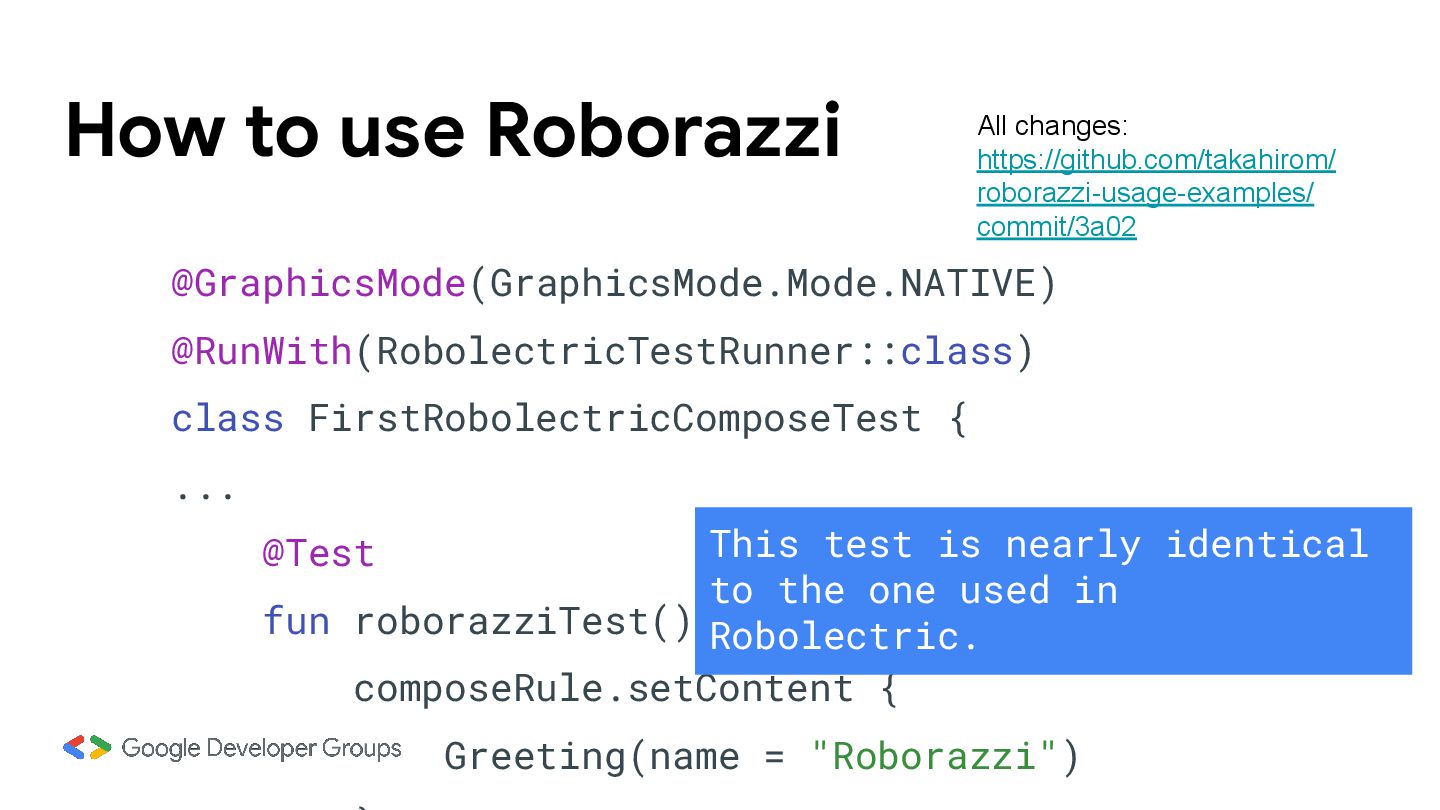
@Test fun roborazziTest() { composeRule.setContent { Greeting(name = "Roborazzi") All changes: https://github.com/takahirom/ roborazzi-usage-examples/ commit/3a02 This test is nearly identical to the one used in Robolectric.
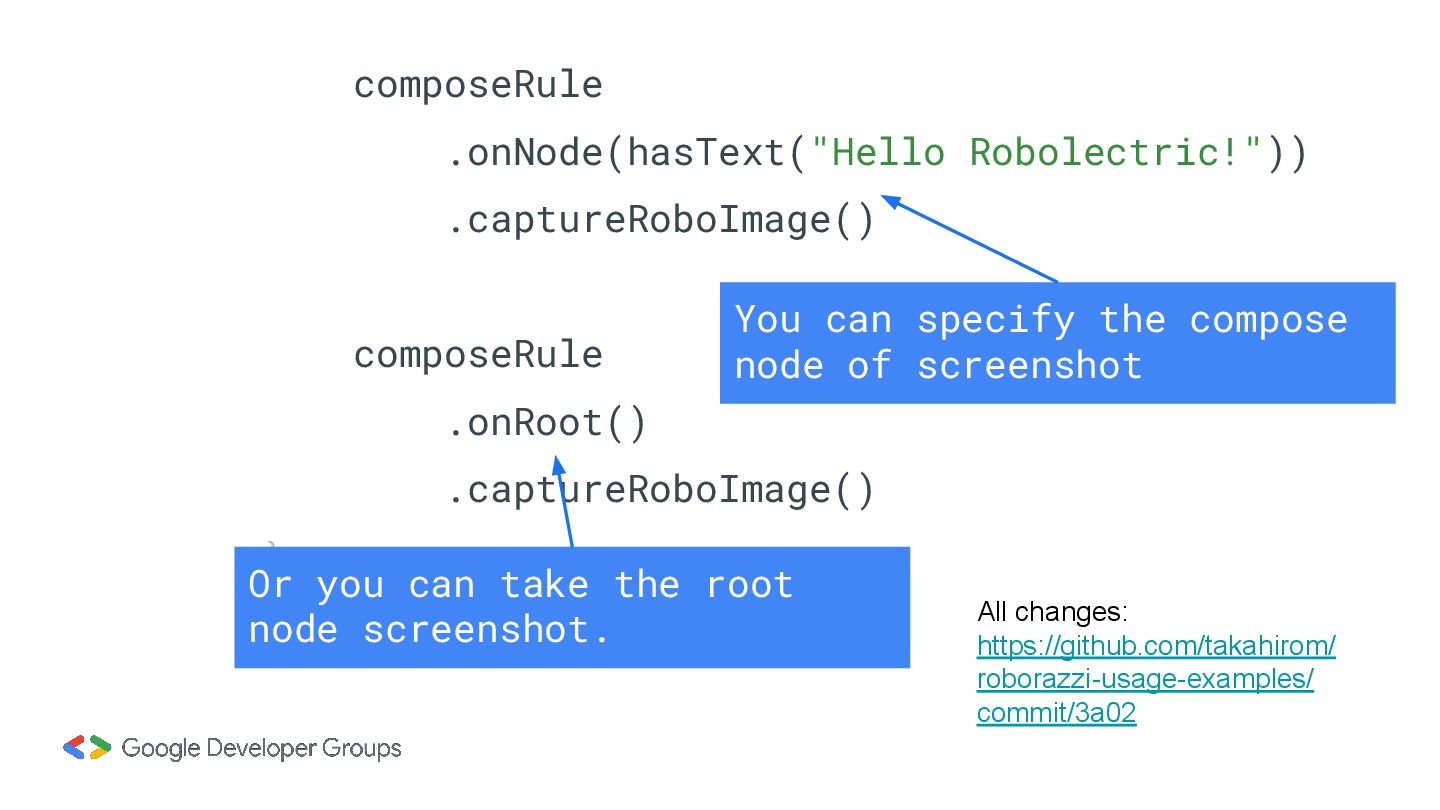
https://github.com/takahirom/ roborazzi-usage-examples/ commit/3a02 You can specify the compose node of screenshot Or you can take the root node screenshot.
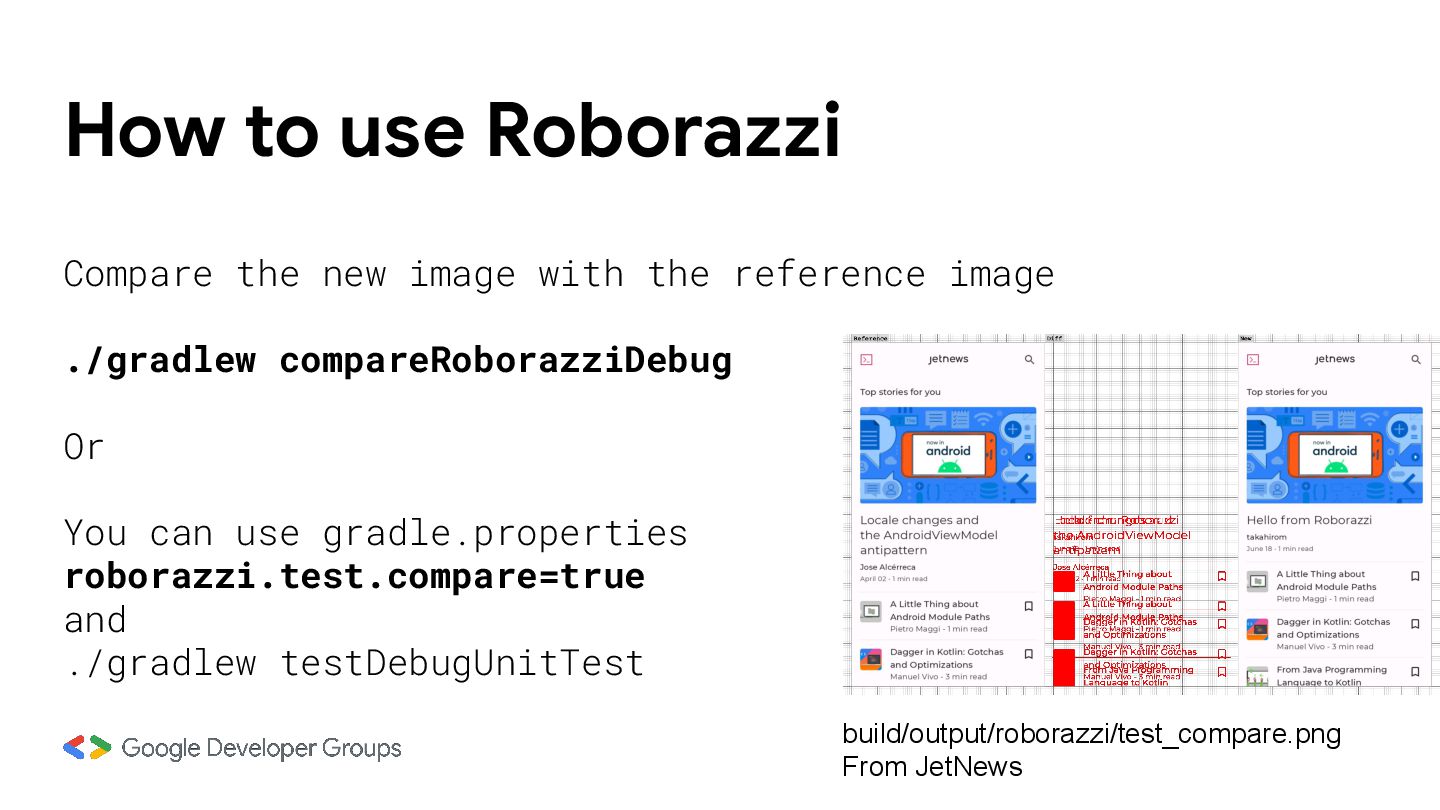
image with the reference image ./gradlew compareRoborazziDebug Or You can use gradle.properties roborazzi.test.compare=true and ./gradlew testDebugUnitTest
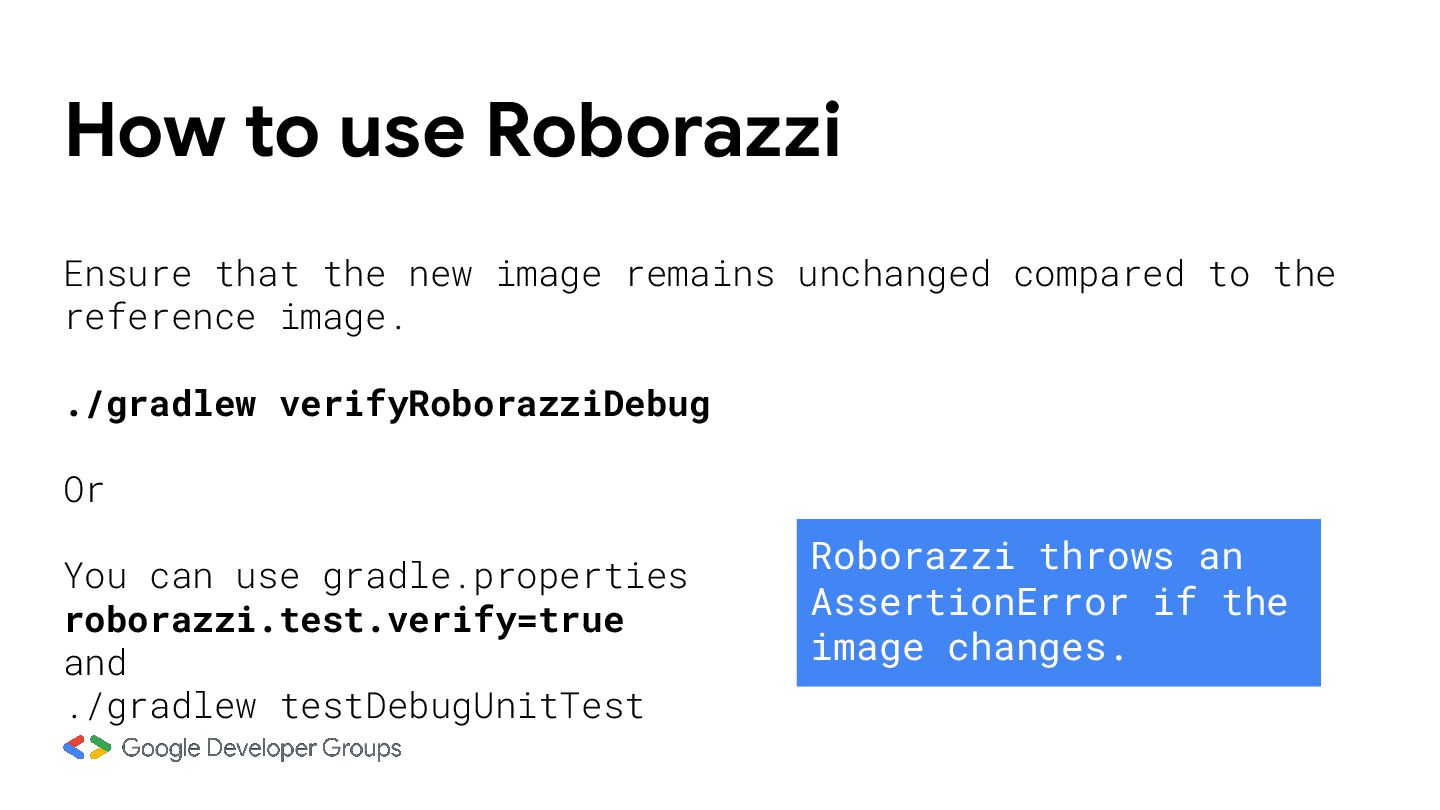
unchanged compared to the reference image. ./gradlew verifyRoborazziDebug Or You can use gradle.properties roborazzi.test.verify=true and ./gradlew testDebugUnitTest Roborazzi throws an AssertionError if the image changes.
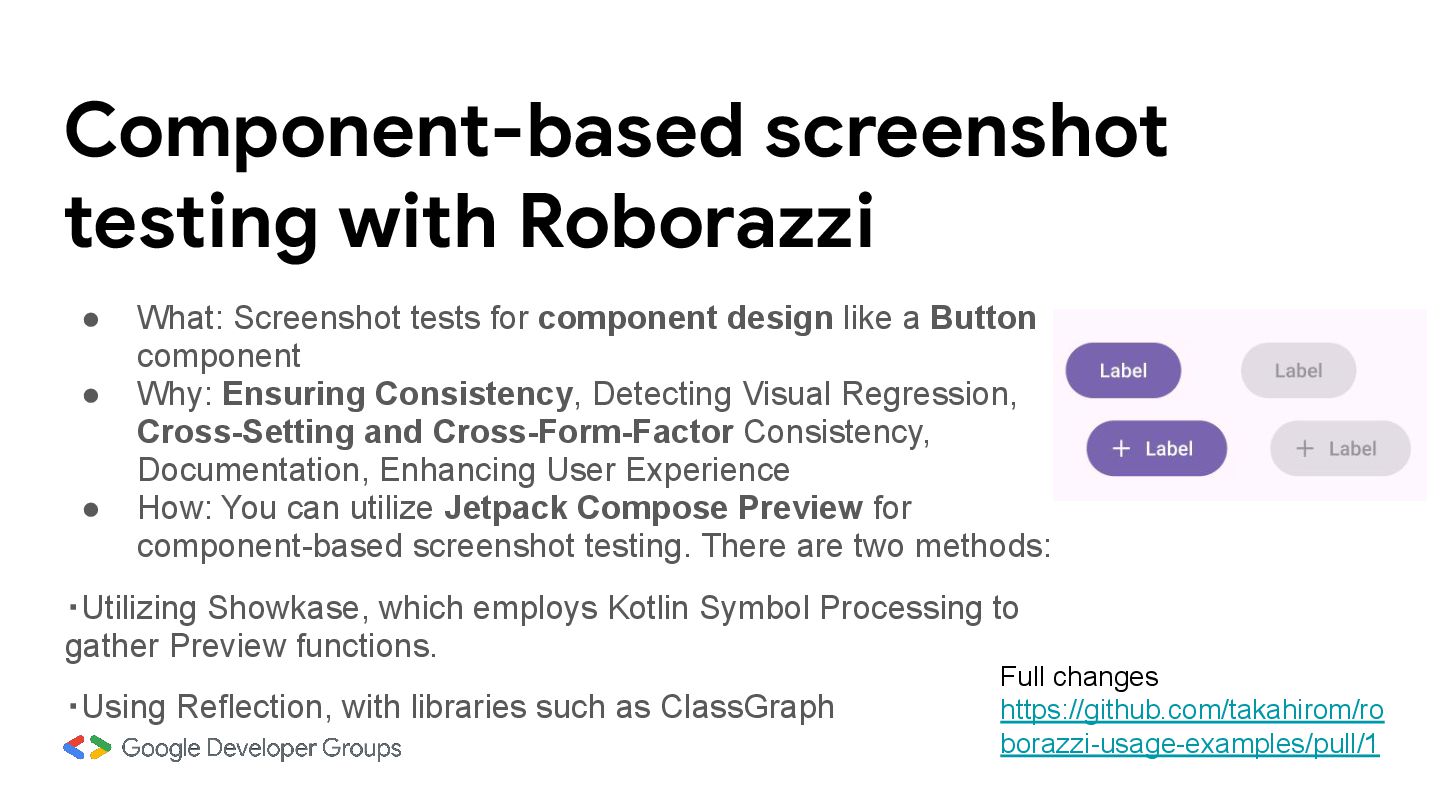
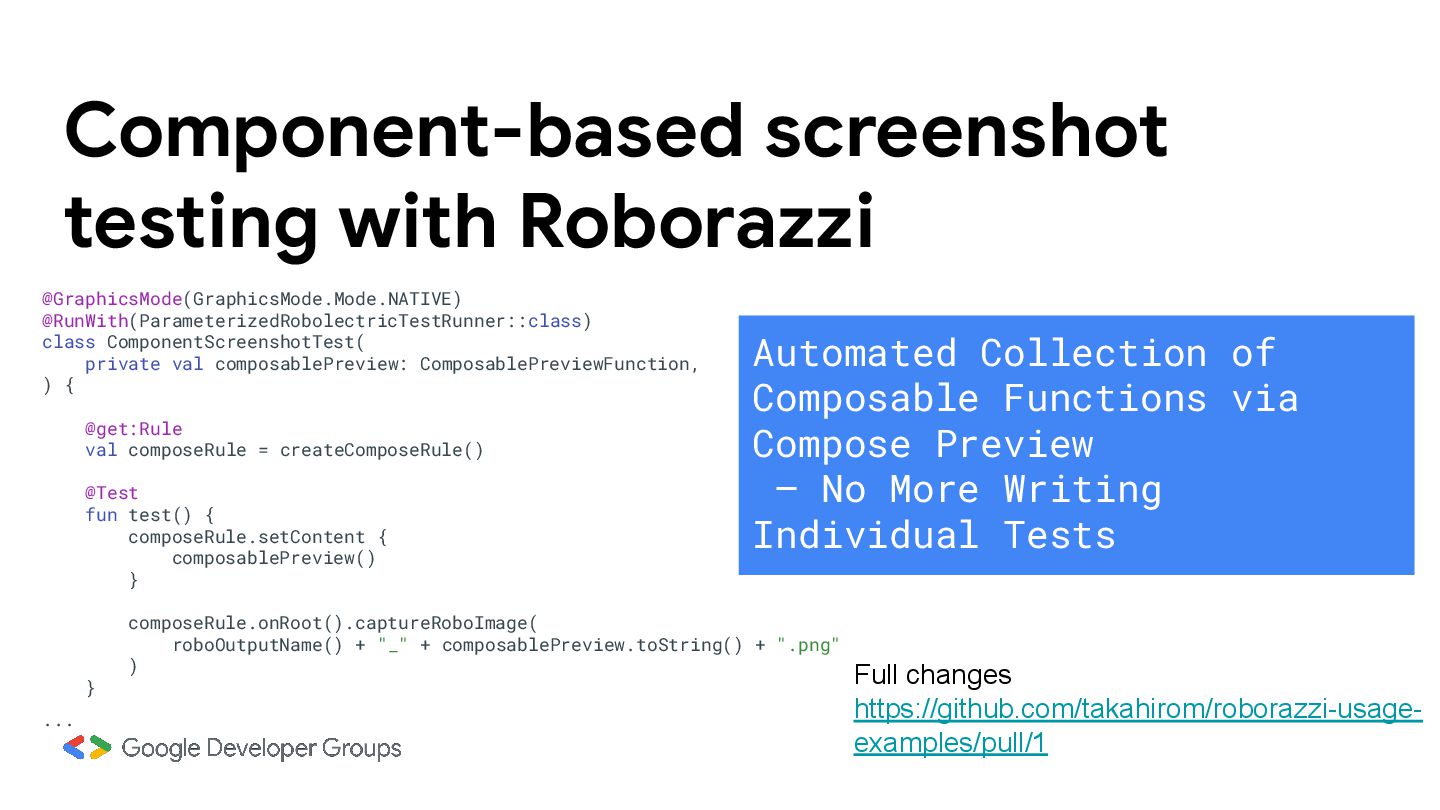
component design like a Button component • Why: Ensuring Consistency, Detecting Visual Regression, Cross-Setting and Cross-Form-Factor Consistency, Documentation, Enhancing User Experience • How: You can utilize Jetpack Compose Preview for component-based screenshot testing. There are two methods: ・Utilizing Showkase, which employs Kotlin Symbol Processing to gather Preview functions. ・Using Reflection, with libraries such as ClassGraph Full changes https://github.com/takahirom/ro borazzi-usage-examples/pull/1
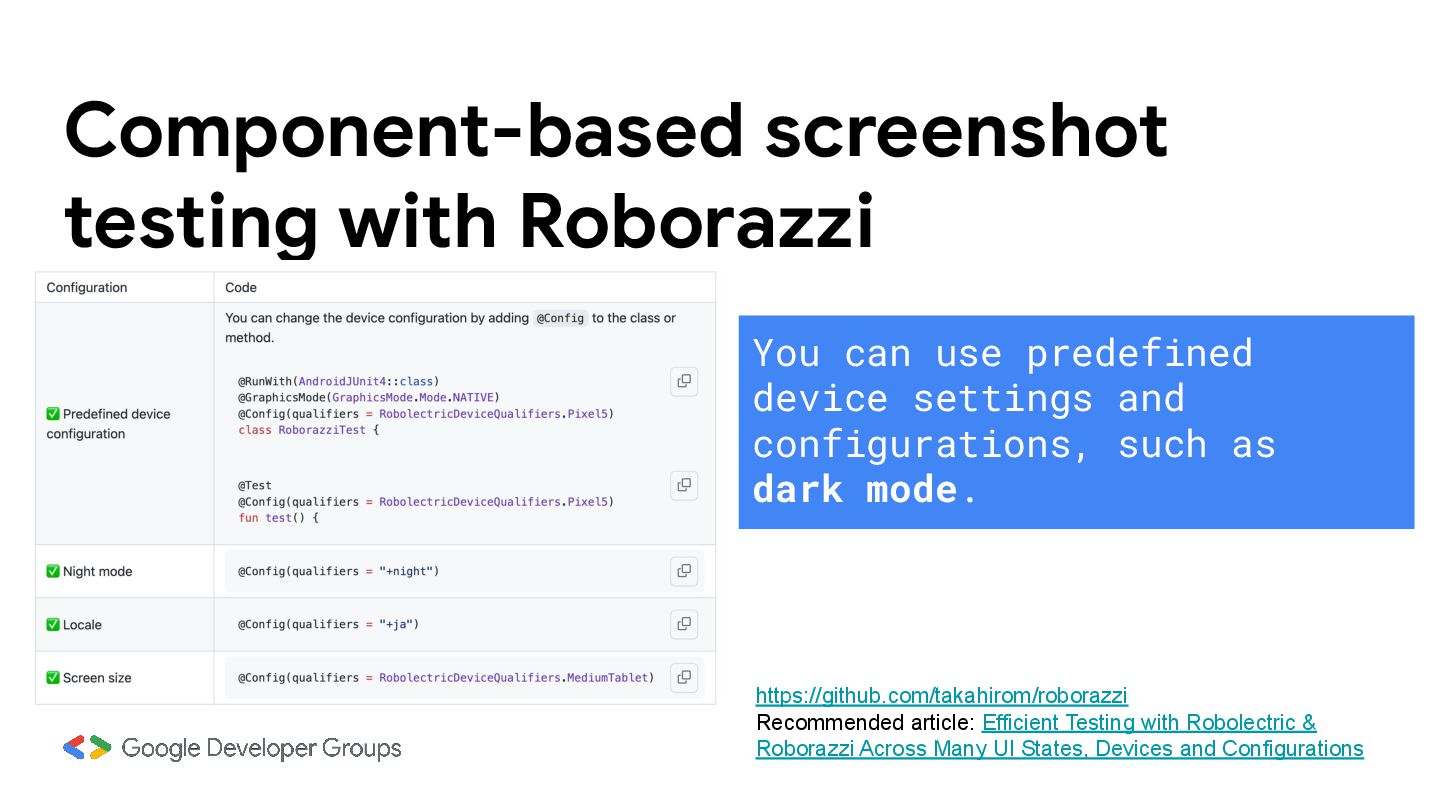
with Robolectric & Roborazzi Across Many UI States, Devices and Configurations You can use predefined device settings and configurations, such as dark mode.
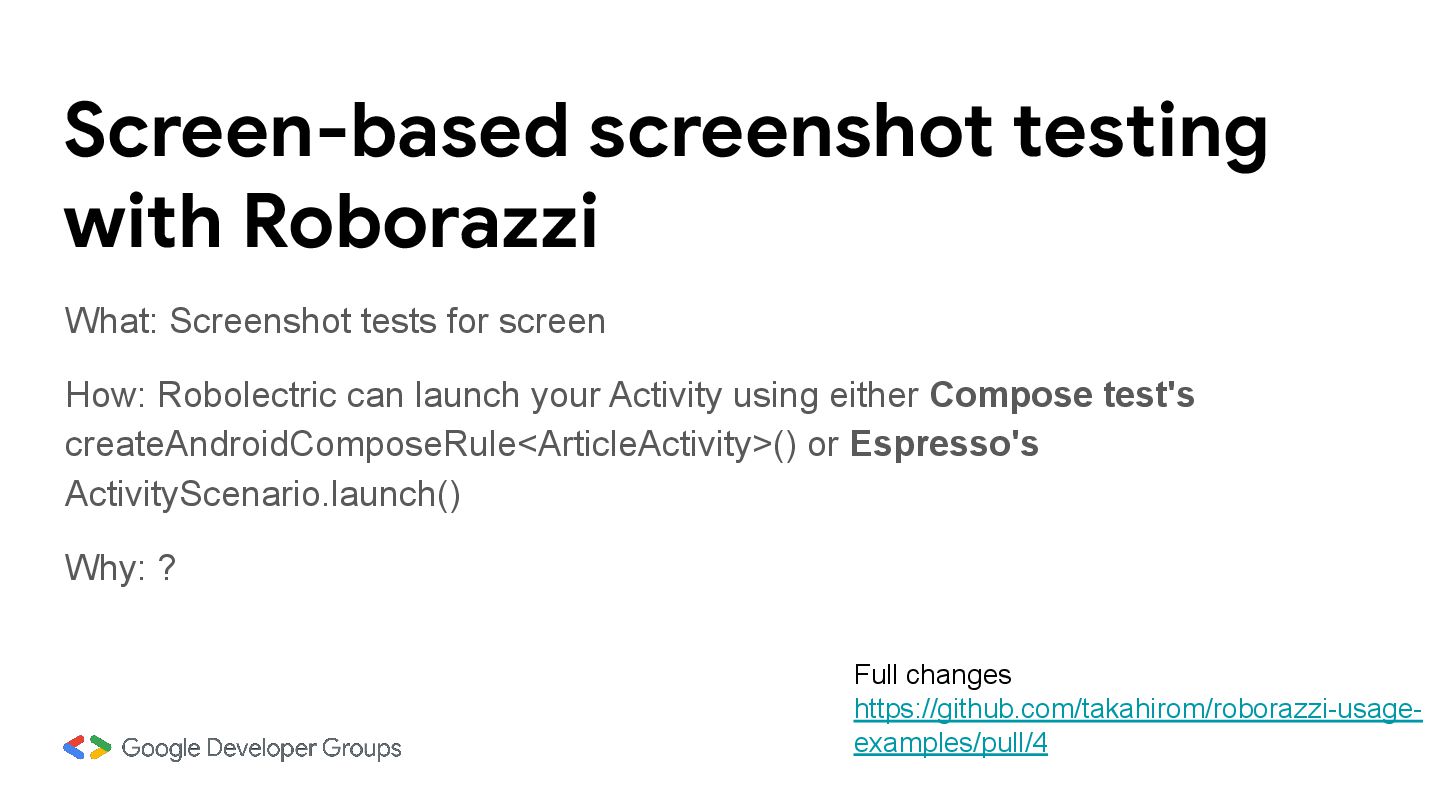
How: Robolectric can launch your Activity using either Compose test's createAndroidComposeRule<ArticleActivity>() or Espresso's ActivityScenario.launch() Why: ? Full changes https://github.com/takahirom/roborazzi-usage- examples/pull/4
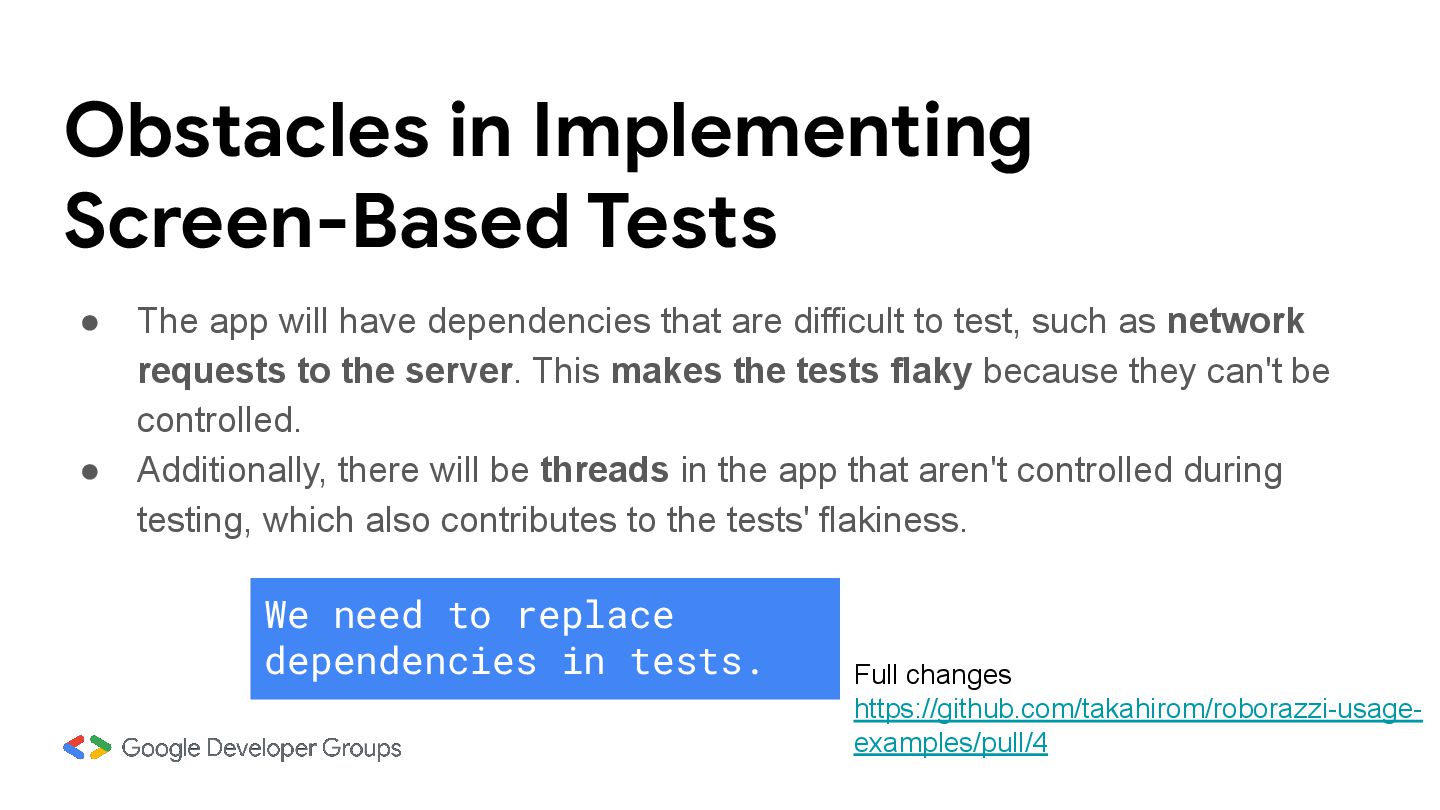
dependencies that are difficult to test, such as network requests to the server. This makes the tests flaky because they can't be controlled. • Additionally, there will be threads in the app that aren't controlled during testing, which also contributes to the tests' flakiness. Full changes https://github.com/takahir om/roborazzi-usage-exa mples/pull/4 Dependencies (Server APIs, Threads)
dependencies that are difficult to test, such as network requests to the server. This makes the tests flaky because they can't be controlled. • Additionally, there will be threads in the app that aren't controlled during testing, which also contributes to the tests' flakiness. Full changes https://github.com/takahirom/roborazzi-usage- examples/pull/4 We need to replace dependencies in tests.
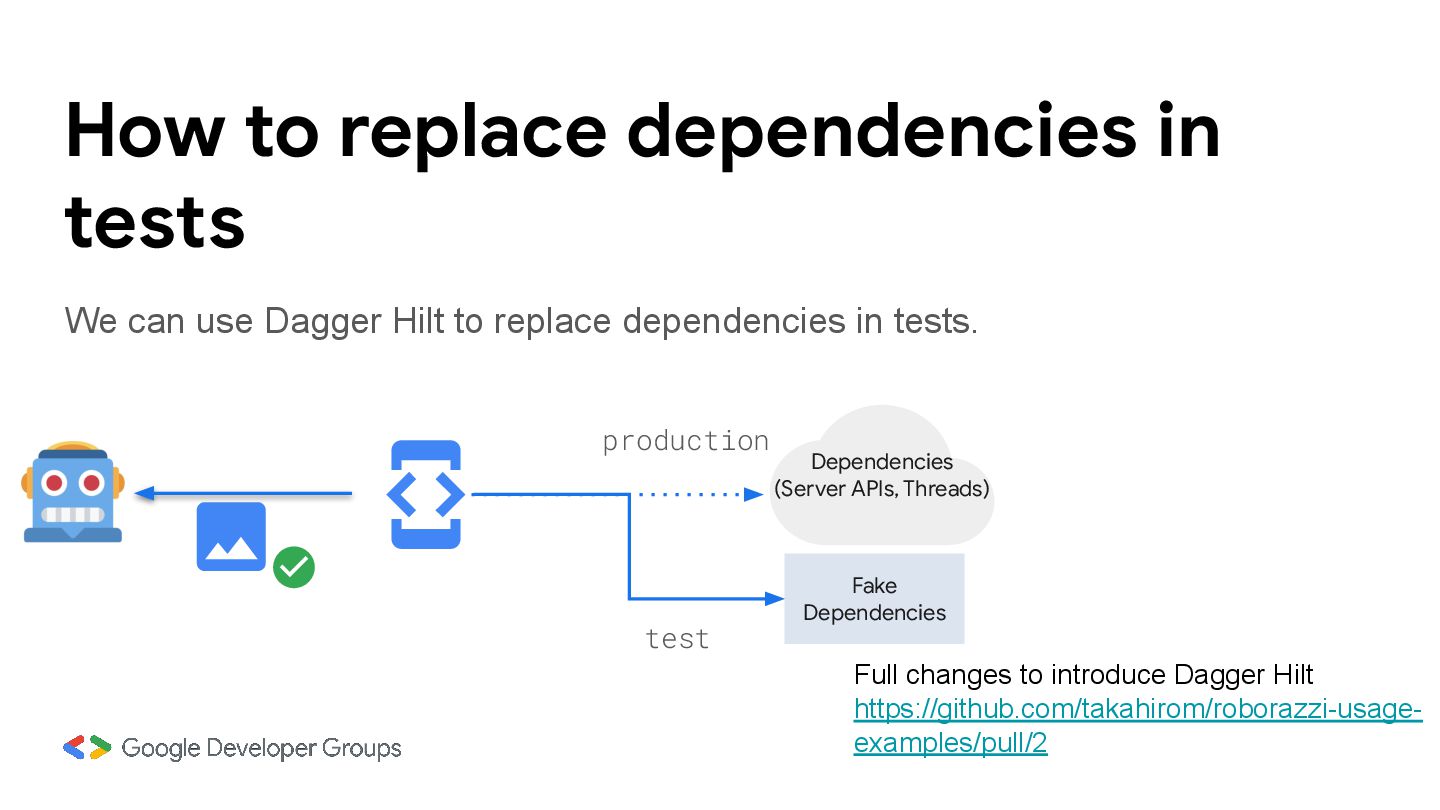
Hilt to replace dependencies in tests. Full changes to introduce Dagger Hilt https://github.com/takahirom/roborazzi-usage- examples/pull/2 Fake Dependencies production test Dependencies (Server APIs, Threads)
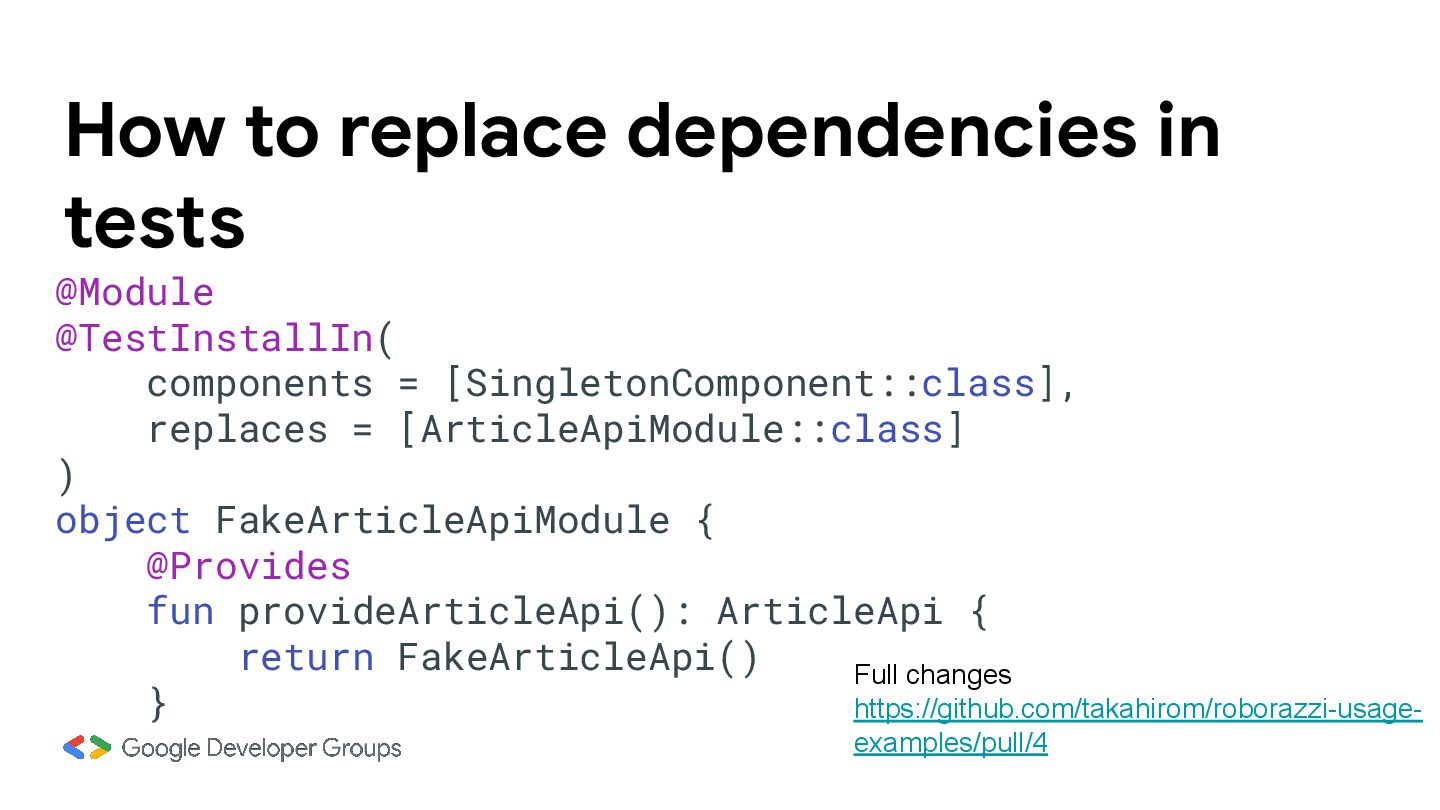
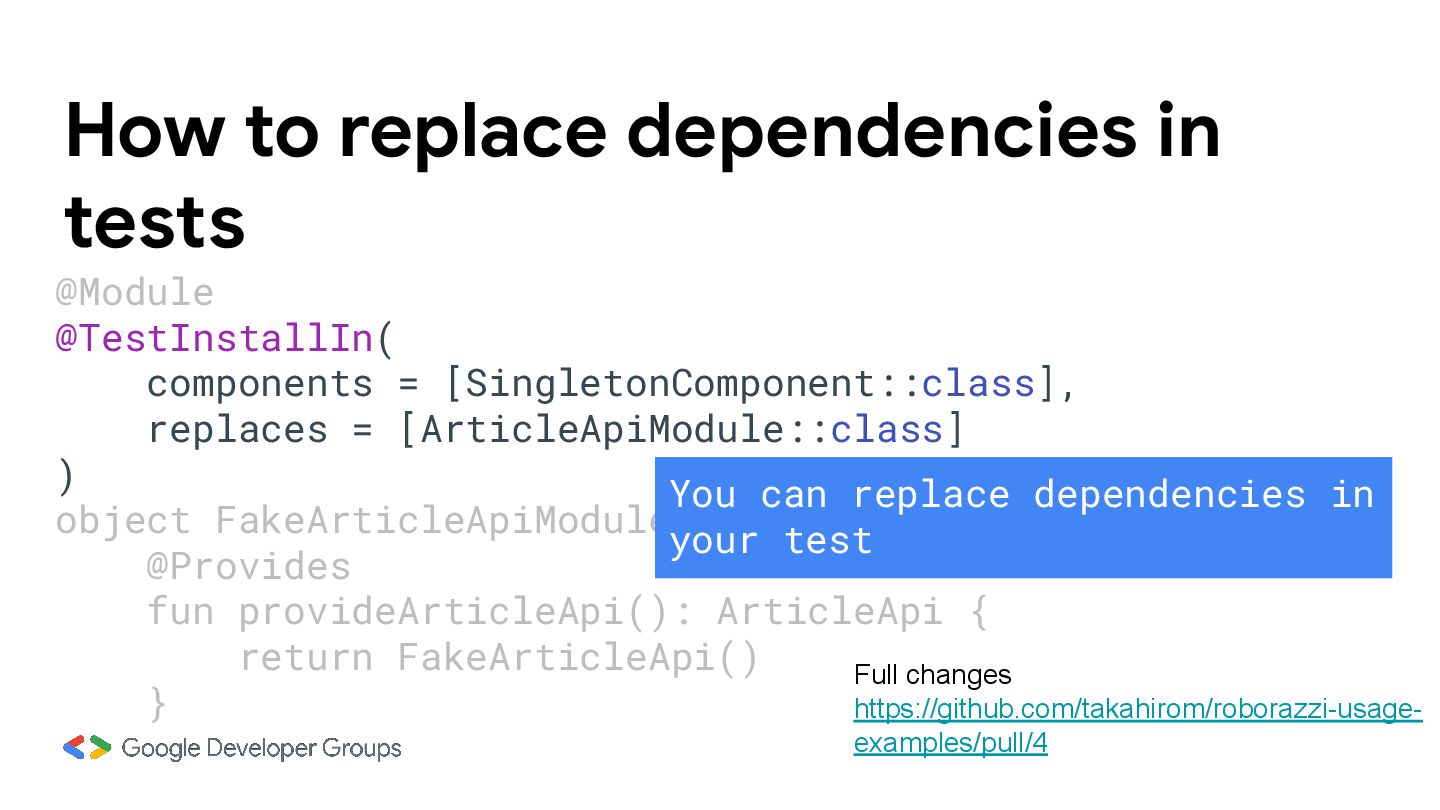
@Module @TestInstallIn( components = [SingletonComponent::class], replaces = [ArticleApiModule::class] ) object FakeArticleApiModule { @Provides fun provideArticleApi(): ArticleApi { return FakeArticleApi() } You can replace dependencies in your test
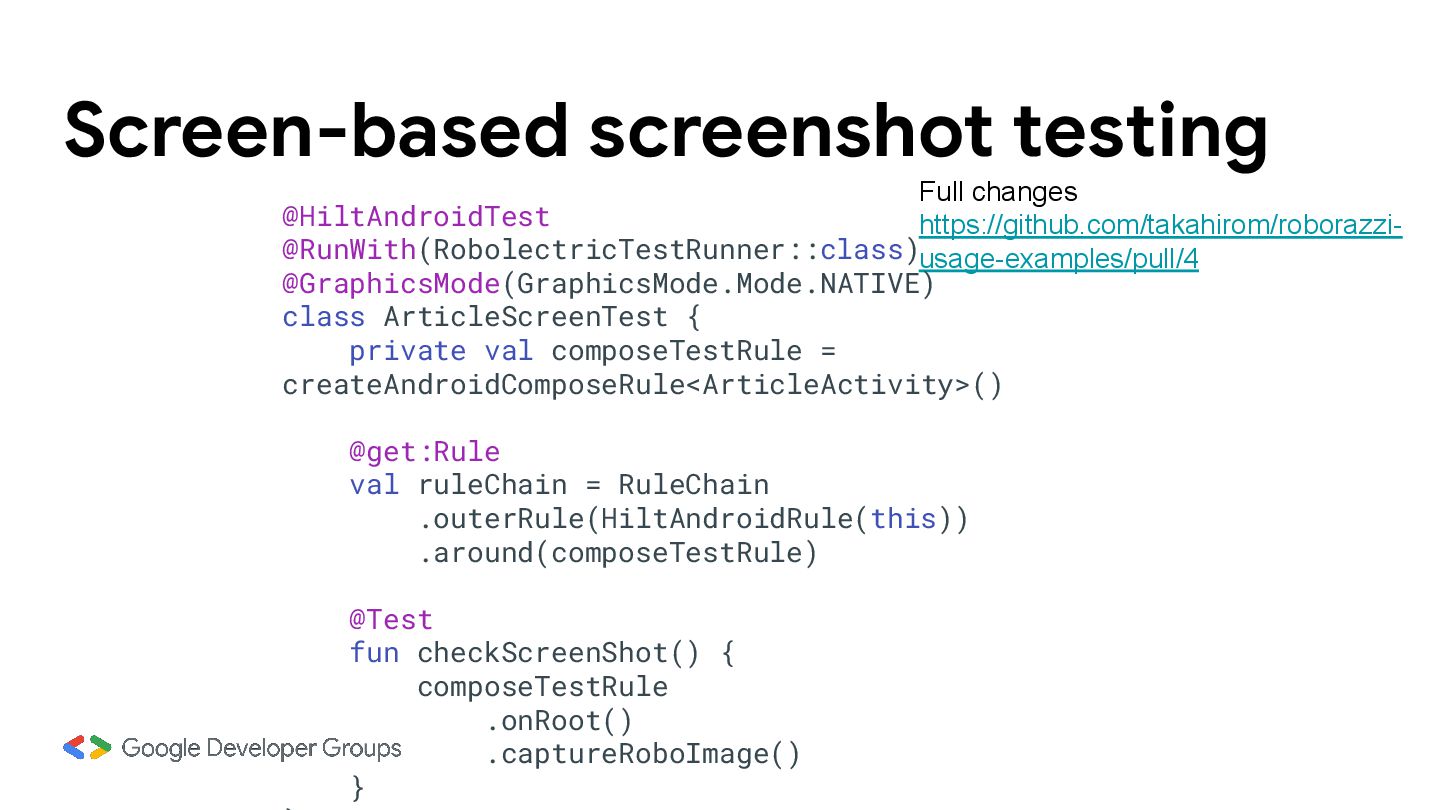
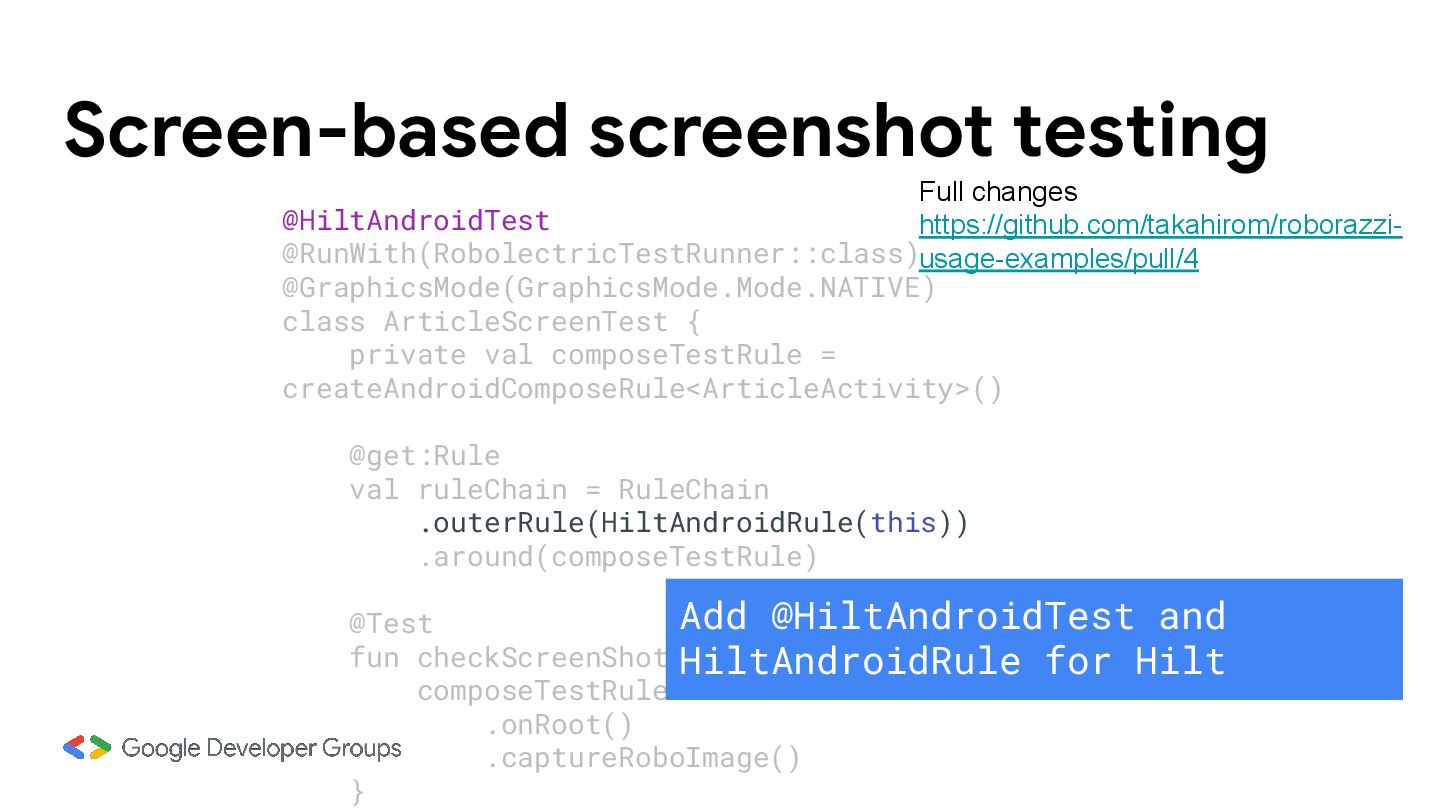
class ArticleScreenTest { private val composeTestRule = createAndroidComposeRule<ArticleActivity>() @get:Rule val ruleChain = RuleChain .outerRule(HiltAndroidRule(this)) .around(composeTestRule) @Test fun checkScreenShot() { composeTestRule .onRoot() .captureRoboImage() } Add @HiltAndroidTest and HiltAndroidRule for Hilt
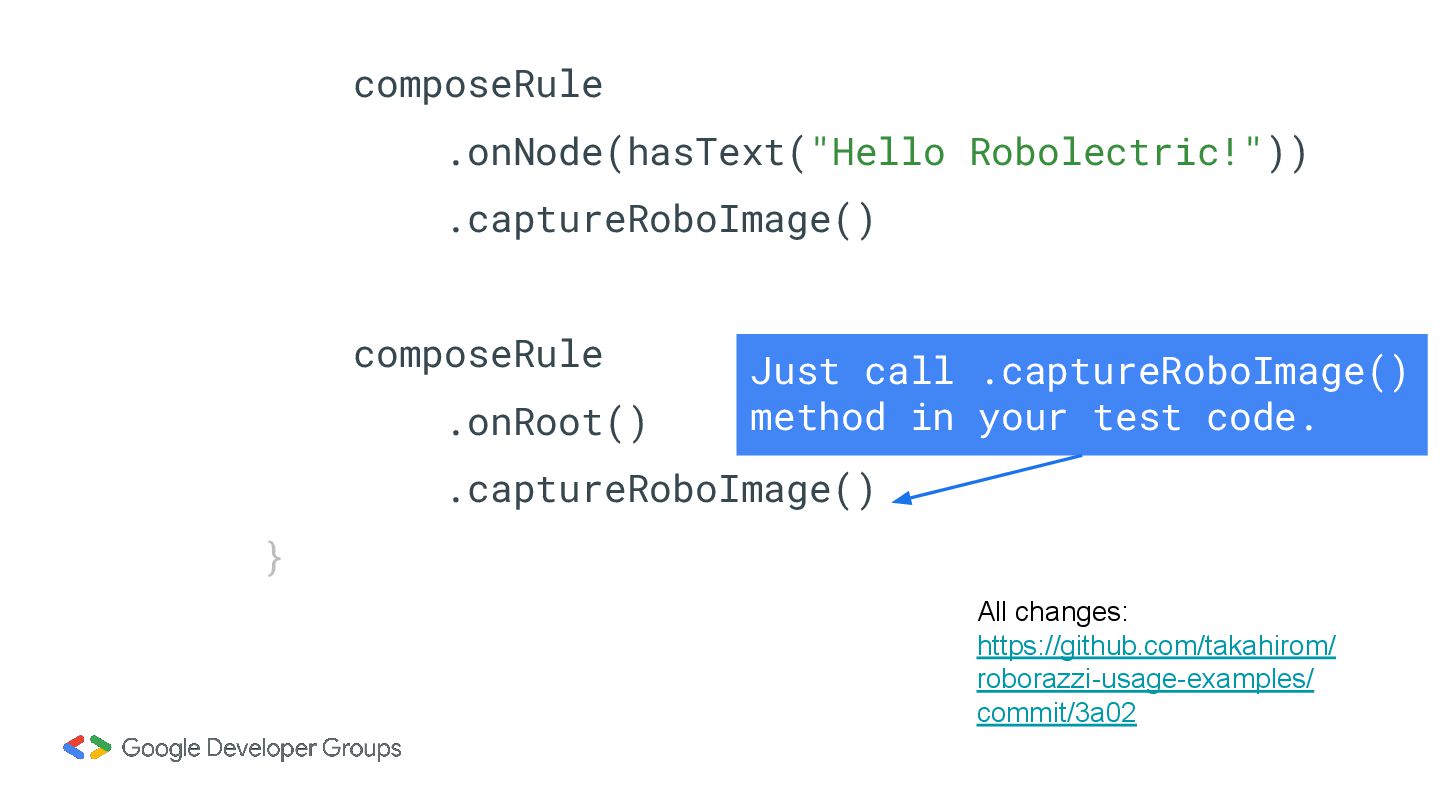
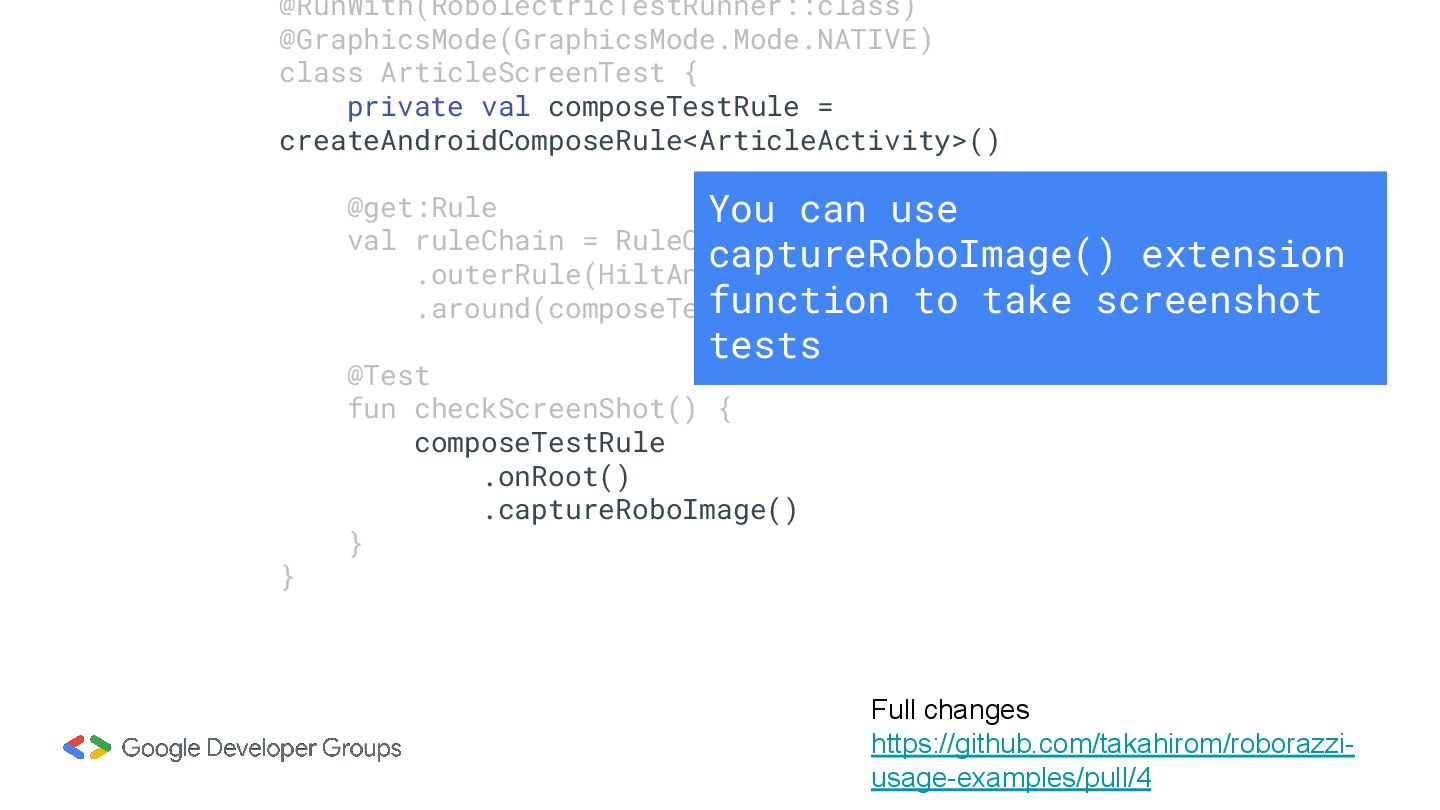
val composeTestRule = createAndroidComposeRule<ArticleActivity>() @get:Rule val ruleChain = RuleChain .outerRule(HiltAndroidRule(this)) .around(composeTestRule) @Test fun checkScreenShot() { composeTestRule .onRoot() .captureRoboImage() } } You can use captureRoboImage() extension function to take screenshot tests
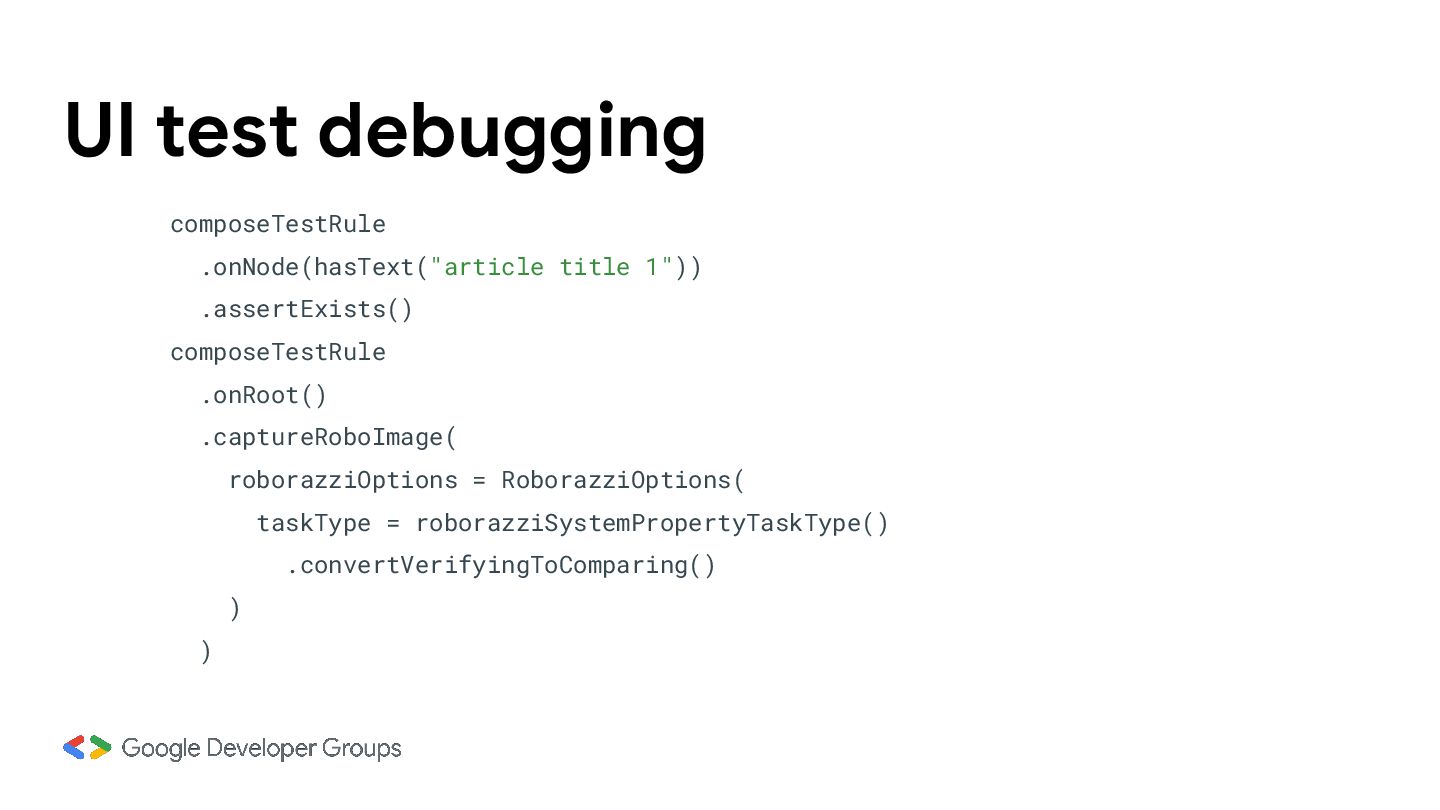
supplemental tool for debugging UI tests, such as verifying button visibility. Why: Writing tests becomes challenging when unable to visually assess the layout. How: It serves as an auxiliary tool used in conjunction with standard UI testing methods to enhance debugging capabilities.
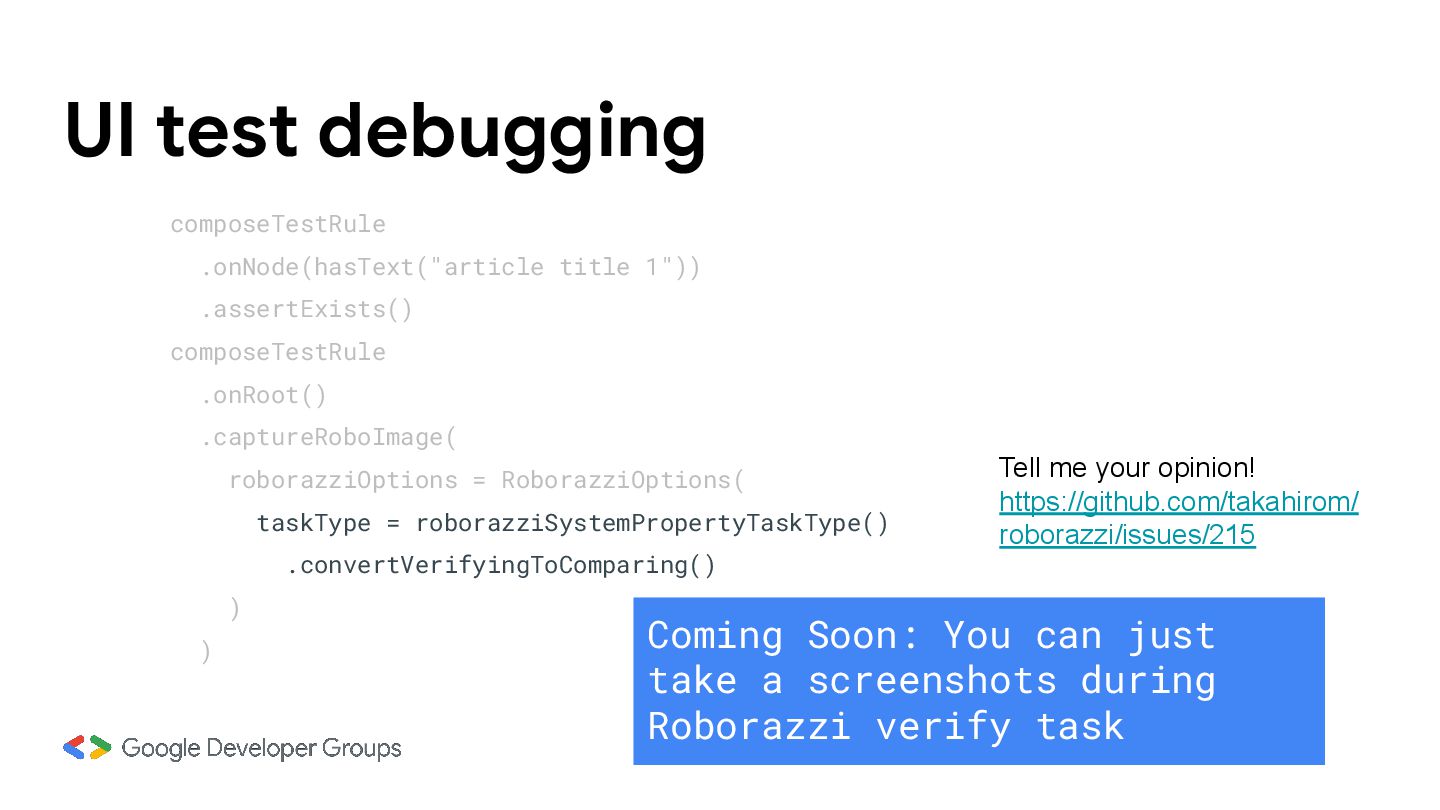
.captureRoboImage( roborazziOptions = RoborazziOptions( taskType = roborazziSystemPropertyTaskType() .convertVerifyingToComparing() ) ) Coming Soon: You can just take a screenshots during Roborazzi verify task Tell me your opinion! https://github.com/takahirom/ roborazzi/issues/215
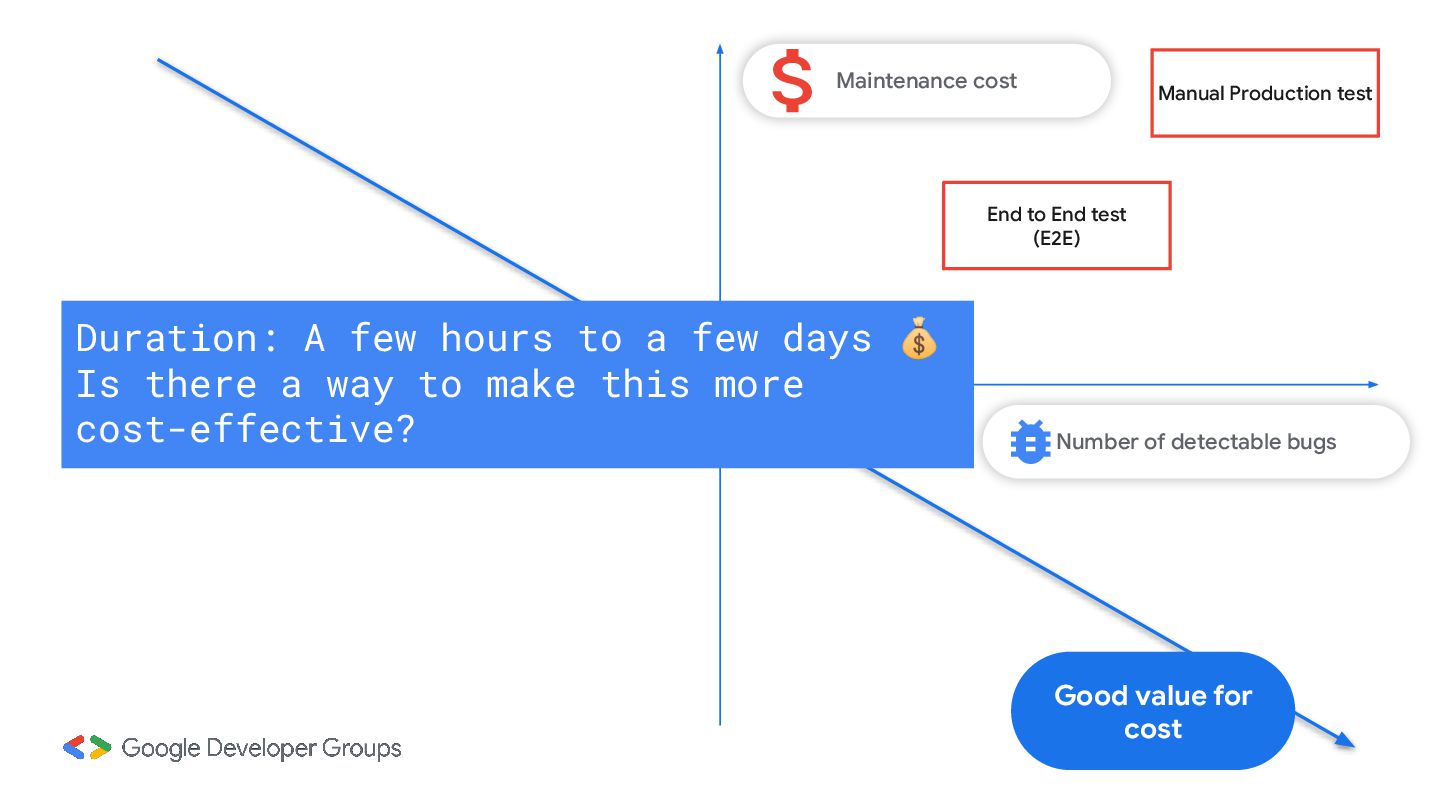
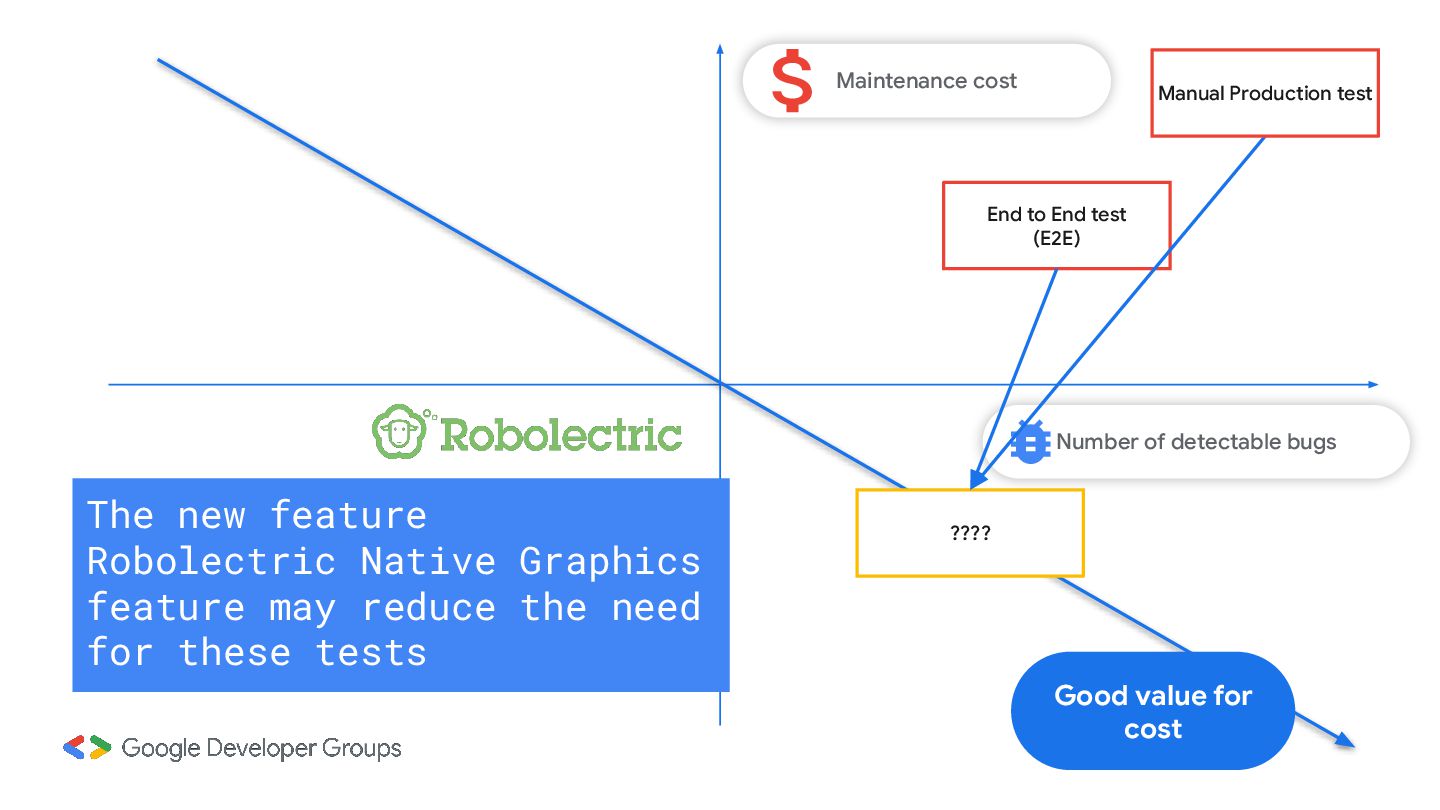
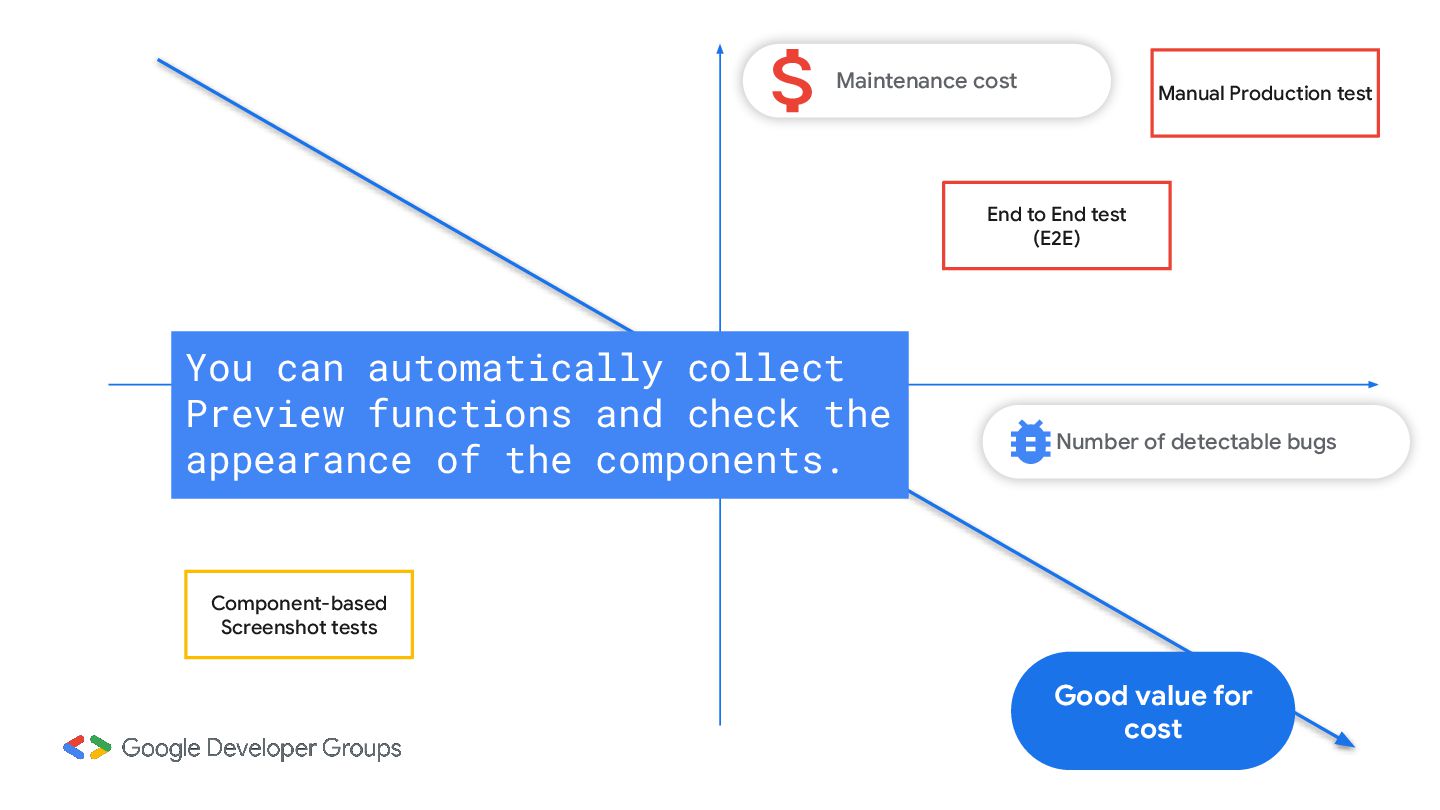
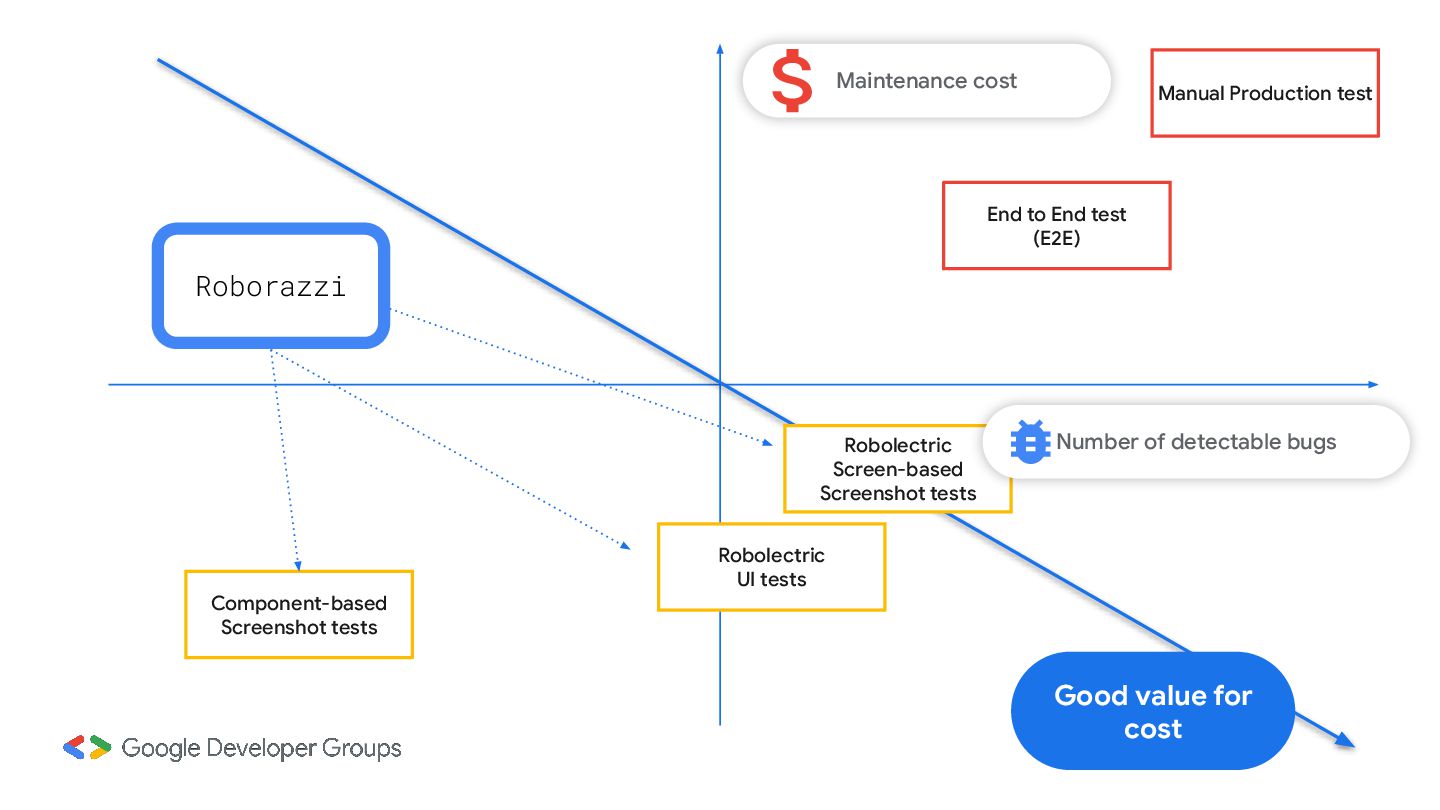
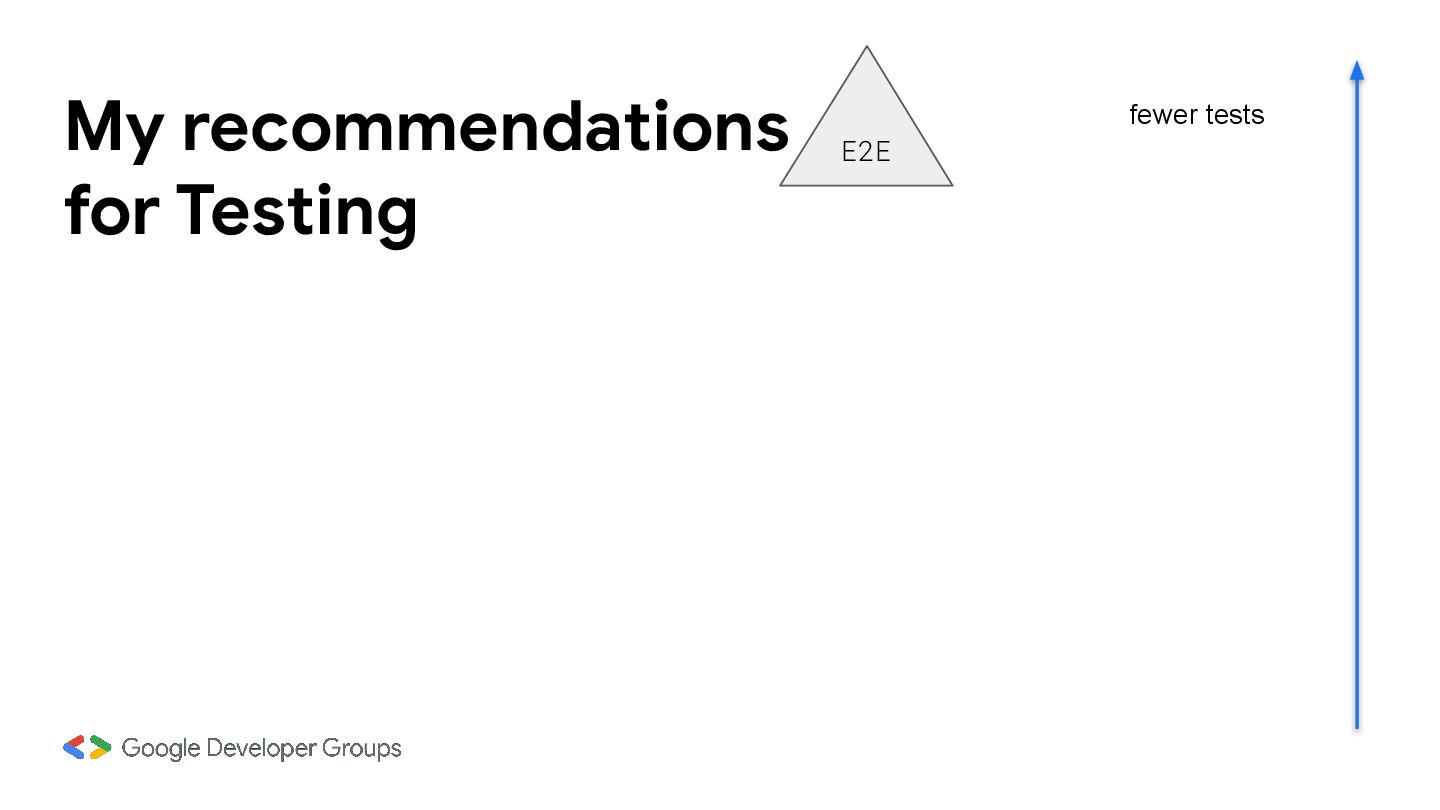
test (E2E) You can automatically collect Preview functions and check the appearance of the components. Good value for cost Maintenance cost Manual Production test
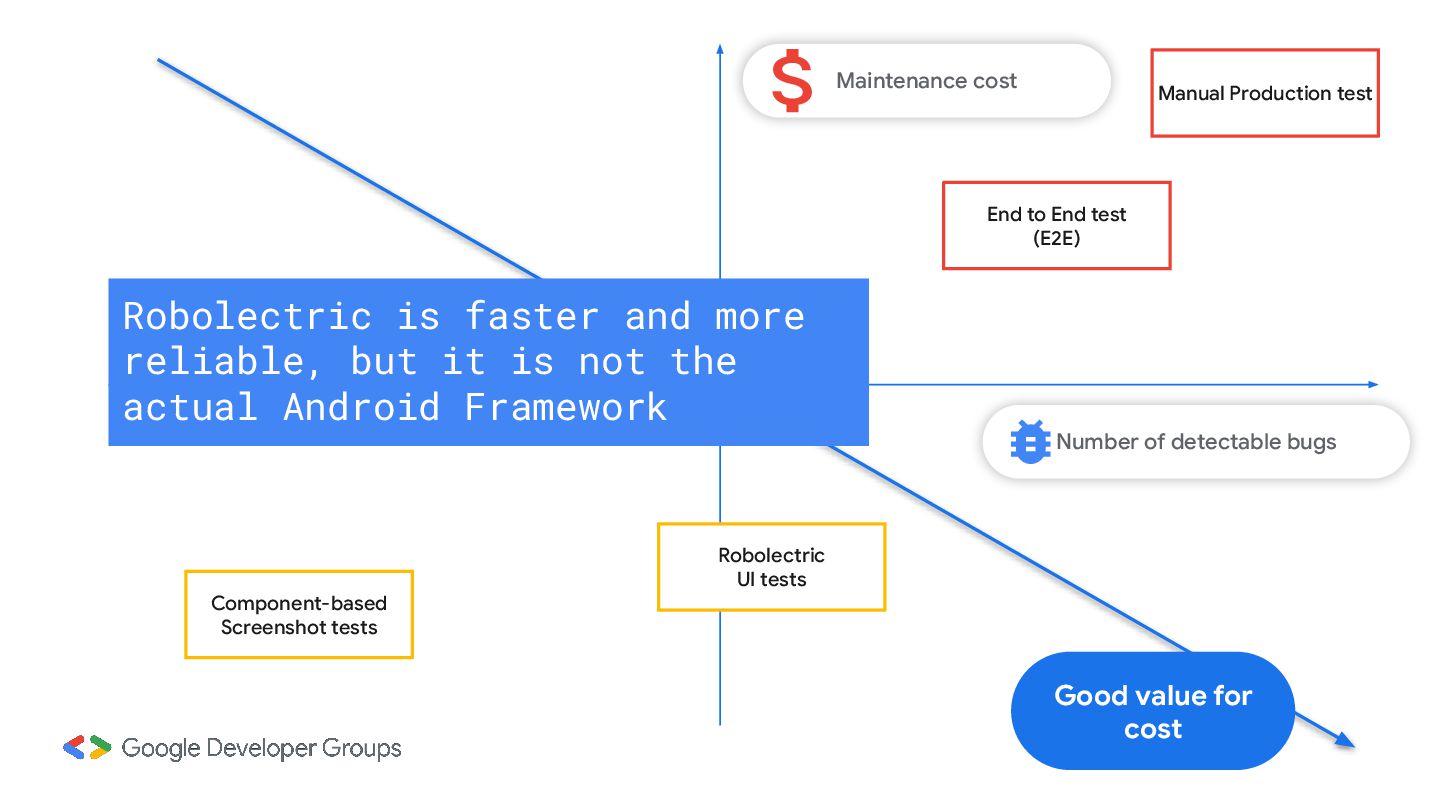
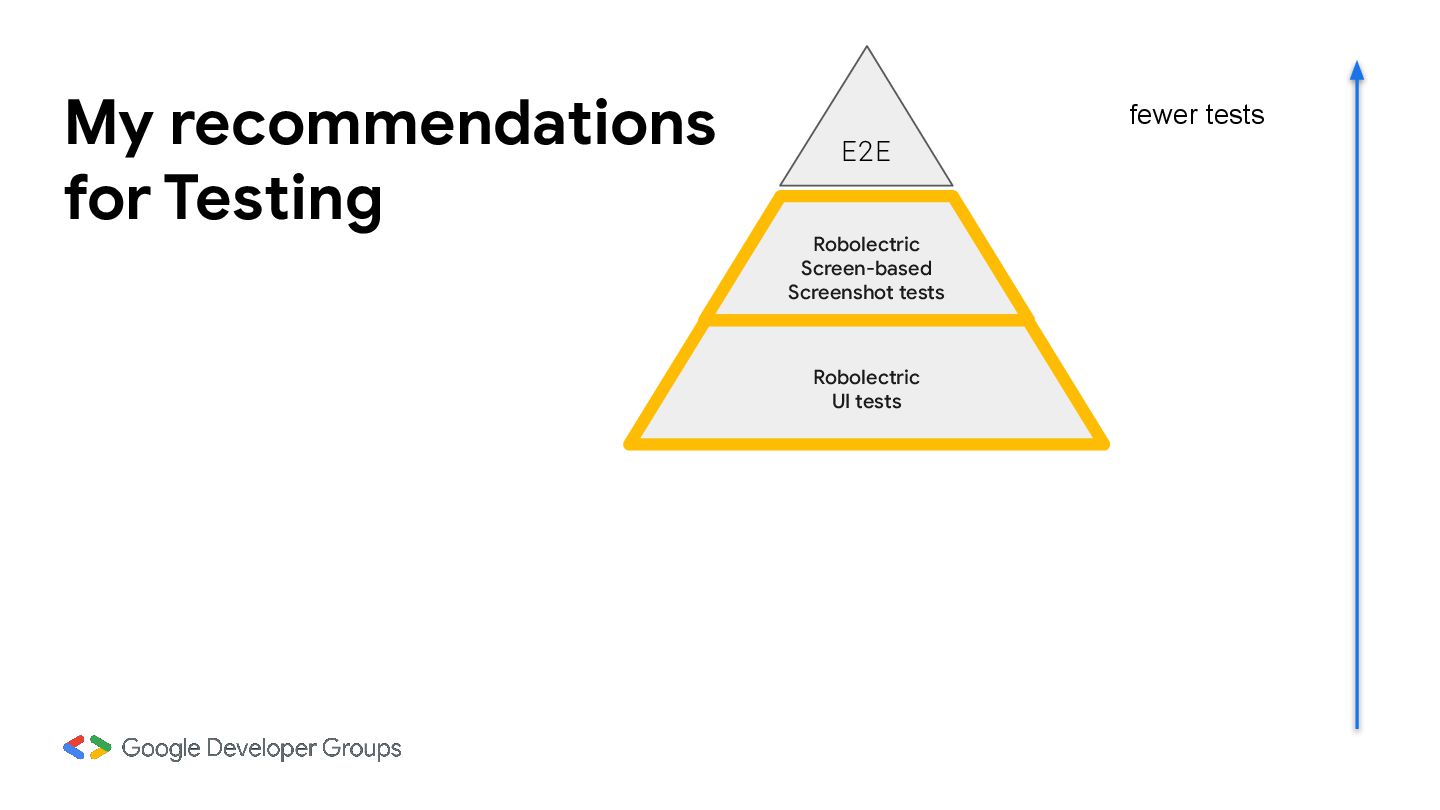
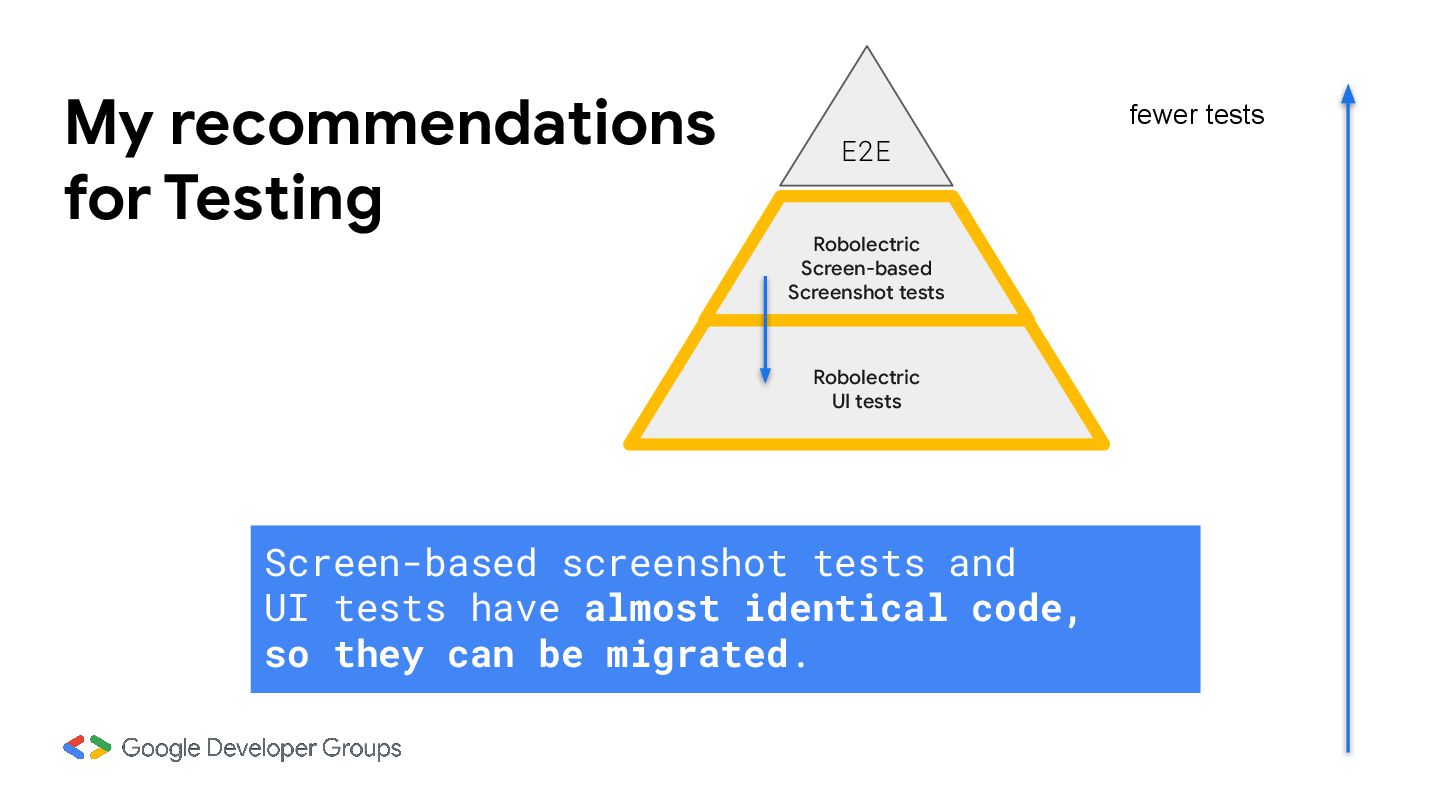
test (E2E) Robolectric UI tests Robolectric is faster and more reliable, but it is not the actual Android Framework Good value for cost Maintenance cost Manual Production test
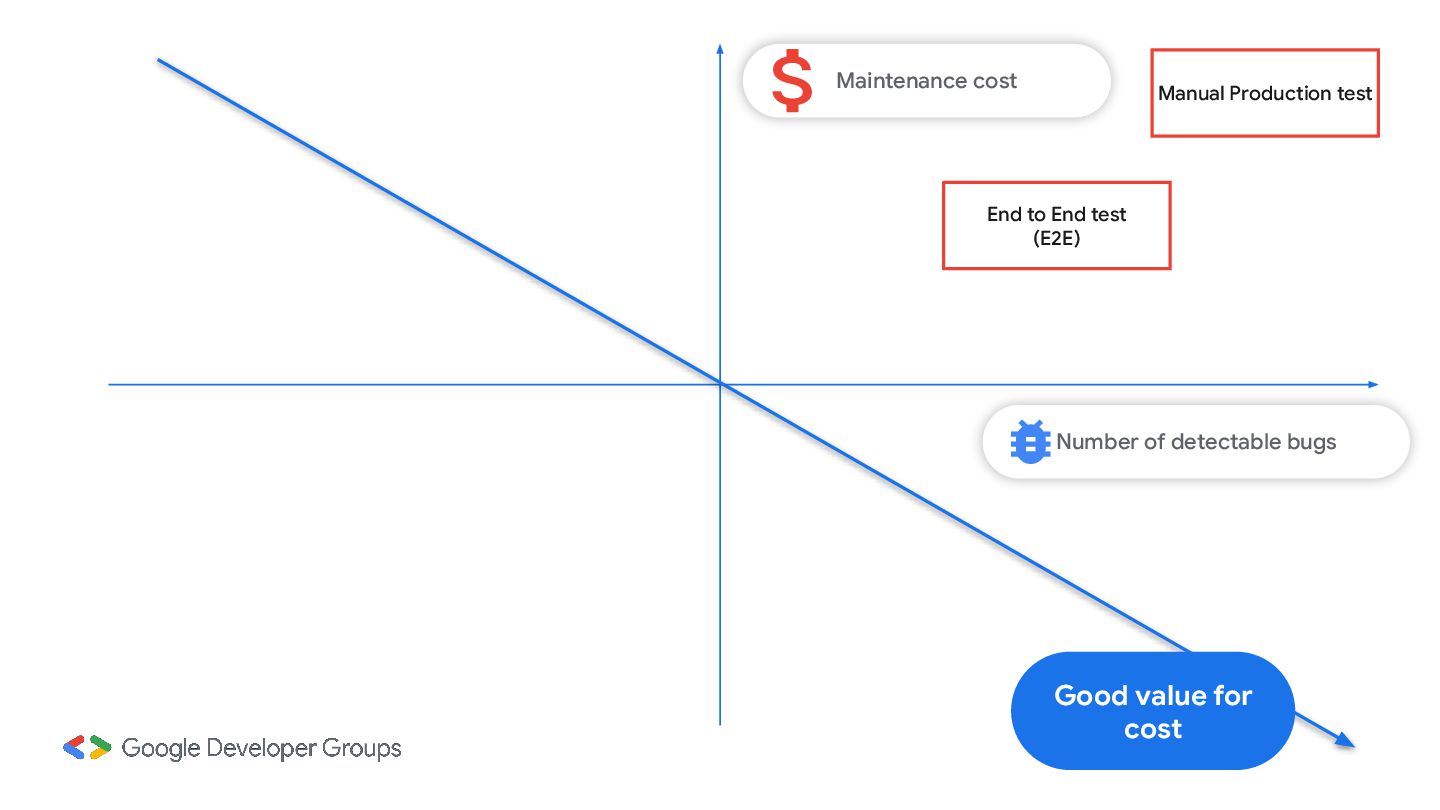
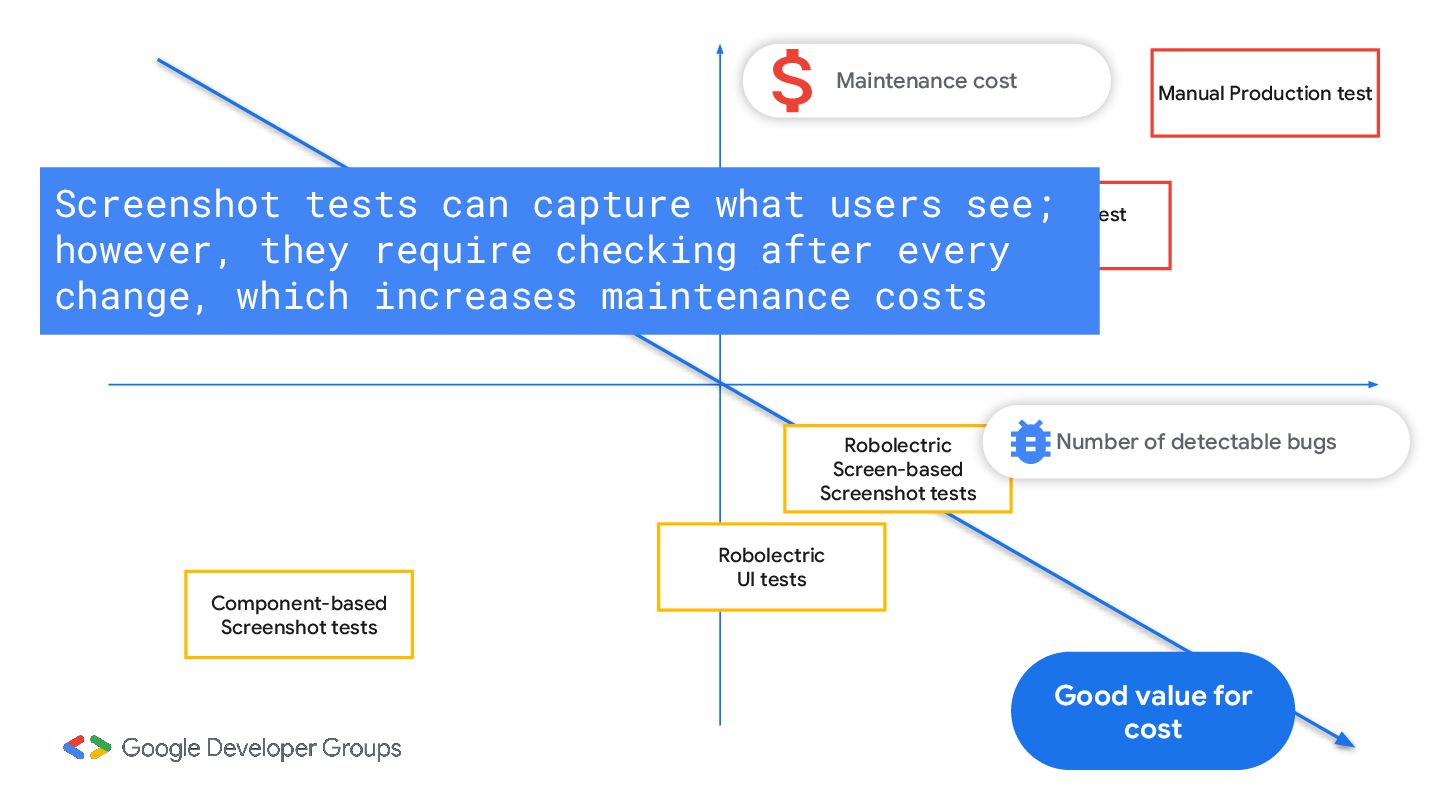
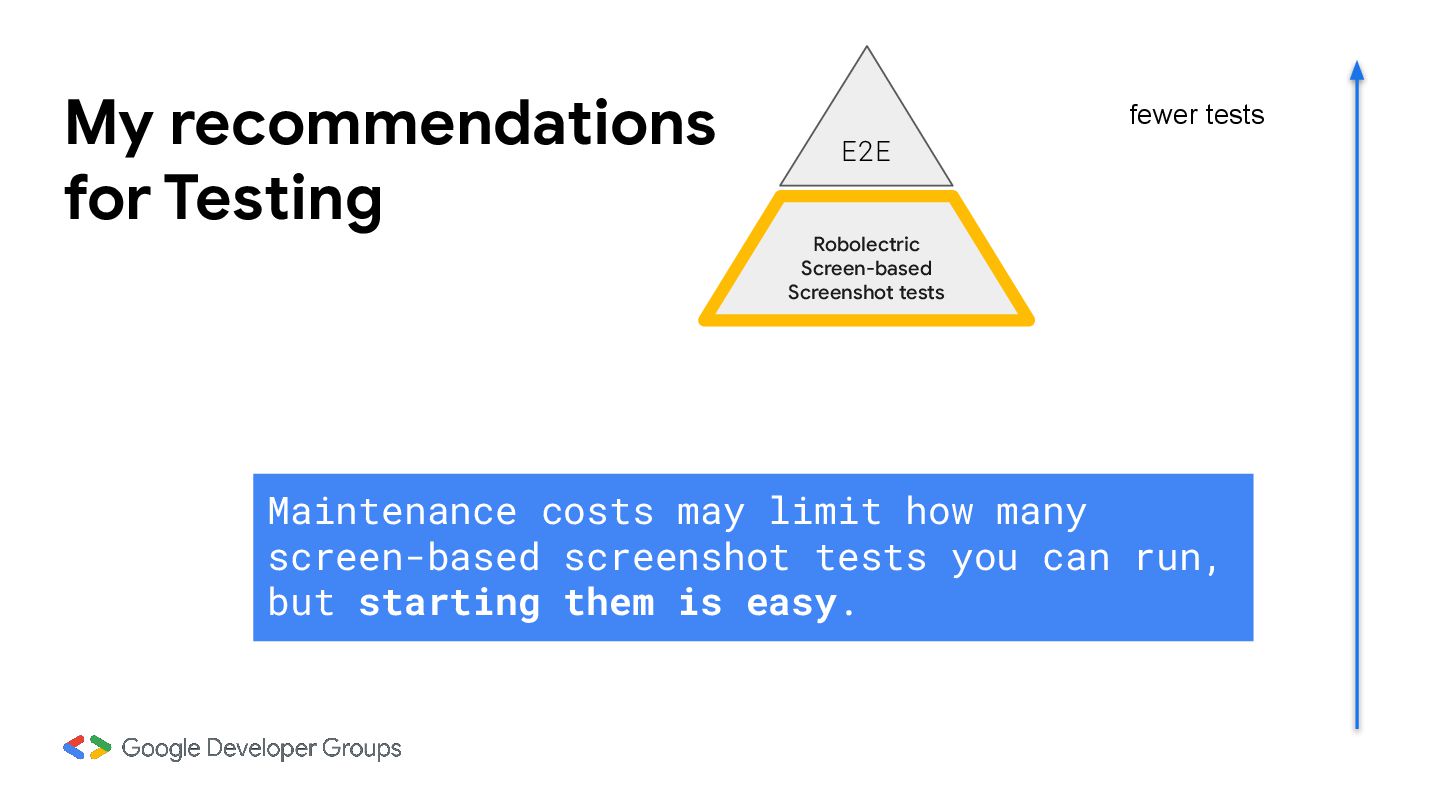
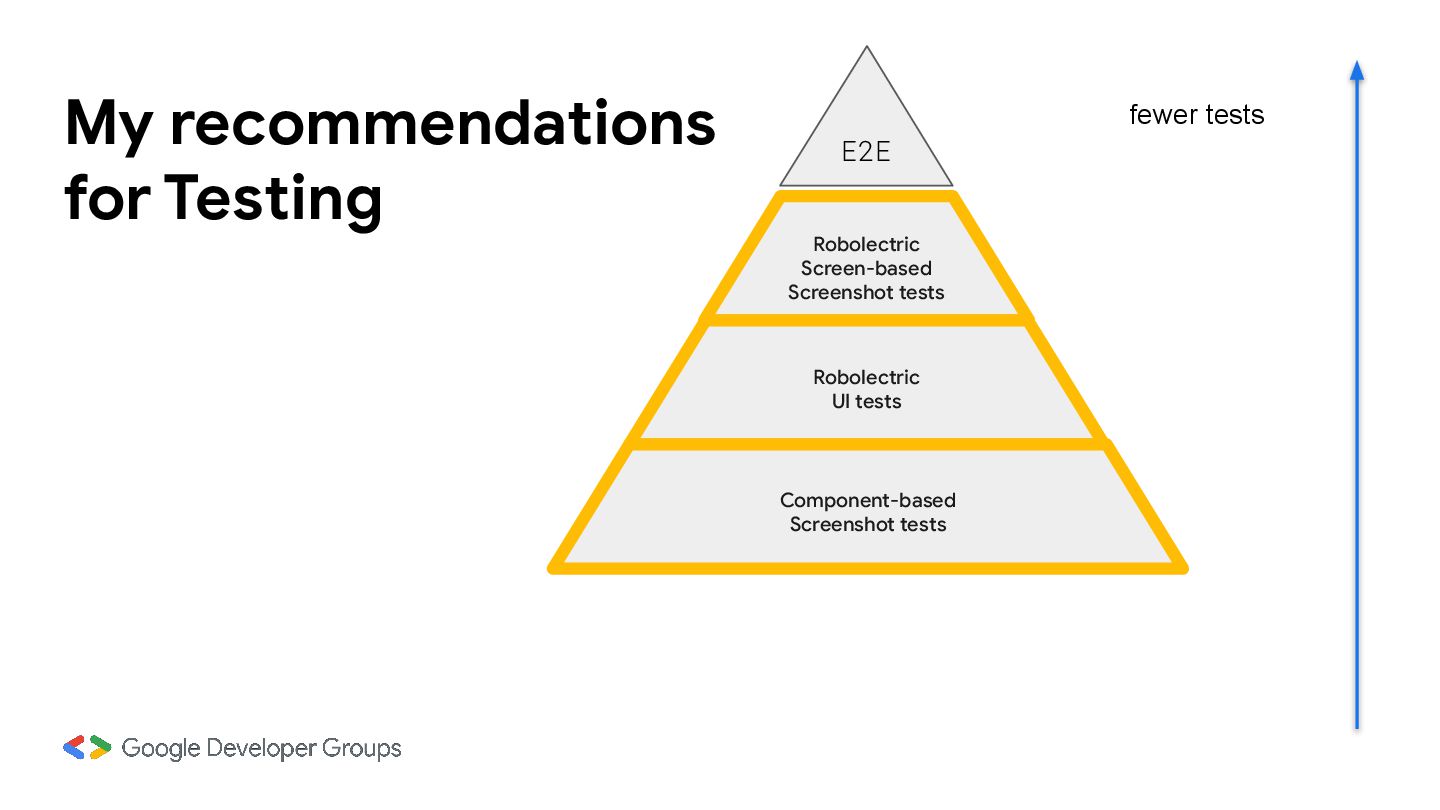
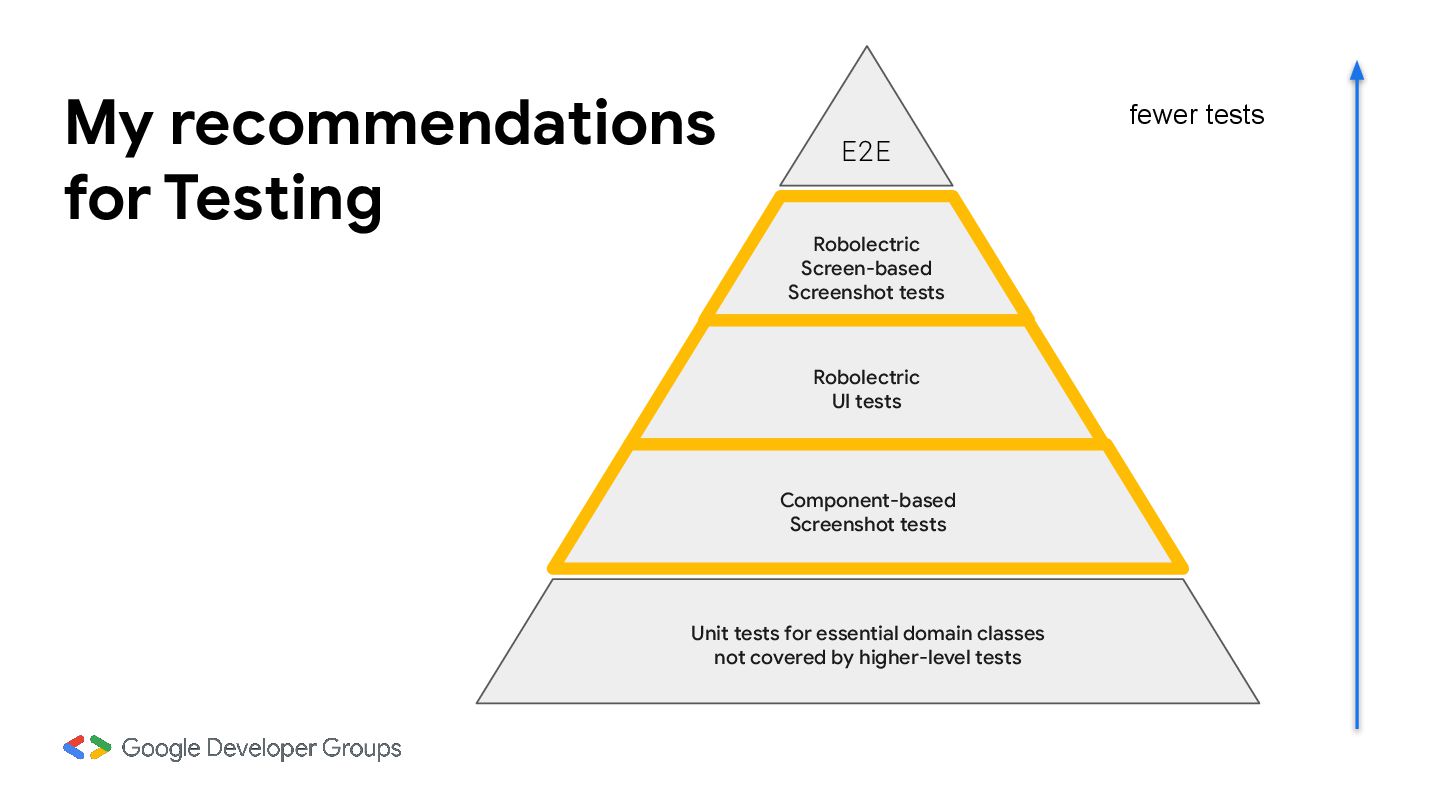
can capture what users see; however, they require checking after every change, which increases maintenance costs Robolectric Screen-based Screenshot tests Good value for cost Robolectric UI tests Number of detectable bugs Maintenance cost Manual Production test
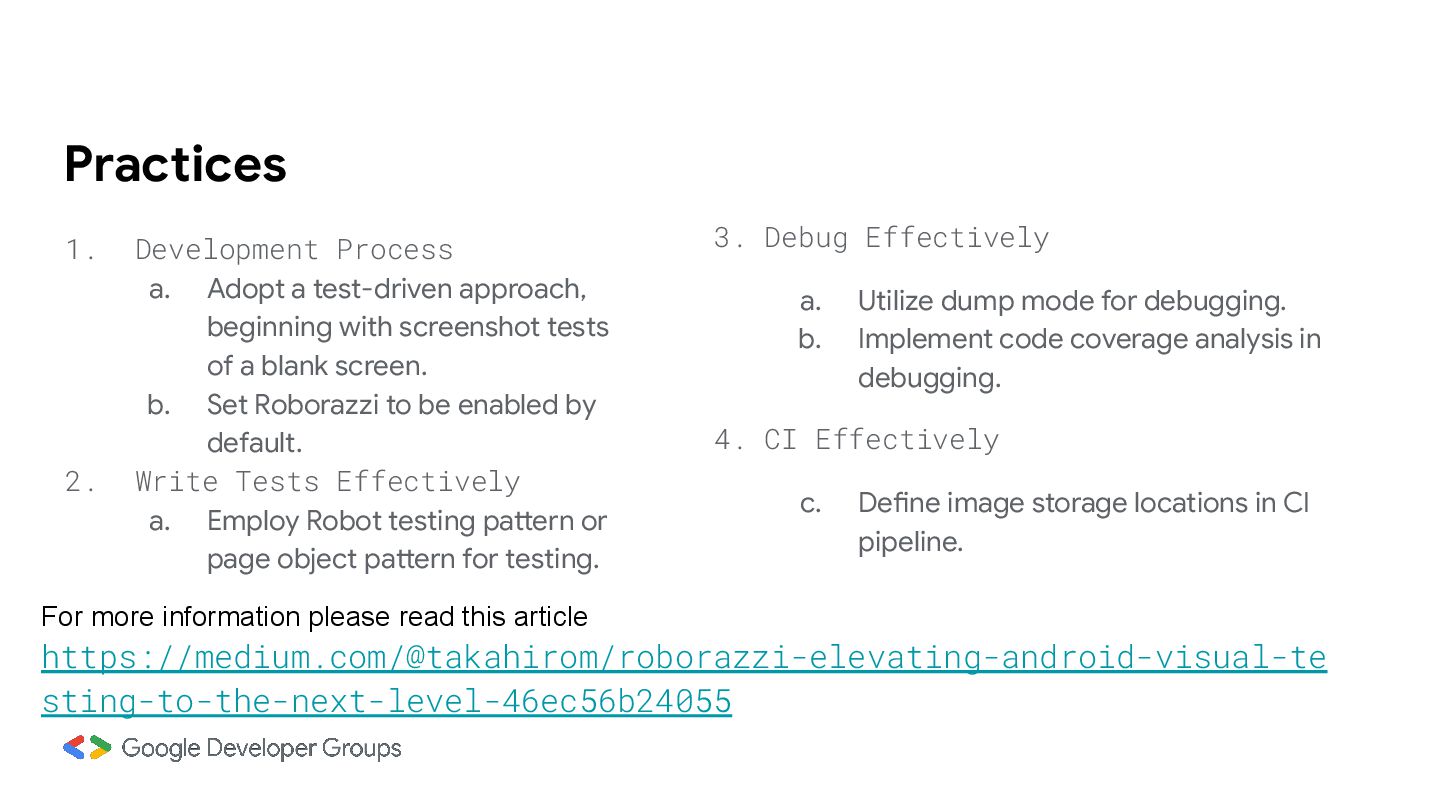
with screenshot tests of a blank screen. b. Set Roborazzi to be enabled by default. 2. Write Tests Effectively a. Employ Robot testing pattern or page object pattern for testing. For more information please read this article https://medium.com/@takahirom/roborazzi-elevating-android-visual-te sting-to-the-next-level-46ec56b24055 3. Debug Effectively a. Utilize dump mode for debugging. b. Implement code coverage analysis in debugging. 4. CI Effectively c. Define image storage locations in CI pipeline.
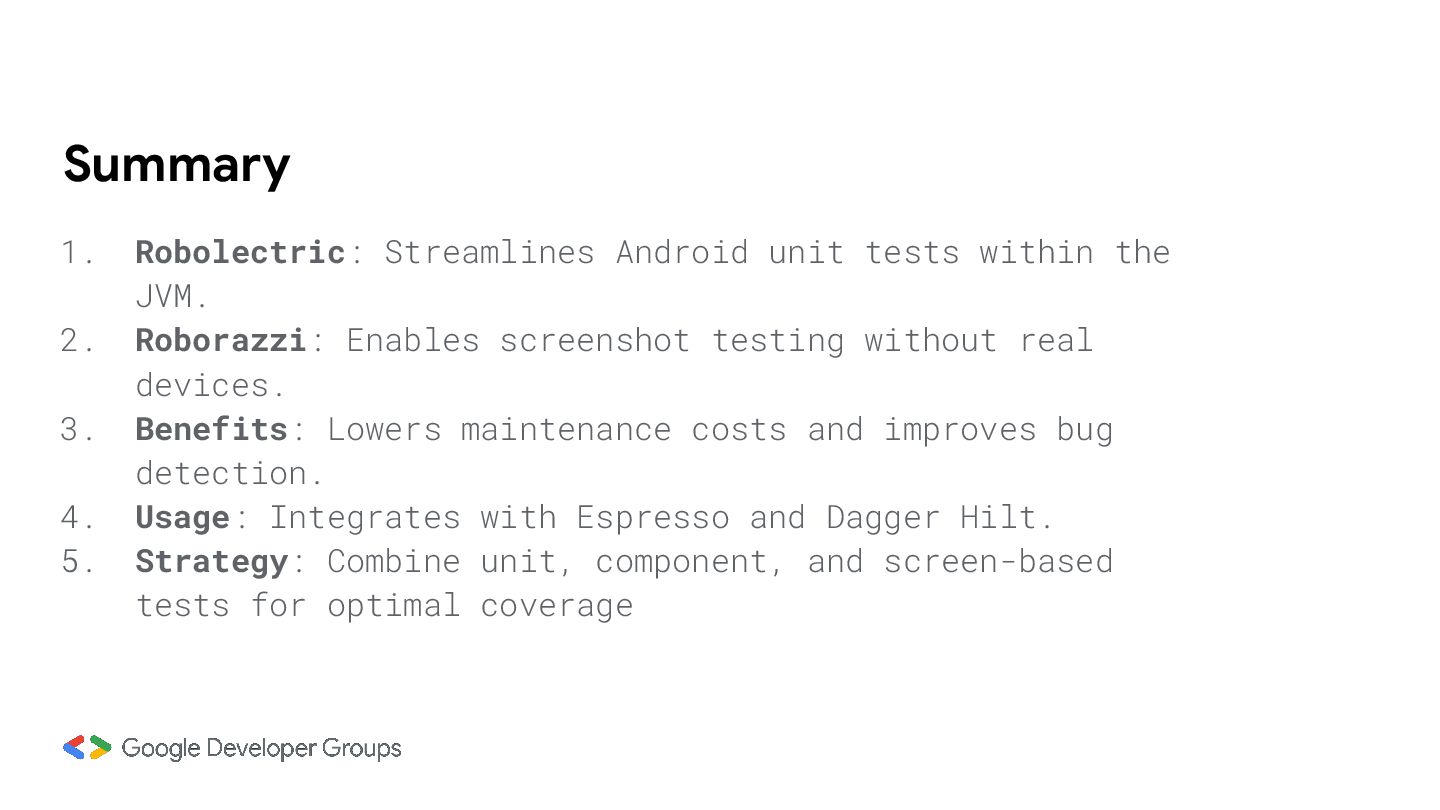
2. Roborazzi: Enables screenshot testing without real devices. 3. Benefits: Lowers maintenance costs and improves bug detection. 4. Usage: Integrates with Espresso and Dagger Hilt. 5. Strategy: Combine unit, component, and screen-based tests for optimal coverage