rights reserved. Kubernetes • Container orchestration platform that manages containers across your infrastructure in logical groups • Rich API to integrate 3rd parties • Open Source
tool that’s right for you. That means that you should choose whatever makes the most sense for you and your architecture, that you’re comfortable with, and that you can scale, maintain, and manage.
AWS and Heptio for my initial cluster set up. To see the stack in full, you can look here: https://s3.amazonaws.com/quickstart- reference/heptio/latest/templates/kubernetes-cluster-with- new-vpc.template This will download the full template.
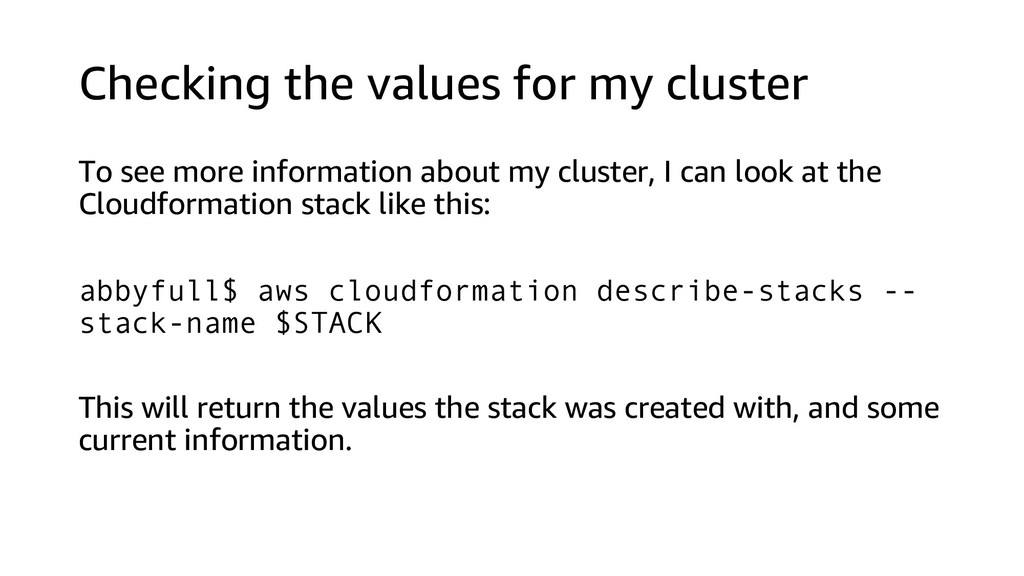
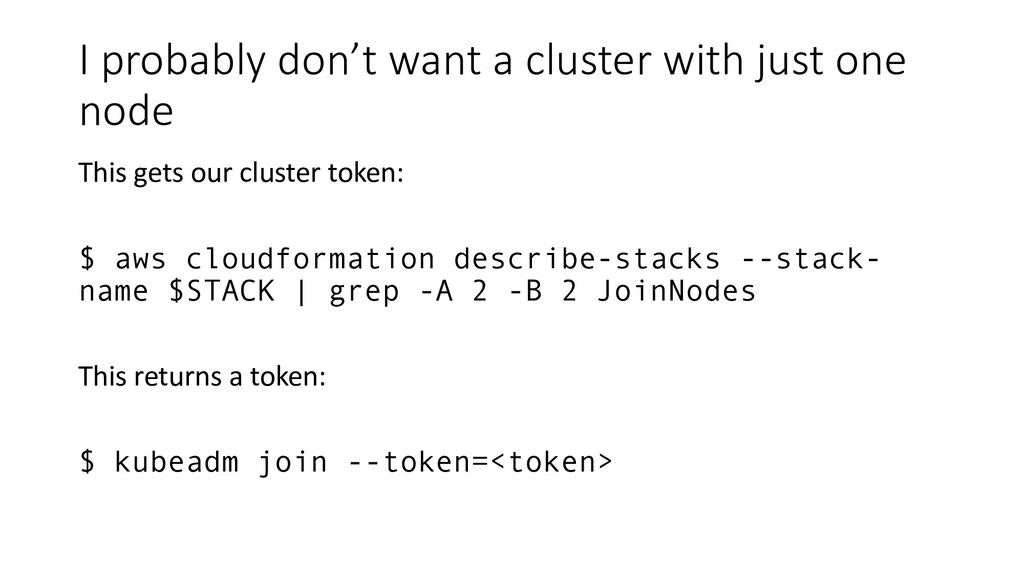
about my cluster, I can look at the Cloudformation stack like this: abbyfull$ aws cloudformation describe-stacks -- stack-name $STACK This will return the values the stack was created with, and some current information.
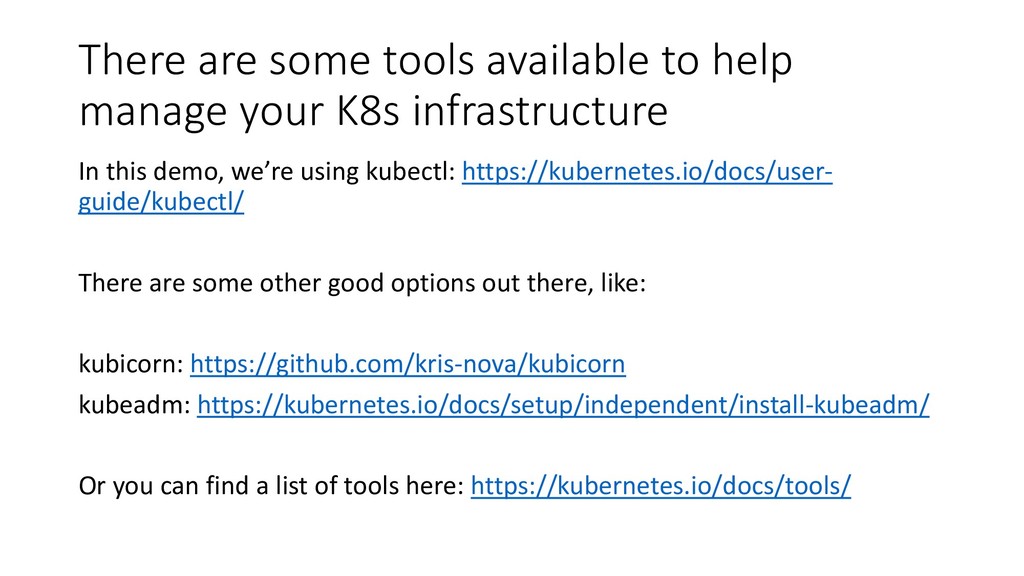
infrastructure In this demo, we’re using kubectl: https://kubernetes.io/docs/user- guide/kubectl/ There are some other good options out there, like: kubicorn: https://github.com/kris-nova/kubicorn kubeadm: https://kubernetes.io/docs/setup/independent/install-kubeadm/ Or you can find a list of tools here: https://kubernetes.io/docs/tools/
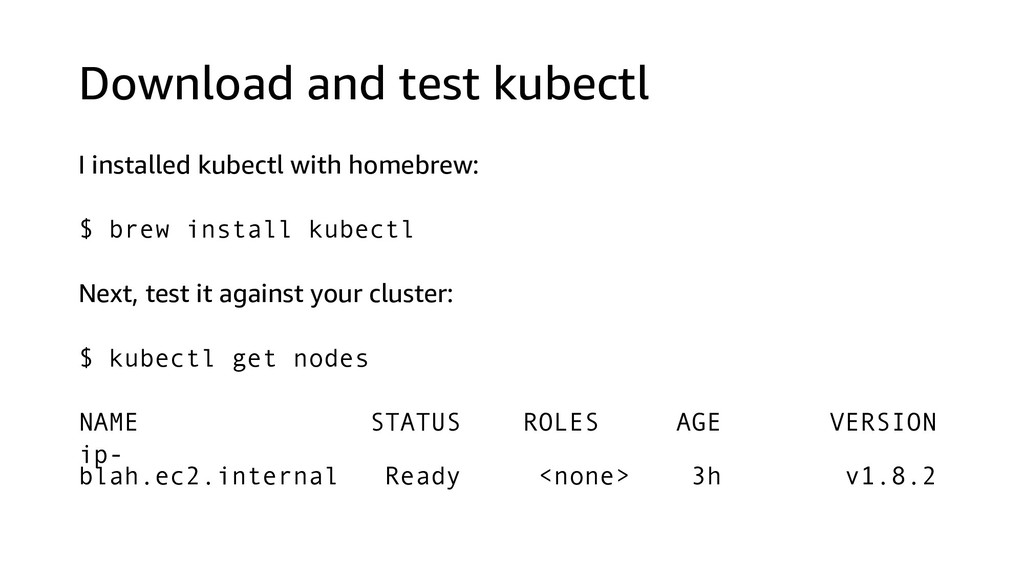
brew install kubectl Next, test it against your cluster: $ kubectl get nodes NAME STATUS ROLES AGE VERSION ip- blah.ec2.internal Ready <none> 3h v1.8.2
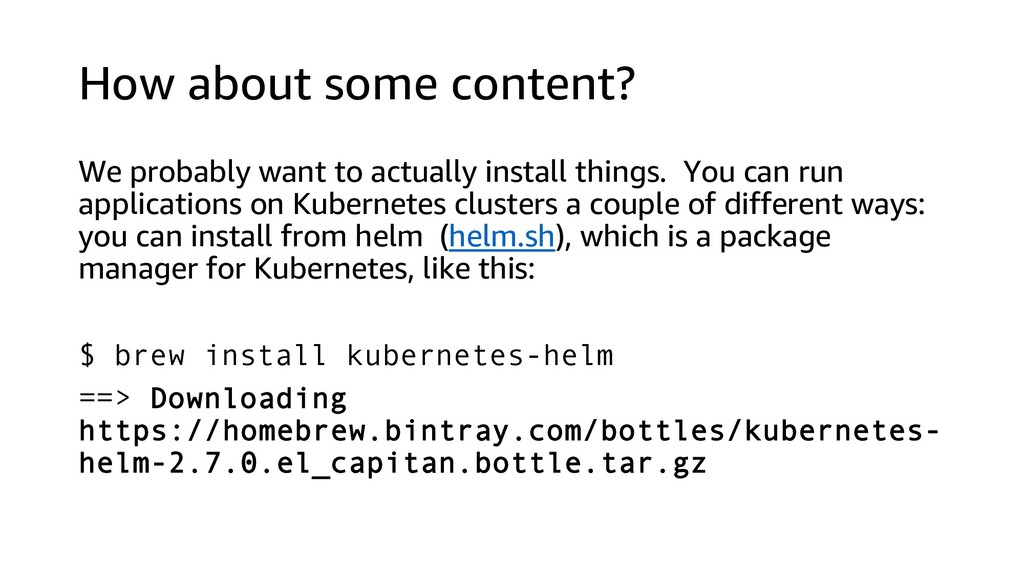
things. You can run applications on Kubernetes clusters a couple of different ways: you can install from helm (helm.sh), which is a package manager for Kubernetes, like this: $ brew install kubernetes-helm ==> Downloading https://homebrew.bintray.com/bottles/kubernetes- helm-2.7.0.el_capitan.bottle.tar.gz
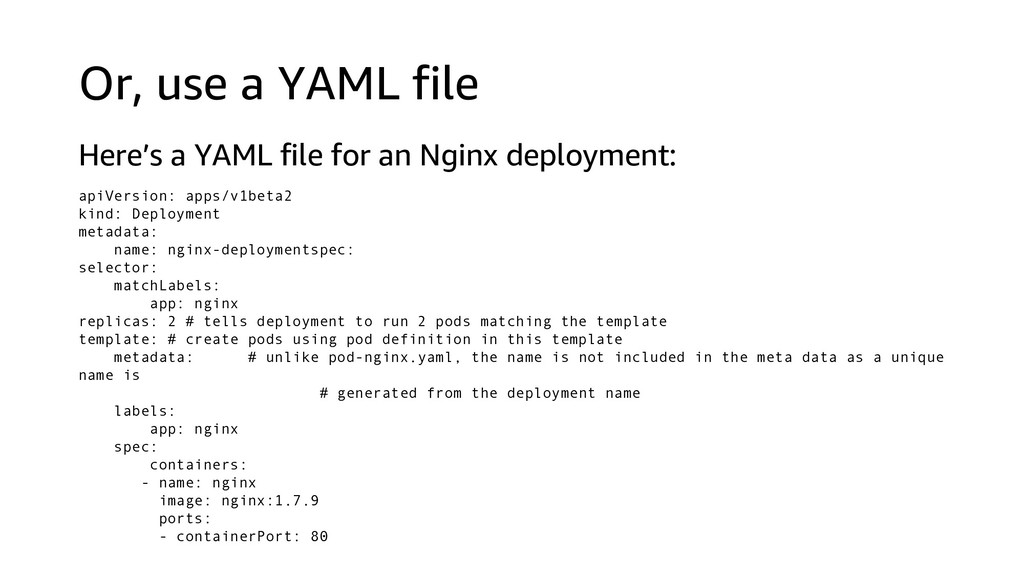
an Nginx deployment: apiVersion: apps/v1beta2 kind: Deployment metadata: name: nginx-deploymentspec: selector: matchLabels: app: nginx replicas: 2 # tells deployment to run 2 pods matching the template template: # create pods using pod definition in this template metadata: # unlike pod-nginx.yaml, the name is not included in the meta data as a unique name is # generated from the deployment name labels: app: nginx spec: containers: - name: nginx image: nginx:1.7.9 ports: - containerPort: 80
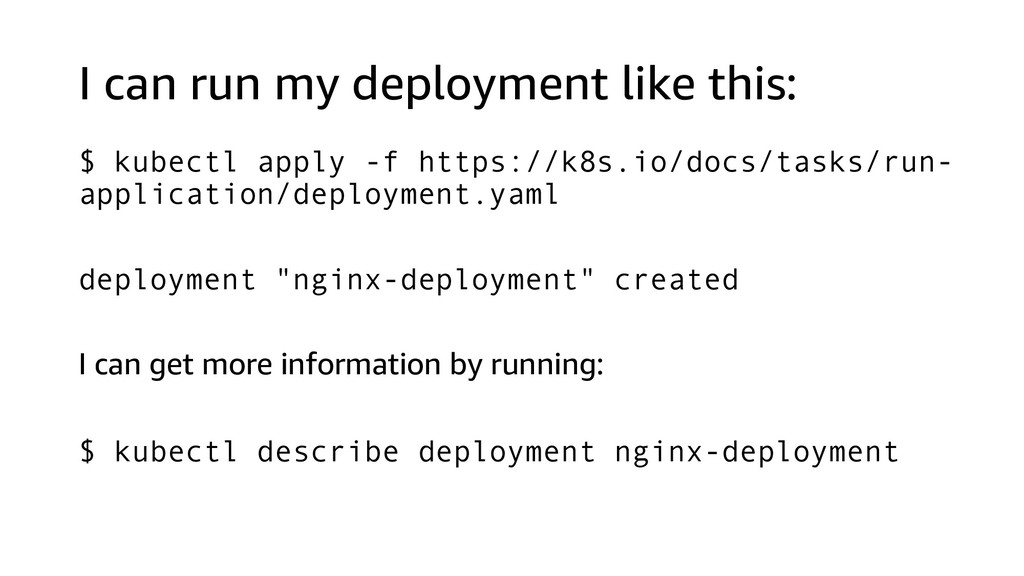
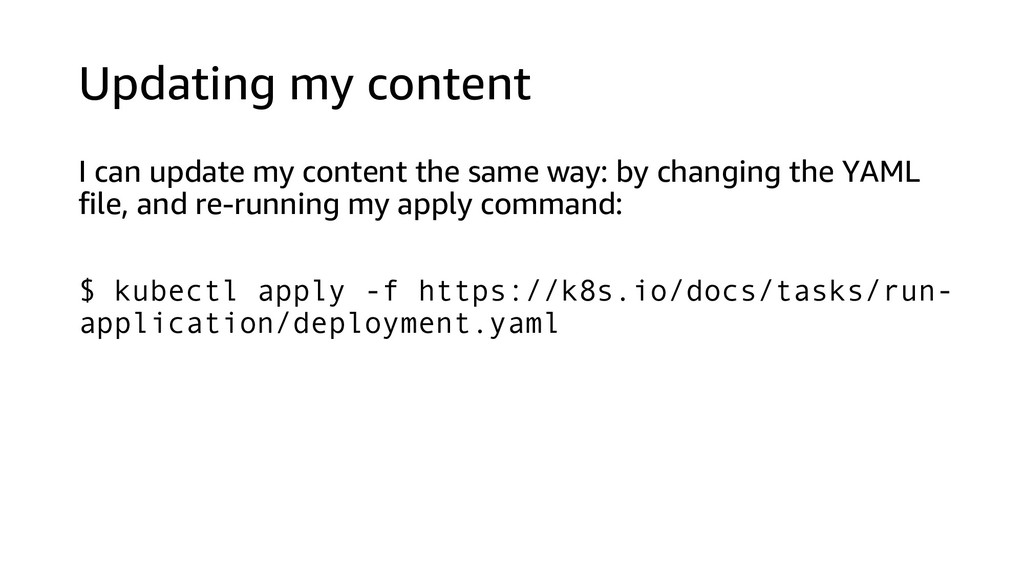
-f https://k8s.io/docs/tasks/run- application/deployment.yaml deployment "nginx-deployment" created I can get more information by running: $ kubectl describe deployment nginx-deployment
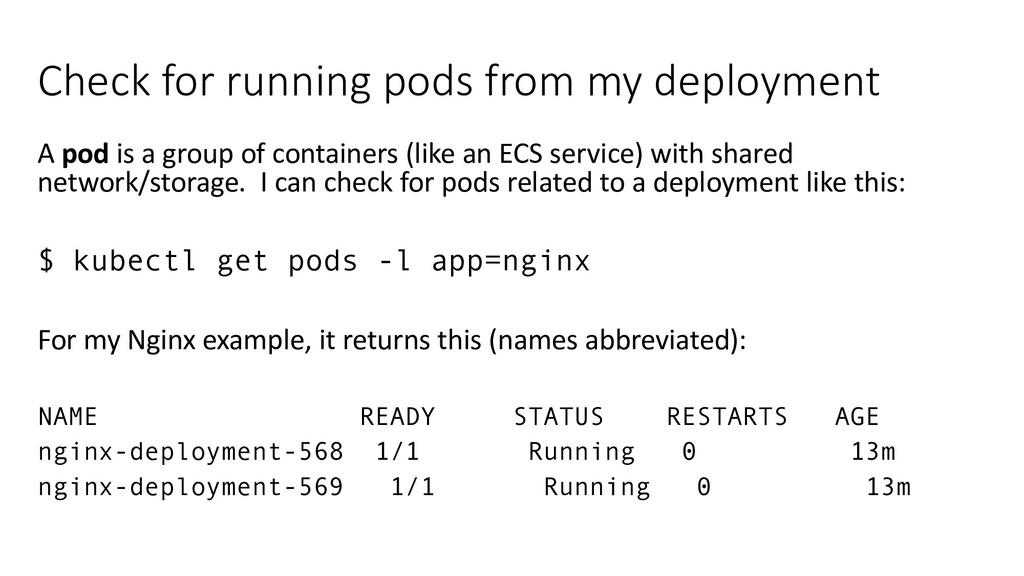
a group of containers (like an ECS service) with shared network/storage. I can check for pods related to a deployment like this: $ kubectl get pods -l app=nginx For my Nginx example, it returns this (names abbreviated): NAME READY STATUS RESTARTS AGE nginx-deployment-568 1/1 Running 0 13m nginx-deployment-569 1/1 Running 0 13m
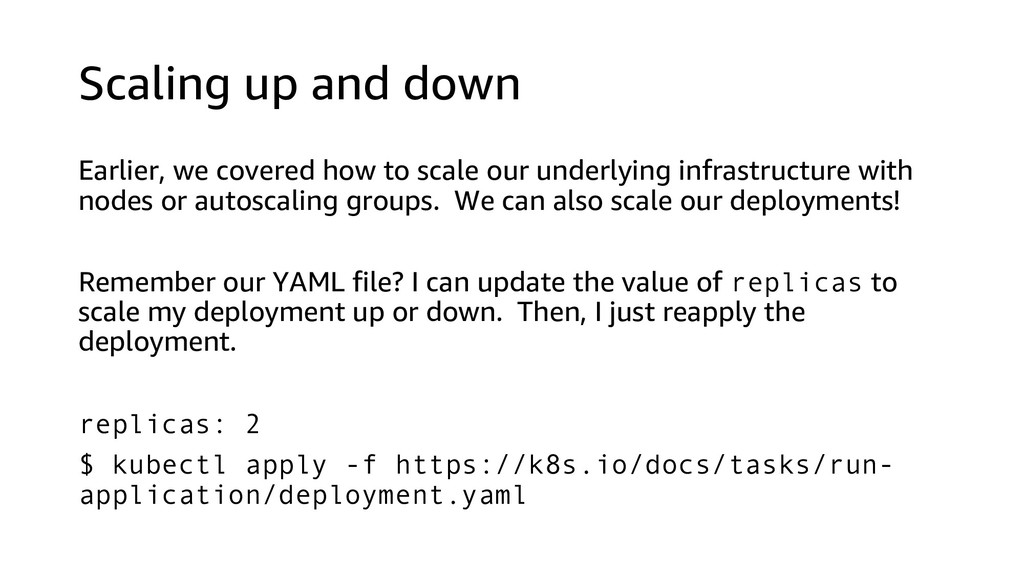
our underlying infrastructure with nodes or autoscaling groups. We can also scale our deployments! Remember our YAML file? I can update the value of replicas to scale my deployment up or down. Then, I just reapply the deployment. replicas: 2 $ kubectl apply -f https://k8s.io/docs/tasks/run- application/deployment.yaml
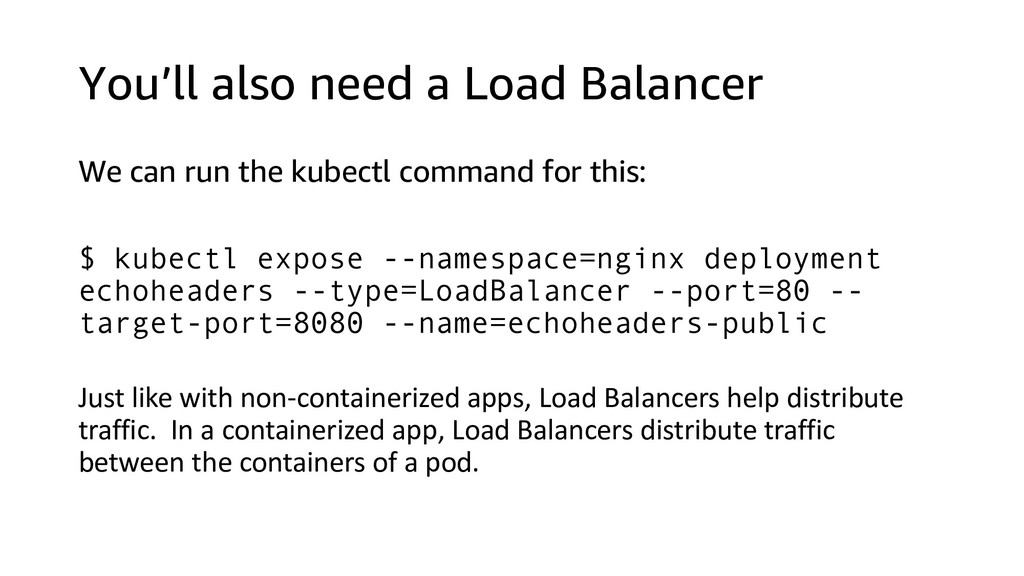
kubectl command for this: $ kubectl expose --namespace=nginx deployment echoheaders --type=LoadBalancer --port=80 -- target-port=8080 --name=echoheaders-public Just like with non-containerized apps, Load Balancers help distribute traffic. In a containerized app, Load Balancers distribute traffic between the containers of a pod.
practice is to run highly available apps. This means that your is designed to work in the event of an Availability Zone or Region failure. If one AZ went down, your application would still function. • This is not quite the same in Kubernetes: rather than run one cluster that spans multiple AZs, you run one cluster per AZ. • You can learn more about high availability in Kubernetes here. • You can manage multiple clusters in Kubernetes with something called “federation”.
Kubernetes and ECS is the master node: a Kubernetes cluster has a master node, which hosts the control plane. This is responsible for deployments, and updates, and if a node is lost.
if the master node goes down? • For AWS, you can use EC2 Auto Recovery. • In a lot of cases, not necessarily to have a highly available master: as long as Auto Recovery can replace the node fast enough, the only impact on your cluster will be that you can’t deploy new versions, or update the cluster until the master is back online.
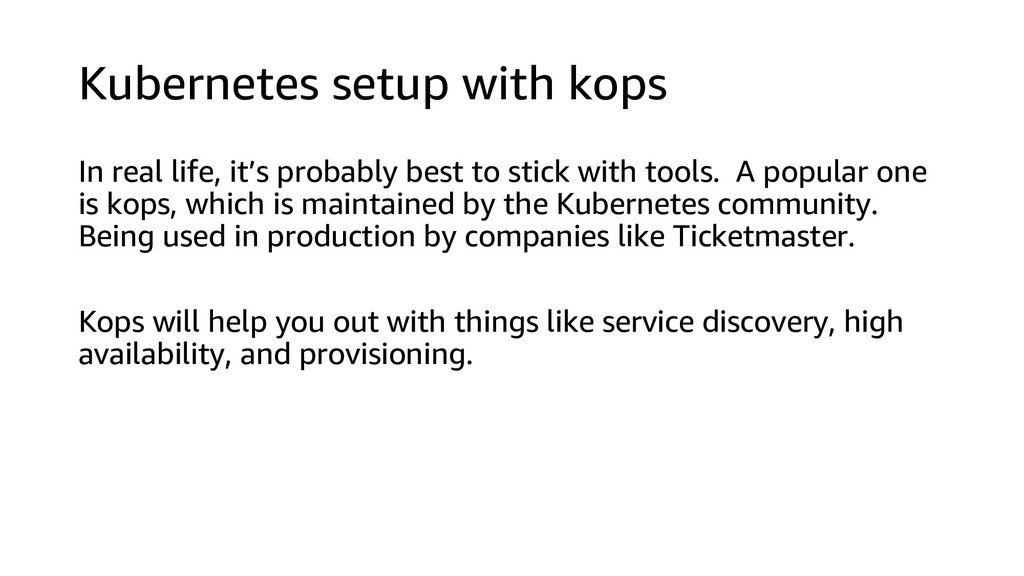
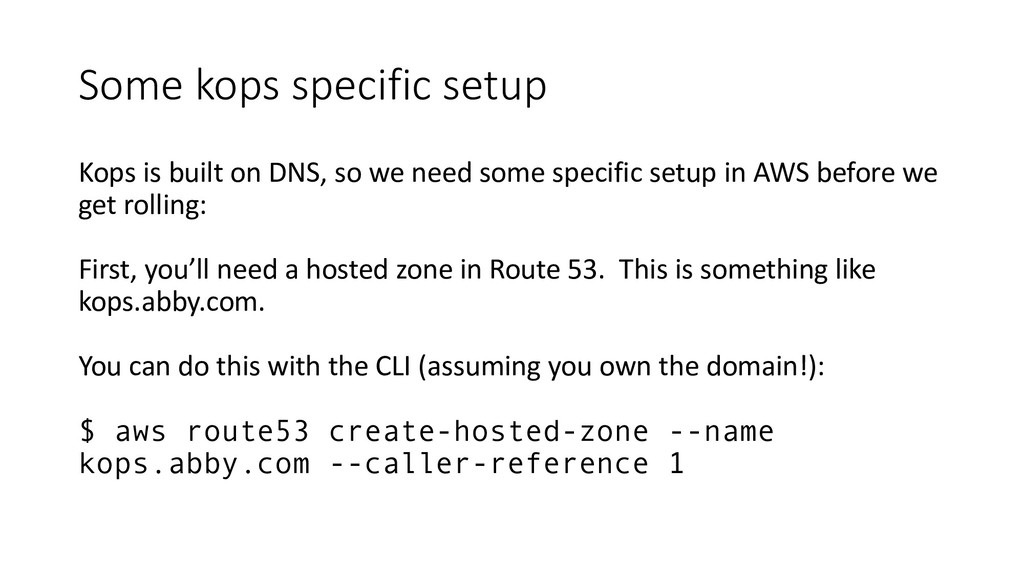
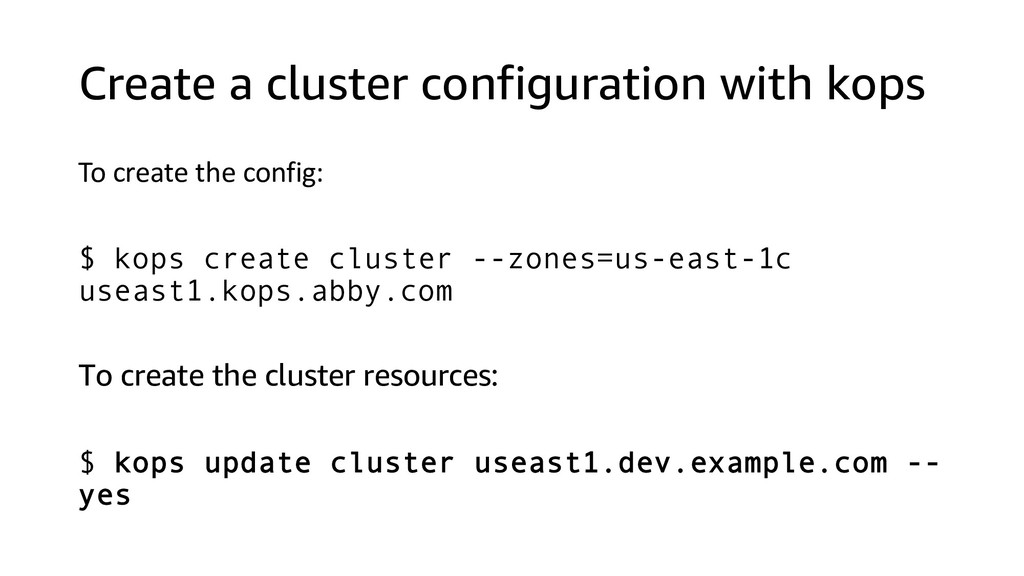
to stick with tools. A popular one is kops, which is maintained by the Kubernetes community. Being used in production by companies like Ticketmaster. Kops will help you out with things like service discovery, high availability, and provisioning.
we need some specific setup in AWS before we get rolling: First, you’ll need a hosted zone in Route 53. This is something like kops.abby.com. You can do this with the CLI (assuming you own the domain!): $ aws route53 create-hosted-zone --name kops.abby.com --caller-reference 1
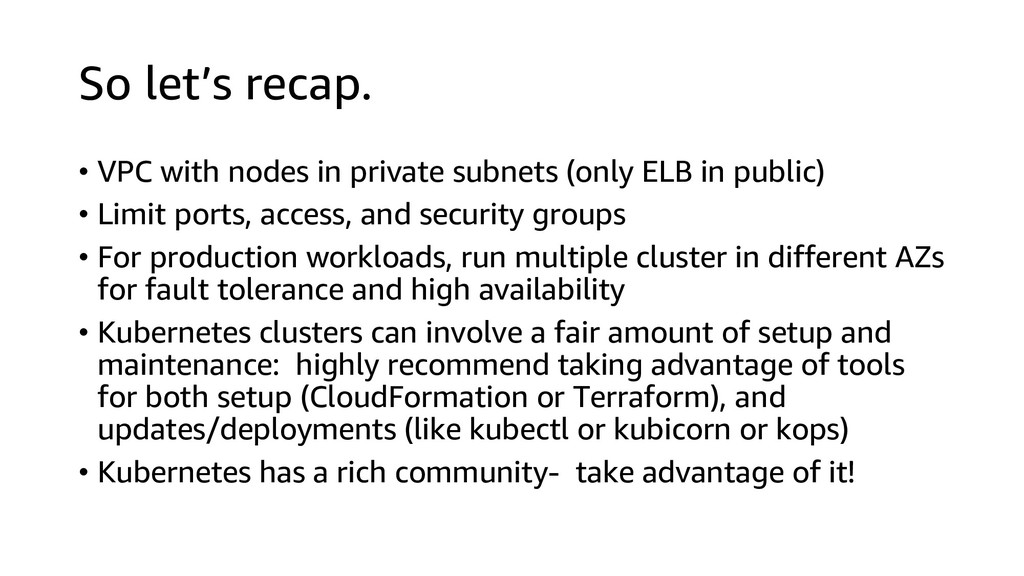
(only ELB in public) • Limit ports, access, and security groups • For production workloads, run multiple cluster in different AZs for fault tolerance and high availability • Kubernetes clusters can involve a fair amount of setup and maintenance: highly recommend taking advantage of tools for both setup (CloudFormation or Terraform), and updates/deployments (like kubectl or kubicorn or kops) • Kubernetes has a rich community- take advantage of it!