Web Development. Started Destiny Vault Raider as a hobby project and learning experience. Blogging my experiences with Python and Destiny Vault Raider. Originally I wanted to keep project scope to pure Python, HTML and CSS.
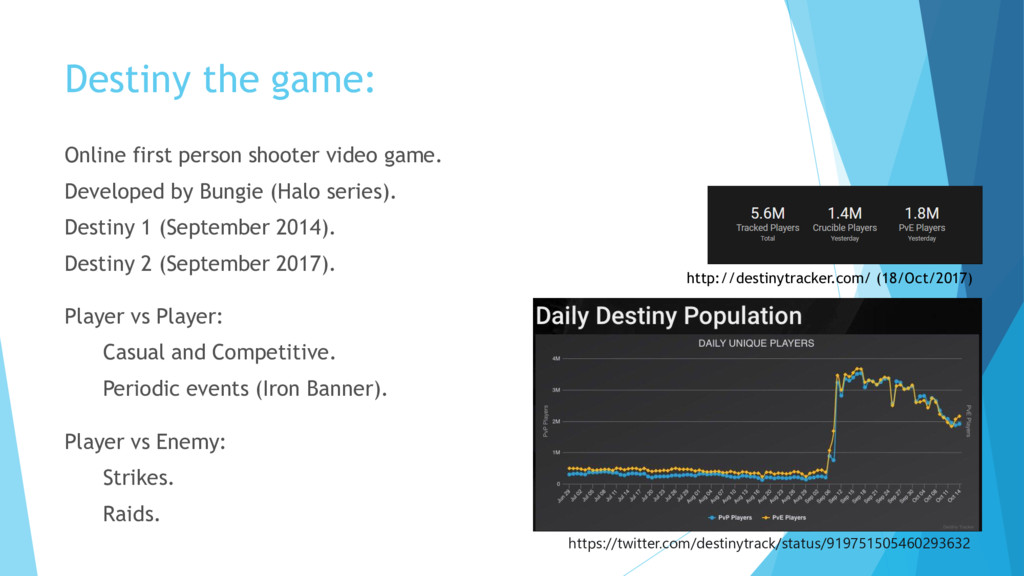
by Bungie (Halo series). Destiny 1 (September 2014). Destiny 2 (September 2017). https://twitter.com/destinytrack/status/919751505460293632 http://destinytracker.com/ (18/Oct/2017) Player vs Player: Casual and Competitive. Periodic events (Iron Banner). Player vs Enemy: Strikes. Raids.
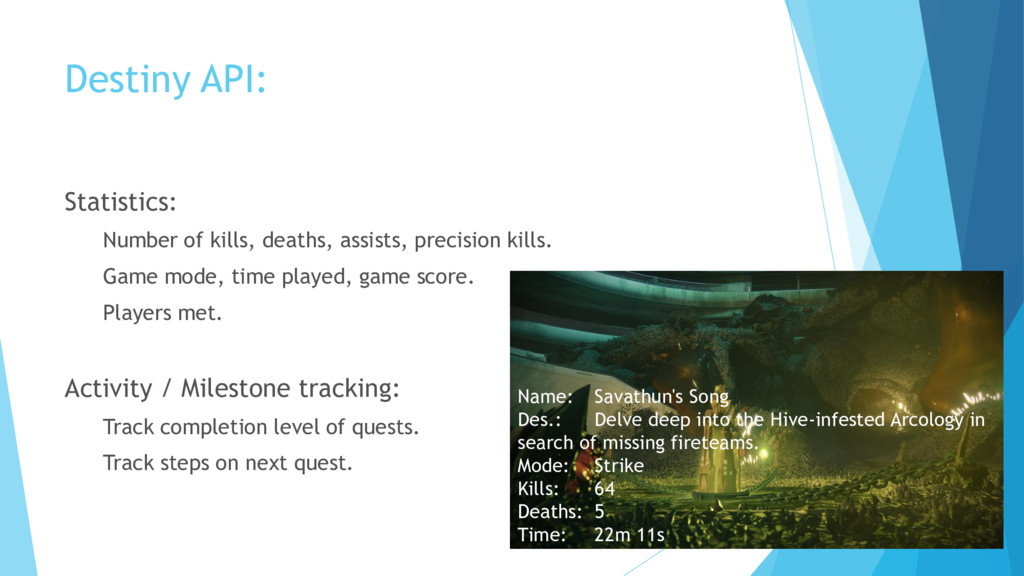
Game mode, time played, game score. Players met. Activity / Milestone tracking: Track completion level of quests. Track steps on next quest. Name: Savathun's Song Des.: Delve deep into the Hive-infested Arcology in search of missing fireteams. Mode: Strike Kills: 64 Deaths: 5 Time: 22m 11s
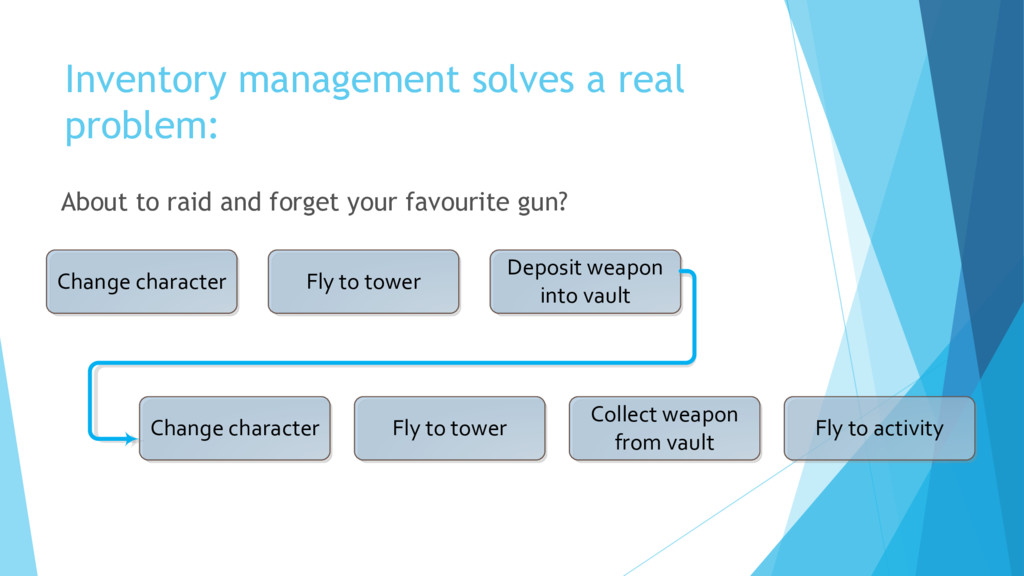
forget your favourite gun? Change character Fly to tower Deposit weapon into vault Change character Fly to tower Collect weapon from vault Fly to activity
of the items in the Destiny world. Names, description, icon, activity name, enemy names, faction details, stats etc. Download from (blog post with more details): manifest_url = 'https://www.bungie.net/Platform/Destiny2/Manifest/' res = requests.get(manifest_url, headers=HEADERS)
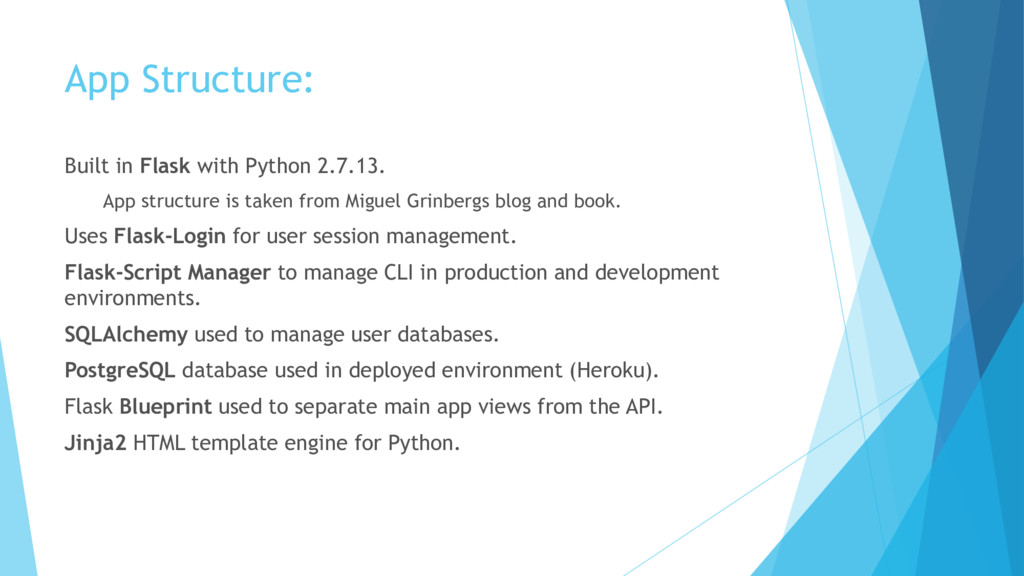
is taken from Miguel Grinbergs blog and book. Uses Flask-Login for user session management. Flask-Script Manager to manage CLI in production and development environments. SQLAlchemy used to manage user databases. PostgreSQL database used in deployed environment (Heroku). Flask Blueprint used to separate main app views from the API. Jinja2 HTML template engine for Python.
2.0 authentication flow. Handles multiple accounts. Other functions: View vendor data (Bungie have not yet enabled for D2). View clan data. Compare active missions between clan members (Bungie have not yet enabled for D2). API and debug: API to sync Manifest version with Bungie servers (Disabled due to Heroku charges). View list of usernames, sorted by last seen. Error reports emailed directly to my Gmail. Messages sent to private Slack account when specific errors are hit.
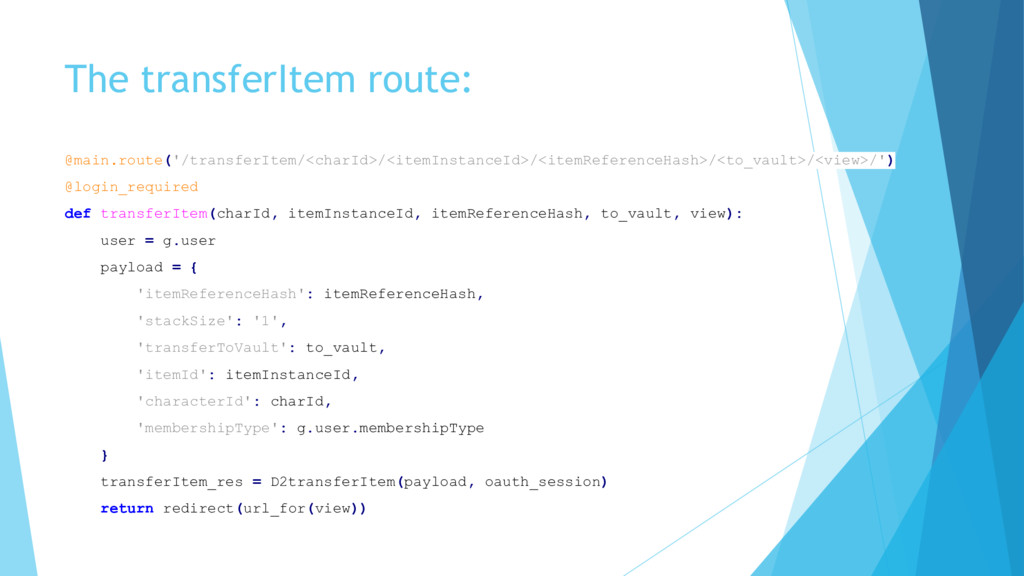
How I created the character vault view. Transferring an item. For information on the following - Check out my blog: Creating the Flask setup. API quick start. Downloading / formatting the Manifest. Background jobs with Celery and Redis.
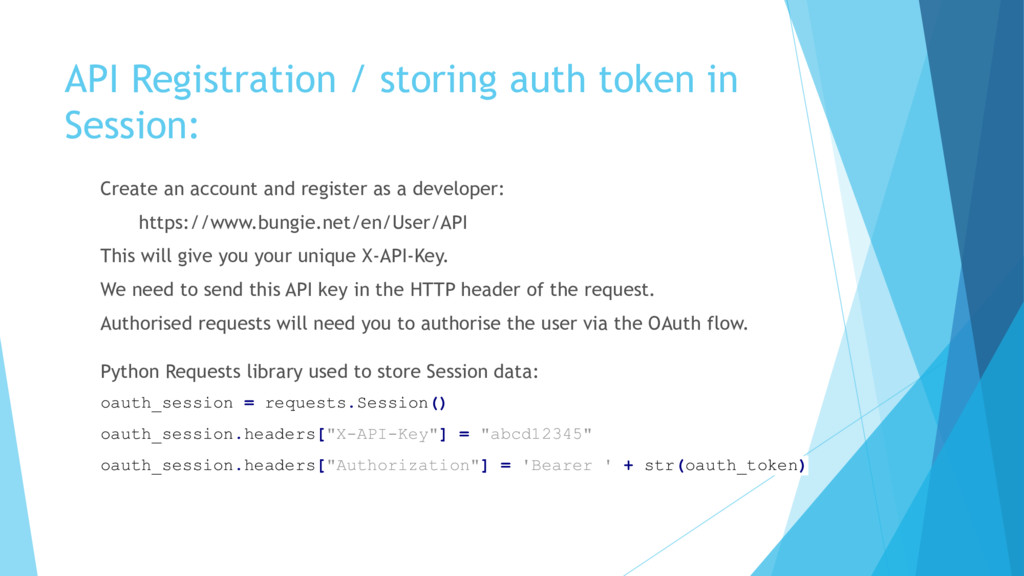
account and register as a developer: https://www.bungie.net/en/User/API This will give you your unique X-API-Key. We need to send this API key in the HTTP header of the request. Authorised requests will need you to authorise the user via the OAuth flow. Python Requests library used to store Session data: oauth_session = requests.Session() oauth_session.headers["X-API-Key"] = "abcd12345" oauth_session.headers["Authorization"] = 'Bearer ' + str(oauth_token)
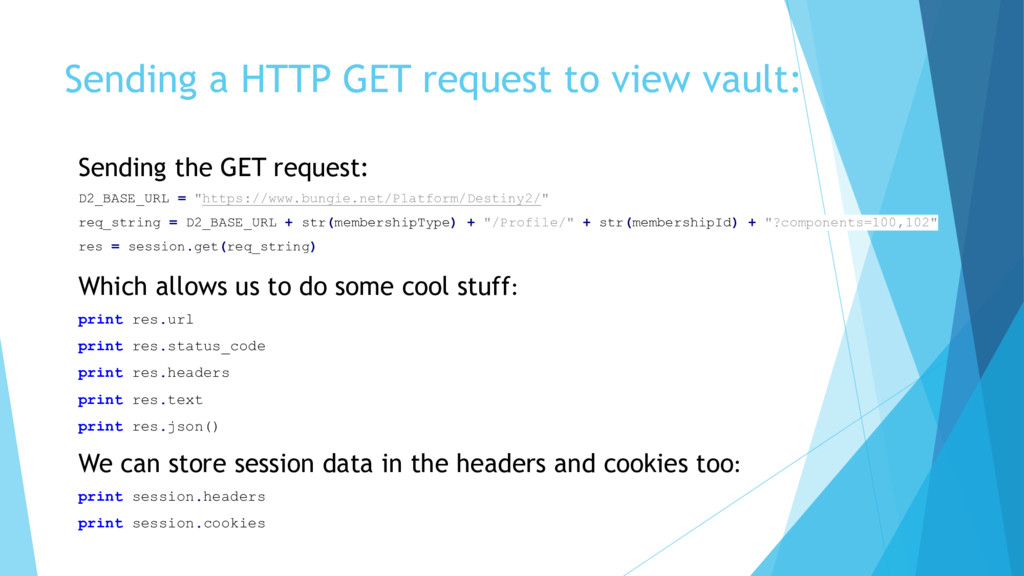
GET request: D2_BASE_URL = "https://www.bungie.net/Platform/Destiny2/" req_string = D2_BASE_URL + str(membershipType) + "/Profile/" + str(membershipId) + "?components=100,102" res = session.get(req_string) Which allows us to do some cool stuff: print res.url print res.status_code print res.headers print res.text print res.json() We can store session data in the headers and cookies too: print session.headers print session.cookies
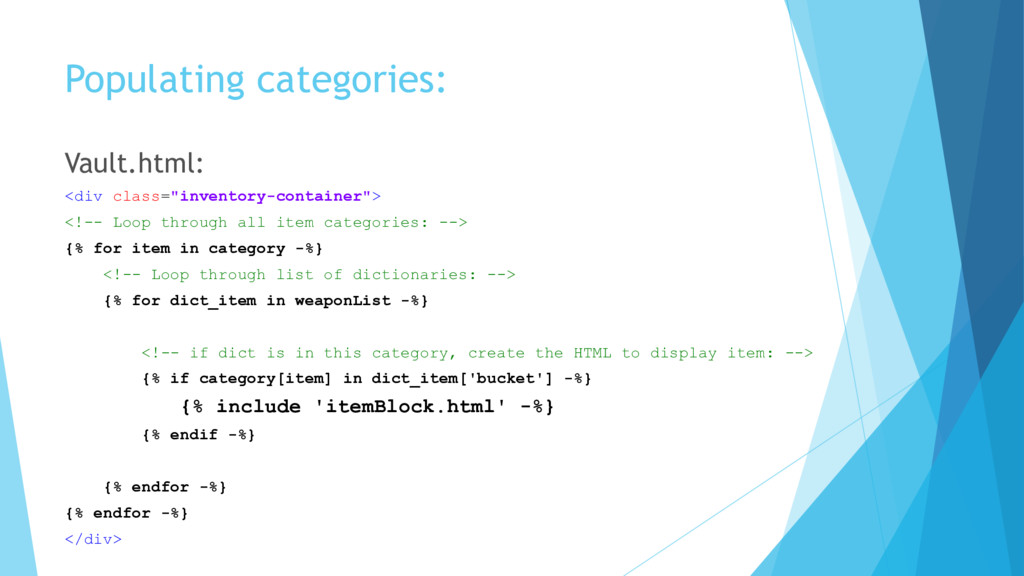
categories: --> {% for item in category -%} <!-- Loop through list of dictionaries: --> {% for dict_item in weaponList -%} <!-- if dict is in this category, create the HTML to display item: --> {% if category[item] in dict_item['bucket'] -%} {% include 'itemBlock.html' -%} {% endif -%} {% endfor -%} {% endfor -%} </div>
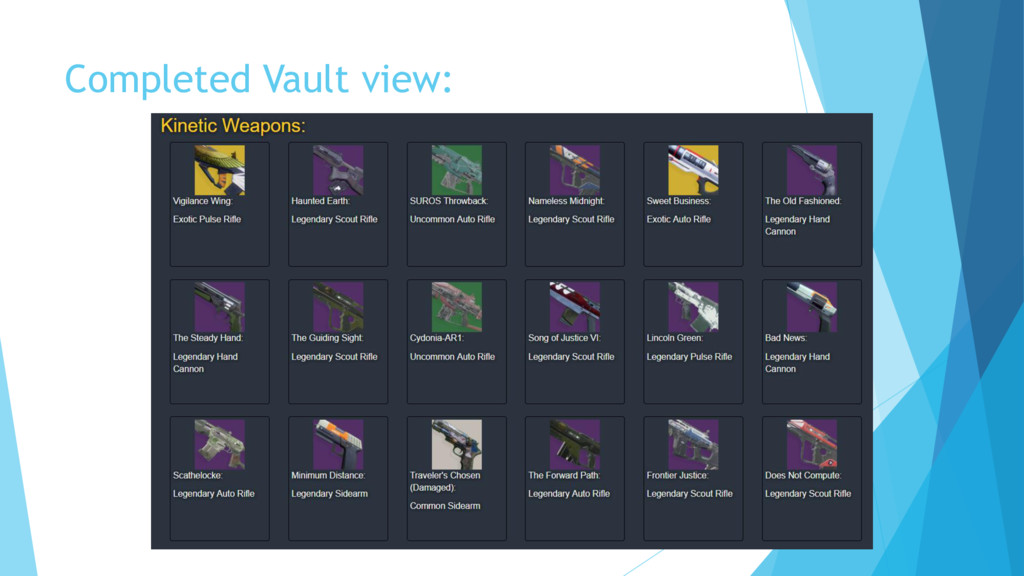
vault view. Transferring Helmet to character, Equip it, helmet changes. Transferring Mida-Multi tool, Equip it, gun on back changes. Transfer a sword for PvP. Equip it, No animation as Mida is currently equipped.
on Beta version of the game. Very difficult to simulate correctly in development. Email error reports and Slack messaging service really helped here. Bungie now return account information in numerical order. Automating deployment of new Manifest files still tricky. Hobby plan + Celery worker + Redis database >€60/month. No easy way to push a JSON file to a Heroku repo. By the time you spot an issue, users are very unlikely to return. Get it right first time!
some unique features in order to progress from tutorial into full product. Lots of redundant API calls and refreshing of data: Can I cache data between item transfers? Can updating view be done on the front-end with AJAX? Lots of front-end work needed to build features: Hover over an item to display screenshot, stats, additional transfer options. Create a loadout builder on the front-end. Possibly move hosting service: Heroku is very easy to get started with but very expensive when adding features.
![Populating the HTML: itemBlock.html: <div class="thumbnail"> <img src="{{ dict_item['icon'] }}"](https://files.speakerdeck.com/presentations/9624c76994964f75802659109f605fe0/slide_21.jpg)
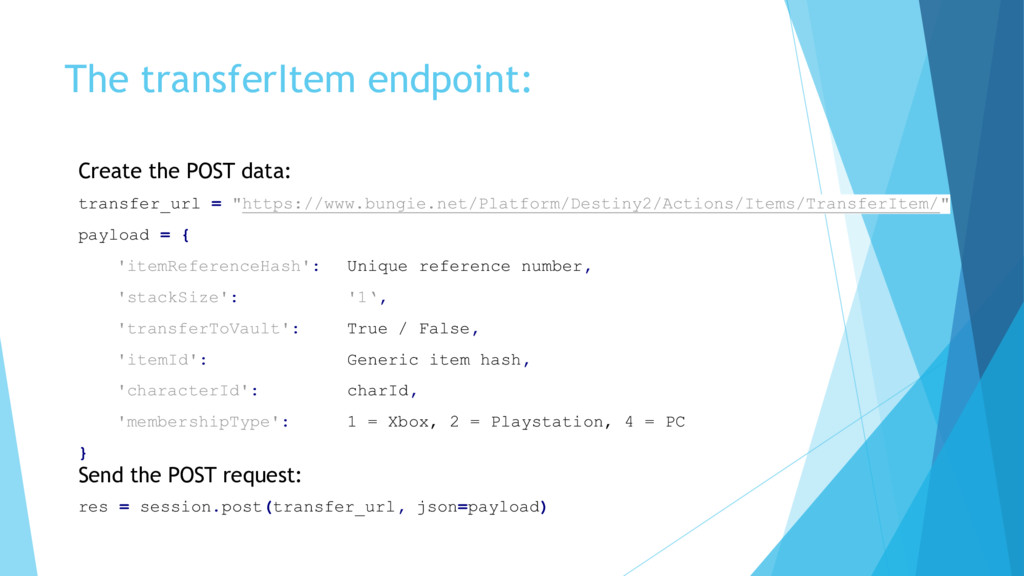
![Transferring an item: HTML: <a href="transferItem/{{ charId }}/{{ dict_item['itemReferenceHash'] }}/{{](https://files.speakerdeck.com/presentations/9624c76994964f75802659109f605fe0/slide_24.jpg)