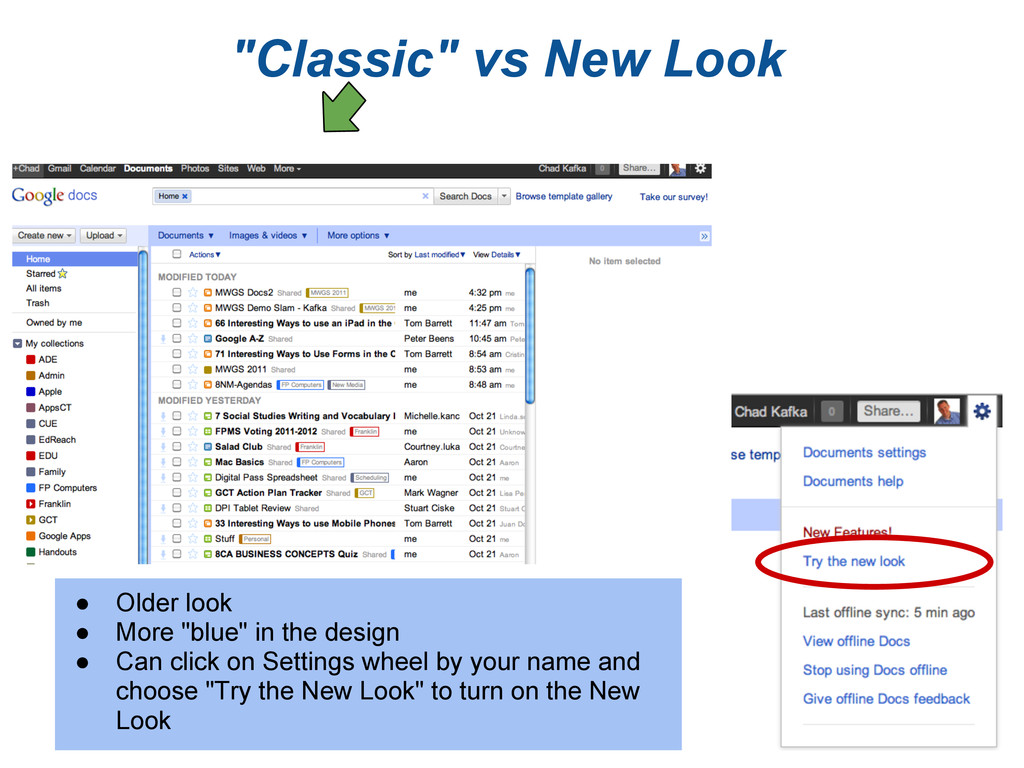
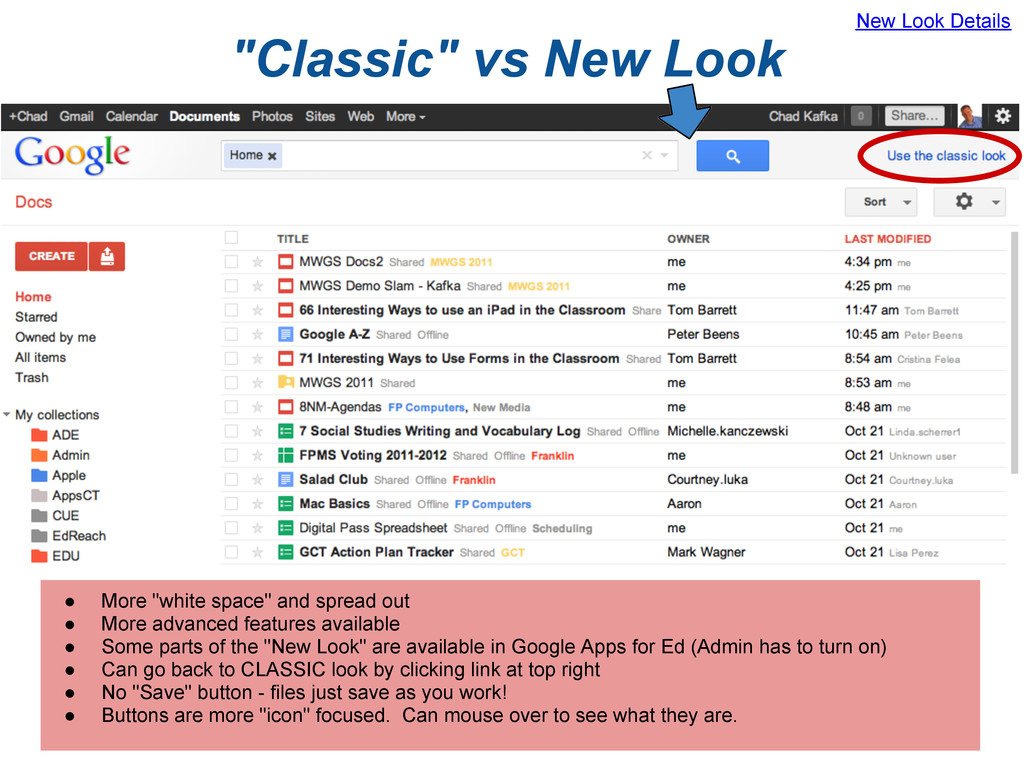
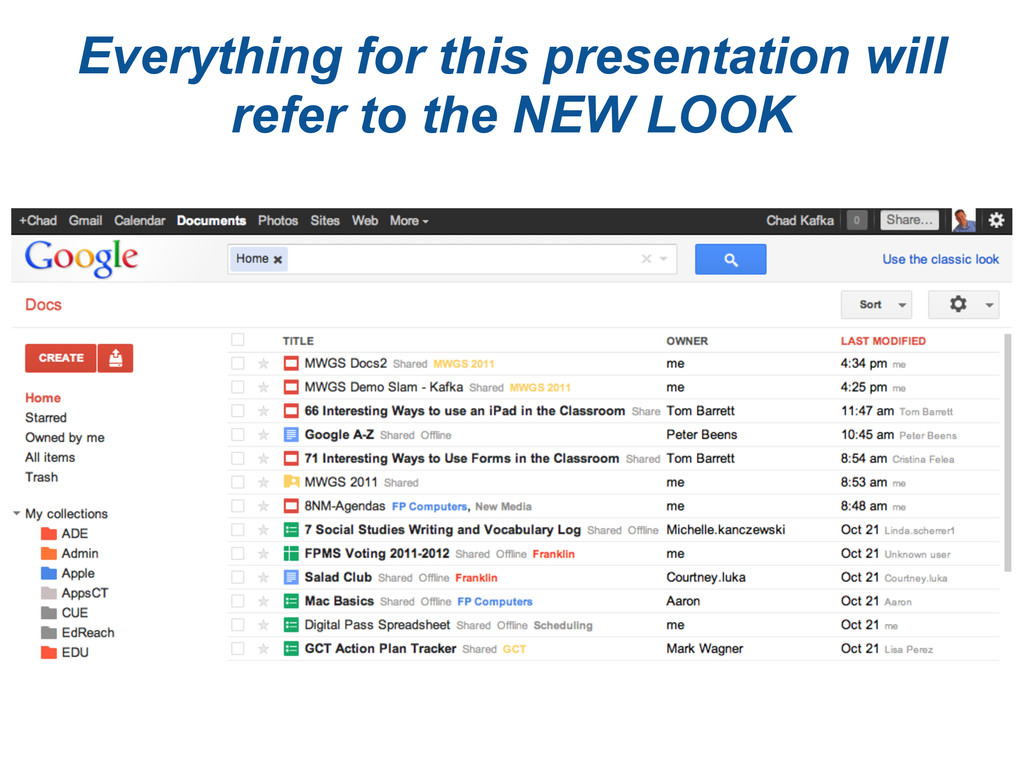
out • More advanced features available • Some parts of the "New Look" are available in Google Apps for Ed (Admin has to turn on) • Can go back to CLASSIC look by clicking link at top right • No "Save" button - files just save as you work! • Buttons are more "icon" focused. Can mouse over to see what they are. New Look Details
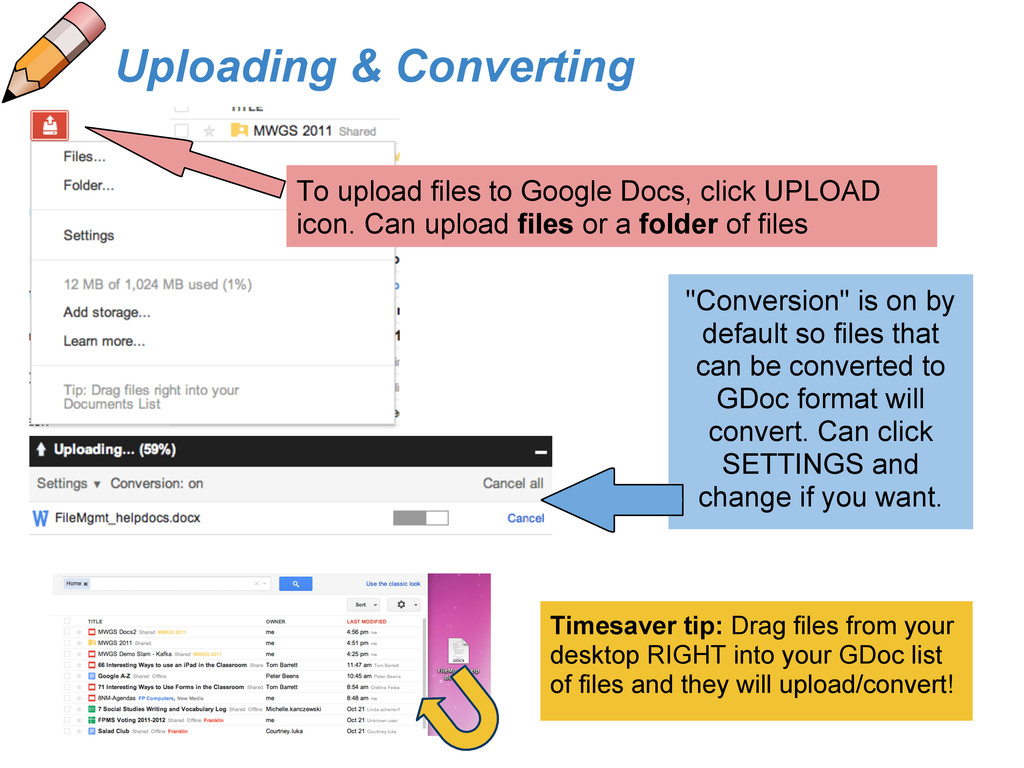
upload files or a folder of files "Conversion" is on by default so files that can be converted to GDoc format will convert. Can click SETTINGS and change if you want. Uploading & Converting Timesaver tip: Drag files from your desktop RIGHT into your GDoc list of files and they will upload/convert!
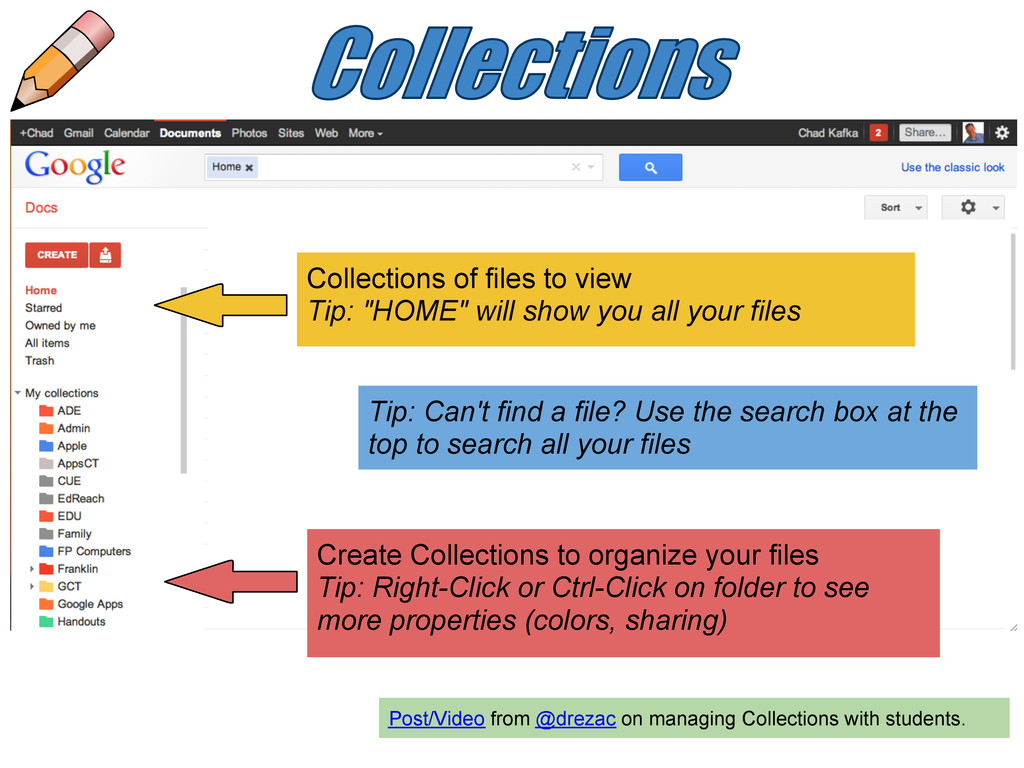
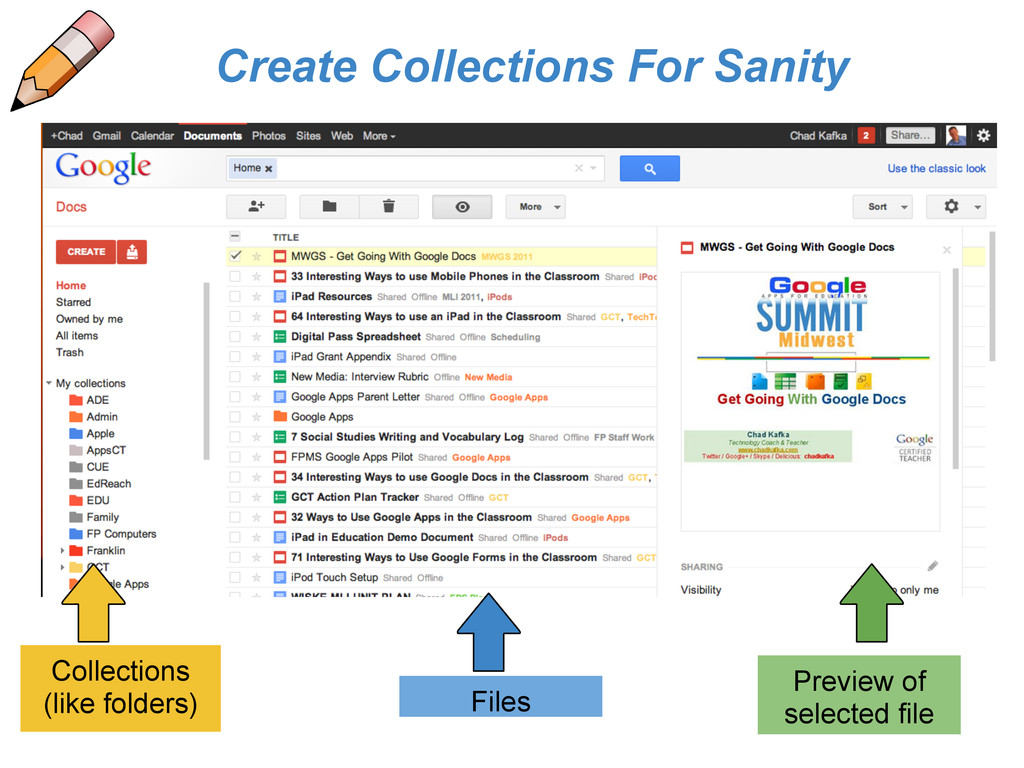
all your files Create Collections to organize your files Tip: Right-Click or Ctrl-Click on folder to see more properties (colors, sharing) Tip: Can't find a file? Use the search box at the top to search all your files Post/Video from @drezac on managing Collections with students.
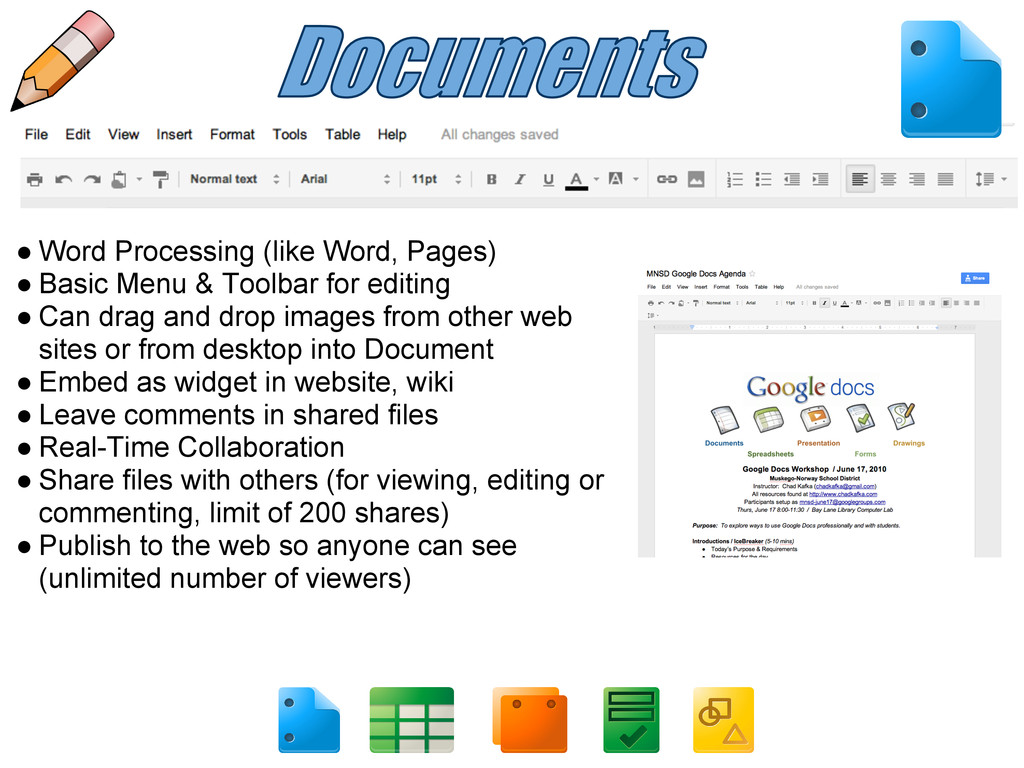
Toolbar for editing • Can drag and drop images from other web sites or from desktop into Document • Embed as widget in website, wiki • Leave comments in shared files • Real-Time Collaboration • Share files with others (for viewing, editing or commenting, limit of 200 shares) • Publish to the web so anyone can see (unlimited number of viewers)
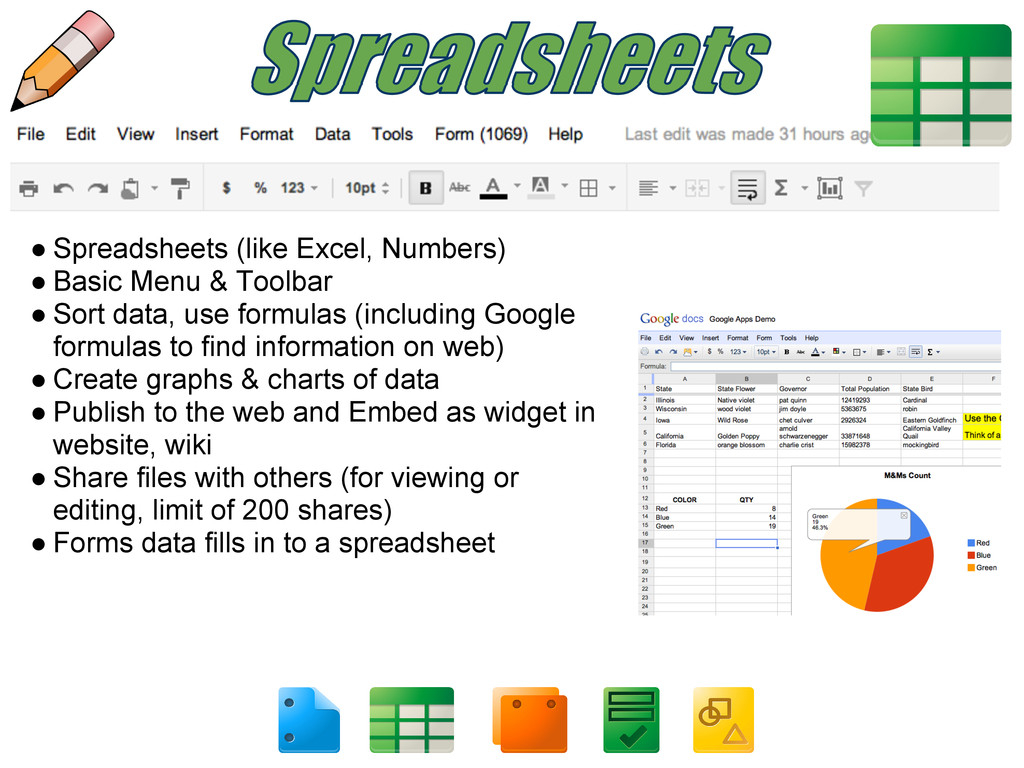
• Sort data, use formulas (including Google formulas to find information on web) • Create graphs & charts of data • Publish to the web and Embed as widget in website, wiki • Share files with others (for viewing or editing, limit of 200 shares) • Forms data fills in to a spreadsheet
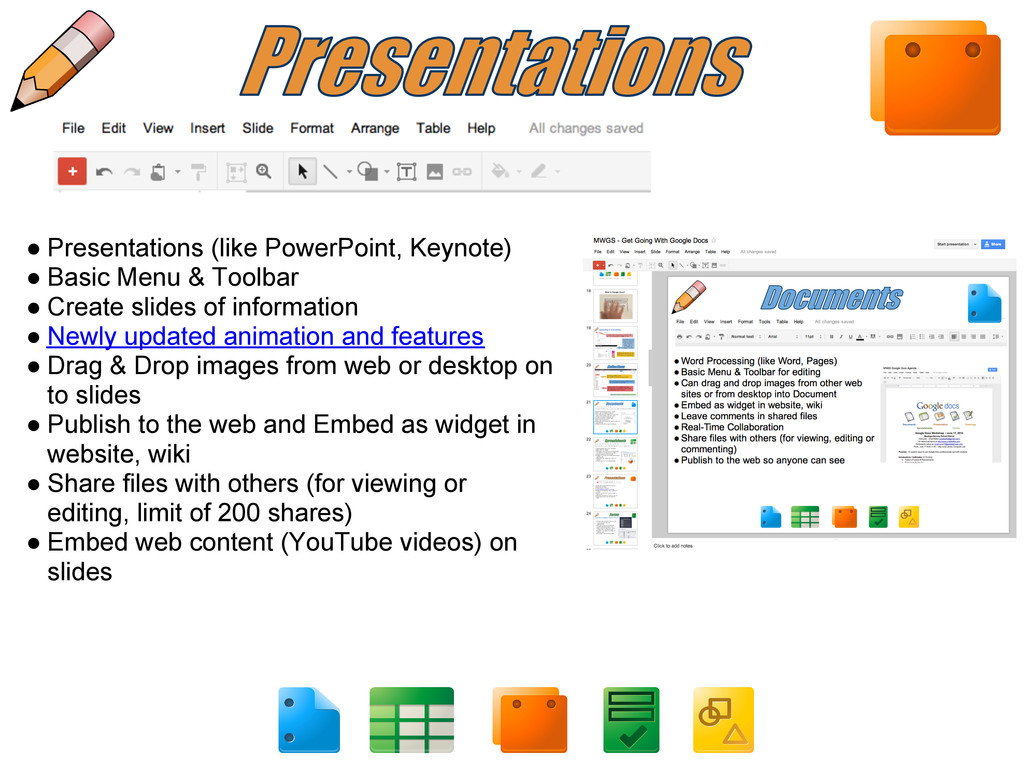
• Create slides of information • Newly updated animation and features • Drag & Drop images from web or desktop on to slides • Publish to the web and Embed as widget in website, wiki • Share files with others (for viewing or editing, limit of 200 shares) • Embed web content (YouTube videos) on slides
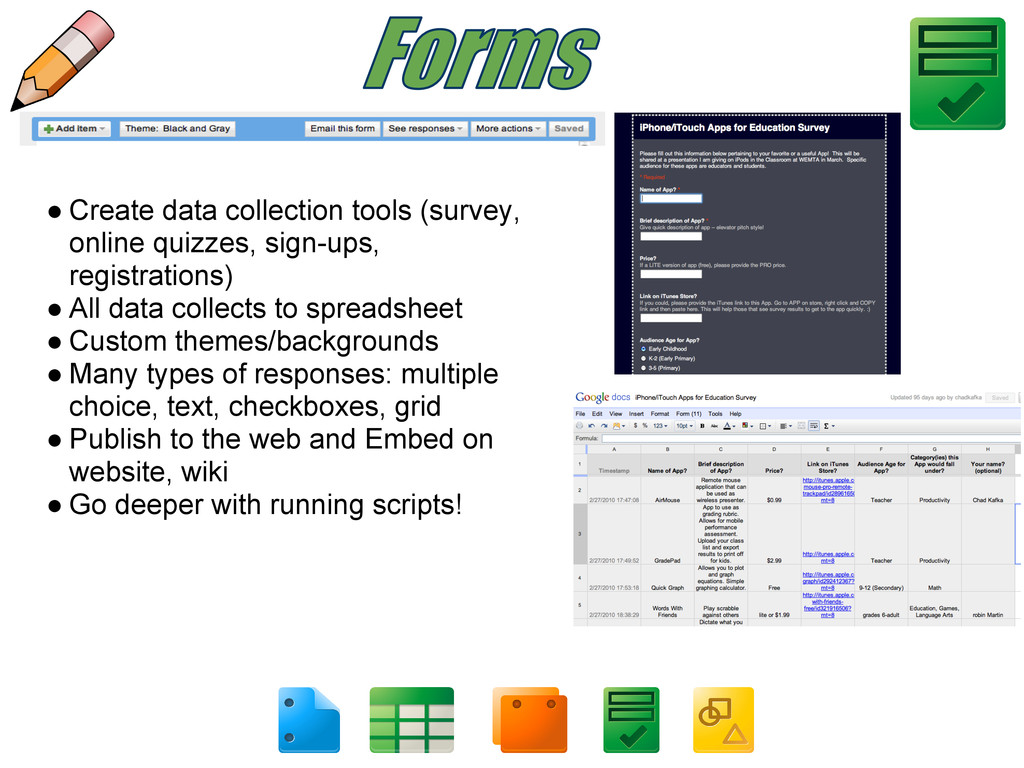
• All data collects to spreadsheet • Custom themes/backgrounds • Many types of responses: multiple choice, text, checkboxes, grid • Publish to the web and Embed on website, wiki • Go deeper with running scripts!
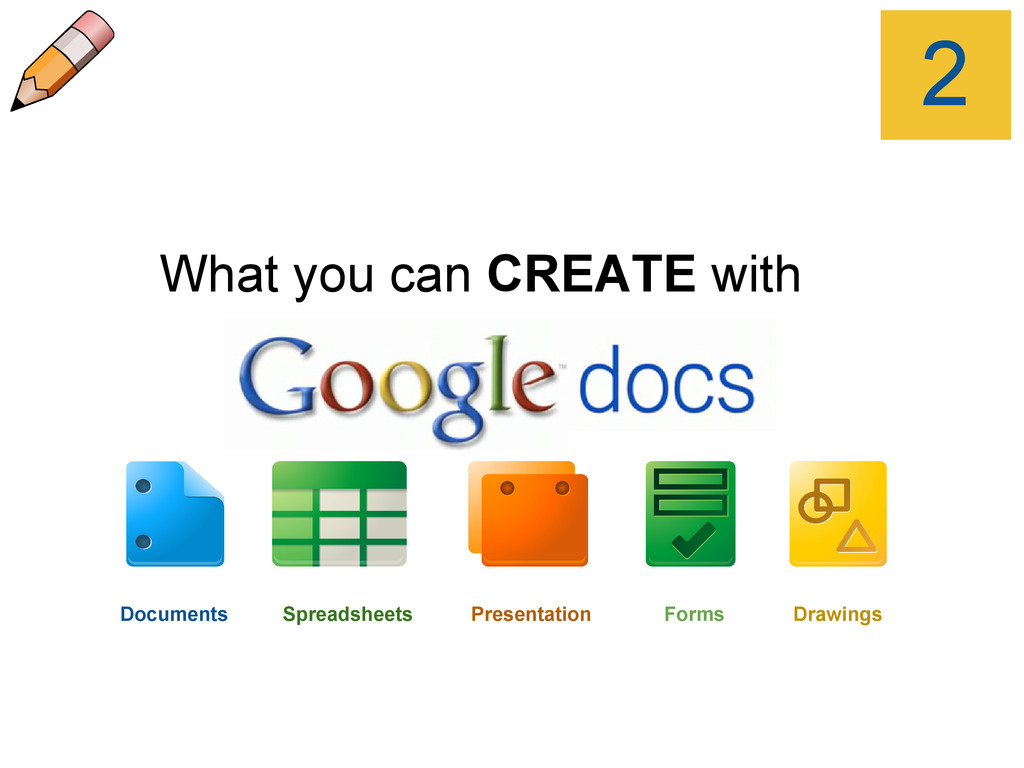
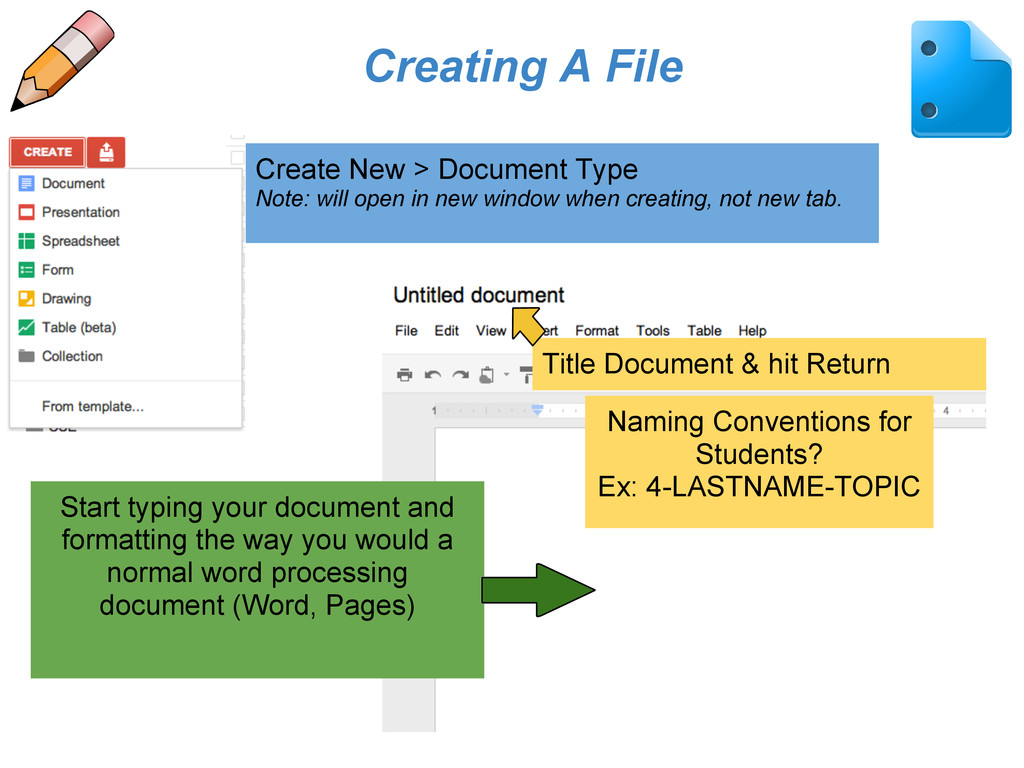
your document and formatting the way you would a normal word processing document (Word, Pages) Create New > Document Type Note: will open in new window when creating, not new tab. Naming Conventions for Students? Ex: 4-LASTNAME-TOPIC
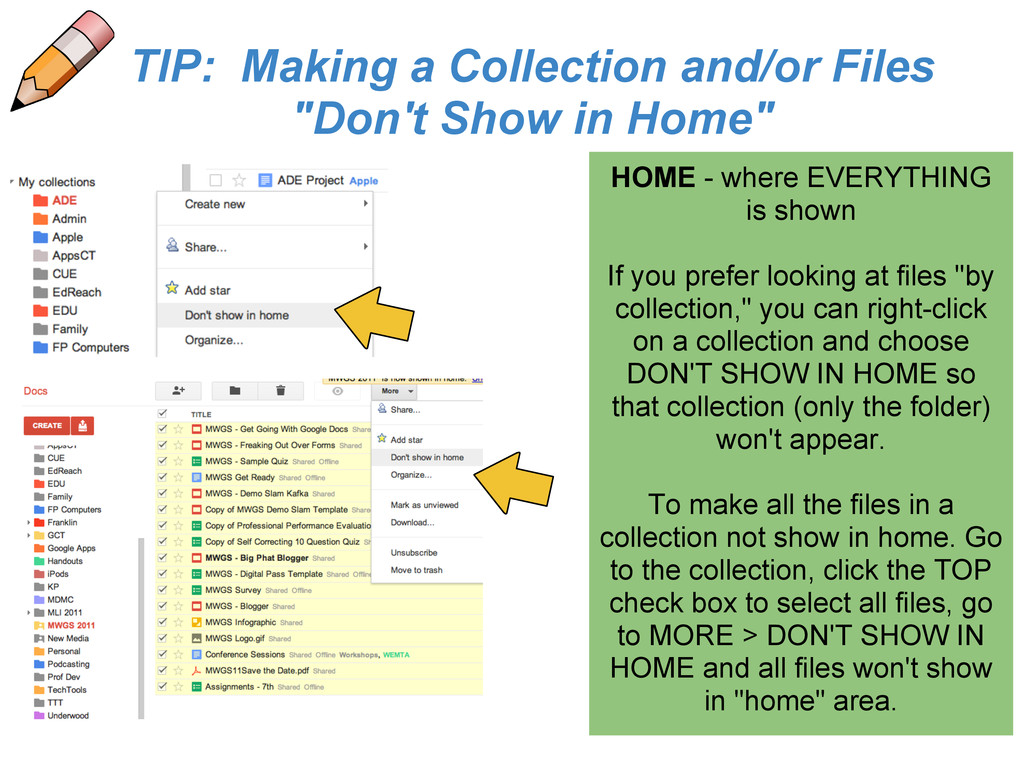
HOME - where EVERYTHING is shown If you prefer looking at files "by collection," you can right-click on a collection and choose DON'T SHOW IN HOME so that collection (only the folder) won't appear. To make all the files in a collection not show in home. Go to the collection, click the TOP check box to select all files, go to MORE > DON'T SHOW IN HOME and all files won't show in "home" area.
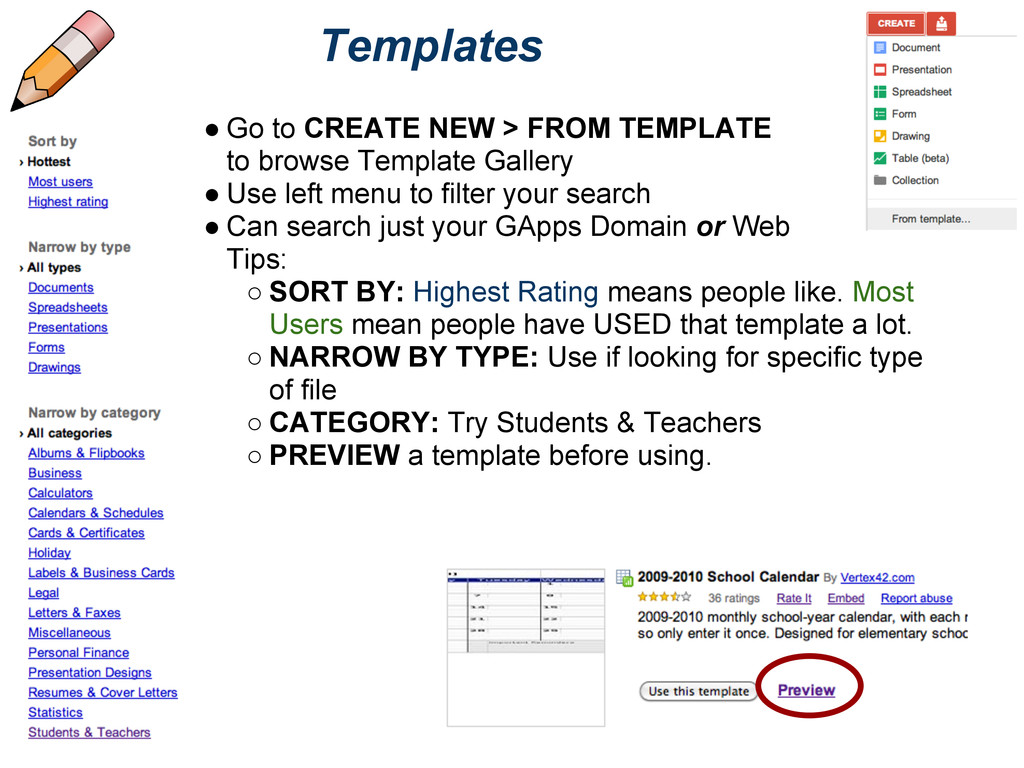
browse Template Gallery • Use left menu to filter your search • Can search just your GApps Domain or Web Tips: ◦ SORT BY: Highest Rating means people like. Most Users mean people have USED that template a lot. ◦ NARROW BY TYPE: Use if looking for specific type of file ◦ CATEGORY: Try Students & Teachers ◦ PREVIEW a template before using.
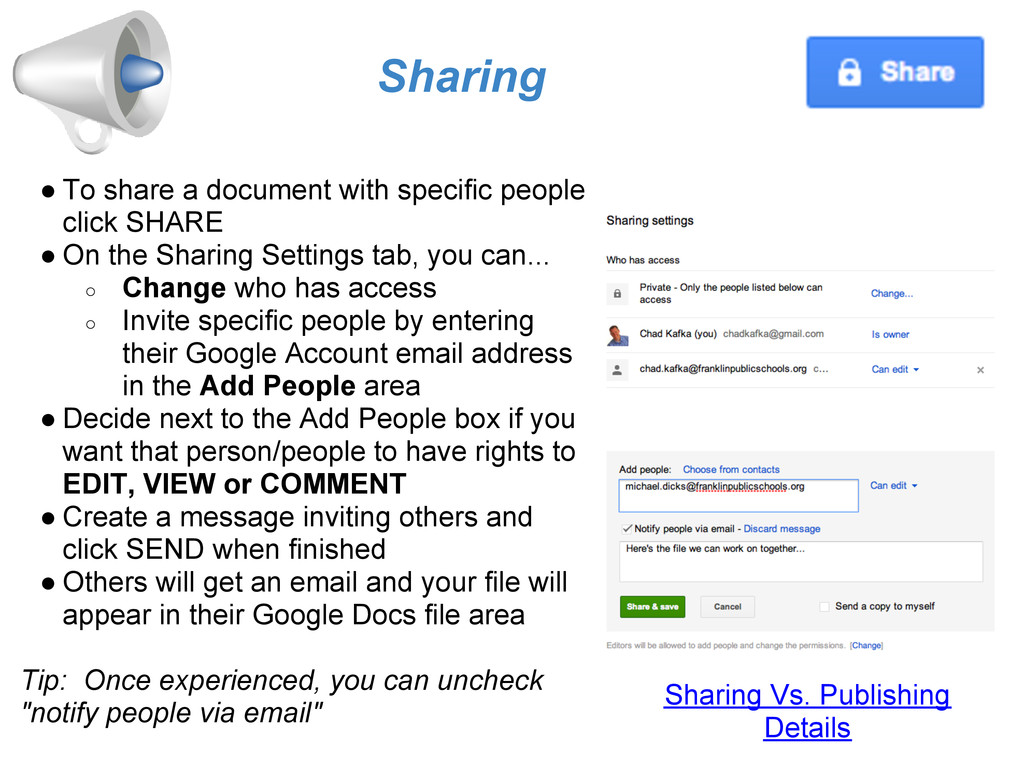
SHARE • On the Sharing Settings tab, you can... ◦ Change who has access ◦ Invite specific people by entering their Google Account email address in the Add People area • Decide next to the Add People box if you want that person/people to have rights to EDIT, VIEW or COMMENT • Create a message inviting others and click SEND when finished • Others will get an email and your file will appear in their Google Docs file area Tip: Once experienced, you can uncheck "notify people via email" Sharing Vs. Publishing Details
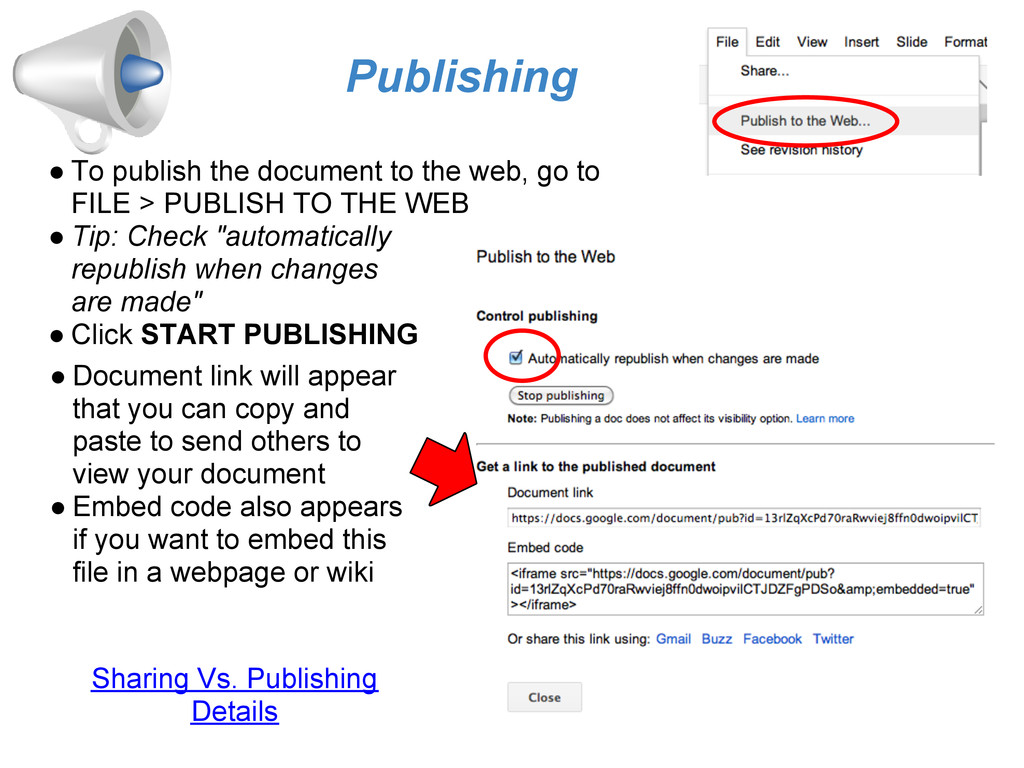
to FILE > PUBLISH TO THE WEB • Tip: Check "automatically republish when changes are made" • Click START PUBLISHING • Document link will appear that you can copy and paste to send others to view your document • Embed code also appears if you want to embed this file in a webpage or wiki Sharing Vs. Publishing Details
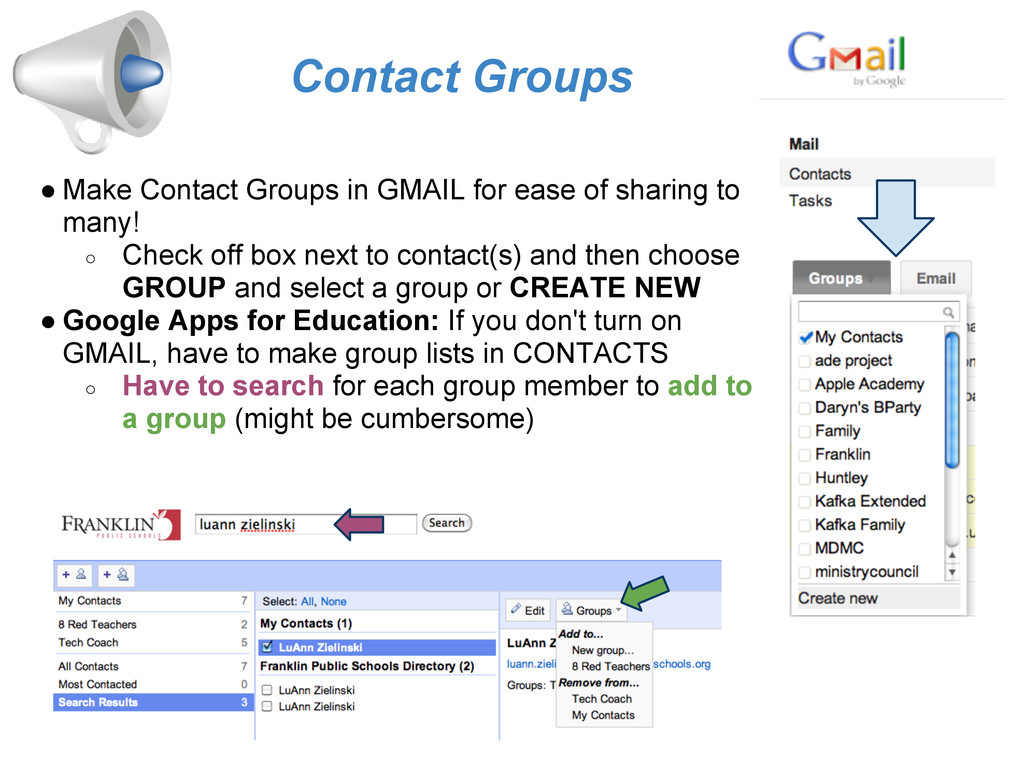
of sharing to many! ◦ Check off box next to contact(s) and then choose GROUP and select a group or CREATE NEW • Google Apps for Education: If you don't turn on GMAIL, have to make group lists in CONTACTS ◦ Have to search for each group member to add to a group (might be cumbersome)
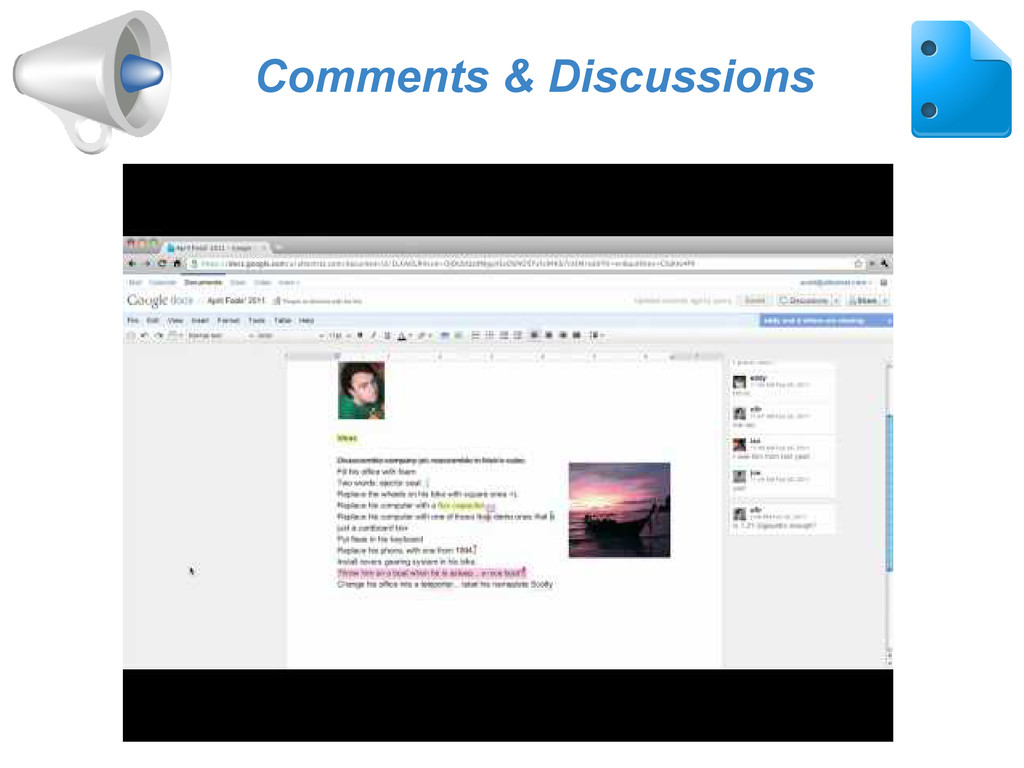
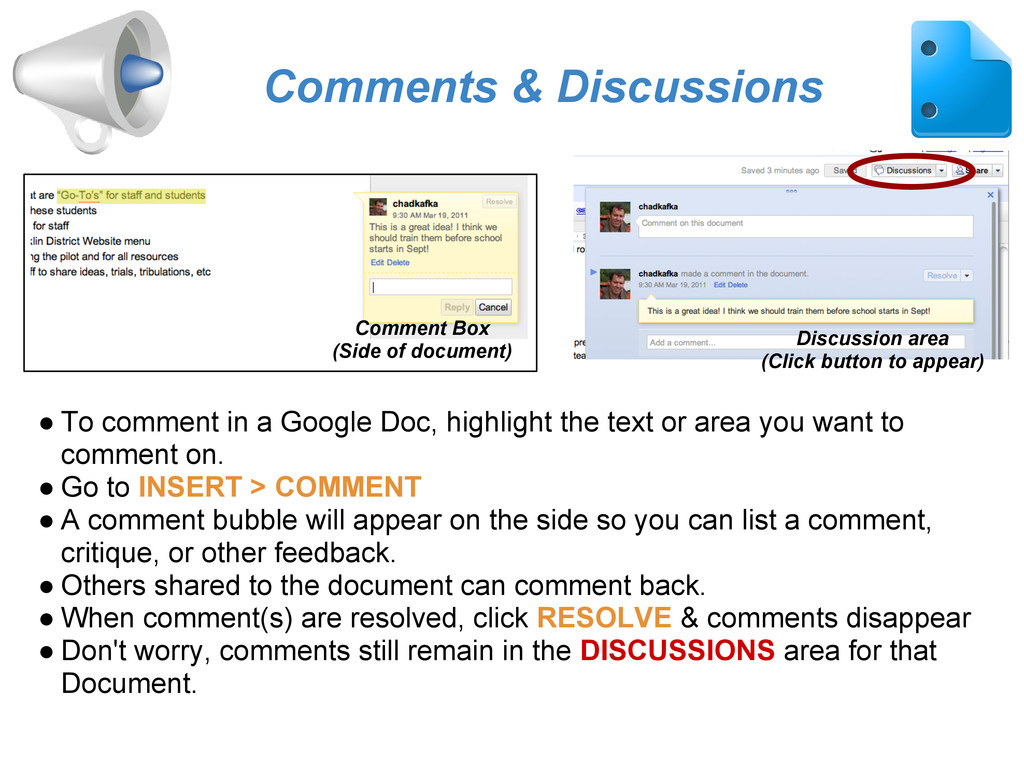
or area you want to comment on. • Go to INSERT > COMMENT • A comment bubble will appear on the side so you can list a comment, critique, or other feedback. • Others shared to the document can comment back. • When comment(s) are resolved, click RESOLVE & comments disappear • Don't worry, comments still remain in the DISCUSSIONS area for that Document. Comments & Discussions Comment Box (Side of document) Discussion area (Click button to appear)
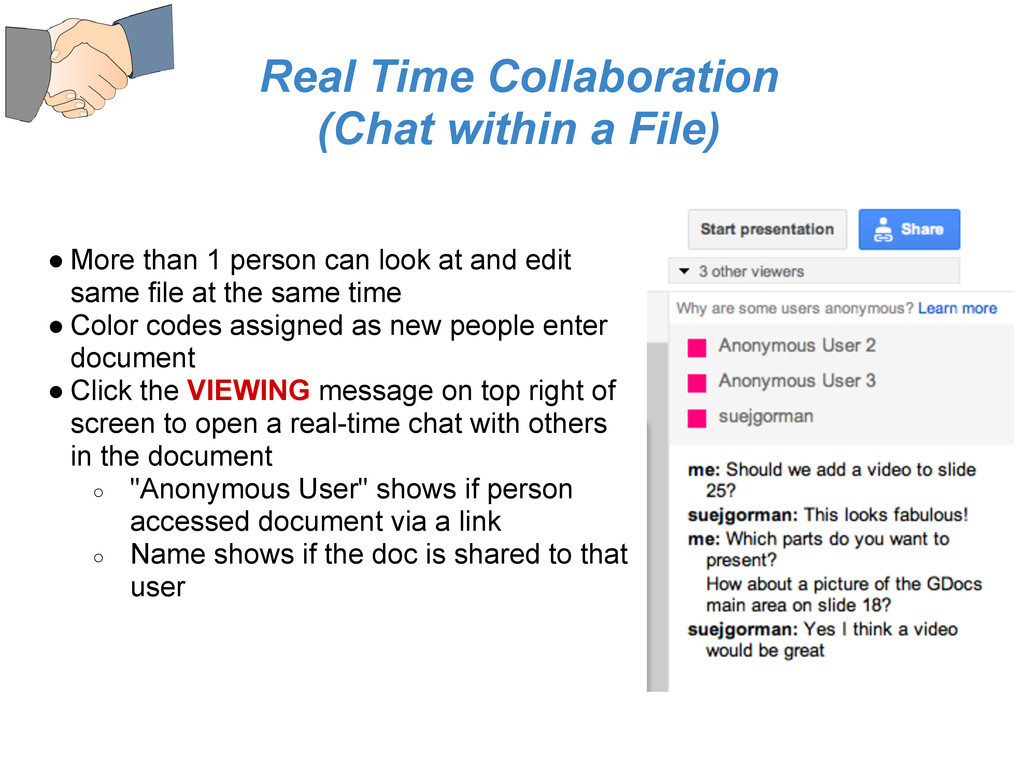
1 person can look at and edit same file at the same time • Color codes assigned as new people enter document • Click the VIEWING message on top right of screen to open a real-time chat with others in the document ◦ "Anonymous User" shows if person accessed document via a link ◦ Name shows if the doc is shared to that user
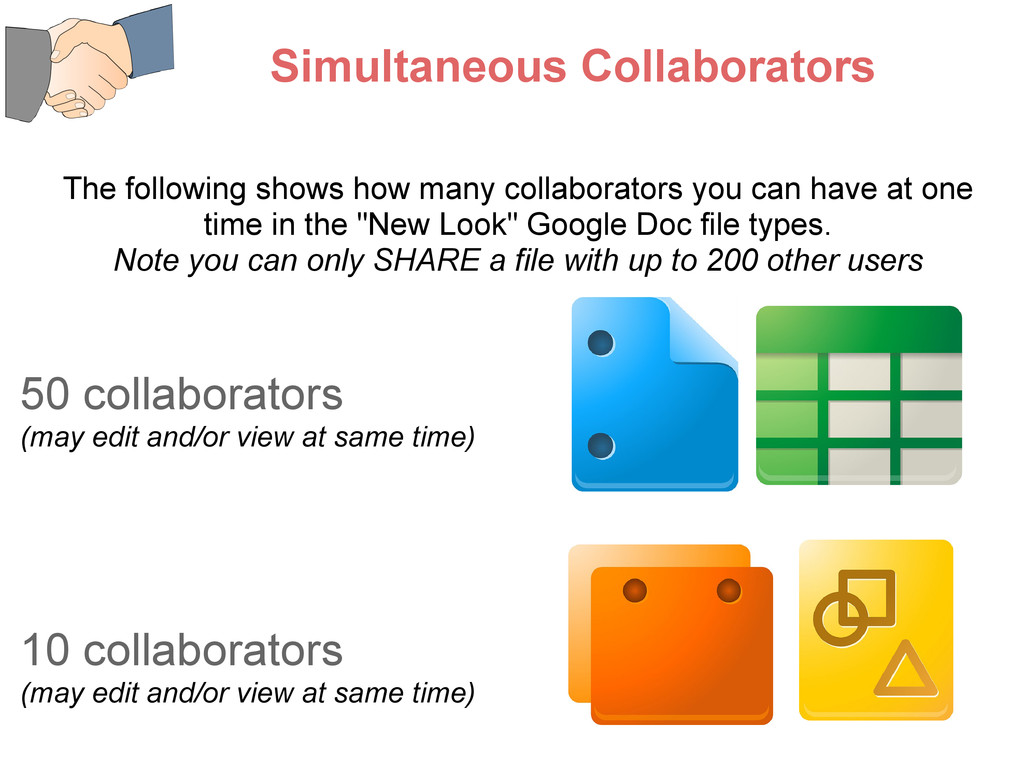
time) 10 collaborators (may edit and/or view at same time) The following shows how many collaborators you can have at one time in the "New Look" Google Doc file types. Note you can only SHARE a file with up to 200 other users
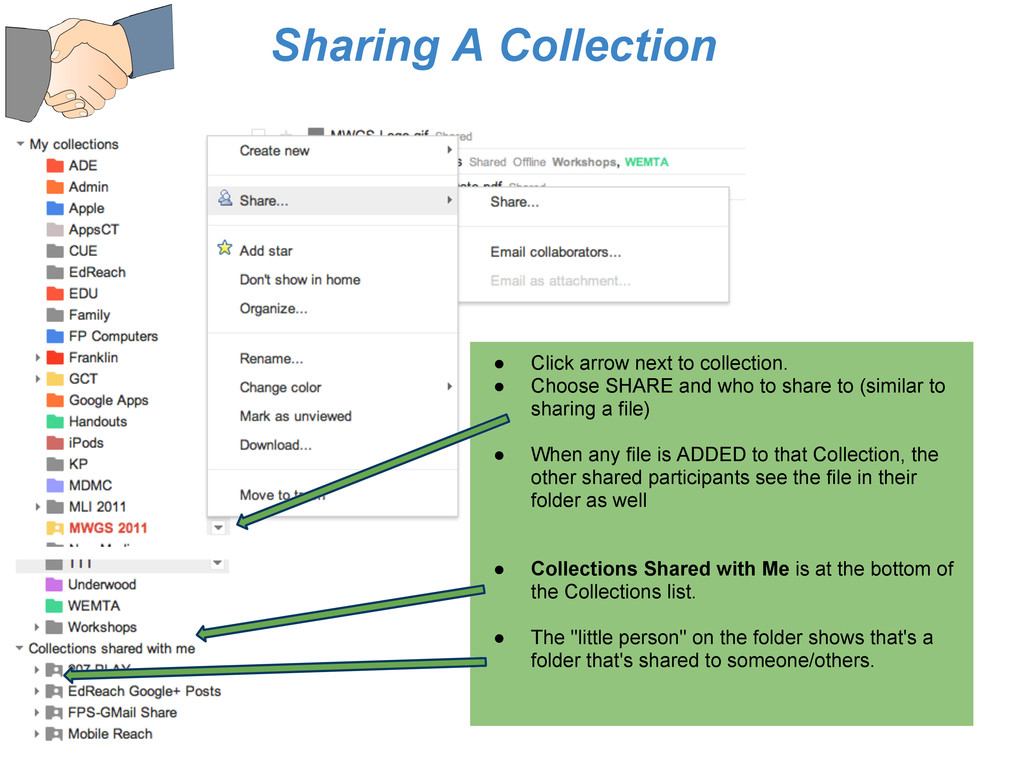
Choose SHARE and who to share to (similar to sharing a file) • When any file is ADDED to that Collection, the other shared participants see the file in their folder as well • Collections Shared with Me is at the bottom of the Collections list. • The "little person" on the folder shows that's a folder that's shared to someone/others.
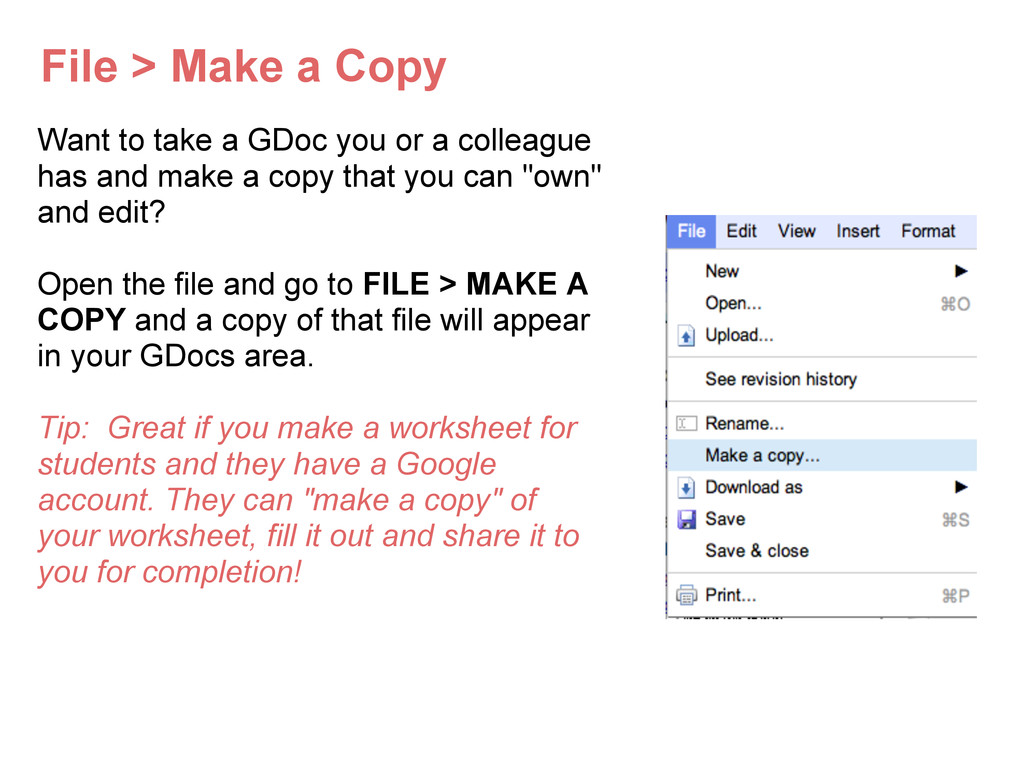
you or a colleague has and make a copy that you can "own" and edit? Open the file and go to FILE > MAKE A COPY and a copy of that file will appear in your GDocs area. Tip: Great if you make a worksheet for students and they have a Google account. They can "make a copy" of your worksheet, fill it out and share it to you for completion!
"share" paper to teacher to grade 2. Collaboration on writing projects (scripts, research) 3. Critiquing each other's work 4. Teacher can easily post documents for students (handouts, letters, worksheets) 5. Tip if collect student work: Have students name file by class first (P1 or H2) so you can "sort" and find files easier
open to anyone being able to edit) 2.Students collect data and input the numbers; class creates charts from data 3.Homeroom teachers will in "voting" from class
2.Share presentation to teacher - no printing! :) 3.Embed class notes/powerpoints online for students to review before upcoming test 4.Easily embed YouTube content!
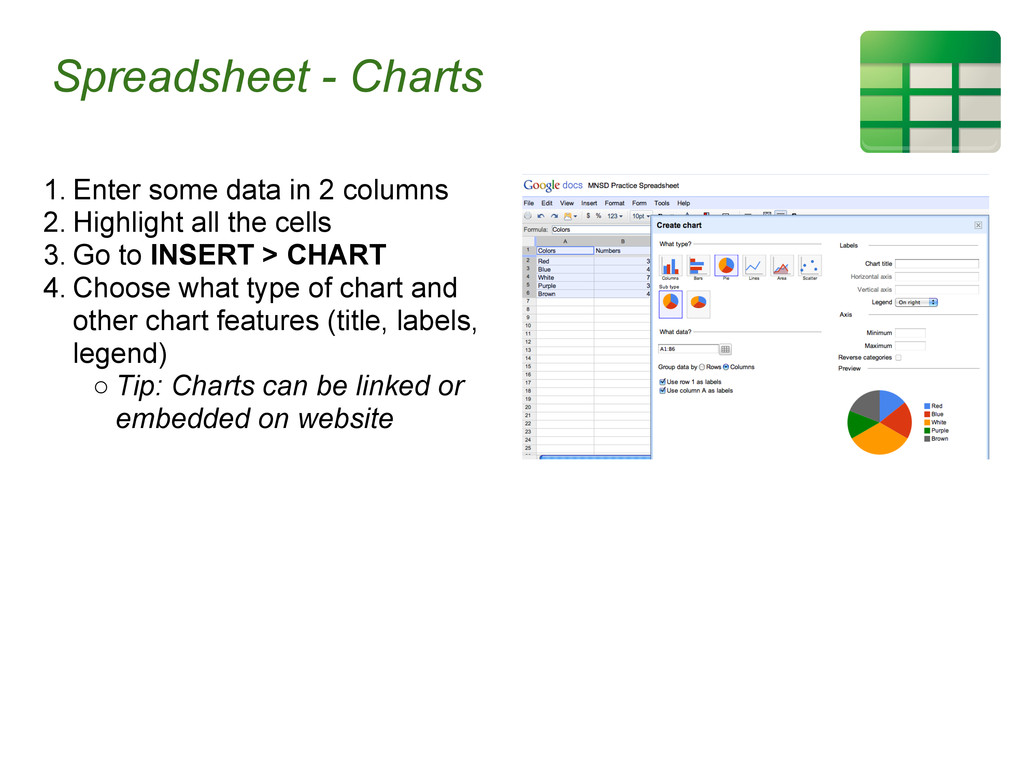
2. Highlight all the cells 3. Go to INSERT > CHART 4. Choose what type of chart and other chart features (title, labels, legend) ◦ Tip: Charts can be linked or embedded on website
like Excel) ◦ Tip: Use the INSERT > FUNCTION menu to browse formulas 2. Turn on/off Formula Bar by going to VIEW > SHOW FORMULA BAR 3. Create more "sheets" in your spreadsheet file by using "+" on bottom right of screen 4. Drag and Drop columns to move where needed; click and hold on column header 5. Formula power being online! ◦ Use =GoogleLookup(entity, attribute) ◦ Tip: Think of as the "thing" and the "stuff of that thing"
> Video) 2. Insert images by uploading or direct linking to URL ending in .png, .jpg (Insert > Images) 3. Format Slide design (Format > Presentation Settings > Change theme or Change Background) 4. Can "order" items on top of or behind other items (right- click and choose ORDER > send to back, front, etc) 5. "Incremental Reveal" is only animation (right-click on object and choose from menu) ◦ Can have objects appear in certain order
Google Docs 2. Embed on websites, wiki, blog 3. Download file as other file type (File > Download As and choose PDF, PowerPoint, Text) 4. Publishing: By publishing and sharing a presentation, viewers can also comment in a side chat room on screen while a presentation is going on. (Let's try!) 5. Print Options (File > Print): get choice of how many slides per page and whether or not to print speaker notes!


 akiraasano
 fmarot
 hiola
hiola
 matleenalaakso
 uchi8977
 lfj
lfj
 terasawat
 signer
 coderdojojapan
 ssmedikasda
 pawan_pharm
 tomit3
 ammeep
 inesmontani
.png) helenjbeal
helenjbeal
 tammyeverts
 tapps
tapps
 livdayseo
 mongodb
 lauravandoore
 baasie
 nwiizo
 rasagy
 jacobtomlinson