Upgrade to Pro — share decks privately, control downloads, hide ads and more …

Gemini for Smarter Apps (By: Adil Soomro) - Roa...

Sponsored · Your Podcast. Everywhere. Effortlessly. Share. Educate. Inspire. Entertain. You do you. We'll handle the rest.

Gemini for Smarter Apps (By: Adil Soomro) - Road to DevFest 2025

Workshop by Adil Soomro (https://www.linkedin.com/in/adilsoomro) at Road To DevFest by GDG Lahore.

Avatar for GDG Lahore

GDG Lahore PRO

November 29, 2025

More Decks by GDG Lahore

Other Decks in Programming

Transcript

  1. Build With AI - Gemini For Smarter Apps Adil Soomro

    Founder Imagitor, Houzi Co Founder BooleanBites Ltd. 1
  2. Special Credits for This Workshop Visit https://trygcp.dev/e/build-ai-LAH07 to sign up

    with your Google Account and get access to the Free Tier. 3
  3. 4

  4. What you'll learn: Overview Welcome to the exciting world of

    Gemini and Flutter! This is a codelab series focused on Gemini using Flutter, in which you'll learn the following: 5
  5. What Makes an App “Smart”? Reactive to user input Predictive

    or Generative Personalized experience for user Capable of understanding natural language 6
  6. Brief Overview of Gemini API Google's generative AI model family

    Multimodel capabilities: Text, image, code 8
  7. 9

  8. Tools Flutter SDK installed Android Studio or VSCode Optional: FirebaseStudio

    (ProjectIDX) Emulator or physical device setup 11
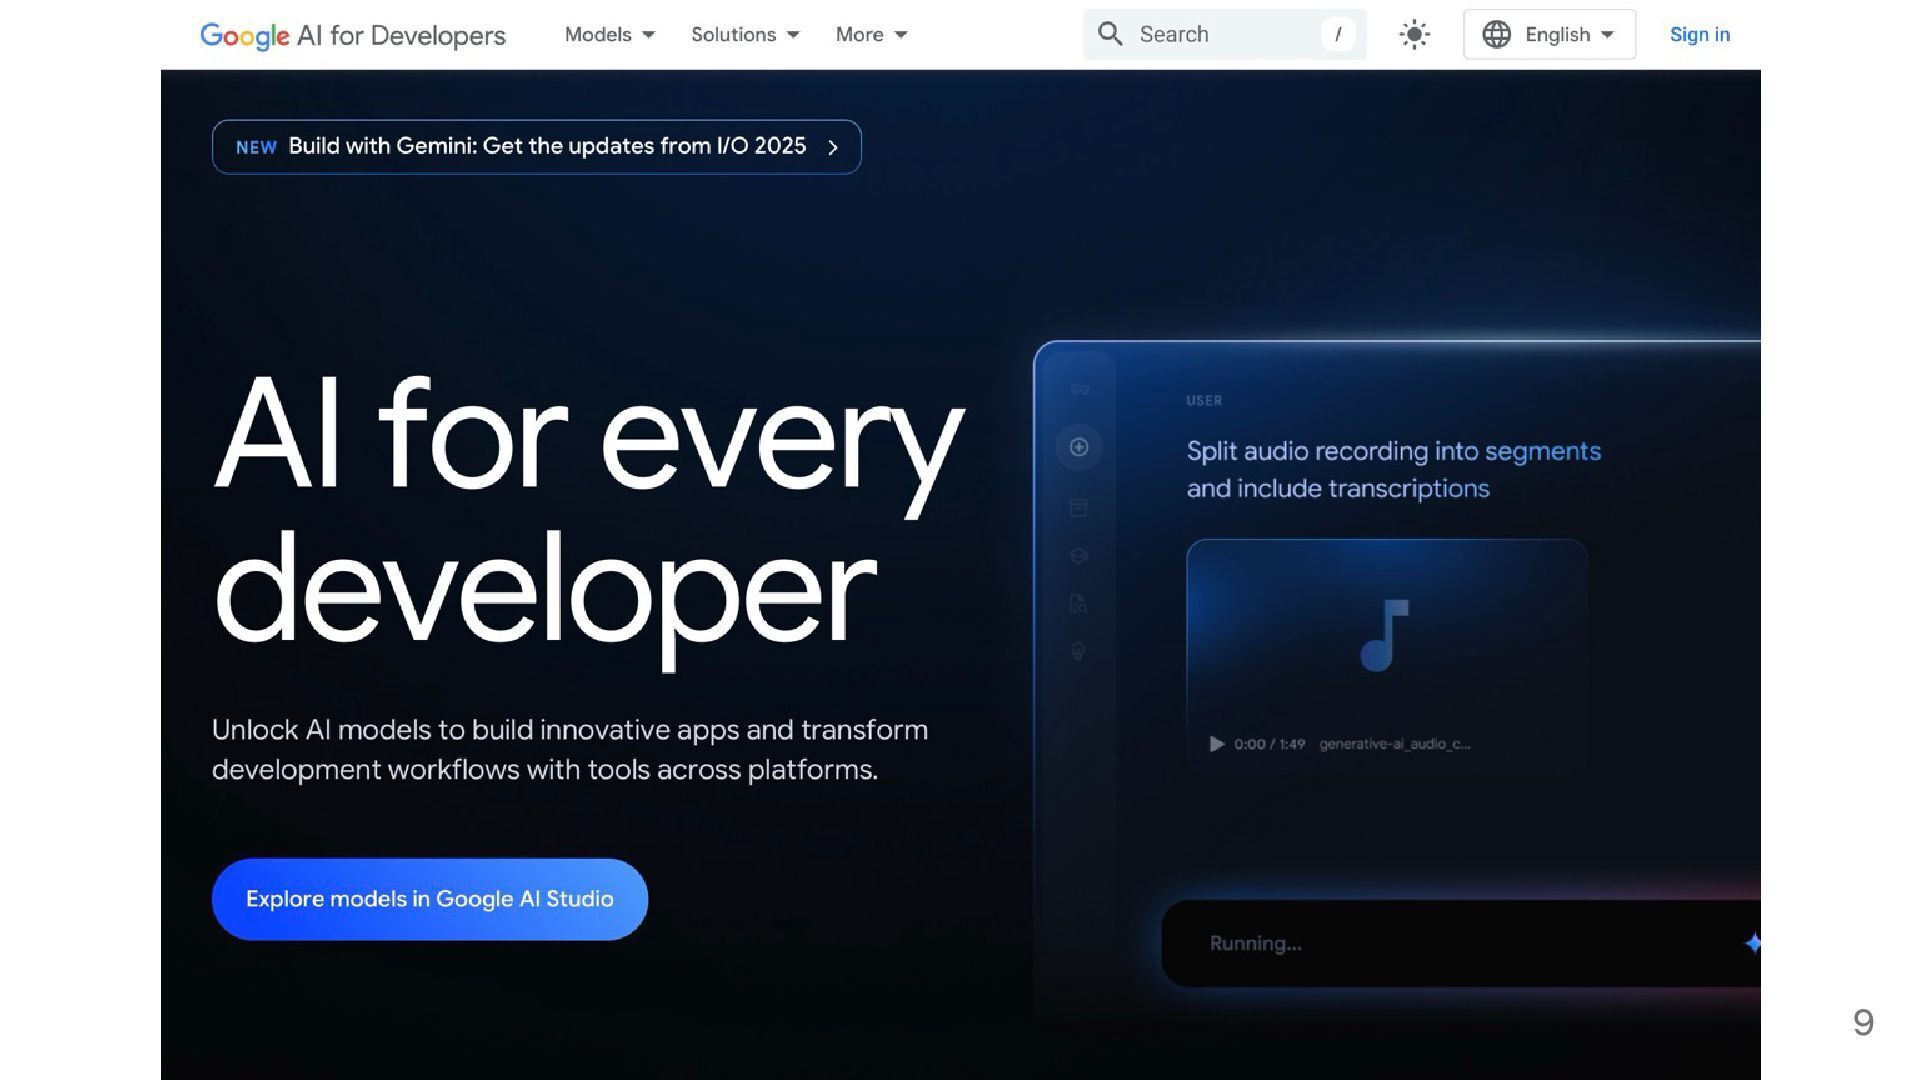
  9. Gemini API Key Visit: https://aistudio.google.com/ Click “Get API Key” (Requires

    a Google account) Choose a project or create new Apply free credits or billing if prompted 13
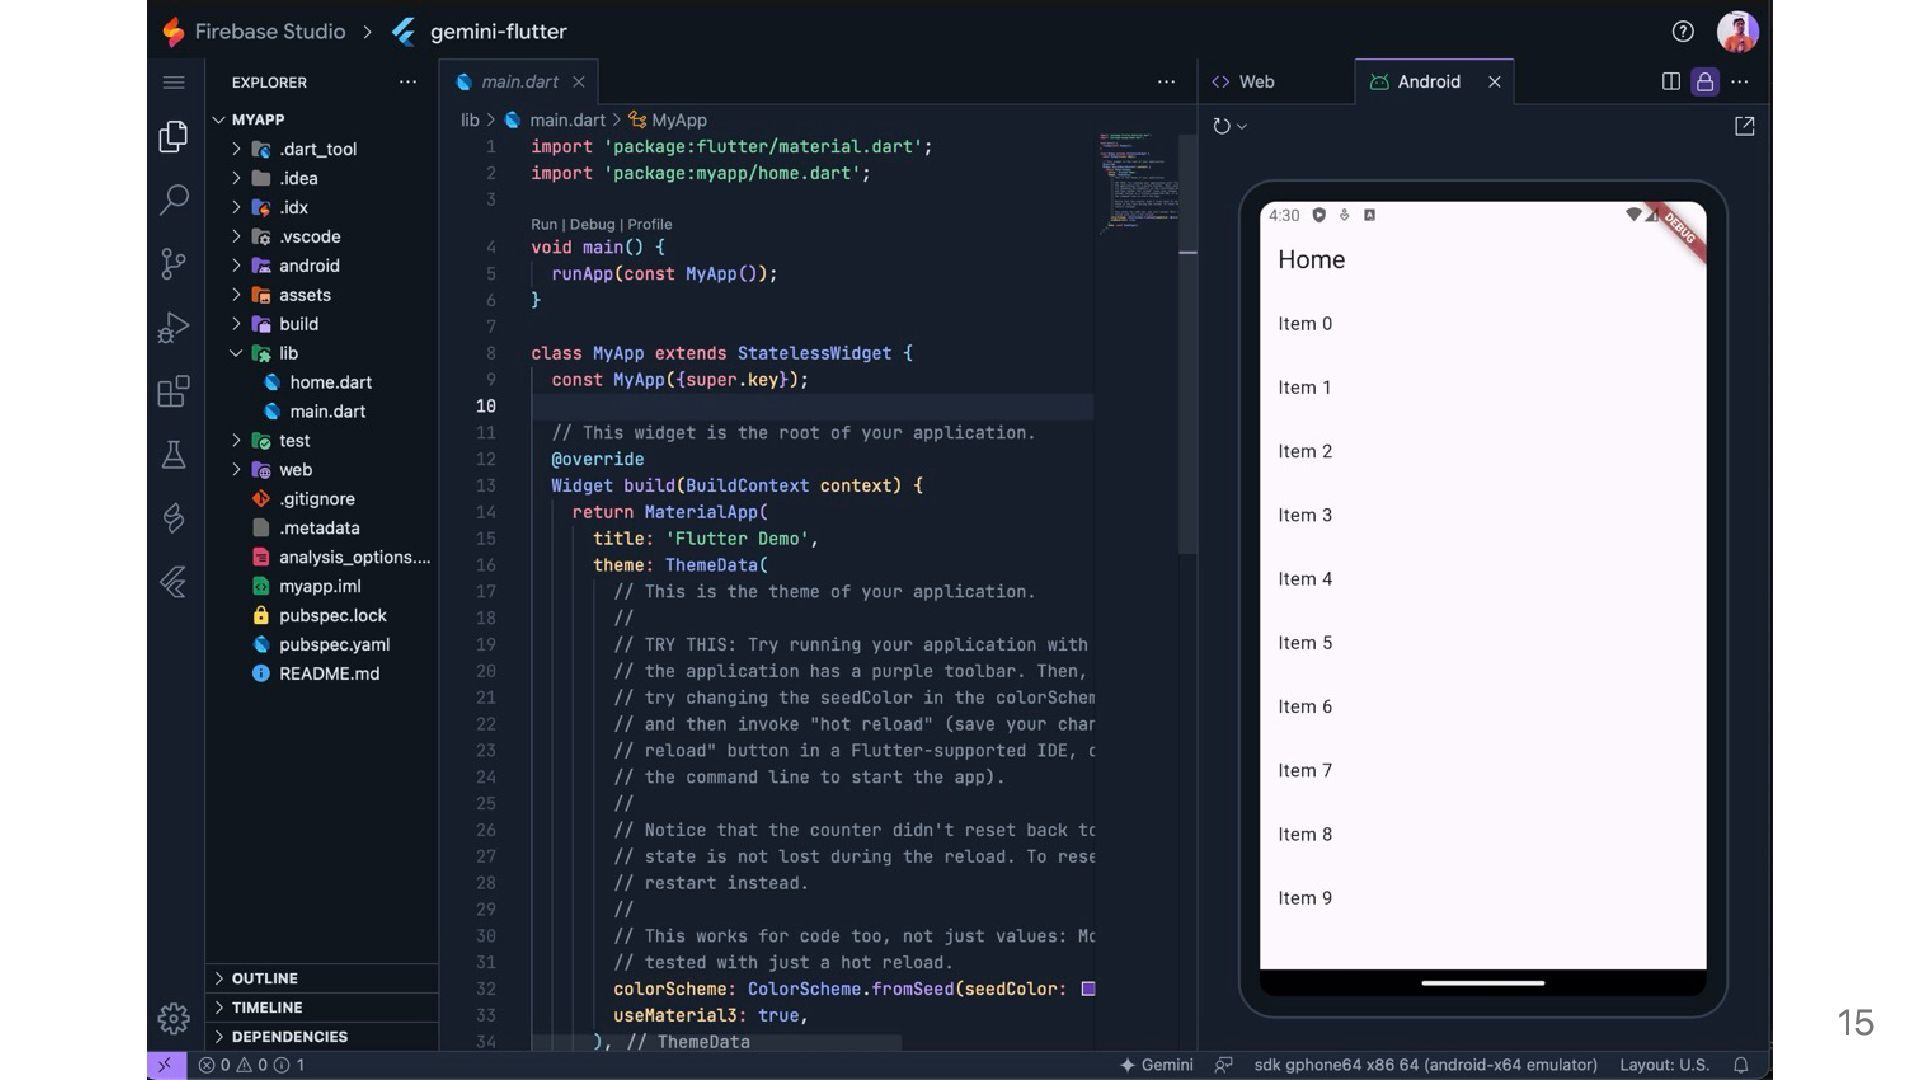
  10. FirebaseStudio (ProjectIDX) If you don't want to set up your

    machine with Flutter at the moment, you can use FirebaseStudio (https://studio.firebase.google.com), an entirely web-based workspace for full-stack application development, complete with the latest generative AI from Gemini, and full-fidelity app previews, powered by cloud emulators. 14
  11. 15

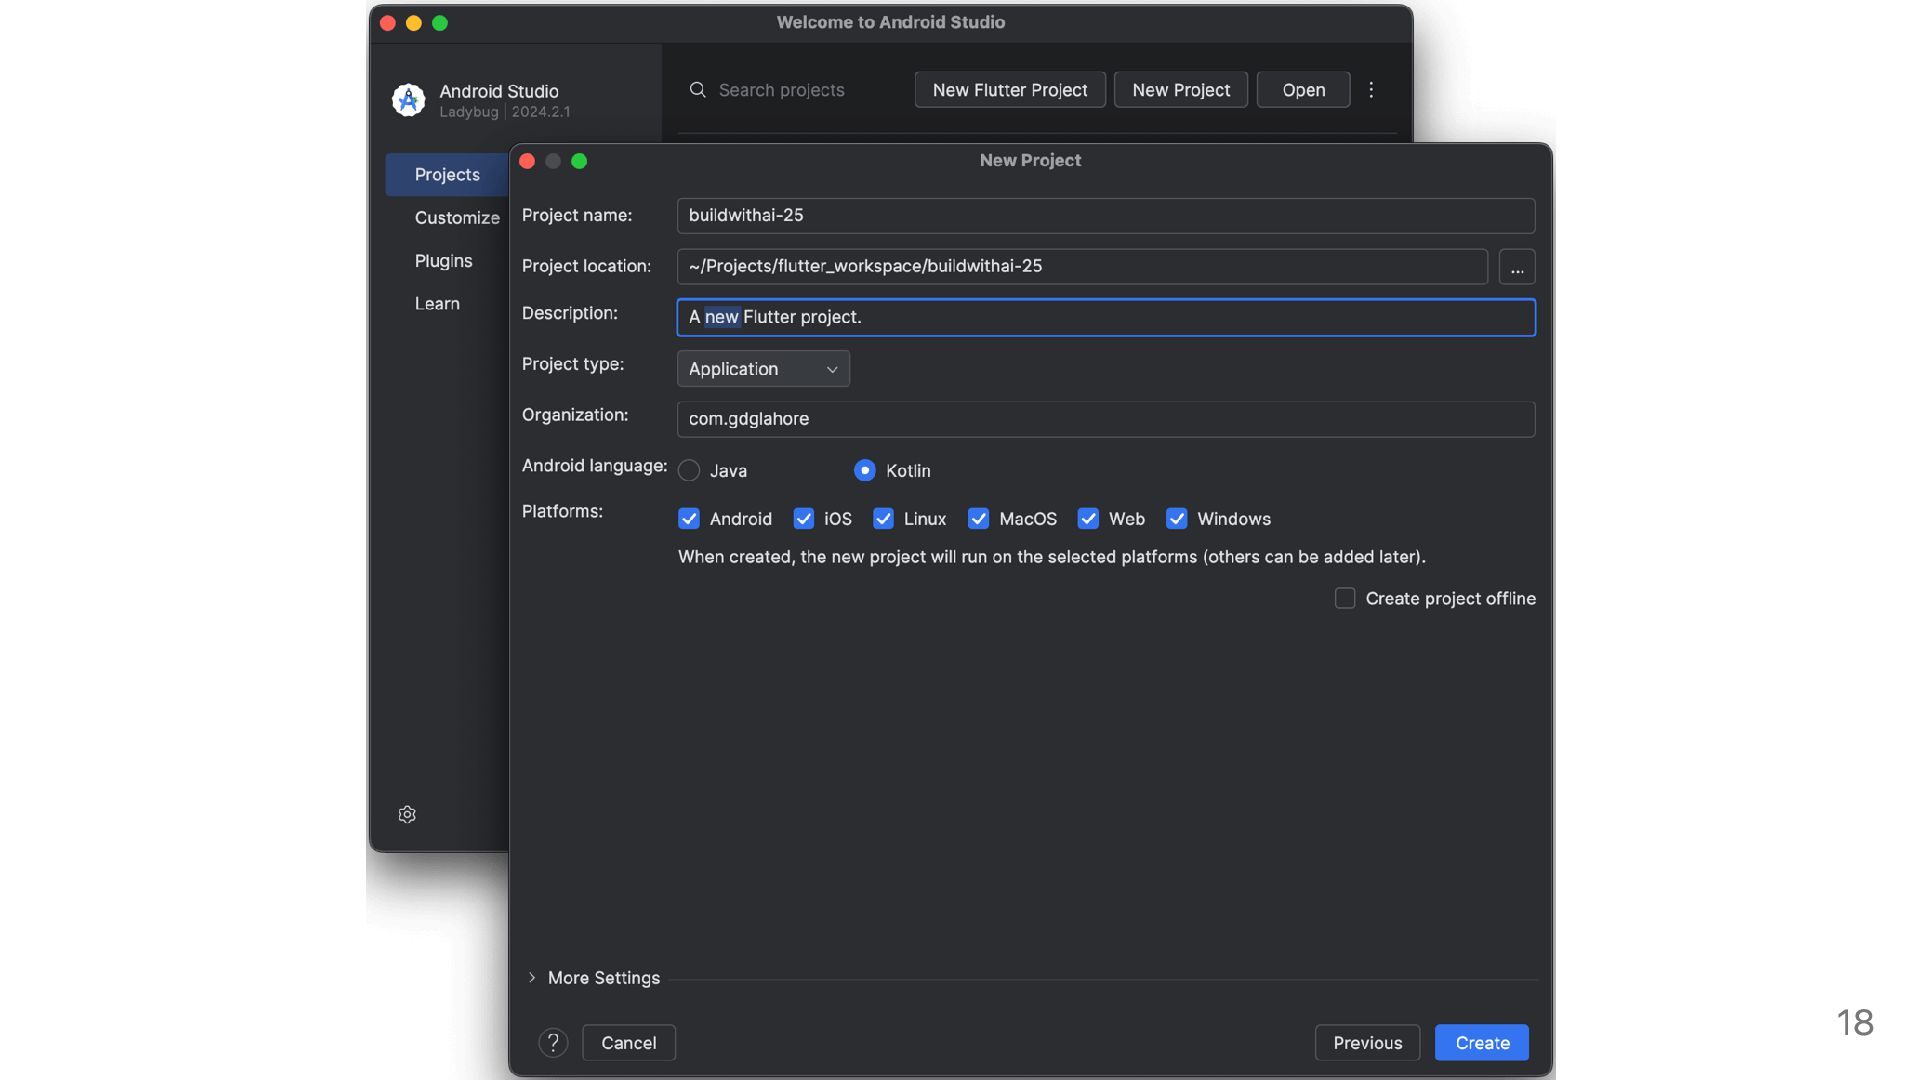
  12. Step 1: Create and Run the App You can create

    a Flutter project from Android Studio UI. 17
  13. 18

  14. Or if you prefer commandline. Run following commands: flutter create

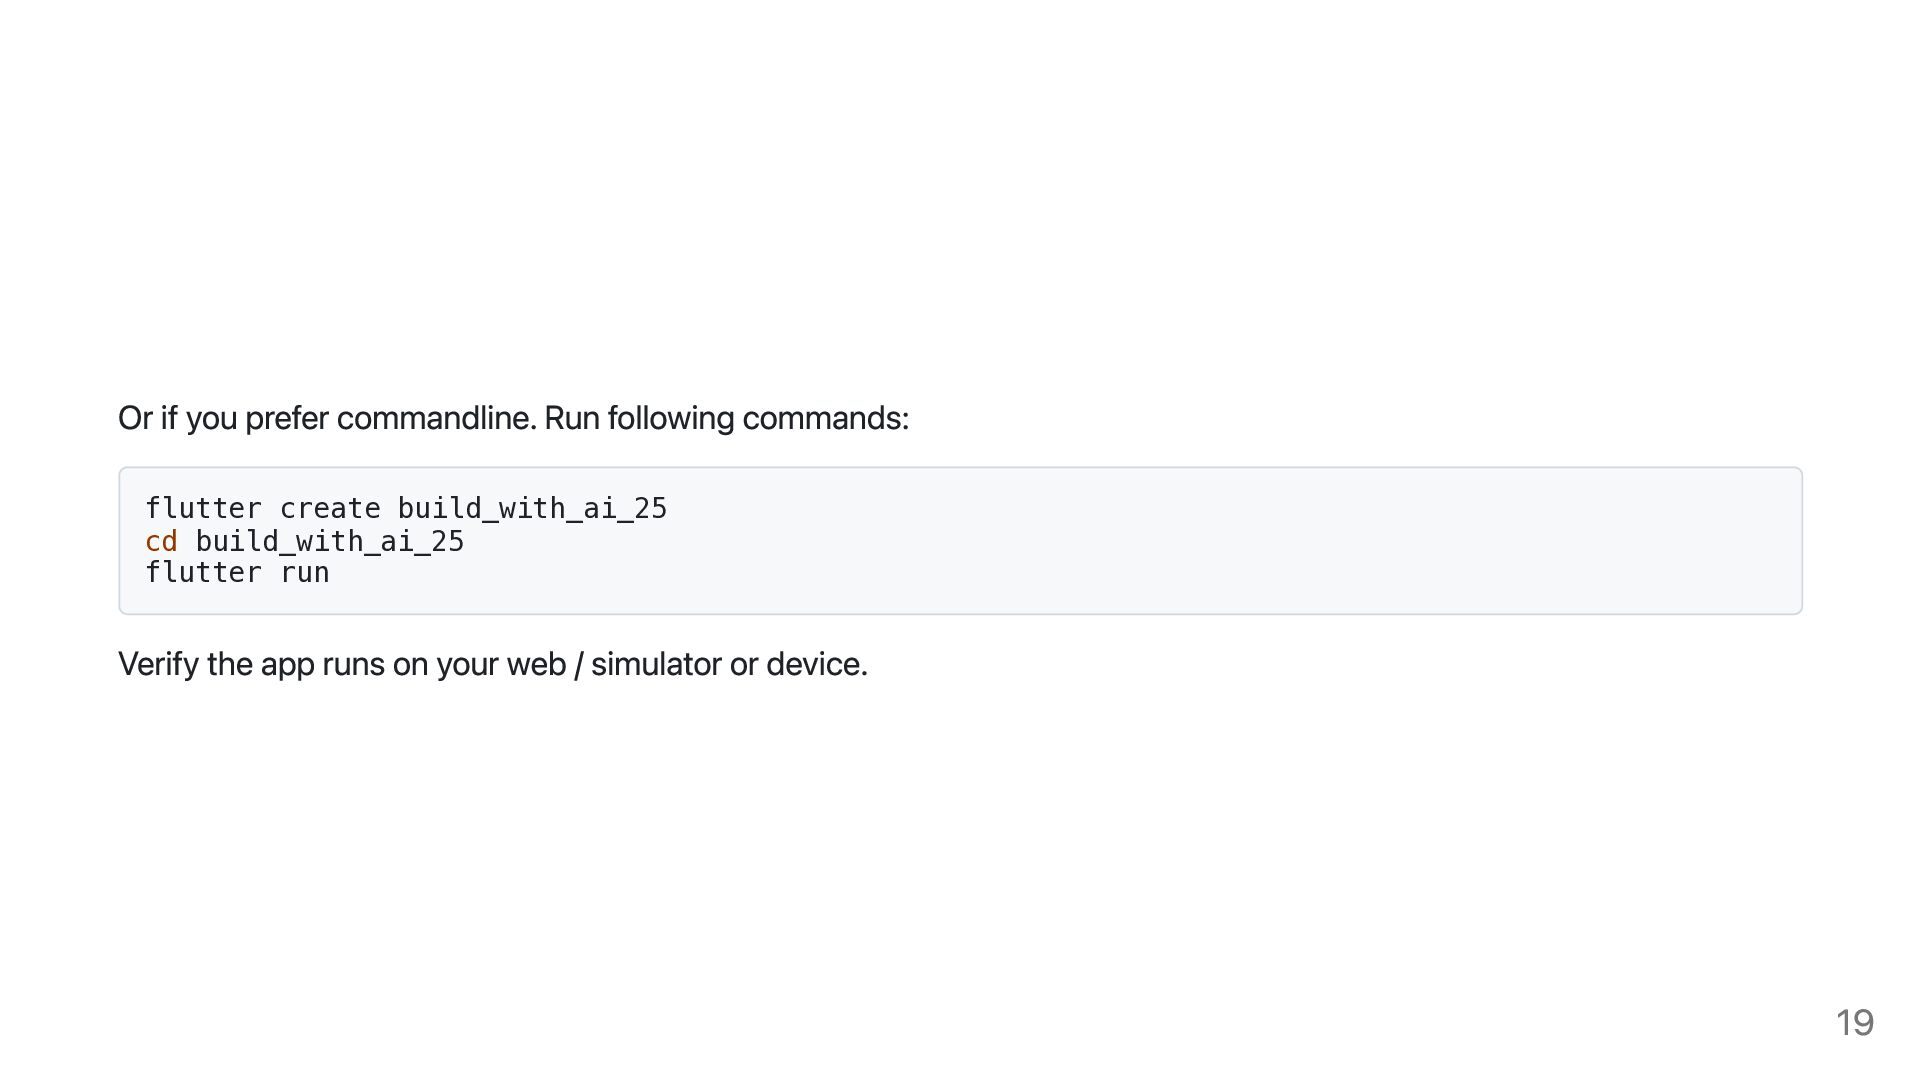
    build_with_ai_25 cd build_with_ai_25 flutter run Verify the app runs on your web / simulator or device. 19
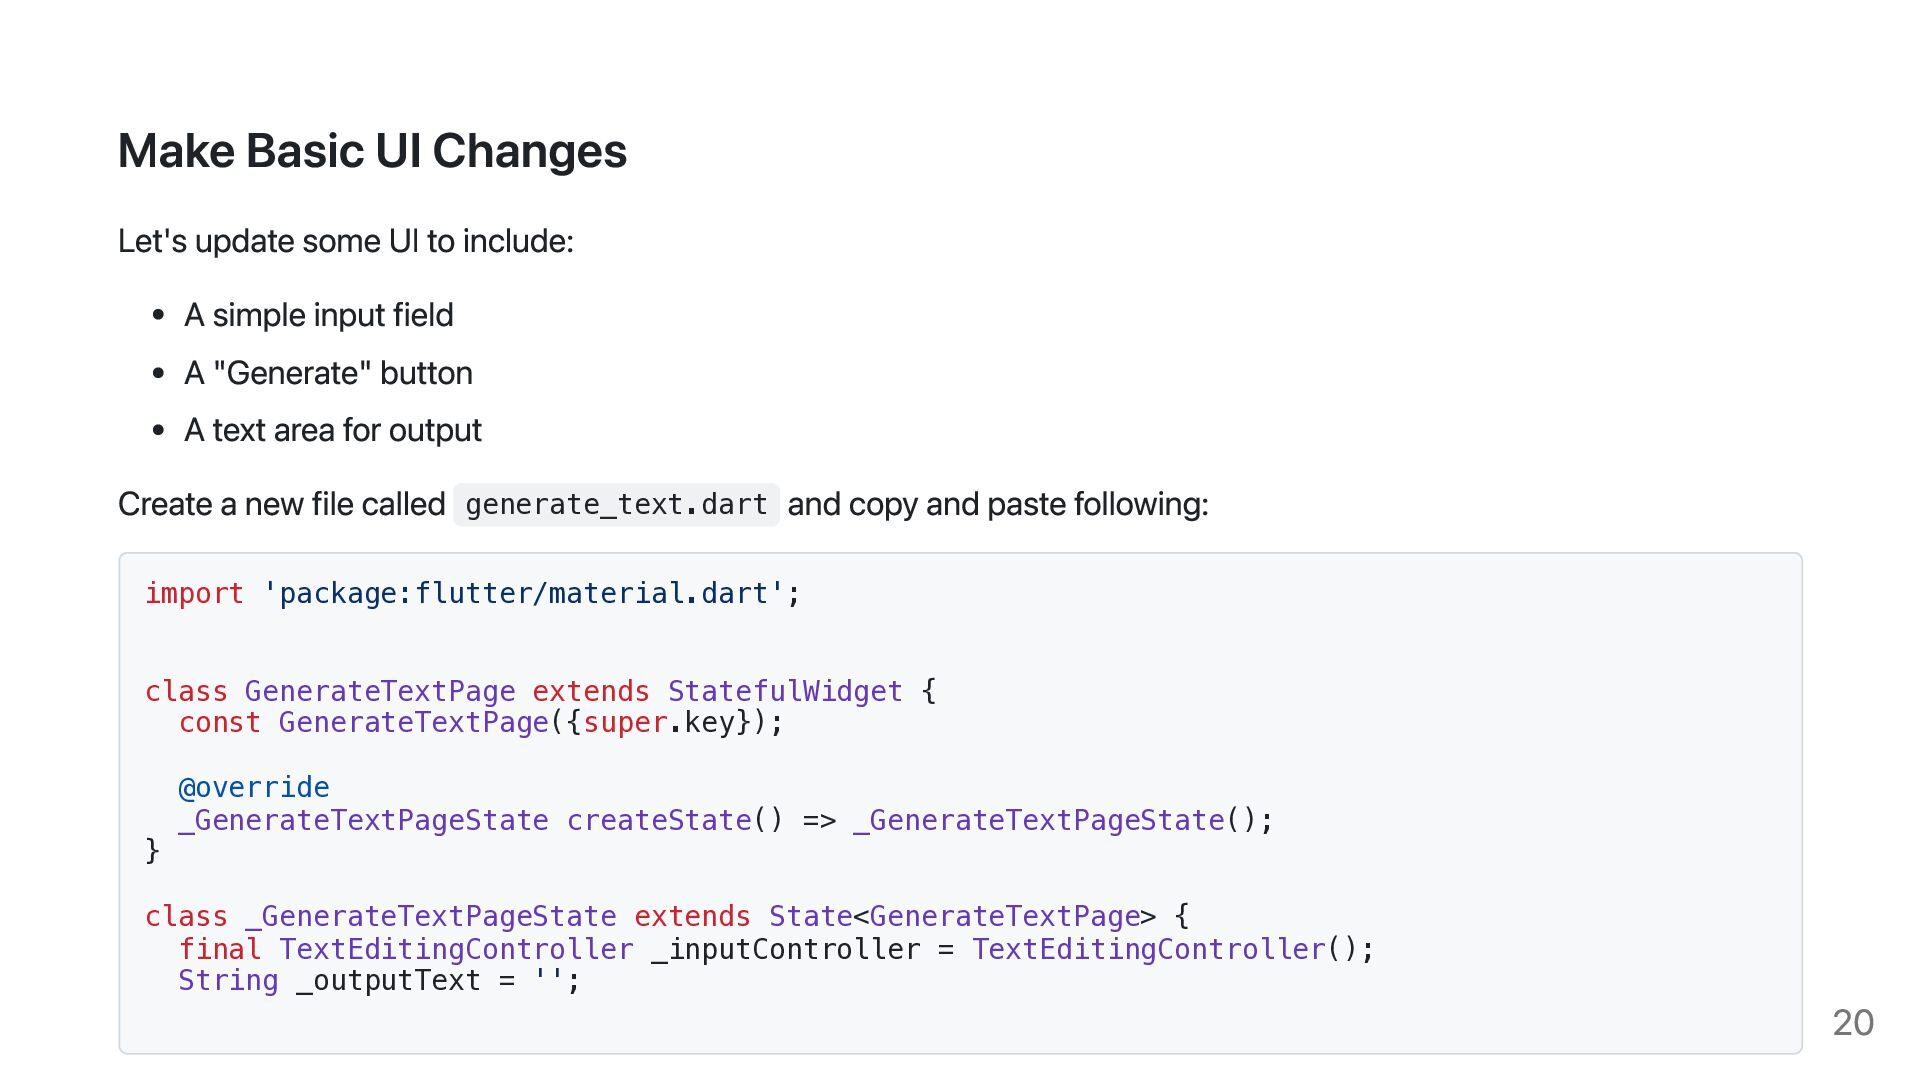
  15. Make Basic UI Changes Let's update some UI to include:

    A simple input field A "Generate" button A text area for output Create a new file called generate_text.dart and copy and paste following: import 'package:flutter/material.dart'; class GenerateTextPage extends StatefulWidget { const GenerateTextPage({super.key}); } @override _GenerateTextPageState createState() => _GenerateTextPageState(); class _GenerateTextPageState extends State<GenerateTextPage> { final TextEditingController _inputController = TextEditingController(); String _outputText = ''; 20
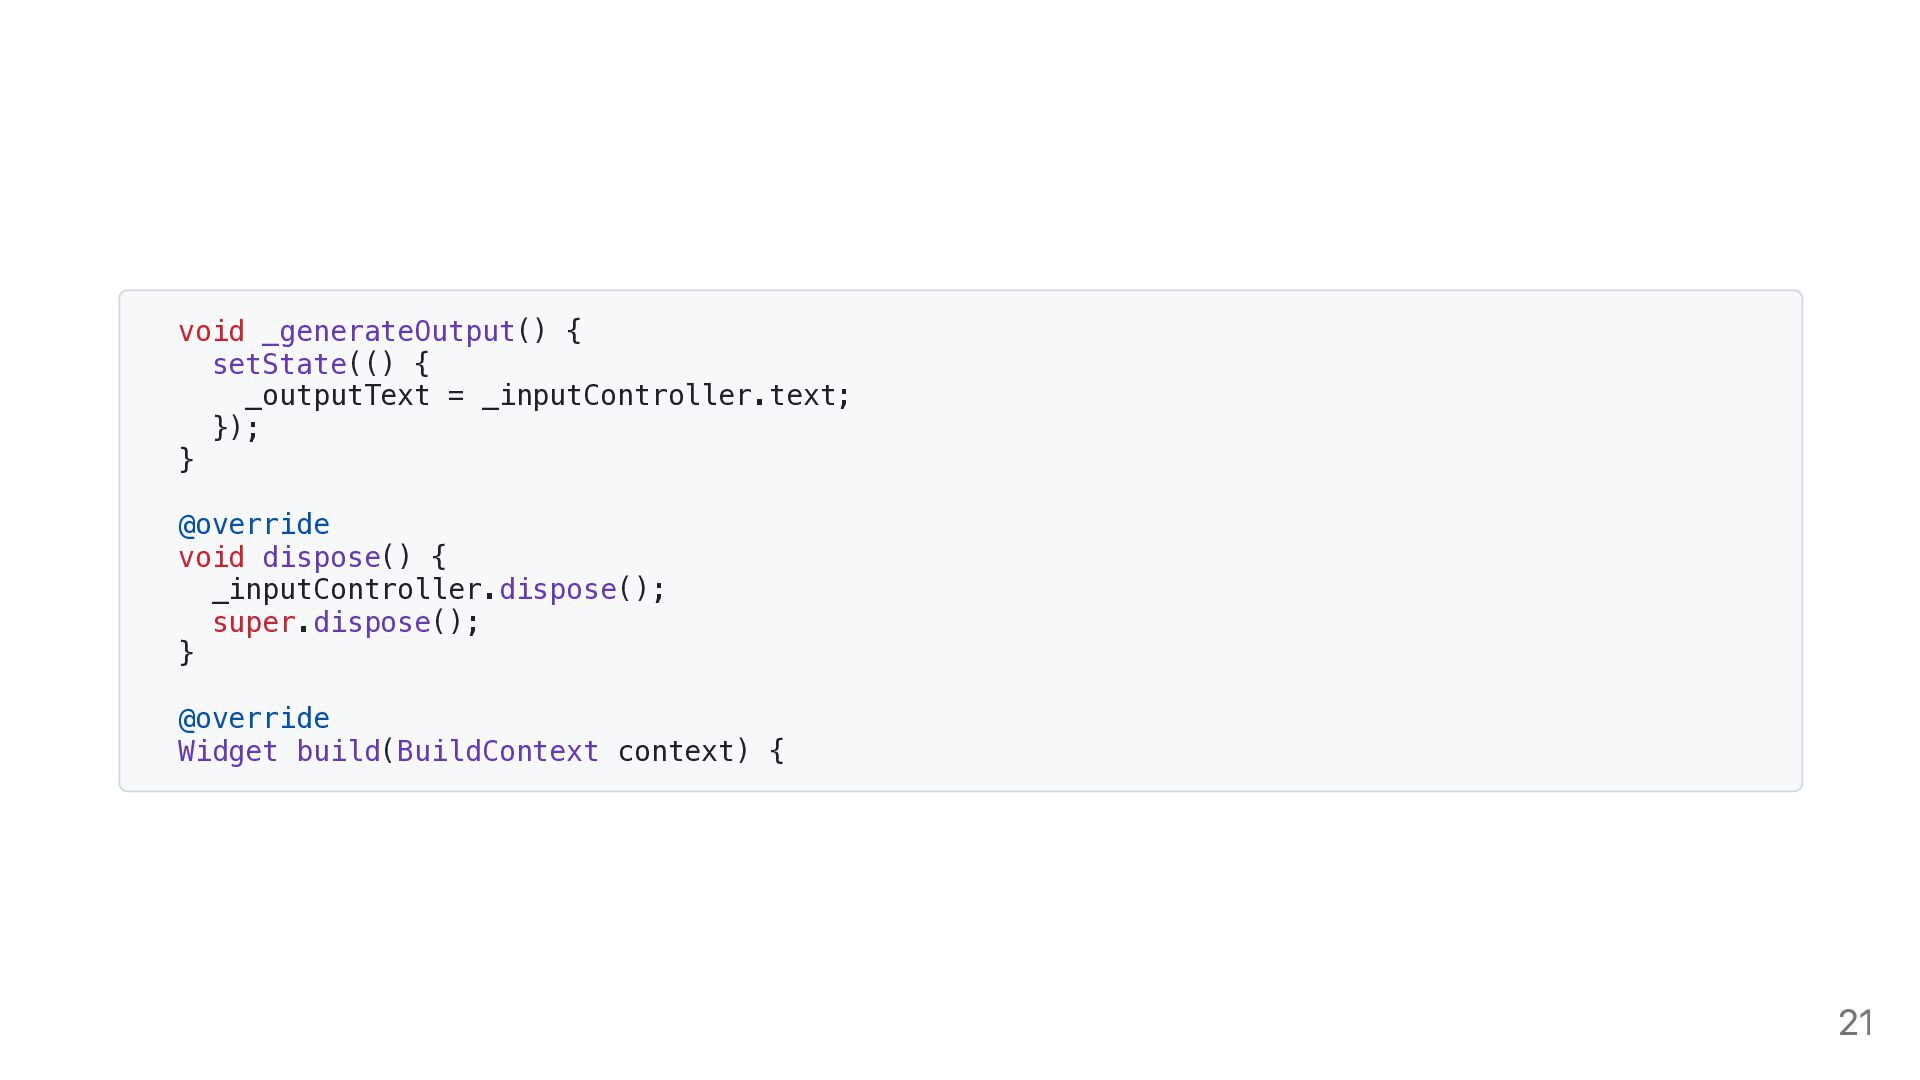
  16. void _generateOutput() { setState(() { _outputText = _inputController.text; }); }

    @override void dispose() { _inputController.dispose(); super.dispose(); } @override Widget build(BuildContext context) { 21
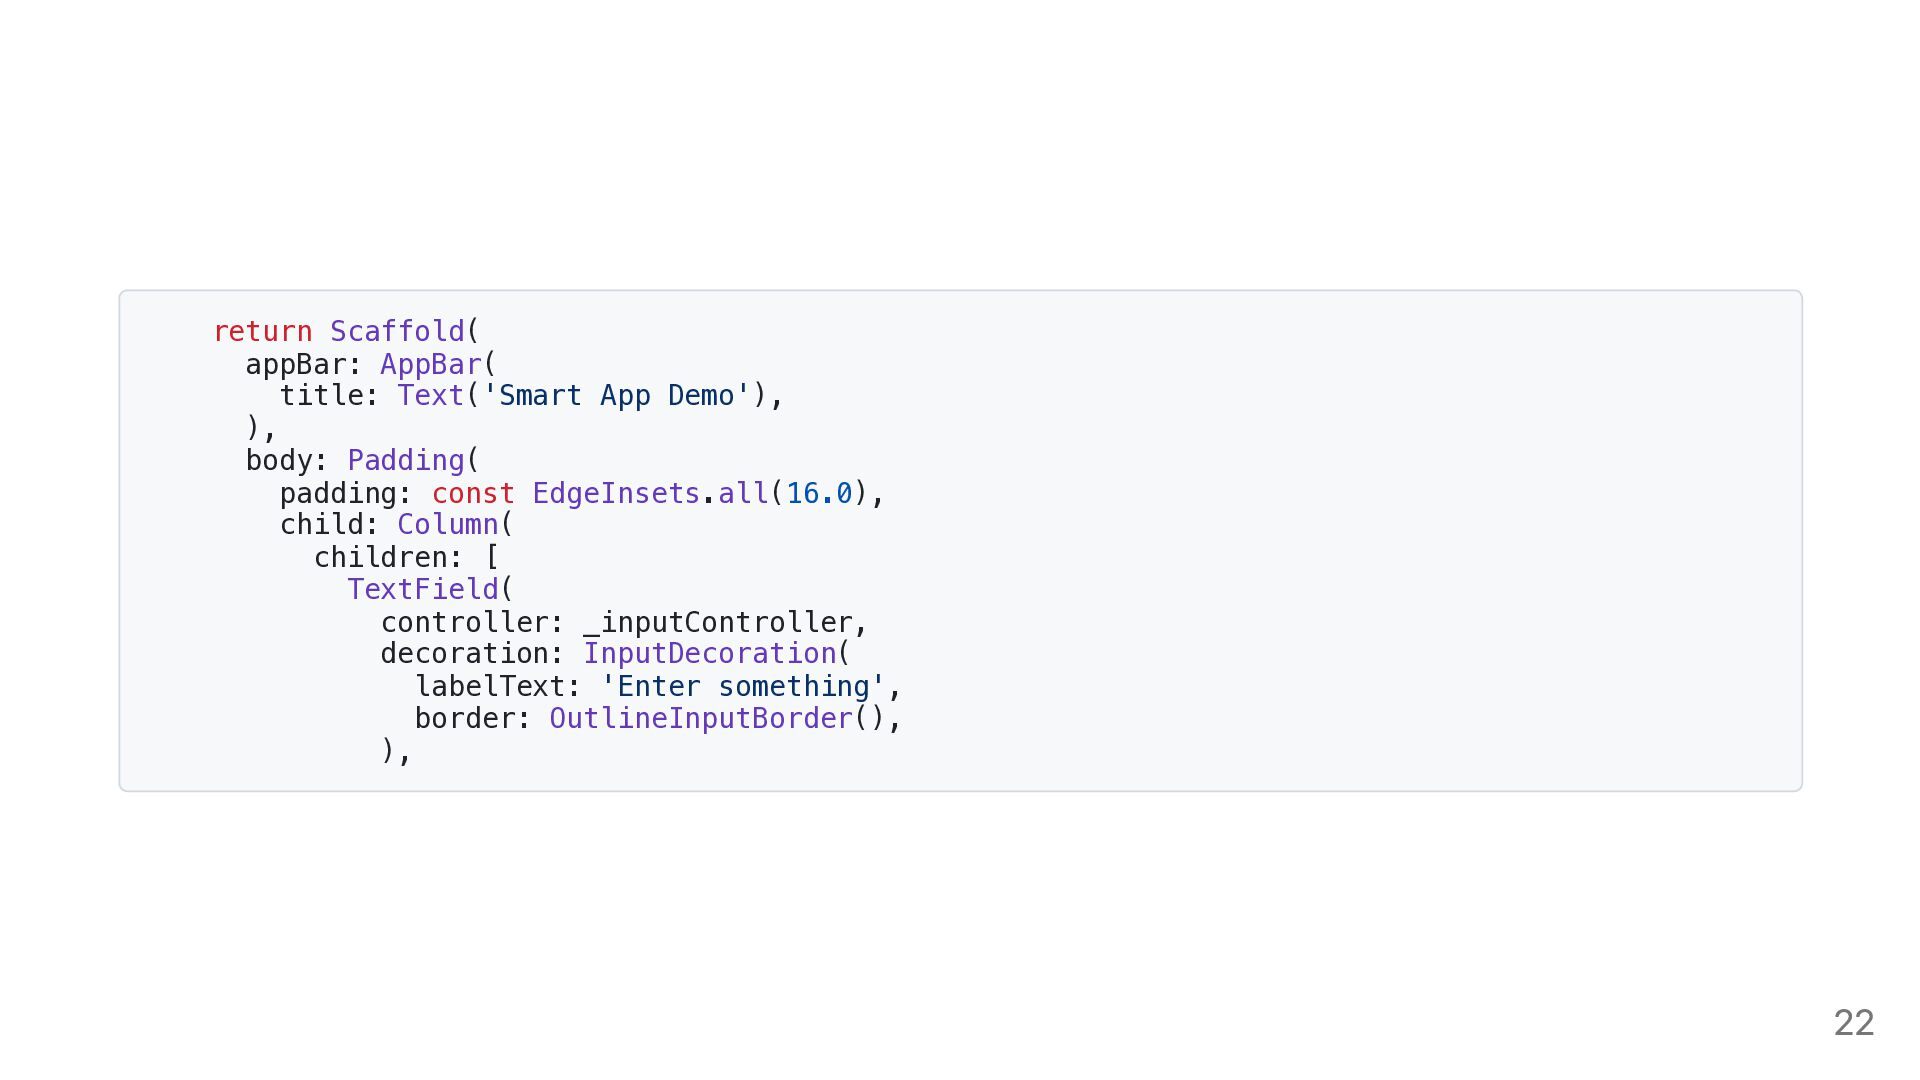
  17. return Scaffold( appBar: AppBar( title: Text('Smart App Demo'), ), body:

    Padding( padding: const EdgeInsets.all(16.0), child: Column( children: [ TextField( controller: _inputController, decoration: InputDecoration( labelText: 'Enter something', border: OutlineInputBorder(), ), 22
  18. ), const SizedBox(height: 16), ElevatedButton( onPressed: _generateOutput, child: Text('Generate'), ),

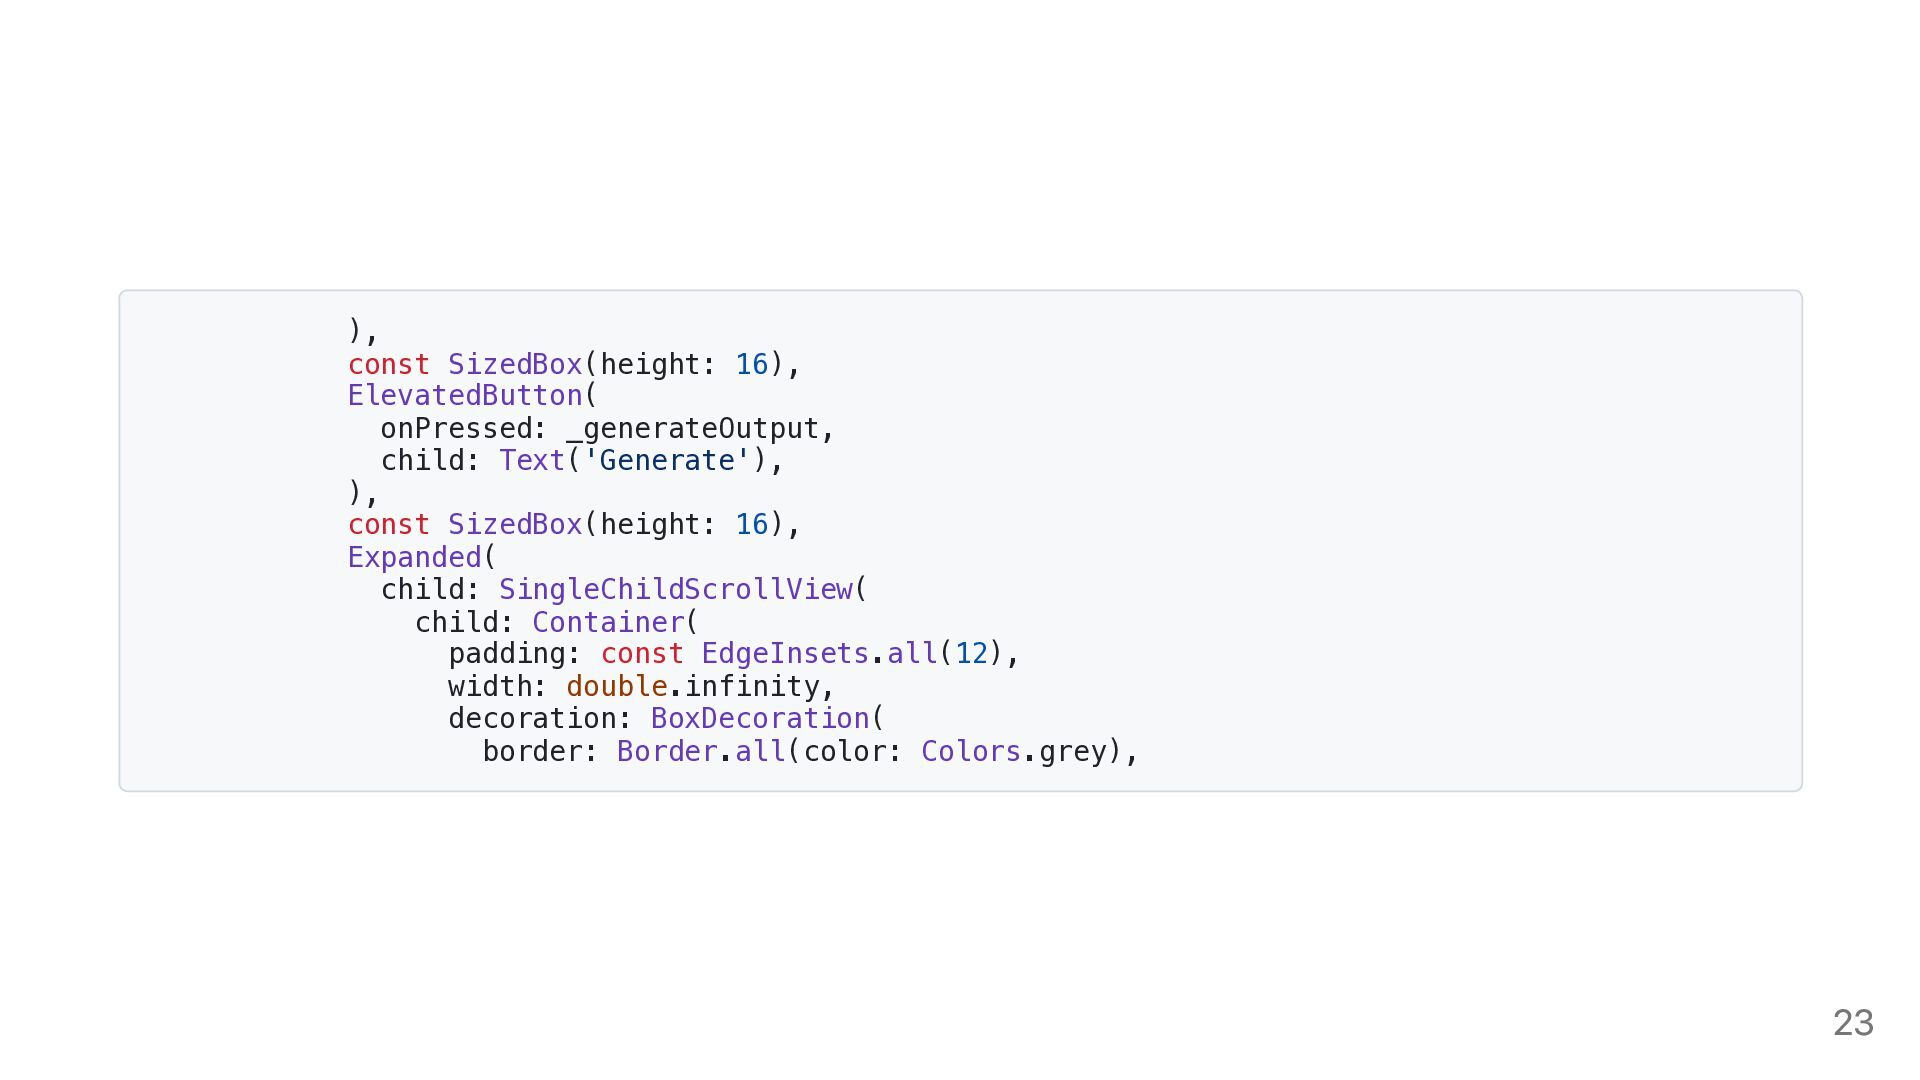
    const SizedBox(height: 16), Expanded( child: SingleChildScrollView( child: Container( padding: const EdgeInsets.all(12), width: double.infinity, decoration: BoxDecoration( border: Border.all(color: Colors.grey), 23
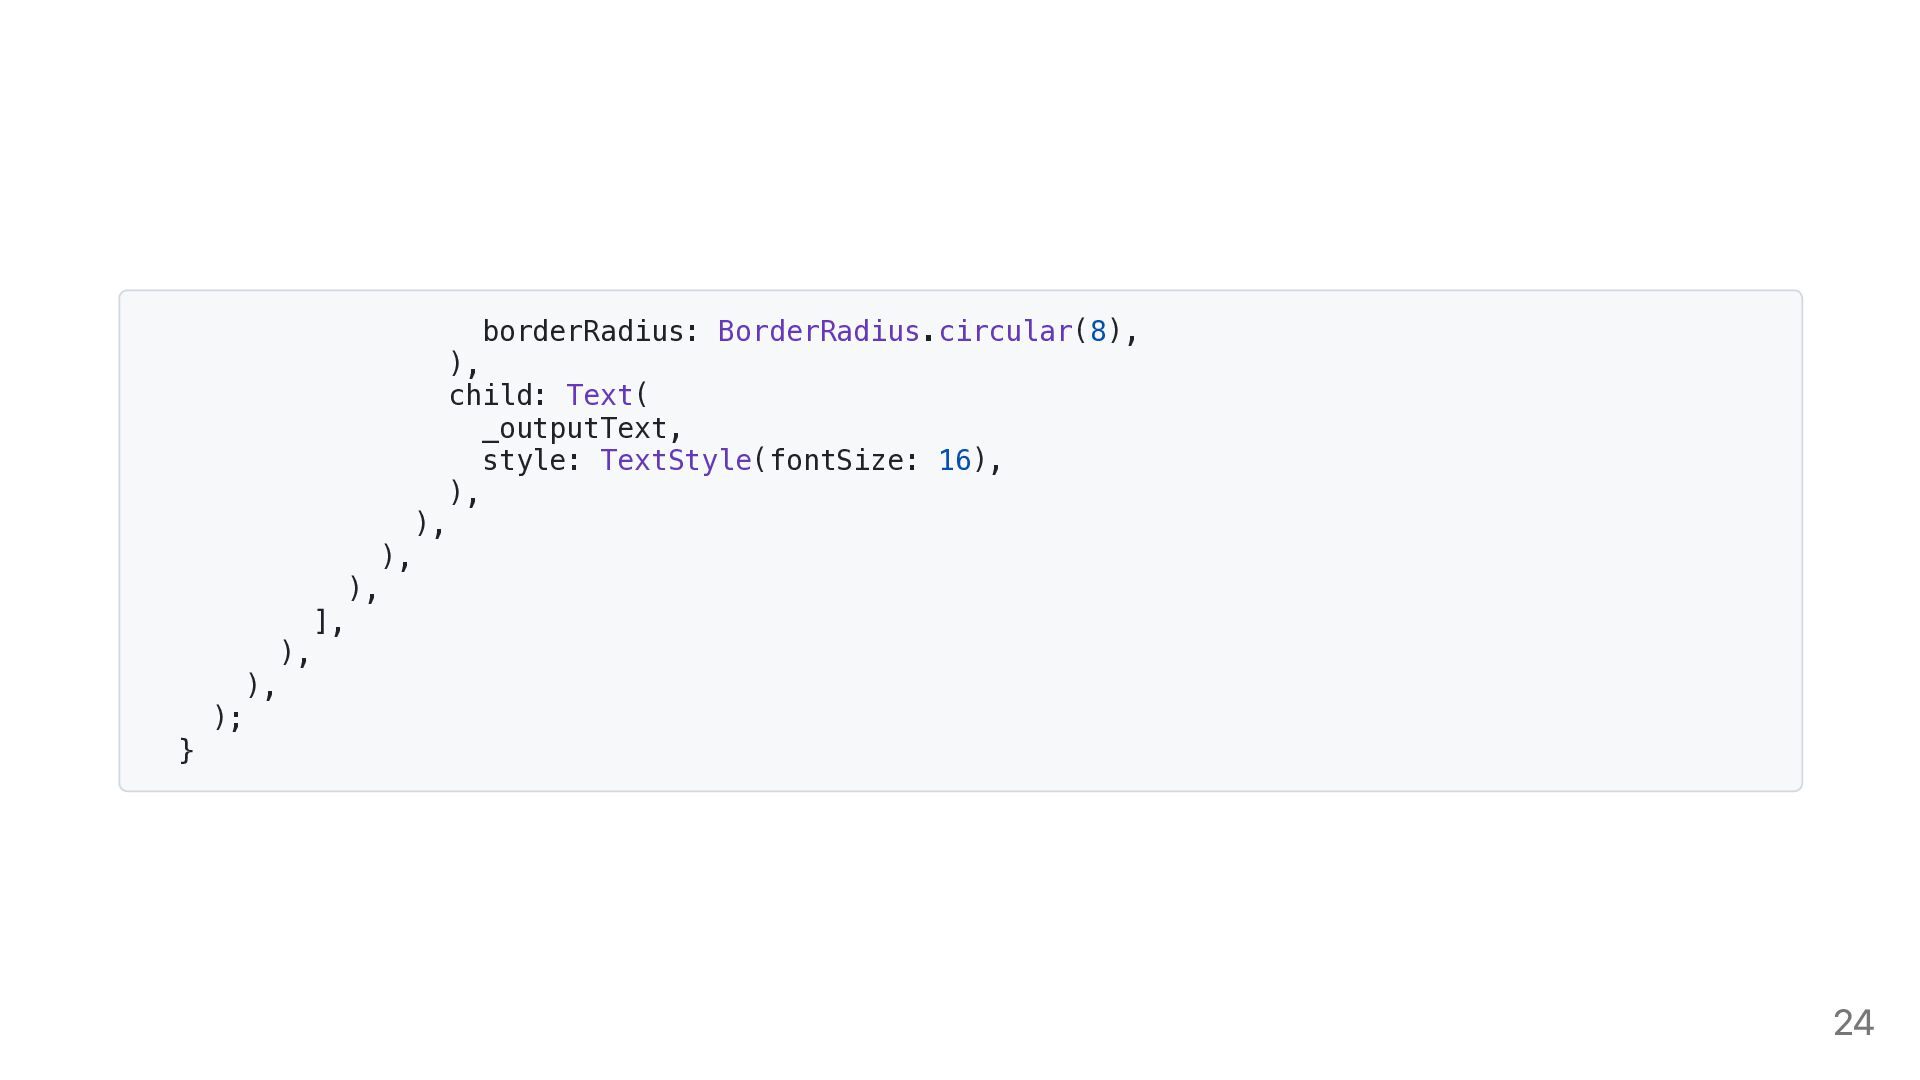
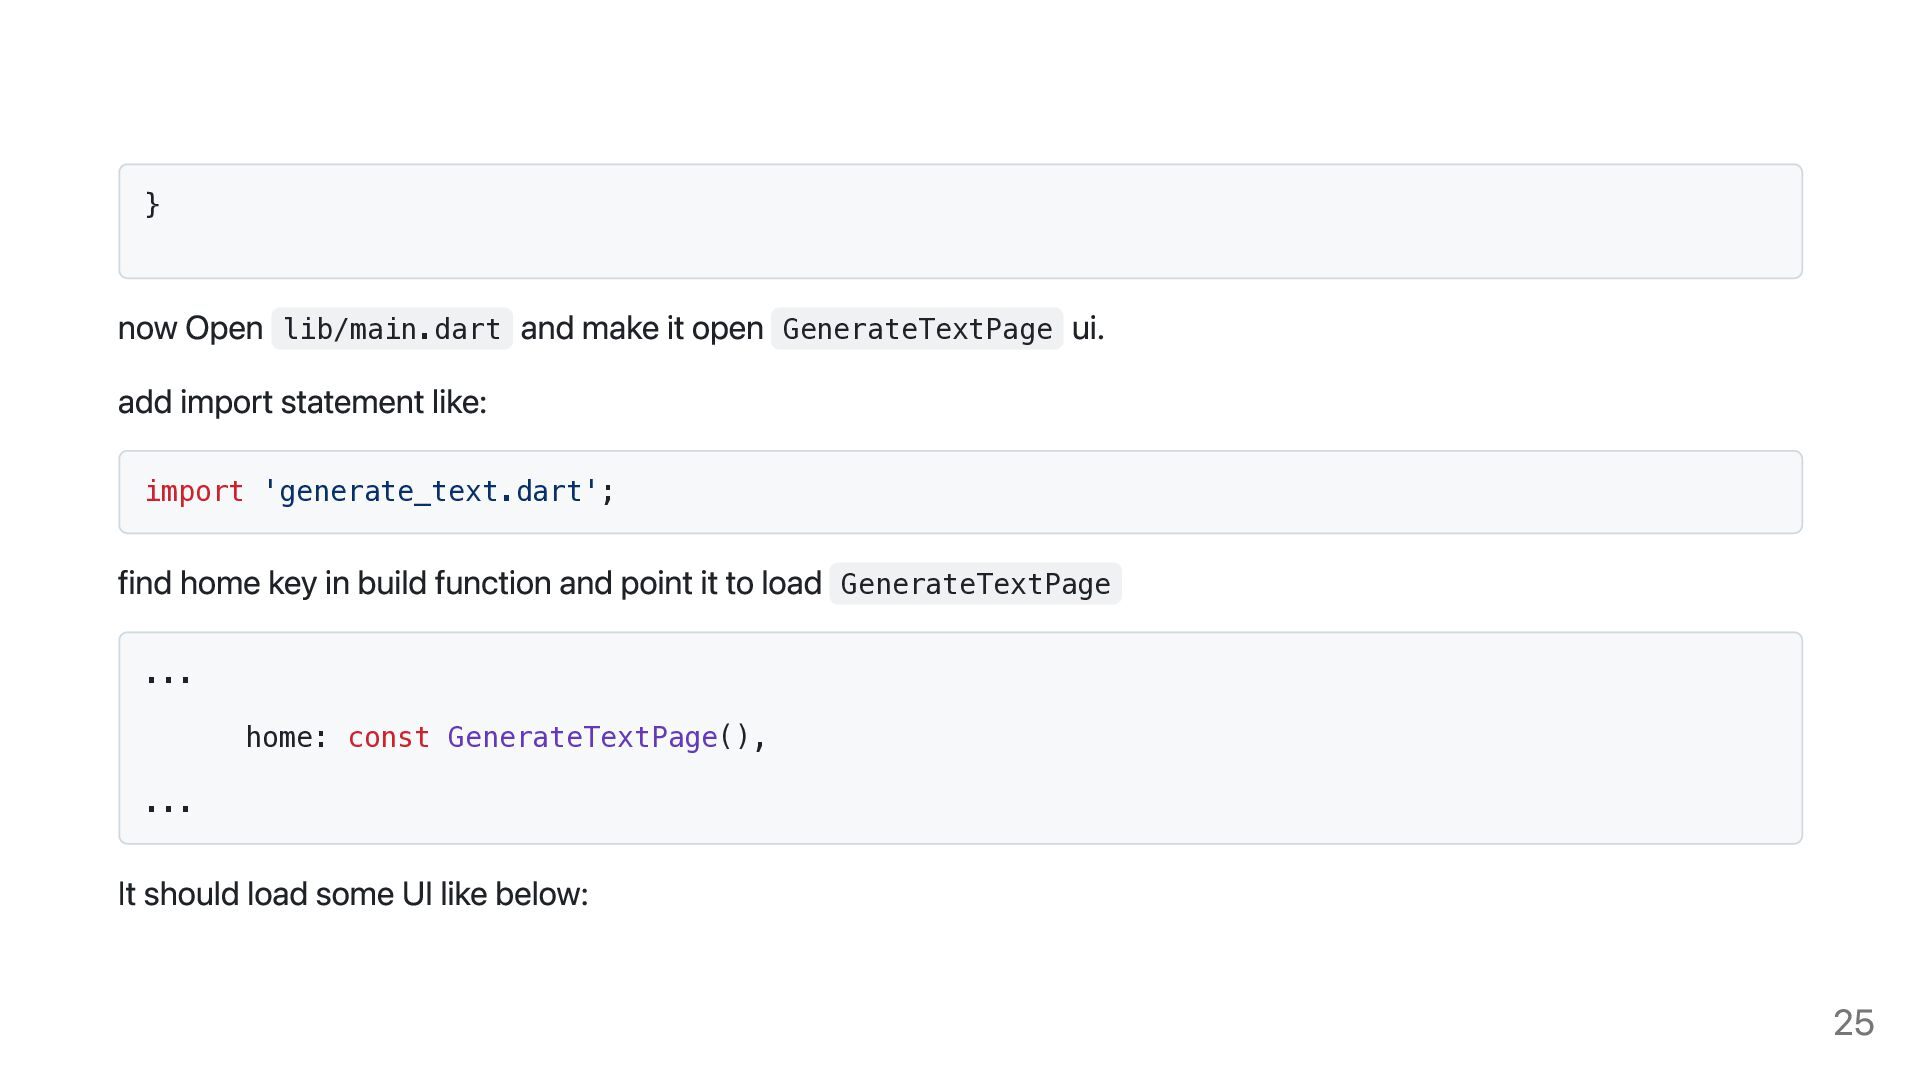
  19. } now Open lib/main.dart and make it open GenerateTextPage ui.

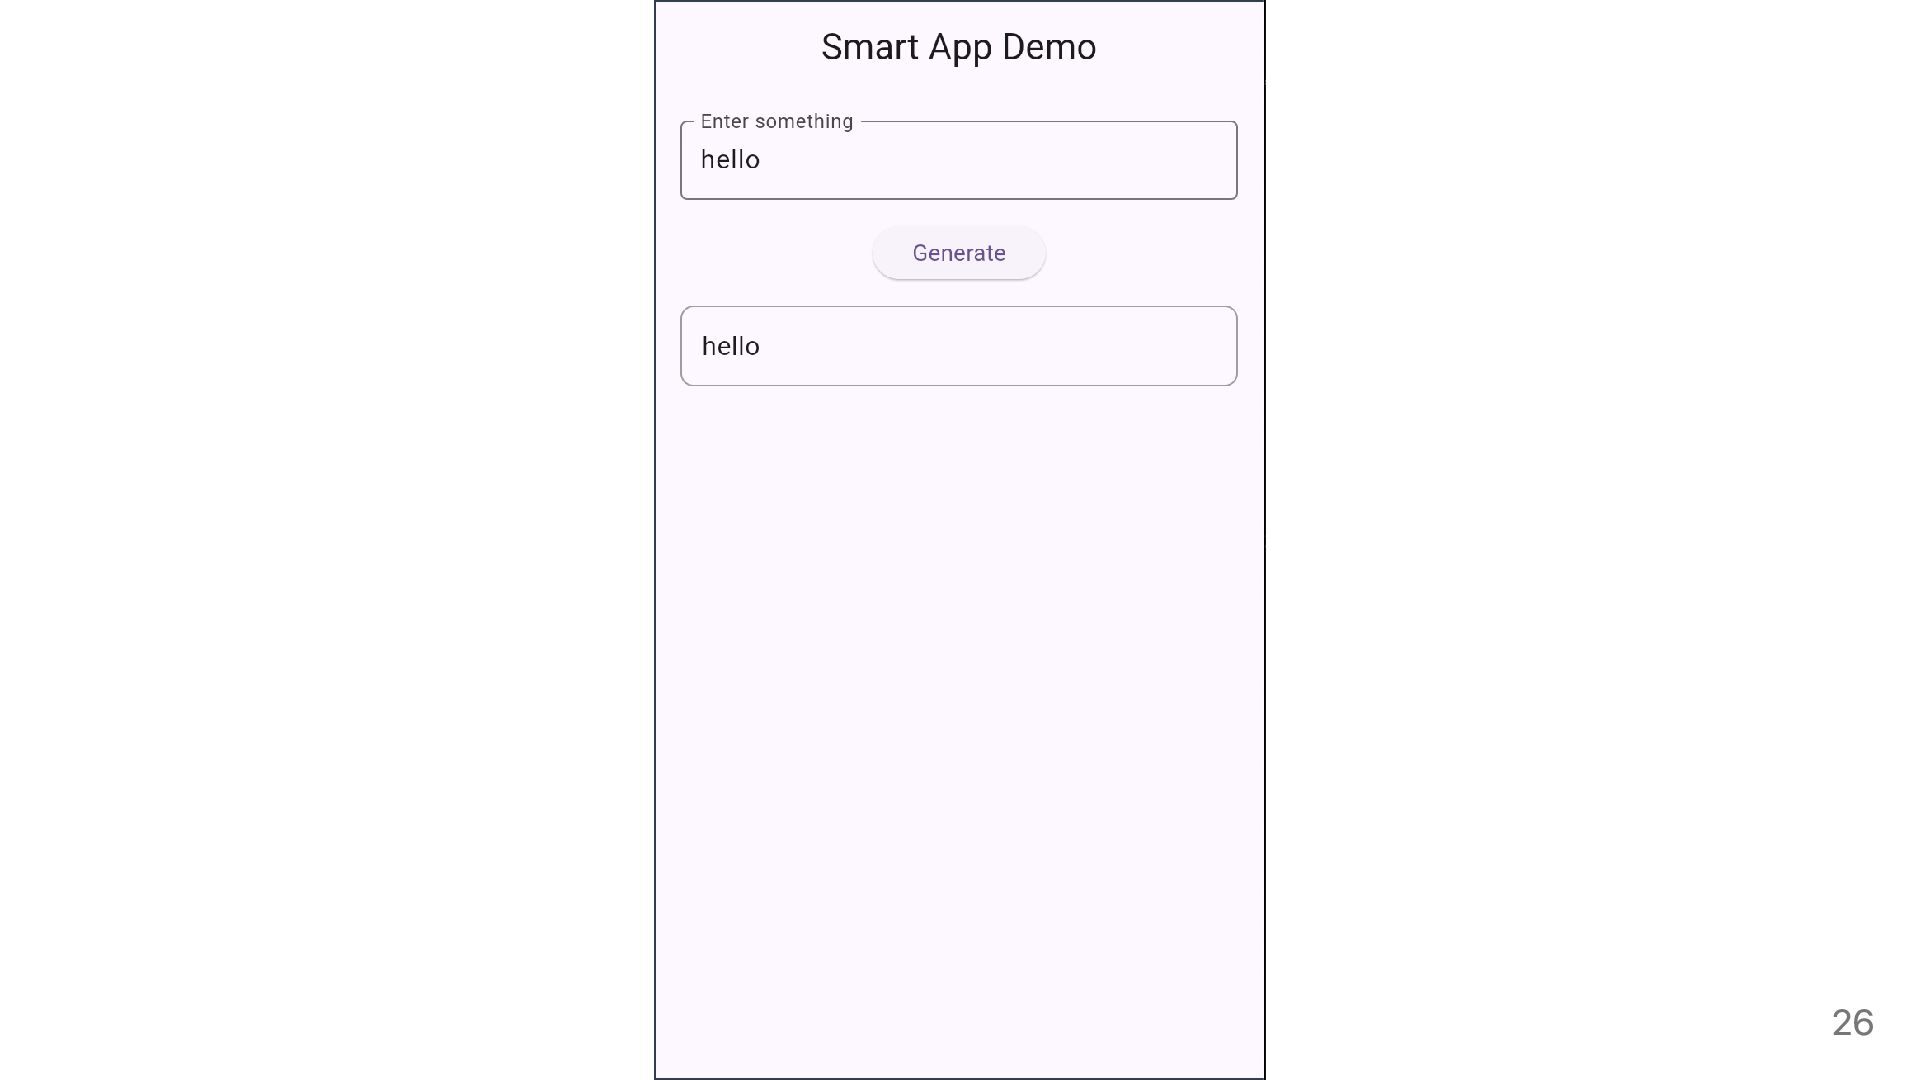
    add import statement like: import 'generate_text.dart'; find home key in build function and point it to load GenerateTextPage ... home: const GenerateTextPage(), ... It should load some UI like below: 25
  20. 26

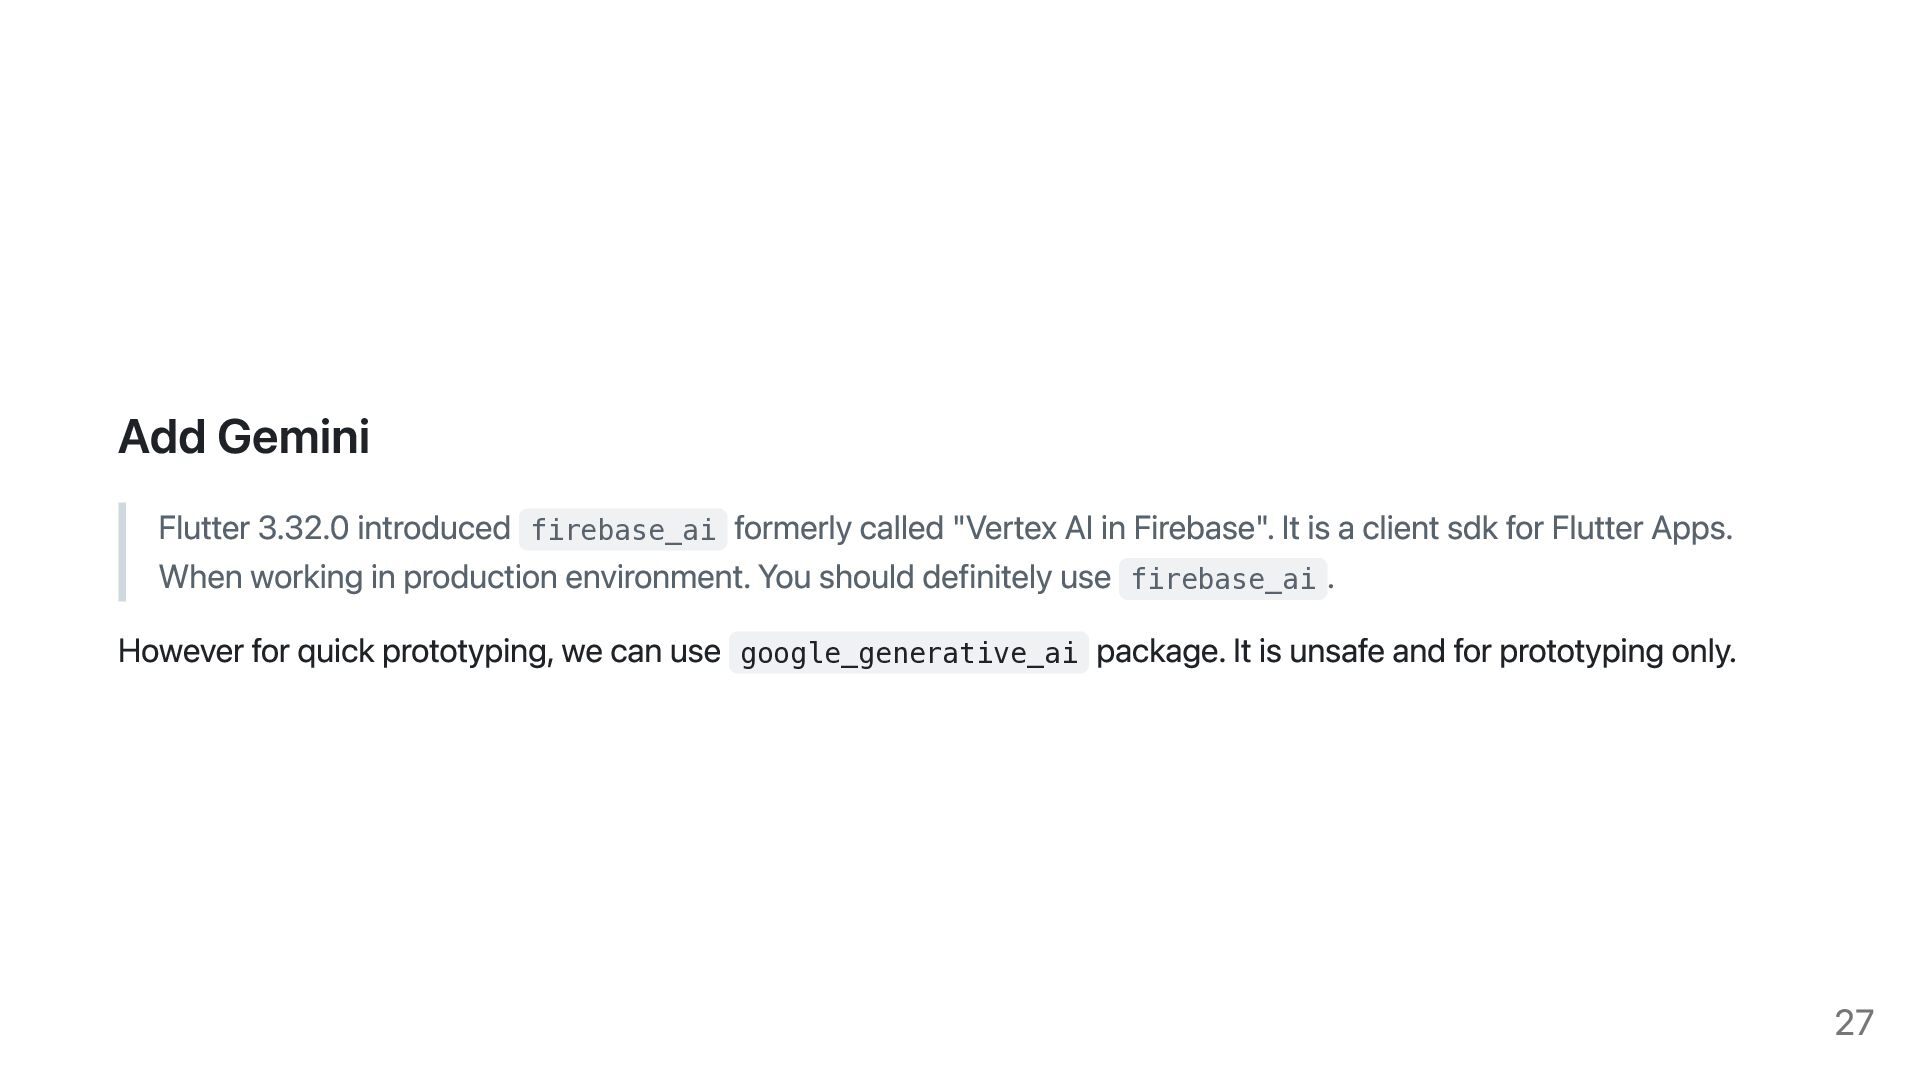
  21. Add Gemini Flutter 3.32.0 introduced firebase_ai formerly called "Vertex AI

    in Firebase". It is a client sdk for Flutter Apps. When working in production environment. You should definitely use firebase_ai . However for quick prototyping, we can use google_generative_ai package. It is unsafe and for prototyping only. 27
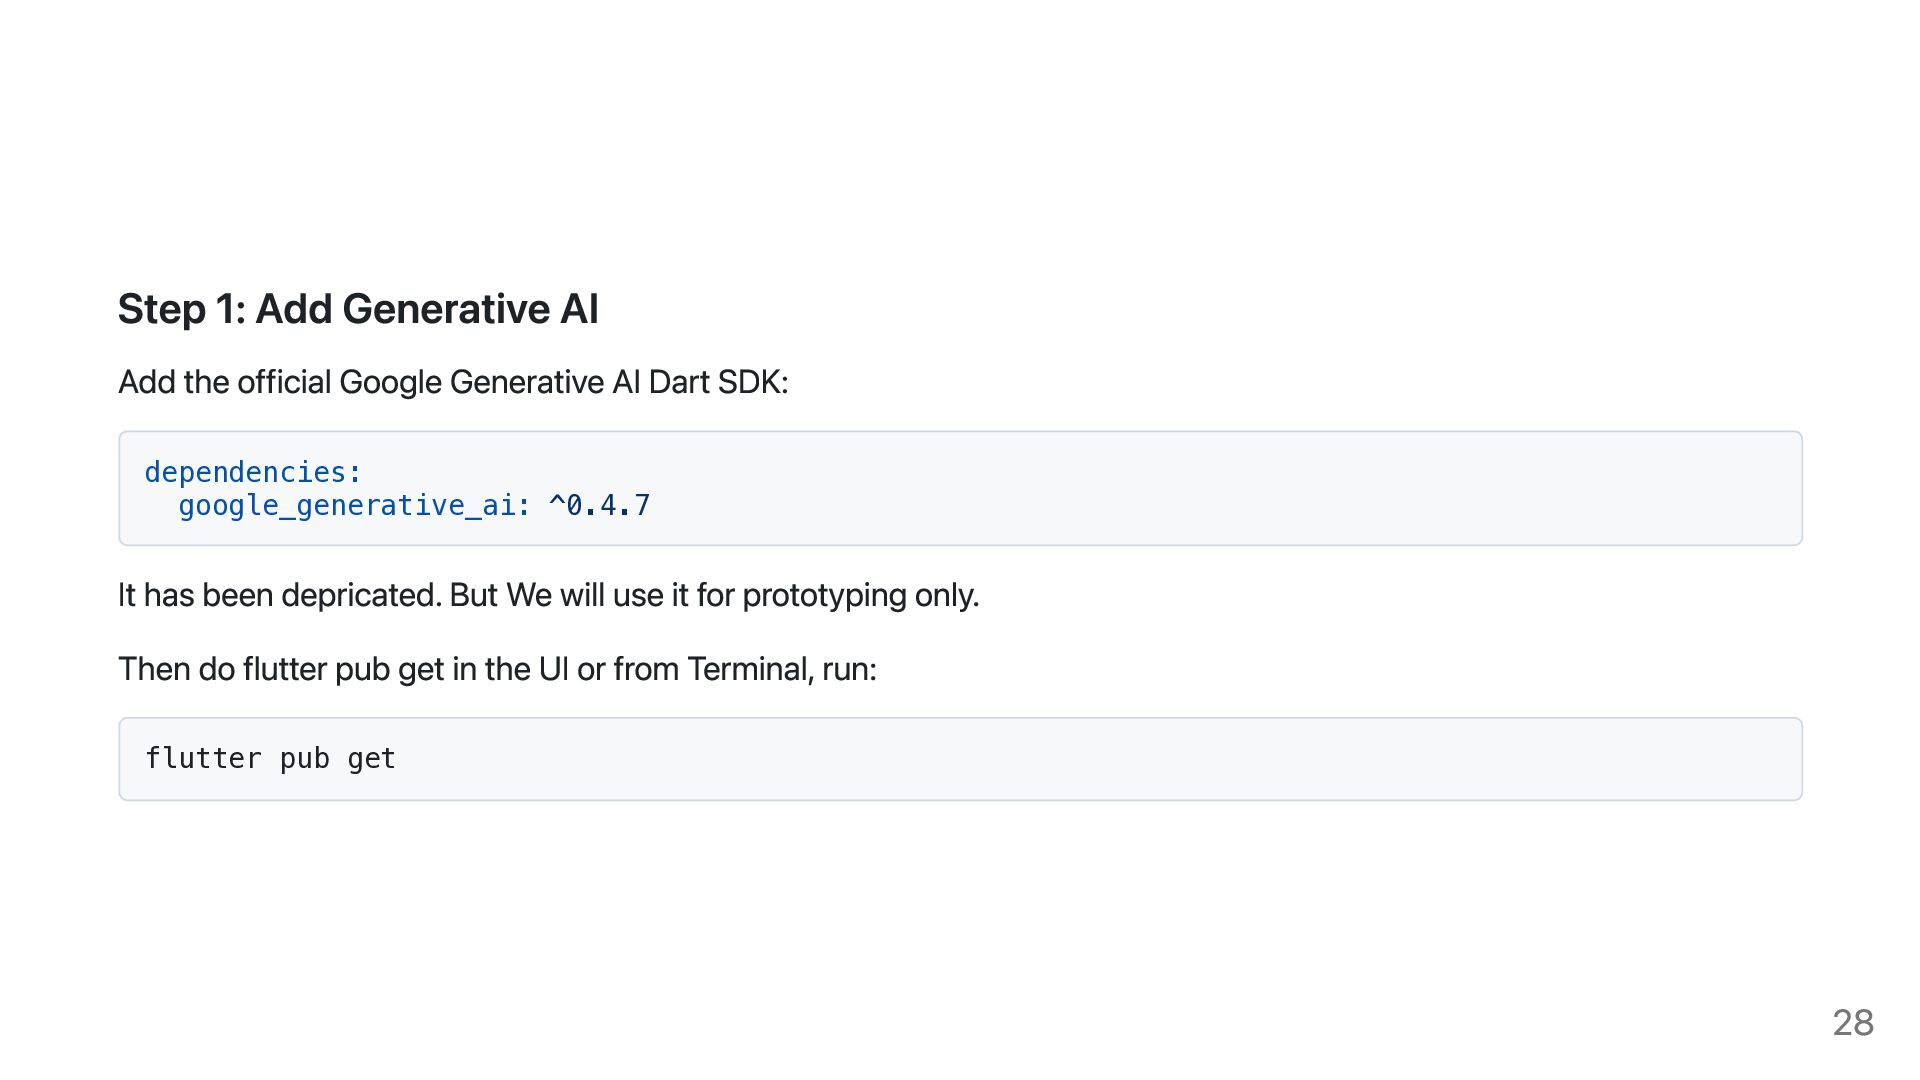
  22. Step 1: Add Generative AI Add the official Google Generative

    AI Dart SDK: dependencies: google_generative_ai: ^0.4.7 It has been depricated. But We will use it for prototyping only. Then do flutter pub get in the UI or from Terminal, run: flutter pub get 28
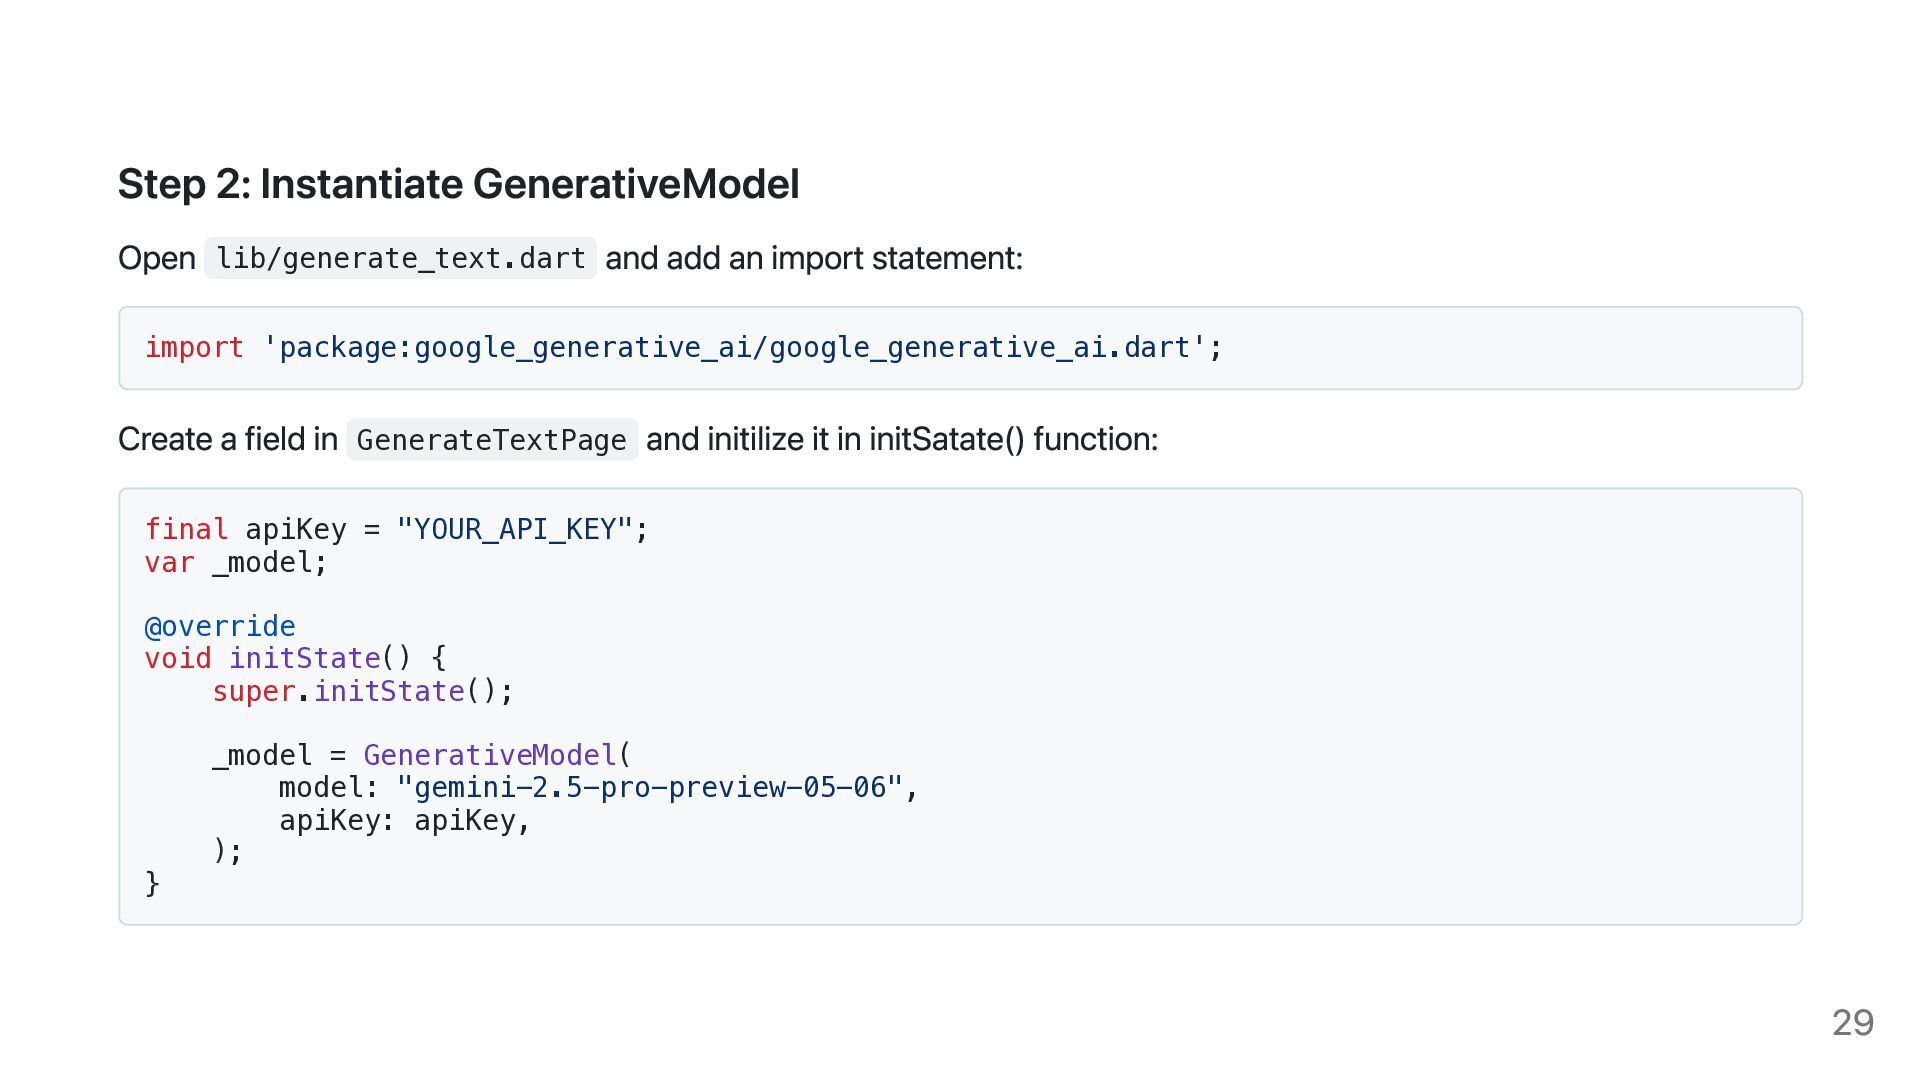
  23. Step 2: Instantiate GenerativeModel Open lib/generate_text.dart and add an import

    statement: import 'package:google_generative_ai/google_generative_ai.dart'; Create a field in GenerateTextPage and initilize it in initSatate() function: final apiKey = "YOUR_API_KEY"; var _model; @override void initState() { super.initState(); _model = GenerativeModel( model: "gemini-2.5-pro-preview-05-06", apiKey: apiKey, ); } 29
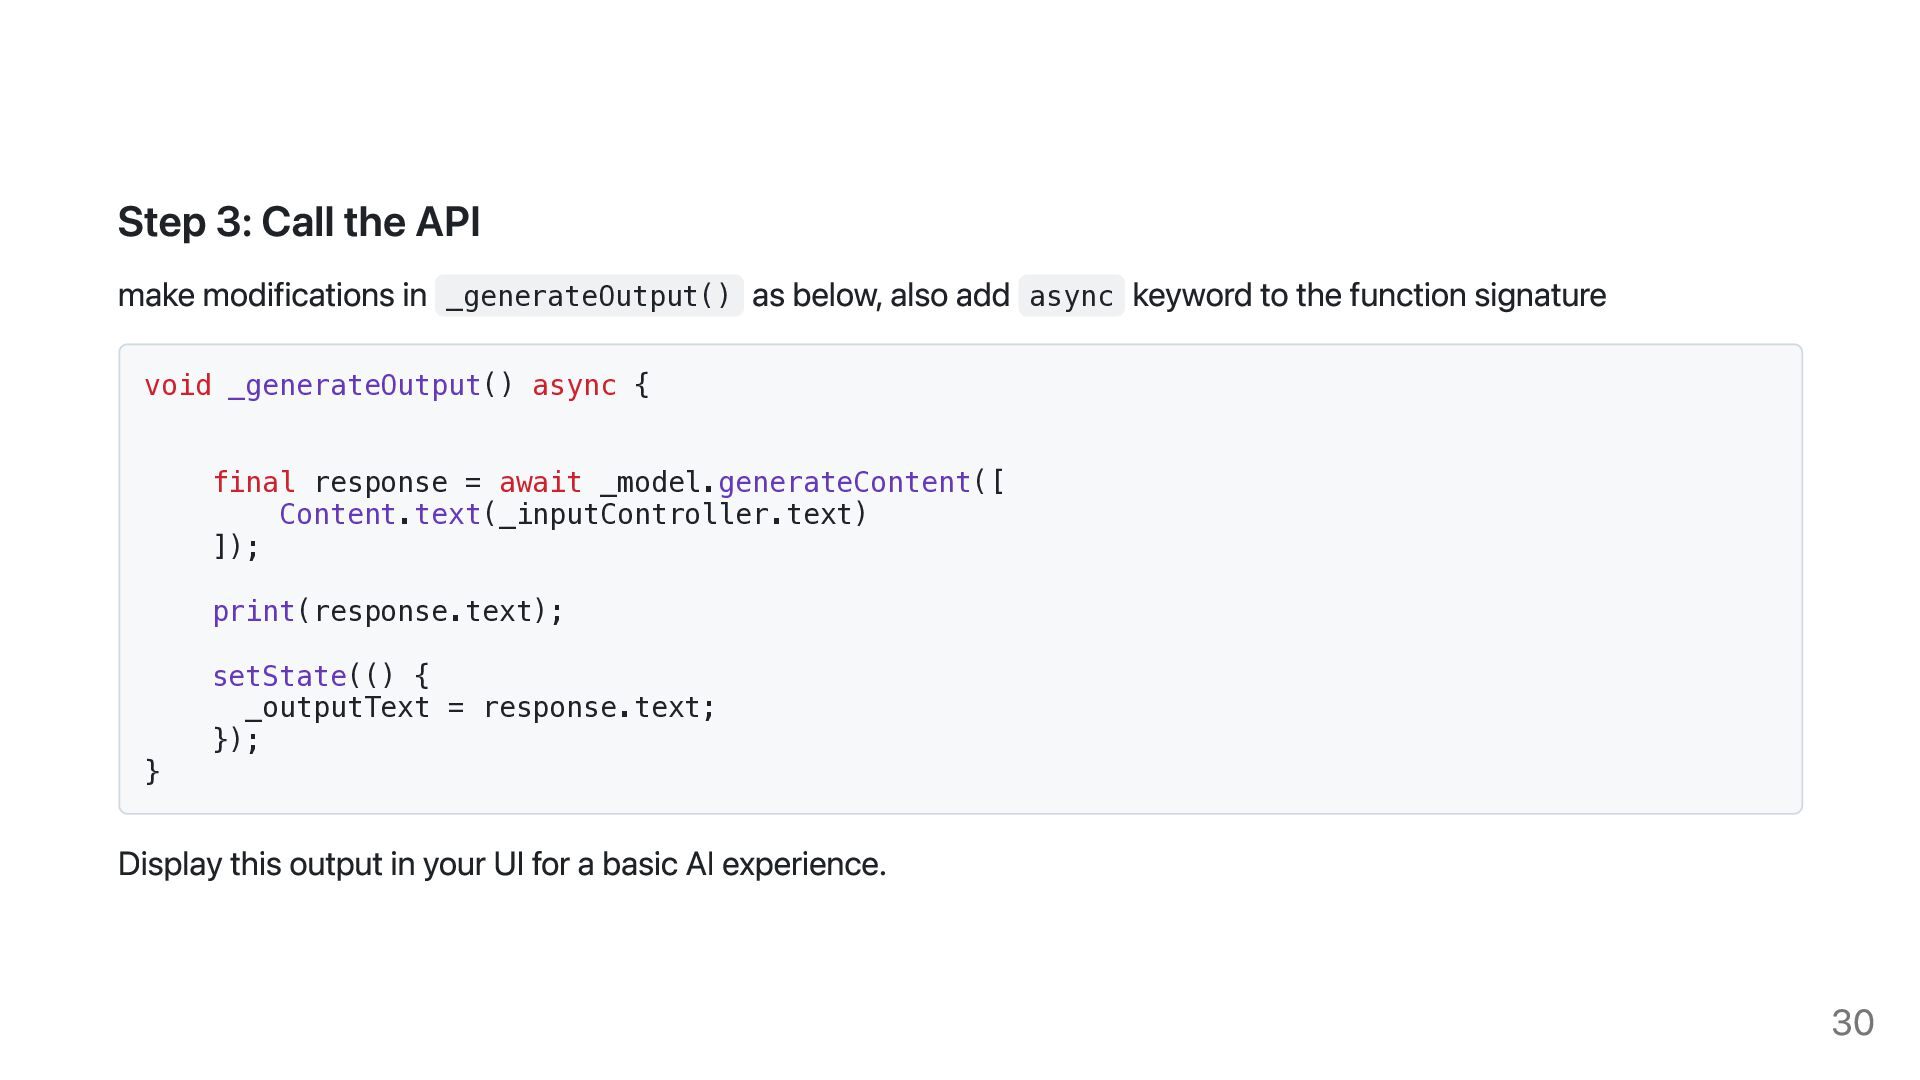
  24. Step 3: Call the API make modifications in _generateOutput() as

    below, also add async keyword to the function signature void _generateOutput() async { final response = await _model.generateContent([ Content.text(_inputController.text) ]); print(response.text); } setState(() { _outputText = response.text; }); Display this output in your UI for a basic AI experience. 30
  25. 31

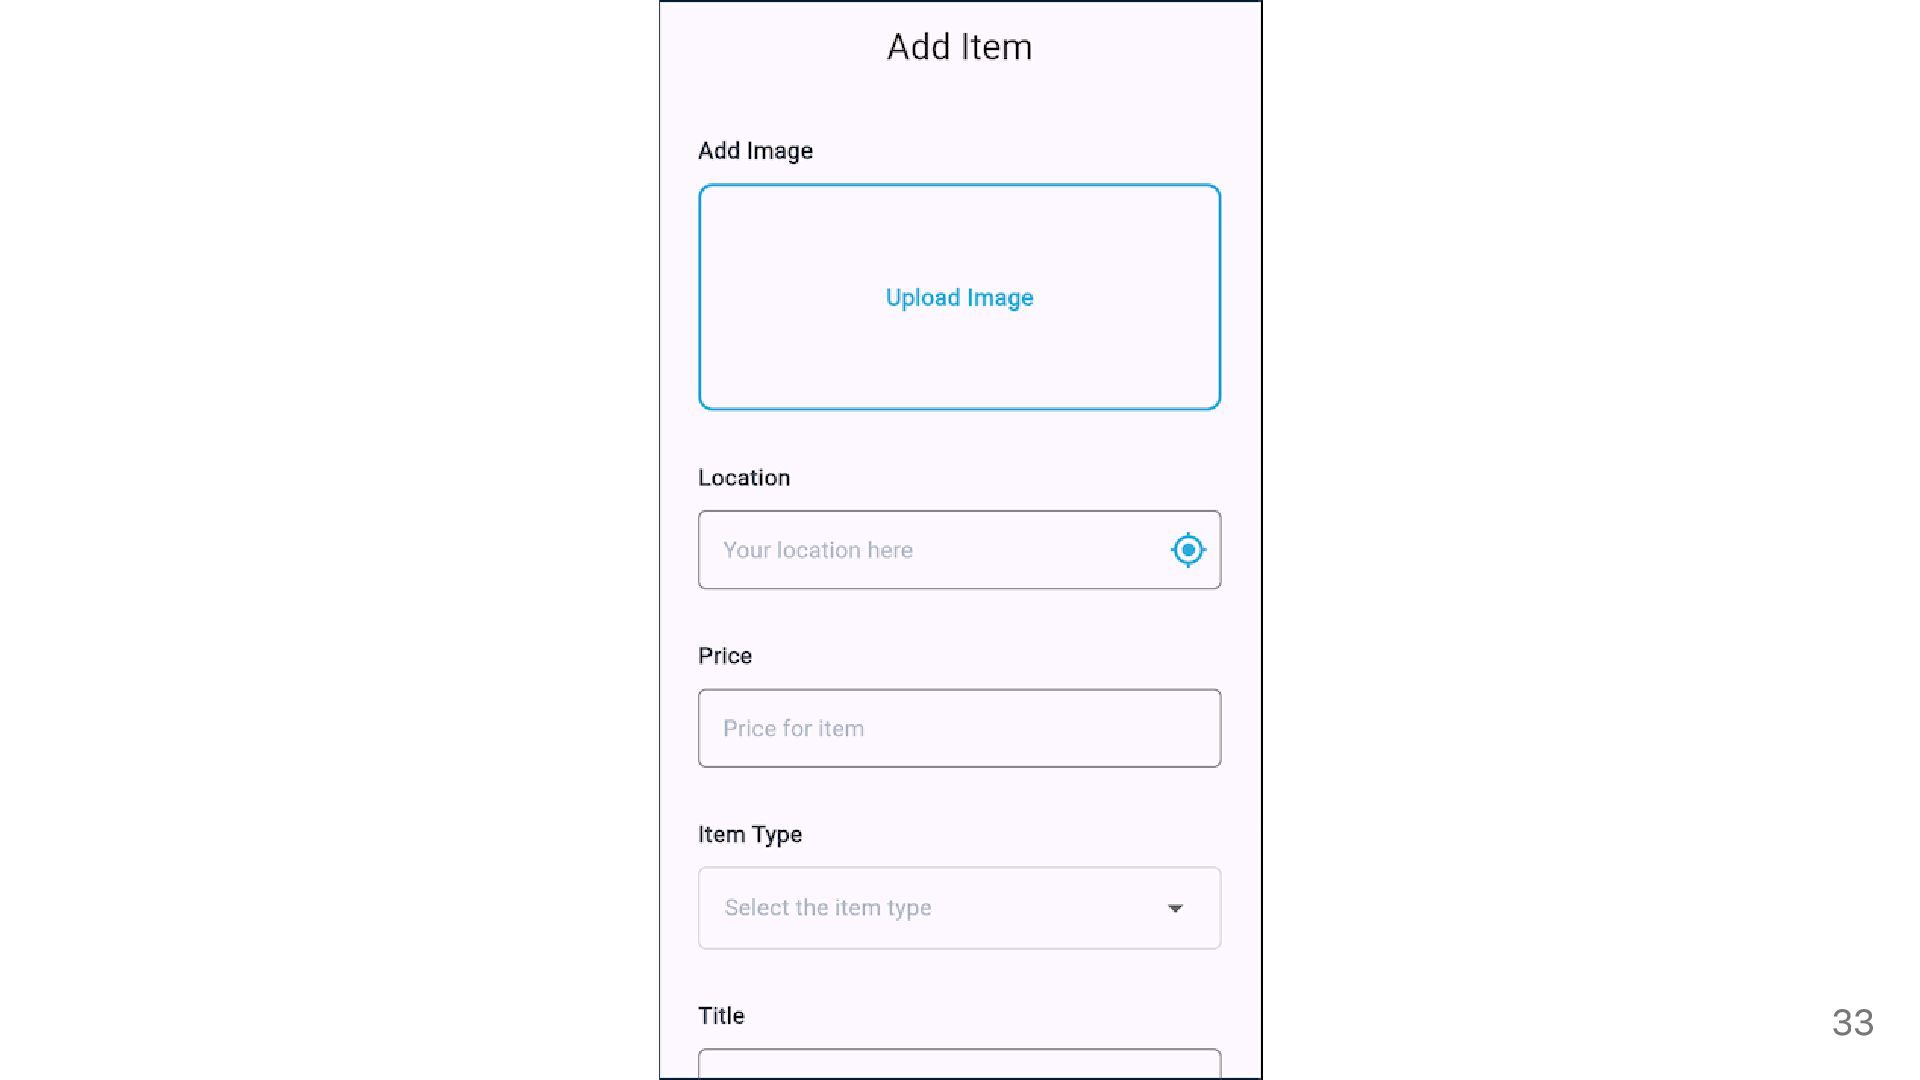
  26. Add Products UI Let's update some UI to include: An

    image picker field Some product related fields A button to submit the form 32
  27. 33

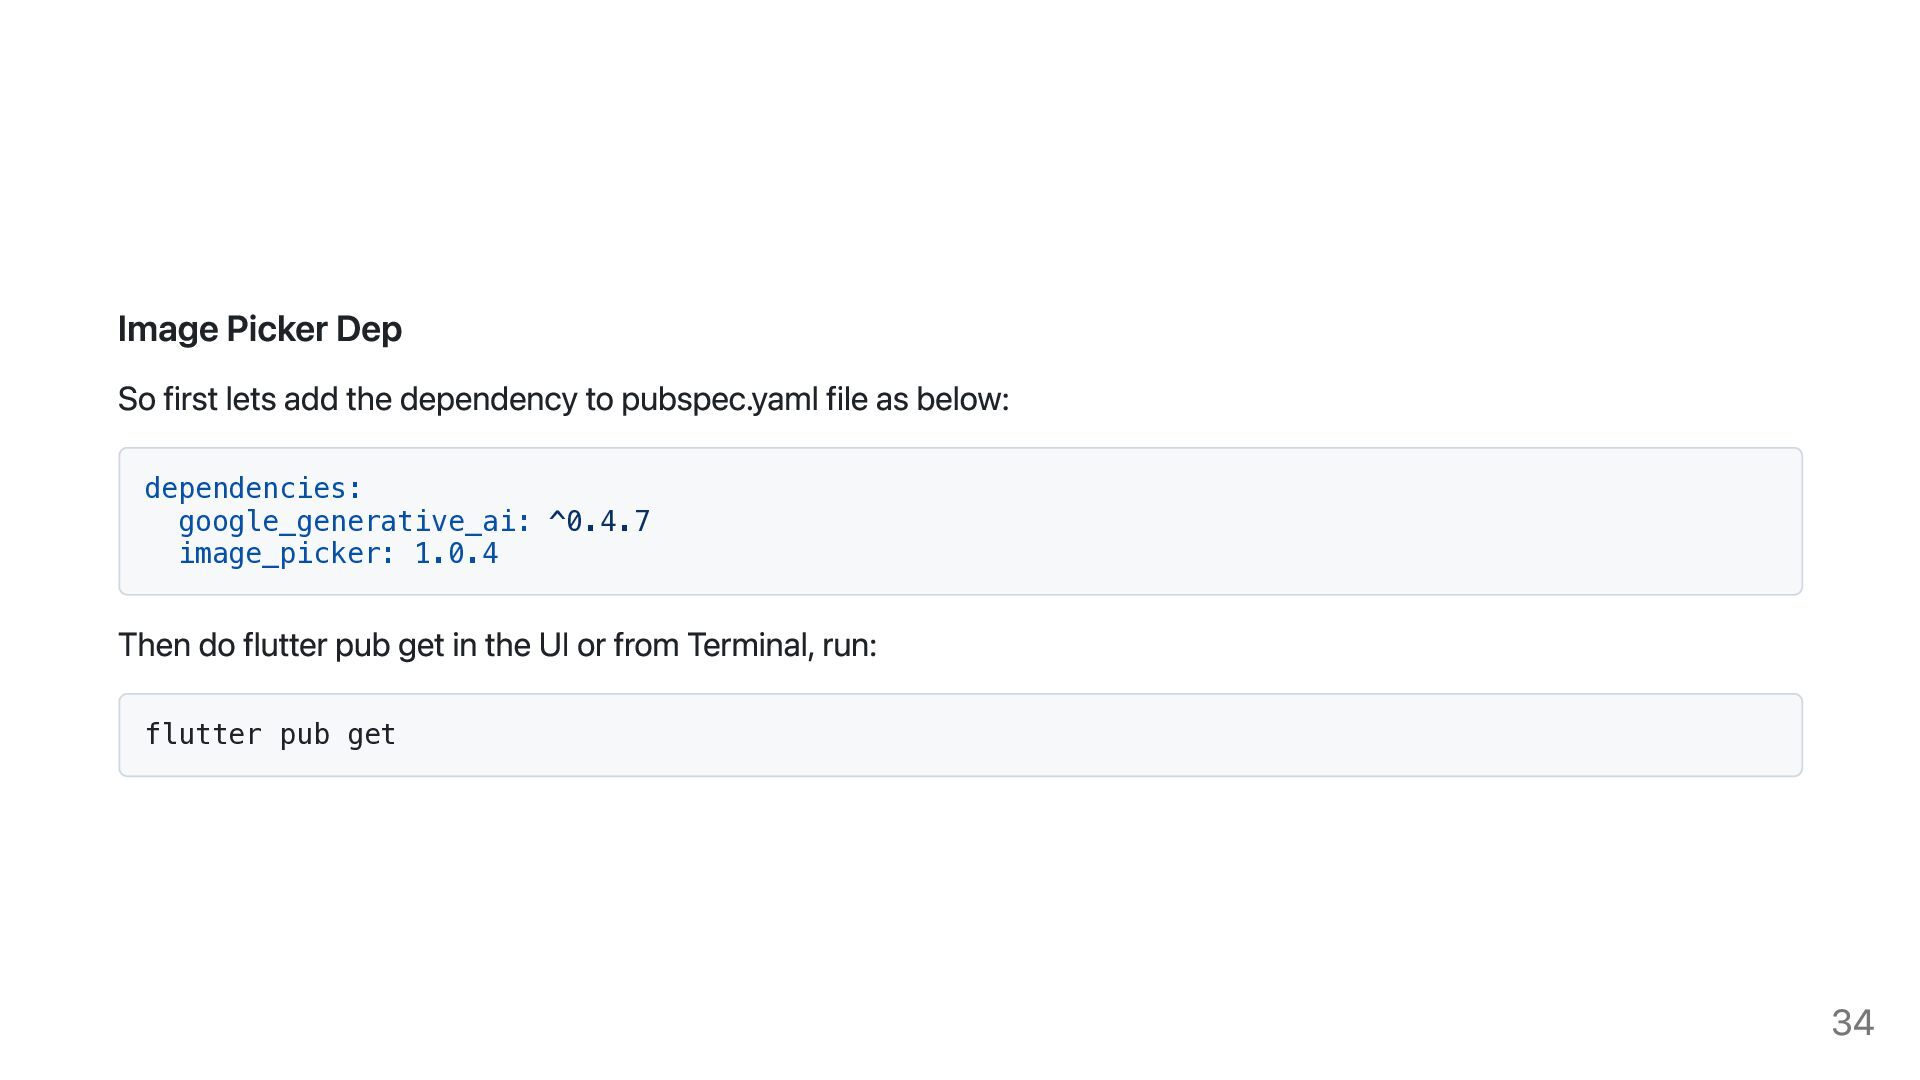
  28. Image Picker Dep So first lets add the dependency to

    pubspec.yaml file as below: dependencies: google_generative_ai: ^0.4.7 image_picker: 1.0.4 Then do flutter pub get in the UI or from Terminal, run: flutter pub get 34
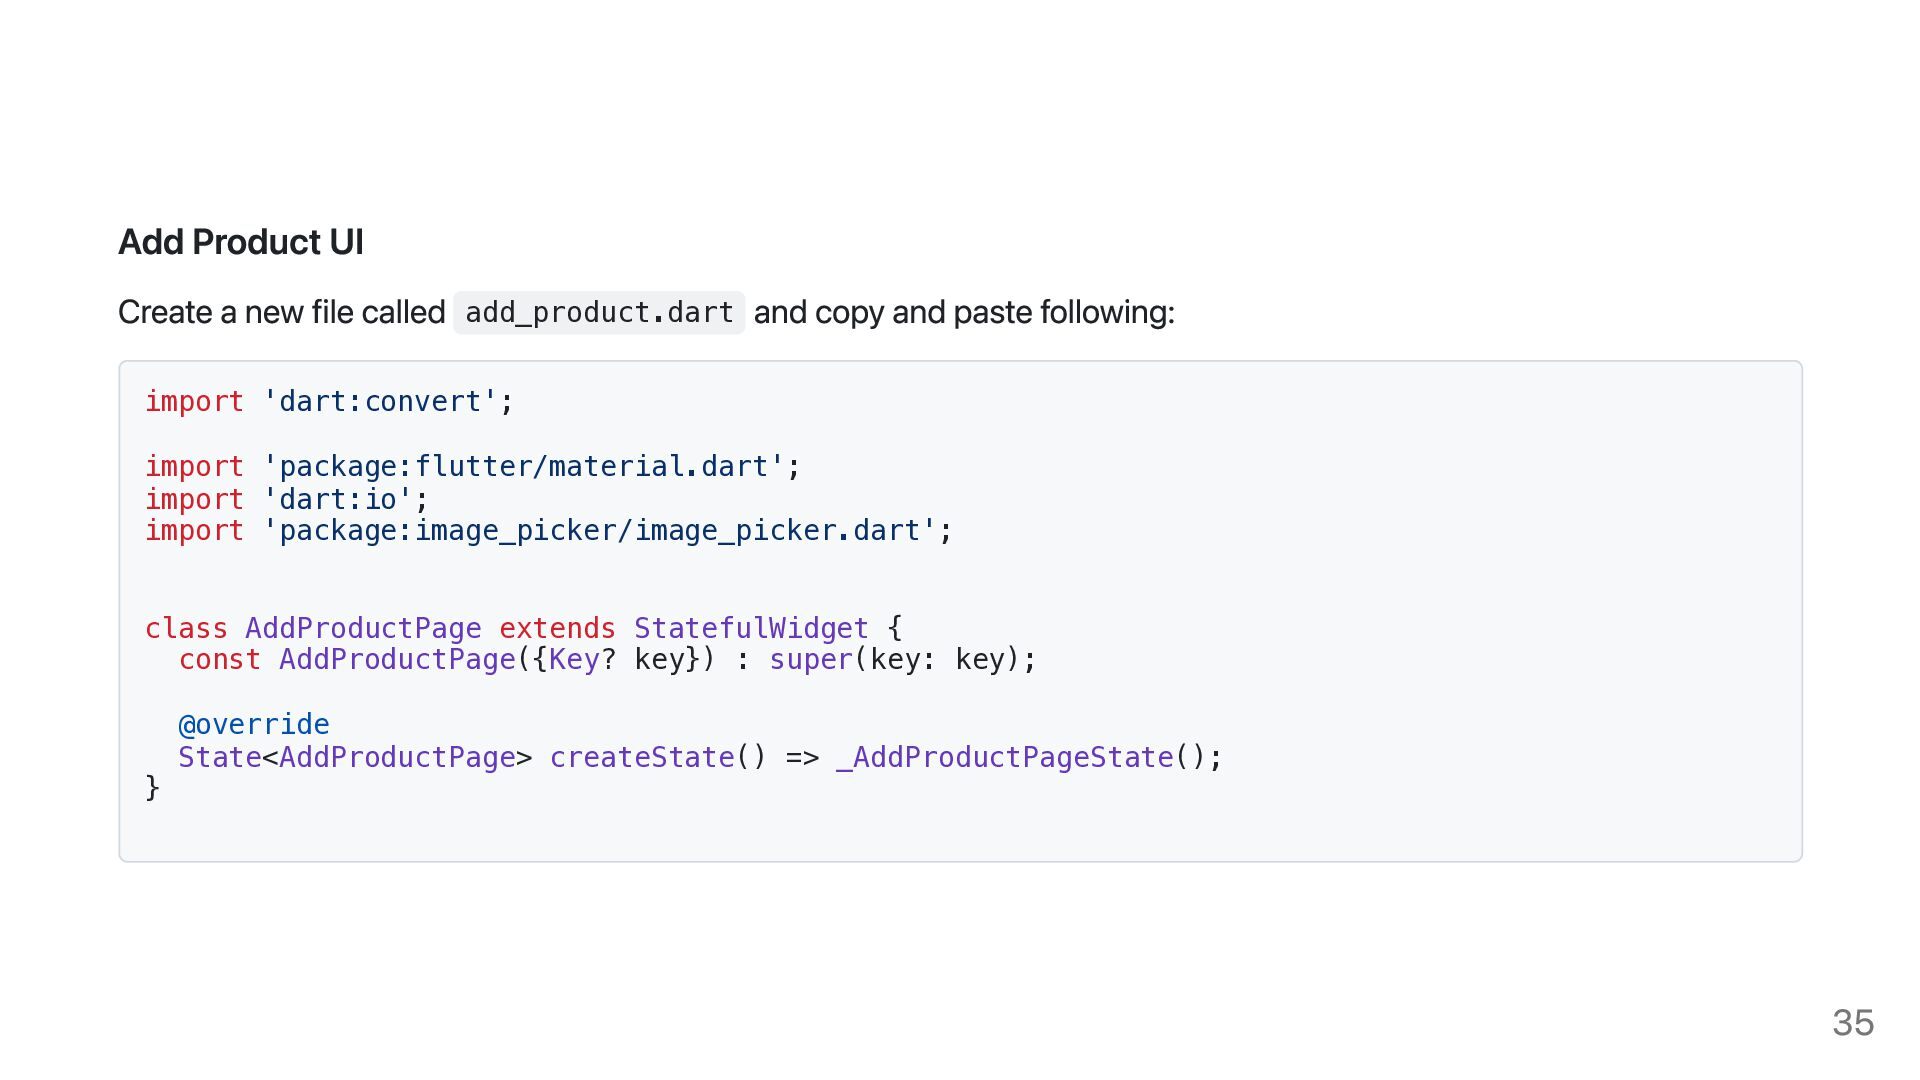
  29. Add Product UI Create a new file called add_product.dart and

    copy and paste following: import 'dart:convert'; import 'package:flutter/material.dart'; import 'dart:io'; import 'package:image_picker/image_picker.dart'; class AddProductPage extends StatefulWidget { const AddProductPage({Key? key}) : super(key: key); } @override State<AddProductPage> createState() => _AddProductPageState(); 35
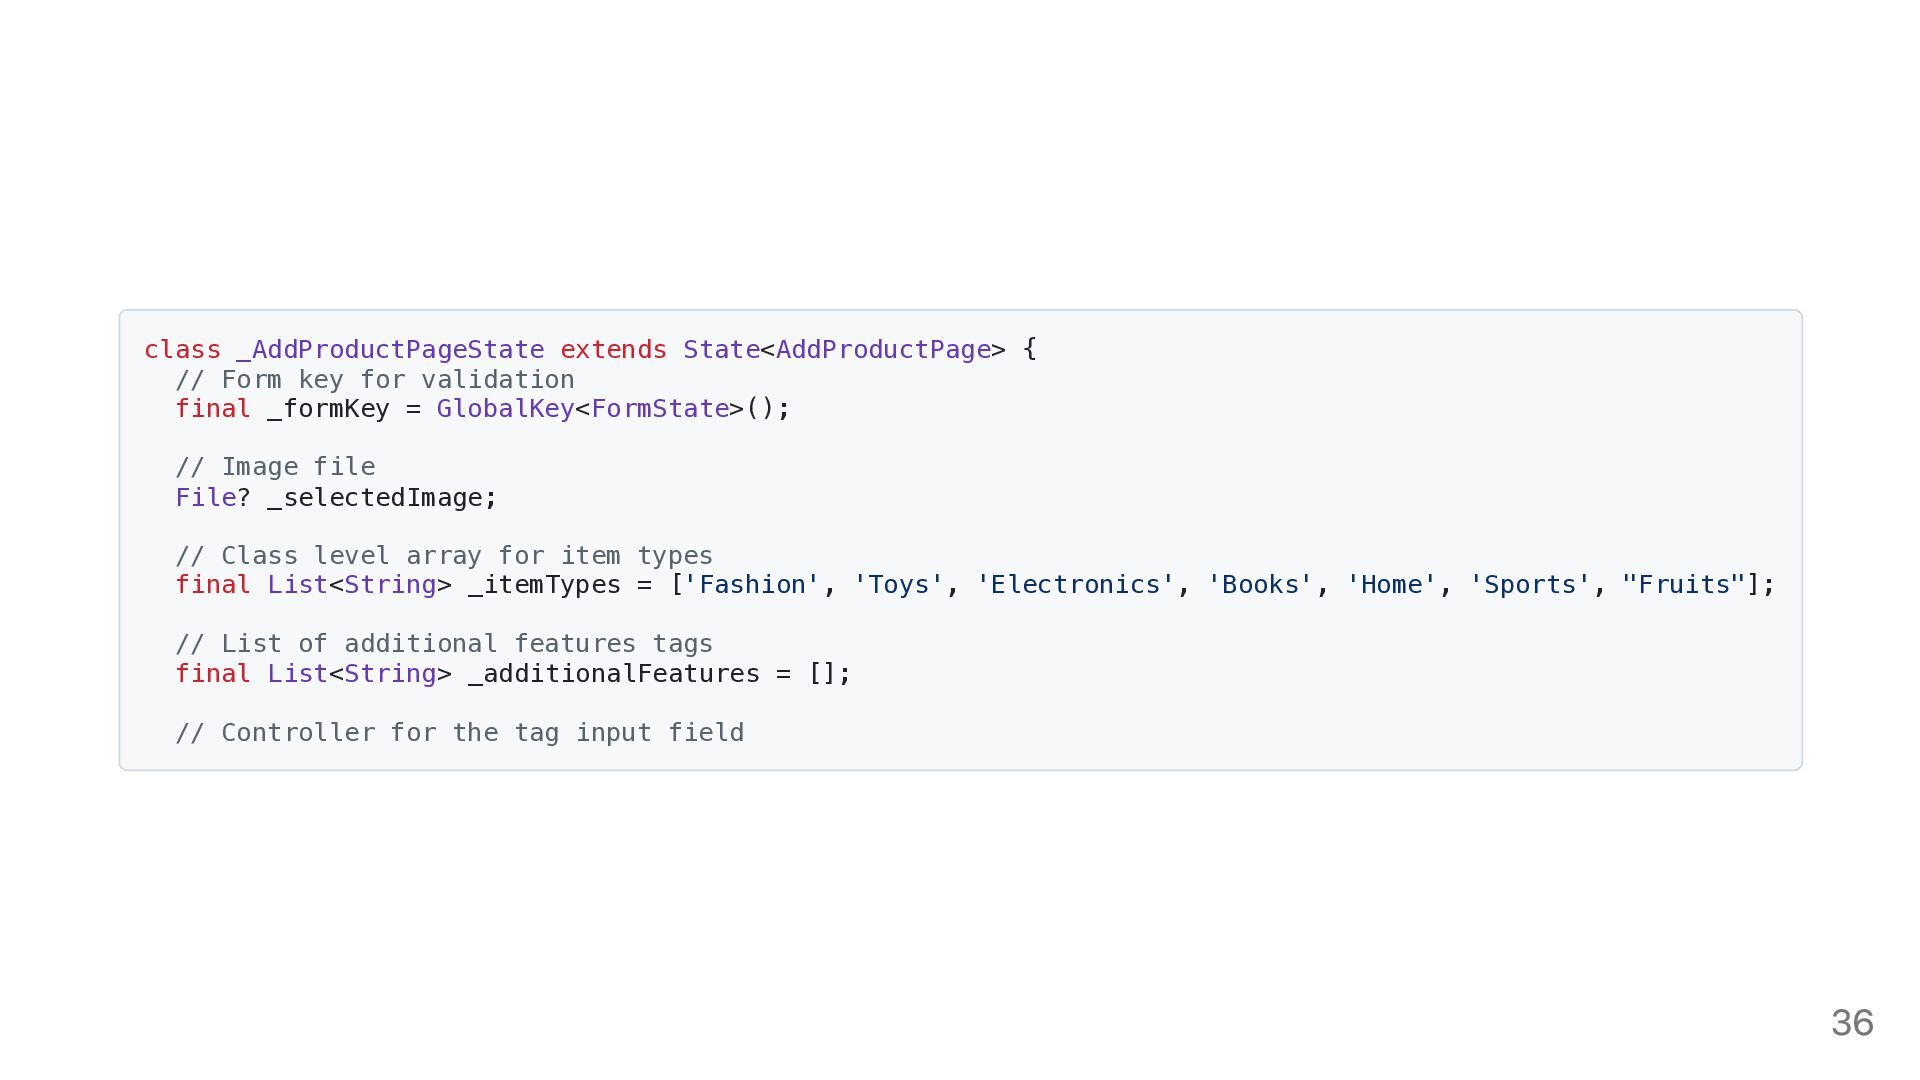
  30. class _AddProductPageState extends State<AddProductPage> { // Form key for validation

    final _formKey = GlobalKey<FormState>(); // Image file File? _selectedImage; // Class level array for item types final List<String> _itemTypes = ['Fashion', 'Toys', 'Electronics', 'Books', 'Home', 'Sports', "Fruits"]; // List of additional features tags final List<String> _additionalFeatures = []; // Controller for the tag input field 36
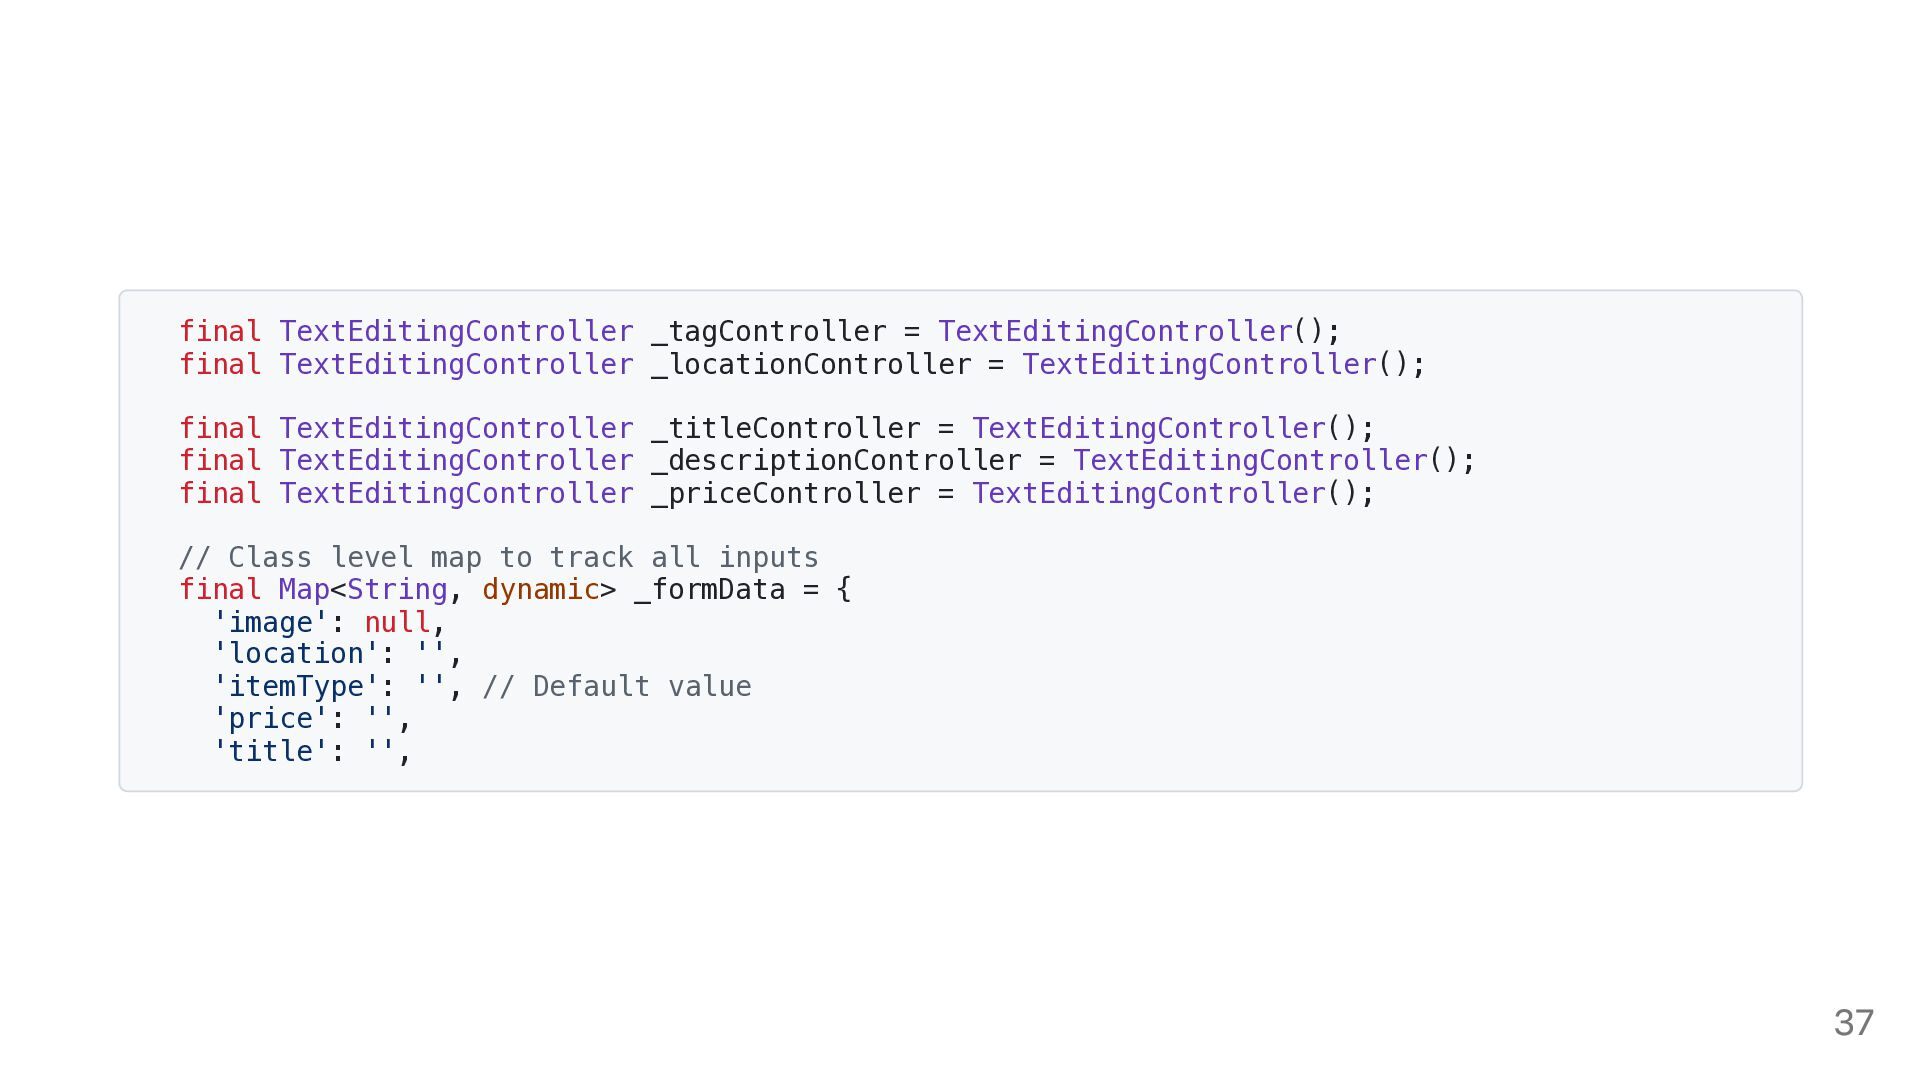
  31. final TextEditingController _tagController = TextEditingController(); final TextEditingController _locationController = TextEditingController();

    final TextEditingController _titleController = TextEditingController(); final TextEditingController _descriptionController = TextEditingController(); final TextEditingController _priceController = TextEditingController(); // Class level map to track all inputs final Map<String, dynamic> _formData = { 'image': null, 'location': '', 'itemType': '', // Default value 'price': '', 'title': '', 37
  32. }; 'description': '', 'additionalFeatures': <String>[], // Method to pick image

    from gallery Future<void> _pickImage() async { final ImagePicker picker = ImagePicker(); final XFile? image = await picker.pickImage(source: ImageSource.gallery); if (image != null) { setState(() { _selectedImage = File(image.path); _formData['image'] = image.path; }); 38
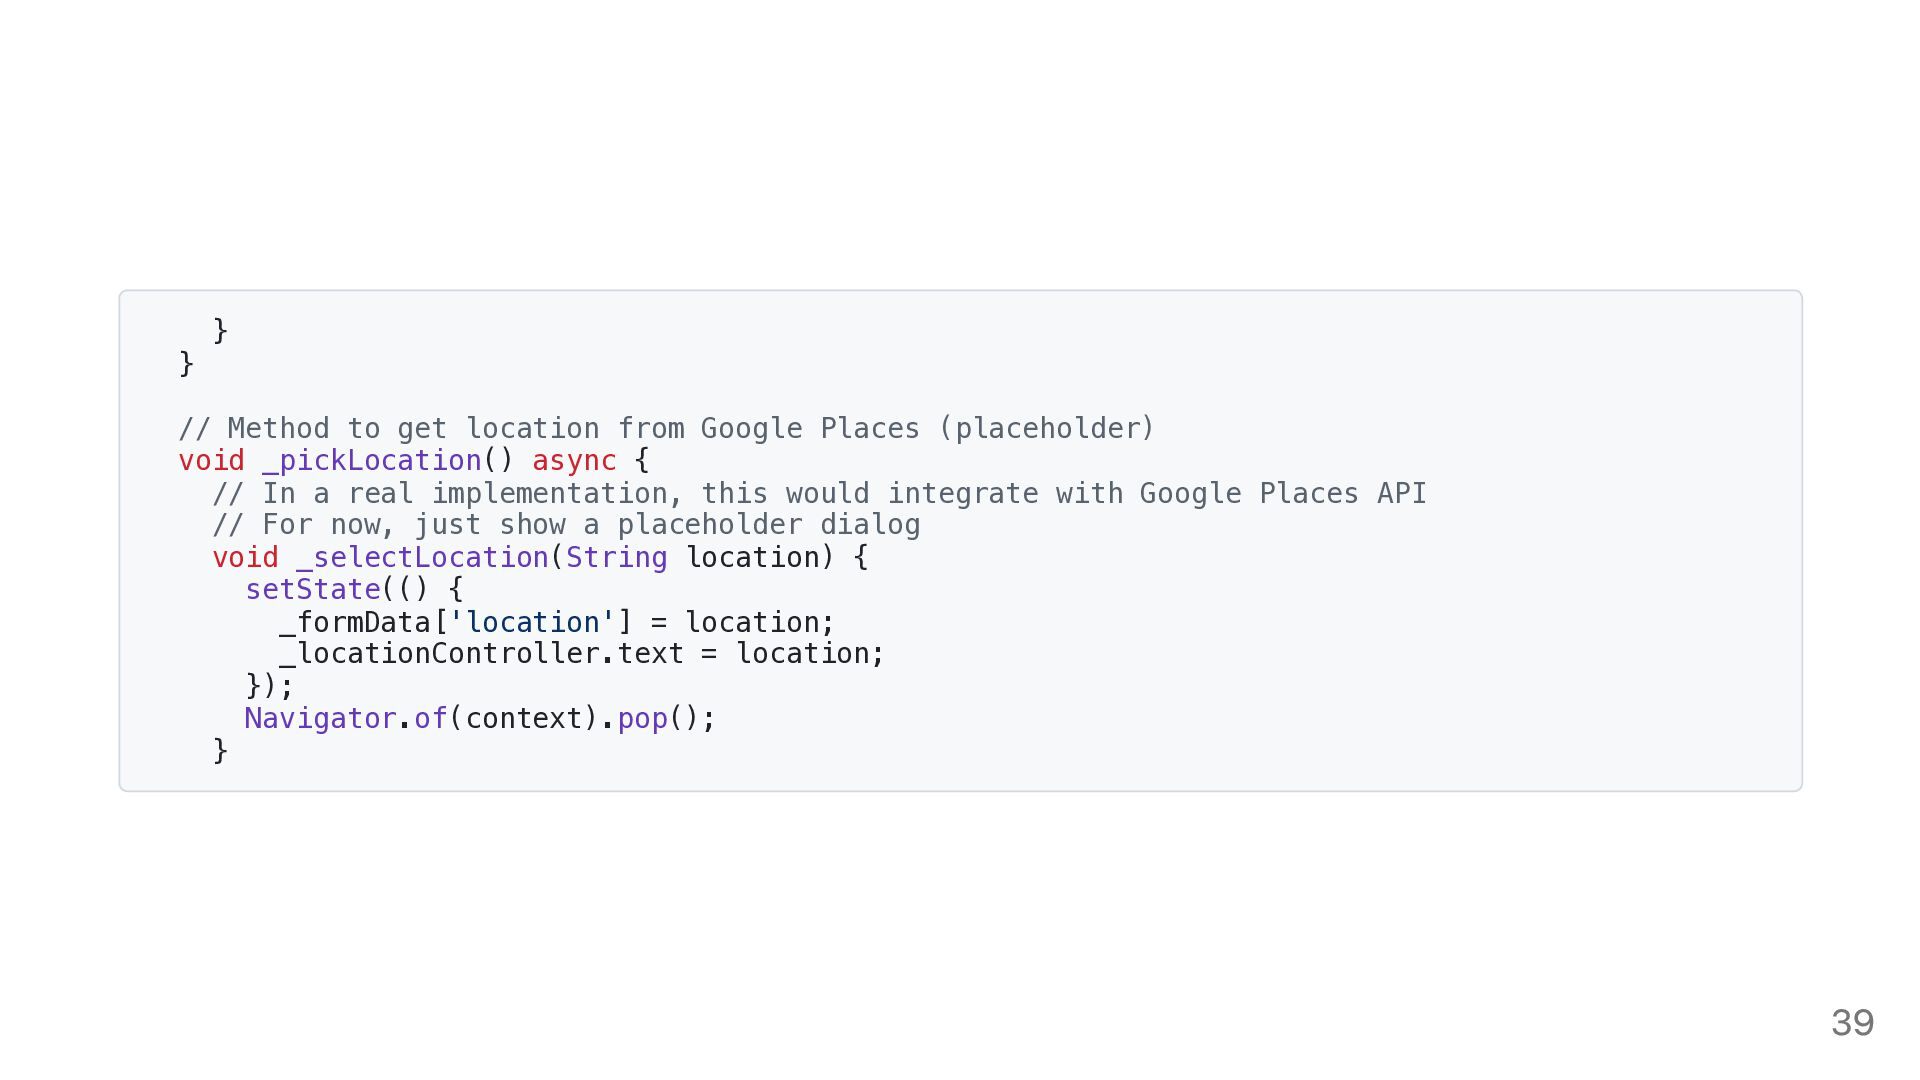
  33. } } // Method to get location from Google Places

    (placeholder) void _pickLocation() async { // In a real implementation, this would integrate with Google Places API // For now, just show a placeholder dialog void _selectLocation(String location) { setState(() { _formData['location'] = location; _locationController.text = location; }); Navigator.of(context).pop(); } 39
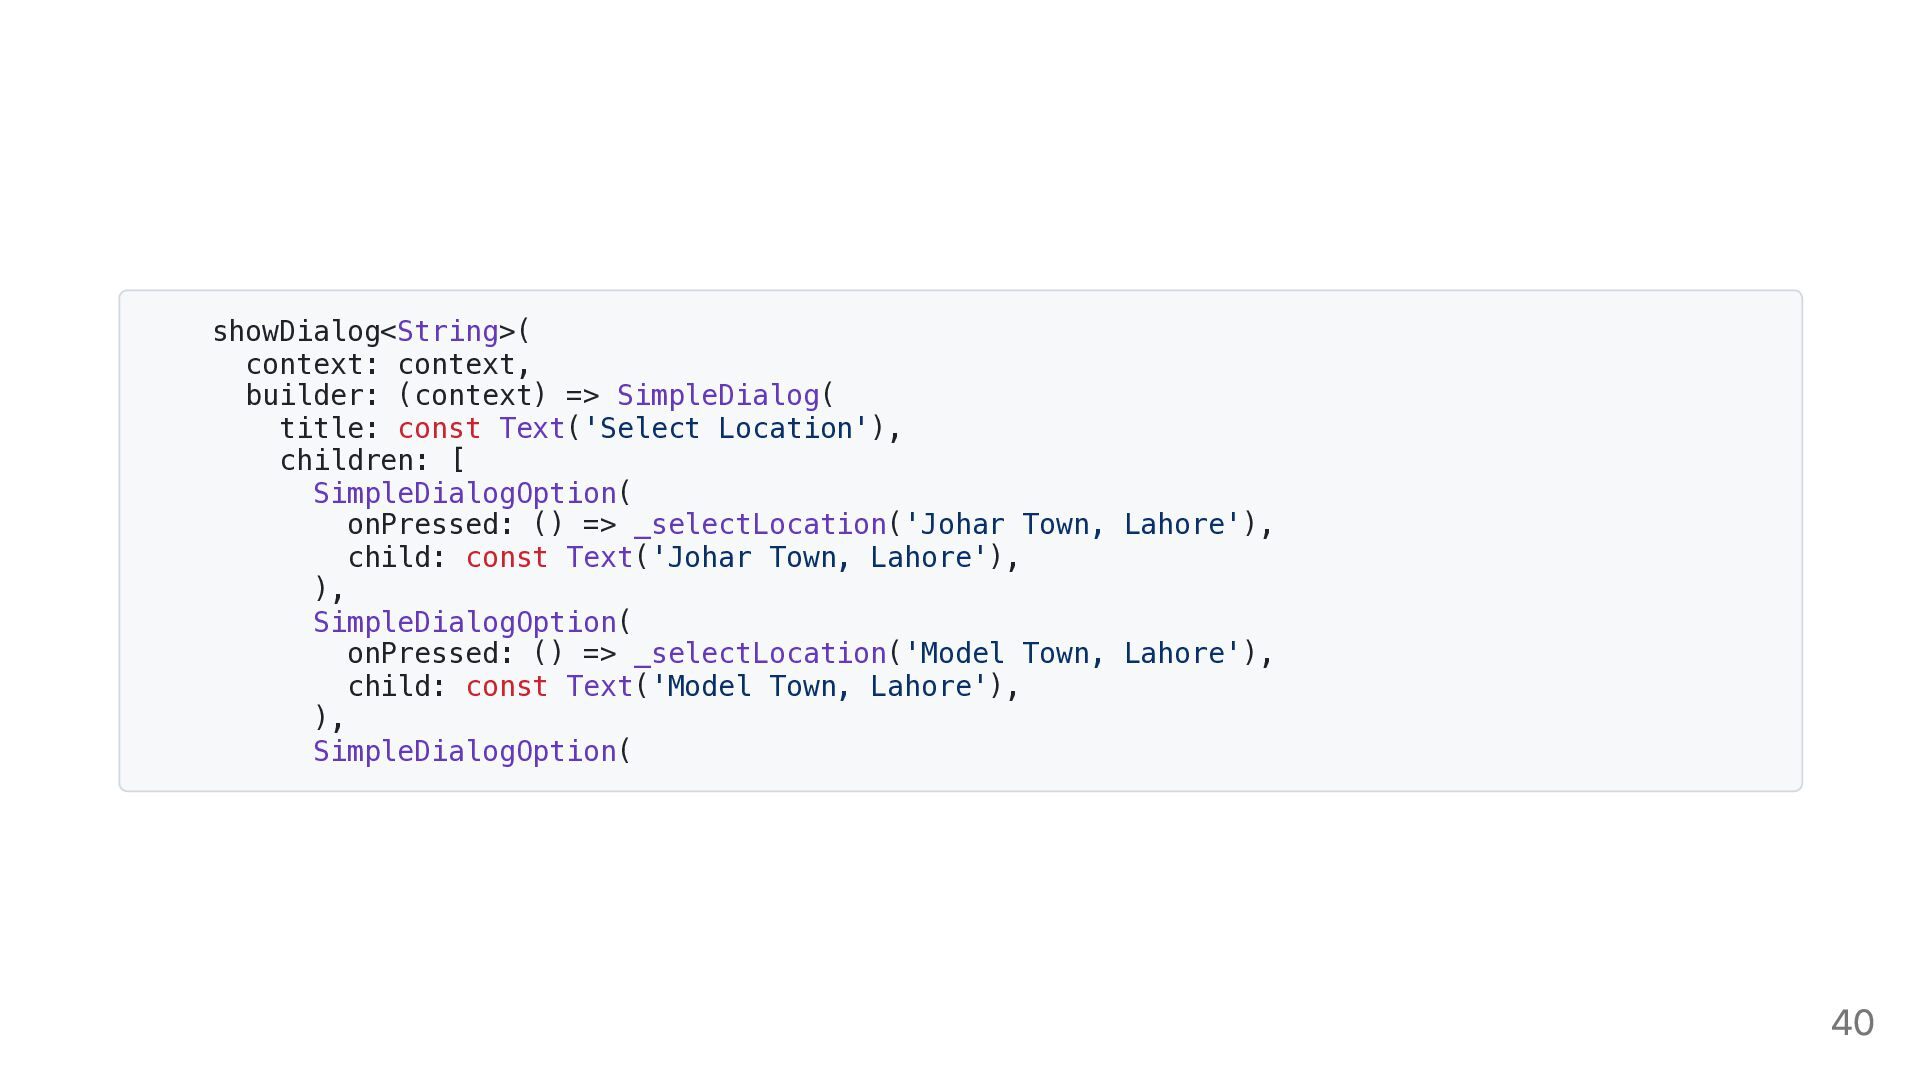
  34. showDialog<String>( context: context, builder: (context) => SimpleDialog( title: const Text('Select

    Location'), children: [ SimpleDialogOption( onPressed: () => _selectLocation('Johar Town, Lahore'), child: const Text('Johar Town, Lahore'), ), SimpleDialogOption( onPressed: () => _selectLocation('Model Town, Lahore'), child: const Text('Model Town, Lahore'), ), SimpleDialogOption( 40
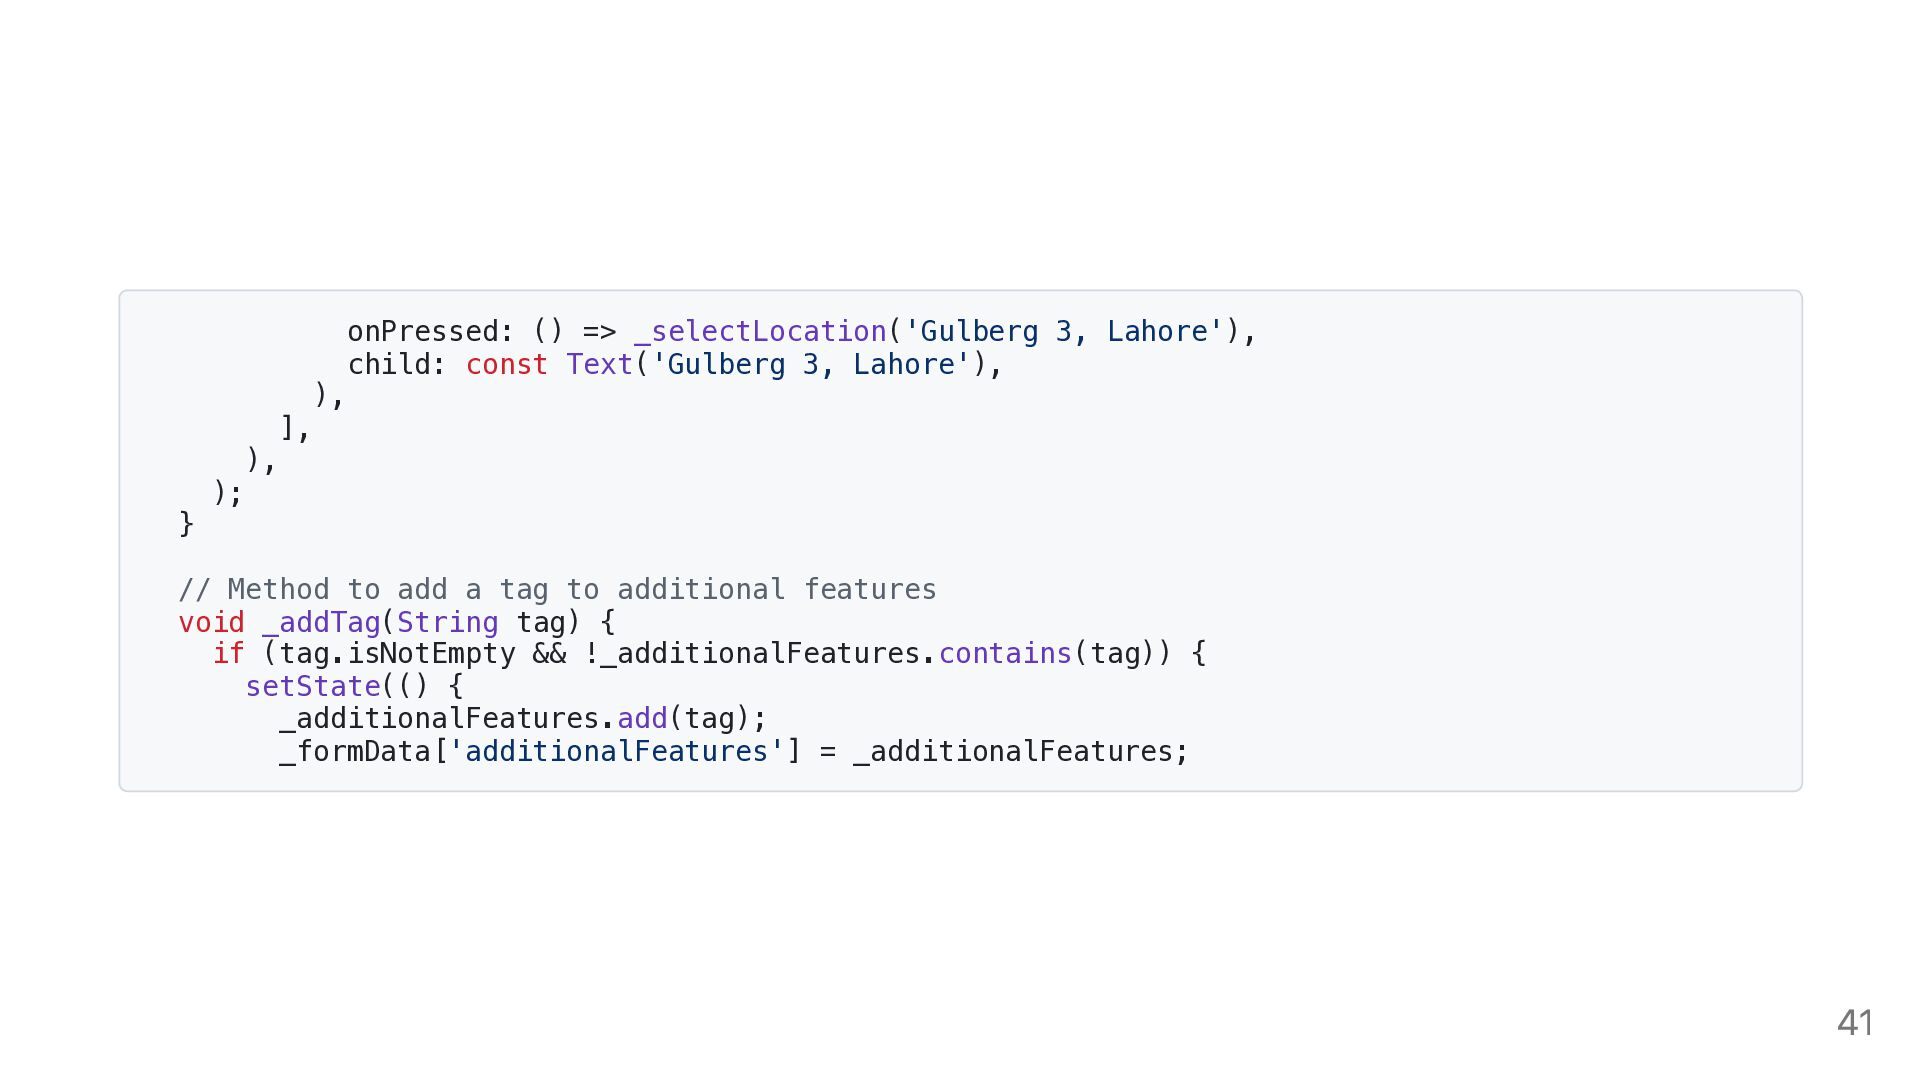
  35. } onPressed: () => _selectLocation('Gulberg 3, Lahore'), child: const Text('Gulberg

    3, Lahore'), ), ], ), ); // Method to add a tag to additional features void _addTag(String tag) { if (tag.isNotEmpty && !_additionalFeatures.contains(tag)) { setState(() { _additionalFeatures.add(tag); _formData['additionalFeatures'] = _additionalFeatures; 41
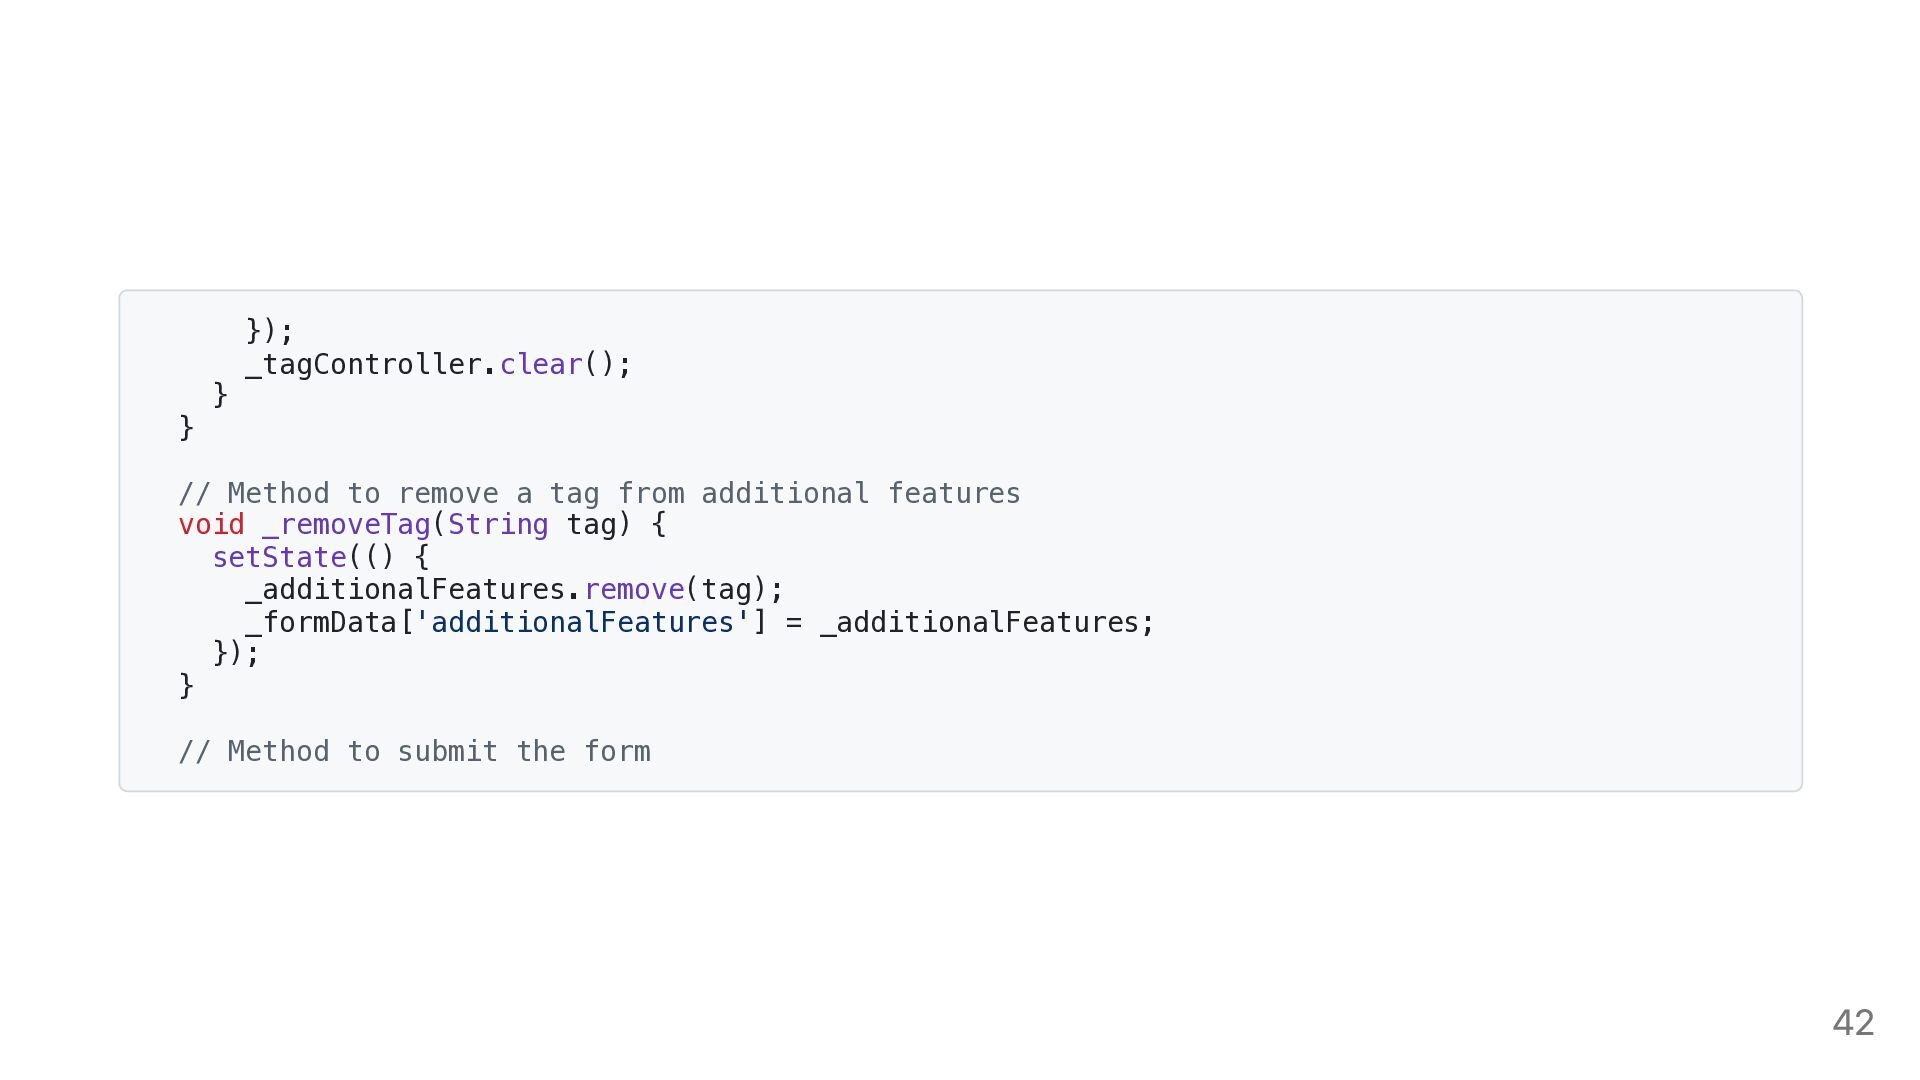
  36. } }); _tagController.clear(); } // Method to remove a tag

    from additional features void _removeTag(String tag) { setState(() { _additionalFeatures.remove(tag); _formData['additionalFeatures'] = _additionalFeatures; }); } // Method to submit the form 42
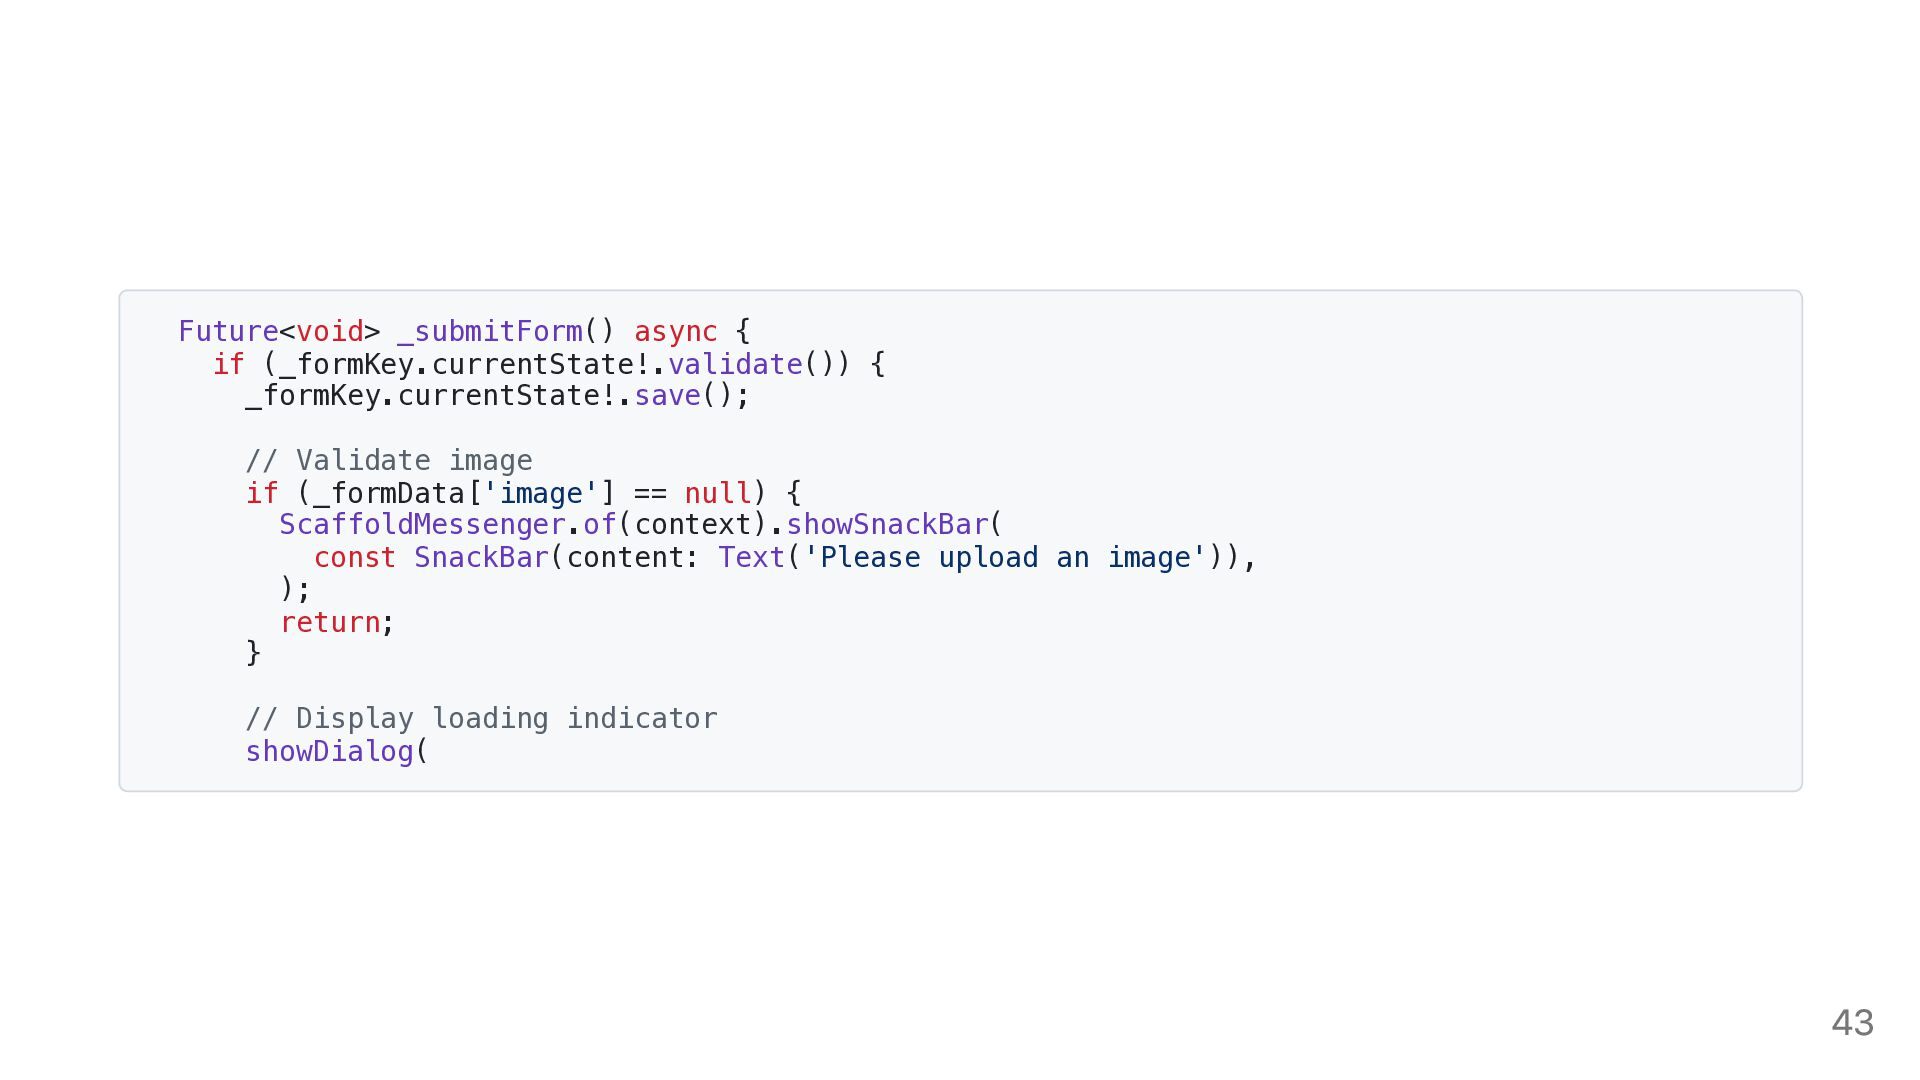
  37. Future<void> _submitForm() async { if (_formKey.currentState!.validate()) { _formKey.currentState!.save(); // Validate

    image if (_formData['image'] == null) { ScaffoldMessenger.of(context).showSnackBar( const SnackBar(content: Text('Please upload an image')), ); return; } // Display loading indicator showDialog( 43
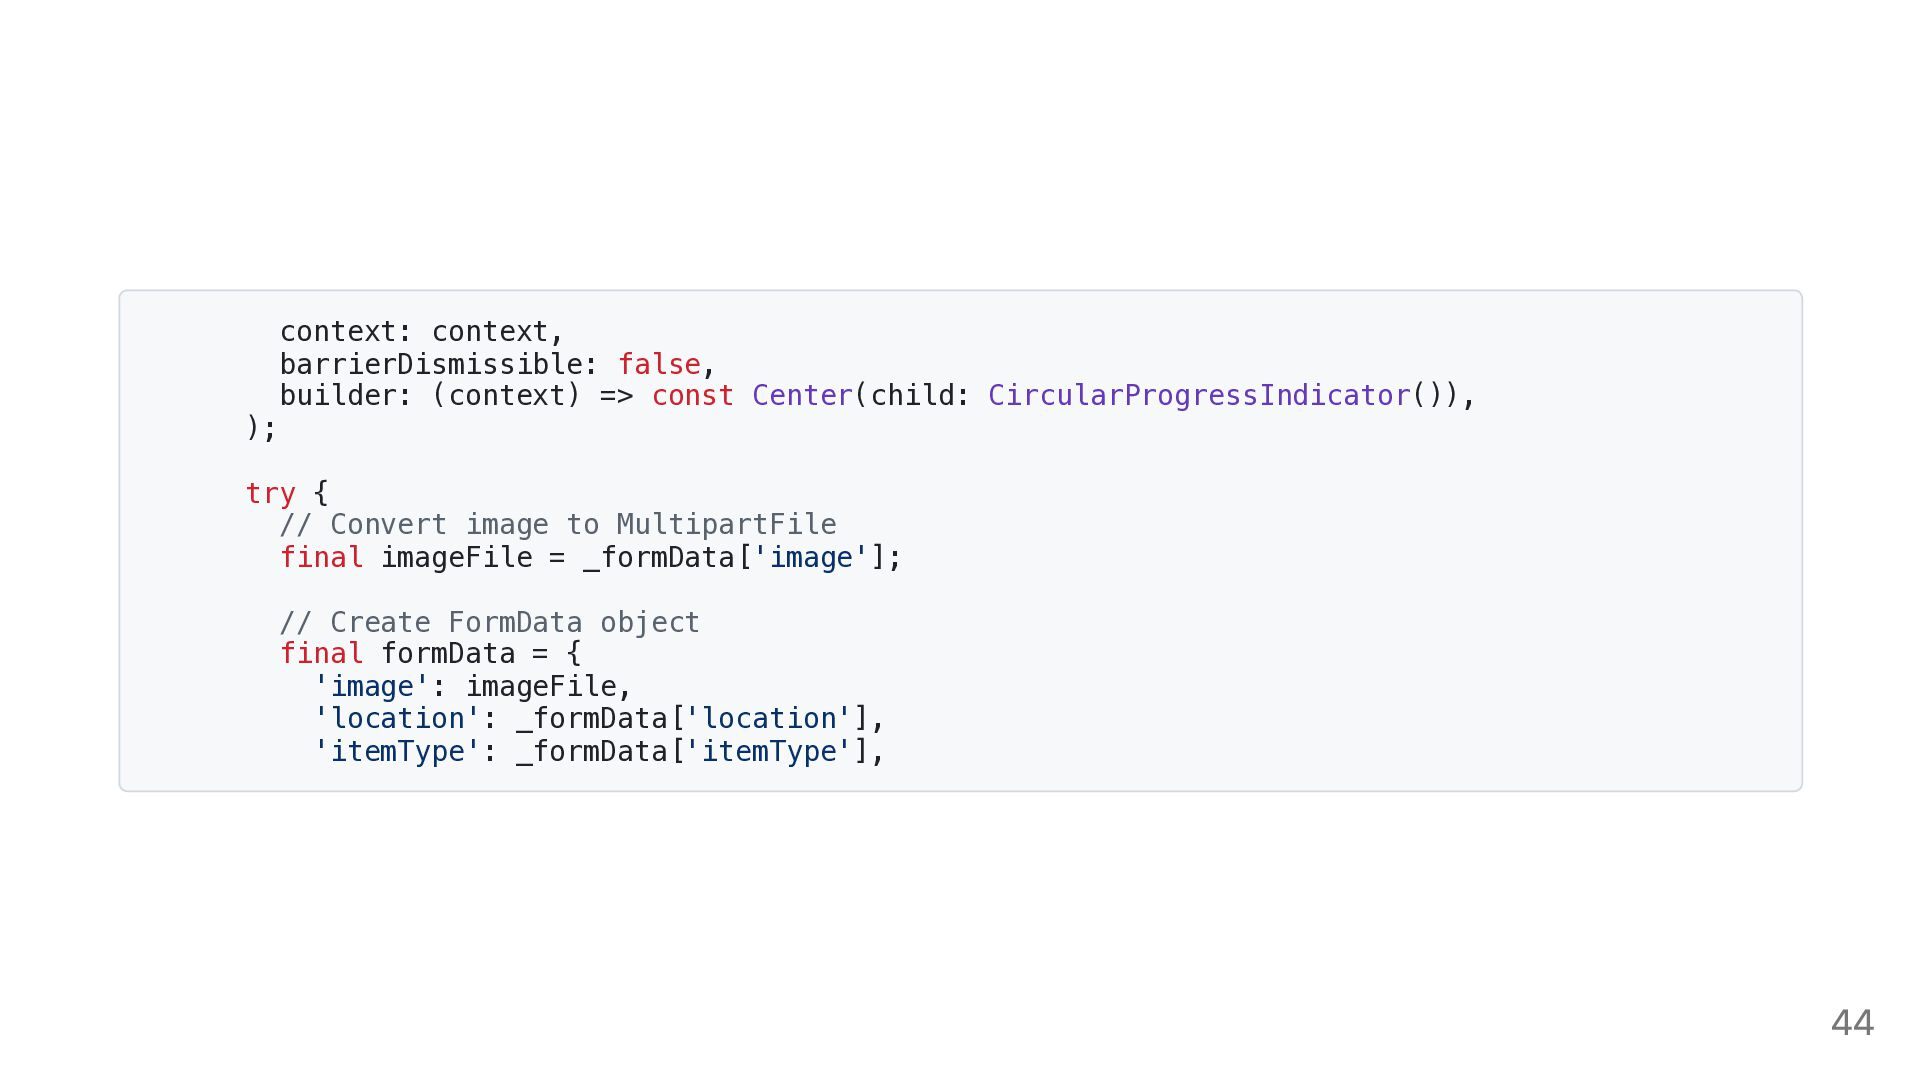
  38. context: context, barrierDismissible: false, builder: (context) => const Center(child: CircularProgressIndicator()),

    ); try { // Convert image to MultipartFile final imageFile = _formData['image']; // Create FormData object final formData = { 'image': imageFile, 'location': _formData['location'], 'itemType': _formData['itemType'], 44
  39. }; 'price': _formData['price'], 'title': _formData['title'], 'description': _formData['description'], 'additionalFeatures': _formData['additionalFeatures'], //

    Hide loading indicator Navigator.of(context).pop(); ScaffoldMessenger.of(context).showSnackBar( const SnackBar(content: Text('Item added successfully')), ); } catch (e) { 45
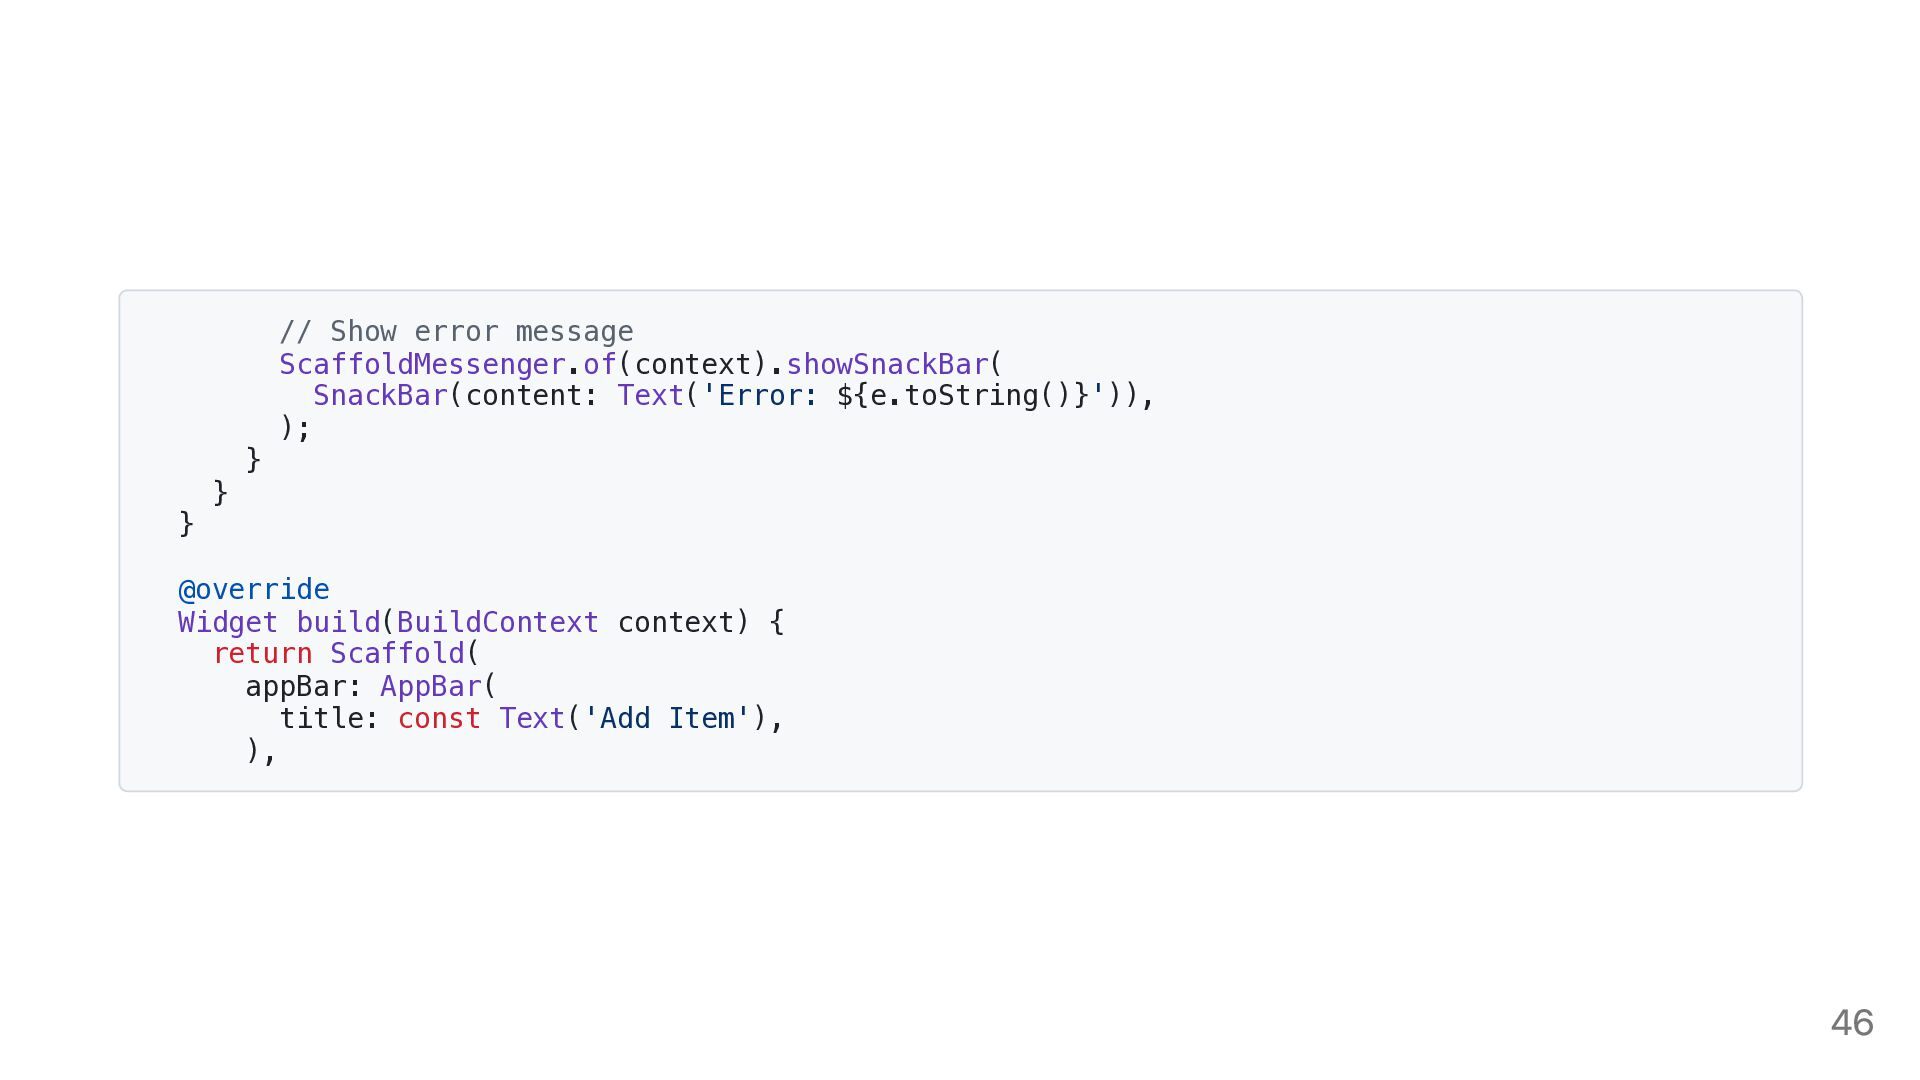
  40. } } // Show error message ScaffoldMessenger.of(context).showSnackBar( SnackBar(content: Text('Error: ${e.toString()}')),

    ); } @override Widget build(BuildContext context) { return Scaffold( appBar: AppBar( title: const Text('Add Item'), ), 46
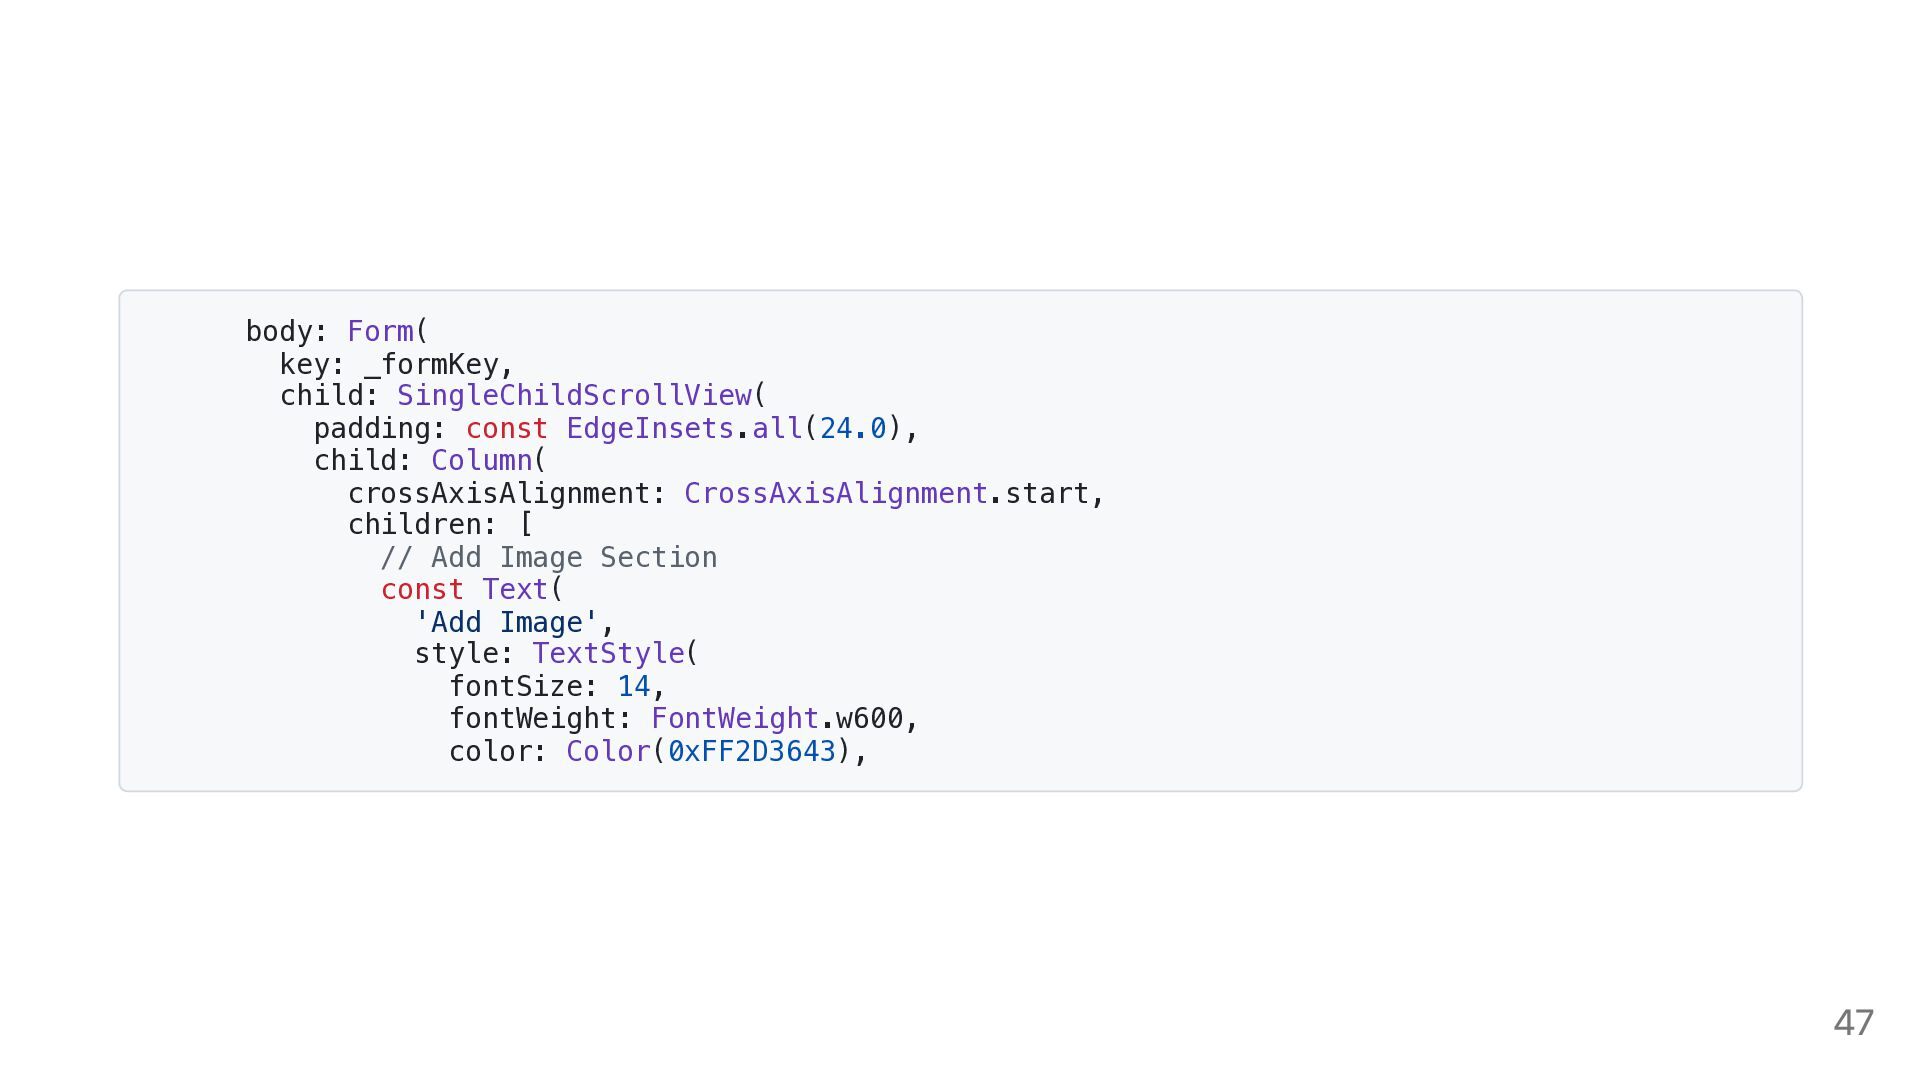
  41. body: Form( key: _formKey, child: SingleChildScrollView( padding: const EdgeInsets.all(24.0), child:

    Column( crossAxisAlignment: CrossAxisAlignment.start, children: [ // Add Image Section const Text( 'Add Image', style: TextStyle( fontSize: 14, fontWeight: FontWeight.w600, color: Color(0xFF2D3643), 47
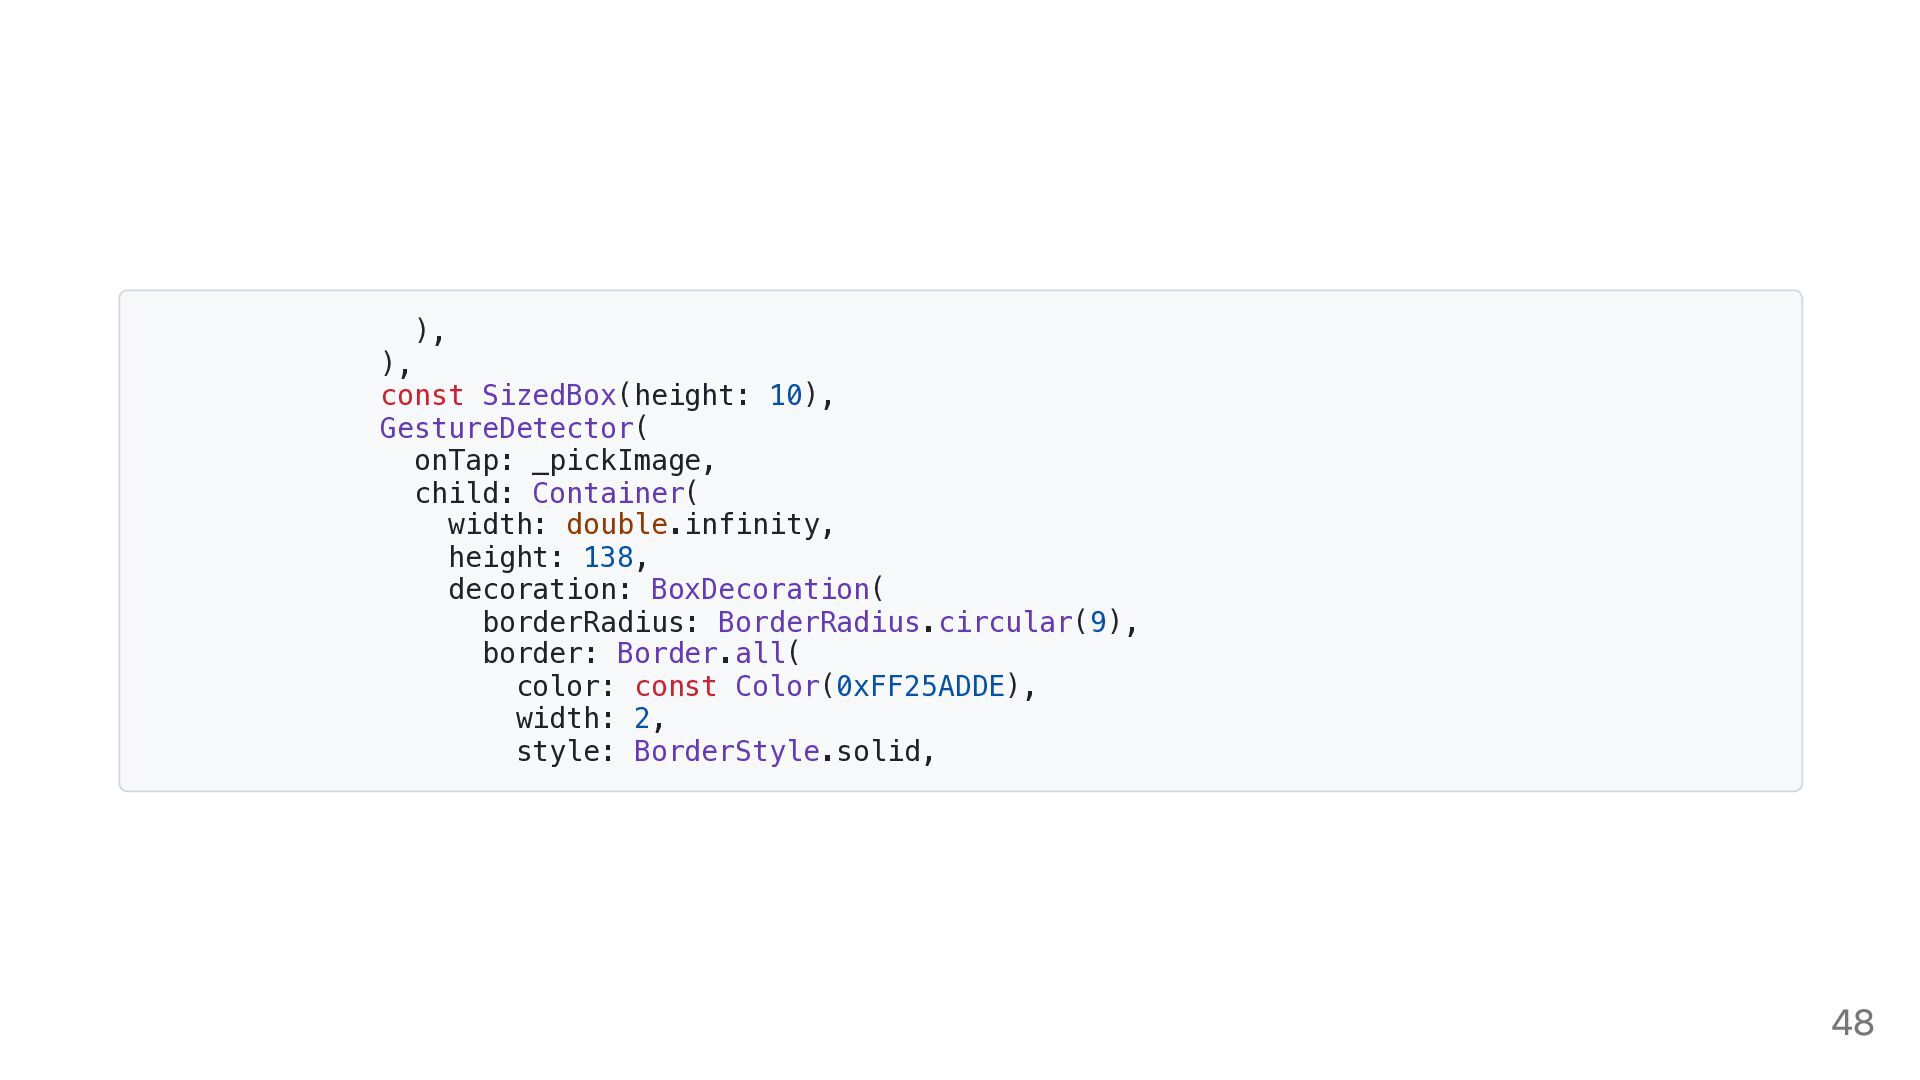
  42. ), ), const SizedBox(height: 10), GestureDetector( onTap: _pickImage, child: Container(

    width: double.infinity, height: 138, decoration: BoxDecoration( borderRadius: BorderRadius.circular(9), border: Border.all( color: const Color(0xFF25ADDE), width: 2, style: BorderStyle.solid, 48
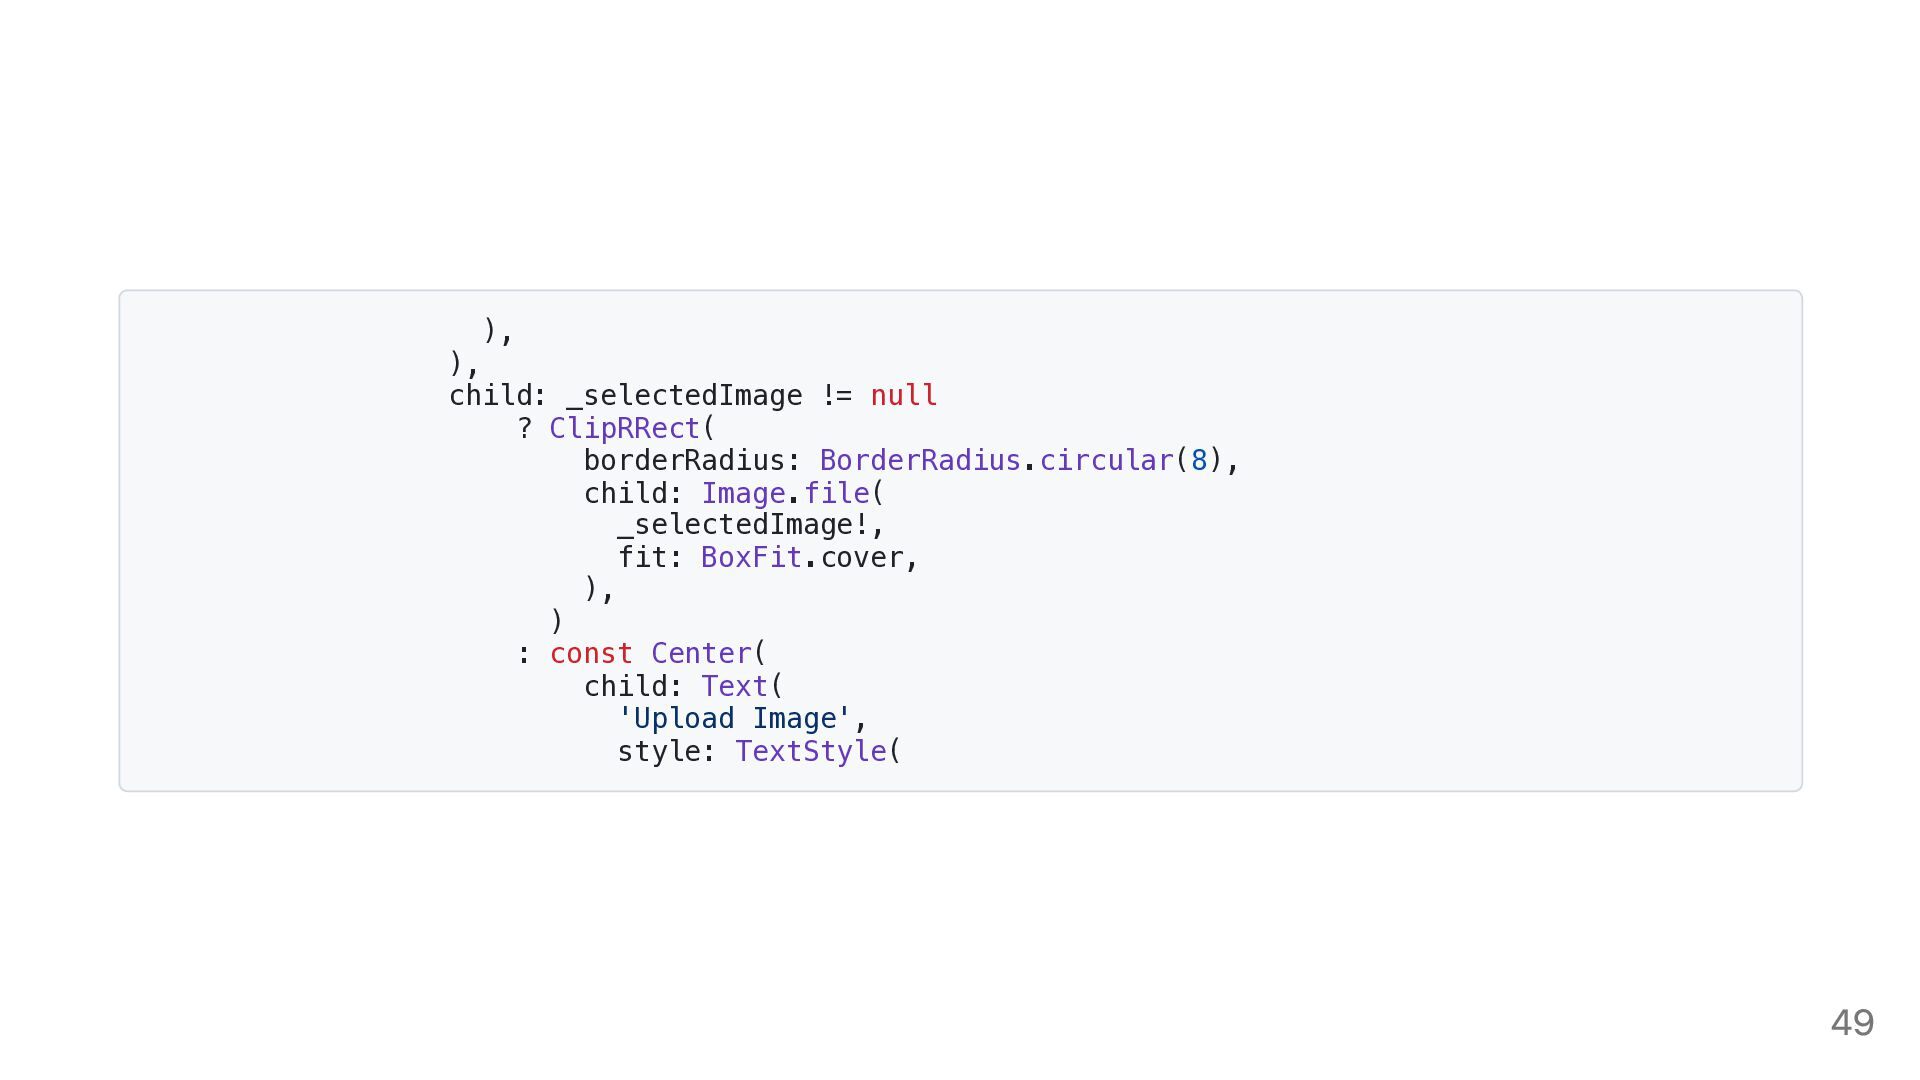
  43. ), ), child: _selectedImage != null ? ClipRRect( borderRadius: BorderRadius.circular(8),

    child: Image.file( _selectedImage!, fit: BoxFit.cover, ), ) : const Center( child: Text( 'Upload Image', style: TextStyle( 49
  44. ), ), fontSize: 14, fontWeight: FontWeight.w600, color: Color(0xFF25ADDE), ), ),

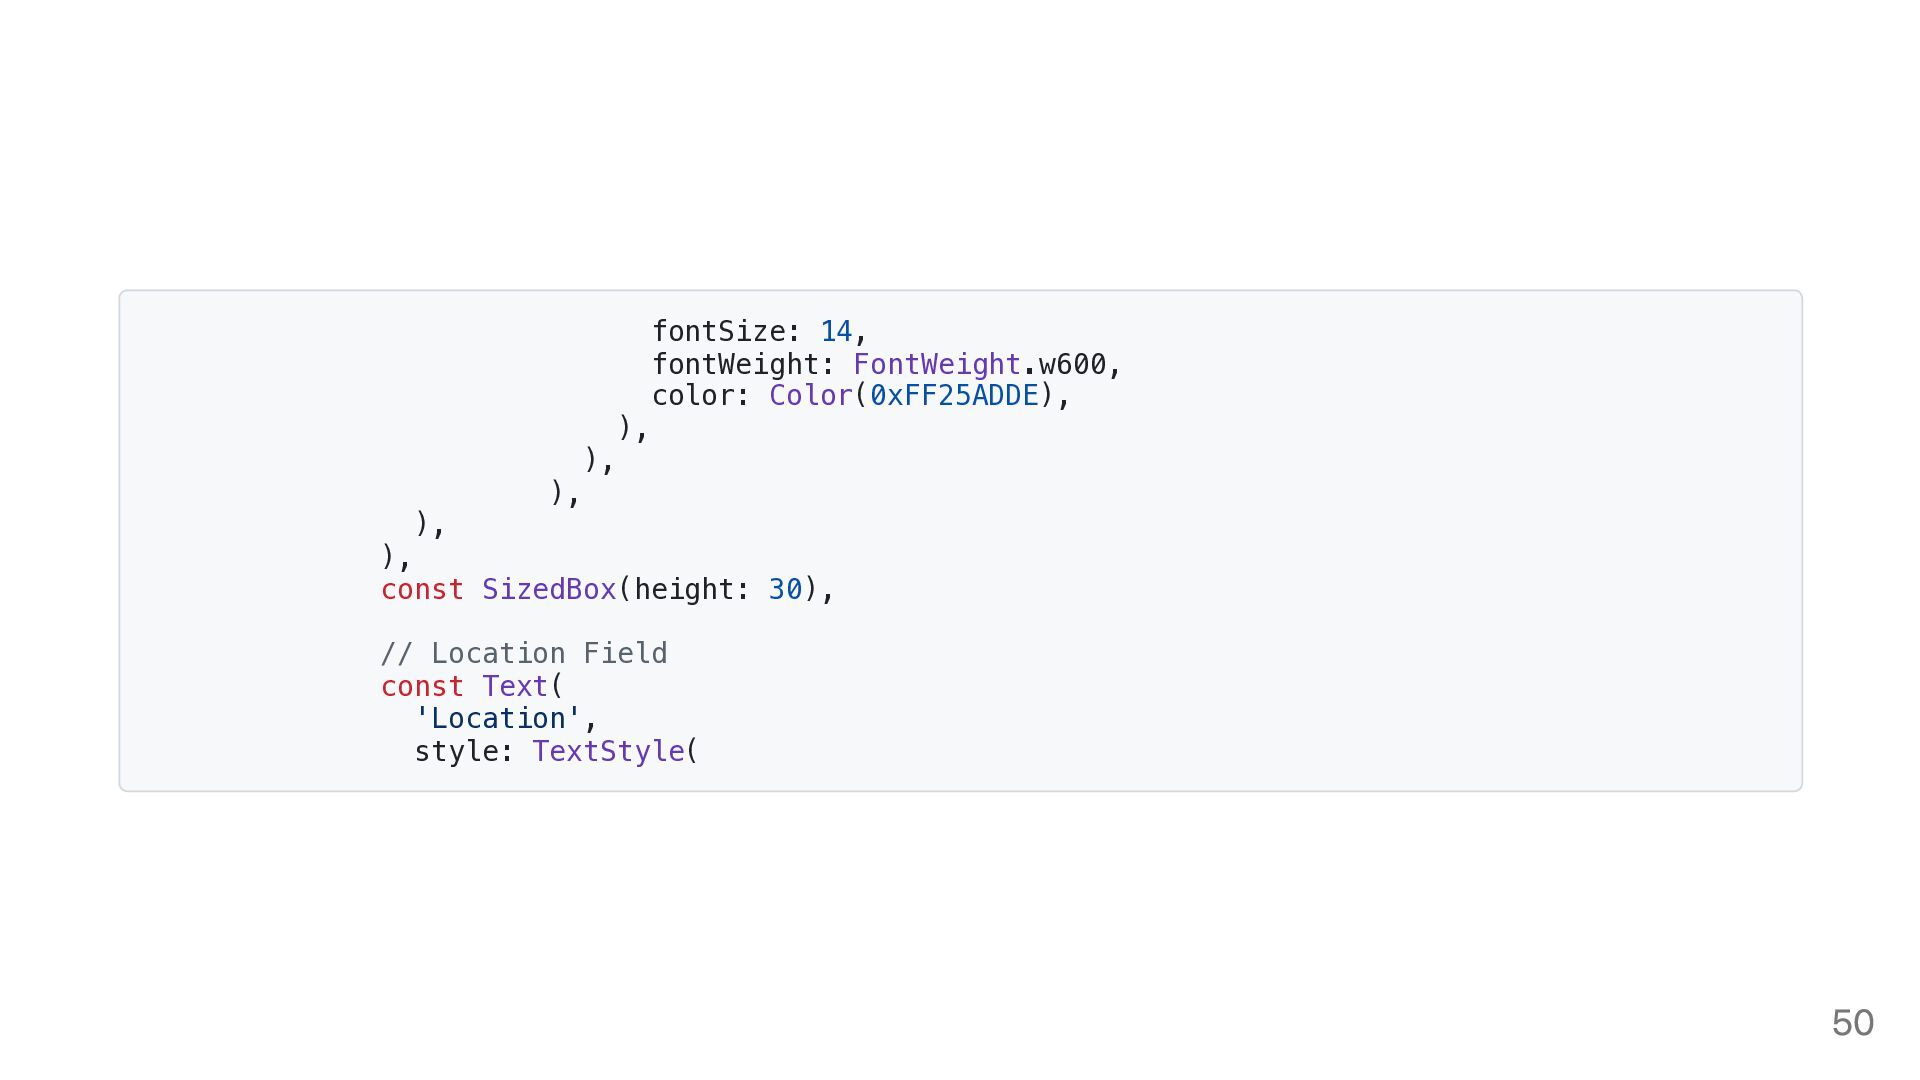
    ), const SizedBox(height: 30), // Location Field const Text( 'Location', style: TextStyle( 50
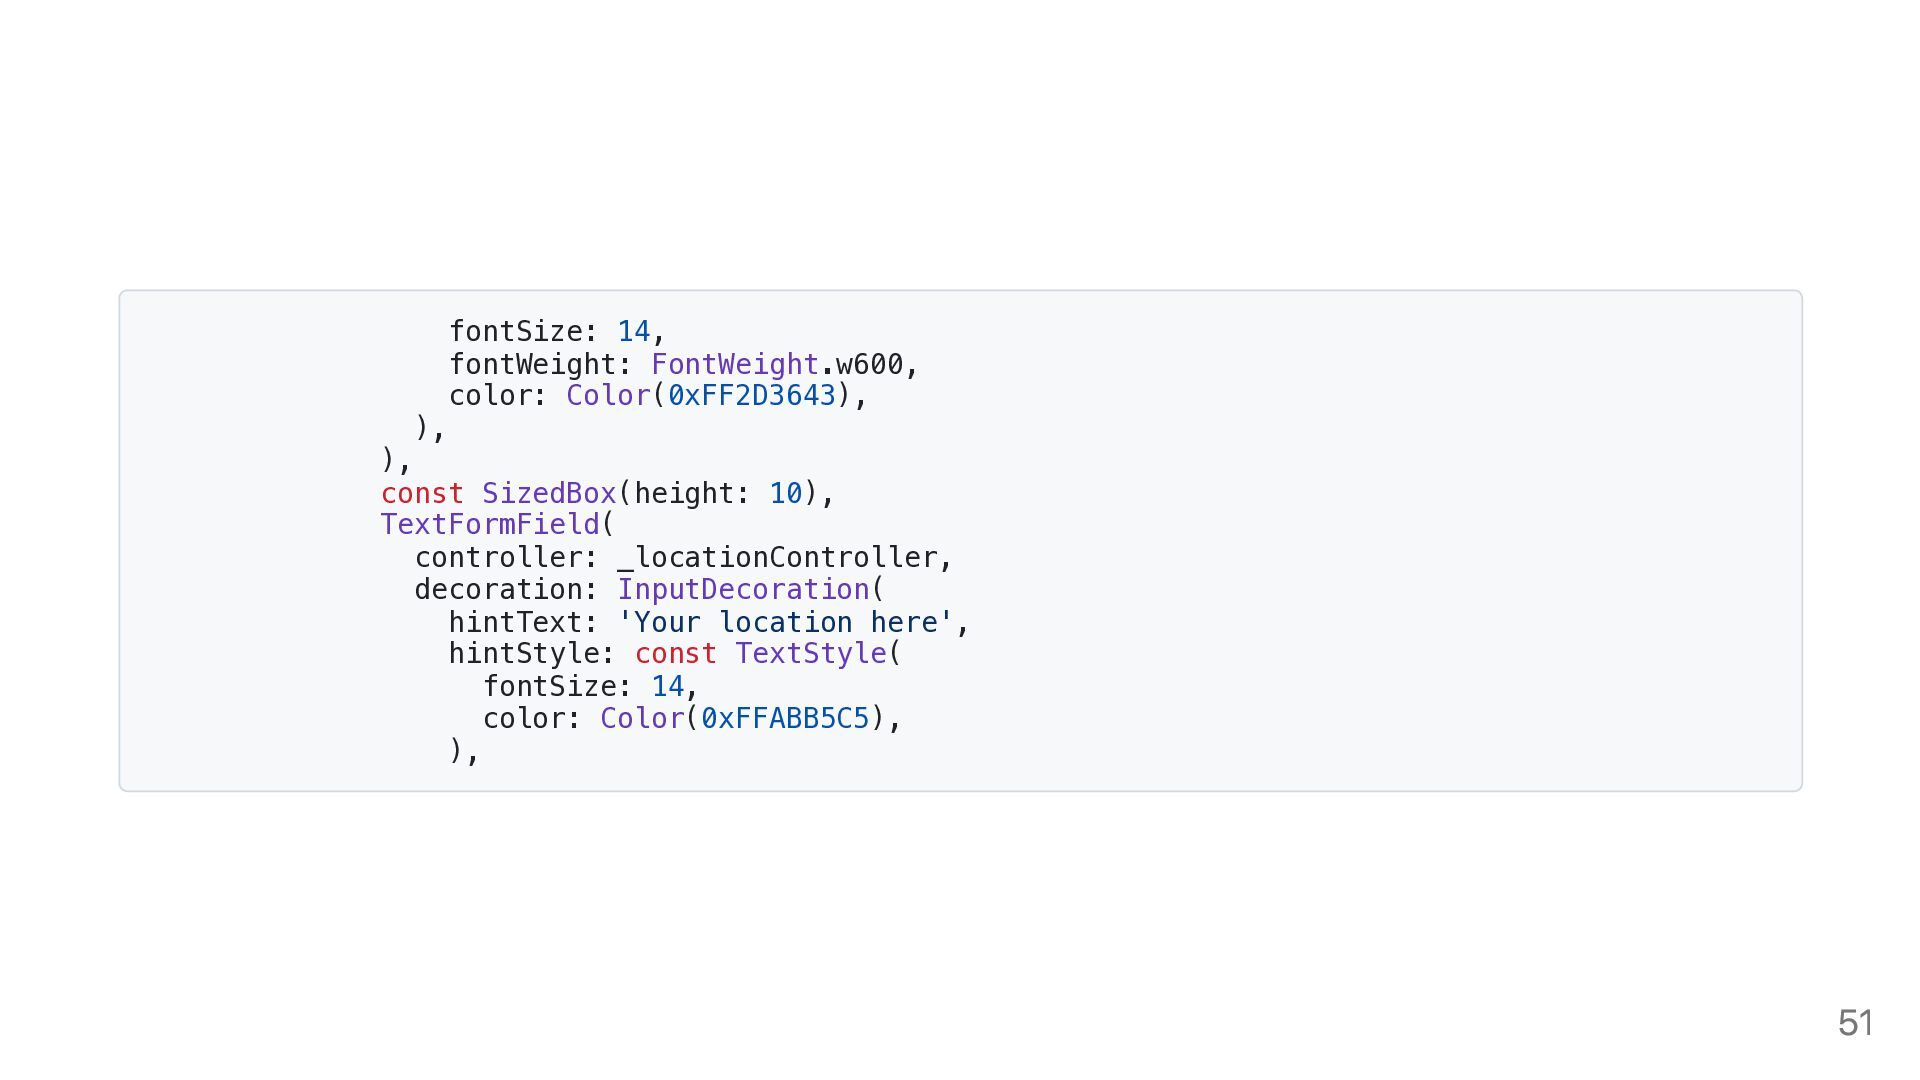
  45. fontSize: 14, fontWeight: FontWeight.w600, color: Color(0xFF2D3643), ), ), const SizedBox(height:

    10), TextFormField( controller: _locationController, decoration: InputDecoration( hintText: 'Your location here', hintStyle: const TextStyle( fontSize: 14, color: Color(0xFFABB5C5), ), 51
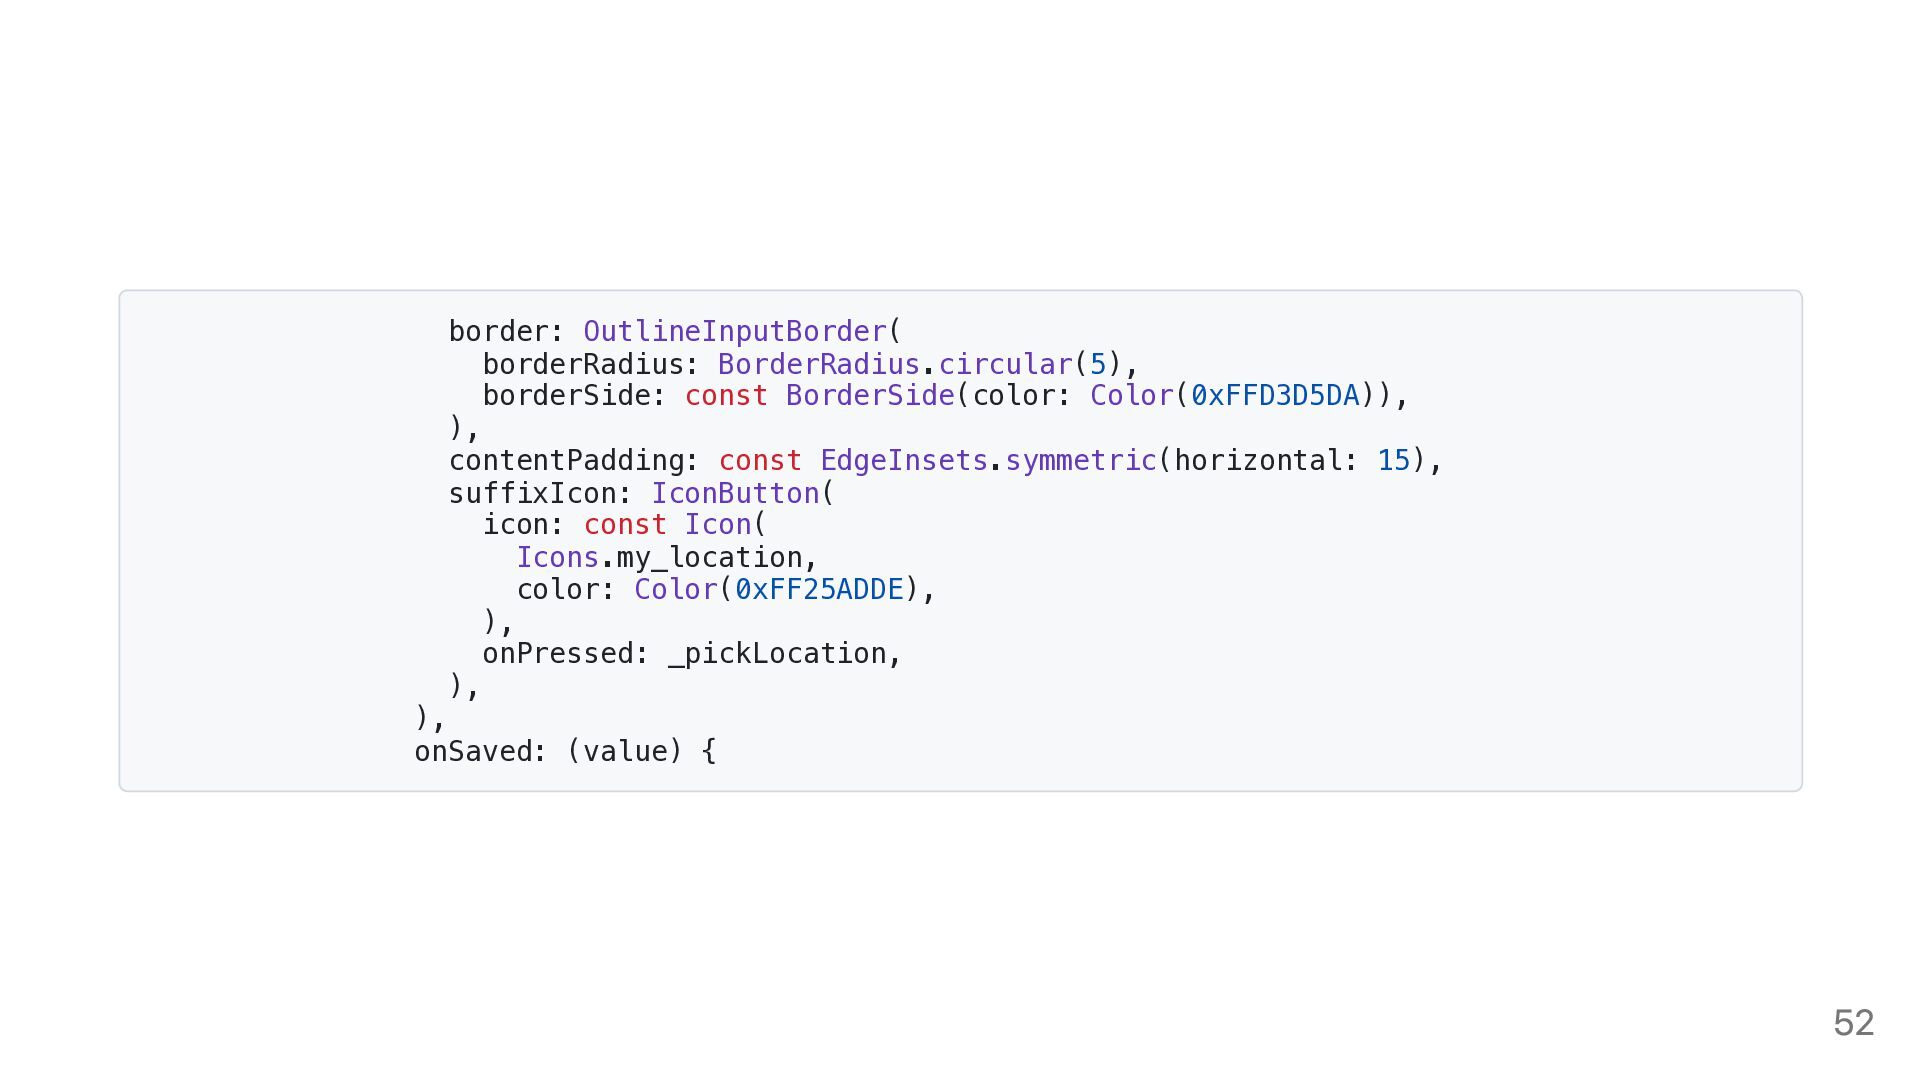
  46. border: OutlineInputBorder( borderRadius: BorderRadius.circular(5), borderSide: const BorderSide(color: Color(0xFFD3D5DA)), ), contentPadding:

    const EdgeInsets.symmetric(horizontal: 15), suffixIcon: IconButton( icon: const Icon( Icons.my_location, color: Color(0xFF25ADDE), ), onPressed: _pickLocation, ), ), onSaved: (value) { 52
  47. _formData['location'] = value ?? ''; }, validator: (value) { if

    (value == null || value.isEmpty) { return 'Please enter a location'; } return null; }, ), const SizedBox(height: 30), // Price Dropdown const Text( 53
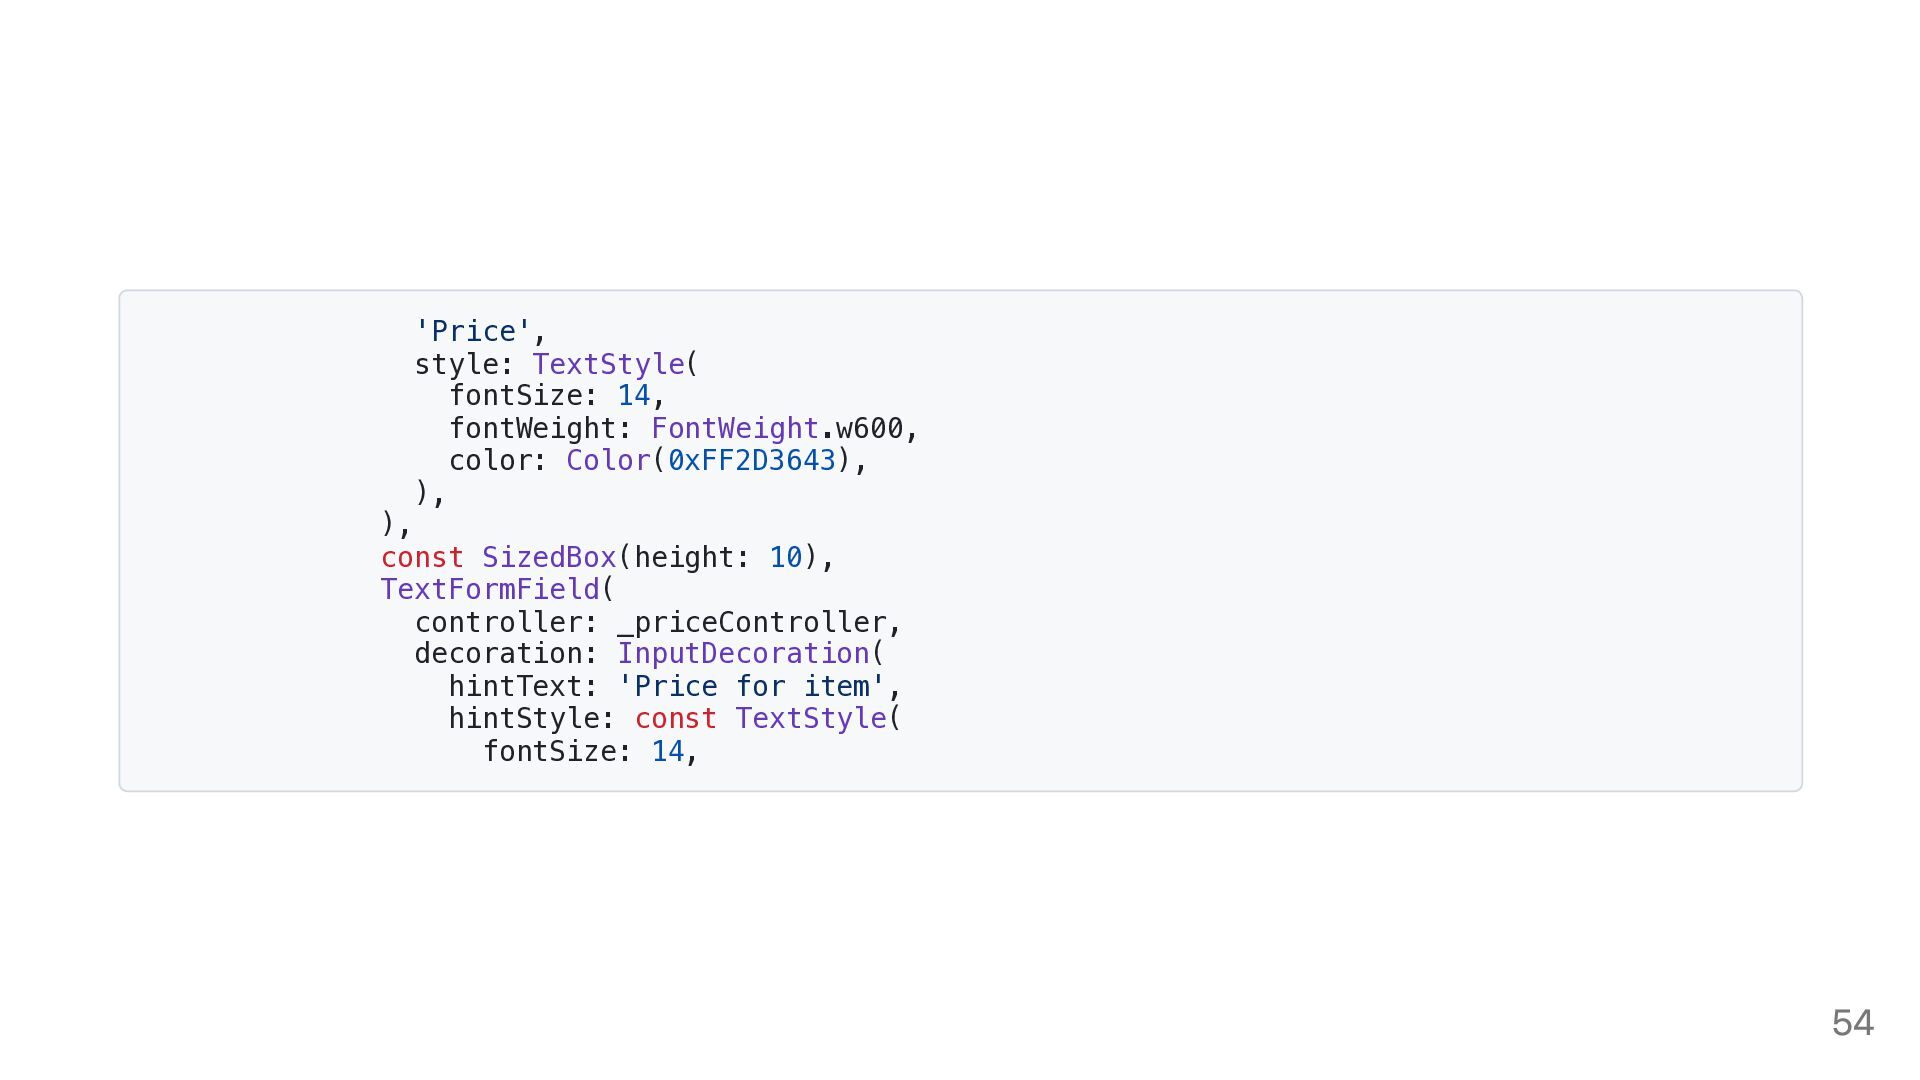
  48. 'Price', style: TextStyle( fontSize: 14, fontWeight: FontWeight.w600, color: Color(0xFF2D3643), ),

    ), const SizedBox(height: 10), TextFormField( controller: _priceController, decoration: InputDecoration( hintText: 'Price for item', hintStyle: const TextStyle( fontSize: 14, 54
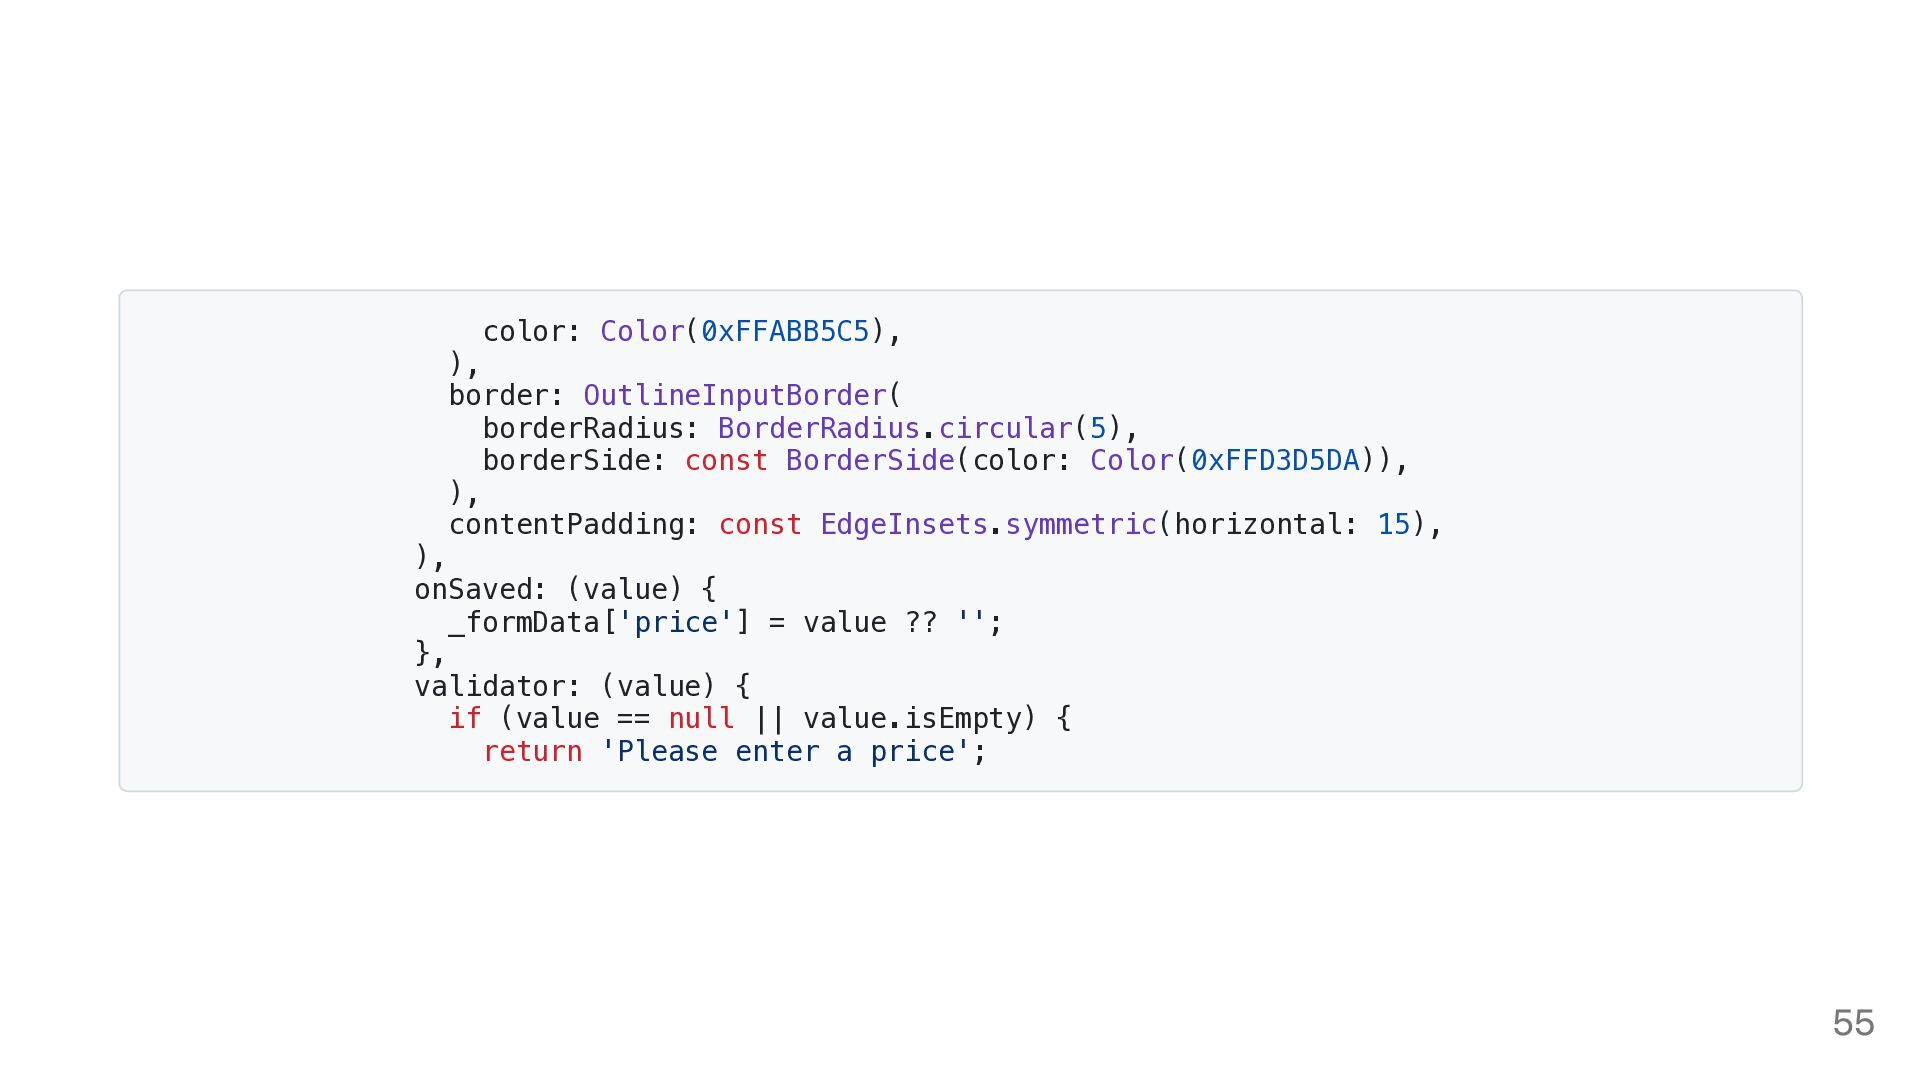
  49. color: Color(0xFFABB5C5), ), border: OutlineInputBorder( borderRadius: BorderRadius.circular(5), borderSide: const BorderSide(color:

    Color(0xFFD3D5DA)), ), contentPadding: const EdgeInsets.symmetric(horizontal: 15), ), onSaved: (value) { _formData['price'] = value ?? ''; }, validator: (value) { if (value == null || value.isEmpty) { return 'Please enter a price'; 55
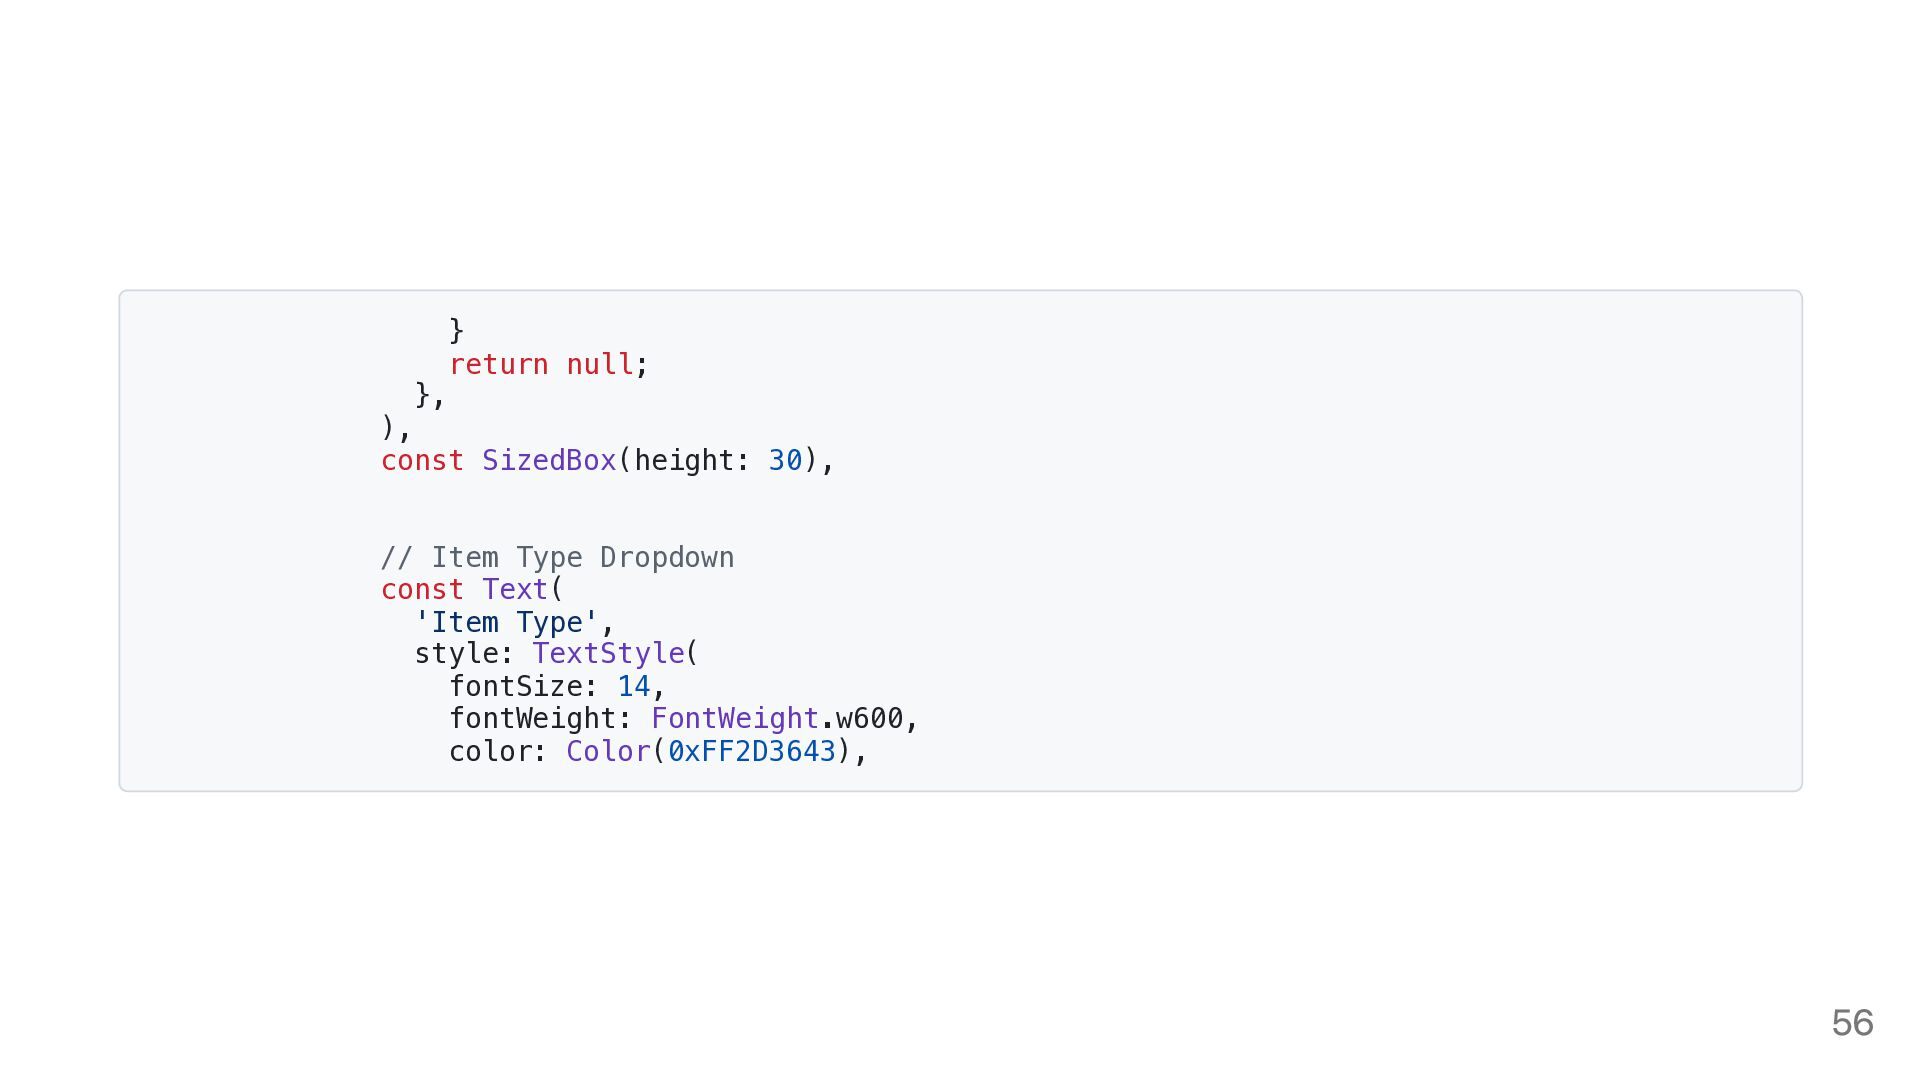
  50. } return null; }, ), const SizedBox(height: 30), // Item

    Type Dropdown const Text( 'Item Type', style: TextStyle( fontSize: 14, fontWeight: FontWeight.w600, color: Color(0xFF2D3643), 56
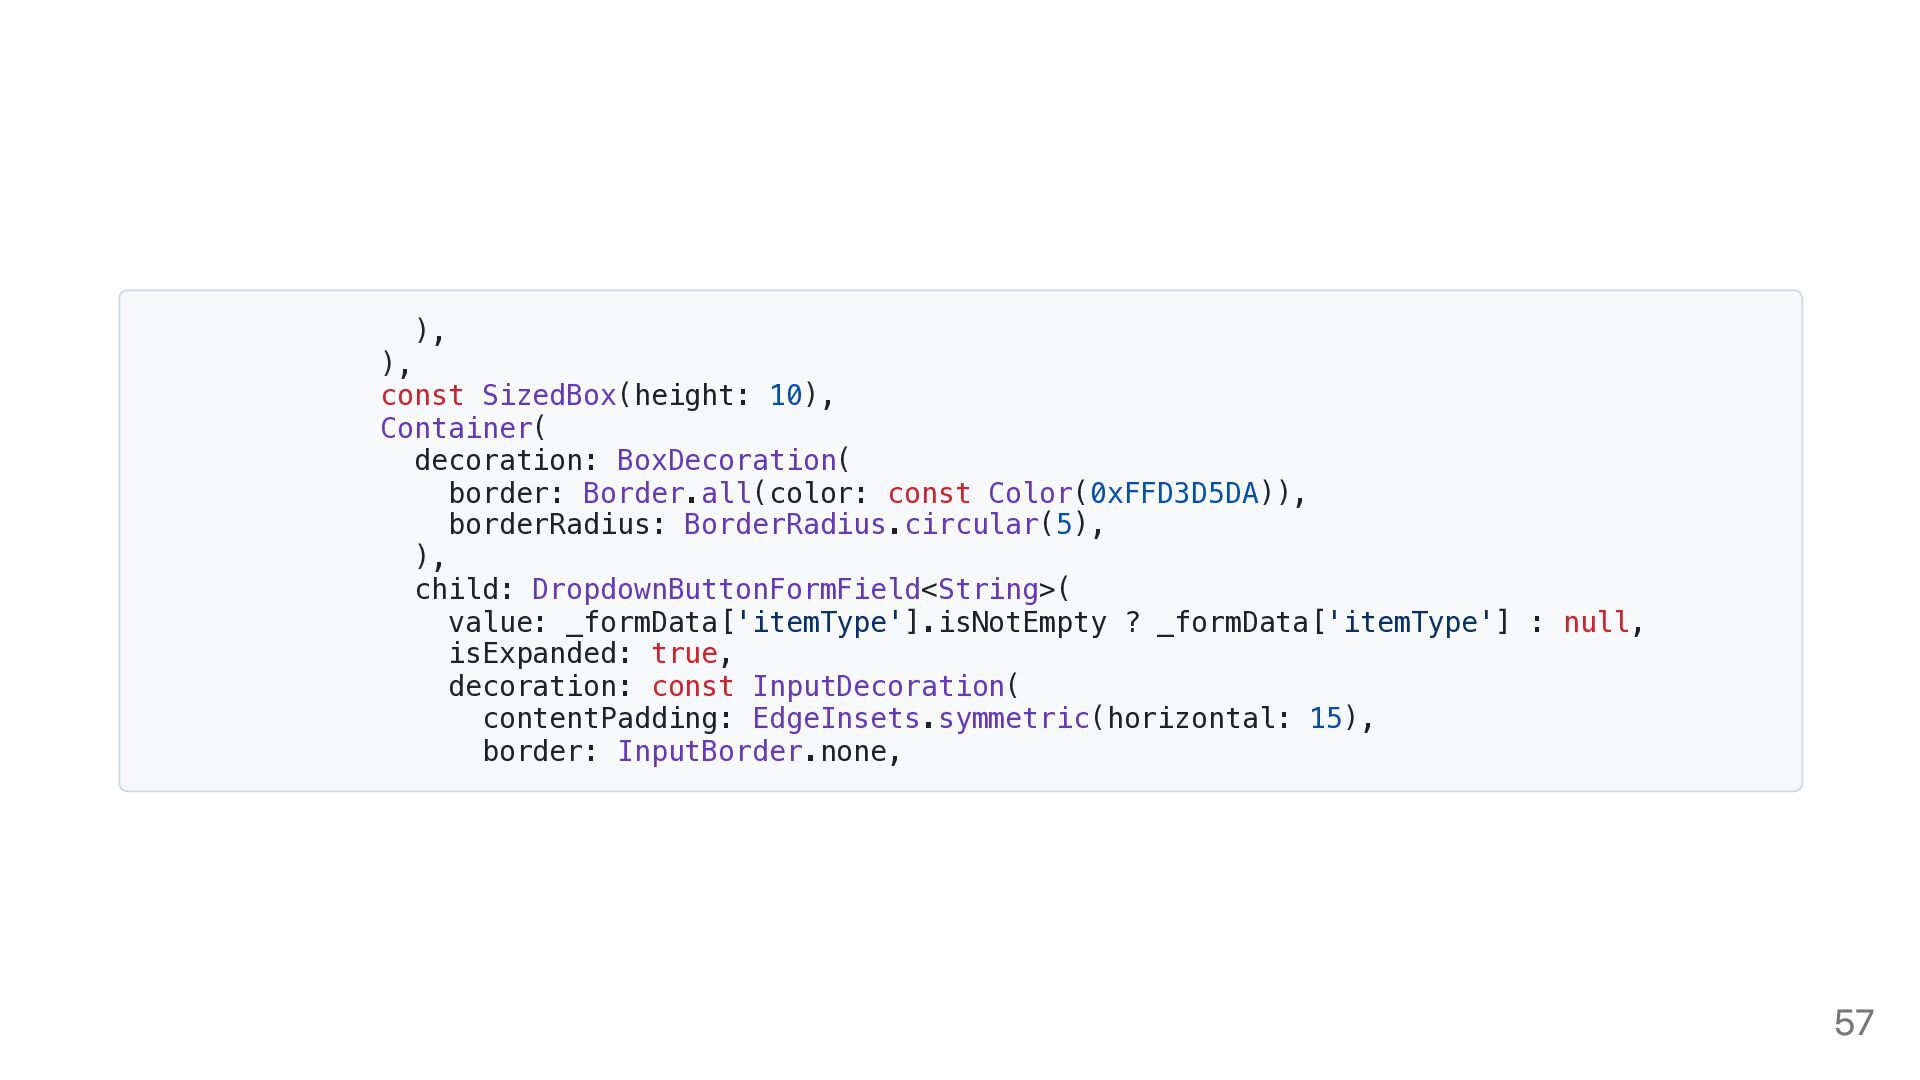
  51. ), ), const SizedBox(height: 10), Container( decoration: BoxDecoration( border: Border.all(color:

    const Color(0xFFD3D5DA)), borderRadius: BorderRadius.circular(5), ), child: DropdownButtonFormField<String>( value: _formData['itemType'].isNotEmpty ? _formData['itemType'] : null, isExpanded: true, decoration: const InputDecoration( contentPadding: EdgeInsets.symmetric(horizontal: 15), border: InputBorder.none, 57
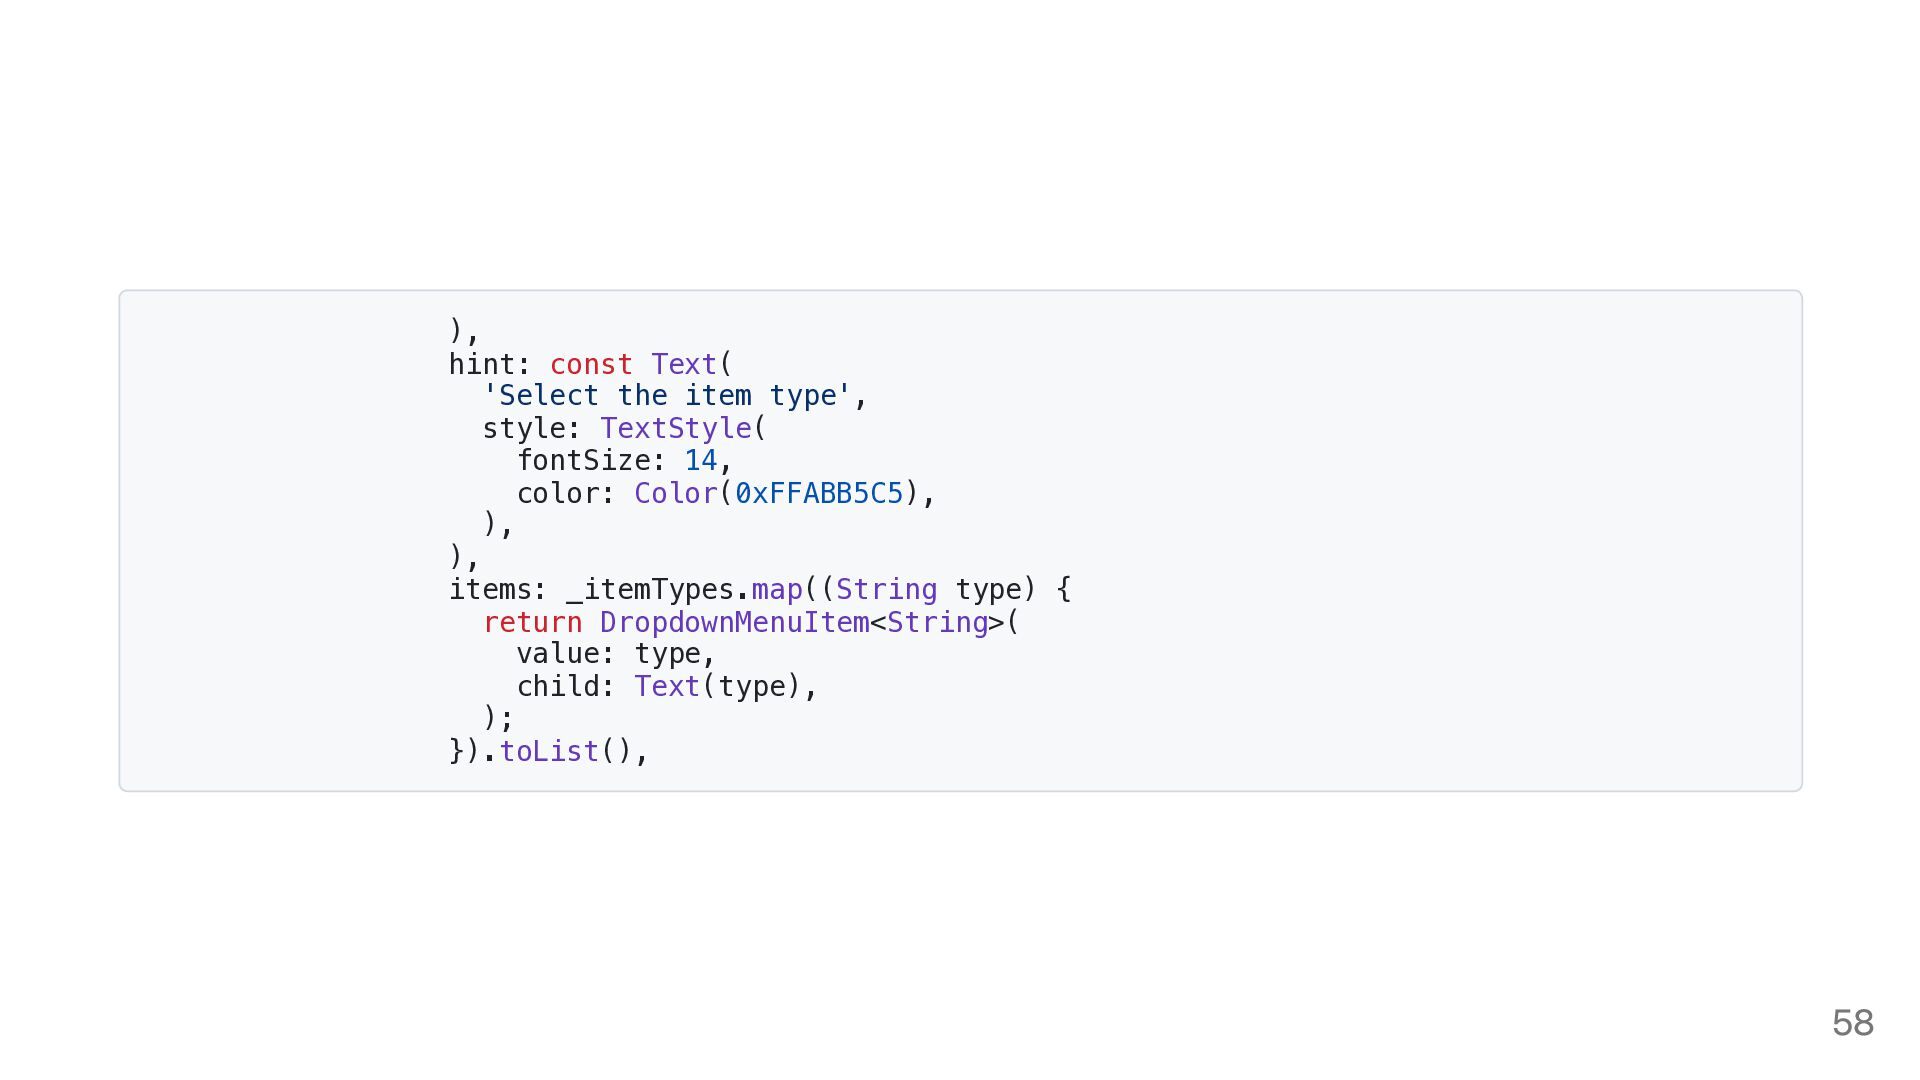
  52. ), hint: const Text( 'Select the item type', style: TextStyle(

    fontSize: 14, color: Color(0xFFABB5C5), ), ), items: _itemTypes.map((String type) { return DropdownMenuItem<String>( value: type, child: Text(type), ); }).toList(), 58
  53. onChanged: (String? newValue) { setState(() { _formData['itemType'] = newValue!; });

    }, ), ), const SizedBox(height: 30), // Title Field const Text( 'Title', style: TextStyle( 59
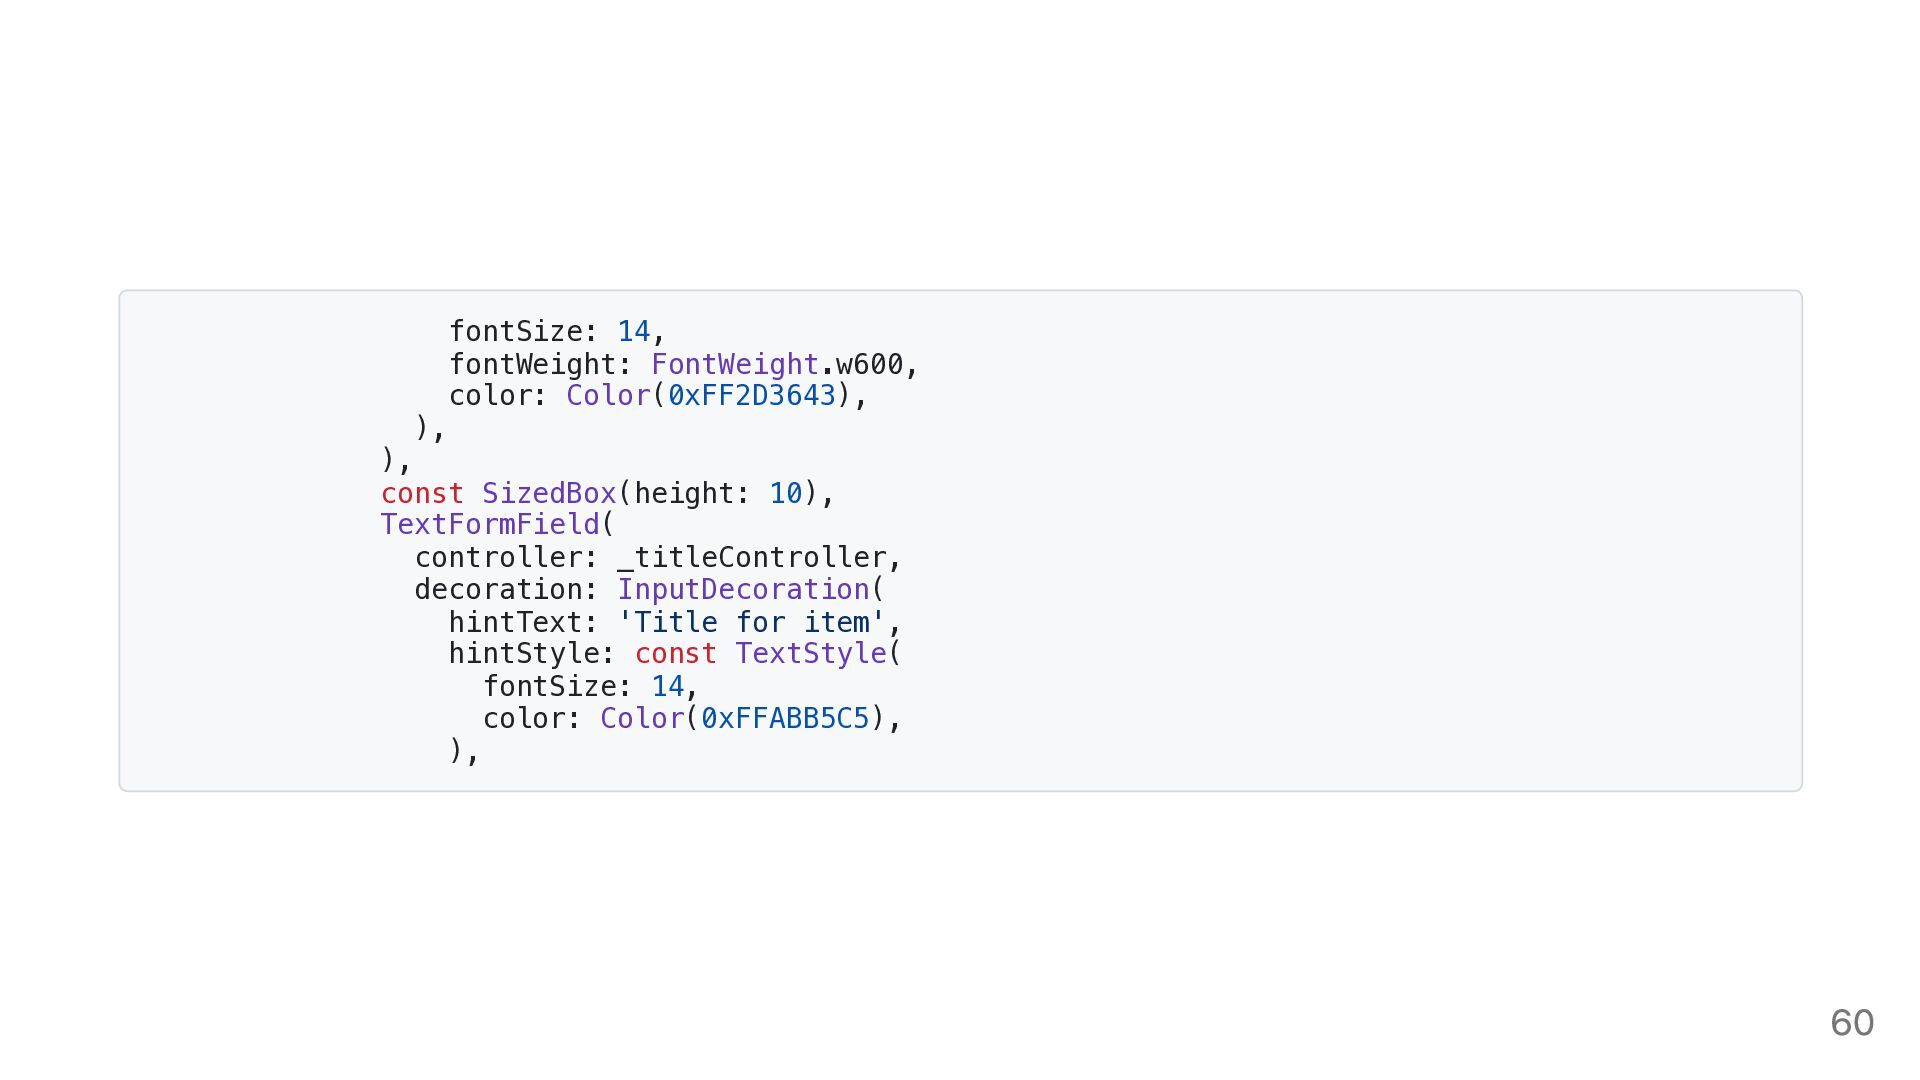
  54. fontSize: 14, fontWeight: FontWeight.w600, color: Color(0xFF2D3643), ), ), const SizedBox(height:

    10), TextFormField( controller: _titleController, decoration: InputDecoration( hintText: 'Title for item', hintStyle: const TextStyle( fontSize: 14, color: Color(0xFFABB5C5), ), 60
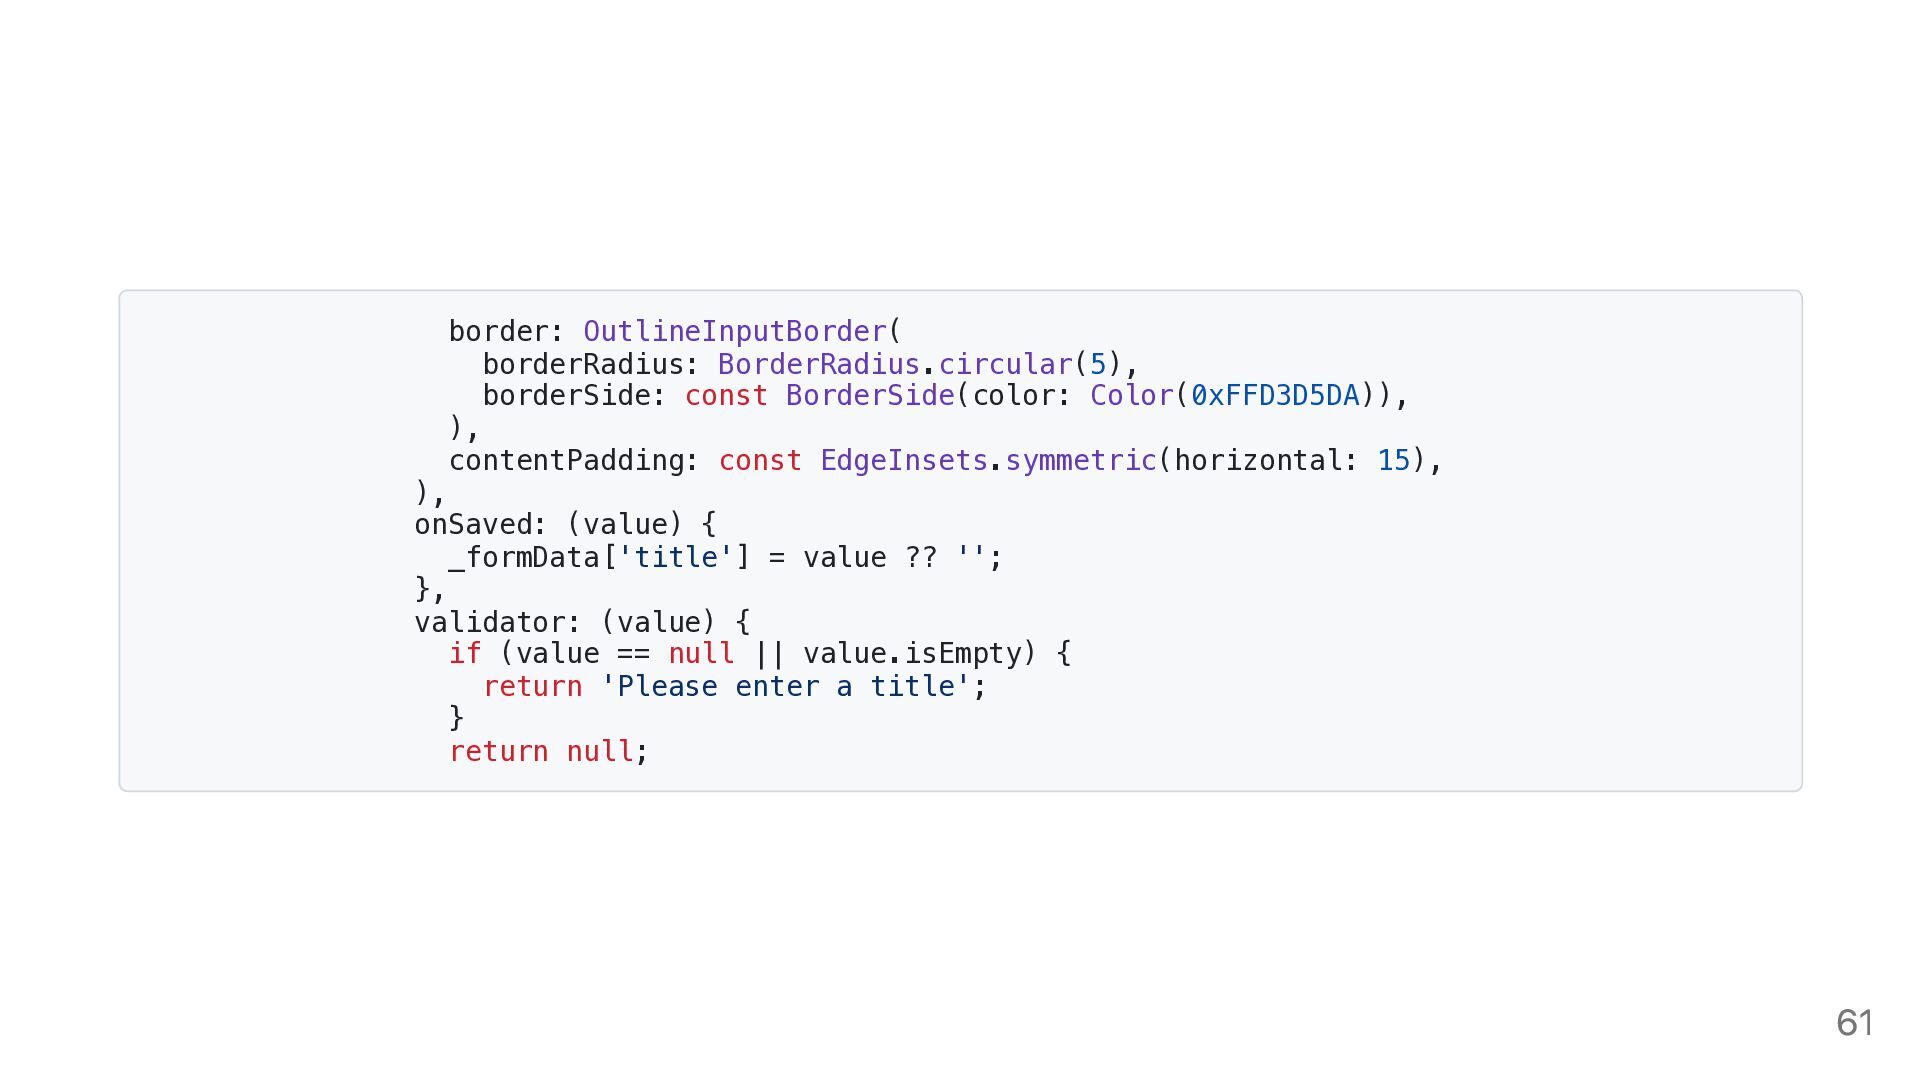
  55. border: OutlineInputBorder( borderRadius: BorderRadius.circular(5), borderSide: const BorderSide(color: Color(0xFFD3D5DA)), ), contentPadding:

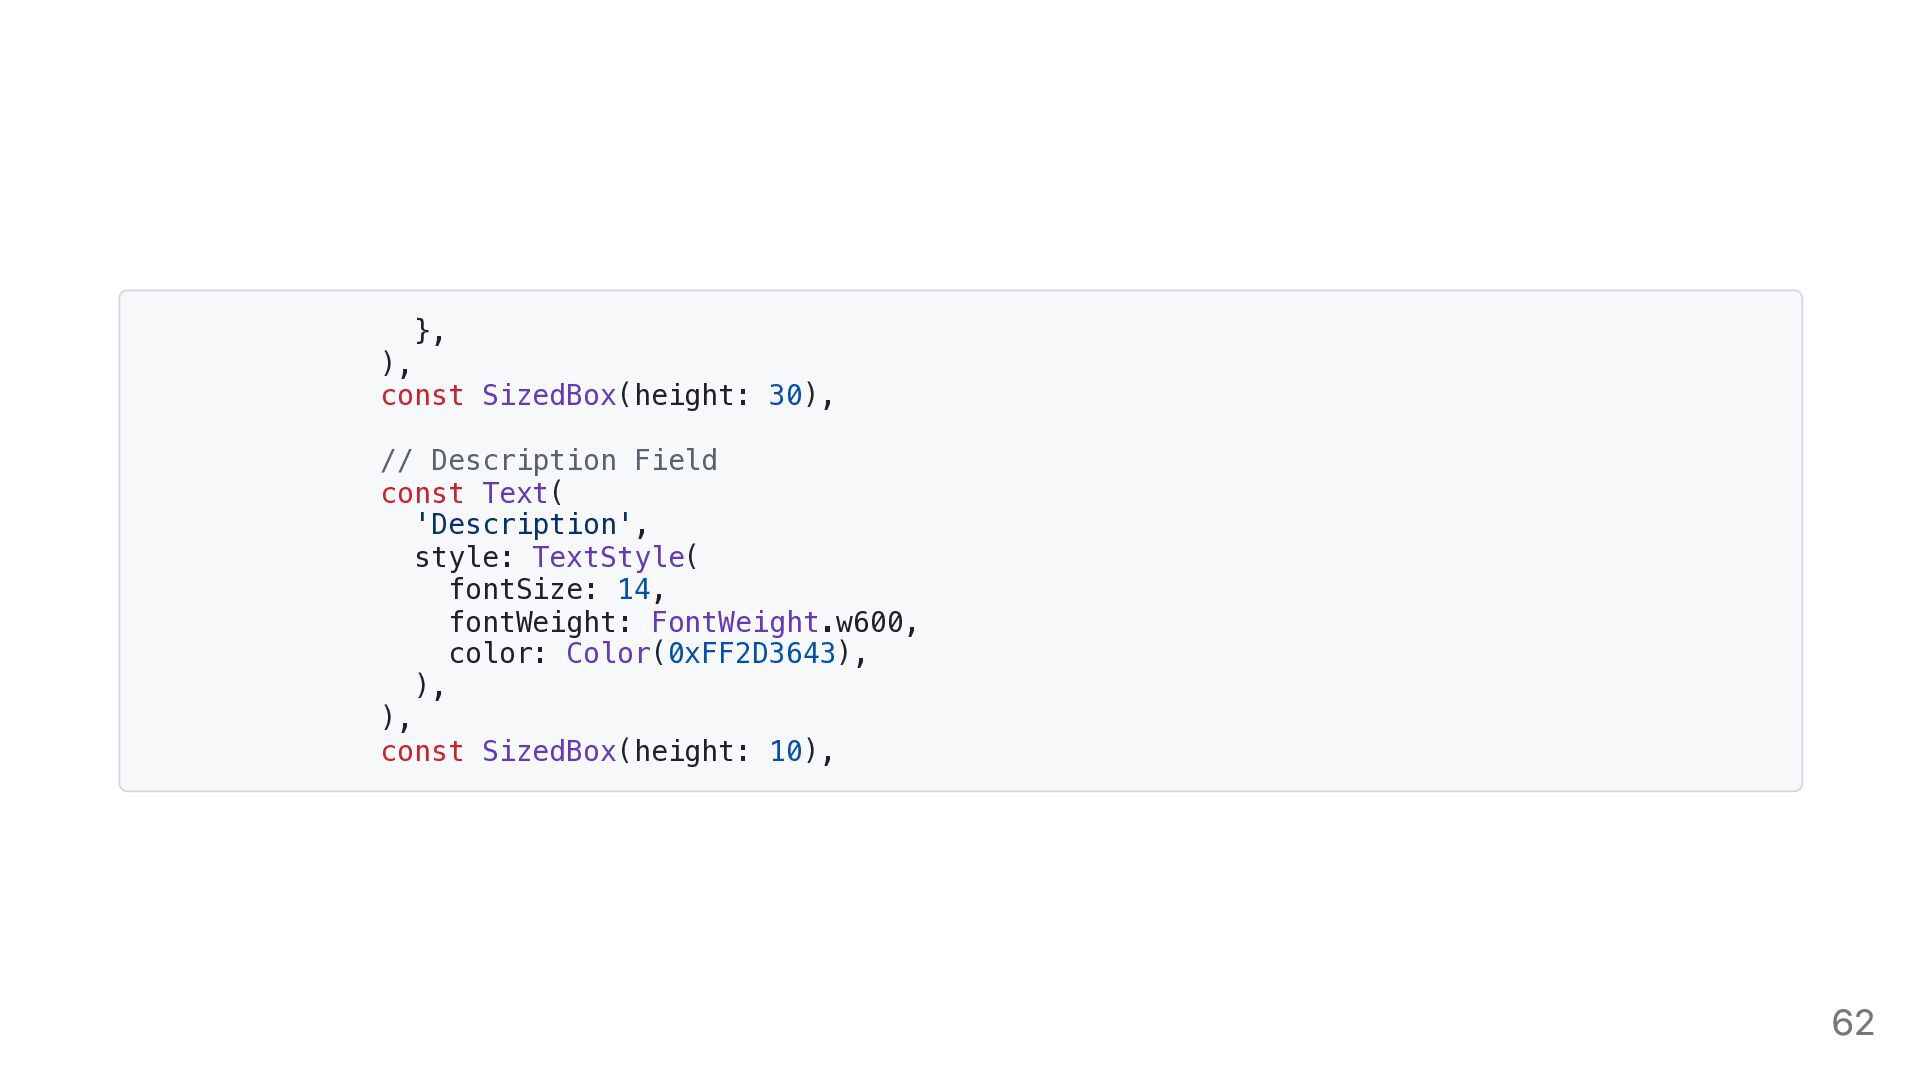
    const EdgeInsets.symmetric(horizontal: 15), ), onSaved: (value) { _formData['title'] = value ?? ''; }, validator: (value) { if (value == null || value.isEmpty) { return 'Please enter a title'; } return null; 61
  56. }, ), const SizedBox(height: 30), // Description Field const Text(

    'Description', style: TextStyle( fontSize: 14, fontWeight: FontWeight.w600, color: Color(0xFF2D3643), ), ), const SizedBox(height: 10), 62
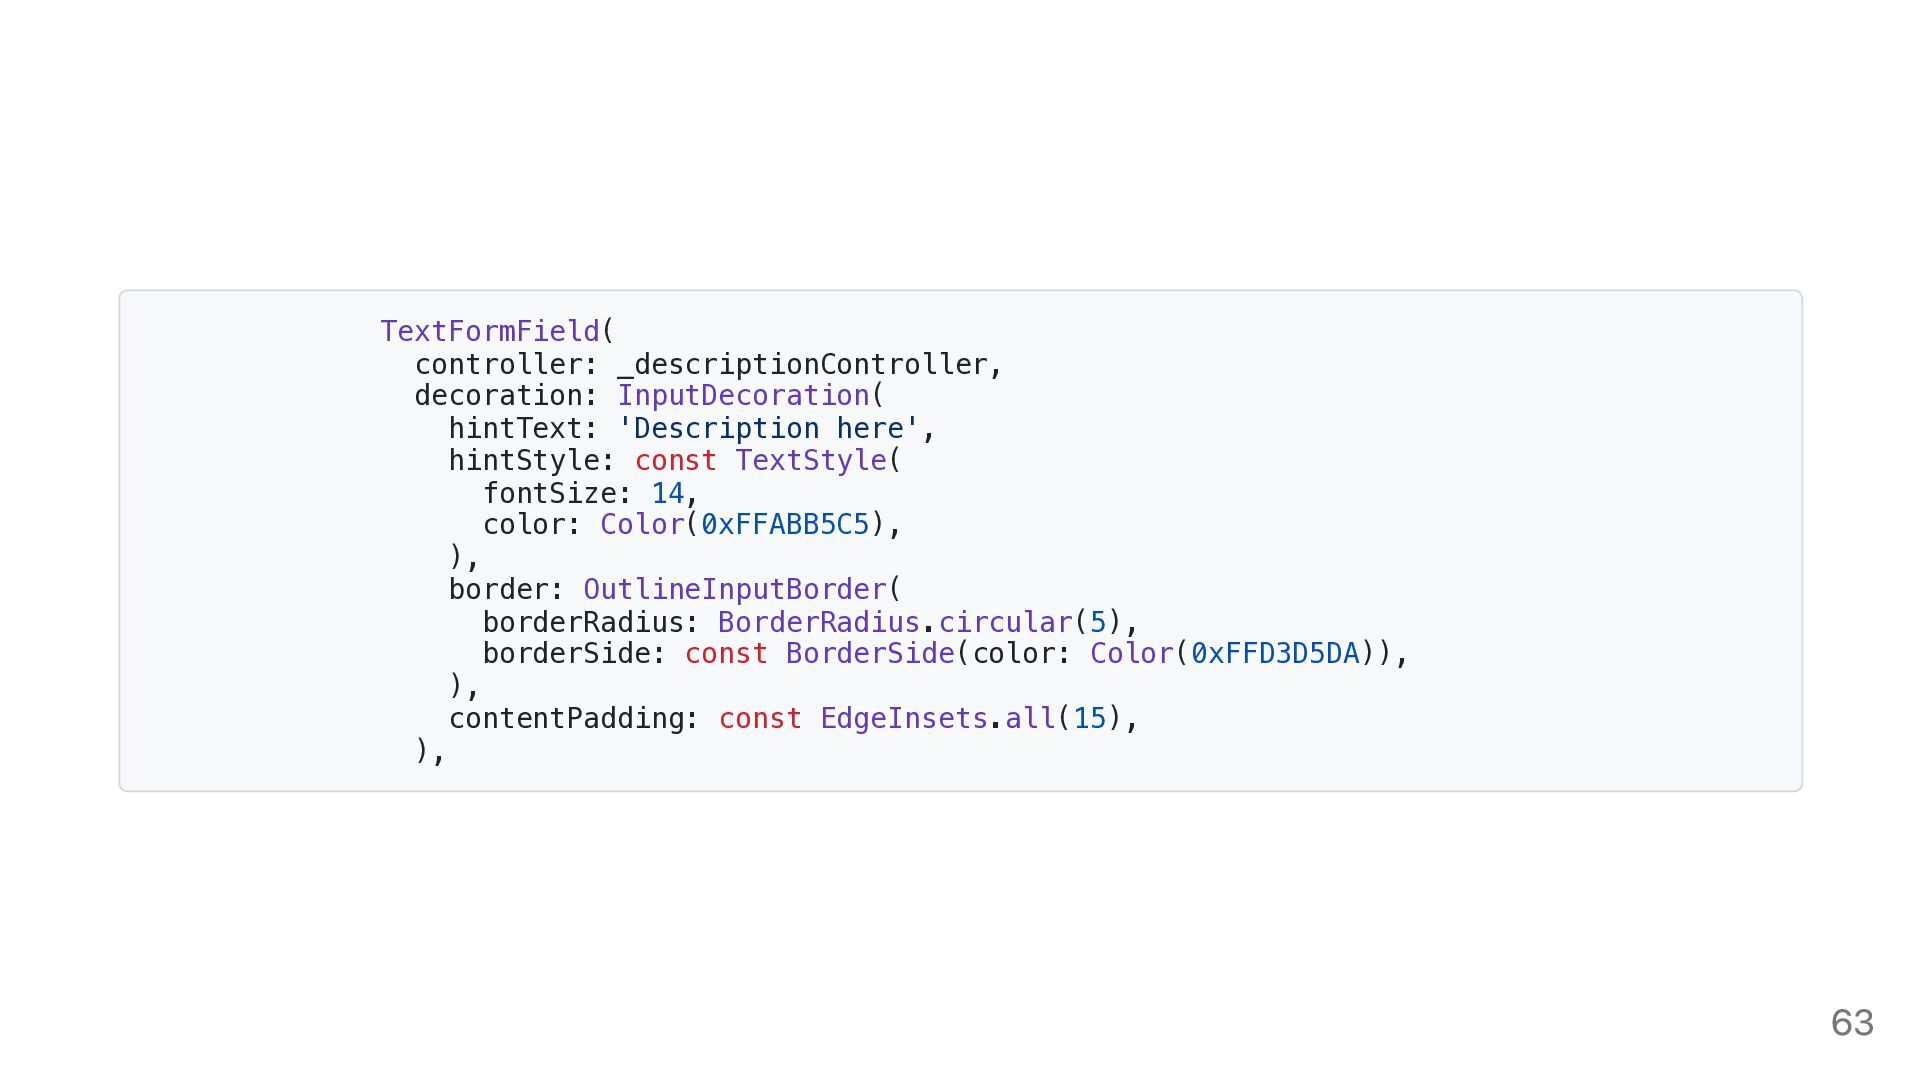
  57. TextFormField( controller: _descriptionController, decoration: InputDecoration( hintText: 'Description here', hintStyle: const

    TextStyle( fontSize: 14, color: Color(0xFFABB5C5), ), border: OutlineInputBorder( borderRadius: BorderRadius.circular(5), borderSide: const BorderSide(color: Color(0xFFD3D5DA)), ), contentPadding: const EdgeInsets.all(15), ), 63
  58. maxLines: 10, onSaved: (value) { _formData['description'] = value ?? '';

    }, validator: (value) { if (value == null || value.isEmpty) { return 'Please enter a description'; } return null; }, ), const SizedBox(height: 30), // Additional Features 64
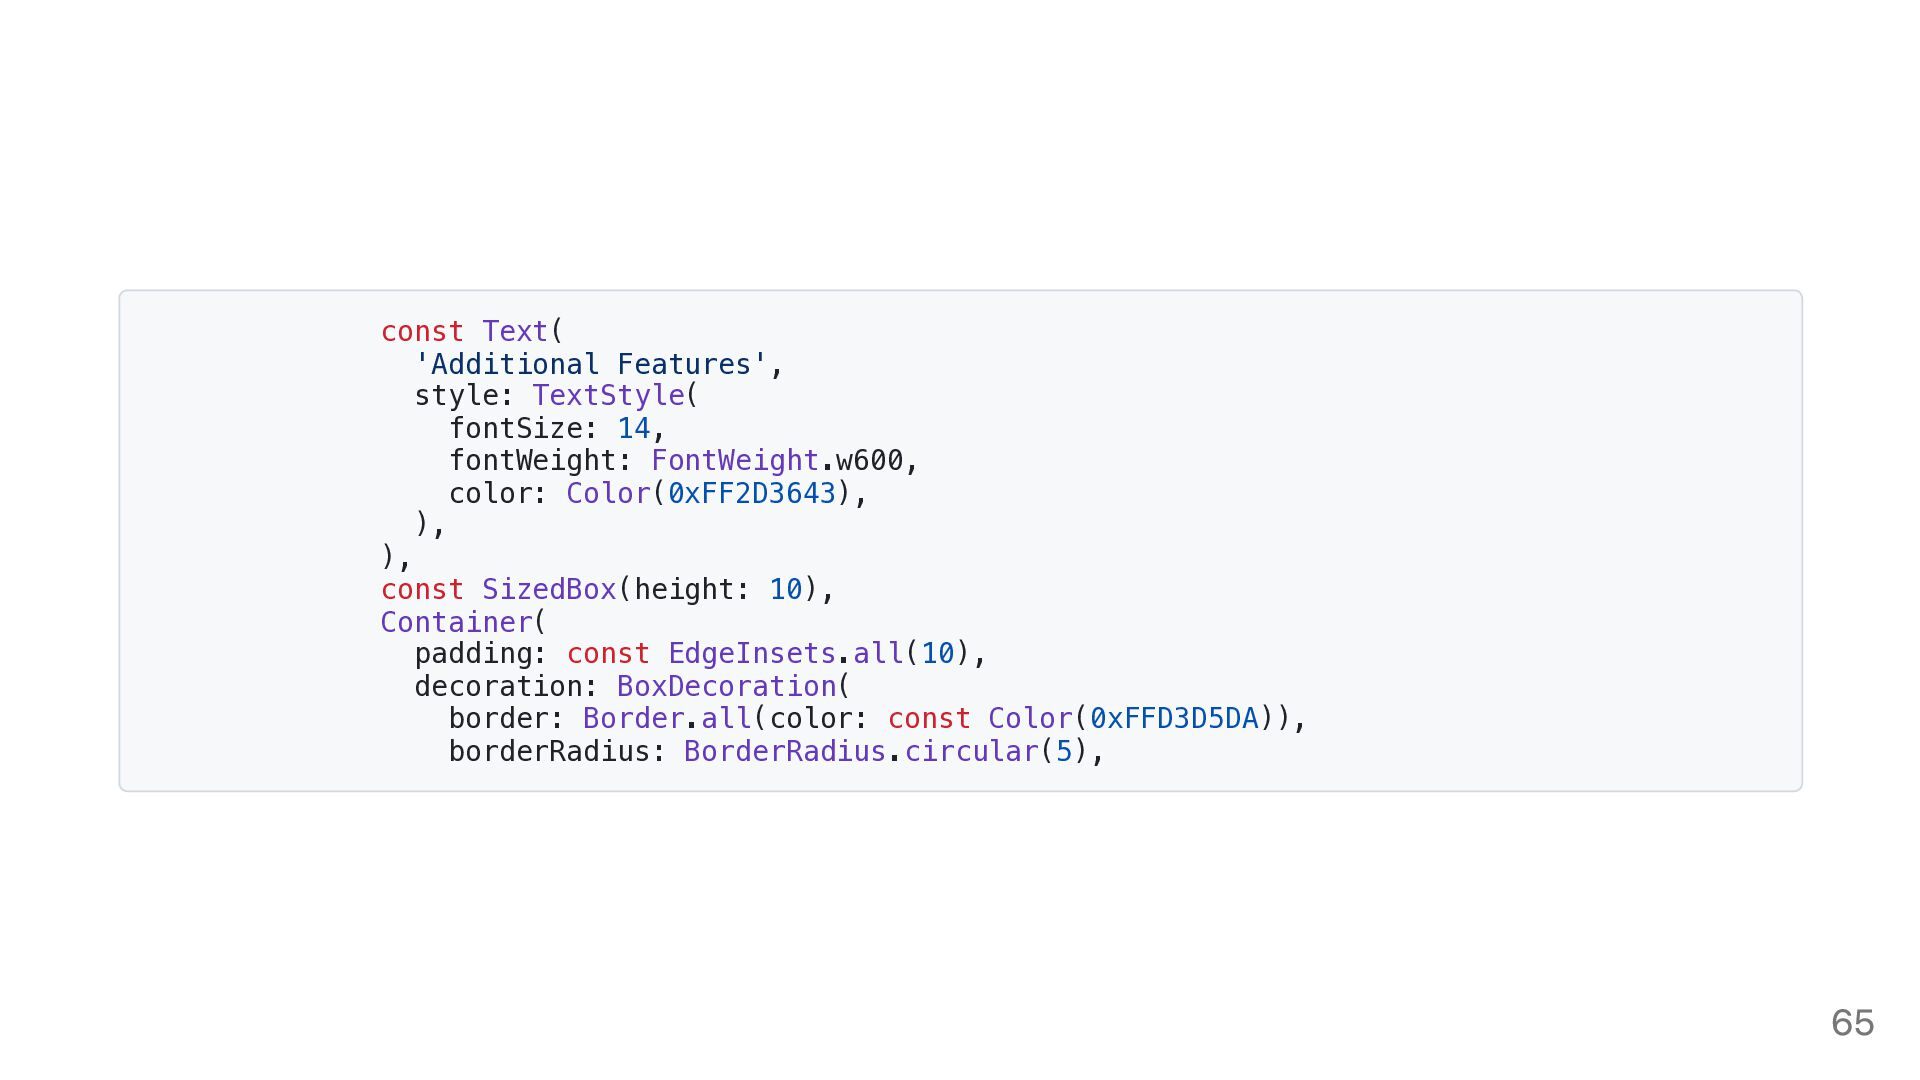
  59. const Text( 'Additional Features', style: TextStyle( fontSize: 14, fontWeight: FontWeight.w600,

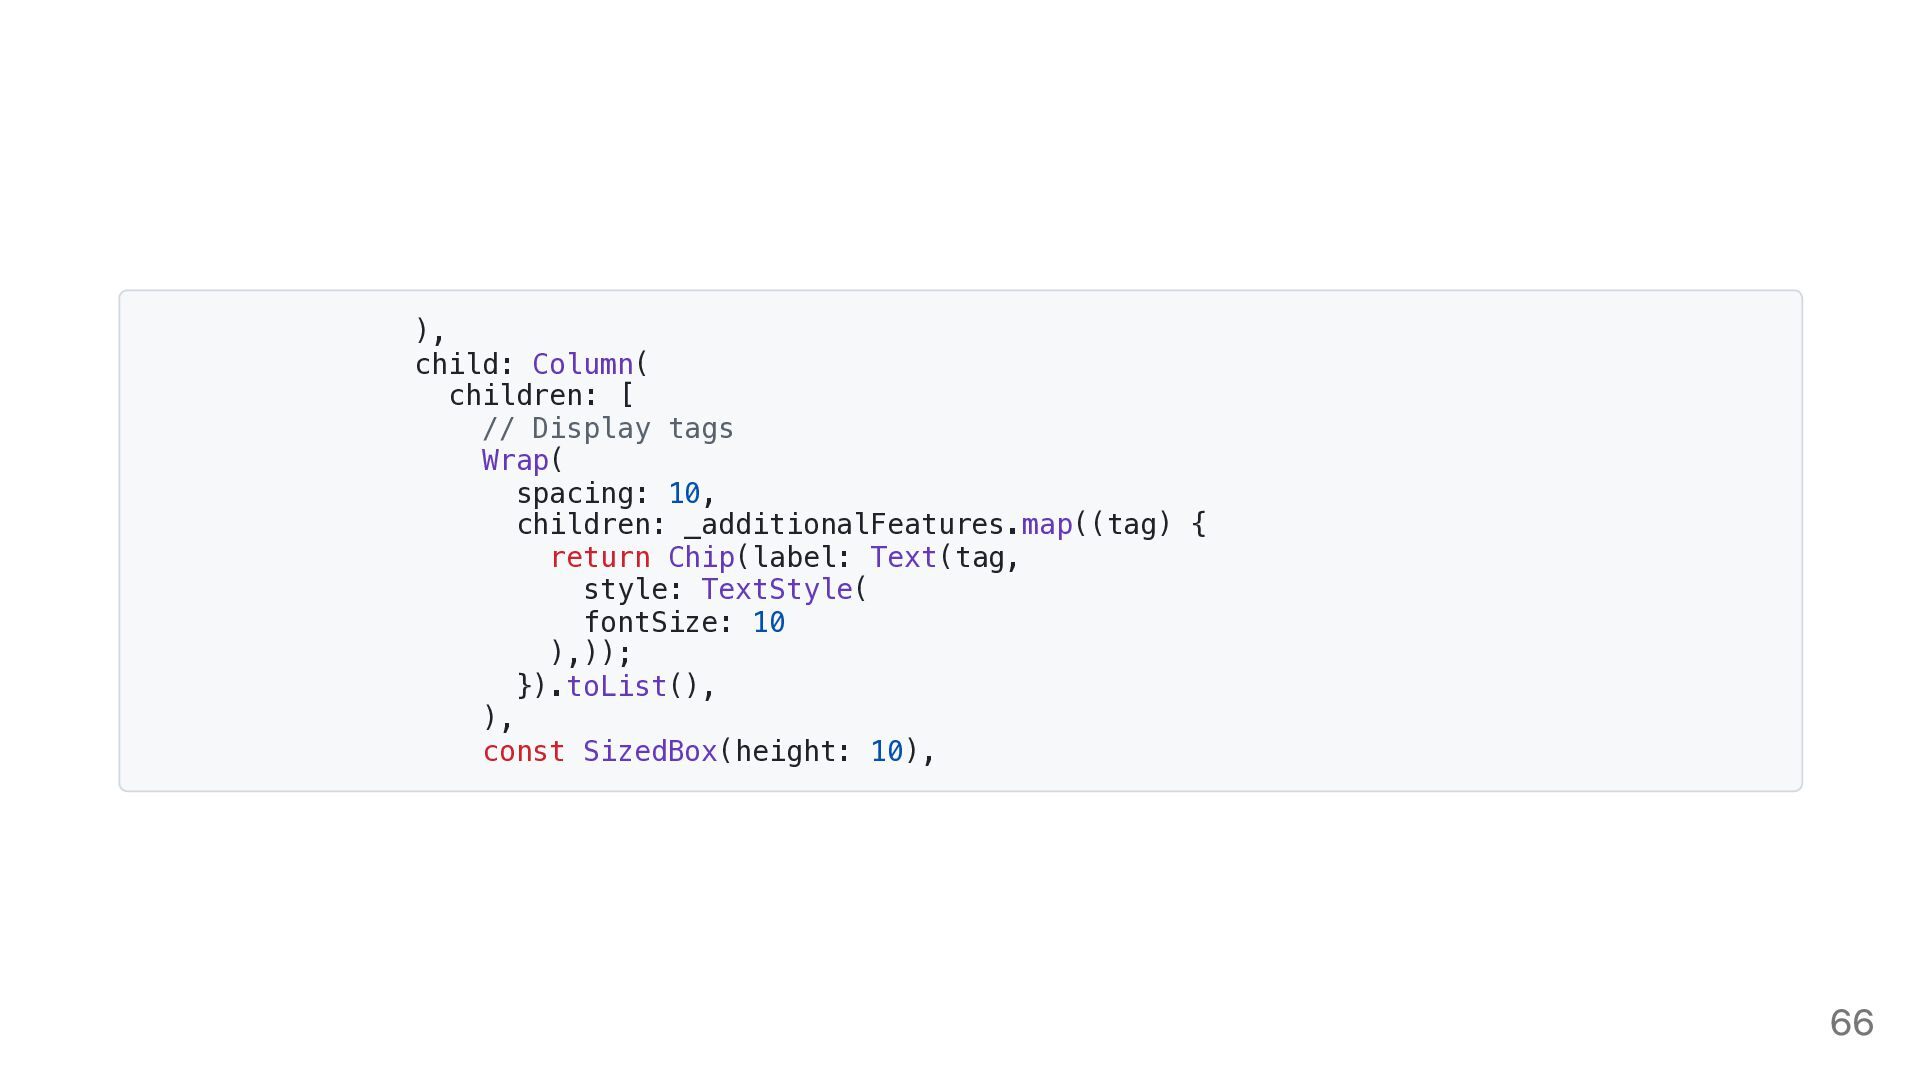
    color: Color(0xFF2D3643), ), ), const SizedBox(height: 10), Container( padding: const EdgeInsets.all(10), decoration: BoxDecoration( border: Border.all(color: const Color(0xFFD3D5DA)), borderRadius: BorderRadius.circular(5), 65
  60. ), child: Column( children: [ // Display tags Wrap( spacing:

    10, children: _additionalFeatures.map((tag) { return Chip(label: Text(tag, style: TextStyle( fontSize: 10 ),)); }).toList(), ), const SizedBox(height: 10), 66
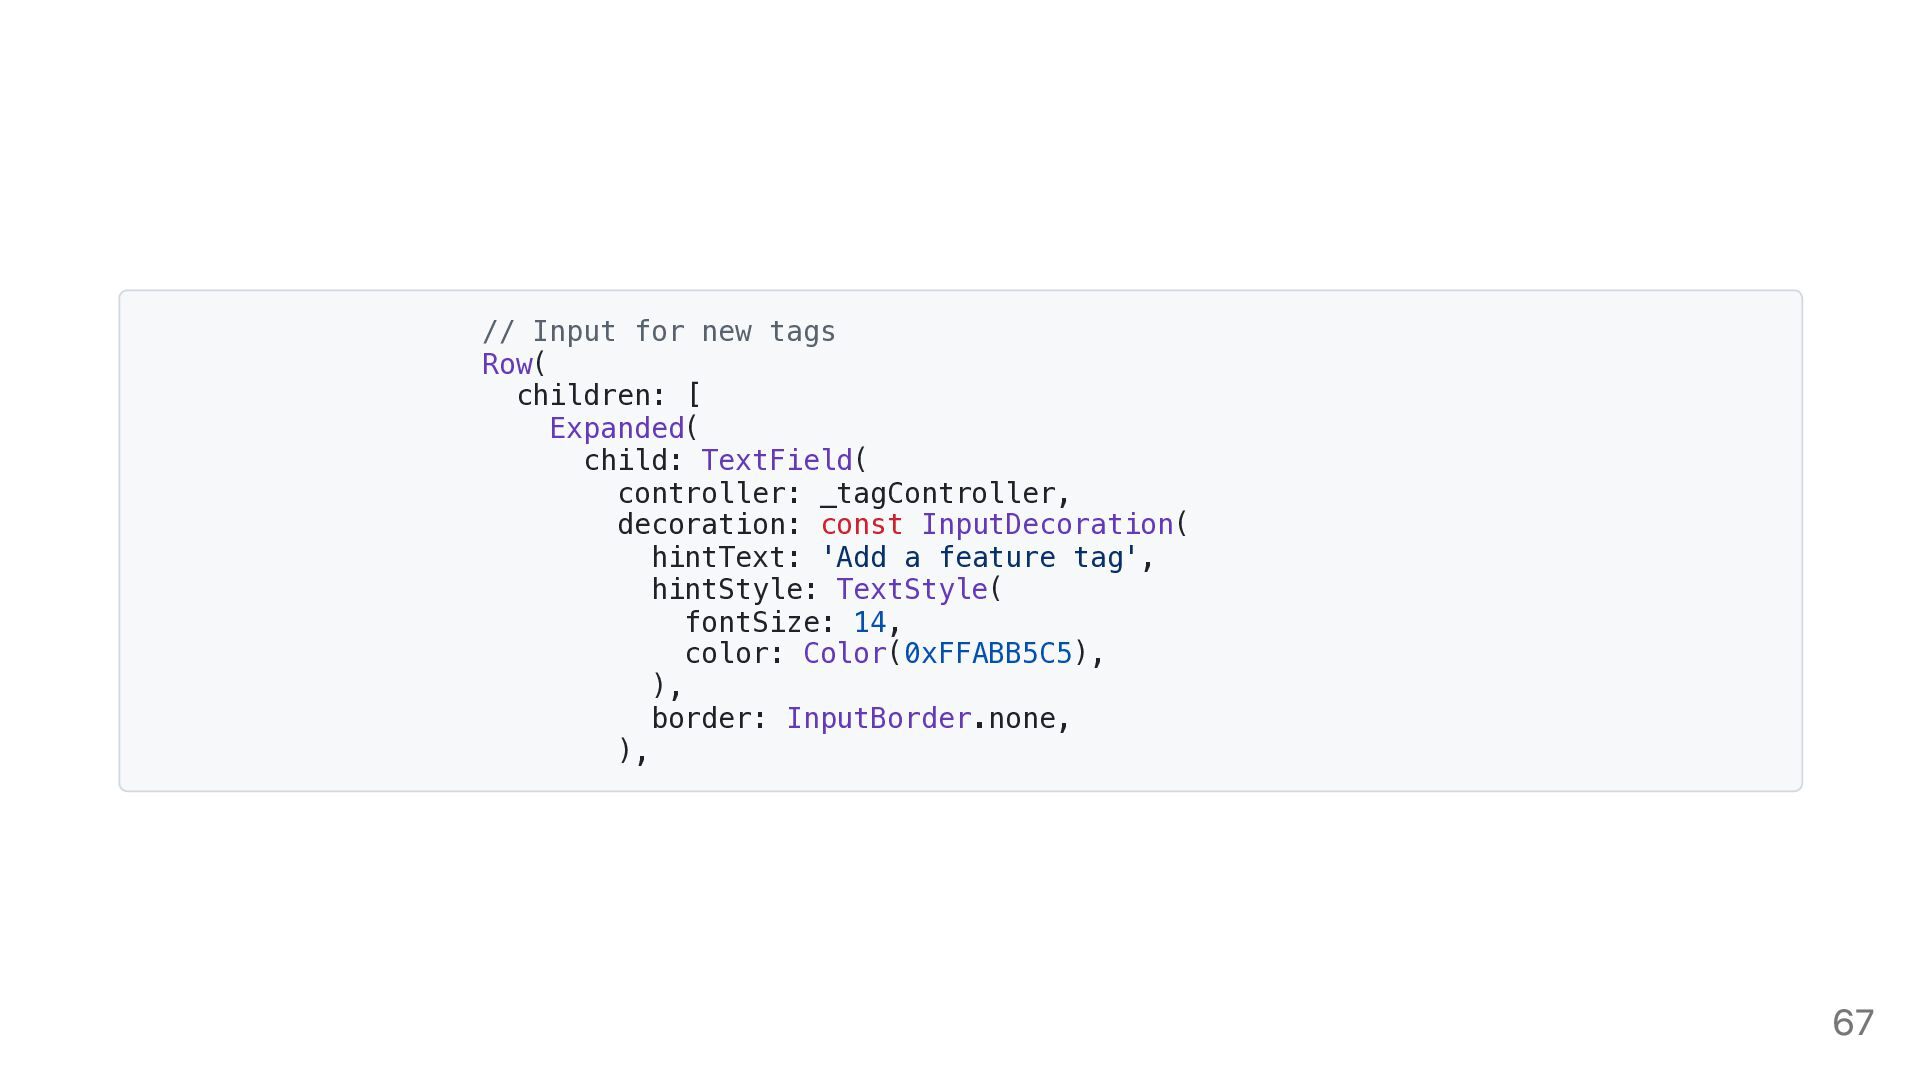
  61. // Input for new tags Row( children: [ Expanded( child:

    TextField( controller: _tagController, decoration: const InputDecoration( hintText: 'Add a feature tag', hintStyle: TextStyle( fontSize: 14, color: Color(0xFFABB5C5), ), border: InputBorder.none, ), 67
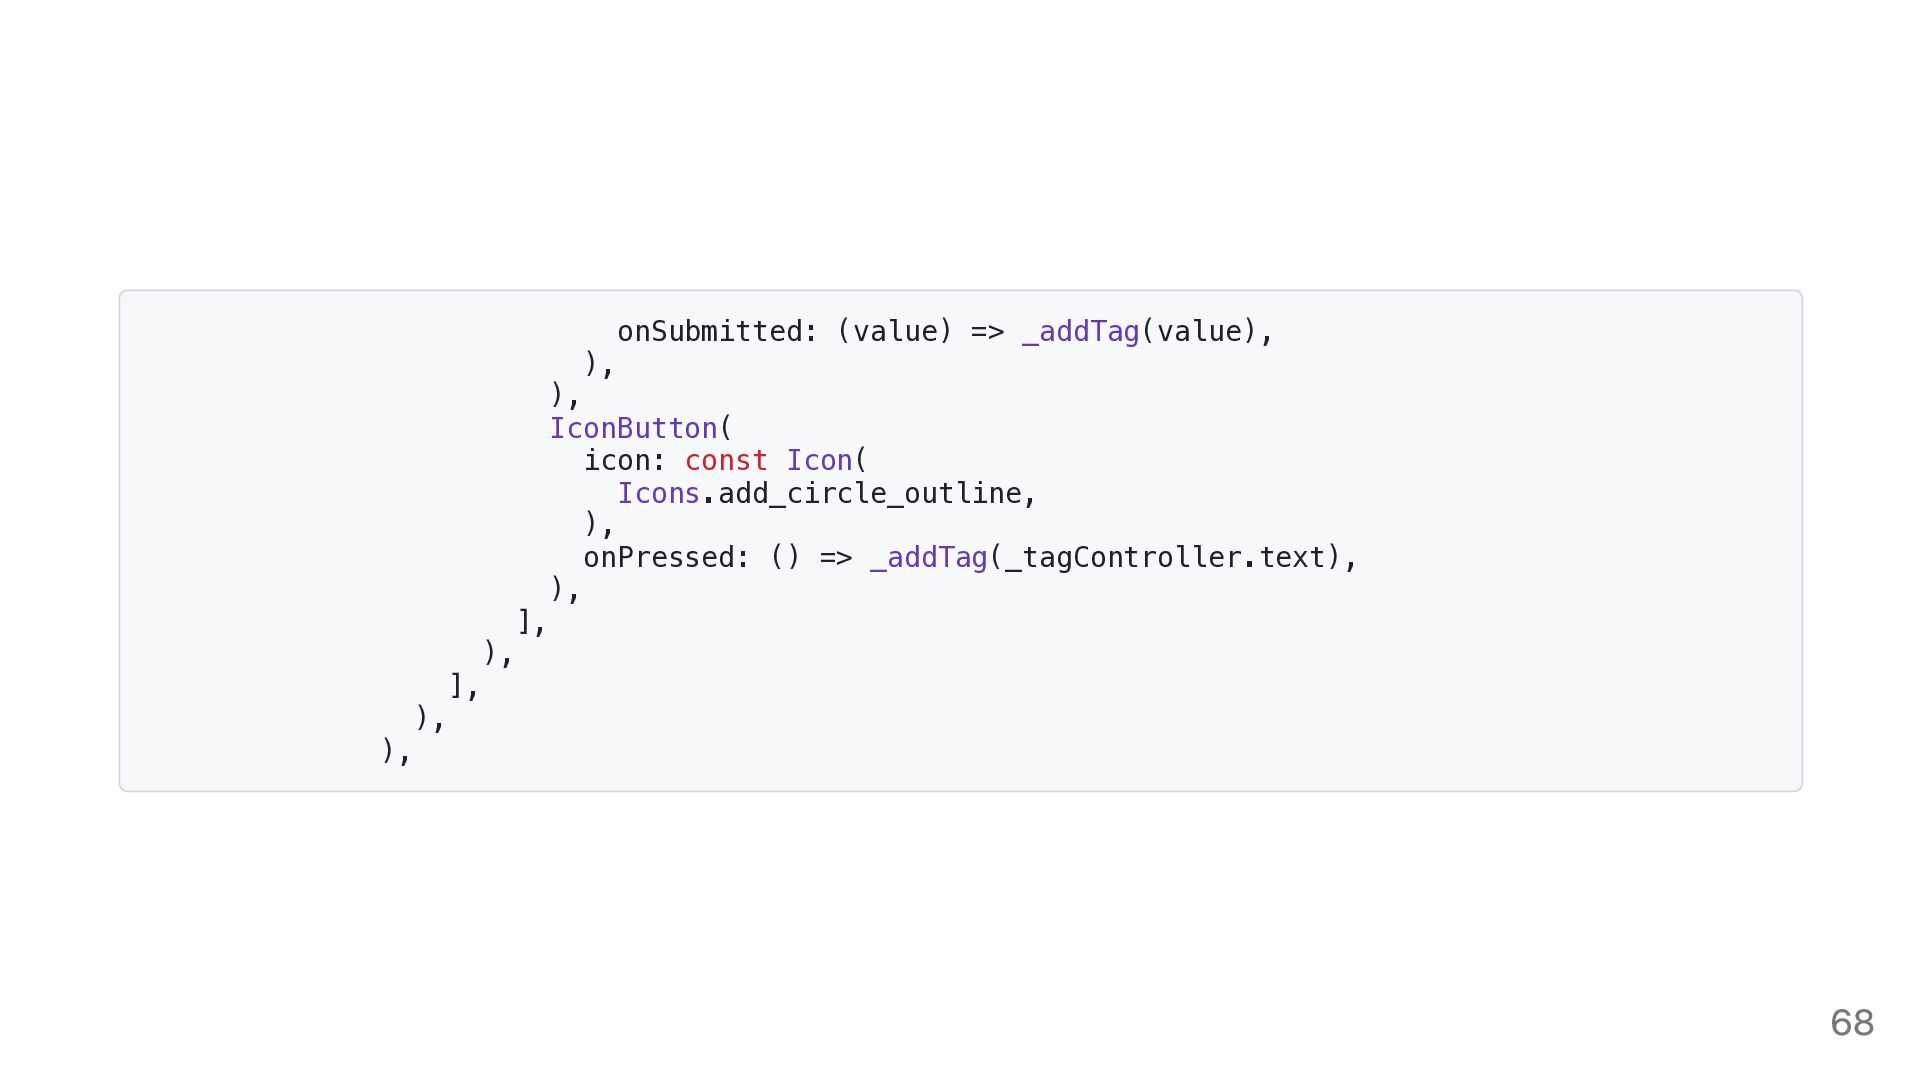
  62. onSubmitted: (value) => _addTag(value), ), ), IconButton( icon: const Icon(

    Icons.add_circle_outline, ), onPressed: () => _addTag(_tagController.text), ), ], ), ], ), ), 68
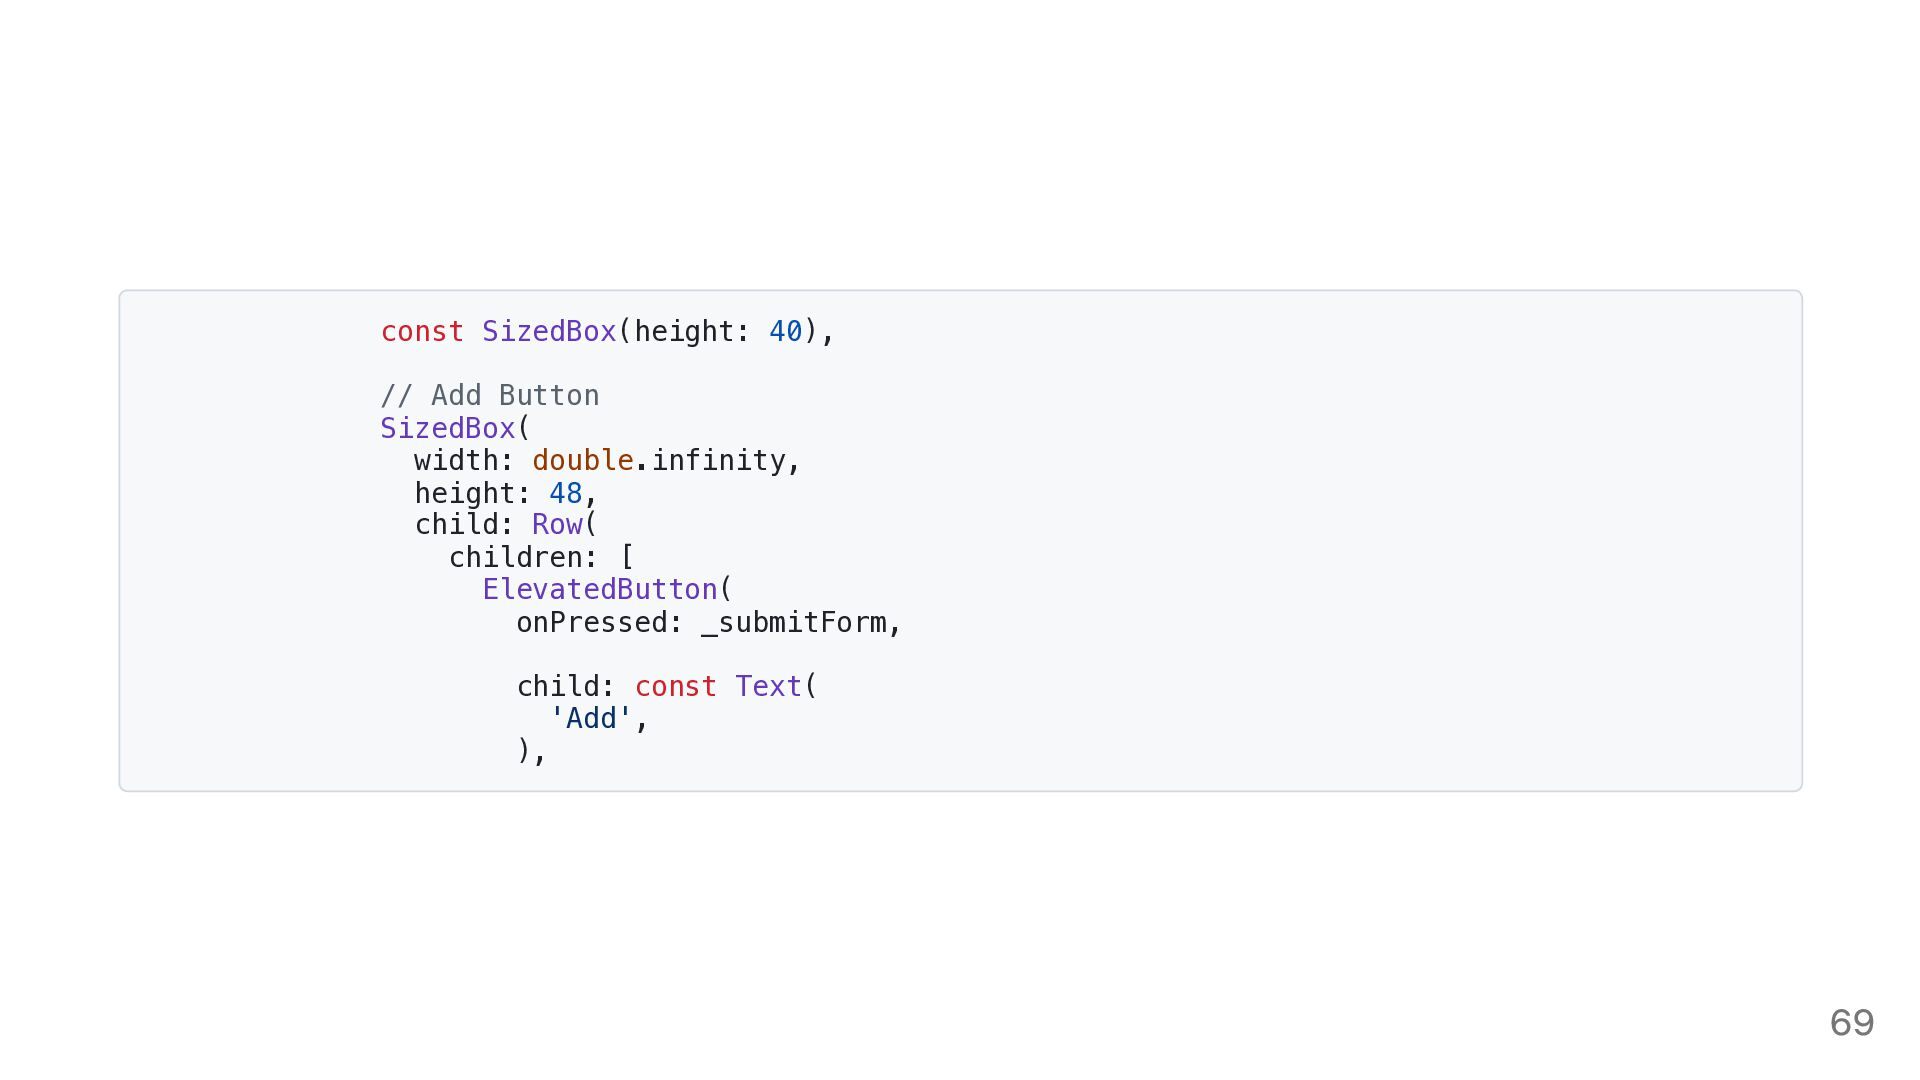
  63. const SizedBox(height: 40), // Add Button SizedBox( width: double.infinity, height:

    48, child: Row( children: [ ElevatedButton( onPressed: _submitForm, child: const Text( 'Add', ), 69
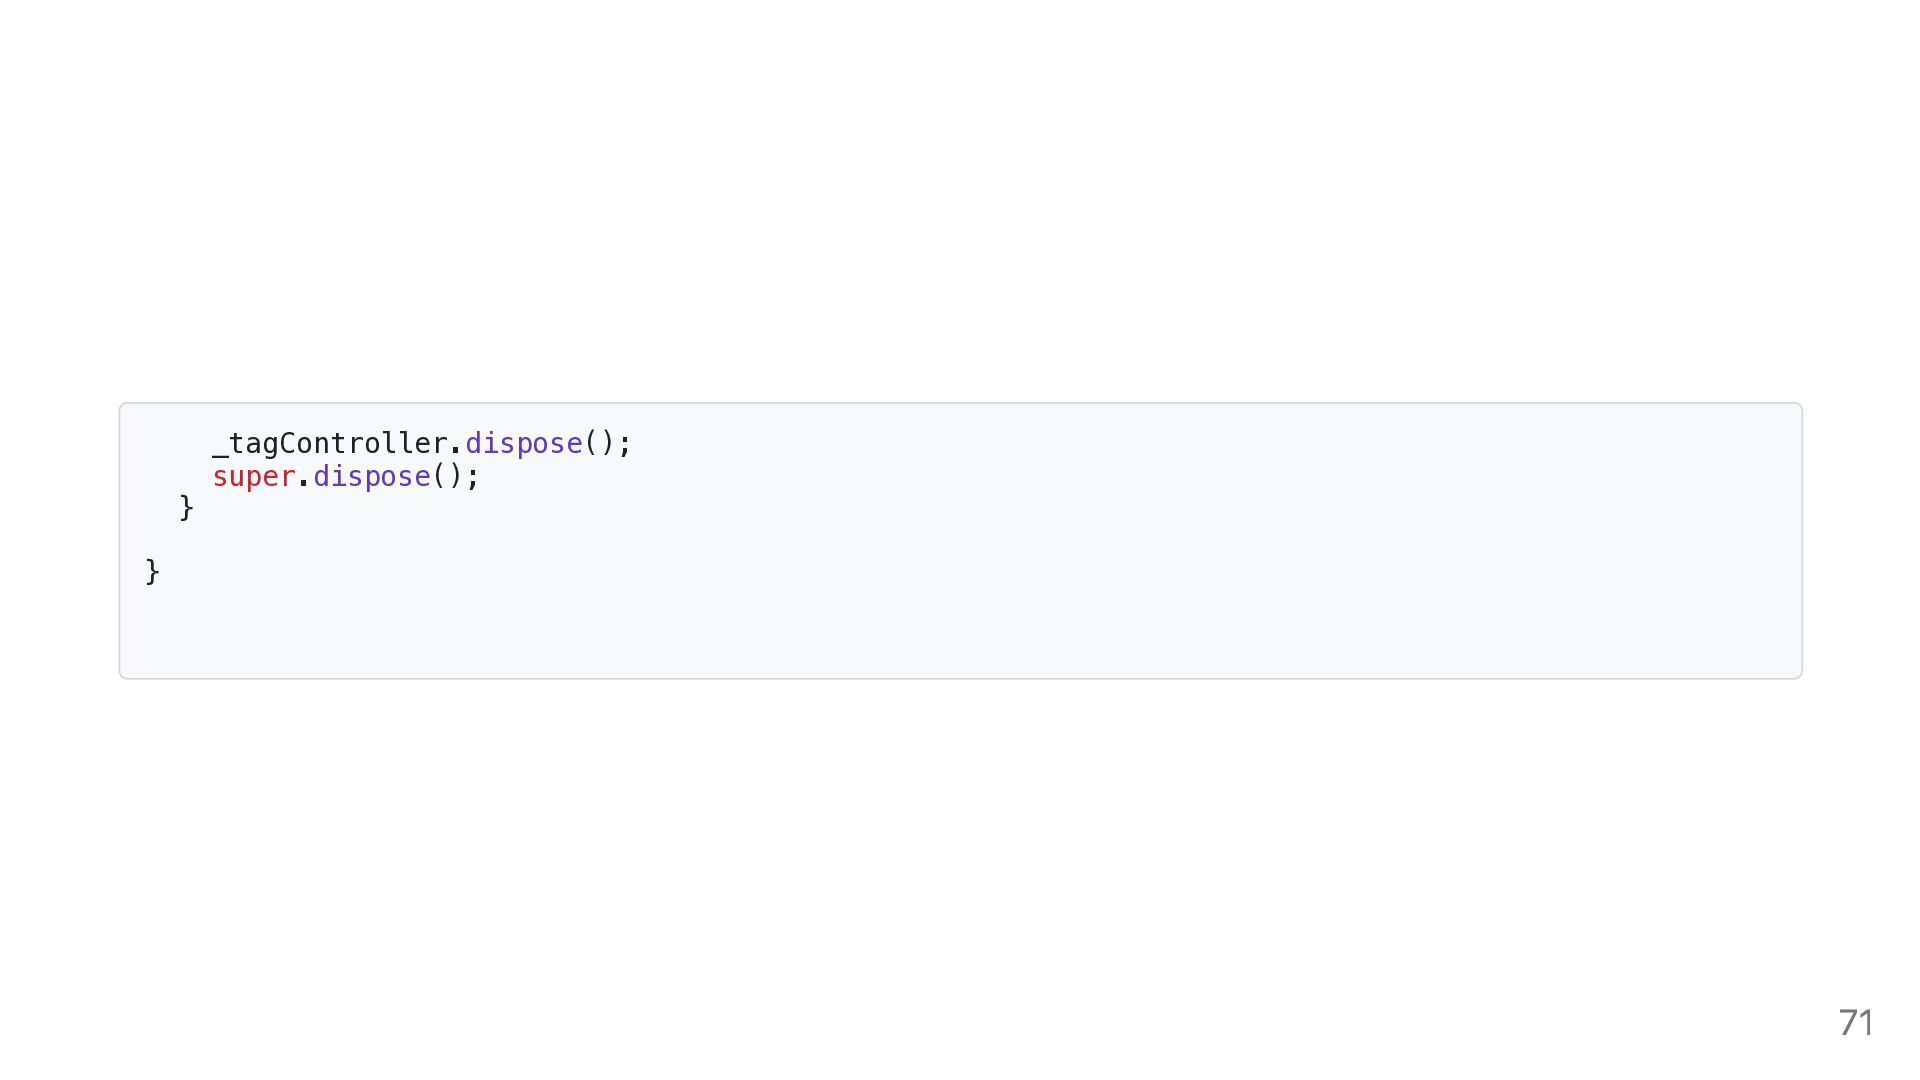
  64. } ), ], ), ), const SizedBox(height: 30), ], ),

    ), ), ); @override void dispose() { 70
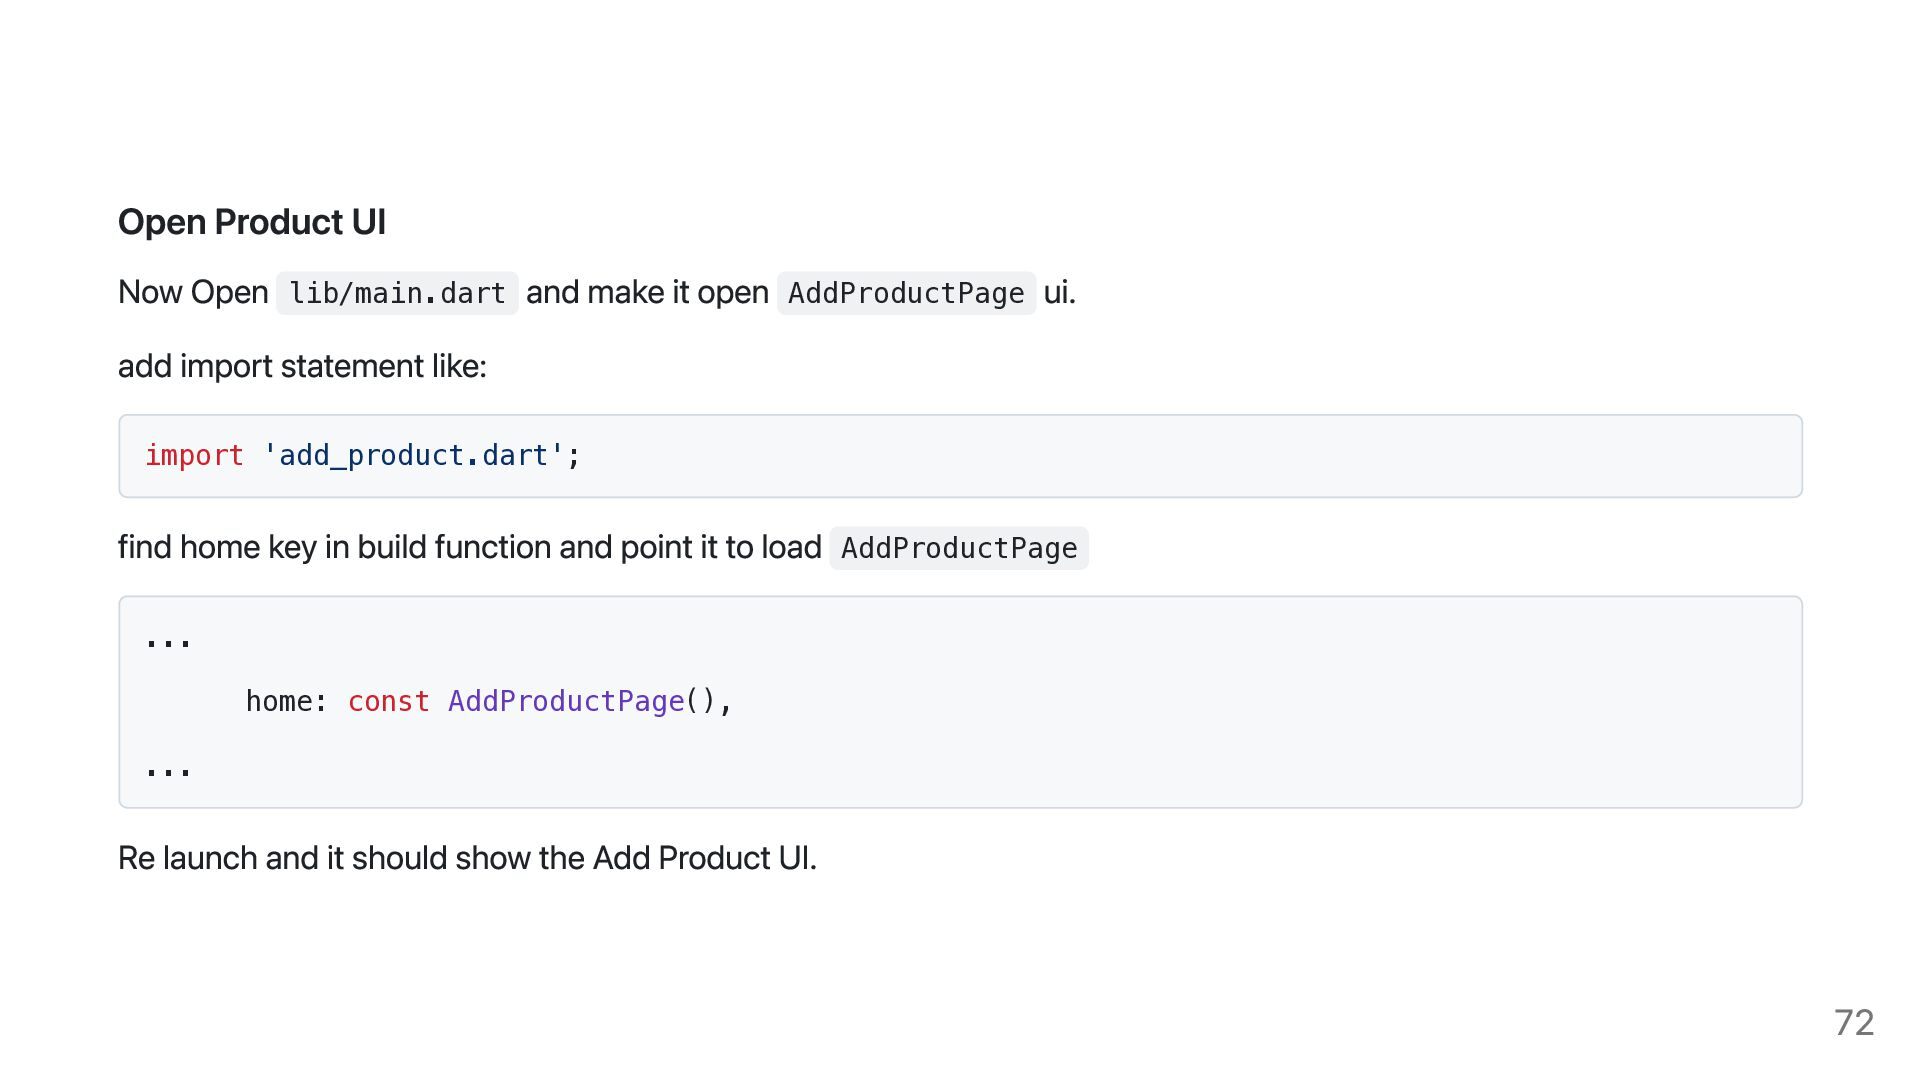
  65. Open Product UI Now Open lib/main.dart and make it open

    AddProductPage ui. add import statement like: import 'add_product.dart'; find home key in build function and point it to load AddProductPage ... home: const AddProductPage(), ... Re launch and it should show the Add Product UI. 72
  66. Add Products Using AI Let’s apply Gemini to a real-world

    task: generating product details (title, tags, descriptions). 73
  67. Step 1: Discuss the Use Case Lets talk about how

    generative AI improves: Speed of data entry Consistency and creativity in descriptions User engagement 74
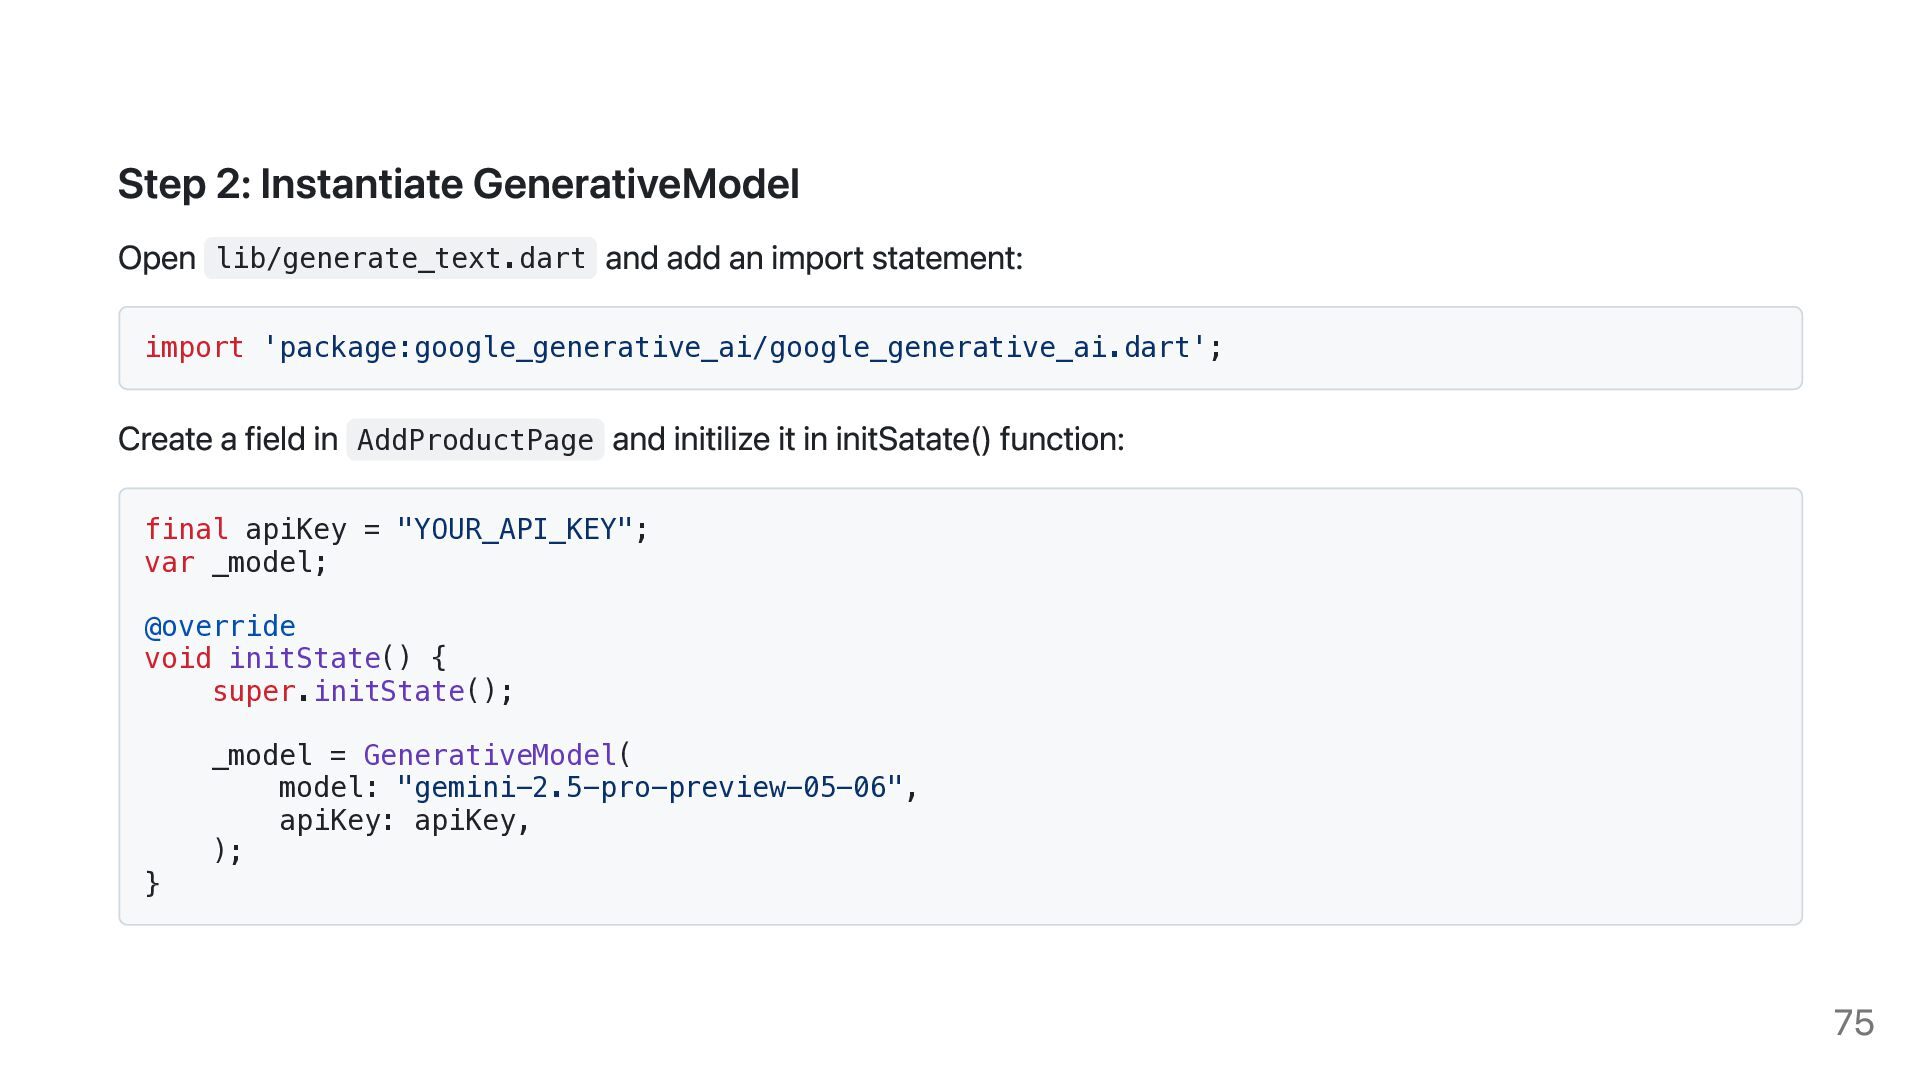
  68. Step 2: Instantiate GenerativeModel Open lib/generate_text.dart and add an import

    statement: import 'package:google_generative_ai/google_generative_ai.dart'; Create a field in AddProductPage and initilize it in initSatate() function: final apiKey = "YOUR_API_KEY"; var _model; @override void initState() { super.initState(); _model = GenerativeModel( model: "gemini-2.5-pro-preview-05-06", apiKey: apiKey, ); } 75
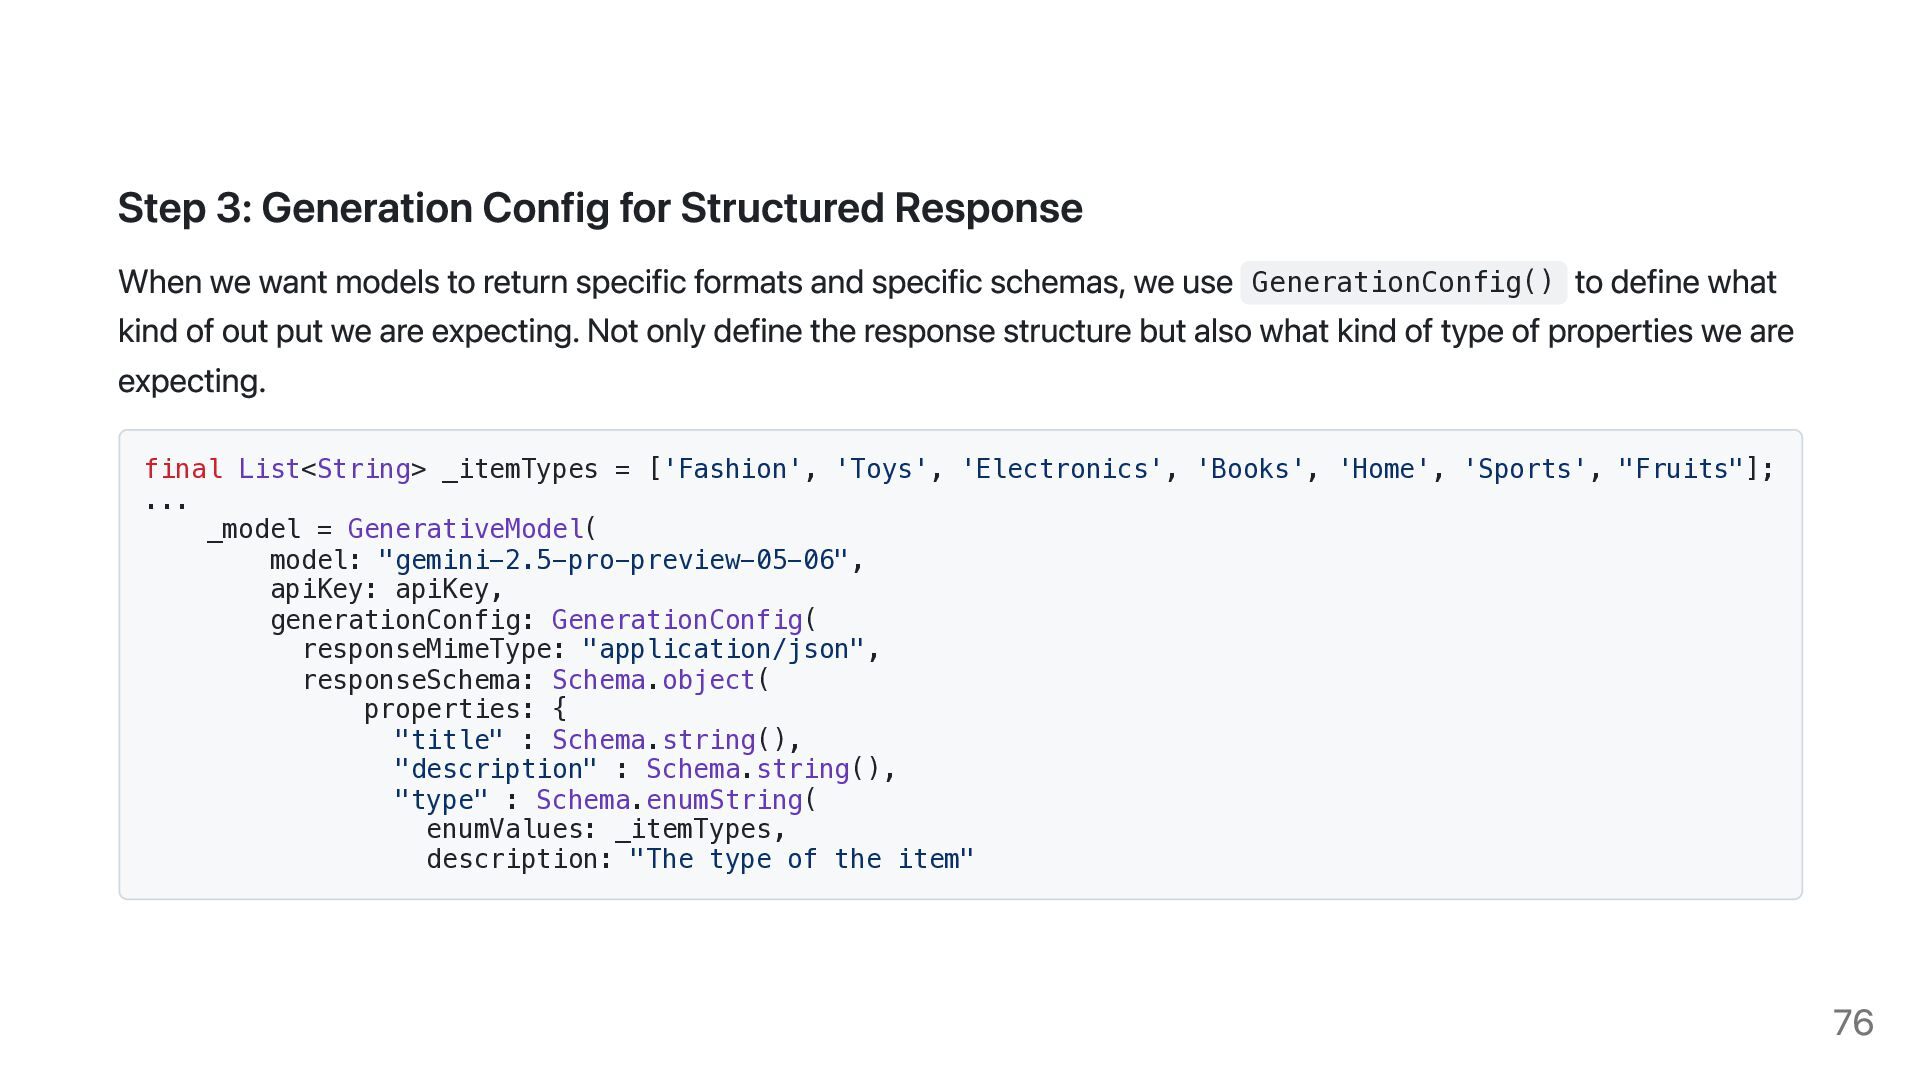
  69. Step 3: Generation Config for Structured Response When we want

    models to return specific formats and specific schemas, we use GenerationConfig() to define what kind of out put we are expecting. Not only define the response structure but also what kind of type of properties we are expecting. final List<String> _itemTypes = ['Fashion', 'Toys', 'Electronics', 'Books', 'Home', 'Sports', "Fruits"]; ... _model = GenerativeModel( model: "gemini-2.5-pro-preview-05-06", apiKey: apiKey, generationConfig: GenerationConfig( responseMimeType: "application/json", responseSchema: Schema.object( properties: { "title" : Schema.string(), "description" : Schema.string(), "type" : Schema.enumString( enumValues: _itemTypes, description: "The type of the item" 76
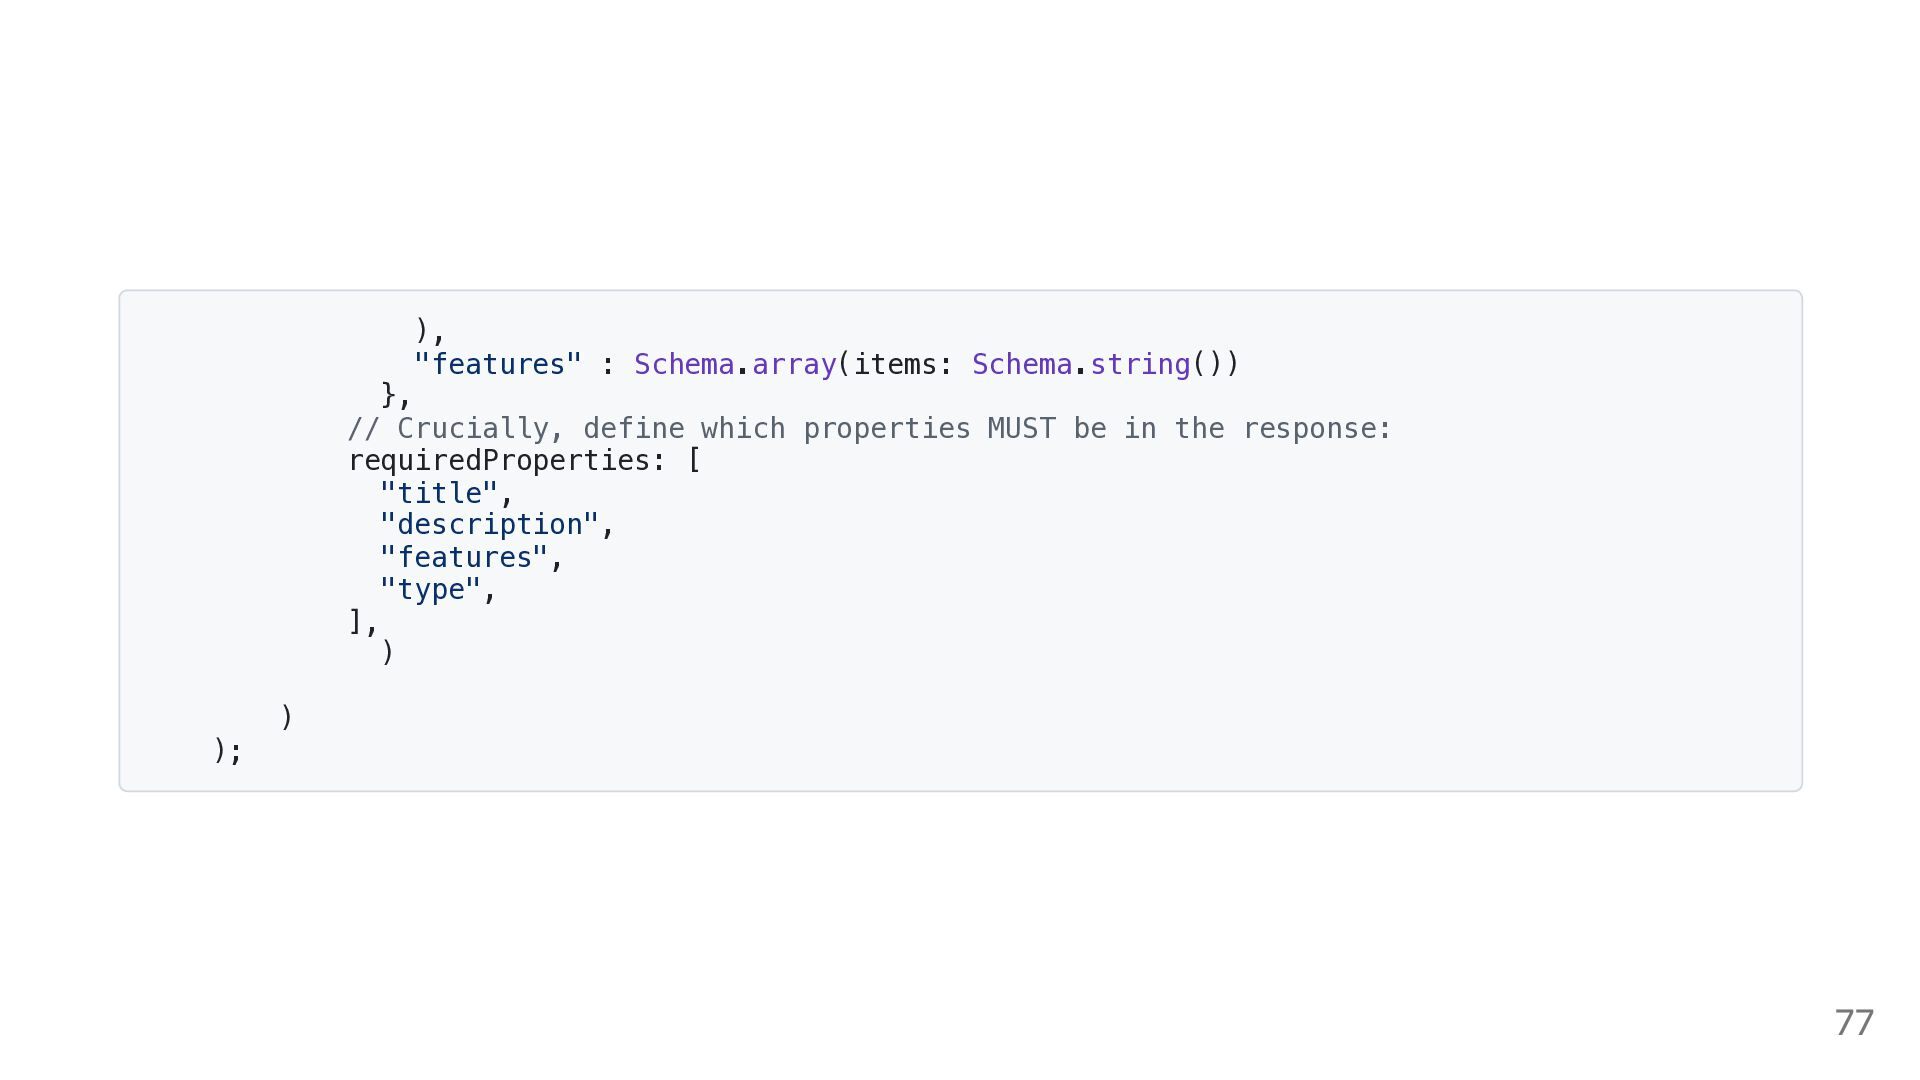
  70. ), "features" : Schema.array(items: Schema.string()) }, // Crucially, define which

    properties MUST be in the response: requiredProperties: [ "title", "description", "features", "type", ], ) ) ); 77
  71. 78

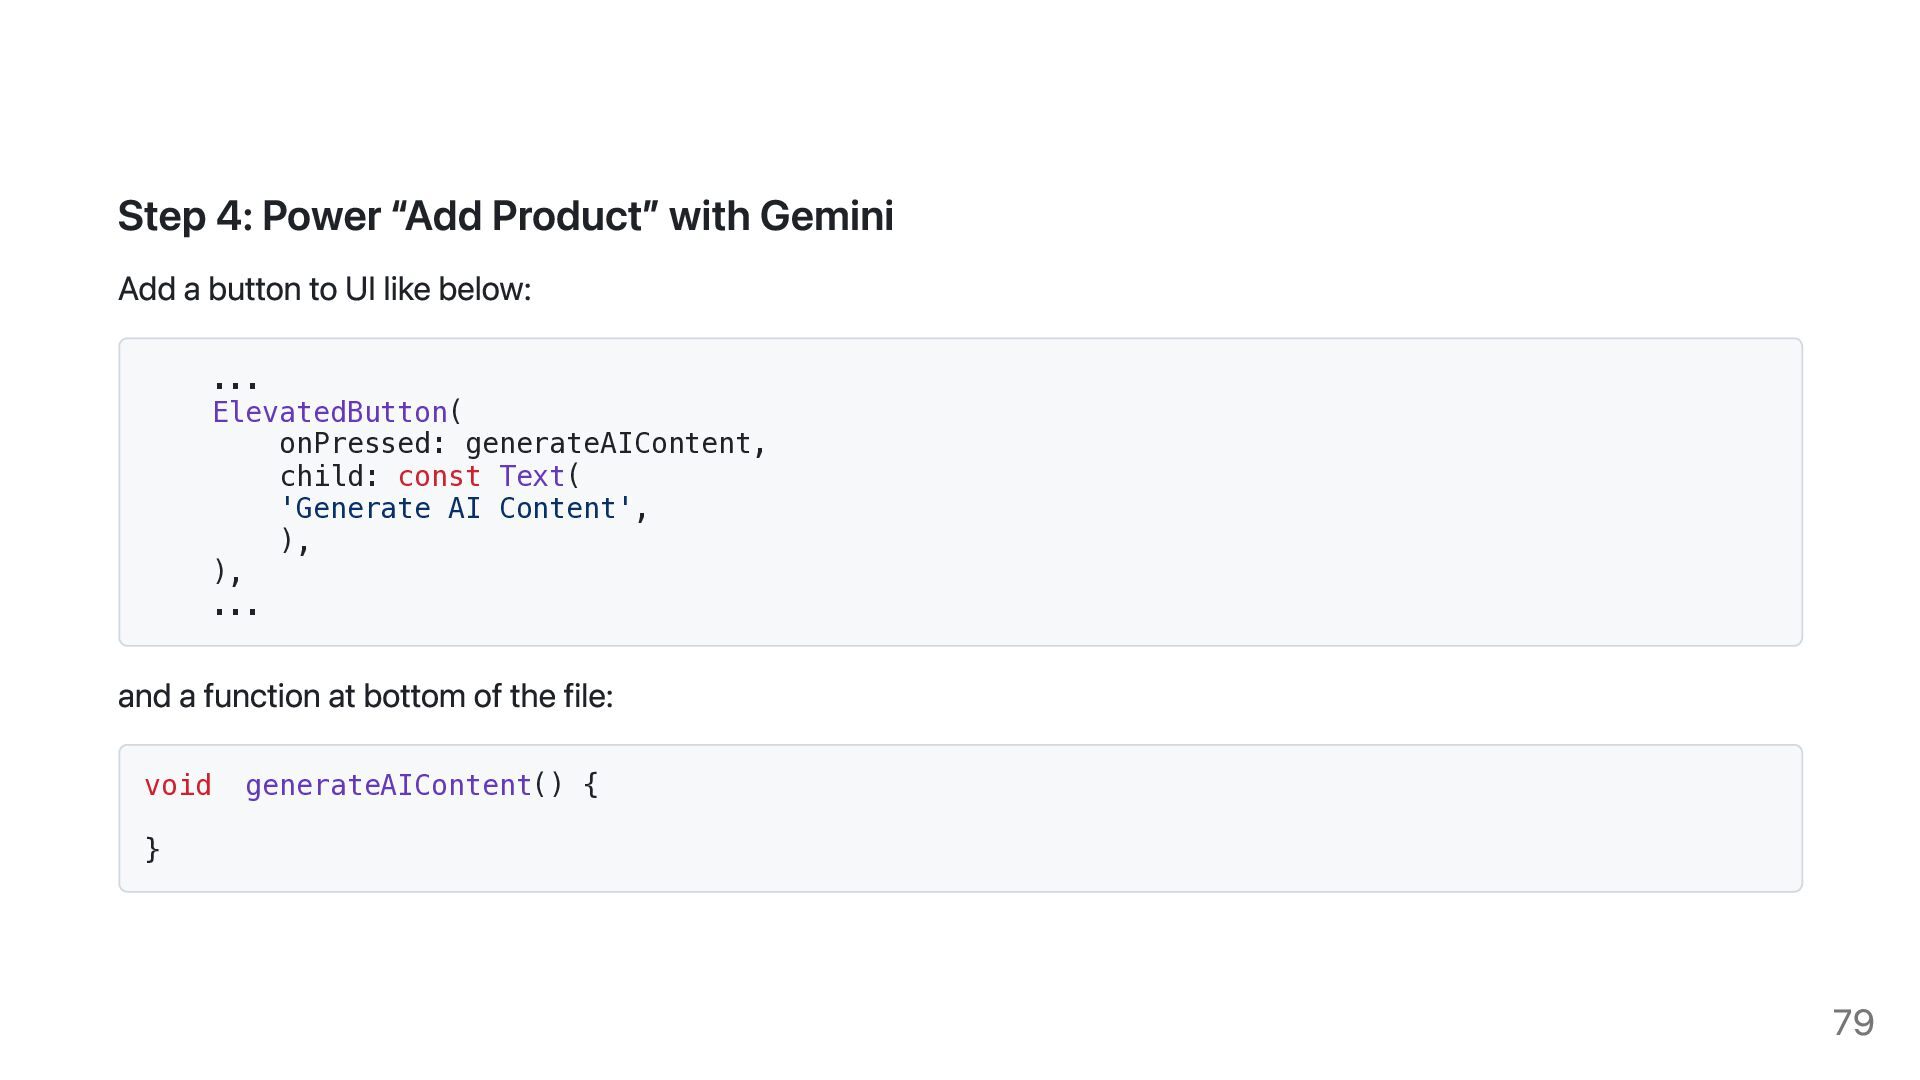
  72. Step 4: Power “Add Product” with Gemini Add a button

    to UI like below: ... ElevatedButton( onPressed: generateAIContent, child: const Text( 'Generate AI Content', ), ), ... and a function at bottom of the file: void generateAIContent() { } 79
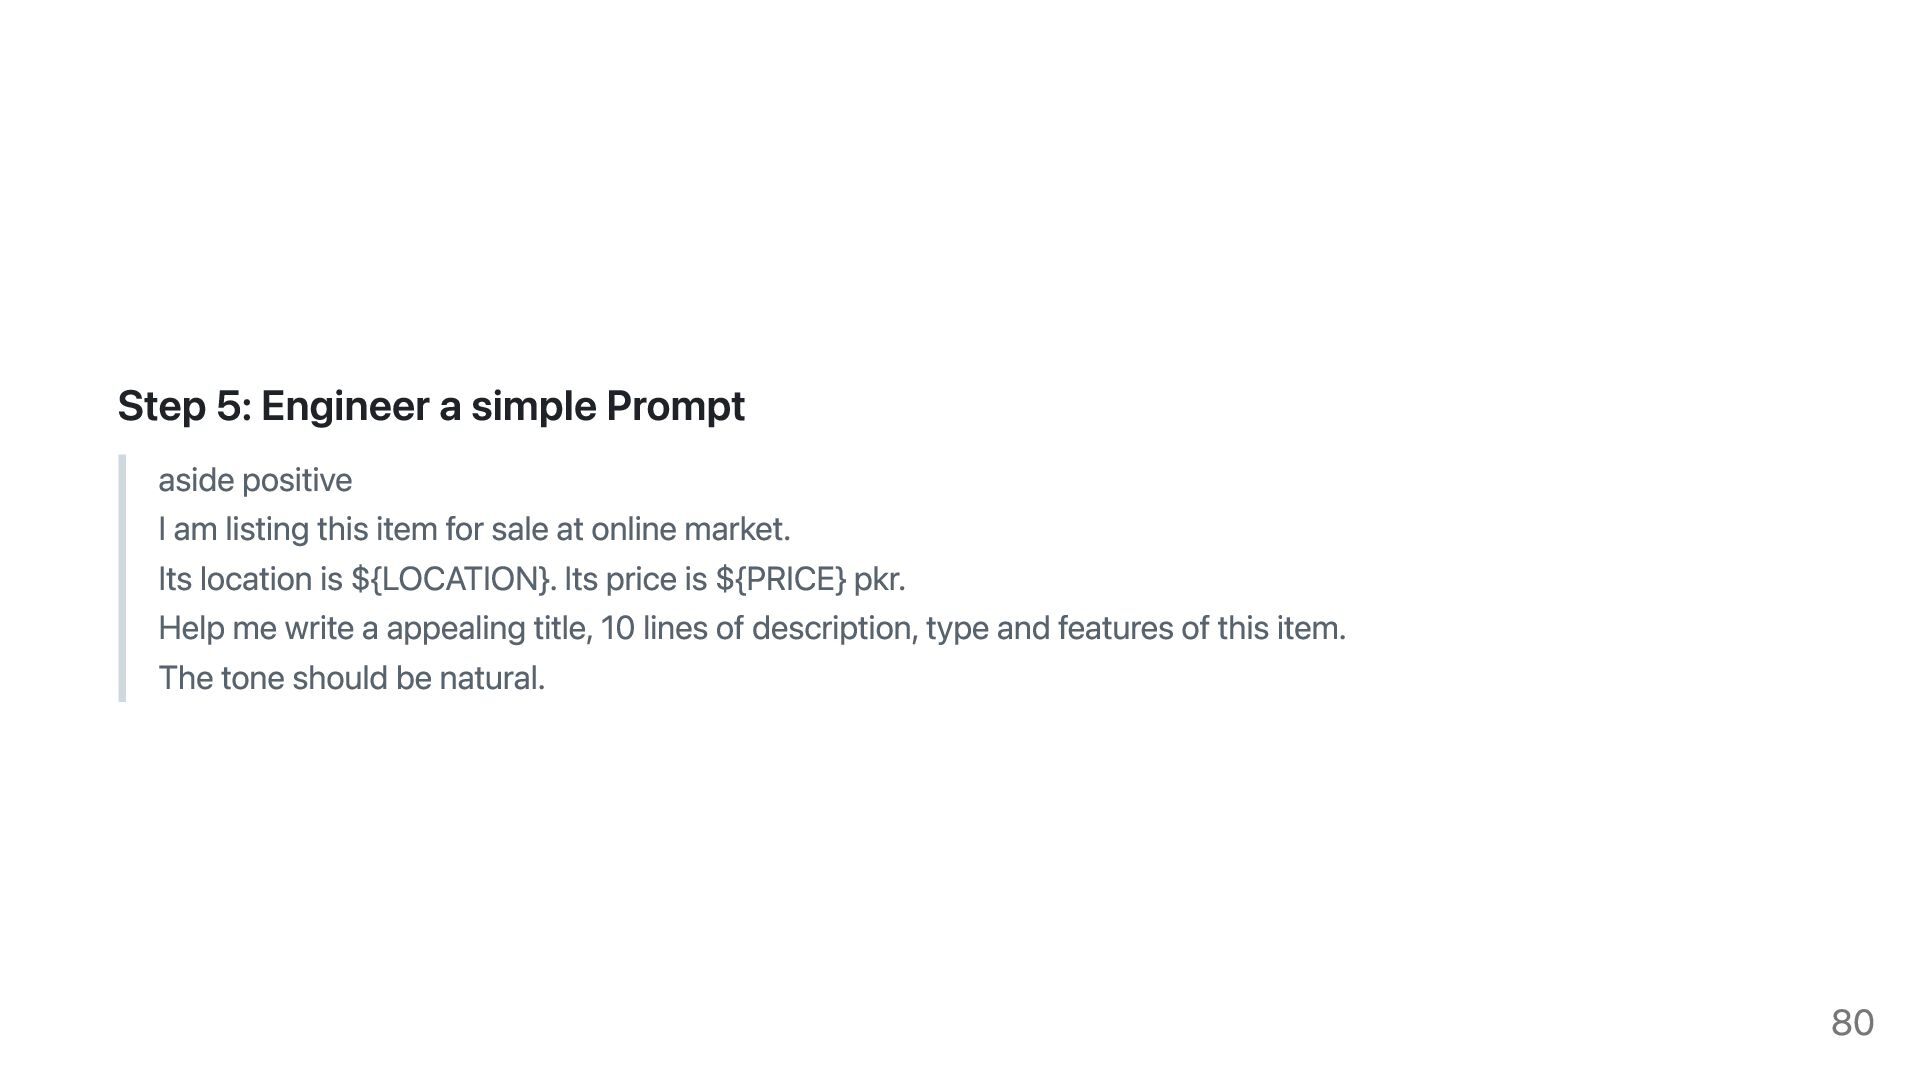
  73. Step 5: Engineer a simple Prompt aside positive I am

    listing this item for sale at online market. Its location is ${LOCATION}. Its price is ${PRICE} pkr. Help me write a appealing title, 10 lines of description, type and features of this item. The tone should be natural. 80
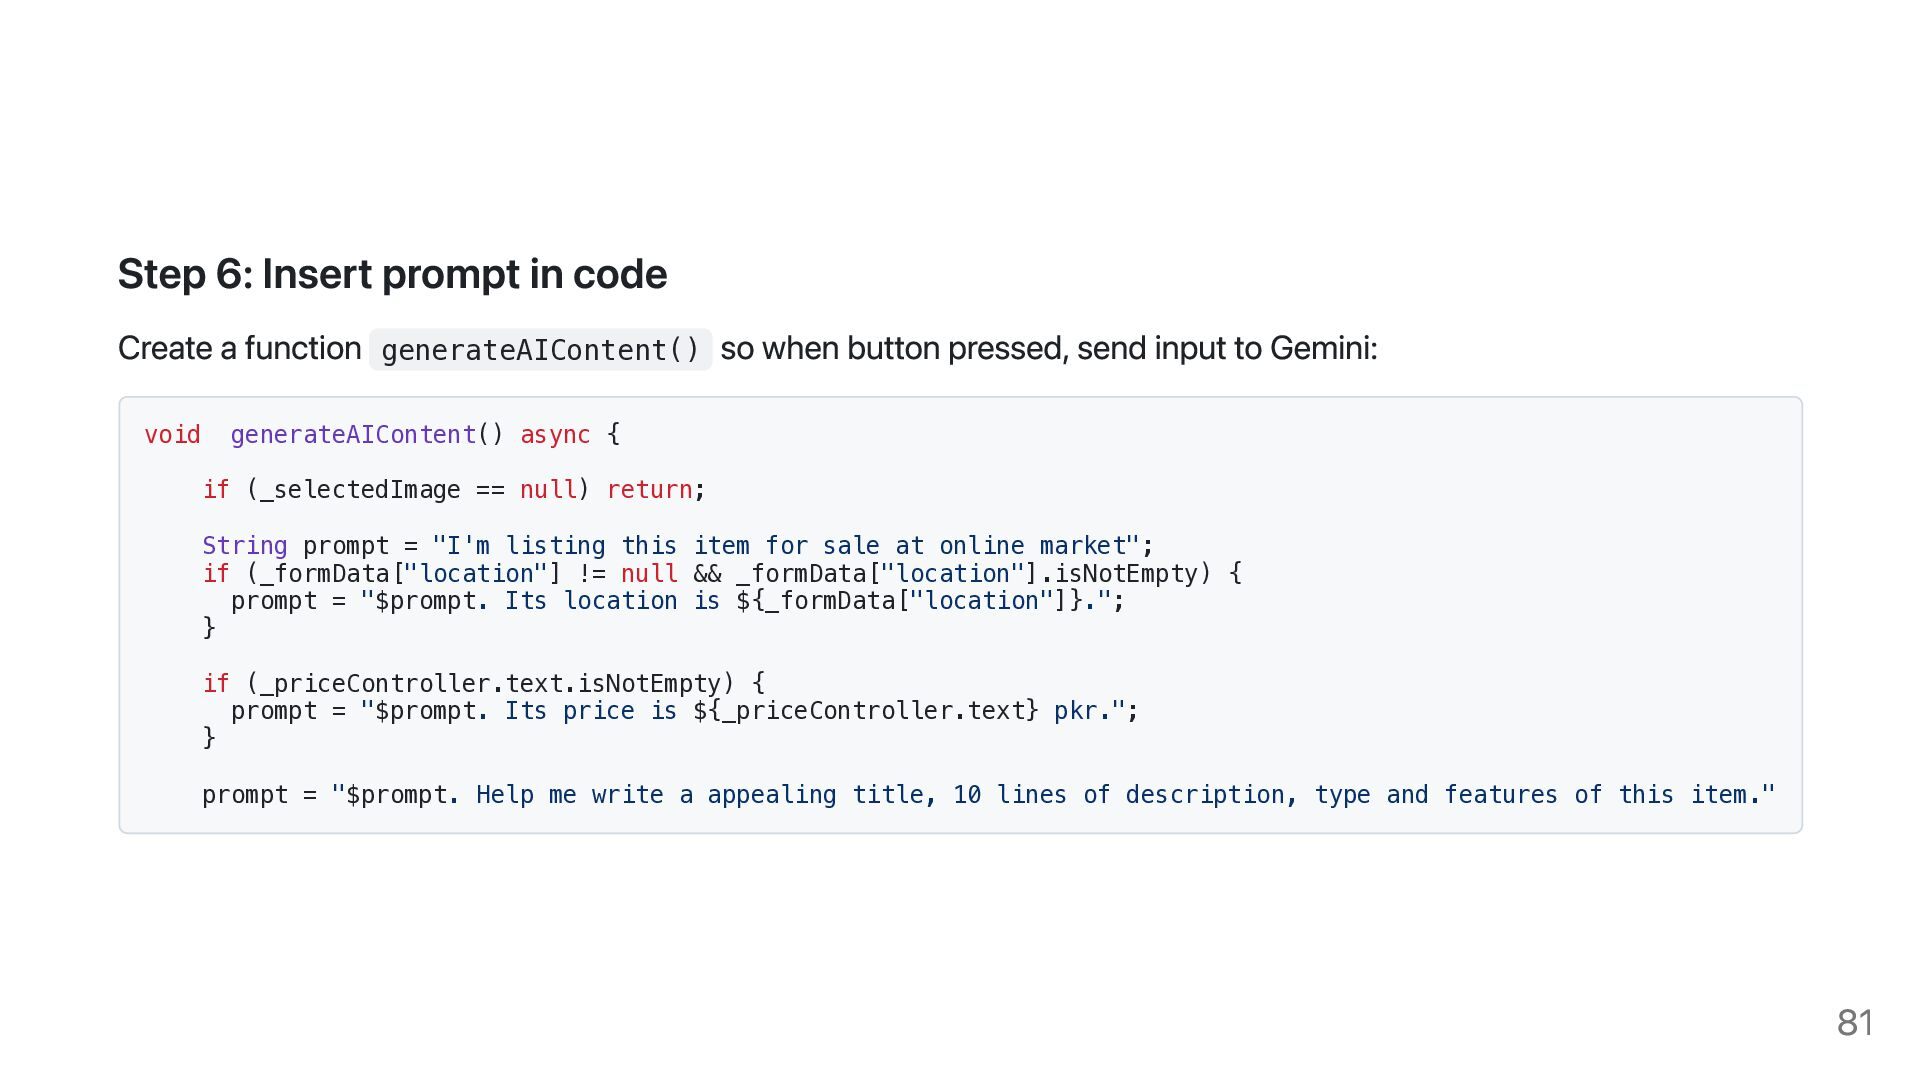
  74. Step 6: Insert prompt in code Create a function generateAIContent()

    so when button pressed, send input to Gemini: void generateAIContent() async { if (_selectedImage == null) return; String prompt = "I'm listing this item for sale at online market"; if (_formData["location"] != null && _formData["location"].isNotEmpty) { prompt = "$prompt. Its location is ${_formData["location"]}."; } if (_priceController.text.isNotEmpty) { prompt = "$prompt. Its price is ${_priceController.text} pkr."; } prompt = "$prompt. Help me write a appealing title, 10 lines of description, type and features of this item." 81
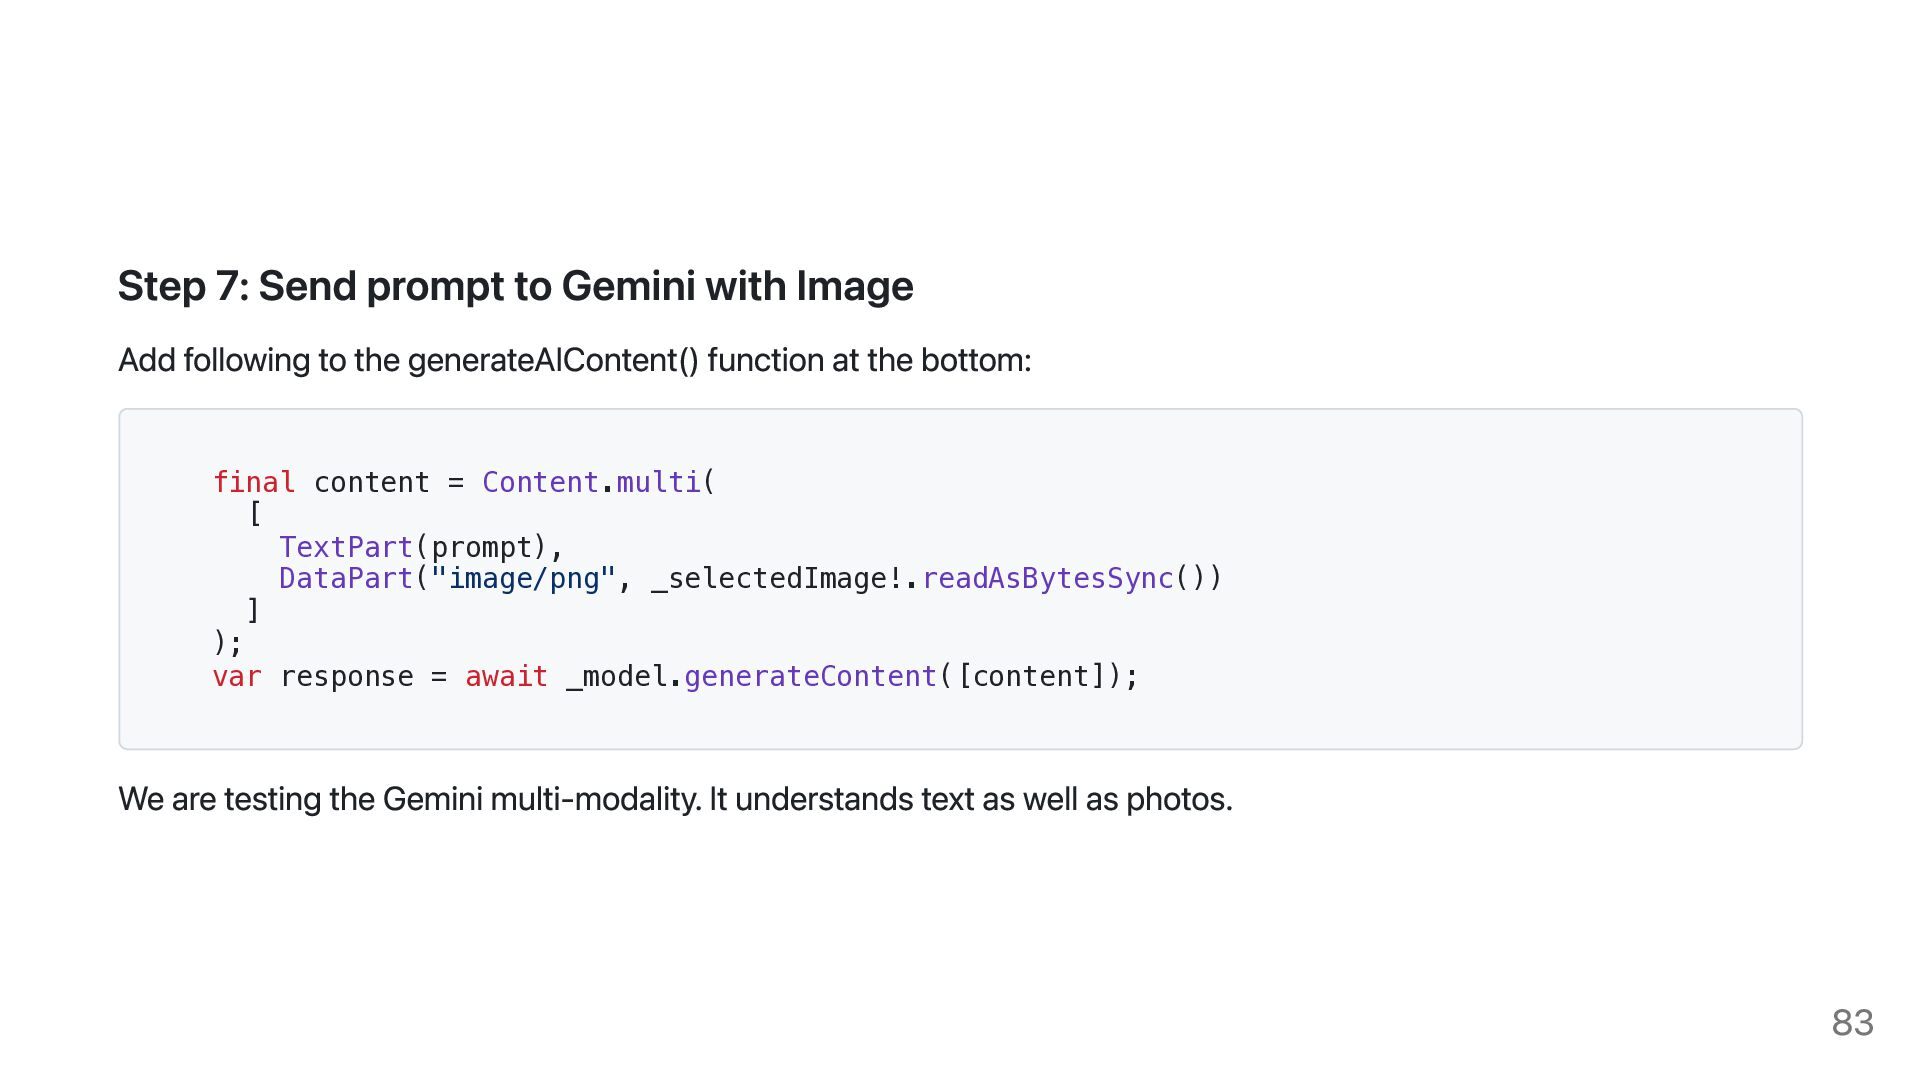
  75. Step 7: Send prompt to Gemini with Image Add following

    to the generateAIContent() function at the bottom: final content = Content.multi( [ TextPart(prompt), DataPart("image/png", _selectedImage!.readAsBytesSync()) ] ); var response = await _model.generateContent([content]); We are testing the Gemini multi-modality. It understands text as well as photos. 83
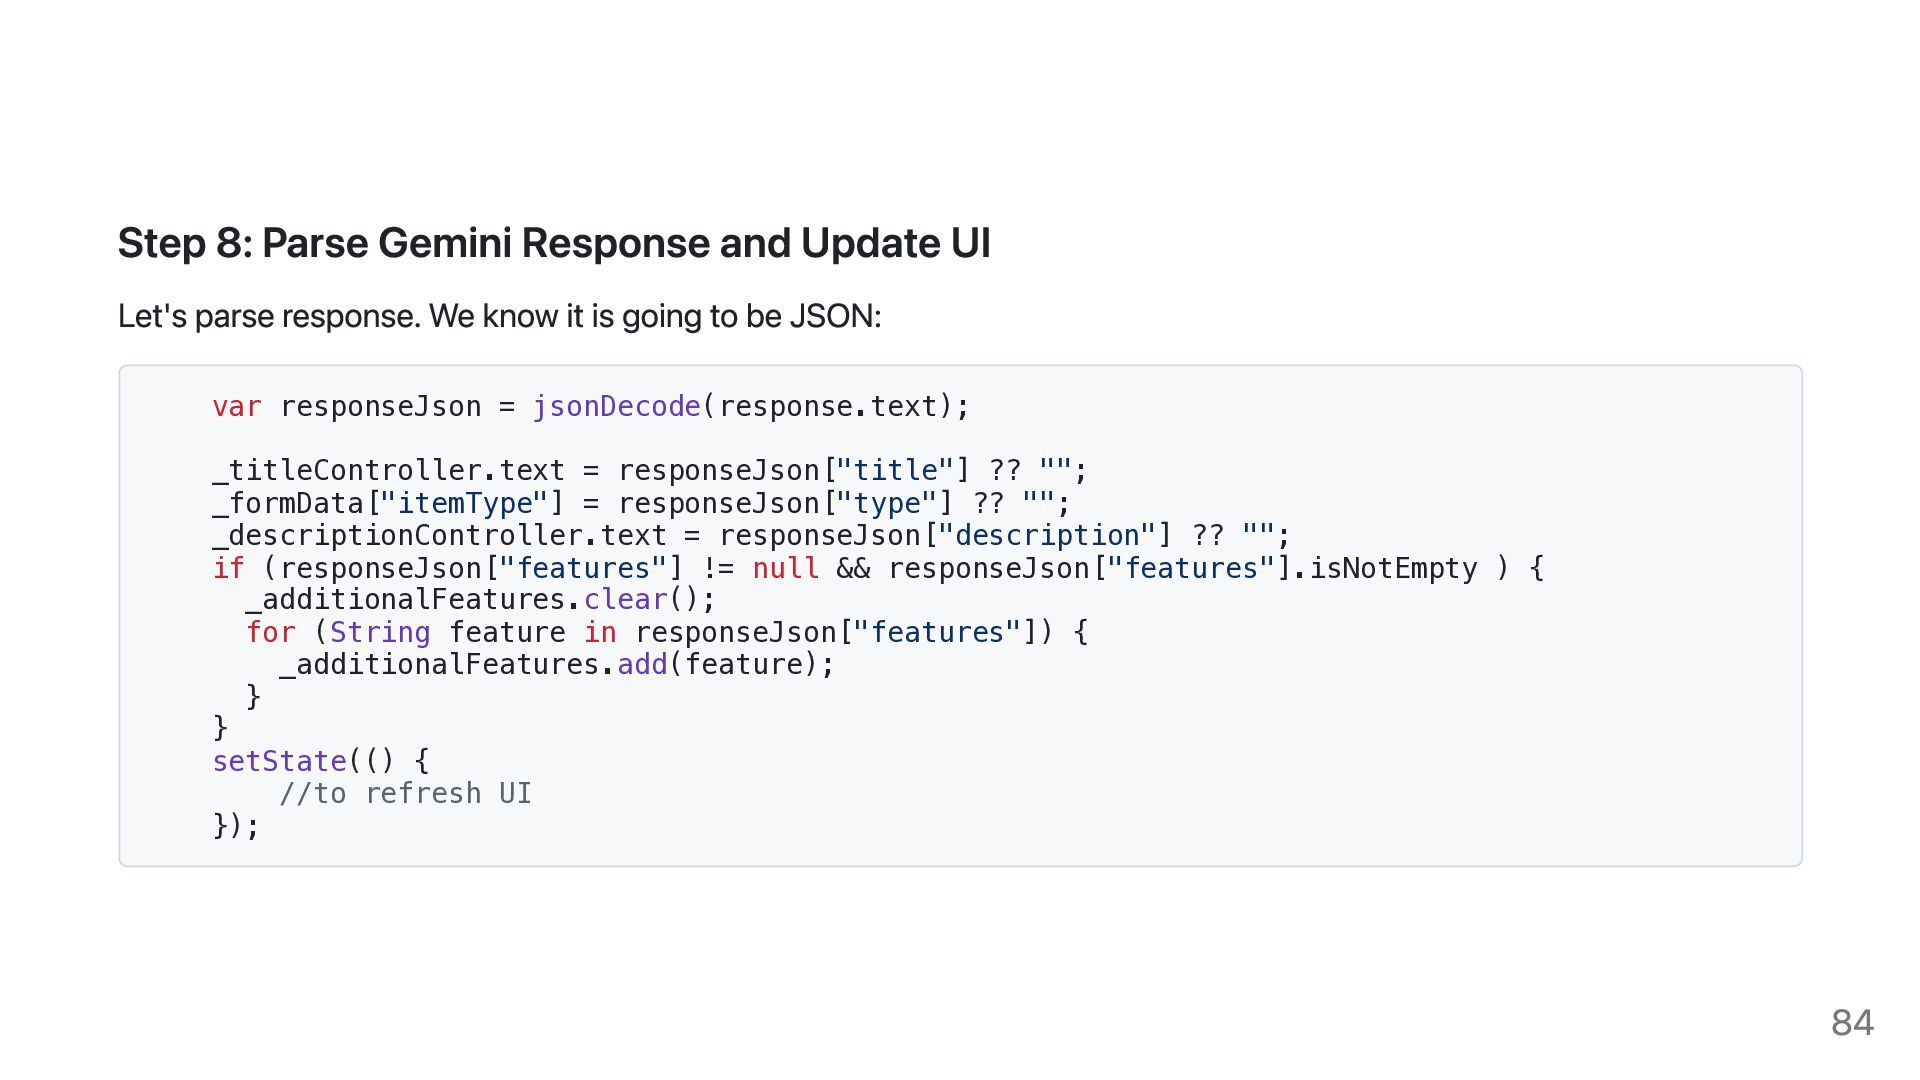
  76. Step 8: Parse Gemini Response and Update UI Let's parse

    response. We know it is going to be JSON: var responseJson = jsonDecode(response.text); _titleController.text = responseJson["title"] ?? ""; _formData["itemType"] = responseJson["type"] ?? ""; _descriptionController.text = responseJson["description"] ?? ""; if (responseJson["features"] != null && responseJson["features"].isNotEmpty ) { _additionalFeatures.clear(); for (String feature in responseJson["features"]) { _additionalFeatures.add(feature); } } setState(() { //to refresh UI }); 84
  77. 85

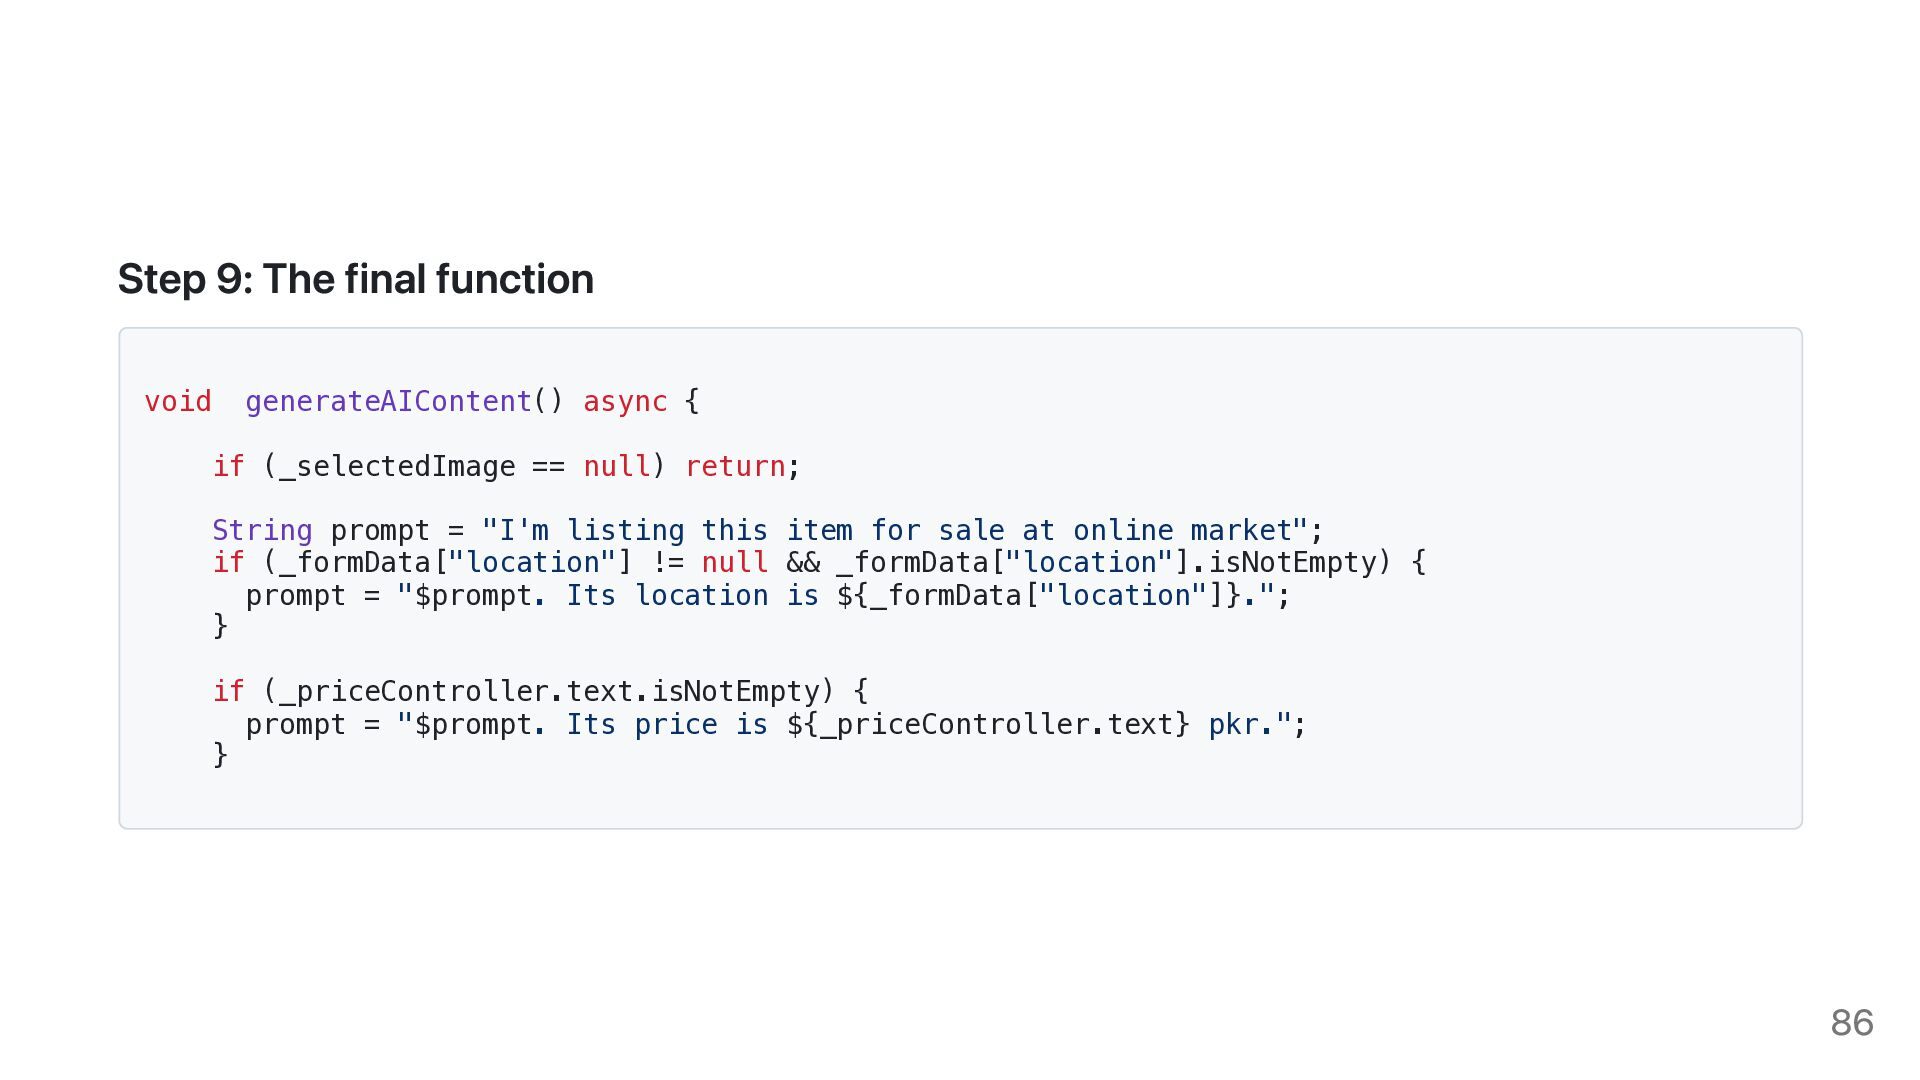
  78. Step 9: The final function void generateAIContent() async { if

    (_selectedImage == null) return; String prompt = "I'm listing this item for sale at online market"; if (_formData["location"] != null && _formData["location"].isNotEmpty) { prompt = "$prompt. Its location is ${_formData["location"]}."; } if (_priceController.text.isNotEmpty) { prompt = "$prompt. Its price is ${_priceController.text} pkr."; } 86
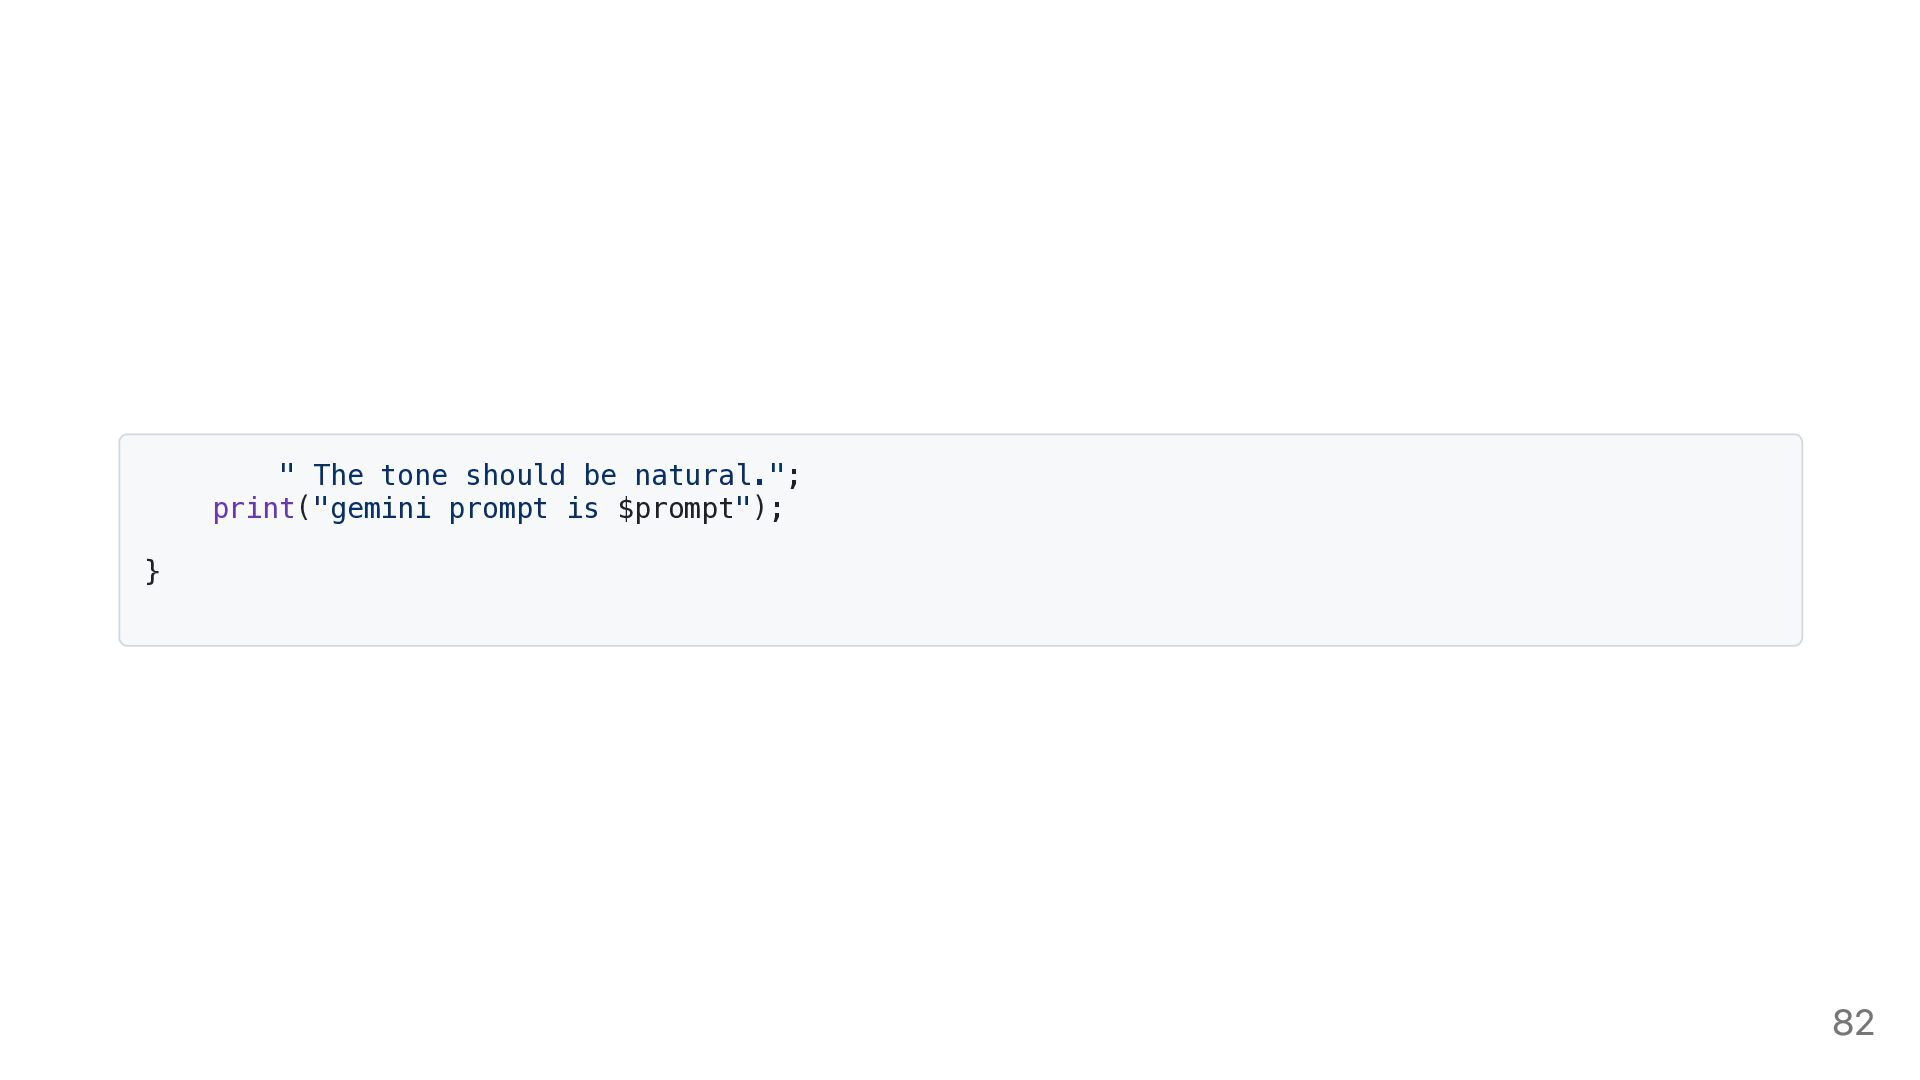
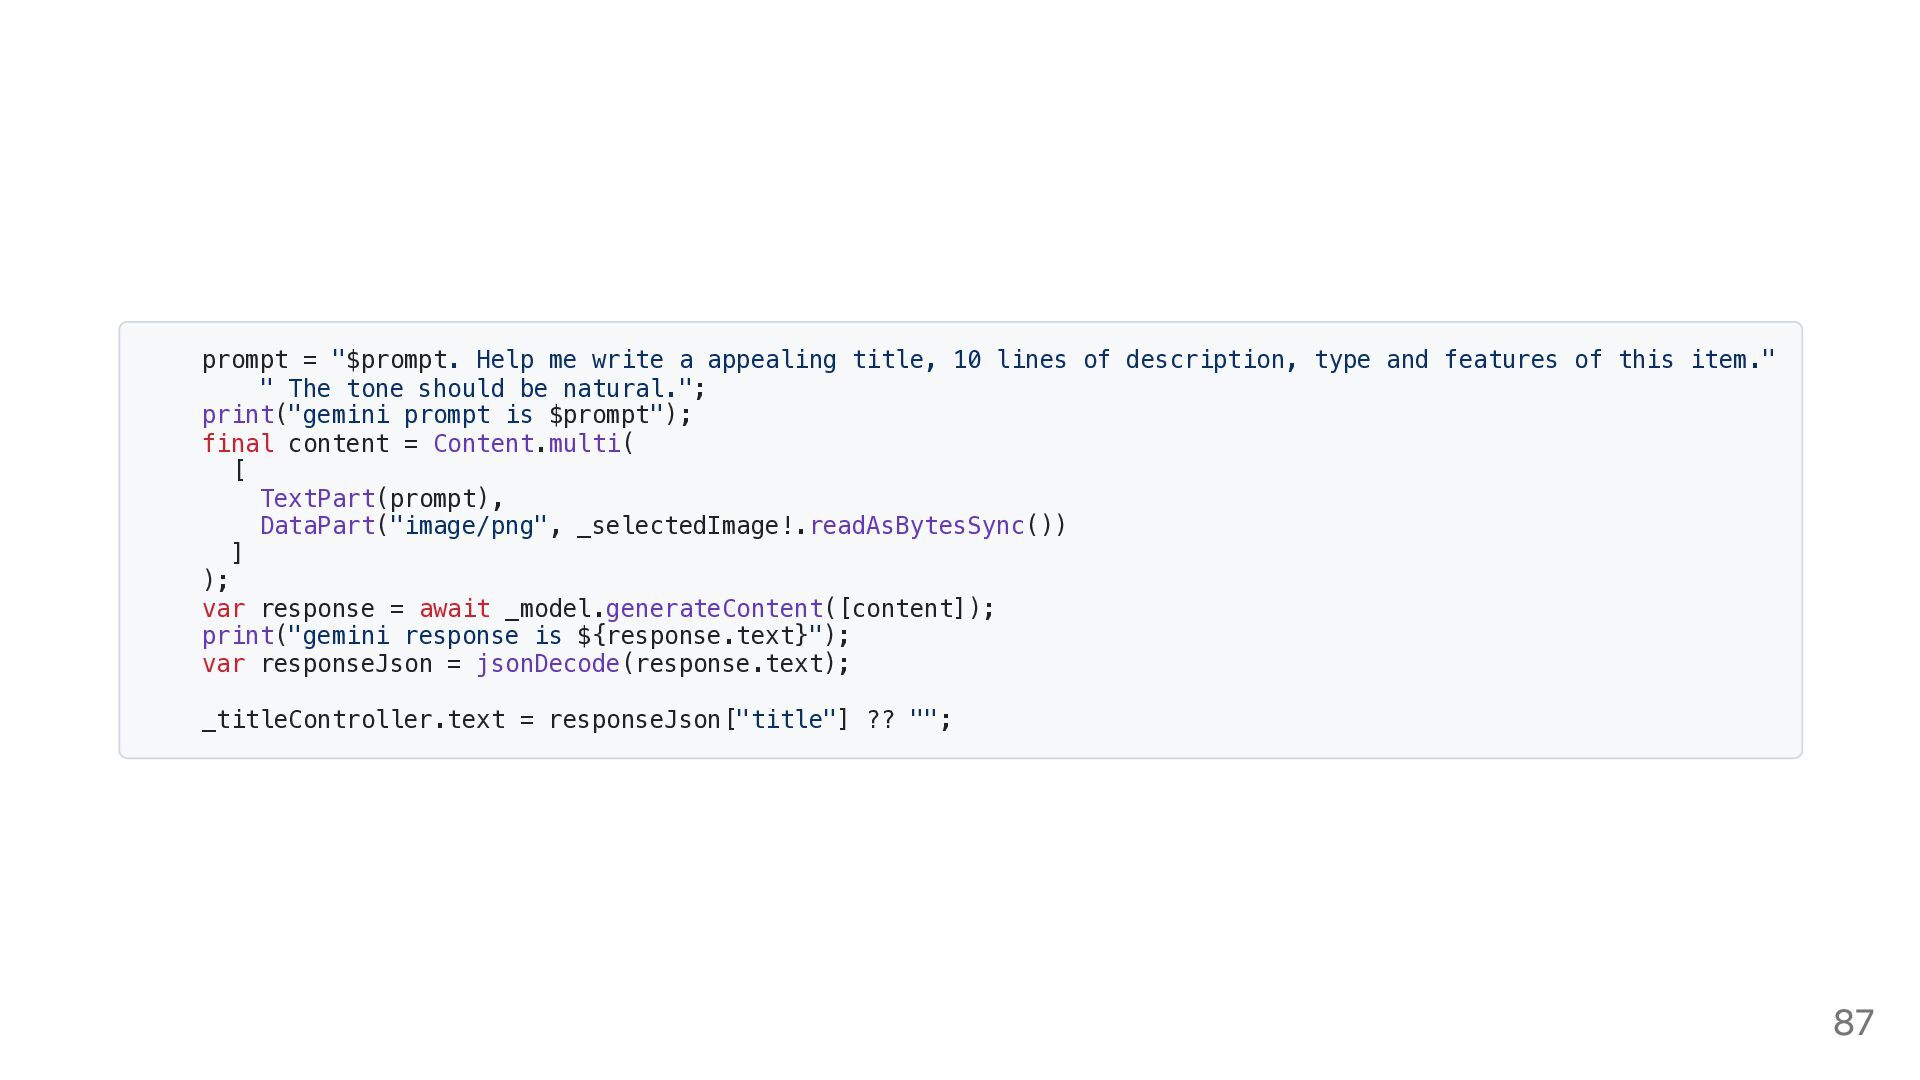
  79. prompt = "$prompt. Help me write a appealing title, 10

    lines of description, type and features of this item." " The tone should be natural."; print("gemini prompt is $prompt"); final content = Content.multi( [ TextPart(prompt), DataPart("image/png", _selectedImage!.readAsBytesSync()) ] ); var response = await _model.generateContent([content]); print("gemini response is ${response.text}"); var responseJson = jsonDecode(response.text); _titleController.text = responseJson["title"] ?? ""; 87
  80. _formData["itemType"] = responseJson["type"] ?? ""; _descriptionController.text = responseJson["description"] ?? "";

    if (responseJson["features"] != null && responseJson["features"].isNotEmpty ) { _additionalFeatures.clear(); for (String feature in responseJson["features"]) { _additionalFeatures.add(feature); } } setState(() {}); } Result: A smart product form that auto-generates compelling title, descriptions, types and features. 88
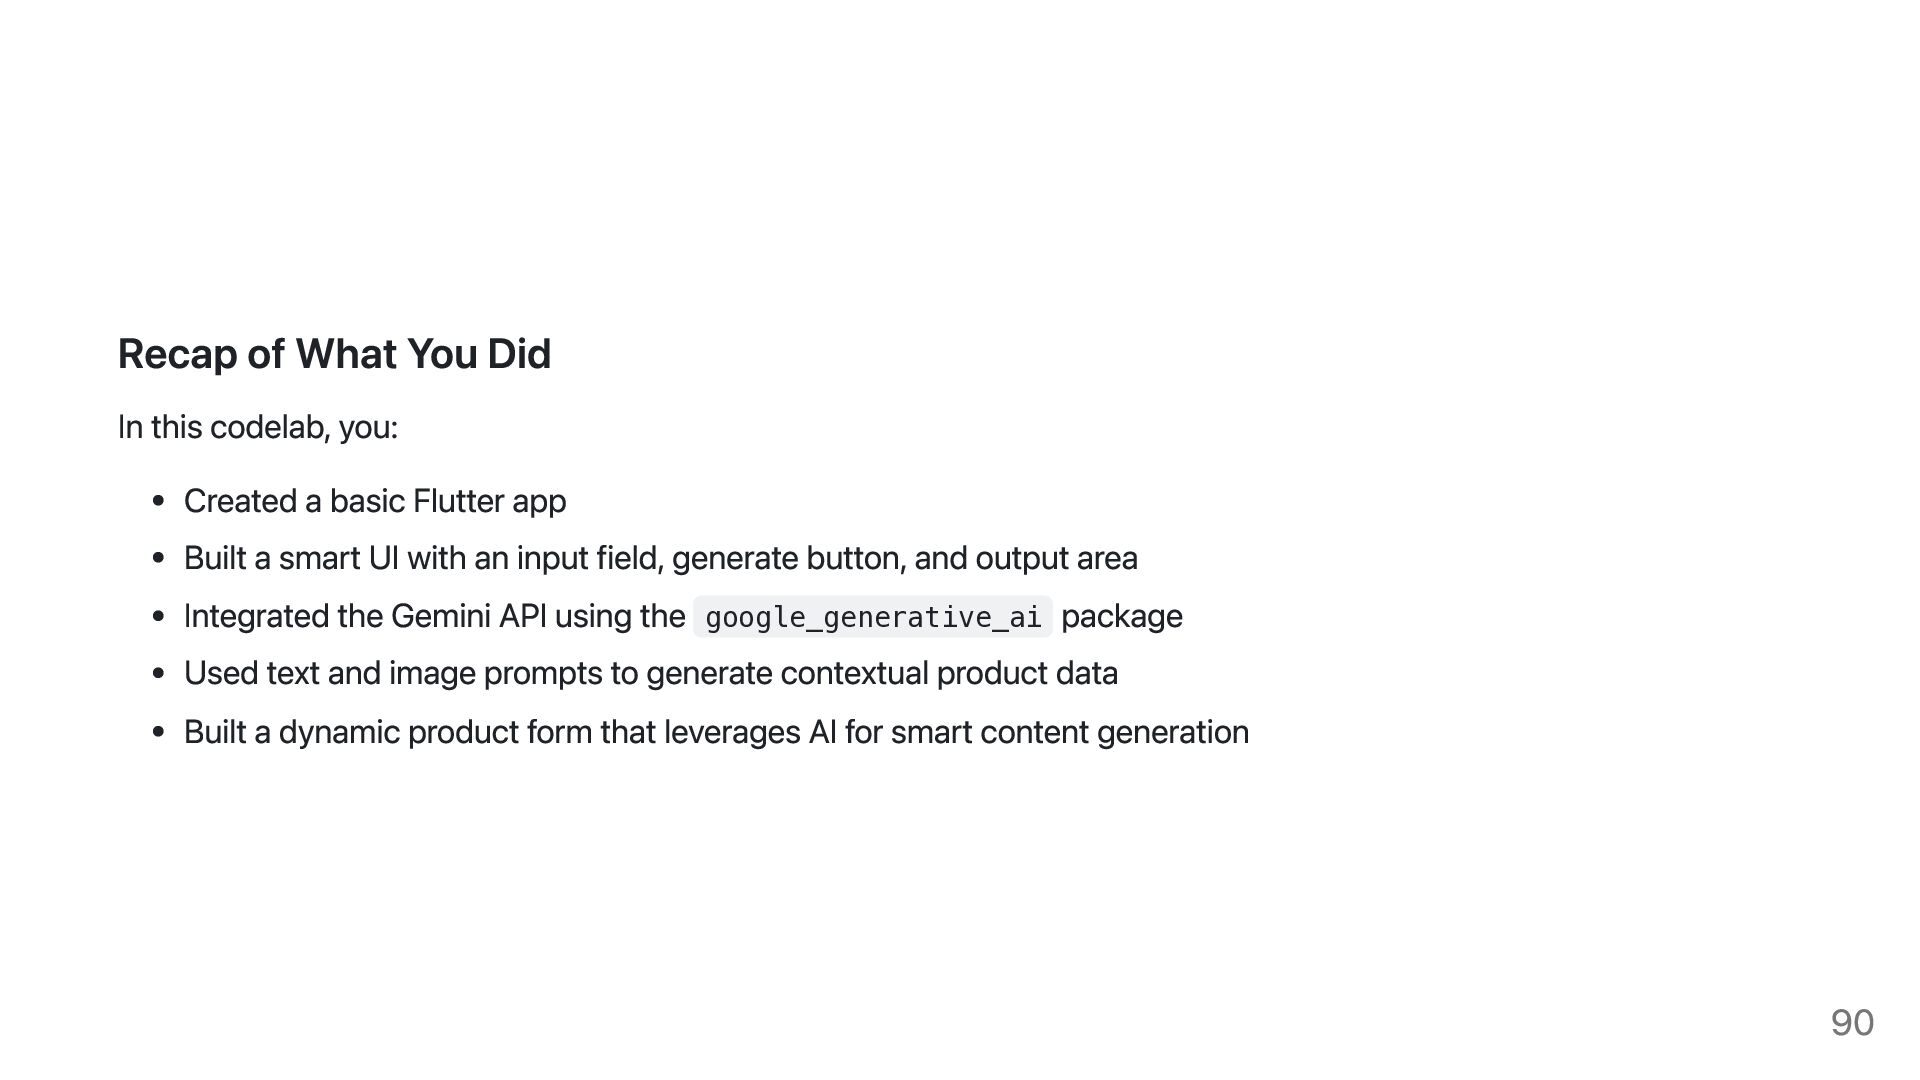
  81. Recap of What You Did In this codelab, you: Created

    a basic Flutter app Built a smart UI with an input field, generate button, and output area Integrated the Gemini API using the google_generative_ai package Used text and image prompts to generate contextual product data Built a dynamic product form that leverages AI for smart content generation 90
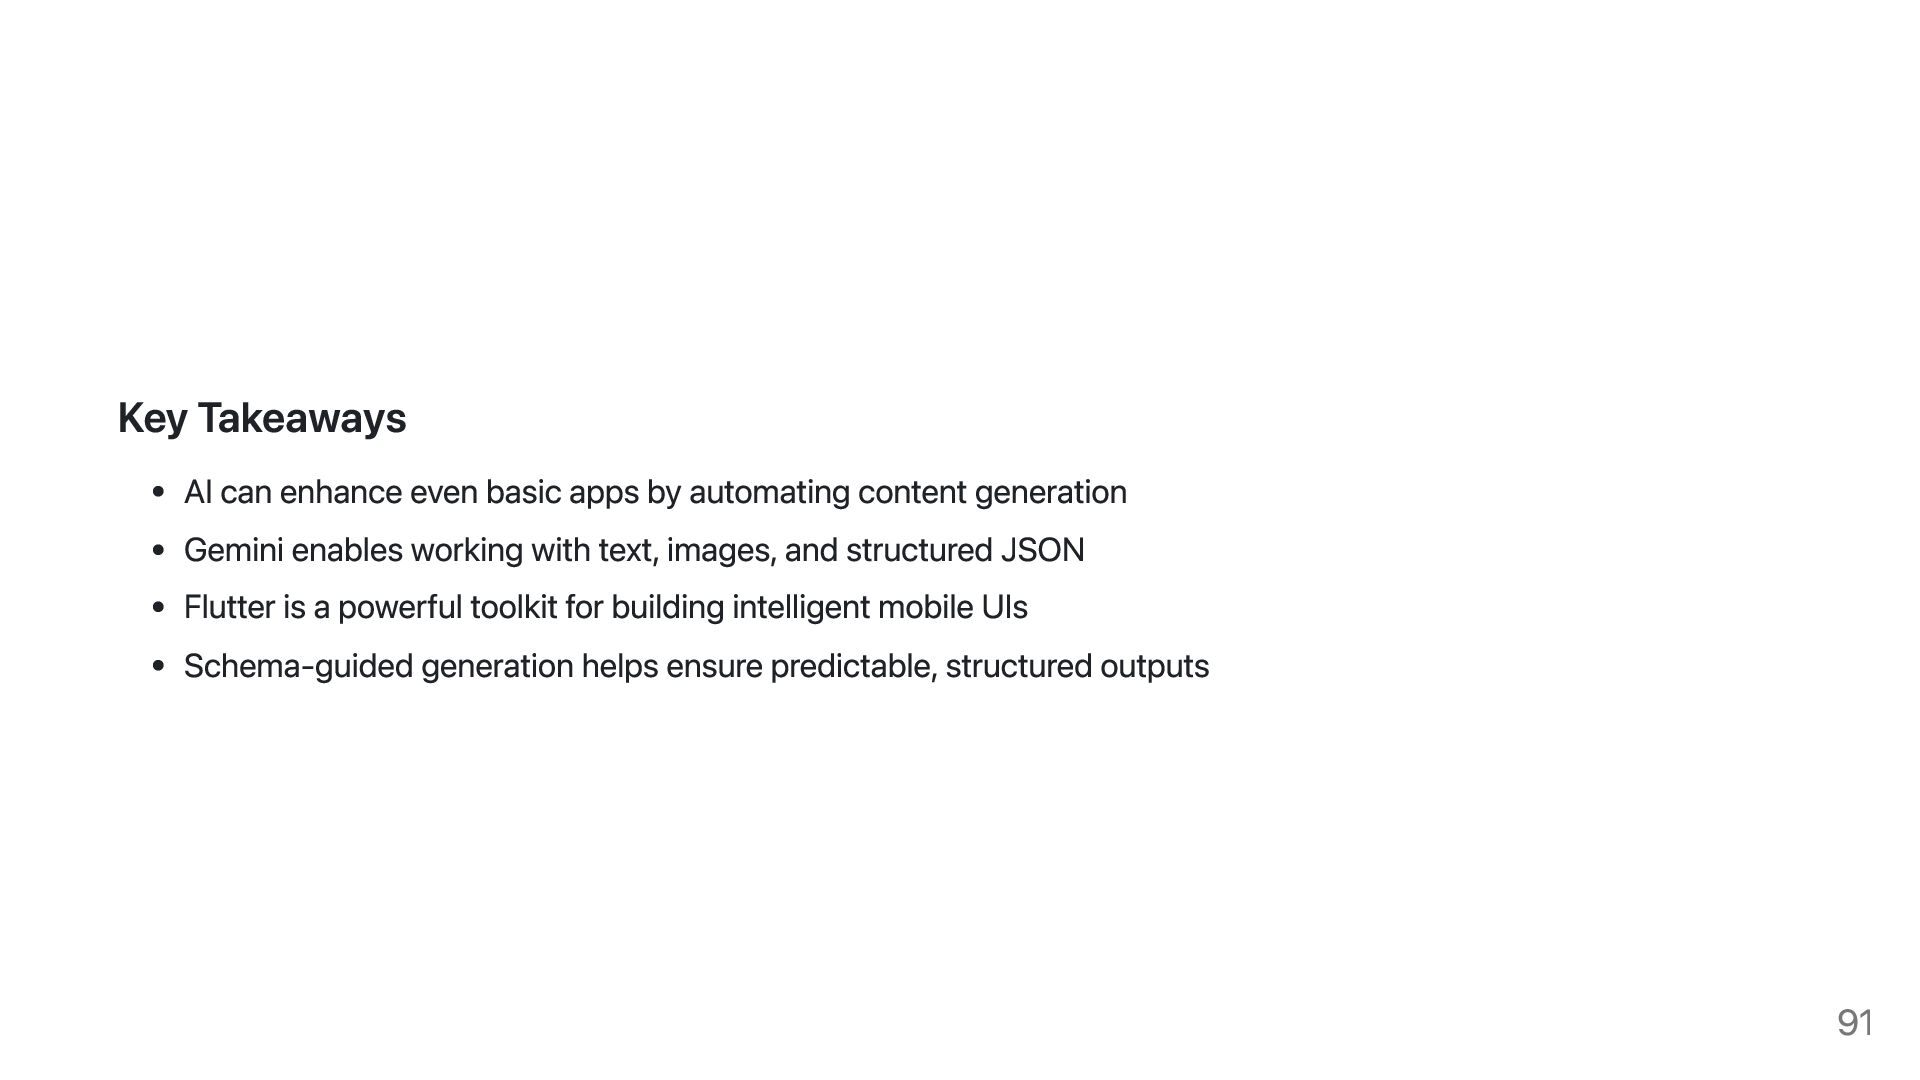
  82. Key Takeaways AI can enhance even basic apps by automating

    content generation Gemini enables working with text, images, and structured JSON Flutter is a powerful toolkit for building intelligent mobile UIs Schema-guided generation helps ensure predictable, structured outputs 91
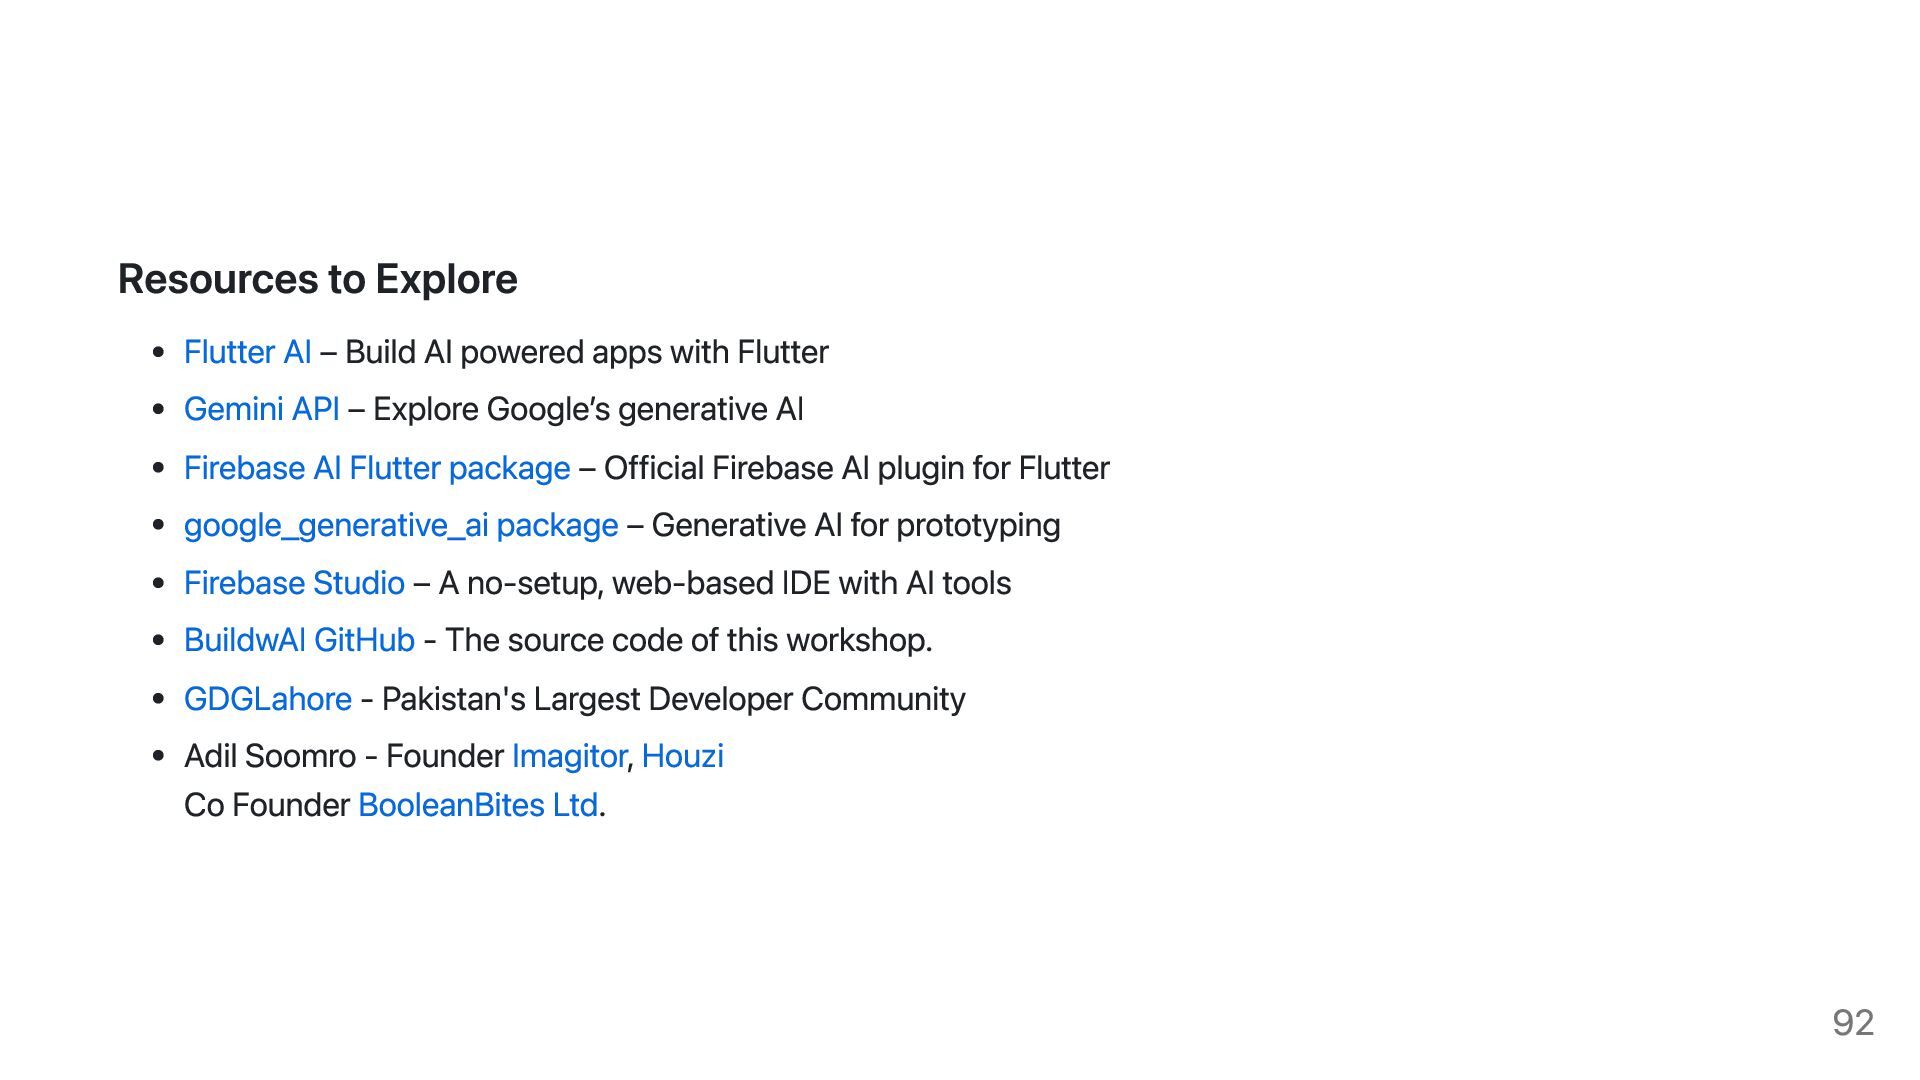
  83. Resources to Explore Flutter AI – Build AI powered apps

    with Flutter Gemini API – Explore Google’s generative AI Firebase AI Flutter package – Official Firebase AI plugin for Flutter google_generative_ai package – Generative AI for prototyping Firebase Studio – A no-setup, web-based IDE with AI tools BuildwAI GitHub - The source code of this workshop. GDGLahore - Pakistan's Largest Developer Community Adil Soomro - Founder Imagitor, Houzi Co Founder BooleanBites Ltd. 92
  84. What’s Next? Try creating more advanced prompts for different use

    cases Add chat or voice capabilities to your AI assistant Use AI to generate summaries, recommendations, or user insights Switch to firebase_ai for secure and scalable production apps Thank you for following along. 93
  85. 94