Upgrade to Pro — share decks privately, control downloads, hide ads and more …

DIY projects with Ruby & Pi

Helio Cola
February 02, 2018

DIY projects with Ruby & Pi

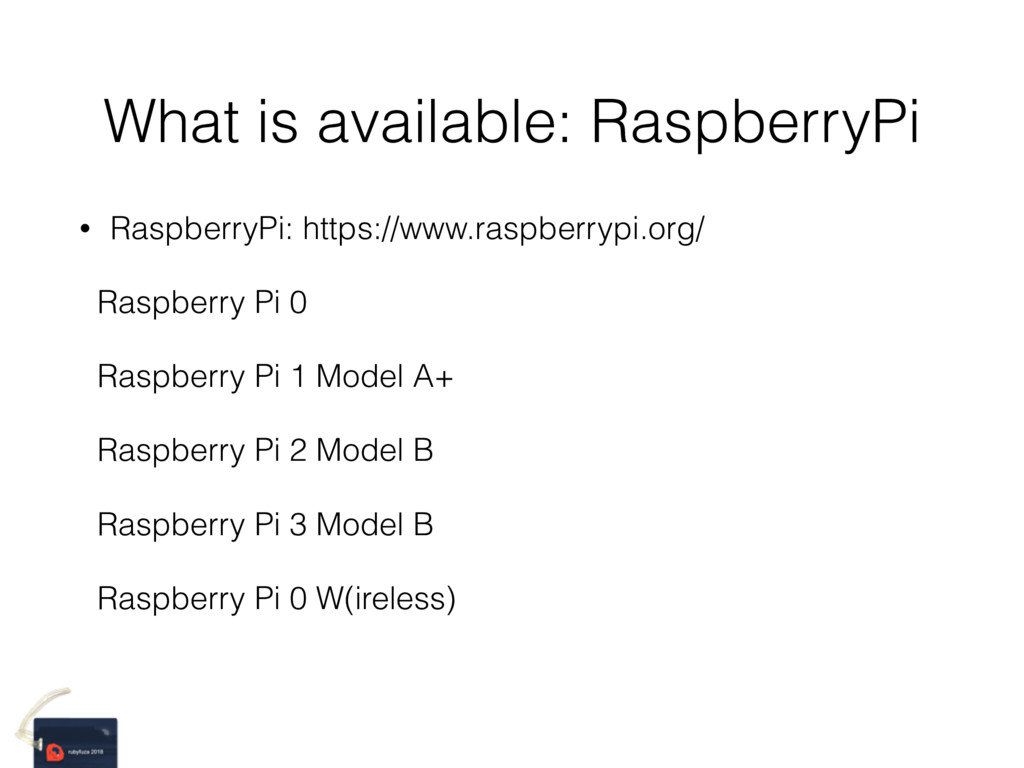
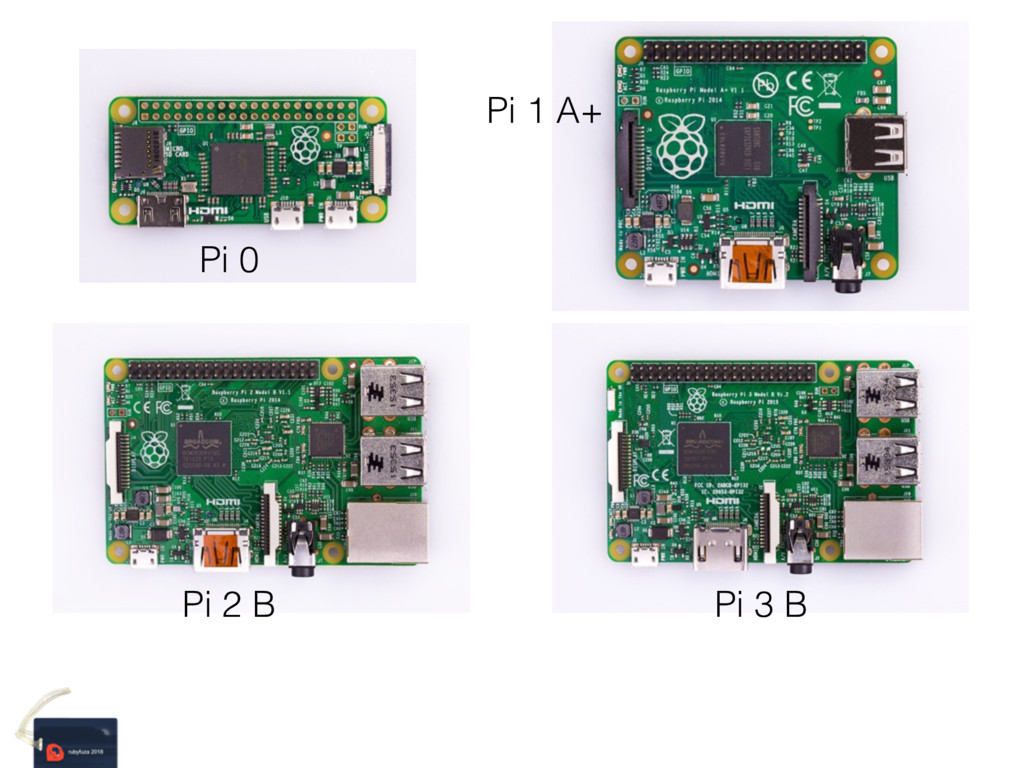
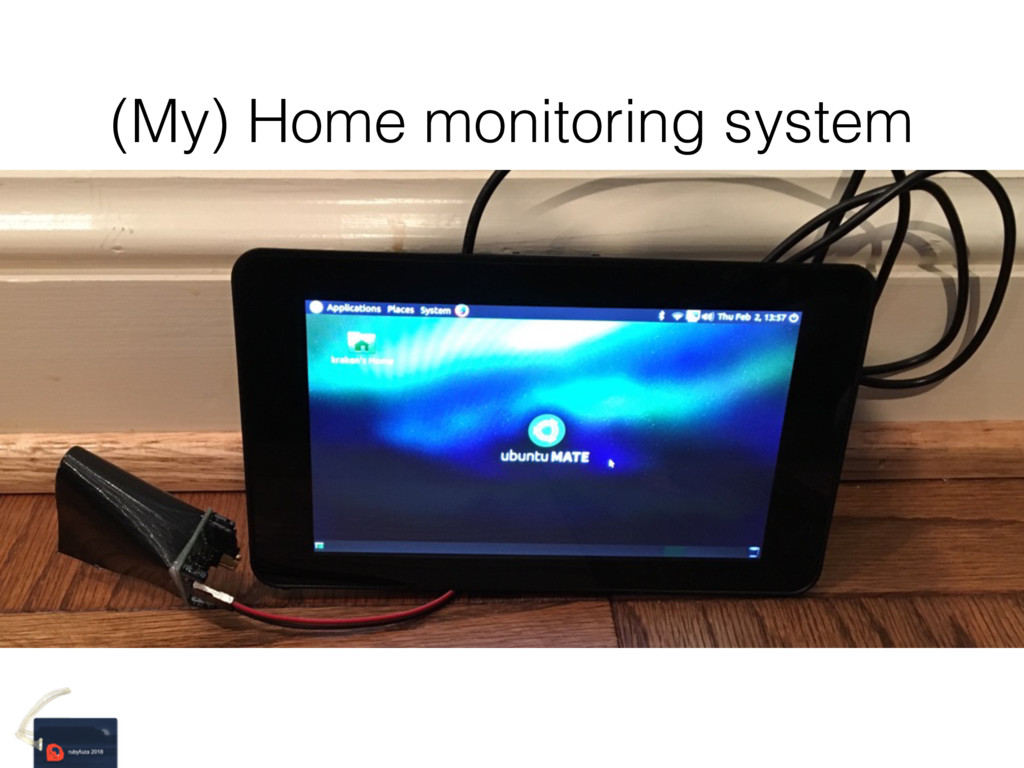
Ruby and RaspberryPi are available to us for quite sometime and this talk is meant to discuss how to use Ruby to explore things on a RaspberryPi.

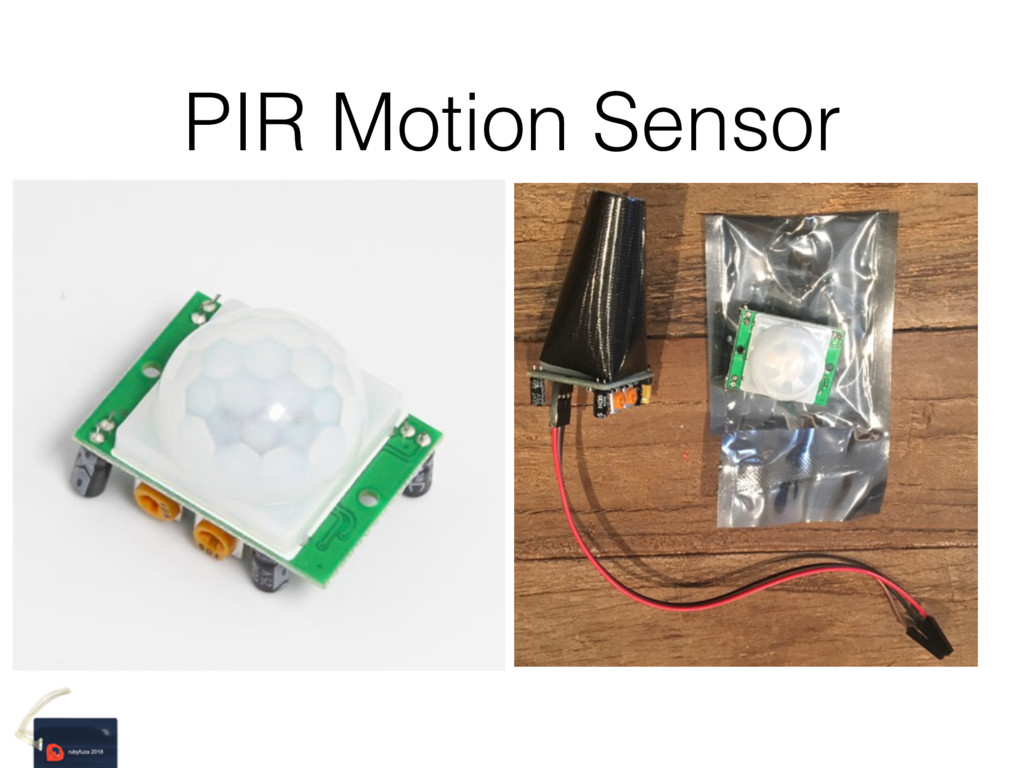
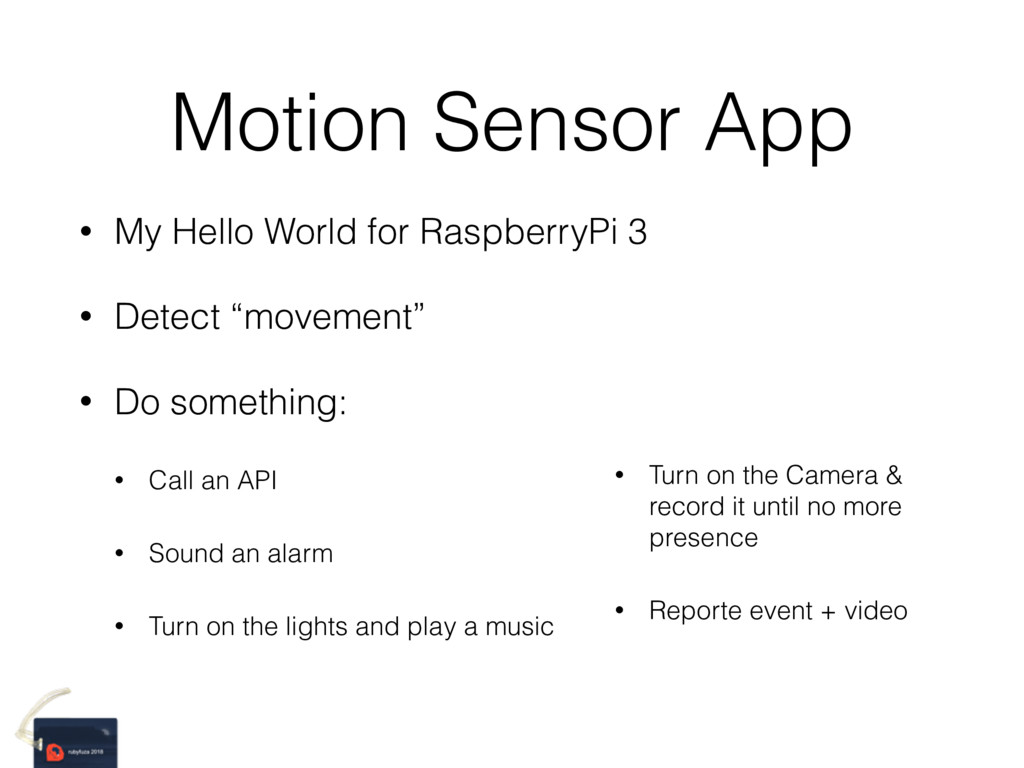
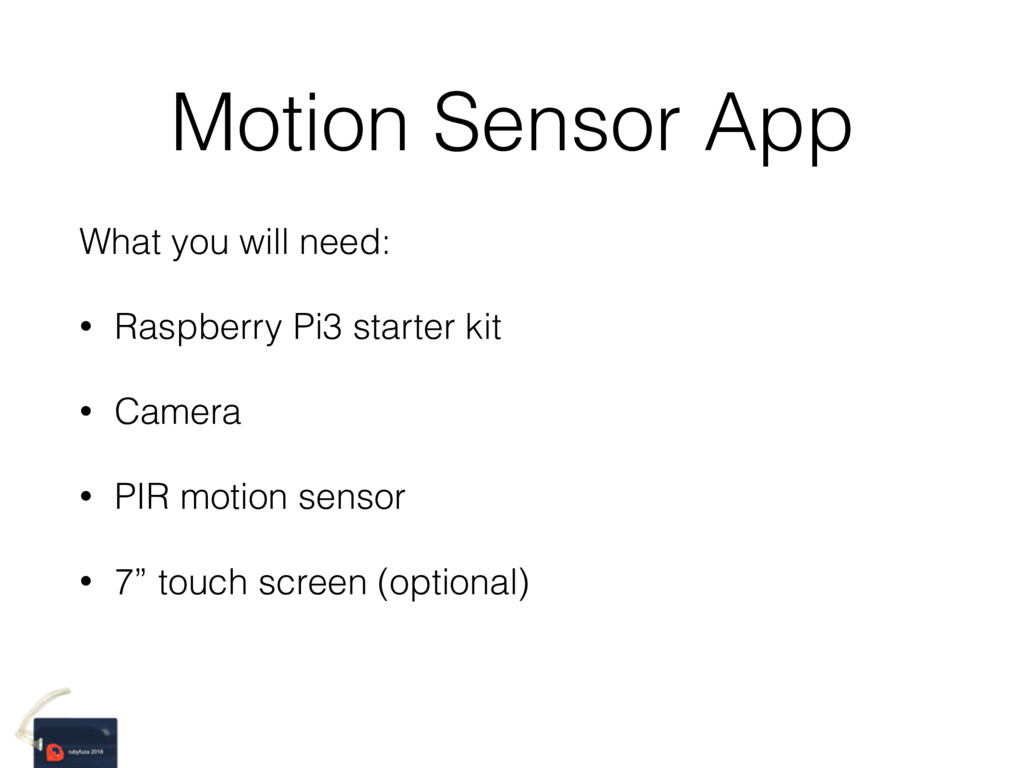
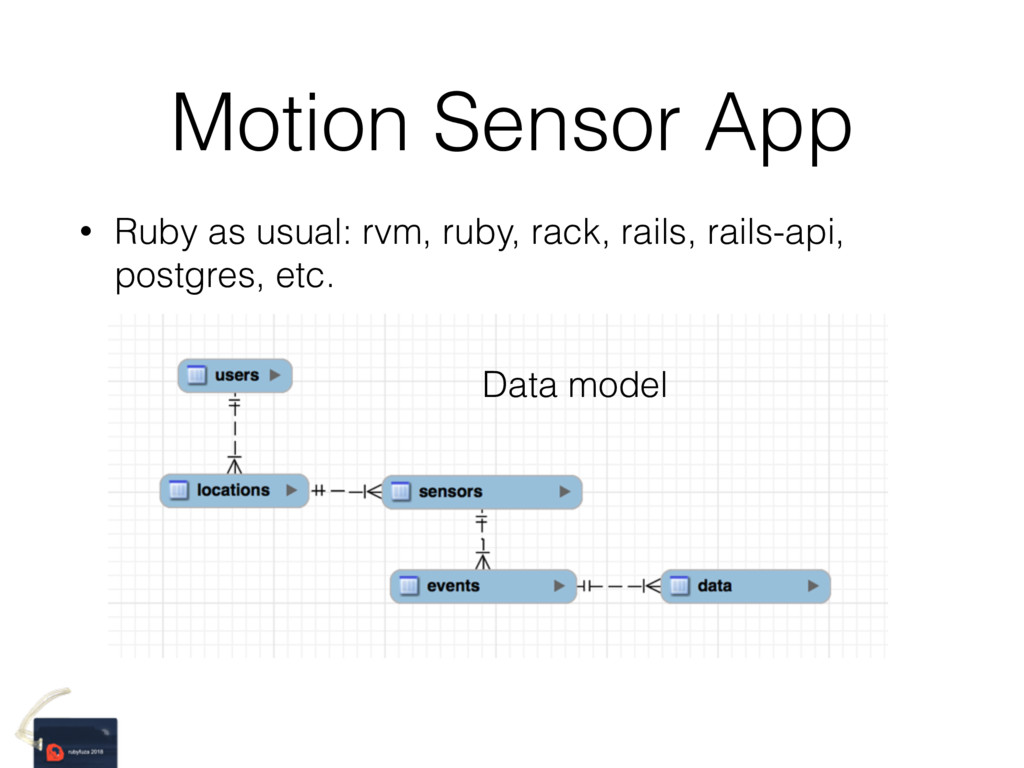
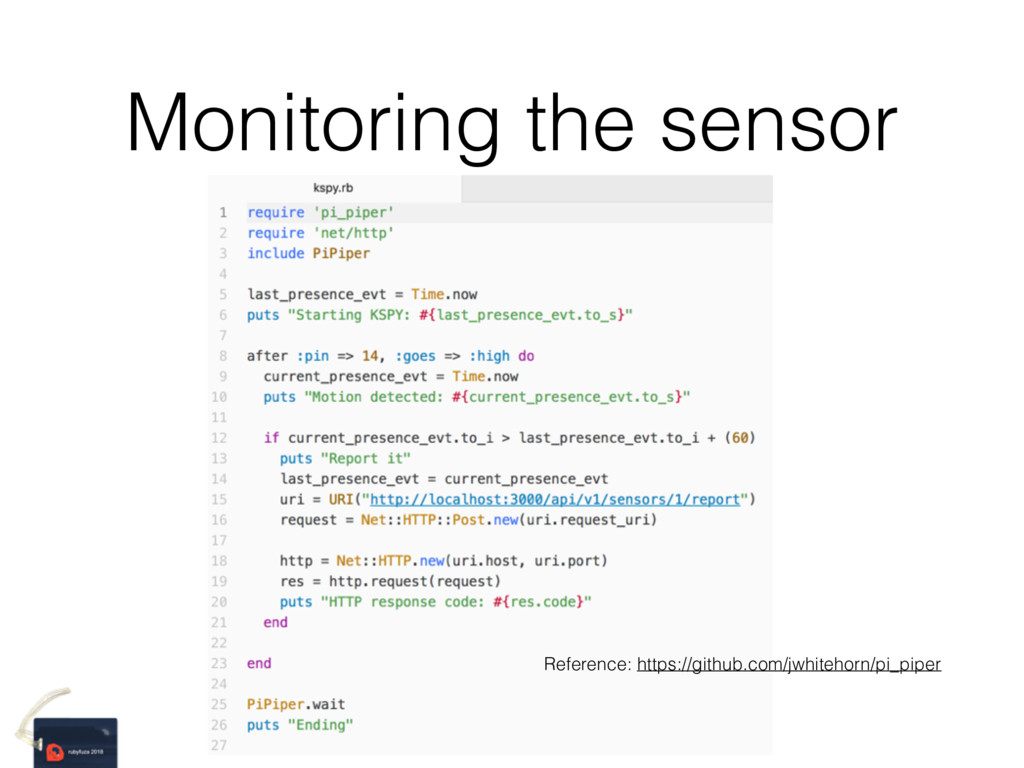
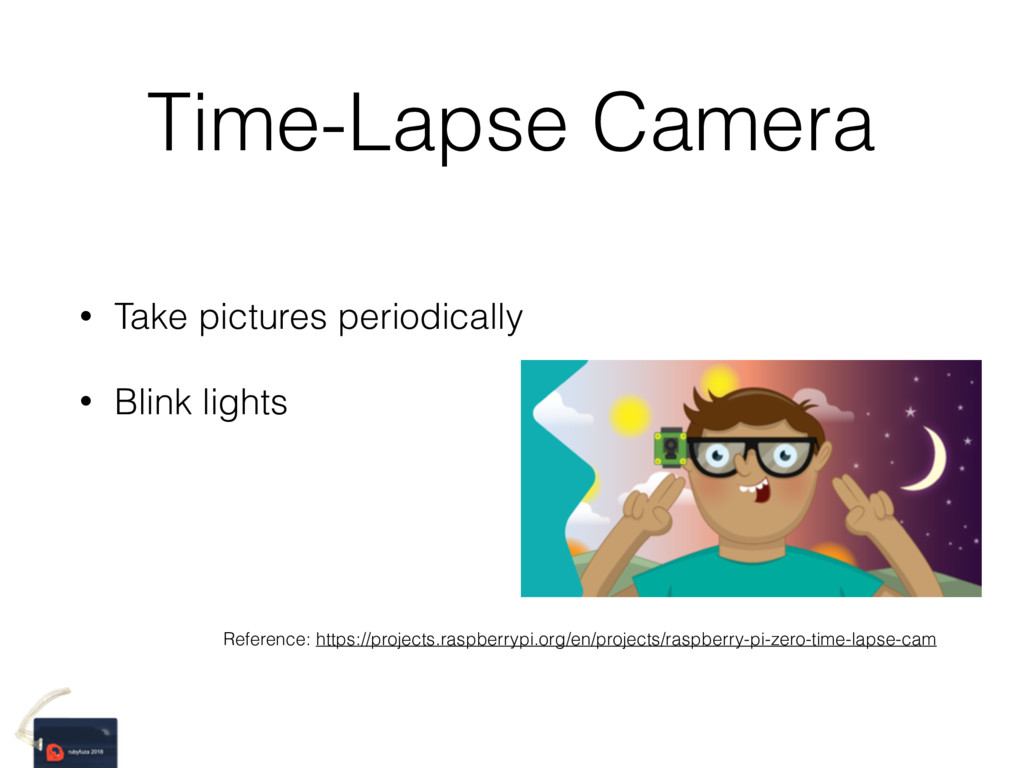
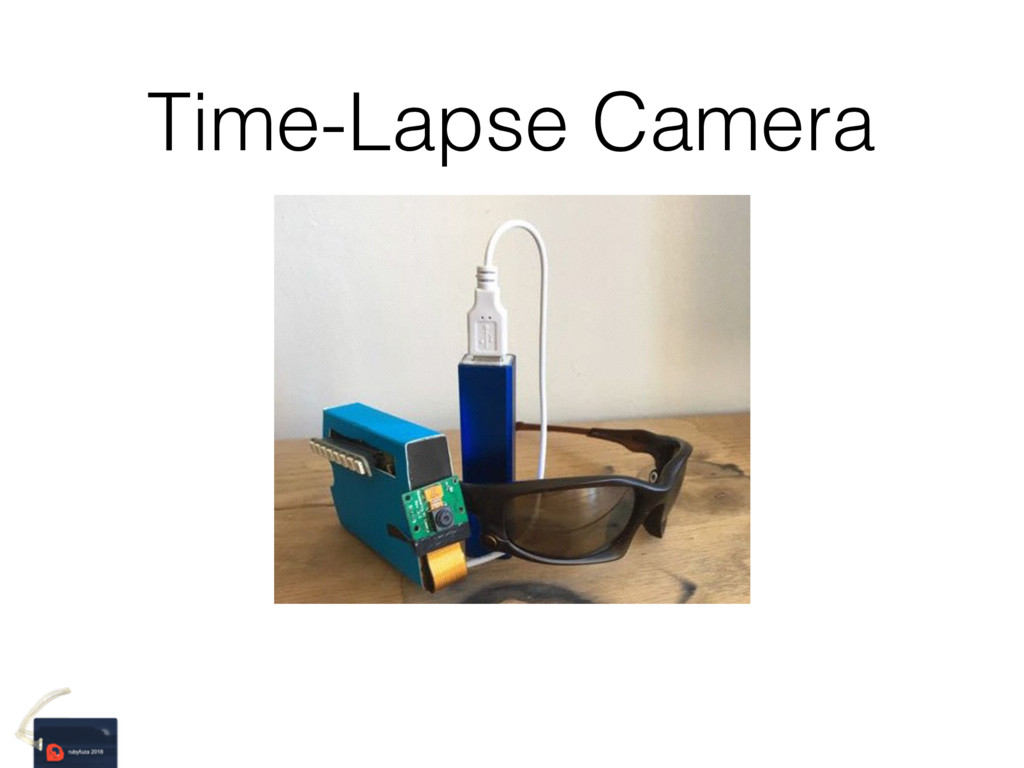
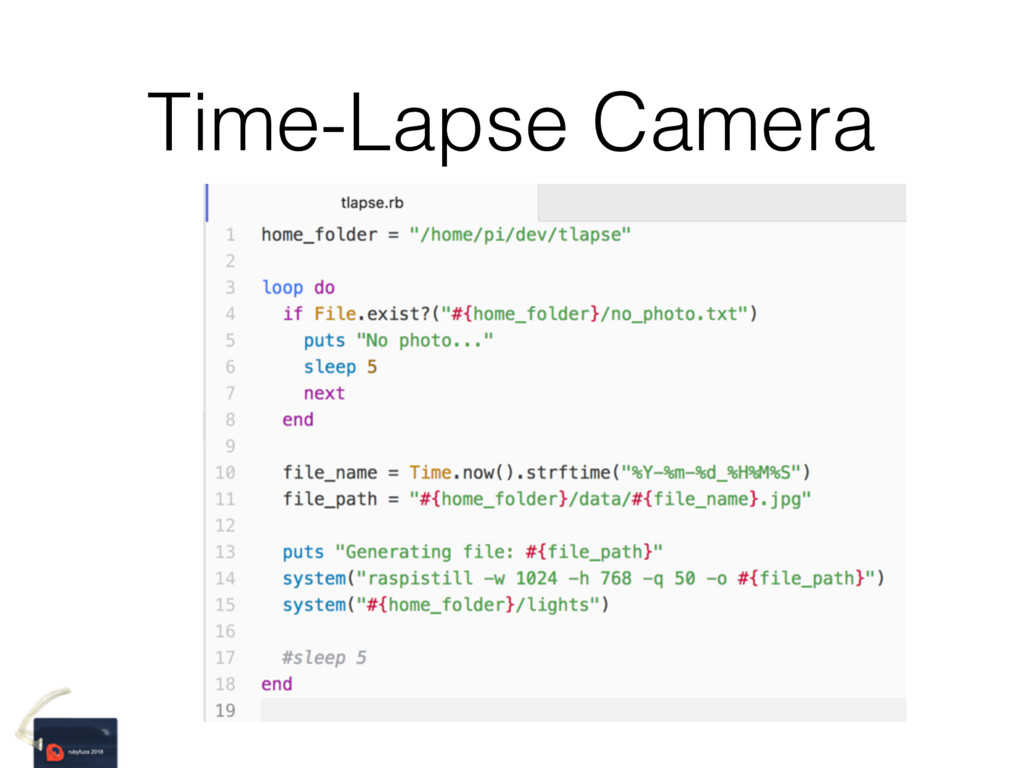
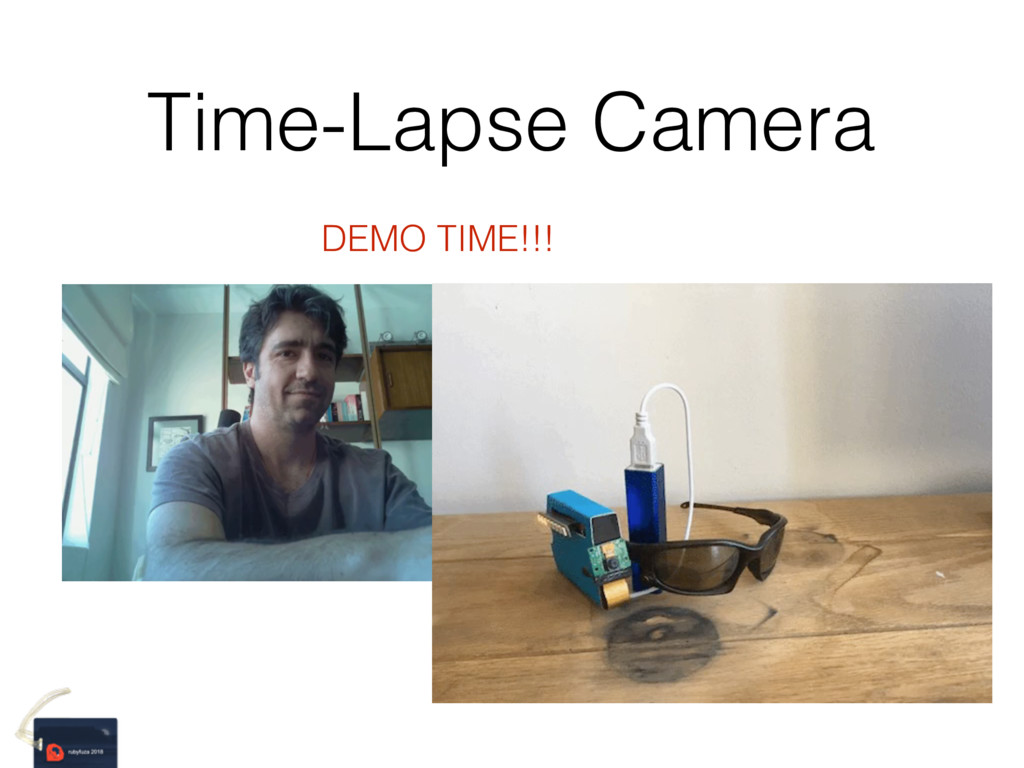
From a practical point of view, we will go through installation, setup, and build a simple Motion Sensor application and a Time-Lapse Camera using RaspberryPi.

Helio Cola

February 02, 2018
Tweet

More Decks by Helio Cola

Other Decks in Programming

Transcript

  1. DIY projects with
    Ruby & Pi
    Helio Cola
    @hacrods

    View Slide

  2. hac-rods.me
    Hi, I am Helio Cola!
    • ~17 years developing SW
    • ~7 years since I found happiness
    • ~6 years full time happiness
    • I go by @hacrods on the internet…

    View Slide

  3. Agenda
    • What is available
    • Buy, Install, Setup
    • Development Environment
    • Sensors & Gadgets & Projects

    View Slide

  4. What is available

    View Slide

  5. What is available
    • RaspberryPi: https://www.raspberrypi.org/
    • Parallella: https://www.parallella.org/

    View Slide

  6. What is available: RaspberryPi
    • RaspberryPi: https://www.raspberrypi.org/
    Raspberry Pi 0
    Raspberry Pi 1 Model A+
    Raspberry Pi 2 Model B
    Raspberry Pi 3 Model B
    Raspberry Pi 0 W(ireless)

    View Slide

  7. Pi 0
    Pi 1 A+
    Pi 2 B Pi 3 B

    View Slide

  8. Pi Zero vs Quarter

    View Slide

  9. Differences between the Pi’
    CPU RAM Display USB Others
    Pi 0 1Ghz,
    single-core
    512MB
    CSI (v1.2 only)
    and Mini HDMI
    USB On-The-
    Go ports
    Pi 0 W 1Ghz,
    single-core
    512MB
    CSI (v1.2 only)
    and Mini HDMI
    USB On-The-
    Go ports
    802.11n
    Pi 1 A+ 700Mhz 512MB HDMI
    One USB 2.0
    Port
    No Ethernet
    Low power 0.5W & 1W
    Pi 2 B 900MHz
    quad-core
    1GB
    CSI, DSI, Full
    HDMI
    4 USB 2.0
    ports
    Ethernet
    Pi 3 B 1.2GHz 64-bit
    quad-core
    1GB
    CSI, DSI, Full
    HDMI
    4 USB ports
    Ethernet, 802.11n,
    Bluetooth & BLE

    View Slide

  10. Differences between the Pi’
    Price Dimensions GPIO
    Pi 0 $5
    65mm long x 30mm wide x
    5mm thick
    HAT-compatible 40-pin
    header
    Pi 0 W $10
    65mm long x 30mm wide x
    5mm thick
    HAT-compatible 40-pin
    header
    Pi 1 A+ $24.95 65mm x 56mm 40 GPIO pins
    Pi 2 B $39.95 85.60mm × 56.5mm 40 GPIO pins
    Pi 3 B $39.95 86.9mm x 58.5mm x 19.1mm 40 GPIO pins

    View Slide

  11. What is available: Parallella
    • Parallella: https://www.parallella.org/
    Parallella Microserver (P1600)
    Parallella Desktop (P1601)
    Parallella Embedded (P1602)

    View Slide

  12. The differences
    CPU Price RAM HDMI USB GPIO
    Microserver
    18 cores
    667 MHz
    (max 1 GHz)
    $99 1GB RAM No 1 port No
    Desktop
    18 cores
    667 MHz
    (max 1 GHz)
    $149 1GB RAM Yes 1 port
    24
    ports
    Embedded
    18 cores
    667 MHz
    (max 1 GHz)
    $264.94 1GB RAM Yes 1 port
    48
    ports

    View Slide

  13. Buy, Install, Setup

    View Slide

  14. Where to buy
    • If you are near Pimoroni
    • If you are near Element14
    • If you are near Adafruit
    • If you are near “Amazon”
    • Otherwise: find Micro Center near you

    View Slide

  15. What to buy
    • Depend of what you are trying to do
    • The basics:
    Pi3 starter kit: board, case, power supply, heatsink, and micro
    SDHC
    Pi0 (W) starter kit: board, 2 micro USB to USB adaptor/cable, 4
    port USB hub, mini to full HDMI adaptor, and micro SDHC
    • Extras:
    Camera, sensors, 7” Touch screen display, Blinkt!, etc

    View Slide

  16. Pi3 Starter kit
    Reference: Amazon, CanaKit Raspberry Pi 3

    View Slide

  17. Pi0 Starter kit
    Reference: Amazon, Raspberry Pi Zero W Complete Starter Kit

    View Slide

  18. Sensors
    Reference: Amazon, KOOKYE 16 in 1 Smart Home Sensor Modules Kit

    View Slide

  19. 7” Touch Screen display
    https://www.element14.com/community/docs/DOC-78156/l/raspberry-pi-7-
    touchscreen-display

    View Slide

  20. Camera

    View Slide

  21. Blinkt!
    https://shop.pimoroni.com/products/blinkt

    View Slide

  22. Pi 3: Install, Setup
    • If your machine is Windows/Linux/Mac:
    https://developer.ubuntu.com/core/get-started/
    installation-medias
    • If your machine is Linux:
    https://ubuntu-mate.org/raspberry-pi/

    View Slide

  23. Pi 3: OS Download
    • Ubuntu Core, Ubuntu Mate, Windows 10 IoT Core
    Core: https://developer.ubuntu.com/core/get-started/
    raspberry-pi-2-3
    Mate: https://ubuntu-mate.org/download/
    Windows (still on my TODO list): http://ms-
    iot.github.io/content/en-US/Downloads.htm

    View Slide

  24. Pi 3: Installation on Mac
    • More or less these were my steps:
    1. Download the image, un-archive, insert SD card
    2. Run:

    View Slide

  25. Pi 3: Setup
    • First boot: it will take longer
    • It may automatically extend the file system (Core)
    • Or you will have to do it manually (Mate)
    • Follow the instructions on the display
    • Configure your network
    • And an administrator account

    View Slide

  26. Pi 3: On a TV

    View Slide

  27. Pi 3: On a touch screen

    View Slide

  28. Development Environment

    View Slide

  29. (My) Development Environment
    • UbuntuMate OS: a GUI on top an Ubuntu distribution
    • ruby 2.1.5p273 (2014-11-13) [arm-linux-gnueabihf]
    • rvm & ruby 2.5
    • Text Editor: vi or Mac/Atom/Git/RaspberryPi
    • Firefox: more than enough
    • A monitor or TV, keyboard and mouse

    View Slide

  30. 7” Touch Screen display

    View Slide

  31. 7” Touch Screen display

    View Slide

  32. 7” Touch Screen display

    View Slide

  33. Sensors

    View Slide

  34. PIR Motion Sensor

    View Slide

  35. Smoke and
    Combustible
    Gas

    View Slide

  36. Buzzer

    View Slide

  37. Carbon
    Monoxide

    View Slide

  38. Digital
    touch

    View Slide

  39. Flame

    View Slide

  40. Vibration

    View Slide

  41. Temperature
    and Humidity

    View Slide

  42. Sound

    View Slide

  43. Water level

    View Slide

  44. Motion Sensor App

    View Slide

  45. Motion Sensor App
    • My Hello World for RaspberryPi 3
    • Detect “movement”
    • Do something:
    • Call an API
    • Sound an alarm
    • Turn on the lights and play a music
    • Turn on the Camera &
    record it until no more
    presence
    • Reporte event + video

    View Slide

  46. Motion Sensor App
    Pi3 Rails App
    Local at your house,
    AWS, Heroku, etc
    Pi0W Front door
    Pi0W Back door
    Pi0W Game room

    View Slide

  47. Motion Sensor App
    What you will need:
    • Raspberry Pi3 starter kit
    • Camera
    • PIR motion sensor
    • 7” touch screen (optional)

    View Slide

  48. Motion Sensor App
    • Ruby as usual: rvm, ruby, rack, rails, rails-api,
    postgres, etc.
    Data model

    View Slide

  49. Motion Sensor App
    • CRUD admin app & api to allow events to come in

    View Slide

  50. PIR Motion Sensor

    View Slide

  51. PIR Motion Sensor
    Reference: https://cdn-learn.adafruit.com/downloads/pdf/pir-passive-infrared-proximity-motion-sensor.pdf
    Passive infrared
    Pyroelectric
    IR motion

    View Slide

  52. Monitoring the sensor
    Reference: https://github.com/jwhitehorn/pi_piper

    View Slide

  53. (My) Home monitoring system

    View Slide

  54. (My) Home monitoring system
    experiment
    • Left it running on my house for 2 months
    • A friend came by regularly to check the house
    • And walked through the sensor
    • And I monitored everything from the other side of
    the globe

    View Slide

  55. Time-Lapse Camera

    View Slide

  56. Time-Lapse Camera
    • Take pictures periodically
    • Blink lights
    Reference: https://projects.raspberrypi.org/en/projects/raspberry-pi-zero-time-lapse-cam

    View Slide

  57. Time-Lapse Camera
    What you will need:
    • Raspberry Pi0 starter kit
    • GPIO Hammer Header (solderless)
    • Blinkt (optional)
    • Camera
    • Reused cardboard box & sunglass
    • 5V Power pack

    View Slide

  58. Time-Lapse Camera

    View Slide

  59. Time-Lapse Camera

    View Slide

  60. Time-Lapse Camera

    View Slide

  61. Time-Lapse Camera
    DEMO TIME!!!

    View Slide

  62. References
    http://rayhightower.com/
    https://www.raspberrypi.org/
    https://www.parallella.org/
    https://developer.ubuntu.com/core/get-started/installation-medias
    https://ubuntu-mate.org/raspberry-pi/
    https://developer.ubuntu.com/core/get-started/raspberry-pi-2-3
    https://ubuntu-mate.org/download/
    http://ms-iot.github.io/content/en-US/Downloads.htm
    https://www.element14.com/community/docs/DOC-78156/l/raspberry-pi-7-
    touchscreen-display
    https://cdn-learn.adafruit.com/downloads/pdf/pir-passive-infrared-proximity-
    motion-sensor.pdf
    https://codingyoda.com/Raspberry-Pi-Email-PIR-Sensor.php
    https://github.com/jwhitehorn/pi_piper
    https://projects.raspberrypi.org/en/projects/raspberry-pi-zero-time-lapse-cam
    http://bit.ly/k8s-rpi

    View Slide

  63. Thank you!
    http://bit.ly/k8s-rpi
    Helio Cola
    @hacrods

    View Slide