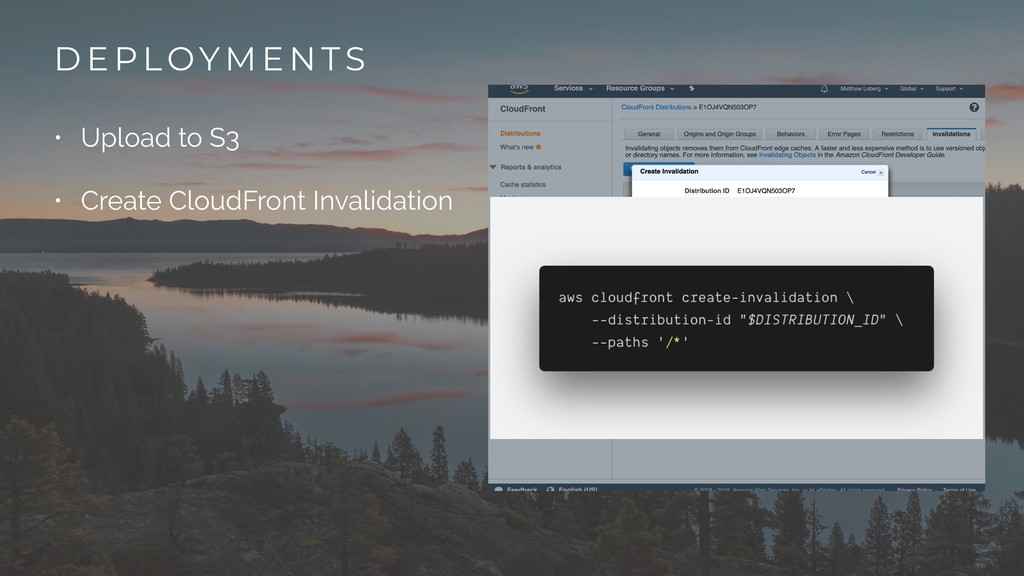
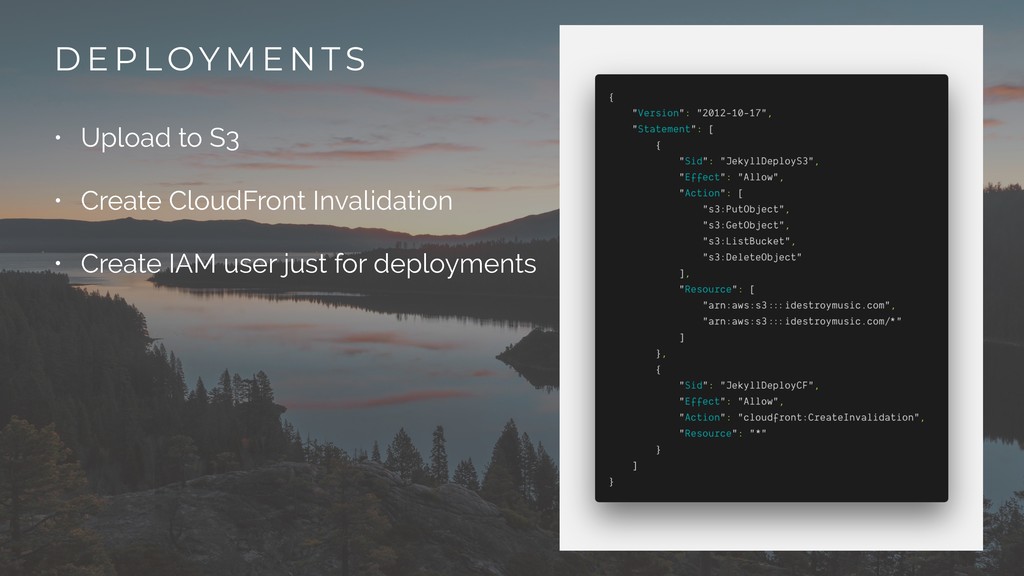
S3 • Create CloudFront Invalidation • Create IAM user just for deployments • Automate with Continuous Integration (CircleCI, Travis) https:/ /github.com/mloberg/mlo.io/blob/master/.circleci/config.yml
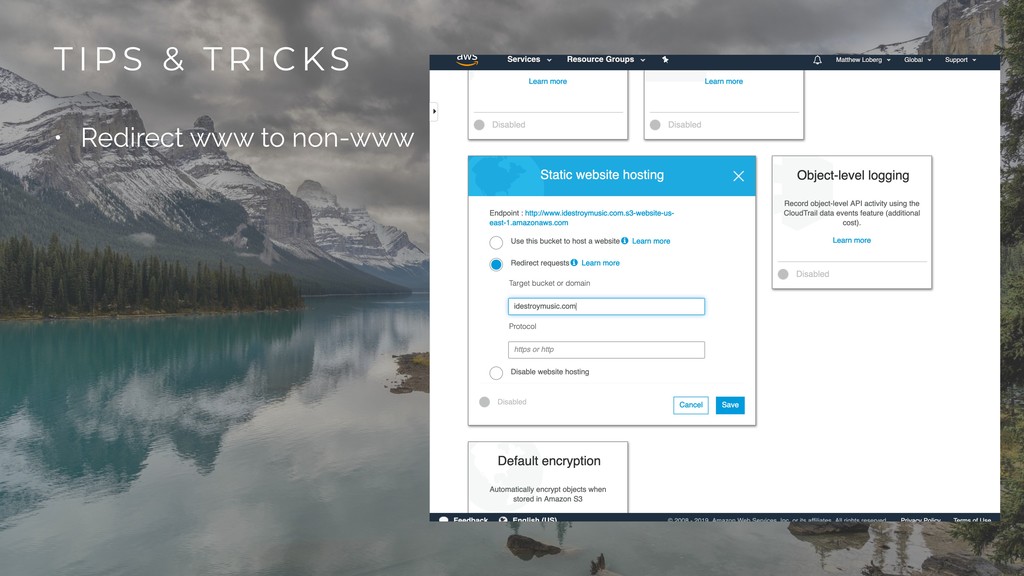
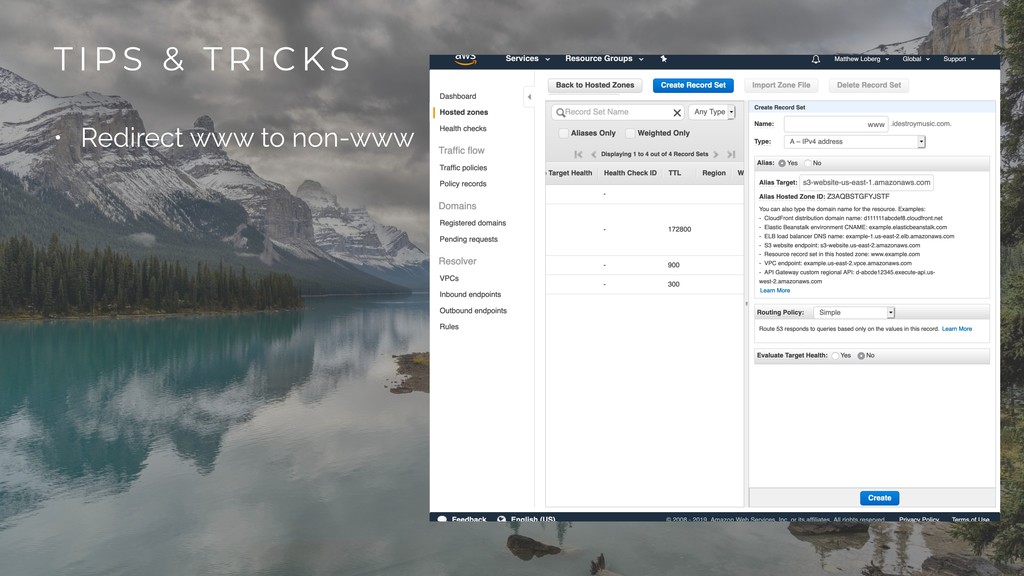
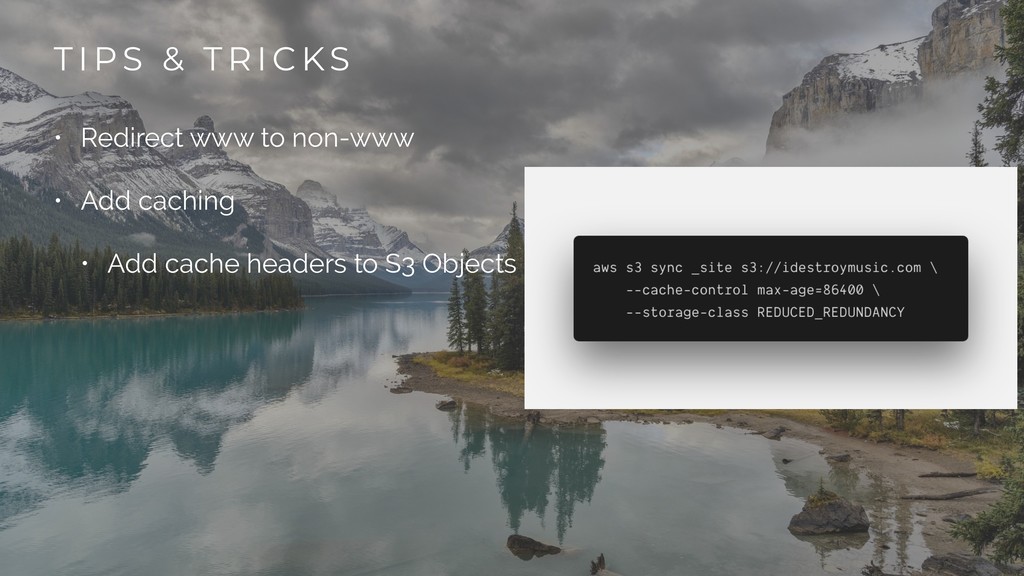
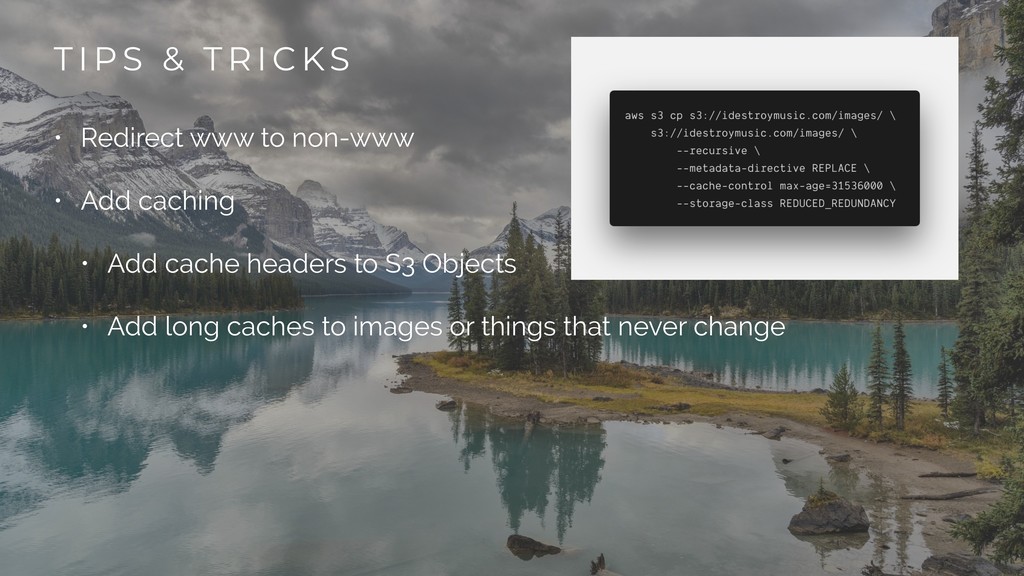
• Redirect www to non-www • Add caching • Add cache headers to S3 Objects • Add long caches to images or things that never change • Use hashed filenames to create long caches for CSS/JS