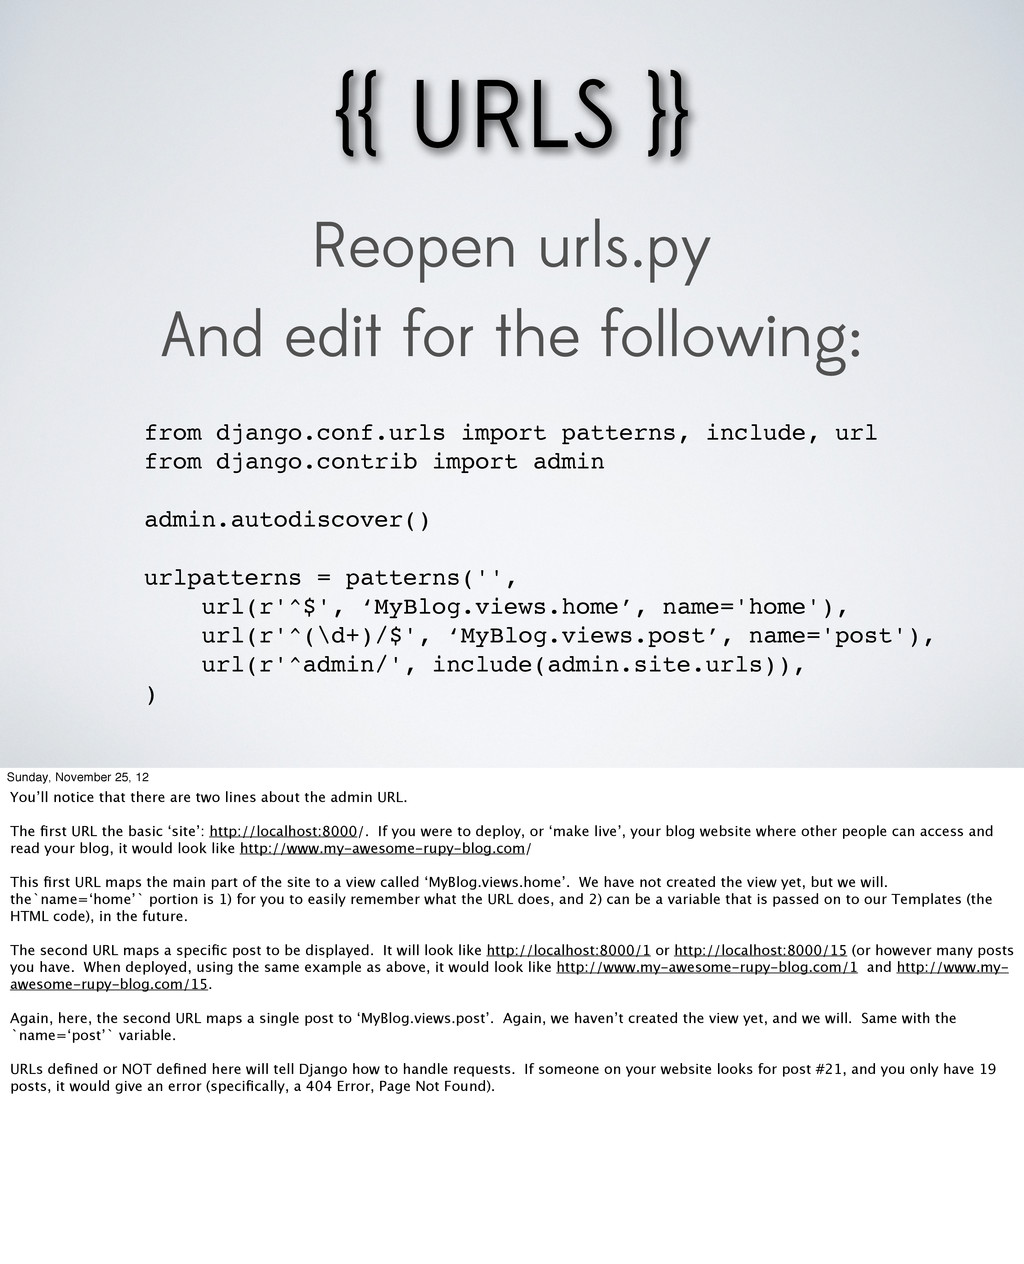
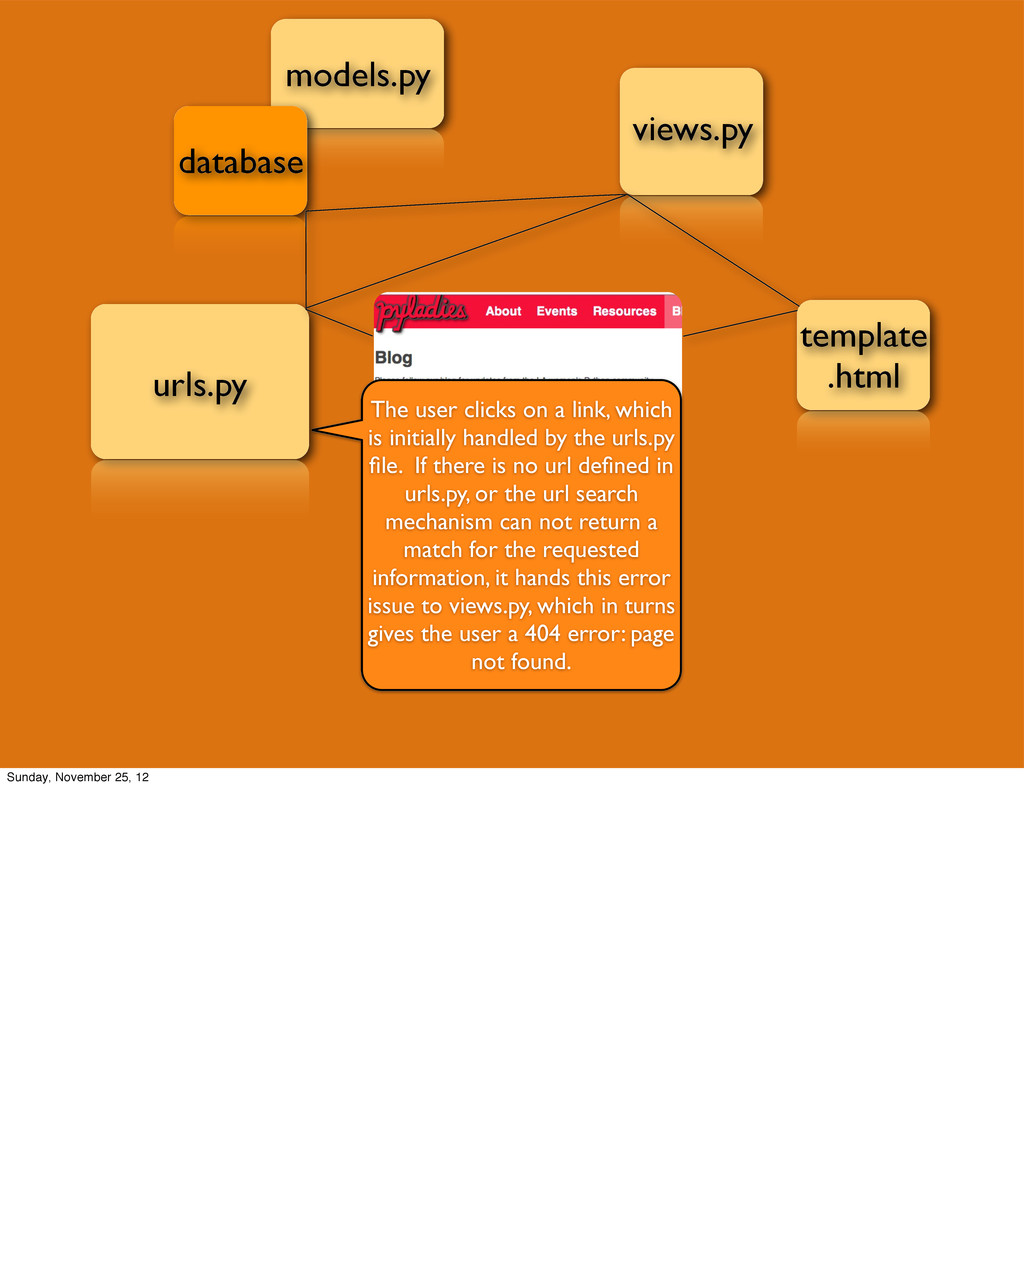
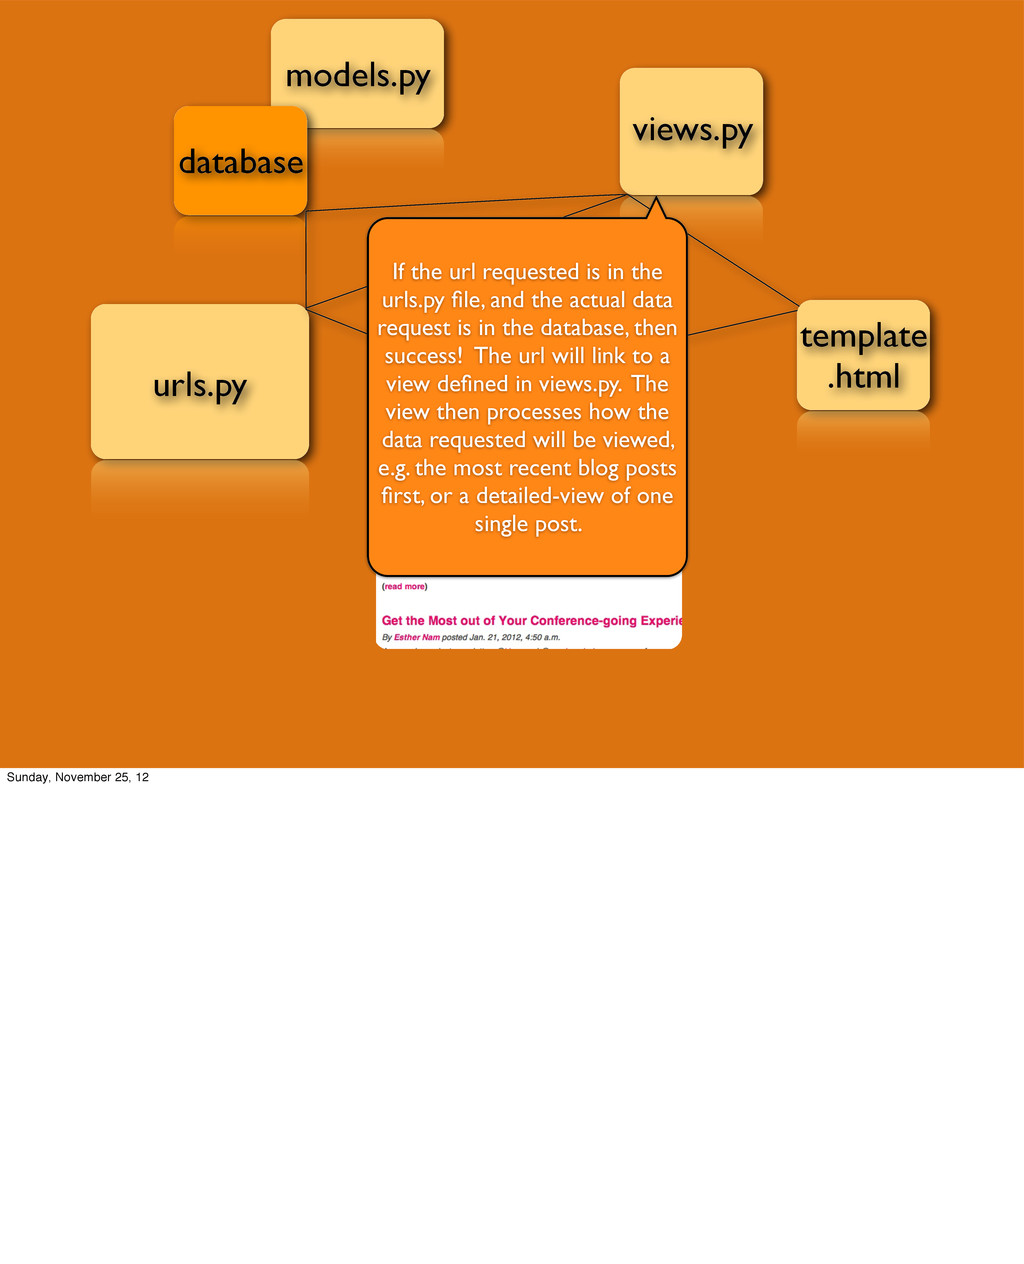
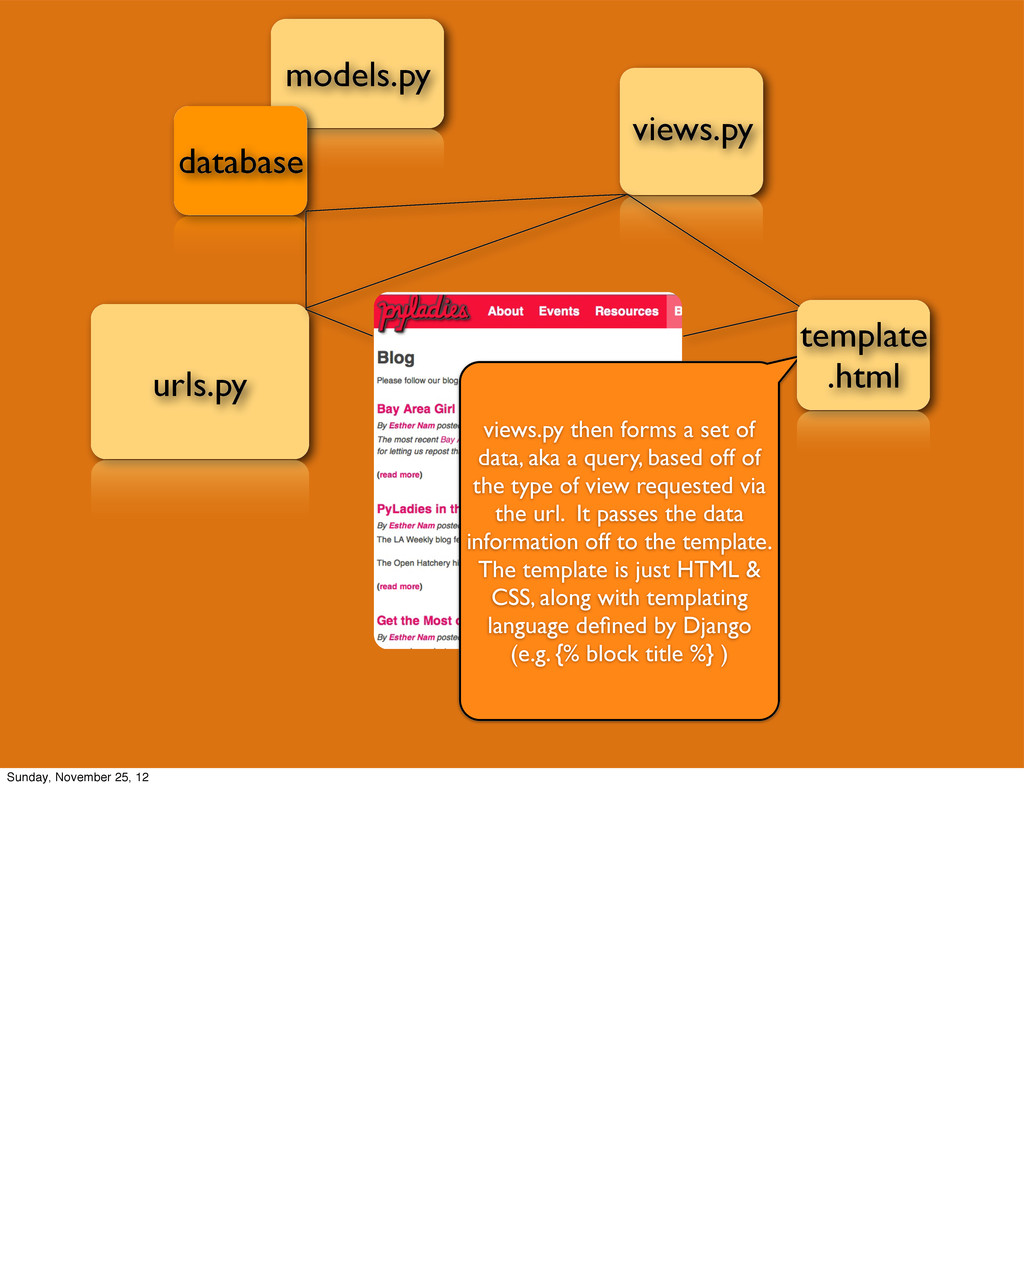
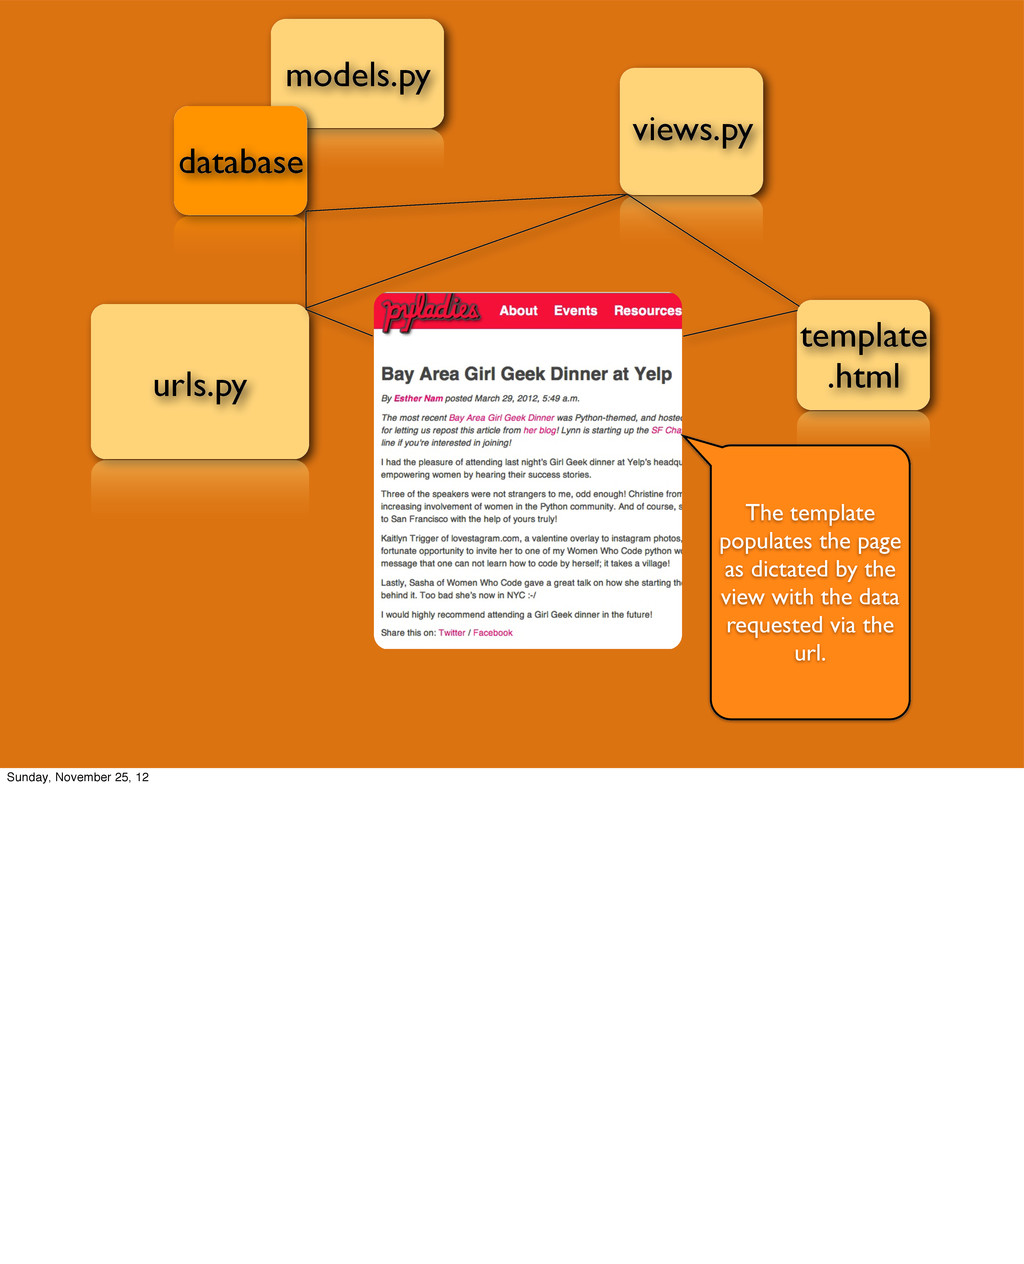
from django.conf.urls import patterns, include, url from django.contrib import admin admin.autodiscover() urlpatterns = patterns('', url(r'^$', ‘MyBlog.views.home’, name='home'), url(r'^(\d+)/$', ‘MyBlog.views.post’, name='post'), url(r'^admin/', include(admin.site.urls)), ) Sunday, November 25, 12 You’ll notice that there are two lines about the admin URL. The first URL the basic ‘site’: http://localhost:8000/. If you were to deploy, or ‘make live’, your blog website where other people can access and read your blog, it would look like http://www.my-awesome-rupy-blog.com/ This first URL maps the main part of the site to a view called ‘MyBlog.views.home’. We have not created the view yet, but we will. the`name=‘home’` portion is 1) for you to easily remember what the URL does, and 2) can be a variable that is passed on to our Templates (the HTML code), in the future. The second URL maps a specific post to be displayed. It will look like http://localhost:8000/1 or http://localhost:8000/15 (or however many posts you have. When deployed, using the same example as above, it would look like http://www.my-awesome-rupy-blog.com/1 and http://www.my- awesome-rupy-blog.com/15. Again, here, the second URL maps a single post to ‘MyBlog.views.post’. Again, we haven’t created the view yet, and we will. Same with the `name=‘post’` variable. URLs defined or NOT defined here will tell Django how to handle requests. If someone on your website looks for post #21, and you only have 19 posts, it would give an error (specifically, a 404 Error, Page Not Found).
![HOLD UP Sunday, November 25, 12 [next slide]](https://files.speakerdeck.com/presentations/9cdddf90195c01307dd222000a9f27e2/slide_17.jpg)