Upgrade to Pro — share decks privately, control downloads, hide ads and more …

Machida Tech Night #1 My First Use of Chainer

Shunta Furukawa
November 24, 2015
42

Machida Tech Night #1 My First Use of Chainer

Talk about my first use of chainer. Brief introduction of myself and Chainer, which is domestic deep learning framework.

Shunta Furukawa

November 24, 2015
Tweet

Transcript

  1. SELF INTRODUCTION • Shunta Furukawa @ shunter1112 • 2009 -

    2013 : Worked as a designer for a mobile game company. • 2013 - 2015 : Studied at Keio University, graduate school of system design and management (SDM). • 2015 - Work for Telecommunication Company, Innovation Management department. • Job : Business Development • Interest : Machine Learning
  2. EVENT? MACHIDA? • New to join event (relatively). • Love

    Machida, Like Tech. • But not good at… programming • Been here for 5 years. • Happy to have event at Machida. • Hope to drive this community :)
  3. FLEXIBLE FRAMEWORK FOR DEEP LEARNING CHAINER • Deep Learning framework

    provided as a Python Library. • Preferred Network, Inc has developed, OSS. • For more information, see : • http://chainer.org/ • http://www.slideshare.net/beam2d/introduction-to-chainer-a- flexible-framework-for-deep-learning • Easy to implement Deep Learning algorithm, even for beginner programmer like me.
  4. DEEP LEARNING • One of machine learning algorithm, which trigger

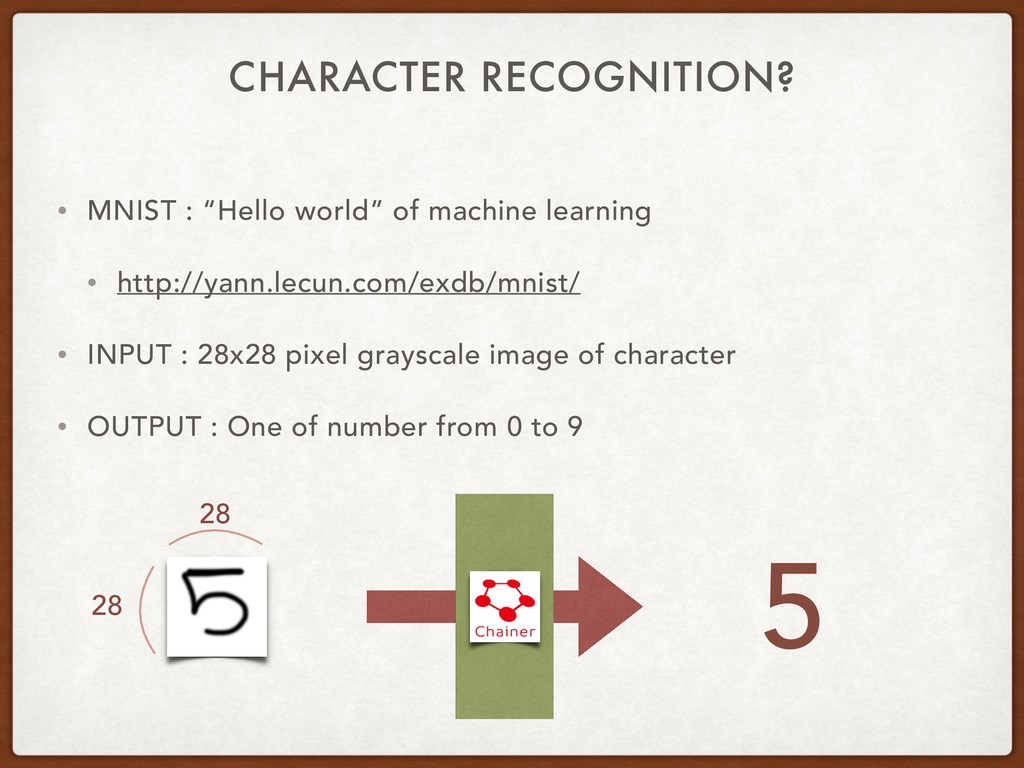
    to make AI in Fasion. (Google, Facebook, IBM…) • Mimics structure of neural network in brain. • Lots of application • Image recognition • Text recognition • Natural Language Processing
  5. CHARACTER RECOGNITION? • MNIST : “Hello world” of machine learning

    • http://yann.lecun.com/exdb/mnist/ • INPUT : 28x28 pixel grayscale image of character • OUTPUT : One of number from 0 to 9 28 28 5
  6. WORKFLOW 1. Built Model • Define the structure of model.

    2. Train Model • Feed data into model and optimize parameter (or weight) of data 3. Use Model • give input image and output number with model.
  7. DEFINED STRUCTURE OF MODEL 784 100 100 0 1 2

    3 4 5 6 7 8 9 784 (28x28) Units Layer 100 Units Layer 100 Units Layer 10 Units Layer INPUT OUTPUT 5
  8. FORWARD PROPAGATION 784 100 100 0 1 2 3 4

    5 6 7 8 9 INPUT OUTPUT 5 w*x w*x w*x u z w*z ui = X x,wi wix zi = f ( ui ) x : input w : weight u : unitvalue f : activationfunction z : output
  9. BACK PROPAGATION 784 100 100 0 1 2 3 4

    5 6 7 8 9 DIFF 5 5 DIFF DIFF DIFF Update Weights with Differential Compare output and label output label
  10. WORKFLOW 1. Built Model • Define the structure of model.

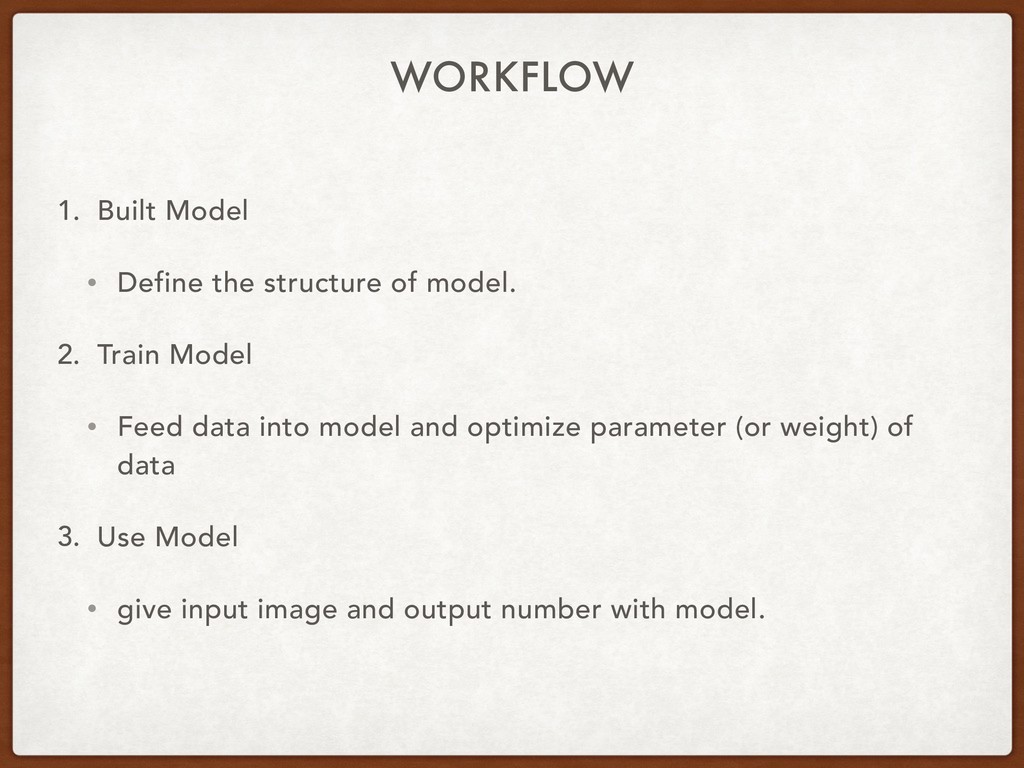
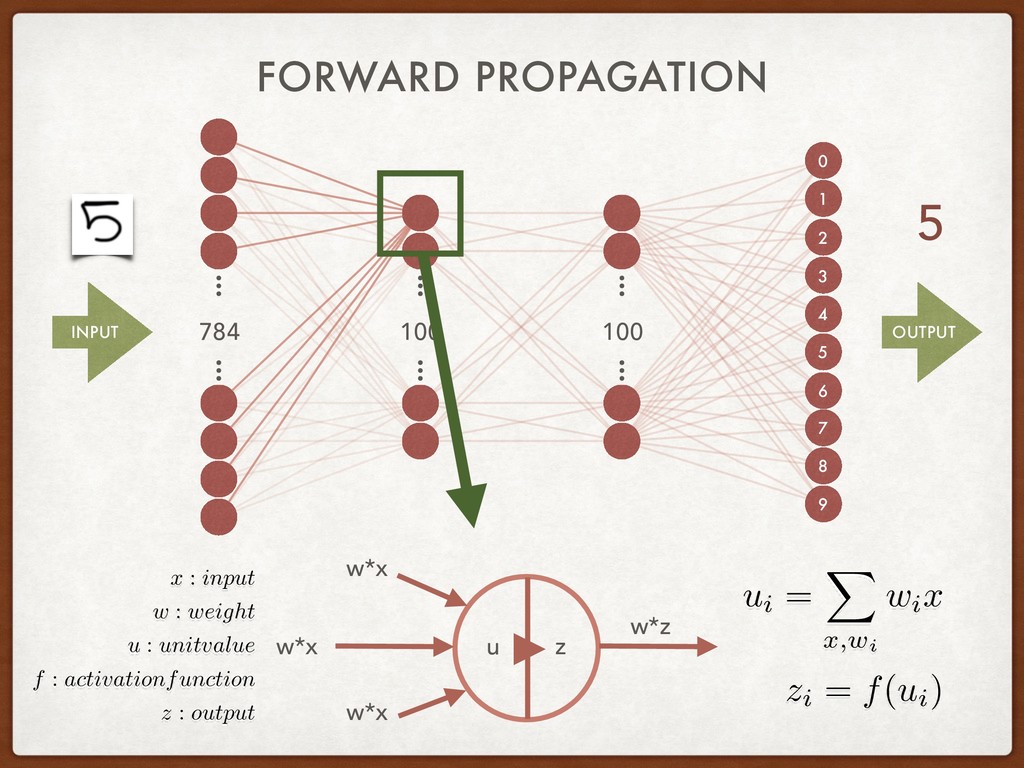
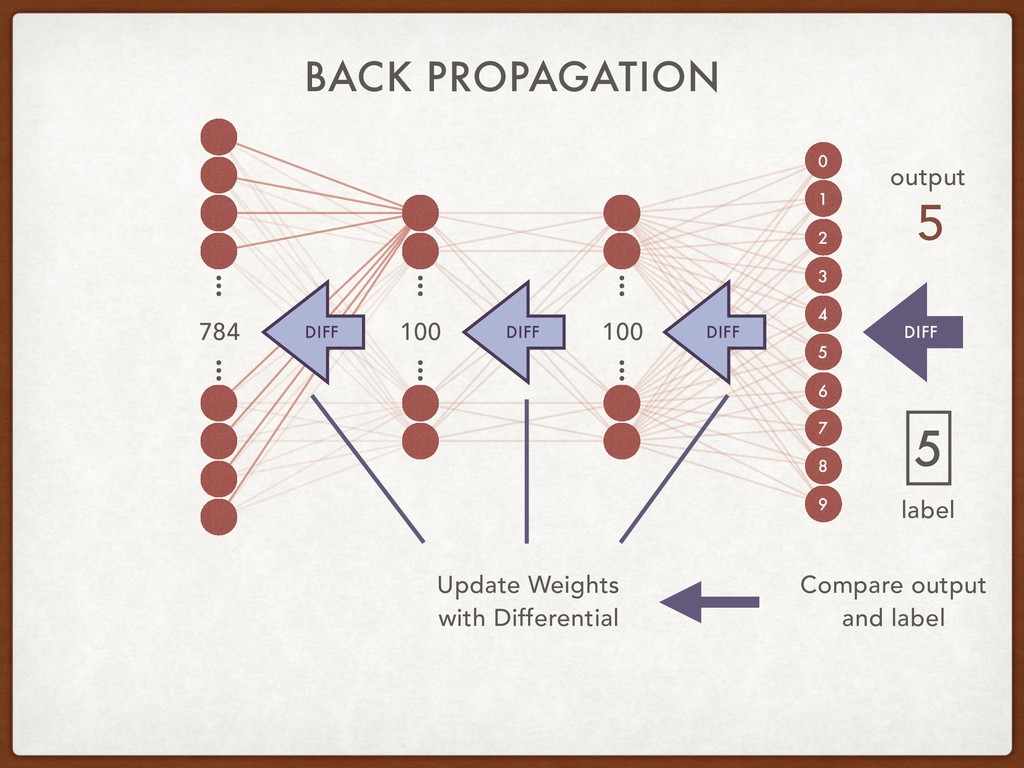
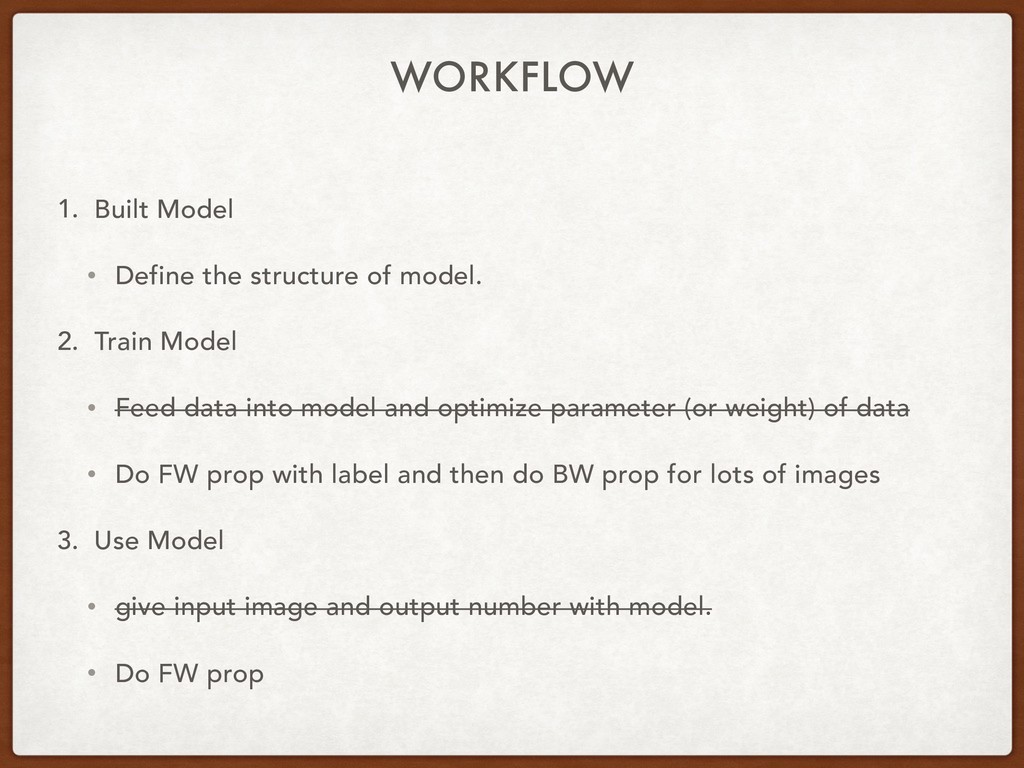
    2. Train Model • Feed data into model and optimize parameter (or weight) of data • Do FW prop with label and then do BW prop for lots of images 3. Use Model • give input image and output number with model. • Do FW prop
  11. CODE ## Build Model model = FunctionSet( l1 = F.Linear(784,

    100), l2 = F.Linear(100, 100), l3 = F.Linear(100, 10) ) ## Define Forward Propagation def forward(x_data, y_data): x = Variable(x_data) t = Variable(y_data) h1 = F.relu(model.l1(x)) <- apply activation function h2 = F.relu(model.l2(h1)) <- apply activation function y = model.l3(h2) return F.softmax_cross_entropy(y, t), F.accuracy(y, t)
  12. CODE ## Train model optimizer = optimizers.SGD() optimizer.setup(model) batchsize =

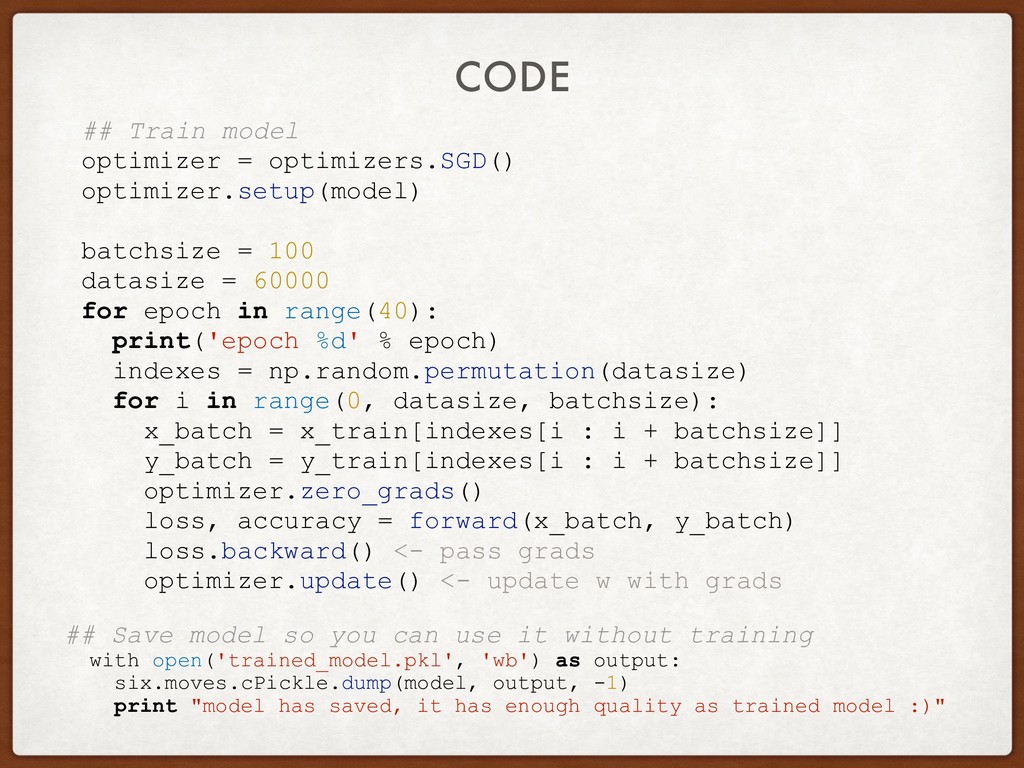
    100 datasize = 60000 for epoch in range(40): print('epoch %d' % epoch) indexes = np.random.permutation(datasize) for i in range(0, datasize, batchsize): x_batch = x_train[indexes[i : i + batchsize]] y_batch = y_train[indexes[i : i + batchsize]] optimizer.zero_grads() loss, accuracy = forward(x_batch, y_batch) loss.backward() <- pass grads optimizer.update() <- update w with grads ## Save model so you can use it without training with open('trained_model.pkl', 'wb') as output: six.moves.cPickle.dump(model, output, -1) print "model has saved, it has enough quality as trained model :)"