Upgrade to Pro — share decks privately, control downloads, hide ads and more …

What's in a button?

What's in a button?

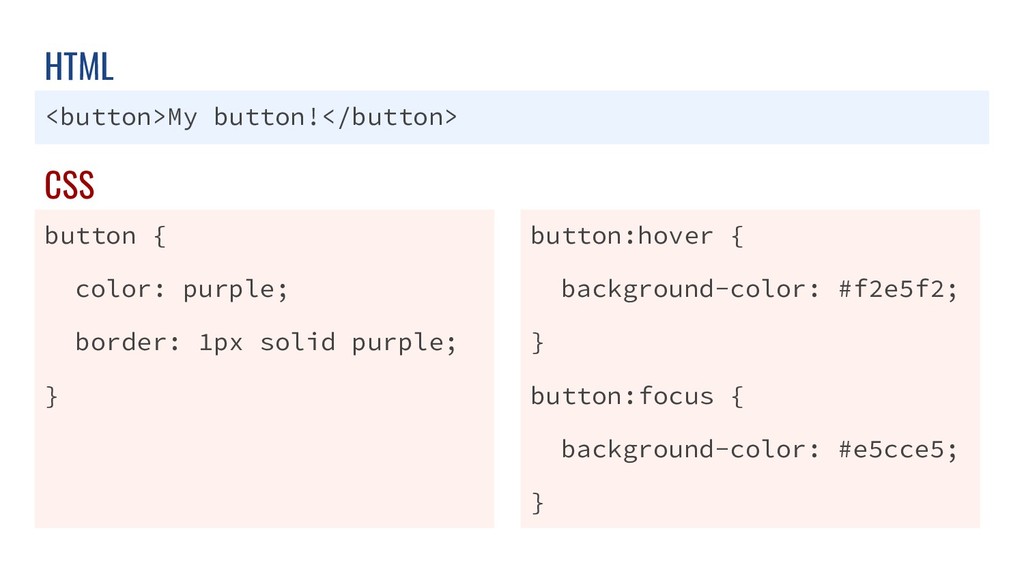
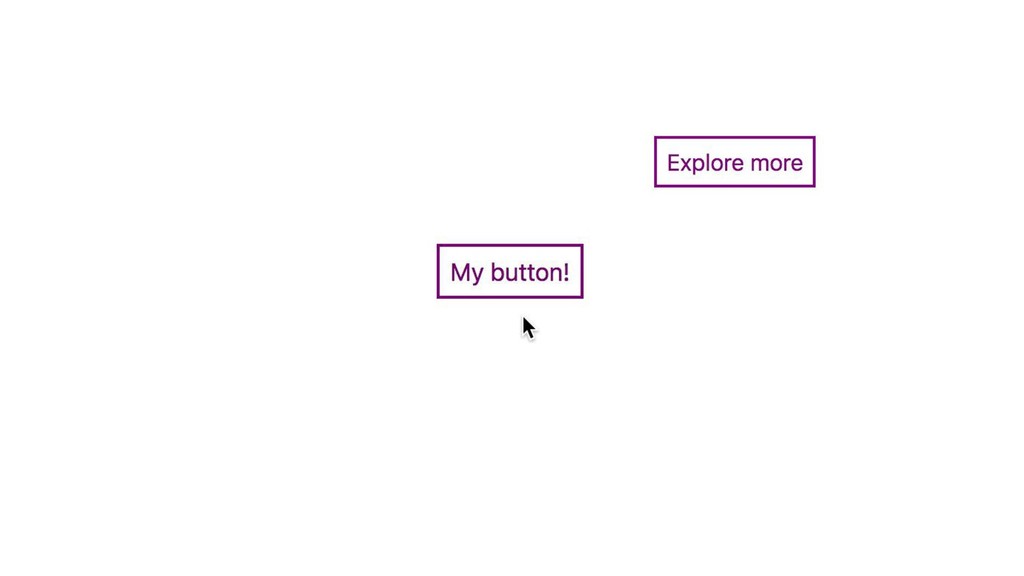
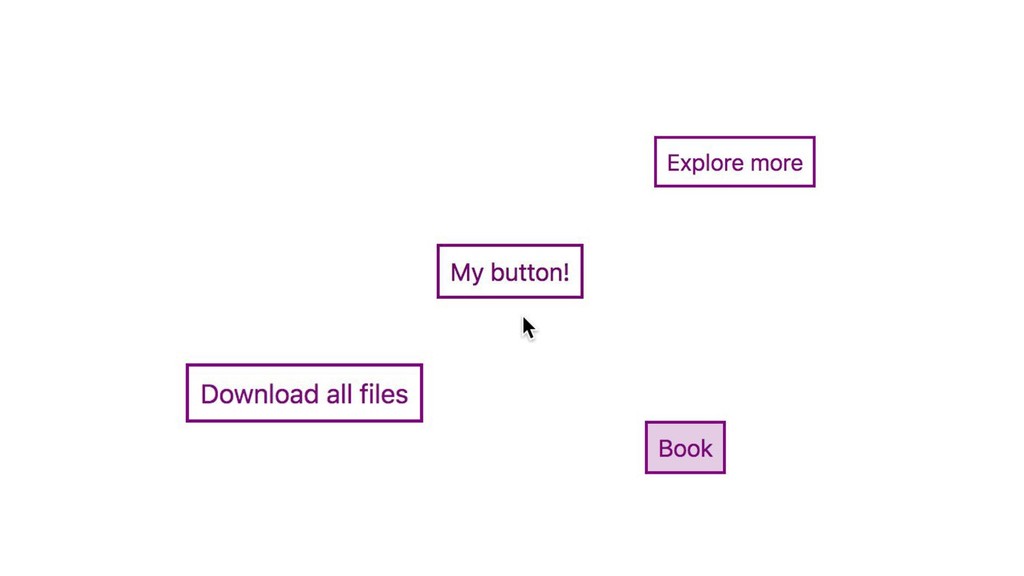
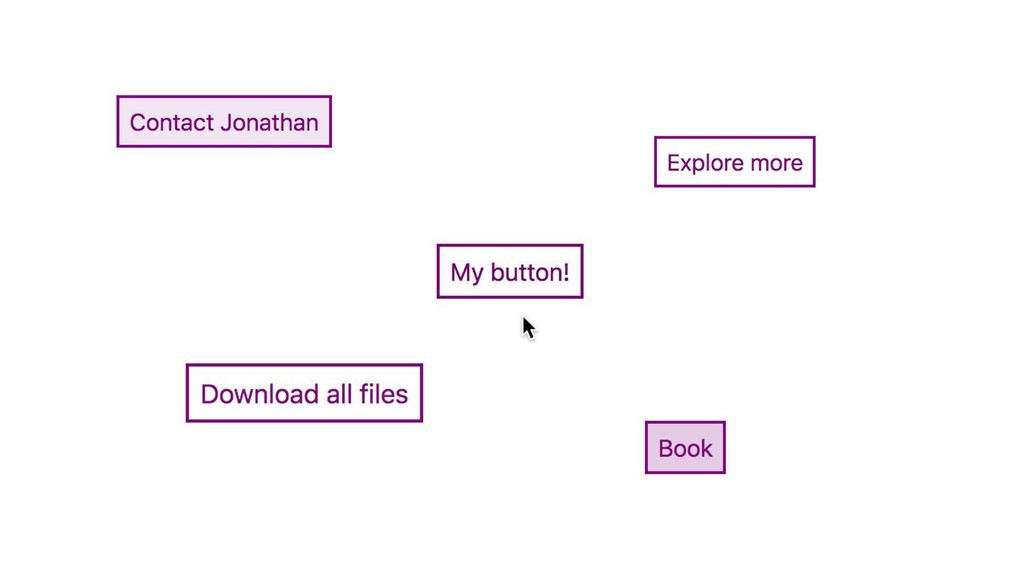
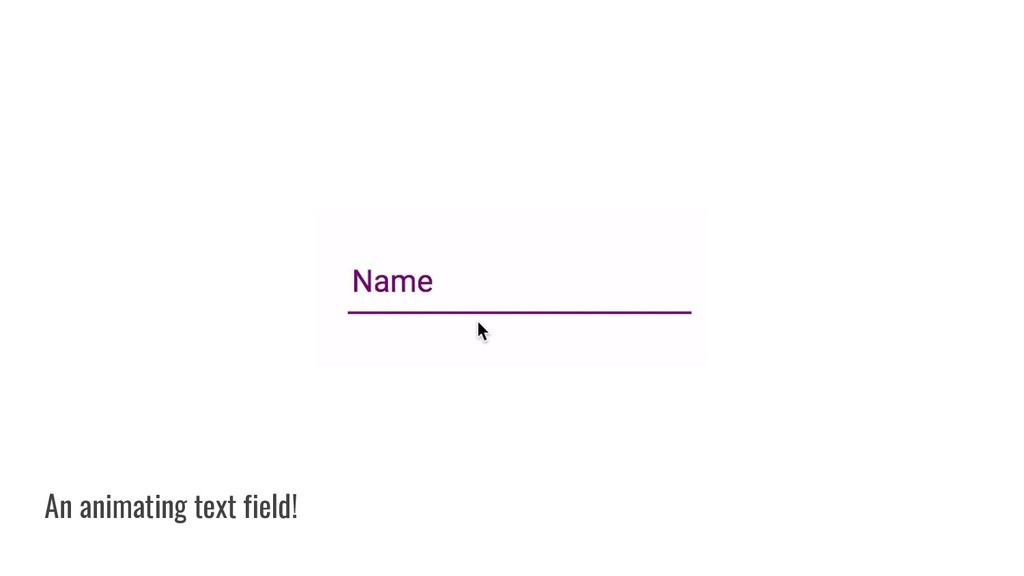
Building user interfaces goes beyond the pixels you see on the screen. There's plenty of engineering complexity in building UI that's easy to use, easy to customize, and provides user delight. We'll start with very simple components and extend them to use animations and multiple elements, while discussing the technical challenges that we might run into along the way.

Bonnie Zhou

May 05, 2018
Tweet

More Decks by Bonnie Zhou

Other Decks in Programming

Transcript

  1. Design requirements 1. Text: purple color 2. Border: purple color

    Design requirements for interaction 3. When you hover over it, light purple (#f2e5f2) background color 4. When you focus on it, medium purple (#e5cce5) background color
  2. Button hover and focus CSS button:hover { background-color: #f2e5f2; }

    button:focus { background-color: #e5cce5; } pseudo-classes
  3. <button>My button!</button> button { color: purple; border: 1px solid purple;

    } button:hover { background-color: #f2e5f2; } button:focus { background-color: #e5cce5; } HTML CSS
  4. <button>My button!</button> button { color: purple; border: 1px solid purple;

    } button:hover { background-color: #f2e5f2; } button:focus { background-color: #e5cce5; } HTML CSS
  5. <button class="button-component">My button!</button> .button-component { color: purple; border: 1px solid

    purple; } .button-component:hover { background-color: #f2e5f2; } .button-component:focus { background-color: #e5cce5; } HTML CSS
  6. <button class="button-component">My other button!</button> .button-component { color: purple; border: 1px

    solid purple; } .button-component:hover { … HTML CSS (that we already wrote!)
  7. Design requirements 1. Text: purple color, Roboto font 2. Border:

    purple color, only on the bottom Design requirements for interaction 3. When you focus on the input, the label should float to the top right 4. When you blur (stop focusing) on the input, the label should go back to its initial position UNLESS the input is filled
  8. Text Field CSS .text-field-component { width: 180px; height: 30px; color:

    purple; font-family: Roboto; border-bottom: 1px solid purple; } .text-field-component input { width: 170px; height: 28px; } .text-field-component label { position: absolute; transform: translateX(-170px) translateY(5px); }
  9. Text Field CSS .text-field-component { width: 180px; height: 30px; color:

    purple; font-family: Roboto; border-bottom: 1px solid purple; } .text-field-component input { width: 170px; height: 28px; } .text-field-component label { position: absolute; transform: translateX(-170px) translateY(5px); }
  10. Text Field CSS .text-field-component { width: 180px; height: 30px; color:

    purple; font-family: Roboto; border-bottom: 1px solid purple; } .text-field-component input { width: 170px; height: 28px; } .text-field-component label { position: absolute; transform: translateX(-170px) translateY(5px); }
  11. Text Field CSS .text-field-component { width: 180px; height: 30px; color:

    purple; font-family: Roboto; border-bottom: 1px solid purple; } .text-field-component input { width: 170px; height: 28px; } .text-field-component label { position: absolute; transform: translateX(-170px) translateY(5px); }
  12. <div class="text-field-component"> <input type="text"> <label>Name</label> </div> HTML CSS .text-field-component {

    … } .text-field-component input { … } .text-field-component label { … }
  13. JavaScript: 3 steps to animating the label 1. Setup: select

    the HTML elements in JavaScript 2. On focus: add the floating-label class 3. On blur: remove the floating-label class
  14. 1. Select the HTML elements textFieldElement = document.querySelector(".text-field-component"); inputElement =

    textFieldElement.querySelector("input"); labelElement = textFieldElement.querySelector("label");
  15. 3. On blur, remove the floating-label class inputElement.addEventListener("blur", { if

    (!inputElement.value) { labelElement.classList.remove("floating-label"); } });
  16. 3. On blur, remove the floating-label class inputElement.addEventListener("blur", { if

    (!inputElement.value) { labelElement.classList.remove("floating-label"); } });
  17. Put it all in a JavaScript class textFieldElement = document.querySelector("...");

    class TextFieldComponent(textFieldElement) { inputElement = document.querySelector("..."); labelElement = document.querySelector("..."); inputElement.addEventListener("focus", {...}); inputElement.addEventListener("blur", {...}); }
  18. <div class="text-field-component">...</div> HTML CSS .text-field-component { … } .text-field-component input

    { … } .text-field-component label { … } JavaScript class TextFieldComponent(textFieldElement) { … }
  19. <div class="text-field-component my-other-text-field"> <input type="text"> <label class="floating-label">My other text field</label>

    </div> HTML JavaScript myOtherTextField = document.querySelector(".my-other-text-field"); new TextFieldComponent(myOtherTextField);