Share
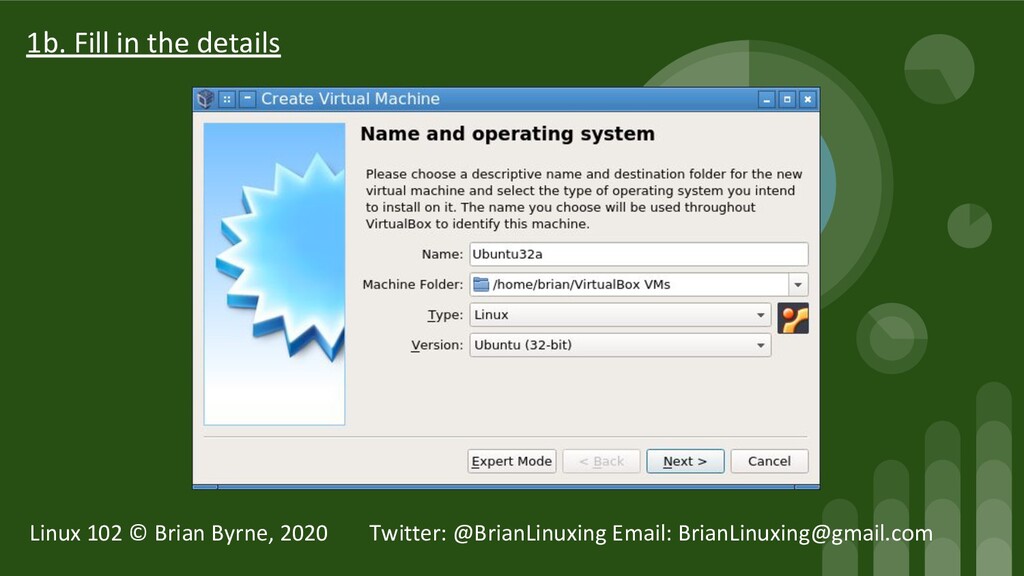
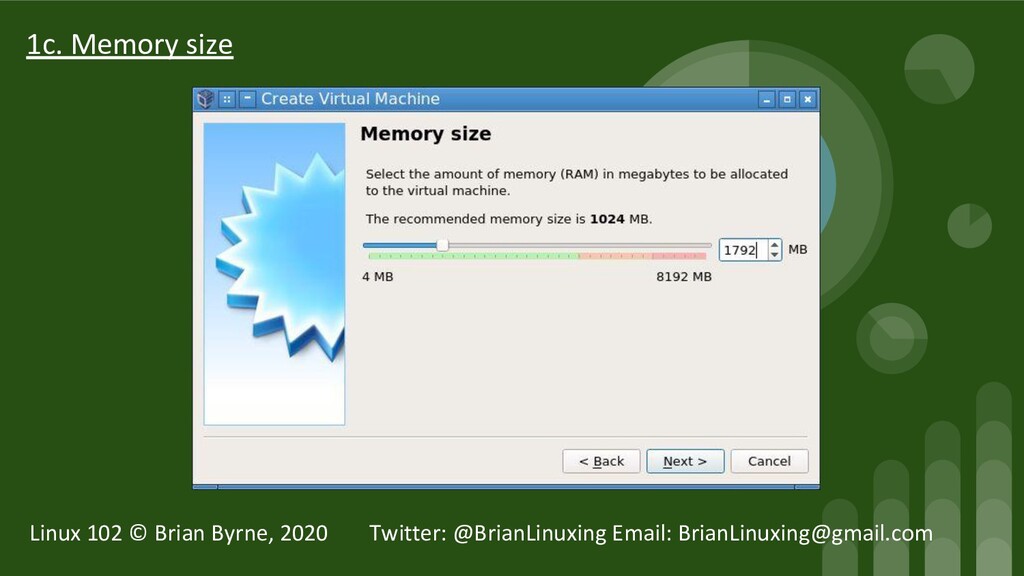
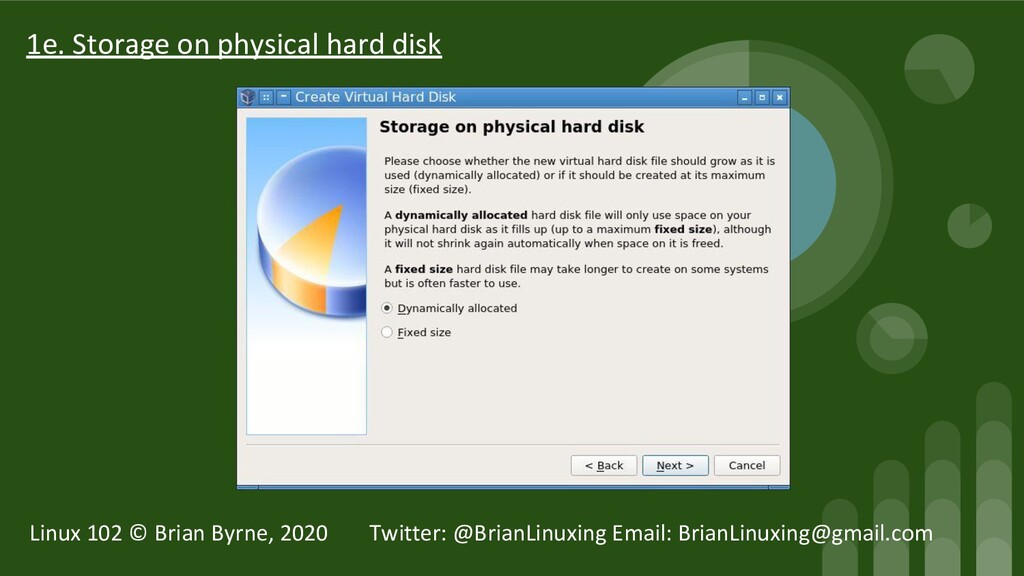
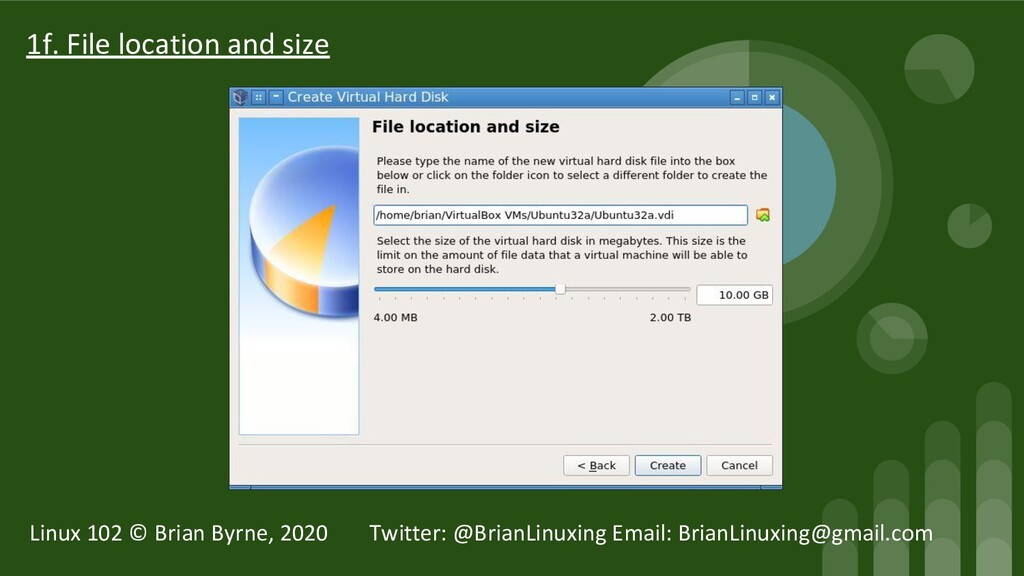
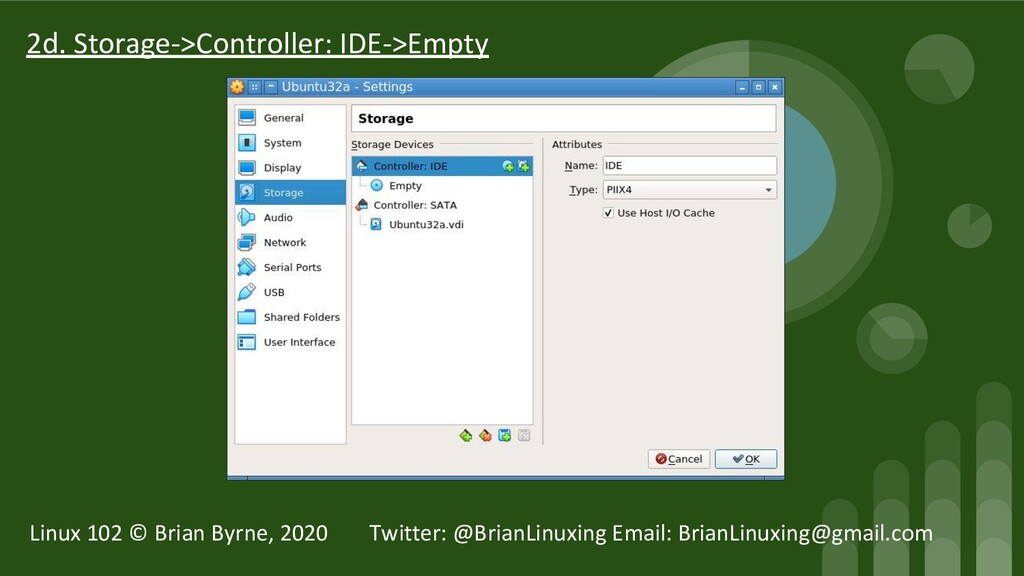
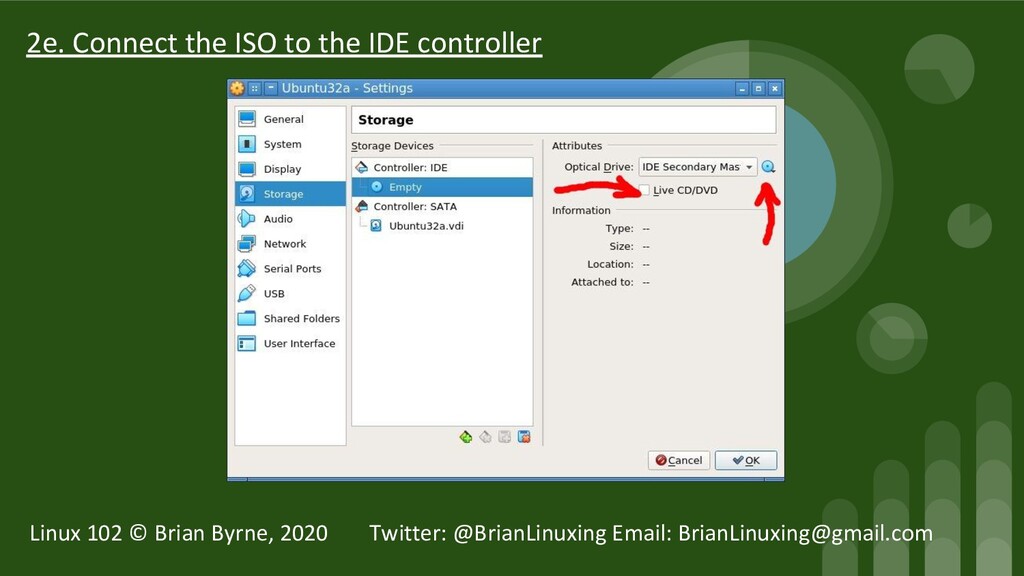
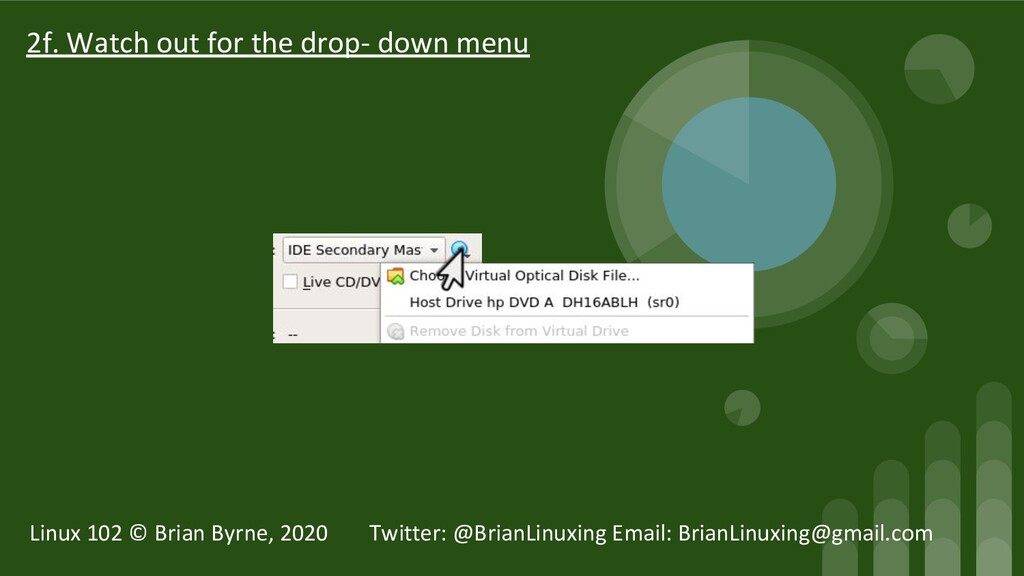
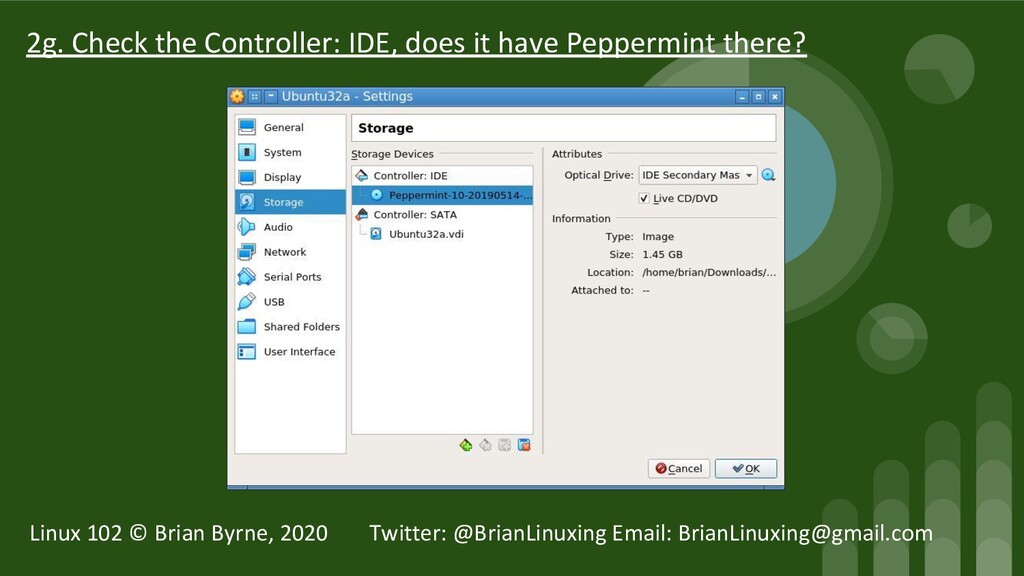
Linux 102 - Installing Linux from scratch on VirtualBox under Mac OS or Windows 7, 8, 8.1 or 10 by Brian Byrne
Gamesys, February 2020