Go Wireless NZ Ltd has provided this information in good faith and will not be responsible for any failures in the configuration procedure. Any equipment damaged during the procedure will not be covered under warrantee as specified in Go Wireless NZ Ltd terms and conditions.
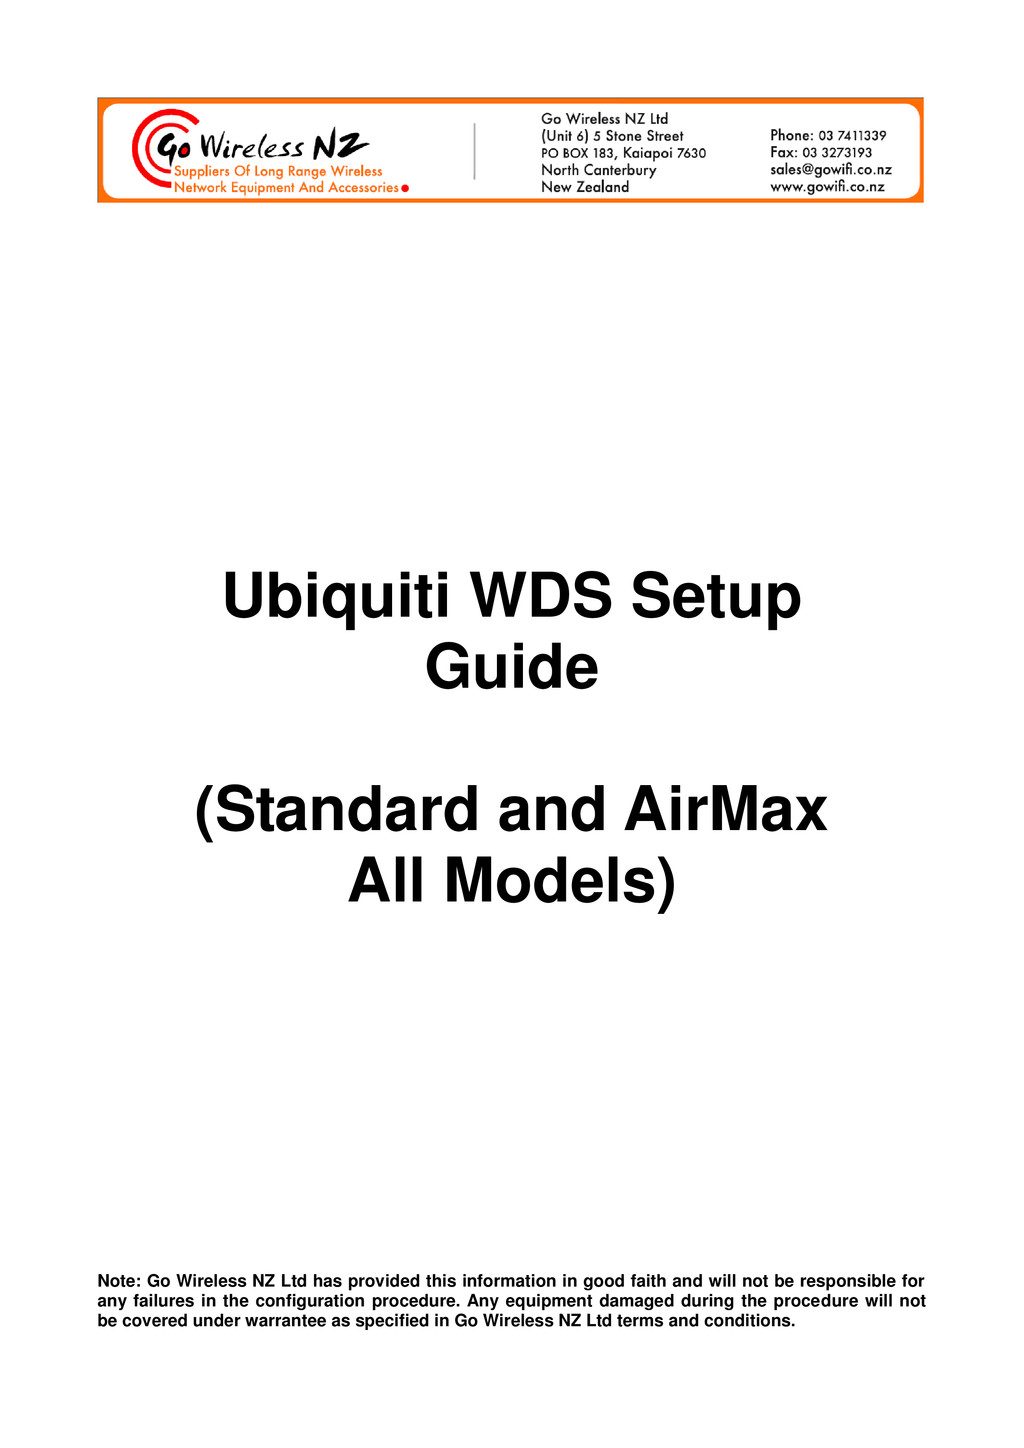
Points. NOTE: The first image in each step is using a Standard B/G ubnt Device, the second image is using an AirMax Device. Configure Access Point WDS (Device directly connected to the Internet at the local end: Step 1: Plug the first device into your Network and login to the Website Configuration page using INTERNET EXPLORER. The default settings are as follows: IP Address: 192.168.1.20 Username: ubnt Password: ubnt
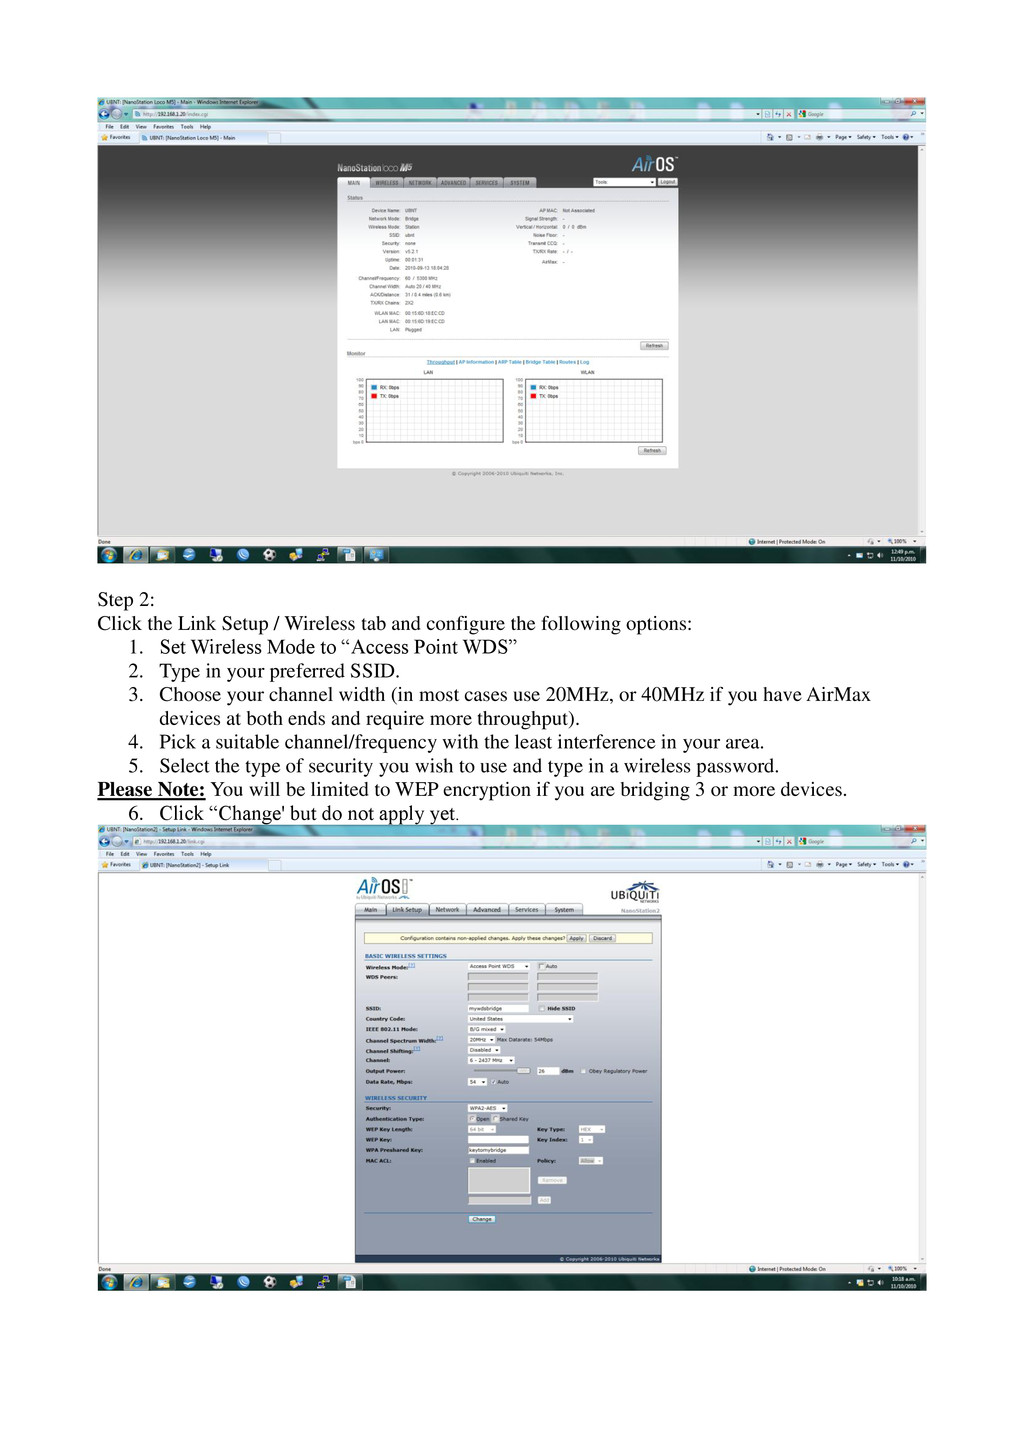
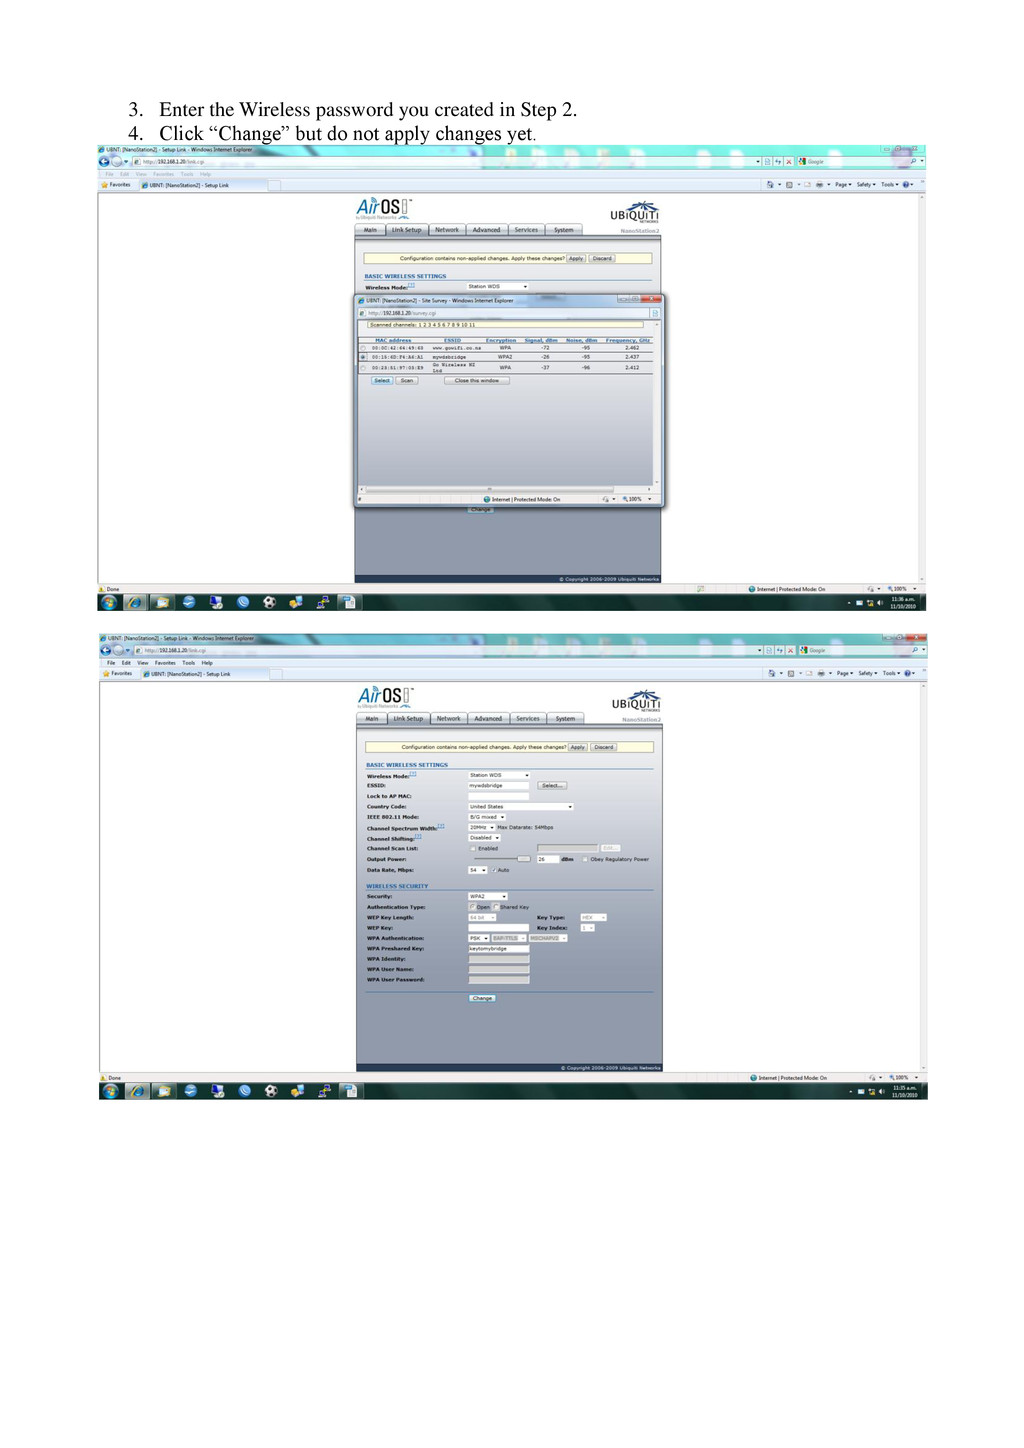
configure the following options: 1. Set Wireless Mode to “Access Point WDS” 2. Type in your preferred SSID. 3. Choose your channel width (in most cases use 20MHz, or 40MHz if you have AirMax devices at both ends and require more throughput). 4. Pick a suitable channel/frequency with the least interference in your area. 5. Select the type of security you wish to use and type in a wireless password. Please Note: You will be limited to WEP encryption if you are bridging 3 or more devices. 6. Click “Change' but do not apply yet.
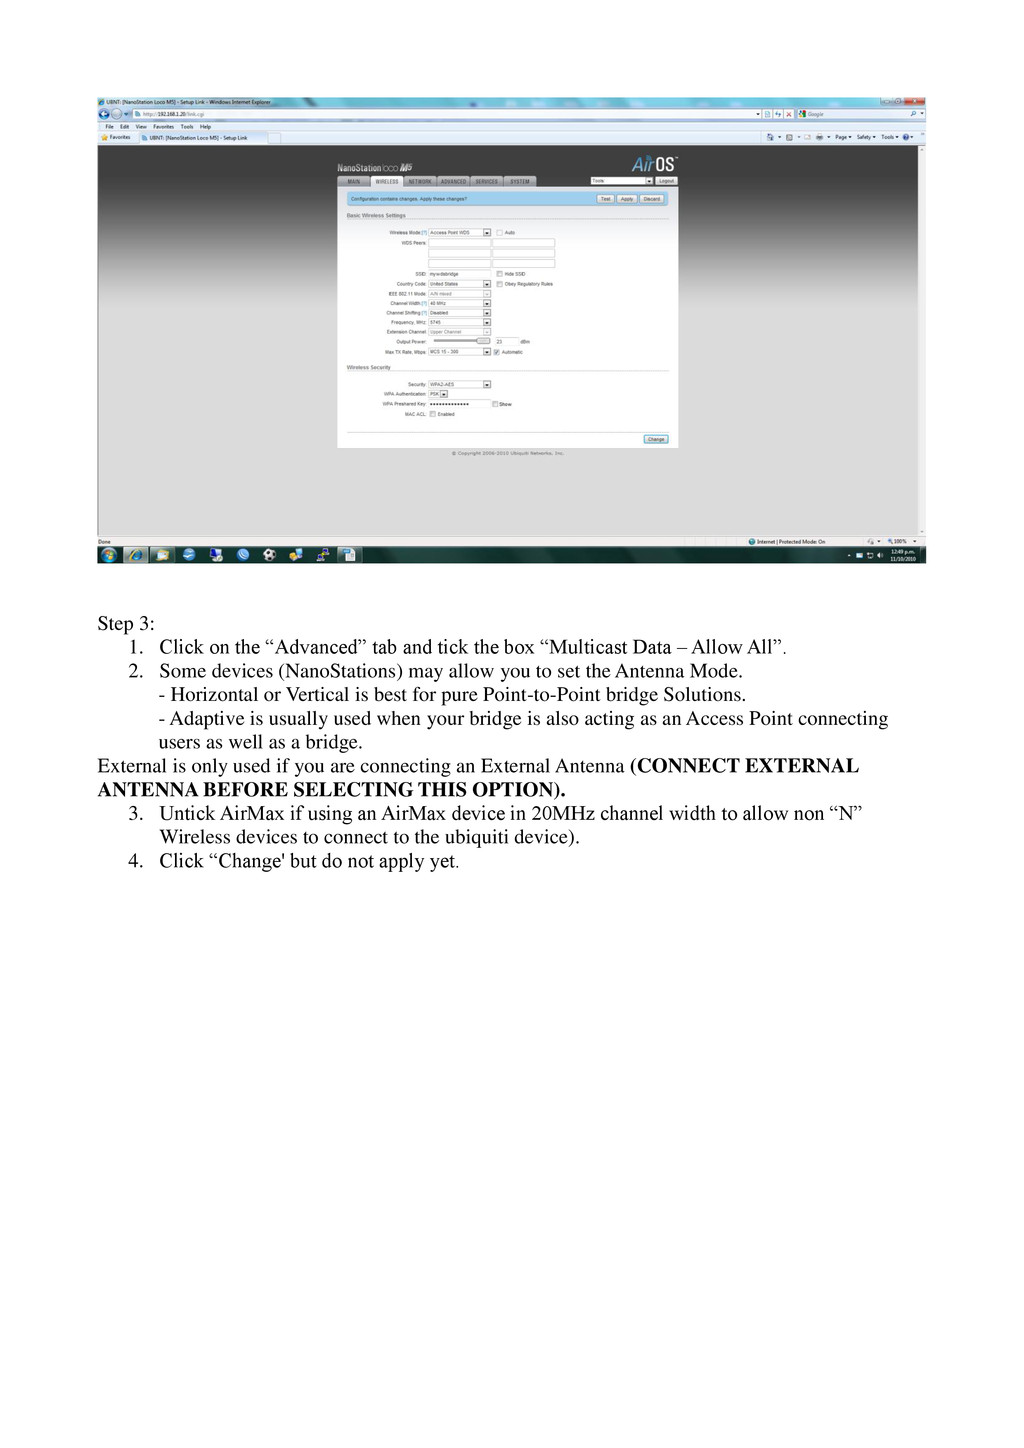
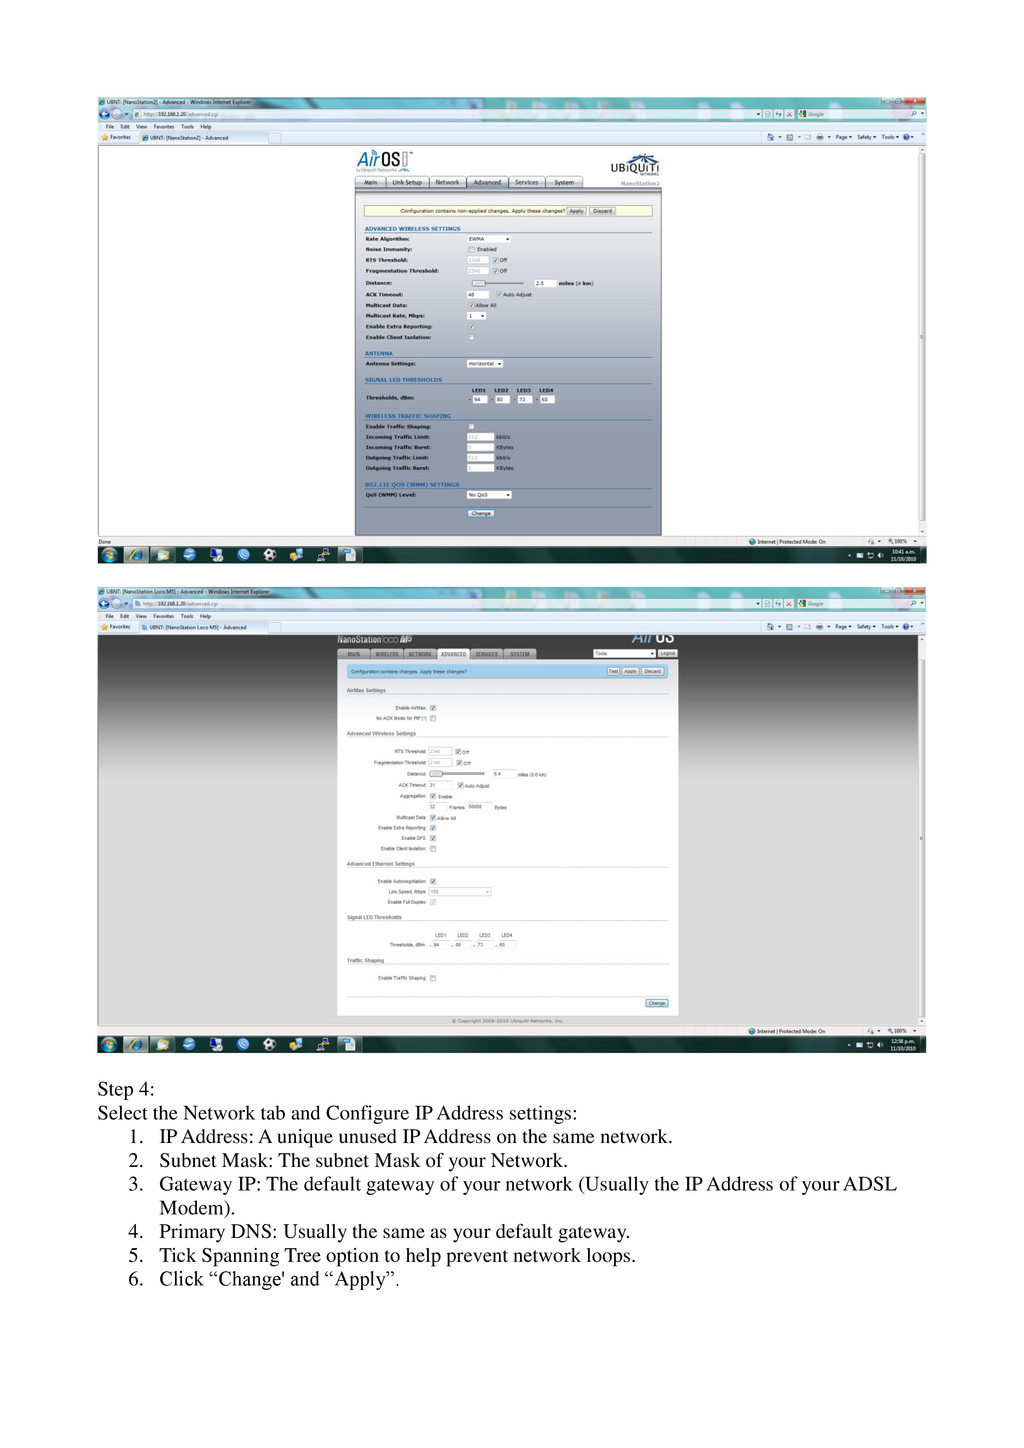
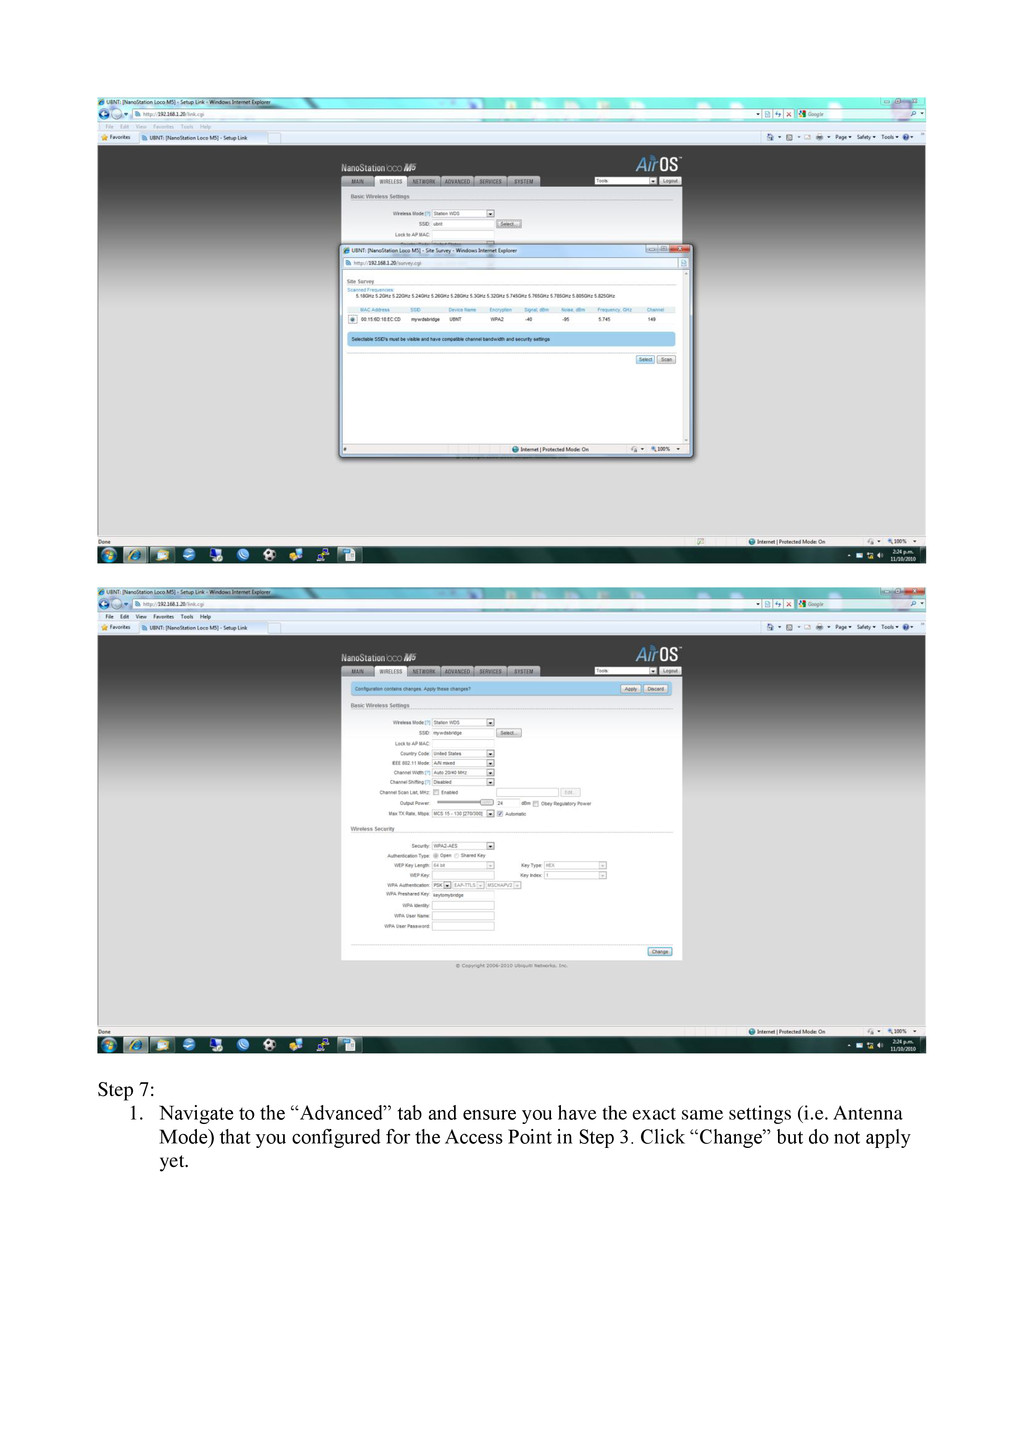
the box “Multicast Data – Allow All”. 2. Some devices (NanoStations) may allow you to set the Antenna Mode. - Horizontal or Vertical is best for pure Point-to-Point bridge Solutions. - Adaptive is usually used when your bridge is also acting as an Access Point connecting users as well as a bridge. External is only used if you are connecting an External Antenna (CONNECT EXTERNAL ANTENNA BEFORE SELECTING THIS OPTION). 3. Untick AirMax if using an AirMax device in 20MHz channel width to allow non “N” Wireless devices to connect to the ubiquiti device). 4. Click “Change' but do not apply yet.
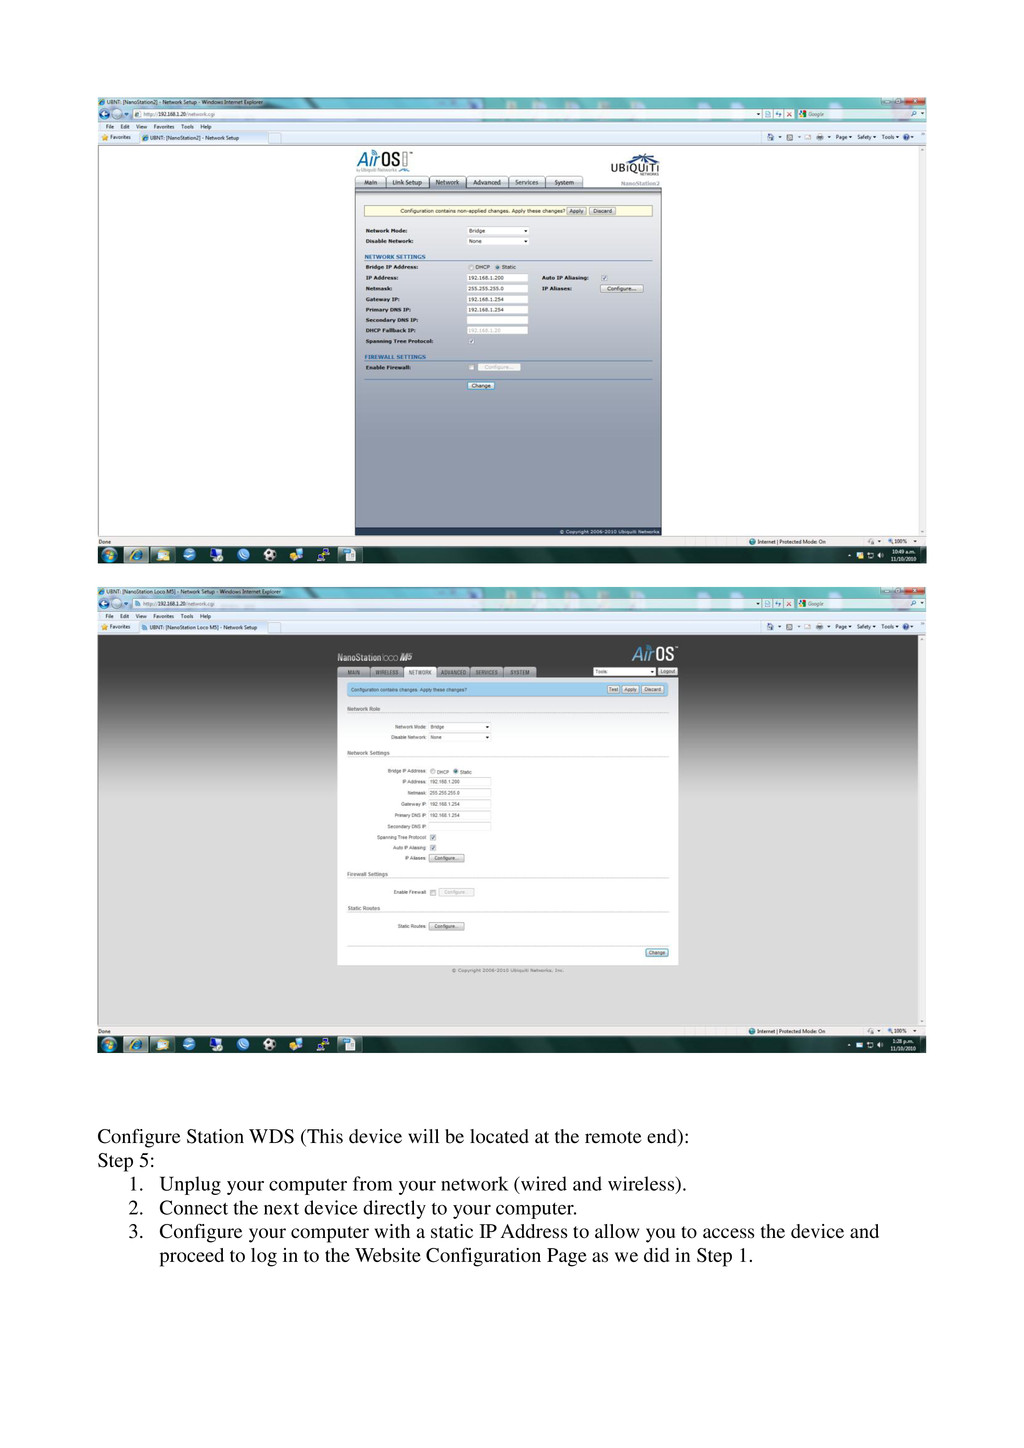
settings: 1. IP Address: A unique unused IP Address on the same network. 2. Subnet Mask: The subnet Mask of your Network. 3. Gateway IP: The default gateway of your network (Usually the IP Address of your ADSL Modem). 4. Primary DNS: Usually the same as your default gateway. 5. Tick Spanning Tree option to help prevent network loops. 6. Click “Change' and “Apply”.
remote end): Step 5: 1. Unplug your computer from your network (wired and wireless). 2. Connect the next device directly to your computer. 3. Configure your computer with a static IP Address to allow you to access the device and proceed to log in to the Website Configuration Page as we did in Step 1.
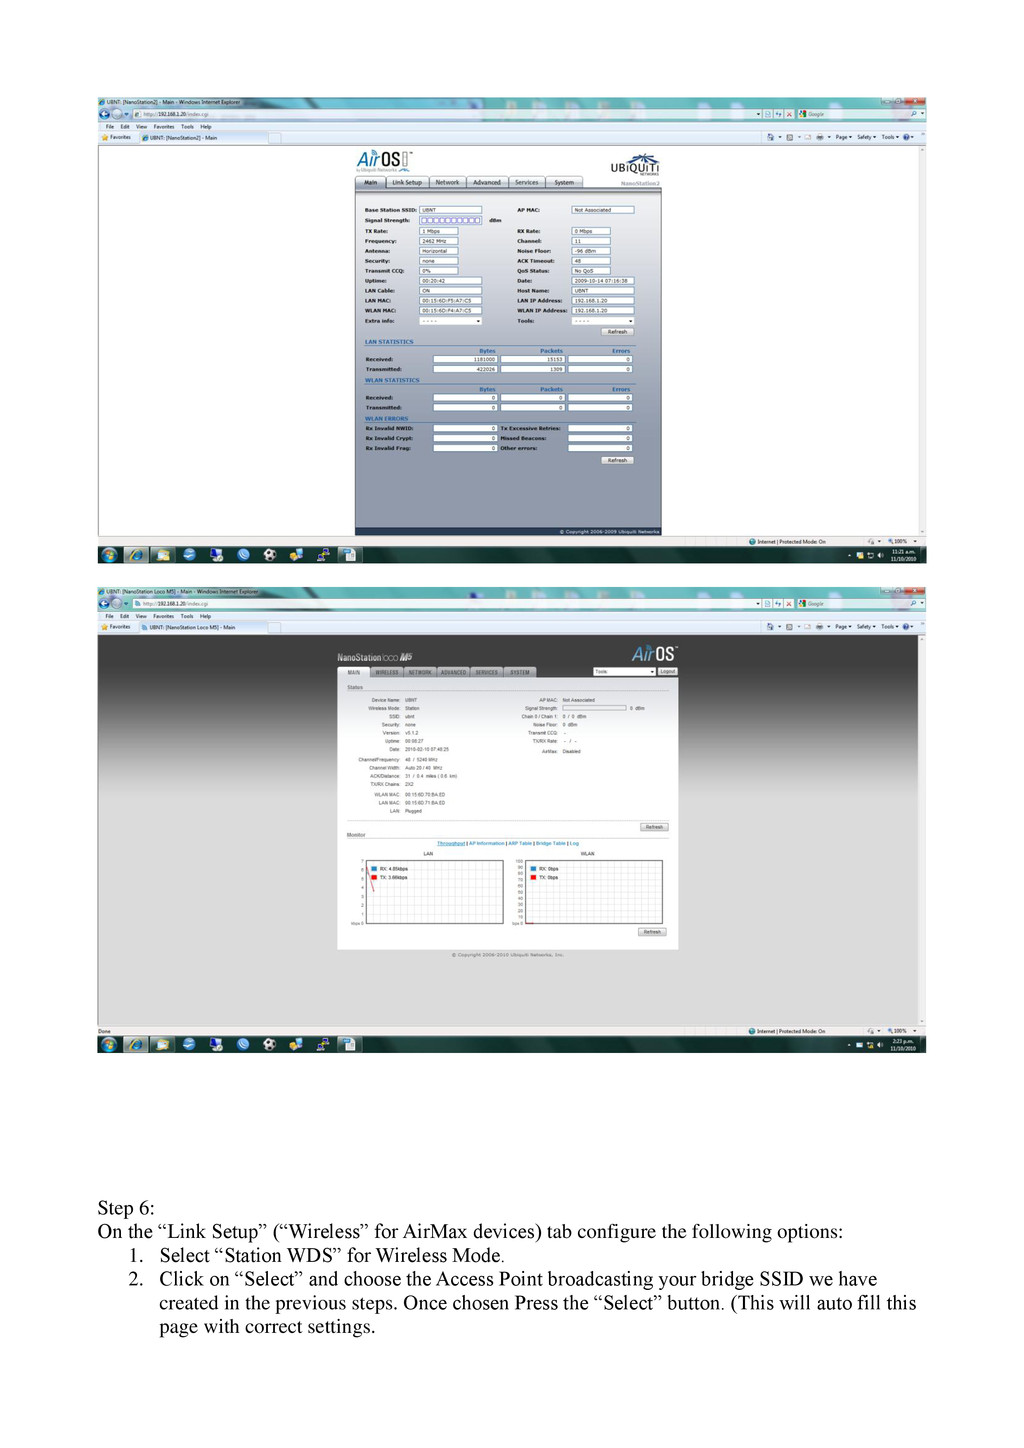
tab configure the following options: 1. Select “Station WDS” for Wireless Mode. 2. Click on “Select” and choose the Access Point broadcasting your bridge SSID we have created in the previous steps. Once chosen Press the “Select” button. (This will auto fill this page with correct settings.
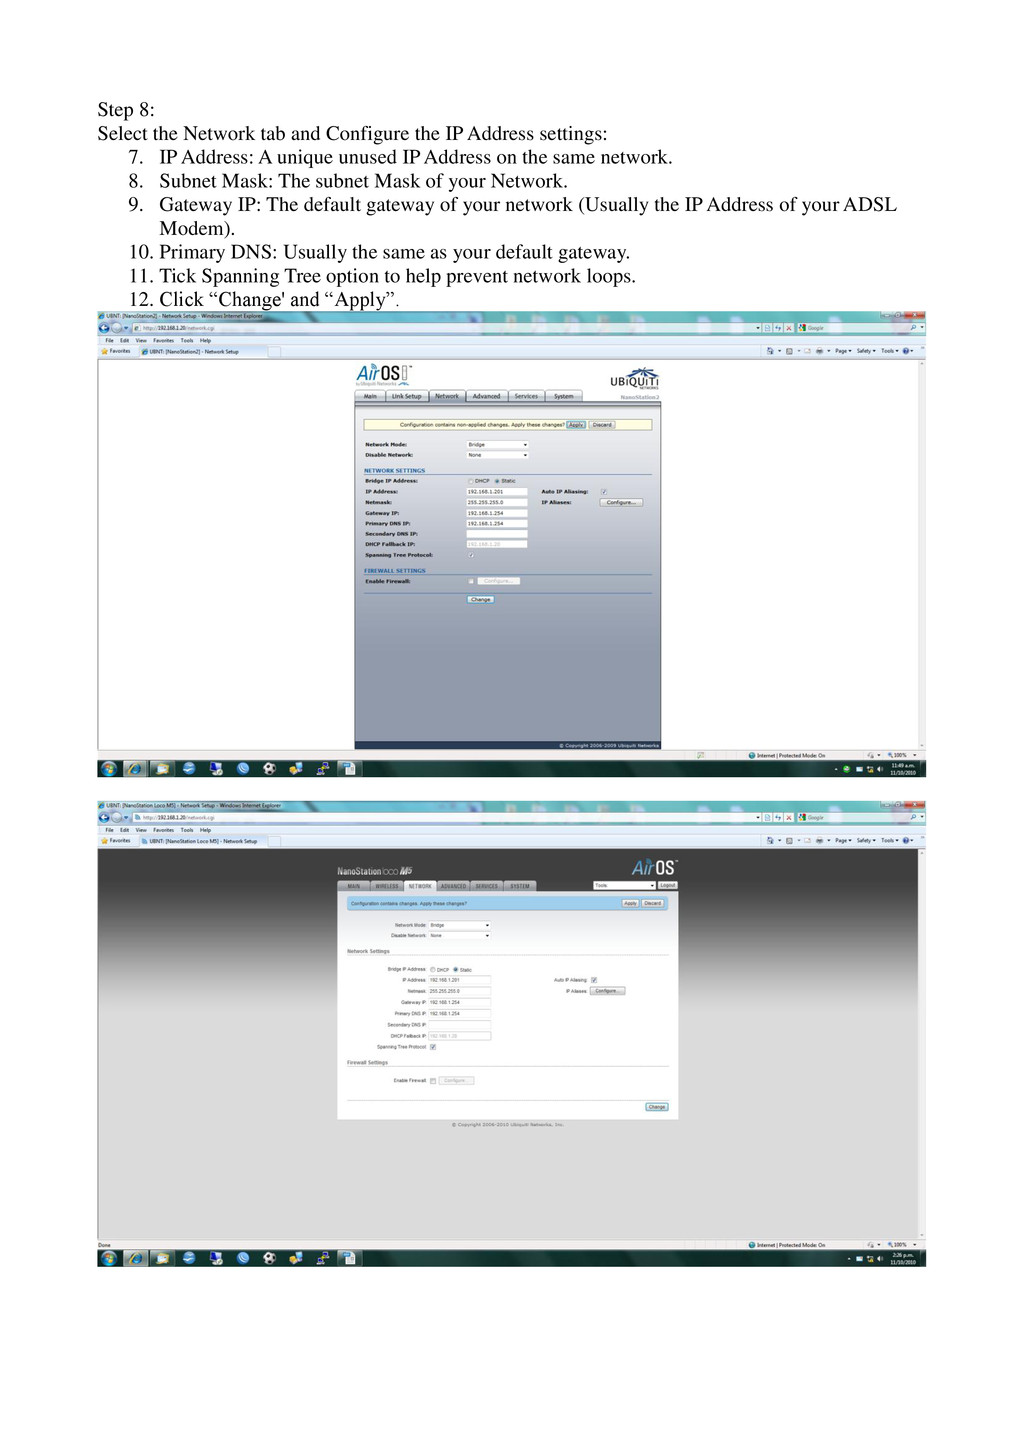
Address settings: 7. IP Address: A unique unused IP Address on the same network. 8. Subnet Mask: The subnet Mask of your Network. 9. Gateway IP: The default gateway of your network (Usually the IP Address of your ADSL Modem). 10. Primary DNS: Usually the same as your default gateway. 11. Tick Spanning Tree option to help prevent network loops. 12. Click “Change' and “Apply”.
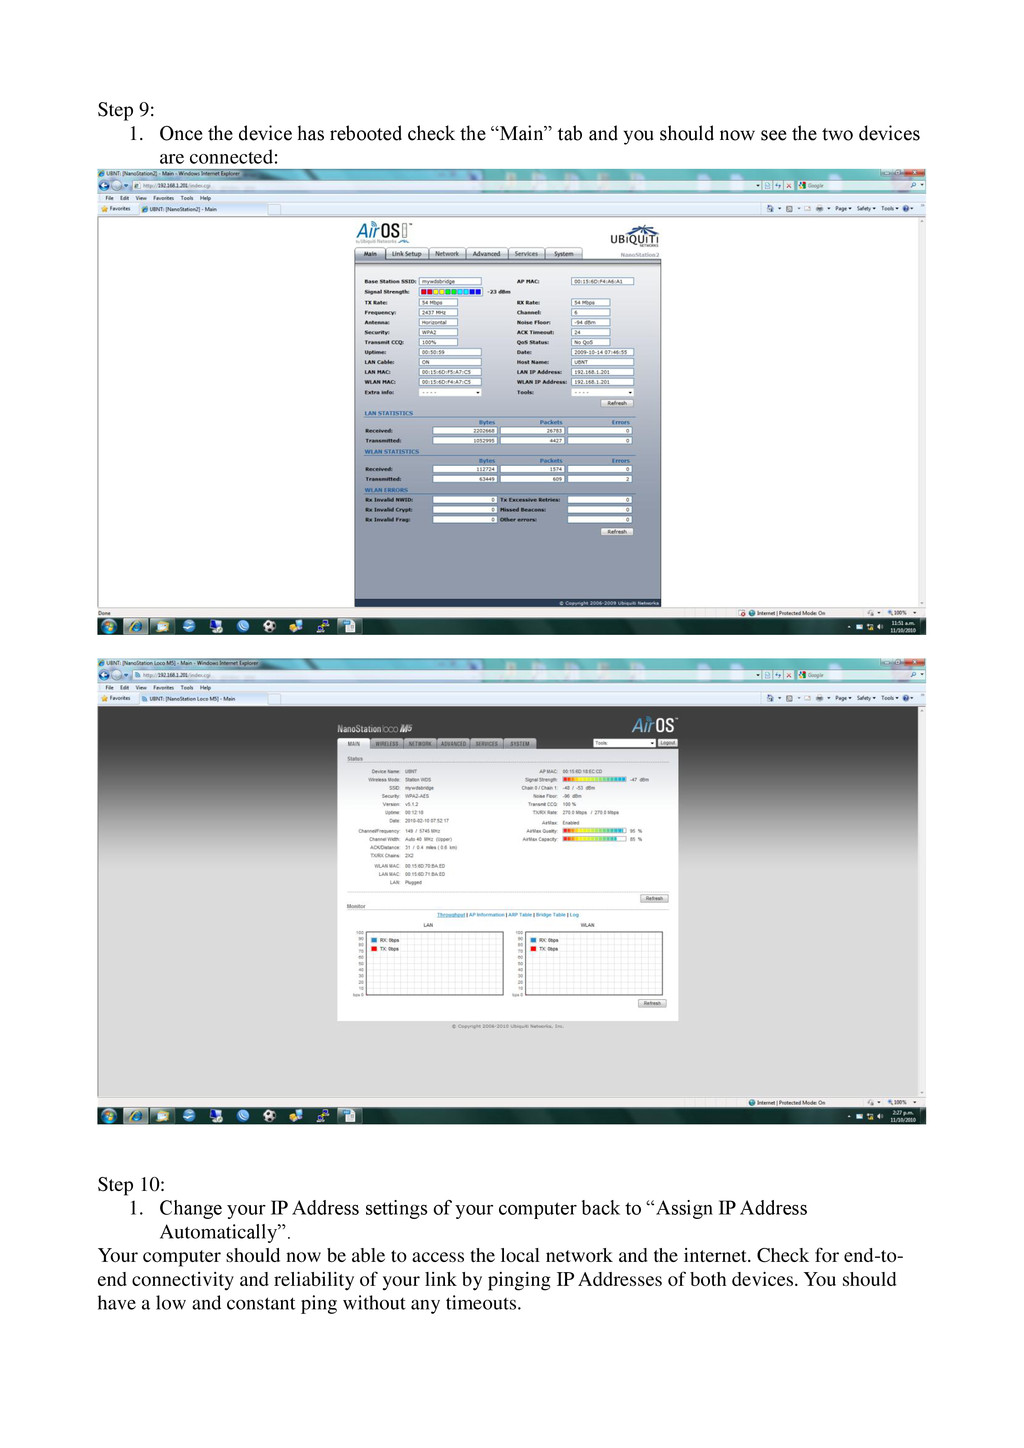
“Main” tab and you should now see the two devices are connected: Step 10: 1. Change your IP Address settings of your computer back to “Assign IP Address Automatically”. Your computer should now be able to access the local network and the internet. Check for end-to- end connectivity and reliability of your link by pinging IP Addresses of both devices. You should have a low and constant ping without any timeouts.