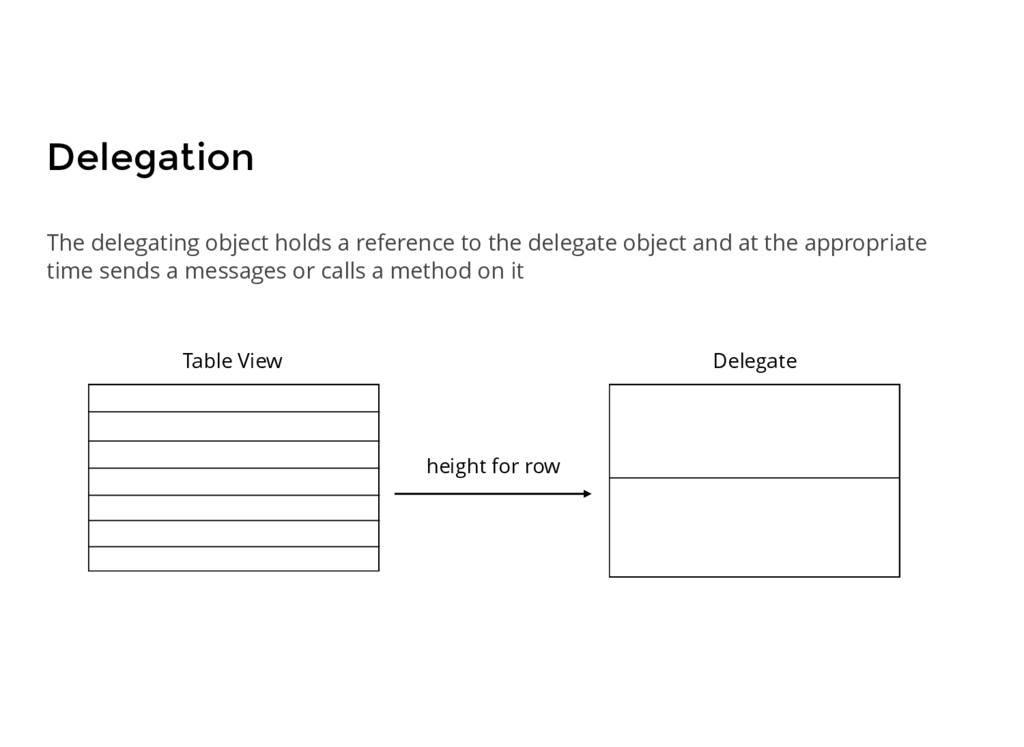
table views Eliminate a lot of the boilerplate code that arises by using a tableview in a view controller UITableView displayed full screen so you are restricted in your layout options
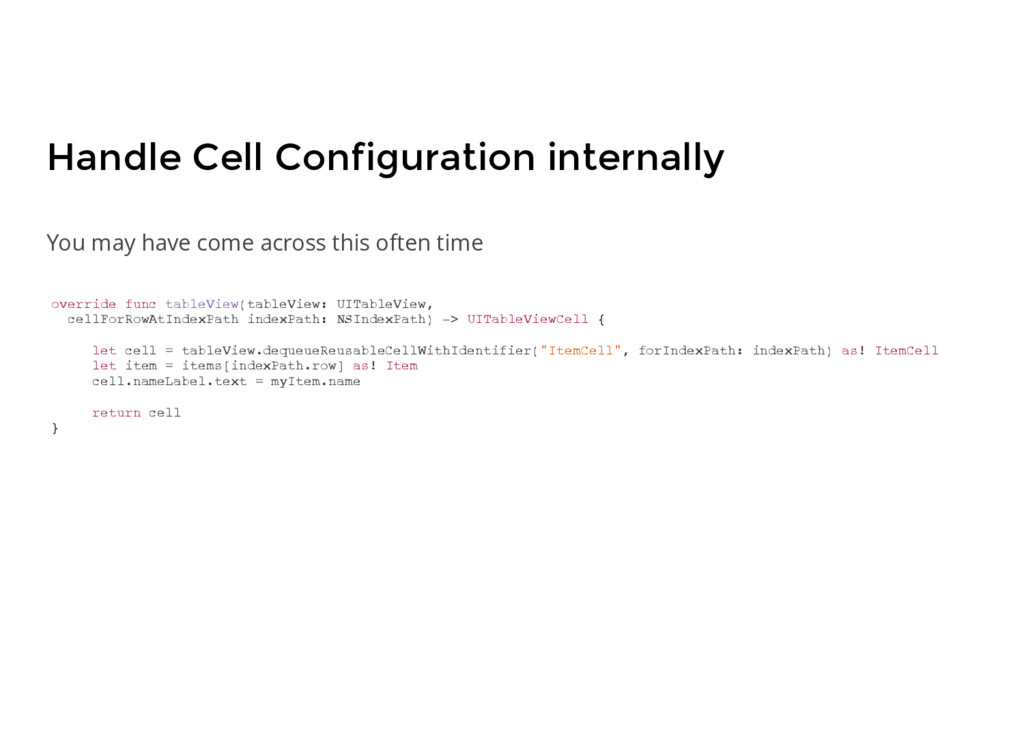
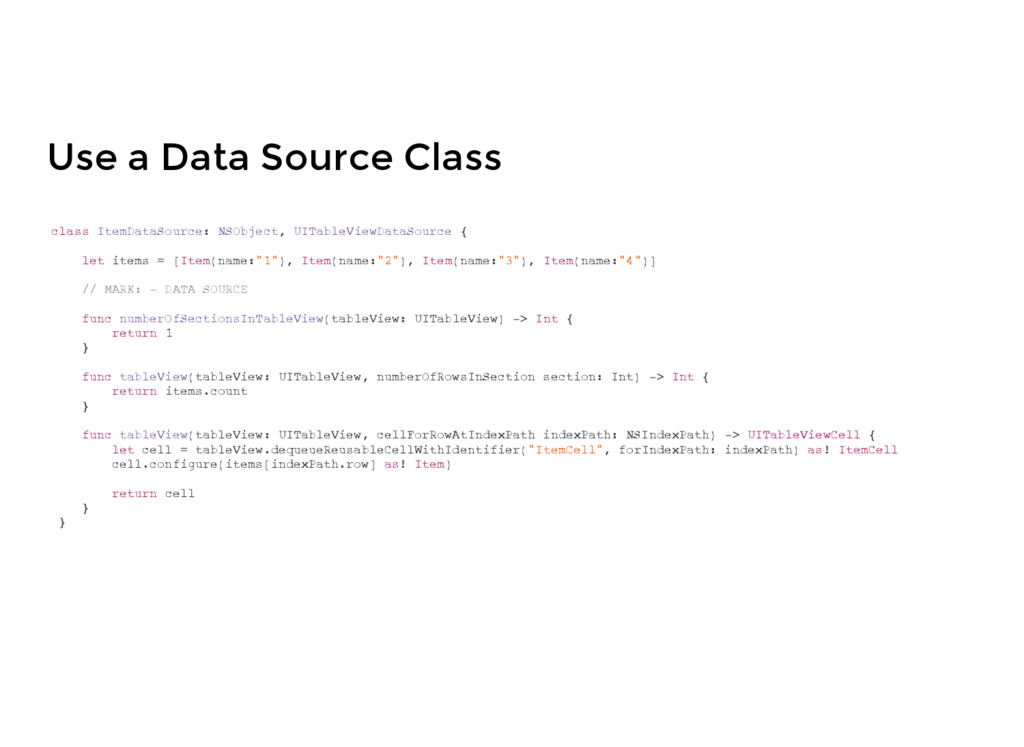
let cell = tableView.dequeueReusableCellWithIdentifier("ItemCell", forIndexPath: indexPath) as! ItemCell let item = items[indexPath.row] as! Item cell.nameLabel.text = myItem.name return cell } You may have come across this often time Handle Cell Configuration internally
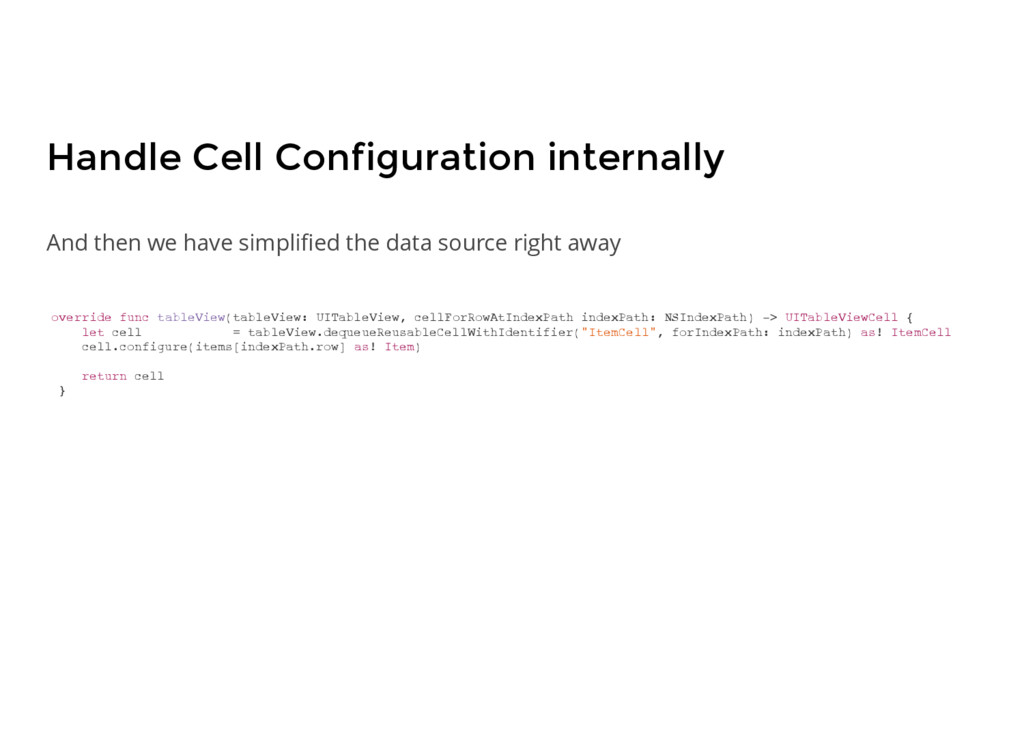
NSIndexPath) -> UITableViewCell { let cell = tableView.dequeueReusableCellWithIdentifier("ItemCell", forIndexPath: indexPath) as! ItemCell cell.configure(items[indexPath.row] as! Item) return cell } And then we have simplified the data source right away
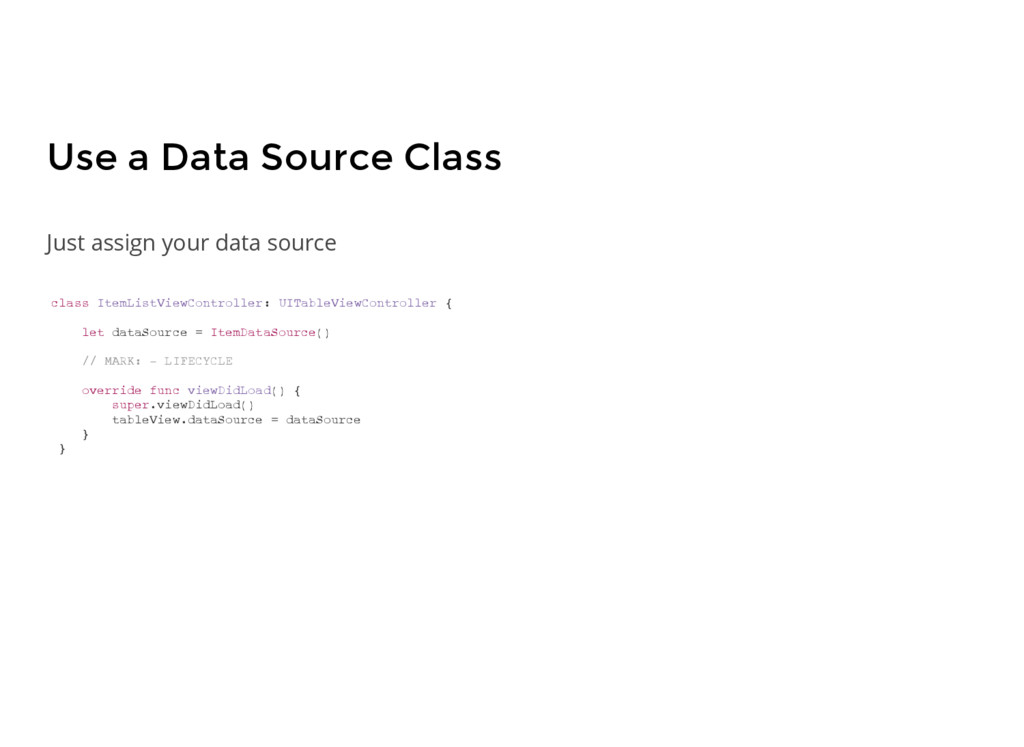
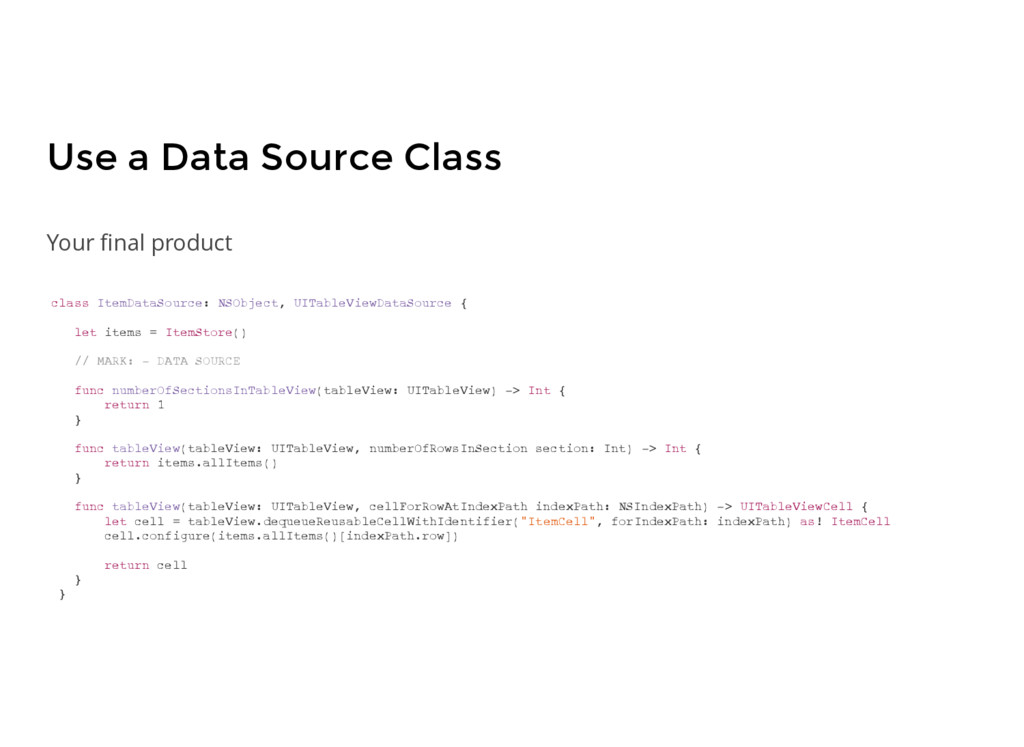
items = [Item(name:"1"), Item(name:"2"), Item(name:"3"), Item(name:"4")] func allItems() -> [String] { return items } } Use a separate class for you items too
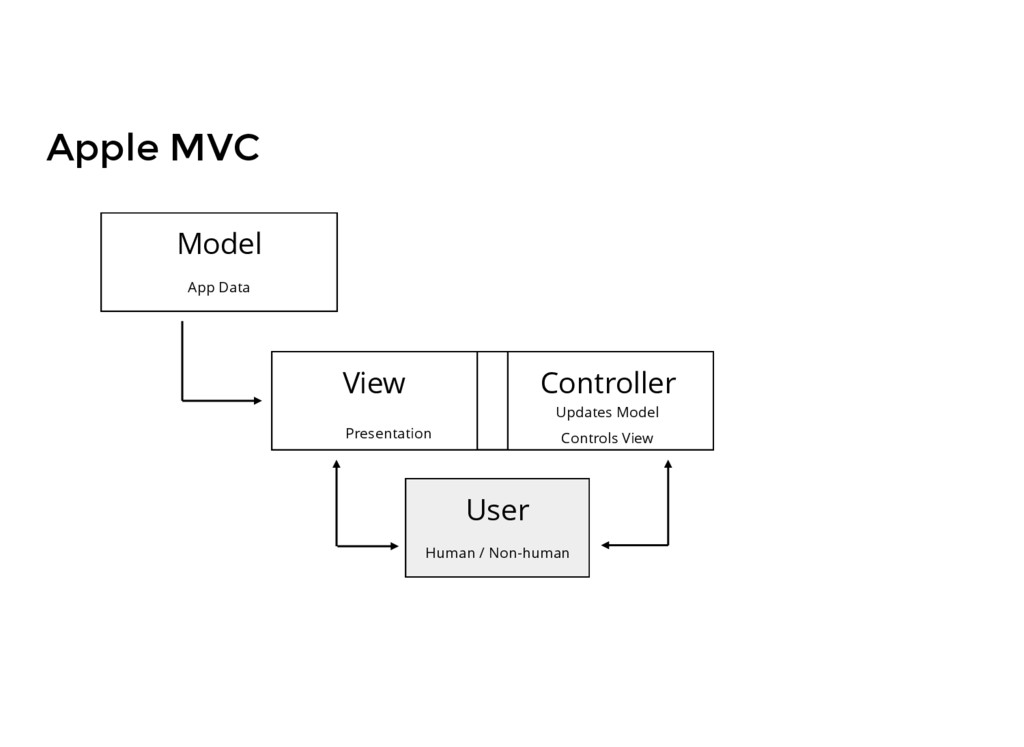
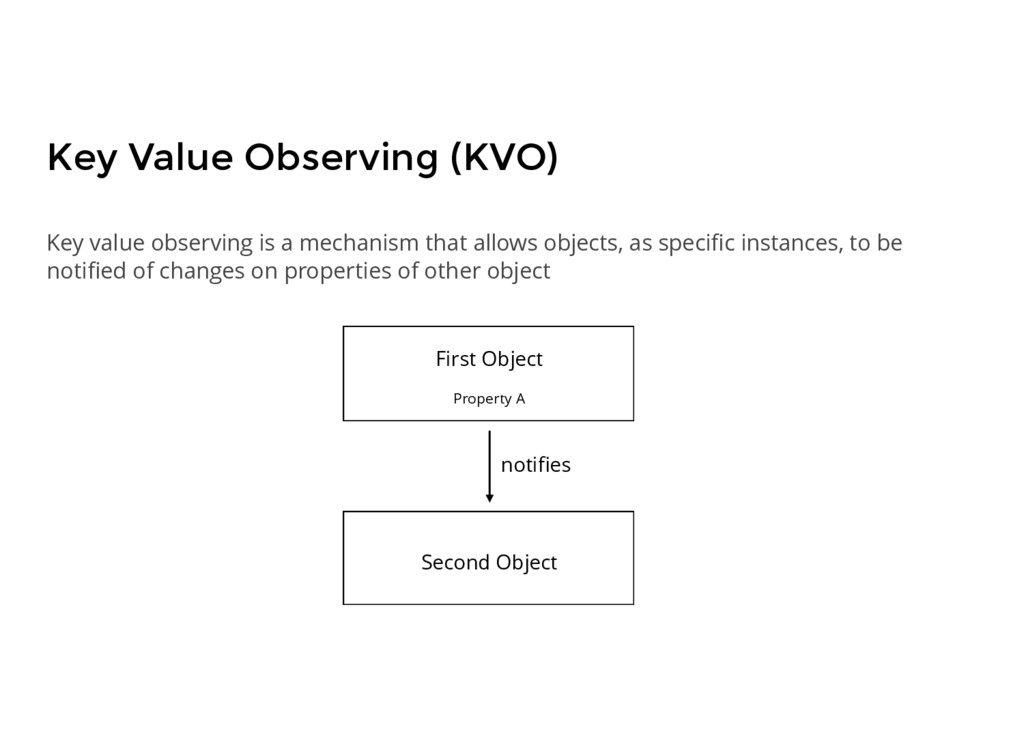
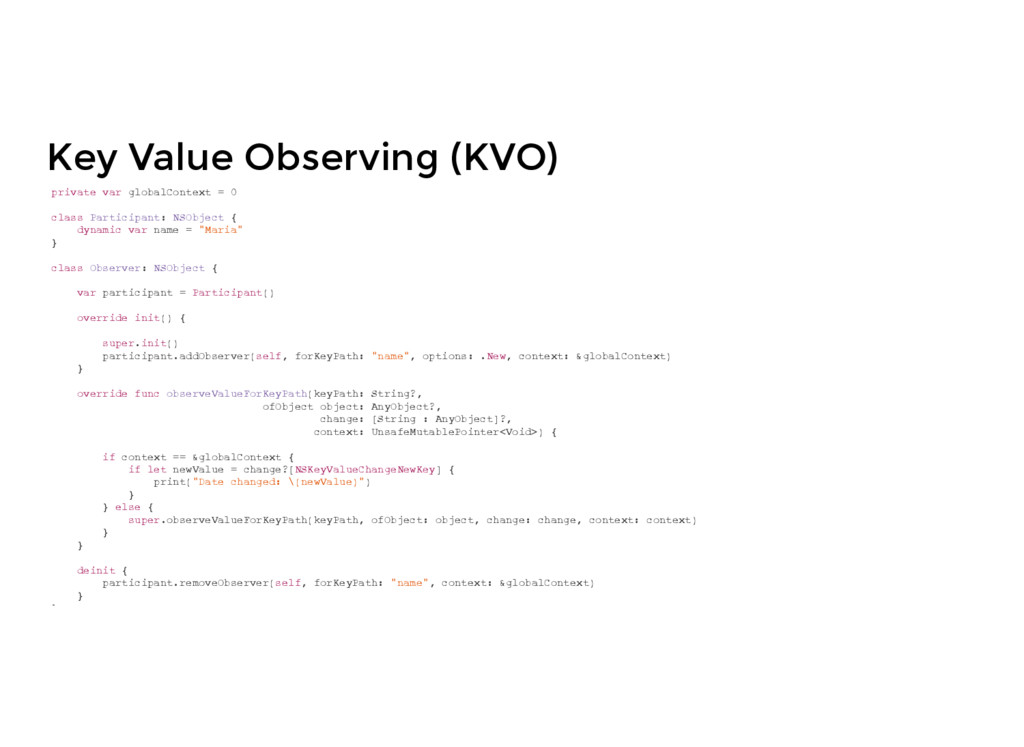
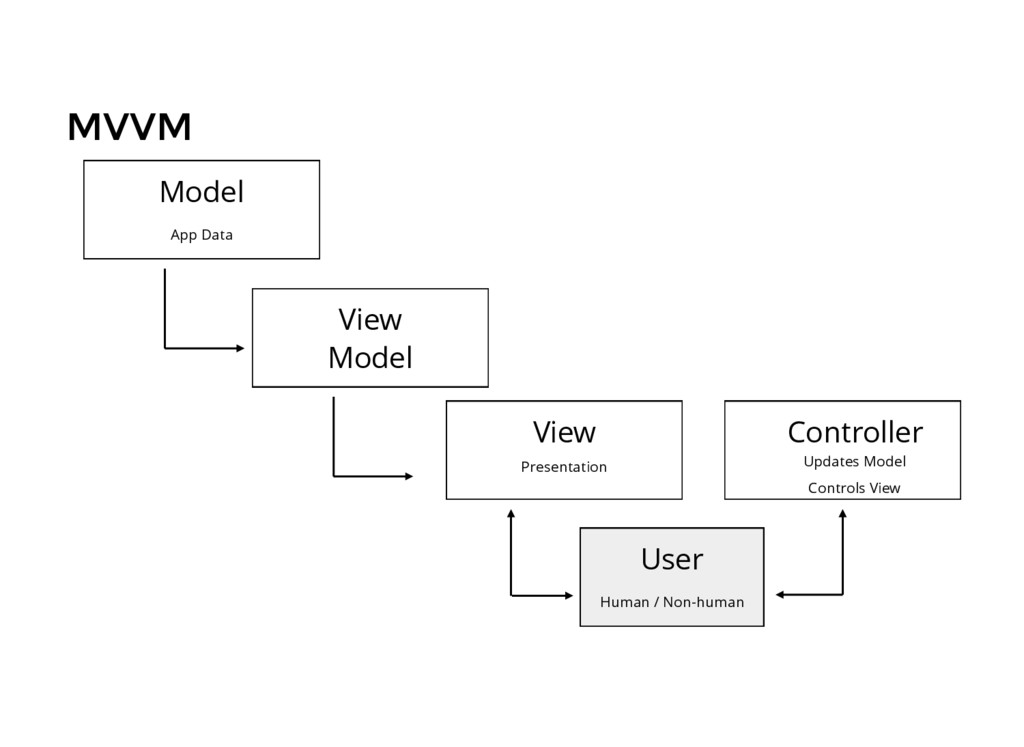
that allows objects, as specific instances, to be notified of changes on properties of other object Second Object Container First Object notifies Property A
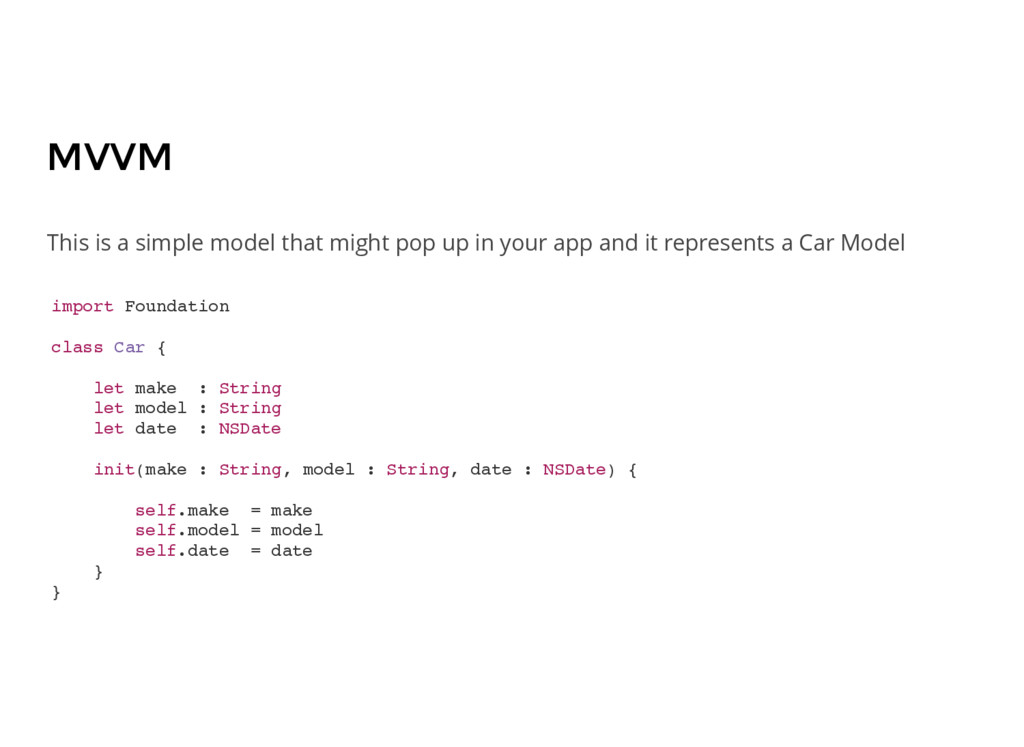
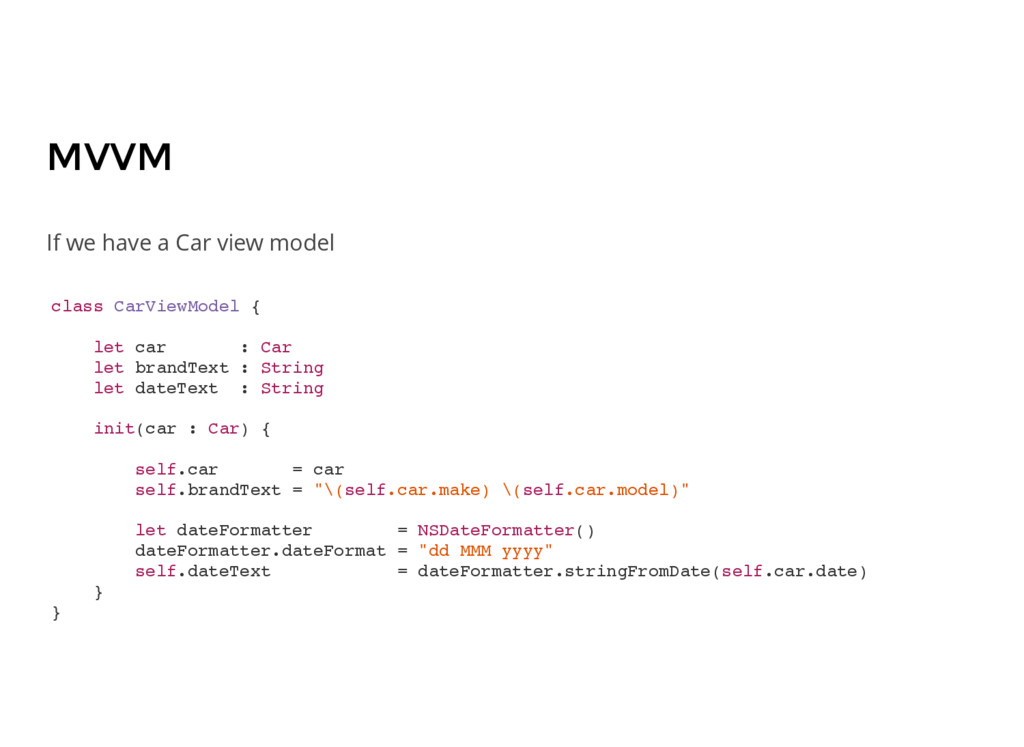
let model : String let date : NSDate init(make : String, model : String, date : NSDate) { self.make = make self.model = model self.date = date } } This is a simple model that might pop up in your app and it represents a Car Model
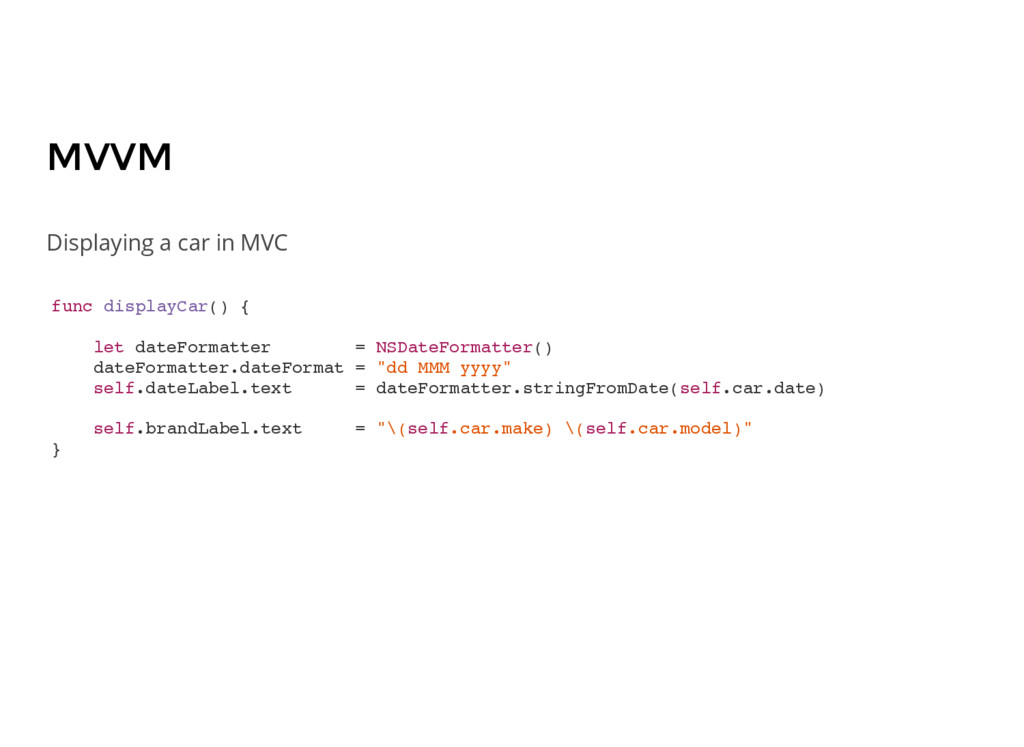
: String let dateText : String init(car : Car) { self.car = car self.brandText = "\(self.car.make) \(self.car.model)" let dateFormatter = NSDateFormatter() dateFormatter.dateFormat = "dd MMM yyyy" self.dateText = dateFormatter.stringFromDate(self.car.date) } } If we have a Car view model
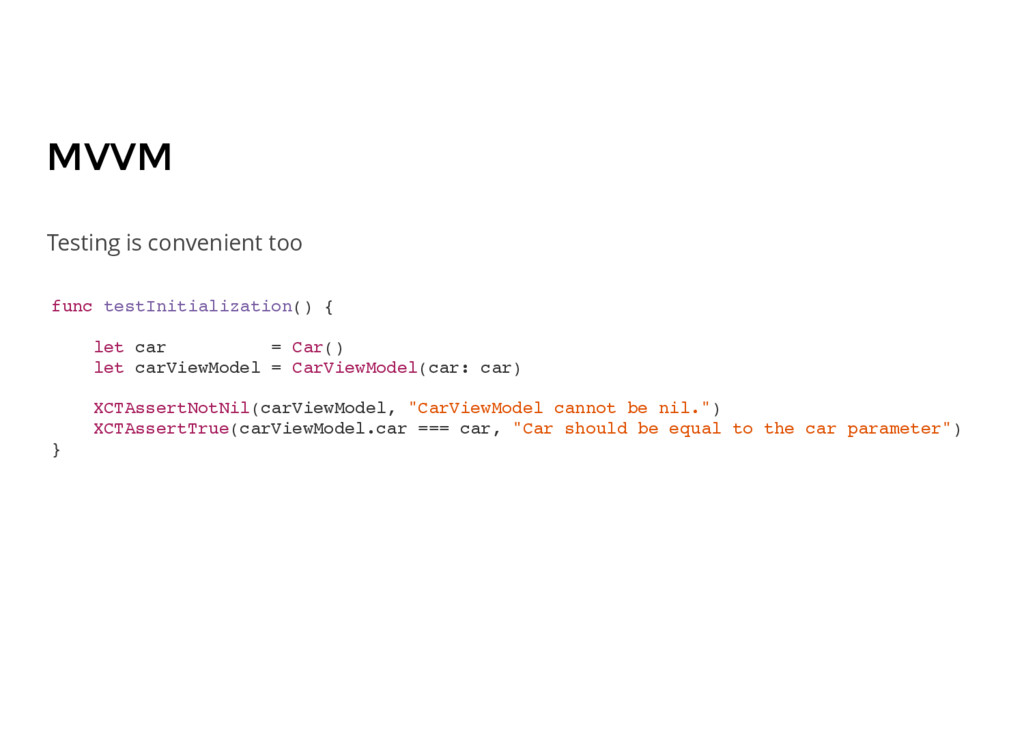
= CarViewModel(car: car) XCTAssertNotNil(carViewModel, "CarViewModel cannot be nil.") XCTAssertTrue(carViewModel.car === car, "Car should be equal to the car parameter") } Testing is convenient too