photos, videos or gifs within the notification. Tonight we'll go through some code snippets, examples and good practices so you could use them in your own apps. Intro
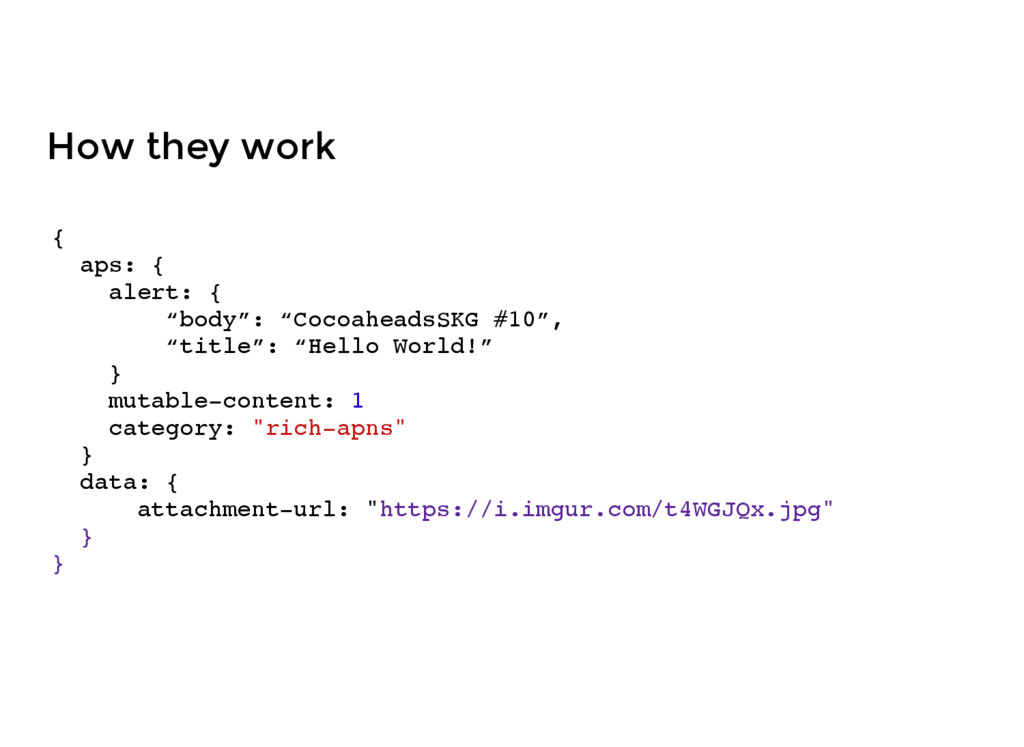
notification has content that can be changed by a service extension before delivery, and the attachment-url field contains the URL for the content to be downloaded.
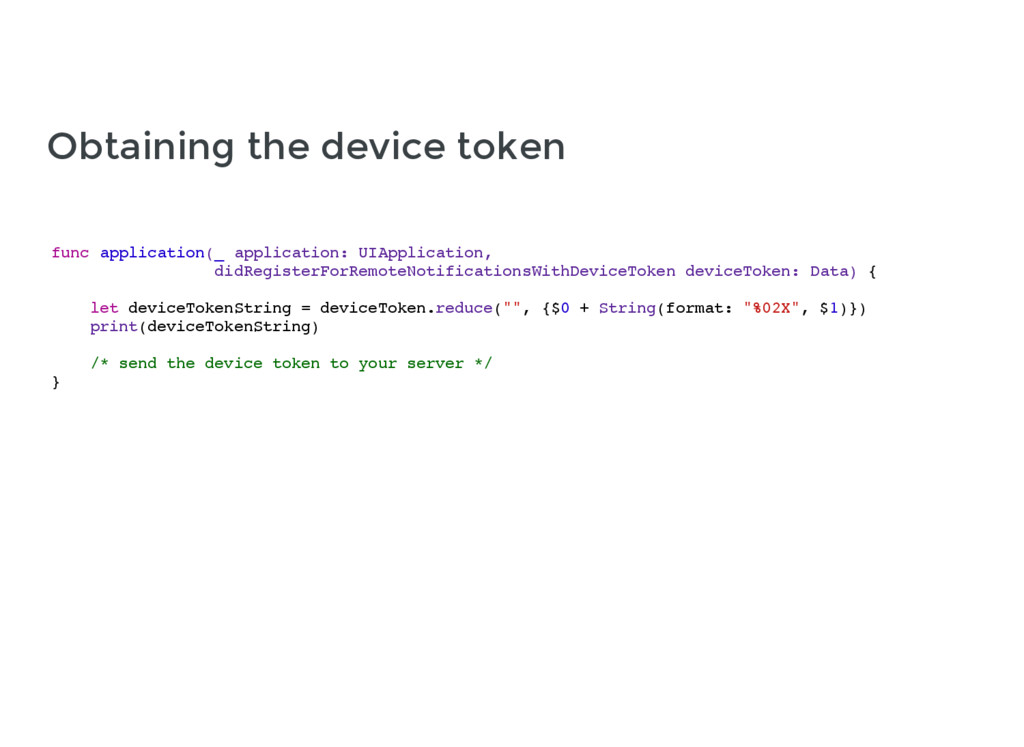
= deviceToken.reduce("", {$0 + String(format: "%02X", $1)}) print(deviceTokenString) /* send the device token to your server */ } Obtaining the device token
case .disabled: print("setting has been disabled") case .notSupported: print("something vital went wrong here") } } If you need to know the permissions granted
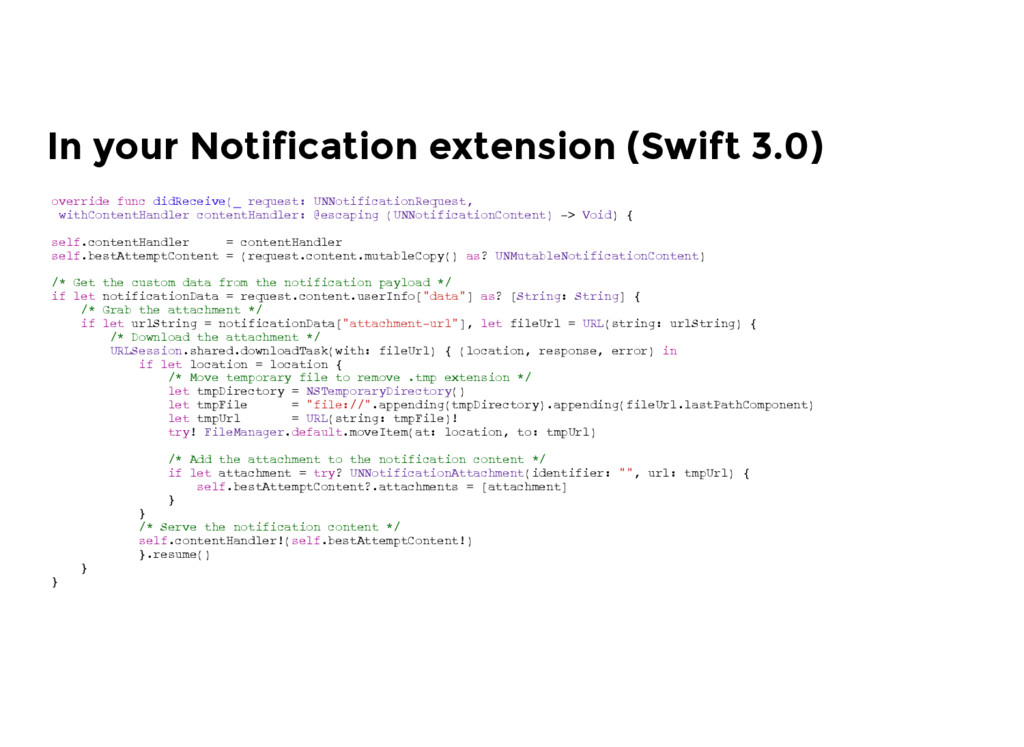
walking through the apns's payload for the dictionary named data that contains the key attachment-url. If it exists, we download the image from the URL which is the key's value. The URLSession downloads the media to temporary storage and appends a .tmp file extension, which needs to be removed so that the application can infer the file type and display it. This is done by moving the temporary file to the device’s File Manager.
Void) { self.contentHandler = contentHandler self.bestAttemptContent = (request.content.mutableCopy() as? UNMutableNotificationContent) /* Get the custom data from the notification payload */ if let notificationData = request.content.userInfo["data"] as? [String: String] { /* Grab the attachment */ if let urlString = notificationData["attachment-url"], let fileUrl = URL(string: urlString) { /* Download the attachment */ URLSession.shared.downloadTask(with: fileUrl) { (location, response, error) in if let location = location { /* Move temporary file to remove .tmp extension */ let tmpDirectory = NSTemporaryDirectory() let tmpFile = "file://".appending(tmpDirectory).appending(fileUrl.lastPathComponent) let tmpUrl = URL(string: tmpFile)! try! FileManager.default.moveItem(at: location, to: tmpUrl) /* Add the attachment to the notification content */ if let attachment = try? UNNotificationAttachment(identifier: "", url: tmpUrl) { self.bestAttemptContent?.attachments = [attachment] } } /* Serve the notification content */ self.contentHandler!(self.bestAttemptContent!) }.resume() } } In your Notification extension (Swift 3.0)
which is a subclass of UIViewController. When you created the Content Extension, Xcode created the NotificationViewController.swift file, a MainInterface.storyboard and a plist file. The UNNotificationExtensionCategory key value is the same as the category value set before. This tells iOS that the push notification you’re triggering is handled with a Content Extension. It should be set in the notification payload. In MainInterface.storyboard, create the UI that your push notifications will display, just like a regular UIViewController. In NotificationViewController.swift, declare any IBOutlets and connect them to the Storyboard file.
![let center = UNUserNotificationCenter.current() center.requestAuthorization(options: [.alert, .sound]) { (granted, error)](https://files.speakerdeck.com/presentations/f0ce0d4ef642429aa6b380734d193523/slide_9.jpg)