ads, Facebook Advertising is some of the most effective in the industry. It is tailored to fit your specific audience in one of their most well maintained facets of life: their Facebook Personal Page. This network allows you to focus on consumer likes and interests rather than guessing keywords. The ads appear on the right side of the screen, beside your wall, newsfeed, or any feature that you happen to be using. easyemerge.com
can begin “targeting” your audience. Notice that box at the upper right-hand corner of your page that keeps a constant calculation of the number of people you will reach with your current combination of terms, interests, or keywords. easyemerge.com
like to target. You can begin as broad as nations, or tighten your lens to cities. Do this by selecting the radio buttons below the “Location” criteria. easyemerge.com
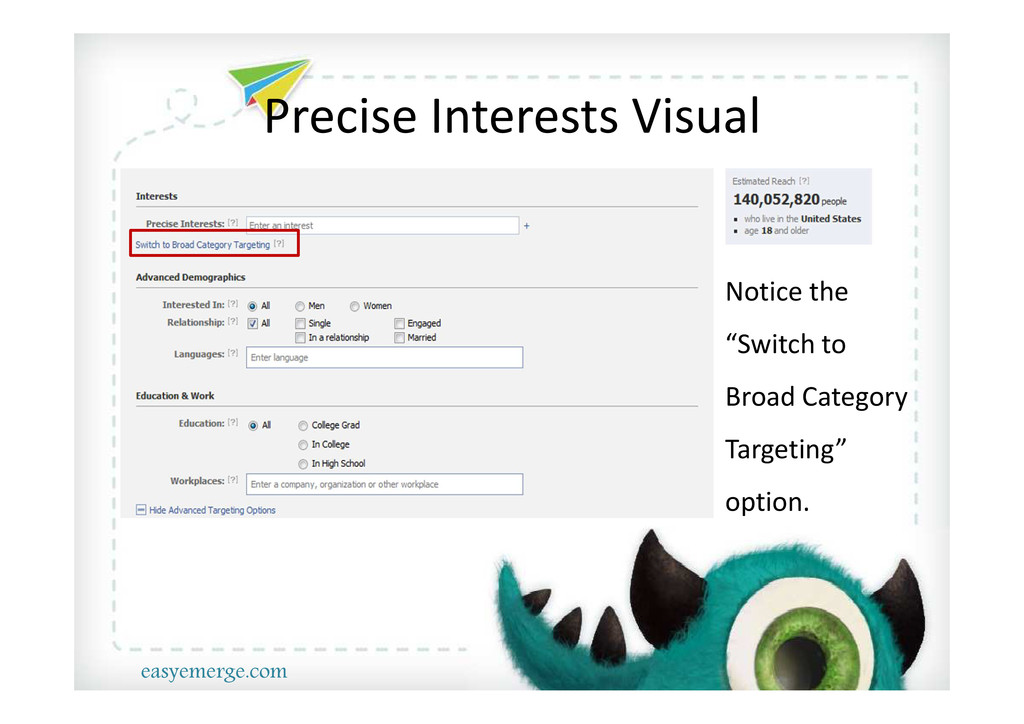
words or terms that coincide with the functionality of your business. Options will appear below, which displays groups or pages that have already accumulated likes. The people that interact with these special interests pages are targeted to view your advertisement. easyemerge.com
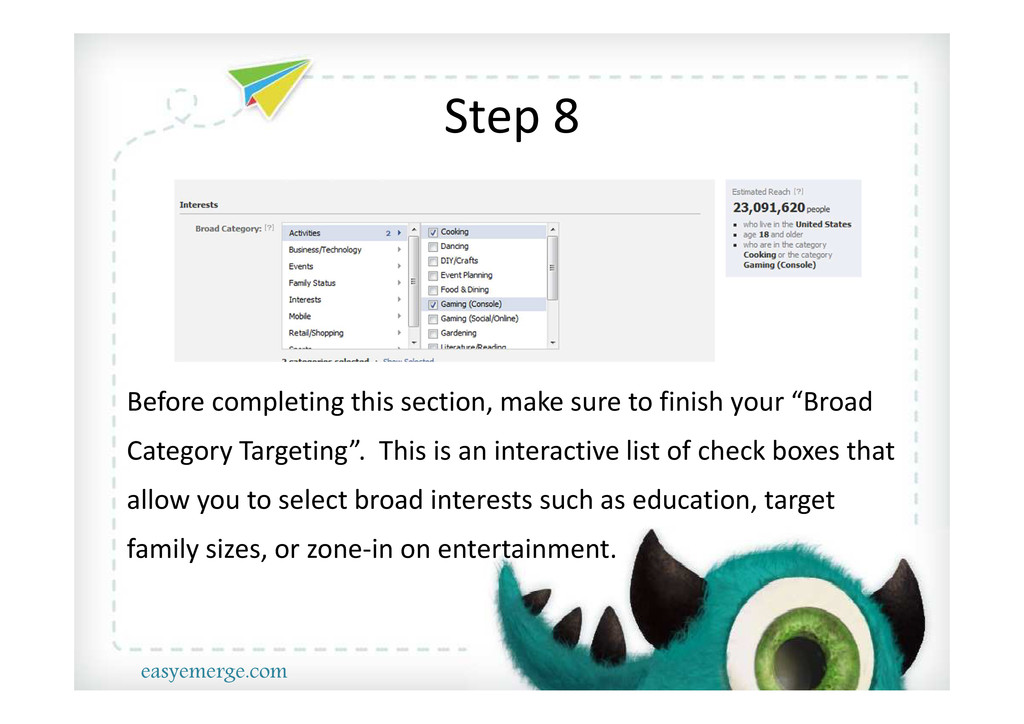
your “Broad Category Targeting”. This is an interactive list of check boxes that allow you to select broad interests such as education, target family sizes, or zone-in on entertainment. easyemerge.com
“Campaigns, Pricing, and Scheduling,” allow you to view the bid for the ad, or the estimated price you will pay per click, set your daily budget, select the time zone of which you live. easyemerge.com