Can publish to many platforms (Windows, Linux, Playstation 4, Android) • Can be used to port XNA games that will no longer build on current Windows • Can use the .NET libraries and components • Still actively developed by the MonoGame community • No costs; No forced splash screen Cons • No concept of a "scene" or "room" • Not made for 3D games in mind • No built in GUI components like buttons, text boxes, checkboxes, sliders, etc • No key press/button press event; Must track the previous keyboard/gamepad state yourself • Many things that should be simple take a lot of setup and code (asset loading)
if you don't already have it • https://visualstudio.microsoft.com/vs/community/ • Install the MonoGame Visual Studio extension (recommended) • Extensions > Manage Extensions • Search for "monogame" • Click Download button • Close Visual Studio for it to start • Click Modify button • Alternatively, download the package from https://www.monogame.net/downloads/ • Getting started guide (Visual Studio 2019) - https://docs.monogame.net/articles/getting_started/1_settin g_up_your_development_environment_windows.html
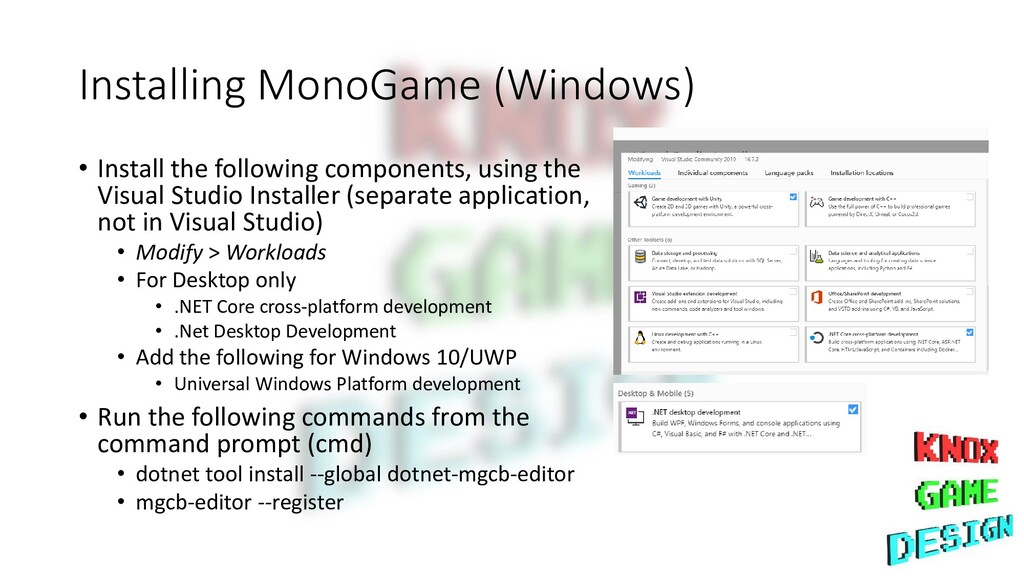
Visual Studio Installer (separate application, not in Visual Studio) • Modify > Workloads • For Desktop only • .NET Core cross-platform development • .Net Desktop Development • Add the following for Windows 10/UWP • Universal Windows Platform development • Run the following commands from the command prompt (cmd) • dotnet tool install --global dotnet-mgcb-editor • mgcb-editor --register
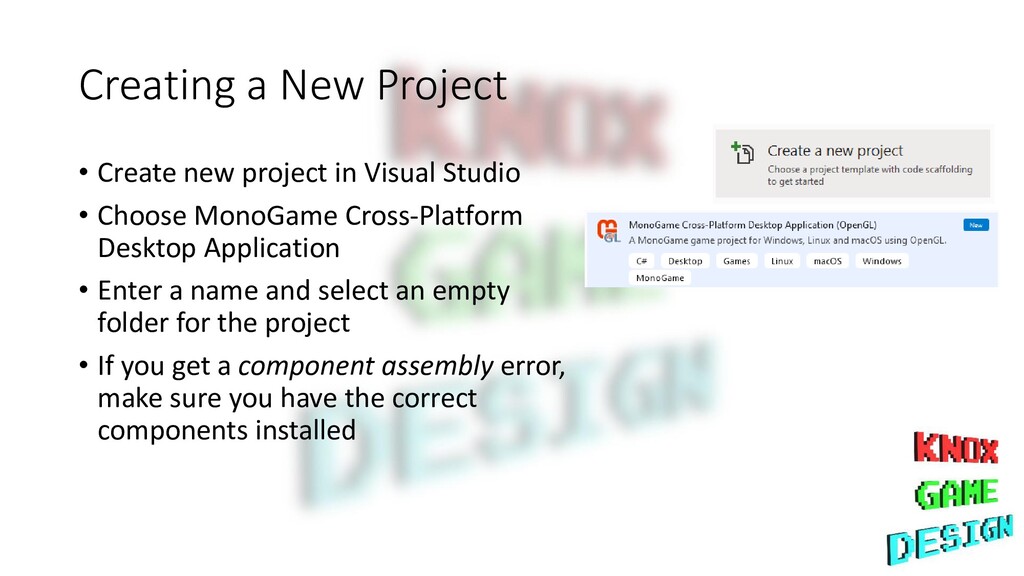
Studio • Choose MonoGame Cross-Platform Desktop Application • Enter a name and select an empty folder for the project • If you get a component assembly error, make sure you have the correct components installed
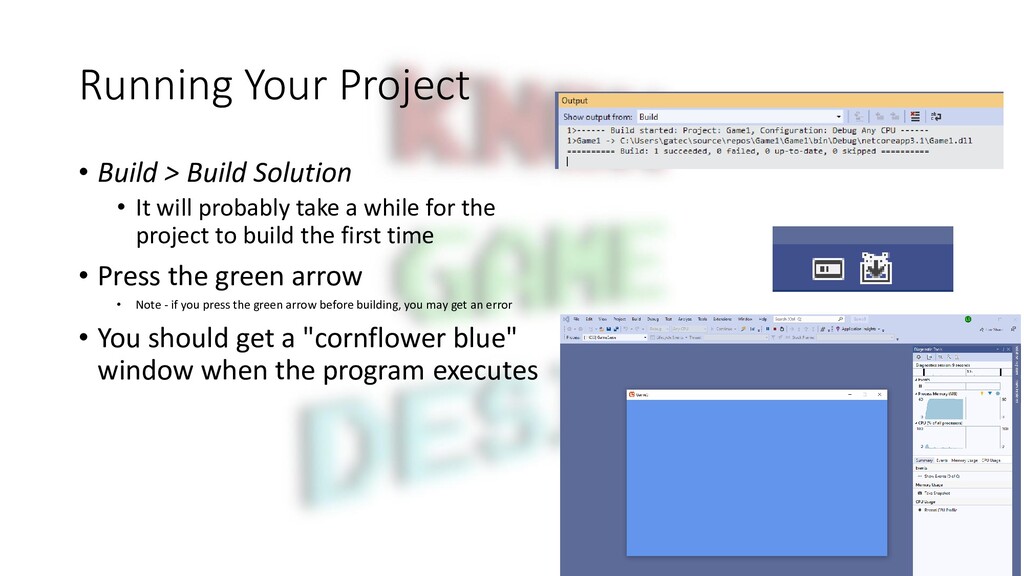
will probably take a while for the project to build the first time • Press the green arrow • Note - if you press the green arrow before building, you may get an error • You should get a "cornflower blue" window when the program executes
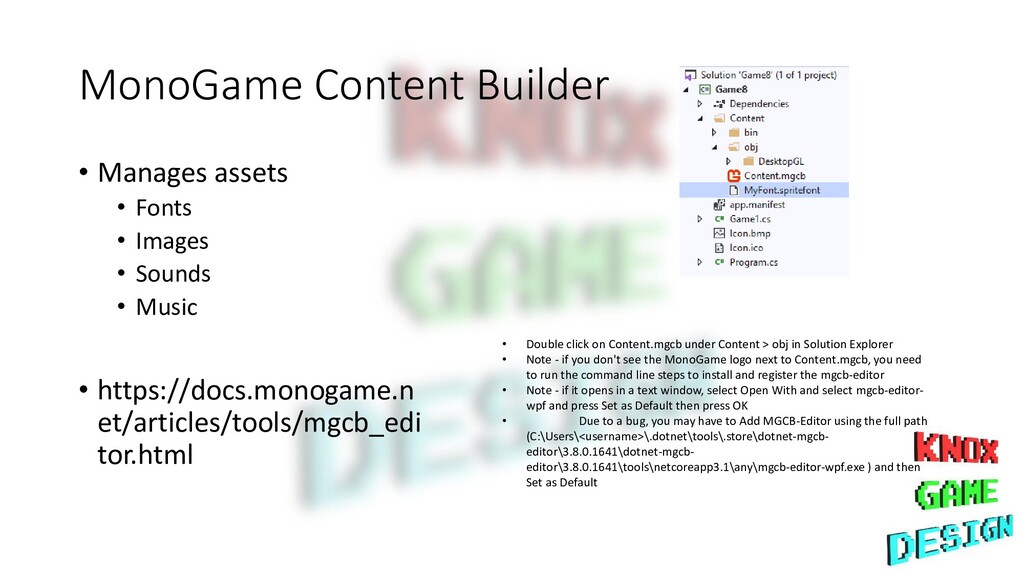
• Sounds • Music • https://docs.monogame.n et/articles/tools/mgcb_edi tor.html • Double click on Content.mgcb under Content > obj in Solution Explorer • Note - if you don't see the MonoGame logo next to Content.mgcb, you need to run the command line steps to install and register the mgcb-editor • Note - if it opens in a text window, select Open With and select mgcb-editor- wpf and press Set as Default then press OK • Due to a bug, you may have to Add MGCB-Editor using the full path (C:\Users\<username>\.dotnet\tools\.store\dotnet-mgcb- editor\3.8.0.1641\dotnet-mgcb- editor\3.8.0.1641\tools\netcoreapp3.1\any\mgcb-editor-wpf.exe ) and then Set as Default
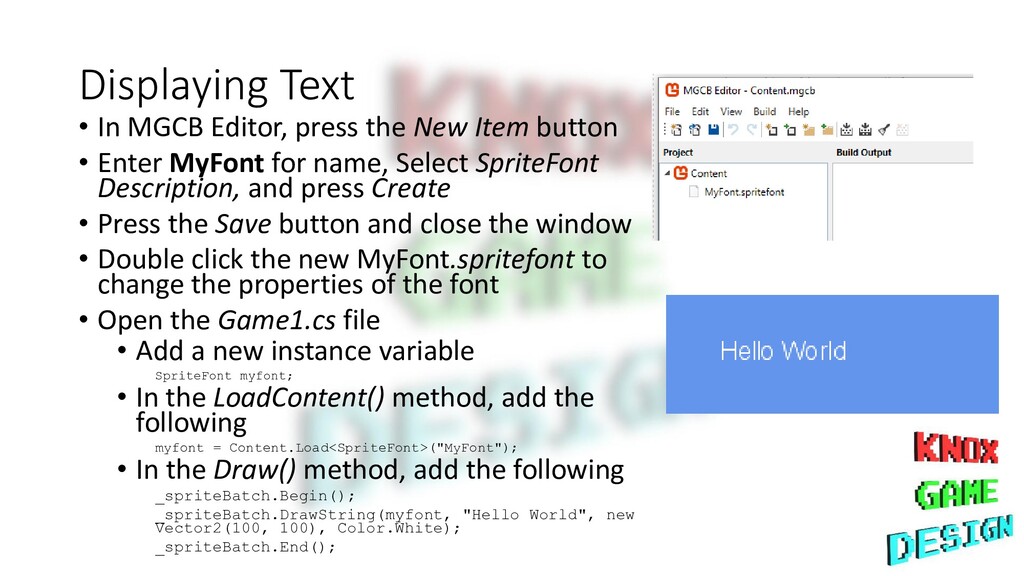
button • Enter MyFont for name, Select SpriteFont Description, and press Create • Press the Save button and close the window • Double click the new MyFont.spritefont to change the properties of the font • Open the Game1.cs file • Add a new instance variable SpriteFont myfont; • In the LoadContent() method, add the following myfont = Content.Load<SpriteFont>("MyFont"); • In the Draw() method, add the following _spriteBatch.Begin(); _spriteBatch.DrawString(myfont, "Hello World", new Vector2(100, 100), Color.White); _spriteBatch.End();
Called when object is instantiated • Initialize - Called on start • LoadContent - Call on start, used for loading assets/resources • Update - Called on each frame • Used to handle input and update game logic • Don't have to handle sleeping until next update • Use gameTime to smooth movements (similar to Unity's Time.deltaTime) • Draw - Called on each frame, Used for drawing to the screen
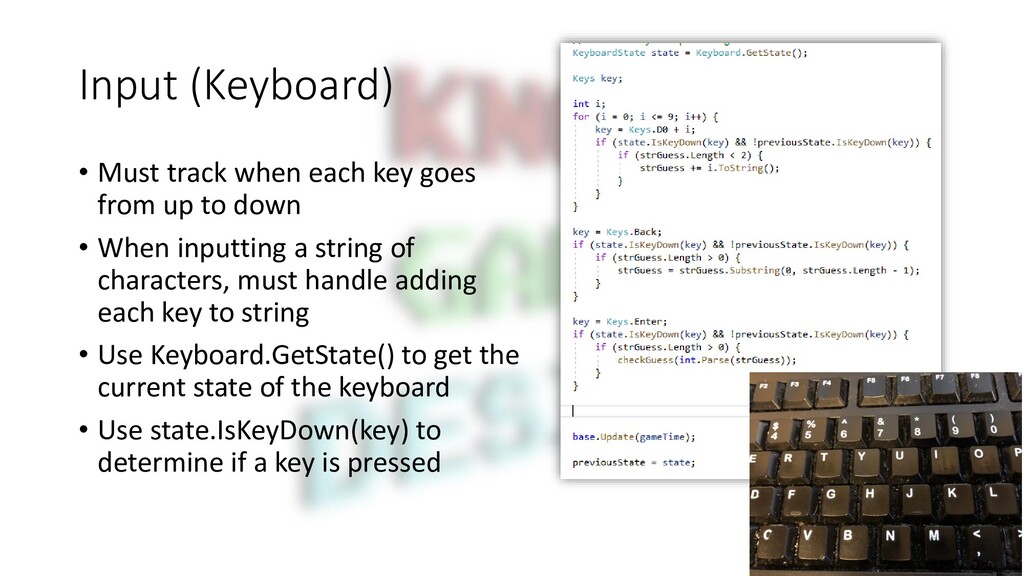
up to down • When inputting a string of characters, must handle adding each key to string • Use Keyboard.GetState() to get the current state of the keyboard • Use state.IsKeyDown(key) to determine if a key is pressed
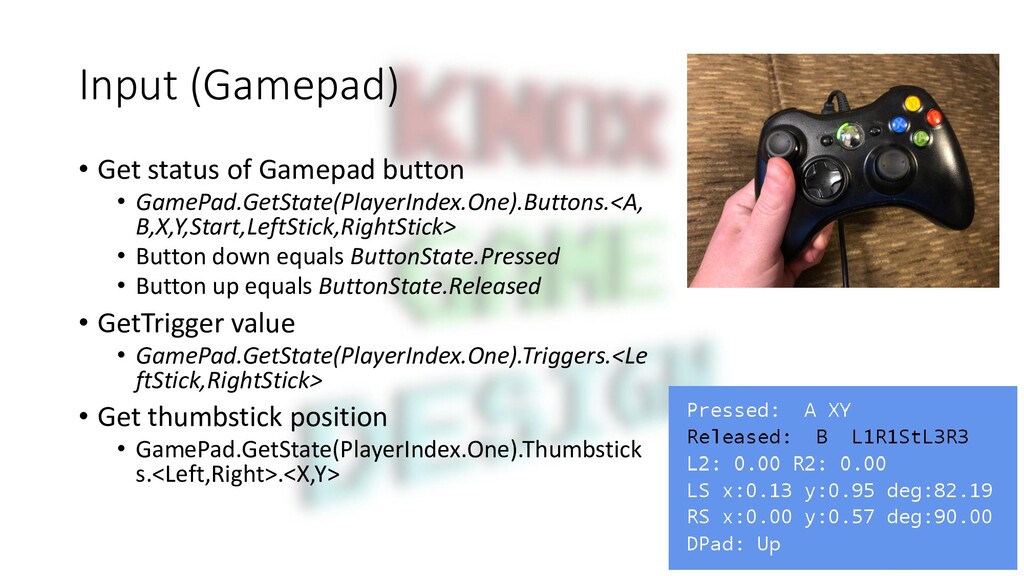
B,X,Y,Start,LeftStick,RightStick> • Button down equals ButtonState.Pressed • Button up equals ButtonState.Released • GetTrigger value • GamePad.GetState(PlayerIndex.One).Triggers.<Le ftStick,RightStick> • Get thumbstick position • GamePad.GetState(PlayerIndex.One).Thumbstick s.<Left,Right>.<X,Y>
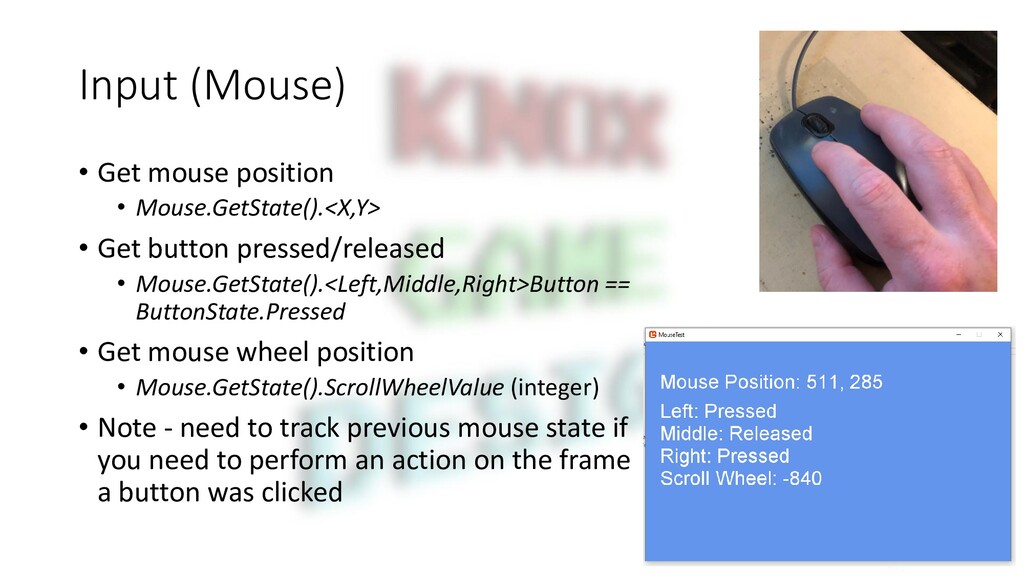
button pressed/released • Mouse.GetState().<Left,Middle,Right>Button == ButtonState.Pressed • Get mouse wheel position • Mouse.GetState().ScrollWheelValue (integer) • Note - need to track previous mouse state if you need to perform an action on the frame a button was clicked
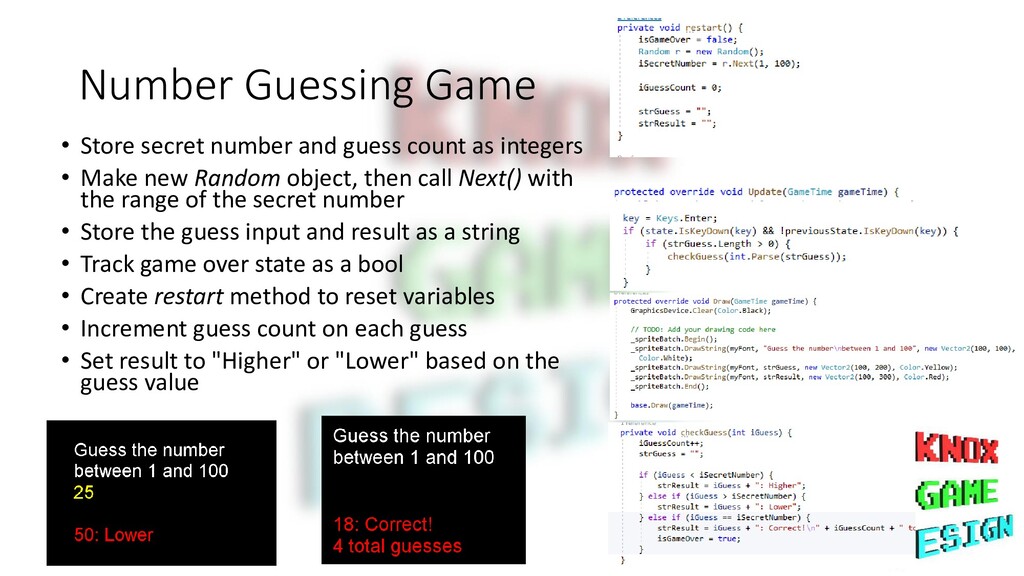
as integers • Make new Random object, then call Next() with the range of the secret number • Store the guess input and result as a string • Track game over state as a bool • Create restart method to reset variables • Increment guess count on each guess • Set result to "Higher" or "Lower" based on the guess value
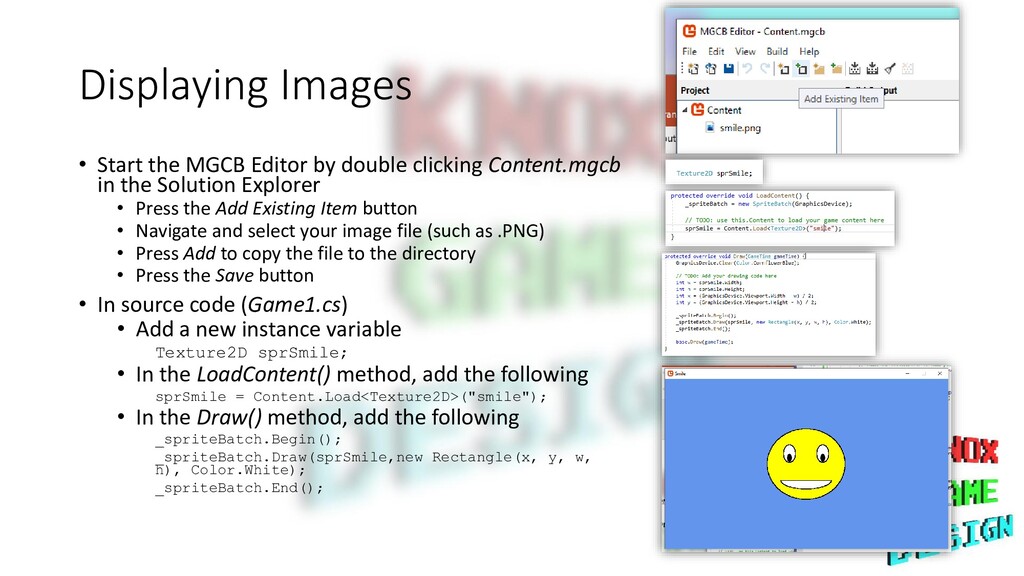
Content.mgcb in the Solution Explorer • Press the Add Existing Item button • Navigate and select your image file (such as .PNG) • Press Add to copy the file to the directory • Press the Save button • In source code (Game1.cs) • Add a new instance variable Texture2D sprSmile; • In the LoadContent() method, add the following sprSmile = Content.Load<Texture2D>("smile"); • In the Draw() method, add the following _spriteBatch.Begin(); _spriteBatch.Draw(sprSmile,new Rectangle(x, y, w, h), Color.White); _spriteBatch.End();
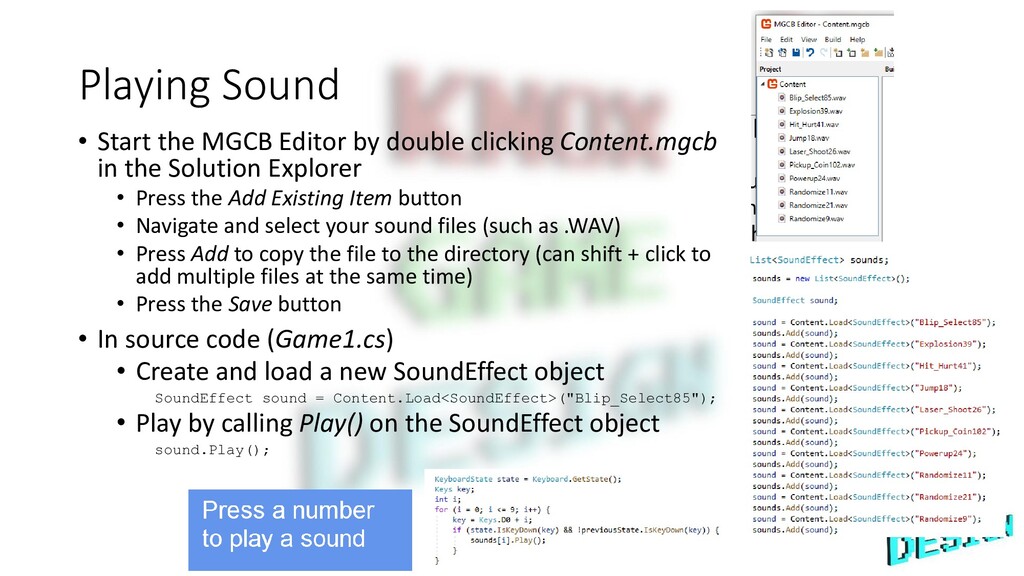
Content.mgcb in the Solution Explorer • Press the Add Existing Item button • Navigate and select your sound files (such as .WAV) • Press Add to copy the file to the directory (can shift + click to add multiple files at the same time) • Press the Save button • In source code (Game1.cs) • Create and load a new SoundEffect object SoundEffect sound = Content.Load<SoundEffect>("Blip_Select85"); • Play by calling Play() on the SoundEffect object sound.Play();
MGCB Editor • Create a Song object Song mysong; • Load using Content mysong = Content.Load<Song>("mus_overworld"); • Note - If using a .wav file, make sure to change Processor to Song • Play using MediaPlayer MediaPlayer.Play(mysong); • Use MediaPlayer.Volume property to set the volume • Stop playing with MediaPlayer.Stop()
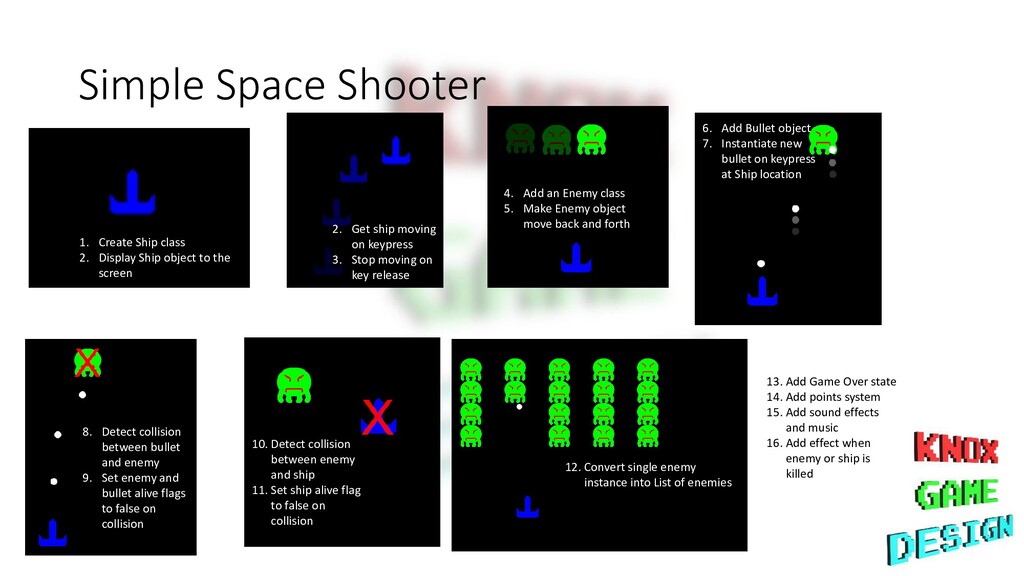
object to the screen 2. Get ship moving on keypress 3. Stop moving on key release 4. Add an Enemy class 5. Make Enemy object move back and forth 6. Add Bullet object 7. Instantiate new bullet on keypress at Ship location 8. Detect collision between bullet and enemy 9. Set enemy and bullet alive flags to false on collision 10. Detect collision between enemy and ship 11. Set ship alive flag to false on collision 12. Convert single enemy instance into List of enemies 13. Add Game Over state 14. Add points system 15. Add sound effects and music 16. Add effect when enemy or ship is killed