Upgrade to Pro — share decks privately, control downloads, hide ads and more …

Animation in Blender - Knox Game Design, January 2021

LD Smith
January 23, 2021

Animation in Blender - Knox Game Design, January 2021

http://www.knoxgamedesign.org/1546/animation-in-blender-knox-game-design-january-2021/
Presentation video - https://www.youtube.com/watch?v=52vSVyoUZAs
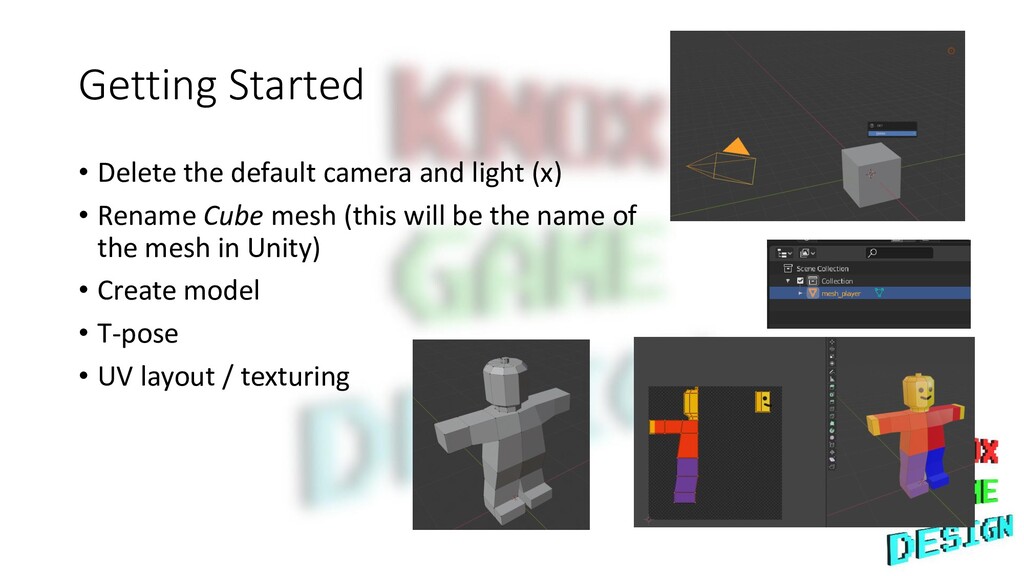
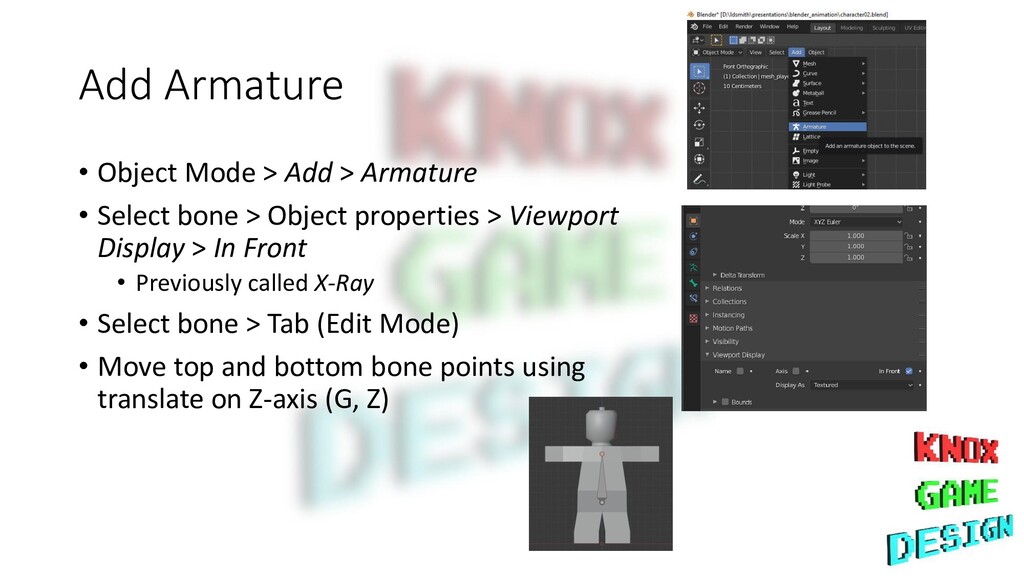
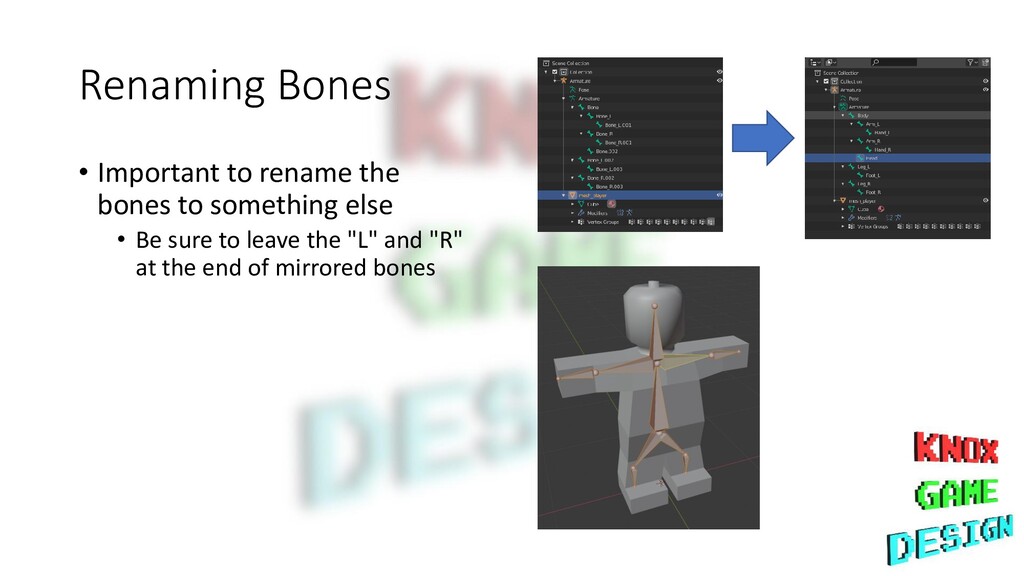
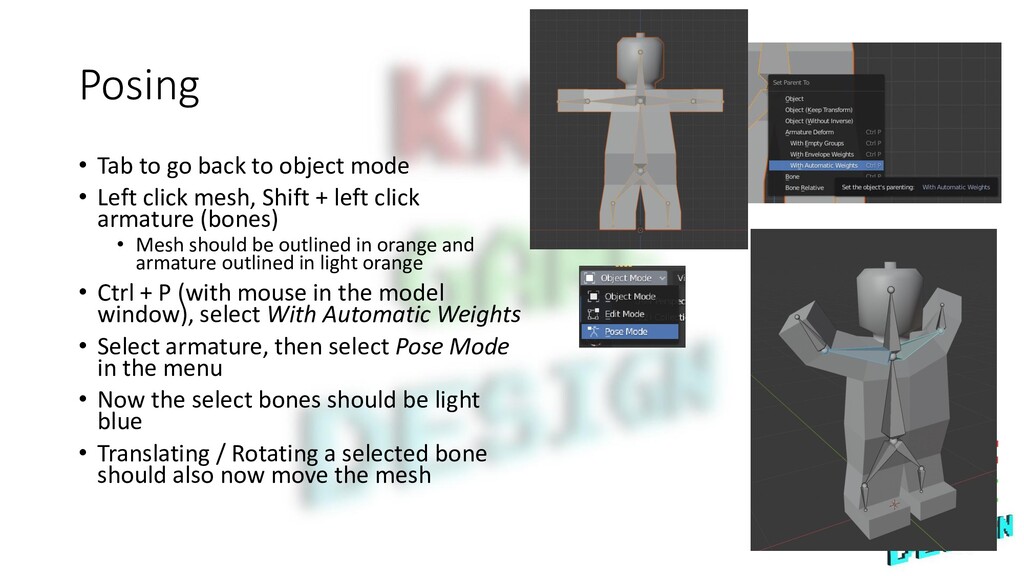
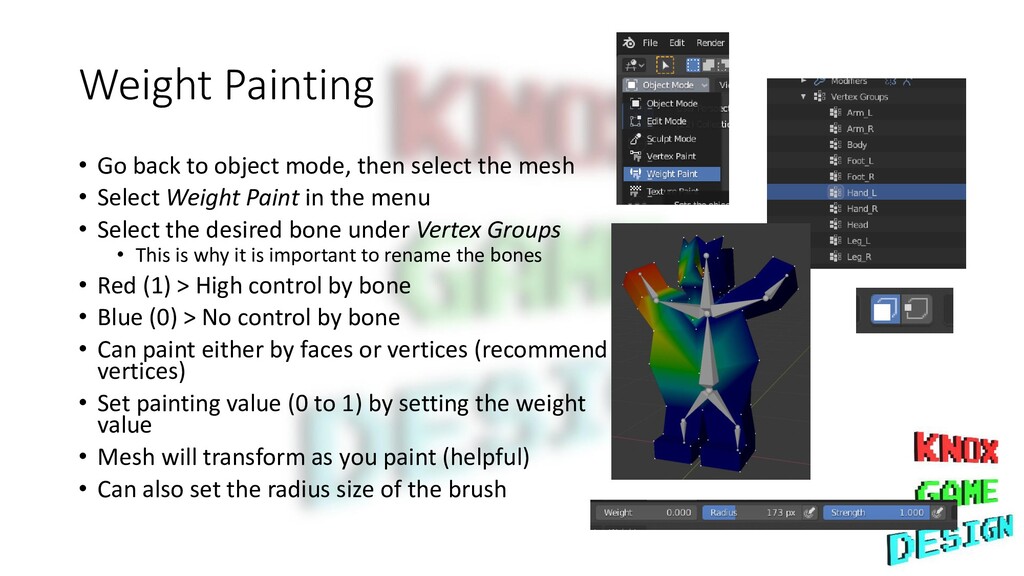
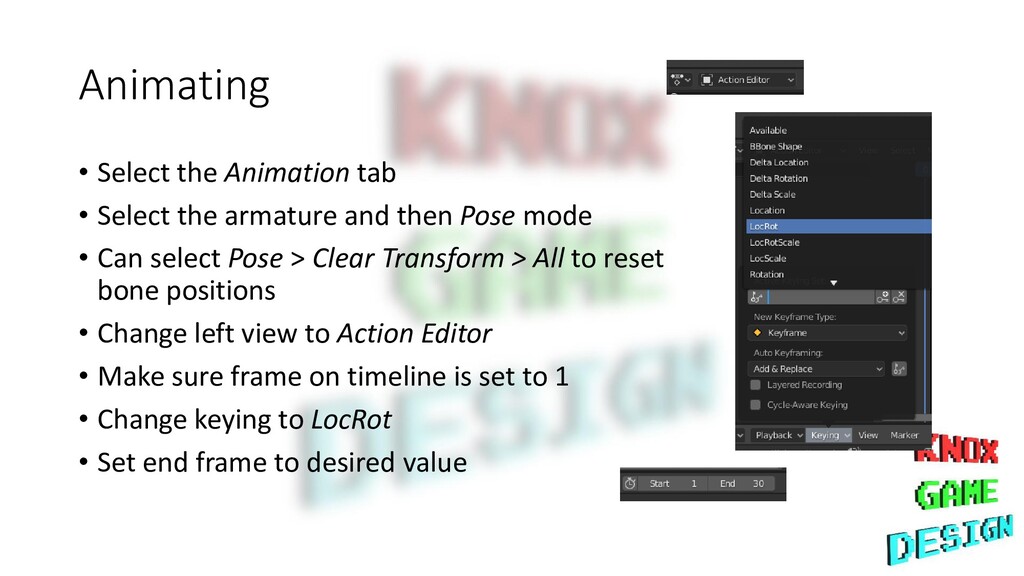
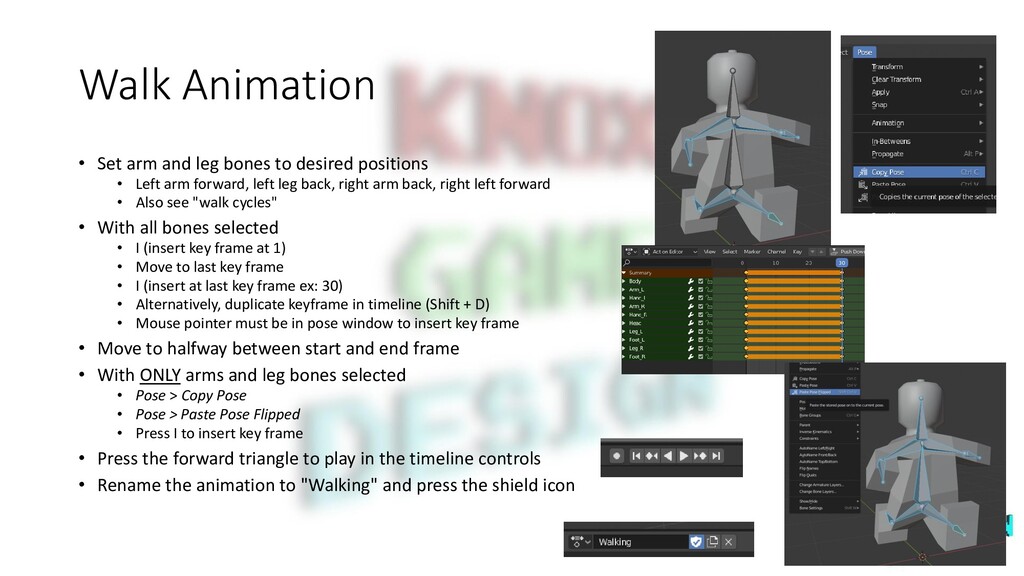
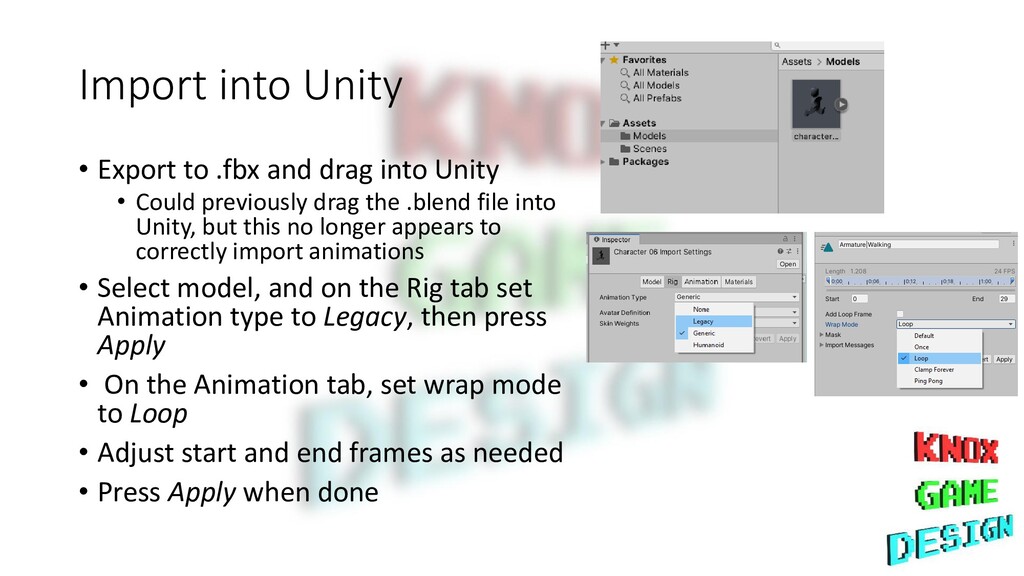
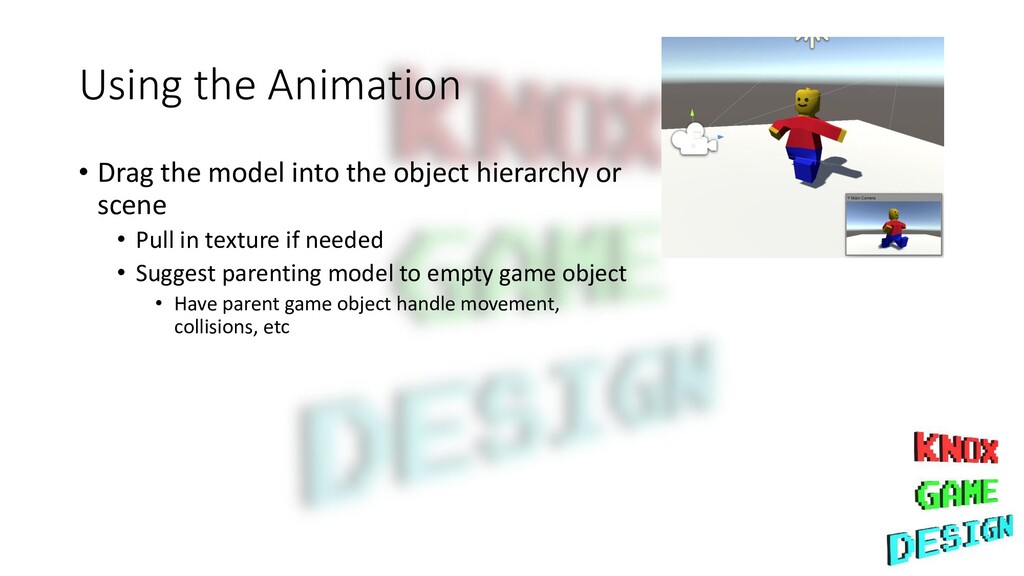
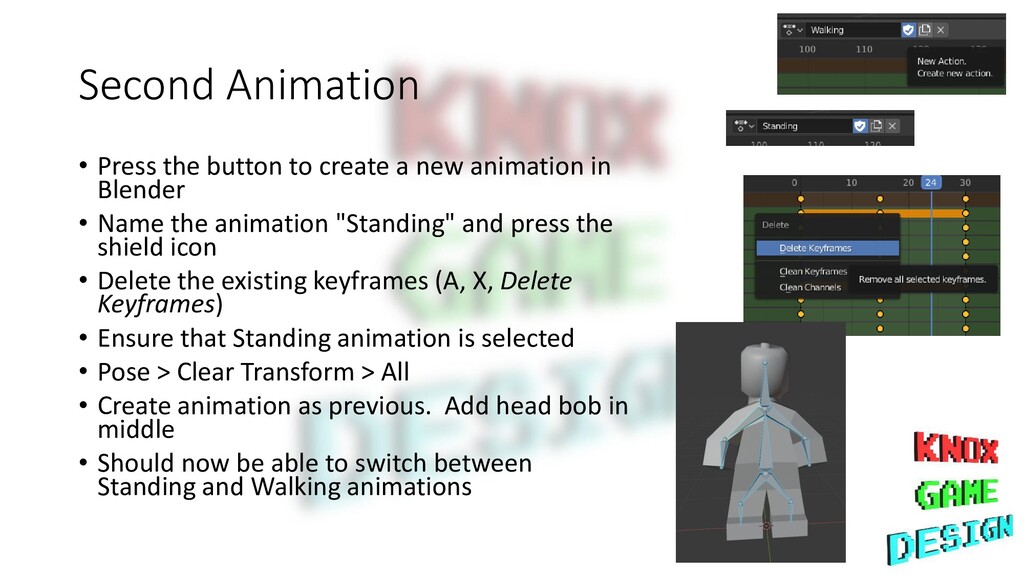
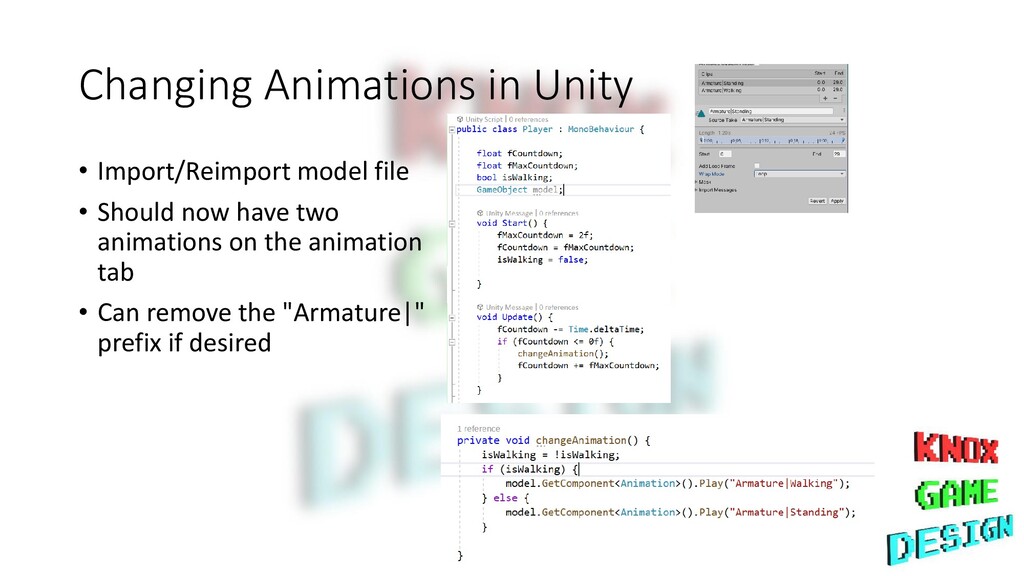
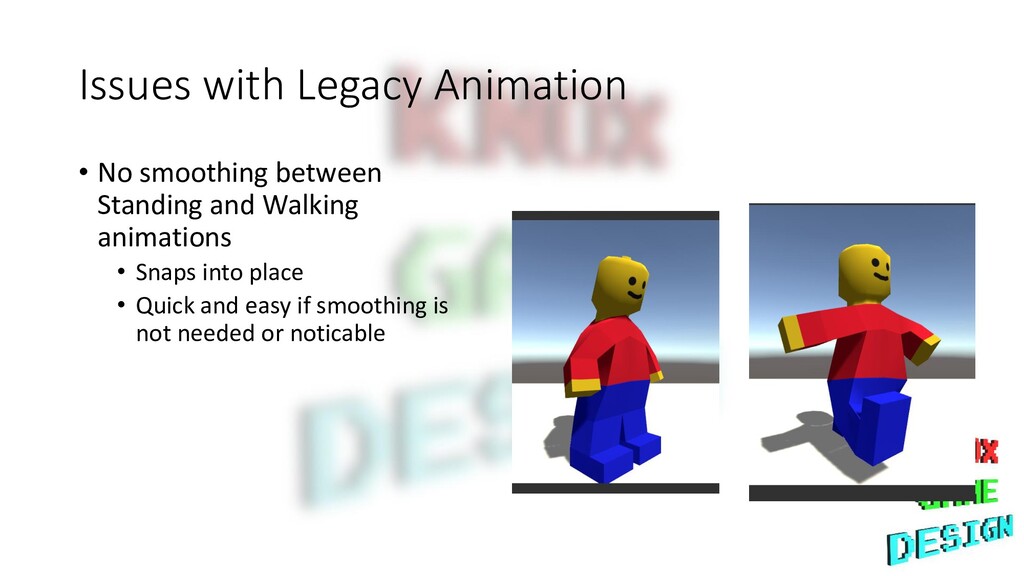
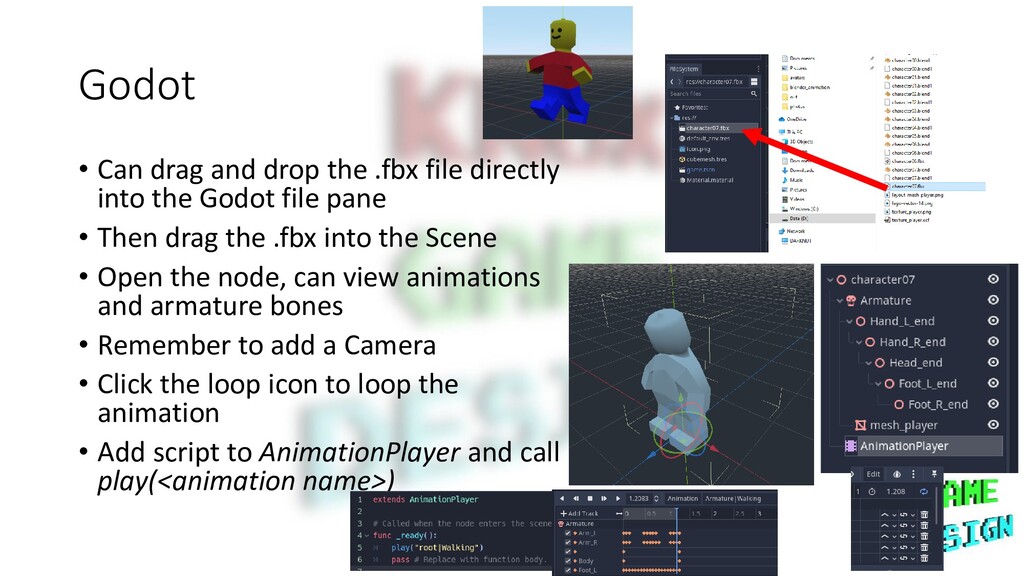
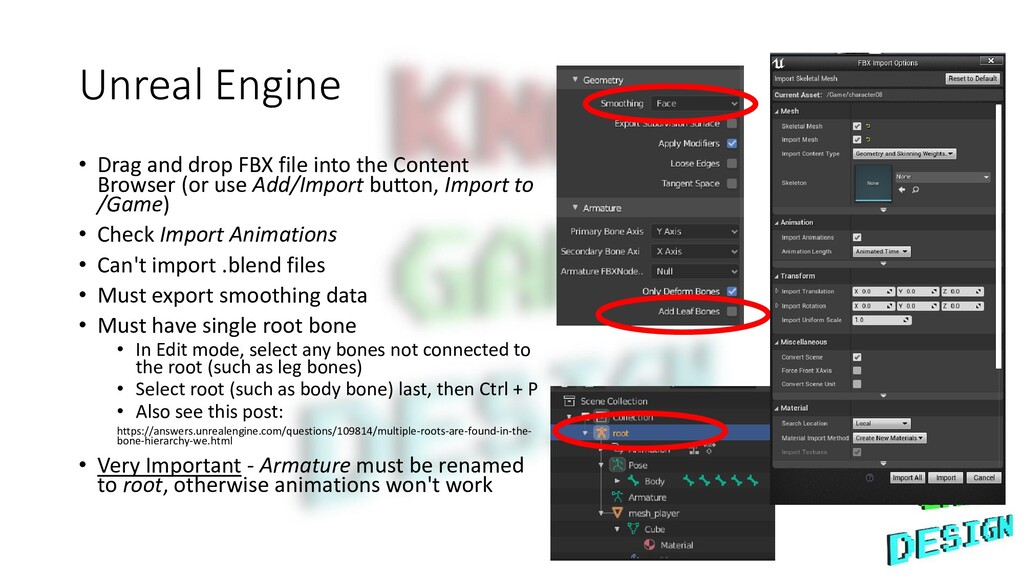
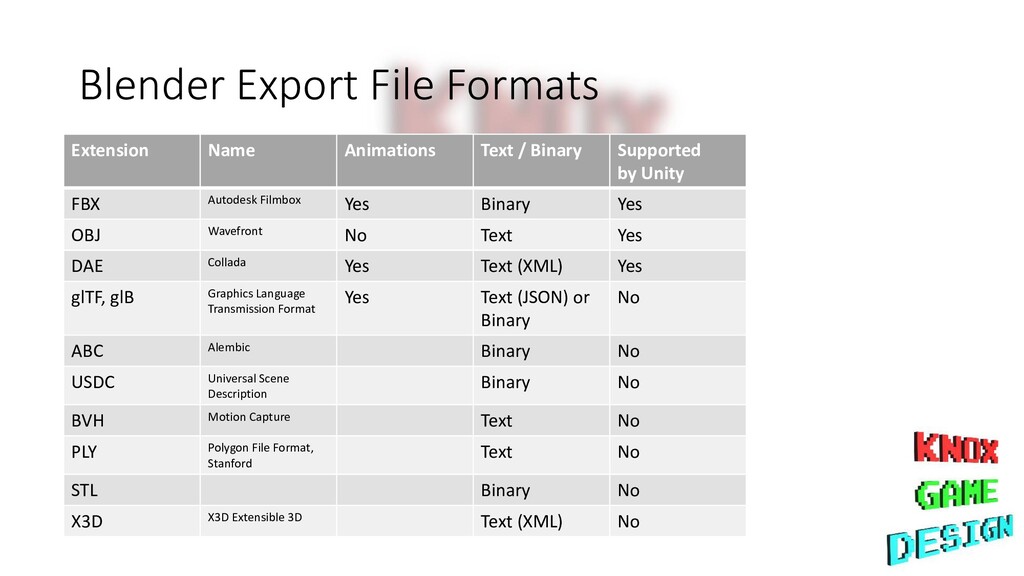
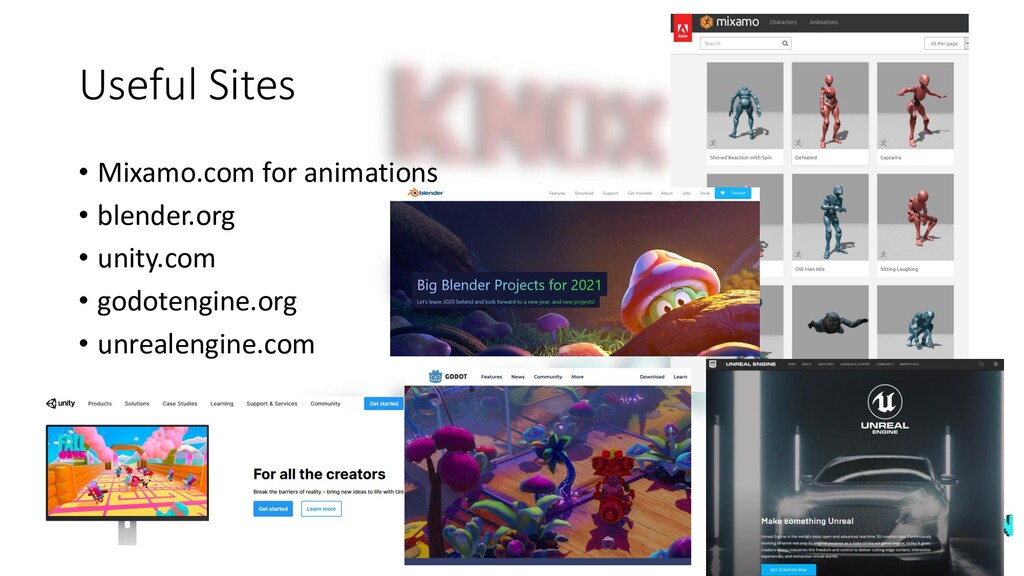
Demonstration of how to create a simple humanoid armature in Blender to be used in a game development environment. Explanation of how to assign a mesh to an armature and weight painting. How to create simple walking and standing animation by adding key frames. The model and animation are exported into FBX format and imported into Unity, Godot, and Unreal Engine. C# script for switching between animations in Unity.

LD Smith

January 23, 2021
Tweet

More Decks by LD Smith

Other Decks in Technology

Transcript

  1. Getting Started • Delete the default camera and light (x)

    • Rename Cube mesh (this will be the name of the mesh in Unity) • Create model • T-pose • UV layout / texturing
  2. Add Armature • Object Mode > Add > Armature •

    Select bone > Object properties > Viewport Display > In Front • Previously called X-Ray • Select bone > Tab (Edit Mode) • Move top and bottom bone points using translate on Z-axis (G, Z)
  3. Extruding Bones • Check Options > X-Axis Mirror • Select

    top point on body bone, Shift + E to extrude in both directions to make arm bones • Shift + E again to make "hand" (lower arm) bones • E, Z to make head bone • With bottom body bone selected, Shift + E to make leg bones • Shift + E again to make "feet" (lower leg) bones
  4. Renaming Bones • Important to rename the bones to something

    else • Be sure to leave the "L" and "R" at the end of mirrored bones
  5. Posing • Tab to go back to object mode •

    Left click mesh, Shift + left click armature (bones) • Mesh should be outlined in orange and armature outlined in light orange • Ctrl + P (with mouse in the model window), select With Automatic Weights • Select armature, then select Pose Mode in the menu • Now the select bones should be light blue • Translating / Rotating a selected bone should also now move the mesh
  6. Weight Painting • Go back to object mode, then select

    the mesh • Select Weight Paint in the menu • Select the desired bone under Vertex Groups • This is why it is important to rename the bones • Red (1) > High control by bone • Blue (0) > No control by bone • Can paint either by faces or vertices (recommend vertices) • Set painting value (0 to 1) by setting the weight value • Mesh will transform as you paint (helpful) • Can also set the radius size of the brush
  7. Animating • Select the Animation tab • Select the armature

    and then Pose mode • Can select Pose > Clear Transform > All to reset bone positions • Change left view to Action Editor • Make sure frame on timeline is set to 1 • Change keying to LocRot • Set end frame to desired value
  8. Walk Animation • Set arm and leg bones to desired

    positions • Left arm forward, left leg back, right arm back, right left forward • Also see "walk cycles" • With all bones selected • I (insert key frame at 1) • Move to last key frame • I (insert at last key frame ex: 30) • Alternatively, duplicate keyframe in timeline (Shift + D) • Mouse pointer must be in pose window to insert key frame • Move to halfway between start and end frame • With ONLY arms and leg bones selected • Pose > Copy Pose • Pose > Paste Pose Flipped • Press I to insert key frame • Press the forward triangle to play in the timeline controls • Rename the animation to "Walking" and press the shield icon
  9. Import into Unity • Export to .fbx and drag into

    Unity • Could previously drag the .blend file into Unity, but this no longer appears to correctly import animations • Select model, and on the Rig tab set Animation type to Legacy, then press Apply • On the Animation tab, set wrap mode to Loop • Adjust start and end frames as needed • Press Apply when done
  10. Using the Animation • Drag the model into the object

    hierarchy or scene • Pull in texture if needed • Suggest parenting model to empty game object • Have parent game object handle movement, collisions, etc
  11. Second Animation • Press the button to create a new

    animation in Blender • Name the animation "Standing" and press the shield icon • Delete the existing keyframes (A, X, Delete Keyframes) • Ensure that Standing animation is selected • Pose > Clear Transform > All • Create animation as previous. Add head bob in middle • Should now be able to switch between Standing and Walking animations
  12. Changing Animations in Unity • Import/Reimport model file • Should

    now have two animations on the animation tab • Can remove the "Armature|" prefix if desired
  13. Issues with Legacy Animation • No smoothing between Standing and

    Walking animations • Snaps into place • Quick and easy if smoothing is not needed or noticable
  14. Godot • Can drag and drop the .fbx file directly

    into the Godot file pane • Then drag the .fbx into the Scene • Open the node, can view animations and armature bones • Remember to add a Camera • Click the loop icon to loop the animation • Add script to AnimationPlayer and call play(<animation name>)
  15. Unreal Engine • Drag and drop FBX file into the

    Content Browser (or use Add/Import button, Import to /Game) • Check Import Animations • Can't import .blend files • Must export smoothing data • Must have single root bone • In Edit mode, select any bones not connected to the root (such as leg bones) • Select root (such as body bone) last, then Ctrl + P • Also see this post: https://answers.unrealengine.com/questions/109814/multiple-roots-are-found-in-the- bone-hierarchy-we.html • Very Important - Armature must be renamed to root, otherwise animations won't work
  16. Blender Export File Formats Extension Name Animations Text / Binary

    Supported by Unity FBX Autodesk Filmbox Yes Binary Yes OBJ Wavefront No Text Yes DAE Collada Yes Text (XML) Yes glTF, glB Graphics Language Transmission Format Yes Text (JSON) or Binary No ABC Alembic Binary No USDC Universal Scene Description Binary No BVH Motion Capture Text No PLY Polygon File Format, Stanford Text No STL Binary No X3D X3D Extensible 3D Text (XML) No