Upgrade to Pro — share decks privately, control downloads, hide ads and more …

勉強会向けサーバを作ってみる 2 Rasbian jessie を試す Google Authenticator のパスコードを作る

勉強会向けサーバを作ってみる 2 Rasbian jessie を試す Google Authenticator のパスコードを作る

鹿児島 Linux 勉強会 2015.11 ( 第 11 回 ) 20151113( 金 )

Kenichiro MATOHARA

November 13, 2015
Tweet

More Decks by Kenichiro MATOHARA

Other Decks in Technology

Transcript

  1. 5 鹿児島らぐ / 鹿児島 Linux 勉強会 今回で 12 回目 前回は

    2 月 3 4 5 6 7 8 9 10 11……9 ヶ月ぶり orz もし集まりたいといった場合には ML 等で告知して勝手に開催して も OK matohara も出来ることは手伝います !
  2. 7 端末の共有 前回 → http://www.slideshare.net/matoken/ss-51975843 GNU Screen/Tmux 等 ー>リモートログインが面倒 GoTTY(

    https://github.com/yudai/gotty ) ウェブブラウザ経由で端末が共有できる ー>お手軽
  3. 8 GoTTY の導入 go の導入 % sudo apt install golang

    go get で GoTTY の導入 (~/usr/local/go 以下に導入 ) GOPATH=~/usr/local/go go get github.com/yudai/gotty
  4. 9 GoTTY の利用例 % ~/usr/local/go/bin/gotty top 2015/11/13 06:26:33 Permitting clients

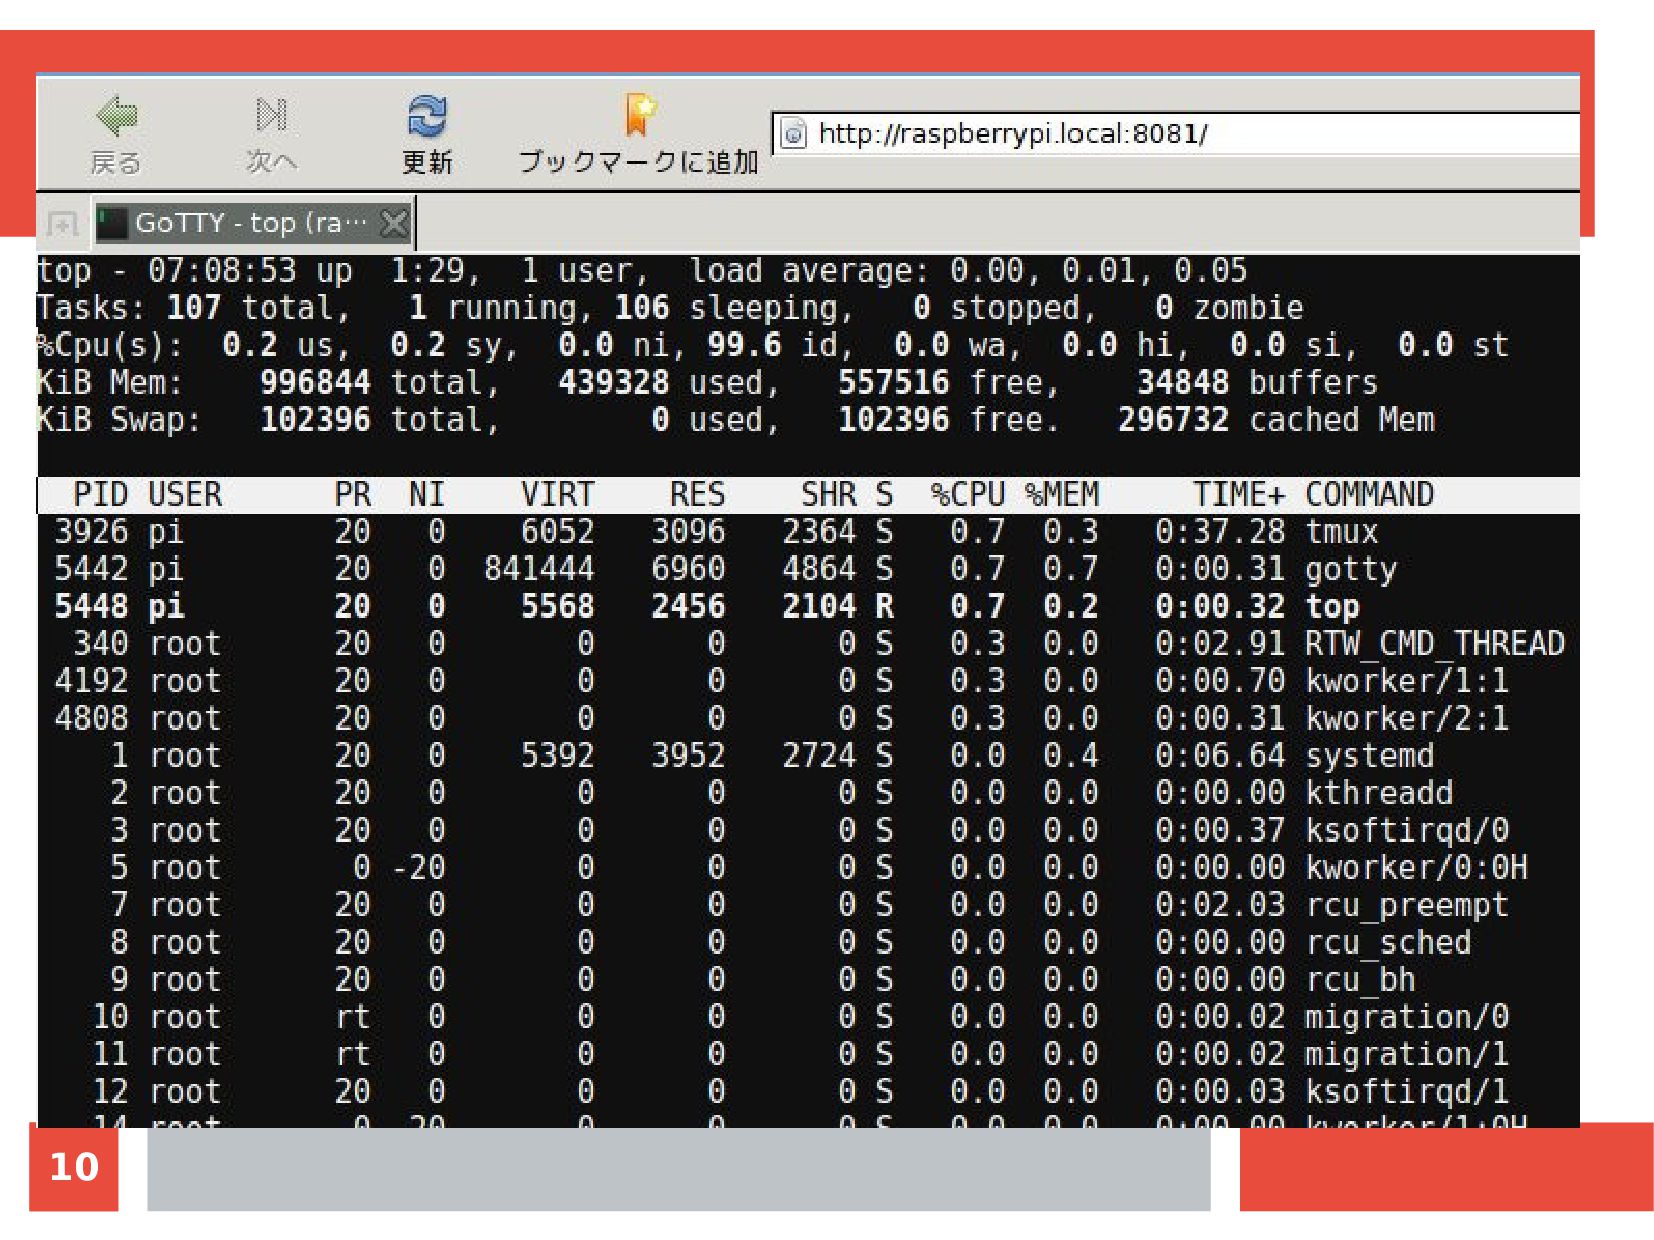
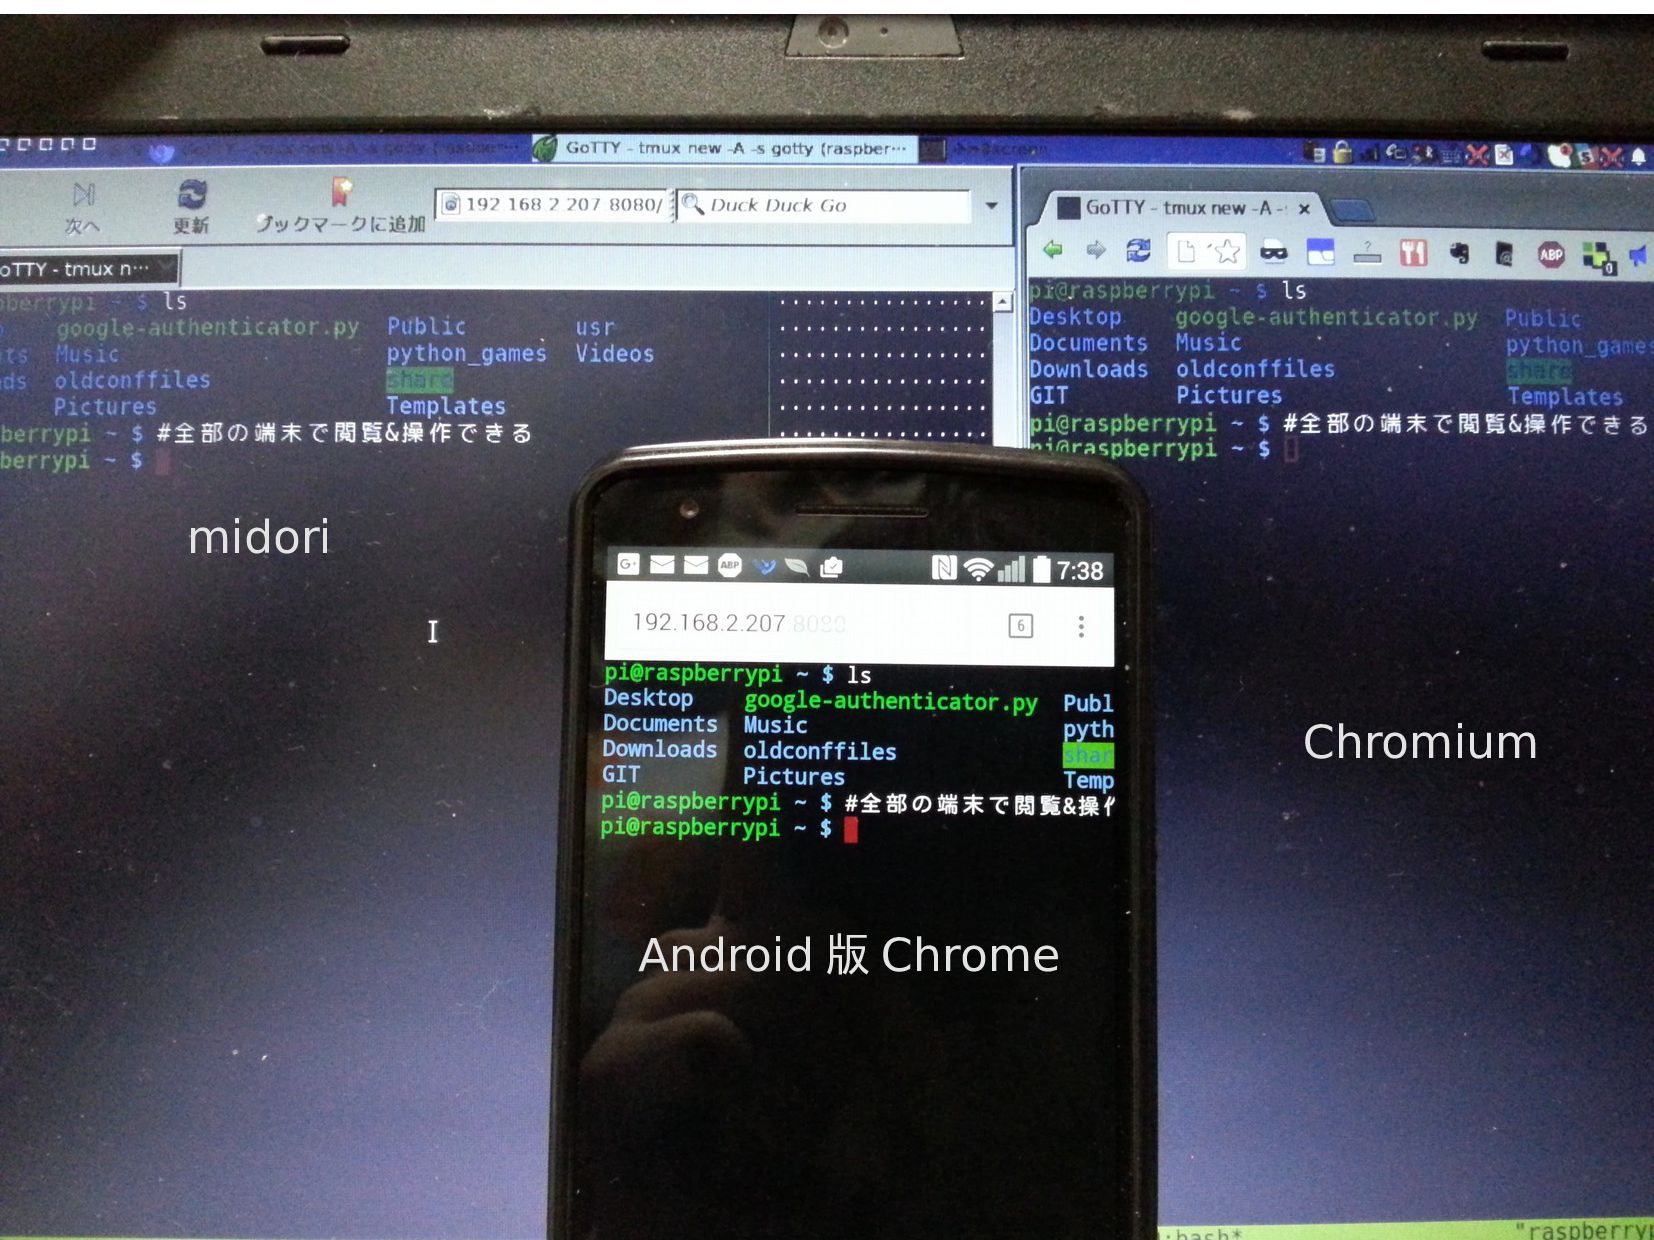
    to write input to the PTY. 2015/11/13 06:26:33 Server is starting with command: tmux new -A -s gotty 2015/11/13 06:26:33 URL: http://127.0.0.1:8080/ 2015/11/13 06:26:33 URL: http://[::1]:8080/ 2015/11/13 06:26:33 URL: http://[fe80::a27e:a3b8:cfa7:22a6]:8080/ 2015/11/13 06:26:33 URL: http://192.168.2.217:8080/ 2015/11/13 06:26:33 URL: http://[fe80::85e0:9218:1854:8531]:8080/ この状態で URL: 〜 にブラウザでアクセスすると top コマンドが実行されるのが 確認できる
  5. 10

  6. 11 $ gotty bash のようにすると bash が起動するが操作できない --permit-write, -w オプションを利用することで書き込みが可能になる

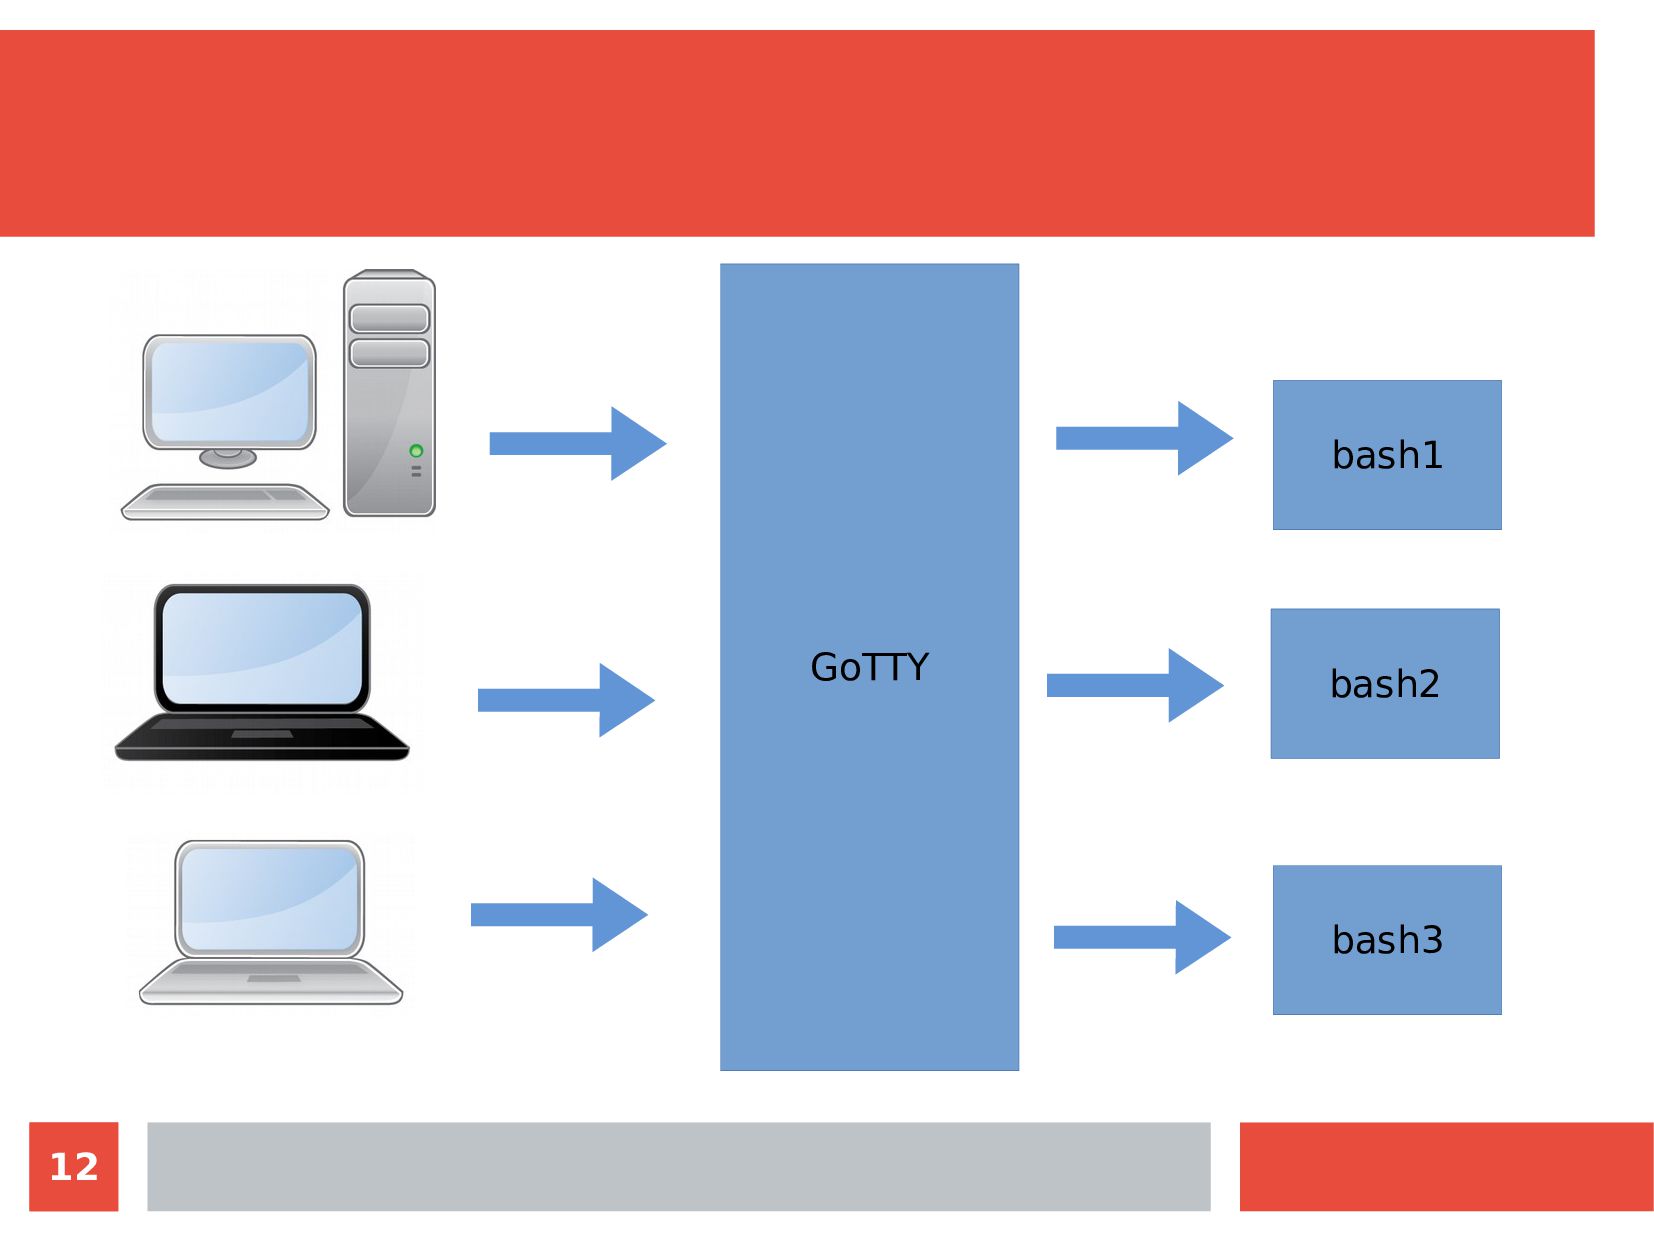
    $ gotty -w bash しかし複数のブラウザでアクセスするとそれぞれ別のセッションになってしま う.みんなでひとつの端末を叩きたい…… 2015/08/23 14:47:42 Server is starting with command: bash 2015/08/23 14:47:46 New client connected: 127.0.0.1:36194 2015/08/23 14:47:46 Command is running for client 127.0.0.1:36194 with PID 28469 2015/08/23 14:48:56 New client connected: 127.0.0.1:36208 2015/08/23 14:48:56 Command is running for client 127.0.0.1:36208 with PID 29315
  7. 14 マルチユーザのセッションを README.md に以下のような記述が,tmux を利用すると行けるらしい Sharing with Multiple Clients Gotty

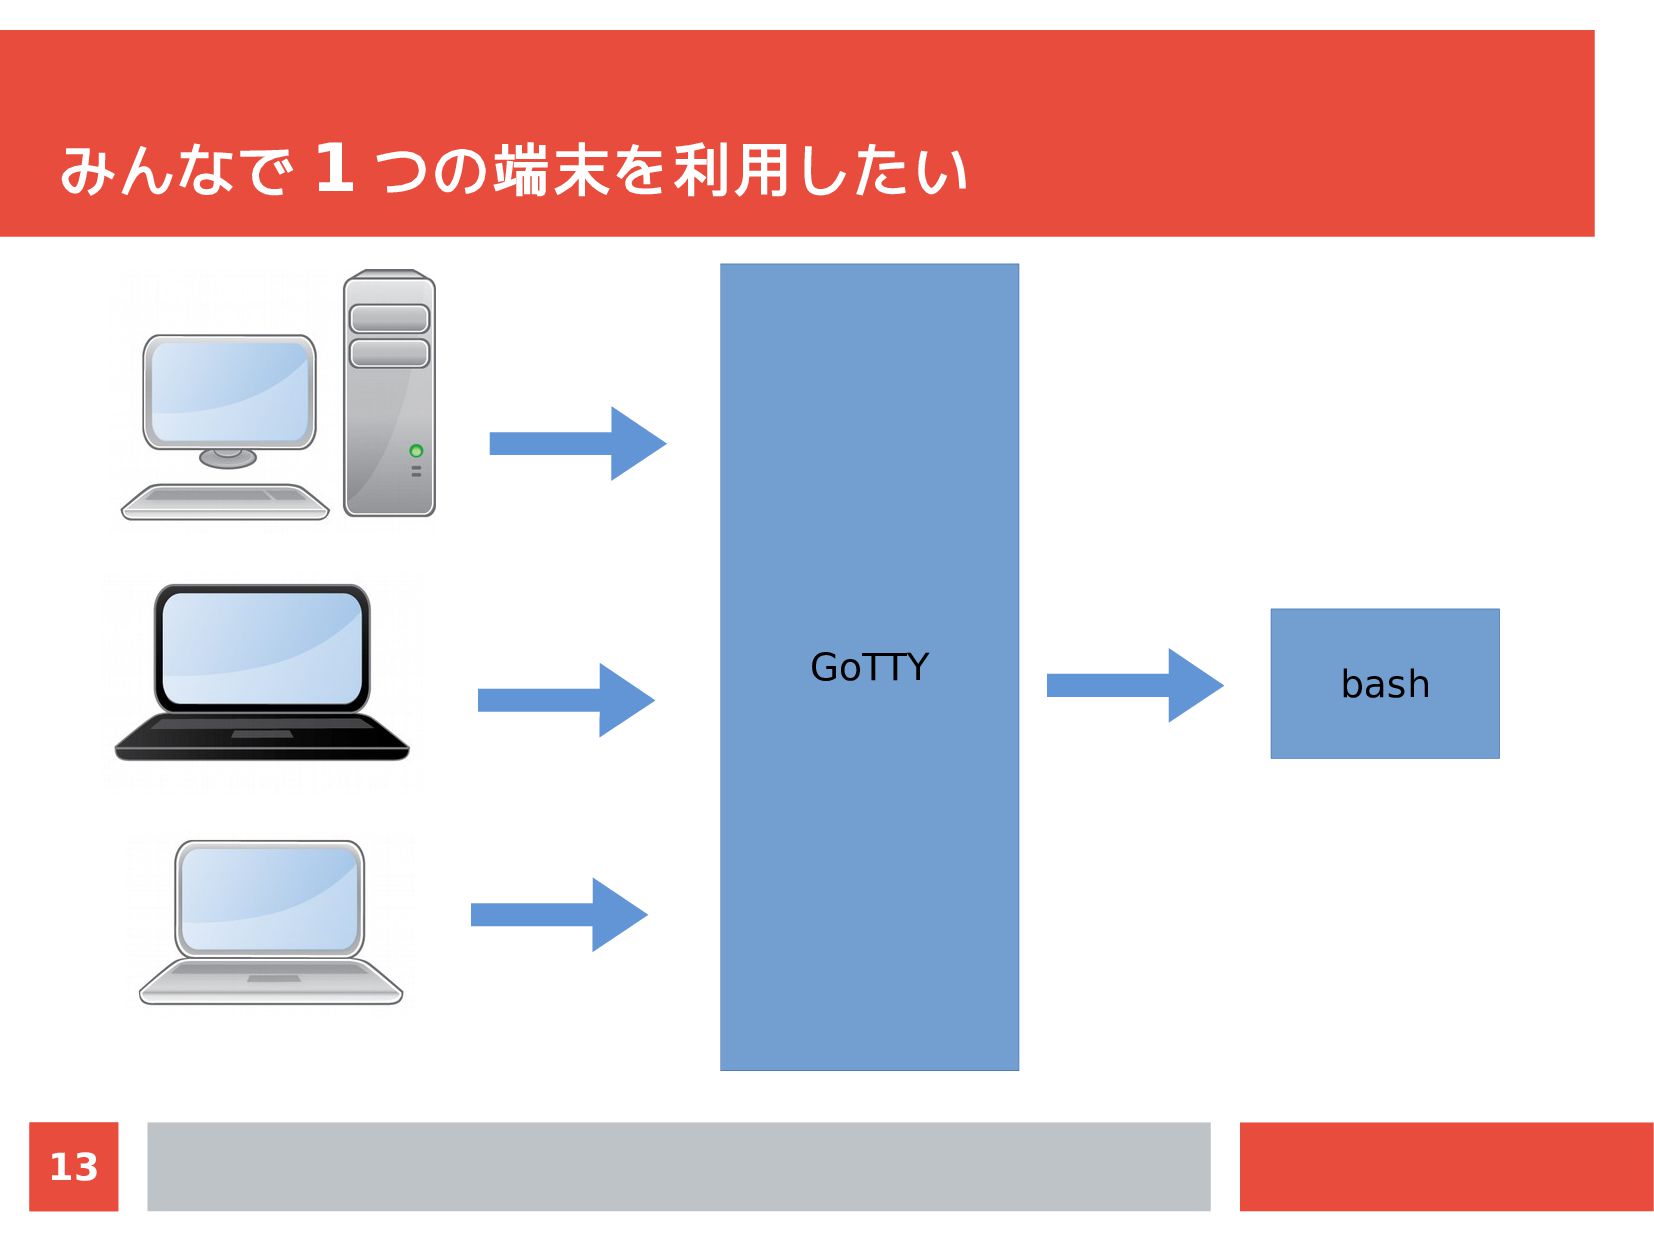
    starts a new process when a new client connects to the server. This means users cannot share a single terminal with others by default. However, you can use terminal multiplexers for sharing a single process with multiple clients. For example, you can start a new tmux session named gotty with top command by the command below. $ gotty tmux new -A -s gotty top This command doesn't allow clients to send keystrokes, however, you can attach the session from your local terminal and run operations like switching the mode of the top command. To connect to the tmux session from your terminal, you can use following command. $ tmux new -A -s gotty By using terminal multiplexers, you can have the control of your terminal and allow clients to just see your screen.
  8. 15 tmux の 1 つのセッションをみんなで叩く $ gotty -w tmux new

    -A -s gotty -w : 入力可能 tmux new -A -s gotty : gotty というセッション名で tmux を起動 GNU Screen でも出来ないかとセッション名を同じように gotty にして multiuser on にしてみましたがこれだけでは うまく行きませんでした. GoTTY 本体に手を入れる必要がある かもしれません.
  9. 17 プロジェクタで画面を映してみんなでひとつの端末を叩くことが出 来るようになる 勉強会とかで重宝しそう セキュリティは BASIC 認証やランダム URL , SSL

    化などが可 能だけど jail 環境で必要なときだけ立ち上げてセッションごとに初 期化するといった運用が良さそう
  10. 21 Raspberry Pi リリース時から wheezy ベースの Rasbian だった ( 当時は確か

    testing) Debian jessie のリリースは 2015 年 04 月 25 日 Rasbian jessie は 2015 年 09 月 25 日リリース ( https://downloads.raspberrypi.org/raspbian/release_ notes.txt ) 現在は Rasbian wheezy/jessie ともにサポート中 Debian jessie は ARMv6 はサポート外だけど Rasbian jessie は ARMv6 の Raspberry Pi(B/B+/A/A+) でも動作する ! 未だ Rasbian jessie の事例は少ないので Rasbperry Pi 特有の 事柄は wheezy の方が良いことも
  11. 22 Rasbian jessie を試す 導入 wheezy と一緒 ダウンロードして hash を確認して

    SD Card に書き込む @ebijun Raspberry Pi の OS 導入手順は みんな知っているので試してもらいやすい "NetBSD/RPI.rst at master · ebijun/NetBSD" https://github.com/ebijun/NetBSD/blob/master/Guide/RPI.rst
  12. 23 気づいたこと raspi-config GUI 版が登場 ( rc_gui ) いきなり X

    が起動して自動ログインしてる コンソールも自動ログインしている GUI でネットワーク設定を行うと /etc/network/interfaces, /etc/wpa_supplicant/wpa_supplicant.conf などが書き換わ る ( LXPanel ) 一度 GUI で設定しちゃえば X を使わない時でも Wi-Fi に繋がるので便利 (もしかして以前から ? ) avahi が導入済み & 自動起動 raspberrypi.local という名前で呼べる dhcp 環境で便利
  13. 27 多要素認証 ユーザ名 + パスワード ⇓ ユーザ名 + パスワード +

    ワンタイムパスワード (OTP) RFC 6238 で標準化されていて色々なサービスで利用できる Google/AWS/GitHUB/Dropbox/Evernote/Facebook…… pam のライブラリもあるので自サーバの ssh でも利用できる !(libpam-google-authenticator) OPT OTP 生成器 スマホアプリケーション 電話 SMS 携帯メール :
  14. 28 OTP 生成器 ( 液晶画面タイプ ) 壊れたことがある 1 つに付き 1

    アカウントなのでたくさん必要に http://japan.emc.com/security/rsa-securid/rsa-securid-hardwar e-tokens.htm http://onlinenoram.gemalto.com/SafeNet-IDProve-100-6digit- OTP-Token/M/B002CRN5X8.htm
  15. 30 スマホアプリ Android/iOS の他大抵のプラットホーム向けにある "Google 認証システム - Google Play の

    Android アプリ " https://play.google.com/store/apps/details?id=com.google.andr oid.apps.authenticator2 "IIJ 、ワンタイムパスワード管理アプリケーション「 IIJ SmartKey 」を提供 開始 | 2015 年 | IIJ" http://www.iij.ad.jp/news/pressrelease/2015/0403.html
  16. 32 調べてみたら簡単に実装できた #!/usr/bin/python import hmac, base64, struct, hashlib, time, os,

    sys def get_hotp_token(secret, intervals_no): key = base64.b32decode(secret, True) msg = struct.pack(">Q", intervals_no) h = hmac.new(key, msg, hashlib.sha1).digest() o = ord(h[19]) & 15 h = (struct.unpack(">I", h[o:o+4])[0] & 0x7fffffff) % 1000000 return h def get_totp_token(secret): return get_hotp_token(secret, intervals_no=int(time.time())//30) if( len(sys.argv) > 1): secret = sys.argv[1] elif( os.path.exists( os.environ["HOME"] + "/.google_authenticator" )): f = open( os.environ["HOME"] + "/.google_authenticator" ) secret = f.readline().replace('\n','') else: print sys.argv[0] + " SECRETKEY" exit(-1) #for i in xrange(1, 10): # print i, get_hotp_token(secret, intervals_no=i) print get_totp_token(secret) https://gist.github.com/matoken/8159502c4a87dc3b0341
  17. 35 % cat opt.sh #!/bin/bash while read line do echo

    $line arr=( `echo $line | tr -s ',' ' '`) echo ${arr[1]}.${arr[2]} notify-send -t 10000 ${arr[1]} `~/script/google- authenticator.py ${arr[2]}` done < ~/fuse/encfs/.2auths % cat ~/fuse/encfs/.2auths Google,6QHI5WW6H3FMJ2ZI GitHUB,6QHI5WW6H3FMJ2ZI micro,6QHI5WW6H3FMJ2ZI ダミーです
  18. 36 SECRETKEY の入手 アカウント設定時に表示される場合はメモしておく QR Code の場合は先に通常の読み取りアプリで読み込んでメモ Android 版 Google

    認証システム &root を使える場合は以下 の手順で入手可能 "Android の Google Authenticator のデータをダンプしてバックアップ する | matoken's meme" http://matoken.org/blog/blog/2015/10/10/i-want-to-back-up-by- dumping-the-data-of-google-authenticator-of-android/
  19. 37 マイコンでも実装できそう AVR とかのマイコンで実装したら持ち歩きも出来そう 壊れても同じ SECRETKEY を流し込める 複数のサービスにも対応できる 紛失盗難時は耐タンパ性が問題かも (

    すぐに変更すれば大丈夫 ?) "Linux で avr 開発環境を構築する +mbed(20100612koedo94)" http://www.slideshare.net/matoken/linux-avrmbed20100612koed o94