Upgrade to Pro — share decks privately, control downloads, hide ads and more …

Image Classification with TensorFlow & Keras-Re...

Image Classification with TensorFlow & Keras-Recognizing Fashion!

Presentation Title: Introduction: The "Hello, World" of Computer Vision

Description:
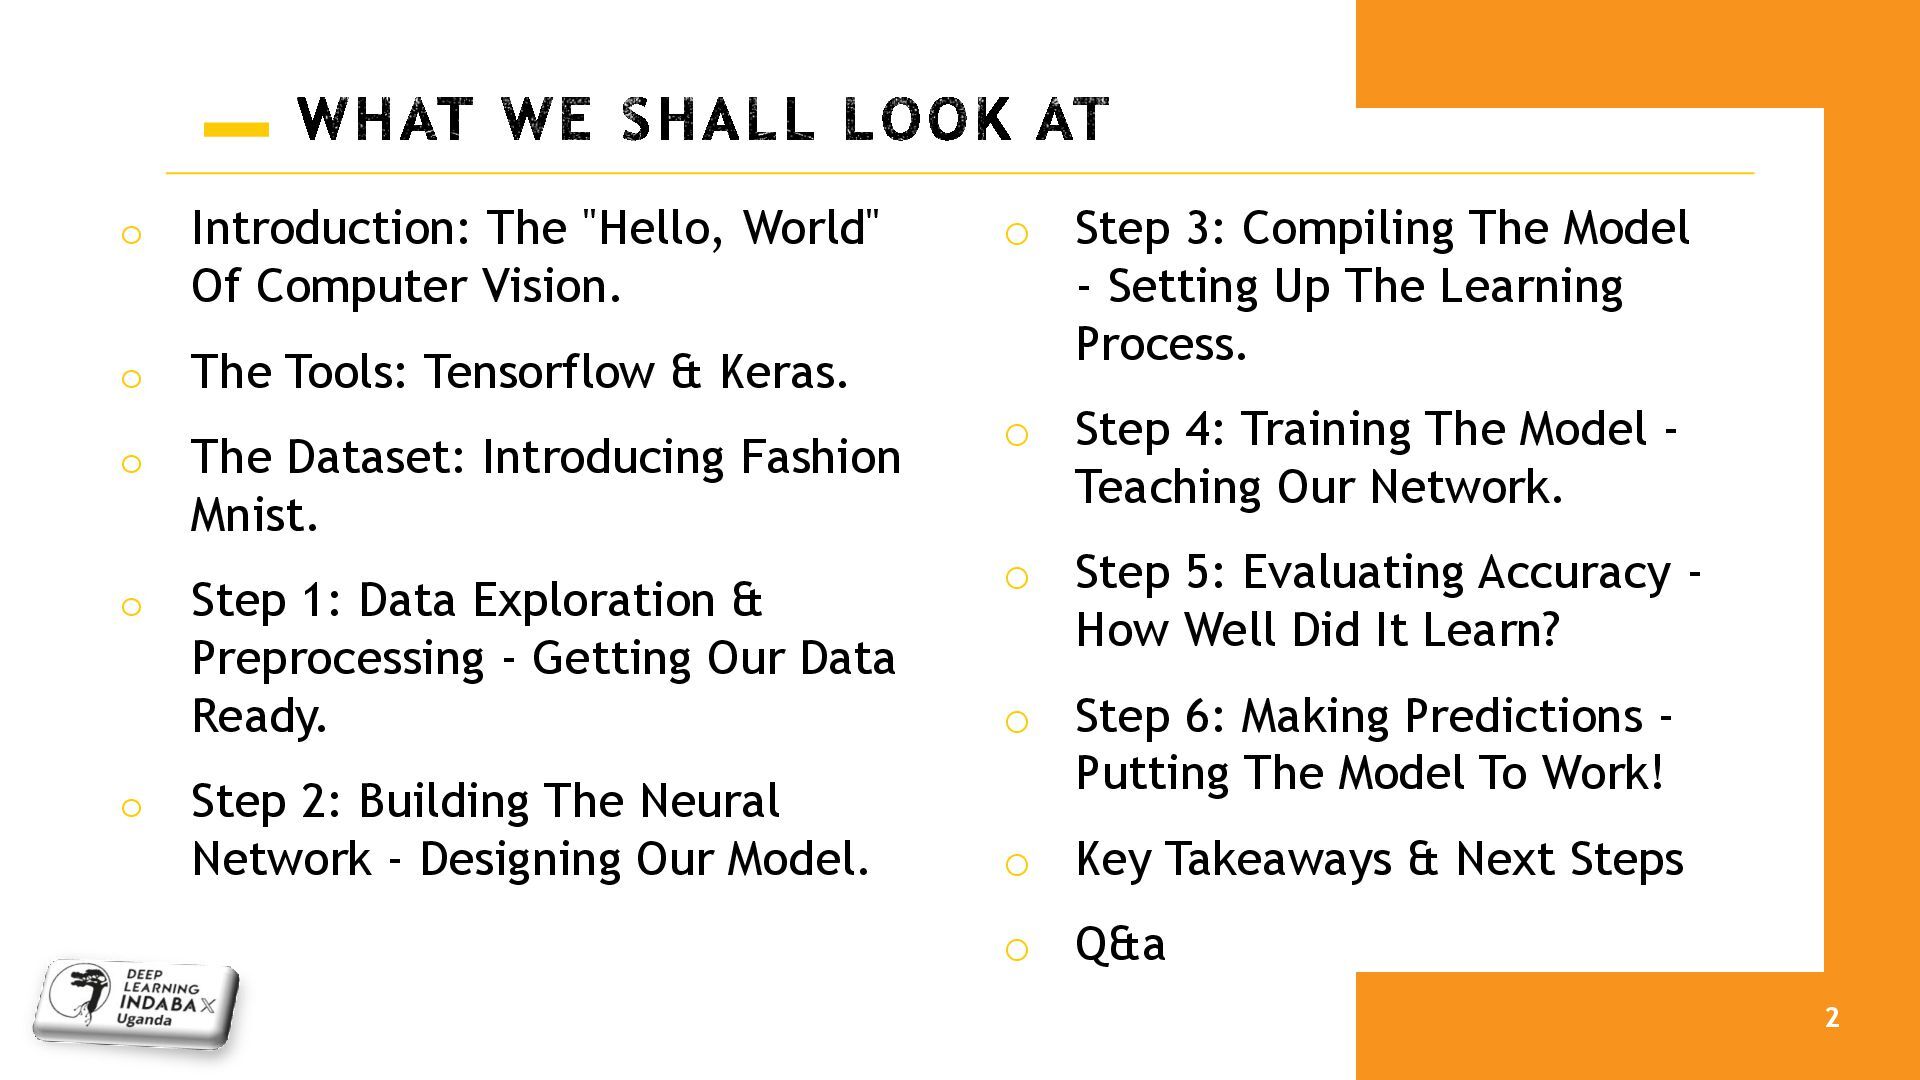
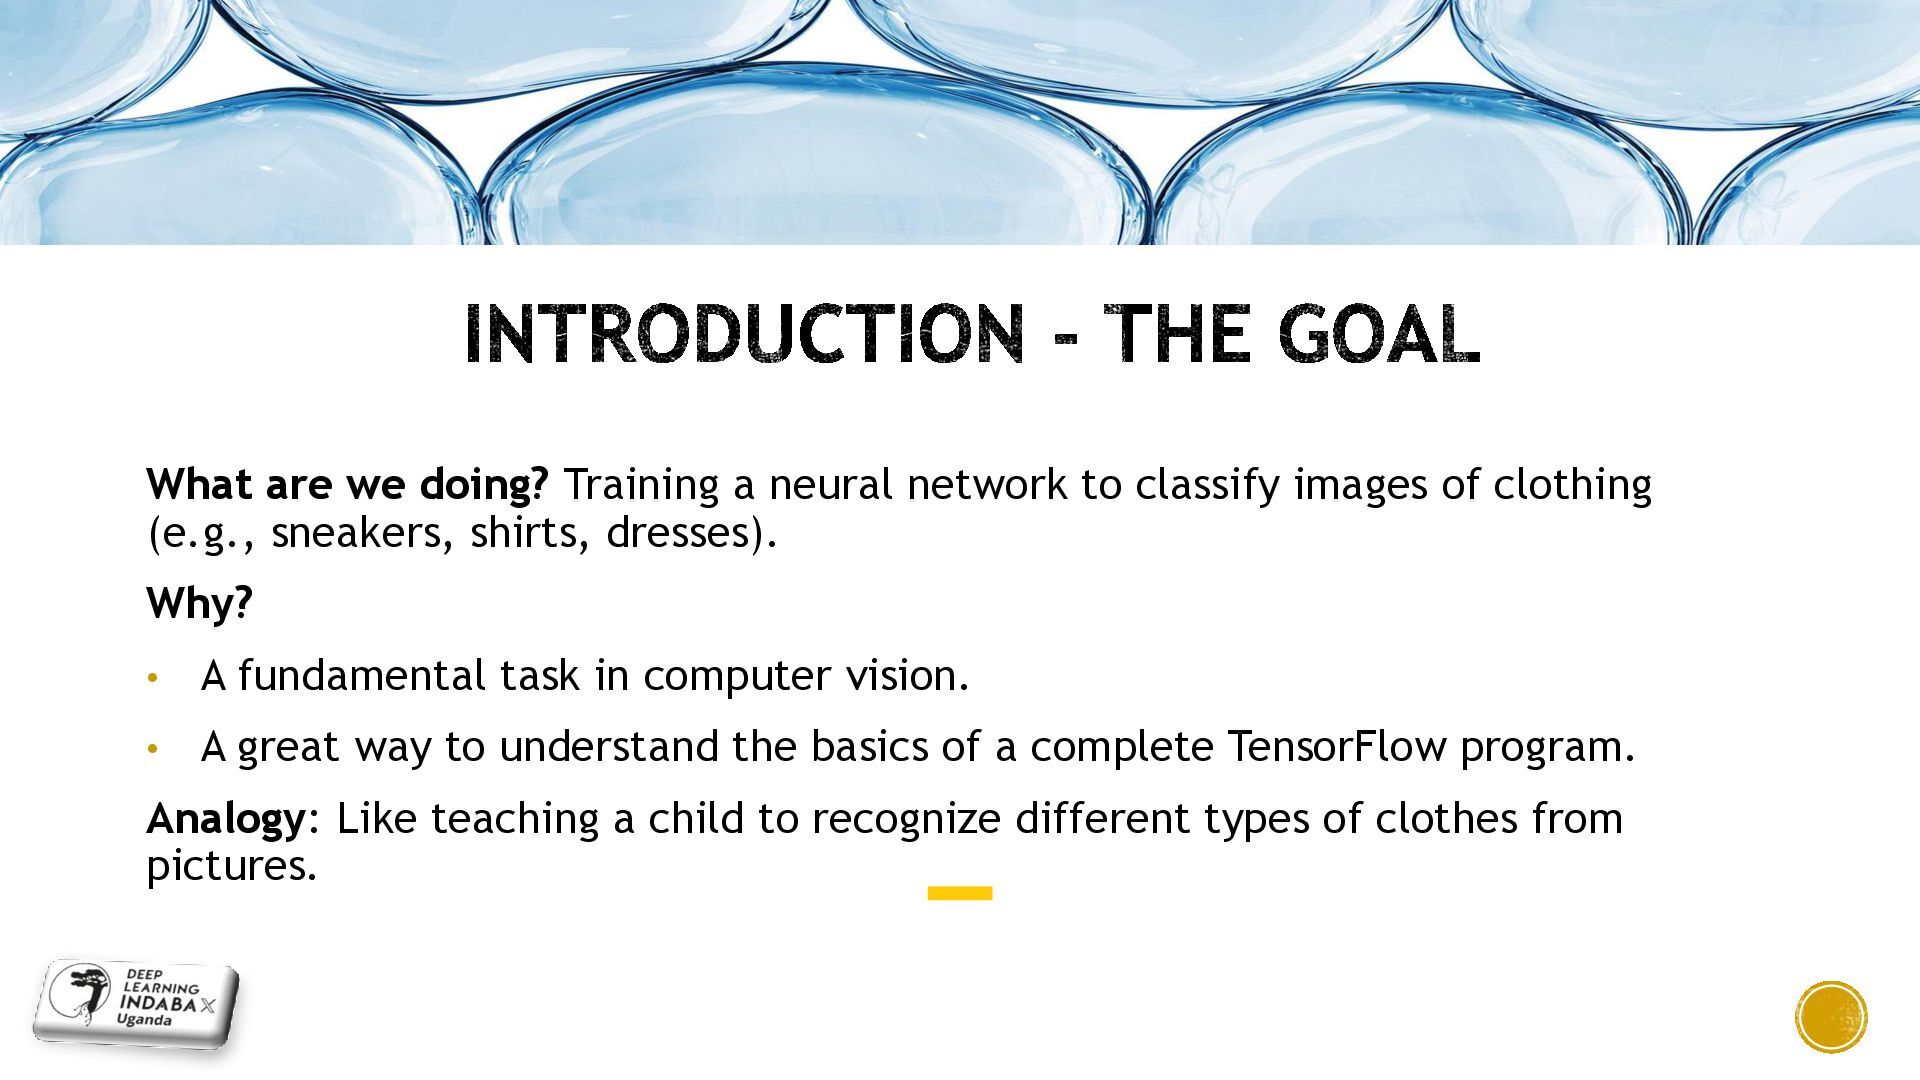
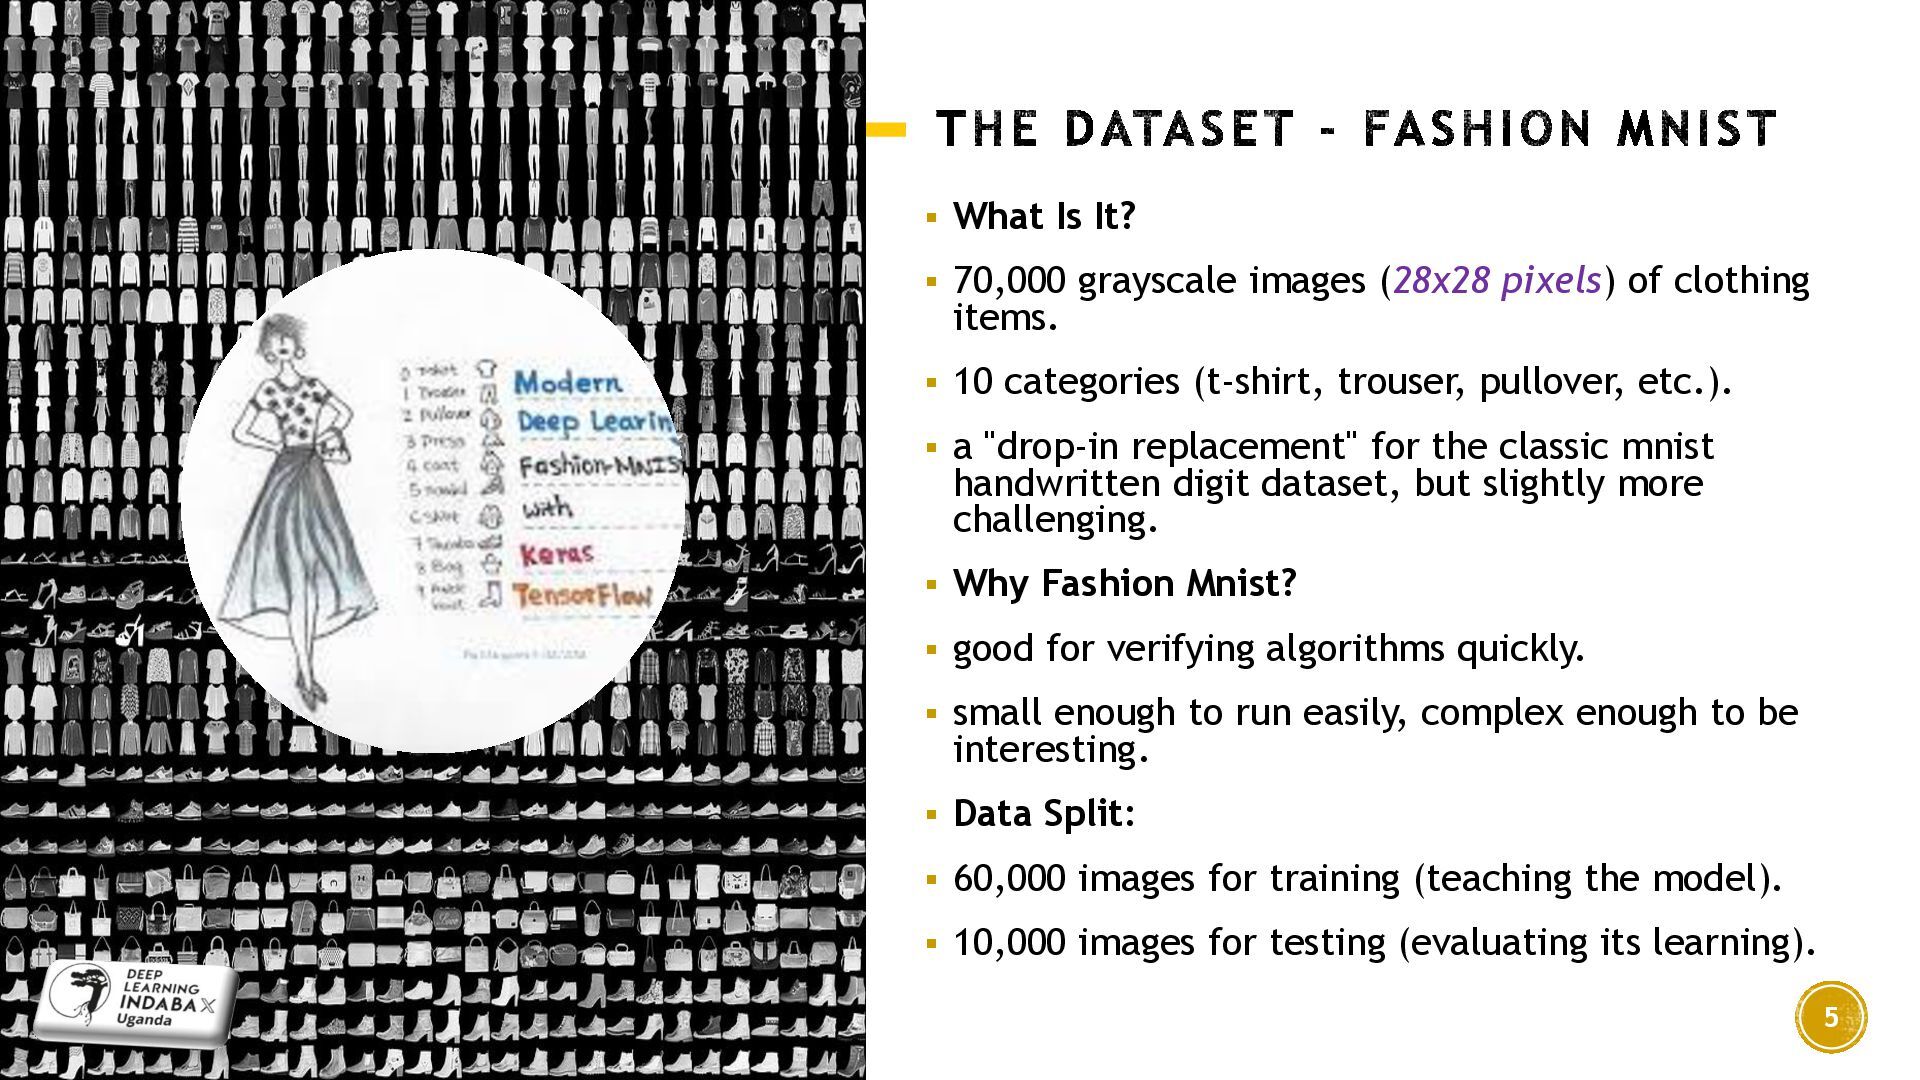
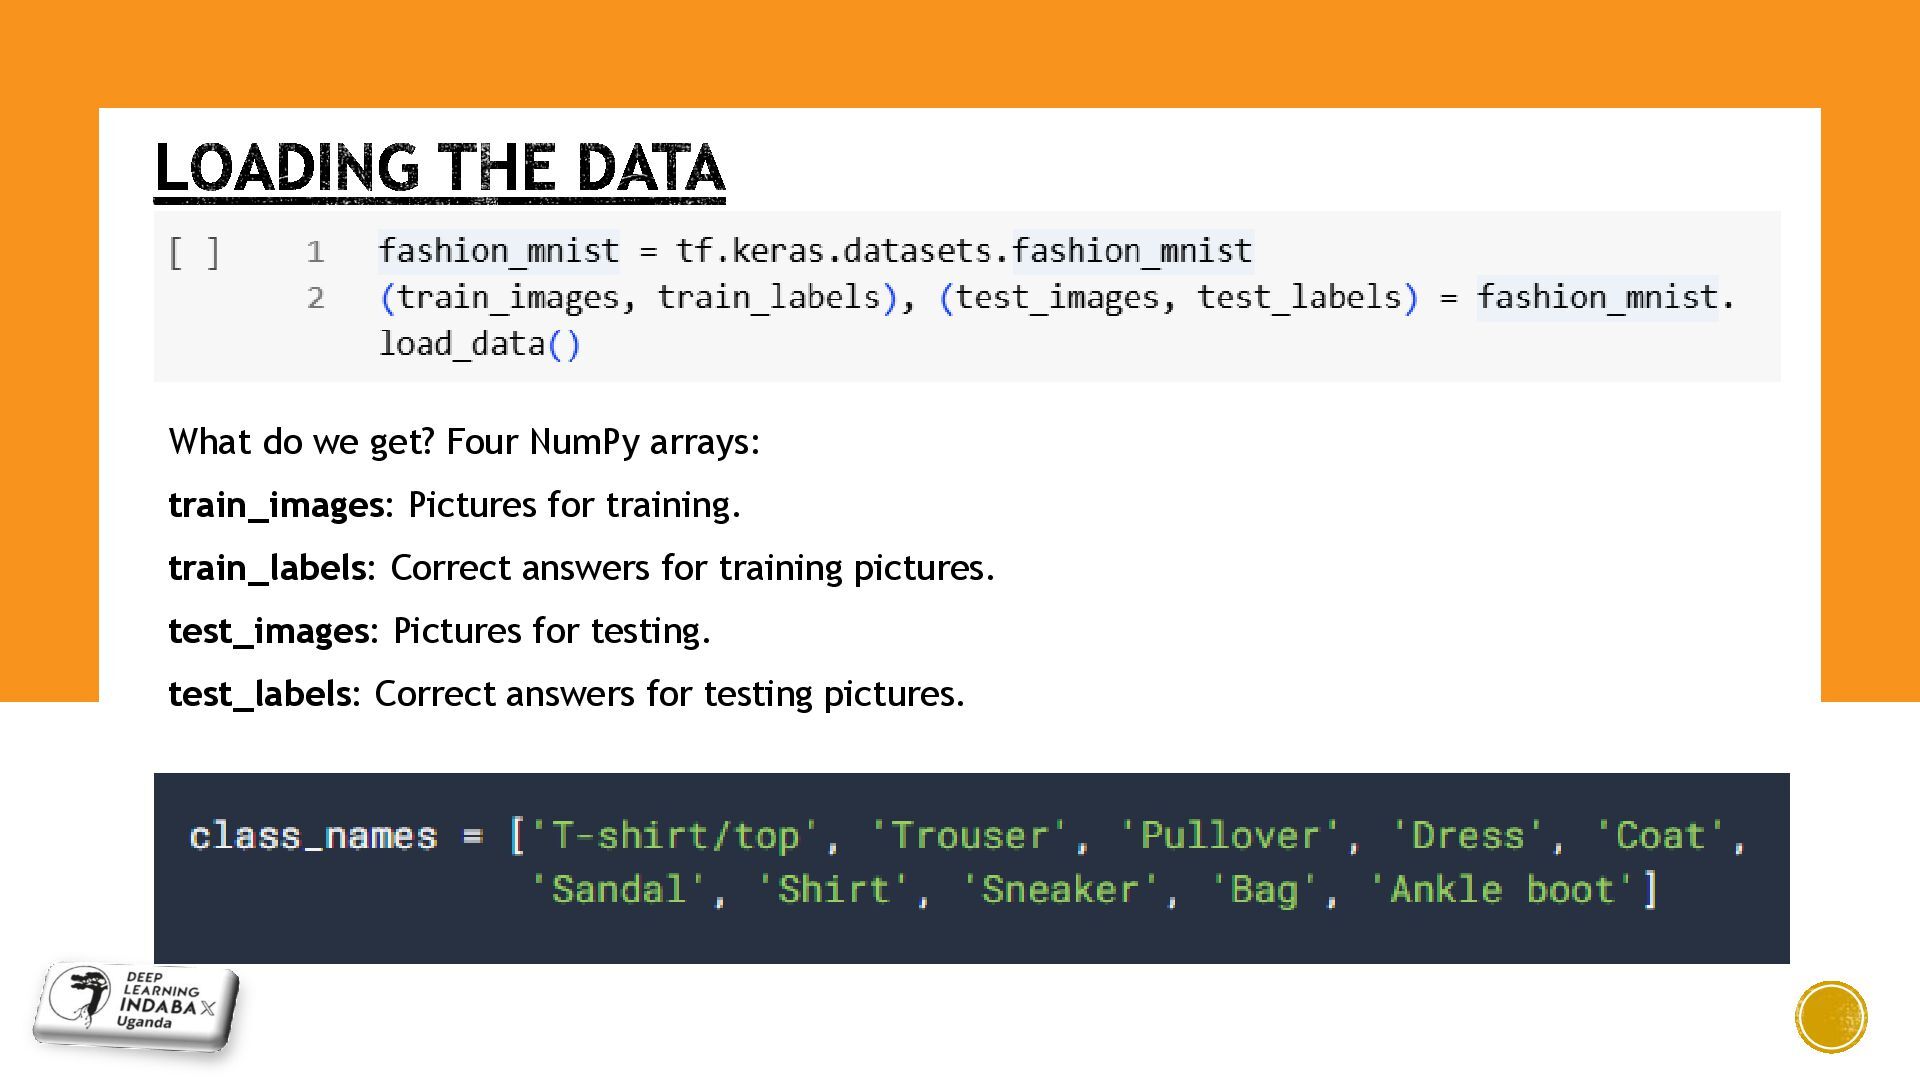
This session offers a hands-on introduction to computer vision by walking through the foundational steps of building an image classification model with TensorFlow and Keras. Using the popular Fashion MNIST dataset, we’ll cover the complete machine learning workflow:

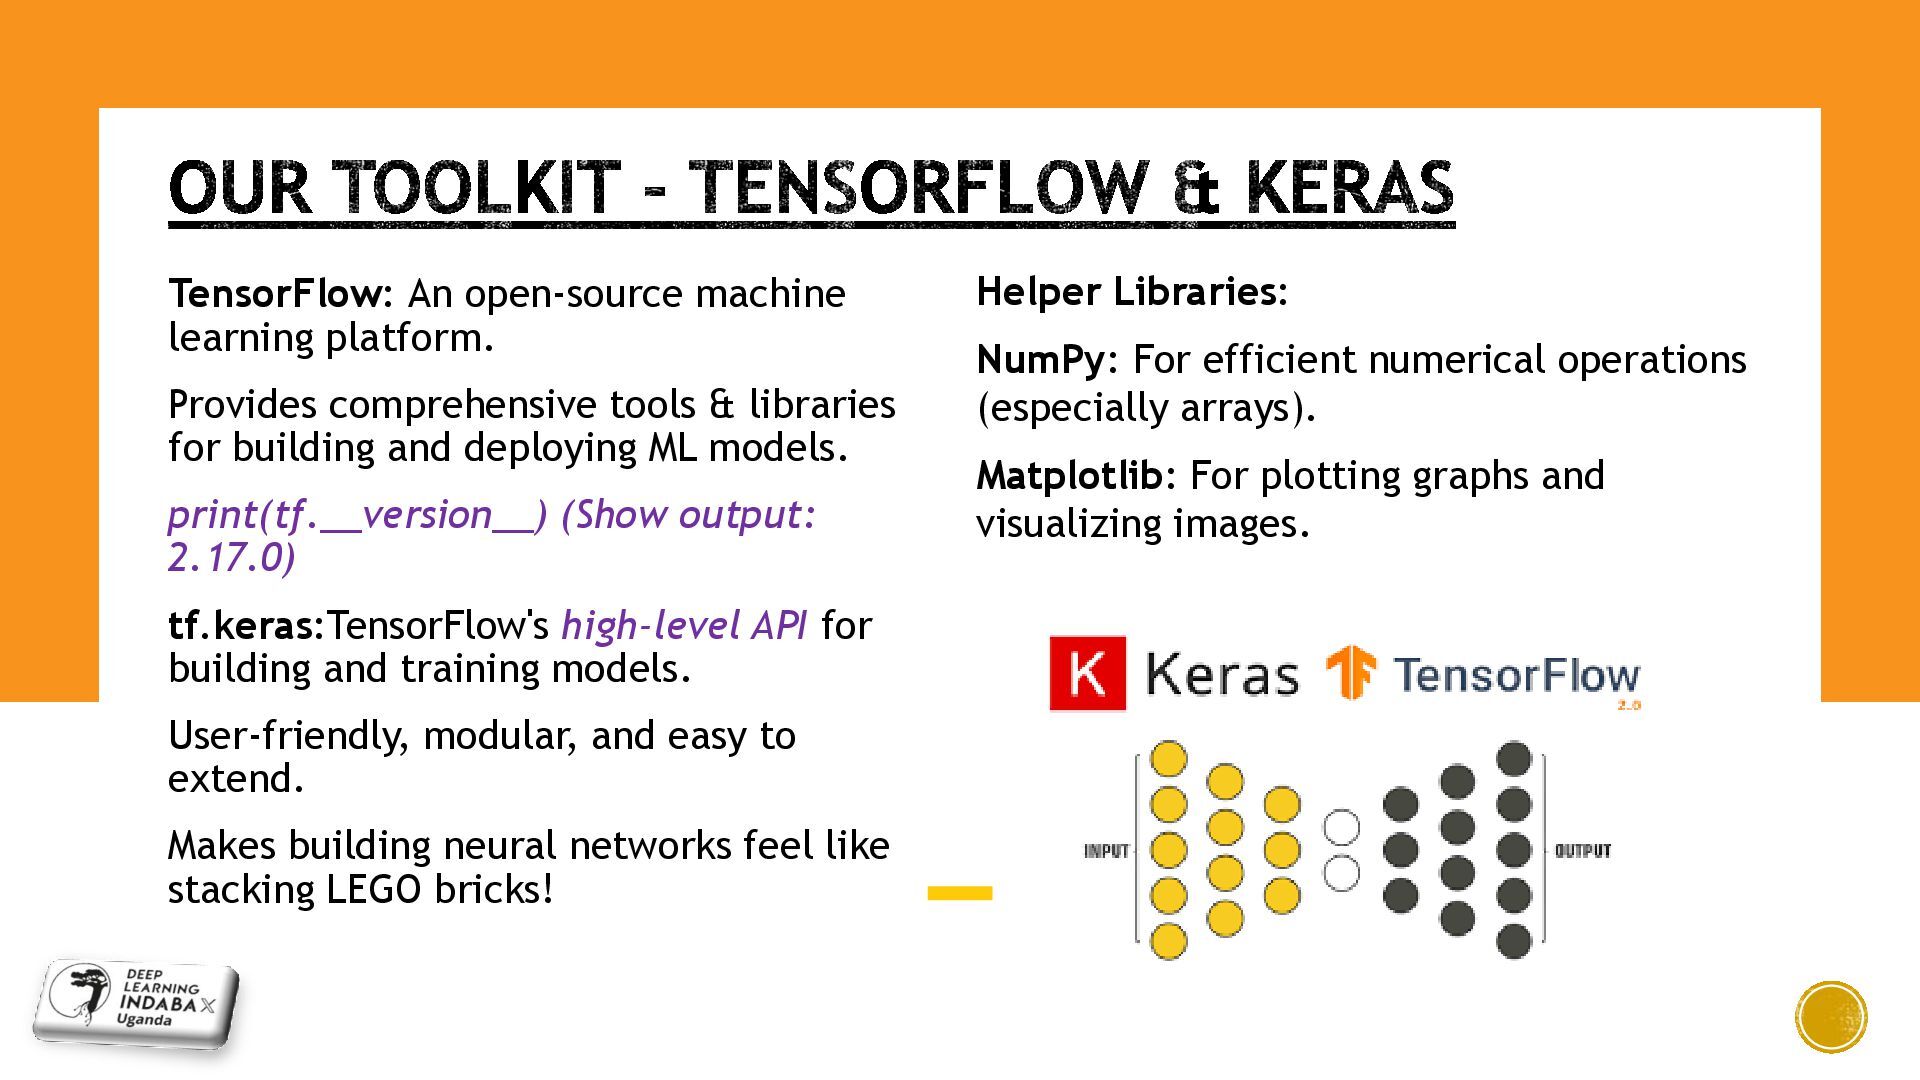
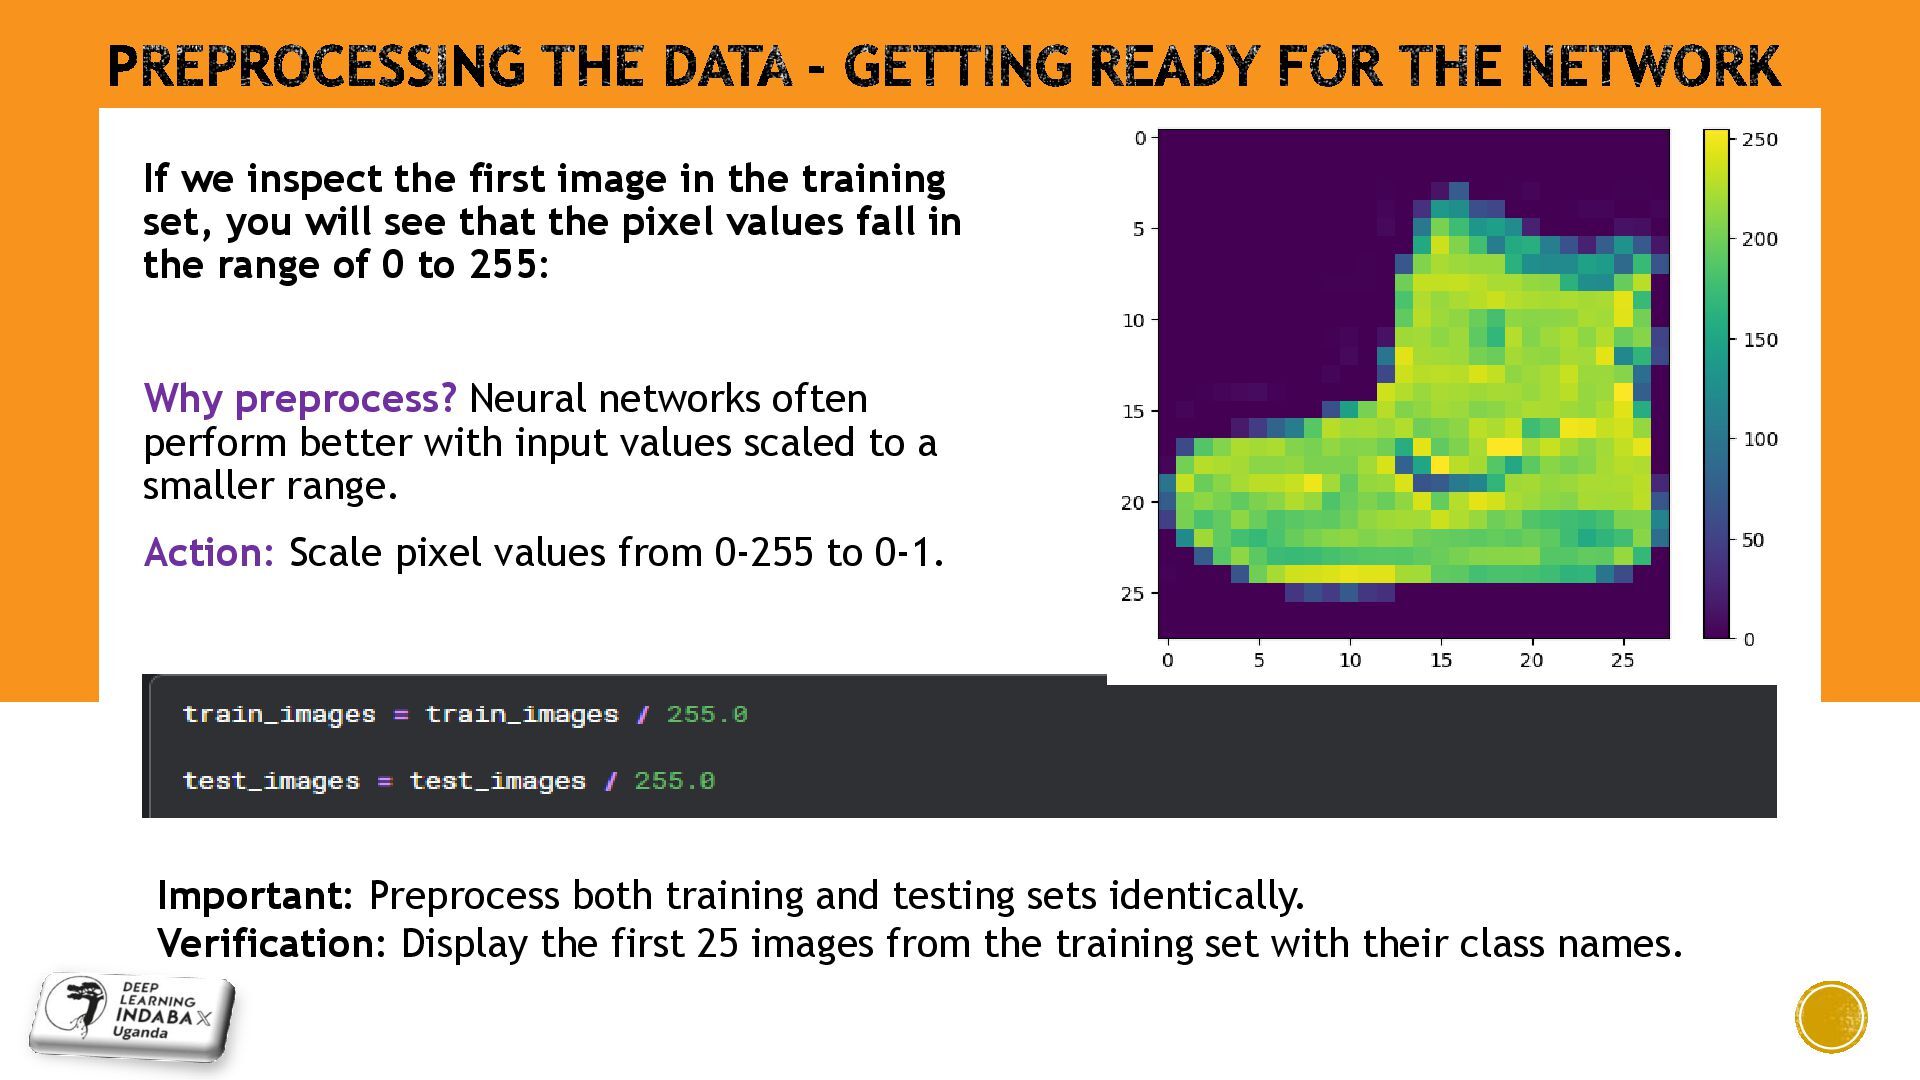
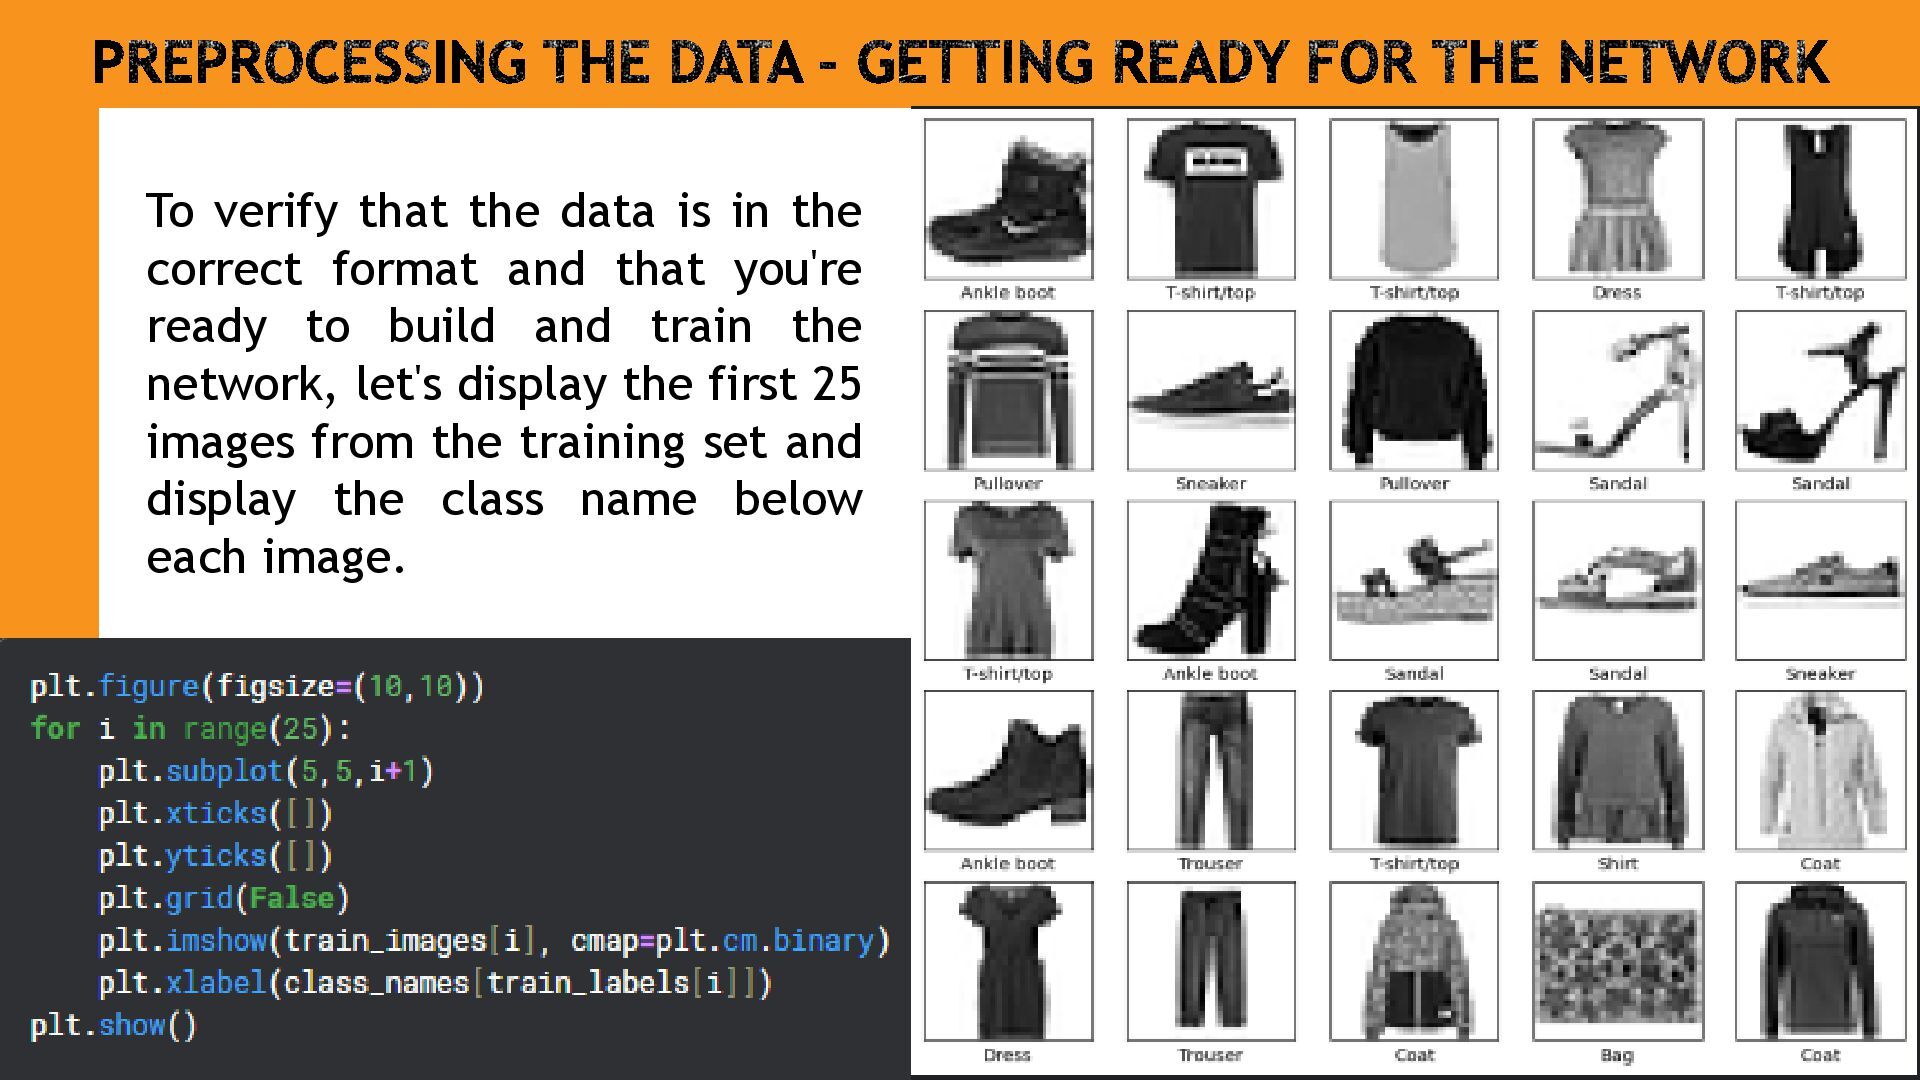
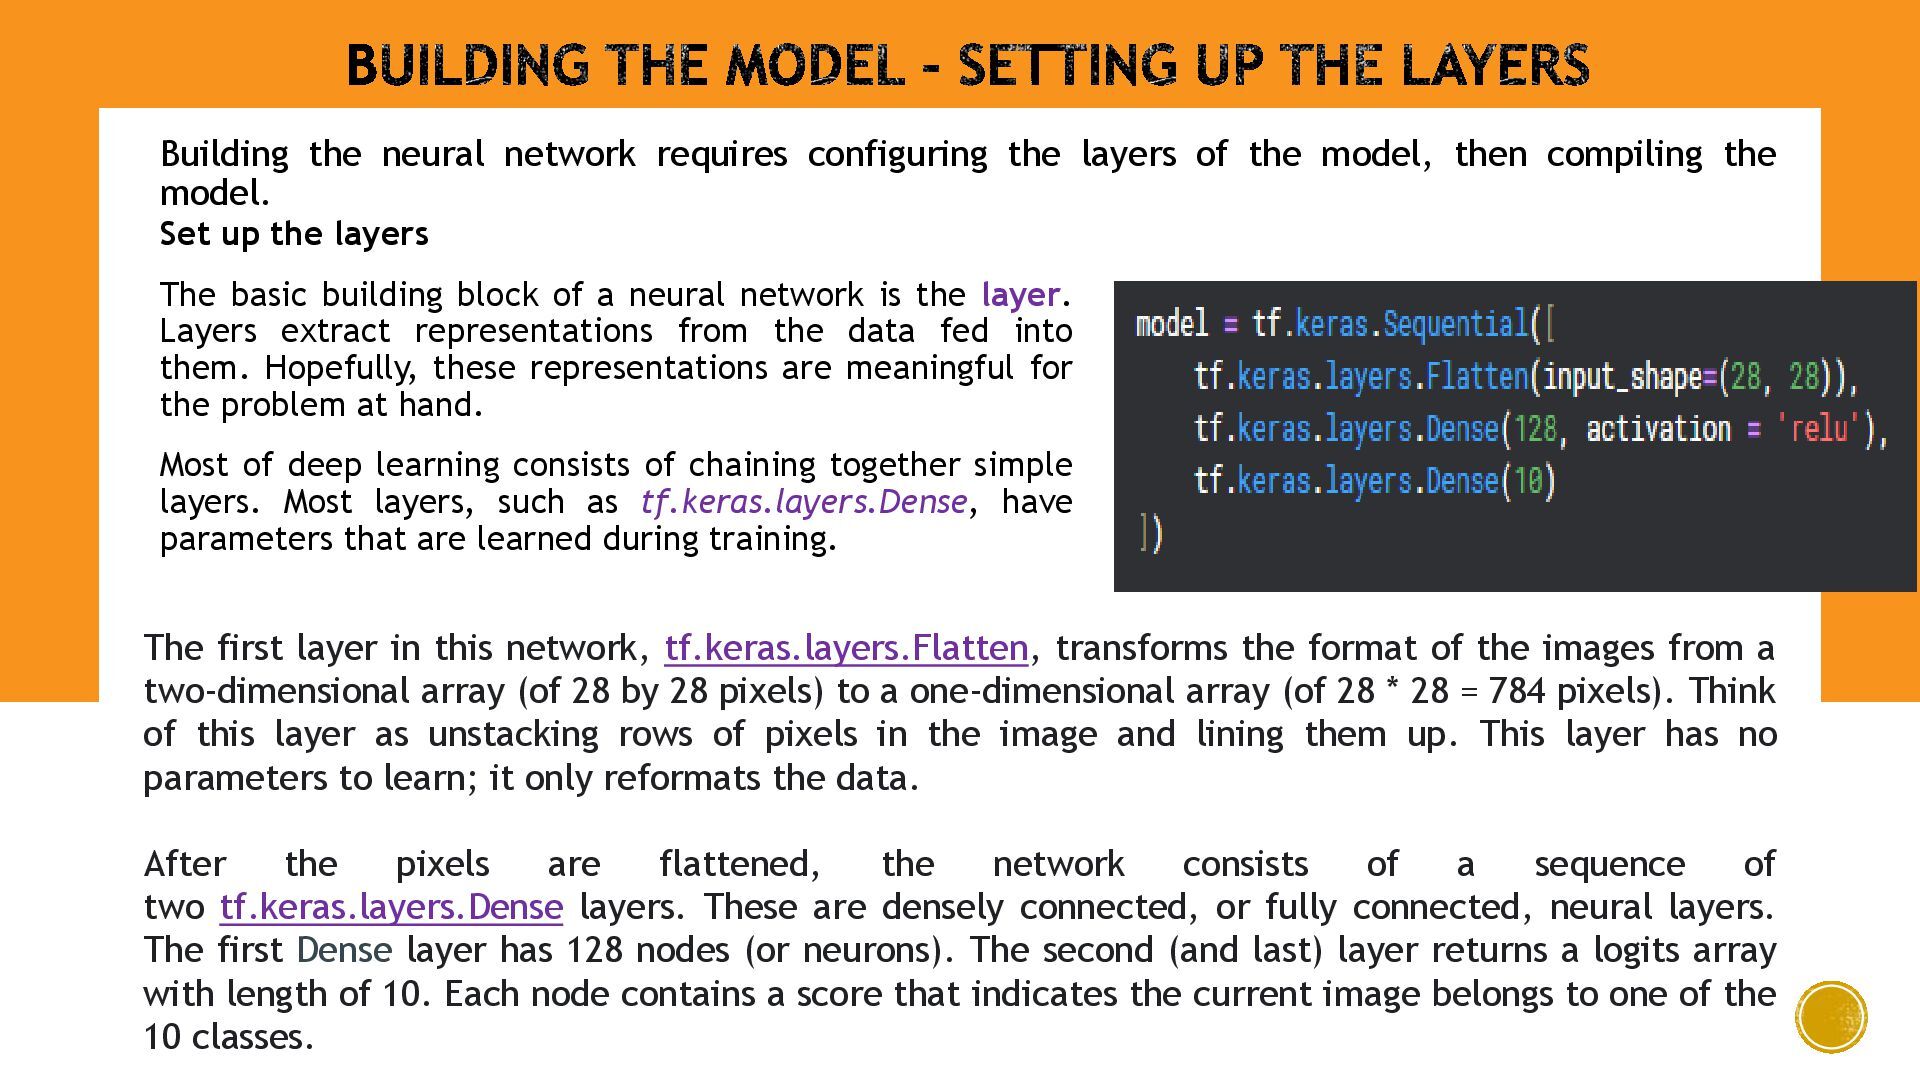
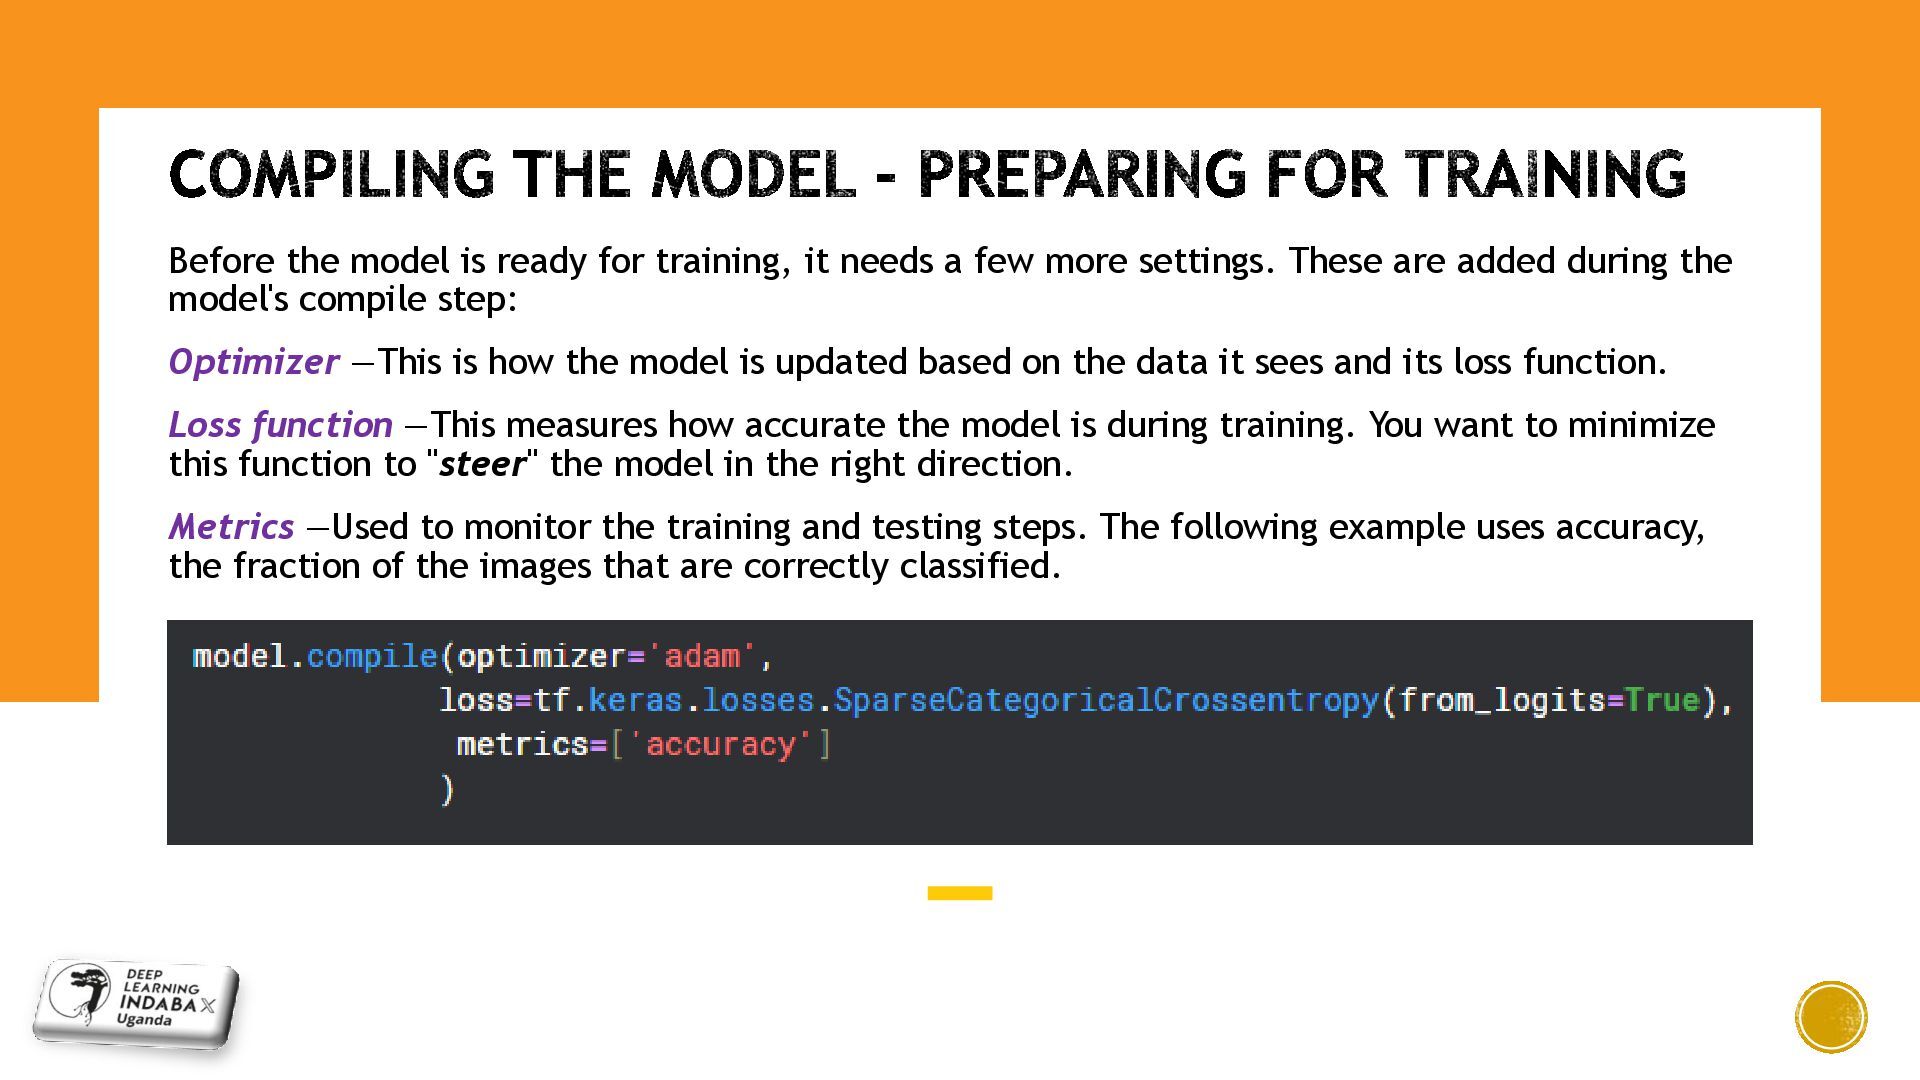
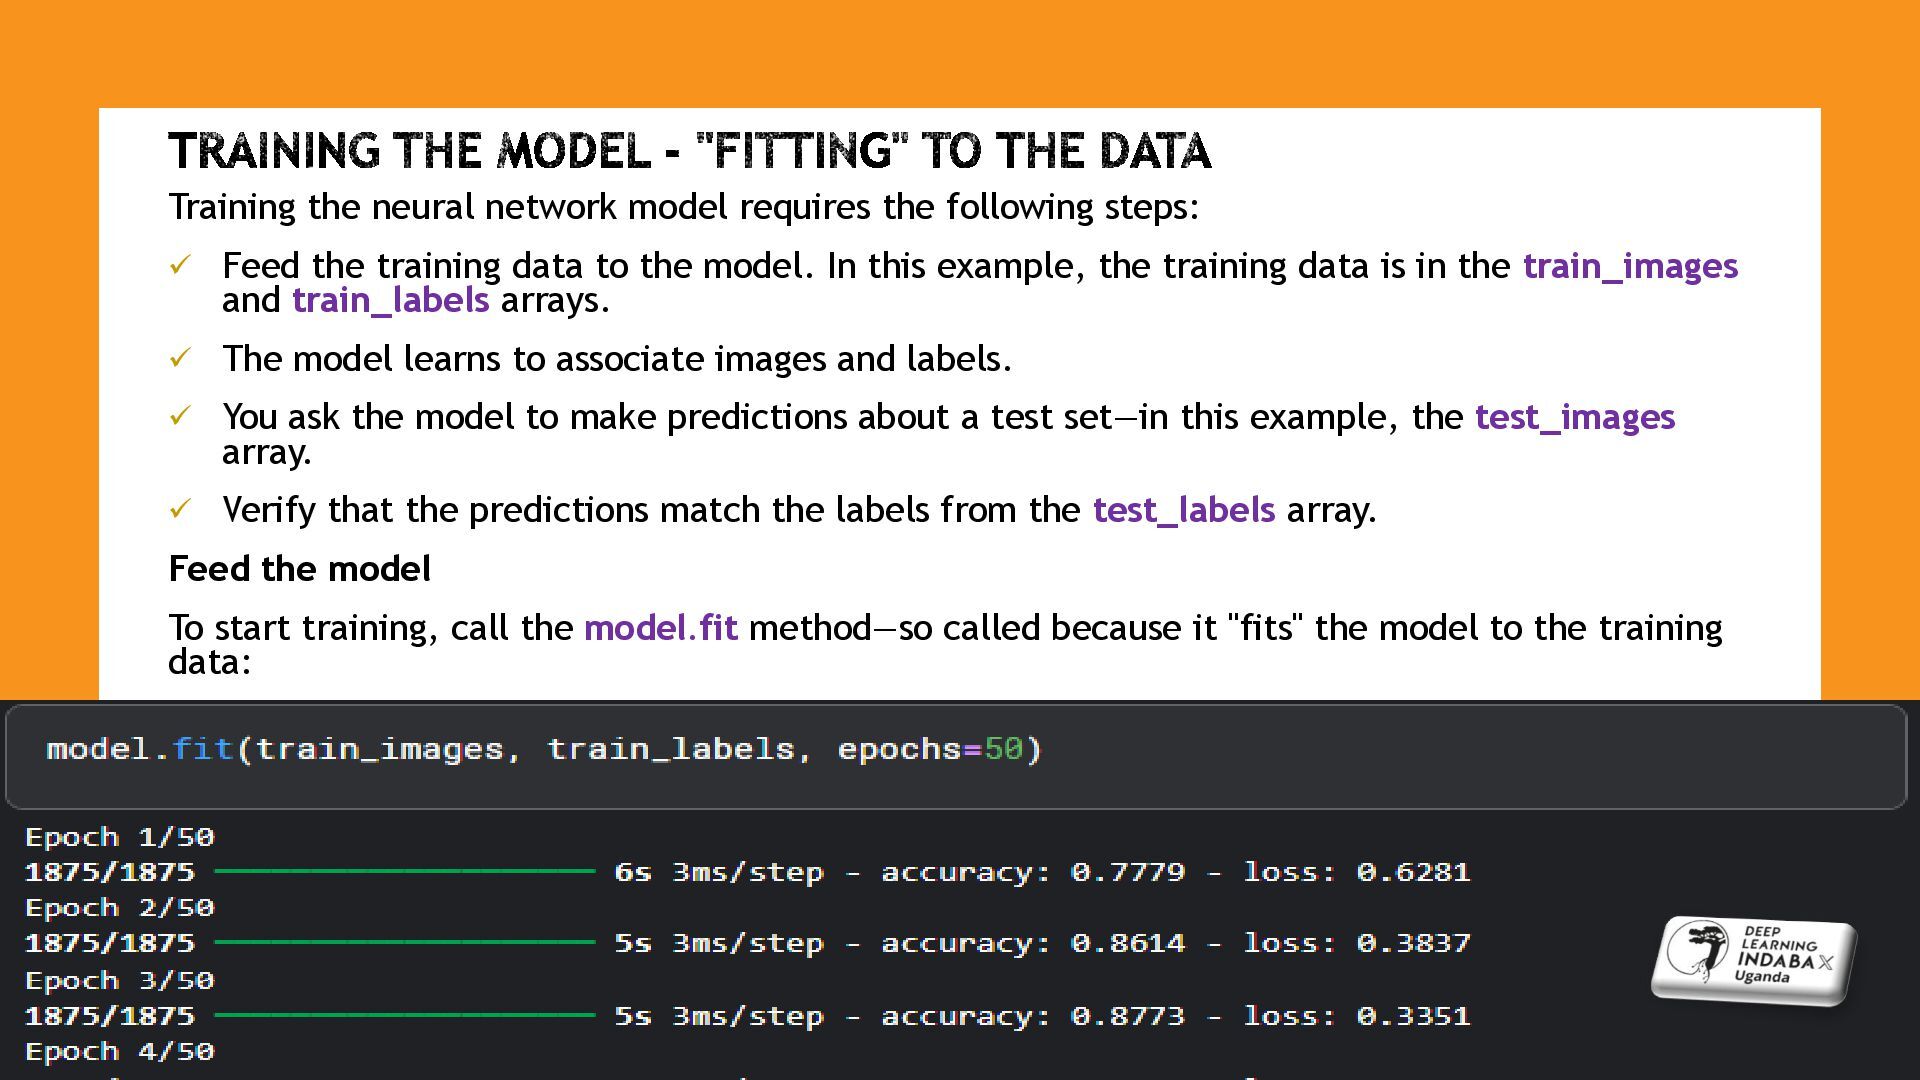
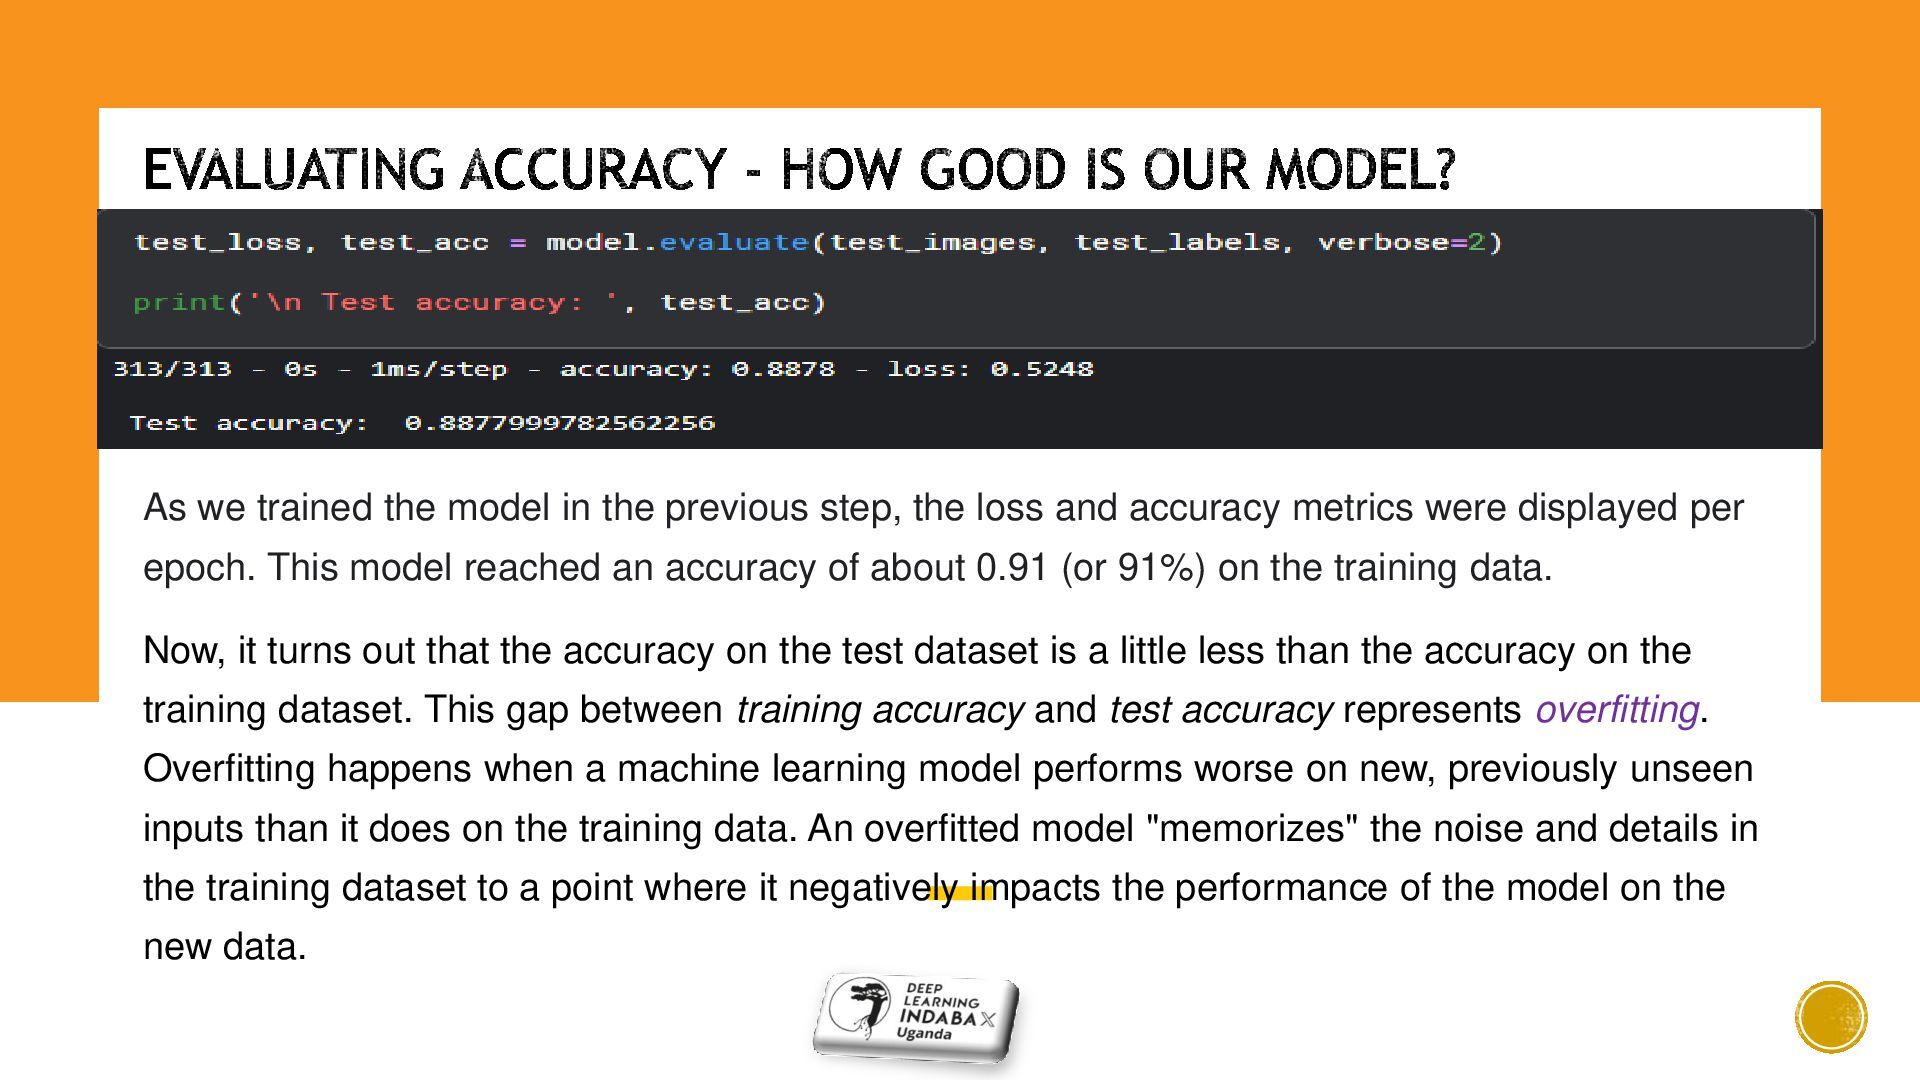
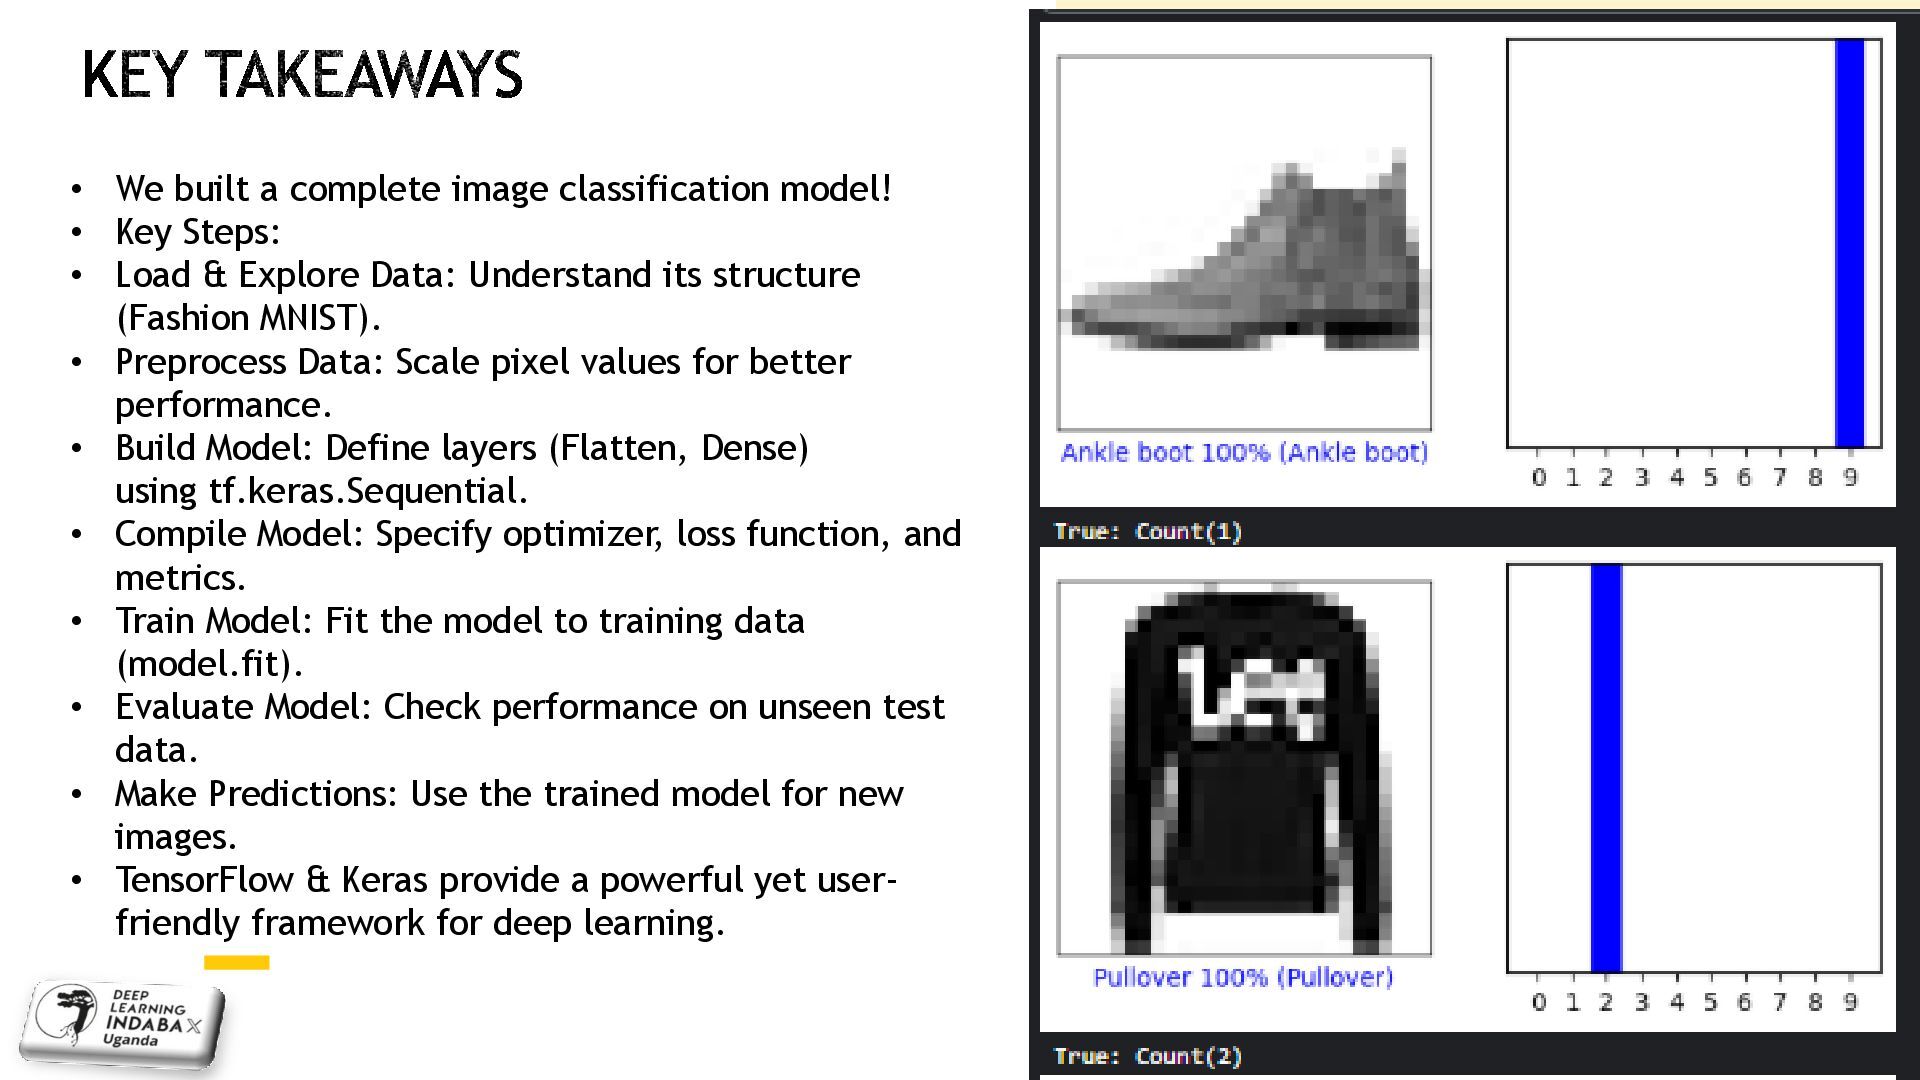
Data Exploration & Preprocessing – Getting our data ready for training Neural Network Design – Building a simple yet powerful model Model Compilation – Setting up how the model learns Training the Model – Teaching the model to recognize patterns Evaluation – Measuring performance and accuracy Prediction – Using the model to classify new images
Whether you're new to deep learning or exploring computer vision for the first time, this talk will provide a clear and practical foundation. We’ll wrap up with key takeaways, suggestions for next steps, and an open Q&A session.

Avatar for Phillip Ssempeebwa

Phillip Ssempeebwa

May 16, 2025
Tweet

Transcript

  1. WHAT WE SHALL LOOK AT o Introduction: The "Hello, World"

    Of Computer Vision. o The Tools: Tensorflow & Keras. o The Dataset: Introducing Fashion Mnist. o Step 1: Data Exploration & Preprocessing - Getting Our Data Ready. o Step 2: Building The Neural Network - Designing Our Model. o Step 3: Compiling The Model - Setting Up The Learning Process. o Step 4: Training The Model - Teaching Our Network. o Step 5: Evaluating Accuracy - How Well Did It Learn? o Step 6: Making Predictions - Putting The Model To Work! o Key Takeaways & Next Steps o Q&a 2
  2. INTRODUCTION - THE GOAL What are we doing? Training a

    neural network to classify images of clothing (e.g., sneakers, shirts, dresses). Why? • A fundamental task in computer vision. • A great way to understand the basics of a complete TensorFlow program. Analogy: Like teaching a child to recognize different types of clothes from pictures.
  3. OUR TOOLKIT - TENSORFLOW & KERAS TensorFlow: An open-source machine

    learning platform. Provides comprehensive tools & libraries for building and deploying ML models. print(tf.__version__) (Show output: 2.17.0) tf.keras:TensorFlow's high-level API for building and training models. User-friendly, modular, and easy to extend. Makes building neural networks feel like stacking LEGO bricks! Helper Libraries: NumPy: For efficient numerical operations (especially arrays). Matplotlib: For plotting graphs and visualizing images.
  4. THE DATASET - FASHION MNIST ▪ What Is It? ▪

    70,000 grayscale images (28x28 pixels) of clothing items. ▪ 10 categories (t-shirt, trouser, pullover, etc.). ▪ a "drop-in replacement" for the classic mnist handwritten digit dataset, but slightly more challenging. ▪ Why Fashion Mnist? ▪ good for verifying algorithms quickly. ▪ small enough to run easily, complex enough to be interesting. ▪ Data Split: ▪ 60,000 images for training (teaching the model). ▪ 10,000 images for testing (evaluating its learning). 5
  5. LOADING THE DATA What do we get? Four NumPy arrays:

    train_images: Pictures for training. train_labels: Correct answers for training pictures. test_images: Pictures for testing. test_labels: Correct answers for testing pictures.
  6. EXPLORING THE DATA - WHAT DOES IT LOOK LIKE? Training

    Data: train_images.shape -> Output: (60000, 28, 28) (60,000 images, each 28 pixels wide by 28 pixels high) len(train_labels) -> Output: 60000 train_labels -> Output: array([9, 0, 0, ..., 3, 0, 5], dtype=uint8) Test Data: test_images.shape -> Output: (10000, 28, 28) len(test_labels) -> Output: 10000 Pixel Values: Range from 0 (black) to 255 (white).
  7. PREPROCESSING THE DATA - GETTING READY FOR THE NETWORK If

    we inspect the first image in the training set, you will see that the pixel values fall in the range of 0 to 255: Why preprocess? Neural networks often perform better with input values scaled to a smaller range. Action: Scale pixel values from 0-255 to 0-1. Important: Preprocess both training and testing sets identically. Verification: Display the first 25 images from the training set with their class names.
  8. PREPROCESSING THE DATA - GETTING READY FOR THE NETWORK To

    verify that the data is in the correct format and that you're ready to build and train the network, let's display the first 25 images from the training set and display the class name below each image.
  9. BUILDING THE MODEL - SETTING UP THE LAYERS Building the

    neural network requires configuring the layers of the model, then compiling the model. The first layer in this network, tf.keras.layers.Flatten, transforms the format of the images from a two-dimensional array (of 28 by 28 pixels) to a one-dimensional array (of 28 * 28 = 784 pixels). Think of this layer as unstacking rows of pixels in the image and lining them up. This layer has no parameters to learn; it only reformats the data. After the pixels are flattened, the network consists of a sequence of two tf.keras.layers.Dense layers. These are densely connected, or fully connected, neural layers. The first Dense layer has 128 nodes (or neurons). The second (and last) layer returns a logits array with length of 10. Each node contains a score that indicates the current image belongs to one of the 10 classes. Set up the layers The basic building block of a neural network is the layer. Layers extract representations from the data fed into them. Hopefully, these representations are meaningful for the problem at hand. Most of deep learning consists of chaining together simple layers. Most layers, such as tf.keras.layers.Dense, have parameters that are learned during training.
  10. COMPILING THE MODEL - PREPARING FOR TRAINING Before the model

    is ready for training, it needs a few more settings. These are added during the model's compile step: Optimizer —This is how the model is updated based on the data it sees and its loss function. Loss function —This measures how accurate the model is during training. You want to minimize this function to "steer" the model in the right direction. Metrics —Used to monitor the training and testing steps. The following example uses accuracy, the fraction of the images that are correctly classified.
  11. COMPILING THE MODEL - PREPARING FOR TRAINING CTD,… Optimizer ('adam'):

    How the model is updated based on the data it sees and its loss function. Adam is a popular and generally effective optimizer. Loss Function (tf.keras.losses.SparseCategoricalCrossentropy(from_logits=True)): Measures how accurate the model is during training. We want to minimize this. SparseCategoricalCrossentropy is used for multi-class classification where labels are integers (0, 1, 2...). from_logits=True: Tells the loss function that the model's output is raw logits. Metrics (['accuracy’]): Used to monitor training and testing. accuracy: The fraction of images that are correctly classified.
  12. TRAINING THE MODEL - "FITTING" TO THE DATA Training the

    neural network model requires the following steps: ✓ Feed the training data to the model. In this example, the training data is in the train_images and train_labels arrays. ✓ The model learns to associate images and labels. ✓ You ask the model to make predictions about a test set—in this example, the test_images array. ✓ Verify that the predictions match the labels from the test_labels array. Feed the model To start training, call the model.fit method—so called because it "fits" the model to the training data:
  13. EVALUATING ACCURACY - HOW GOOD IS OUR MODEL? As we

    trained the model in the previous step, the loss and accuracy metrics were displayed per epoch. This model reached an accuracy of about 0.91 (or 91%) on the training data. Now, it turns out that the accuracy on the test dataset is a little less than the accuracy on the training dataset. This gap between training accuracy and test accuracy represents overfitting. Overfitting happens when a machine learning model performs worse on new, previously unseen inputs than it does on the training data. An overfitted model "memorizes" the noise and details in the training dataset to a point where it negatively impacts the performance of the model on the new data.
  14. KEY TAKEAWAYS • We built a complete image classification model!

    • Key Steps: • Load & Explore Data: Understand its structure (Fashion MNIST). • Preprocess Data: Scale pixel values for better performance. • Build Model: Define layers (Flatten, Dense) using tf.keras.Sequential. • Compile Model: Specify optimizer, loss function, and metrics. • Train Model: Fit the model to training data (model.fit). • Evaluate Model: Check performance on unseen test data. • Make Predictions: Use the trained model for new images. • TensorFlow & Keras provide a powerful yet user- friendly framework for deep learning. 15