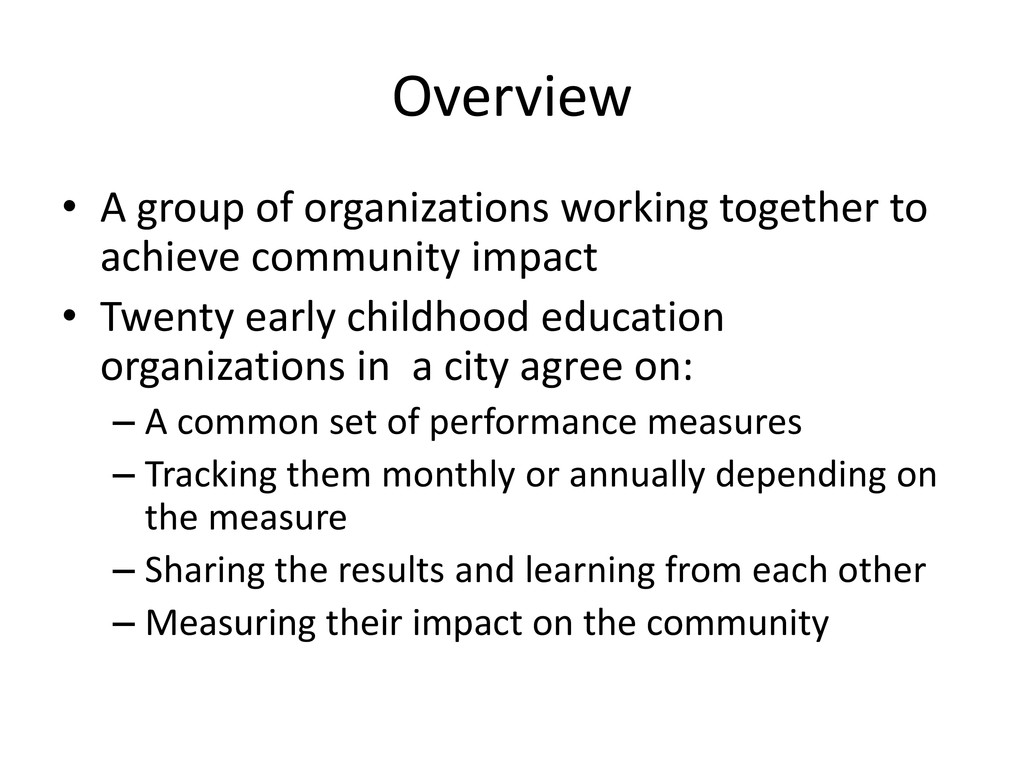
community impact • Twenty early childhood education organizations in a city agree on: – A common set of performance measures – Tracking them monthly or annually depending on the measure – Sharing the results and learning from each other – Measuring their impact on the community
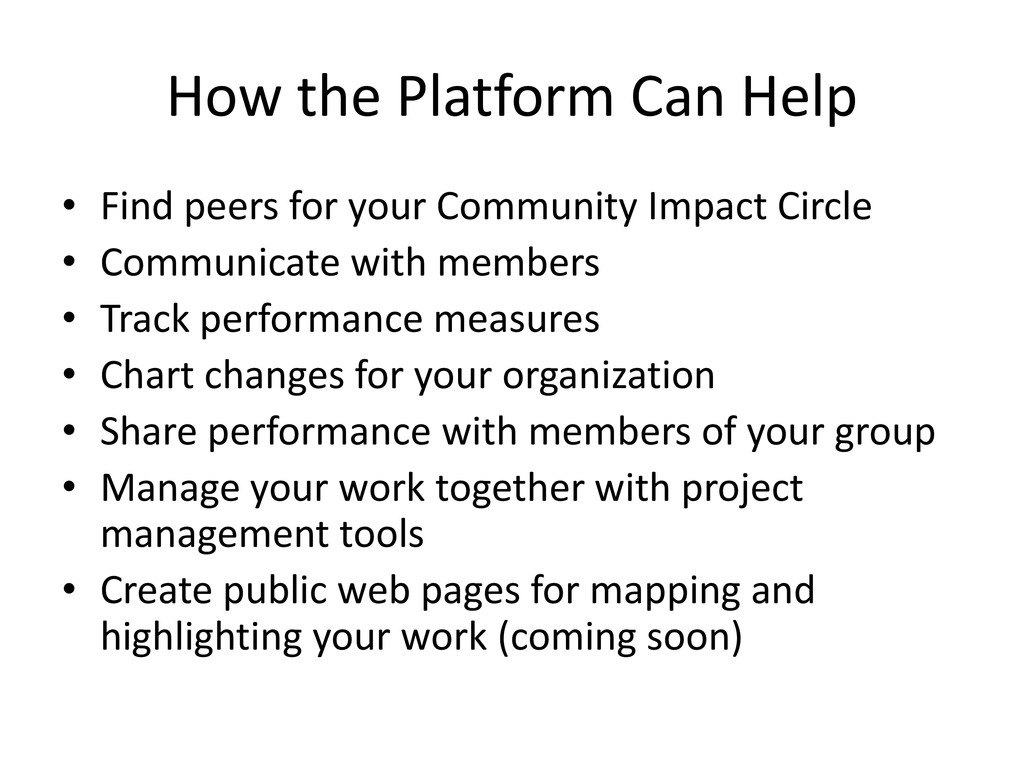
Community Impact Circle • Communicate with members • Track performance measures • Chart changes for your organization • Share performance with members of your group • Manage your work together with project management tools • Create public web pages for mapping and highlighting your work (coming soon)
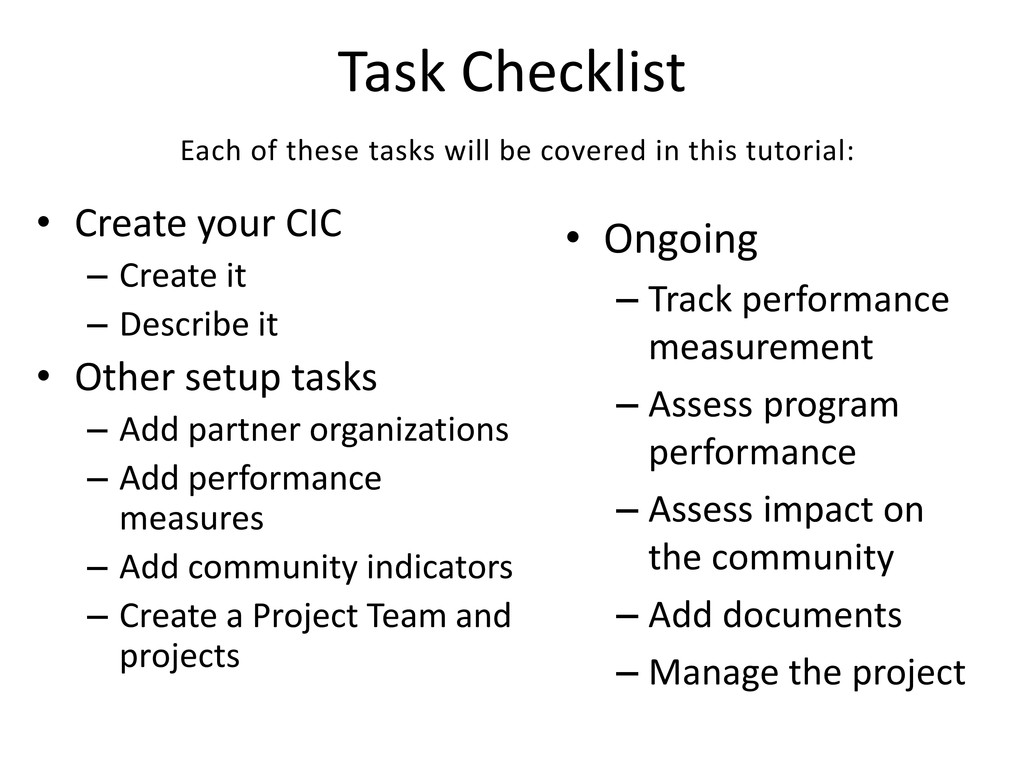
Describe it • Other setup tasks – Add partner organizations – Add performance measures – Add community indicators – Create a Project Team and projects • Ongoing – Track performance measurement – Assess program performance – Assess impact on the community – Add documents – Manage the project Each of these tasks will be covered in this tutorial:
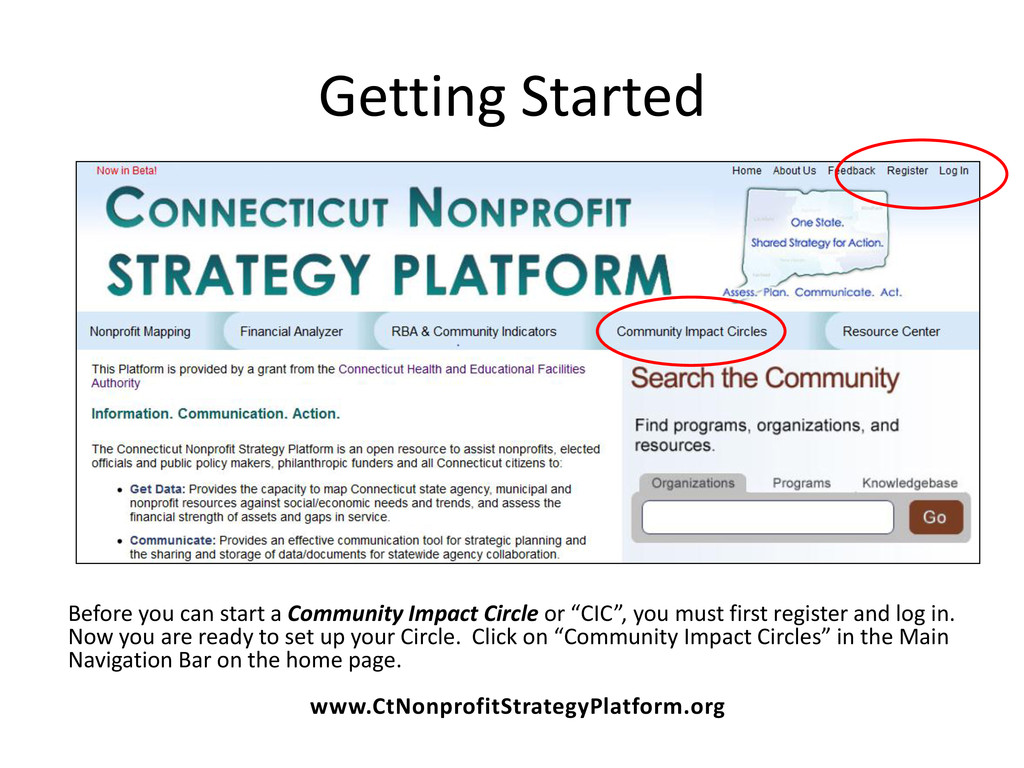
or “CIC”, you must first register and log in. Now you are ready to set up your Circle. Click on “Community Impact Circles” in the Main Navigation Bar on the home page. www.CtNonprofitStrategyPlatform.org
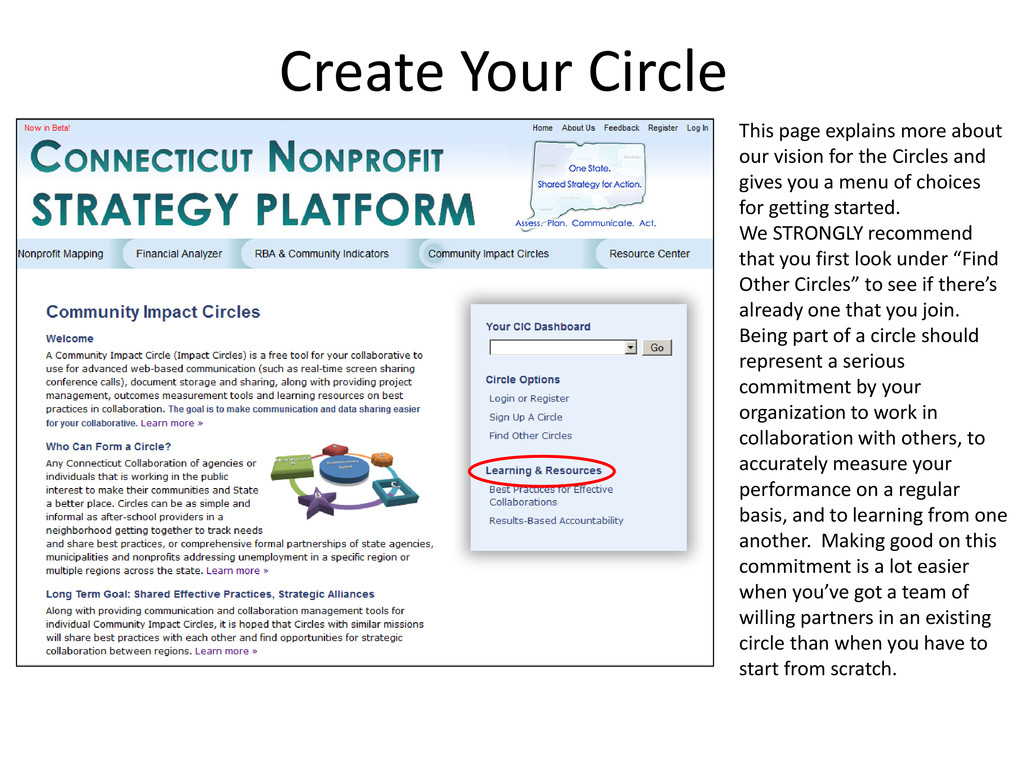
for the Circles and gives you a menu of choices for getting started. We STRONGLY recommend that you first look under “Find Other Circles” to see if there’s already one that you join. Being part of a circle should represent a serious commitment by your organization to work in collaboration with others, to accurately measure your performance on a regular basis, and to learning from one another. Making good on this commitment is a lot easier when you’ve got a team of willing partners in an existing circle than when you have to start from scratch.
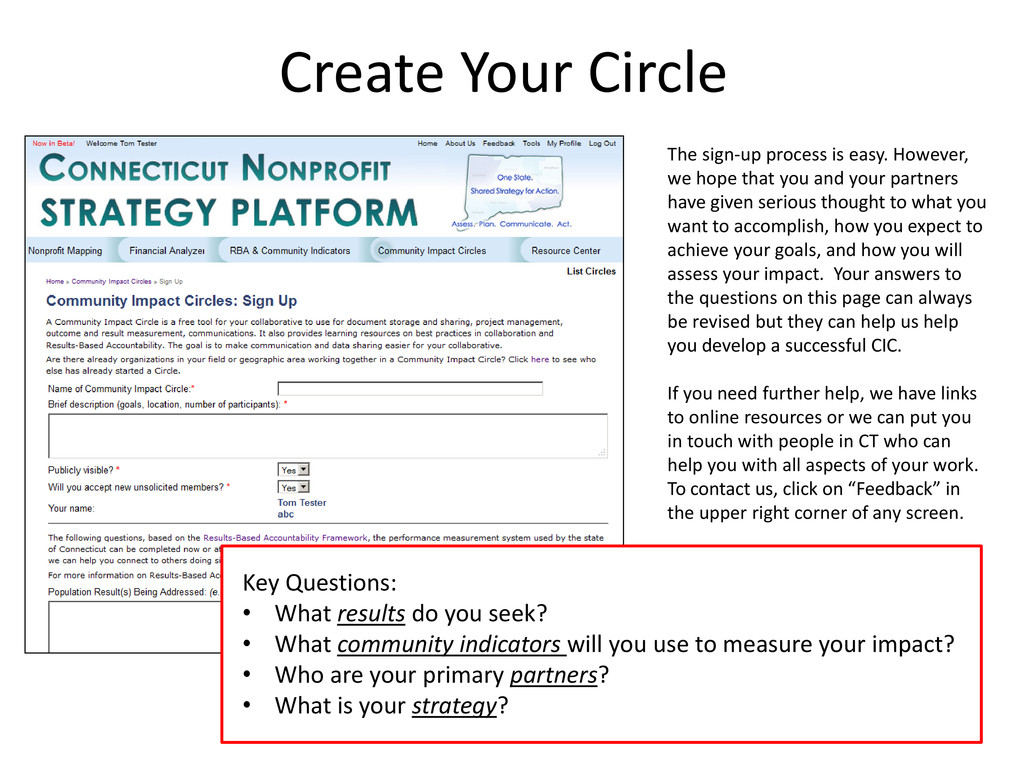
hope that you and your partners have given serious thought to what you want to accomplish, how you expect to achieve your goals, and how you will assess your impact. Your answers to the questions on this page can always be revised but they can help us help you develop a successful CIC. If you need further help, we have links to online resources or we can put you in touch with people in CT who can help you with all aspects of your work. To contact us, click on “Feedback” in the upper right corner of any screen. Key Questions: • What results do you seek? • What community indicators will you use to measure your impact? • Who are your primary partners? • What is your strategy?
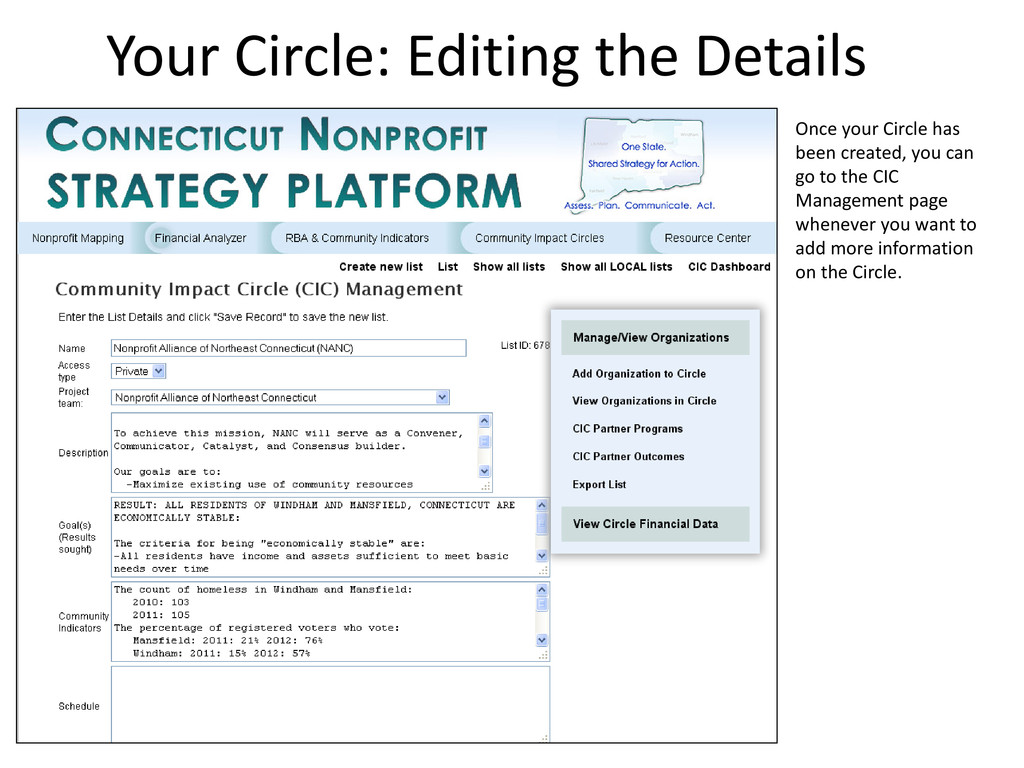
or set up a new one, you will see it in your My Quick Links list on the home page. Simply click on the Circle to jump to its Dashboard. Alternatively, you can open your Dashboard by clicking on “Community Impact Circles” from the Main Navigation Menu, and then selecting your Circle from the dropdown list.
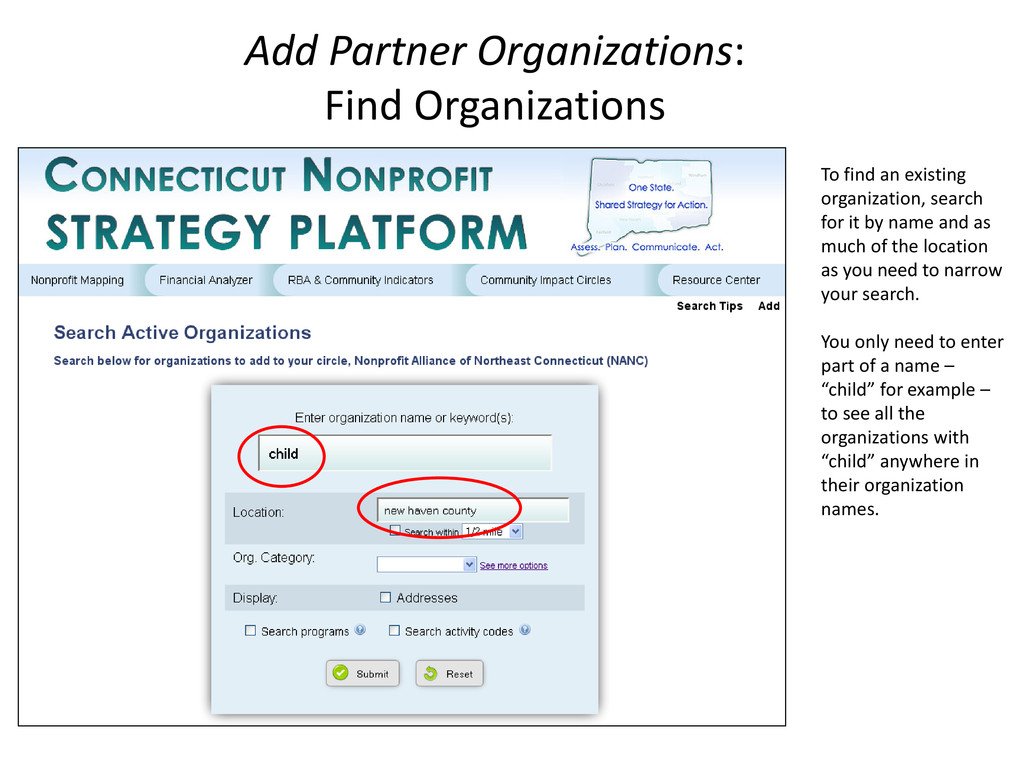
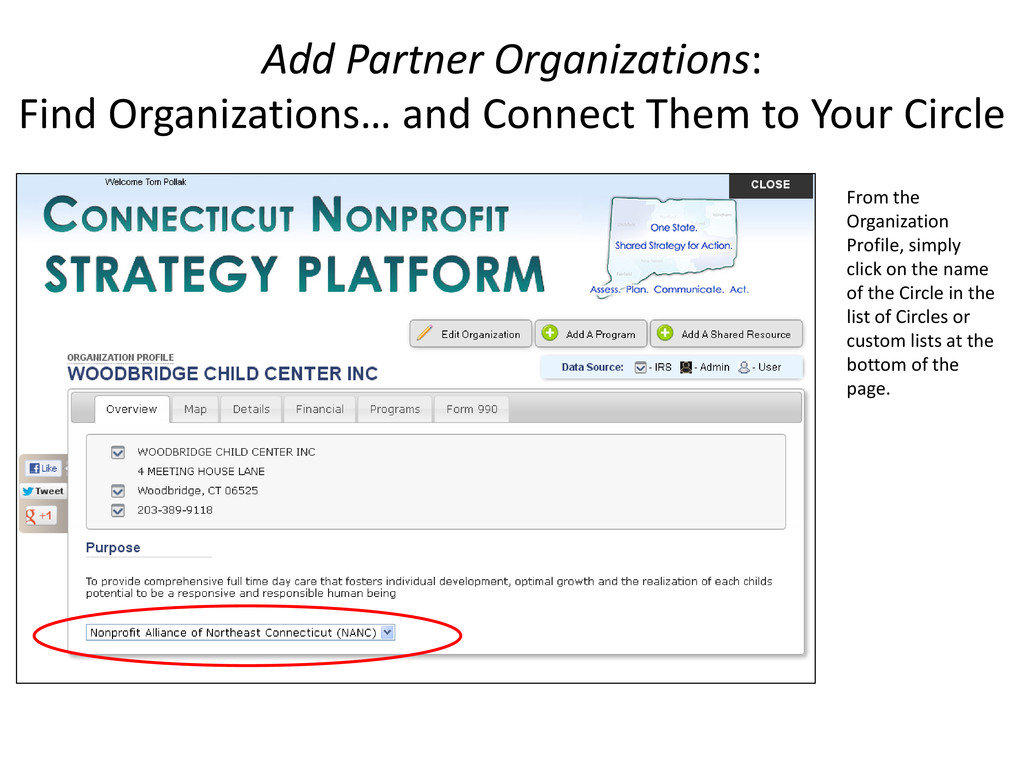
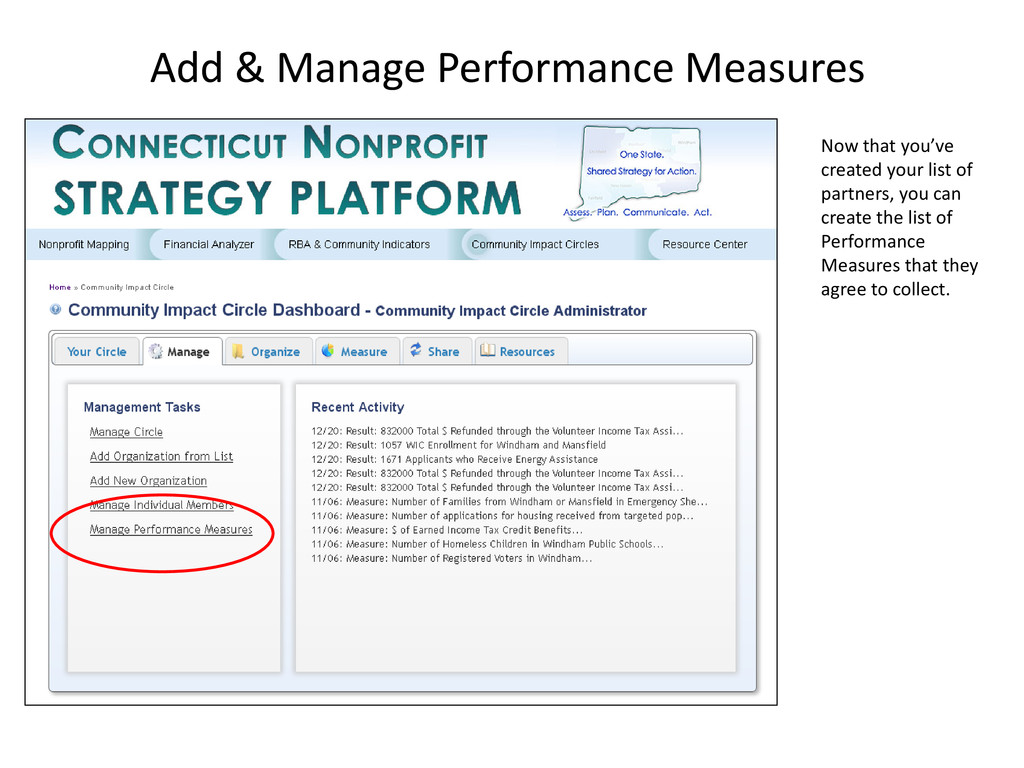
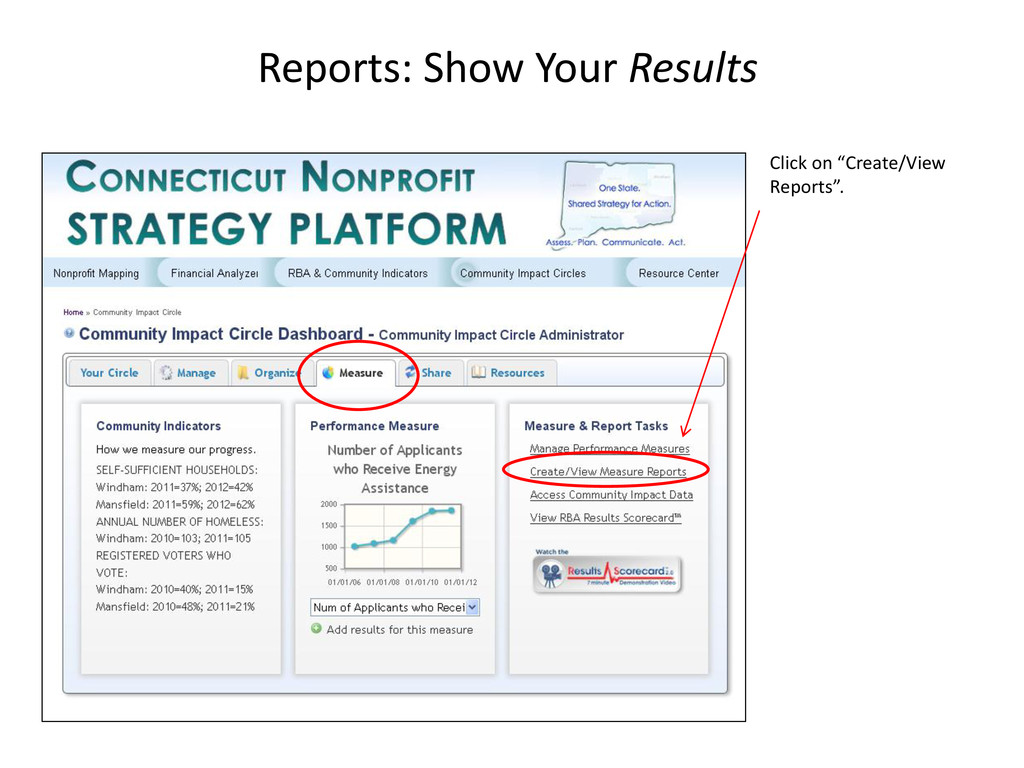
to identify the specific partner organizations. Once this is done, each organization (if it wants) can update its Performance Measures and share, compare and combine its data with other members, and exchange information with other members of the group. If the organization is already in the Platform, you can quickly flag it as a member of the Circle. If not, you can quickly Add it. Add Partner Organizations
search for it by name and as much of the location as you need to narrow your search. You only need to enter part of a name – “child” for example – to see all the organizations with “child” anywhere in their organization names.
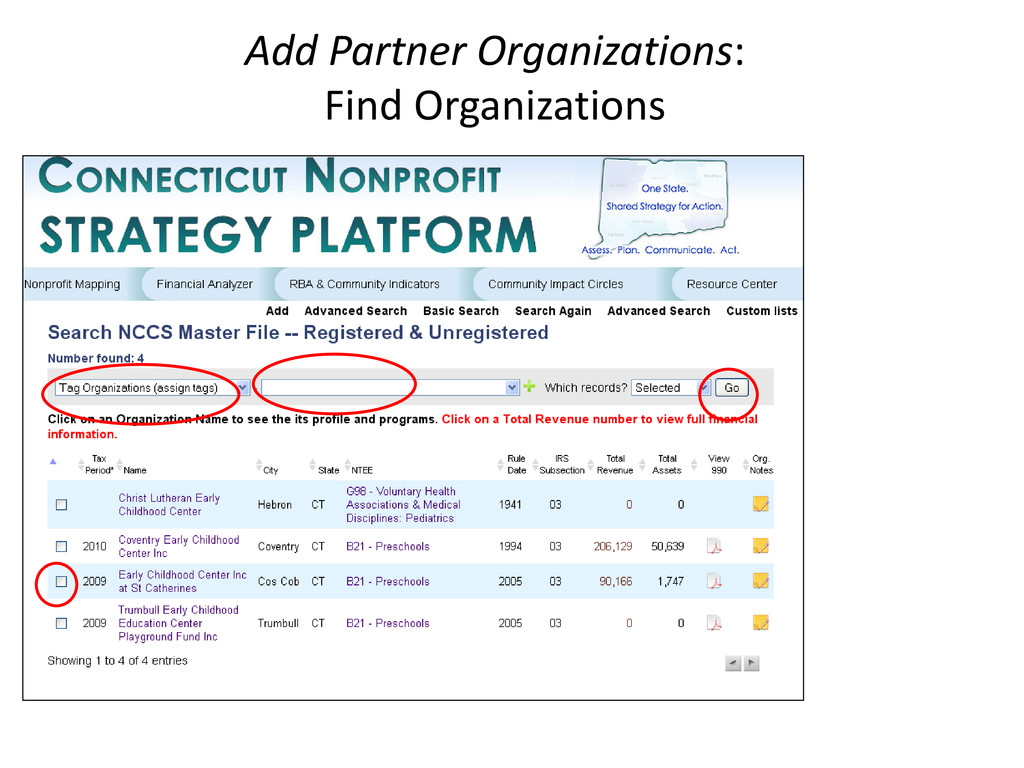
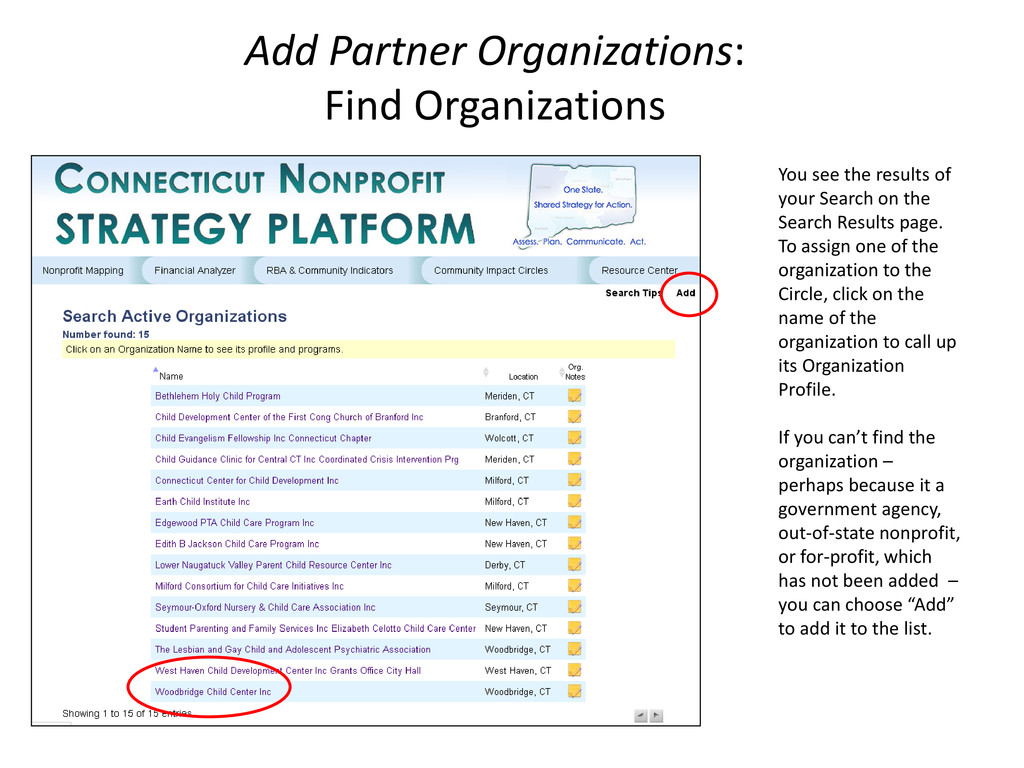
your Search on the Search Results page. To assign one of the organization to the Circle, click on the name of the organization to call up its Organization Profile. If you can’t find the organization – perhaps because it a government agency, out-of-state nonprofit, or for-profit, which has not been added – you can choose “Add” to add it to the list.
Outside the State When you add a new “organization,” you must complete all items marked with red stars (including identifying its legal type). Once you’ve added it, a Community Administrator will need to approve it. You can then add it to your Circle as described in the next slide. (In Version 2, to be released this winter, you will be able to add it directly to your Circle from this page.)
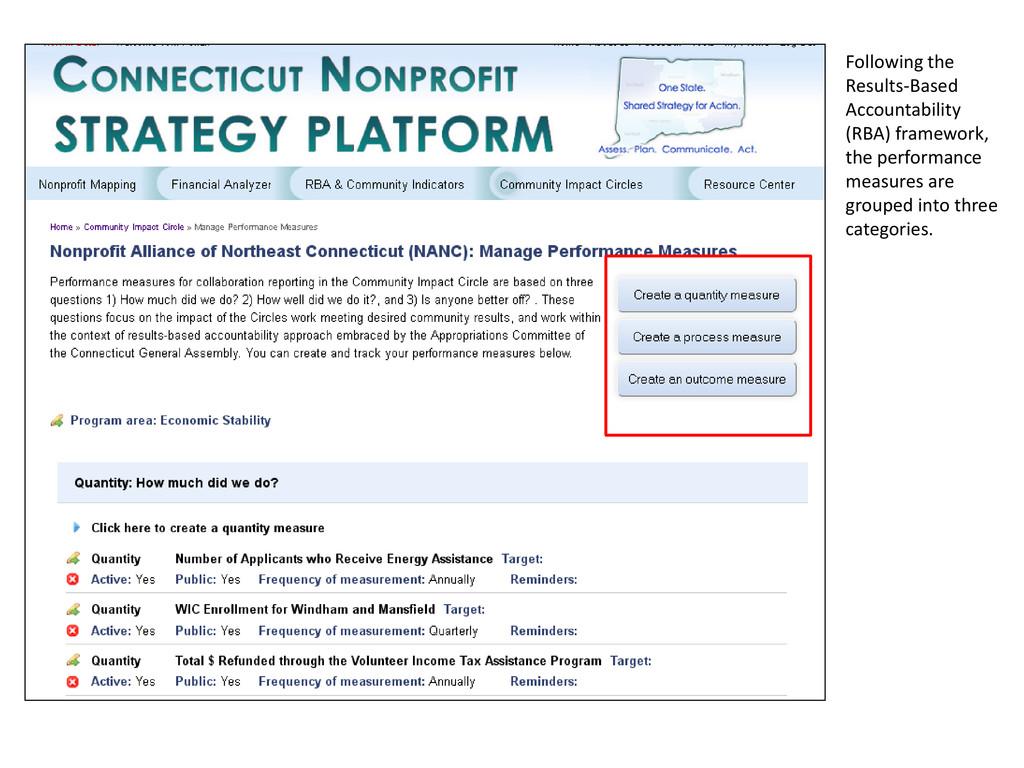
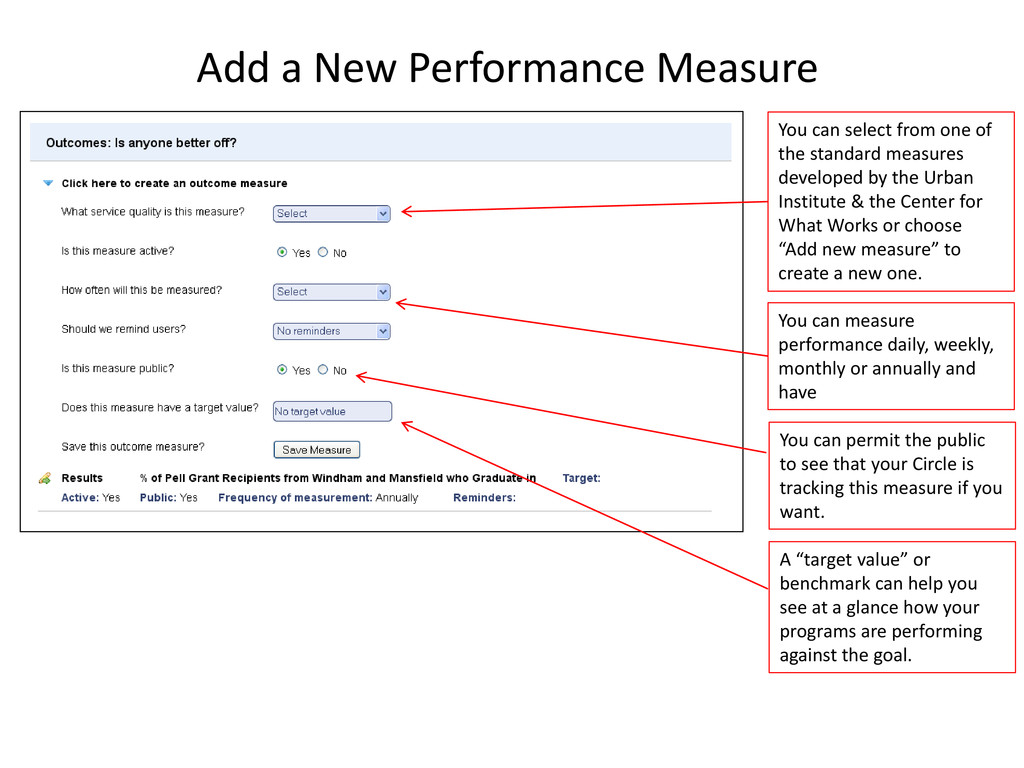
of the standard measures developed by the Urban Institute & the Center for What Works or choose “Add new measure” to create a new one. You can measure performance daily, weekly, monthly or annually and have You can permit the public to see that your Circle is tracking this measure if you want. A “target value” or benchmark can help you see at a glance how your programs are performing against the goal.
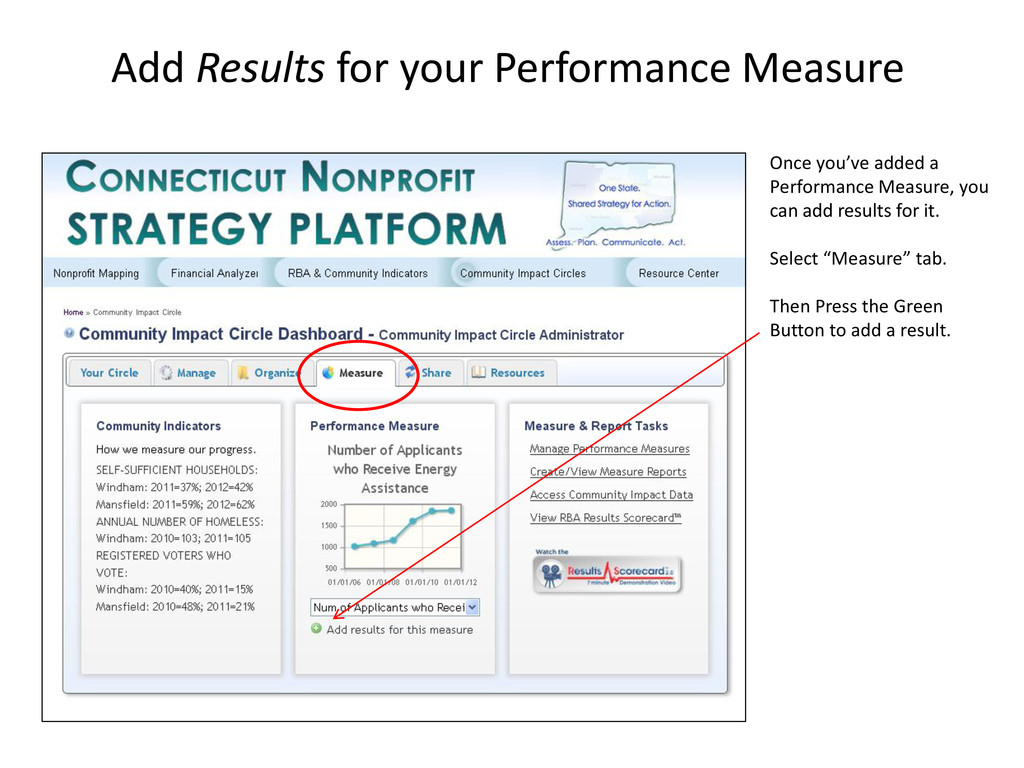
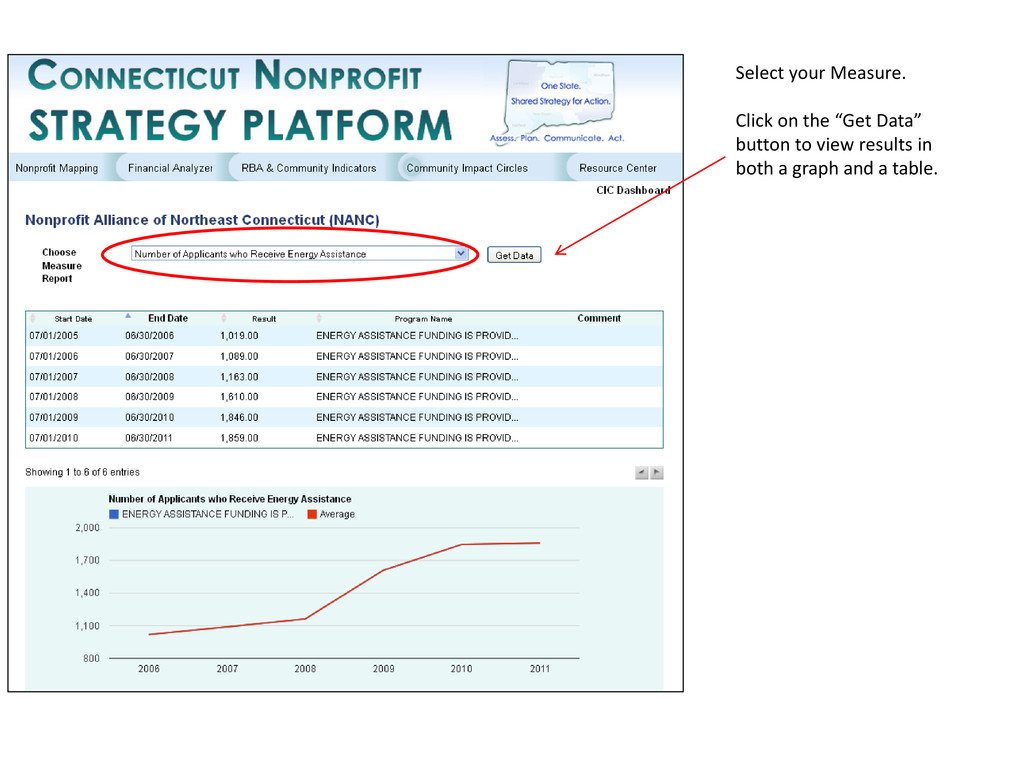
in July 2012, for example… Select the Measure from the dropdown list. Then type in the number under on the “Value” line, enter a starting and ending date for the period, and add any comments you want to be included in your reports. When you are done, click on the Save button and the Results will be added.
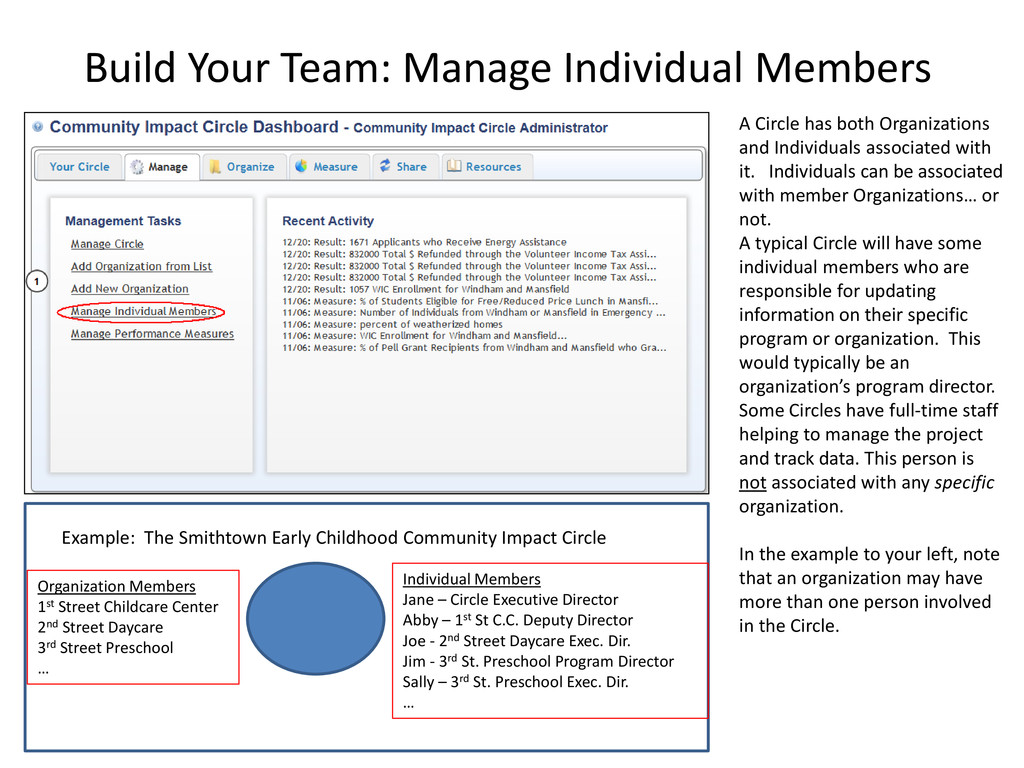
Organizations and Individuals associated with it. Individuals can be associated with member Organizations… or not. A typical Circle will have some individual members who are responsible for updating information on their specific program or organization. This would typically be an organization’s program director. Some Circles have full-time staff helping to manage the project and track data. This person is not associated with any specific organization. In the example to your left, note that an organization may have more than one person involved in the Circle. Individual Members Jane – Circle Executive Director Abby – 1st St C.C. Deputy Director Joe - 2nd Street Daycare Exec. Dir. Jim - 3rd St. Preschool Program Director Sally – 3rd St. Preschool Exec. Dir. … Organization Members 1st Street Childcare Center 2nd Street Daycare 3rd Street Preschool … Example: The Smithtown Early Childhood Community Impact Circle
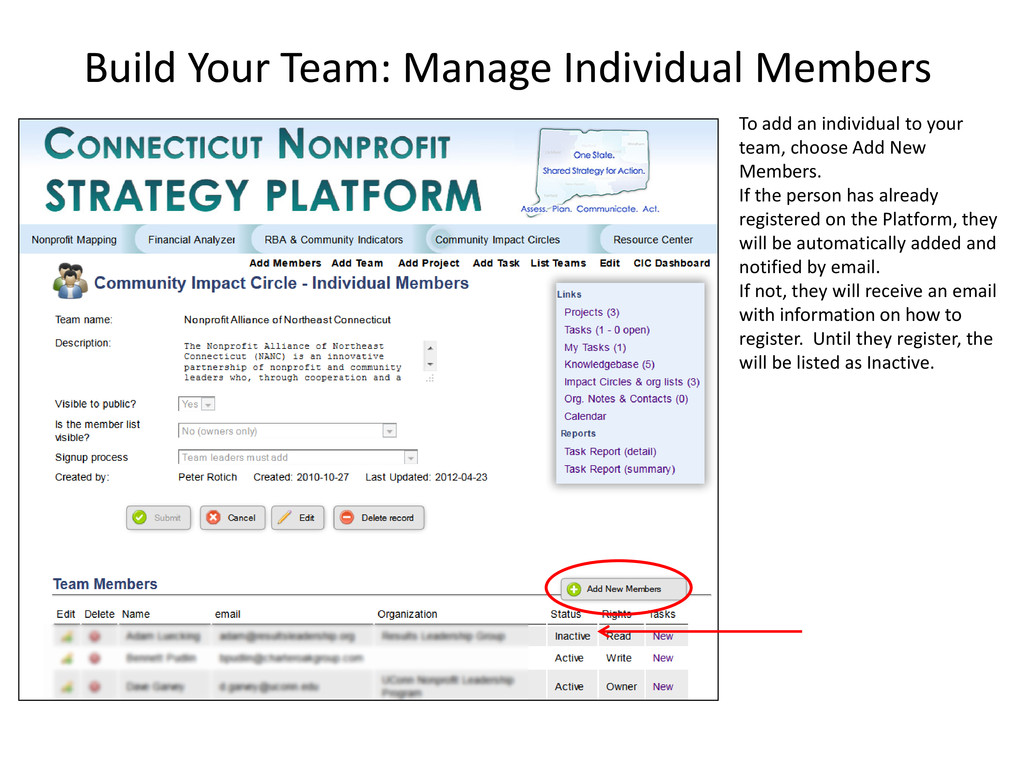
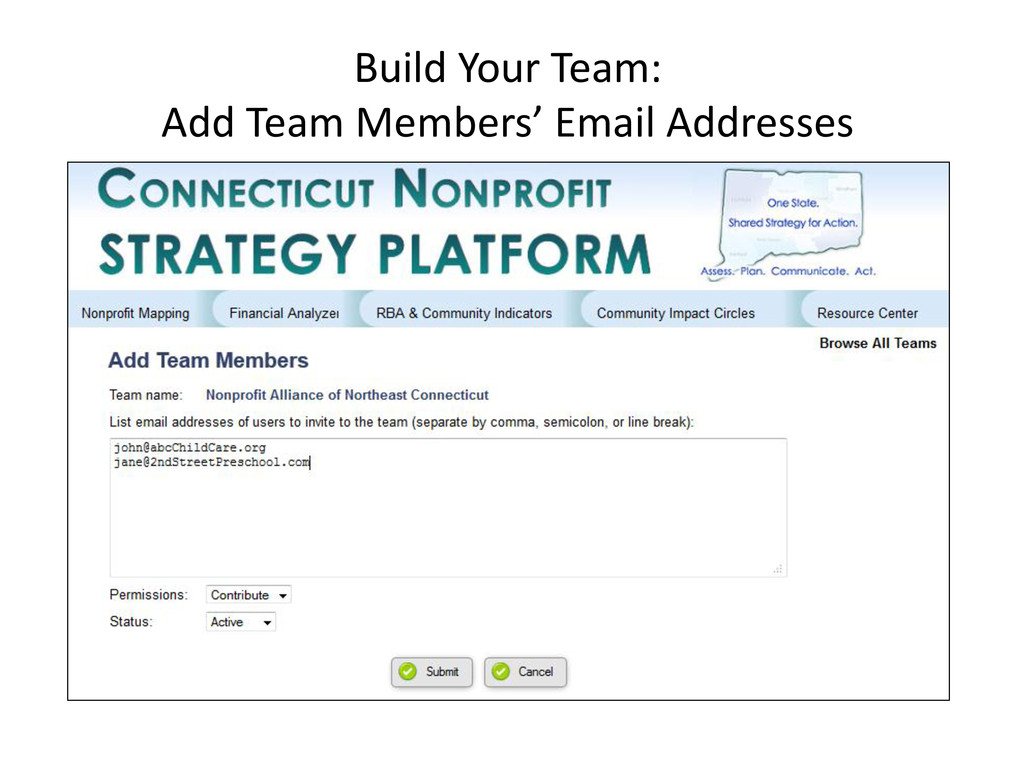
to your team, choose Add New Members. If the person has already registered on the Platform, they will be automatically added and notified by email. If not, they will receive an email with information on how to register. Until they register, the will be listed as Inactive.
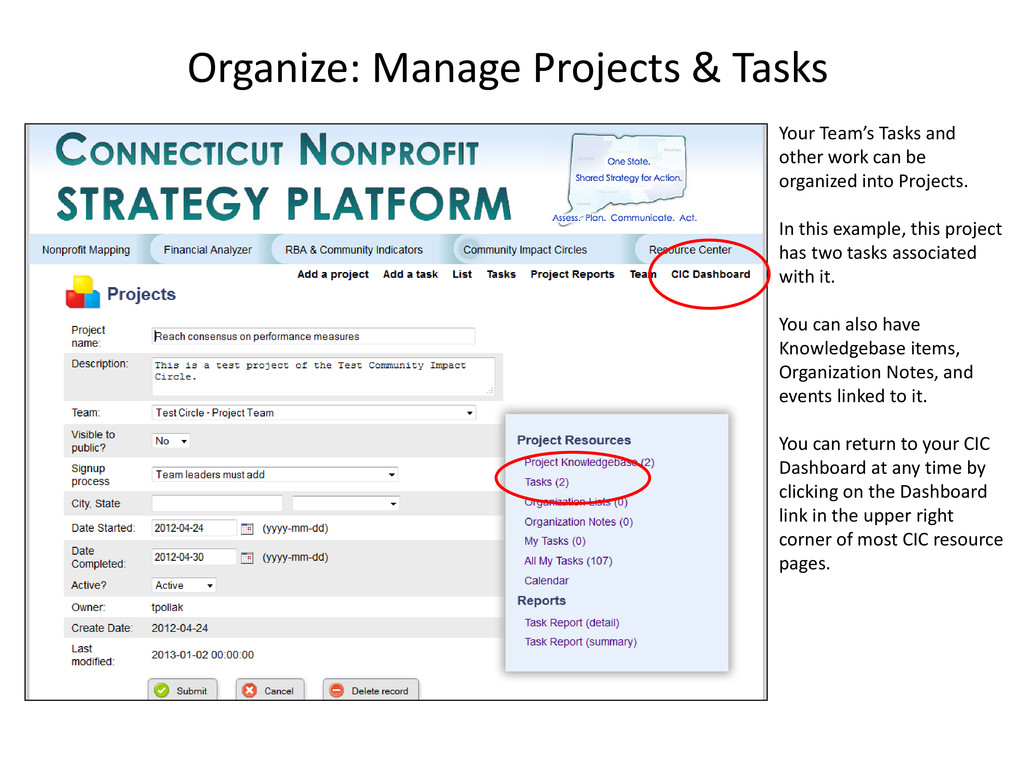
Projects. In this example, this project has two tasks associated with it. You can also have Knowledgebase items, Organization Notes, and events linked to it. You can return to your CIC Dashboard at any time by clicking on the Dashboard link in the upper right corner of most CIC resource pages. Organize: Manage Projects & Tasks
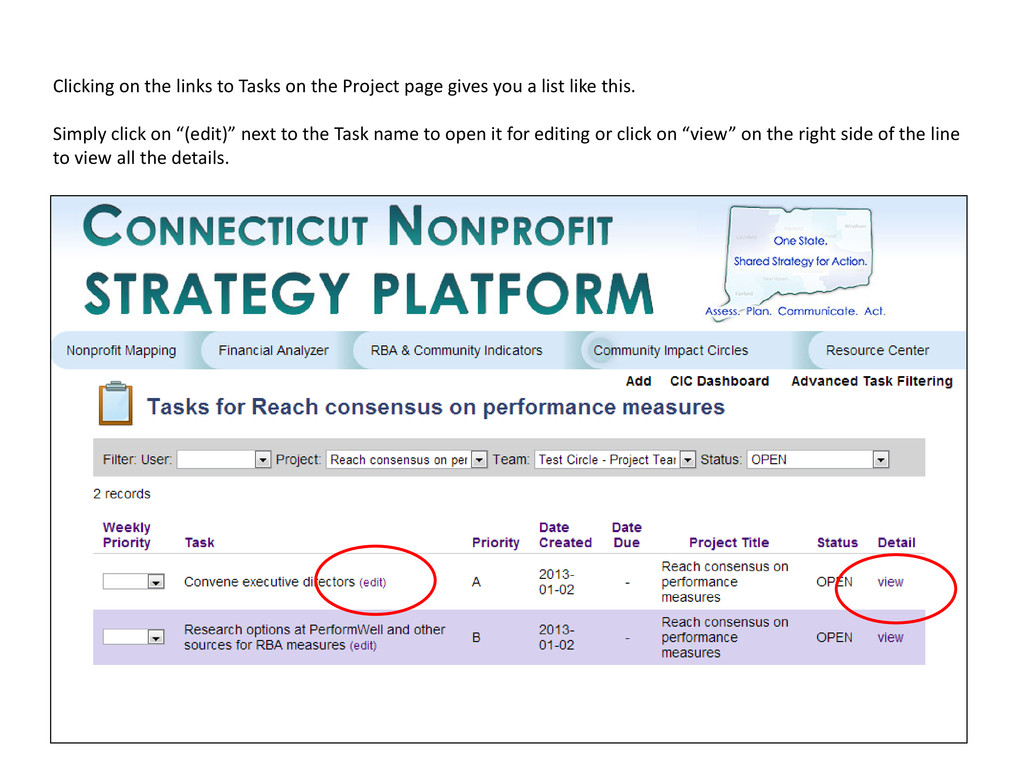
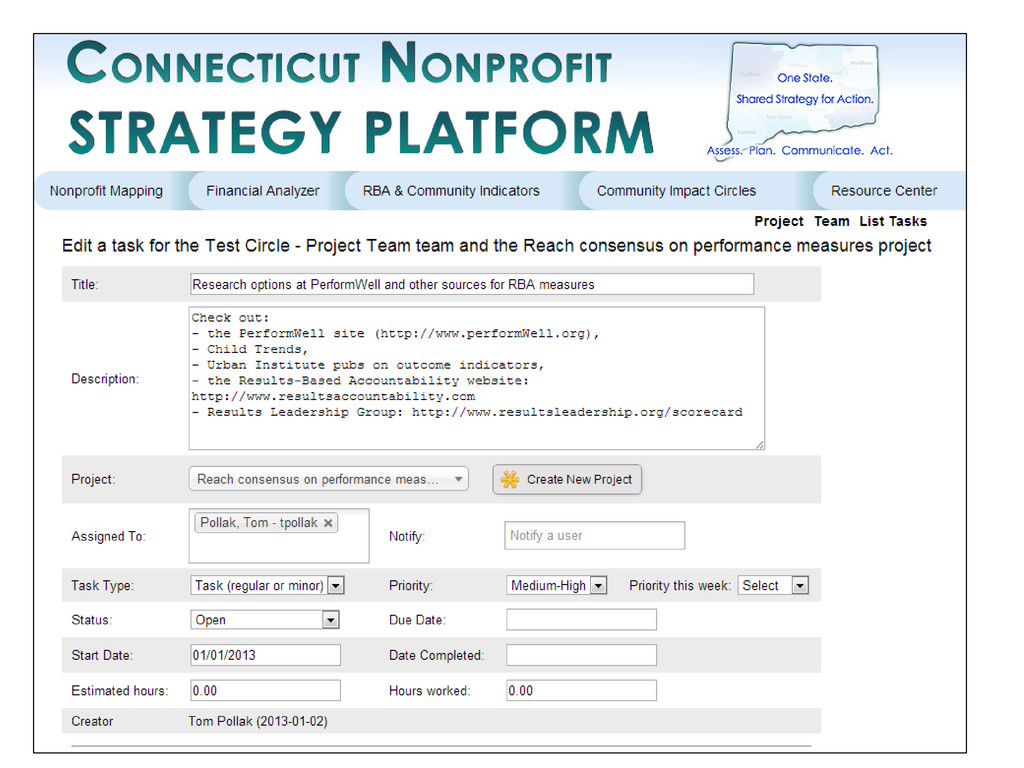
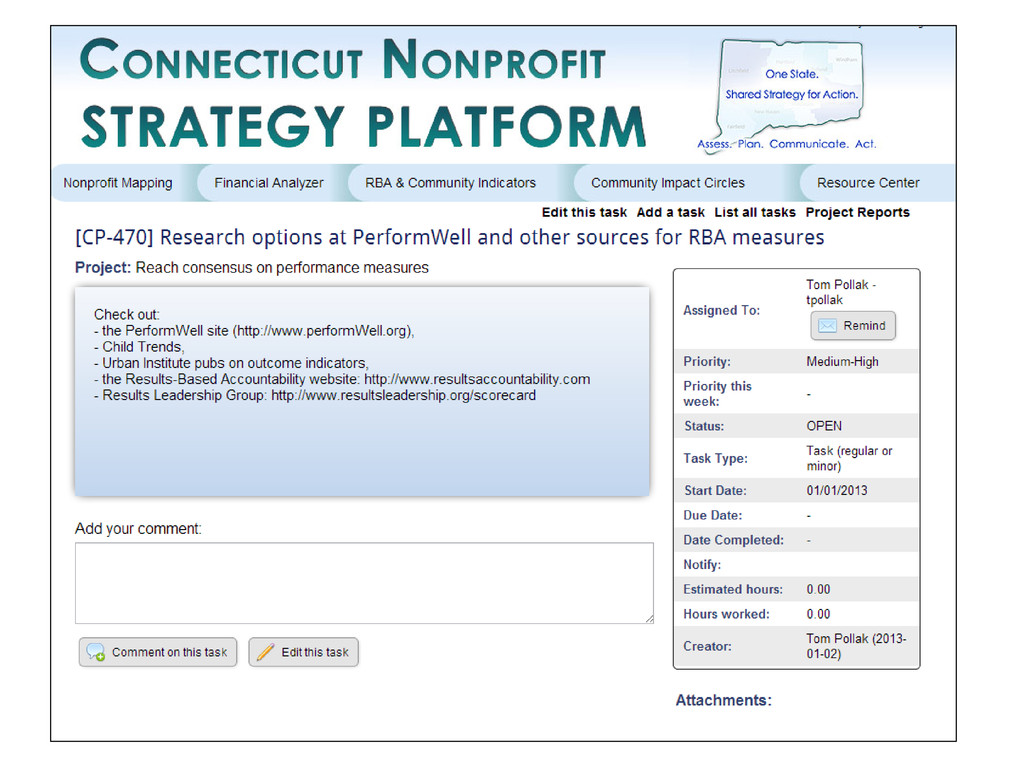
gives you a list like this. Simply click on “(edit)” next to the Task name to open it for editing or click on “view” on the right side of the line to view all the details.
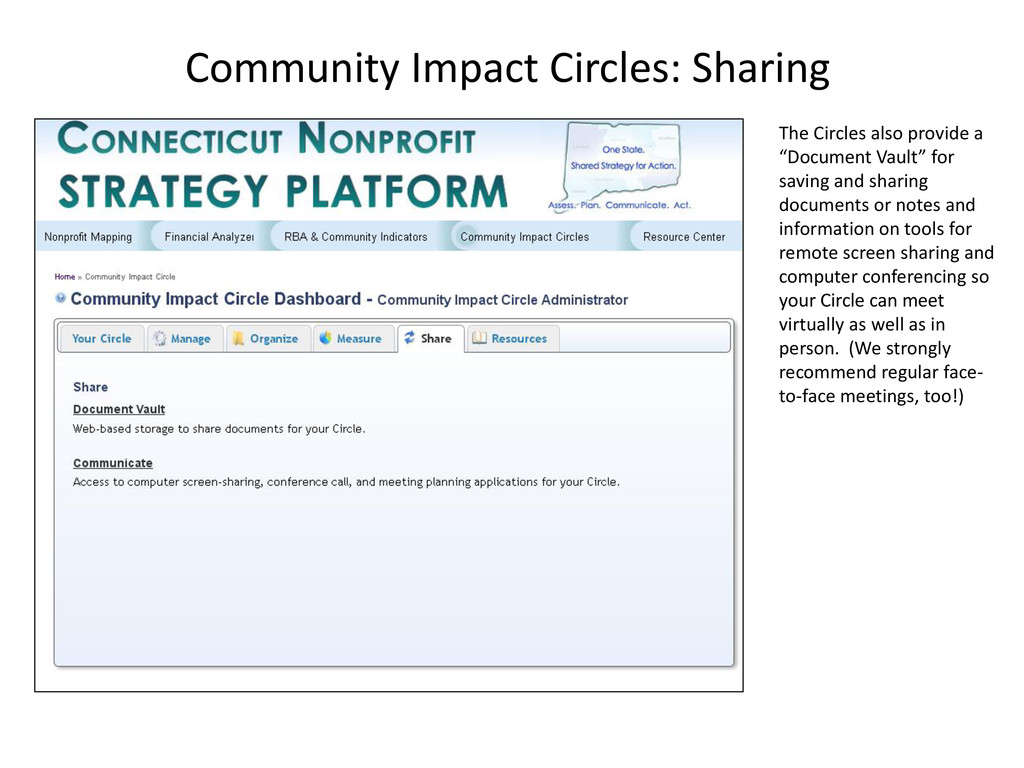
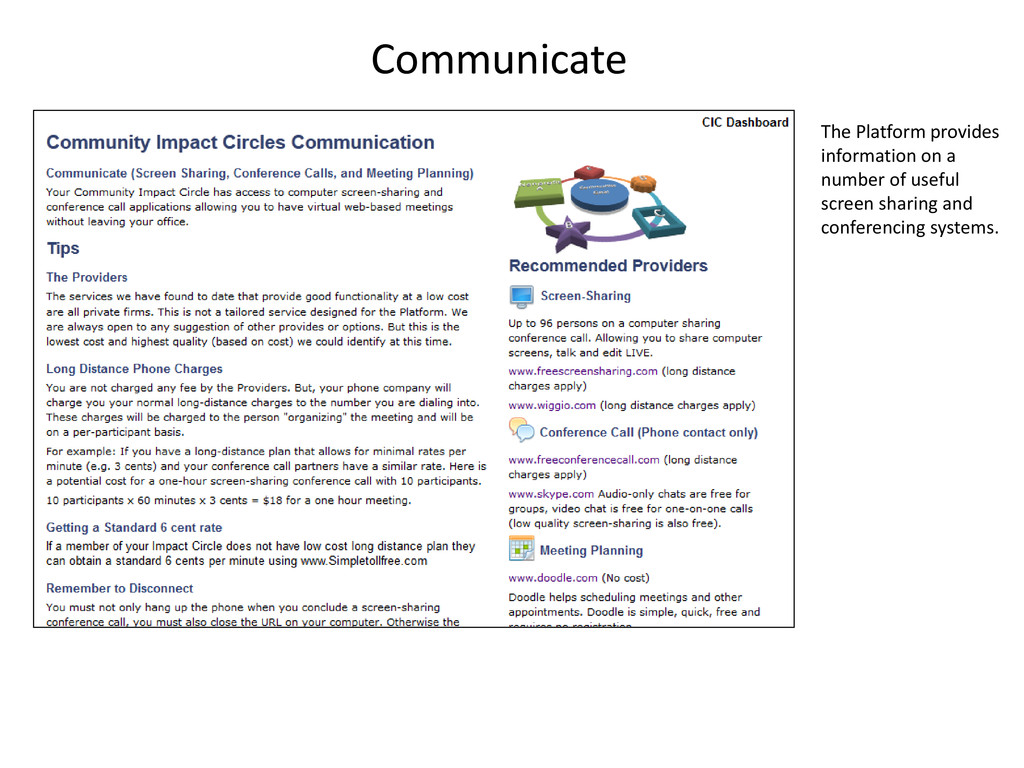
Vault” for saving and sharing documents or notes and information on tools for remote screen sharing and computer conferencing so your Circle can meet virtually as well as in person. (We strongly recommend regular face- to-face meetings, too!)
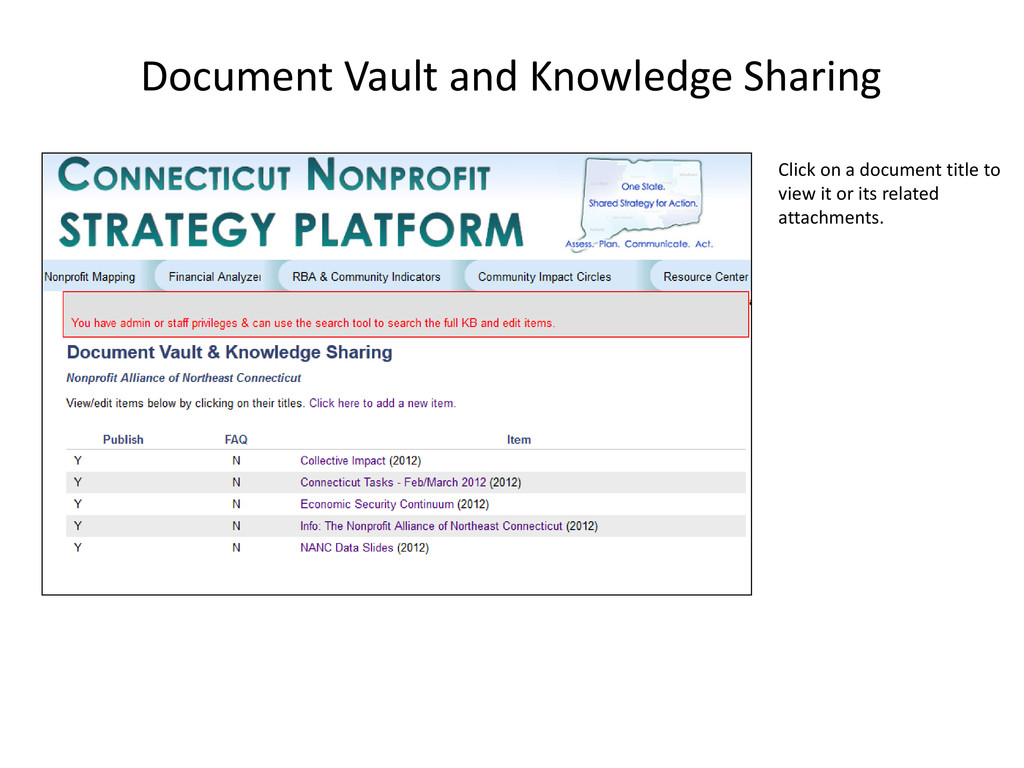
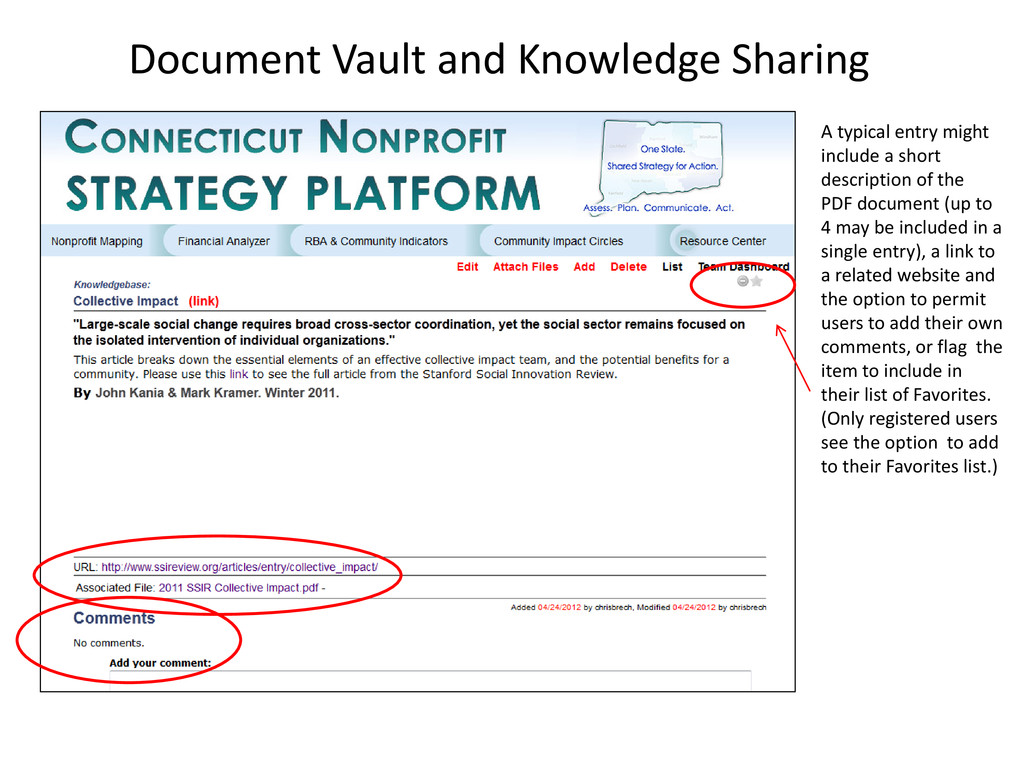
PDF document (up to 4 may be included in a single entry), a link to a related website and the option to permit users to add their own comments, or flag the item to include in their list of Favorites. (Only registered users see the option to add to their Favorites list.) Document Vault and Knowledge Sharing