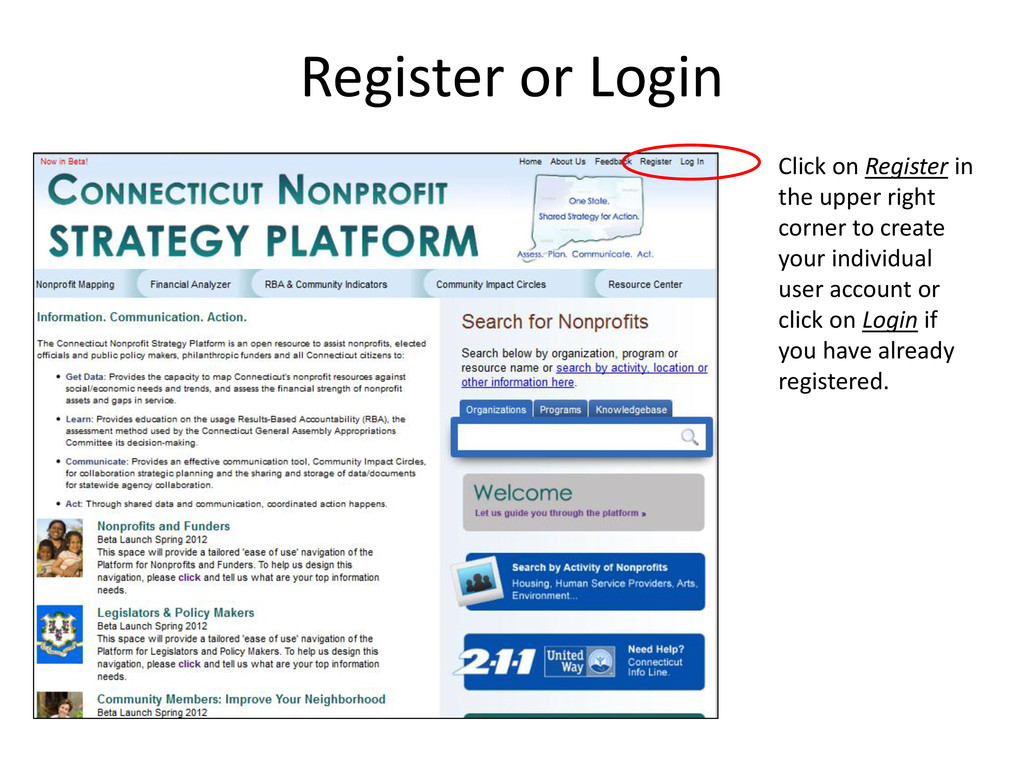
red starts next to them and the Terms of Use agreement. When you press Submit, an email will be automatically sent to you. YOUR ACCOUNT WILL NOT BE ACTIVE UNTIL YOU CLICK ON THE EMAIL LINK.
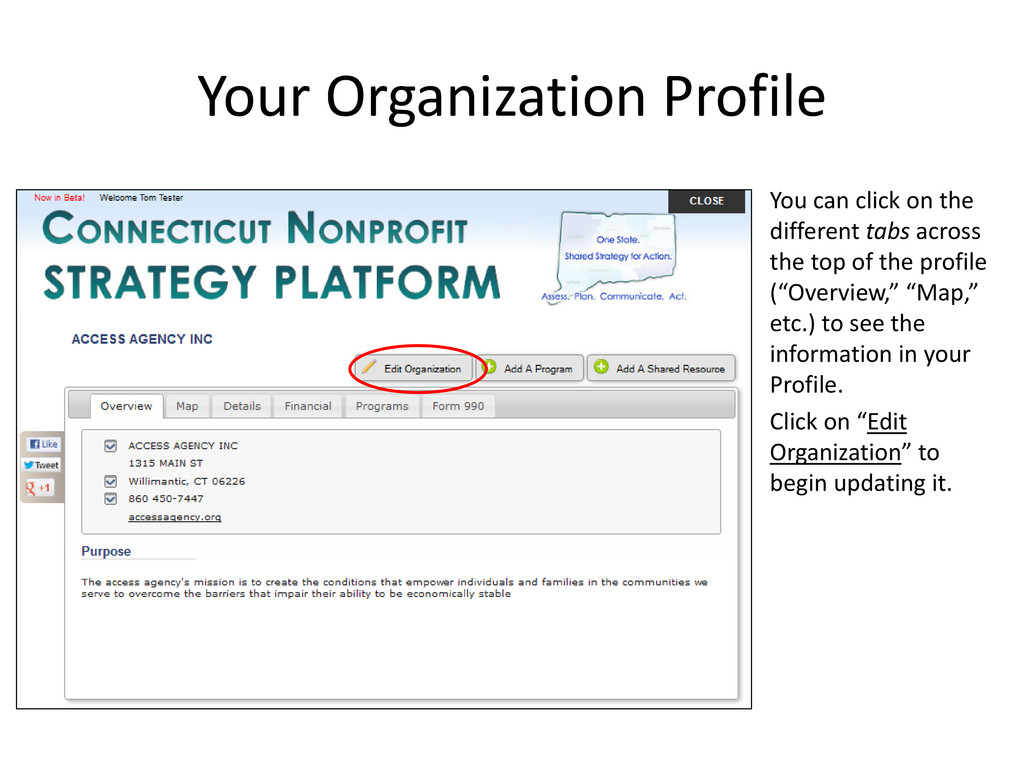
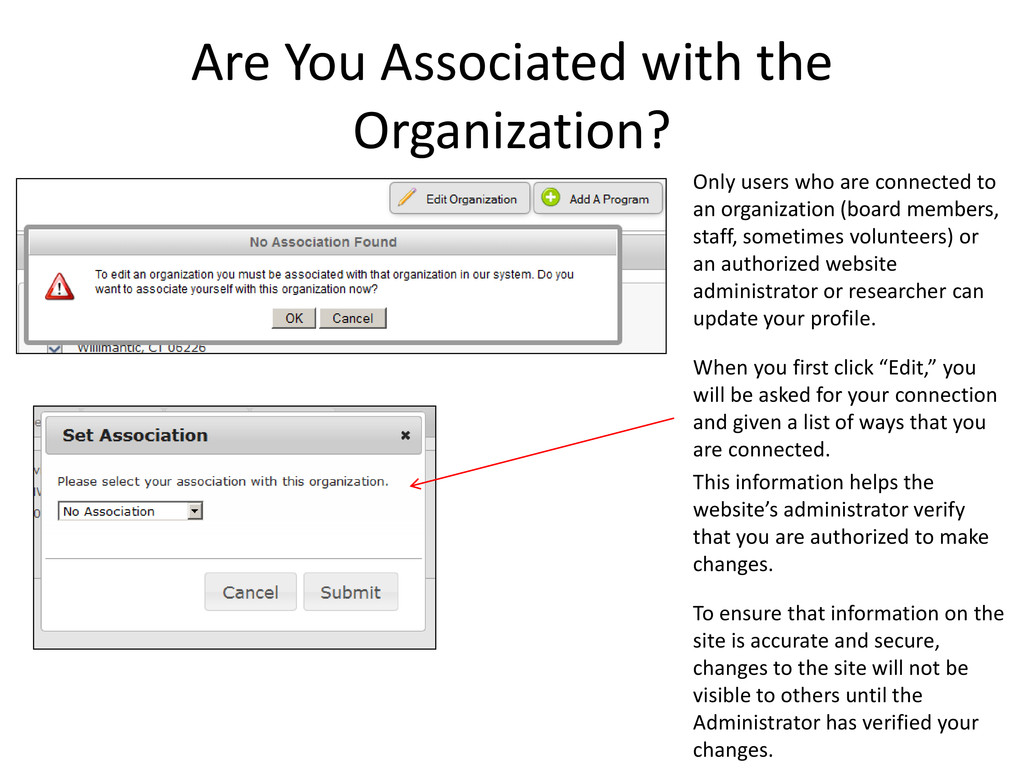
connected to an organization (board members, staff, sometimes volunteers) or an authorized website administrator or researcher can update your profile. When you first click “Edit,” you will be asked for your connection and given a list of ways that you are connected. This information helps the website’s administrator verify that you are authorized to make changes. To ensure that information on the site is accurate and secure, changes to the site will not be visible to others until the Administrator has verified your changes.
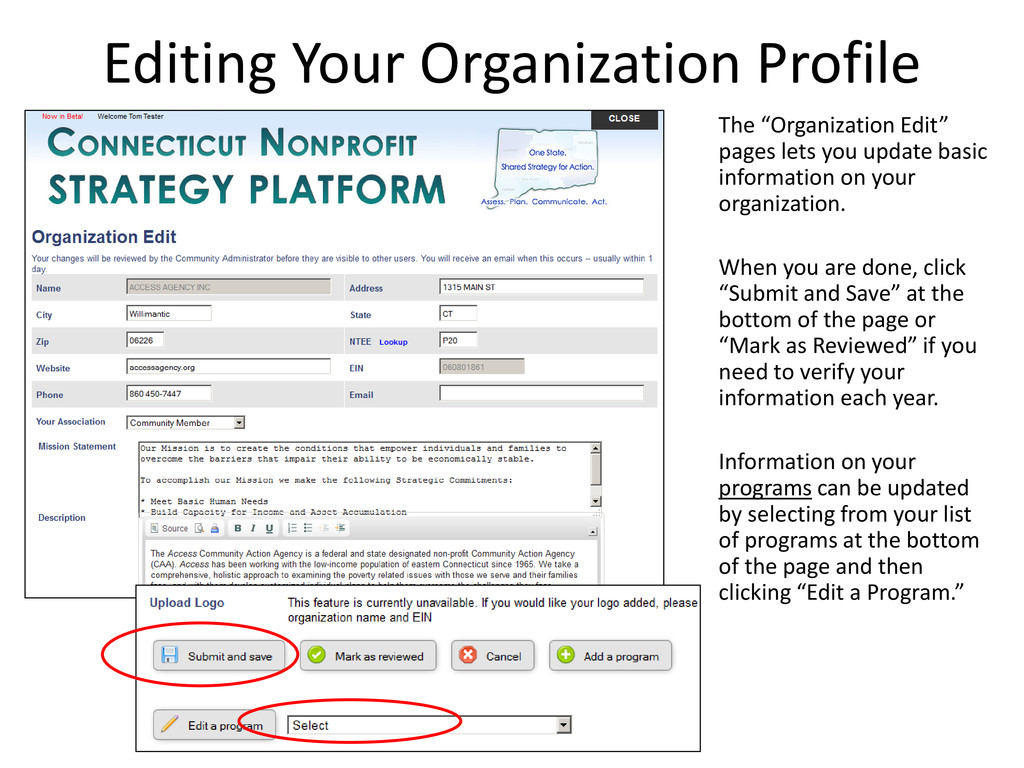
update basic information on your organization. When you are done, click “Submit and Save” at the bottom of the page or “Mark as Reviewed” if you need to verify your information each year. Information on your programs can be updated by selecting from your list of programs at the bottom of the page and then clicking “Edit a Program.”
Profiles as you have programs – it could be just one or it could be 100 or more. Each program should have at least one activity code and population code assigned to it. This ensures that other users can find your service and helps us understand the mix of services in the community as a whole. To select an Activity or Population Code, click on “Lookup” and view a searchable list.
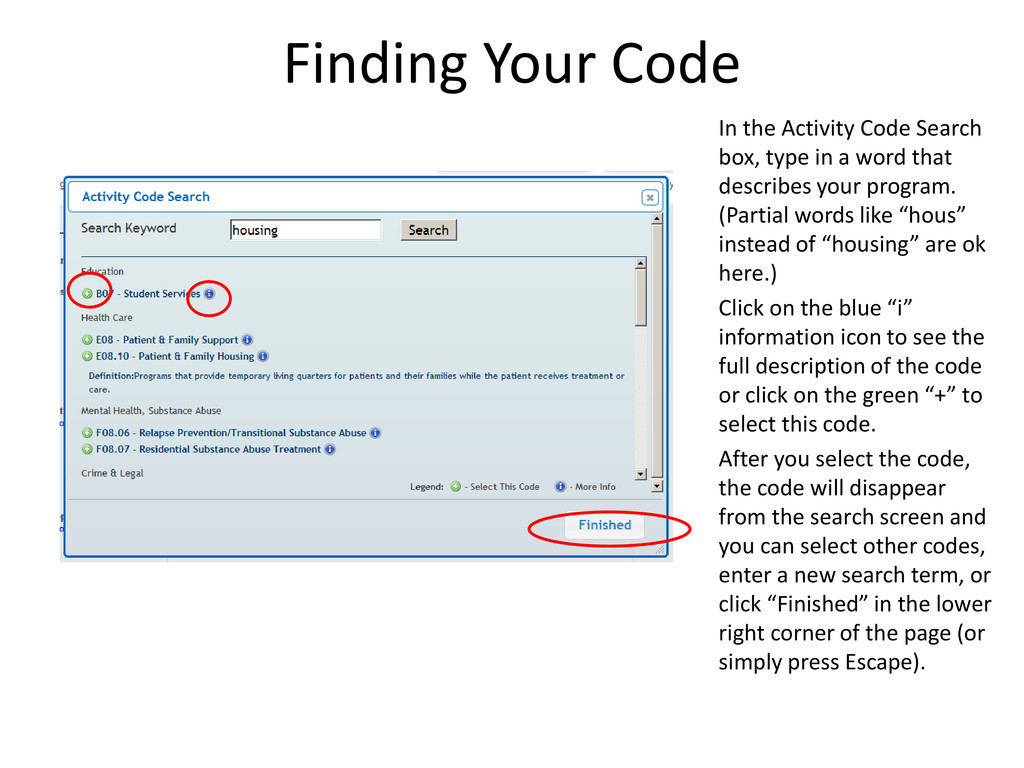
in a word that describes your program. (Partial words like “hous” instead of “housing” are ok here.) Click on the blue “i” information icon to see the full description of the code or click on the green “+” to select this code. After you select the code, the code will disappear from the search screen and you can select other codes, enter a new search term, or click “Finished” in the lower right corner of the page (or simply press Escape).
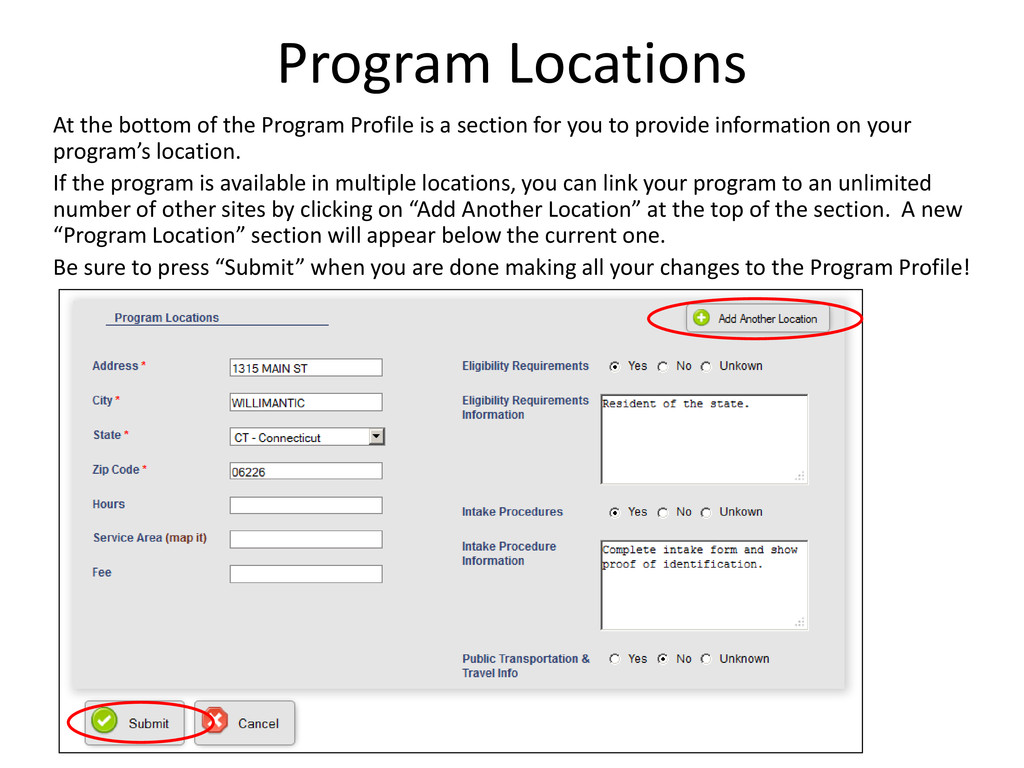
a section for you to provide information on your program’s location. If the program is available in multiple locations, you can link your program to an unlimited number of other sites by clicking on “Add Another Location” at the top of the section. A new “Program Location” section will appear below the current one. Be sure to press “Submit” when you are done making all your changes to the Program Profile!
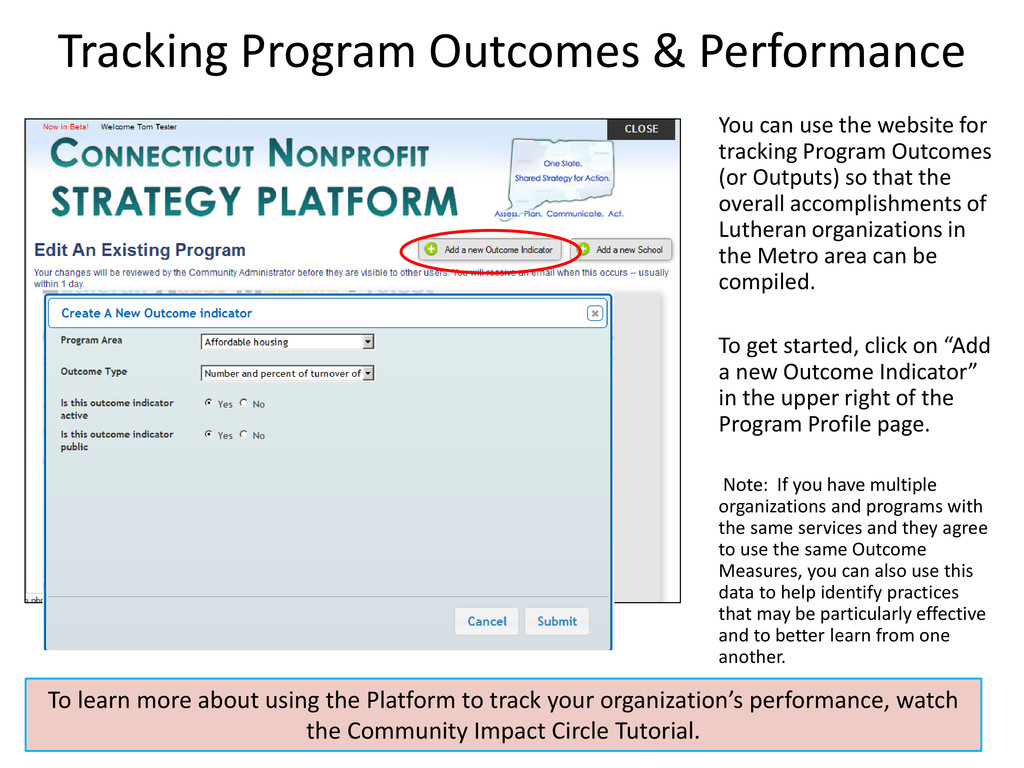
for tracking Program Outcomes (or Outputs) so that the overall accomplishments of Lutheran organizations in the Metro area can be compiled. To get started, click on “Add a new Outcome Indicator” in the upper right of the Program Profile page. Note: If you have multiple organizations and programs with the same services and they agree to use the same Outcome Measures, you can also use this data to help identify practices that may be particularly effective and to better learn from one another. To learn more about using the Platform to track your organization’s performance, watch the Community Impact Circle Tutorial.