unlimited number of lists of organizations based on whatever criteria you choose. Like flagging items as “Favorites” on some websites – but more powerful – custom lists help you to pick out the organizations that are most important to you. • Uses include: – Nonprofit leaders or donors can create a list of their financial health, locations, or to f – Board members can create a list of Peer Organizations for assessing the range of appropriate compensation for a CEO or executive director – Tracking them monthly or annually depending on the measure – Sharing the results and learning from each other – Measuring their impact on the community
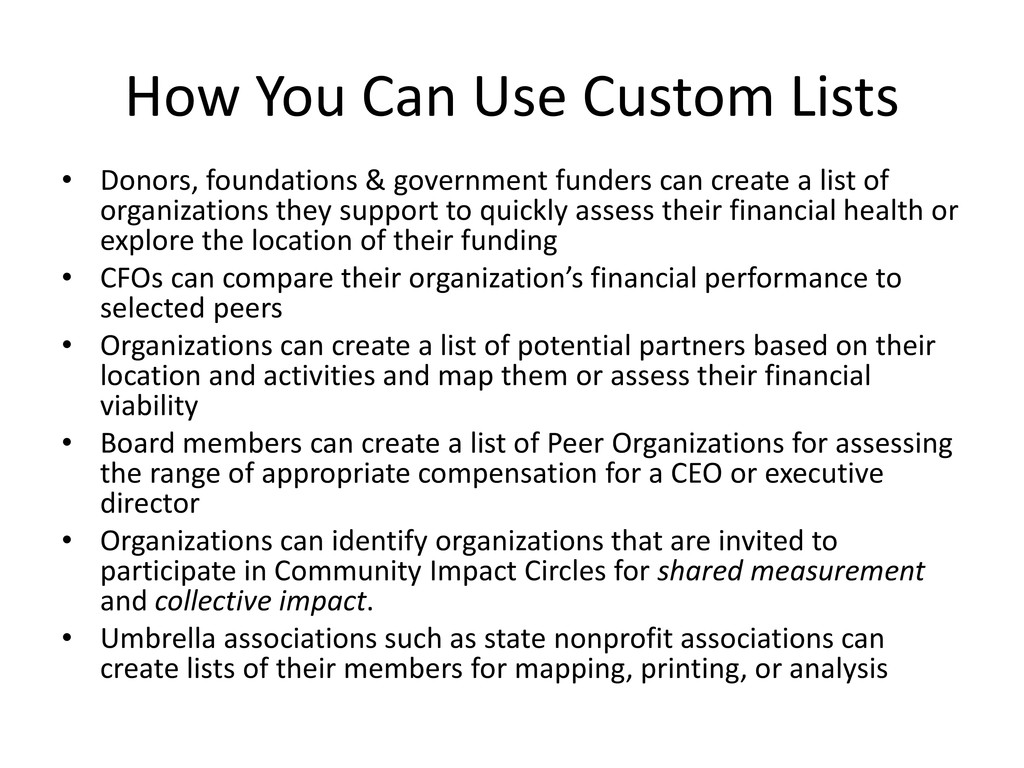
government funders can create a list of organizations they support to quickly assess their financial health or explore the location of their funding • CFOs can compare their organization’s financial performance to selected peers • Organizations can create a list of potential partners based on their location and activities and map them or assess their financial viability • Board members can create a list of Peer Organizations for assessing the range of appropriate compensation for a CEO or executive director • Organizations can identify organizations that are invited to participate in Community Impact Circles for shared measurement and collective impact. • Umbrella associations such as state nonprofit associations can create lists of their members for mapping, printing, or analysis
lists belong to the user – so you must be logged in first. (Once created, they can be shared with others.) Custom Lists are available from a number of locations on the Platform, but the easiest way to find them is to go to the Tools menu in the upper right corner of any page and then select “Custom Organization Lists..” Getting Started
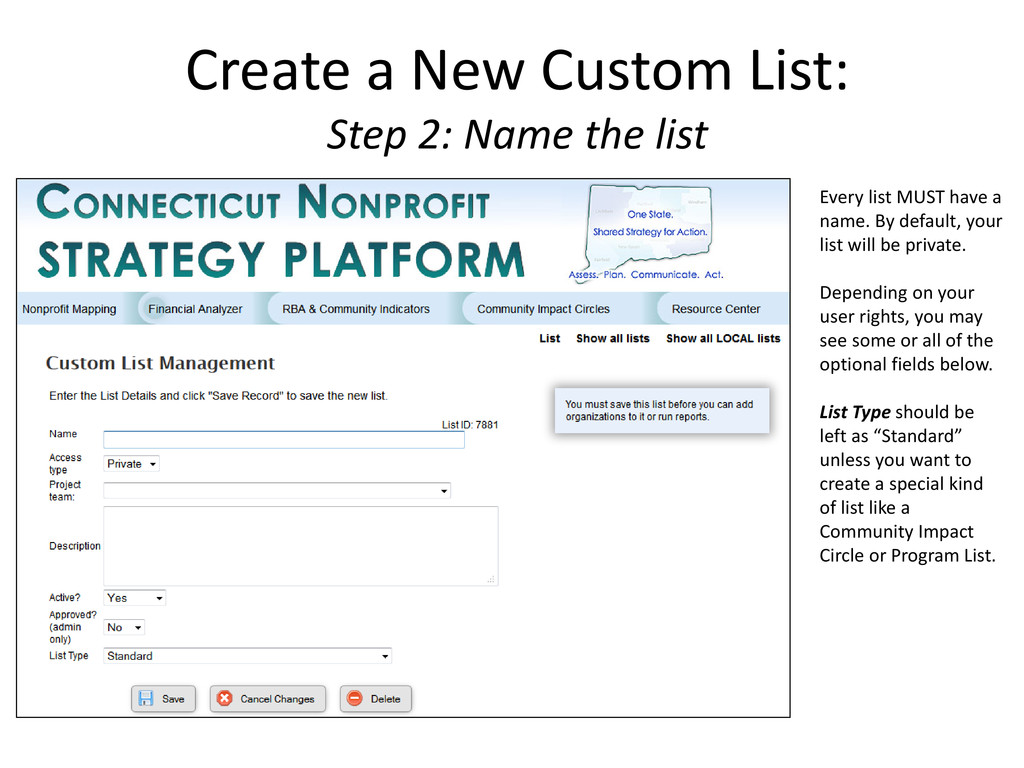
Every list MUST have a name. By default, your list will be private. Depending on your user rights, you may see some or all of the optional fields below. List Type should be left as “Standard” unless you want to create a special kind of list like a Community Impact Circle or Program List.
search for it by name and as much of the location as you need to narrow your search. You only need to enter part of a name – “child” for example – to see all the organizations with “child” anywhere in their organization names.
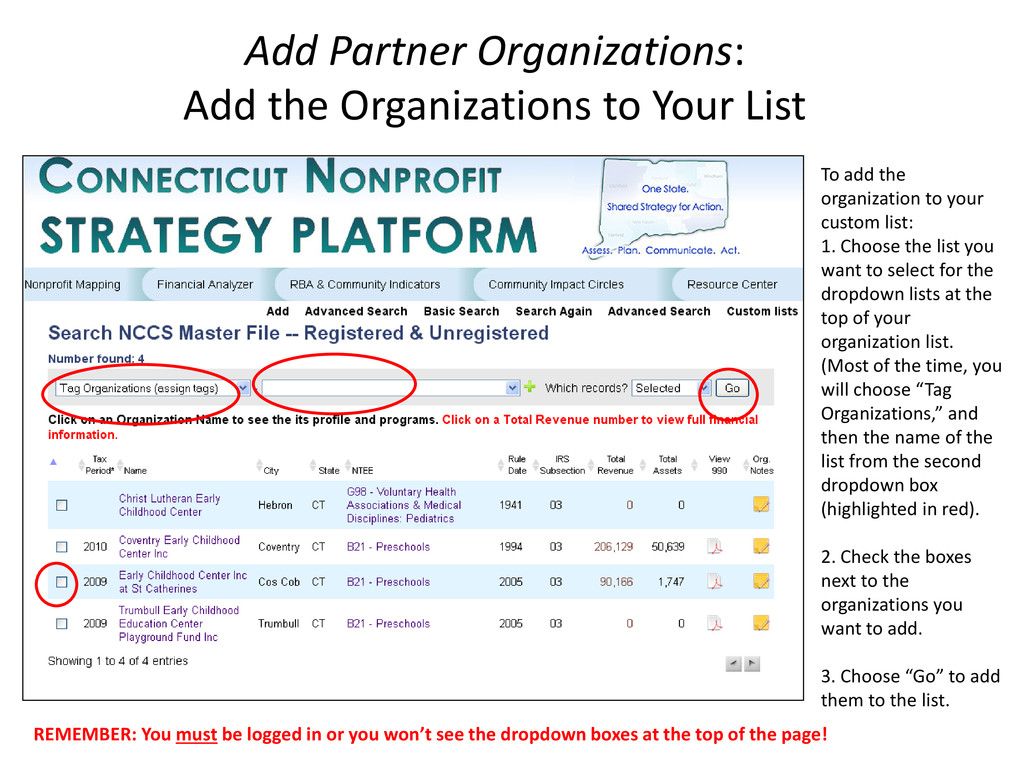
add the organization to your custom list: 1. Choose the list you want to select for the dropdown lists at the top of your organization list. (Most of the time, you will choose “Tag Organizations,” and then the name of the list from the second dropdown box (highlighted in red). 2. Check the boxes next to the organizations you want to add. 3. Choose “Go” to add them to the list. REMEMBER: You must be logged in or you won’t see the dropdown boxes at the top of the page!
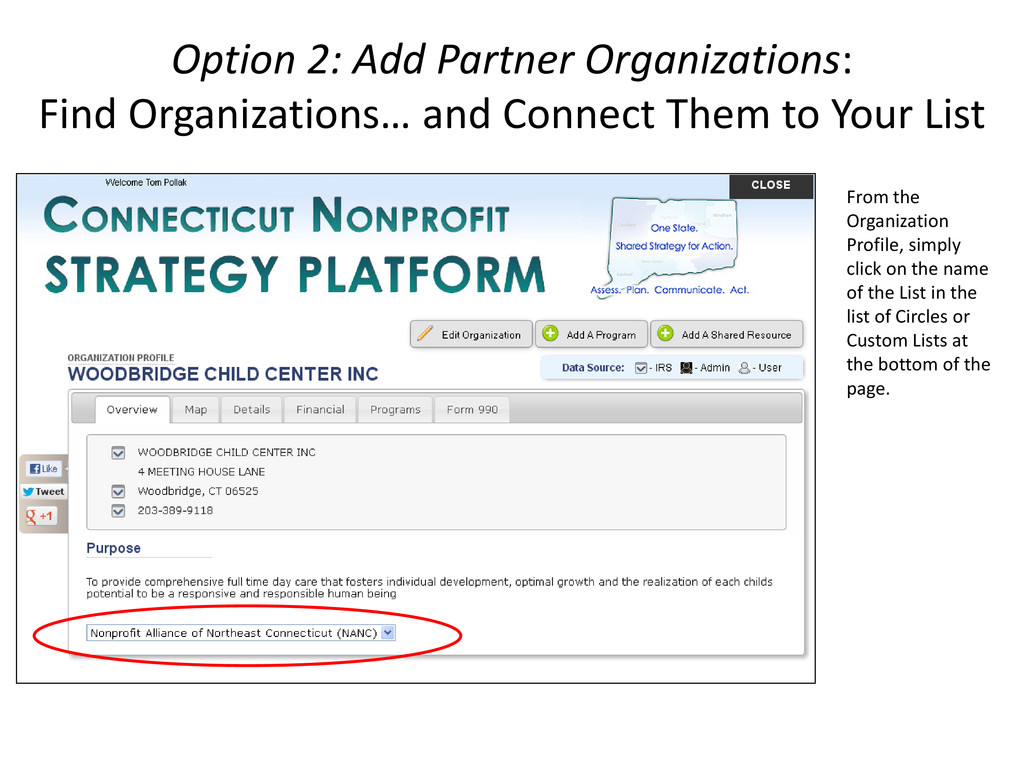
results of your Search on the Search Results page. To assign one of the organization to the Circle, click on the name of the organization to call up its Organization Profile. If you can’t find the organization – perhaps because it a government agency, out-of-state nonprofit, or for-profit, which has not been added – you can choose “Add” to add it to the list.
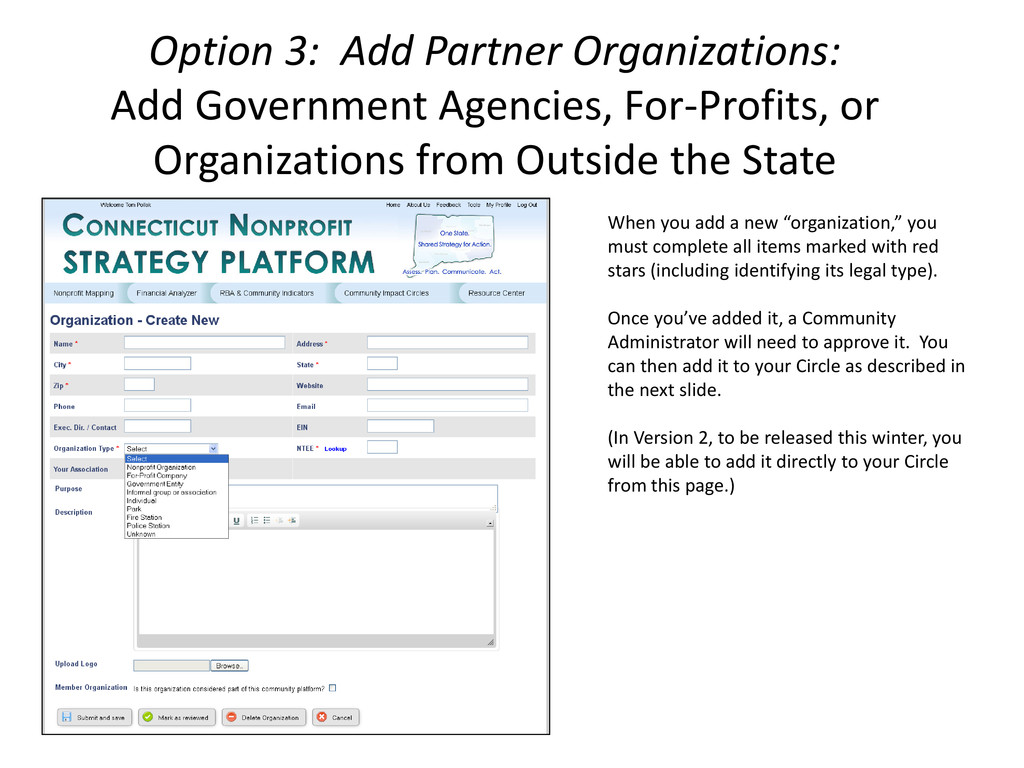
Organizations from Outside the State When you add a new “organization,” you must complete all items marked with red stars (including identifying its legal type). Once you’ve added it, a Community Administrator will need to approve it. You can then add it to your Circle as described in the next slide. (In Version 2, to be released this winter, you will be able to add it directly to your Circle from this page.)
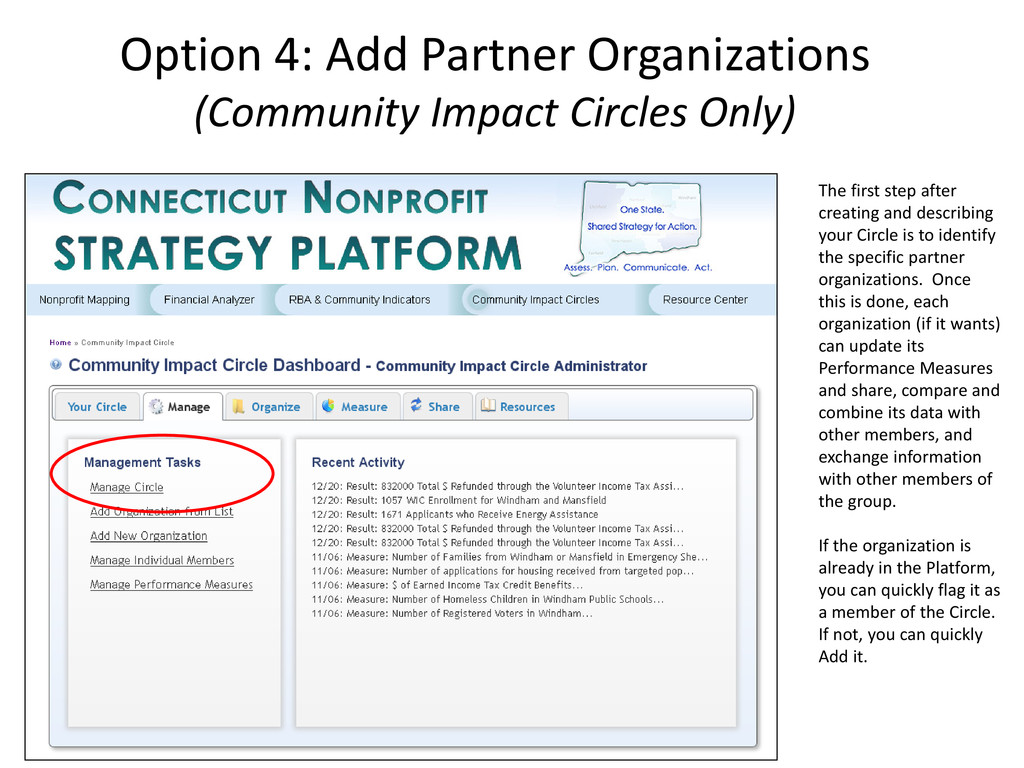
to identify the specific partner organizations. Once this is done, each organization (if it wants) can update its Performance Measures and share, compare and combine its data with other members, and exchange information with other members of the group. If the organization is already in the Platform, you can quickly flag it as a member of the Circle. If not, you can quickly Add it. Option 4: Add Partner Organizations (Community Impact Circles Only)