Upgrade to Pro — share decks privately, control downloads, hide ads and more …

DIY Mapping for Librarians

DIY Mapping for Librarians

A pre-conference workshop at the 2013 Atlantic Provinces Library Association conference in which I showed public and academic librarians how they could use OpenStreetMap tools to do indoor mapping.

Peter Rukavina

May 14, 2013
Tweet

More Decks by Peter Rukavina

Other Decks in How-to & DIY

Transcript

  1. DIY Mapping
    for Librarians
    Atlantic Provinces Library Association
    Pre-Conference Workshop
    May 14, 2013
    Peter Rukavina
    Hacker in Residence, Robertson Library

    View Slide

  2. Agenda
    • Introduction to OpenStreetMap
    • Editing OpenStreetMap with web tools
    • Editing OpenStreetMap with JOSM
    • Making Indoor Maps with JOSM
    • From OpenStreetMap to Google Earth

    View Slide

  3. OpenStreetMap
    • Like Wikipedia, but for a map of the 
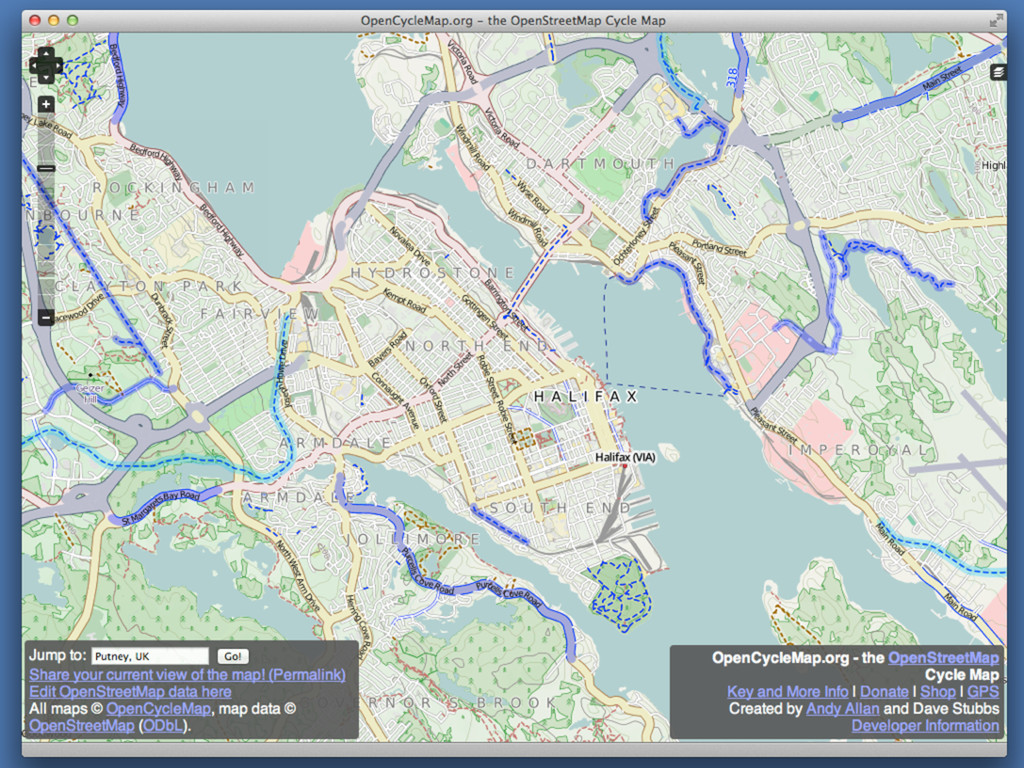
world.
    • “Open” means both the underlying data is
    available, and that anyone can contribute.
    • Often this results in more current maps of
    better quality and coverage than
    commercial mapping companies.
    • Rich set of map-making tools.

    View Slide

  4. View Slide

  5. View Slide

  6. View Slide

  7. View Slide

  8. View Slide

  9. OpenStreetMap
    Concepts
    • Point (a single point on the map)
    • Line (road, path, etc.)
    • Area (building, park, farm, etc.)
    • Lines and Areas are also know as ways
    in OpenStreetMap parlance.

    View Slide

  10. Editing OpenStreetMap
    • Sign up for a free account and 
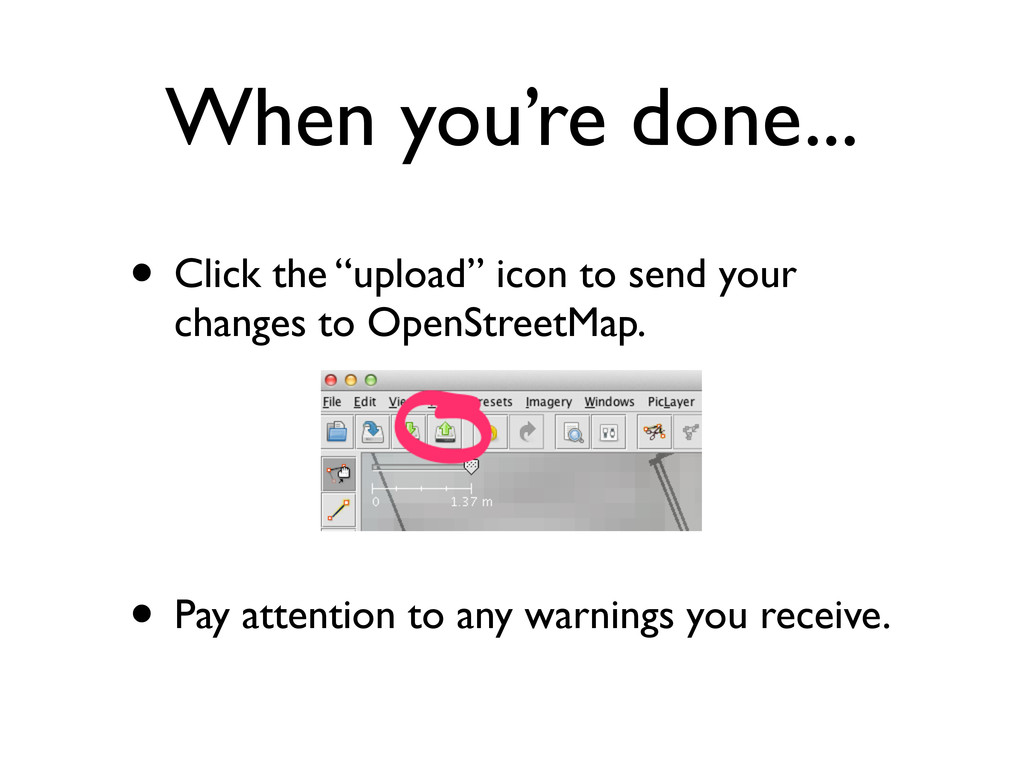
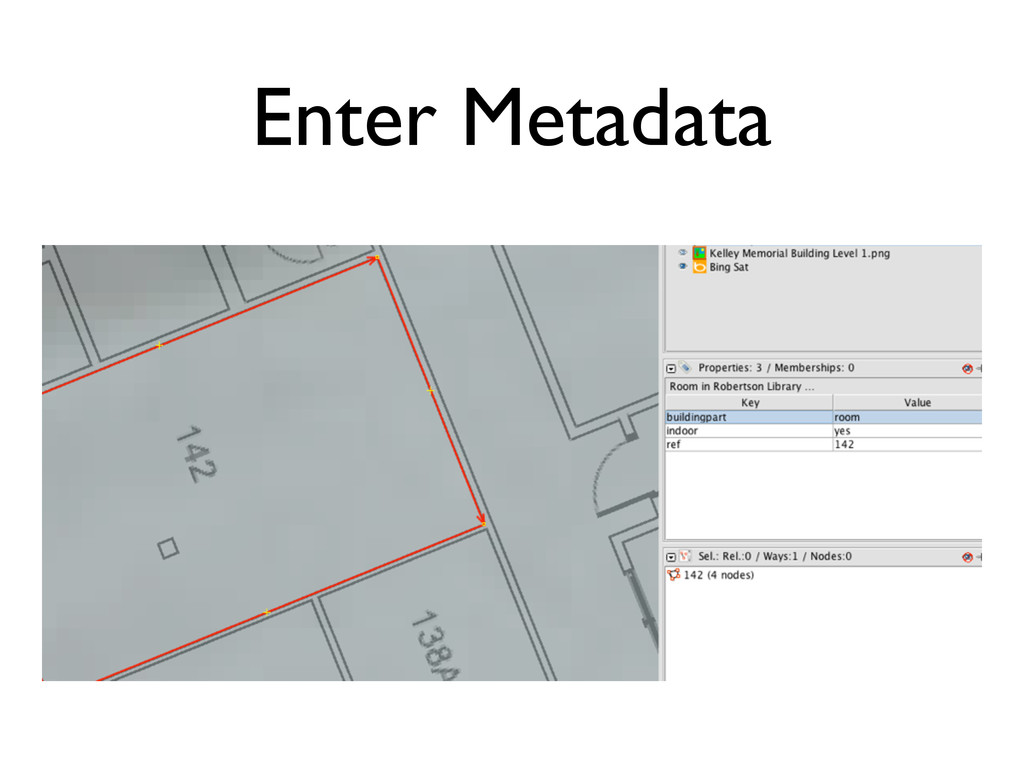
login.
    • Find an area you’d like to map.
    • Click Edit | Edit with iD
    • Click on a feature to edit or,
    • Add a point, line or area.
    • Add metadata.
    • Save (and add a comment about what you did)

    View Slide

  11. Editing OpenStreetMap
    • Sign up for a free account and 
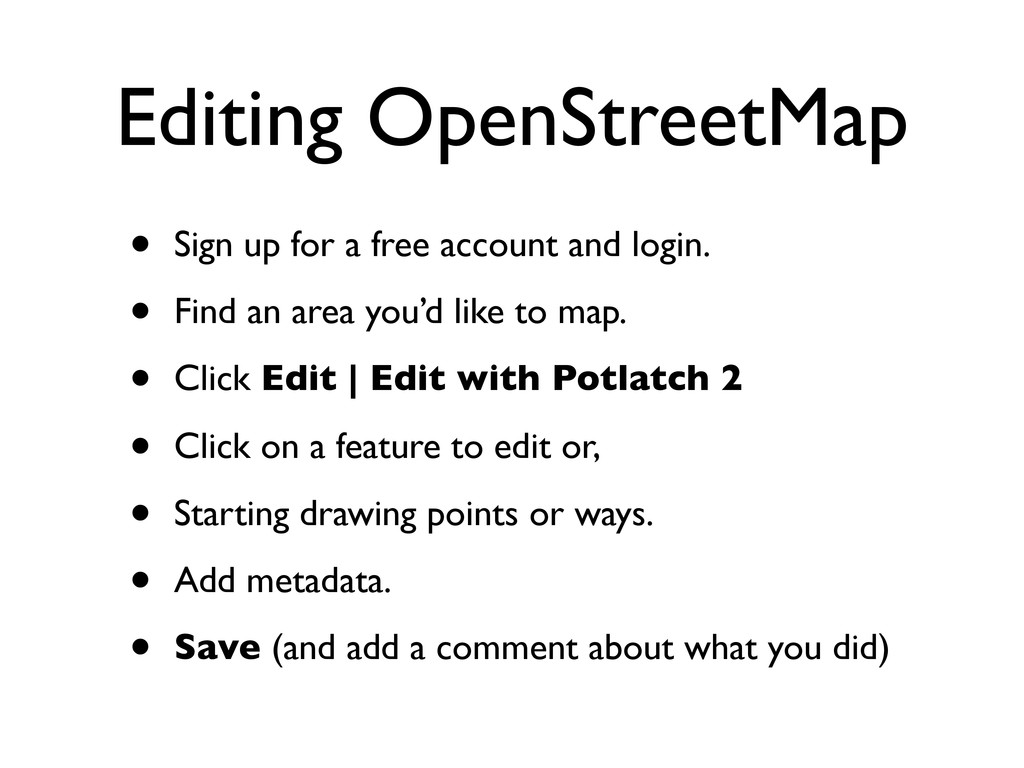
login.
    • Find an area you’d like to map.
    • Click Edit | Edit with Potlatch 2
    • Click on a feature to edit or,
    • Starting drawing points or ways.
    • Add metadata.
    • Save (and add a comment about what you did)

    View Slide

  12. Go Edit Something

    View Slide

  13. Editing with JOSM
    • JOSM is a “power editor” for 
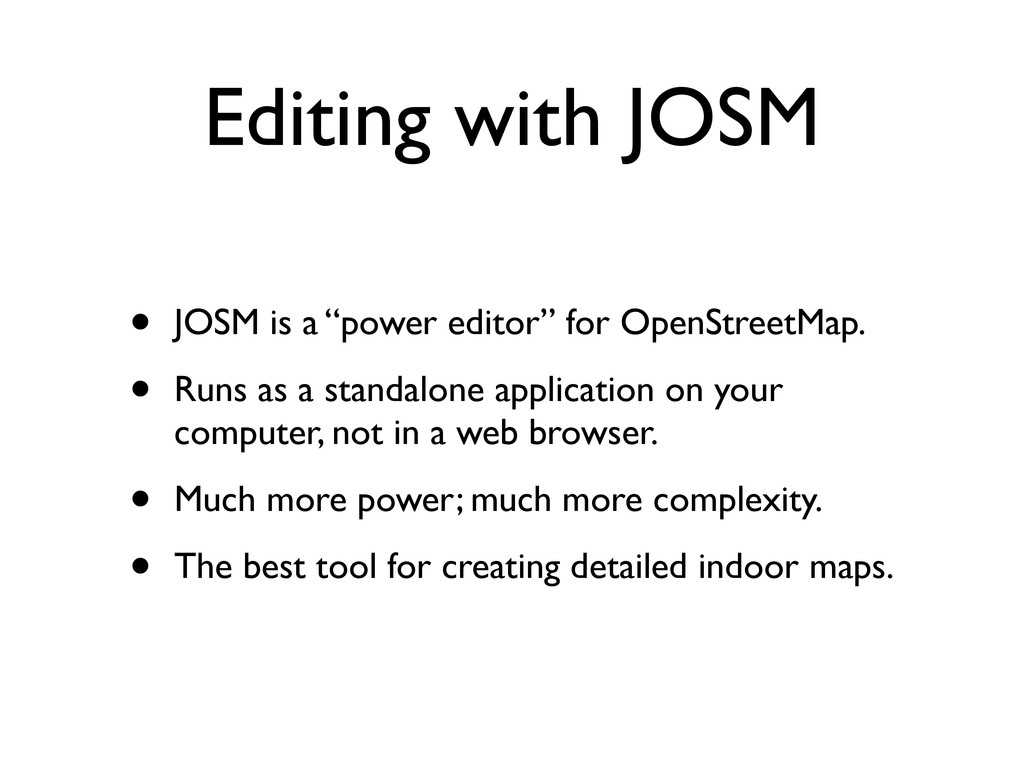
OpenStreetMap.
    • Runs as a standalone application on your
    computer, not in a web browser.
    • Much more power; much more complexity.
    • The best tool for creating detailed indoor maps.

    View Slide

  14. JOSM Basics
    • Drag map with the right mouse button 
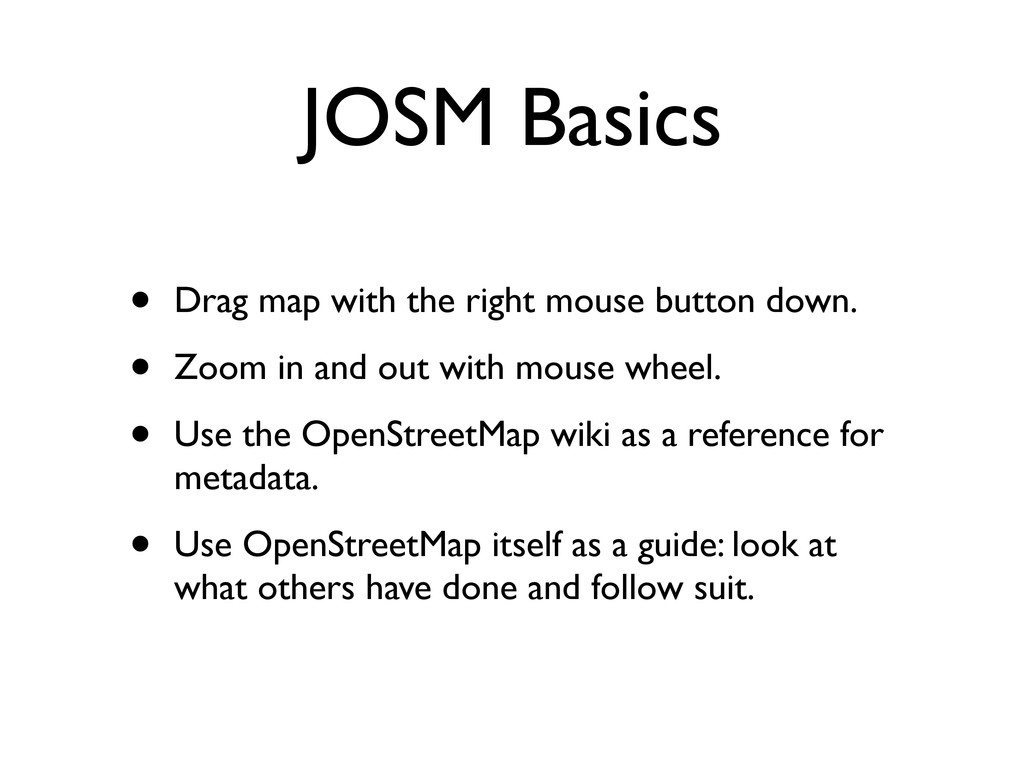
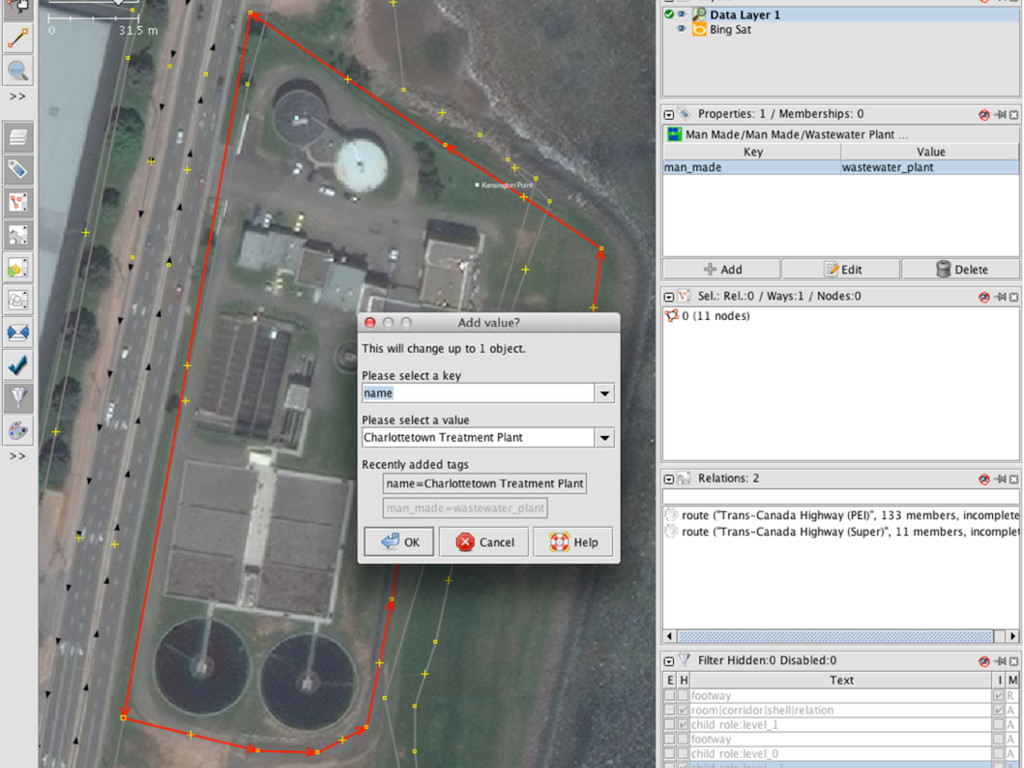
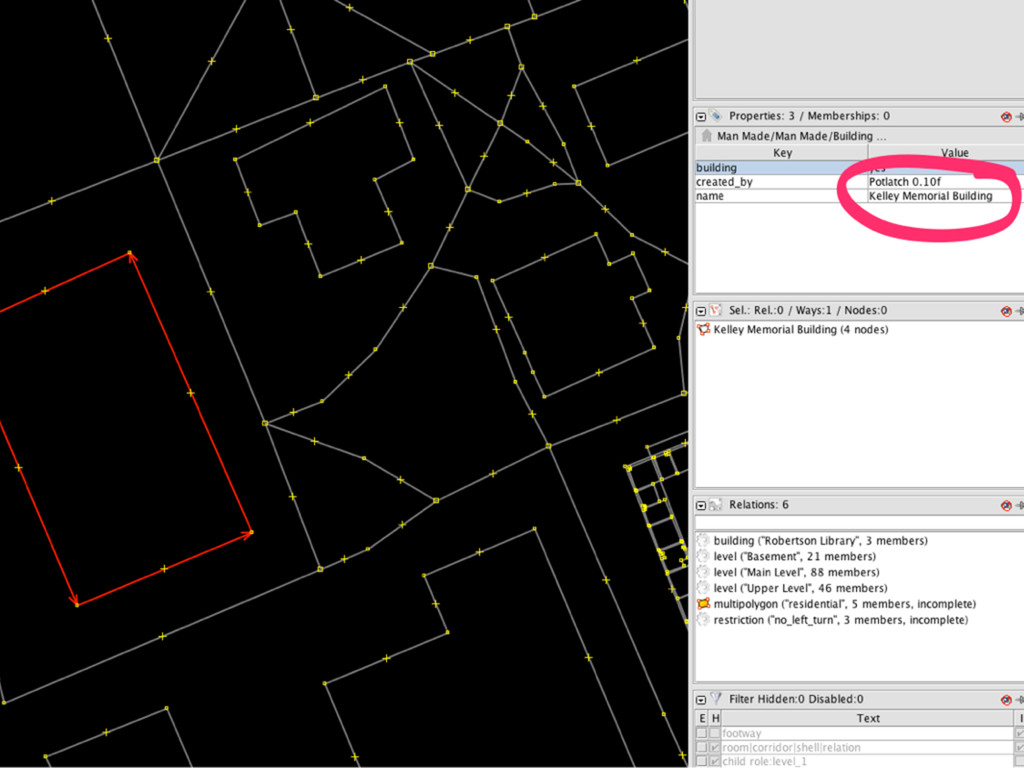
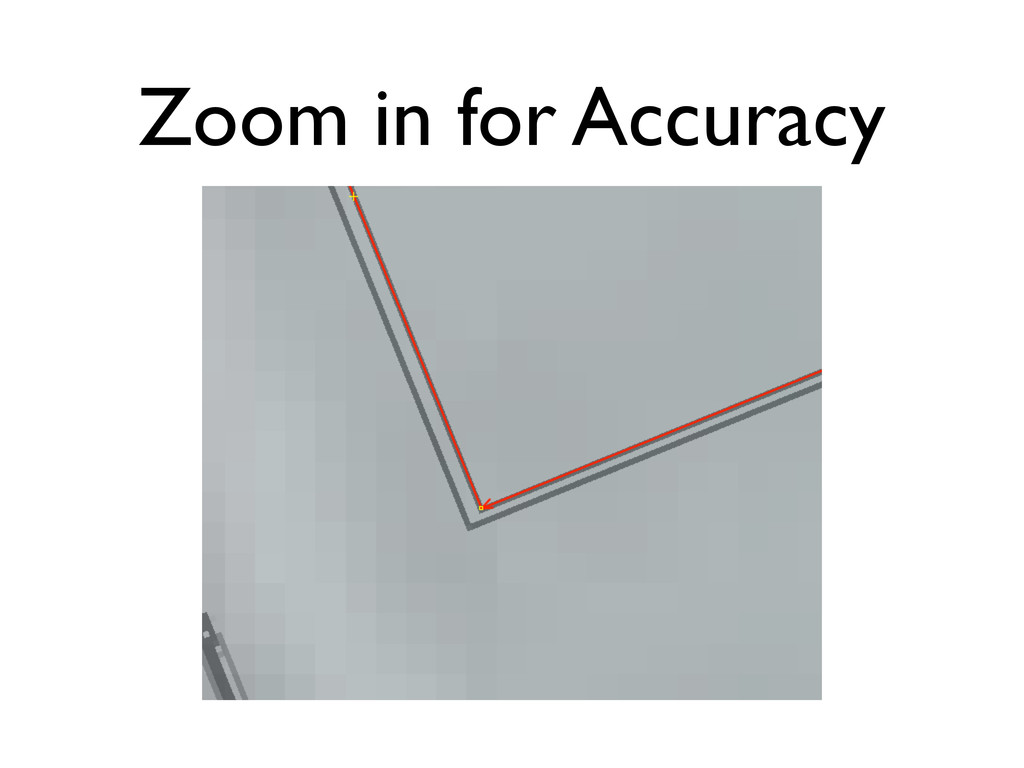
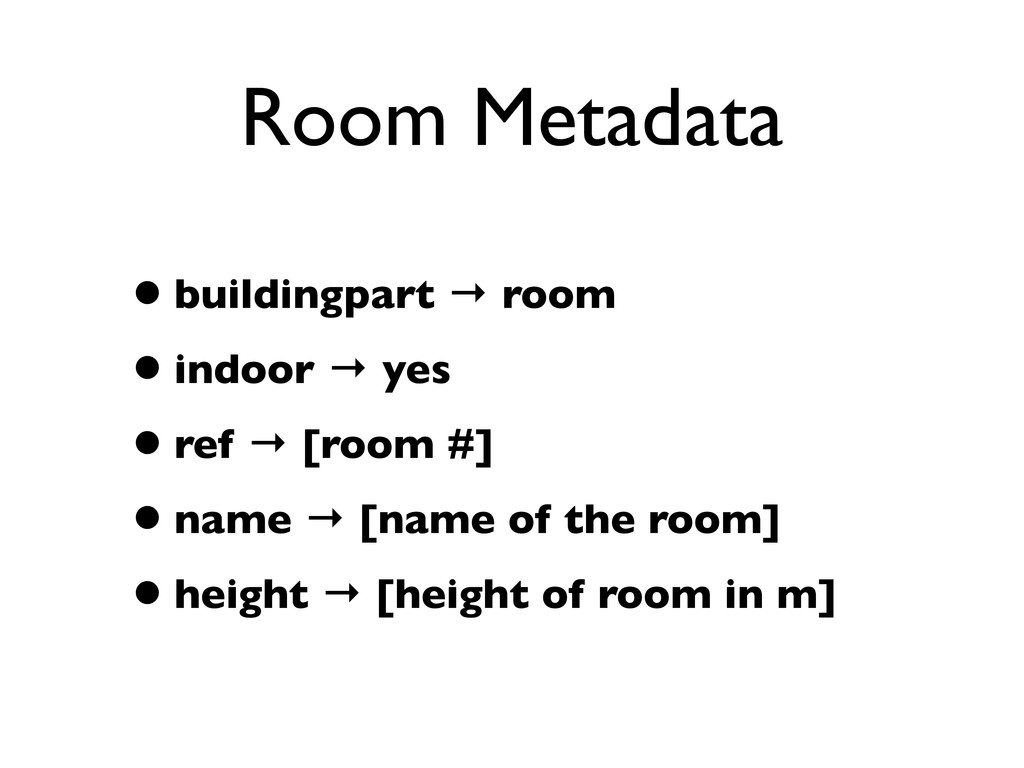
down.
    • Zoom in and out with mouse wheel.
    • Use the OpenStreetMap wiki as a reference for
    metadata.
    • Use OpenStreetMap itself as a guide: look at
    what others have done and follow suit.

    View Slide

  15. JOSM Basics
    • Click to start drawing a way or a point.
    • ESC to stop drawing or double-click to close the
    way into an area.
    • Use the “little cross marks” to add points to a
    way.

    View Slide

  16. Select an Area on Startup

    View Slide

  17. View Slide

  18. Select and Move
    Draw Edit Metadata

    View Slide

  19. View Slide

  20. When you’re done...
    • Click the “upload” icon to send your
    changes to OpenStreetMap.
    • Pay attention to any warnings you receive.

    View Slide

  21. Go Edit Something

    View Slide

  22. OSM Indoor Maps
    • The “next frontier” for OpenStreetMap.
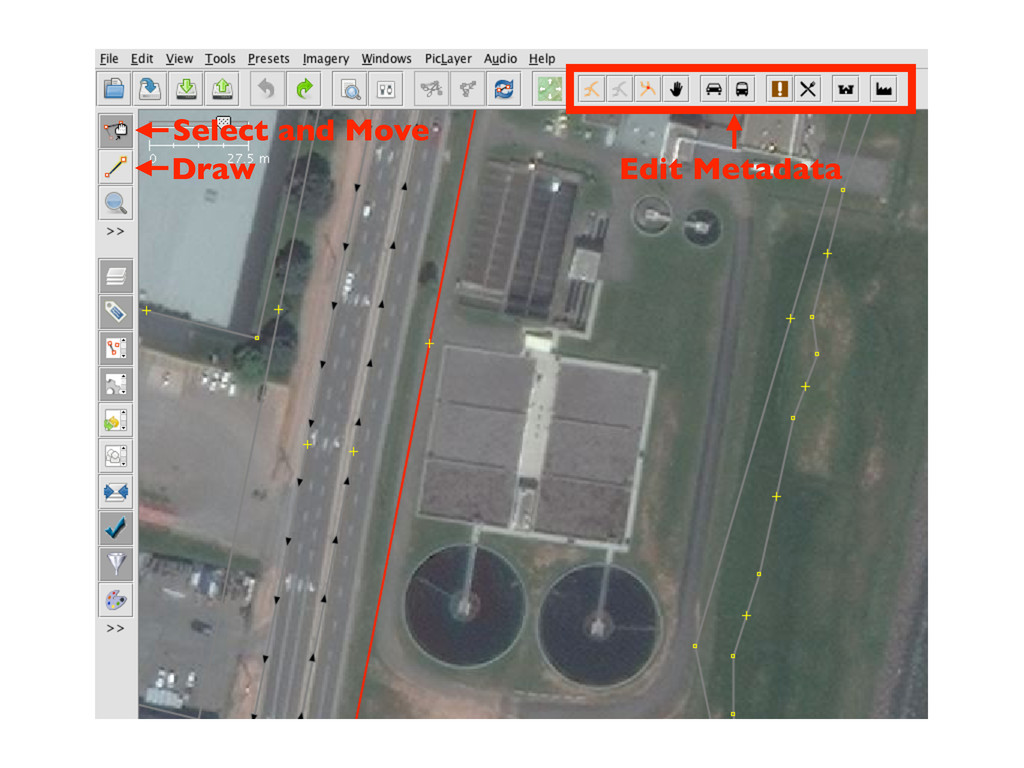
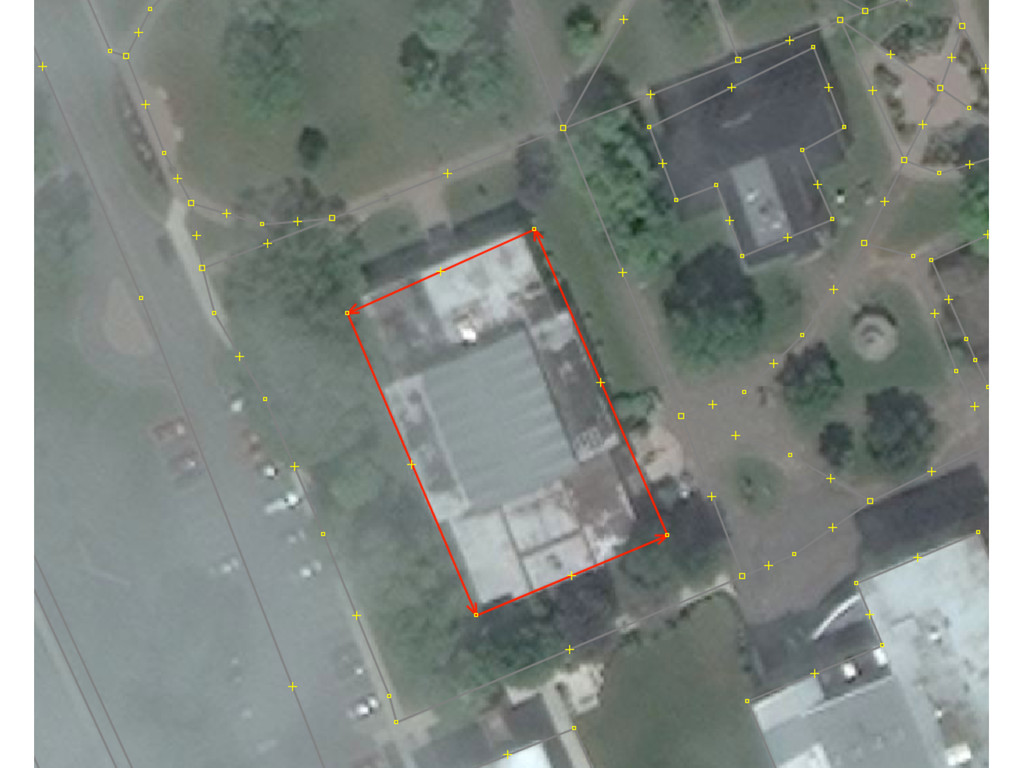
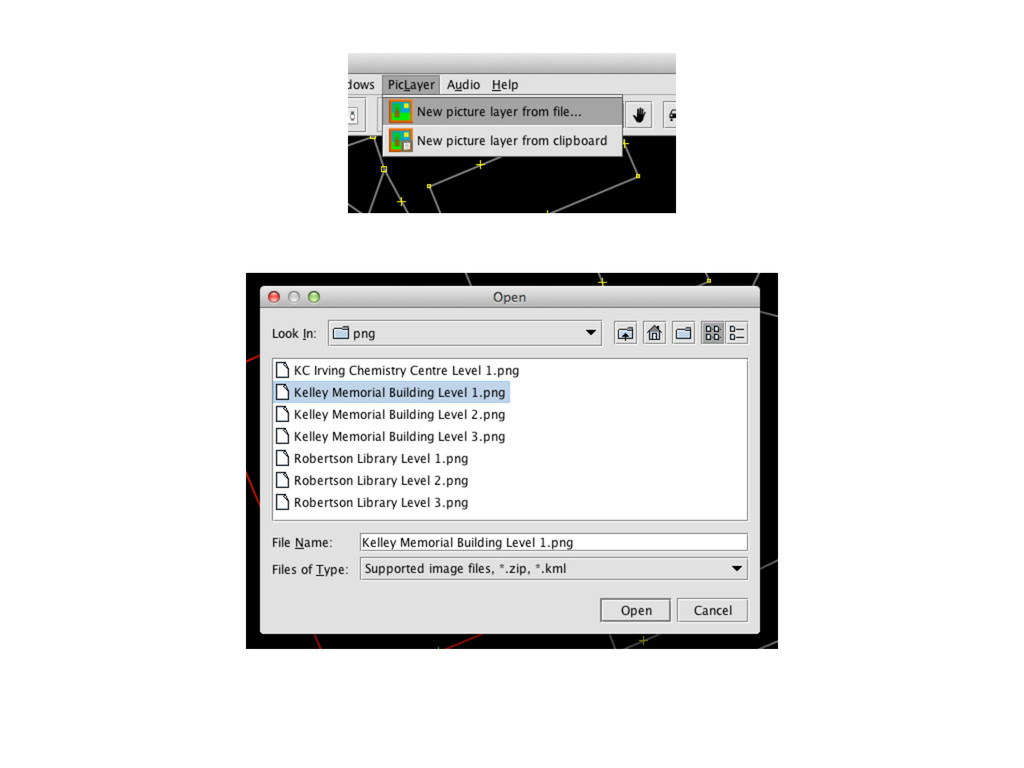
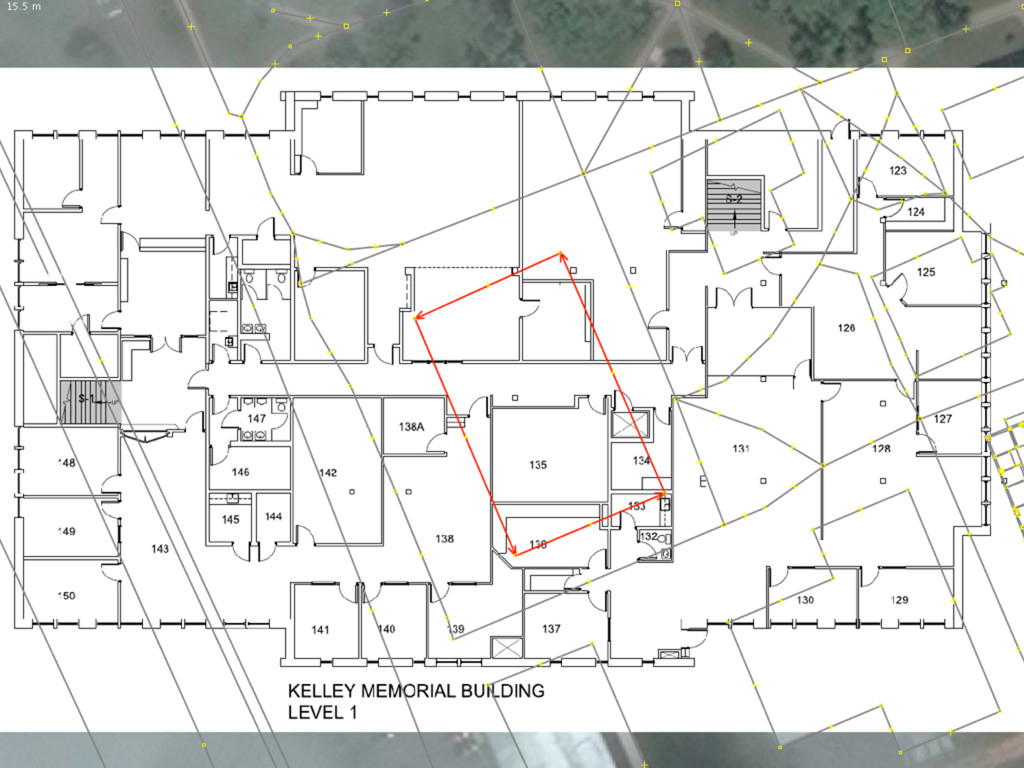
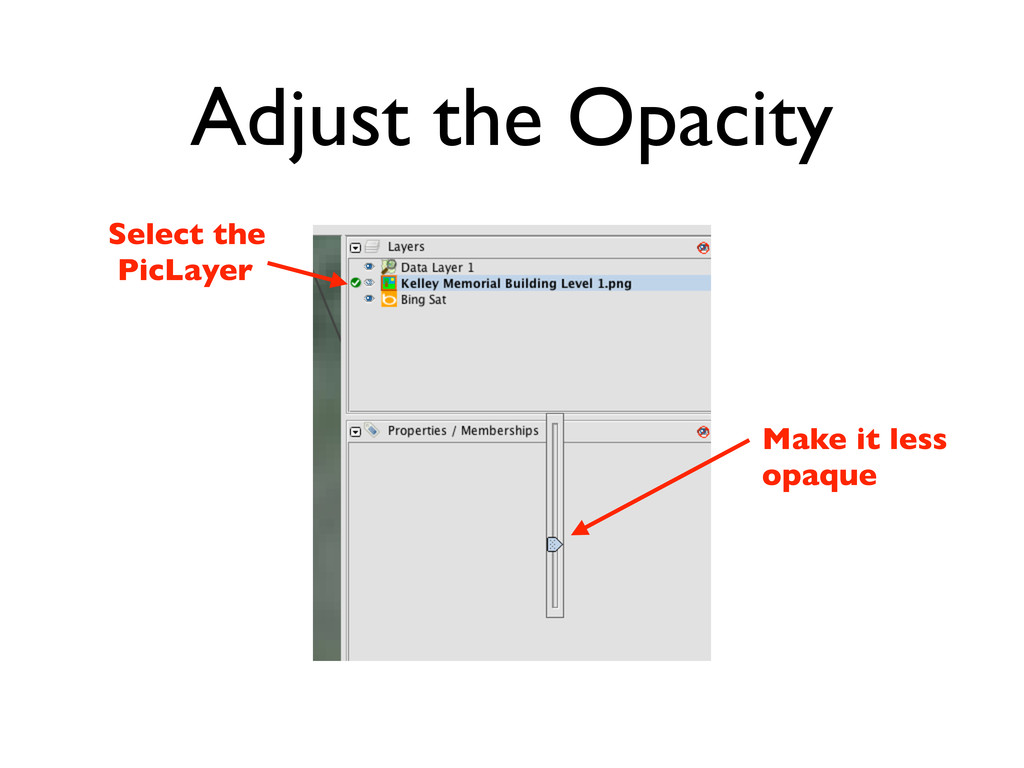
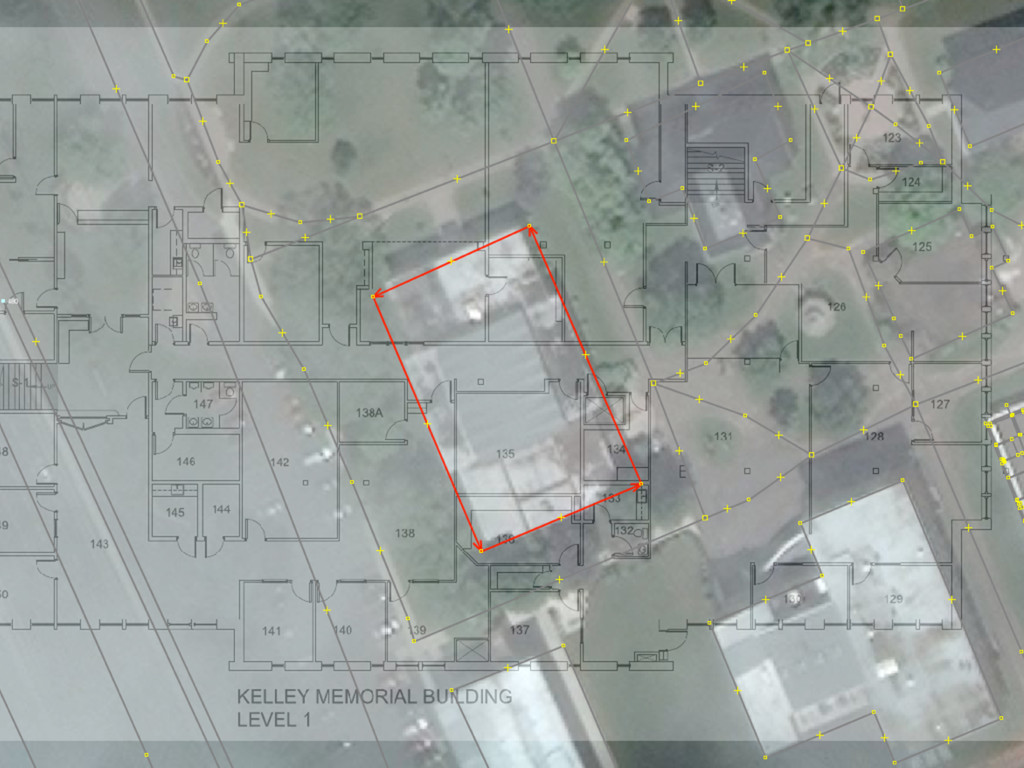
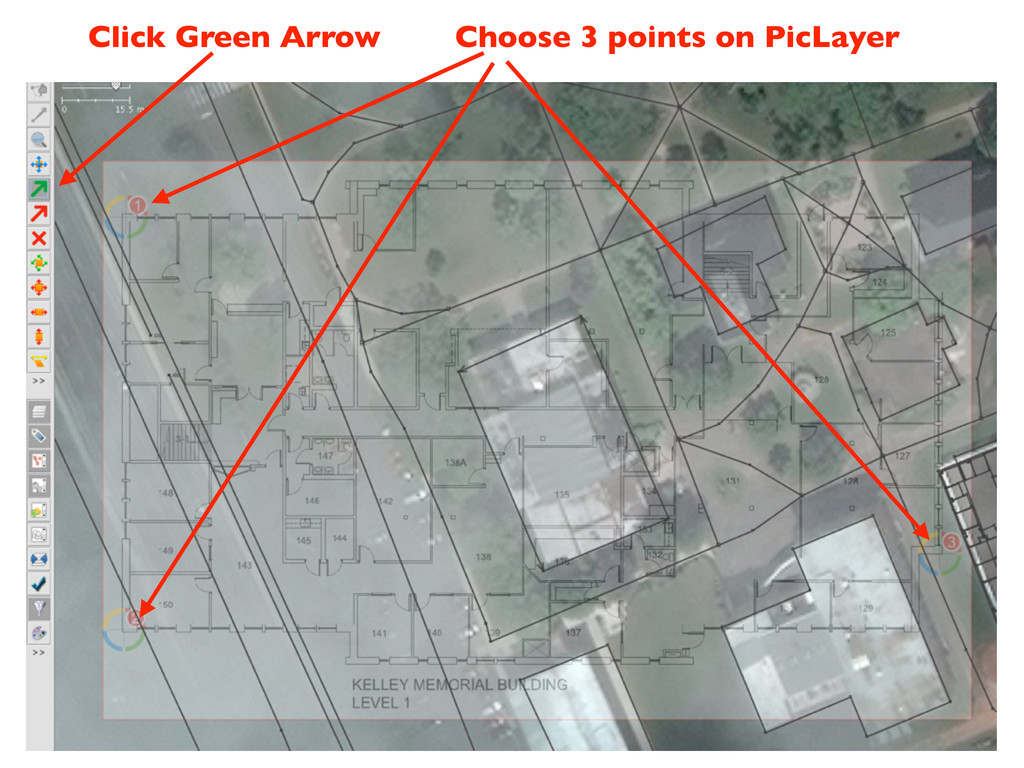
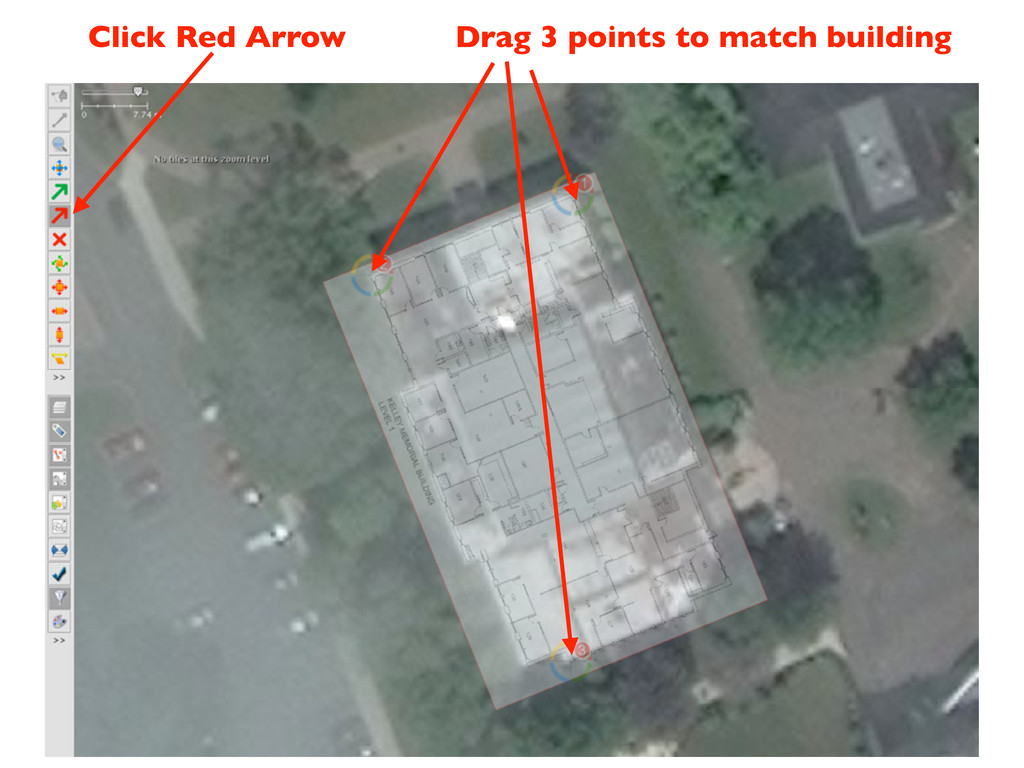
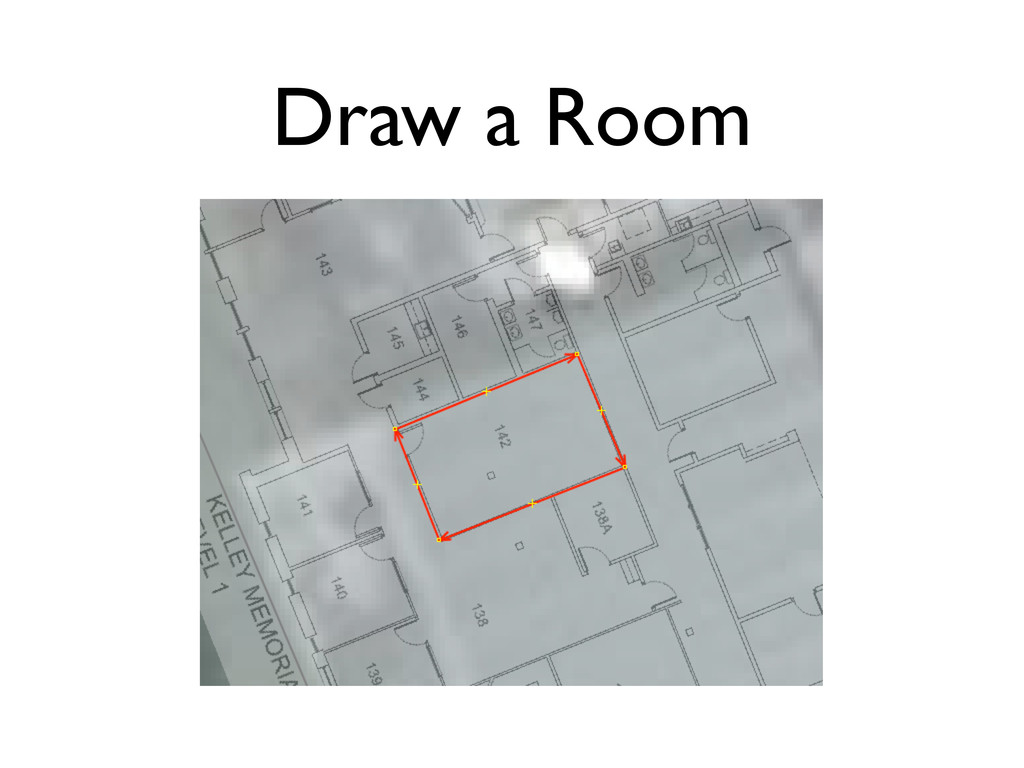
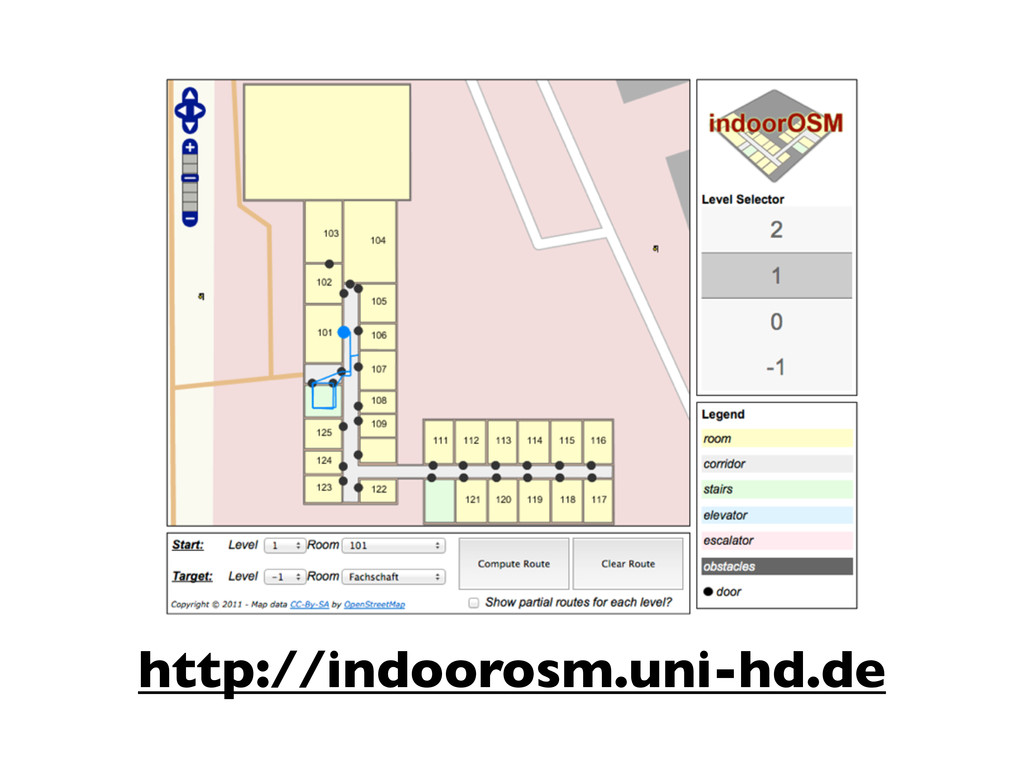
    • Standards and approaches are “in flux.”
    • The tools for outdoor mapping, mainly
    JOSM, are well-suited to indoor mapping.
    • Rendering indoor maps still in its infancy.
    • The “PicLayer” plugin is your friend.
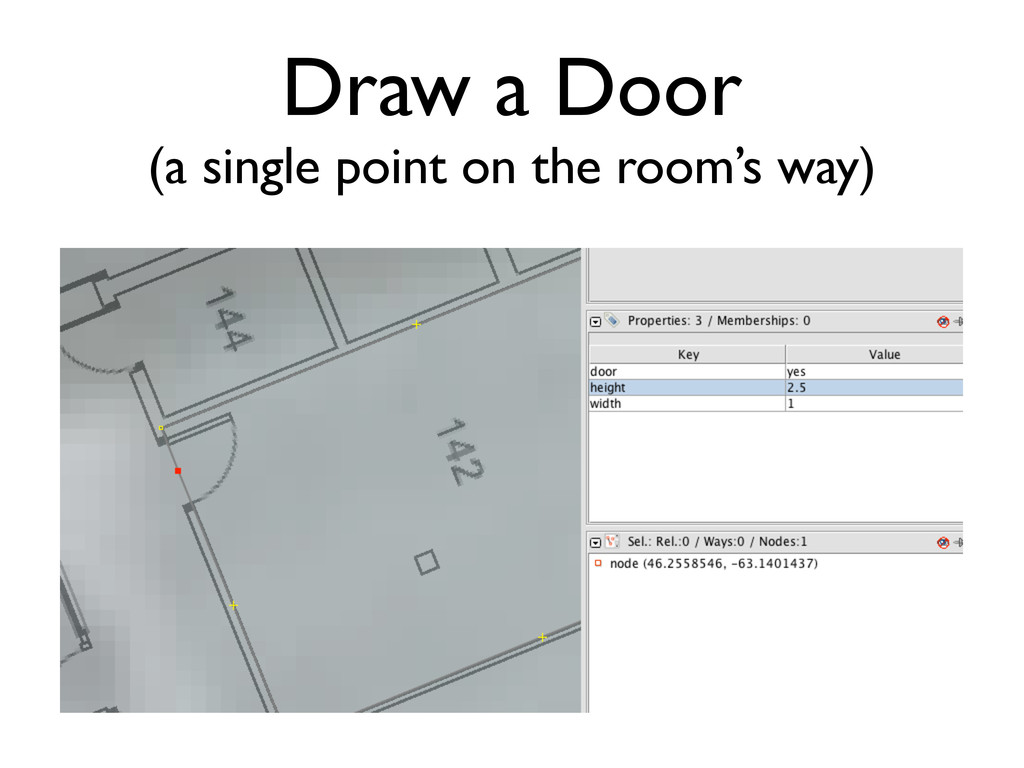
    View Slide

  23. View Slide

  24. View Slide

  25. View Slide

  26. View Slide

  27. View Slide

  28. Adjust the Opacity
    Select the
    PicLayer
    Make it less
    opaque

    View Slide

  29. View Slide

  30. Select the PicLayer
    PicLayer Tools Appear

    View Slide

  31. Click Green Arrow Choose 3 points on PicLayer

    View Slide

  32. Click Red Arrow Drag 3 points to match building

    View Slide

  33. Select the “Data Layer”

    View Slide

  34. Edit the Building Shell

    View Slide

  35. Draw a Room

    View Slide

  36. Zoom in for Accuracy

    View Slide

  37. Enter Metadata

    View Slide

  38. Room Metadata
    •buildingpart → room
    •indoor → yes
    •ref → [room #]
    •name → [name of the room]
    •height → [height of room in m]

    View Slide

  39. Draw a Door
    (a single point on the room’s way)

    View Slide

  40. Door Metadata
    •door → [yes | manual | automatic]
    •height → [height of door in m]
    •width → [width of door in m]

    View Slide

  41. Draw a Window
    (a single point on the room’s way)

    View Slide

  42. Window Metadata
    •window → yes
    •height → [height of window in m]
    •width → [width of window in m]

    View Slide

  43. Go Edit Something

    View Slide

  44. What’s Next?
    • Assemble all the rooms, windows and
    doors on a level into a level “relation”.
    • Assemble all the level relations into a
    “building” relation.

    View Slide

  45. View Slide

  46. View Slide

  47. http://indoorosm.uni-hd.de

    View Slide

  48. From OpenStreetMap
    to Google Earth
    • Select the object(s) you want to export.
    •Edit | Copy
    •File | New Layer
    • Select the new layer.
    •Edit | Paste

    View Slide

  49. Save the Layer as a .osm file

    View Slide

  50. Convert the .osm file
    with GPSBabel

    View Slide

  51. Load the .kml file into
    Google Earth

    View Slide

  52. Edit the Routes
    Edit the
    Altitude
    Check “Extend path to ground”

    View Slide

  53. View Slide

  54. Google Sketchup
    • Install the OpenStreetMap Plugin
    • Import the .osm file you exported from
    JOSM

    View Slide

  55. View Slide