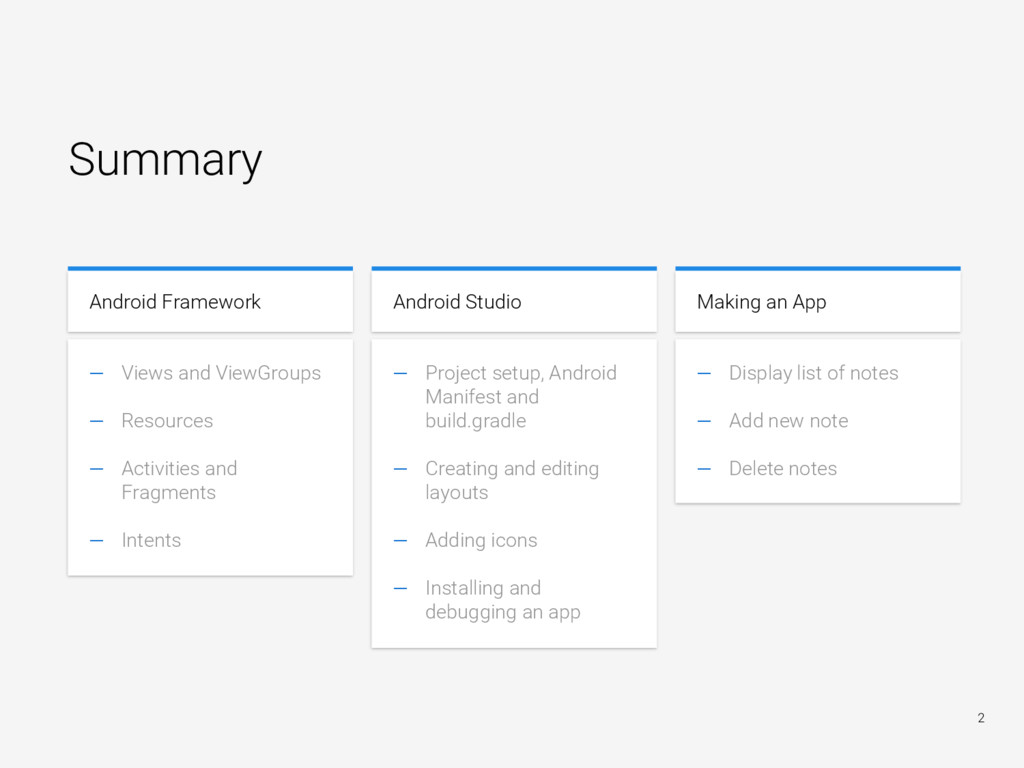
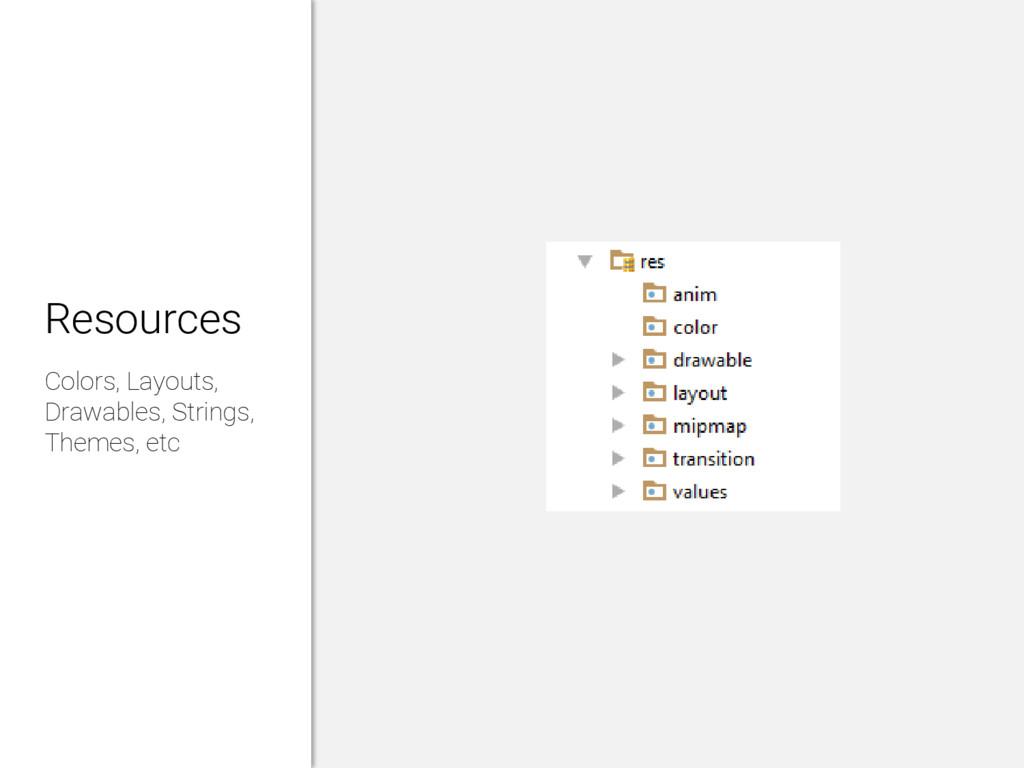
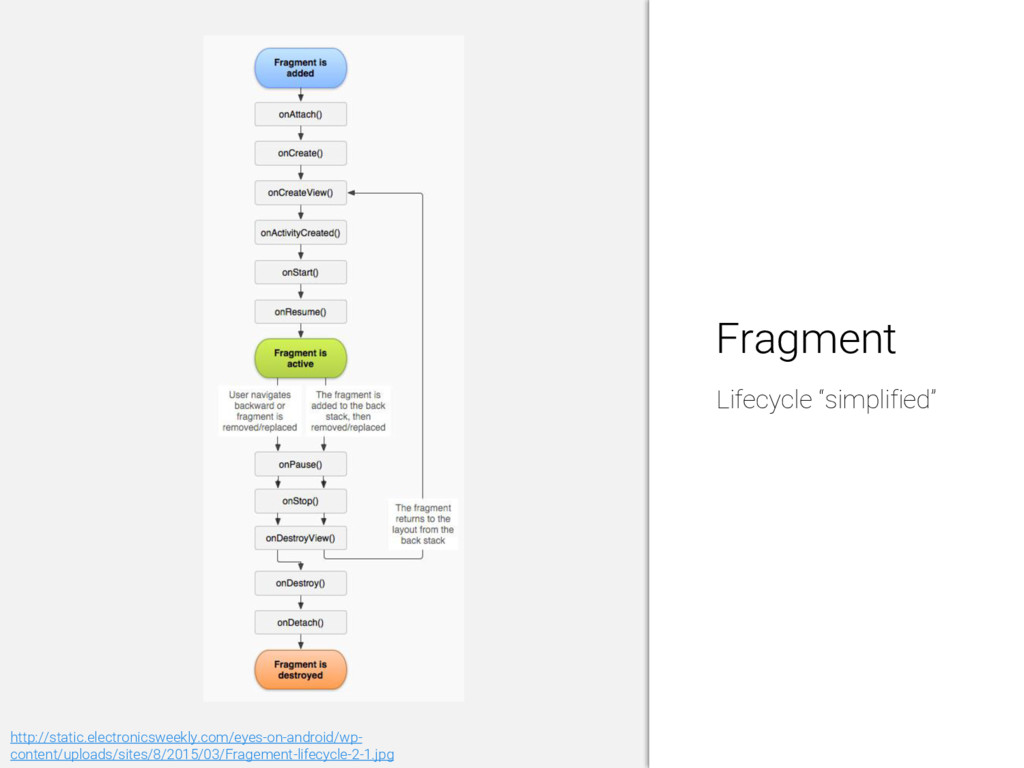
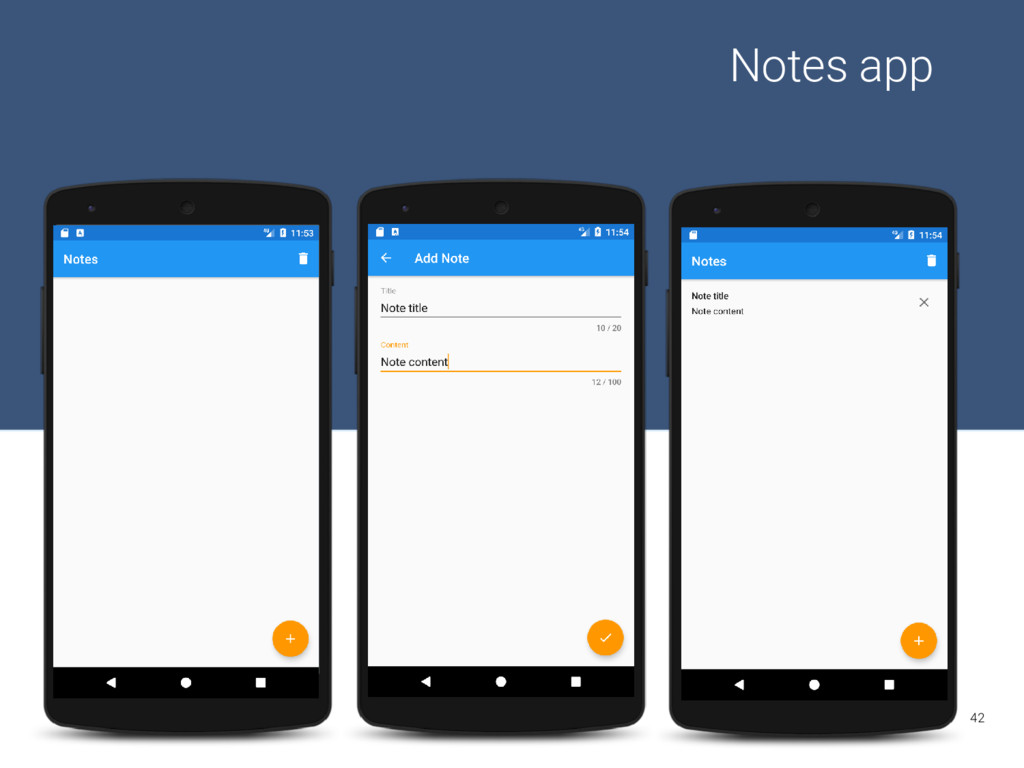
Views and ViewGroups — Resources — Activities and Fragments — Intents — Project setup, Android Manifest and build.gradle — Creating and editing layouts — Adding icons — Installing and debugging an app — Display list of notes — Add new note — Delete notes
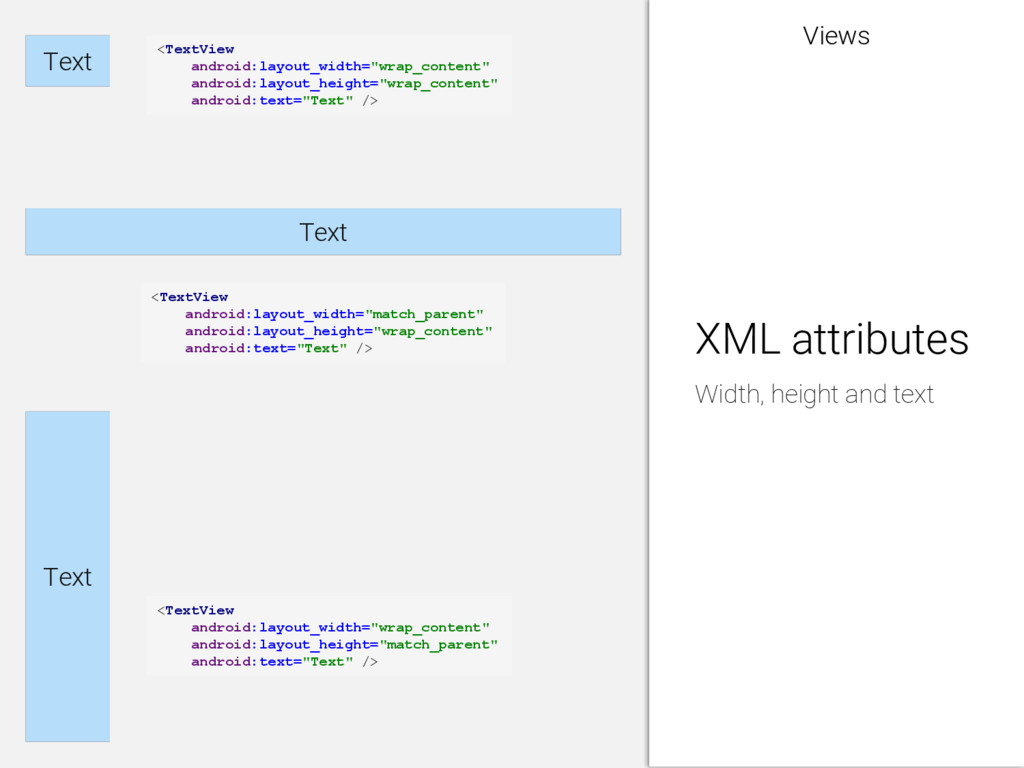
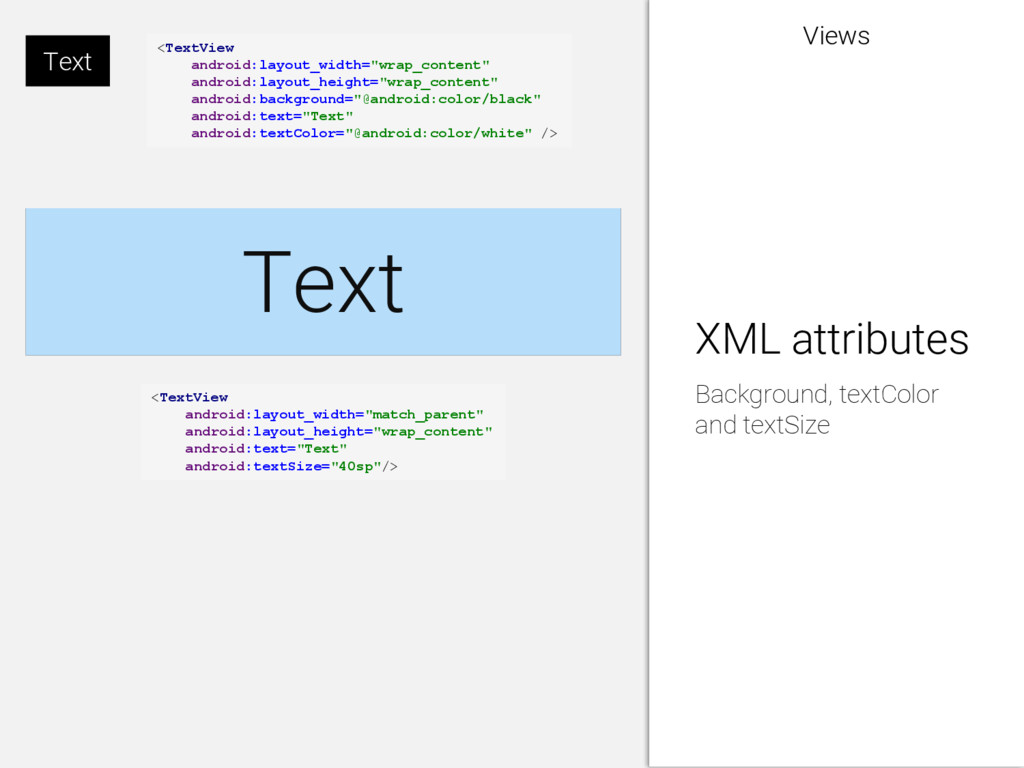
<TextView android:layout_width="match_parent" android:layout_height="wrap_content" android:text="Text" /> Text <TextView android:layout_width="wrap_content" android:layout_height="match_parent" android:text="Text" /> Width, height and text
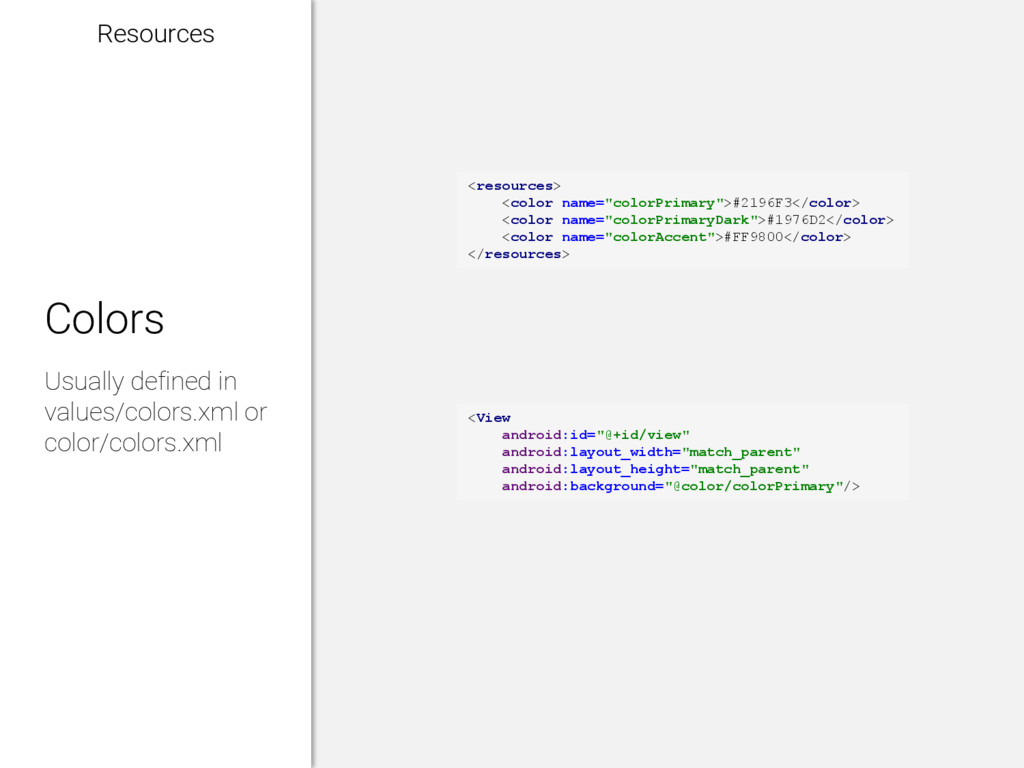
Usually defined in values/colors.xml or color/colors.xml <View android:id="@+id/view" android:layout_width="match_parent" android:layout_height="match_parent" android:background="@color/colorPrimary"/>
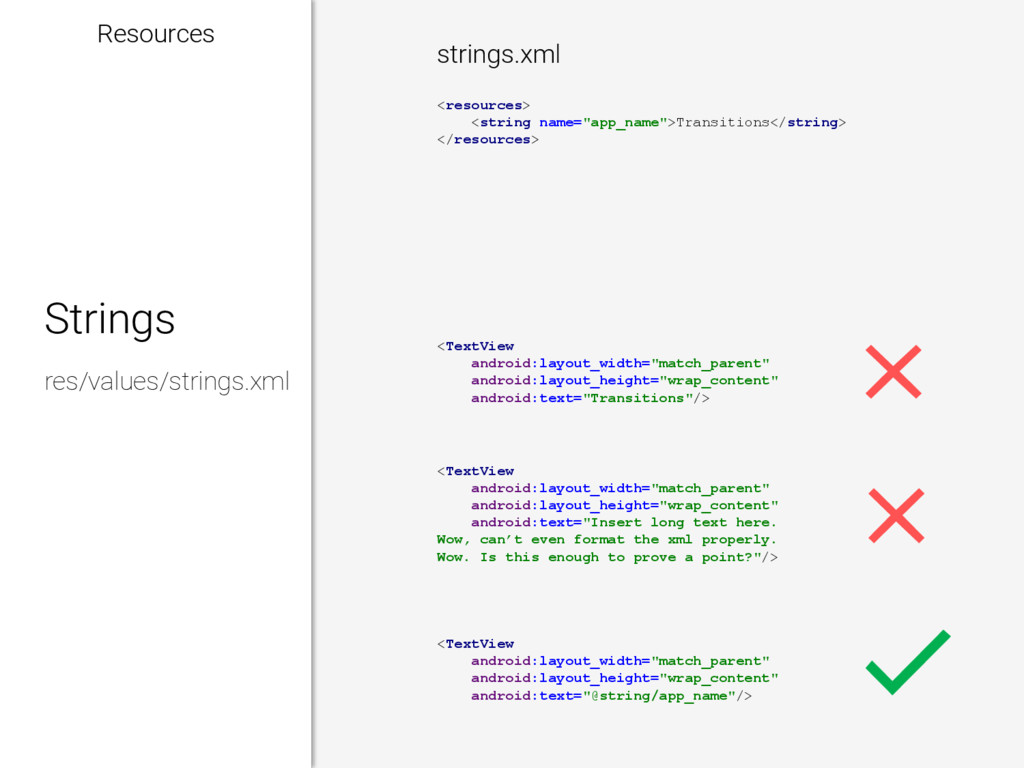
android:layout_height="wrap_content" android:text="Transitions"/> <TextView android:layout_width="match_parent" android:layout_height="wrap_content" android:text="Insert long text here. Wow, can’t even format the xml properly. Wow. Is this enough to prove a point?"/> <TextView android:layout_width="match_parent" android:layout_height="wrap_content" android:text="@string/app_name"/>
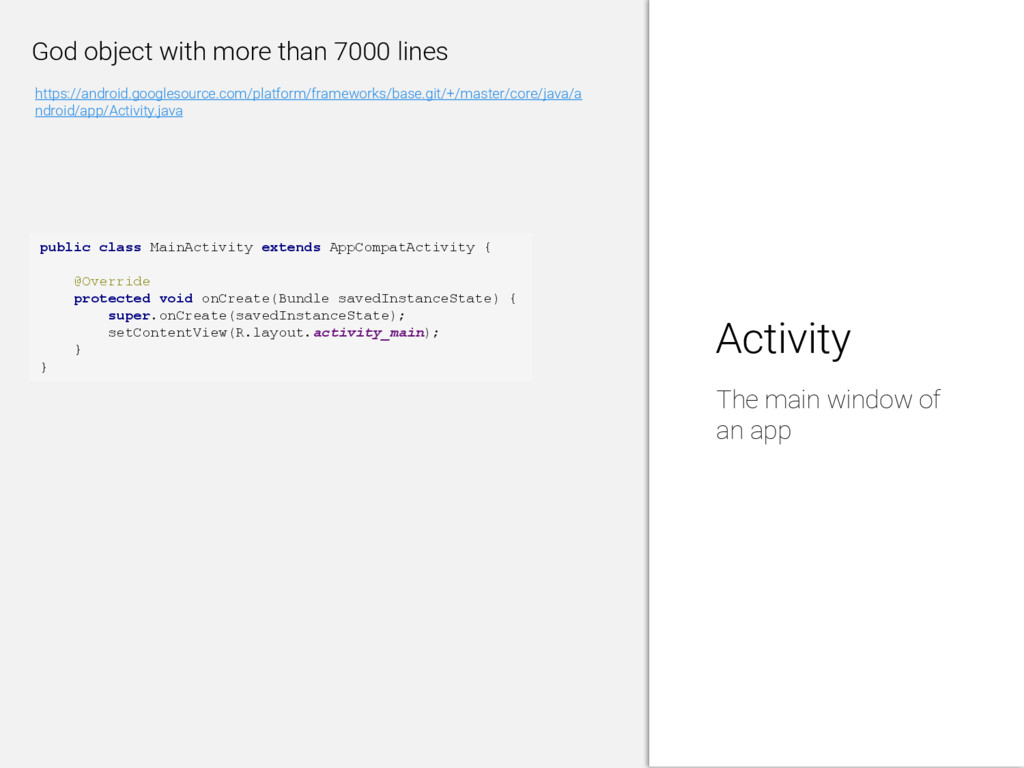
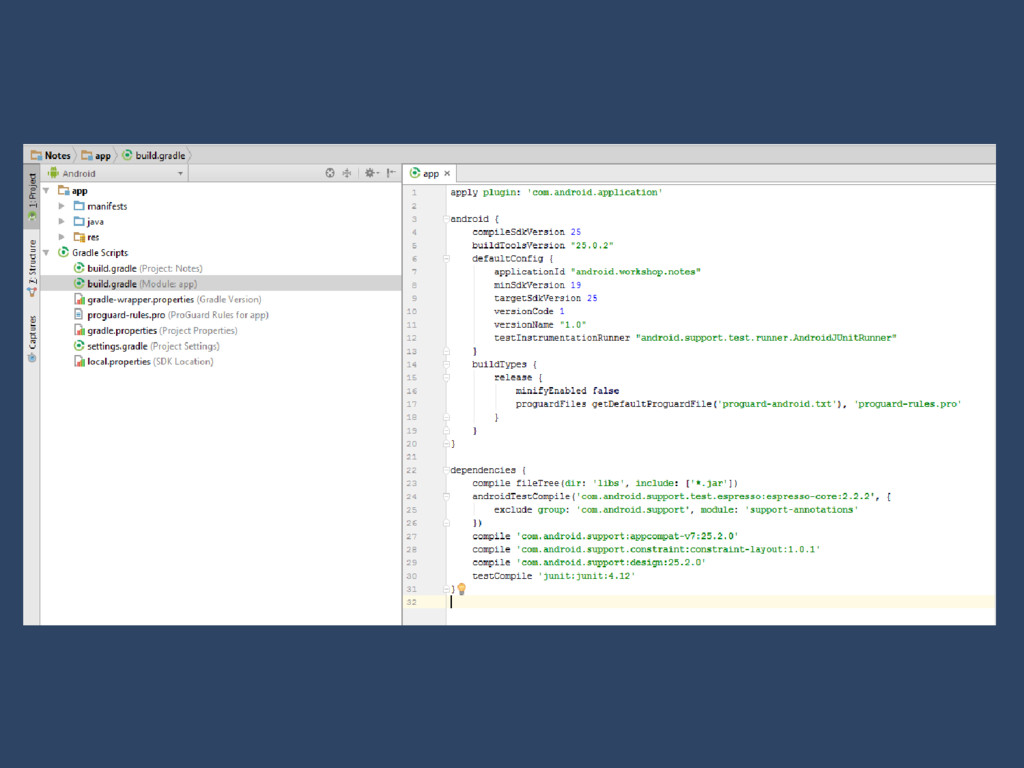
object with more than 7000 lines public class MainActivity extends AppCompatActivity { @Override protected void onCreate(Bundle savedInstanceState) { super.onCreate(savedInstanceState); setContentView(R.layout.activity_main); } }
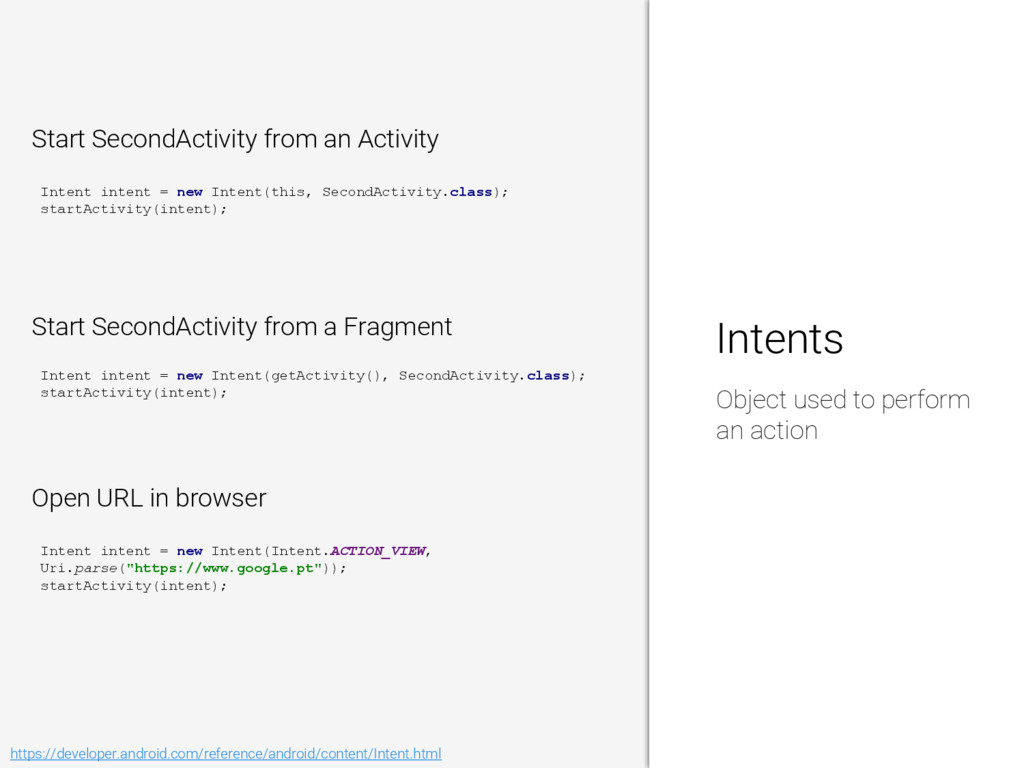
from an Activity Start SecondActivity from a Fragment Open URL in browser Intent intent = new Intent(this, SecondActivity.class); startActivity(intent); Intent intent = new Intent(getActivity(), SecondActivity.class); startActivity(intent); Intent intent = new Intent(Intent.ACTION_VIEW, Uri.parse("https://www.google.pt")); startActivity(intent);
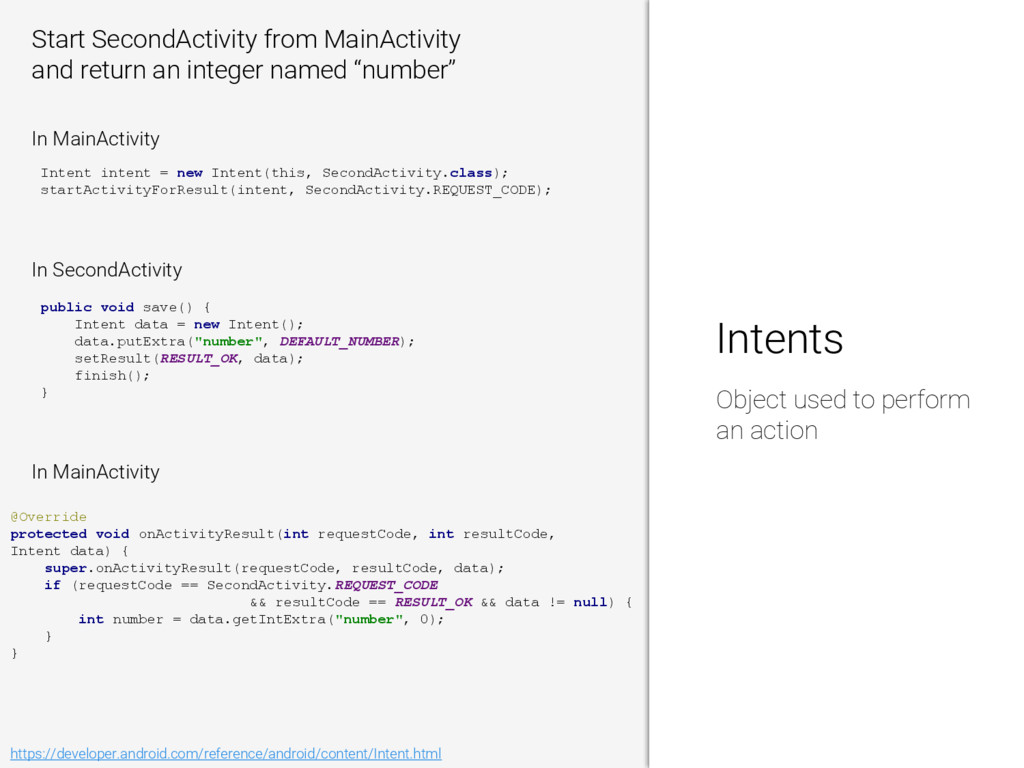
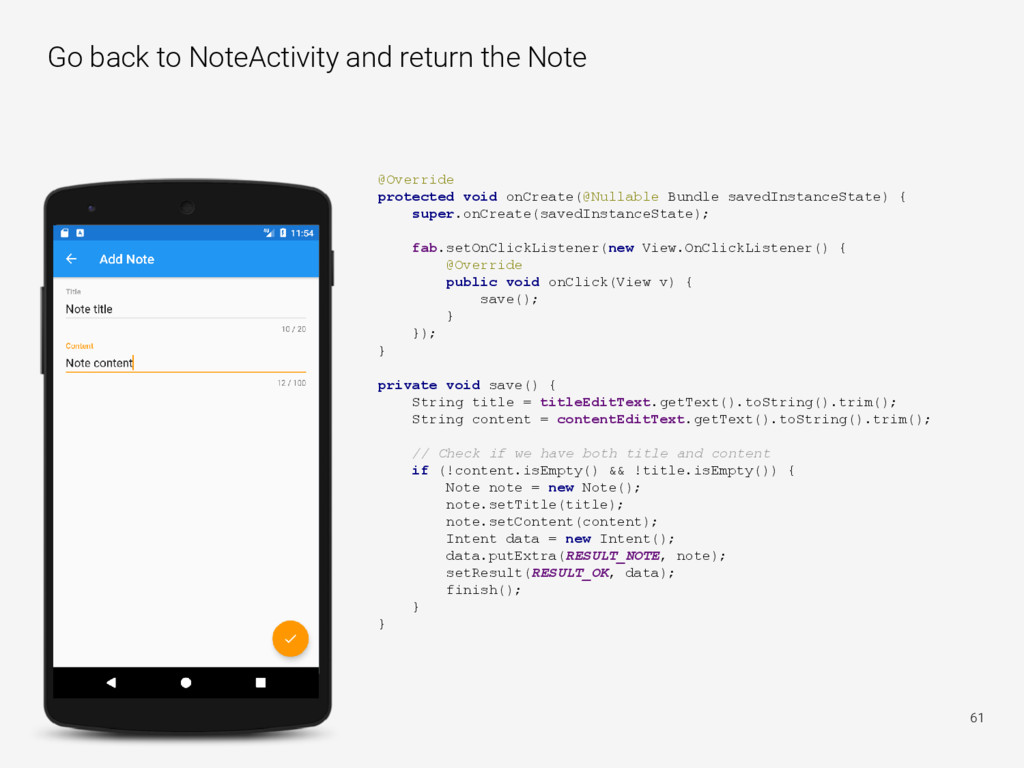
“number” In SecondActivity Intent intent = new Intent(this, SecondActivity.class); startActivityForResult(intent, SecondActivity.REQUEST_CODE); In MainActivity In MainActivity public void save() { Intent data = new Intent(); data.putExtra("number", DEFAULT_NUMBER); setResult(RESULT_OK, data); finish(); } @Override protected void onActivityResult(int requestCode, int resultCode, Intent data) { super.onActivityResult(requestCode, resultCode, data); if (requestCode == SecondActivity.REQUEST_CODE && resultCode == RESULT_OK && data != null) { int number = data.getIntExtra("number", 0); } } Intents Object used to perform an action
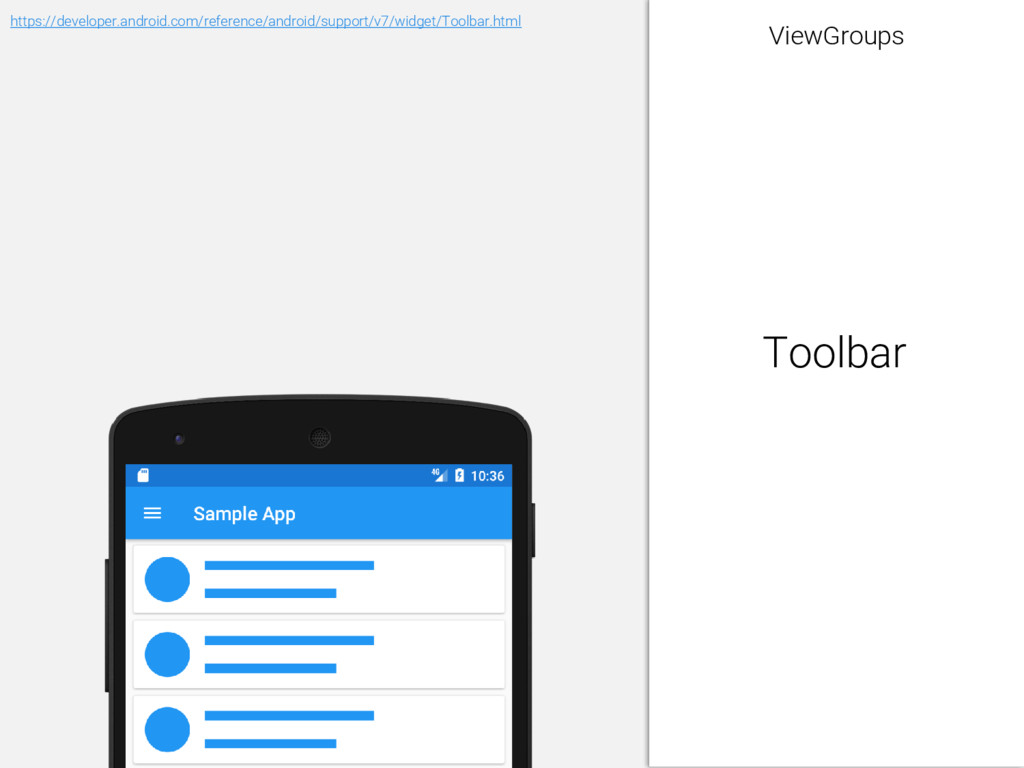
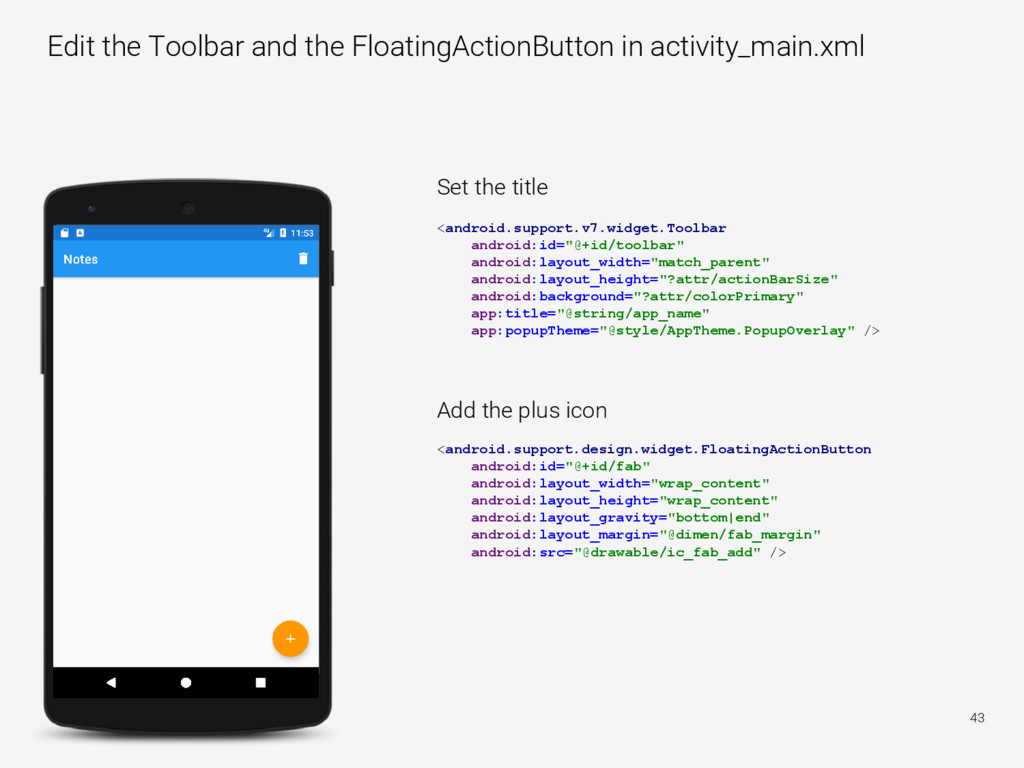
android:id="@+id/toolbar" android:layout_width="match_parent" android:layout_height="?attr/actionBarSize" android:background="?attr/colorPrimary" app:title="@string/app_name" app:popupTheme="@style/AppTheme.PopupOverlay" /> <android.support.design.widget.FloatingActionButton android:id="@+id/fab" android:layout_width="wrap_content" android:layout_height="wrap_content" android:layout_gravity="bottom|end" android:layout_margin="@dimen/fab_margin" android:src="@drawable/ic_fab_add" /> Set the title Add the plus icon
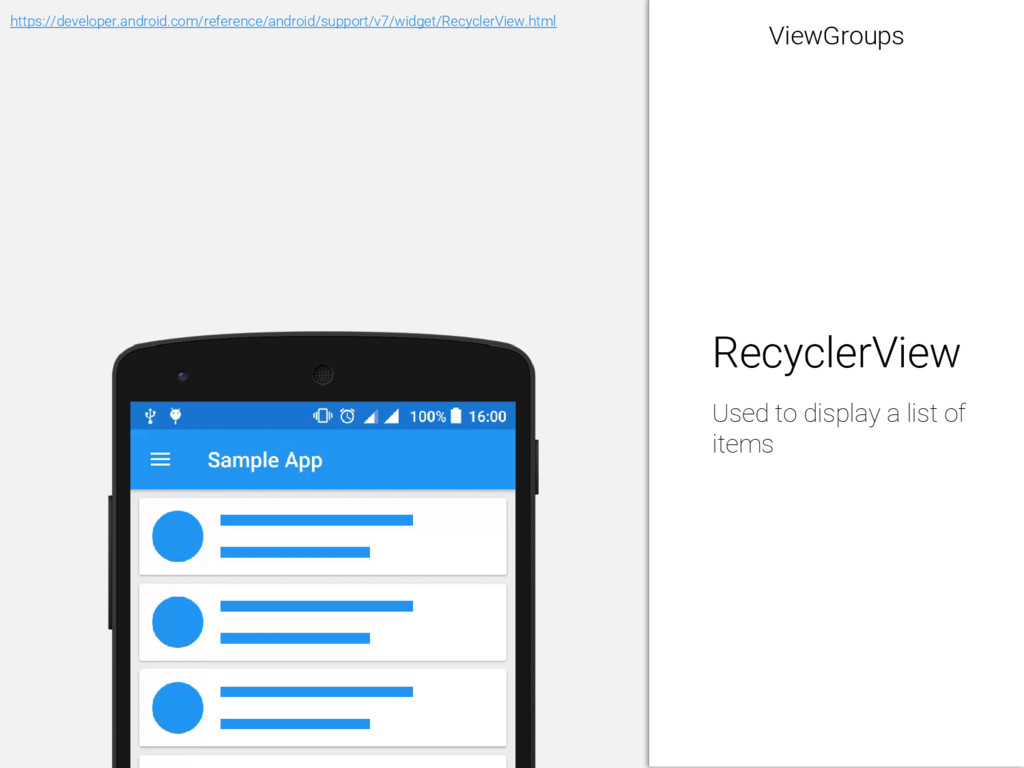
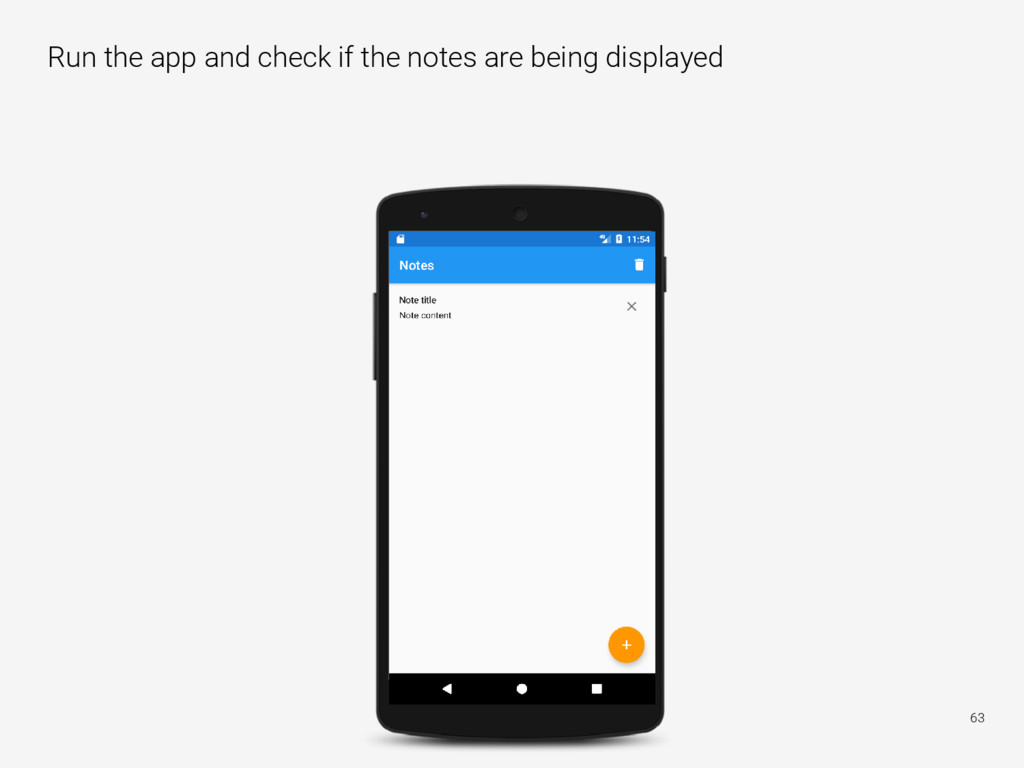
{ private Toolbar toolbar; private RecyclerView recyclerView; private FloatingActionButton fab; @Override protected void onCreate(Bundle savedInstanceState) { super.onCreate(savedInstanceState); setContentView(R.layout.activity_main); bindViews(); // Setup menu toolbar.inflateMenu(R.menu.menu_main); } private void bindViews() { toolbar = (Toolbar) findViewById(R.id.toolbar); recyclerView = (RecyclerView) findViewById(R.id.recyclerView); fab = (FloatingActionButton) findViewById(R.id.fab); } } Now launch the app and you should have the same as screen in the left!
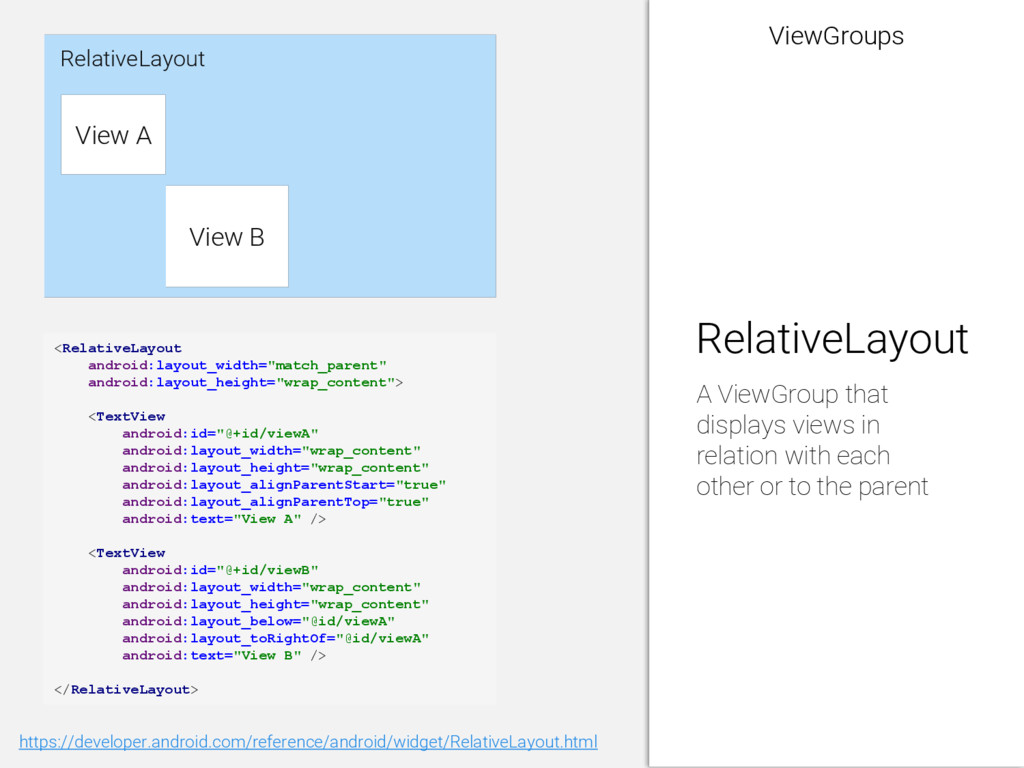
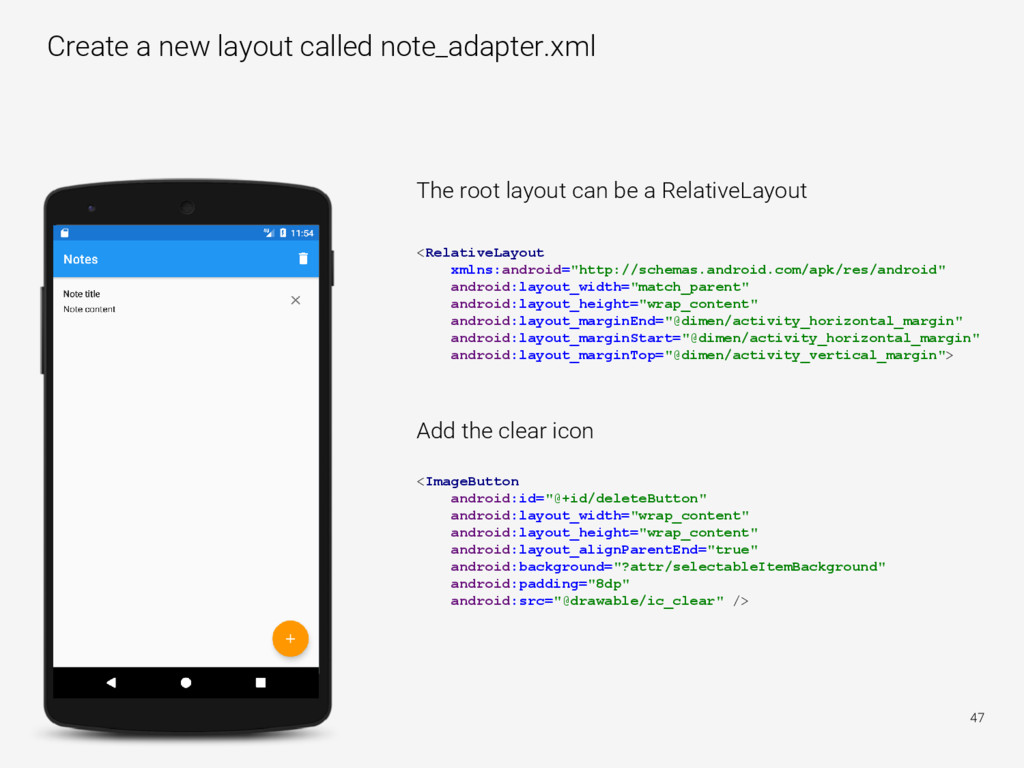
android:layout_height="wrap_content" android:layout_marginEnd="@dimen/activity_horizontal_margin" android:layout_marginStart="@dimen/activity_horizontal_margin" android:layout_marginTop="@dimen/activity_vertical_margin"> The root layout can be a RelativeLayout Add the clear icon <ImageButton android:id="@+id/deleteButton" android:layout_width="wrap_content" android:layout_height="wrap_content" android:layout_alignParentEnd="true" android:background="?attr/selectableItemBackground" android:padding="8dp" android:src="@drawable/ic_clear" />
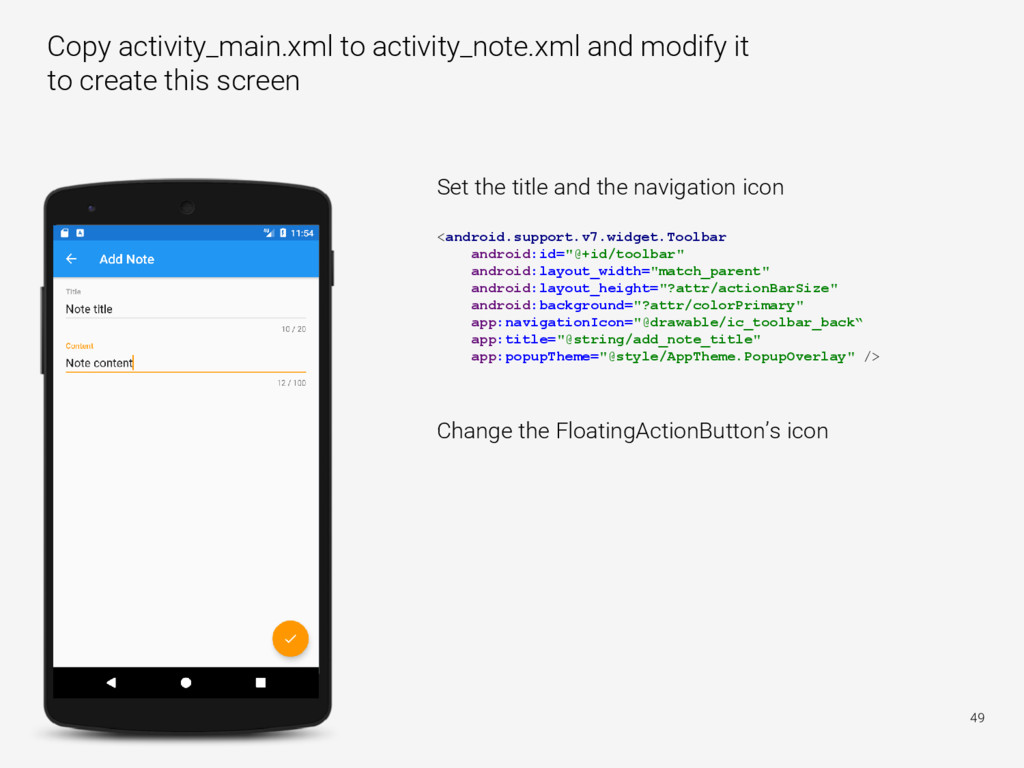
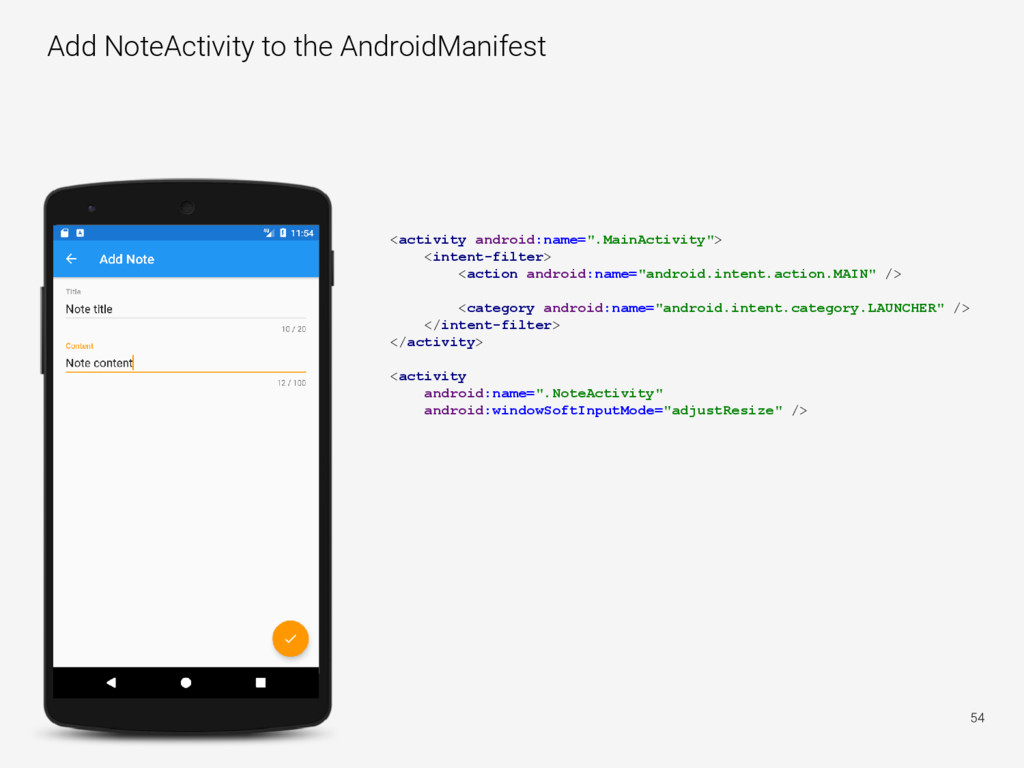
screen 49 <android.support.v7.widget.Toolbar android:id="@+id/toolbar" android:layout_width="match_parent" android:layout_height="?attr/actionBarSize" android:background="?attr/colorPrimary" app:navigationIcon="@drawable/ic_toolbar_back“ app:title="@string/add_note_title" app:popupTheme="@style/AppTheme.PopupOverlay" /> Set the title and the navigation icon Change the FloatingActionButton’s icon
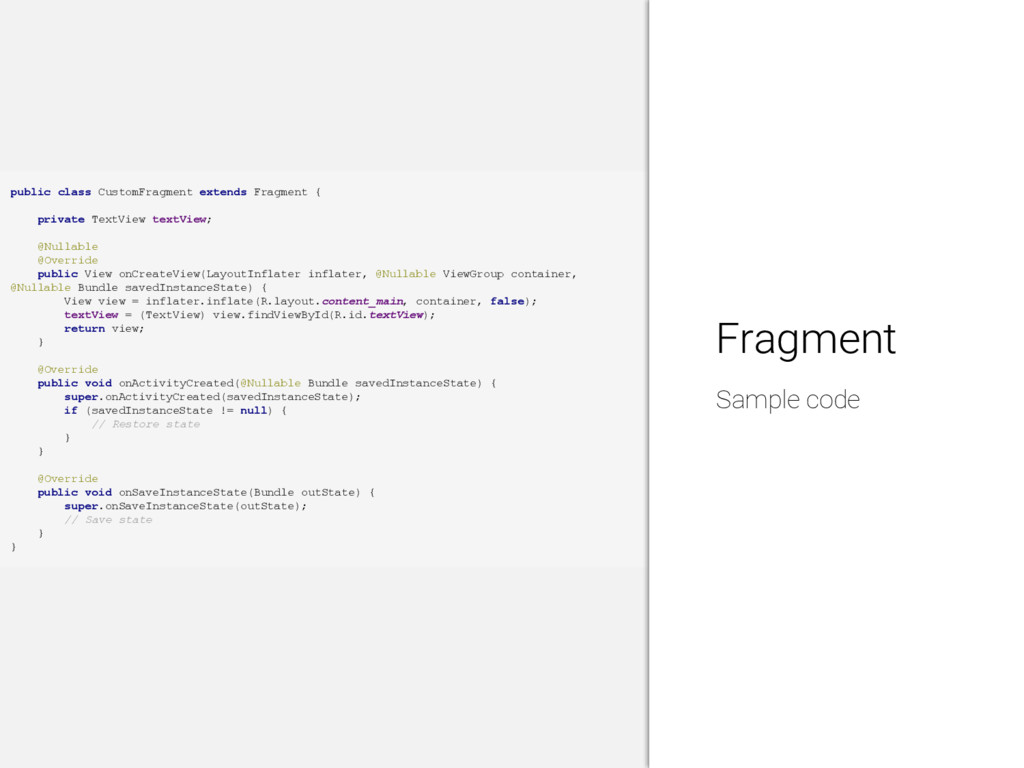
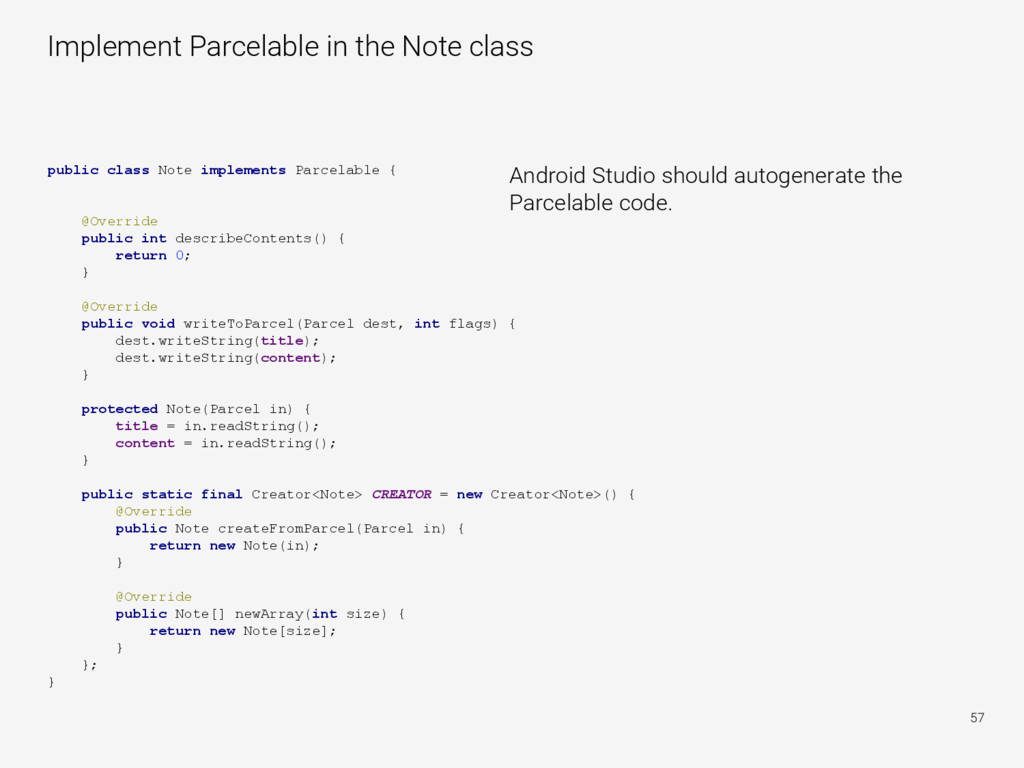
implements Parcelable { @Override public int describeContents() { return 0; } @Override public void writeToParcel(Parcel dest, int flags) { dest.writeString(title); dest.writeString(content); } protected Note(Parcel in) { title = in.readString(); content = in.readString(); } public static final Creator<Note> CREATOR = new Creator<Note>() { @Override public Note createFromParcel(Parcel in) { return new Note(in); } @Override public Note[] newArray(int size) { return new Note[size]; } }; } Android Studio should autogenerate the Parcelable code.