29-31, 2016 @samjarman * Making apps for 6 years * Work with fortune 500 companies on setting up push and more daily * Obsessed with Push and getting it right
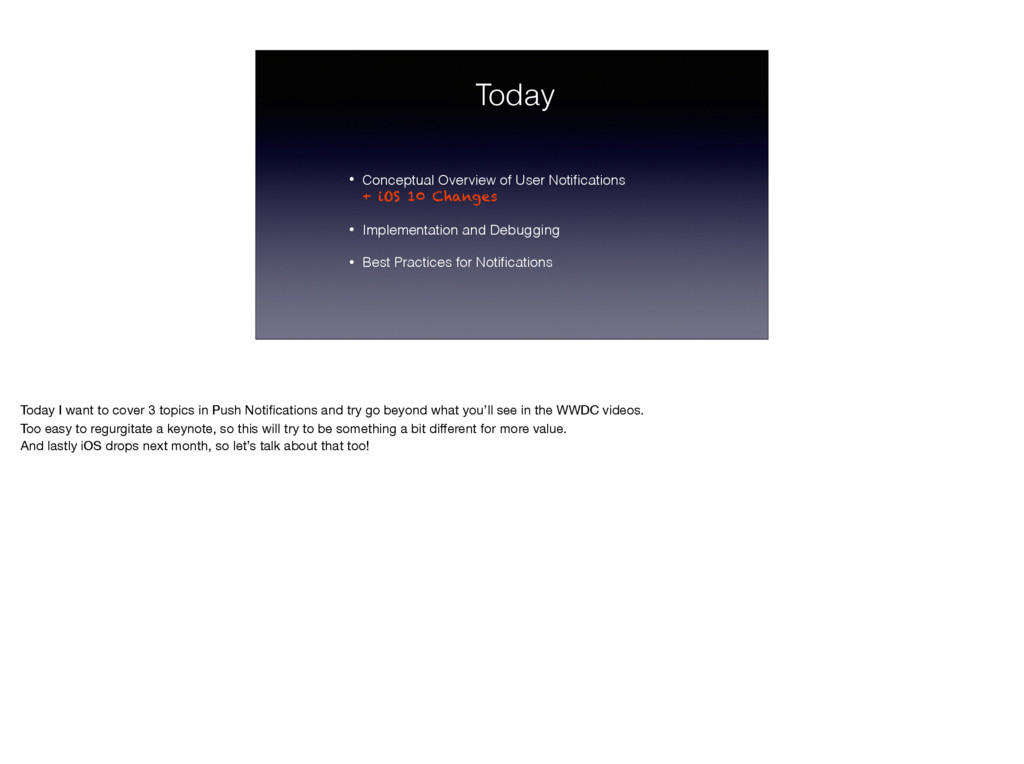
Changes • Implementation and Debugging • Best Practices for Notifications Today I want to cover 3 topics in Push Notifications and try go beyond what you’ll see in the WWDC videos. Too easy to regurgitate a keynote, so this will try to be something a bit different for more value. And lastly iOS drops next month, so let’s talk about that too!
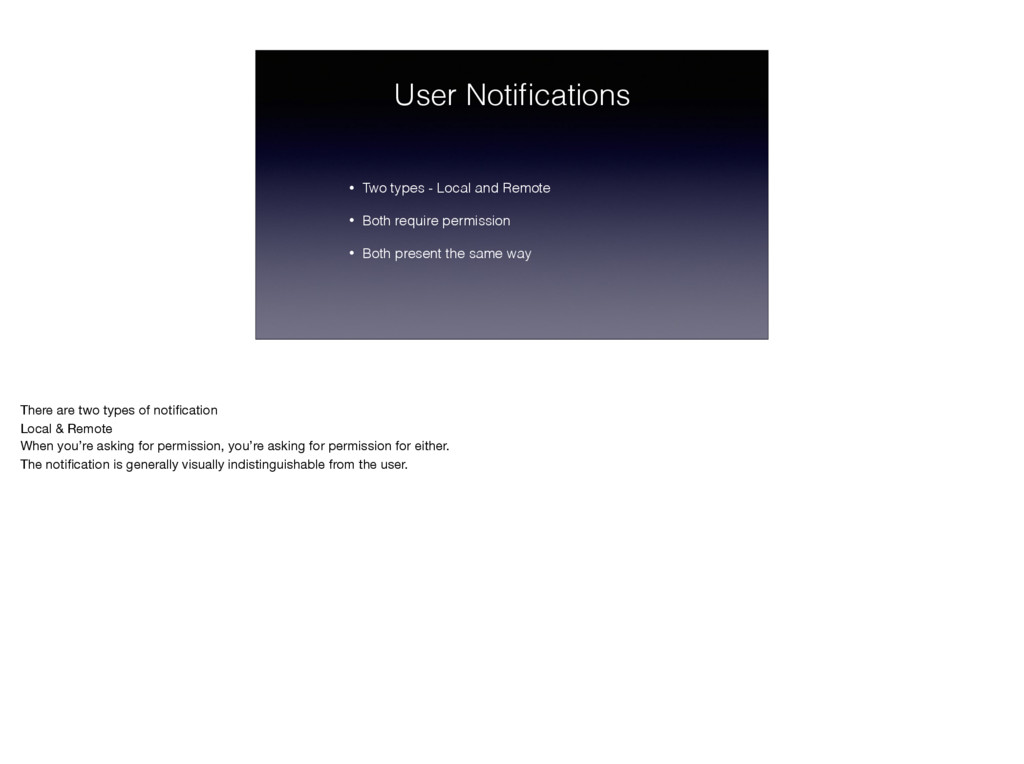
Both require permission • Both present the same way There are two types of notification Local & Remote When you’re asking for permission, you’re asking for permission for either. The notification is generally visually indistinguishable from the user.
- Interval and Calendar • Location based triggers Local notifications are scheduled in code. They have to be thought about ahead of time in terms of structure and even content.
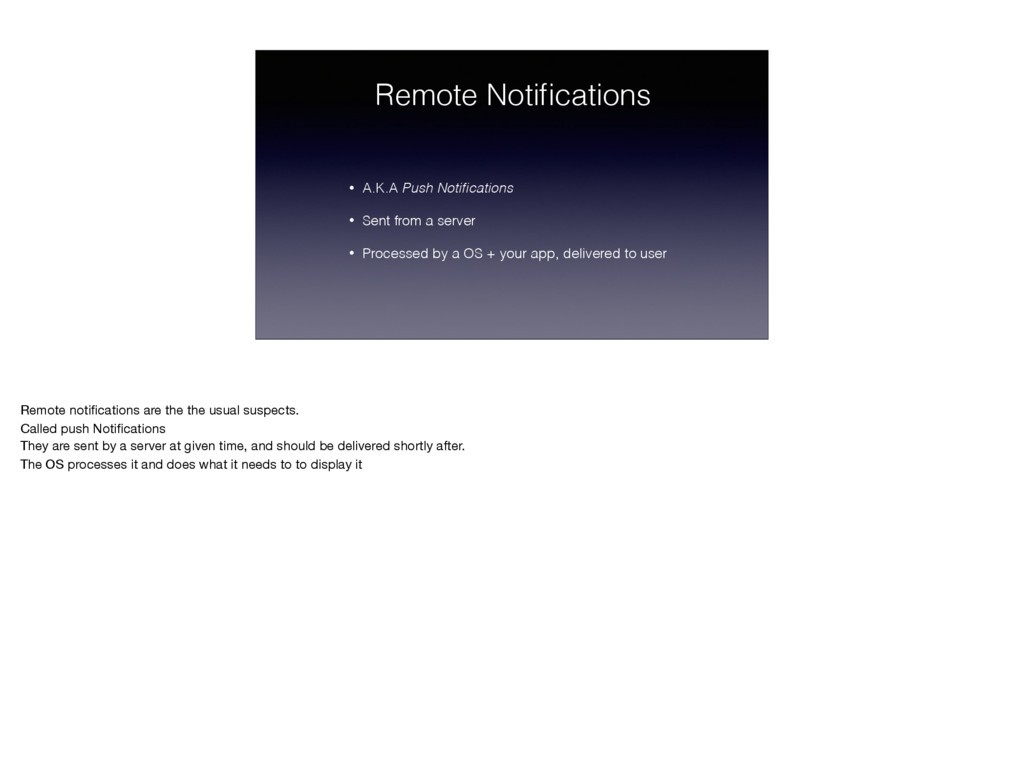
server • Processed by a OS + your app, delivered to user Remote notifications are the the usual suspects. Called push Notifications They are sent by a server at given time, and should be delivered shortly after. The OS processes it and does what it needs to to display it
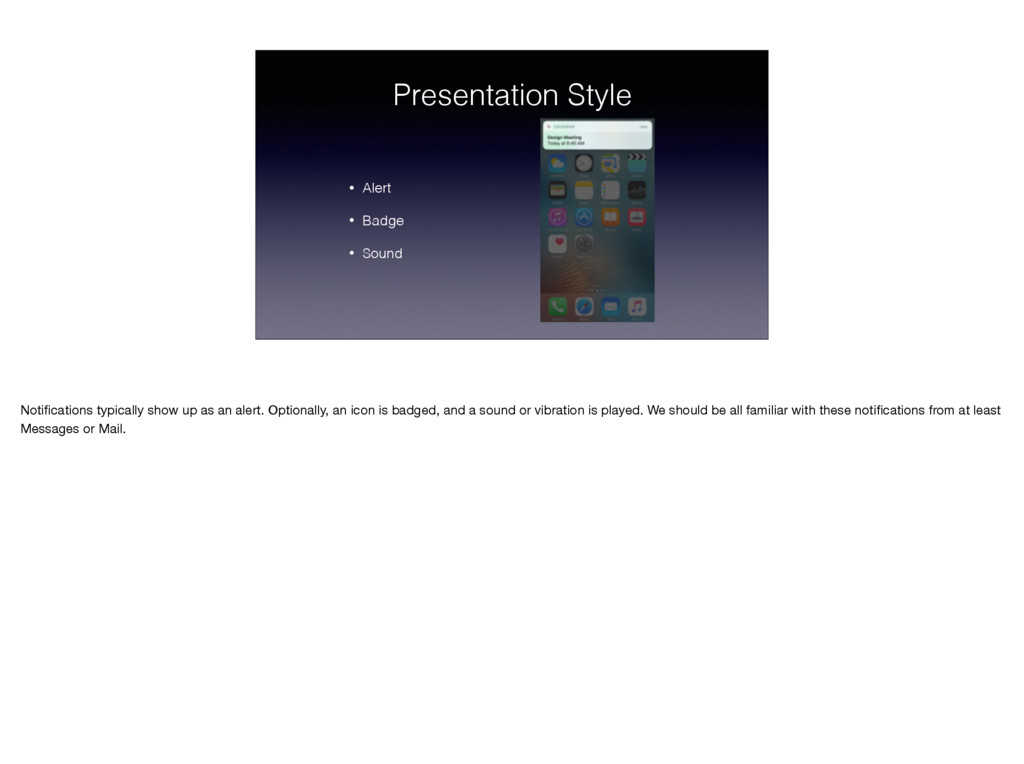
show up as an alert. Optionally, an icon is badged, and a sound or vibration is played. We should be all familiar with these notifications from at least Messages or Mail.
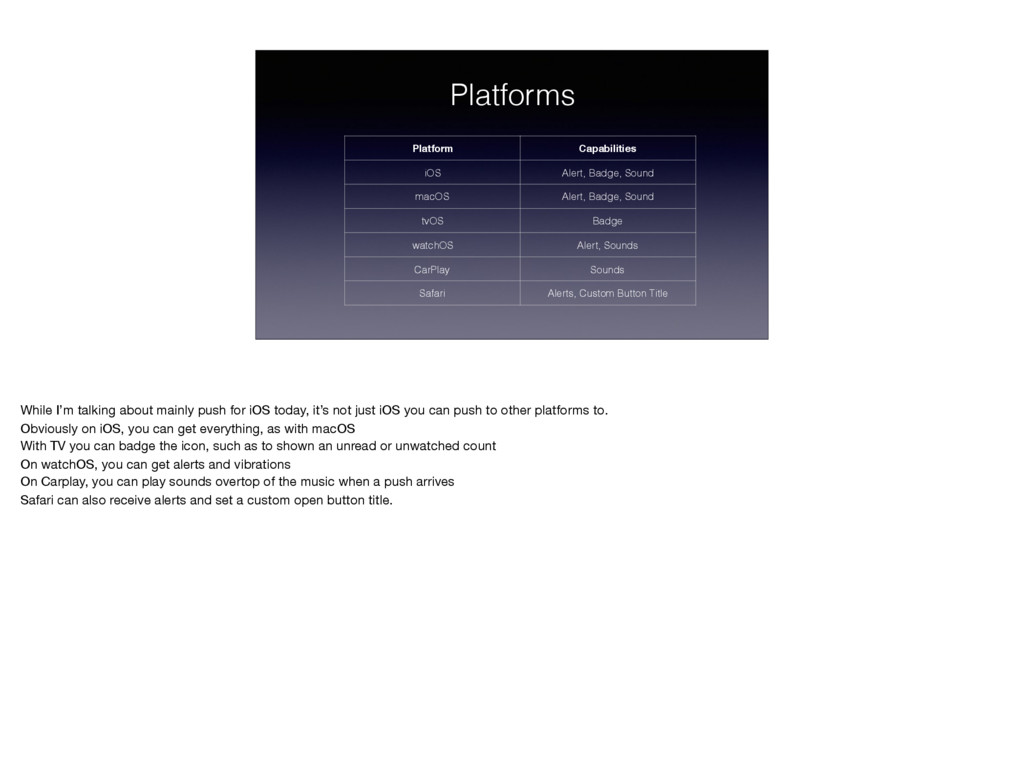
Sound tvOS Badge watchOS Alert, Sounds CarPlay Sounds Safari Alerts, Custom Button Title While I’m talking about mainly push for iOS today, it’s not just iOS you can push to other platforms to. Obviously on iOS, you can get everything, as with macOS With TV you can badge the icon, such as to shown an unread or unwatched count On watchOS, you can get alerts and vibrations On Carplay, you can play sounds overtop of the music when a push arrives Safari can also receive alerts and set a custom open button title.
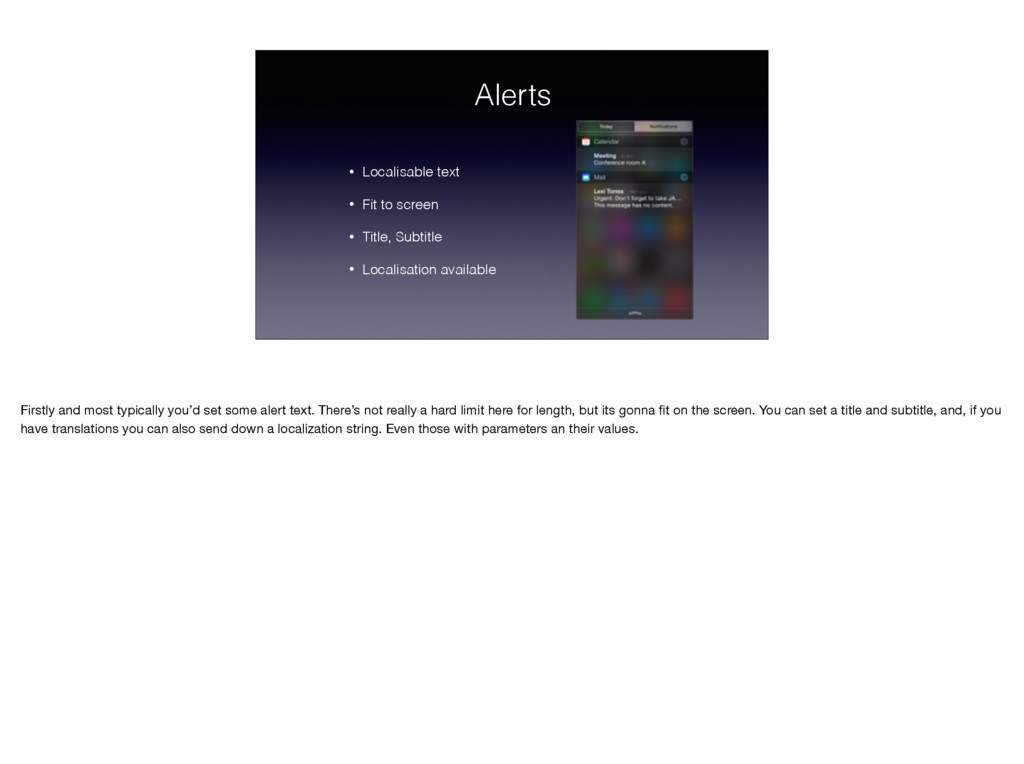
Subtitle • Localisation available Firstly and most typically you’d set some alert text. There’s not really a hard limit here for length, but its gonna fit on the screen. You can set a title and subtitle, and, if you have translations you can also send down a localization string. Even those with parameters an their values.
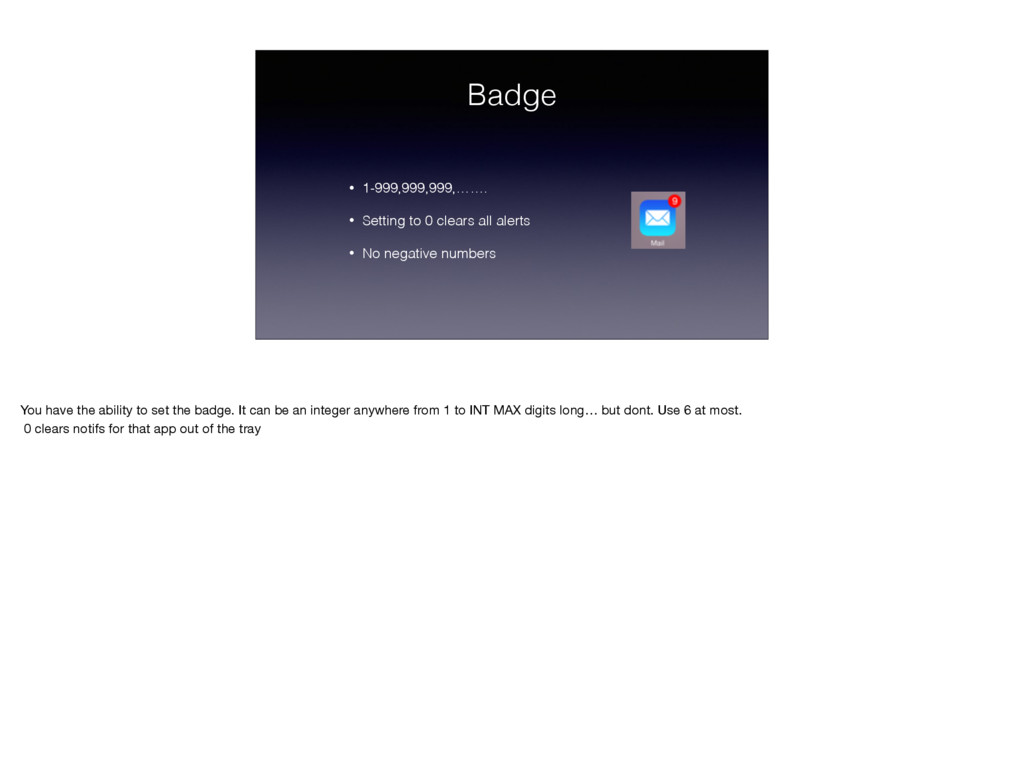
• No negative numbers You have the ability to set the badge. It can be an integer anywhere from 1 to INT MAX digits long… but dont. Use 6 at most. 0 clears notifs for that app out of the tray
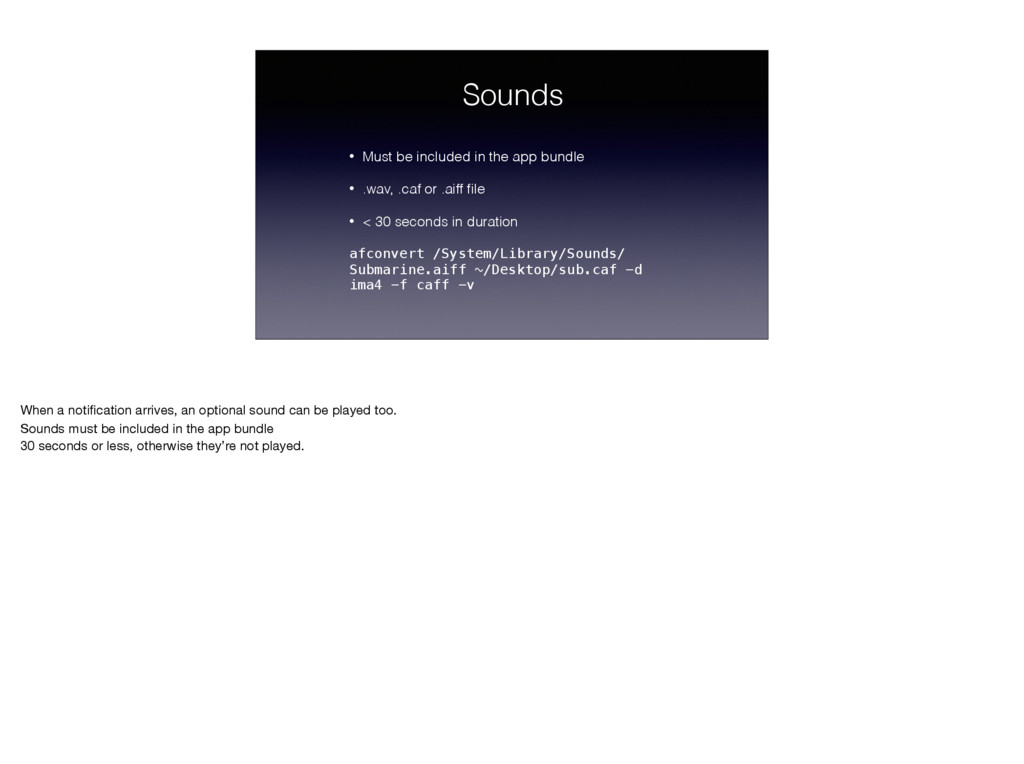
.wav, .caf or .aiff file • < 30 seconds in duration afconvert /System/Library/Sounds/ Submarine.aiff ~/Desktop/sub.caf -d ima4 -f caff -v When a notification arrives, an optional sound can be played too. Sounds must be included in the app bundle 30 seconds or less, otherwise they’re not played.
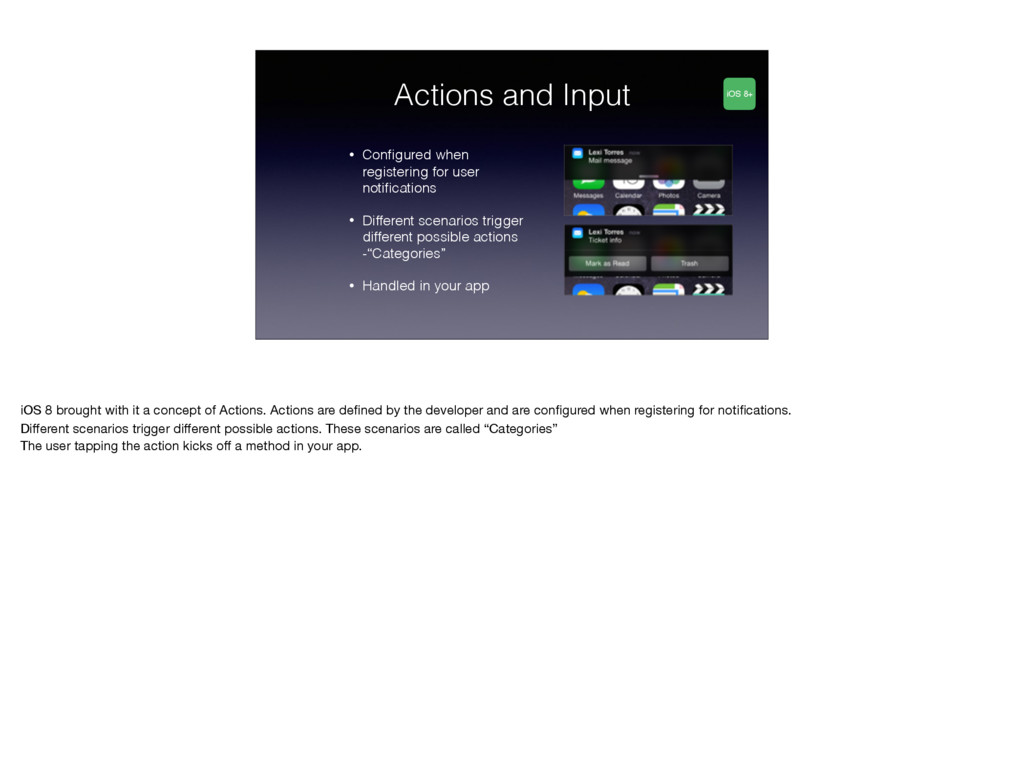
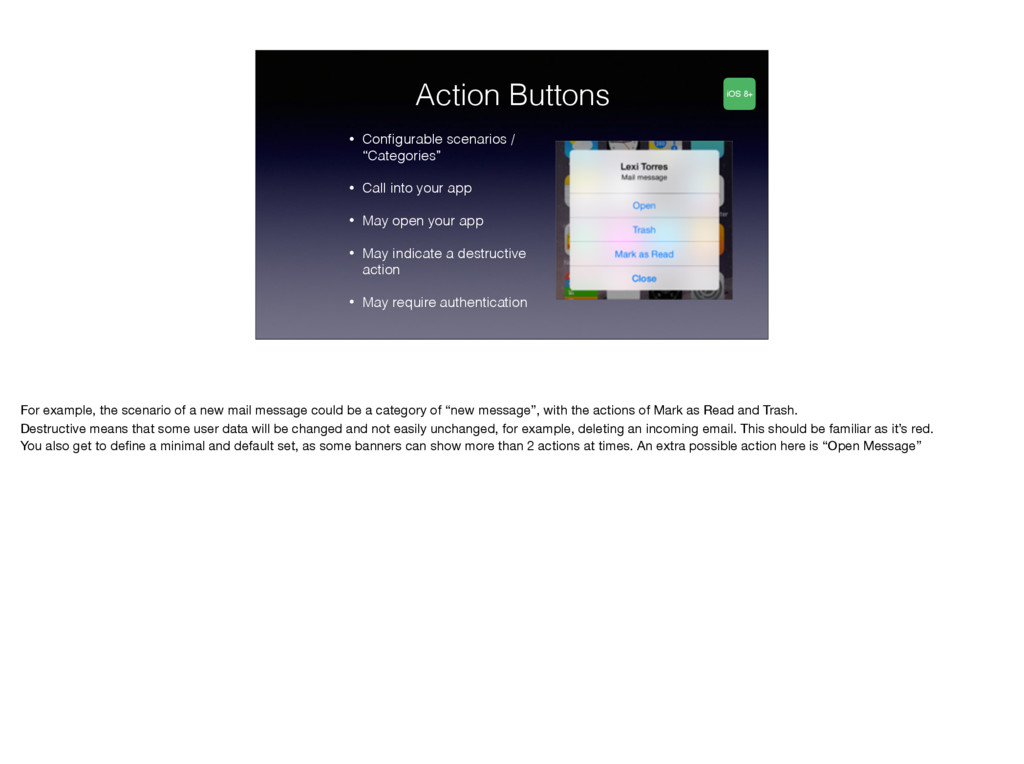
• Different scenarios trigger different possible actions -“Categories” • Handled in your app iOS 8+ iOS 8 brought with it a concept of Actions. Actions are defined by the developer and are configured when registering for notifications. Different scenarios trigger different possible actions. These scenarios are called “Categories” The user tapping the action kicks off a method in your app.
your app • May open your app • May indicate a destructive action • May require authentication iOS 8+ For example, the scenario of a new mail message could be a category of “new message”, with the actions of Mark as Read and Trash. Destructive means that some user data will be changed and not easily unchanged, for example, deleting an incoming email. This should be familiar as it’s red. You also get to define a minimal and default set, as some banners can show more than 2 actions at times. An extra possible action here is “Open Message”
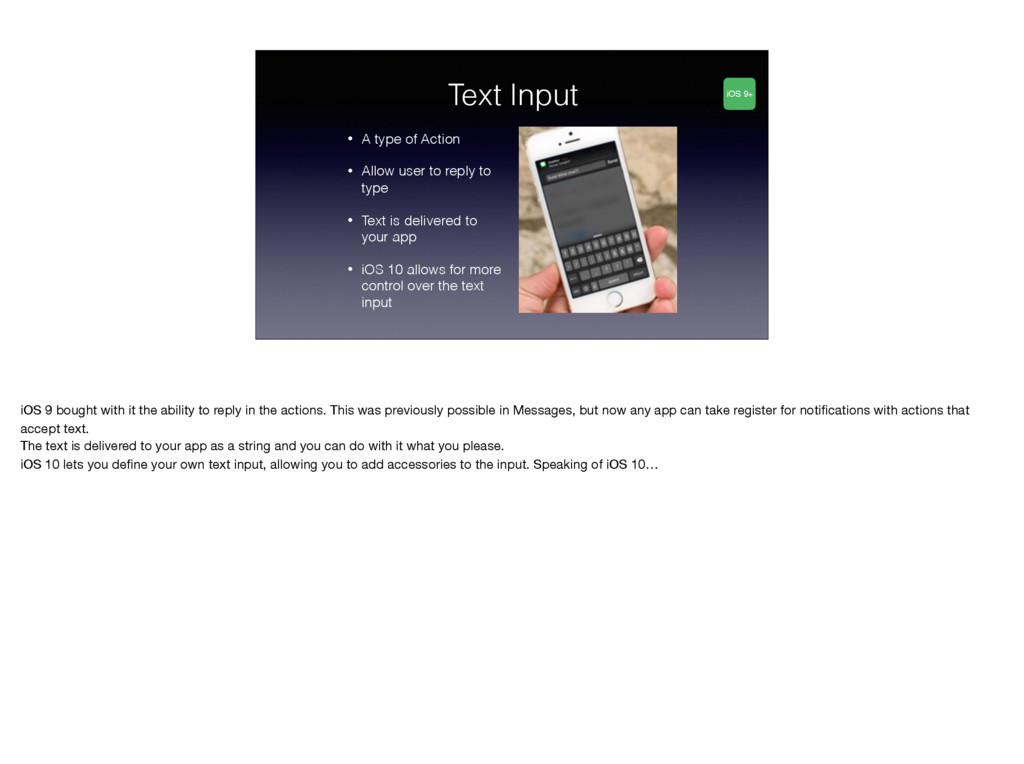
to reply to type • Text is delivered to your app • iOS 10 allows for more control over the text input iOS 9+ iOS 9 bought with it the ability to reply in the actions. This was previously possible in Messages, but now any app can take register for notifications with actions that accept text. The text is delivered to your app as a string and you can do with it what you please. iOS 10 lets you define your own text input, allowing you to add accessories to the input. Speaking of iOS 10…
Service Extensions • Notification Content Extensions iOS 10 brings with it a completely revamped API, and two new extensions to deal with notifications too.
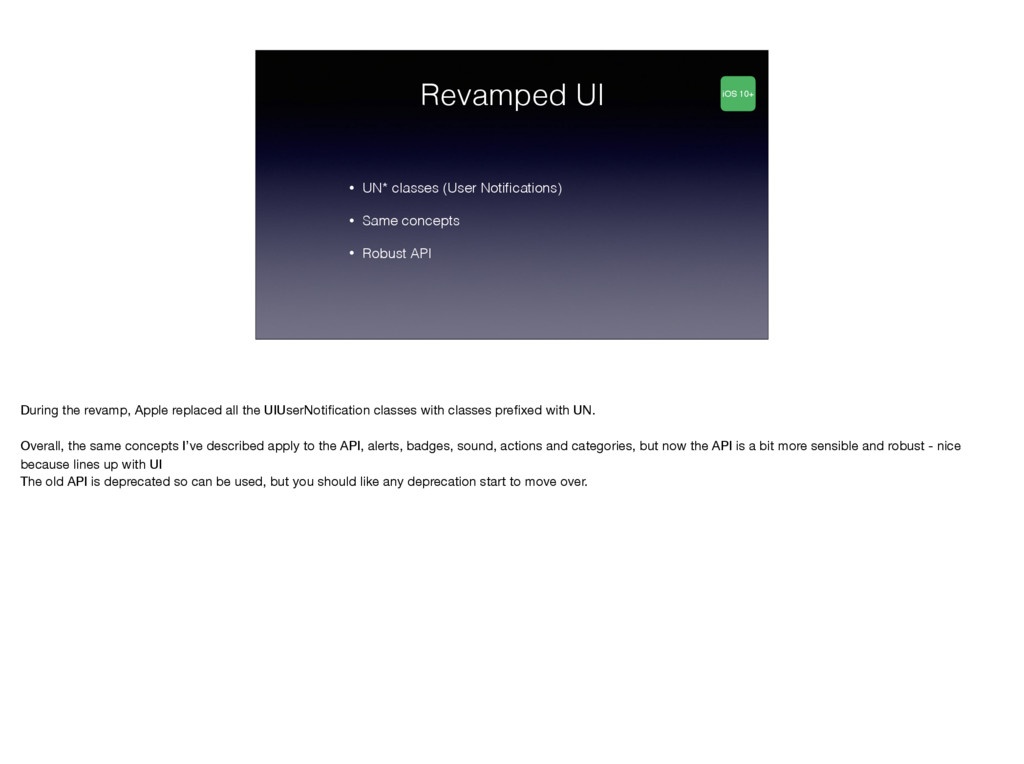
• Robust API iOS 10+ During the revamp, Apple replaced all the UIUserNotification classes with classes prefixed with UN. Overall, the same concepts I’ve described apply to the API, alerts, badges, sound, actions and categories, but now the API is a bit more sensible and robust - nice because lines up with UI The old API is deprecated so can be used, but you should like any deprecation start to move over.
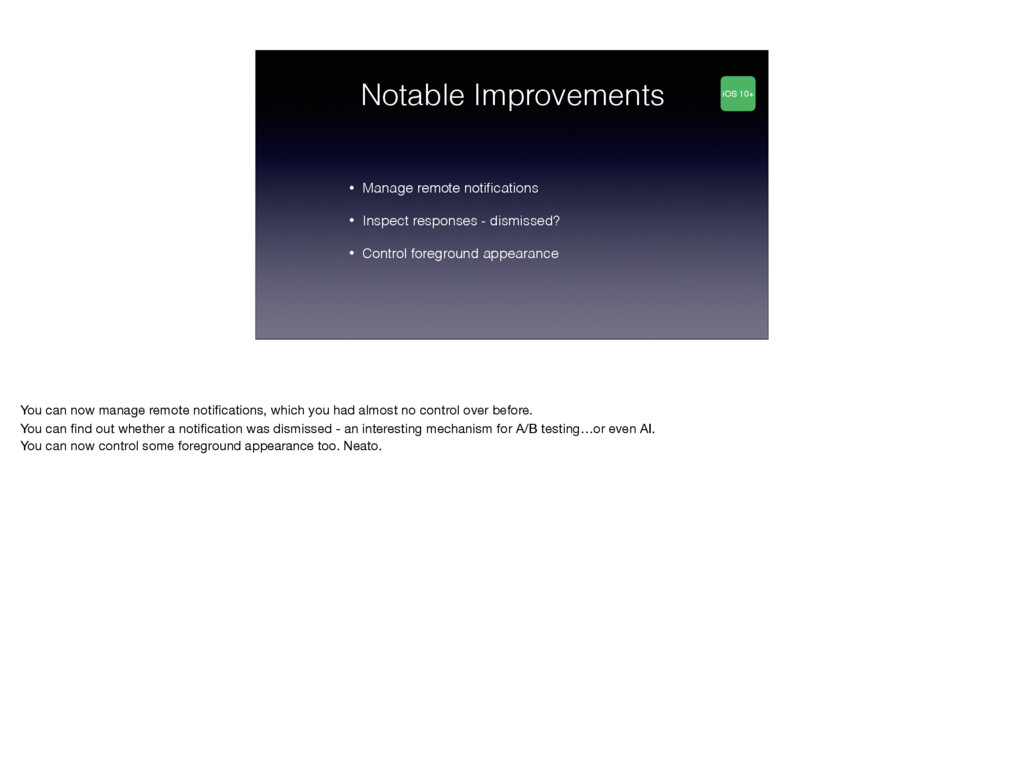
dismissed? • Control foreground appearance iOS 10+ You can now manage remote notifications, which you had almost no control over before. You can find out whether a notification was dismissed - an interesting mechanism for A/B testing…or even AI. You can now control some foreground appearance too. Neato.
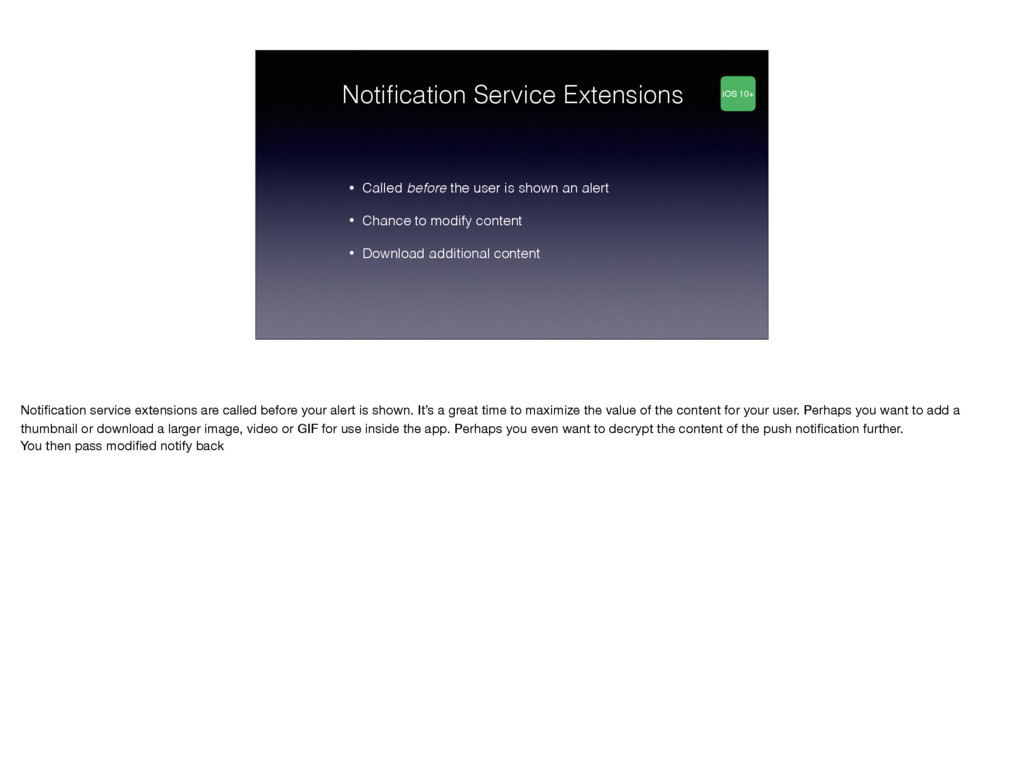
an alert • Chance to modify content • Download additional content iOS 10+ Notification service extensions are called before your alert is shown. It’s a great time to maximize the value of the content for your user. Perhaps you want to add a thumbnail or download a larger image, video or GIF for use inside the app. Perhaps you even want to decrypt the content of the push notification further. You then pass modified notify back
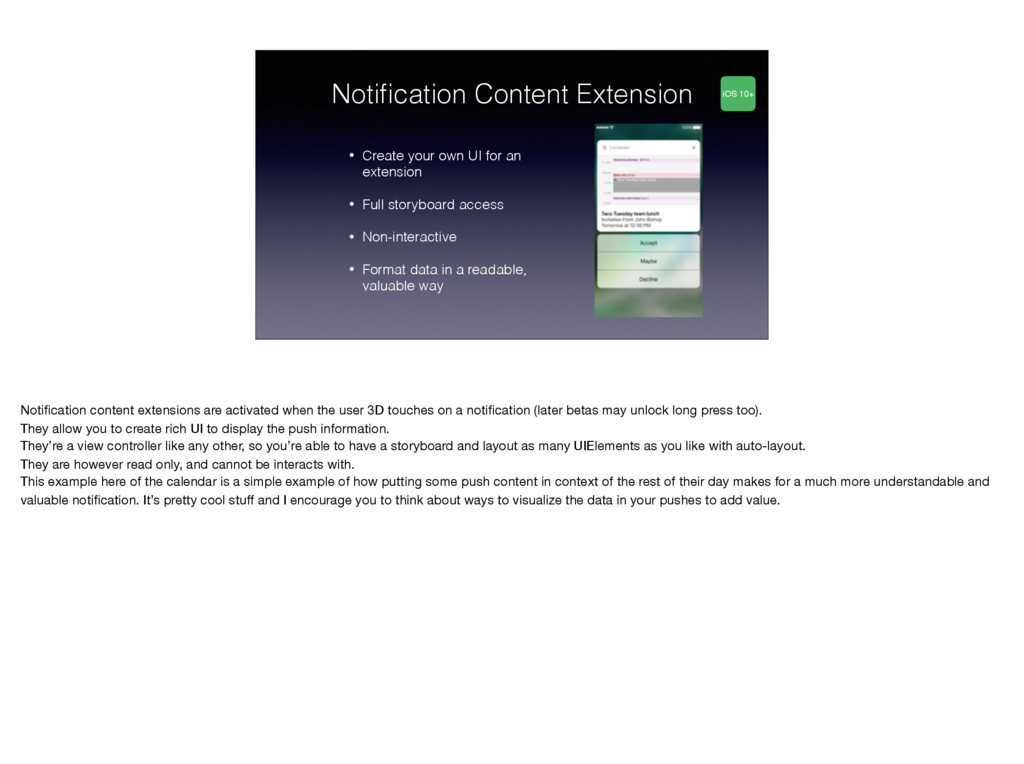
extension • Full storyboard access • Non-interactive • Format data in a readable, valuable way iOS 10+ Notification content extensions are activated when the user 3D touches on a notification (later betas may unlock long press too). They allow you to create rich UI to display the push information. They’re a view controller like any other, so you’re able to have a storyboard and layout as many UIElements as you like with auto-layout. They are however read only, and cannot be interacts with. This example here of the calendar is a simple example of how putting some push content in context of the rest of their day makes for a much more understandable and valuable notification. It’s pretty cool stuff and I encourage you to think about ways to visualize the data in your pushes to add value.
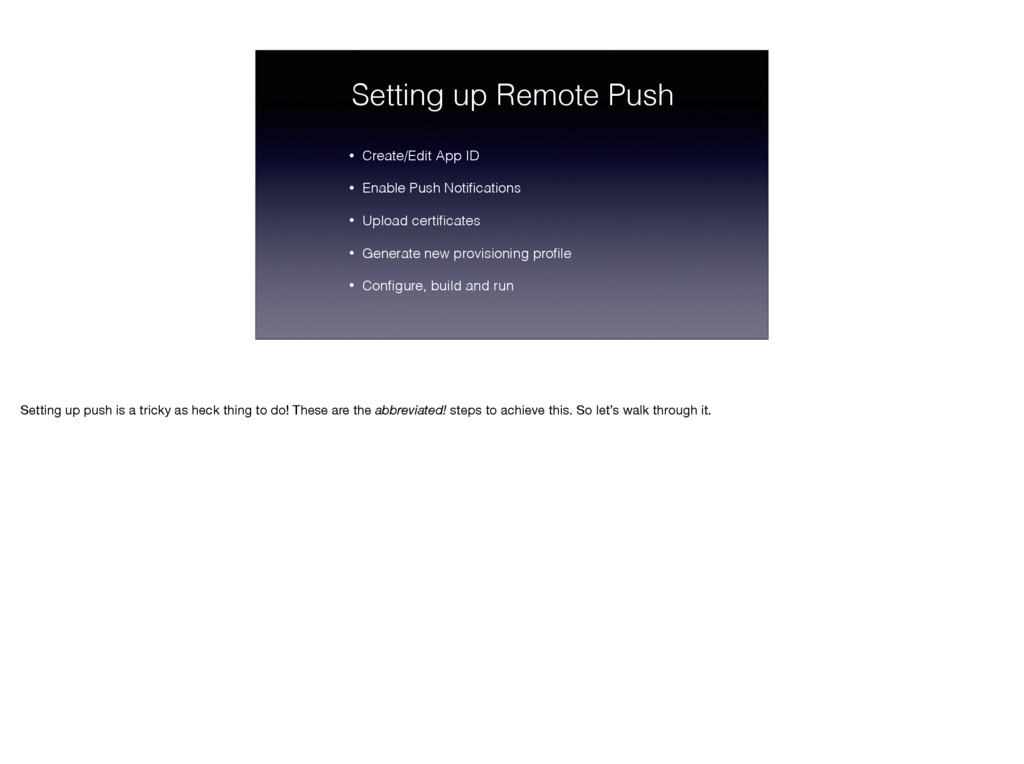
Push Notifications • Upload certificates • Generate new provisioning profile • Configure, build and run Setting up push is a tricky as heck thing to do! These are the abbreviated! steps to achieve this. So let’s walk through it.
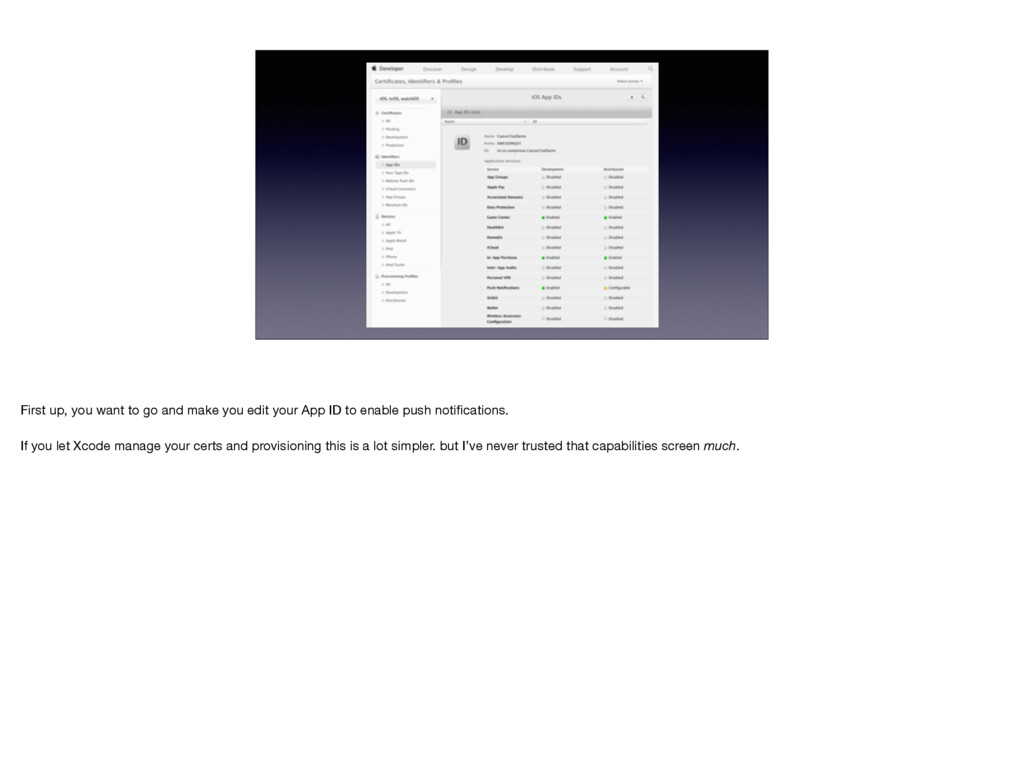
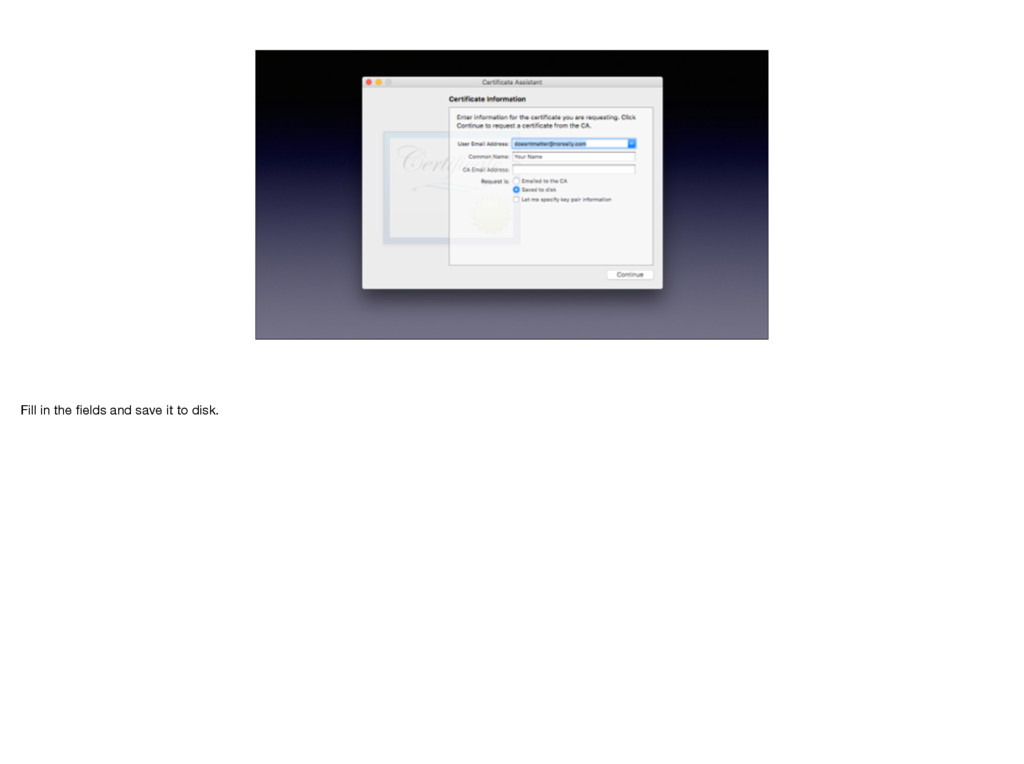
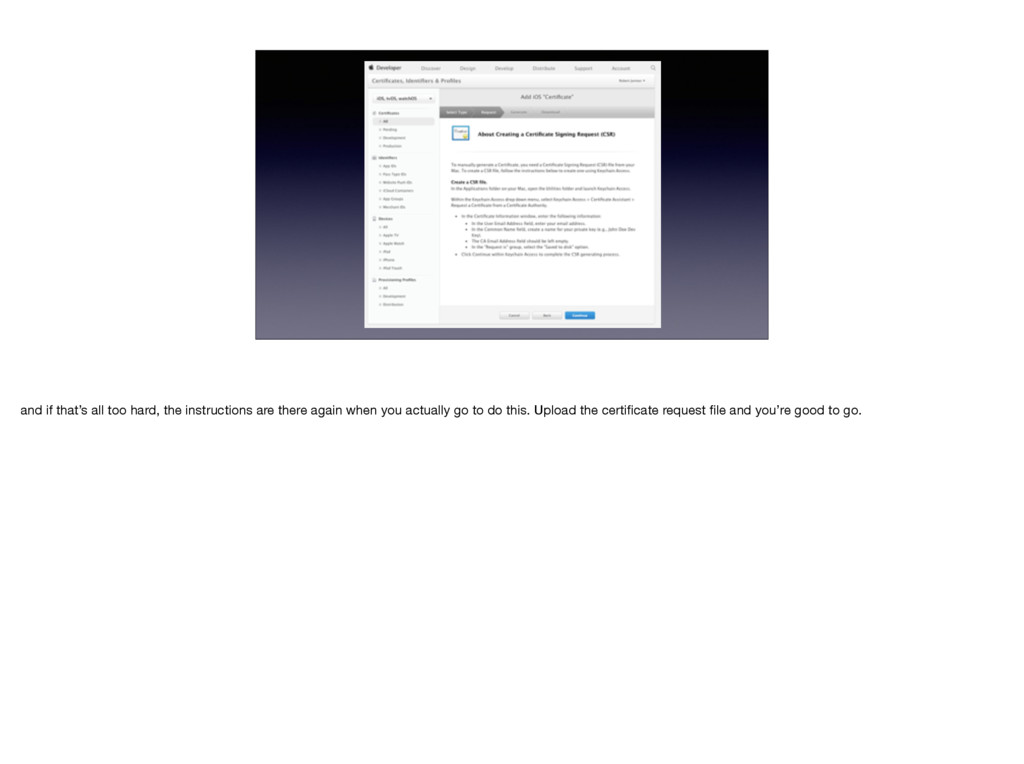
your App ID to enable push notifications. If you let Xcode manage your certs and provisioning this is a lot simpler. but I’ve never trusted that capabilities screen much.
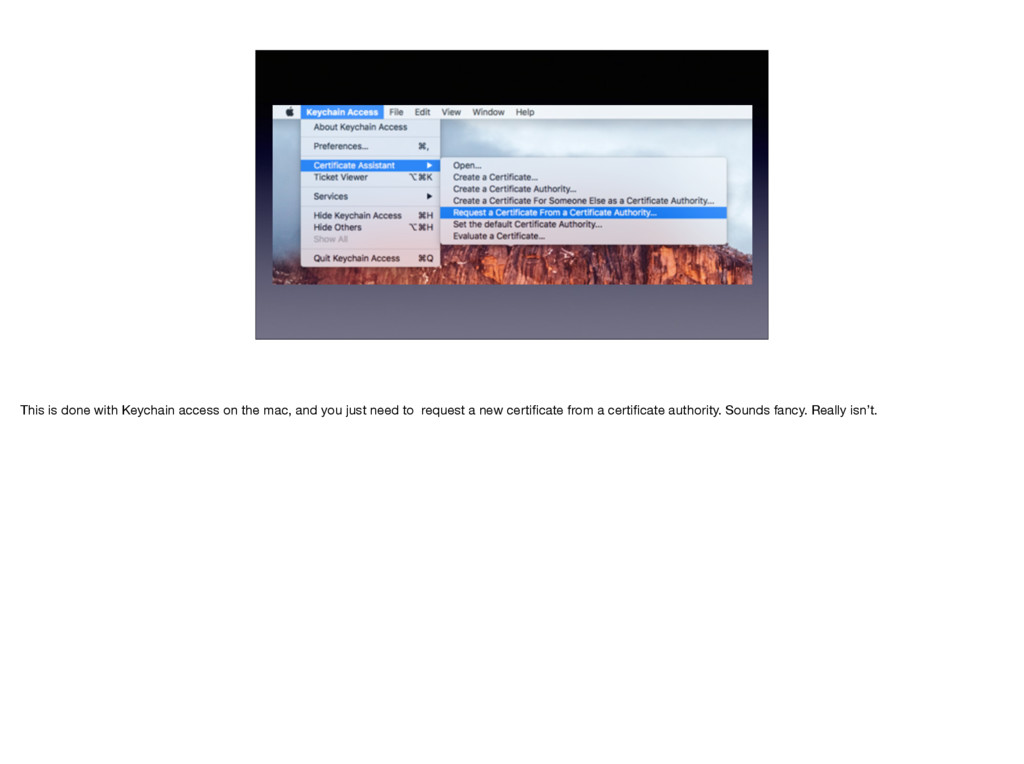
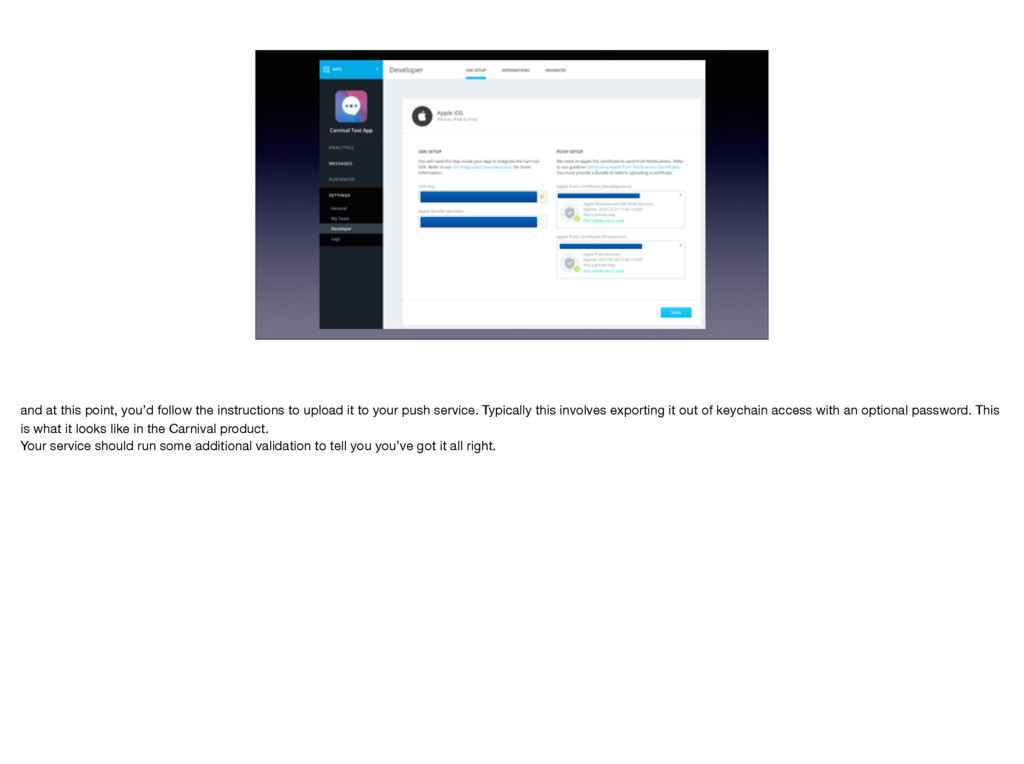
it to your push service. Typically this involves exporting it out of keychain access with an optional password. This is what it looks like in the Carnival product. Your service should run some additional validation to tell you you’ve got it all right.
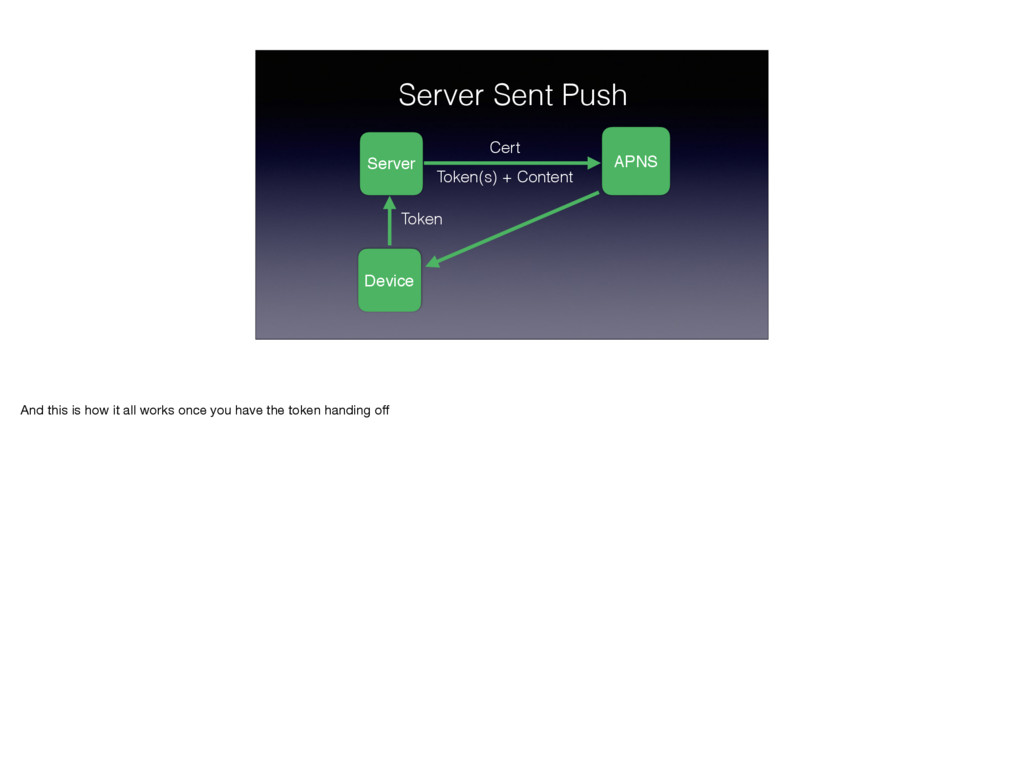
So here’s a diagram of how a service like this goes about getting a push to your device. They use tokens and the content and talk to Apple. Apple then works out which device it is and which app and tries to do the push via it’s persistent socket connection with each device.
Remote? • Perform at a suitable time for your user (not just straight away) Now, you’ve added your new provisioning profile, you’ve tuned on the capabilities in Xcode, and you’re ready to go. You need to set up your categories and their actions and then register the lot at once with he operating system. You’ll also optionally register for remote notification, and you’ll get a token at this stage.
categories: nil) UIApplication.sharedApplication().registerUserNotificationSetti ngs(settings) UIApplication.sharedApplication().registerForRemoteNotification s() This is the basic code to register for push. There’s some concepts here Types refer to alert, badge, sound categories are what we spoke about earlier, each with a set of actions. You can have multiple categories You register for the lot Then you additionally register for the push notifications. This API has changed slightly in iOS 10.
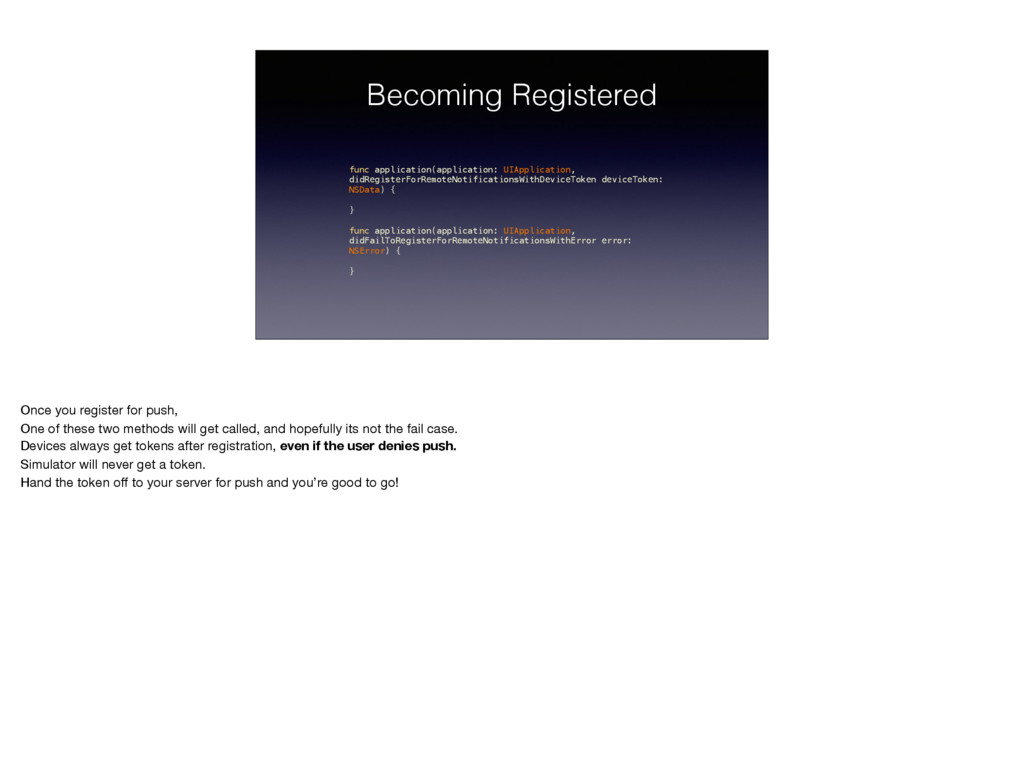
func application(application: UIApplication, didFailToRegisterForRemoteNotificationsWithError error: NSError) { } Once you register for push, One of these two methods will get called, and hopefully its not the fail case. Devices always get tokens after registration, even if the user denies push. Simulator will never get a token. Hand the token off to your server for push and you’re good to go!
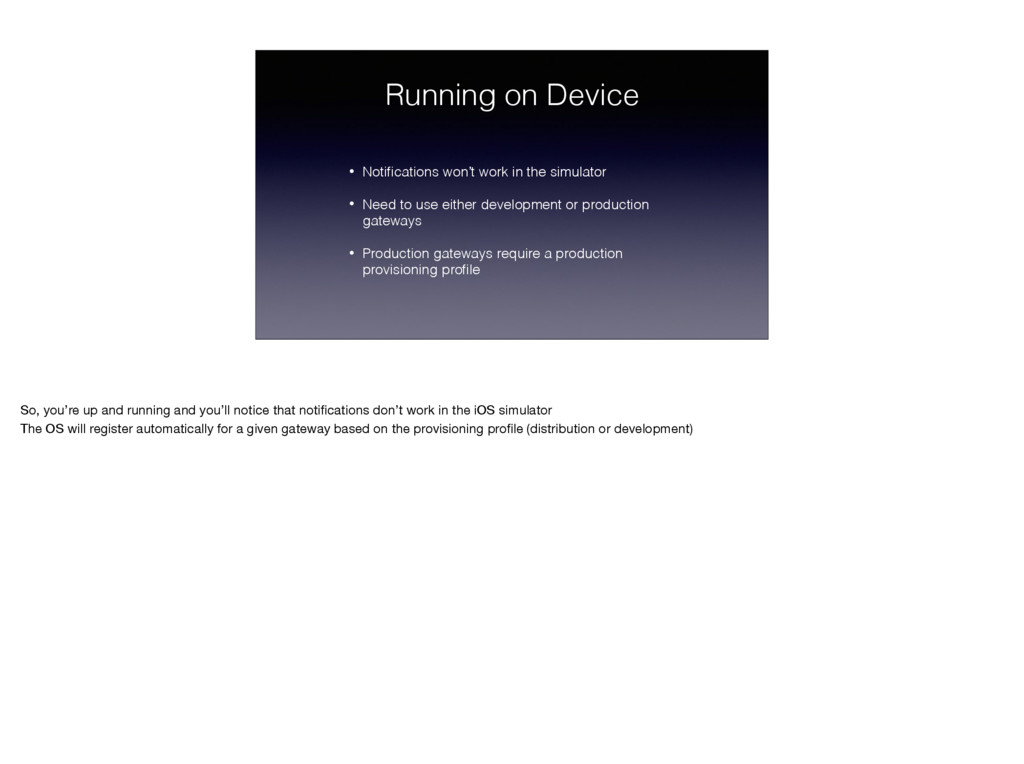
• Need to use either development or production gateways • Production gateways require a production provisioning profile So, you’re up and running and you’ll notice that notifications don’t work in the iOS simulator The OS will register automatically for a given gateway based on the provisioning profile (distribution or development)
{ } func application(application: UIApplication, didReceiveRemoteNotification userInfo: [NSObject : AnyObject], fetchCompletionHandler completionHandler: (UIBackgroundFetchResult) -> Void) { } iOS <10 and the finally in here you’ll get the push. But only if your app is in the background (not restarted or swiped out of memory) There is an alternative method, that allows you to do background processing.
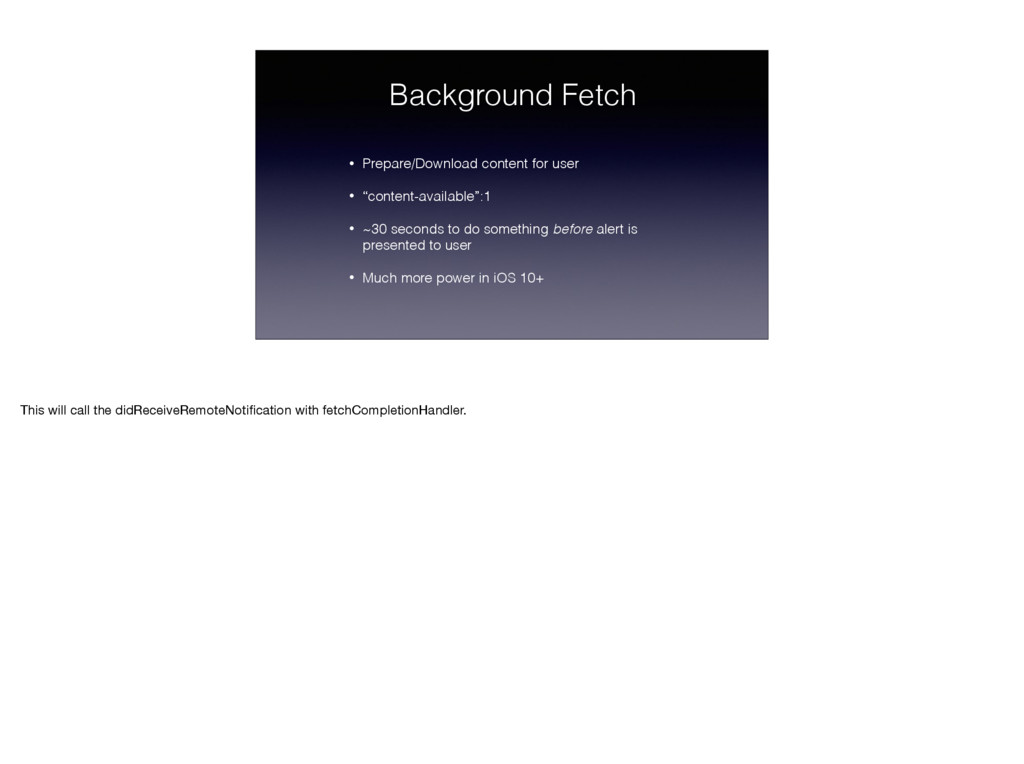
~30 seconds to do something before alert is presented to user • Much more power in iOS 10+ This will call the didReceiveRemoteNotification with fetchCompletionHandler.
app ID • Using the wrong APNS gateway • Using the “Fix Issue” button in Xcode. Just don’t. I deal with a lot of customers setting up put with our system, so I see the pitfalls a lot.
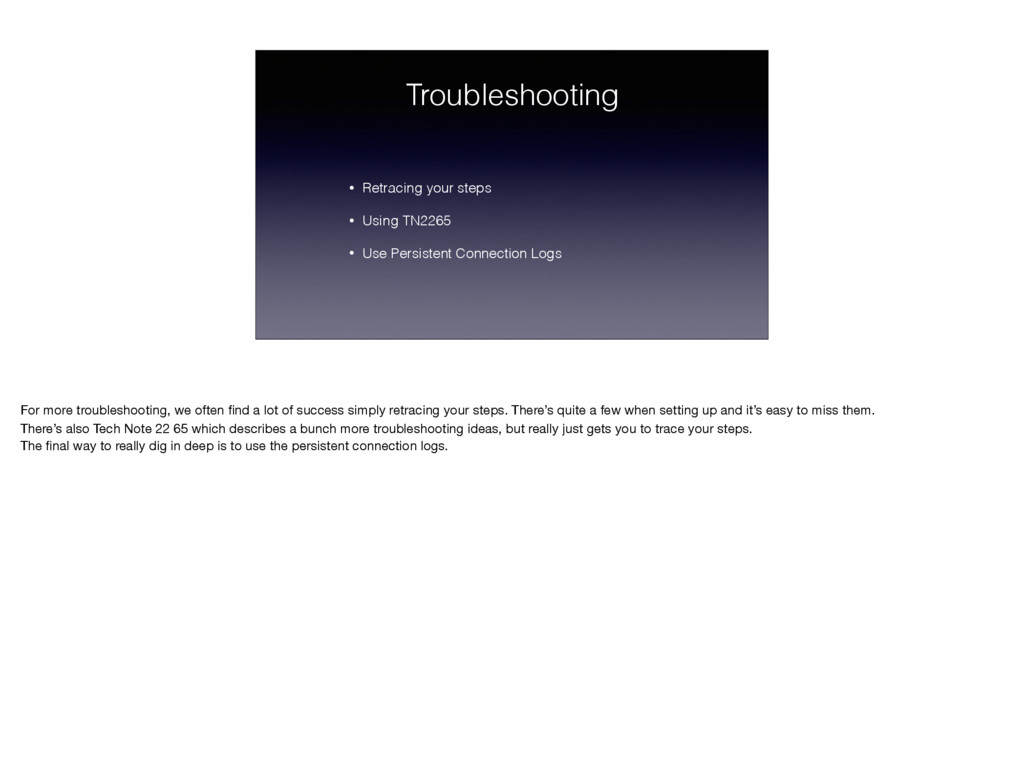
Persistent Connection Logs For more troubleshooting, we often find a lot of success simply retracing your steps. There’s quite a few when setting up and it’s easy to miss them. There’s also Tech Note 22 65 which describes a bunch more troubleshooting ideas, but really just gets you to trace your steps. The final way to really dig in deep is to use the persistent connection logs.
time your phone is powered on. This logging profile when installed will log out everything going over that connection, as well as a bunch more logs from the OS. To install, download it from the TN2265 and email to your phone. Restart the phone and you’re good to go.
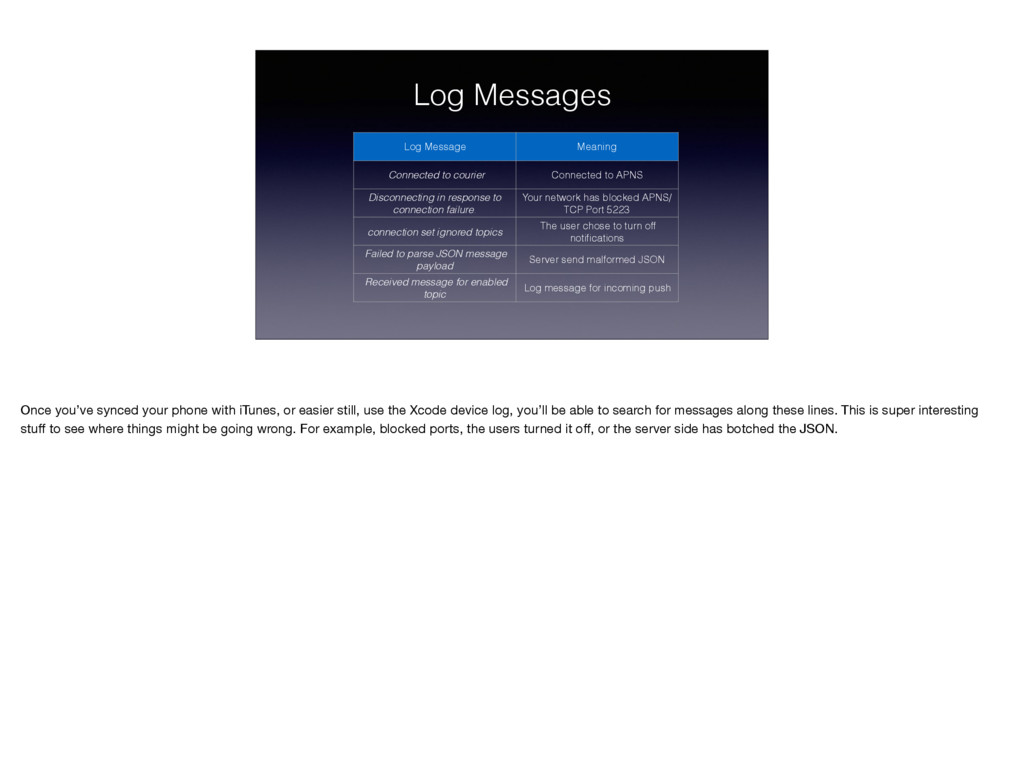
APNS Disconnecting in response to connection failure. Your network has blocked APNS/ TCP Port 5223 connection set ignored topics The user chose to turn off notifications Failed to parse JSON message payload Server send malformed JSON Received message for enabled topic Log message for incoming push Once you’ve synced your phone with iTunes, or easier still, use the Xcode device log, you’ll be able to search for messages along these lines. This is super interesting stuff to see where things might be going wrong. For example, blocked ports, the users turned it off, or the server side has botched the JSON.
topic 'com.carnivalmobile.carnivaltestapp' with payload '{ "_nid" = 57ae8a248234f60009002e2f; aps = { alert = “Oh, Hi Mark!”; "content-available" = 1; }; }' onInterface: WWAN for device token: NO with priority (null) Here’s an example log message of a payload.
with your implementation of push. It can be tricky but it’s just a matter of slowing down and making sure you’re checking those boxes. I’ve done this hundreds of times now so it’s second nature.
people, not devices. Remember this. People have good times to be contacted or interrupted, and they have terrible times. They might see your push and not care at all, or it might be something super important to them.
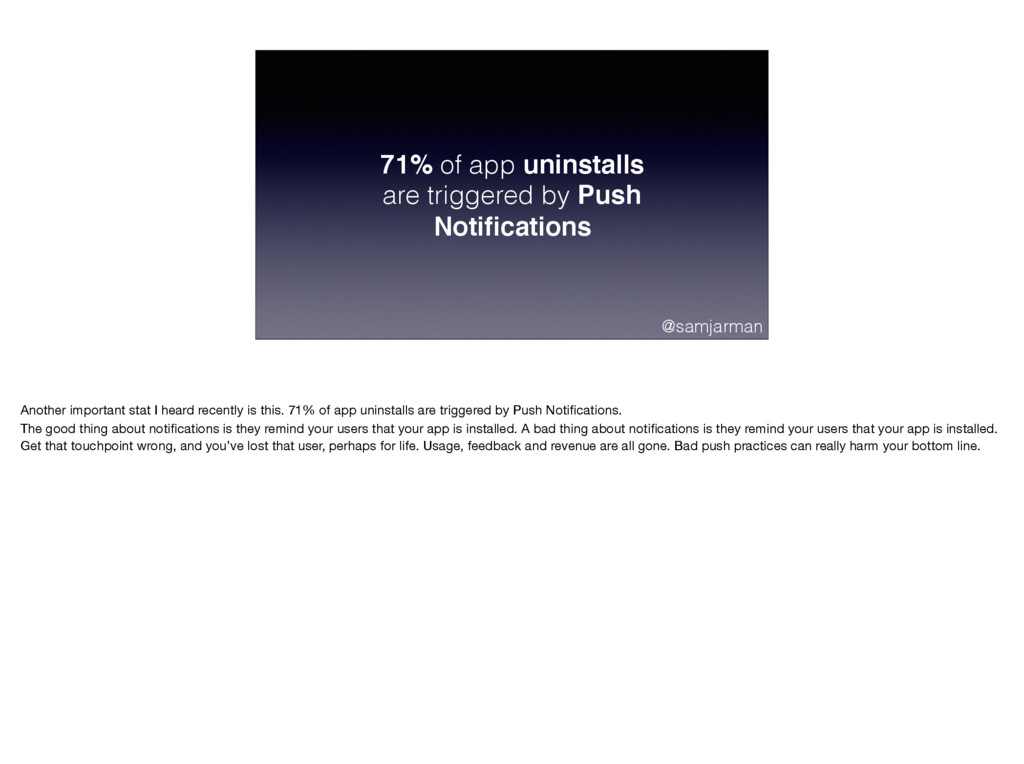
Another important stat I heard recently is this. 71% of app uninstalls are triggered by Push Notifications. The good thing about notifications is they remind your users that your app is installed. A bad thing about notifications is they remind your users that your app is installed. Get that touchpoint wrong, and you’ve lost that user, perhaps for life. Usage, feedback and revenue are all gone. Bad push practices can really harm your bottom line.
to say oh it’s 5pm here in Melbourne lets send out a push to all commuters, only to have your audience asleep in other parts of the world. If you have a sale or something, try send in the local timezone for the user. This will stagger the pushes over a window and might even reduce load on your server, if that’s required. A decent push service should give this this option.
pushes per day, or different services that interact with your app with to inform the user. Consider having a hard limit on this. The limit is relative to the value, but something like a 5-10 max per day would suit most applications. Chat apps for example, won’t have a limit. Consider also an internal priority for some notifications over the other.
phones on do not disturb overnight, or at least on silent. But consider this… do you read all your notifications in the morning? or do you clear them all immediately maybe after reading the important ones? If you’re part of that overnight noise, you have a lower chance of standing out. Perhaps restrict the amount of pushes you send over night and send a summary style push in the morning.
are the pushes for me. Chats, deals based on history, or news alerts based on preferences. Don’t send me junk and certainly don’t something that can’t apply to me, for whatever reasons.
personalization based on journey. This could be anything to do with the context of the app. What level of the game you’re on, which items you have in your cart, which news stories you’ve read. How long you’ve had the app installed, or how long it’s been since you’ve last used it. There’s a bunch of marketing and engagement automation possible here off some basic stuff.
segmentation is transitional push. These is the 1:1 pushes that go to a single users only. Perhaps their package is shipping, or they have a chat, or they’ve got a new like. These sorts of notifications are perfectly personalized by definition, but still adhere to the other best practices I’m talking about such as timeliness.
want. Make the call to action here. “You have a new chat from Ben”. “A new deal for you. Tap here for more” “Sam sent you a friend request”. You have no more than 10 words to make your impact. Use them wisely.
after you register push may be one of the most important dialogs for your apps. Preempt it. Onboard your user well. Explain “hey, here’s why we want to send you pushes and here’s what you get out of it. Keen?” If you explain the value before you present that alert, you’ll get a much higher opt in rate. We’ve seen rates go from 20-30% opt jump to 70-90% with these techniques. This also applies to all other dialogs such as location or bluetooth by the way.
in app content, you should really be pre-loading that with the available API first. This will delay the push by 20 seconds or so, but when they open the app, the UI should be ready to go. No one wants to be driven to a loading screen. Example: Facebook sometimes does this well.
easy to clear notifications. You should always try and duplicate the notification content inside the app. This could be an activity log, a chat history or a notifications log. Make it so users can always re-read the alert text of a notification. Example: Tweetbot’s activity screen
to send push, let the user turn off hearing about certain situations. You can also use the notifications API to see which alerts they’ve enabled, and if they’ve denied you in past, you can always remind the users of the benefits (of which there should be some) of turning off push. Deep link them to the settings app and you’re done. Example: Swarm
Debugging • Best Practices for Notifications So today you’ve heard about what notifications are, how to code them and how to use them for good and not evil.
![Registering for push let settings = UIUserNotificationSettings(forTypes: [.Alert, .Sound, .Badge],](https://files.speakerdeck.com/presentations/3219834cda904d4ab1b6dcfc8e5ea168/slide_38.jpg)
![In code func application(application: UIApplication, didReceiveRemoteNotification userInfo: [NSObject : AnyObject])](https://files.speakerdeck.com/presentations/3219834cda904d4ab1b6dcfc8e5ea168/slide_42.jpg)
![2016-08-13 14:47:01 +1200 apsd[100]: <APSCourier: 0x144e0d6c0>: Received message for enabled](https://files.speakerdeck.com/presentations/3219834cda904d4ab1b6dcfc8e5ea168/slide_55.jpg)