Upgrade to Pro — share decks privately, control downloads, hide ads and more …

Давайте использовать анимации грамотно

Давайте использовать анимации грамотно

Talk by Yevhenii Peteliev.
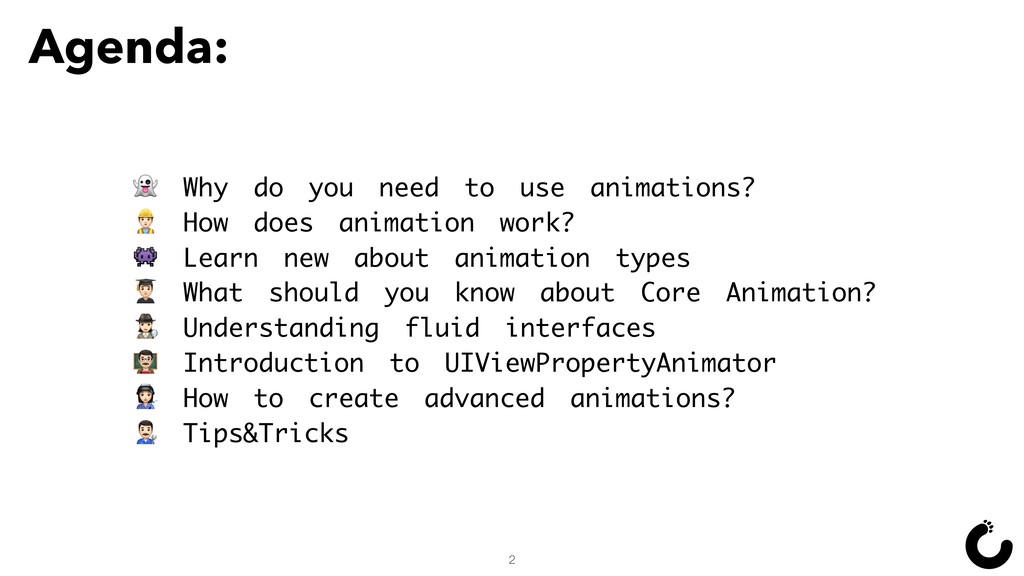
Речь пойдет о:

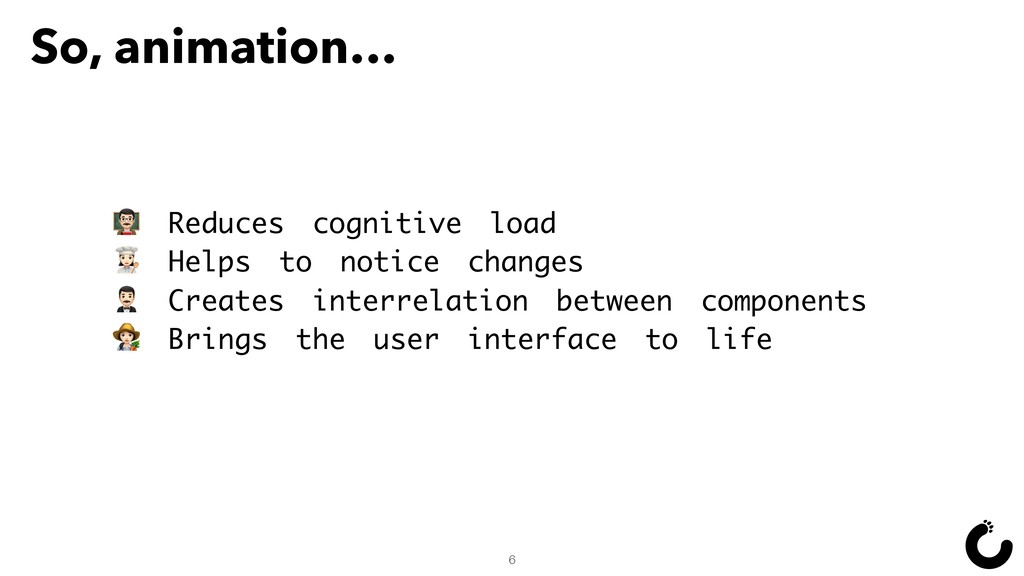
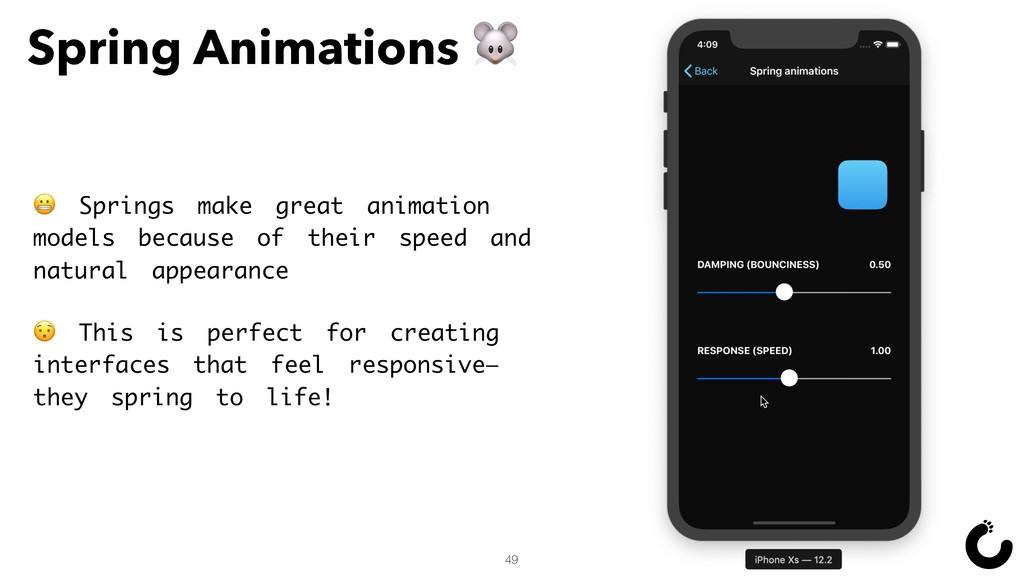
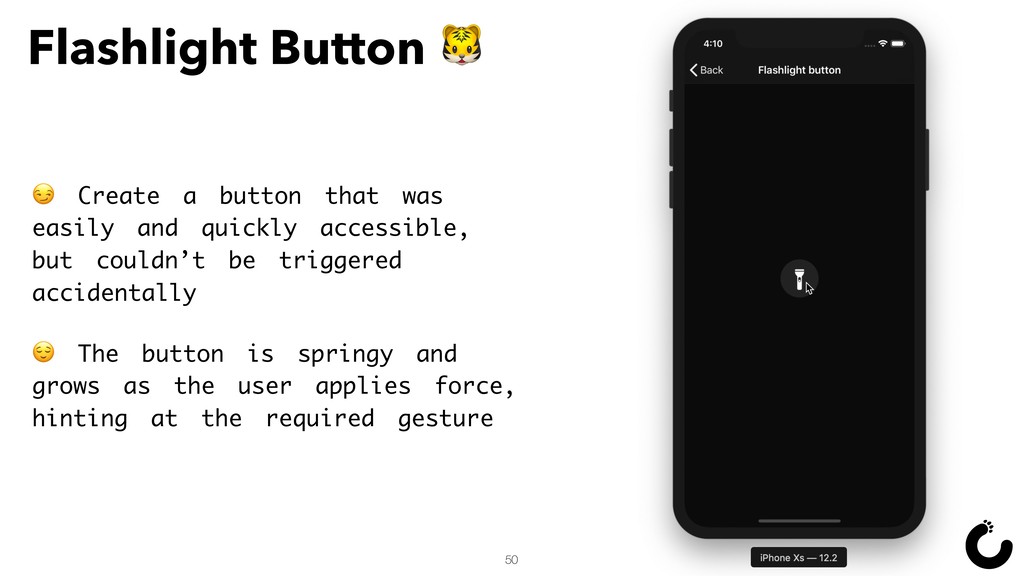
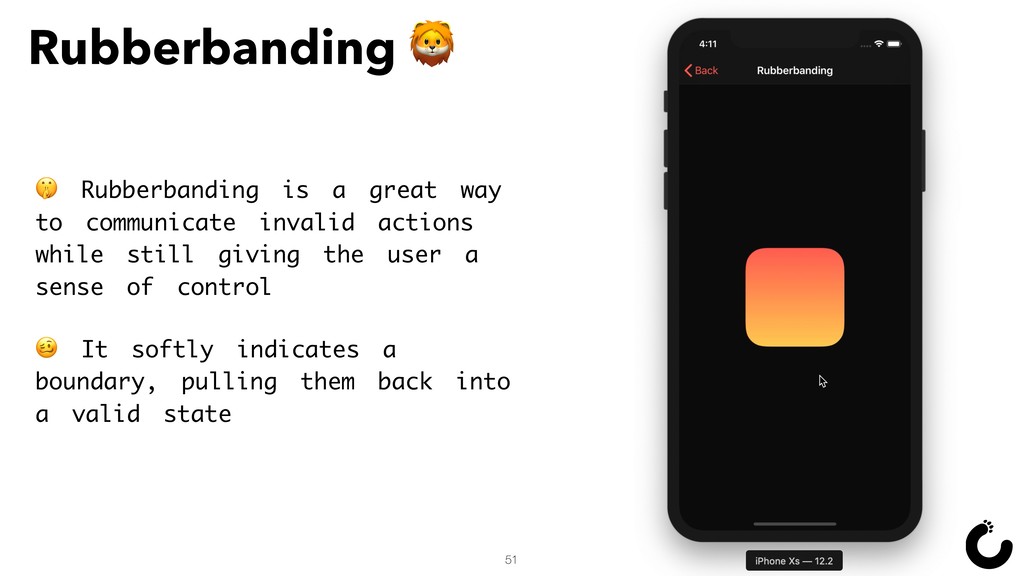
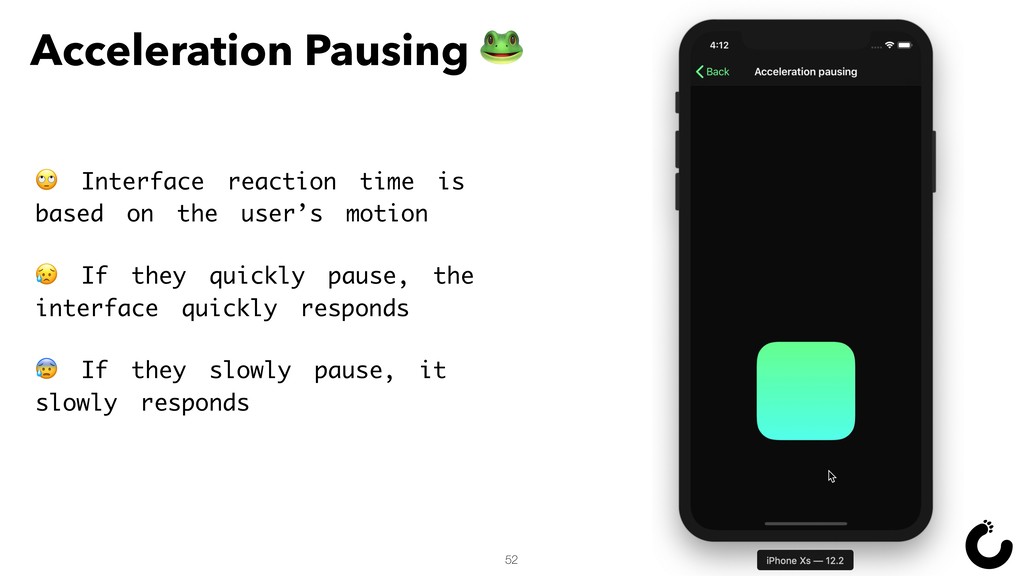
1. Роли анимаций в приложениях.
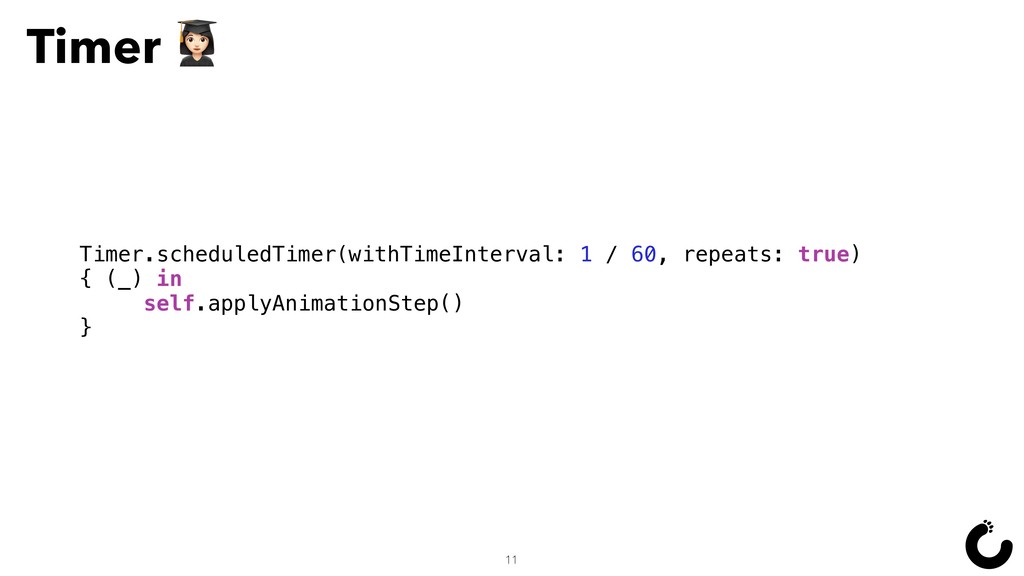
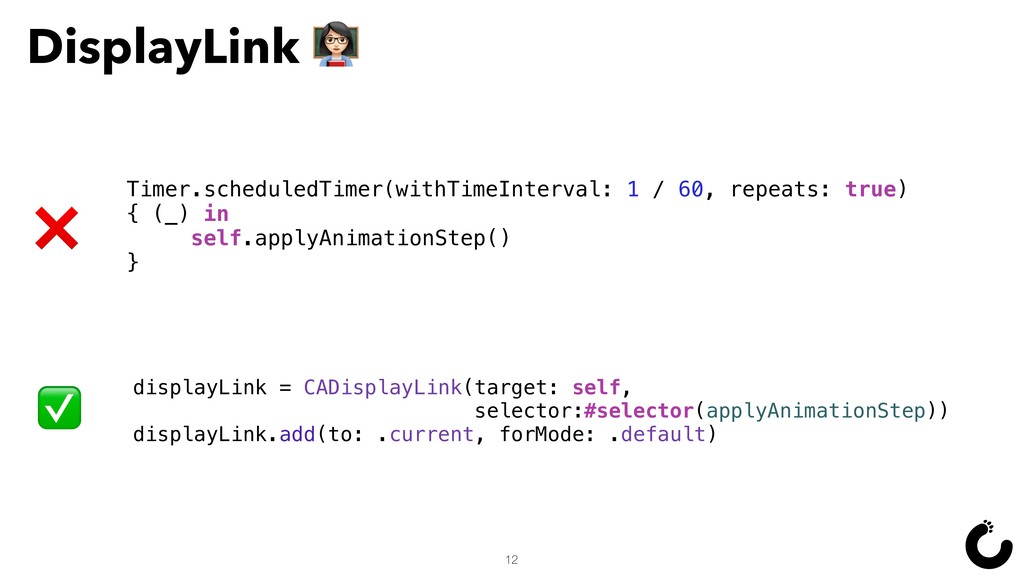
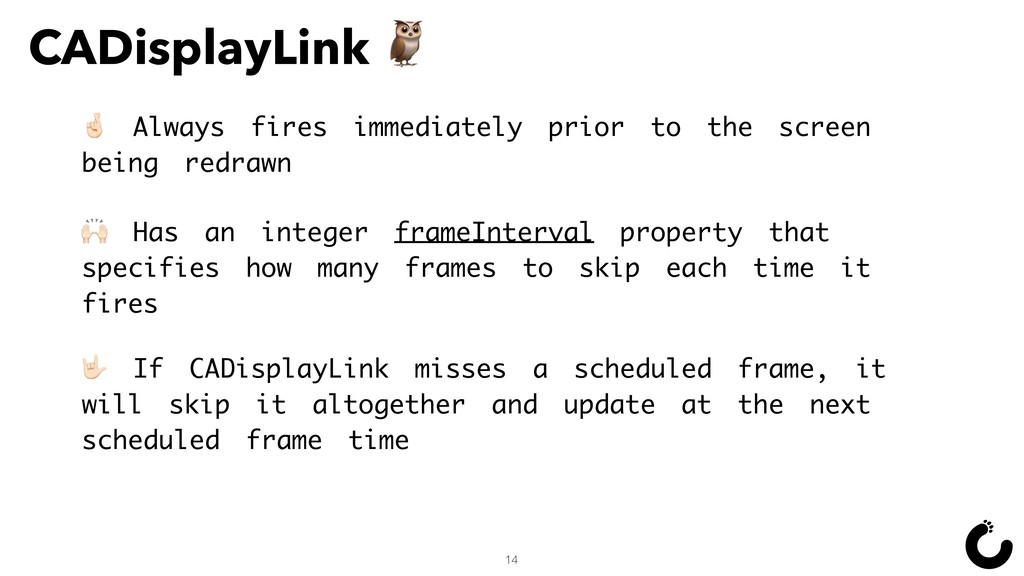
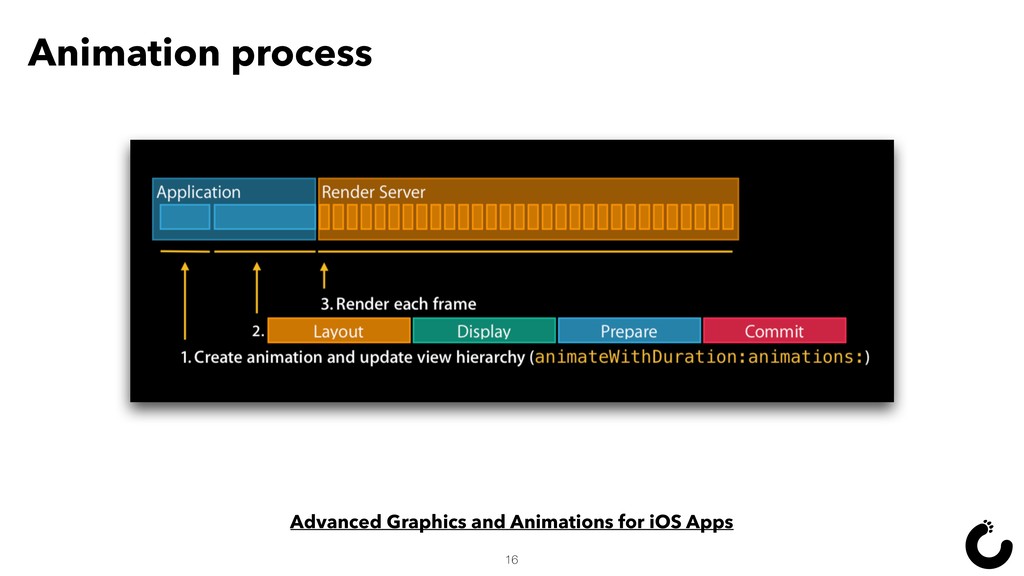
2. Инструментах и подходах к построениям анимаций.
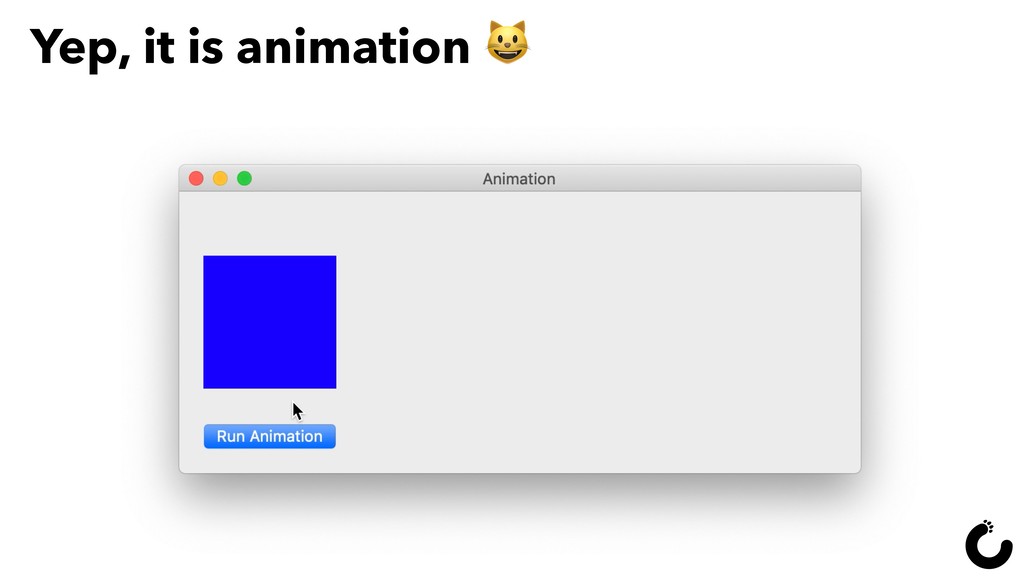
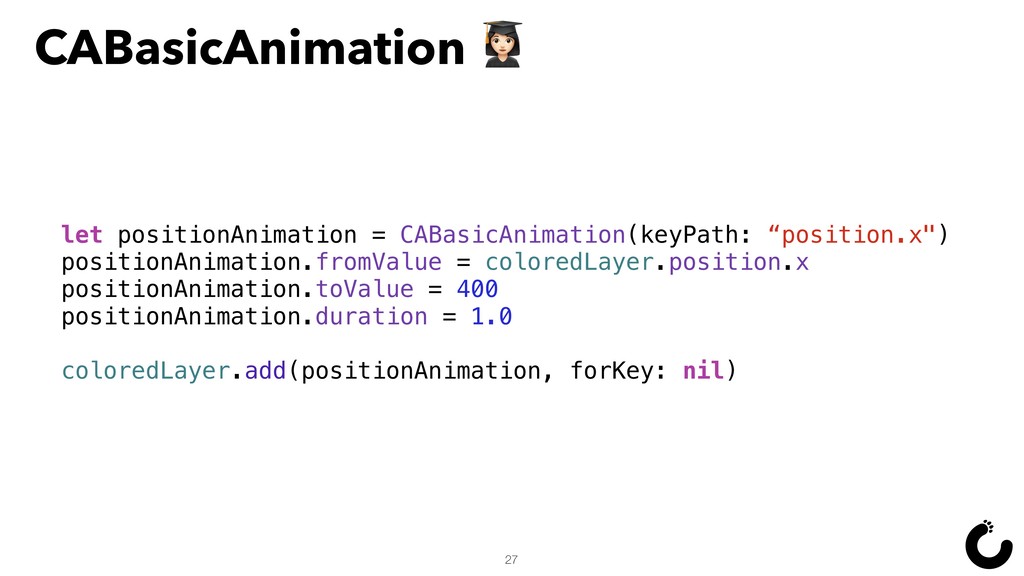
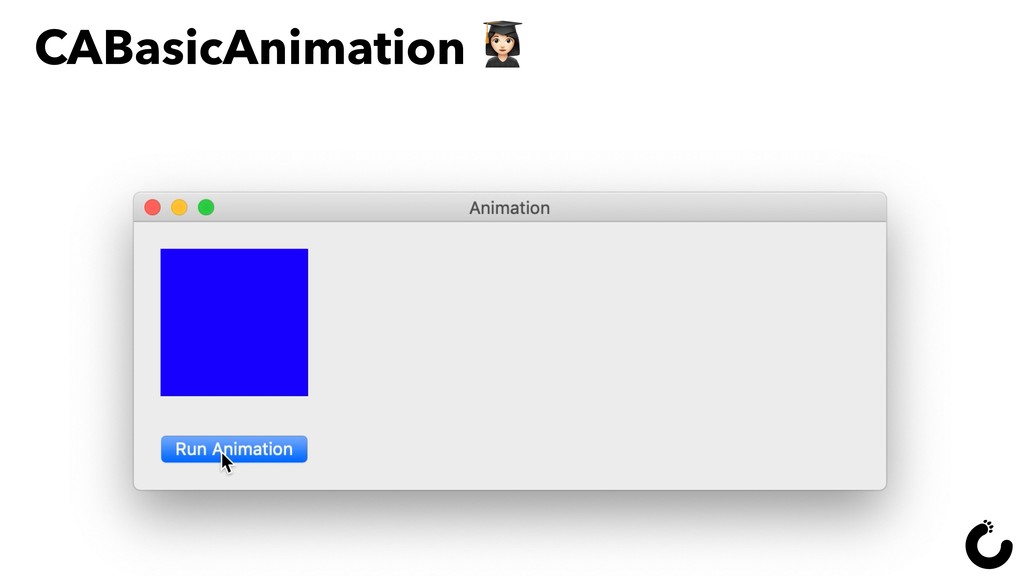
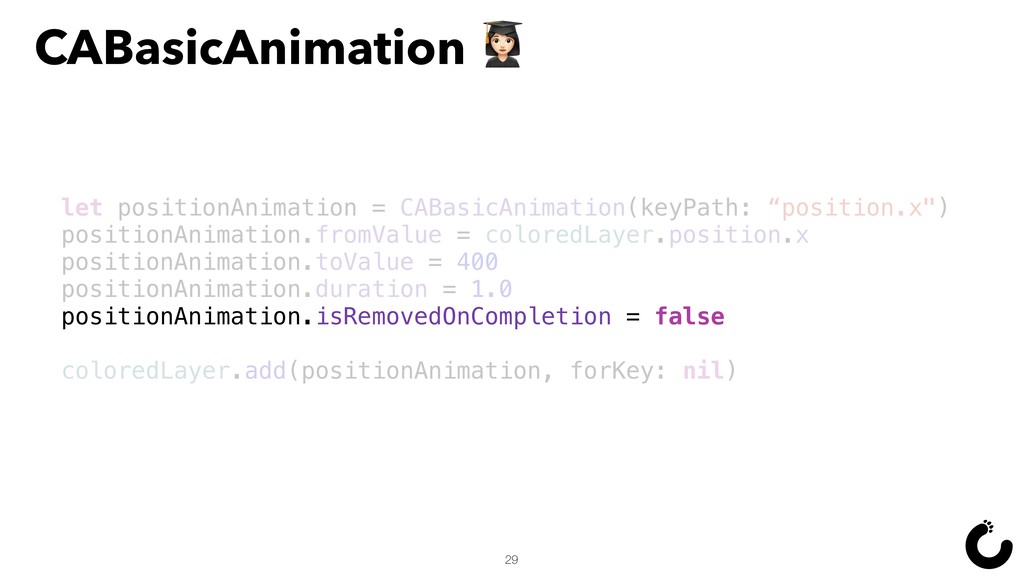
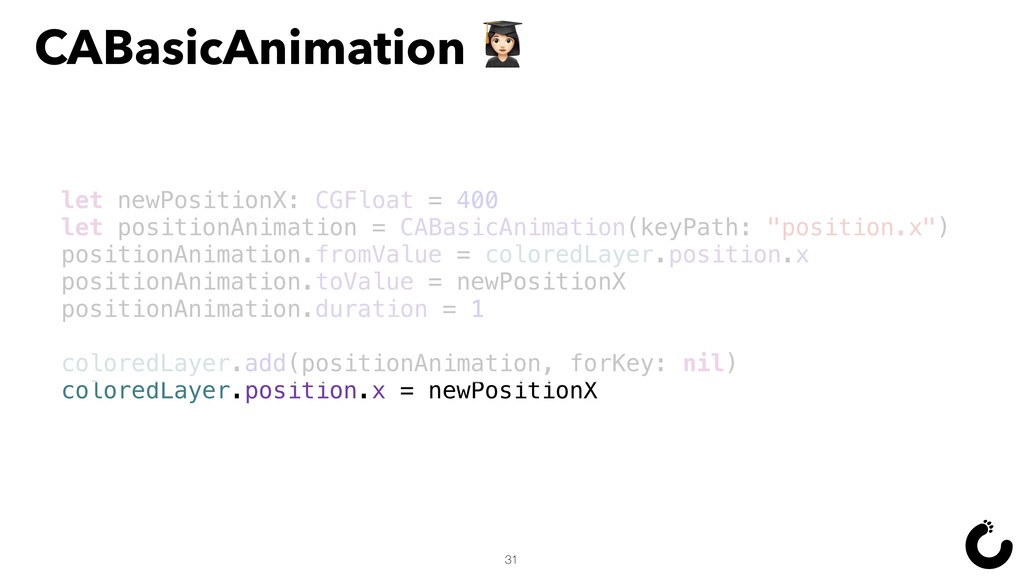
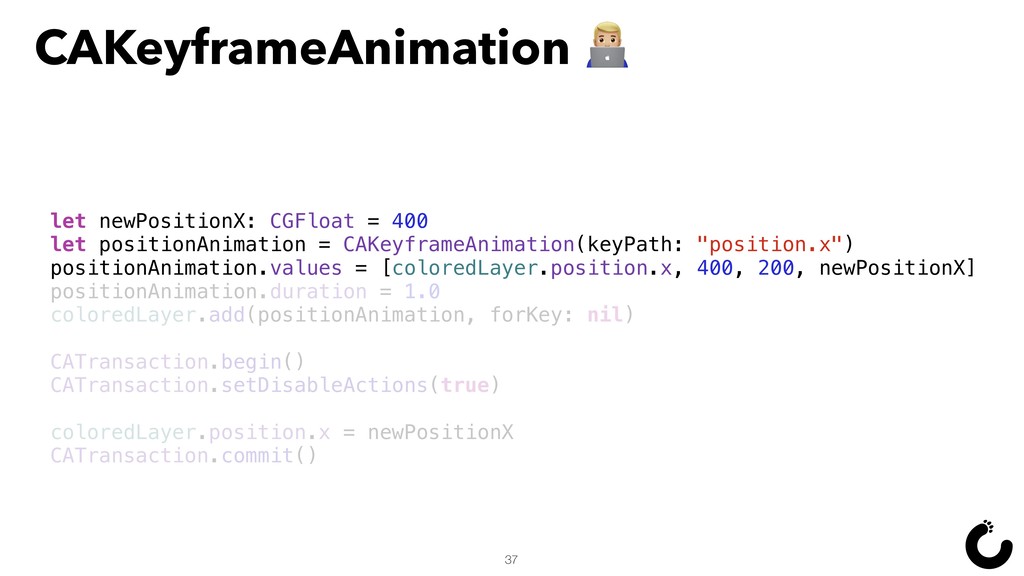
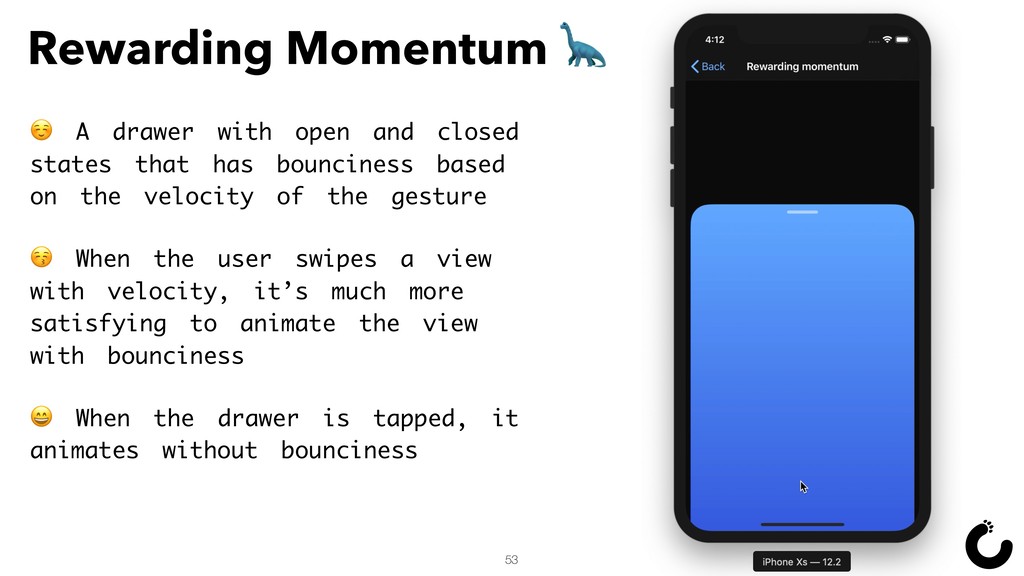
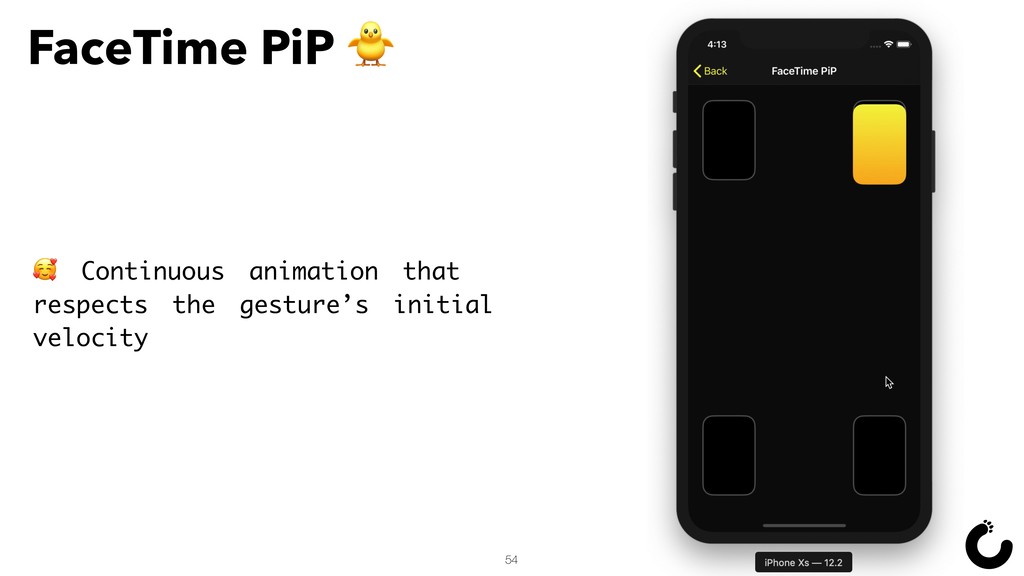
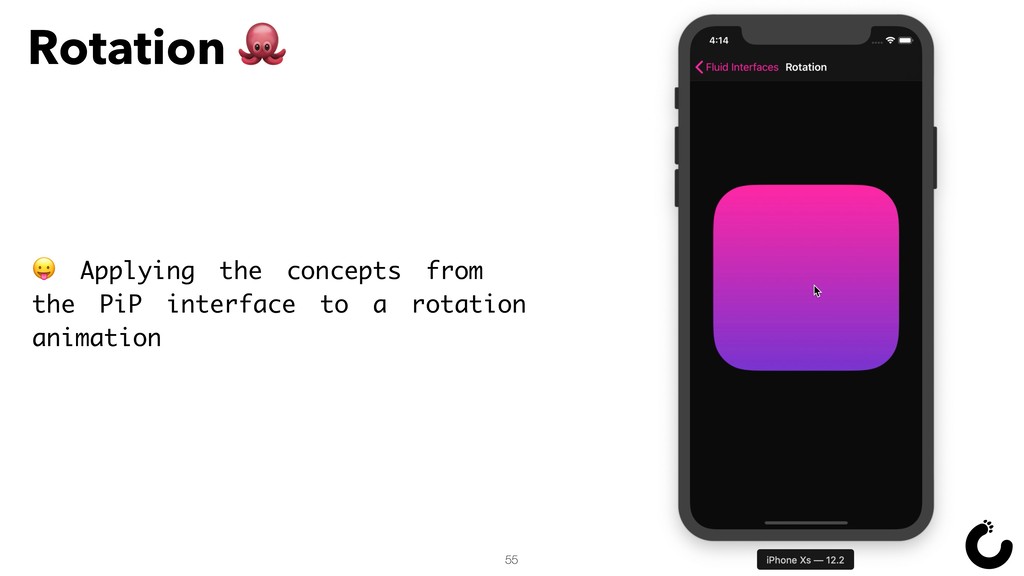
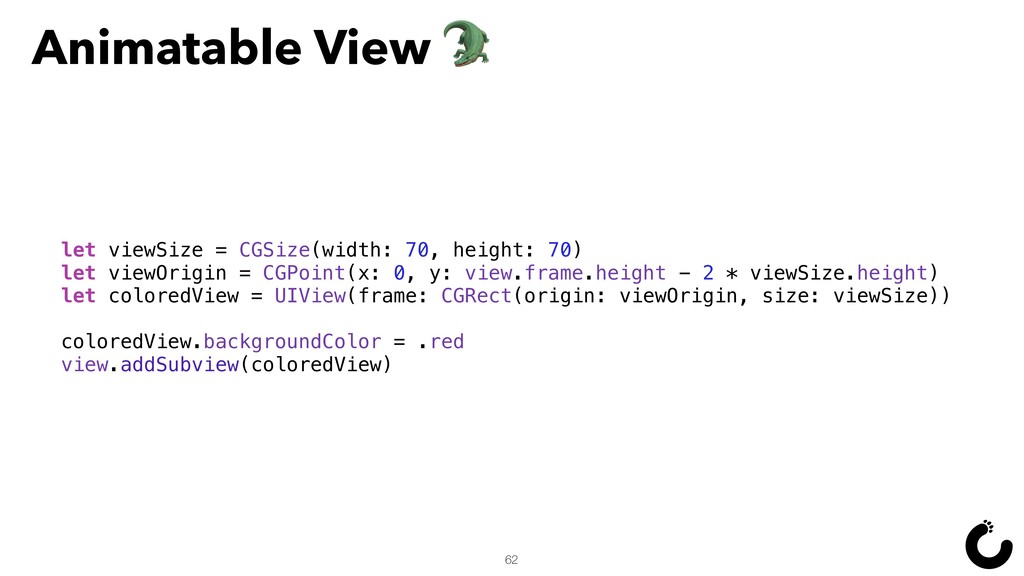
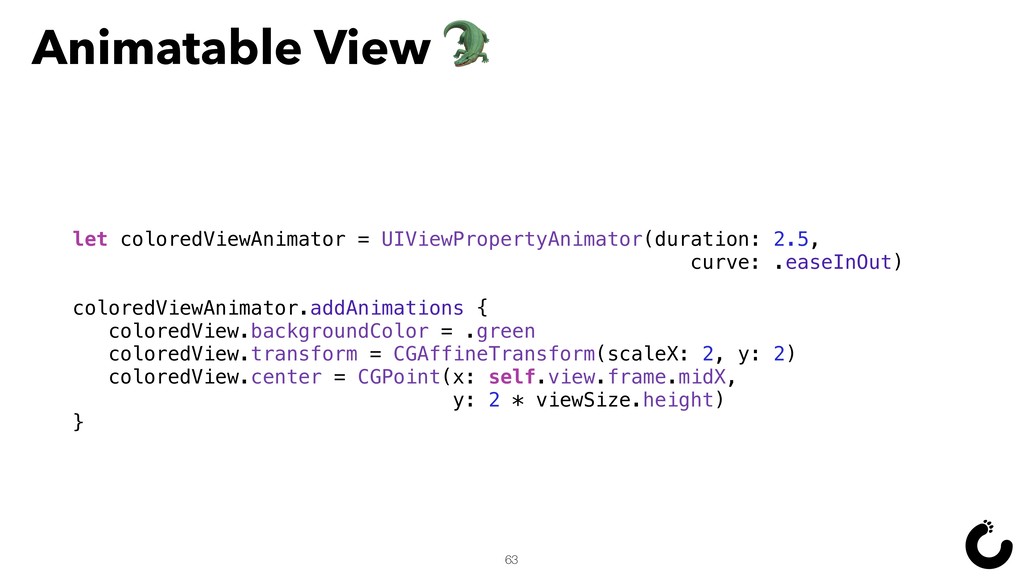
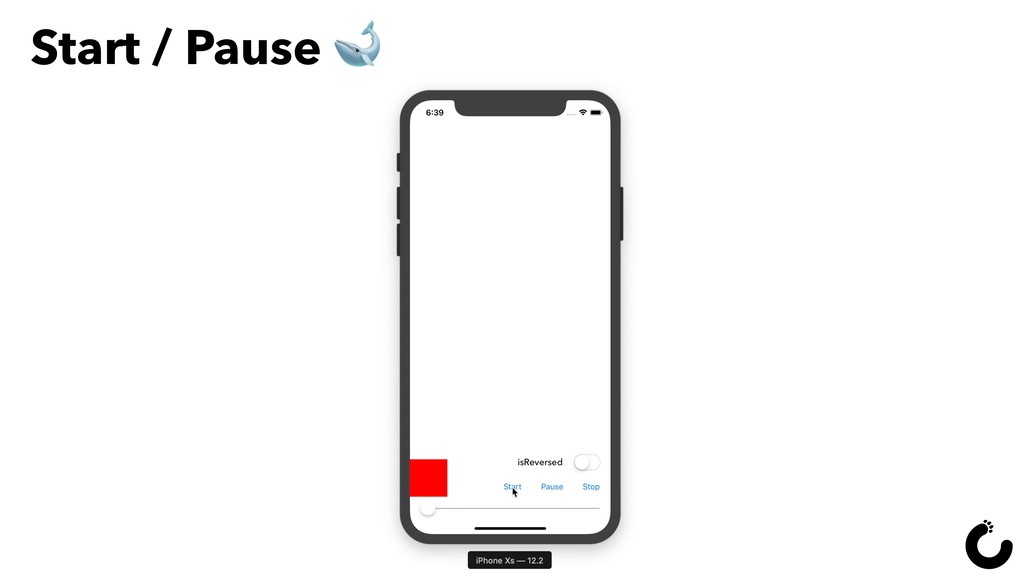
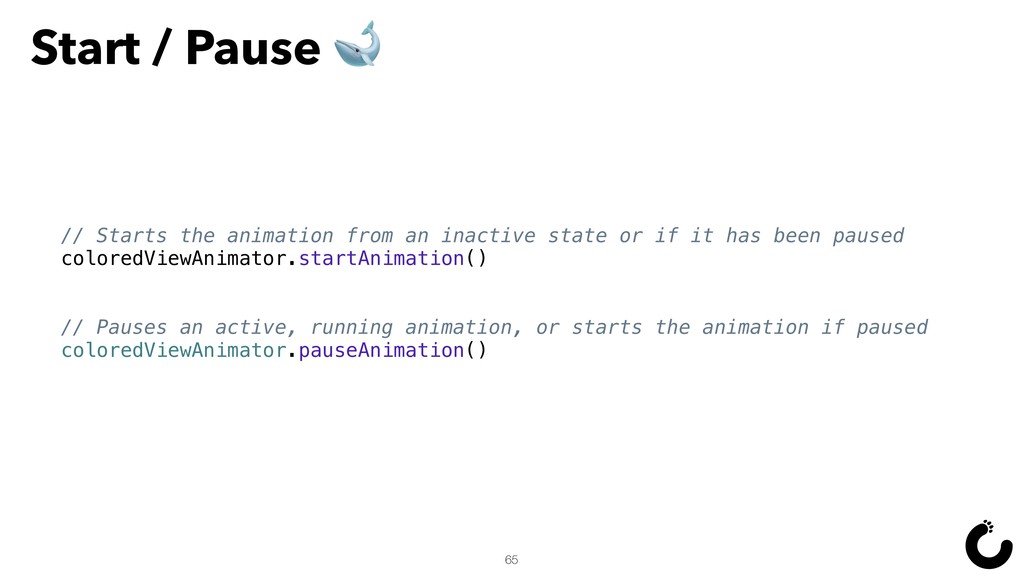
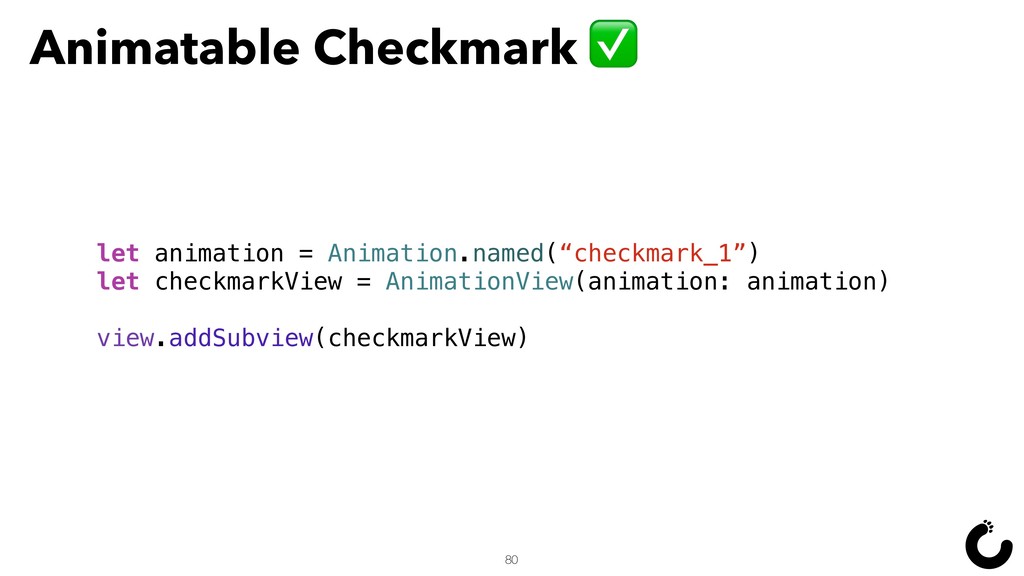
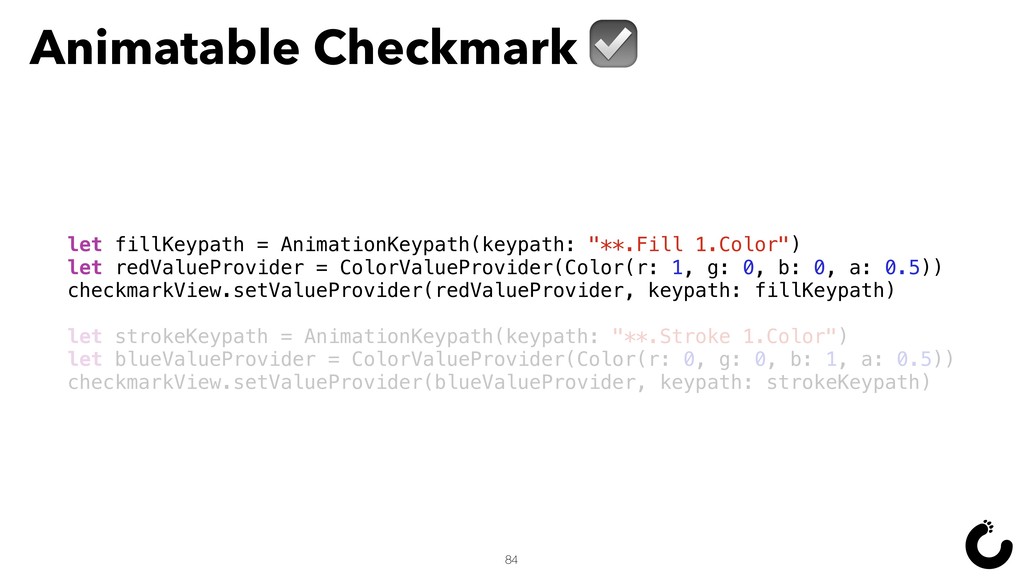
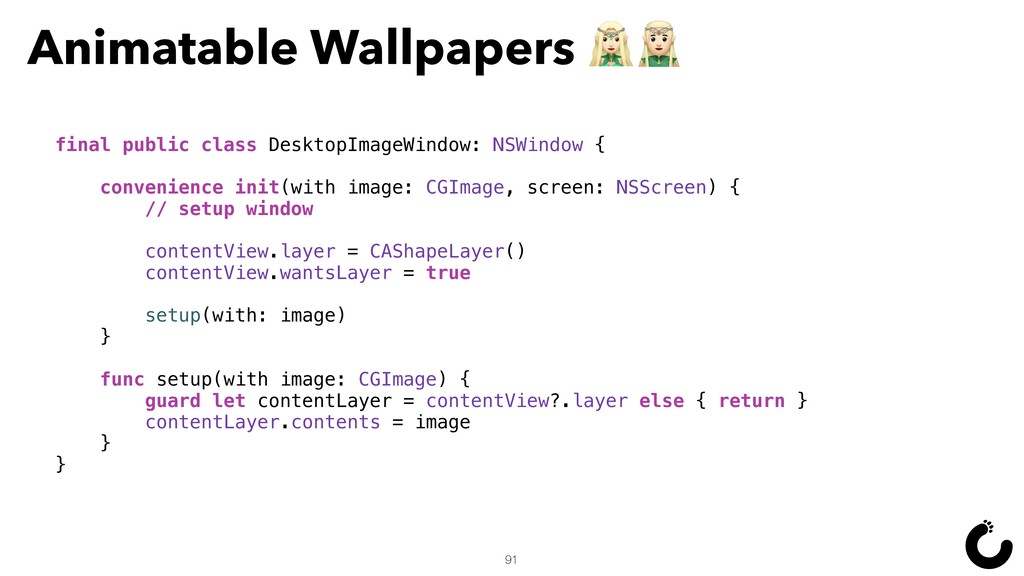
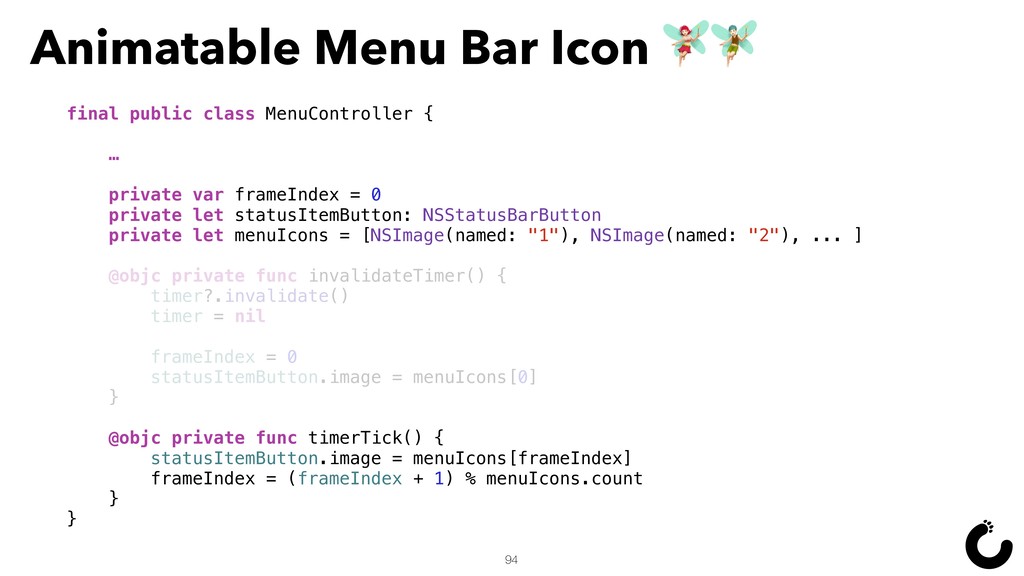
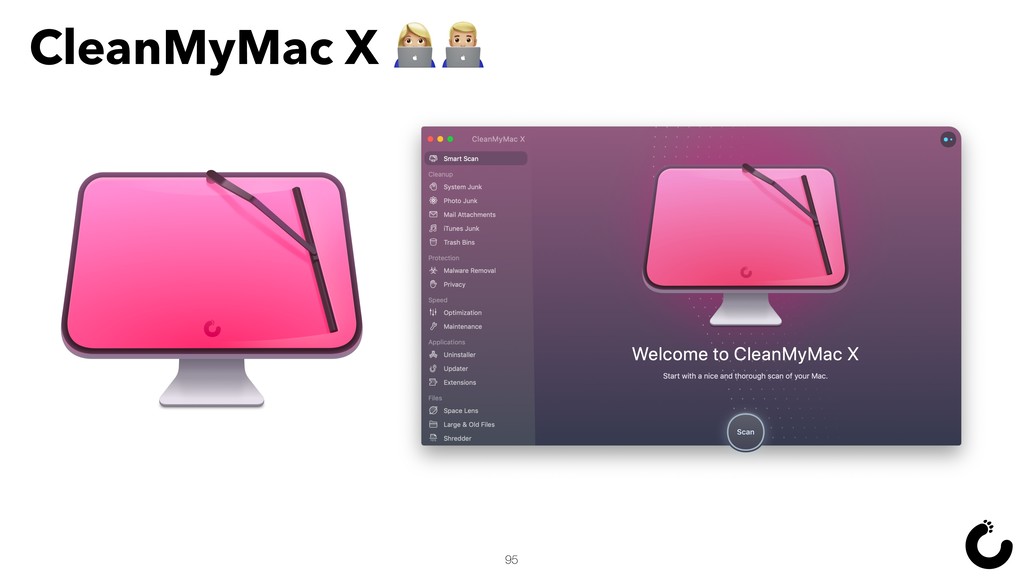
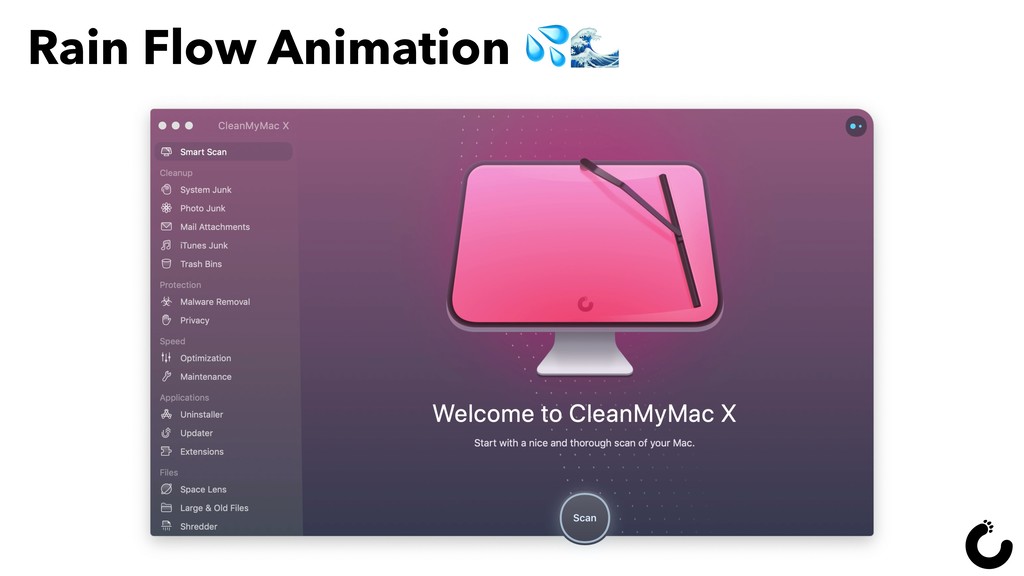
3. Примерах использования анимаций и их реализациях.

This talk was made for CocoaFriday #3 ( https://cocoaheads.org.ua/cocoafriday/3) which took place May 10, 2019.

Video: https://youtu.be/6R55YbJimlc

CocoaHeads Ukraine

May 10, 2019
Tweet

More Decks by CocoaHeads Ukraine

Other Decks in Technology

Transcript

  1. Proper use of animations !"
    1
    Yevhenii Peteliev
    Mac Software Engineer, MacPaw Inc.

    View Slide

  2. Agenda:
    Why do you need to use animations?
    $ How does animation work?
    Learn new about animation types
    ! What should you know about Core Animation?
    & Understanding fluid interfaces
    ' Introduction to UIViewPropertyAnimator
    ( How to create advanced animations?
    ) Tips&Tricks
    2

    View Slide

  3. Why do we need to use animations?
    *+
    3

    View Slide

  4. 4
    World without animations

    View Slide

  5. 5
    And what about animations?

    View Slide

  6. So, animation…
    ' Reduces cognitive load
    . Helps to notice changes
    / Creates interrelation between components
    0 Brings the user interface to life
    6

    View Slide

  7. Is it animation?
    7

    View Slide

  8. Yep, it is animation
    8

    View Slide

  9. Soo, boring…

    9

    View Slide

  10. Timing Functions
    10

    View Slide

  11. Timer "
    11
    Timer.scheduledTimer(withTimeInterval: 1 / 60, repeats: true)
    { (_) in
    self.applyAnimationStep()
    }

    View Slide

  12. 12
    displayLink = CADisplayLink(target: self,
    selector:#selector(applyAnimationStep))
    displayLink.add(to: .current, forMode: .default)
    DisplayLink 7
    Timer.scheduledTimer(withTimeInterval: 1 / 60, repeats: true)
    { (_) in
    self.applyAnimationStep()
    }


    View Slide

  13. Why is CADisplayLink better?

    13

    View Slide

  14. CADisplayLink
    14
    < Always fires immediately prior to the screen
    being redrawn
    = Has an integer frameInterval property that
    specifies how many frames to skip each time it
    fires
    > If CADisplayLink misses a scheduled frame, it
    will skip it altogether and update at the next
    scheduled frame time

    View Slide

  15. How does animation go?

    15

    View Slide

  16. Animation process
    16
    Advanced Graphics and Animations for iOS Apps

    View Slide

  17. Animation Types

    17

    View Slide

  18. Сhoice
    18
    Core Animation

    Time-Based

    View Slide

  19. Core Animation
    Optimization
    UIKit based
    Custom transitions
    19
    Benefits:

    View Slide

  20. ☺ Custom property
    State observing (iOS<10)
    Custom timing function
    20
    Time-Based
    Benefits:

    View Slide

  21. Core Animation
    UIView animation
    UIViewPropertyAnimator
    21
    Representatives:
    Core Animation

    View Slide

  22. Timer/CADisplayLink
    Facebook POP
    Lottie
    Others
    22
    Representatives:
    Time-Based

    View Slide

  23. Why CoreAnimation?
    QR
    23

    View Slide

  24. Core Animation S
    24
    T Fast
    = Shared both for iOS/macOS
    U Use CALayer’s:
    V CAShapeLayer
    W CAGradientLayer
    > CAReplicatorLayer
    X CAEmitterLayer
    Y Others

    View Slide

  25. CALayer
    25
    bounds
    contents
    borderColor
    backgroundColor
    transform
    opacity
    others

    View Slide

  26. CABasicAnimation "
    26
    Provides basic, single-keyframe animation
    capabilities for a layer property

    View Slide

  27. 27
    let positionAnimation = CABasicAnimation(keyPath: “position.x")
    positionAnimation.fromValue = coloredLayer.position.x
    positionAnimation.toValue = 400
    positionAnimation.duration = 1.0
    coloredLayer.add(positionAnimation, forKey: nil)
    CABasicAnimation "

    View Slide

  28. 28
    CABasicAnimation "

    View Slide

  29. 29
    let positionAnimation = CABasicAnimation(keyPath: “position.x")
    positionAnimation.fromValue = coloredLayer.position.x
    positionAnimation.toValue = 400
    positionAnimation.duration = 1.0
    positionAnimation.isRemovedOnCompletion = false
    coloredLayer.add(positionAnimation, forKey: nil)
    CABasicAnimation "

    View Slide

  30. 30
    Presentation Model

    View Slide

  31. 31
    let newPositionX: CGFloat = 400
    let positionAnimation = CABasicAnimation(keyPath: "position.x")
    positionAnimation.fromValue = coloredLayer.position.x
    positionAnimation.toValue = newPositionX
    positionAnimation.duration = 1
    coloredLayer.add(positionAnimation, forKey: nil)
    coloredLayer.position.x = newPositionX
    CABasicAnimation "

    View Slide

  32. 32
    CABasicAnimation "

    View Slide

  33. 33
    let newPositionX: CGFloat = 400
    let positionAnimation = CABasicAnimation(keyPath: "position.x")
    positionAnimation.fromValue = coloredLayer.position.x
    positionAnimation.toValue = newPositionX
    positionAnimation.duration = 1
    coloredLayer.add(positionAnimation, forKey: nil)
    CATransaction.begin()
    CATransaction.setDisableActions(true)
    coloredLayer.position.x = newPositionX
    CATransaction.commit()
    CABasicAnimation "

    View Slide

  34. 34
    CABasicAnimation "

    View Slide

  35. CAKeyframeAnimation ^
    35
    Provides keyframe animation capabilities for a
    layer object

    View Slide

  36. 36
    CAKeyframeAnimation ^

    View Slide

  37. CAKeyframeAnimation ^
    37
    let newPositionX: CGFloat = 400
    let positionAnimation = CAKeyframeAnimation(keyPath: "position.x")
    positionAnimation.values = [coloredLayer.position.x, 400, 200, newPositionX]
    positionAnimation.duration = 1.0
    coloredLayer.add(positionAnimation, forKey: nil)
    CATransaction.begin()
    CATransaction.setDisableActions(true)
    coloredLayer.position.x = newPositionX
    CATransaction.commit()

    View Slide

  38. CASpringAnimation `
    38
    Applies a spring-like force to a layer's
    properties
    Allows control over physically based
    attributes such as the spring's damping and
    stiffness

    View Slide

  39. 39
    CASpringAnimation `

    View Slide

  40. 40
    let newPositionX: CGFloat = 400
    let positionAnimation = CASpringAnimation(keyPath: "position.x")
    positionAnimation.fromValue = coloredLayer.position.x
    positionAnimation.toValue = newPositionX
    positionAnimation.duration = positionAnimation.settlingDuration
    coloredLayer.add(positionAnimation, forKey: nil)
    CATransaction.begin()
    CATransaction.setDisableActions(true)
    coloredLayer.position.x = newPositionX
    CATransaction.commit()
    CASpringAnimation `

    View Slide

  41. What about some practice?

    41

    View Slide

  42. 42
    Simple Animation

    View Slide

  43. 43
    let newScale: CGFloat = 2
    let newBorderWidth: CGFloat = 10
    let newBorderColor = NSColor.green.cgColor
    let newBackgroundColor = NSColor.red.cgColor
    let borderWidthAnimation = CABasicAnimation(keyPath: "borderWidth")
    borderWidthAnimation.fromValue = coloredLayer.borderWidth
    borderWidthAnimation.toValue = newBorderWidth
    let borderColorAnimation = CABasicAnimation(keyPath: "borderColor")
    borderColorAnimation.fromValue = coloredLayer.borderColor
    borderColorAnimation.toValue = newBorderColor
    let backgroundColorAnimation = CABasicAnimation(keyPath: "backgroundColor")
    backgroundColorAnimation.fromValue = coloredLayer.backgroundColor
    backgroundColorAnimation.toValue = newBackgroundColor
    let scaleAnimation = CABasicAnimation(keyPath: "transform.scale")
    scaleAnimation.fromValue = 1
    scaleAnimation.toValue = newScale
    Simple Animation

    View Slide

  44. 44

    let groupAnimation = CAAnimationGroup()
    groupAnimation.duration = 2.0
    groupAnimation.timingFunction = CAMediaTimingFunction(name: .easeInEaseOut)
    groupAnimation.animations = [borderWidthAnimation, borderColorAnimation,
    backgroundColorAnimation, scaleAnimation]
    coloredLayer.add(groupAnimation, forKey: nil)
    CATransaction.begin()
    CATransaction.setDisableActions(true)
    coloredLayer.borderWidth = newBorderWidth
    coloredLayer.borderColor = newBorderColor
    coloredLayer.backgroundColor = newBackgroundColor
    coloredLayer.transform = CATransform3DMakeScale(newScale, newScale, 1)
    CATransaction.commit()
    Simple Animation

    View Slide

  45. Fluid Interfaces

    45

    View Slide

  46. Fluid Interfaces
    46

    View Slide

  47. 47
    Improve the user’s experience, making every
    interaction feel quick, lightweight and meaningful
    Give the user a feeling of control, which
    builds trust with your app
    Fluid Interfaces

    View Slide

  48. 48
    Calculator Button
    Buttons that feel responsive,
    acknowledging to the user that
    they are functional
    We want the action to be
    cancellable if the user decides
    against their action

    View Slide

  49. 49
    Spring Animations
    Springs make great animation
    models because of their speed and
    natural appearance
    This is perfect for creating
    interfaces that feel responsive—
    they spring to life!

    View Slide

  50. 50
    Flashlight Button
    Create a button that was
    easily and quickly accessible,
    but couldn’t be triggered
    accidentally
    The button is springy and
    grows as the user applies force,
    hinting at the required gesture

    View Slide

  51. 51
    Rubberbanding
    Rubberbanding is a great way
    to communicate invalid actions
    while still giving the user a
    sense of control
    It softly indicates a
    boundary, pulling them back into
    a valid state

    View Slide

  52. 52
    Acceleration Pausing
    Interface reaction time is
    based on the user’s motion
    If they quickly pause, the
    interface quickly responds
    If they slowly pause, it
    slowly responds

    View Slide

  53. 53
    Rewarding Momentum
    ☺ A drawer with open and closed
    states that has bounciness based
    on the velocity of the gesture
    When the user swipes a view
    with velocity, it’s much more
    satisfying to animate the view
    with bounciness
    When the drawer is tapped, it
    animates without bounciness

    View Slide

  54. 54
    FaceTime PiP
    Continuous animation that
    respects the gesture’s initial
    velocity

    View Slide

  55. 55
    Rotation
    Applying the concepts from
    the PiP interface to a rotation
    animation

    View Slide

  56. Sooo
    56
    Apply these tips to your components
    Teach designers about new possibilities
    Use these approach into your projects
    You’re a rockstar!

    View Slide

  57. UIViewPropertyAnimator

    57

    View Slide

  58. UIViewPropertyAnimator
    58
    Animates changes to views and allows the
    dynamic modification of those animations
    Operates on animatable properties of views
    (frame, alpha, transform, etc), creating
    animations from the blocks you provide

    View Slide

  59. 59
    Scrub through a paused animation by modifying
    the fractionComplete property
    Change the animation’s direction using the
    isReversed property
    Start, pause, resume and stop animations
    UIViewPropertyAnimator

    View Slide

  60. What about some practice?

    60

    View Slide

  61. 61
    Animatable View

    View Slide

  62. 62
    let viewSize = CGSize(width: 70, height: 70)
    let viewOrigin = CGPoint(x: 0, y: view.frame.height - 2 * viewSize.height)
    let coloredView = UIView(frame: CGRect(origin: viewOrigin, size: viewSize))
    coloredView.backgroundColor = .red
    view.addSubview(coloredView)
    Animatable View

    View Slide

  63. 63
    let coloredViewAnimator = UIViewPropertyAnimator(duration: 2.5,
    curve: .easeInOut)
    coloredViewAnimator.addAnimations {
    coloredView.backgroundColor = .green
    coloredView.transform = CGAffineTransform(scaleX: 2, y: 2)
    coloredView.center = CGPoint(x: self.view.frame.midX,
    y: 2 * viewSize.height)
    }
    Animatable View

    View Slide

  64. 64
    Start / Pause

    View Slide

  65. 65
    // Starts the animation from an inactive state or if it has been paused
    coloredViewAnimator.startAnimation()

    // Pauses an active, running animation, or starts the animation if paused
    coloredViewAnimator.pauseAnimation()
    Start / Pause

    View Slide

  66. 66
    Stop

    View Slide

  67. 67
    // Stops the animation
    coloredViewAnimator.stopAnimation(true)
    Stop

    View Slide

  68. 68
    Progress

    View Slide

  69. 69
    // The completion percentage of the animation
    coloredViewAnimator.fractionComplete = CGFloat(sender.value)
    Progress

    View Slide

  70. 70
    Reverse

    View Slide

  71. 71
    // Reversed indicates that the animation is running in the reversed direction
    coloredViewAnimator.isReversed = sender.isOn
    Reverse

    View Slide

  72. Advanced Animations
    †⭐
    72

    View Slide

  73. 73
    ˆ Lottie is a library for Android, iOS, Web
    and Windows that parses Adobe After Effects
    animations exported as JSON with Bodymovin and
    renders them natively on mobile and on the web!
    Lottie ‰

    View Slide

  74. Lottie ‰
    74

    View Slide

  75. Lottie ‰
    75

    View Slide

  76. What do we need?
    Š‹
    76

    View Slide

  77. Requirements Œ
    77
    • Creative designer
    ` Adobe After Effects
    ) Bodymovin
    Ž Lottie library
    That’s all

    View Slide

  78. 78
    Animatable Checkmark ✅

    View Slide

  79. 79
    Animatable Checkmark ✅

    View Slide

  80. 80
    let animation = Animation.named(“checkmark_1”)
    let checkmarkView = AnimationView(animation: animation)
    view.addSubview(checkmarkView)
    Animatable Checkmark ✅

    View Slide

  81. 81
    Animatable Checkmark ✅

    View Slide

  82. 82
    // play button clicked
    checkmarkView.play()
    // slider changed value
    checkmarkView.currentProgress = AnimationProgressTime(slider.floatValue)
    Animatable Checkmark ✅

    View Slide

  83. 83
    Animatable Checkmark ☑

    View Slide

  84. 84
    let fillKeypath = AnimationKeypath(keypath: "**.Fill 1.Color")
    let redValueProvider = ColorValueProvider(Color(r: 1, g: 0, b: 0, a: 0.5))
    checkmarkView.setValueProvider(redValueProvider, keypath: fillKeypath)
    let strokeKeypath = AnimationKeypath(keypath: "**.Stroke 1.Color")
    let blueValueProvider = ColorValueProvider(Color(r: 0, g: 0, b: 1, a: 0.5))
    checkmarkView.setValueProvider(blueValueProvider, keypath: strokeKeypath)
    Animatable Checkmark ☑

    View Slide

  85. Where can I use it?
    ‘’
    85

    View Slide

  86. Onboarding ‰
    86

    View Slide

  87. Advantages
    87
    Size
    Mutability
    Control
    Speed
    Progress
    Completion

    View Slide

  88. Tips&Tricks
    0’
    88

    View Slide

  89. Wallpaper Wizard
    89

    View Slide

  90. Animatable Wallpapers •*
    90

    View Slide

  91. final public class DesktopImageWindow: NSWindow {
    convenience init(with image: CGImage, screen: NSScreen) {
    // setup window
    contentView.layer = CAShapeLayer()
    contentView.wantsLayer = true
    setup(with: image)
    }
    func setup(with image: CGImage) {
    guard let contentLayer = contentView?.layer else { return }
    contentLayer.contents = image
    }
    }
    91
    Animatable Wallpapers •*

    View Slide

  92. Animatable Menu Bar Icon –R
    92

    View Slide

  93. final public class MenuController {
    private var timer: Timer?
    func animate() {
    invalidateTimer()
    timer = Timer.scheduledTimer(timeInterval: 1.0 / 30.0,
    target: self,
    selector: #selector(timerTick),
    userInfo: nil,
    repeats: true)
    }
    }
    93
    Animatable Menu Bar Icon –R

    View Slide

  94. final public class MenuController {

    private var frameIndex = 0
    private let statusItemButton: NSStatusBarButton
    private let menuIcons = [NSImage(named: "1"), NSImage(named: "2"), ... ]
    @objc private func invalidateTimer() {
    timer?.invalidate()
    timer = nil
    frameIndex = 0
    statusItemButton.image = menuIcons[0]
    }
    @objc private func timerTick() {
    statusItemButton.image = menuIcons[frameIndex]
    frameIndex = (frameIndex + 1) % menuIcons.count
    }
    }
    94
    Animatable Menu Bar Icon –R

    View Slide

  95. CleanMyMac X `^
    95

    View Slide

  96. Rain Flow Animation
    96

    View Slide

  97. 97
    final public class RainFlowView: NSView {

    private let numberOfLines = 10
    private var dashLayers: [CAShapeLayer] = []
    }
    Rain Flow Animation

    View Slide

  98. 98
    final public class RainFlowView: NSView {

    public class Rule {
    let speed: Float
    let color: NSColor
    let dashPattern: [Int]
    }
    private var currentRule: Rule = .intro
    public func set(rule: Rule) {
    let path = buildPath(at: index, with: rule)
    dashLayers
    .enumerated()
    .forEach { index, layer in
    layer.path = path
    layer.dashPattern = rule.dashPattern
    layer.strokeColor = rule.color.cgColor
    }
    }
    }
    Rain Flow Animation

    View Slide

  99. Conclusion ™š
    99
    < Use animations properly
    = Combine multiple layers
    > Use Core Animation where it is possible
    W Don’t be afraid to use time-based animations
    Y Start using new features and concepts

    View Slide

  100. Links:
    " https://github.com/facebook/pop
    ! https://github.com/airbnb/lottie-ios
    ›https://github.com/nathangitter/fluid-interfaces
    Ž https://developer.apple.com/design/human-
    interface-guidelines/
    œ https://developer.apple.com/library/archive/
    documentation/Cocoa/Conceptual/CoreAnimation_guide/
    Introduction/Introduction.html
    • https://lottiefiles.com
    100

    View Slide

  101. Thank you for your attention!

    101

    View Slide

  102. Sooo…questions?
    Ÿ&
    102

    View Slide

  103. Contacts:
    Email: [email protected]
    ¡ Medium: peteliev
    ¢ Twitter: peteliev
    £ Facebook: peteliev
    103

    View Slide