Upgrade to Pro — share decks privately, control downloads, hide ads and more …

ThatConference 2014: From Zero to Full Deployment Automation in 60 minutes

ThatConference 2014: From Zero to Full Deployment Automation in 60 minutes

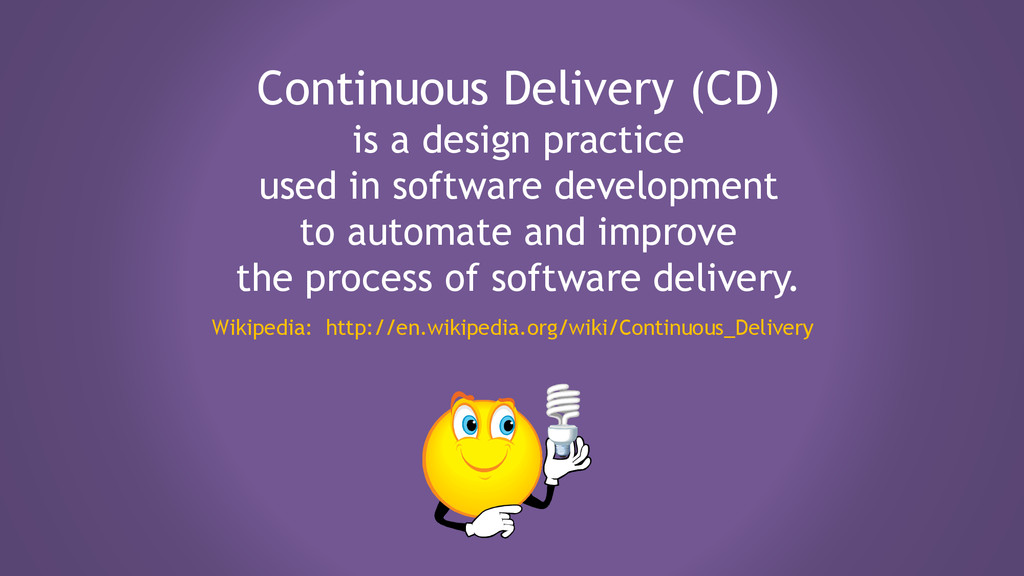
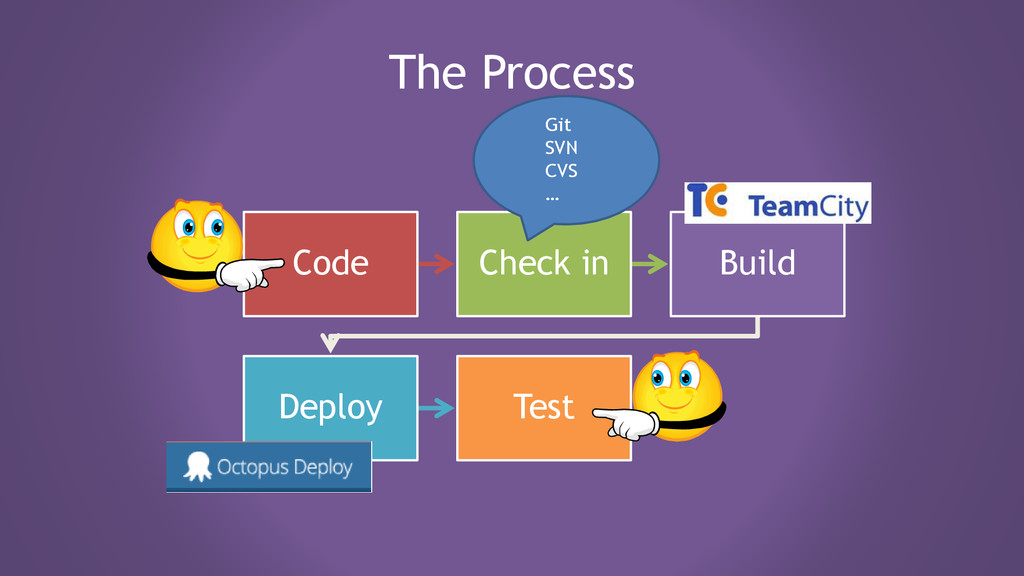
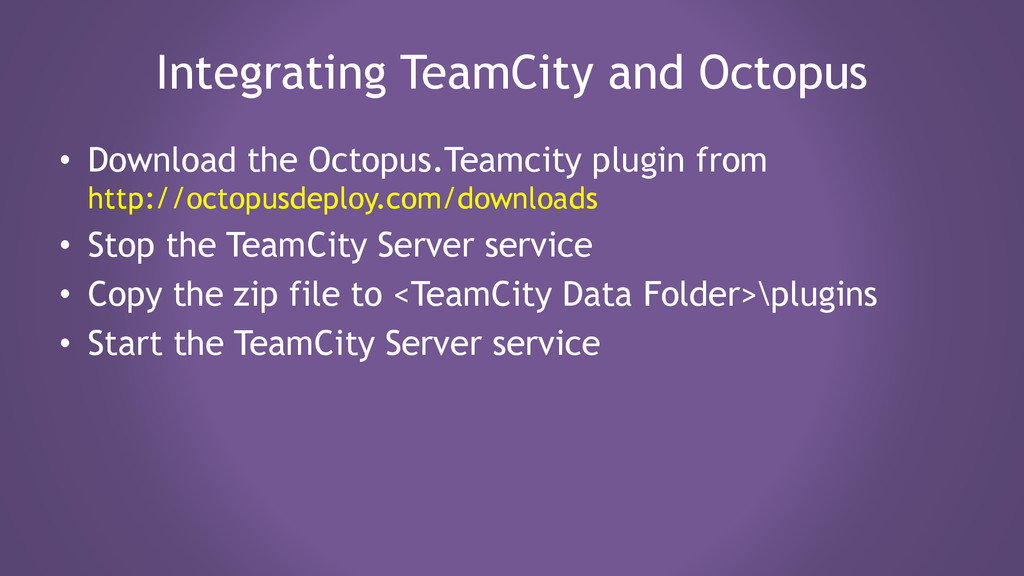
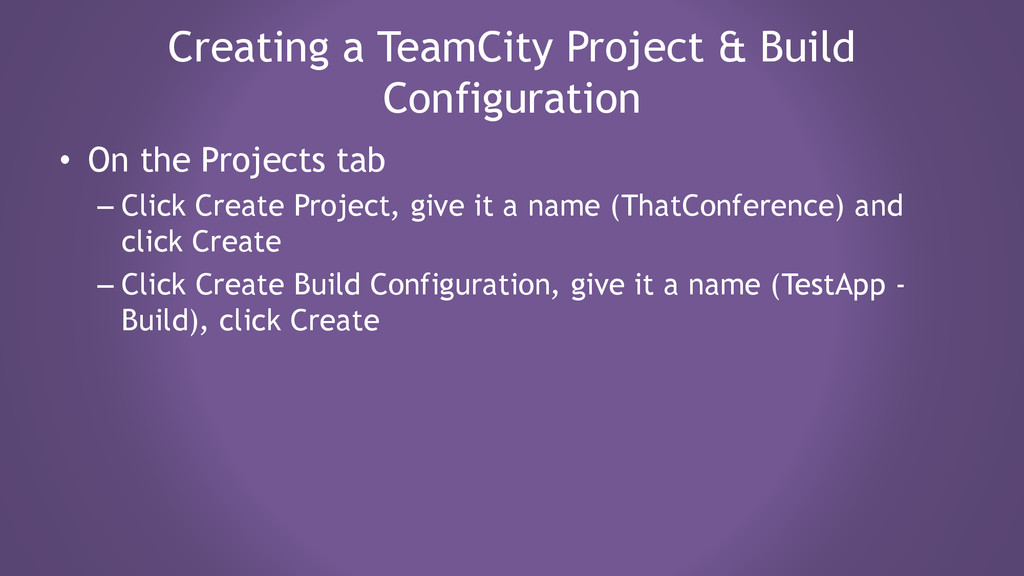
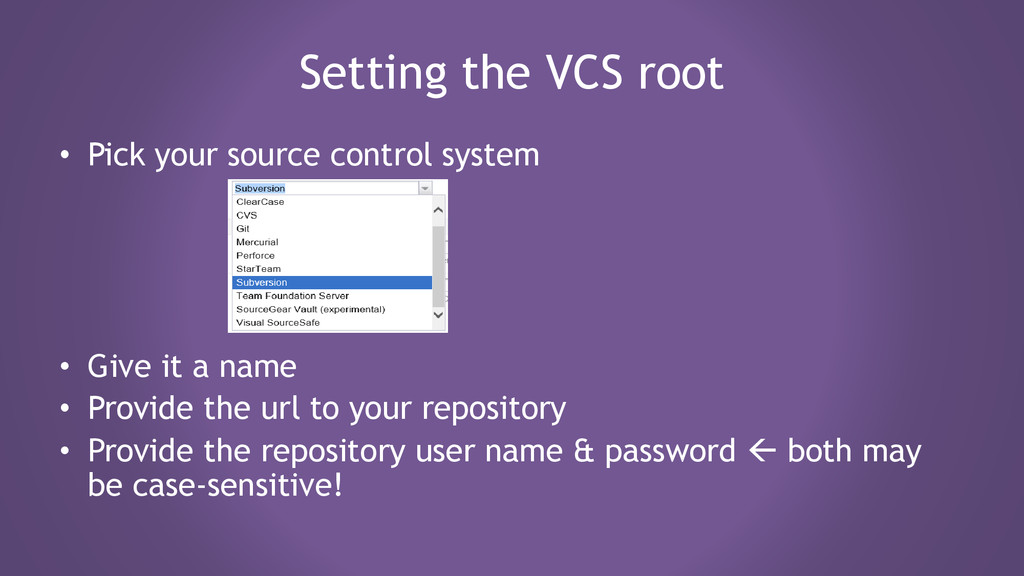
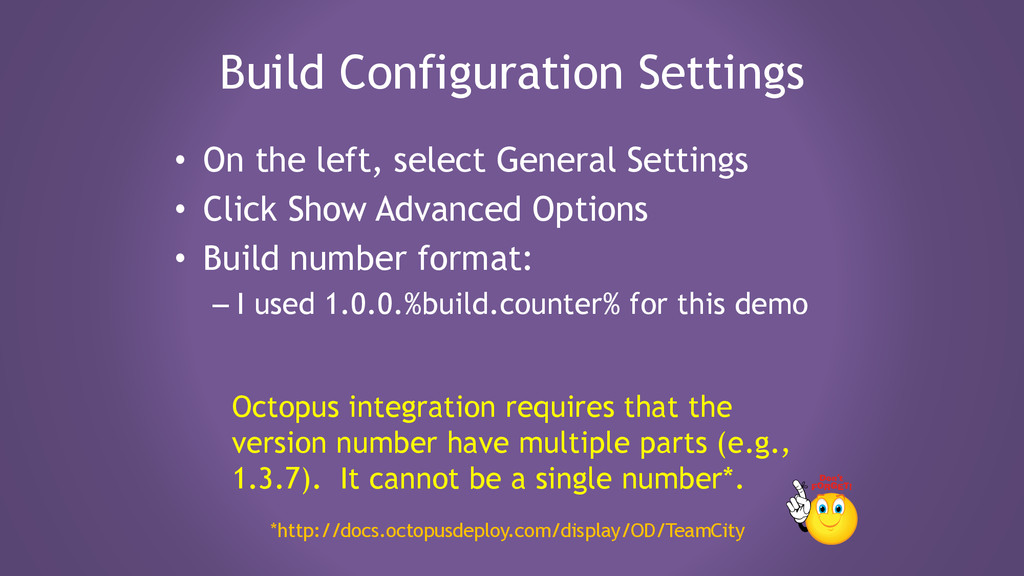
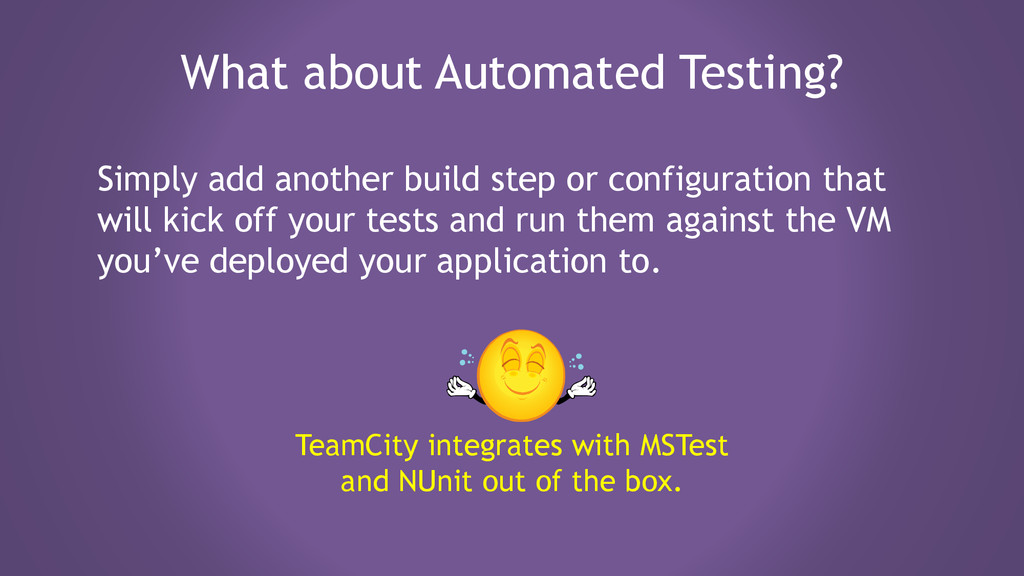
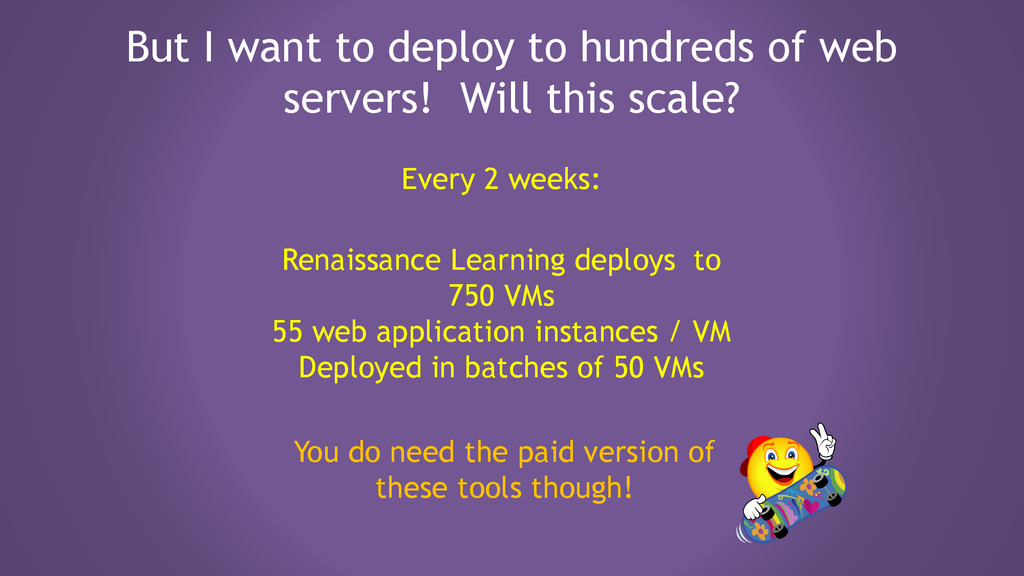
Wouldn’t it be nice if the simple action of checking in your latest changes into source control triggered an official build? Wouldn’t it be even better if, upon a successful build, the latest executables were automatically deployed to your test bed without you lifting a finger? If you’re not lucky enough to be deploying to a cloud platform that provides such functionality out of the box, automating your process might seem daunting. In this session, Danielle will demonstrate how you can leverage tools such as TeamCity and Octopus Deploy to automate your builds and deployments. You’ll be introduced to a variety of options you can use to customize the process in order to meet your particular requirements. Along the way, you’ll learn about some neat productivity features you may wish to leverage as well as some pitfalls you would do well to avoid. You’ll leave this session with the knowledge of how to automate your own builds and deployments and how to extend that automation chain so you can reach the next level. Test automation, anyone?

Danielle Boldt

August 13, 2014
Tweet

More Decks by Danielle Boldt

Other Decks in Programming

Transcript

  1. Continuous Integration (CI) is the practice, in software engineering, of

    merging all developer working copies with a shared mainline several times a day. Wikipedia: http://en.wikipedia.org/wiki/Continuous_Integration That’s not what we’re going to talk about today…
  2. Continuous Delivery (CD) is a design practice used in software

    development to automate and improve the process of software delivery. Wikipedia: http://en.wikipedia.org/wiki/Continuous_Delivery
  3. My setup Laptop: • Is where I code and check

    in • Runs VisualSVN for source control • Runs a VM for everything else
  4. My setup VM • Runs TeamCity Server – Also runs

    TeamCity Agent but the agent (or agents) should really reside on a different machine. • Runs Octopus Deploy Server – Also runs the Tentacle which deploys executables to a folder on the VM. Tentacles should reside on the machines to be deployed to.
  5. Development Laptop • Visual Studio – Solution will need Octopack

    NuGet package • Visual SVN Server • Tortoise SVN Not going to show those
  6. Service VM • TeamCity 8.1.3 – TeamCity Octopus Plugin –

    MS Build Tools – NuGet – TeamCity Artifactory Plugin (optional) • Octopus Server 2.4.8.107 • Octopus Tentacle 2.4.8.107 • Artifactory (optional) – Java
  7. TeamCity Server Installation • Took all defaults except for –

    Paths – TeamCity server port which I set to 8080 to avoid having multiple things running on port 80 • By default, server-agent communication will be done over port 9090 • Provided user accounts for both server and agent • Done!
  8. TeamCity Initial Configuration • The first time TeamCity launches, it

    asks which database type you wish to use. I took the default. • Create Administrator Account: – TeamCity / teamcity TeamCity is ready for use!
  9. TeamCity Agent Configuration • The agents come with some basic

    build tools but I wanted the latest msbuild.exe from Microsoft so I installed that on the agent. Don’t forget to re-start the agent service (in the Windows Services management tool) when you make changes.
  10. Octopus Server Installation • Took all defaults except paths •

    Entered license key from Welcome email • Chose to use port 8082 • Virtual directory: /Octopus • Administrator / secure password Octopus is ready for use!
  11. This is where the fun starts! Switching to the demo.

    Have no fear, the slide deck will still have all the info so you don’t have to take notes.
  12. Integrating TeamCity and Octopus • Download the Octopus.Teamcity plugin from

    http://octopusdeploy.com/downloads • Stop the TeamCity Server service • Copy the zip file to <TeamCity Data Folder>\plugins • Start the TeamCity Server service
  13. Creating a TeamCity Project & Build Configuration • On the

    Projects tab – Click Create Project, give it a name (ThatConference) and click Create – Click Create Build Configuration, give it a name (TestApp - Build), click Create
  14. Setting the VCS root • Pick your source control system

    • Give it a name • Provide the url to your repository • Provide the repository user name & password  both may be case-sensitive!
  15. Build Configuration Settings • On the left, select General Settings

    • Click Show Advanced Options • Build number format: – I used 1.0.0.%build.counter% for this demo Octopus integration requires that the version number have multiple parts (e.g., 1.3.7). It cannot be a single number*. *http://docs.octopusdeploy.com/display/OD/TeamCity
  16. VCS Trigger • On the Trigger tab, Add a VCS

    trigger. – Show Advanced Options – Click Trigger a build on each check-in • In Administration / Global Settings, you can set the amount of time you want TC to wait before it starts building your project.
  17. TC Build Step • On the left, select Build Steps

    • Click Add Build Step to build our solution – Select a build runner • Visual Studio (sln) – Name it: TestApp Build – Provide a path to the solution file from the perspective of the VCS root – Save
  18. Testing • Click Projects to return to the dashboard •

    Click the Run button to the right of your configuration But we’re not deploying to Octopus yet. We still need a few more things. Our solution should build cleanly!
  19. TeamCity as artifact repository TeamCity can store build artifacts. Beware:

    When a build configuration is deleted, TeamCity deletes all artifacts that were built using that configuration. For this demo, I will use TeamCity as the artifact repository but in a real-life situation, I recommend leveraging an official tool such as Artifactory by JFrog* instead. It integrates with TeamCity via plug-in. * http://www.jfrog.com/home/v_artifactory_opensource_overview
  20. TeamCity as artifact repository • In TeamCity Administration – NuGet

    Settings tab: Enable NuGet server – NuGet.exe tab: provide .nuget package • In Octopus Server, on Library / External Feeds tab – Add Feed – Provide the URL from TeamCity’s Authenticated Feed URL – Provide credentials as required
  21. You then get an opportunity to test the repository but

    we don’t have anything in there yet so when we search, no packages are found.
  22. Add Octopack to the VS Solution • In VisualStudio, with

    your solution open, right-click on References / Manage NuGet packages and add Octopack. You can provide a <solutionName>.nuspec file to configure the contents of your deployment package. If no such file is found, Octopack will create a default one for you based on the type of project your solution is building.
  23. TC Build Step.. reprise • Edit your build configuration to

    check the “Run Octopack” checkbox. • Package version: %build.number% If you build again and go to Octopus to test the artifact repository (type in the solution name), you should see it appear in the list.
  24. But what machine will we be deploying on? My VM,

    but it could be any other machine or VM (or group of machines / VMs) that is/are running the Octopus Tentacle software.
  25. Octopus Tentacle Installation • Took all defaults except paths •

    Configured as Listening Tentacle • Kept port 10933 • Provided the thumbprint shown in Octopus Server Configuration \ Certificates Octopus Tentacle is ready for use!
  26. Octopus Environments Machines running the Tentacle software can be grouped

    into environments (Test, QA, Staging, Production, etc.)
  27. Test Environment • Click Add Environment and name it Test

    • Click Add Machine and provide the hostname • Assign a role: TestAppRole • Discover. It may take a couple of minutes. Don’t forget to tab out of controls in Octopus Deploy or your changes will be lost!
  28. Octopus Roles • All machines defined with a particular role

    will be able to receive packages marked with the same role. BEWARE: Changing the role on a machine (fixing a typo, for example) will not update the projects defined to use that role.
  29. Create an Octopus Project • On the Projects Tab, Add

    New • Name it: TestAppProject (no spaces) • Save it • In Process, Add Step  Deploy NuGet Package – Name it – Give it a role that matches the role of the machine you wish to deploy to Multiple Machines with the same role can be deployed to simultaneously.
  30. Create an Octopus Project • Select TeamCity as the NuGet

    feed • Give the solution name (TestApp1) as Package ID • Configure Features: Octopus can take care of creating the appropriate infrastructure to deploy Windows Services or Web apps/services – Deploy to a custom folder Octopus will always deploy the most recent package (highest version number) with the root name specified here.
  31. Variables • If your deployment includes scripts or configuration, you’ll

    want to declare your variables here. Common variables can be grouped into Variable Libraries for re-use across projects.
  32. Variables: Automatic substitution • Octopus can automatically replace config file

    appSettings or connectionStrings with the values provided here if “Configuration Transforms” is enabled on the Process page. Octopus isn’t currently able to locate and substitute values for service endpoints. Solution: <endpoint address=“$myAddress“ … /> Octopus will perform simple variable substitution.
  33. Creating an Octopus API Key • In order for TeamCity

    to connect to Octopus, it needs the URL and a special GUID. To generate this key: – In Octopus, click on Administrator (user) and go to the Profile / API Keys page. – Click on +New API Key and give it the purpose of TeamCity Save this key in your favorite password repository. It will never be displayed to you again.
  34. TC Build Configuration: Deploy ..1 • Add a new Build

    Configuration: Test App - Deploy • Add Trigger – Finish Build Trigger on successful build • Add Snapshot Dependency
  35. TC Build Configuration: Deploy .. 2 • Click Add Build

    Step to deploy our solution – Select a build runner • Octopus Create Release – Name it: TestApp Deploy – Provide the Octopus Server url – Provide the Octopus API Key you just generated earlier (and saved, right?) – Provide the Octopus Project name (TestAppProject) – Release number: %dep.ThatConference_TestAppContinuousDeployment.build.numbe r% – Deploy to: Environment: Test
  36. Why not just a build step? The deployment could just

    be a subsequent build step within the first configuration but TC only publishes the artifacts once all build steps have completed. You can tell it to publish earlier via service messages but that’s an advanced feature.
  37. We should have my little application deploying to the VM

    as requested! If we did things right…
  38. What about Automated Testing? Simply add another build step or

    configuration that will kick off your tests and run them against the VM you’ve deployed your application to. TeamCity integrates with MSTest and NUnit out of the box.
  39. But I want to deploy to hundreds of web servers!

    Will this scale? Renaissance Learning deploys to 750 VMs 55 web application instances / VM Deployed in batches of 50 VMs You do need the paid version of these tools though! Every 2 weeks: