Upgrade to Pro — share decks privately, control downloads, hide ads and more …

CodeFest 2019. Карл Кроуфорд (Badoo) — Visual Regression Testing

CodeFest
April 05, 2019

CodeFest 2019. Карл Кроуфорд (Badoo) — Visual Regression Testing

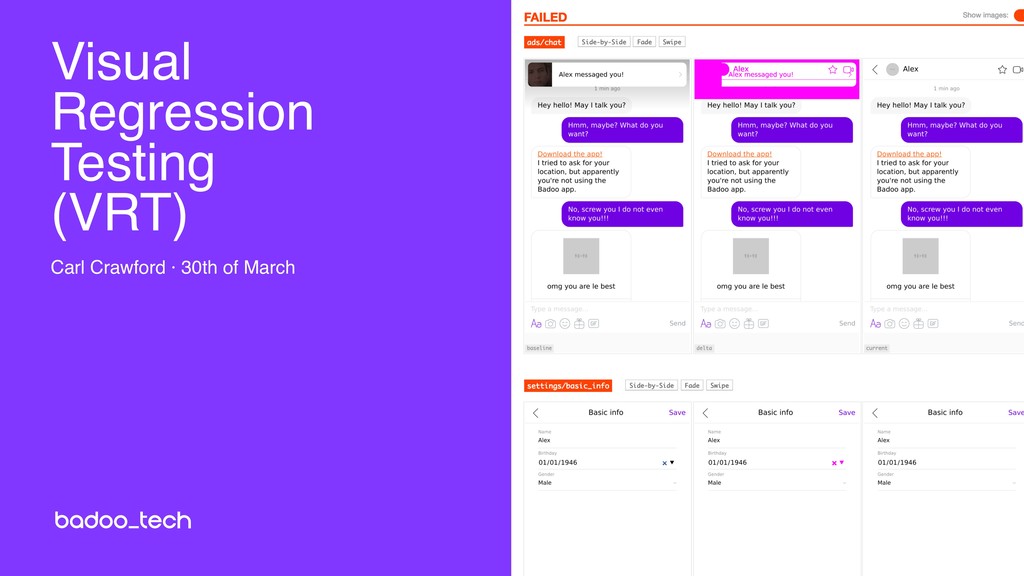
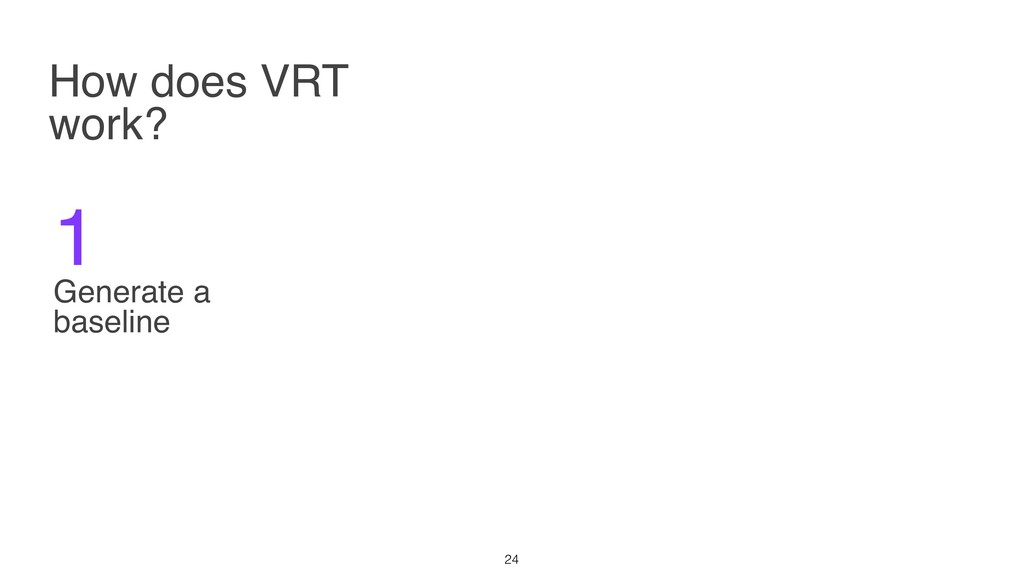
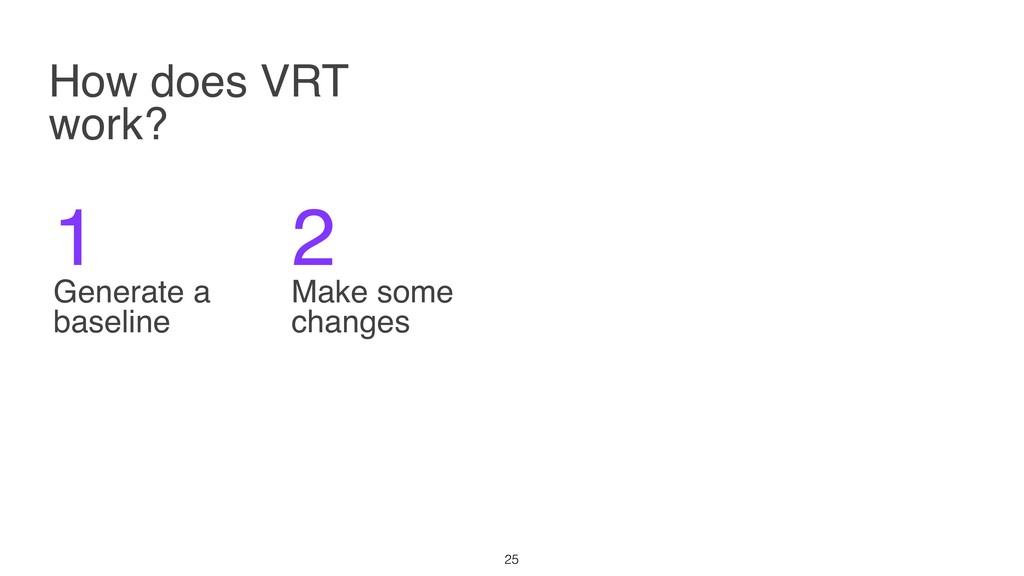
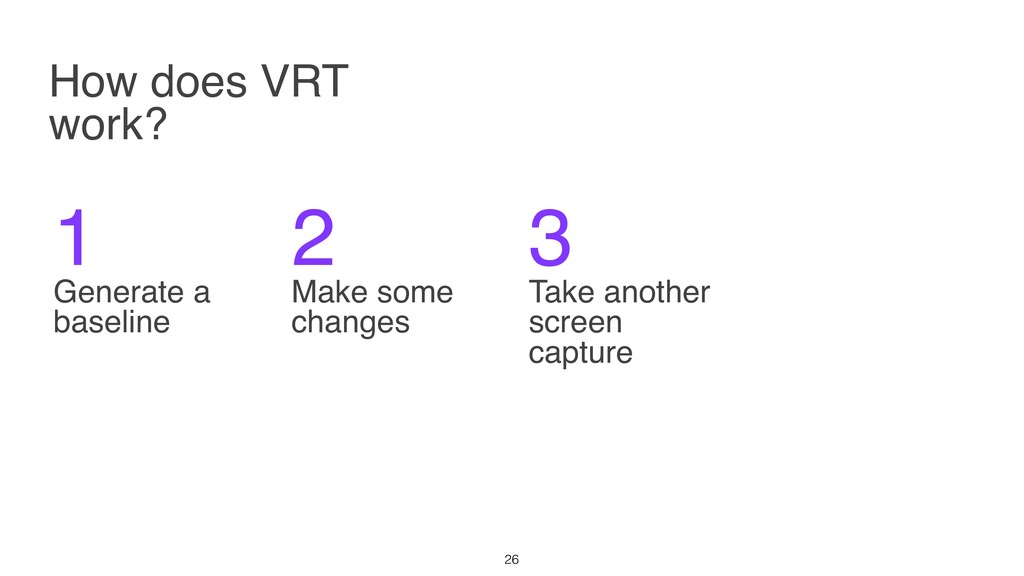
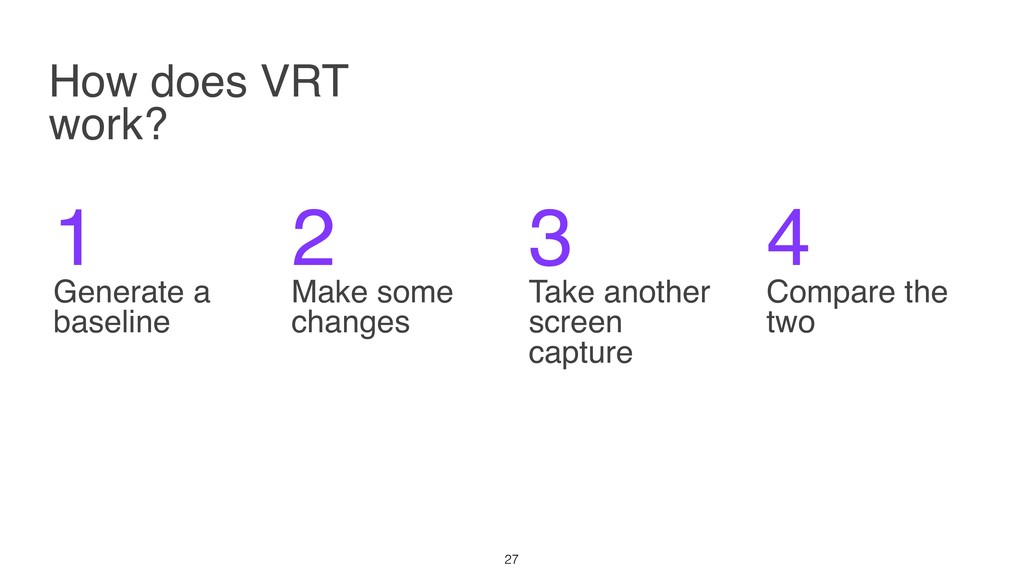
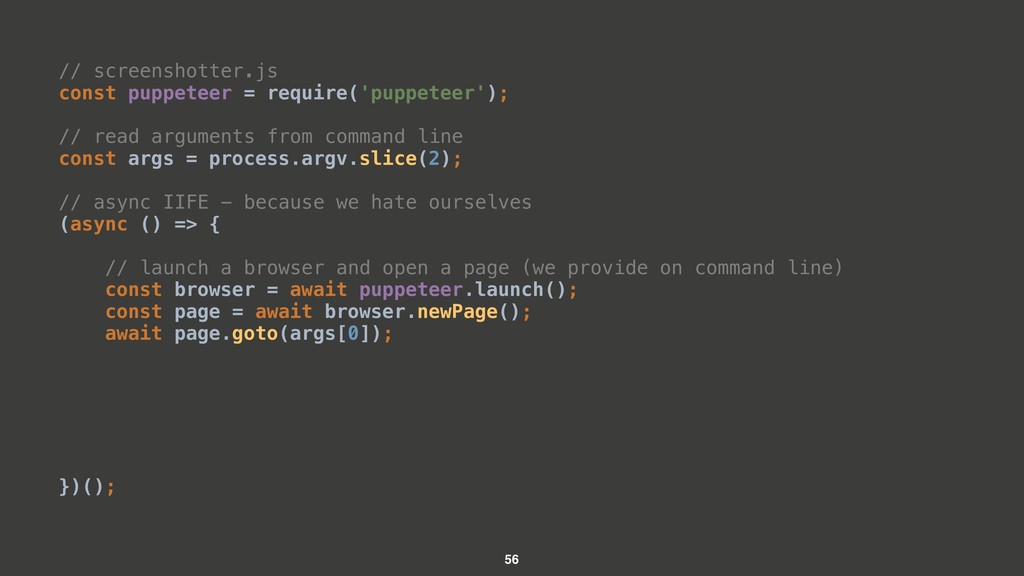
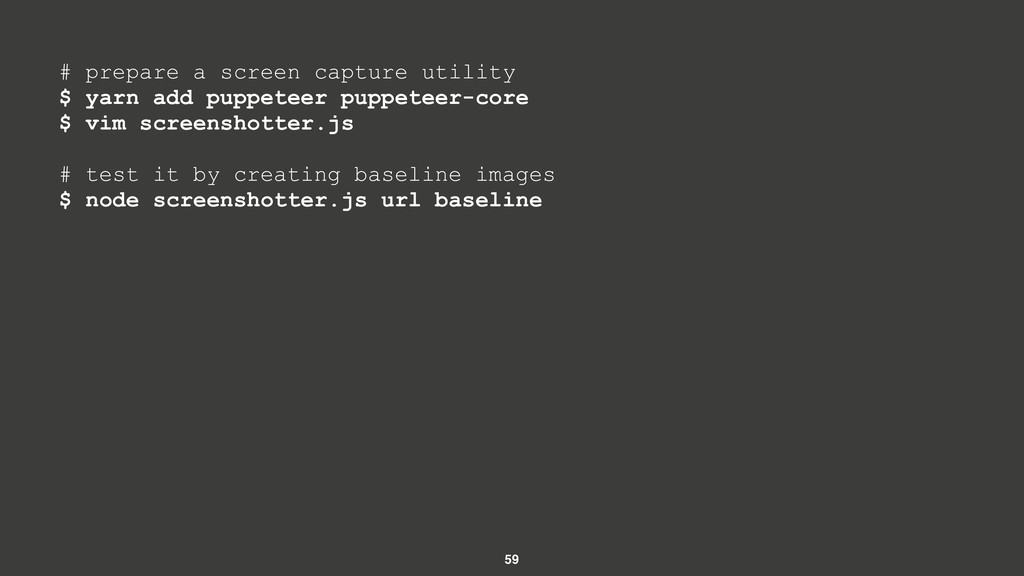
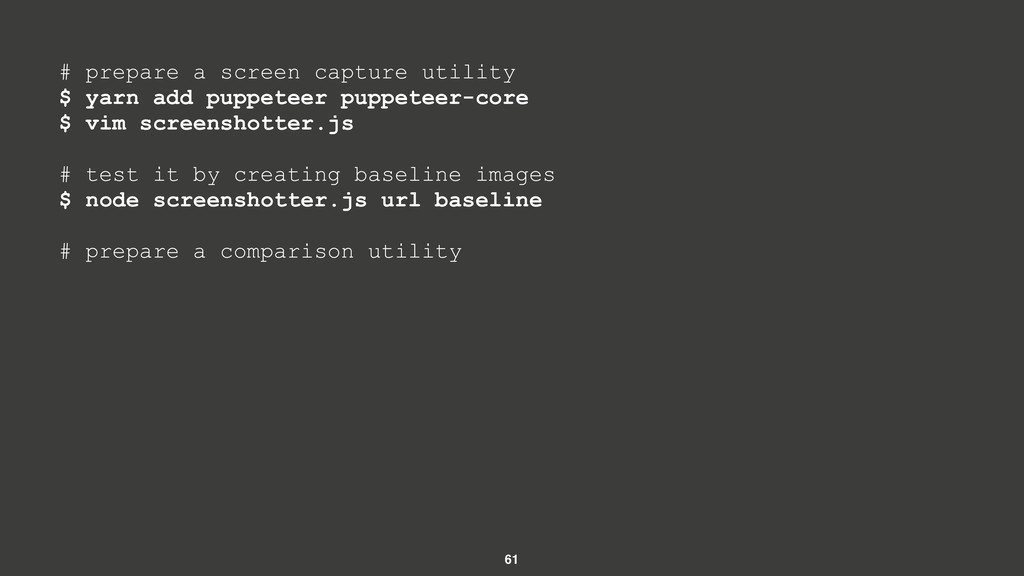
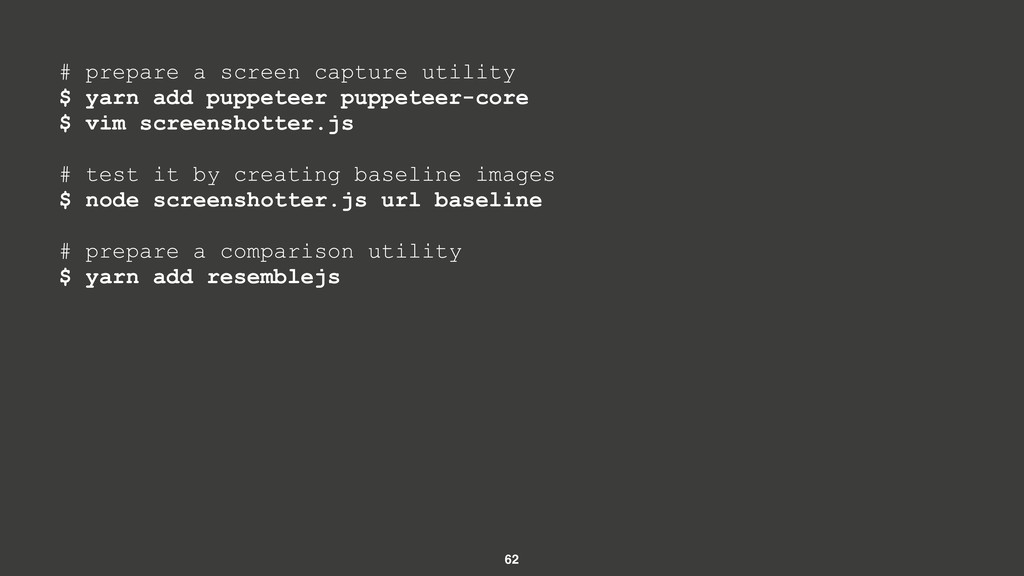
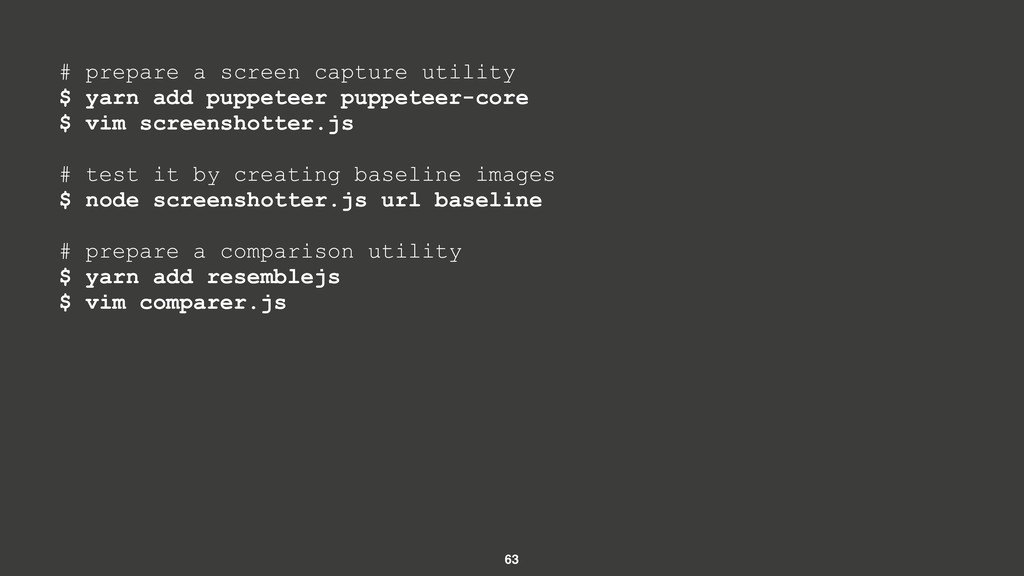
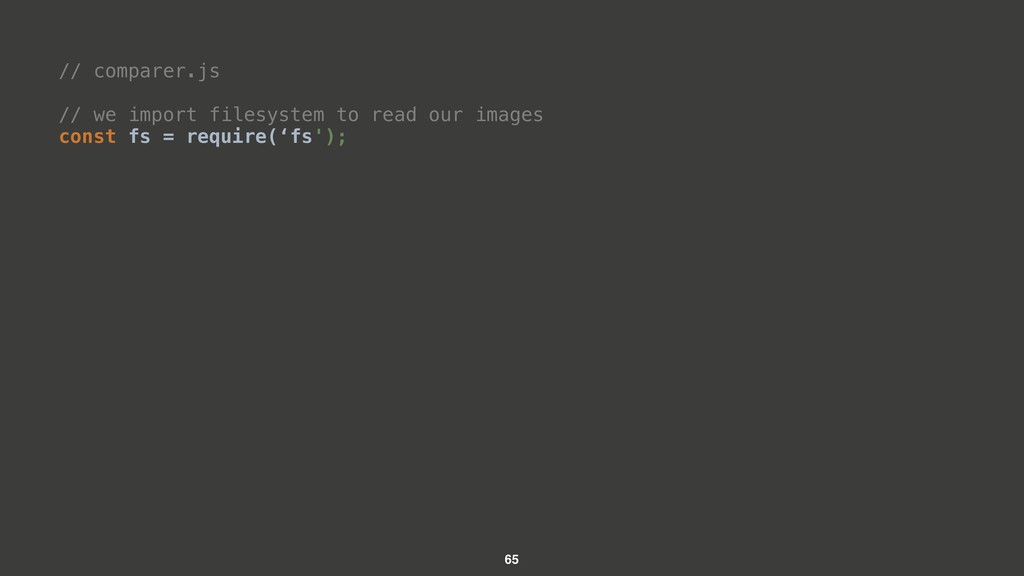
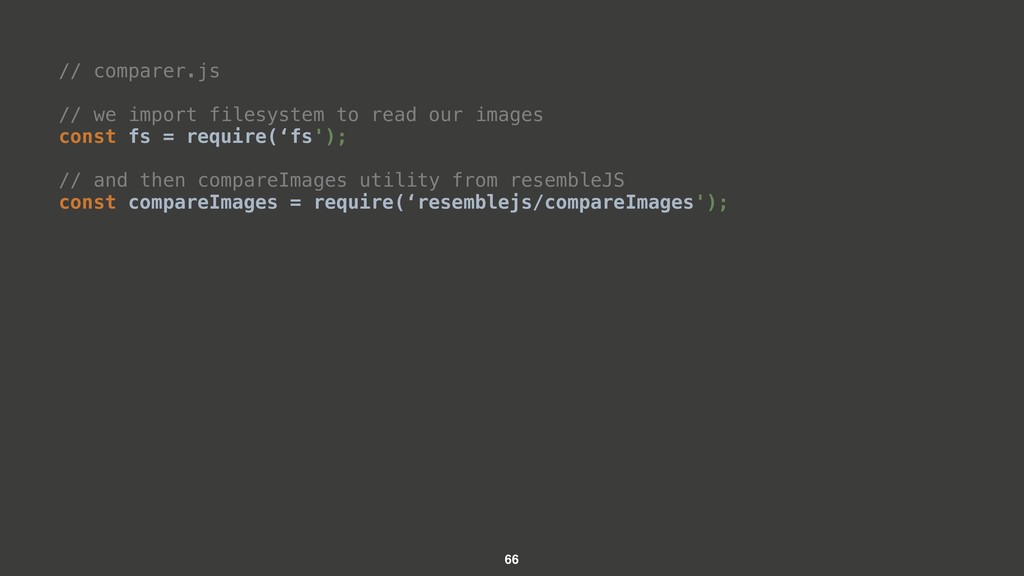
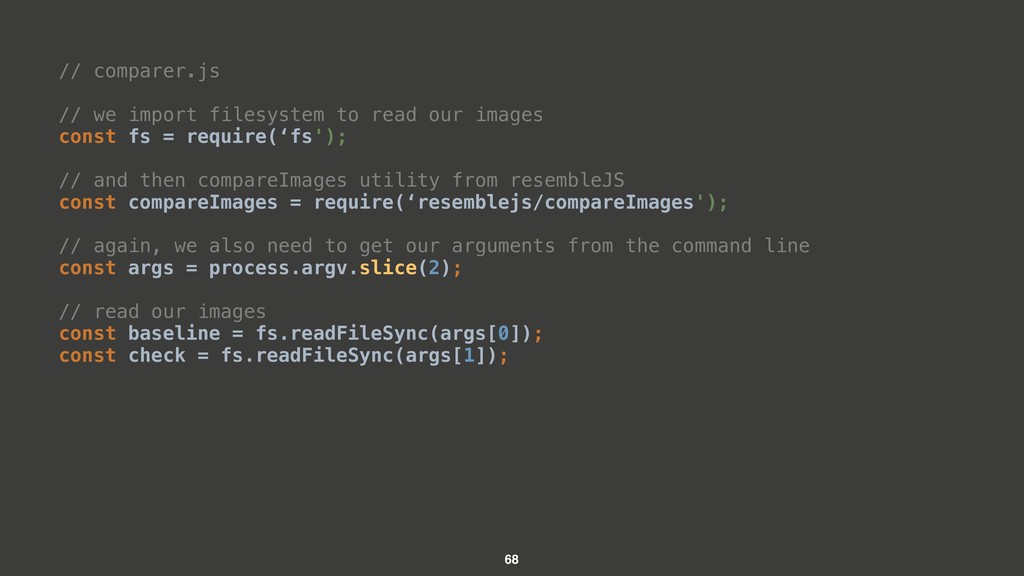
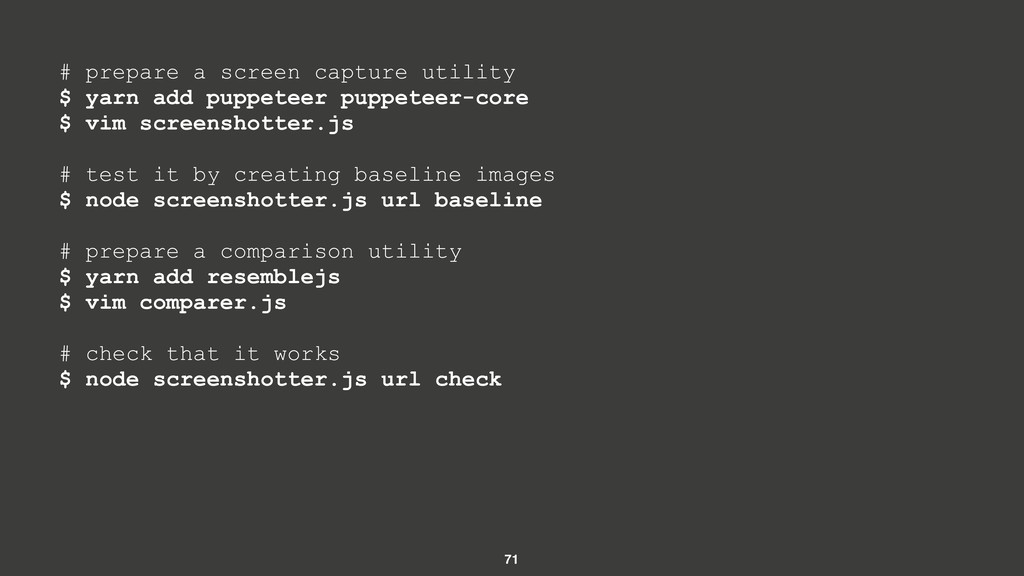
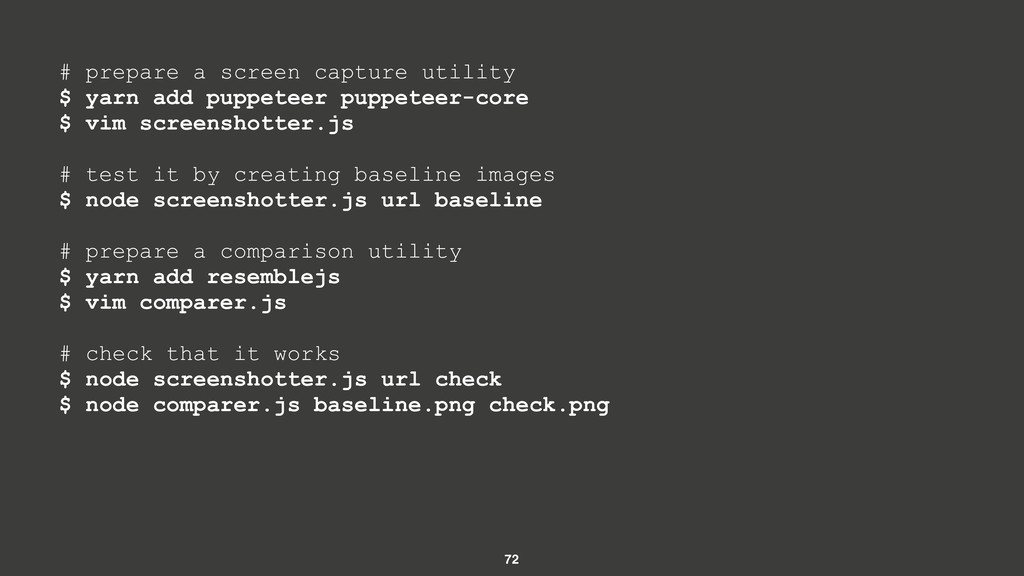
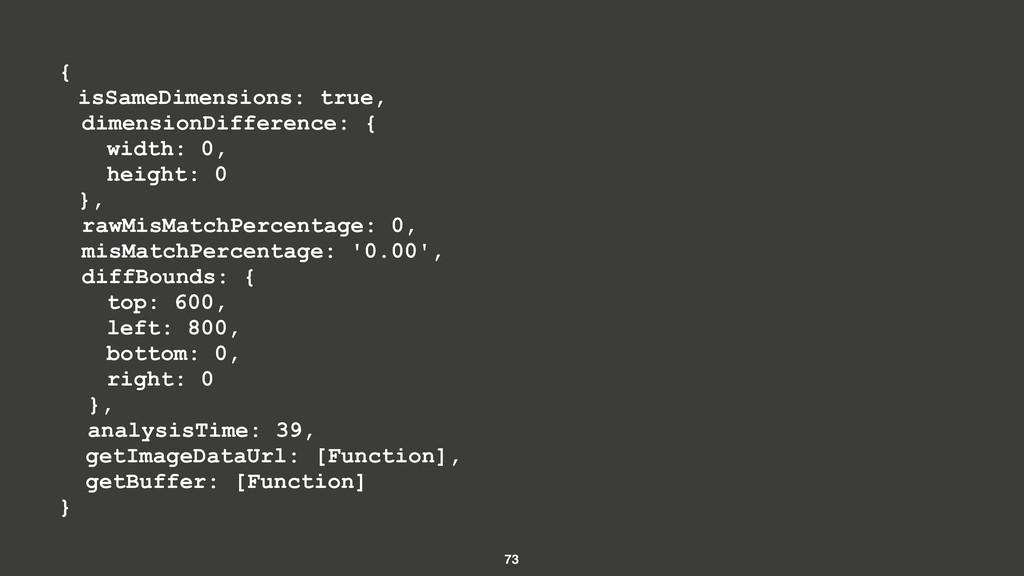
Visual regression testing (VRT) is a weapon-like tool used by many QAs to protect against the inevitable and unexpected (but expected) dangers of development. In recent years the area has grown in popularity, with many more commercial and custom solutions becoming available — but what is it? How can we use it? And how hard is it to implement? In this presentation, I aim to share the principles of VRT while incrementally building a VRT solution from scratch, using Puppeteer and Headless Chrome. The plan is for you to come away with both knowledge and examples to help you bring VRT to your workplace.

CodeFest

April 05, 2019
Tweet

More Decks by CodeFest

Other Decks in Technology

Transcript

  1. 1. What is Visual Regression Testing? 2. Why use it?

    3. When to use it? 4. Available tools? 5. Building VRT 6. Pros and Cons 7. Real Failures 5
  2. visual /ˈvɪʒ(j)ʊəl,ˈvɪzjʊəl/ adjective 1. relating to seeing or sight.


    regression /rɪˈɡrɛʃ(ə)n/ noun 1. a return to a former or less developed state. 7
  3. “Testing - that something visual - did not return to

    a former or less developed state” visual /ˈvɪʒ(j)ʊəl,ˈvɪzjʊəl/ adjective 1. relating to seeing or sight.
 
 regression /rɪˈɡrɛʃ(ə)n/ noun 1. a return to a former or less developed state. 8
  4. “Testing - that something visual - did not return to

    a former or less developed state” visual /ˈvɪʒ(j)ʊəl,ˈvɪzjʊəl/ adjective 1. relating to seeing or sight.
 
 regression /rɪˈɡrɛʃ(ə)n/ noun 1. a return to a former or less developed state. УХУДШЕ́ НИЕ Средний род 1. Изменение, ухудшающее что-н. 9
  5. Why VRT? Detecting visual changes is hard It’s another form

    of automated testing Automation is easy and reliable Tests are descriptive, defined, and reproducible 11
  6. Why VRT? Detecting visual changes is hard It’s another form

    of automated testing Automation is easy and reliable Tests are descriptive, defined, and reproducible Avoid “change blindness” Magic word 12
  7. Change blindness is a perceptual phenomenon that occurs when a

    change in a visual stimulus is introduced and the observer does not notice it. 13
  8. 17

  9. 19

  10. 20

  11. 22

  12. 1 Generate a baseline 2 Make some changes 3 Take

    another screen capture How does VRT work? 26
  13. 1 Generate a baseline 2 Make some changes 3 Take

    another screen capture 4 Compare the two How does VRT work? 27
  14. 30

  15. 31

  16. 32

  17. What’s available? An awesome source of information for all VRT

    related topics provided by Alexander Wunshik https://github.com/mojoaxel/awesome-regression-testing 33
  18. 1. Browsers 2. Frameworks 3. Online Services 4. Blog posts

    https://github.com/mojoaxel/awesome-regression-testing 37
  19. 1. Browsers 2. Frameworks 3. Online Services 4. Blog posts

    5. Talks/Videos from the community https://github.com/mojoaxel/awesome-regression-testing 38
  20. 1 Browser and/or App Automation 2 Tool or framework for

    captures 3 Something to compare captures General Architecture 42
  21. A brief history of VRT in Badoo PhantomJS Load and

    control our site Casper and PhantomCSS Provided us tools for scripting and comparing screenshots as tests 44
  22. A brief history of VRT in Badoo PhantomJS Load and

    control our site Casper and PhantomCSS Provided us tools for scripting and comparing screenshots as tests Custom interface Used to present the results to QA and developers in a user friendly fashion 45
  23. A brief history of VRT in Badoo Then along came

    Headless Chrome With puppeteer, it replaced PhantomJS and PhantomCSS for us 46
  24. <html> <head> <link href=“styles.css” … /> </head> <body> <ul class="navbar">

    <li>About Me</li> <li>Kittens</li> </ul> <hr> <div class="content"> <div class="avatar"> <img src="me.png"> </div> <div> <p>Hey! my name is Carl</p> <p>I like cats!</p> <p>also, things</p> </div> </div> </body> </html> 48
  25. <html> <head> <link href=“styles.css” … /> </head> <body> <ul class="navbar">

    <li>About Me</li> <li>Kittens</li> </ul> <hr> <div class="content"> <div class="kitty"> <img src="mlem.png"> </div> </div> </body> </html> 49
  26. # prepare a screen capture utility $ yarn add puppeteer

    puppeteer-core $ vim screenshotter.js 51
  27. // screenshotter.js const puppeteer = require('puppeteer'); // read arguments from

    command line const args = process.argv.slice(2); // async IIFE - because we hate ourselves (async () => { })(); 55
  28. // screenshotter.js const puppeteer = require('puppeteer'); // read arguments from

    command line const args = process.argv.slice(2); // async IIFE - because we hate ourselves (async () => { // launch a browser and open a page (we provide on command line) const browser = await puppeteer.launch(); const page = await browser.newPage(); await page.goto(args[0]); })(); 56
  29. // screenshotter.js const puppeteer = require('puppeteer'); // read arguments from

    command line const args = process.argv.slice(2); // async IIFE - because we hate ourselves (async () => { // launch a browser and open a page (we provide on command line) const browser = await puppeteer.launch(); const page = await browser.newPage(); await page.goto(args[0]); // take a screenshot await page.screenshot({path: `${args[1]}.png`}); })(); 57
  30. // screenshotter.js const puppeteer = require('puppeteer'); // read arguments from

    command line const args = process.argv.slice(2); // async IIFE - because we hate ourselves (async () => { // launch a browser and open a page (we provide on command line) const browser = await puppeteer.launch(); const page = await browser.newPage(); await page.goto(args[0]); // take a screenshot await page.screenshot({path: `${args[1]}.png`}); // close the browser await browser.close(); })(); 58
  31. # prepare a screen capture utility $ yarn add puppeteer

    puppeteer-core $ vim screenshotter.js # test it by creating baseline images $ node screenshotter.js url baseline 59
  32. 60

  33. # prepare a screen capture utility $ yarn add puppeteer

    puppeteer-core $ vim screenshotter.js # test it by creating baseline images $ node screenshotter.js url baseline # prepare a comparison utility 61
  34. # prepare a screen capture utility $ yarn add puppeteer

    puppeteer-core $ vim screenshotter.js # test it by creating baseline images $ node screenshotter.js url baseline # prepare a comparison utility $ yarn add resemblejs 62
  35. # prepare a screen capture utility $ yarn add puppeteer

    puppeteer-core $ vim screenshotter.js # test it by creating baseline images $ node screenshotter.js url baseline # prepare a comparison utility $ yarn add resemblejs $ vim comparer.js 63
  36. // comparer.js // we import filesystem to read our images

    const fs = require(‘fs'); // and then compareImages utility from resembleJS const compareImages = require(‘resemblejs/compareImages'); 66
  37. // comparer.js // we import filesystem to read our images

    const fs = require(‘fs'); // and then compareImages utility from resembleJS const compareImages = require(‘resemblejs/compareImages'); // again, we also need to get our arguments from the command line const args = process.argv.slice(2); 67
  38. // comparer.js // we import filesystem to read our images

    const fs = require(‘fs'); // and then compareImages utility from resembleJS const compareImages = require(‘resemblejs/compareImages'); // again, we also need to get our arguments from the command line const args = process.argv.slice(2); // read our images const baseline = fs.readFileSync(args[0]); const check = fs.readFileSync(args[1]); 68
  39. // comparer.js // we import filesystem to read our images

    const fs = require(‘fs'); // and then compareImages utility from resembleJS const compareImages = require(‘resemblejs/compareImages'); // again, we also need to get our arguments from the command line const args = process.argv.slice(2); // read our images const baseline = fs.readFileSync(args[0]); const check = fs.readFileSync(args[1]); // and then compare, printing the comparison data to console compareImages(baseline, check) .then(data => console.log(data)); 69
  40. # prepare a screen capture utility $ yarn add puppeteer

    puppeteer-core $ vim screenshotter.js # test it by creating baseline images $ node screenshotter.js url baseline # prepare a comparison utility $ yarn add resemblejs $ vim comparer.js # check that it works 70
  41. # prepare a screen capture utility $ yarn add puppeteer

    puppeteer-core $ vim screenshotter.js # test it by creating baseline images $ node screenshotter.js url baseline # prepare a comparison utility $ yarn add resemblejs $ vim comparer.js # check that it works $ node screenshotter.js url check 71
  42. # prepare a screen capture utility $ yarn add puppeteer

    puppeteer-core $ vim screenshotter.js # test it by creating baseline images $ node screenshotter.js url baseline # prepare a comparison utility $ yarn add resemblejs $ vim comparer.js # check that it works $ node screenshotter.js url check $ node comparer.js baseline.png check.png 72
  43. { isSameDimensions: true, dimensionDifference: { width: 0, height: 0 },

    rawMisMatchPercentage: 0, misMatchPercentage: '0.00', diffBounds: { top: 600, left: 800, bottom: 0, right: 0 }, analysisTime: 39, getImageDataUrl: [Function], getBuffer: [Function] } 73
  44. # 0% difference is expected # lets make a change

    # styles.css img { border-radius: 150px; } 75
  45. # 0% difference is expected # lets make a change

    # styles.css img { border-radius: 150px; } # let’s try again $ node screenshotter.js url check $ node comparer.js baseline.png check.png 76
  46. { isSameDimensions: true, dimensionDifference: { width: 0, height: 0 },

    rawMisMatchPercentage: 3.31145834, misMatchPercentage: '3.31', diffBounds: { top: 106, left: 264, bottom: 405, right: 535 }, analysisTime: 47, getImageDataUrl: [Function], getBuffer: [Function] } 77
  47. // the output text came from here compareImages(baseline, check) .then(data

    => console.log(data)); // but you may have noticed this line in the output // getBuffer: [Function] // this gives us a "diff" image of the two input images which we // can then save to the file system 79
  48. // the output text came from here compareImages(baseline, check) .then(data

    => console.log(data)); // but you may have noticed this line in the output // getBuffer: [Function] // this gives us a "diff" image of the two input images which we // can then save to the file system // we can write a new function to do this: async function handleCompareData(data) { const suffix = args[1].substring(args[1].lastIndexOf('.')); const diff = args[1].replace(suffix, `.diff${suffix}`); await fs.writeFile(diff, data.getBuffer()); } 80
  49. // the output text came from here compareImages(baseline, check) .then(data

    => console.log(data)); // but you may have noticed this line in the output // getBuffer: [Function] // this gives us a "diff" image of the two input images which we // can then save to the file system // we can write a new function to do this: async function handleCompareData(data) { const suffix = args[1].substring(args[1].lastIndexOf('.')); const diff = args[1].replace(suffix, `.diff${suffix}`); await fs.writeFile(diff, data.getBuffer()); } // and then replace our earlier code with: compareImages(baseline, check) .then(handleCompareData); 81
  50. # so running it once again $ node comparer.js baseline.png

    check.png # we can see the diff clearly 83
  51. # so running it once again $ node comparer.js baseline.png

    check.png # we can see the diff clearly # and because it’s expected # we can recreate our baseline! 84
  52. # but wait! # we almost forget the kitty! #

    let’s check our change didn’t break anything $ node comparer.js kitty- baseline.png kitty-check.png 86
  53. 87

  54. Lots of components Icons can be renamed or changed Text

    can change without client even knowing Components can have many states Buttons are a goldmine for changes More complex sites have more parts and more places to break - so VRT can become a much needed safety net Complex sites 88
  55. Hook it up to CI Automatically generate baseline and check

    any new branches/changes More automation! 90
  56. Hook it up to CI Automatically generate baseline and check

    any new branches/changes Notify DEV and QA Slack, JIRA, Mattermost, Email - tell them if something regressed! More automation! 91
  57. Hook it up to CI Automatically generate baseline and check

    any new branches/changes Notify DEV and QA Slack, JIRA, Mattermost, Email - tell them if something regressed! Improved interface Make it easier for developers and QA to spot problems More automation! 92
  58. 93

  59. Mutable content Automatically generate baseline and check any new branches/changes

    Maintenance New features, ABTests and general refactoring Downsides 96
  60. Mutable content Automatically generate baseline and check any new branches/changes

    Maintenance New features, ABTests and general refactoring Not pixel perfect Antialiasing and animations Downsides 97
  61. Mutable content Automatically generate baseline and check any new branches/changes

    Maintenance New features, ABTests and general refactoring Not pixel perfect Antialiasing and animations Downsides Centralised Generally used for local comparison - slow to compare local captures to remote 98
  62. Another level of safety Can catch issues missed by manual

    or functional testing Documented and reproducible Tests are self documenting and generally reliable Upsides 101
  63. Another level of safety Can catch issues missed by manual

    or functional testing Documented and reproducible Tests are self documenting and generally reliable Wide range Can automatically check visual changes on a variety of devices, resolutions, themes, brands, etc Upsides 102