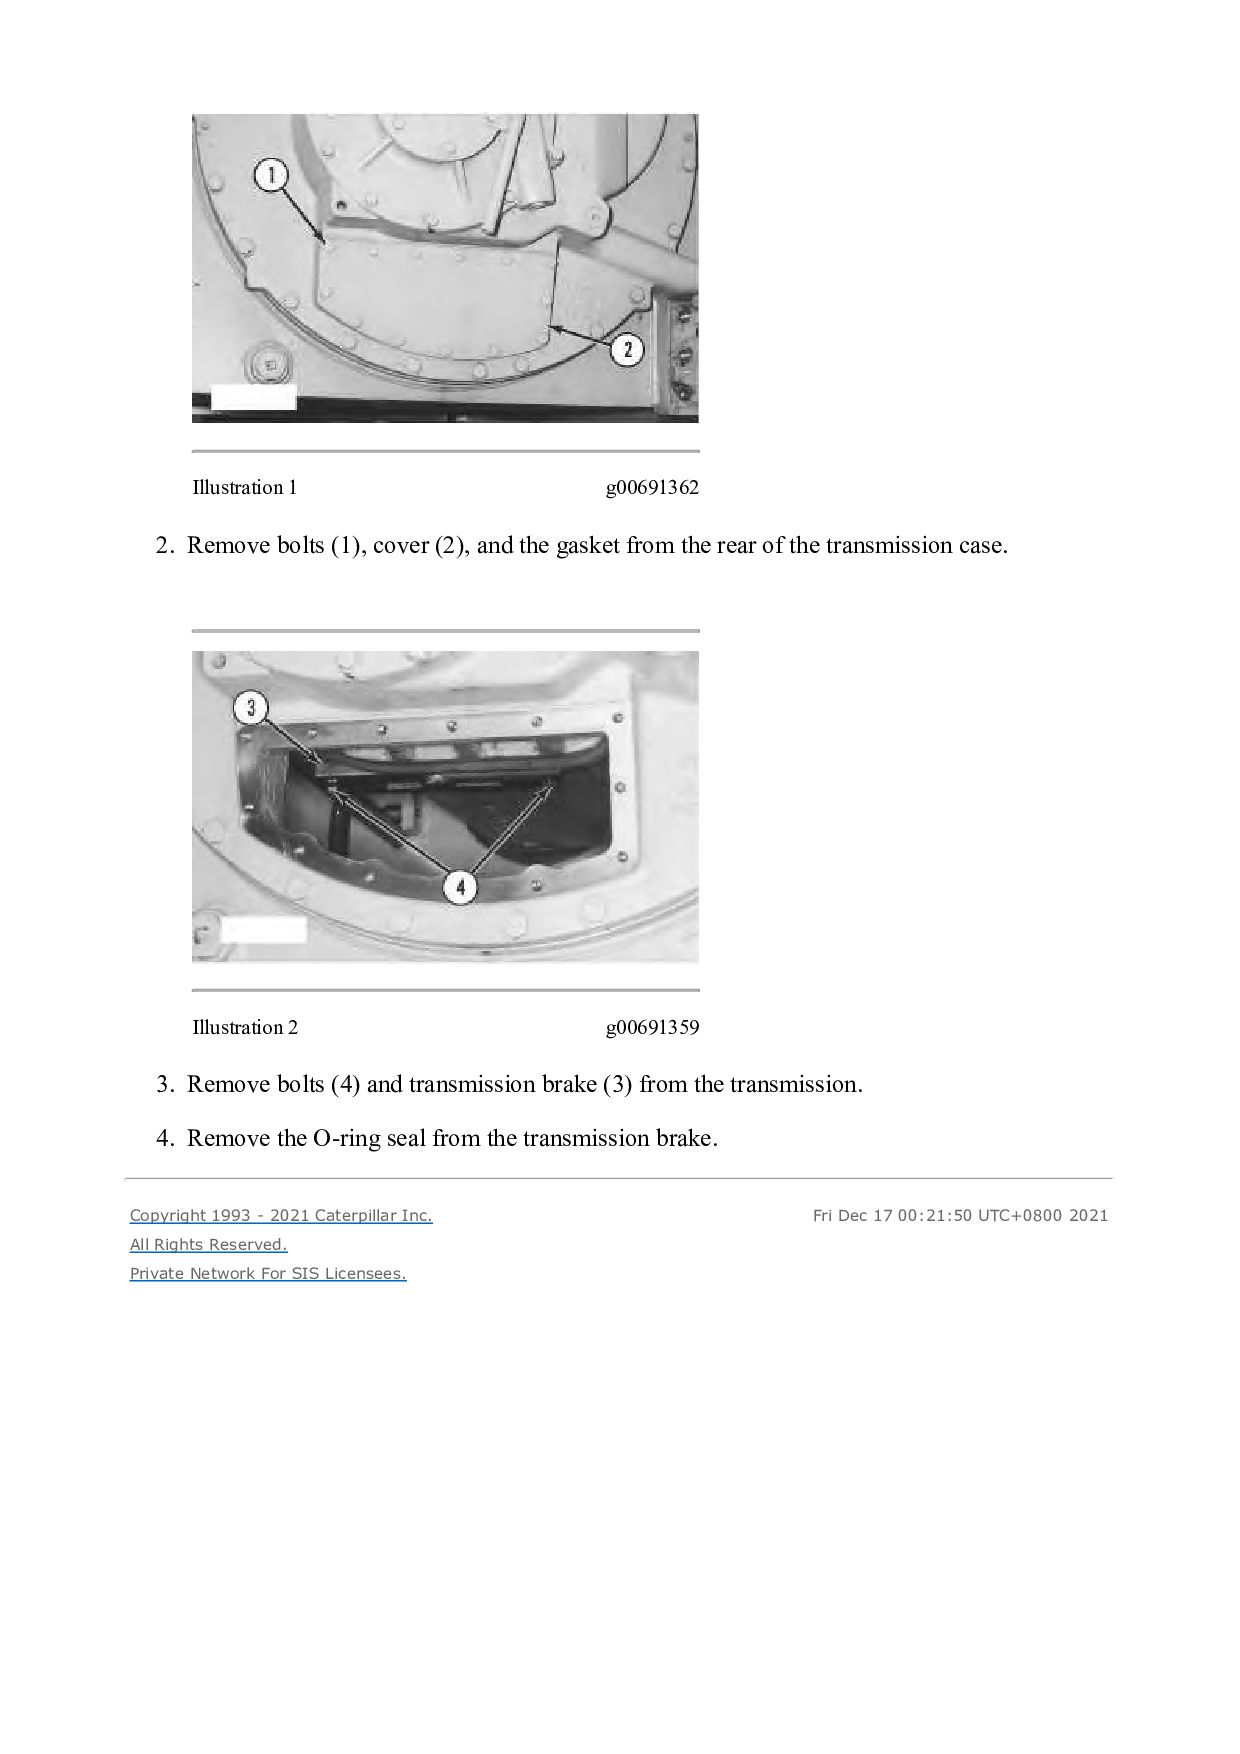
TRACTOR 2YS Configuration: D6M XL & D6M LGP TRACTORS / POWERSHIFT / 2YS00001-UP (MACHINE) POWERED BY 3116 ENGINE Disassembly and Assembly D6M Track-Type Tractor Power Train Media Number -SENR9482-04 Publication Date -01/01/2011 Date Updated -31/01/2011 i00963549 Transmission Brake - Remove SMCS - 4170-077 Removal Procedure NOTICE Care must be taken to ensure that fluids are contained during performance of inspection, maintenance, testing, adjusting and repair of the machine. Be prepared to collect the fluid with suitable containers before opening any compartment or disassembling any component containing fluids. Refer to Special Publication, NENG2500, "Caterpillar Tools and Shop Products Guide", for tools and supplies suitable to collect and contain fluids in Caterpillar machines. Dispose of all fluids according to local regulations and mandates. Note: Cleanliness is an important factor. Before the disassembly procedure, the exterior of the component should be thoroughly cleaned. This will help to prevent dirt from entering the internal mechanism. 1. Drain the oil from the transmission and bevel gear case.
![Please write to us. Our email: [email protected] Please go to](https://files.speakerdeck.com/presentations/3eff9900b7ff4abcb9dd98a0dcaeaf8e/slide_34.jpg)