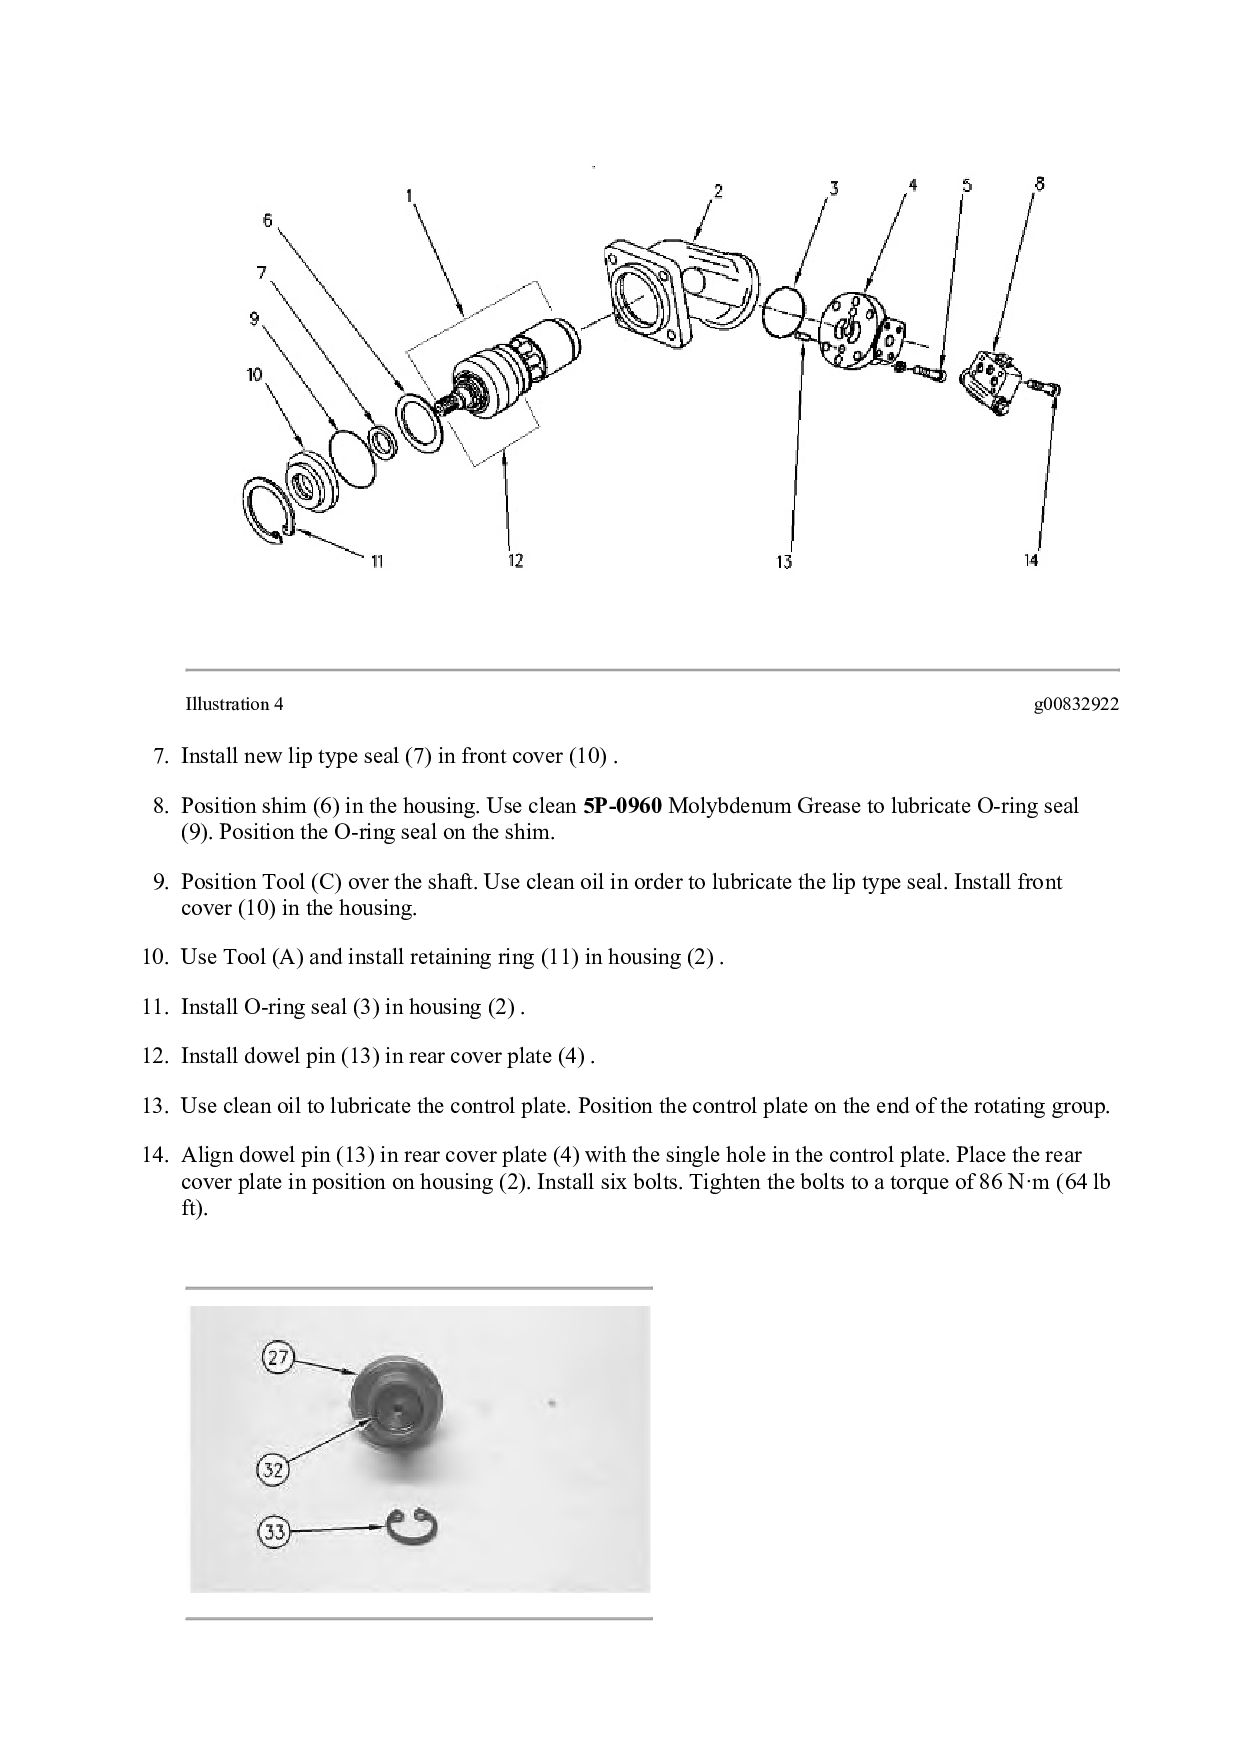
COMPACTOR ASG Configuration: CS-683E Vibratory Compactor ASG00001-UP (MACHINE) POWERED BY 3056E Engine Disassembly and Assembly CP-663E, CS-663E and CS-683E Vibratory Compactors Machine Systems Media Number -KENR3654-01 Publication Date -01/01/2006 Date Updated -03/01/2006 i01935190 Vibratory Support - Remove SMCS - 5656-011 Removal Procedure Table 1 Required Tools Tool Part Number Part Description Qty A 6V-2082 Hook Assembly 1 B 138-7574 Link Bracket 1 Start By: A. Remove the drum. Refer to Disassembly and Assembly, "Drum - Remove". NOTICE Care must be taken to ensure that fluids are contained during performance of inspection, maintenance, testing, adjusting and repair of the product. Be prepared to collect the fluid with suitable containers before opening any compartment or disassembling any component containing fluids. Refer to Special Publication, NENG2500, "Caterpillar Tools and Shop Products Guide" for tools and supplies suitable to collect and contain fluids on Caterpillar products. Dispose of all fluids according to local regulations and mandates.
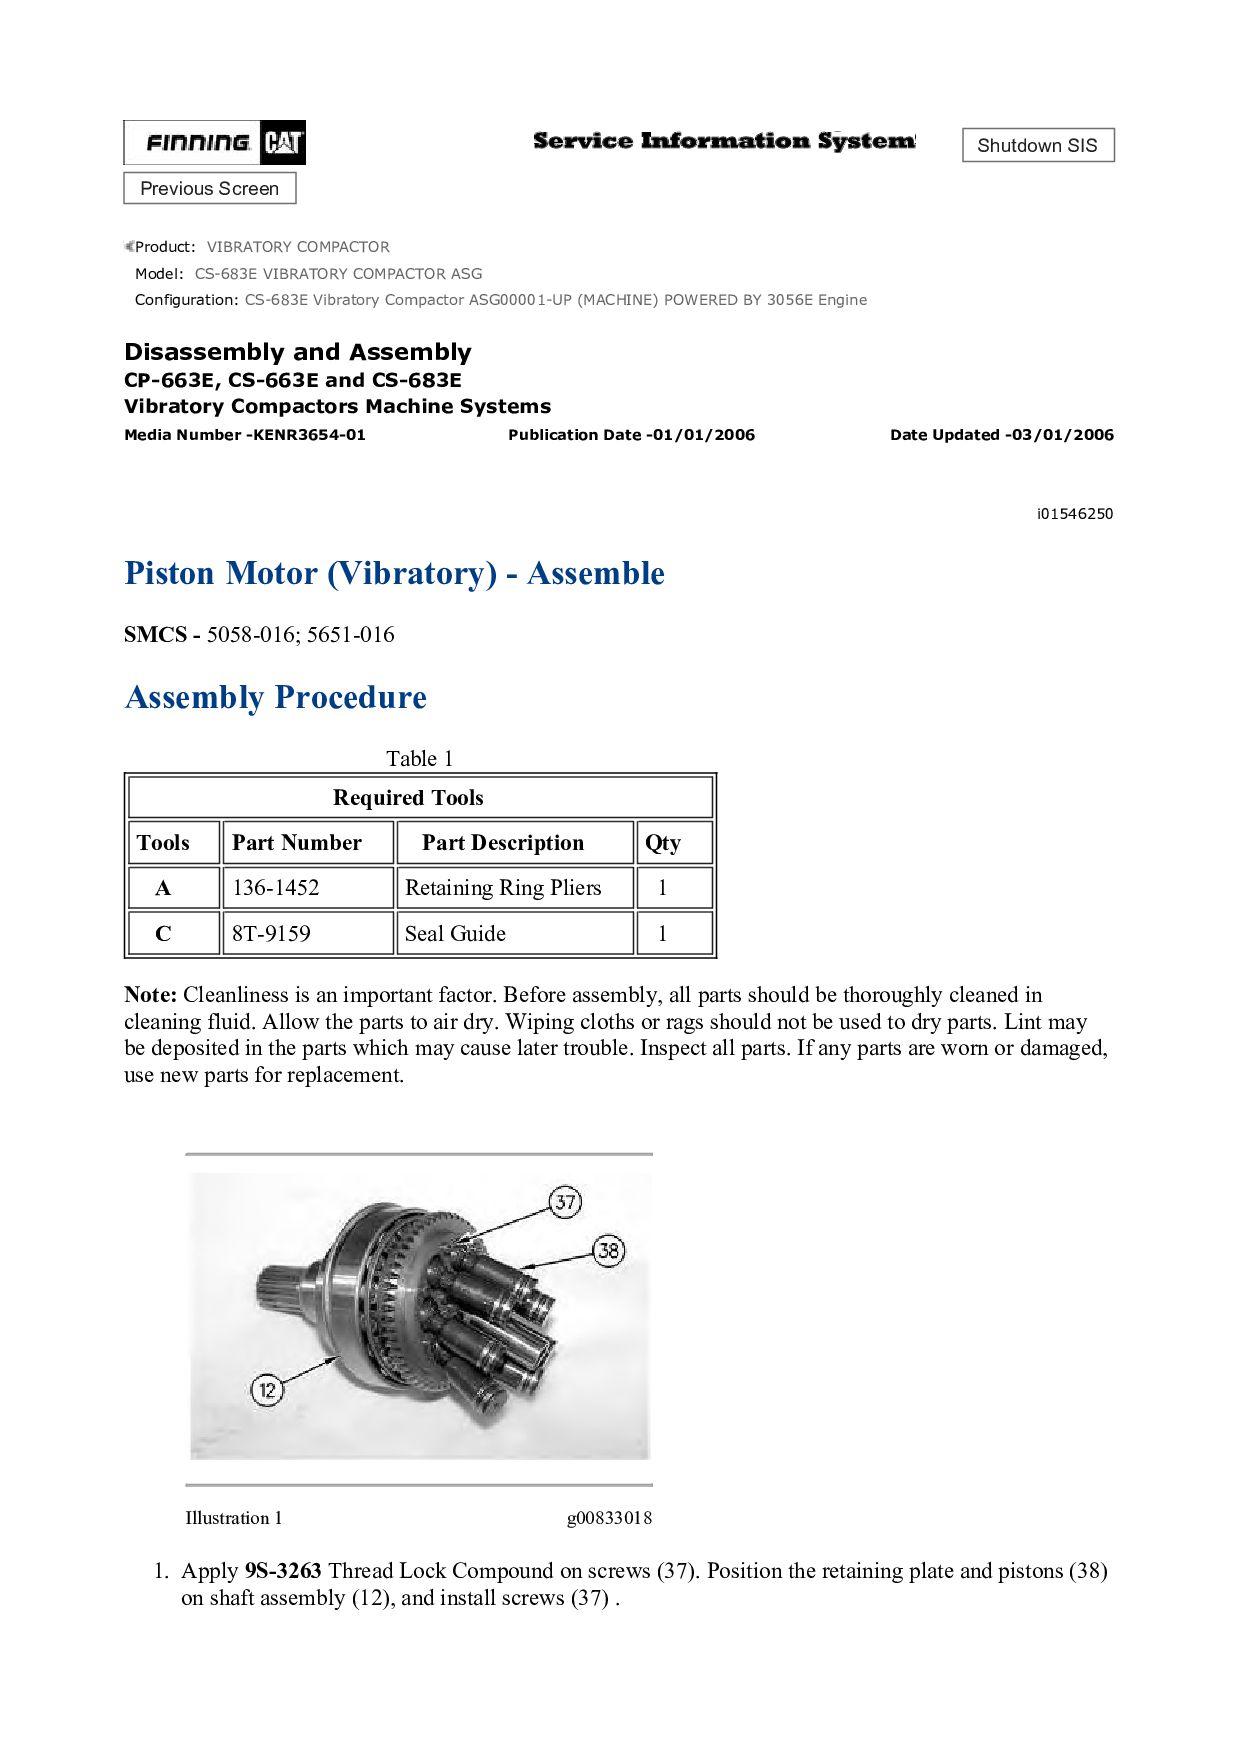
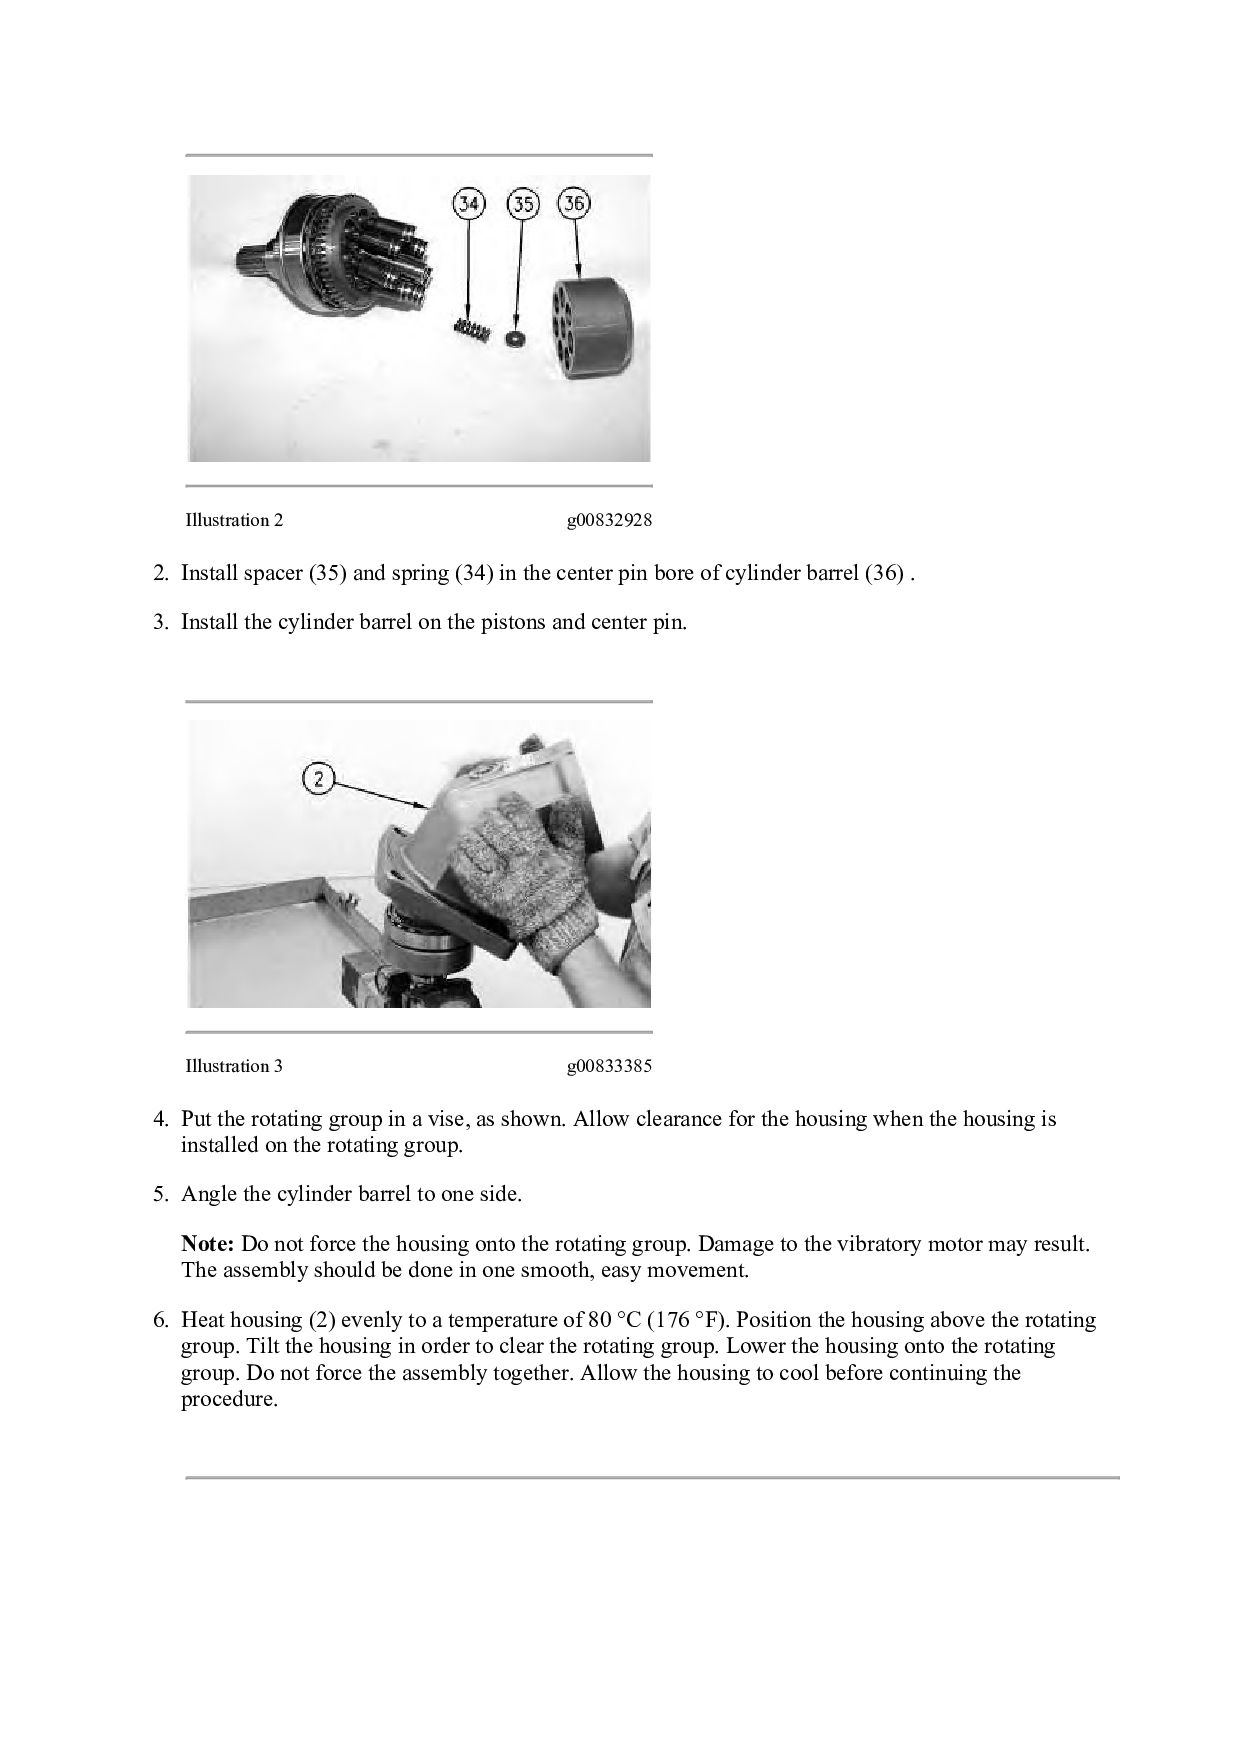
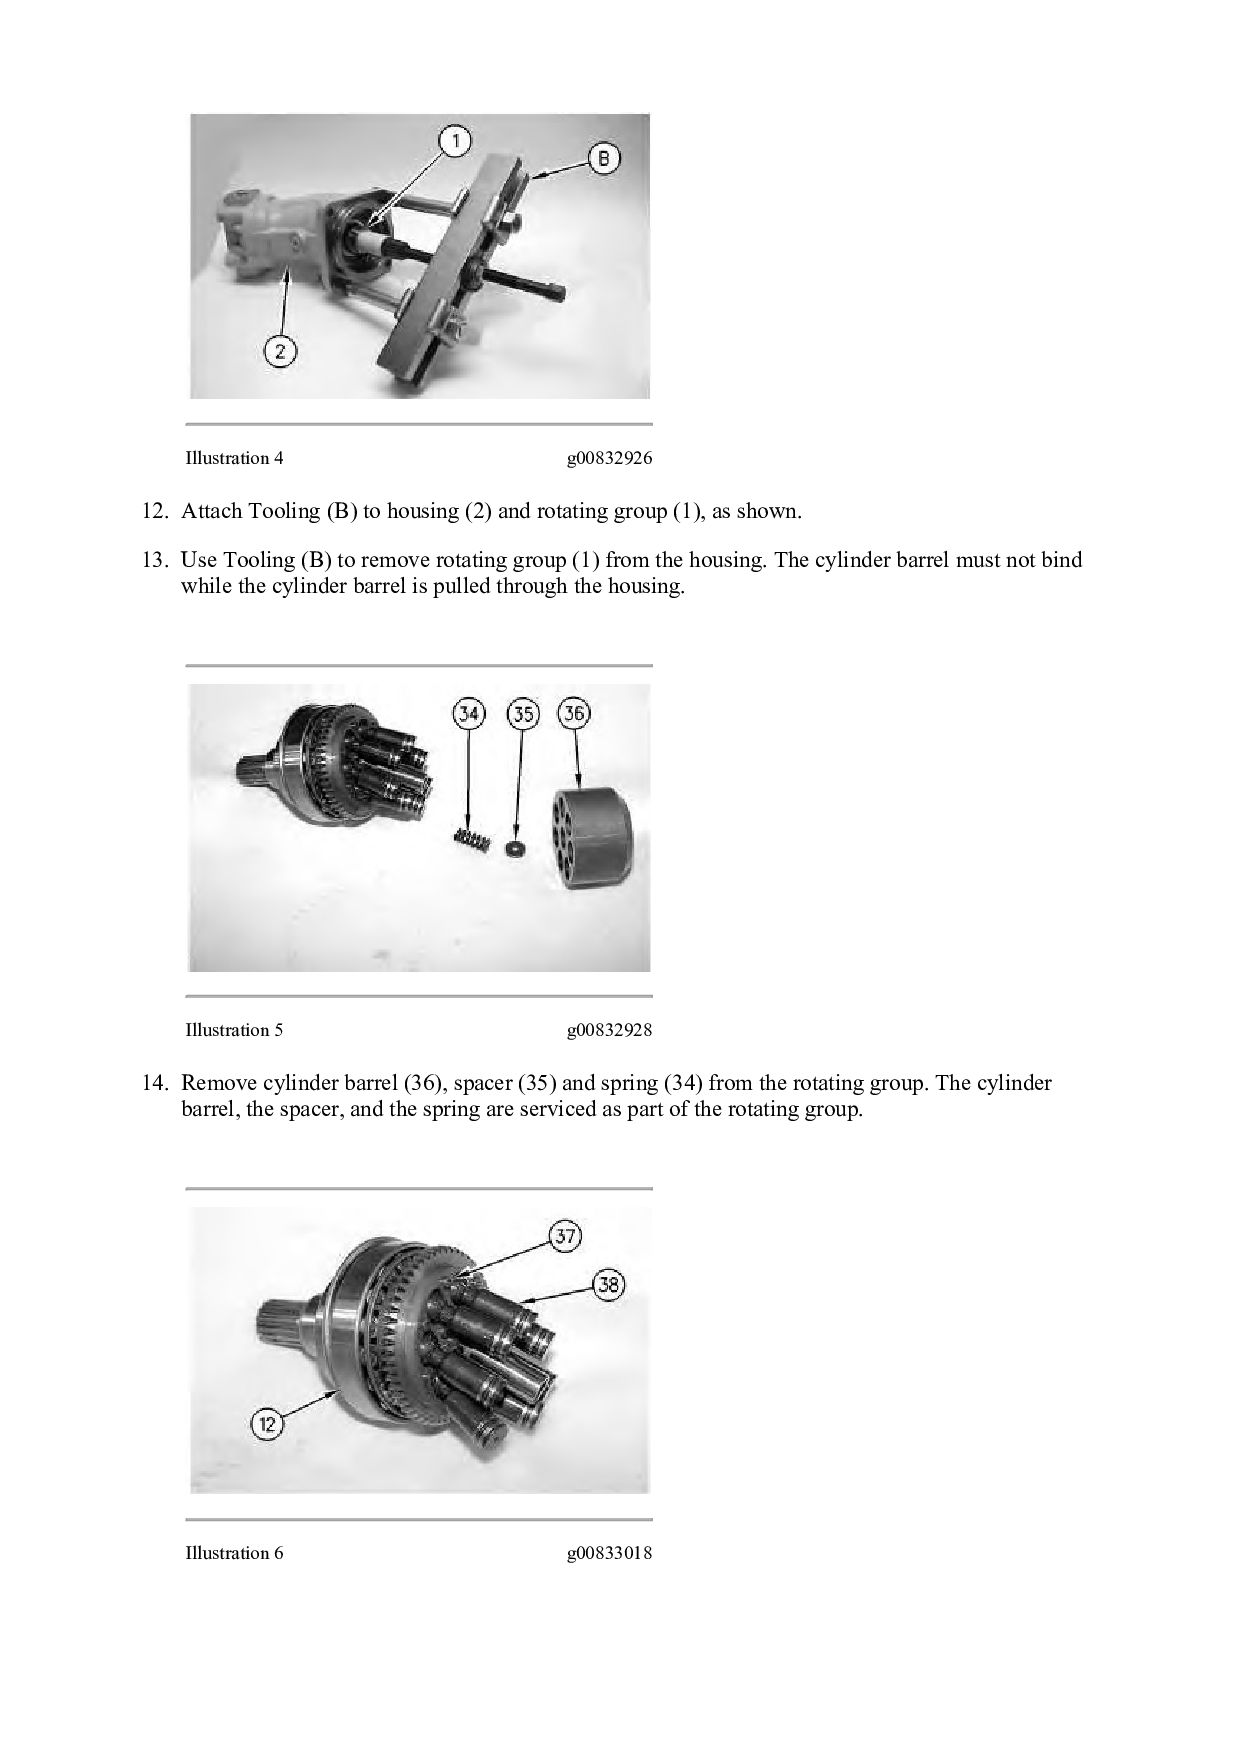
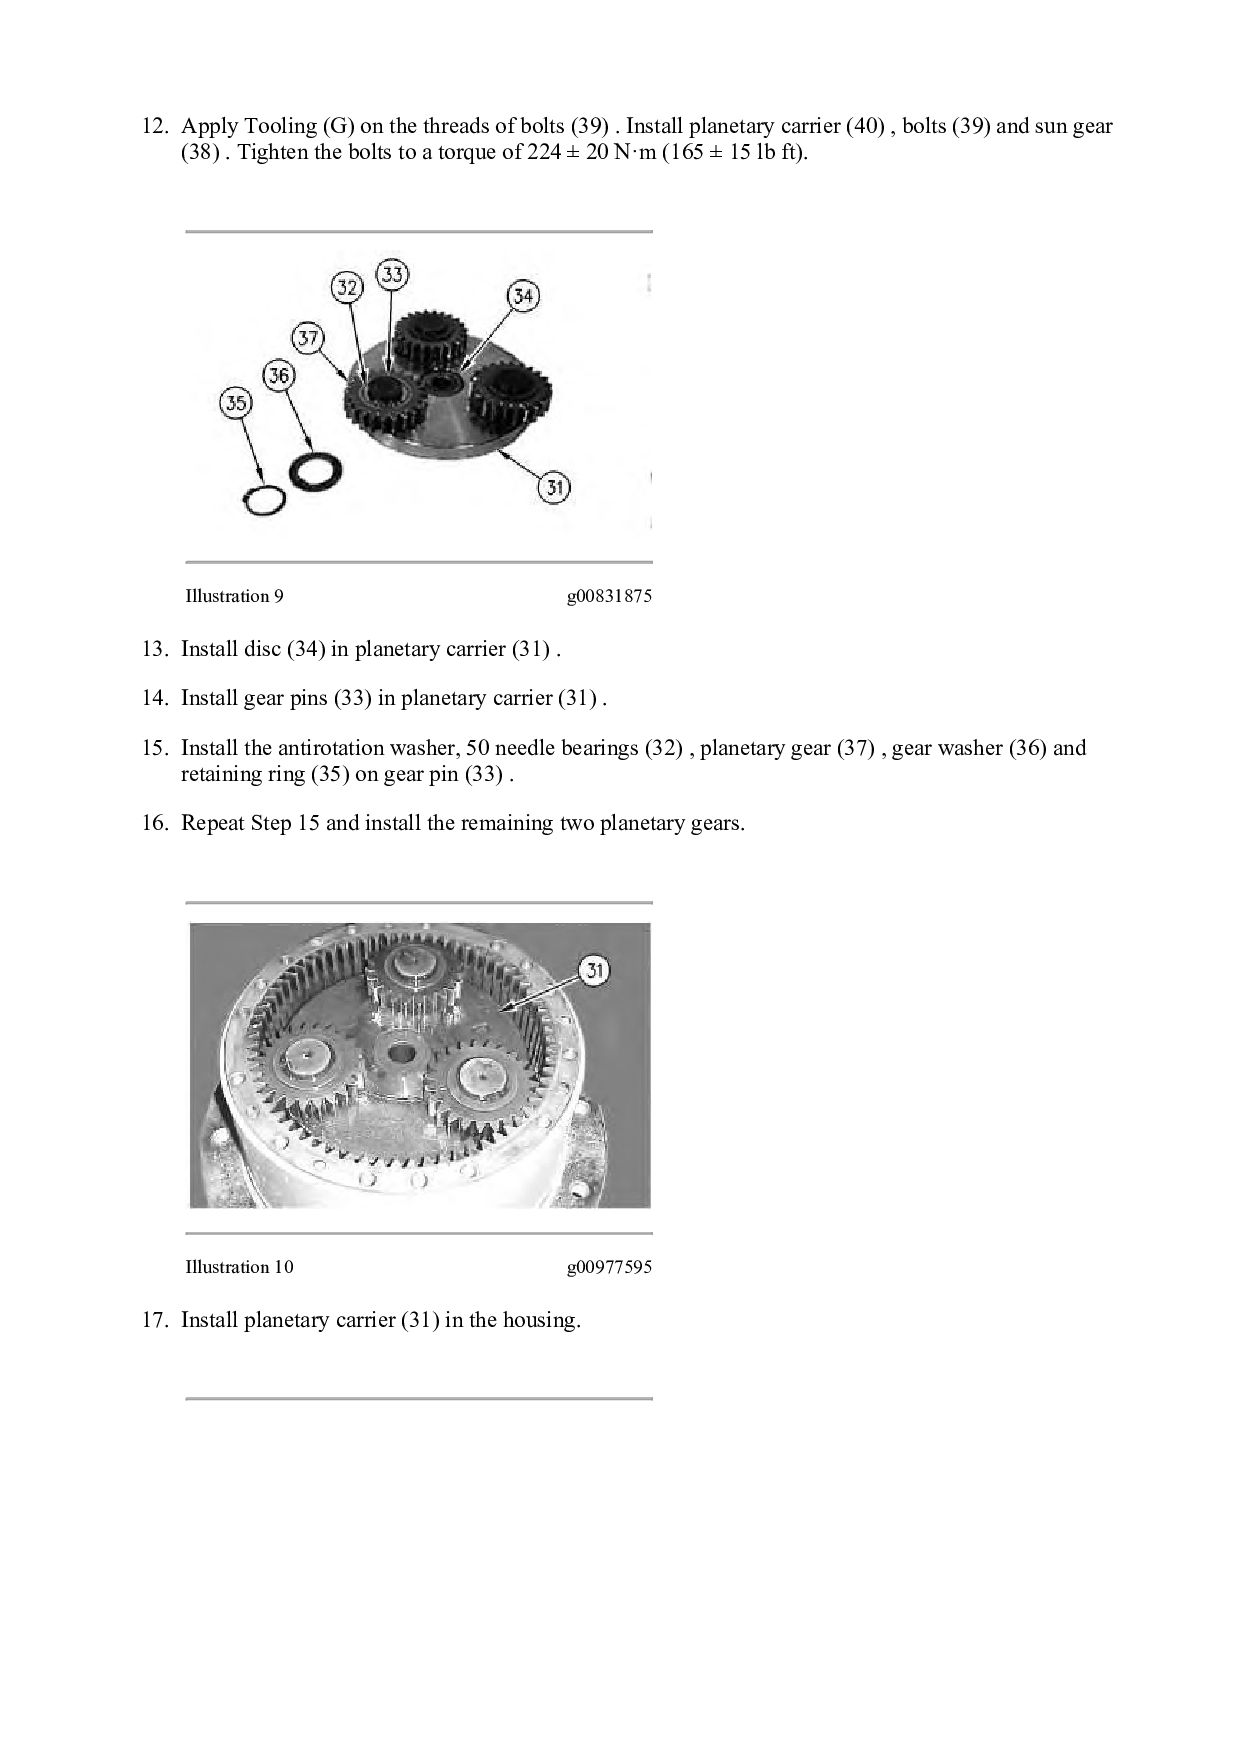
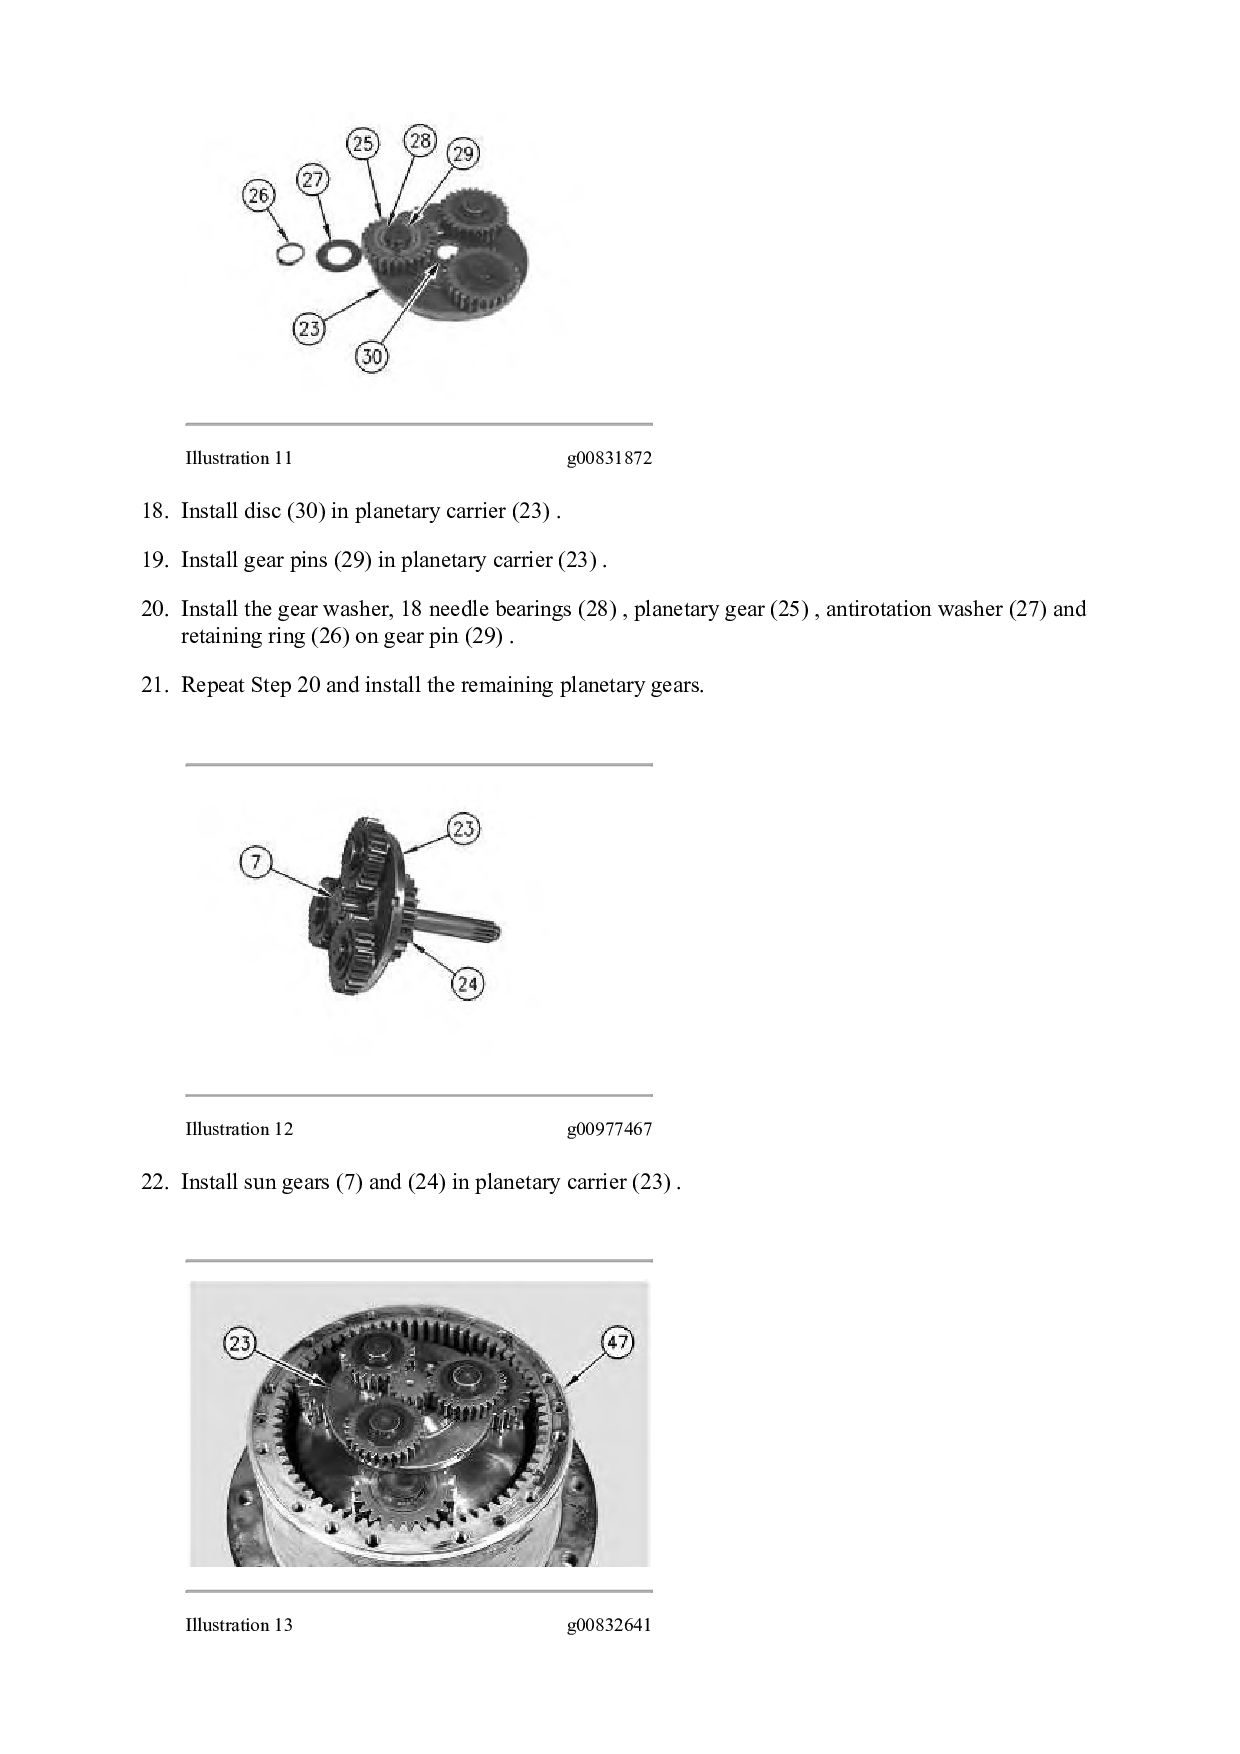
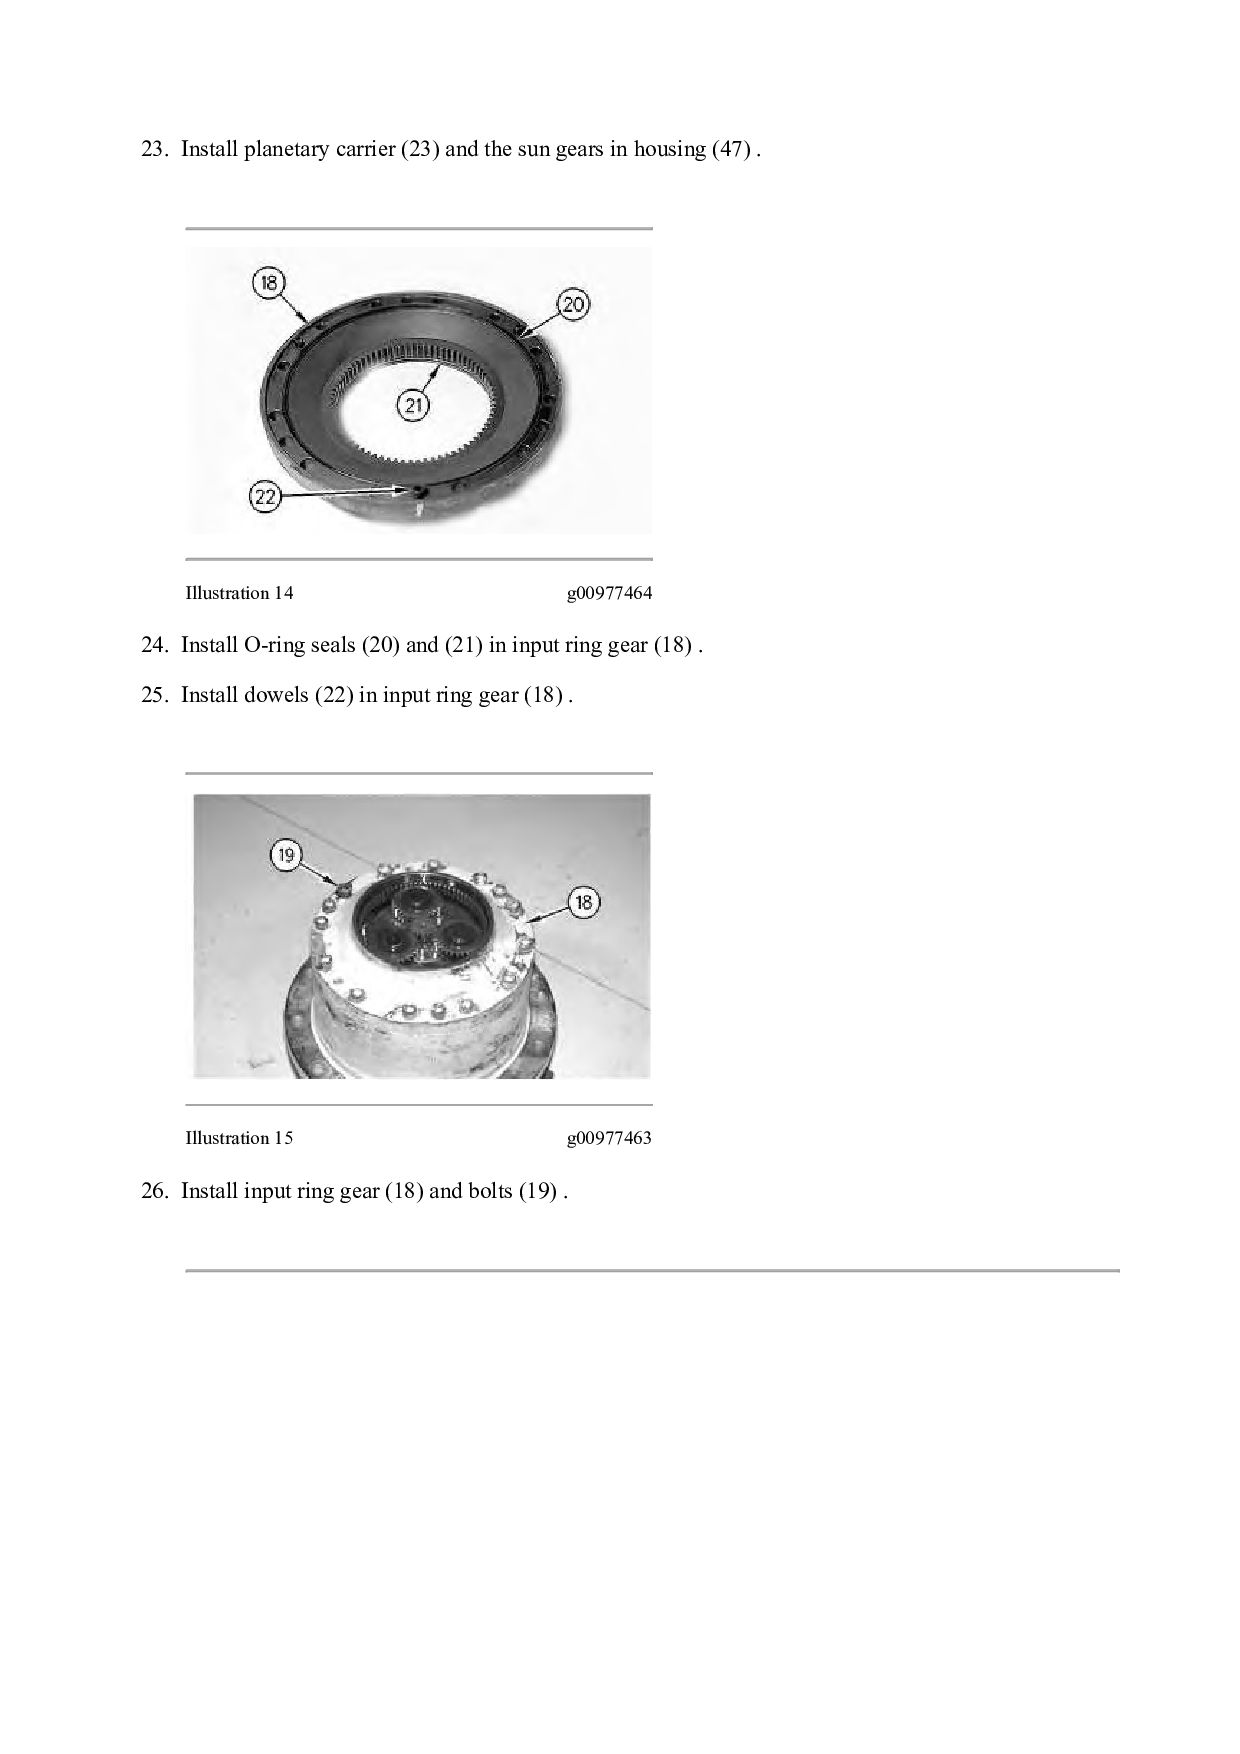
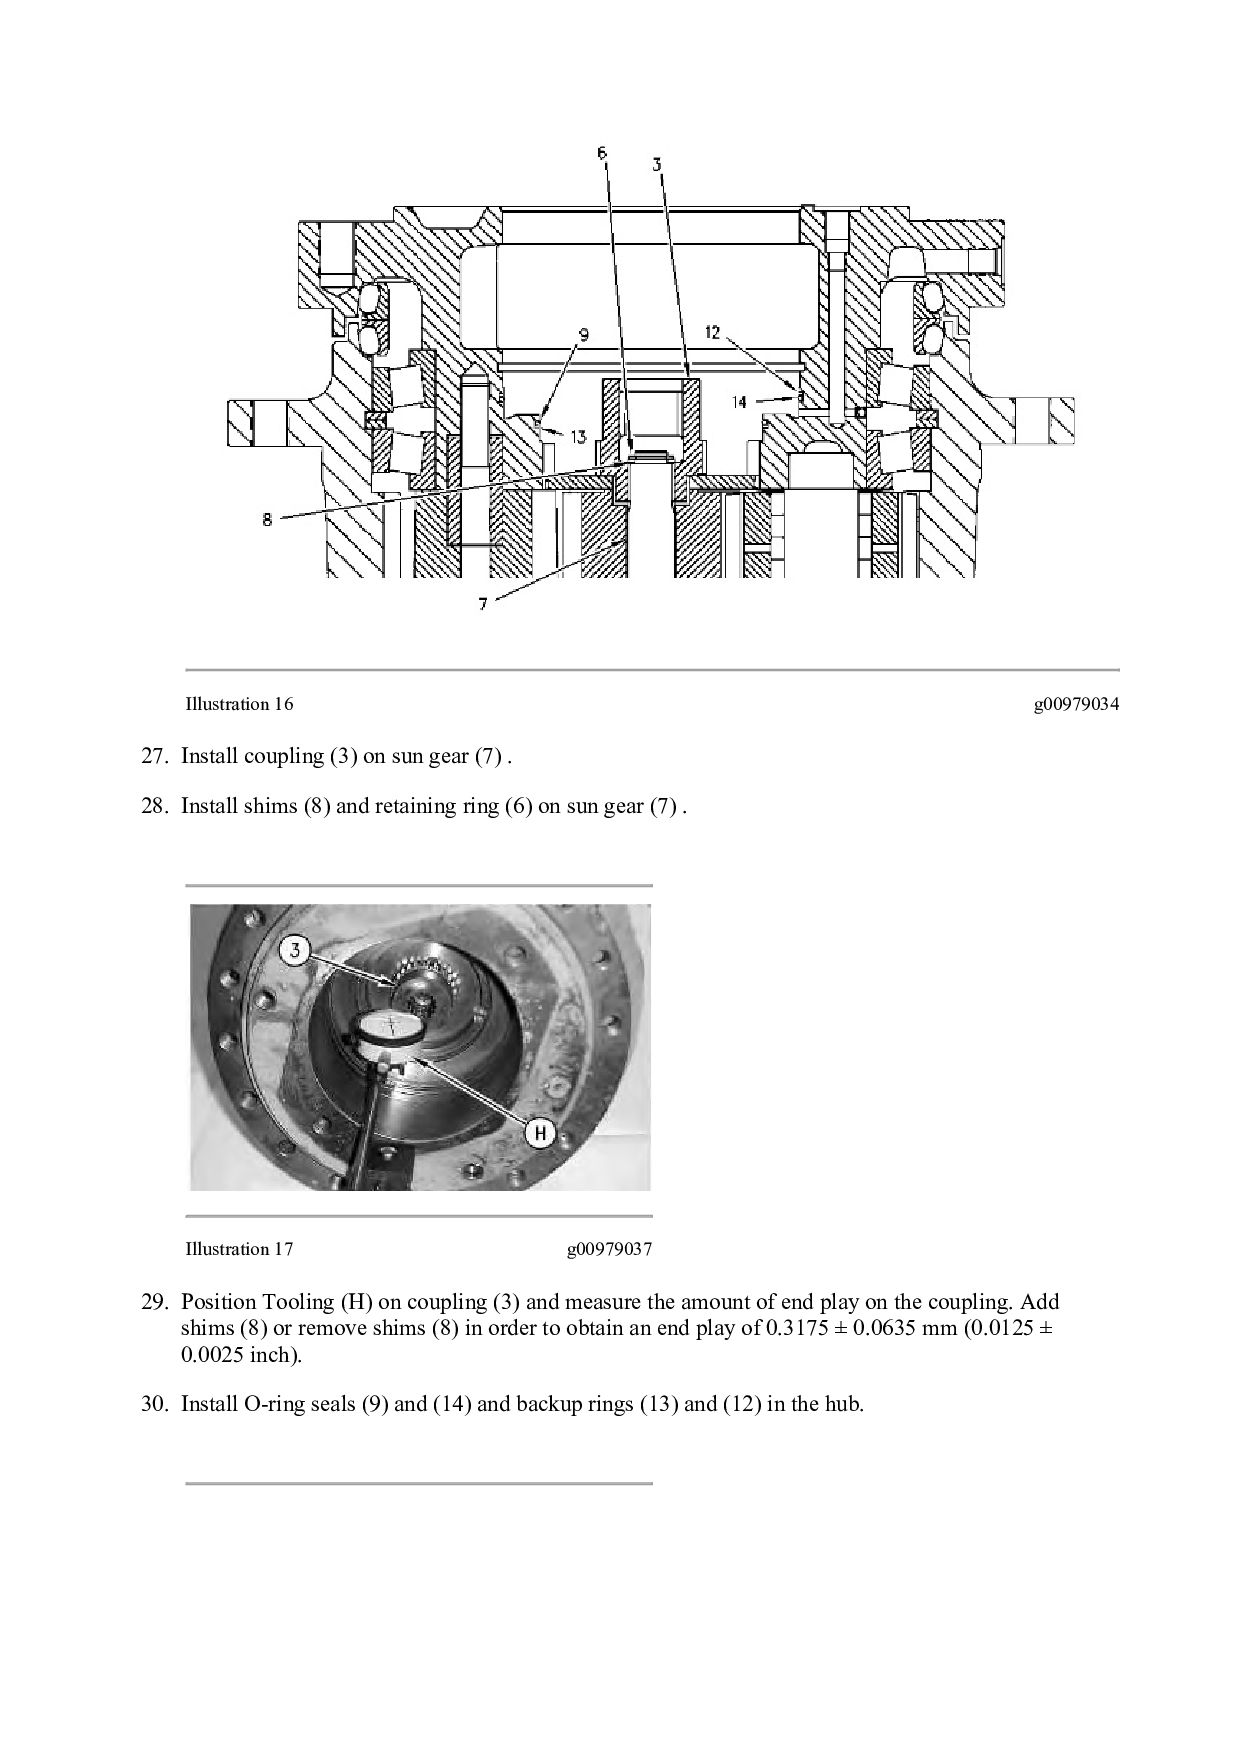
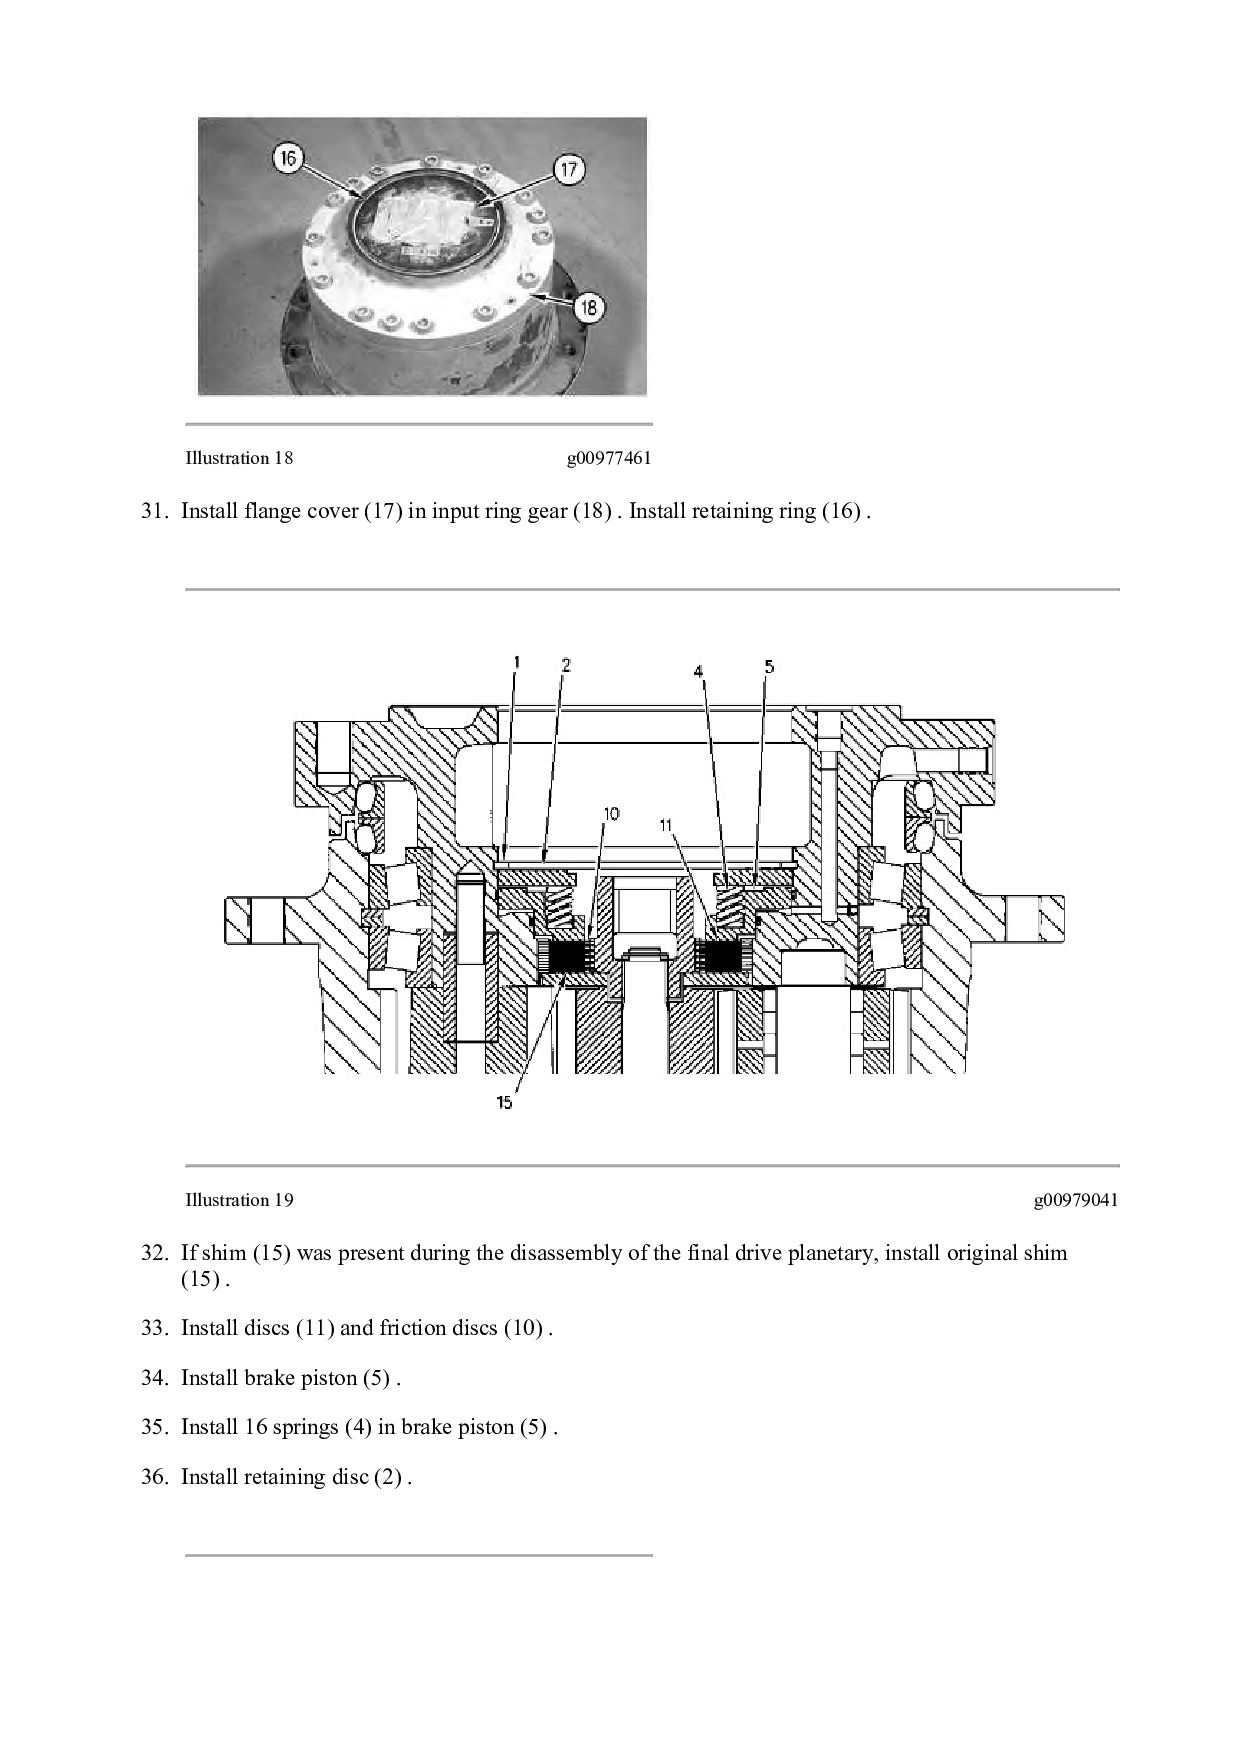
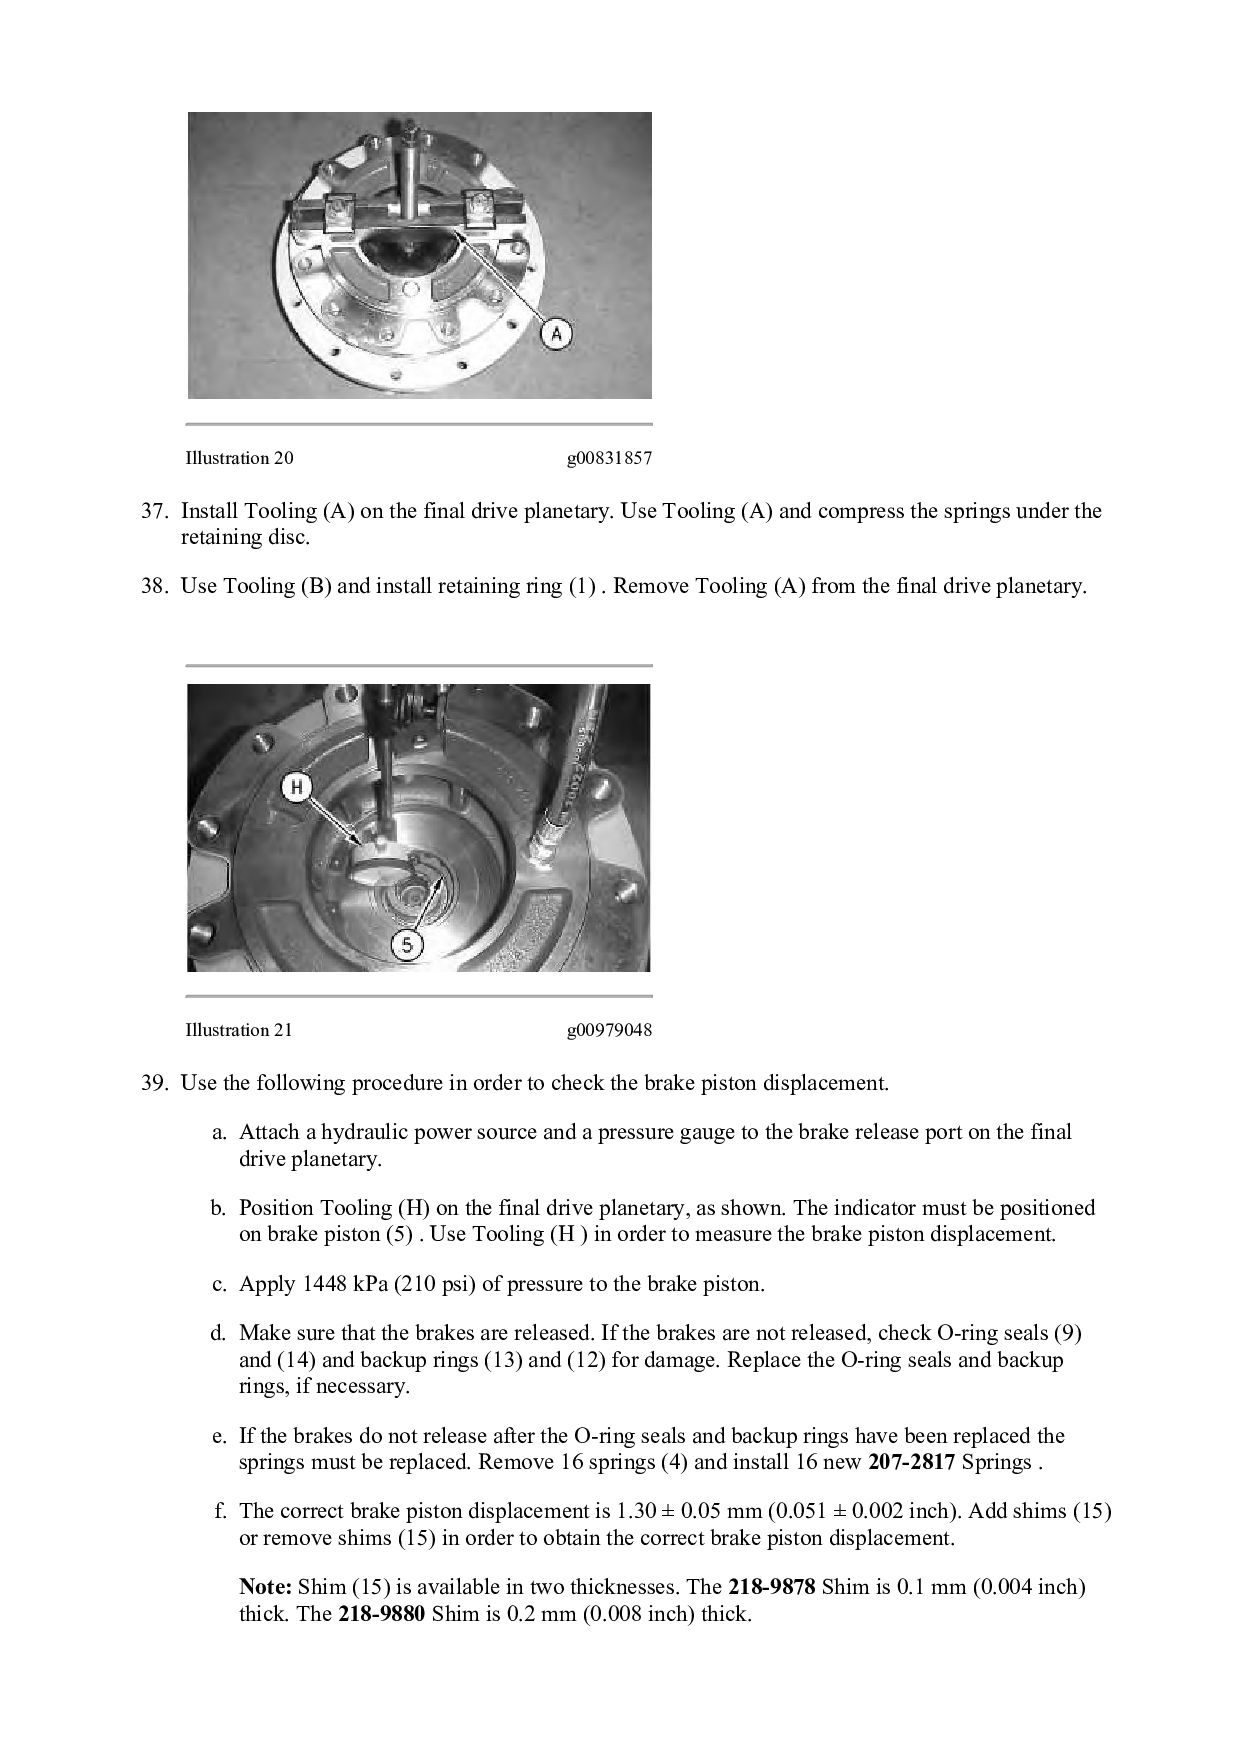