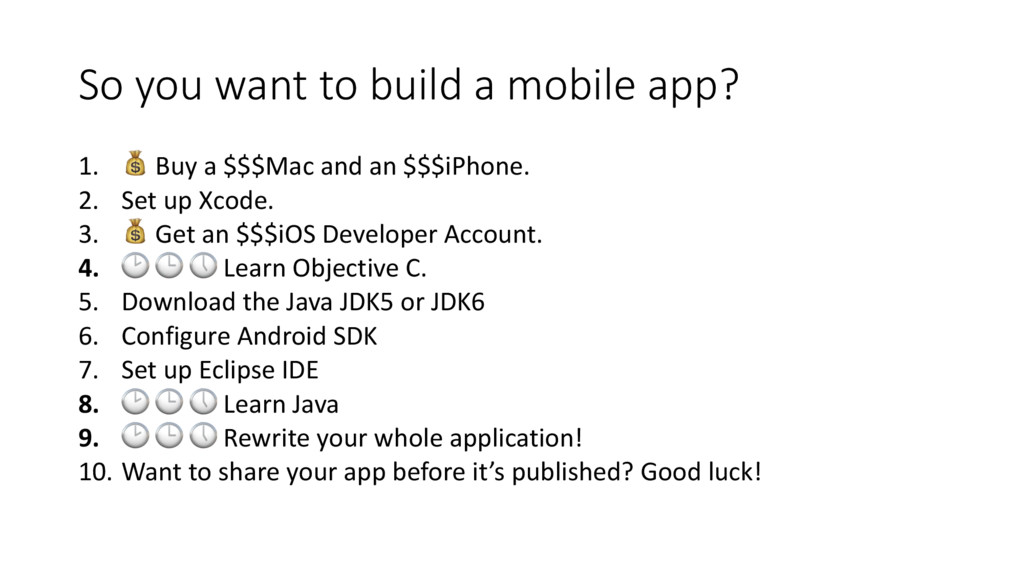
a $$$Mac and an $$$iPhone. 2. Set up Xcode. 3. Get an $$$iOS Developer Account. 4. Learn Objective C. 5. Download the Java JDK5 or JDK6 6. Configure Android SDK 7. Set up Eclipse IDE 8. Learn Java 9. Rewrite your whole application! 10. Want to share your app before it’s published? Good luck!
a $$$Mac and an $$$iPhone. 2. Set up Xcode. 3. Get an $$$iOS Developer Account. 4. Learn Objective C. 5. Download the Java JDK5 or JDK6 6. Configure Android SDK 7. Set up Eclipse IDE 8. Learn Java 9. Learn Want to share your app before it’s published? Good luck!
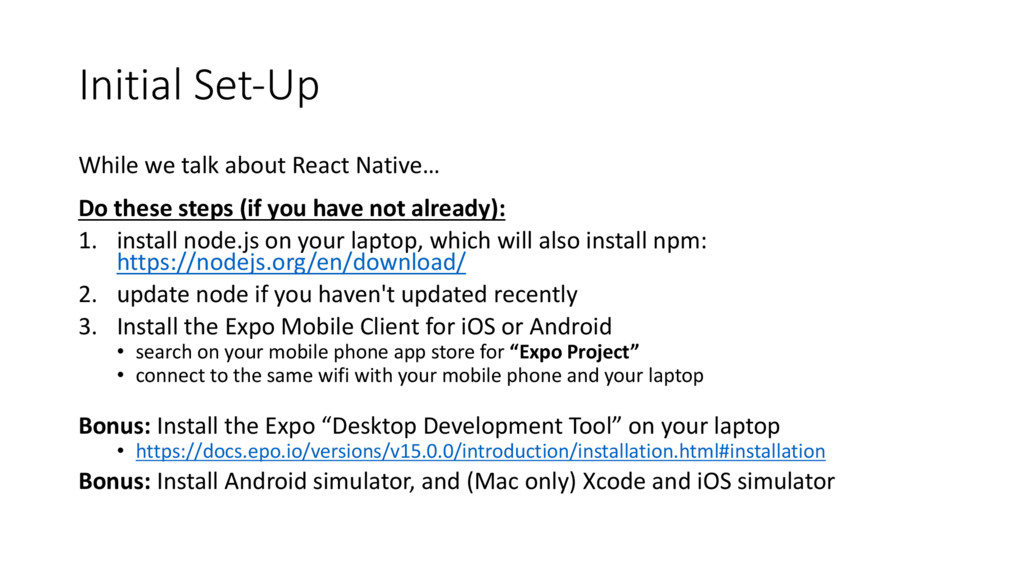
steps (if you have not already): 1. install node.js on your laptop, which will also install npm: https://nodejs.org/en/download/ 2. update node if you haven't updated recently 3. Install the Expo Mobile Client for iOS or Android • search on your mobile phone app store for “Expo Project” • connect to the same wifi with your mobile phone and your laptop Bonus: Install the Expo “Desktop Development Tool” on your laptop • https://docs.epo.io/versions/v15.0.0/introduction/installation.html#installation Bonus: Install Android simulator, and (Mac only) Xcode and iOS simulator
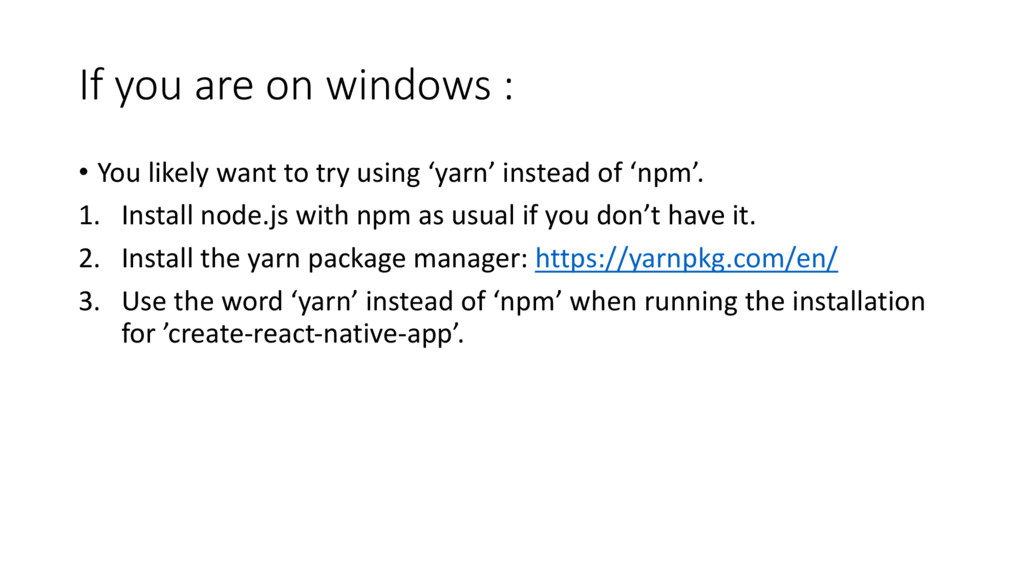
to try using ‘yarn’ instead of ‘npm’. 1. Install node.js with npm as usual if you don’t have it. 2. Install the yarn package manager: https://yarnpkg.com/en/ 3. Use the word ‘yarn’ instead of ‘npm’ when running the installation for ’create-react-native-app’.
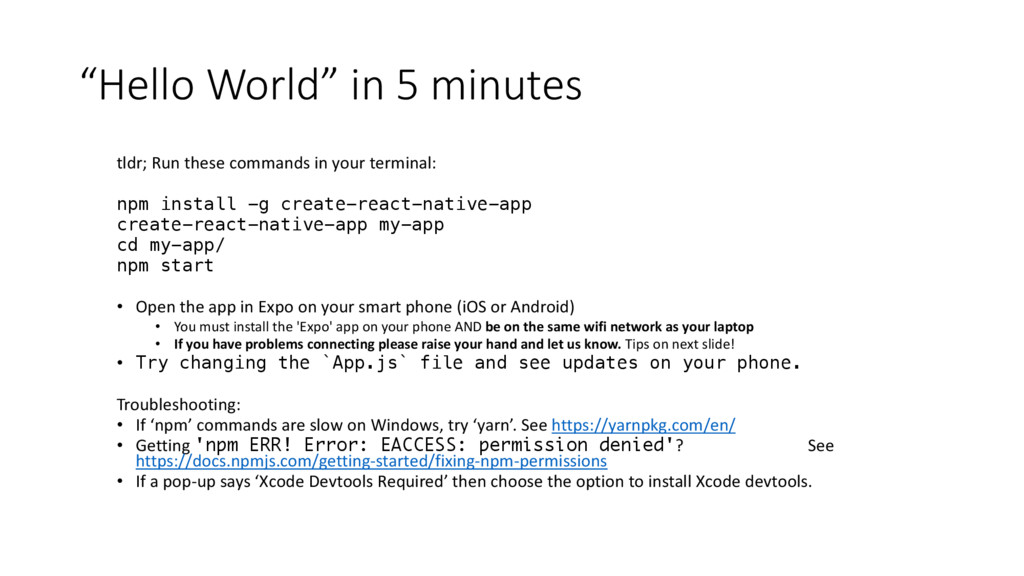
your terminal: npm install -g create-react-native-app create-react-native-app my-app cd my-app/ npm start • Open the app in Expo on your smart phone (iOS or Android) • You must install the 'Expo' app on your phone AND be on the same wifi network as your laptop • If you have problems connecting please raise your hand and let us know. Tips on next slide! • Try changing the `App.js` file and see updates on your phone. Troubleshooting: • If ‘npm’ commands are slow on Windows, try ‘yarn’. See https://yarnpkg.com/en/ • Getting 'npm ERR! Error: EACCESS: permission denied'? See https://docs.npmjs.com/getting-started/fixing-npm-permissions • If a pop-up says ‘Xcode Devtools Required’ then choose the option to install Xcode devtools.
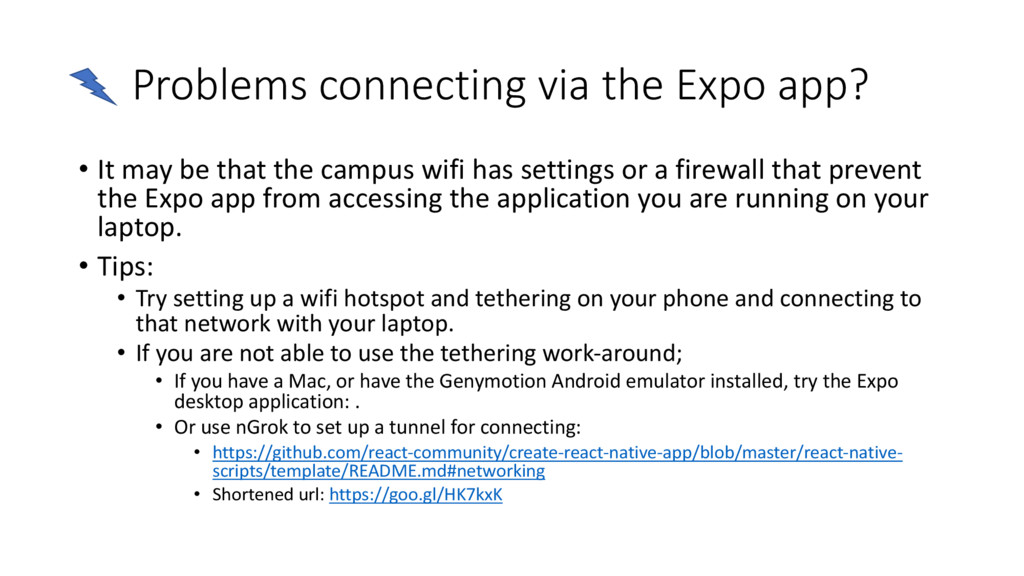
that the campus wifi has settings or a firewall that prevent the Expo app from accessing the application you are running on your laptop. • Tips: • Try setting up a wifi hotspot and tethering on your phone and connecting to that network with your laptop. • If you are not able to use the tethering work-around; • If you have a Mac, or have the Genymotion Android emulator installed, try the Expo desktop application: . • Or use nGrok to set up a tunnel for connecting: • https://github.com/react-community/create-react-native-app/blob/master/react-native- scripts/template/README.md#networking • Shortened url: https://goo.gl/HK7kxK
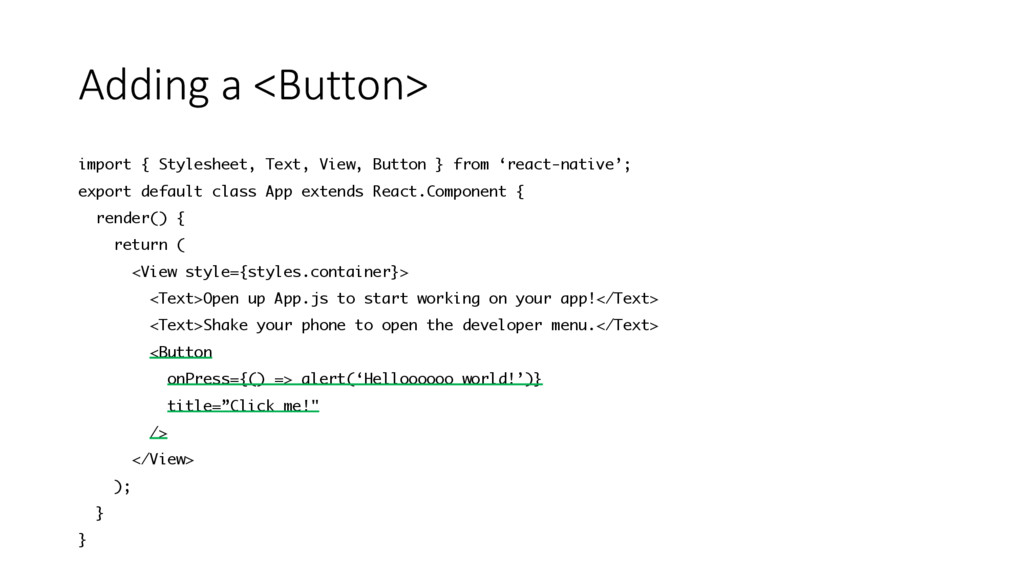
from ‘react-native’; export default class App extends React.Component { render() { return ( <View style={styles.container}> <Text>Open up App.js to start working on your app!</Text> <Text>Shake your phone to open the developer menu.</Text> <Button onPress={() => alert(‘Helloooooo world!’)} title=”Click me!" /> </View> ); } }
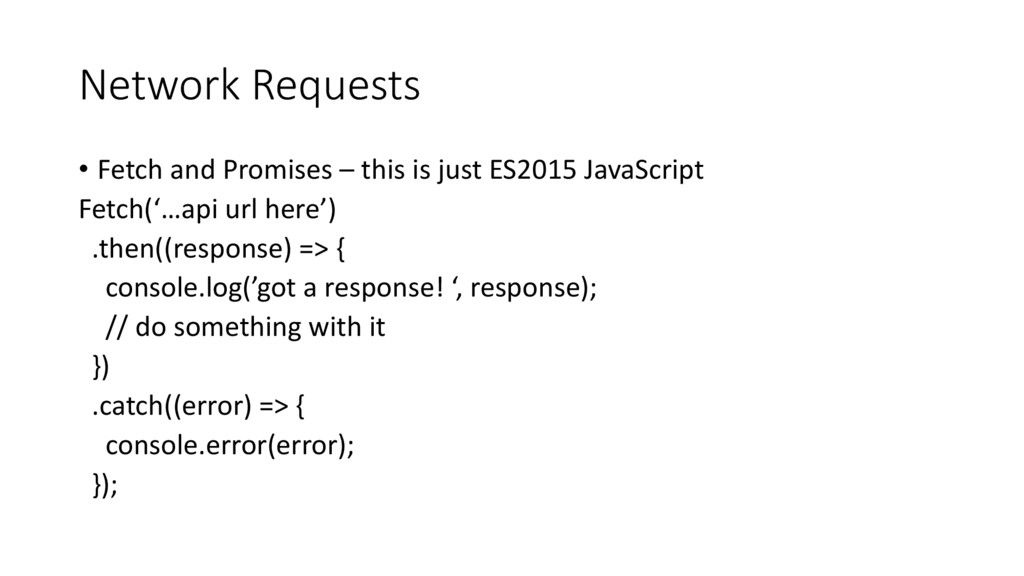
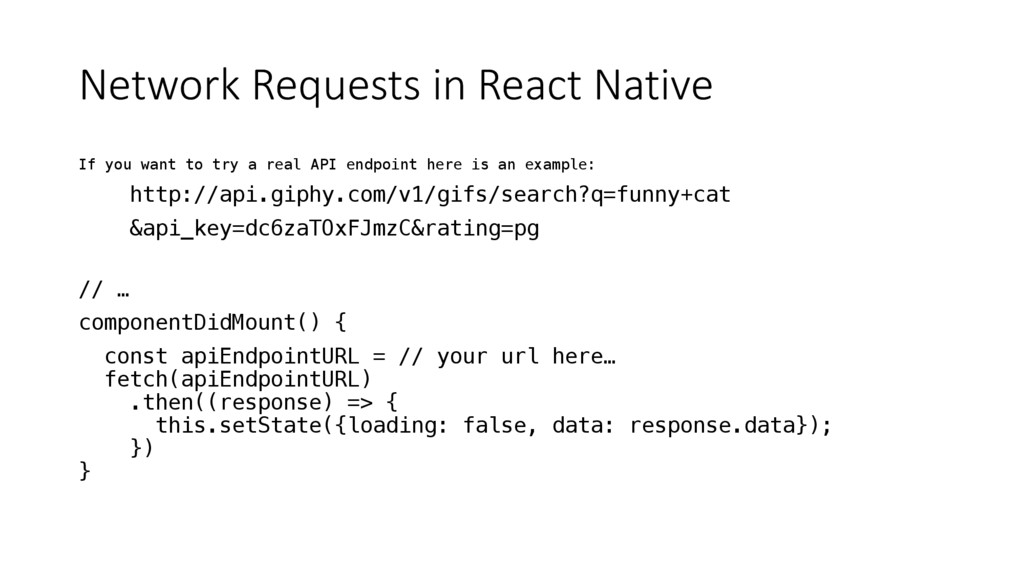
a real API endpoint here is an example: http://api.giphy.com/v1/gifs/search?q=funny+cat &api_key=dc6zaTOxFJmzC&rating=pg // … componentDidMount() { const apiEndpointURL = // your url here… fetch(apiEndpointURL) .then((response) => { this.setState({loading: false, data: response.data}); }) }