Share
Embed
Devfest 2022 - Advantages of espresso tests automation how and why ? by Madona S. Wambua
As engineers, it is good practice to maintain a healthy culture where we write both UI and unit tests. However, the biggest hurdle comes when you have to set up continuous integration; how do you ensure your tests don’t slow down builds from other pull requests hence slowing down the merge process..? What if I told you we found a tool and now run our UI tests nightly and on specific days? Join me, and let’s talk about how, why, and what tool we use.
Madona S. Wambua
Twitter: @madona_syombua
Linkedin: in/madona-syombua/
GDG Montreal
November 19, 2022
Transcript
54 slides
-
AGENDA • What is UI Testing • Android UI Test
Automation • Flakiness • UI Automator APIs • Popular Android UI Testing Tools • Unit Testing • CI/CD Tools • Conclusion @madona_syombua -
About Me • Android Engineer • GDE Android • Author
• Women Tech Makers Ambassador @madona_syombua -
@madona_syombua Pros • Automated software testing can increase the depth
and scope of tests to help improve software quality. • Lengthy tests that are often avoided during manual testing can be run unattended. • Automated software testing can look inside an application and see memory contents, data tables, file contents, and internal program states to determine if the product is behaving as expected. • Test automation can easily execute thousands of different complex test cases during every test run providing coverage that is impossible with manual tests. -
Integration Test Unit Tests End to end test App Scope
@madona_syombua -
UI Testing Suites 5 Accessibility 4 Visual Design (UX) 3
Usability Perform ance 2 1 Functionality @madona_syombua -
Data Type / Field Length This is ensuring the correct
data type is entered, e.g Integer instead of strings. Also validating that fields length and ensuring users don’t enter many chars 2 User Actions (End to end) This can vary from start to finish say logging into your account, accessing your profile and more. Navigation 1 3 2 1 Test Cases 3 Progress Bar Good a example includes progress bar, and that is the test verifies that the correct state is sent to the screen @madona_syombua -
Jetpack Frameworks 2 Jetpack Compose testing APIs 3 UI Automator
4 Robolectric 1 Espresso Testing Framework Frameworks that provide APIs for writing UI tests @madona_syombua -
@Test fun assertProgressBarIsShownWhenIsLoading() { composeTestRule.setContent { loginContent( state = State(isLoading
= true), ) } composeTestRule .onNodeWithTag(TestTags.UI.BUTTON_PROGRES S_BAR) .assertIsDisplayed() } Sample Validation @Test fun assertProgressBarIsNotShownWhenIsNotLoadi ng() { composeTestRule.setContent { loginContent( state = State(isLoading = false), ) } composeTestRule .onNodeWithTag(TestTags.UI.BUTTON_PROGRES S_BAR) .assertDoesNotExist() } @madona_syombua -
XML Sample Validation @Test fun assertProgressBarIsShown() { onView(withId(R.id.login_email)).perform(typeText("sample")) onView(withId(R.id.input_password)).perform(typeText("pass")) onView(withId(R.id.login_log_in)).perform(click())
waitUntilGoneProgressBar() onView(withId(R.id.fragment_home)).check(matches(isDisplayed())) } @madona_syombua -
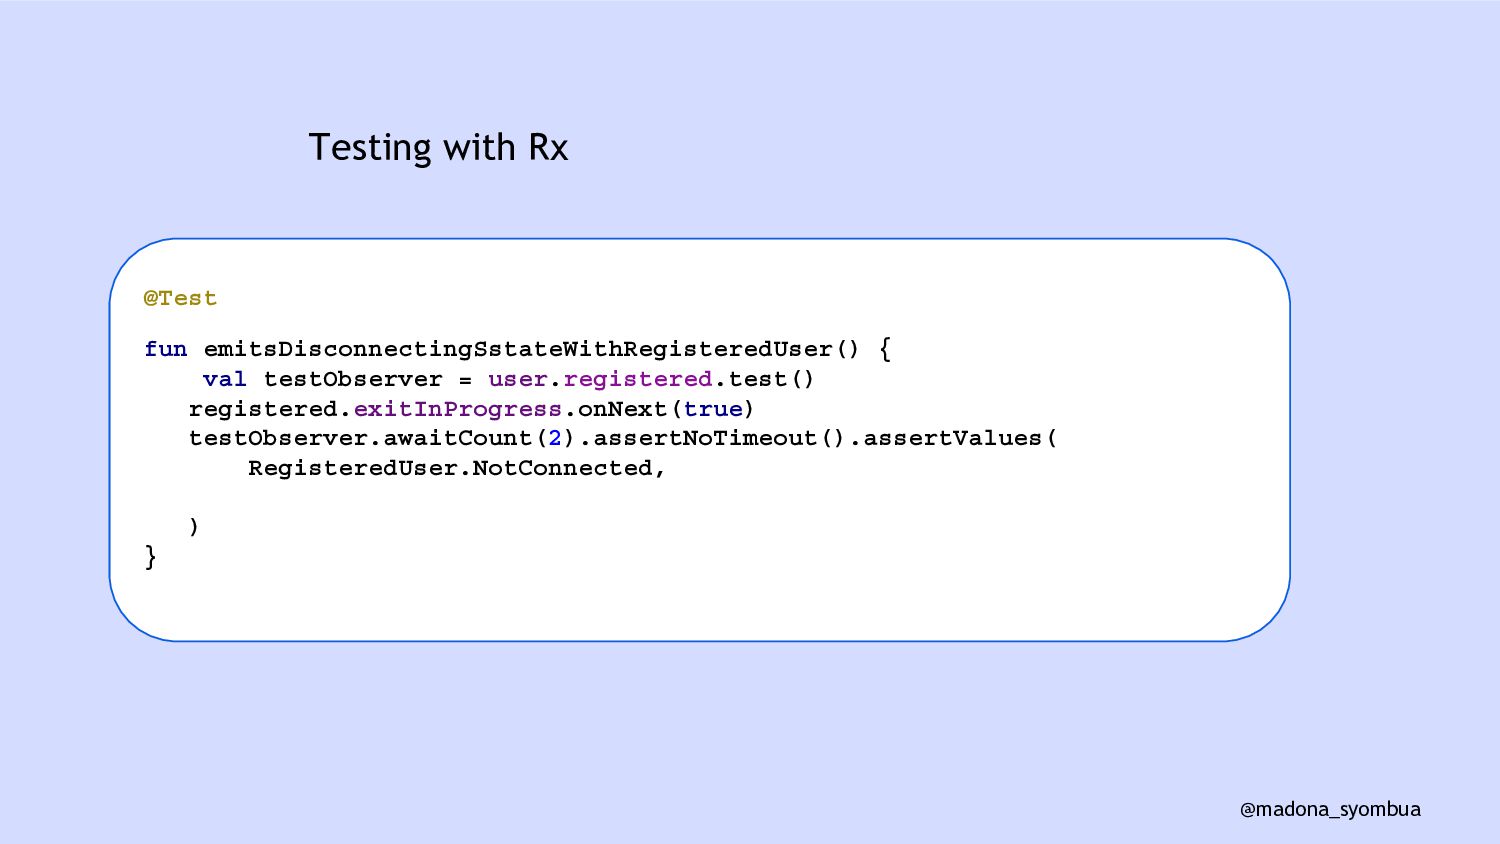
Testing with Rx @Test fun emitsDisconnectingSstateWithRegisteredUser() { val testObserver =
user.registered.test() registered.exitInProgress.onNext(true) testObserver.awaitCount(2).assertNoTimeout().assertValues( RegisteredUser.NotConnected, ) } @madona_syombua -
Use test() method to get a TestObserver you can make
assertions on. Can do things like: • Await completion • Assert count of values emitted • Assert sequence and items expected • Assert a timeout did / did not happen • Assert an expected error was raised @madona_syombua -
class ScreenUnitTestRule<T : Activity>( activityClass: Class<T>, private val navigateToScreen: T.()
-> Unit, private val setupMocks: () -> Unit = {} ) : ActivityTestRule<T>(activityClass) { @ExperimentalStdlibApi override fun beforeActivityLaunched() { val instrumentation = InstrumentationRegistry.getInstrumentation() (instrumentation.targetContext.applicationContext as App).run { setupMocks() } } override fun afterActivityLaunched() { activity.navigateToScreen() } } Set-up @madona_syombua -
Take advantage of long method names in Kotlin @Test fun
`when users wants to exit, make sure they can exit without holding data’(){ ... } @madona_syombua -
Testing Navigation @Test fun testLoginFragmentToHomeFragment() { launchFragmentInHiltContainer<LoginFragment>(null, R.style.CustomTheme) { //
Create a NavController and set the NavController property on the fragment assertNotNull(requireActivity()) val navController = TestNavHostController(requireActivity()) requireActivity().runOnUiThread { navController.setGraph(R.navigation.nav_login) } Navigation.setViewNavController(requireView(), navController) // Then navigate navController.navigate(R.id.action_loginFragment_to_homeFragment) val destination = navController.currentDestination assertNotNull(destination) assertEquals(destination?.id, R.id.homeFragment) } } @madona_syombua -
Click a Button Idling? Assert Success Yes No @madona_syombua Credits:
https://developer.android.com/training/testing/espresso/idling-resource -
Click a Button Click a Button Wait ..Seconds Using Wait/Sleep
leads to flaky or slow tests @madona_syombua -
Write automated tests with UI Automator Instrumentation Based API works
with AndroidJunitRunner Retrieves state information and perform operation on the target device APIs that support cross app UI testing @madona_syombua -
Accessing device state Change the device rotation Press a hardware
key, such as “volume up” Press the back, home or menu buttons Take a screenshot of the current window 03 01 02 @madona_syombua -
device = UiDevice.getInstance(getInstrumentation()) device.pressHome() // Bring up the default launcher
by searching for a UI component // that matches the content description for the launcher button. val allAppsButton: UIObject = device.findObject( UiSelector().description("Apps")) // Perform a click on the button to load the launcher. allAppsButton.clickAndWaitForNewWindow() @madona_syombua -
val cancelButton: UiObject = device.findObject( UiSelector().text("Cancel").className("android.widget.Button") ) val okButton: UiObject
= device.findObject( UiSelector().text("OK").className("android.widget.Button") ) // Simulate a user-click on the OK button, if found. if (okButton.exists() && okButton.isEnabled) { okButton.click() } @madona_syombua Create a UI Automator test class -
val applicationList: UiObject = device.findObject( UiSelector().className("android.widget…") .instance(0) .childSelector( UiSelector().text("MobileApp") )
) @madona_syombua You can specify a selector -
fun setUp() { ... val context = getInstrumentation().context val intent
= context.packageManager.getLaunchIntentForPackage(APP_PACKAGE).apply { addFlags(Intent.FLAG_ACTIVITY_CLEAR_TASK) } context.startActivity(intent) device.wait(Until.hasObject(By.pkg(APP_PACKAGE).depth(0)), TIMEOUT) } @madona_syombua You can specify a selector -
fun testTenPlusSixEqualsSixteen() { // Enter an equation: 10 + 6
= ? device.findObject(UiSelector().packageName(APP_PACKAGE).resourceId("ten")).click() device.findObject(UiSelector().packageName(APP_PACKAGE).resourceId("plus")).click() device.findObject(UiSelector().packageName(APP_PACKAGE).resourceId("six")).click() device.findObject(UiSelector().packageName(APP_PACKAGE).resourceId("equals")).click() // Verify the result = 16 val result: UiObject2 = device.findObject(By.res(APP_PACKAGE, "result")) assertEquals("16", result.text) } @madona_syombua Now, verify your results -
@madona_syombua UI Automator Vs Espresso UI Automator is powerful and
has good external OS system integration e.g. can turn WiFi on and off and access other settings during test, but lacks backward compatibility as it requires Jelly Bean or higher. Espresso is a bit more light weight compared to UI Automator and supports 2.2 Froyo and up it also has a fluent api with powerful hamcrest integration making code more readable and extensible it is newer than Ui automator. NOTE: UI Automator and Espresso use the same instrumentation runner. credit: https://stackoverflow.com/questions/31076228/android-testing-uiautomator-vs-espresso -
Espresso is a famous UI testing framework. It supports android
applications from 2.3 onwards. It requires access to the source codes. Also, it has a White-box testing feature. Popularly used Espresso @madona_syombua -
Some advantages of using Espresso @madona_syombua • Fast and reliable
testing. • It can test web components • Built-in test Recorder. • Active service and team. • It does testing in such a way that the component is isolated. This makes other activities or components available to work on. -
Some disadvantages of using Espresso @madona_syombua • It runs only
one application at a time. • Test cases can only be for Android. • Test cases are only written in either Java or Kotlin. • Deep understanding required. -
Calabash @madona_syombua Calabash is also an open-source and free cross-platform
UI testing tool. It can work efficiently with .NET, java, ruby, and other languages. It tests the native and hybrid applications. -
Monkey is a program that runs on your emulator or
device and generates pseudo-random streams of user events such as clicks, touches, or gestures, as well as a number of system-level events. You can use the Monkey to stress-test applications that you are developing, in a random yet repeatable manner. Monkey credits : https://developer.android.com/tools/help/emulator @madona_syombua -
Use the App Crawler tool, part of Jetpack, to automatically
test your app without the need to write or maintain any code. The crawler runs alongside your app, automatically issuing actions (tap, swipe, etc.) to explore the state-space of your app. The crawl terminates automatically when there are no more unique actions to perform, the app crashes, or a timeout you designate is reached. App Crawler credits : https://developer.android.com/tools/help/emulator @madona_syombua -
• Test small units of code to validate their behavior
• Promote good design, loose coupling • Avoid fragile codebase, promote sustainable growth of the project @madona_syombua -
Some guidelines to strive for: • Don't alter global state
(or reset it if you must) to avoid flakiness in other tests. • Should not communicate with external systems (fake/mock server calls) this is debatable. • ViewModels can be "pure" unit tests with no Android dependencies (although Robolectric is OK if needed) @madona_syombua -
Some guidelines to strive for: • In Unit Testing don't
test private methods, just public interface, • Code to an interface, not an implementation more flexibility of test doubles vs forced to mock. • Unit tests should run FAST so they can be run frequently & easily @madona_syombua -
Bitrise @madona_syombua Bitrise is a Continuous Integration and Delivery (CI/CD)
Platform as a Service (PaaS) with a main focus on mobile app development (iOS, Android, React Native, Flutter, and so on). https://devcenter.bitrise.io/en/getting-started.html -
Test Reports @madona_syombua Test Reports allows you to view all
your test results in a convenient way. https://devcenter.bitrise.io/en/testing/test-reports.html -
Thank You: • Website: https://madonasyombua.com/ • Twitter: madona_syombua • Slide
: https://madonasyombua.com/advantages-of-espresso-tests-automation-how-and-why/ • Pre-Order my book: amazon.com/author/madona_wambua • Resources: https://developer.android.com/training/testing/other-components/ui-automator • More About Automation: https://smartbear.com/learn/automated-testing • Espresso Cheat Sheet: https://developer.android.com/training/testing/espresso/cheat-sheet