Upgrade to Pro — share decks privately, control downloads, hide ads and more …

Detail-oriented UI with Layout Margins @NSSpain 2019

Detail-oriented UI with Layout Margins @NSSpain 2019

Marina Vatmakhter

September 20, 2019
Tweet

More Decks by Marina Vatmakhter

Other Decks in Programming

Transcript

  1. Detail-oriented UI with Layout Margins Marina Gornostaeva Lead iOS developer

    @ Storytel @hybridcattt @NSSpain, 18-20 September 2019
  2. label.leadingAnchor.constraint(equalTo: view.leadingAnchor, constant: 10) label.trailingAnchor.constraint(equalTo: view.trailingAnchor, constant: -10) label.topAnchor.constraint(equalTo: view.topAnchor,

    constant: 5) label.bottomAnchor.constraint(equalTo: view.bottomAnchor, constant: -5) let buttonFrame = CGRect(x: 10, y: 5, width: self.width - 10 * 2, height: 44)
  3. var horizontalMargin: CGFloat { 
 return IS_IPAD ? 20.0 :

    10.0 } class BookCell: UITableViewCell { // Layout constants let coverImagePadding: CGFloat = 10 let coverImageHeightPaddings: CGFloat = 30 let titleLabelTopMargin: CGFloat = 15 let labelPadding: CGFloat = -16 let authorTopMargin: CGFloat = 0 let narratorLabelBottomMargin: CGFloat = 15 ... }
  4. – documentation “ [ Layout margins ] specify the desired

    amount of space between the edge of the view 
 and any subview ”
  5. open class UIView {
 
 @available(iOS 8.0, *)
 open var

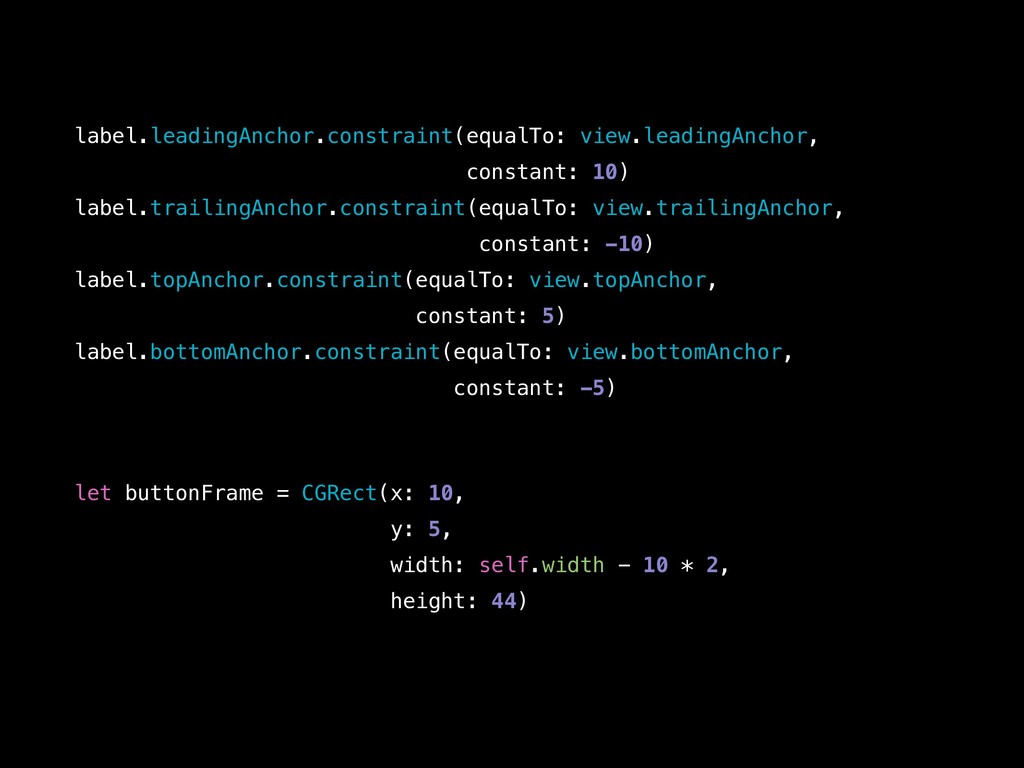
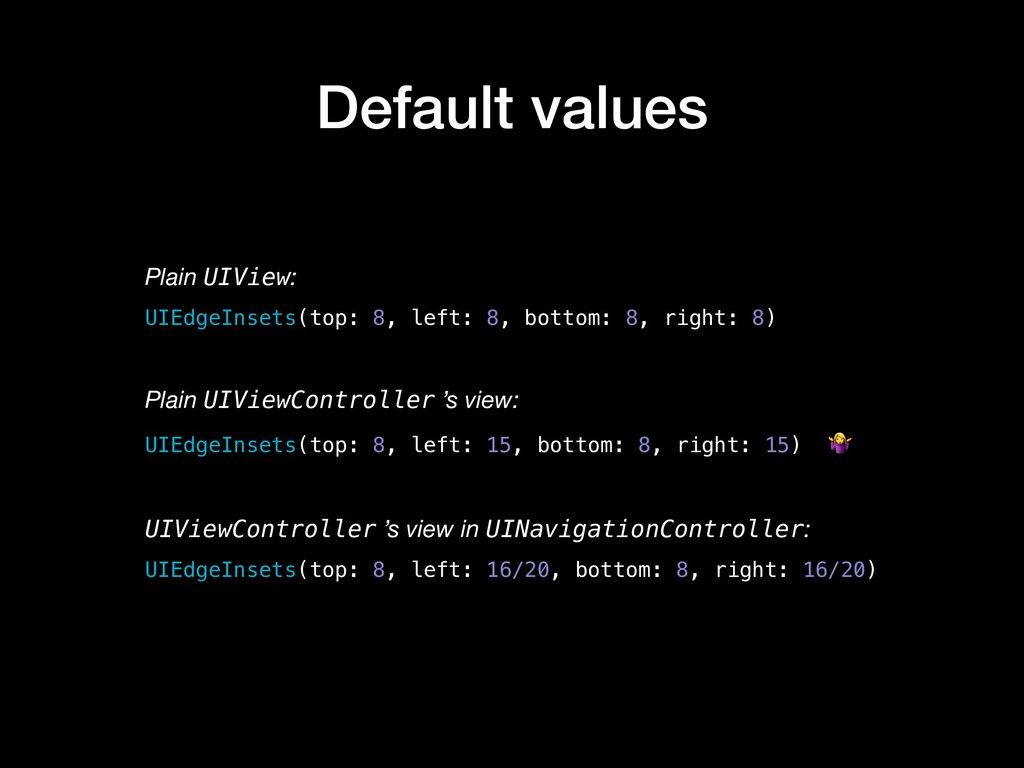
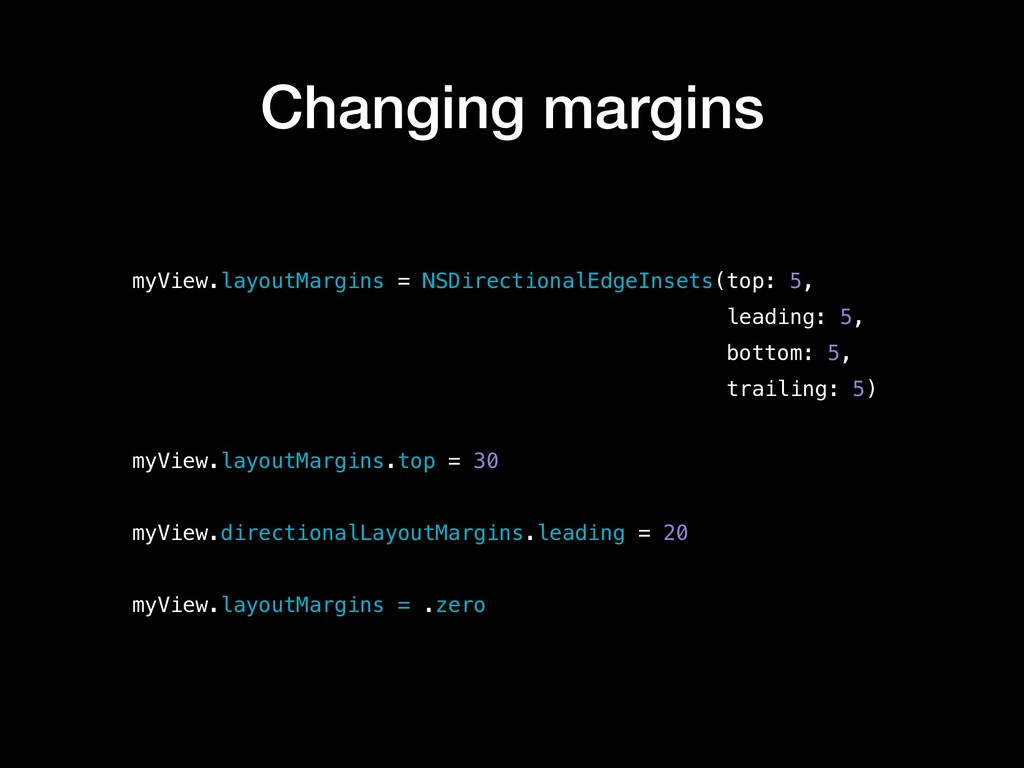
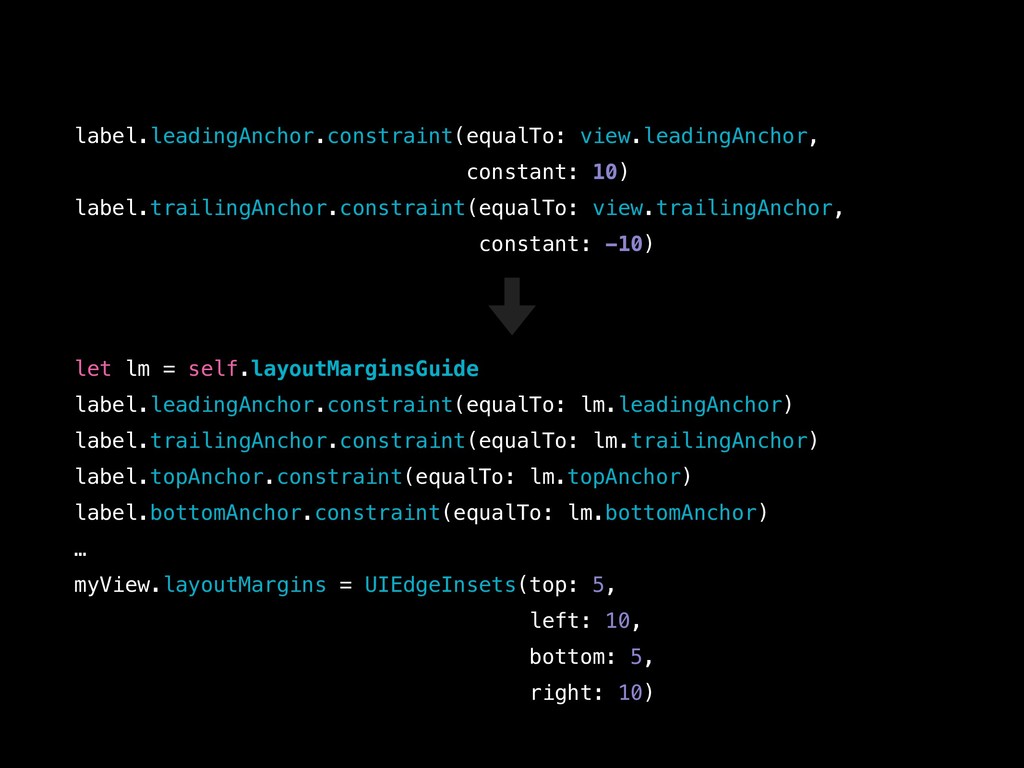
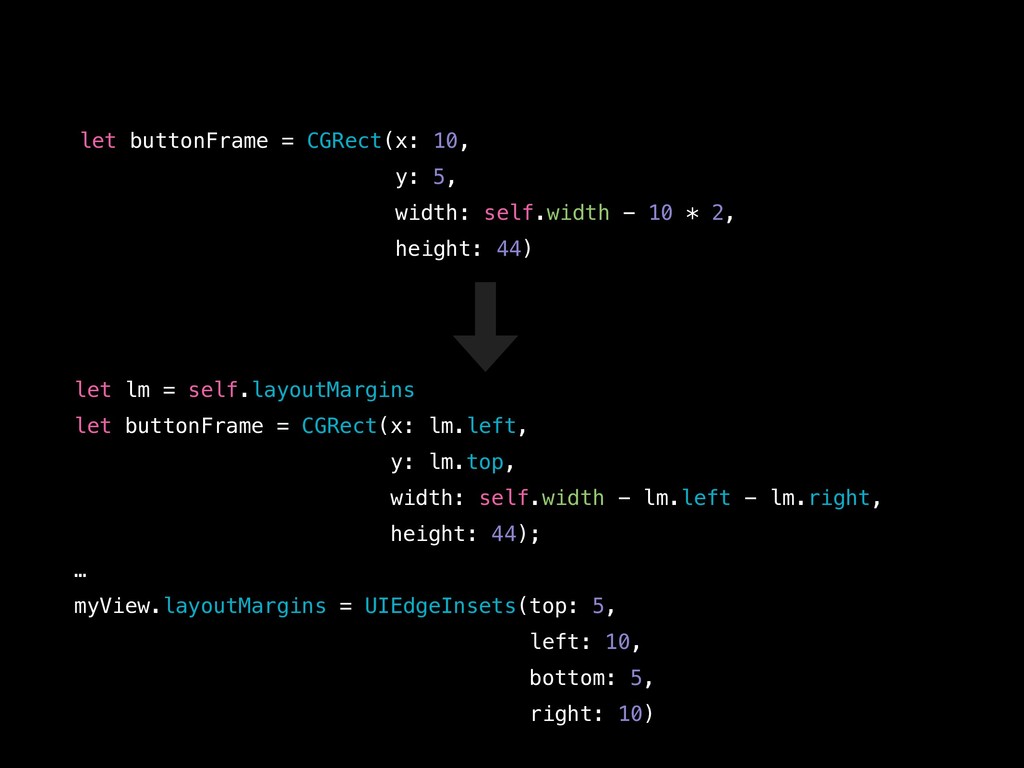
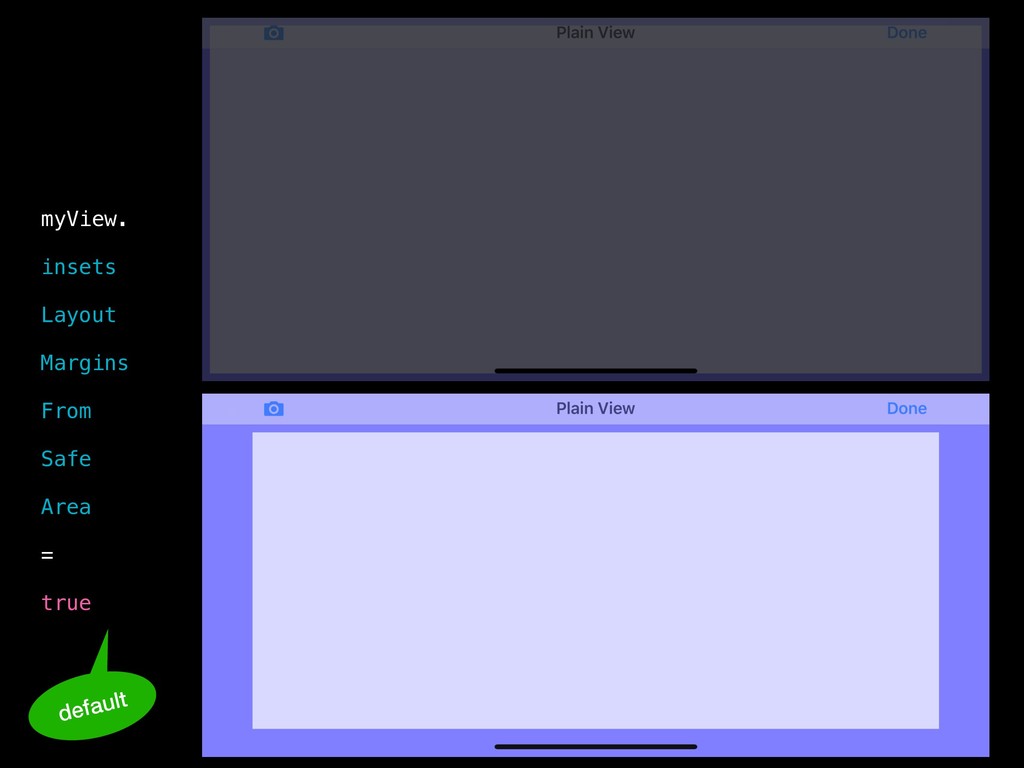
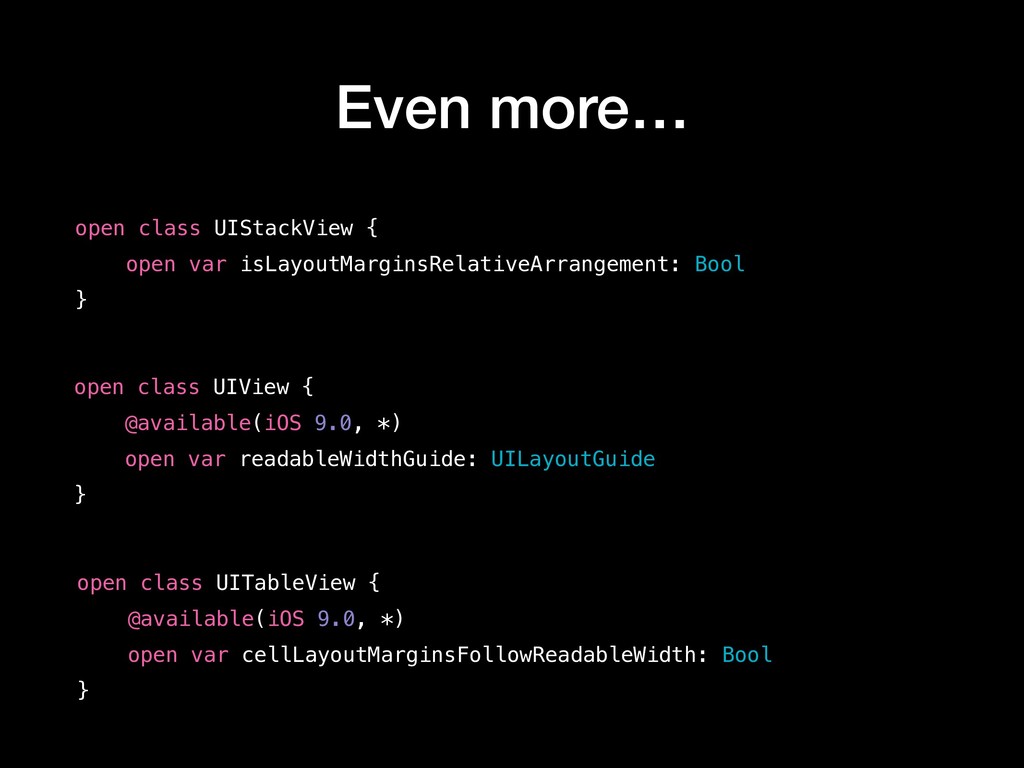
    layoutMargins: UIEdgeInsets
 @available(iOS 11.0, *)
 open var directionalLayoutMargins: NSDirectionalEdgeInsets
 } public struct NSDirectionalEdgeInsets { public var top: CGFloat public var leading: CGFloat public var bottom: CGFloat public var trailing: CGFloat } public struct UIEdgeInsets { public var top: CGFloat public var left: CGFloat public var bottom: CGFloat public var right: CGFloat }
  6. Default values Plain UIView: UIEdgeInsets(top: 8, left: 8, bottom: 8,

    right: 8) Plain UIViewController ’s view: UIEdgeInsets(top: 8, left: 15, bottom: 8, right: 15) UIViewController ’s view in UINavigationController: UIEdgeInsets(top: 8, left: 16/20, bottom: 8, right: 16/20)
  7. myView.layoutMargins = NSDirectionalEdgeInsets(top: 5, 
 leading: 5,
 bottom: 5,
 trailing:

    5)
 myView.layoutMargins.top = 30
 myView.directionalLayoutMargins.leading = 20
 myView.layoutMargins = .zero Changing margins
  8. Auto Layout open class UIView { @available(iOS 9.0, *)
 open

    var layoutMarginsGuide: UILayoutGuide { get } } self.layoutMarginsGuide.leadingAnchor self.layoutMarginsGuide.trailingAnchor self.layoutMarginsGuide.topAnchor self.layoutMarginsGuide.bottomAnchor self.layoutMarginsGuide.widthAnchor …
  9. label.leadingAnchor.constraint(equalTo: view.leadingAnchor, constant: 10) label.trailingAnchor.constraint(equalTo: view.trailingAnchor, constant: -10) let lm

    = self.layoutMarginsGuide
 label.leadingAnchor.constraint(equalTo: lm.leadingAnchor)
 label.trailingAnchor.constraint(equalTo: lm.trailingAnchor)
 label.topAnchor.constraint(equalTo: lm.topAnchor)
 label.bottomAnchor.constraint(equalTo: lm.bottomAnchor) … 
 myView.layoutMargins = UIEdgeInsets(top: 5, 
 left: 10, 
 bottom: 5, 
 right: 10)
  10. Manual layout class MyView: UIView {
 override func layoutSubviews() {


    super.layoutSubviews()
 // use self.layoutMargins property // or self.layoutMarginsGuide.layoutFrame } override func layoutMarginsDidChange() {
 super.layoutMarginsDidChange() self.setNeedsLayout() } }
  11. let lm = self.layoutMargins
 let buttonFrame = CGRect(x: lm.left,
 y:

    lm.top,
 width: self.width - lm.left - lm.right,
 height: 44); …
 myView.layoutMargins = UIEdgeInsets(top: 5, 
 left: 10, 
 bottom: 5, 
 right: 10) let buttonFrame = CGRect(x: 10, y: 5, width: self.width - 10 * 2, height: 44)
  12. Layout margin propagation View’s layout margins can be increased automatically

    by UIKit based on: • margins of all superviews in the view hierarchy • safe area
  13. Even more… open class UIView {
 @available(iOS 9.0, *)
 open

    var readableWidthGuide: UILayoutGuide
 } open class UIStackView {
 open var isLayoutMarginsRelativeArrangement: Bool
 } open class UITableView {
 @available(iOS 9.0, *)
 open var cellLayoutMarginsFollowReadableWidth: Bool
 }
  14. Number-less layout • Follow system margins • Use layout margins

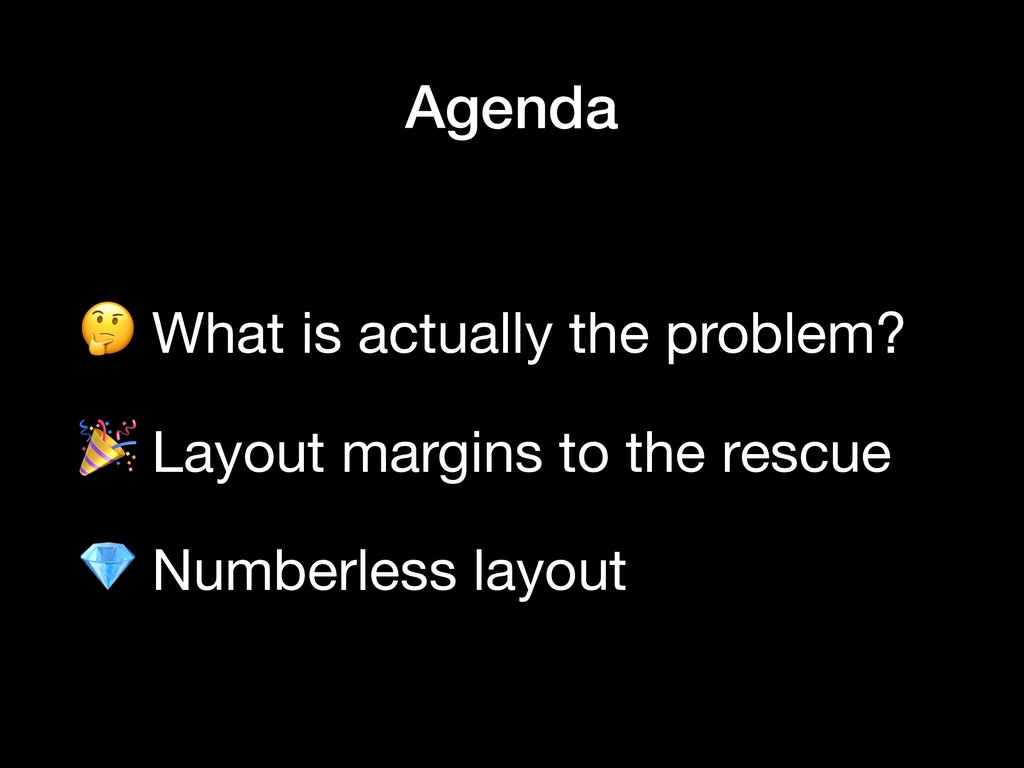
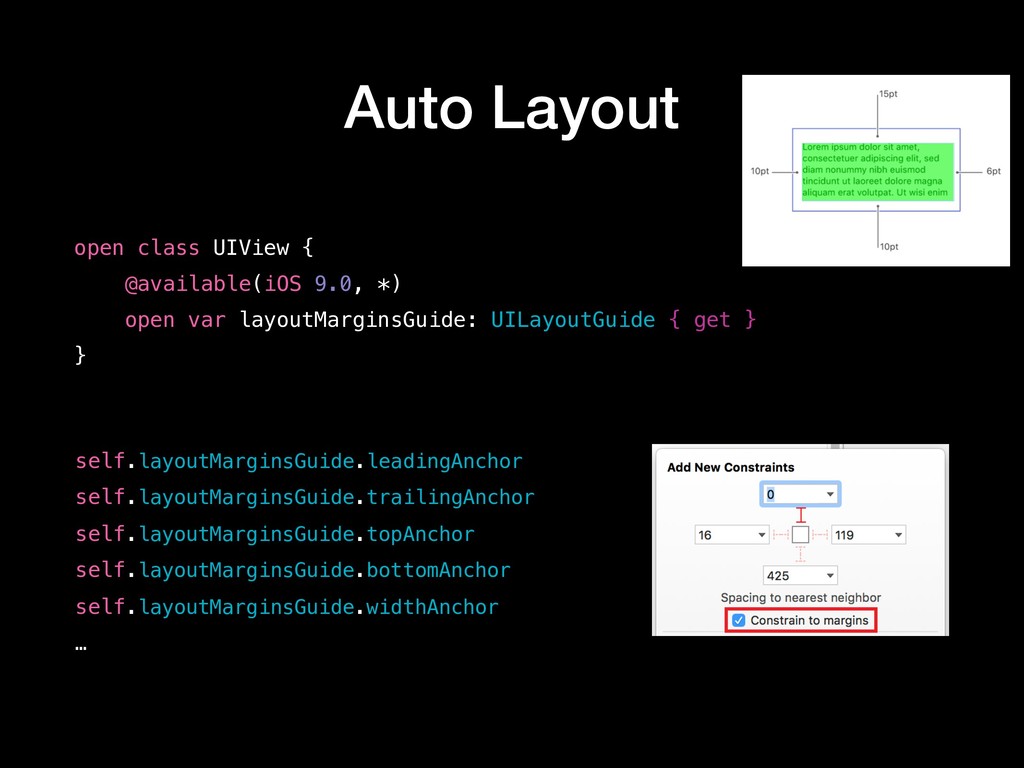
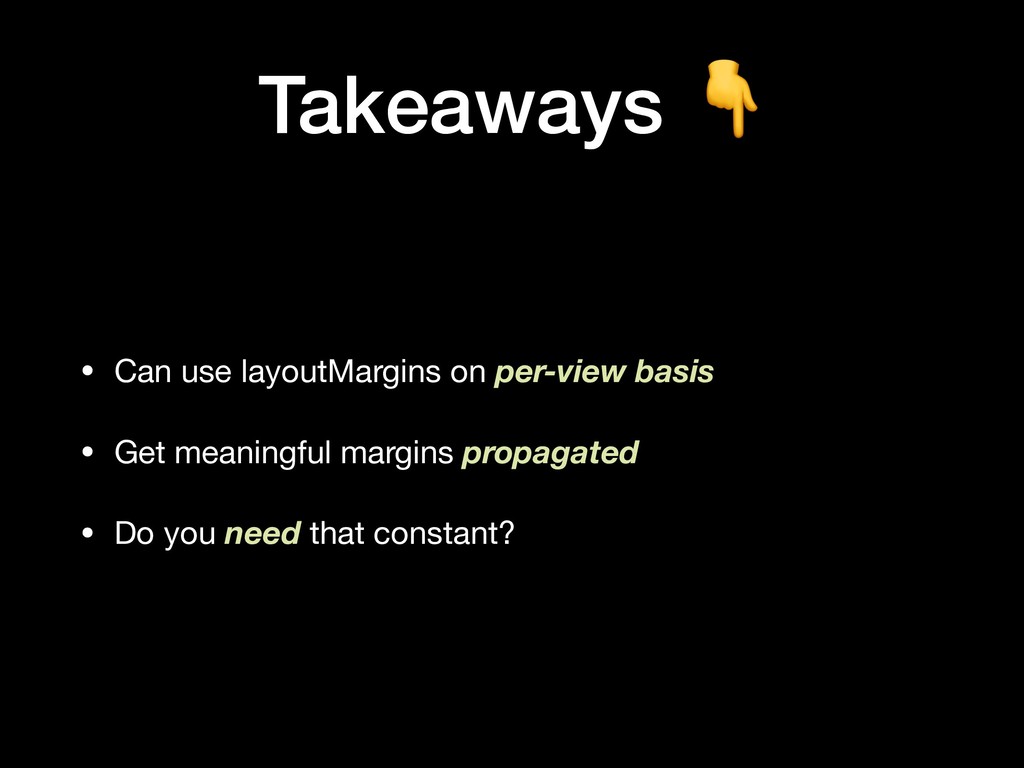
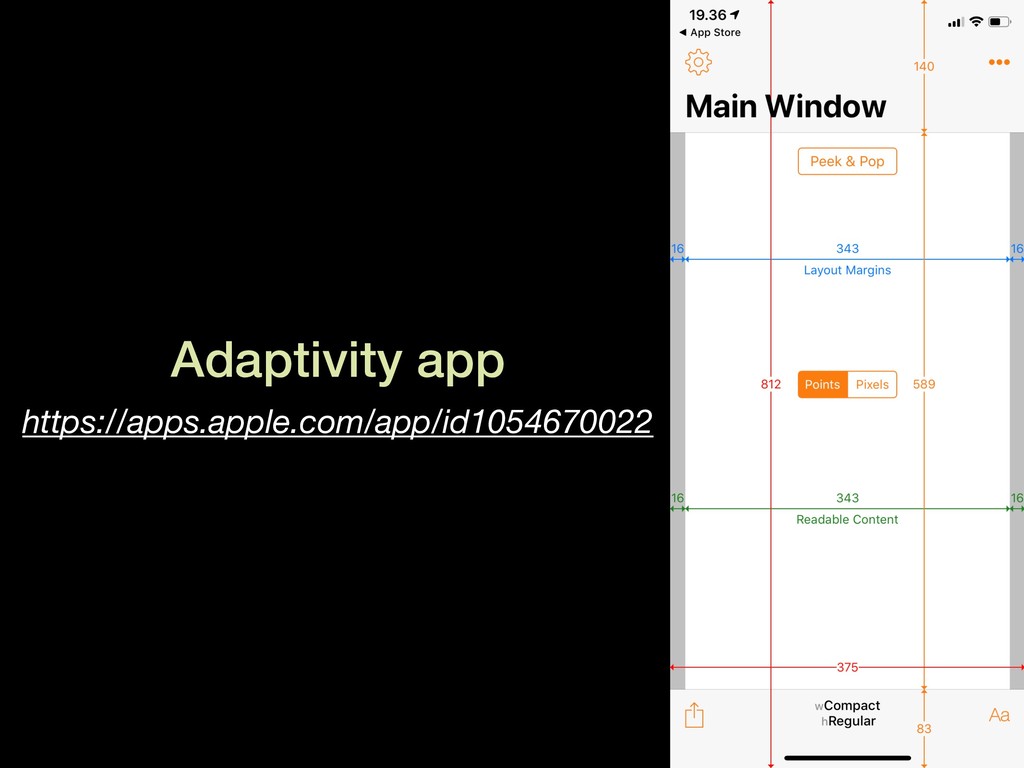
    propagation all the way • Use readableWidth • Use systemSpacing for spacing between views:
 extension NSLayoutXAxisAnchor { open func constraint(equalToSystemSpacingAfter anchor: NSLayoutXAxisAnchor, multiplier: CGFloat) -> NSLayoutConstraint }
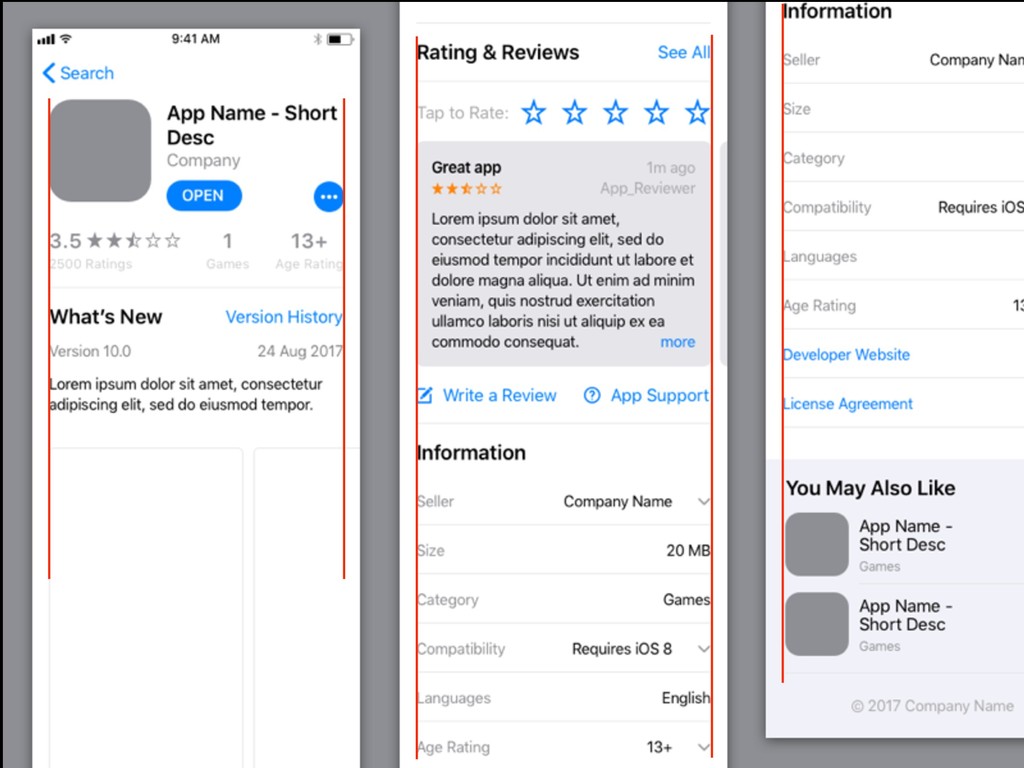
  15. Takeaways • Can use layoutMargins on per-view basis • Get

    meaningful margins propagated • Do you need that constant?
  16. That’s it! Start your way to better app UI with

    UIKit layout margins @hybridcattt