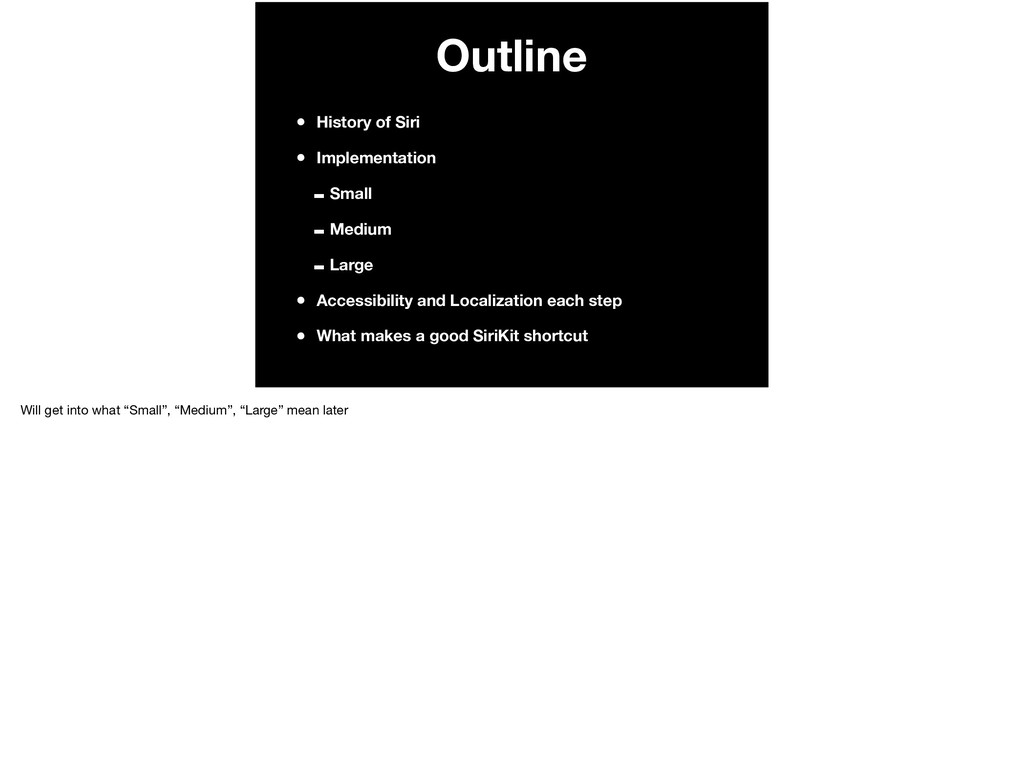
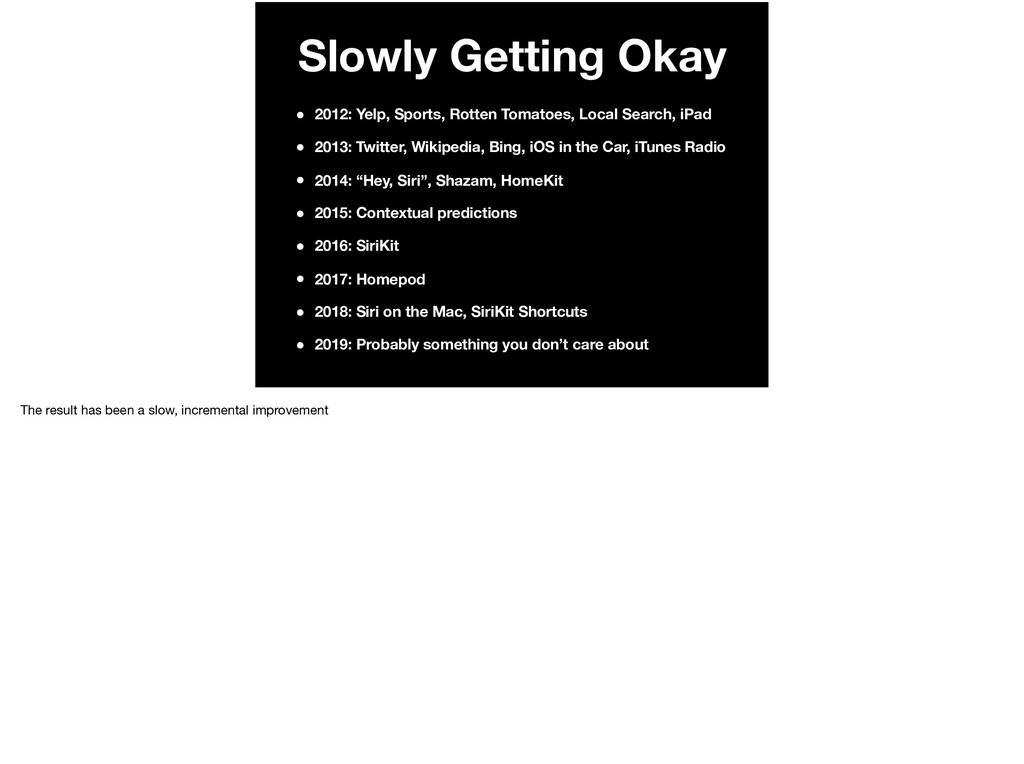
I cover a brief history of Siri in order to give various size implementations of SiriKit Shortcuts in your app. I then talk about what makes for a good SiriKit shortcut and if you should include it.
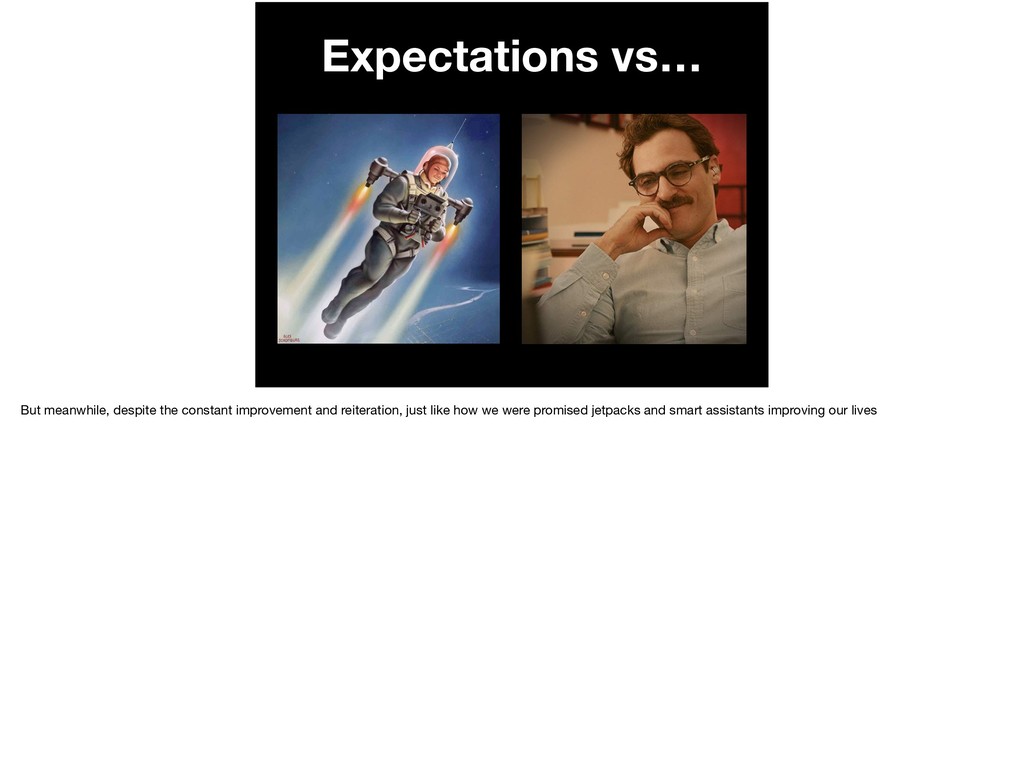
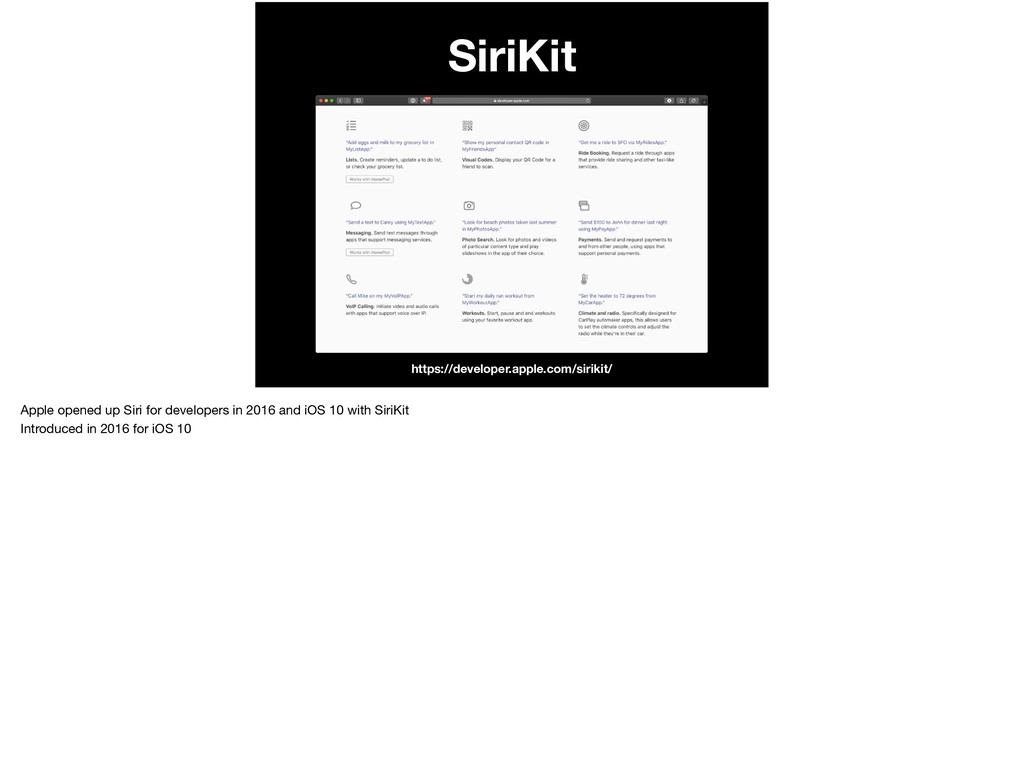
Search, iPad • 2013: Twitter, Wikipedia, Bing, iOS in the Car, iTunes Radio • 2014: “Hey, Siri”, Shazam, HomeKit • 2015: Contextual predictions • 2016: SiriKit • 2017: Homepod • 2018: Siri on the Mac, SiriKit Shortcuts • 2019: Probably something you don’t care about The result has been a slow, incremental improvement
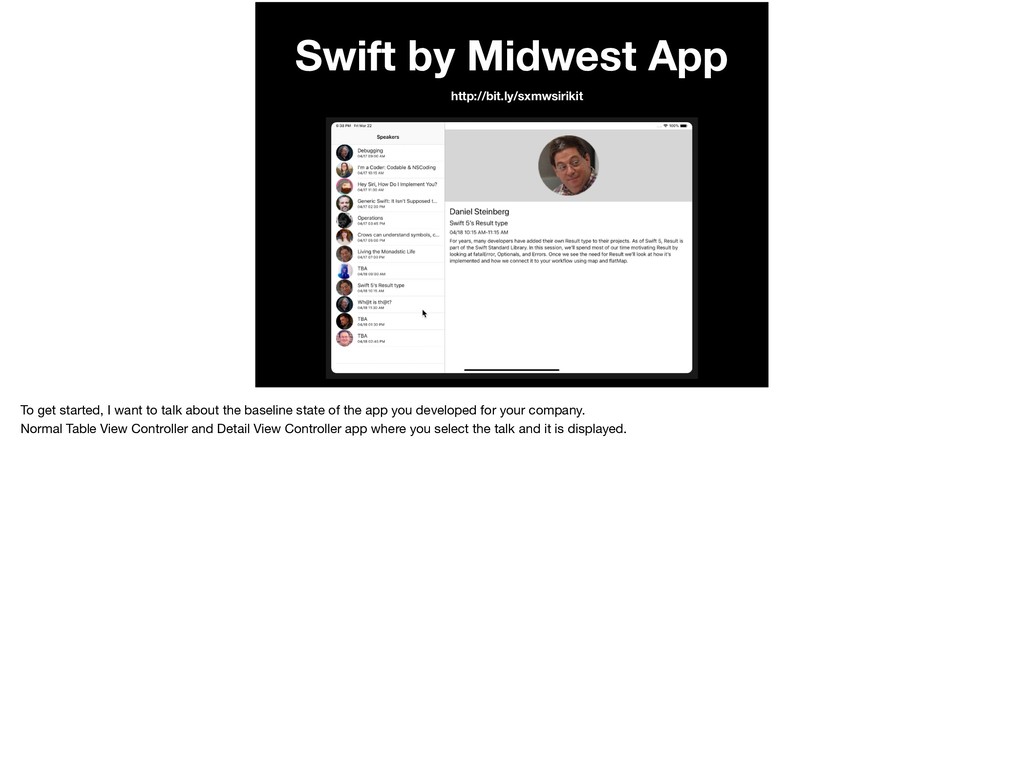
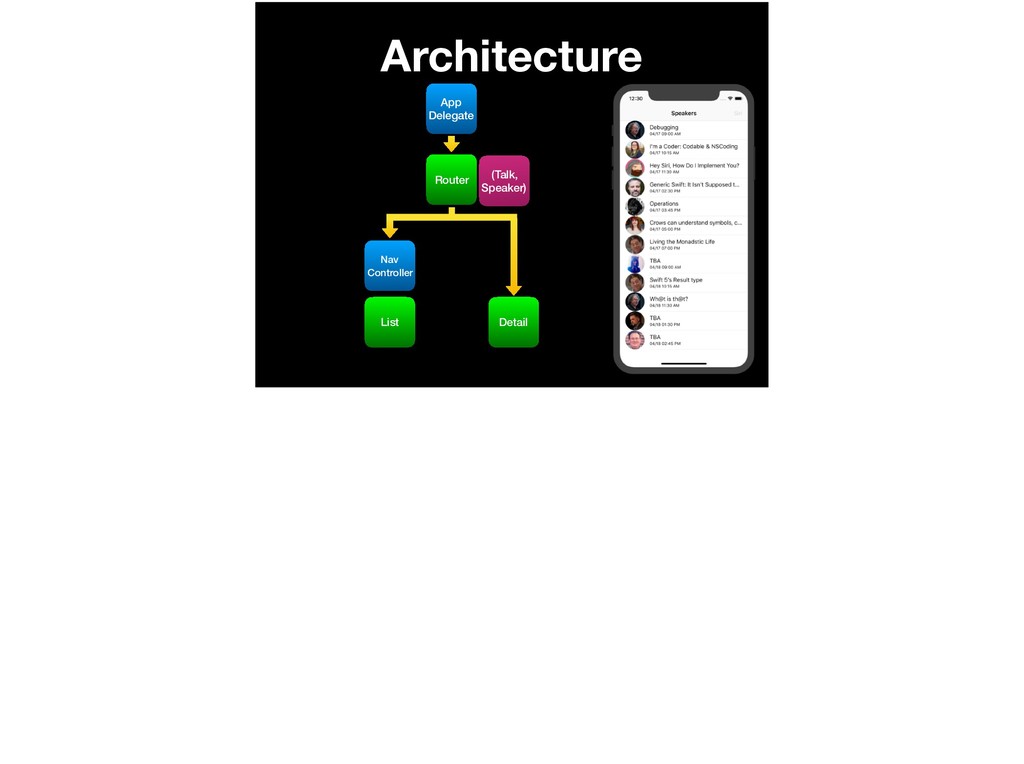
to talk about the baseline state of the app you developed for your company. Normal Table View Controller and Detail View Controller app where you select the talk and it is displayed.
to talk about the baseline state of the app you developed for your company. Normal Table View Controller and Detail View Controller app where you select the talk and it is displayed.
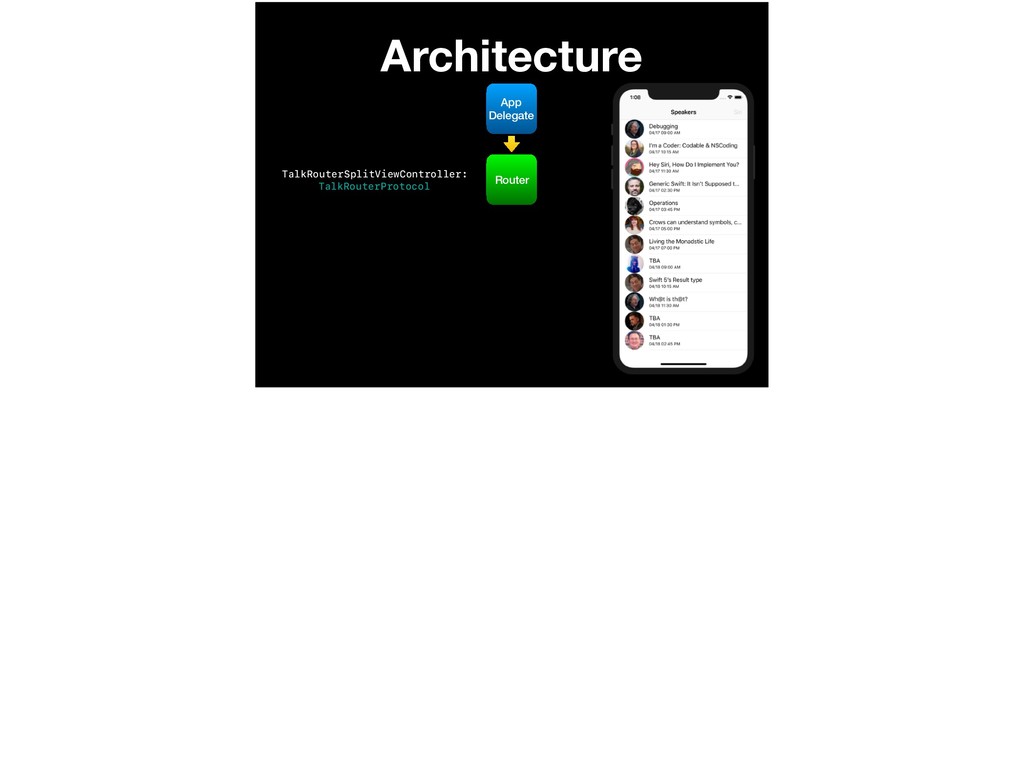
what targets we’re going to want to have in the future such as Apple TV or Apple Watch, we moved our model objects into a CocoaTouch Framework. They are a Conference with an Array of Talks and Speakers.
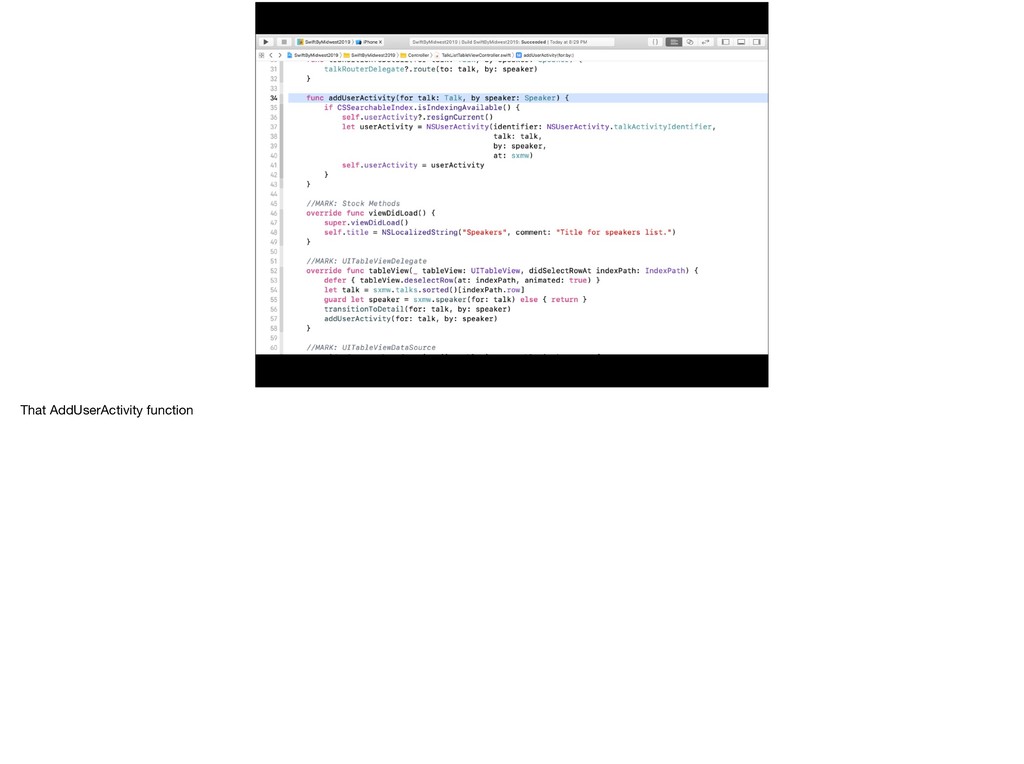
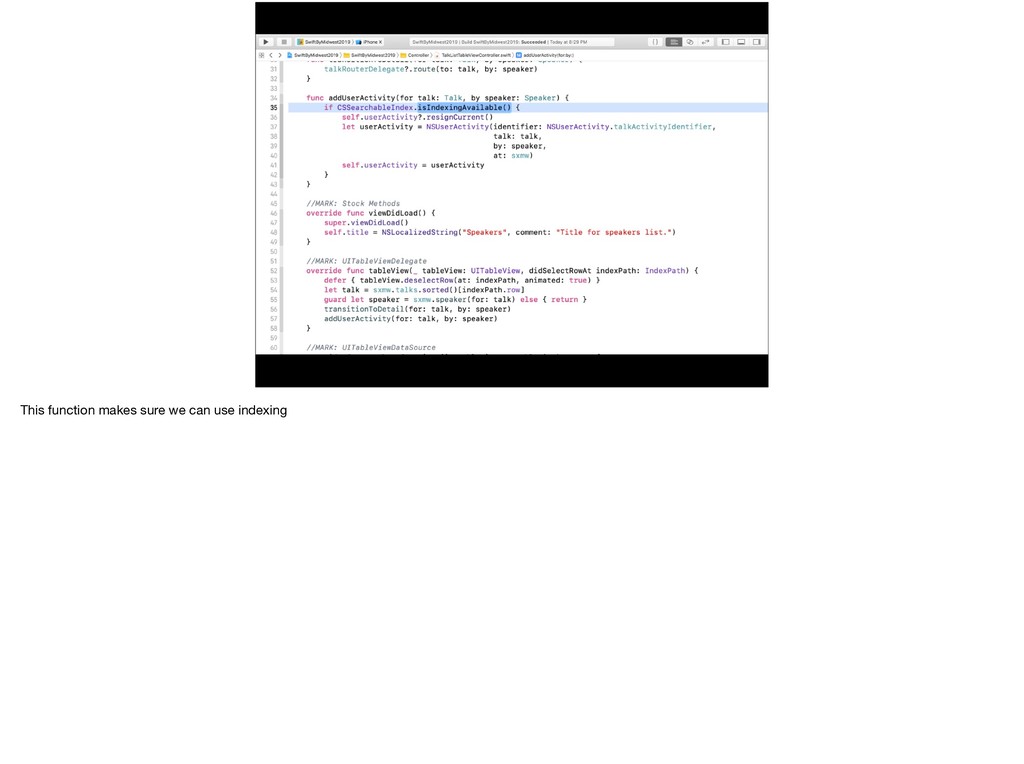
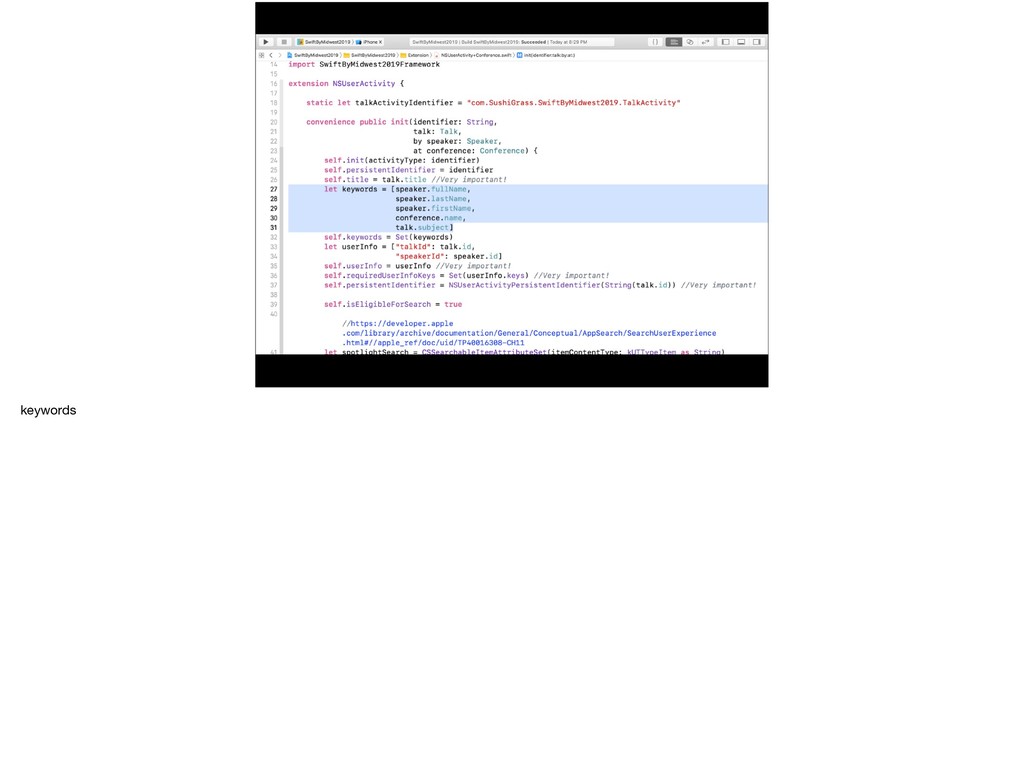
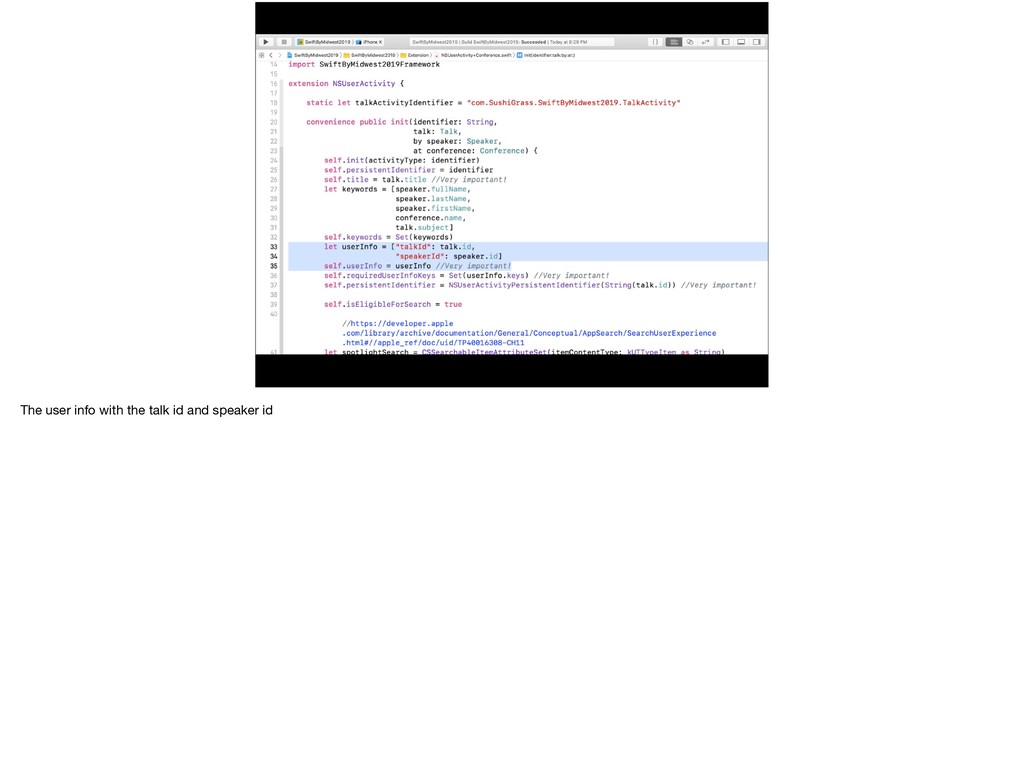
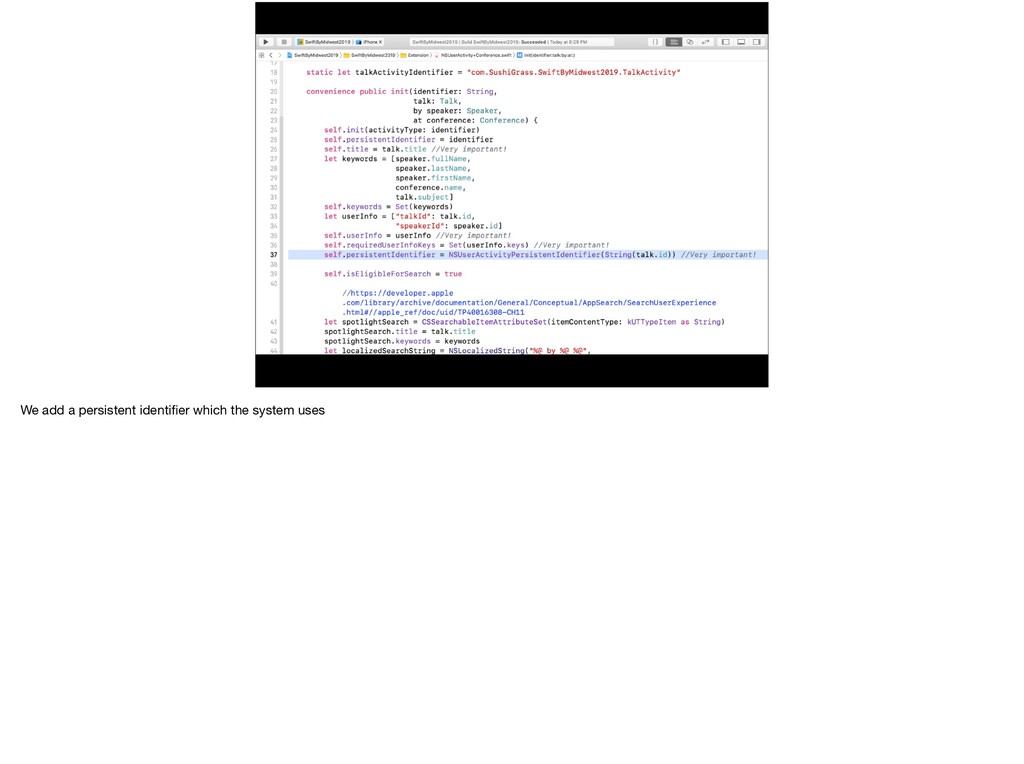
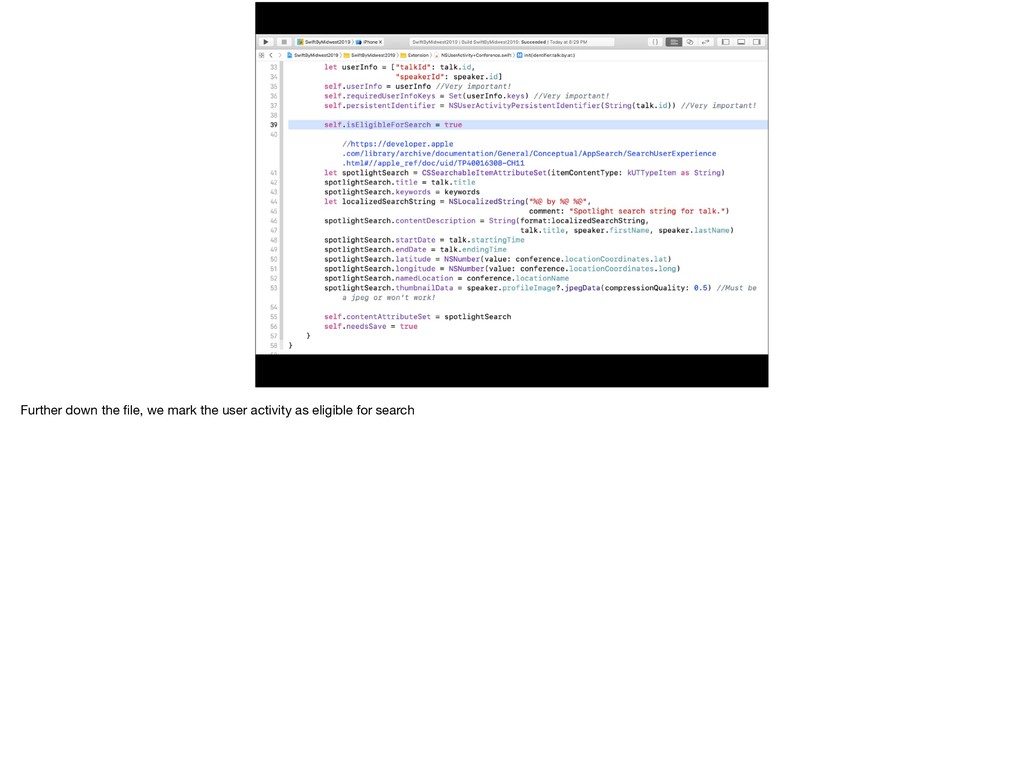
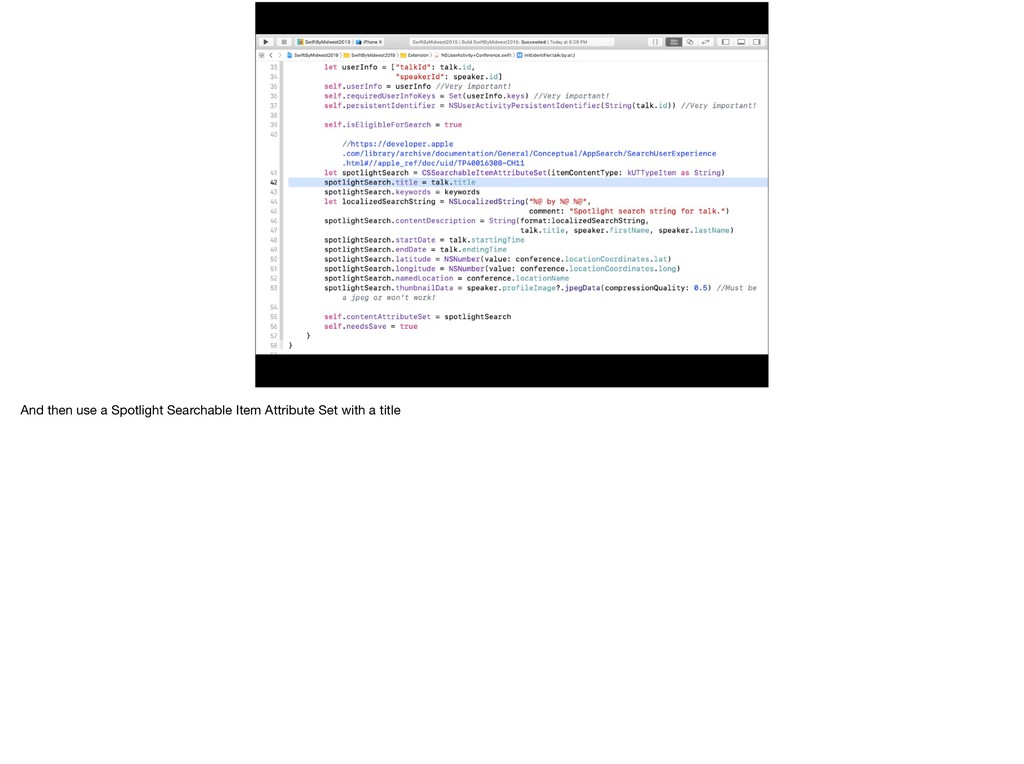
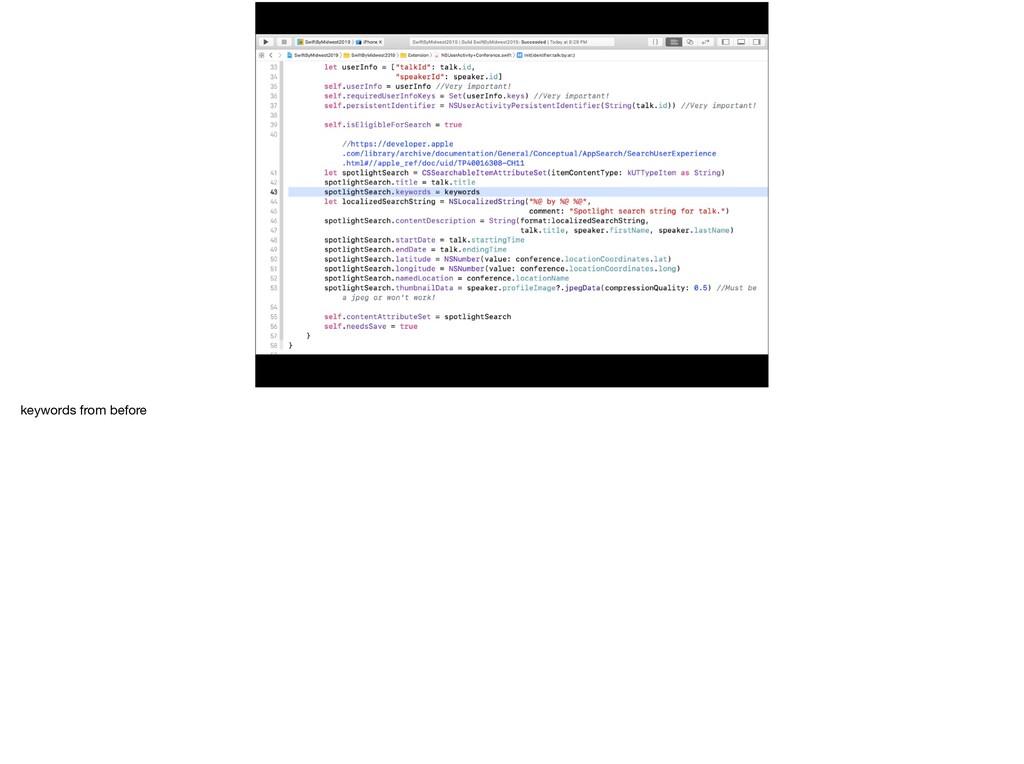
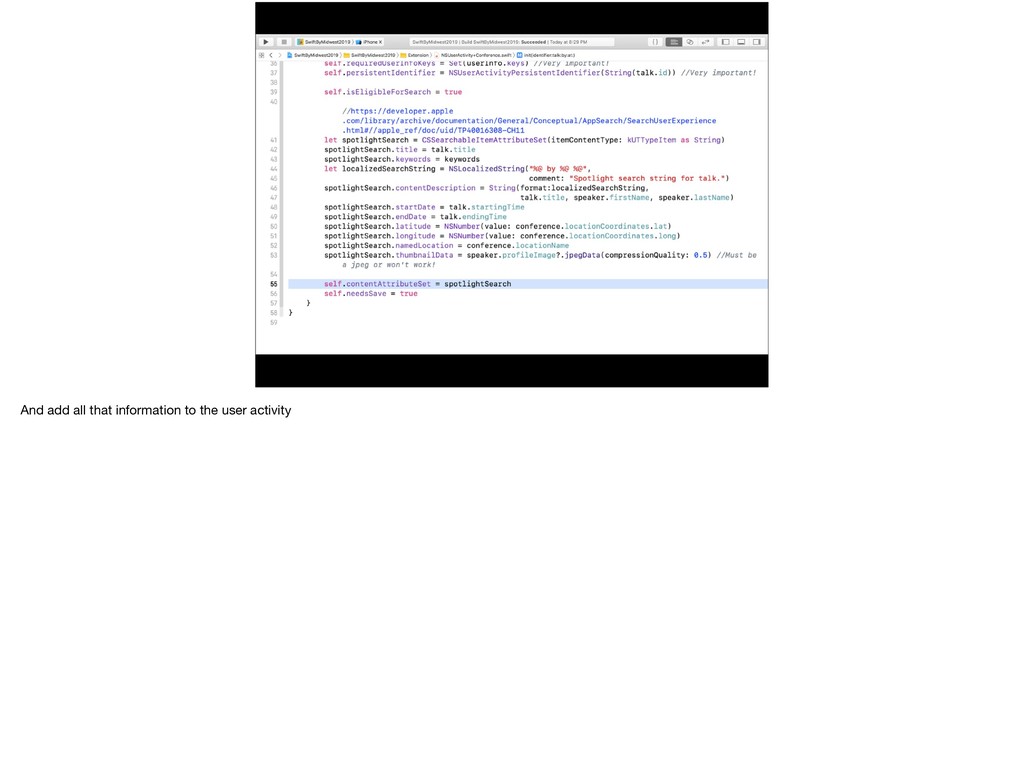
have a NSUserActivity set up. As a reminder, NSUserActivity is way to make note of when a user has taken an action in your app. This can be used for handoff, to continue the activity on another device, or for spotlight which is what we’re going to use it for.
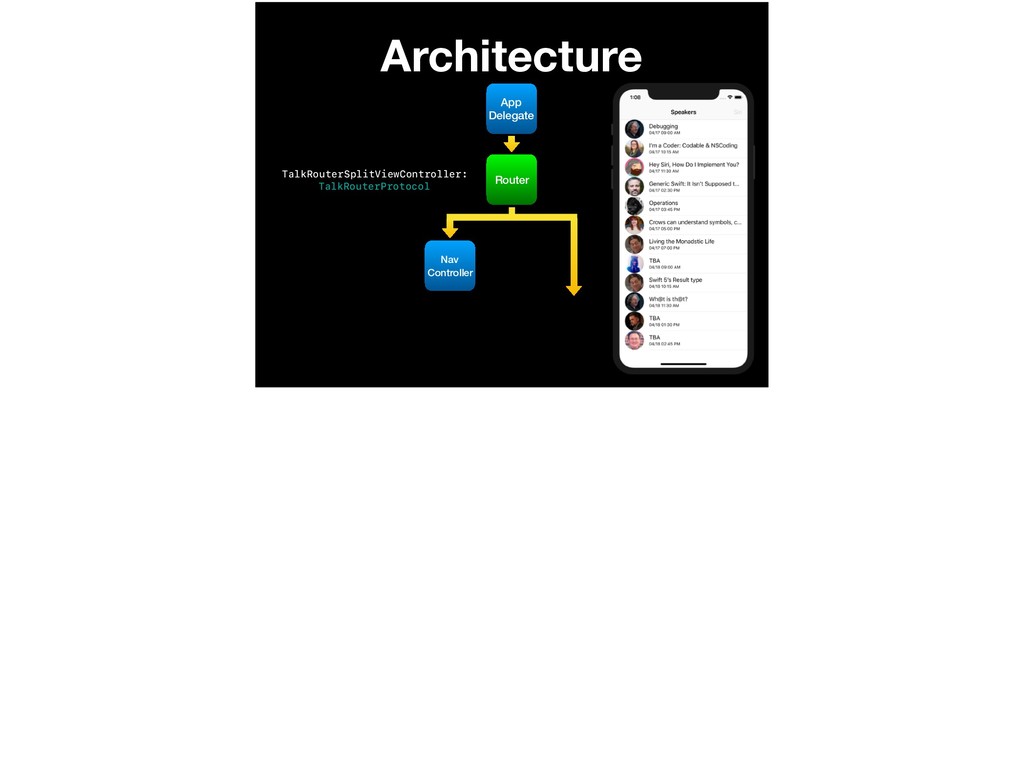
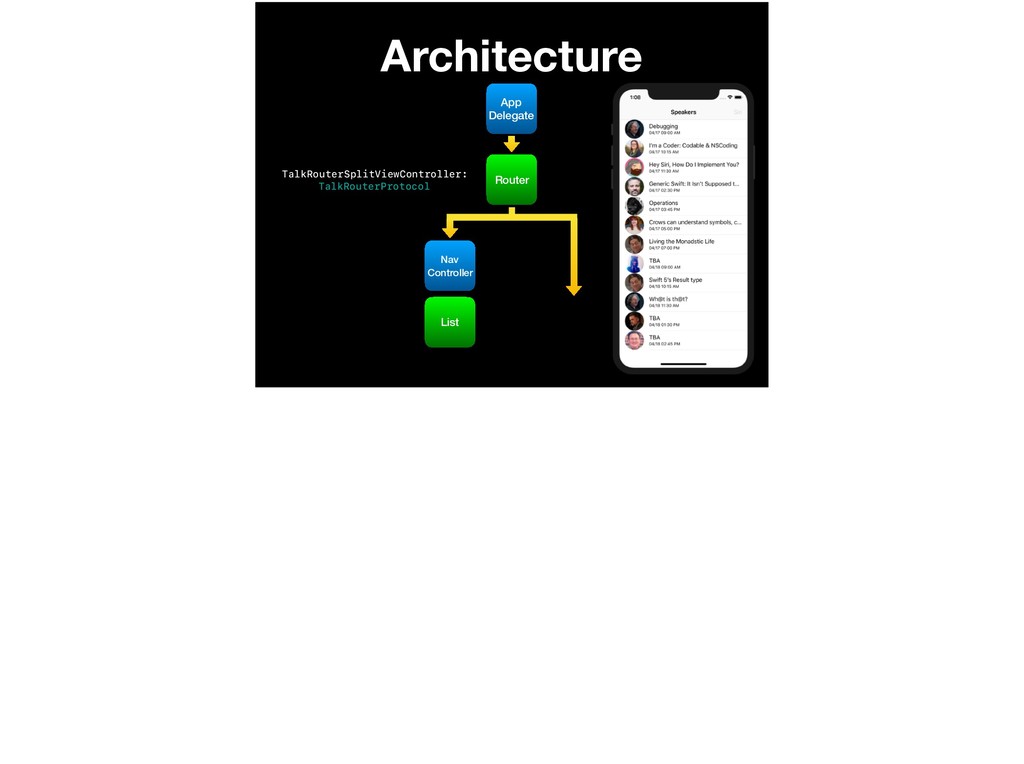
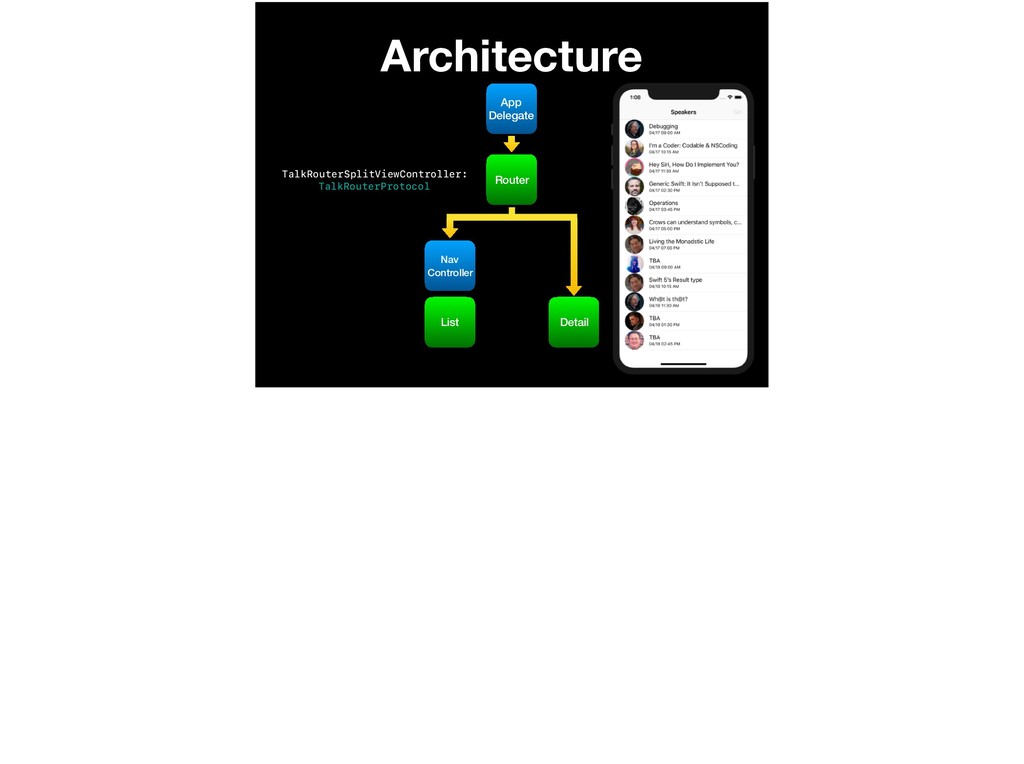
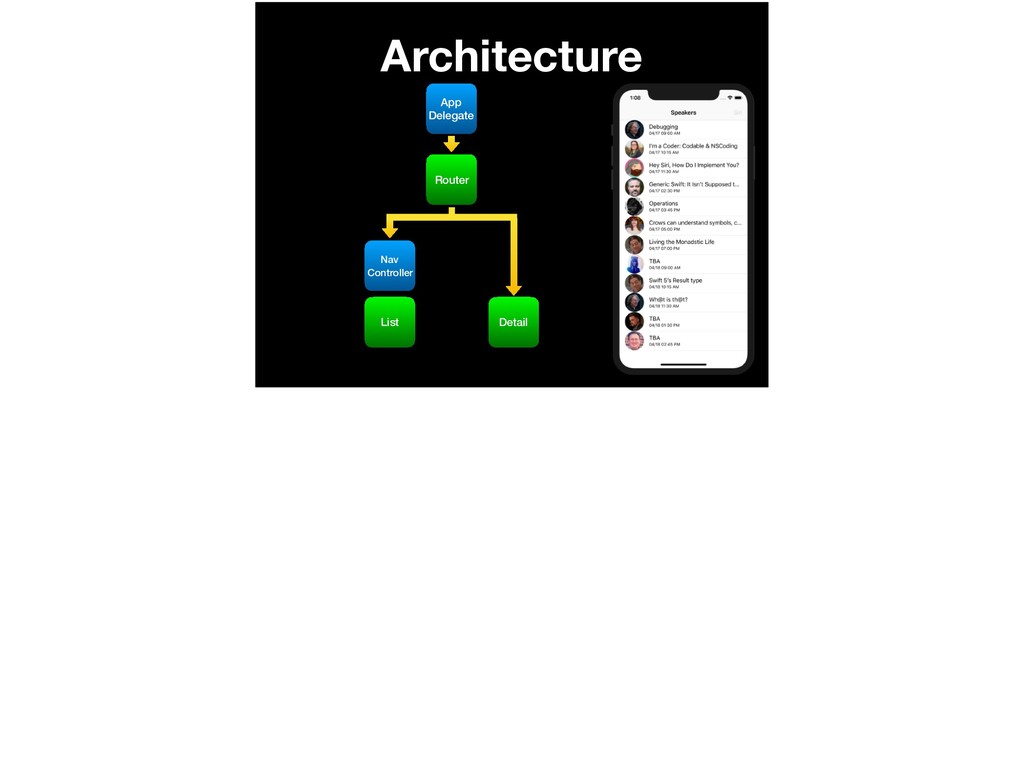
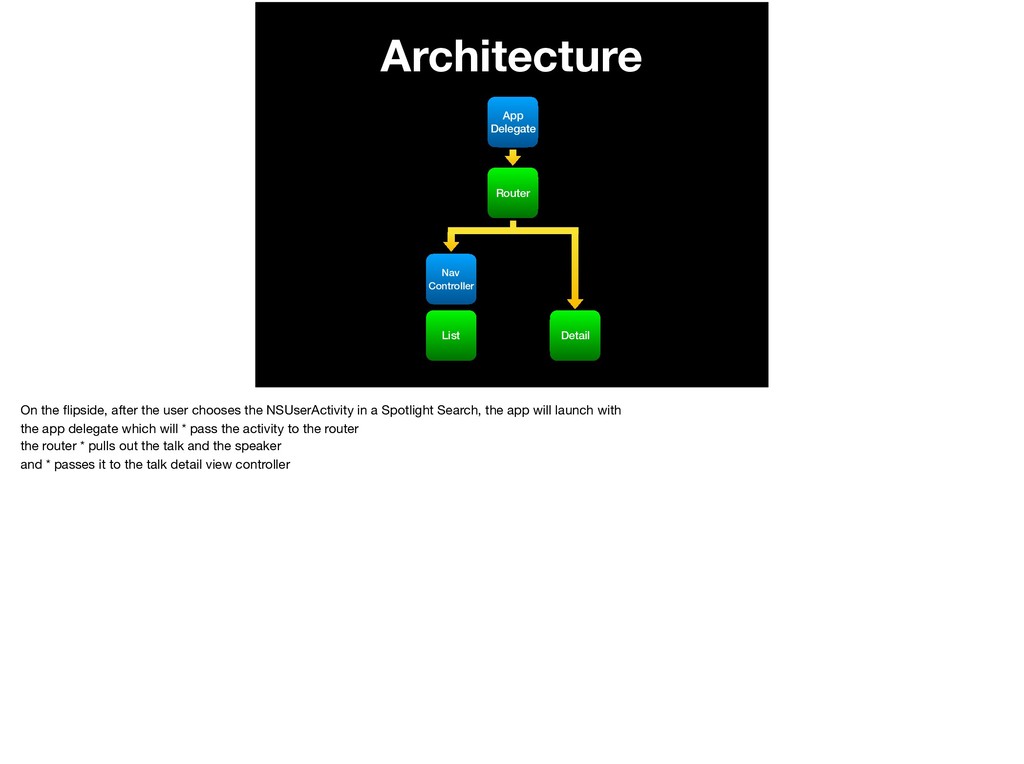
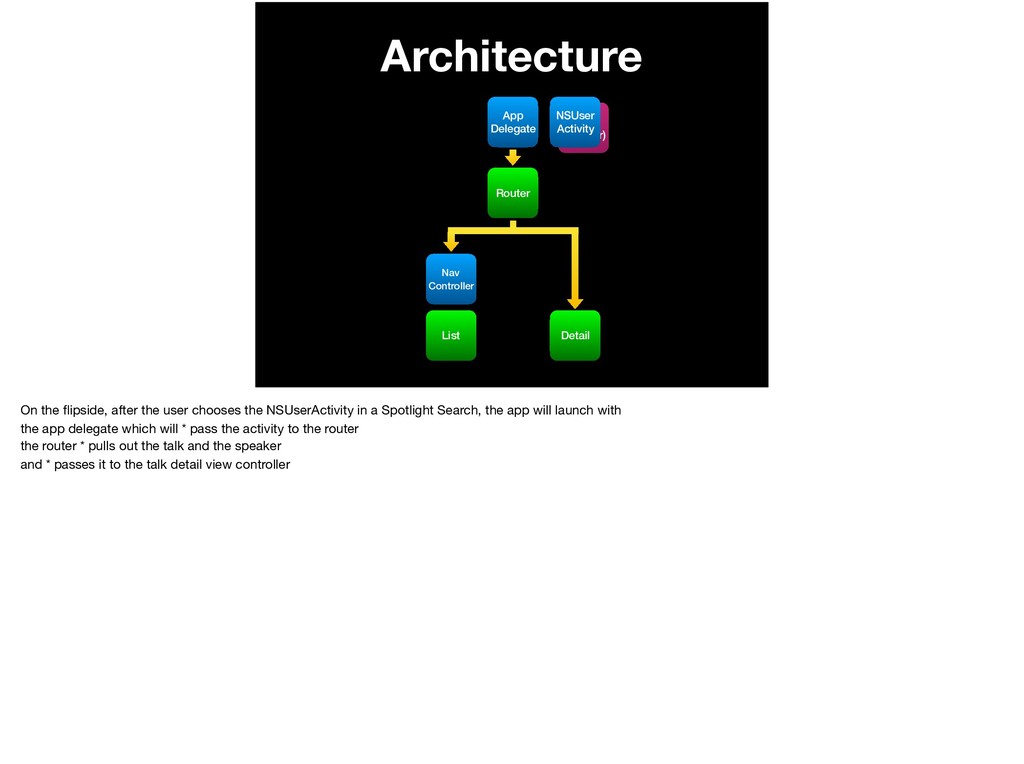
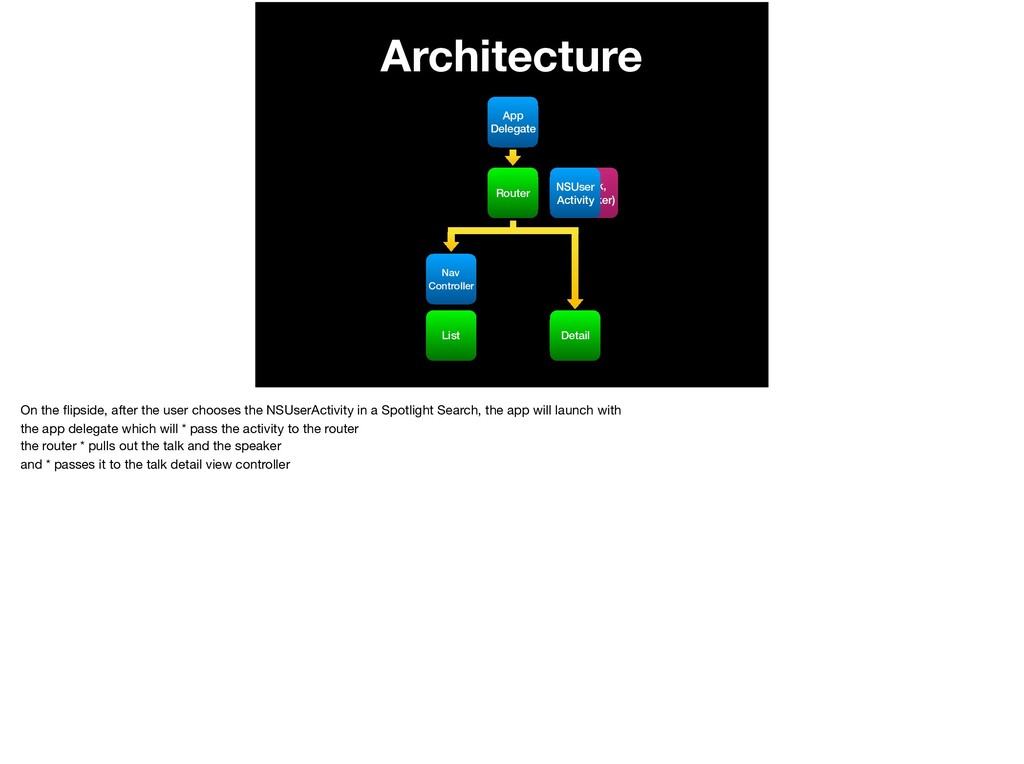
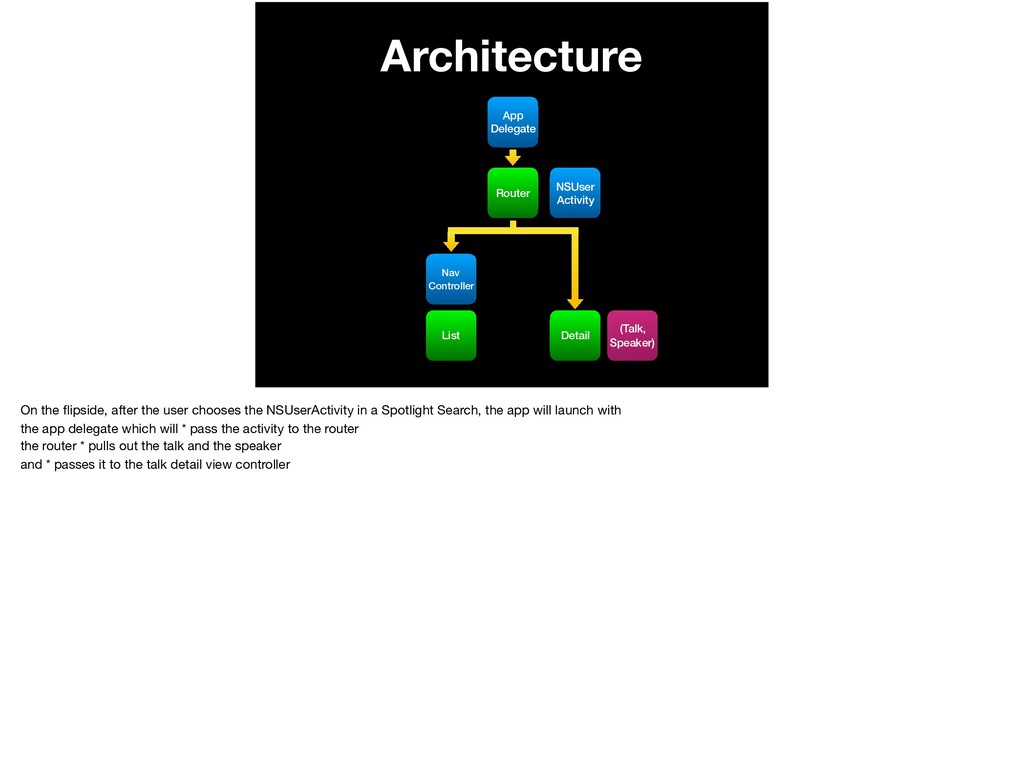
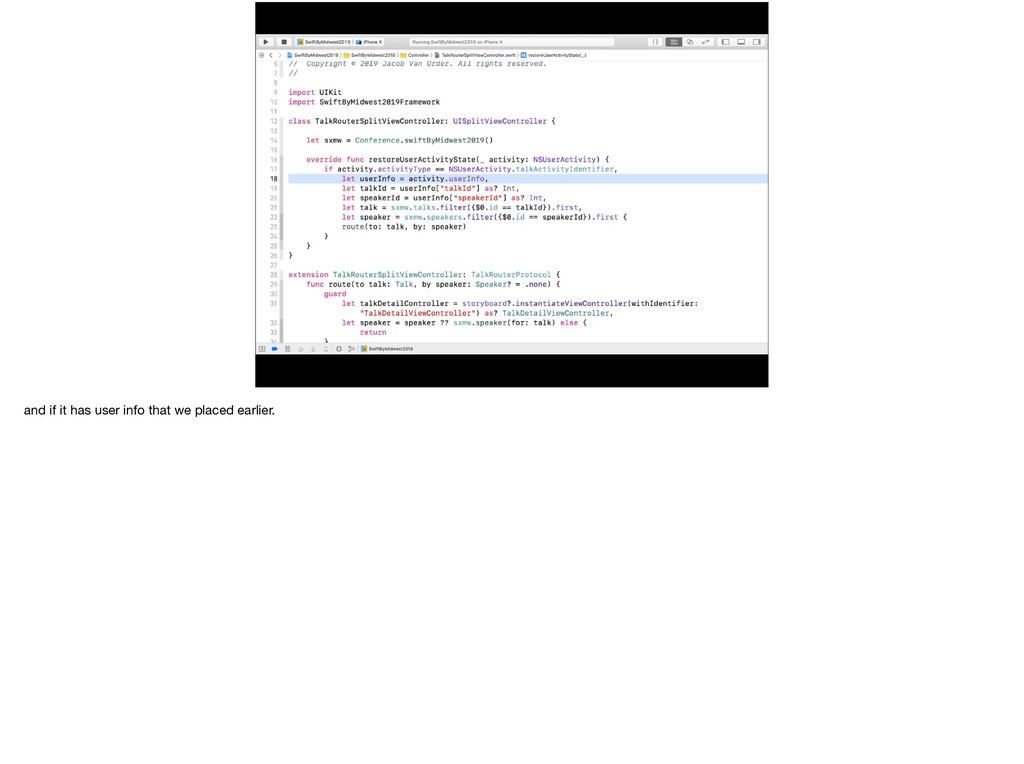
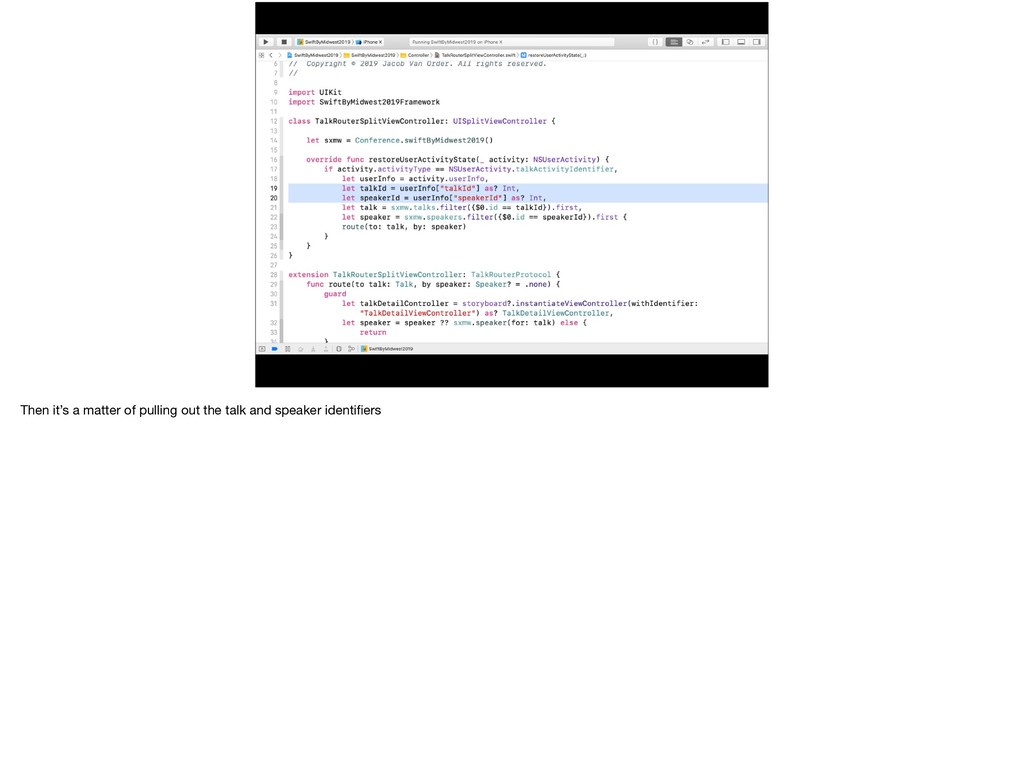
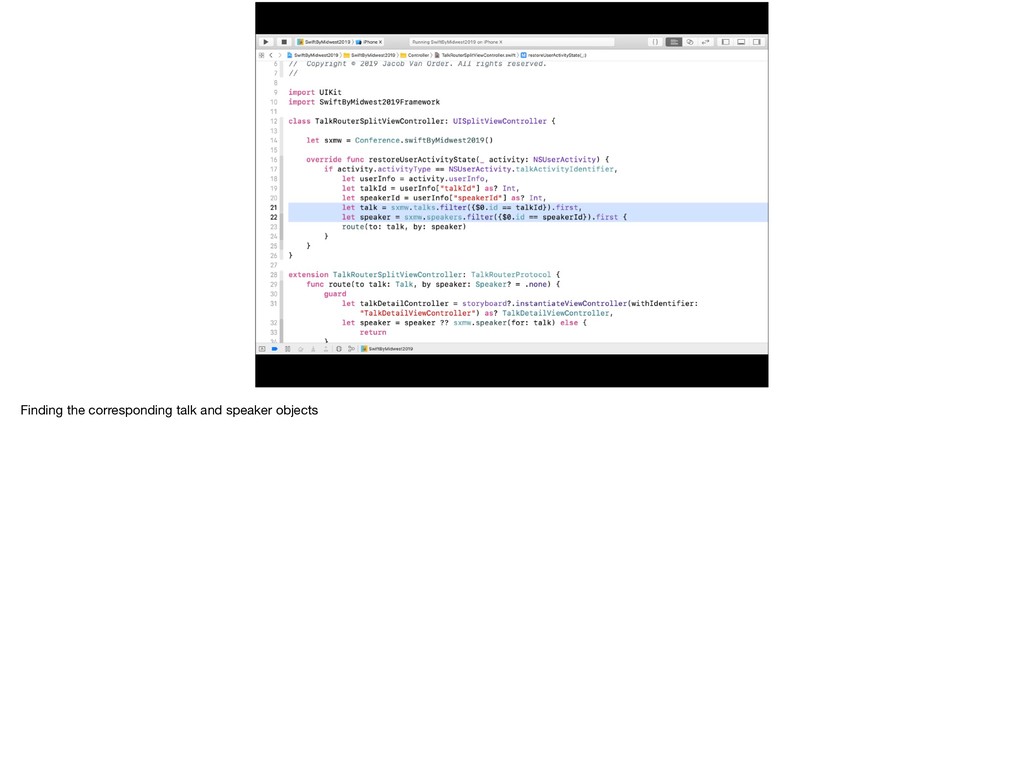
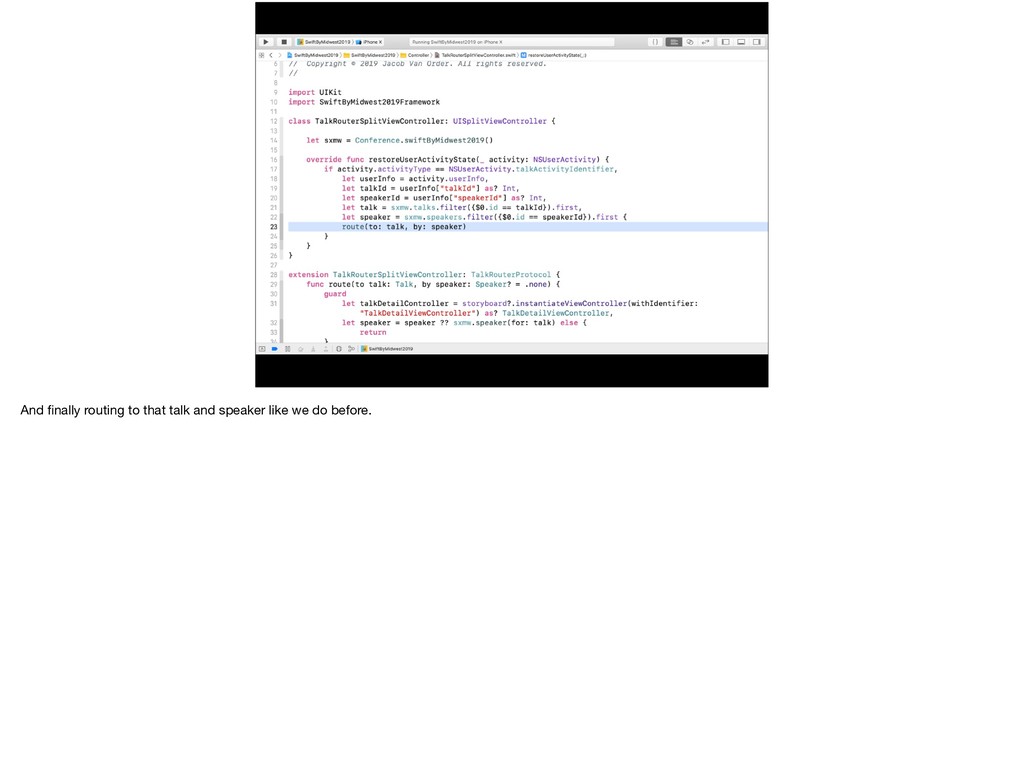
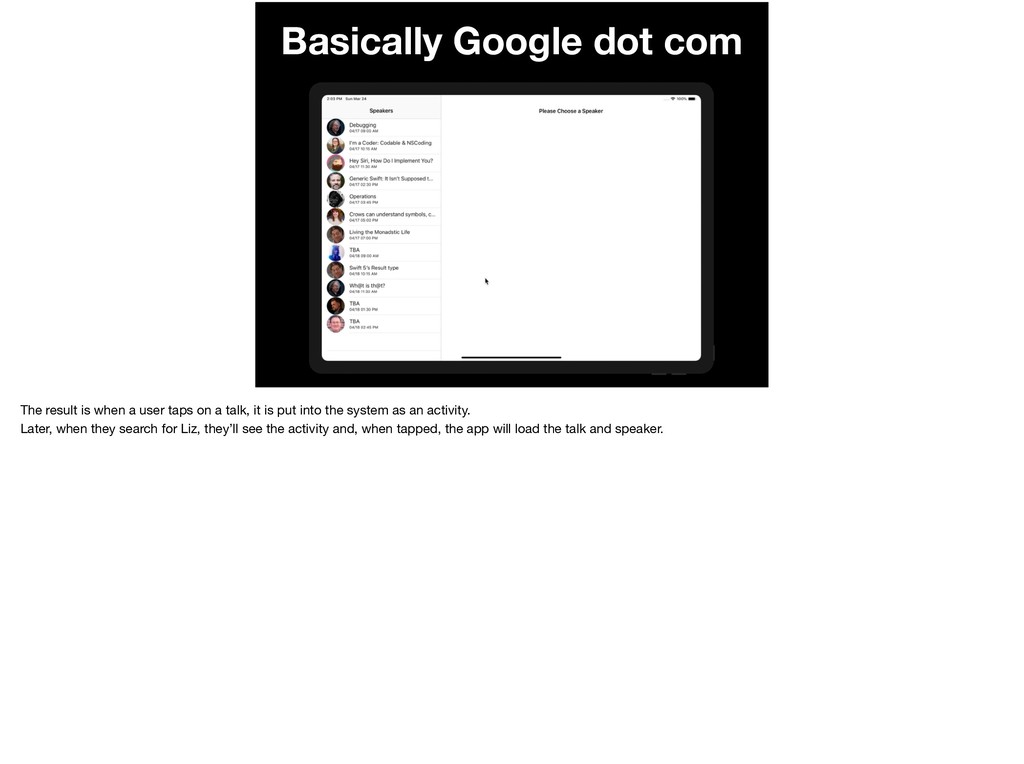
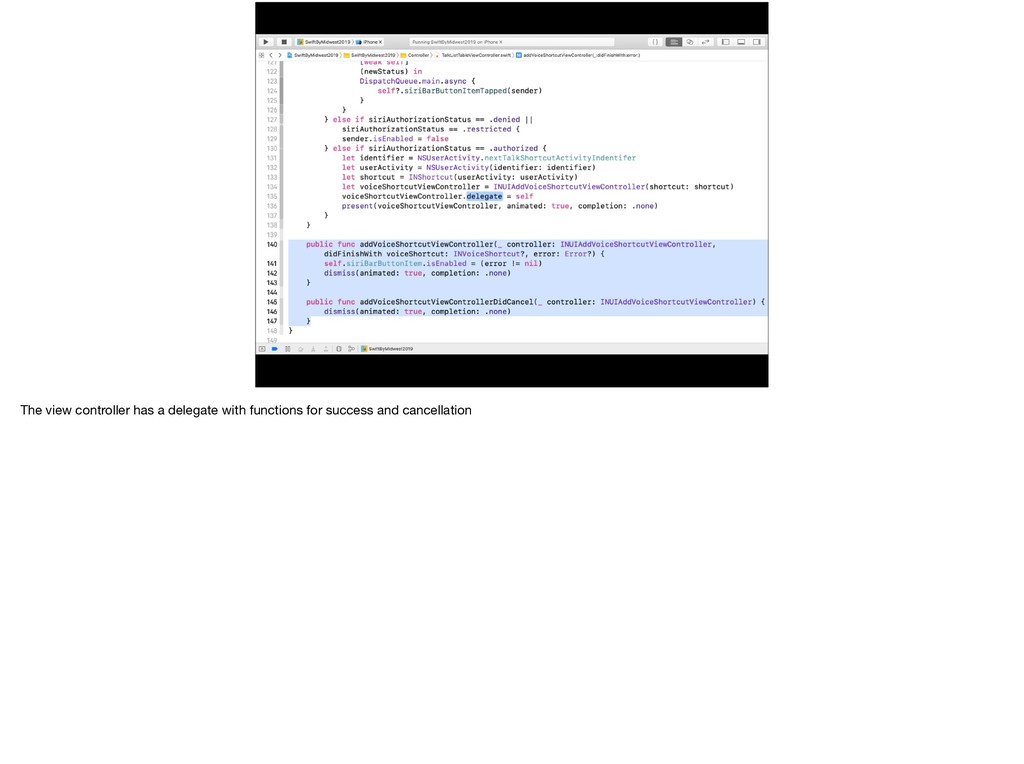
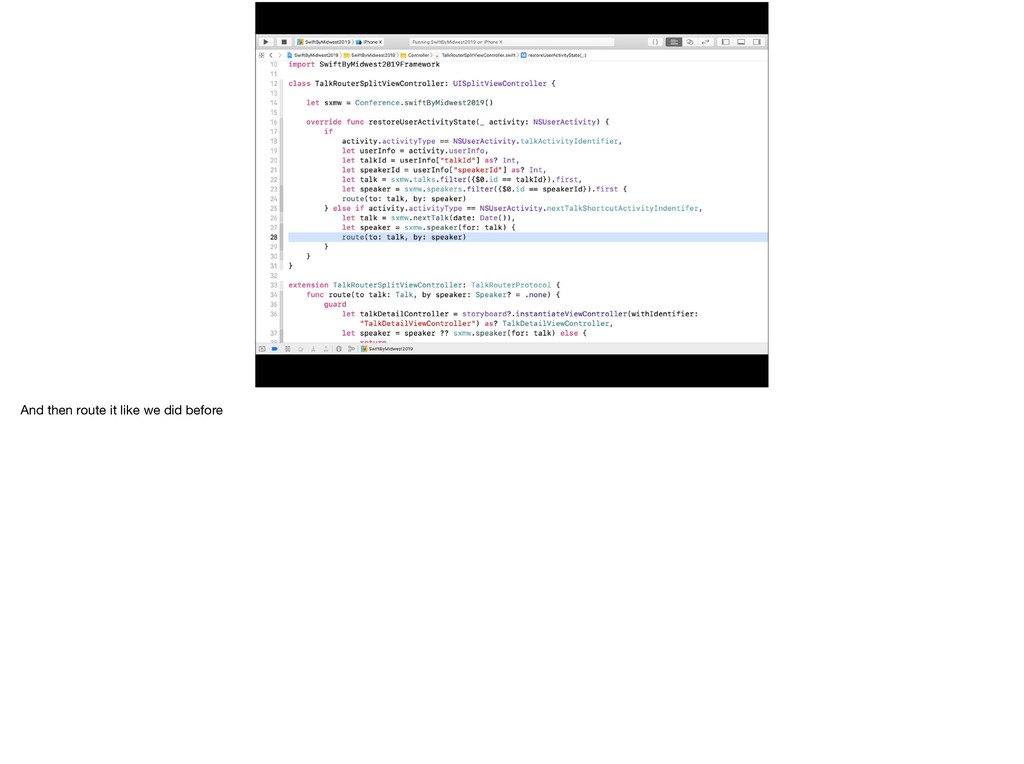
flipside, after the user chooses the NSUserActivity in a Spotlight Search, the app will launch with the app delegate which will * pass the activity to the router the router * pulls out the talk and the speaker and * passes it to the talk detail view controller
NSUser Activity On the flipside, after the user chooses the NSUserActivity in a Spotlight Search, the app will launch with the app delegate which will * pass the activity to the router the router * pulls out the talk and the speaker and * passes it to the talk detail view controller
NSUser Activity On the flipside, after the user chooses the NSUserActivity in a Spotlight Search, the app will launch with the app delegate which will * pass the activity to the router the router * pulls out the talk and the speaker and * passes it to the talk detail view controller
NSUser Activity On the flipside, after the user chooses the NSUserActivity in a Spotlight Search, the app will launch with the app delegate which will * pass the activity to the router the router * pulls out the talk and the speaker and * passes it to the talk detail view controller
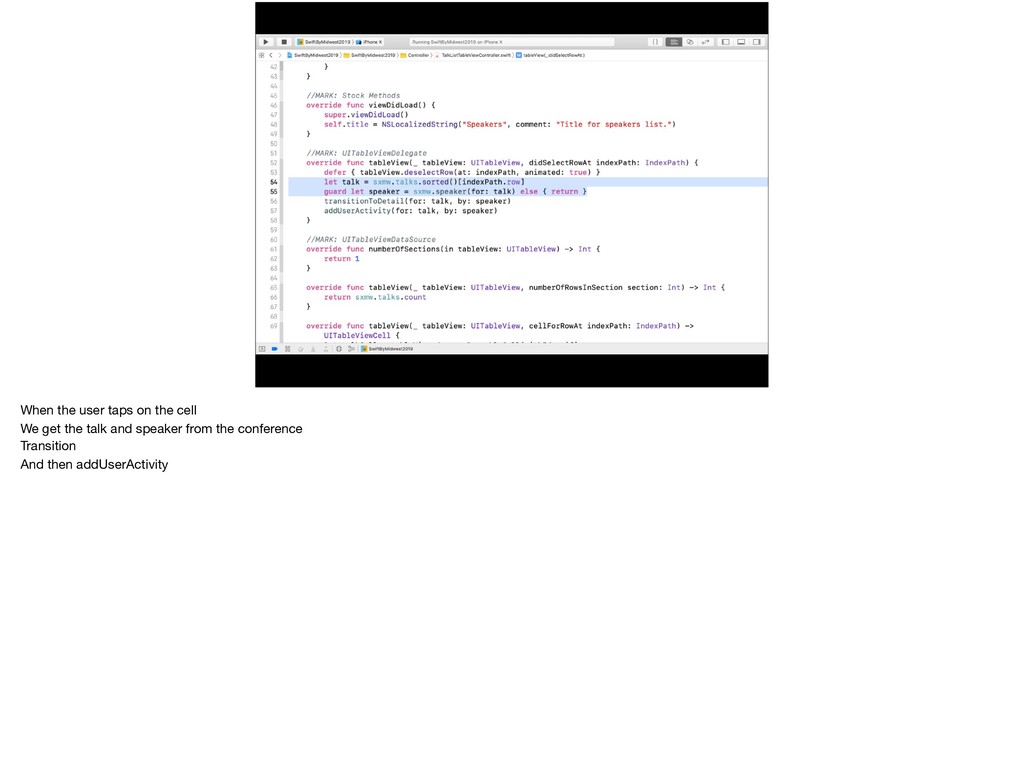
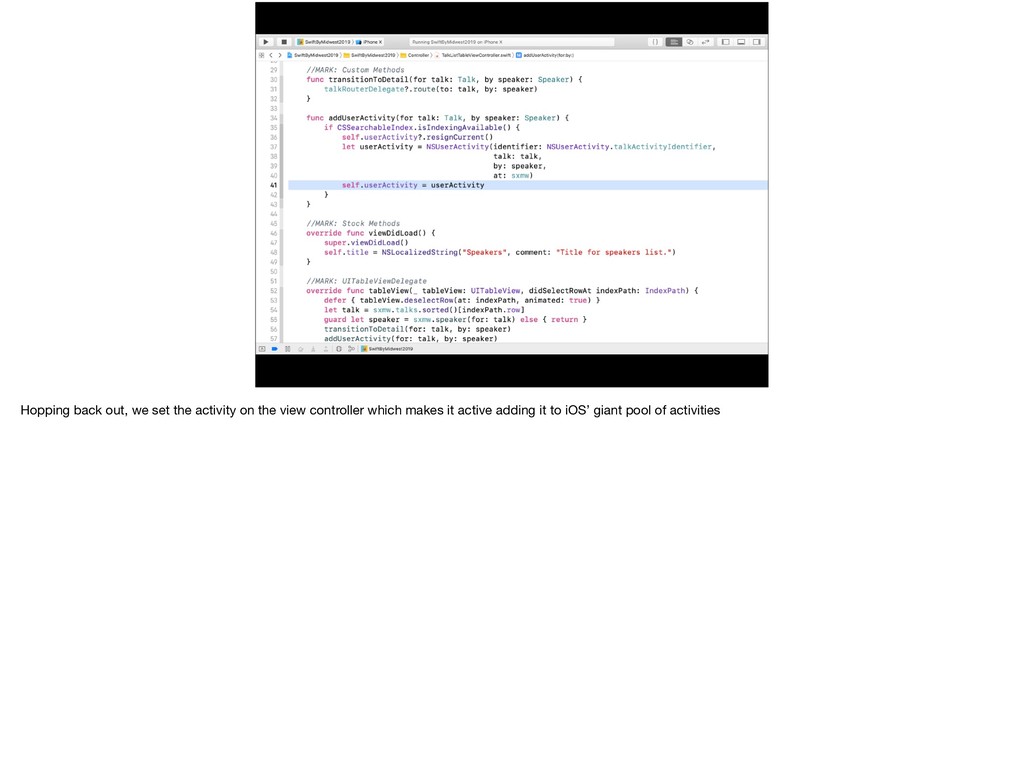
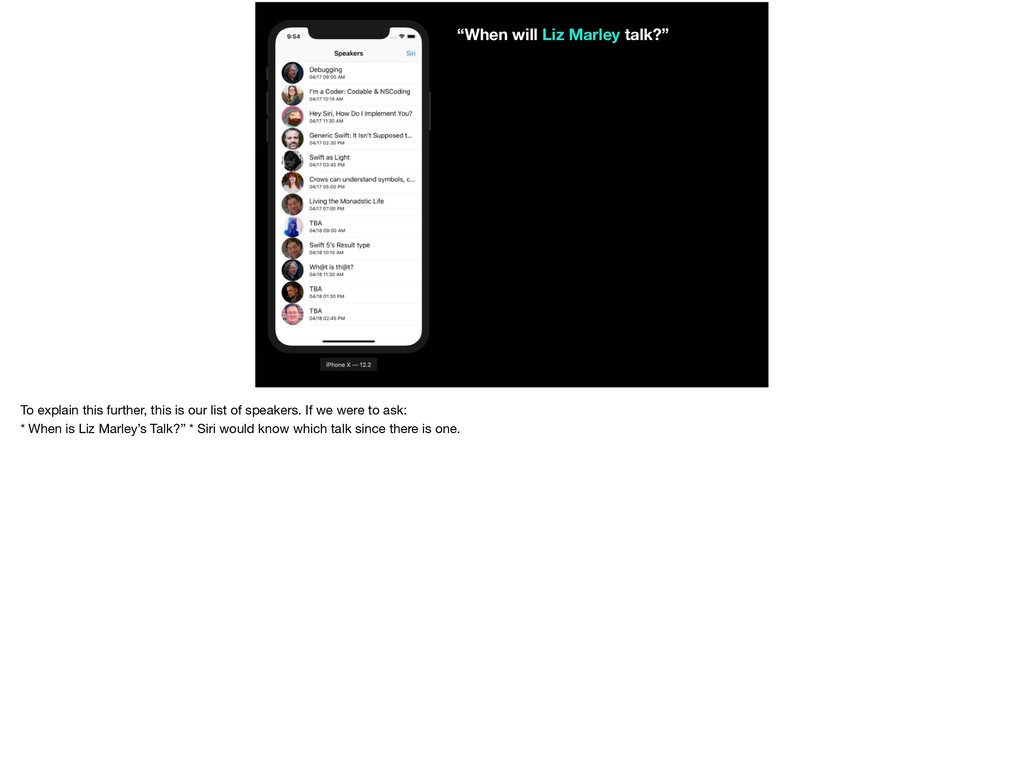
taps on a talk, it is put into the system as an activity. Later, when they search for Liz, they’ll see the activity and, when tapped, the app will load the talk and speaker.
taps on a talk, it is put into the system as an activity. Later, when they search for Liz, they’ll see the activity and, when tapped, the app will load the talk and speaker.
water content can significantly impair physical performance. This can lead to altered body temperature control, reduced motivation, increased fatigue and make exercise feel much more difficult, both physically and mentally https://www.healthline.com/nutrition/7-health-benefits-of-water
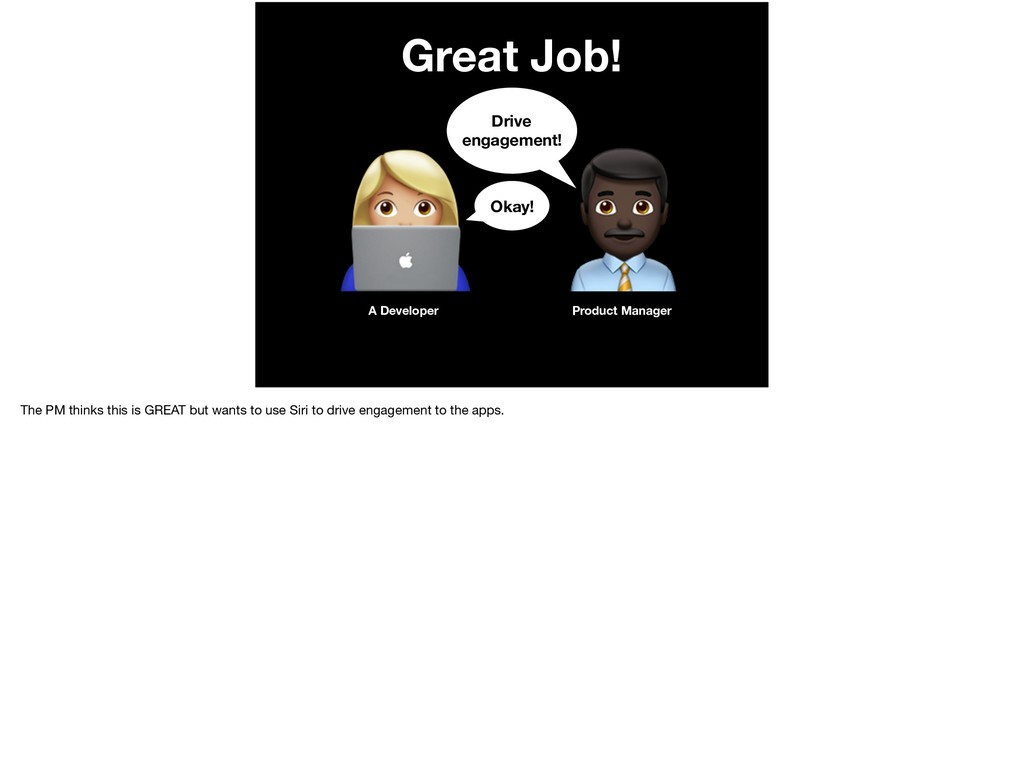
or PM, at GoodApps Co read about Virtual Assistants on LinkedIn and thinks the best way to bolster the product is by implementing Siri on the conference app.
The Product Manager, or PM, at GoodApps Co read about Virtual Assistants on LinkedIn and thinks the best way to bolster the product is by implementing Siri on the conference app.
Assistants! So The Product Manager, or PM, at GoodApps Co read about Virtual Assistants on LinkedIn and thinks the best way to bolster the product is by implementing Siri on the conference app.
Assistants! Okay! So The Product Manager, or PM, at GoodApps Co read about Virtual Assistants on LinkedIn and thinks the best way to bolster the product is by implementing Siri on the conference app.
Assistants! By tomorrow! Okay! So The Product Manager, or PM, at GoodApps Co read about Virtual Assistants on LinkedIn and thinks the best way to bolster the product is by implementing Siri on the conference app.
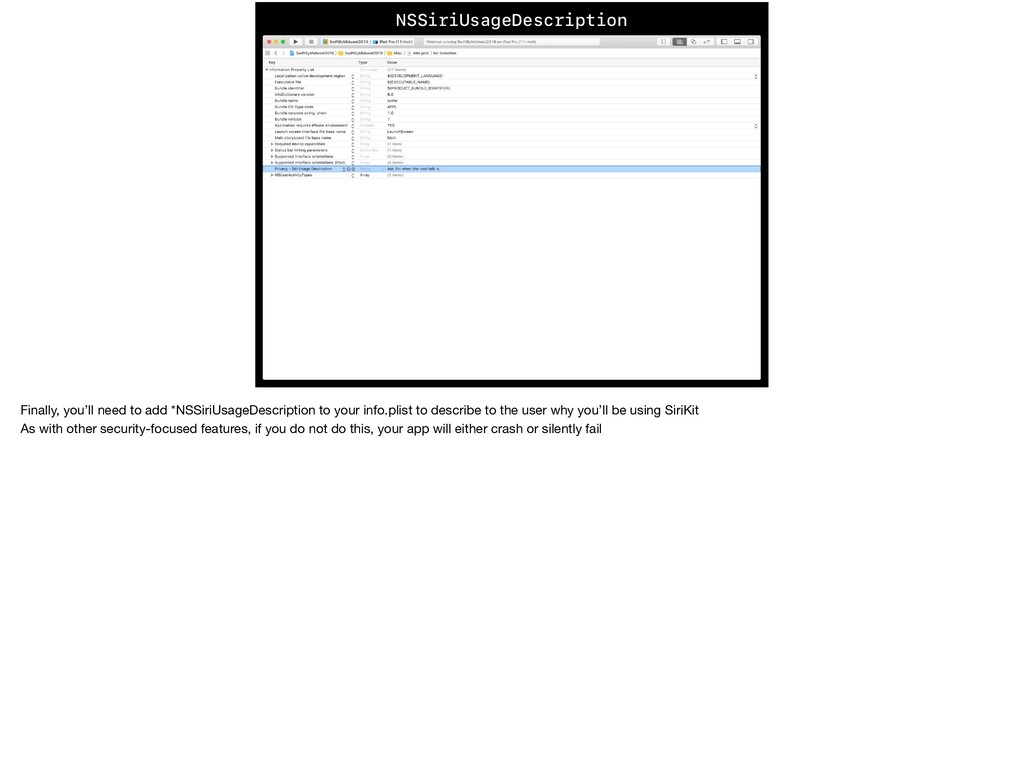
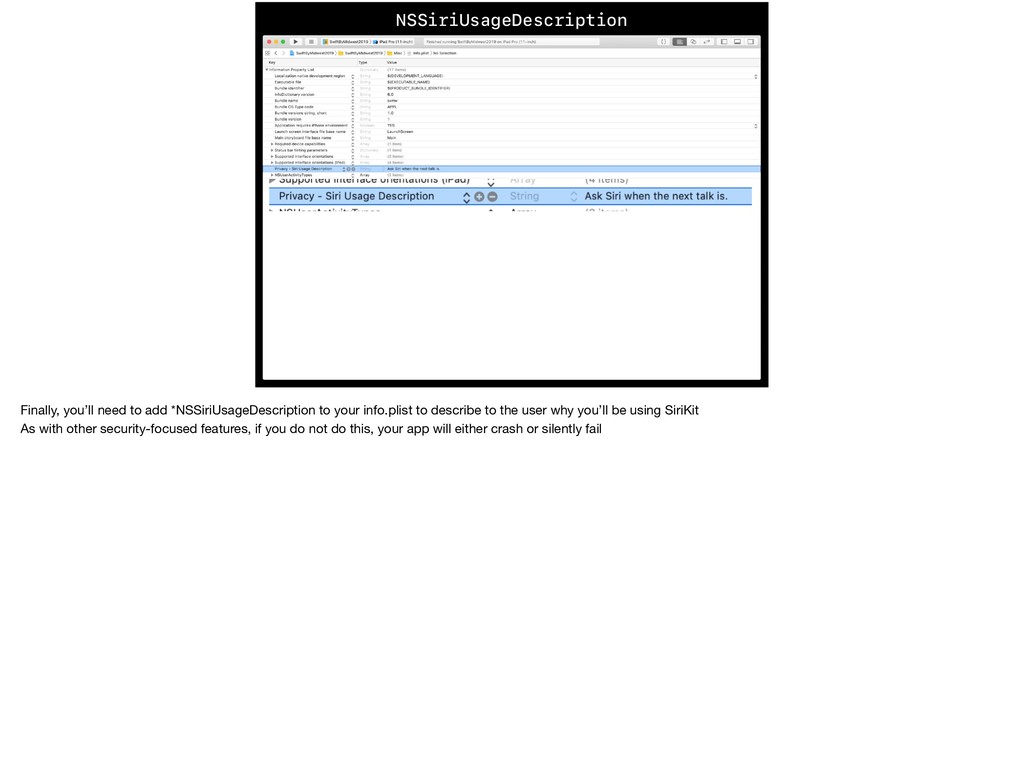
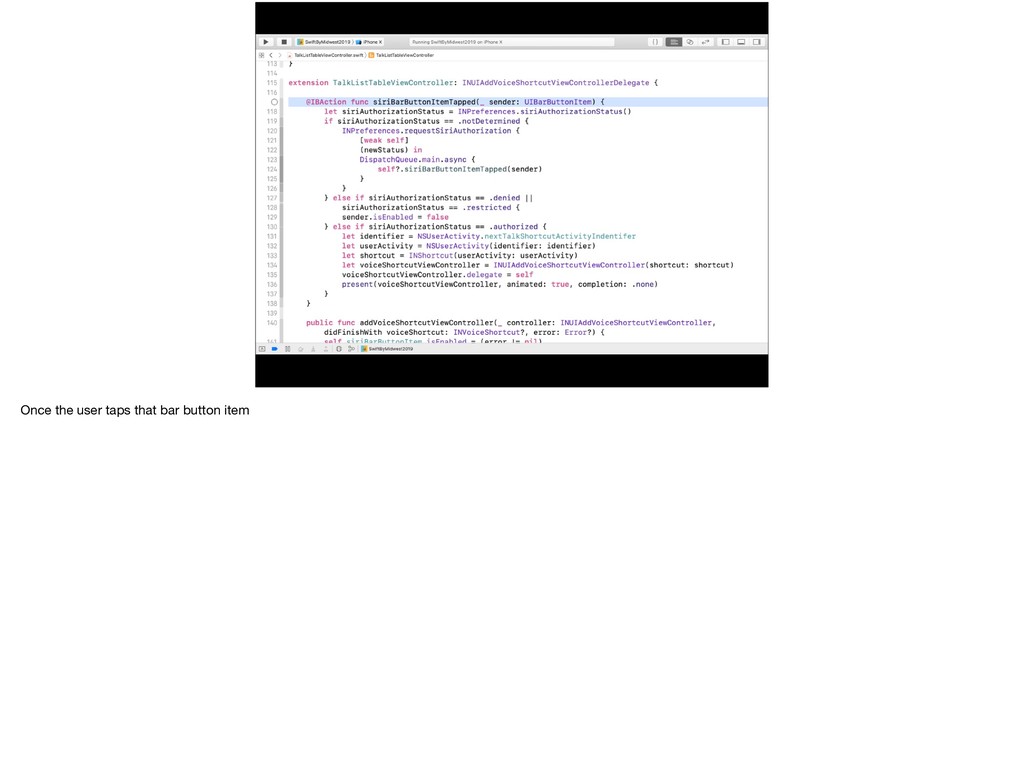
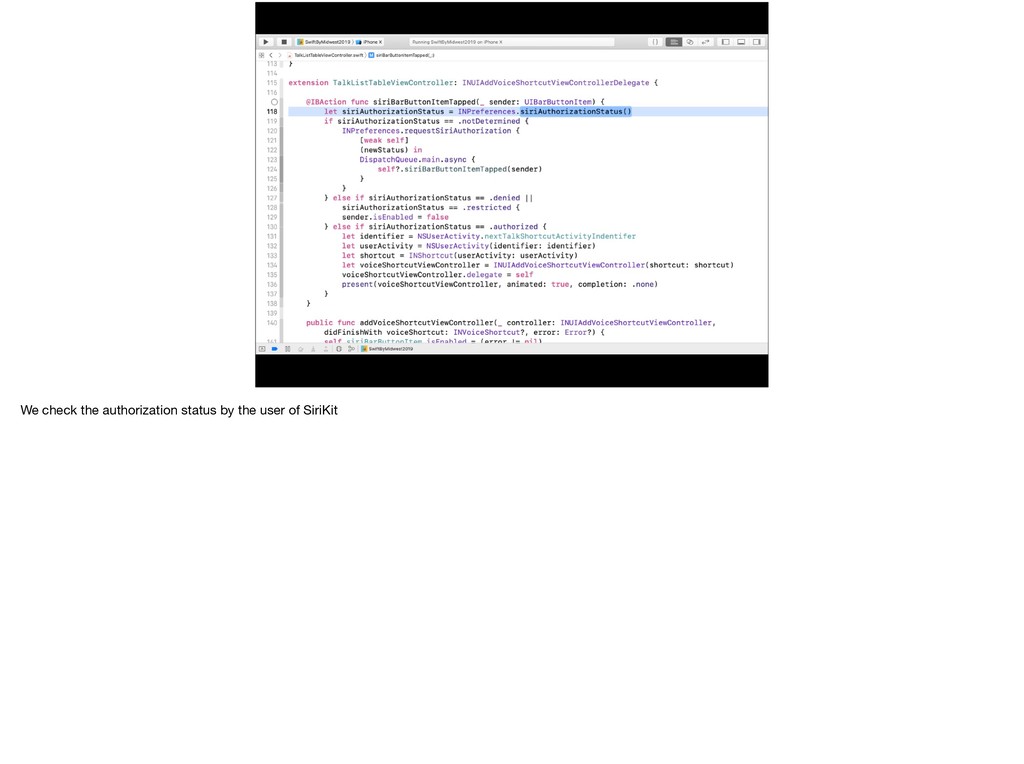
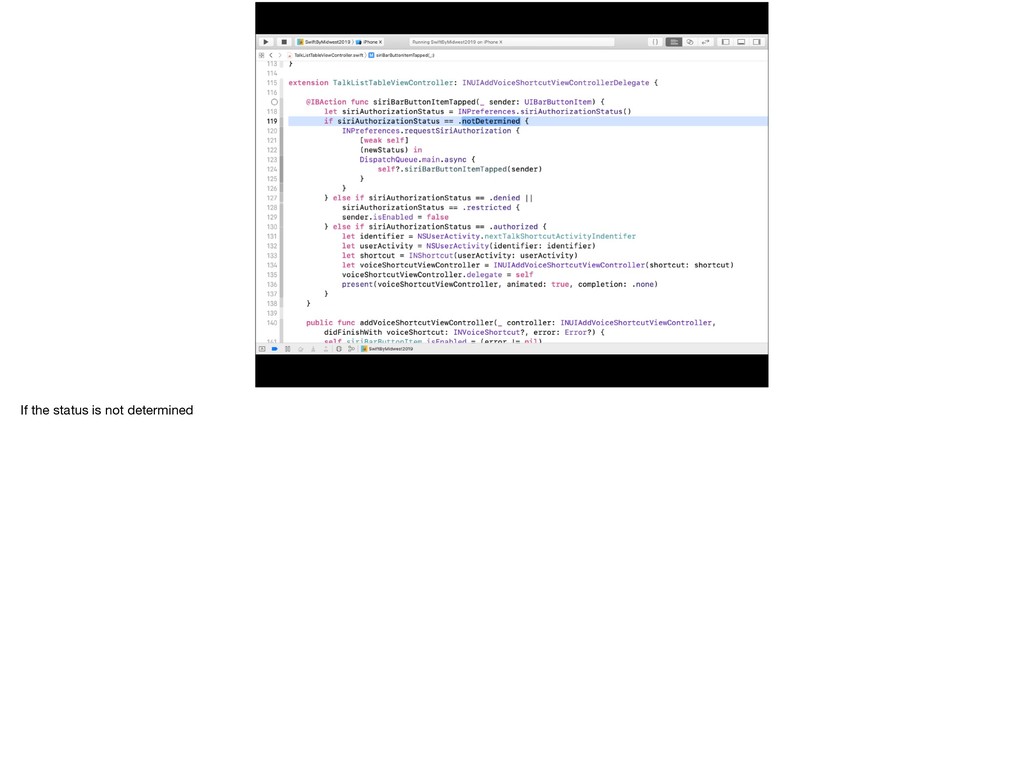
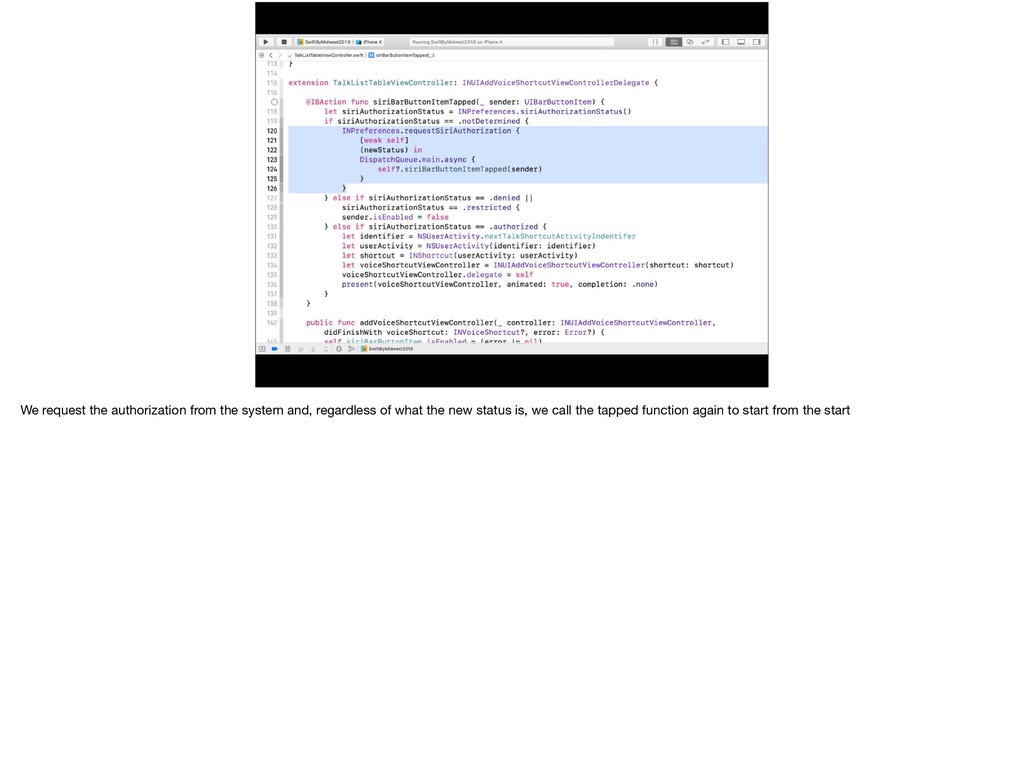
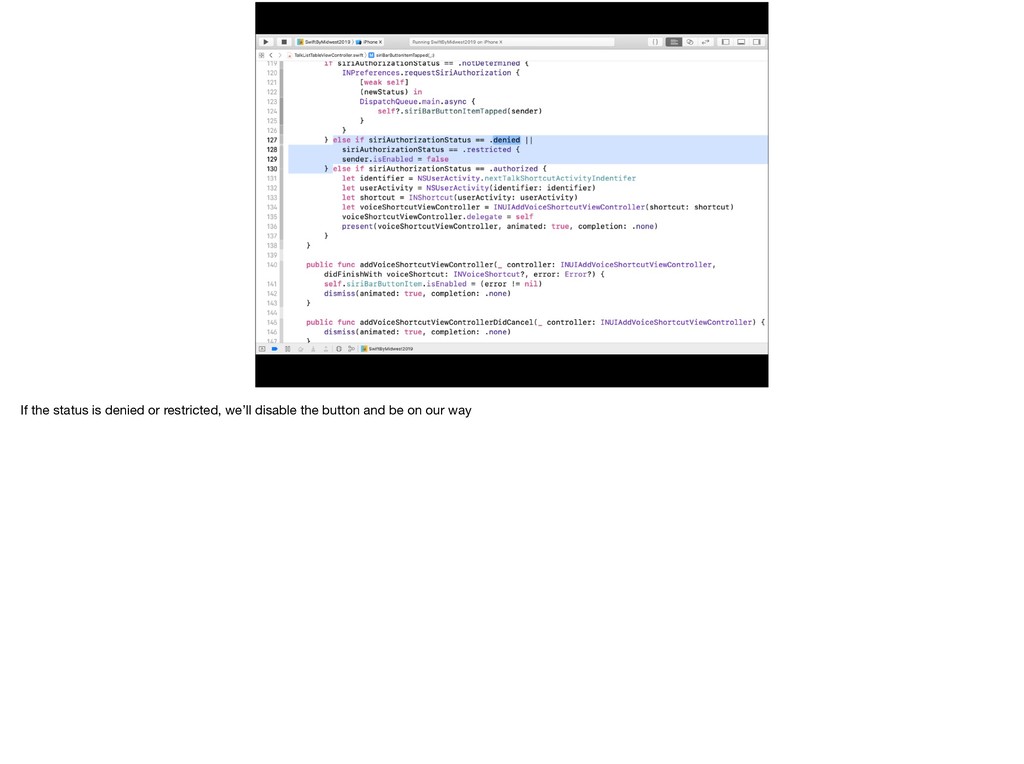
to describe to the user why you’ll be using SiriKit As with other security-focused features, if you do not do this, your app will either crash or silently fail
to describe to the user why you’ll be using SiriKit As with other security-focused features, if you do not do this, your app will either crash or silently fail
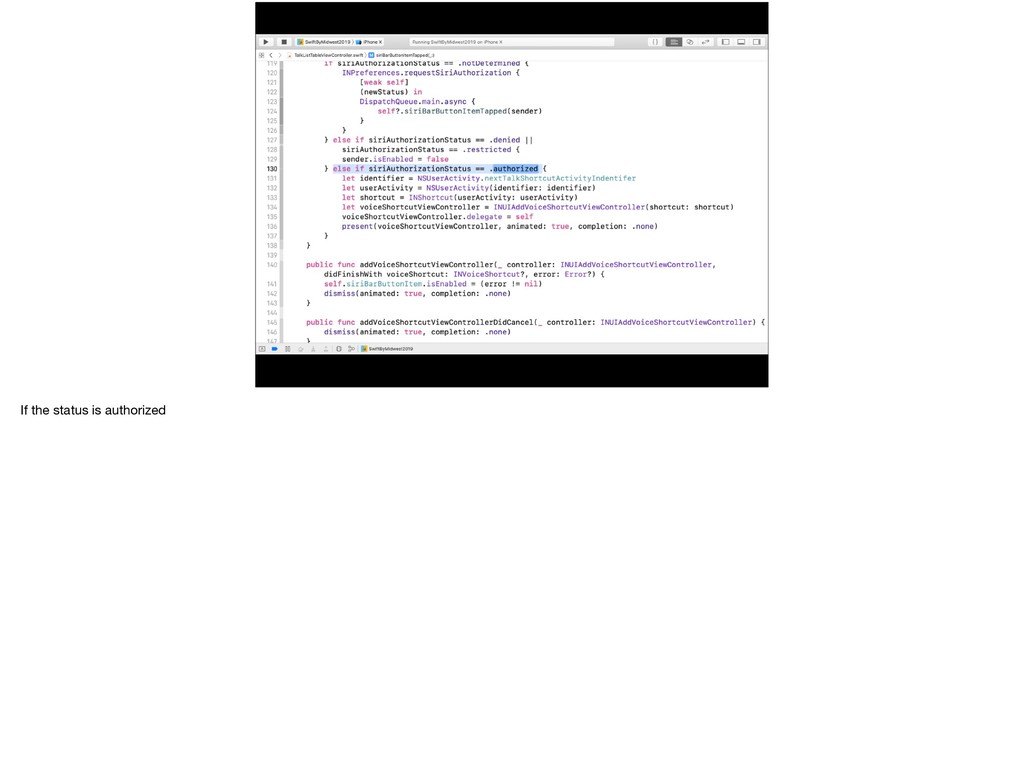
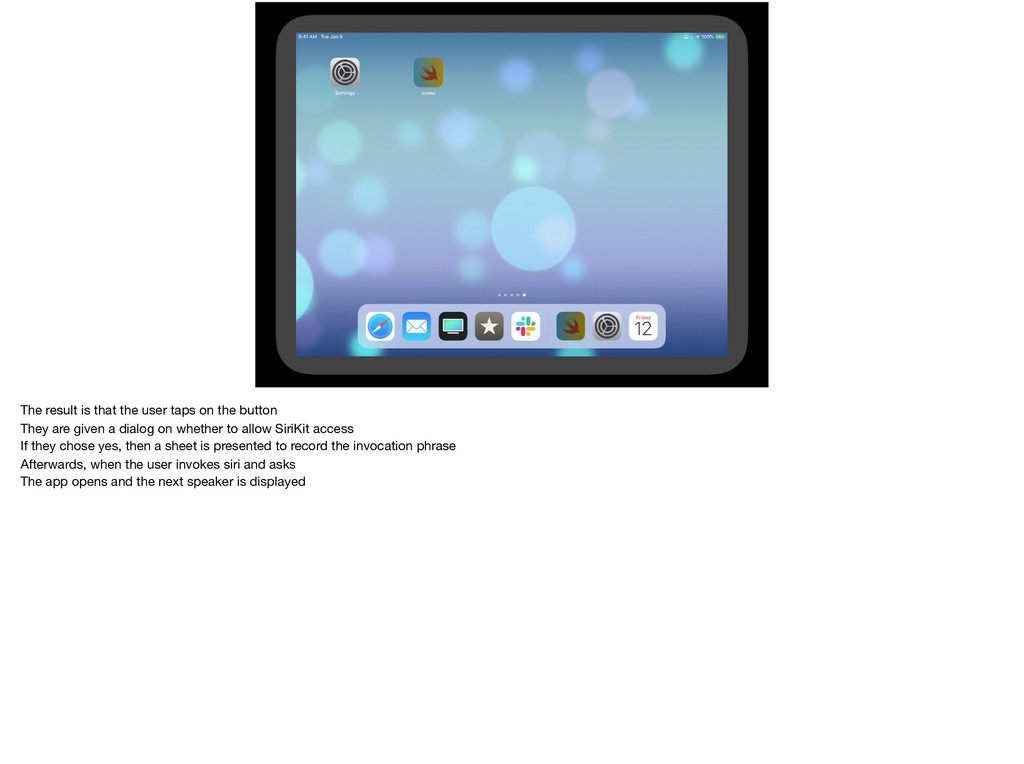
They are given a dialog on whether to allow SiriKit access If they chose yes, then a sheet is presented to record the invocation phrase Afterwards, when the user invokes siri and asks The app opens and the next speaker is displayed
They are given a dialog on whether to allow SiriKit access If they chose yes, then a sheet is presented to record the invocation phrase Afterwards, when the user invokes siri and asks The app opens and the next speaker is displayed
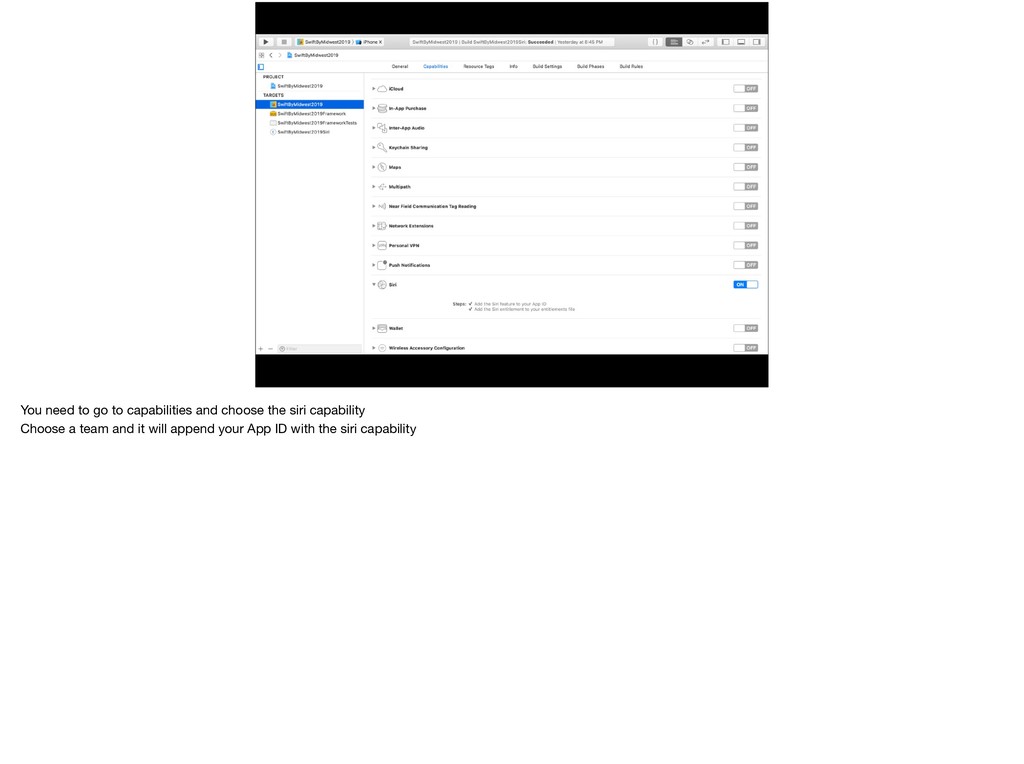
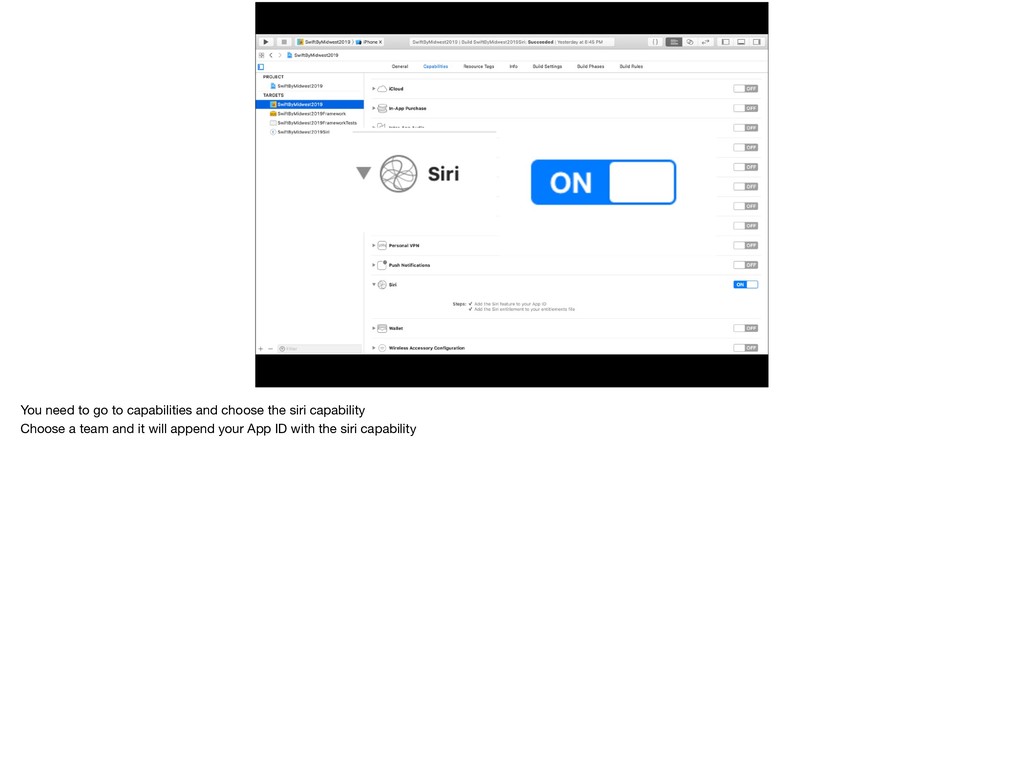
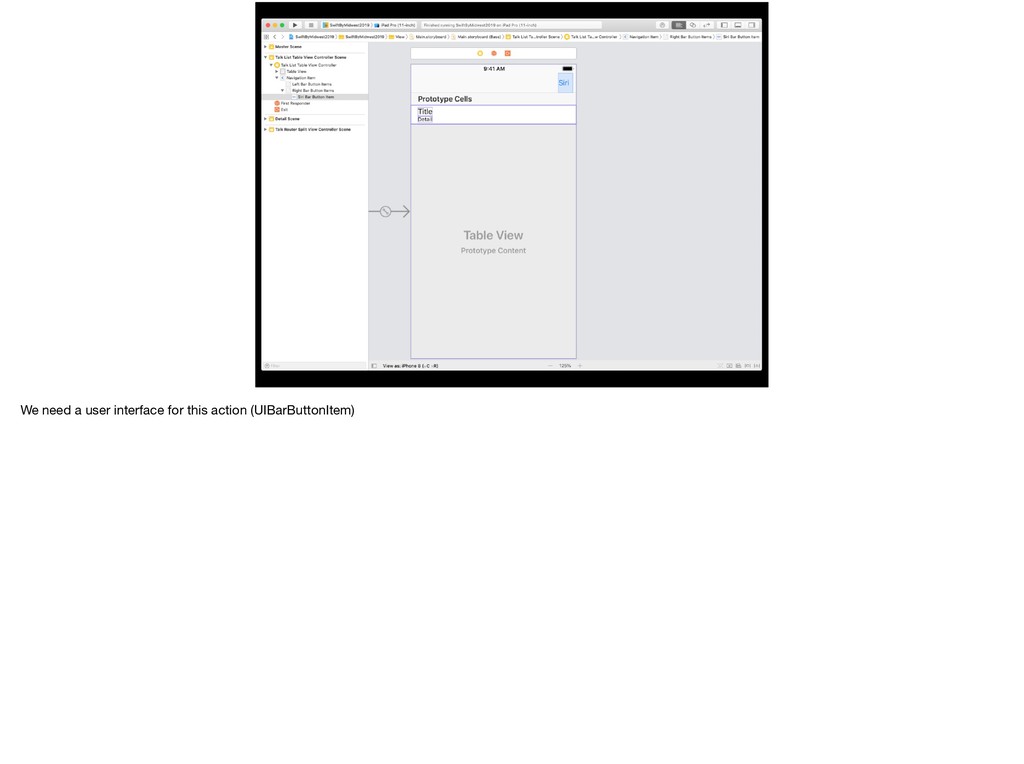
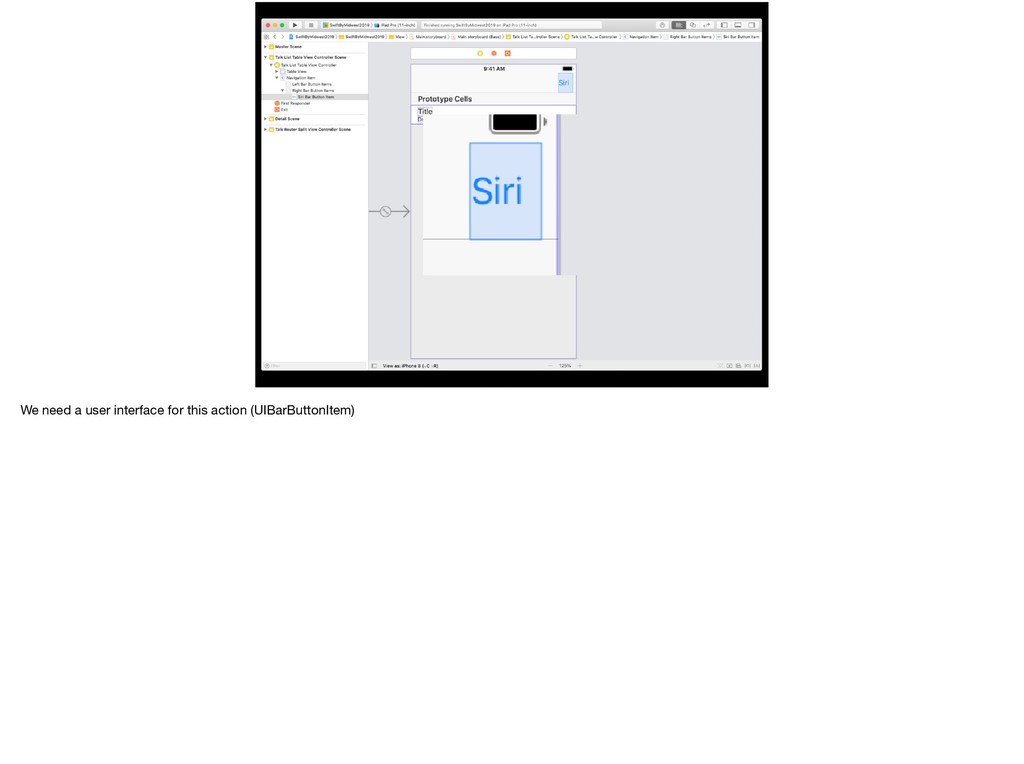
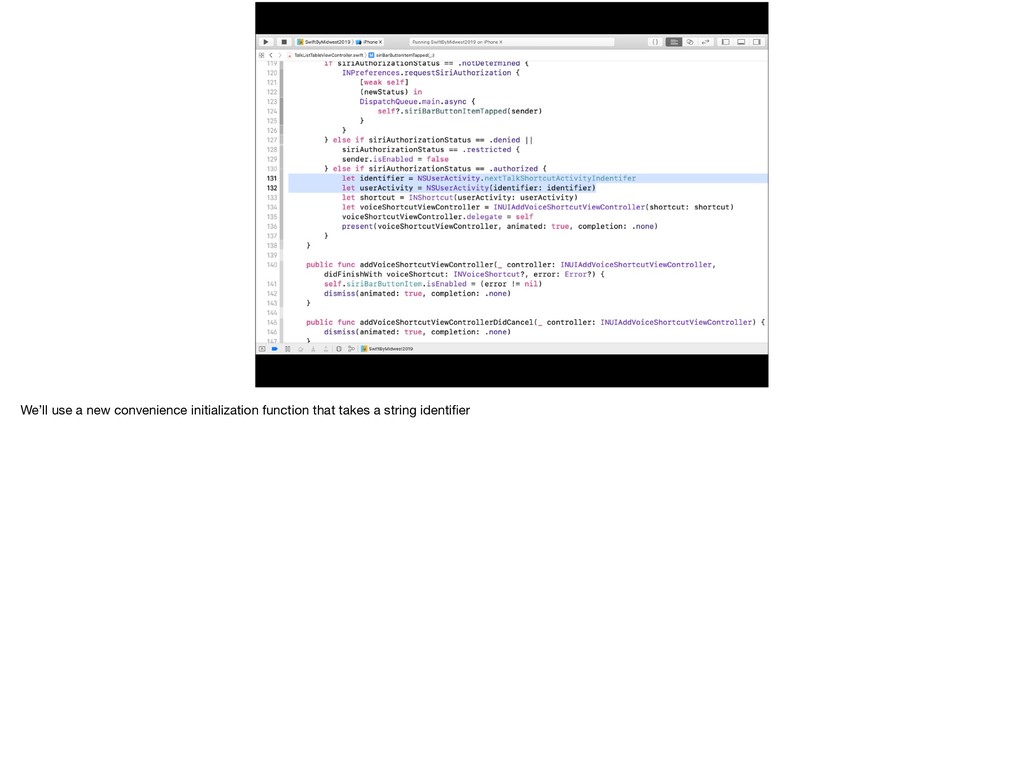
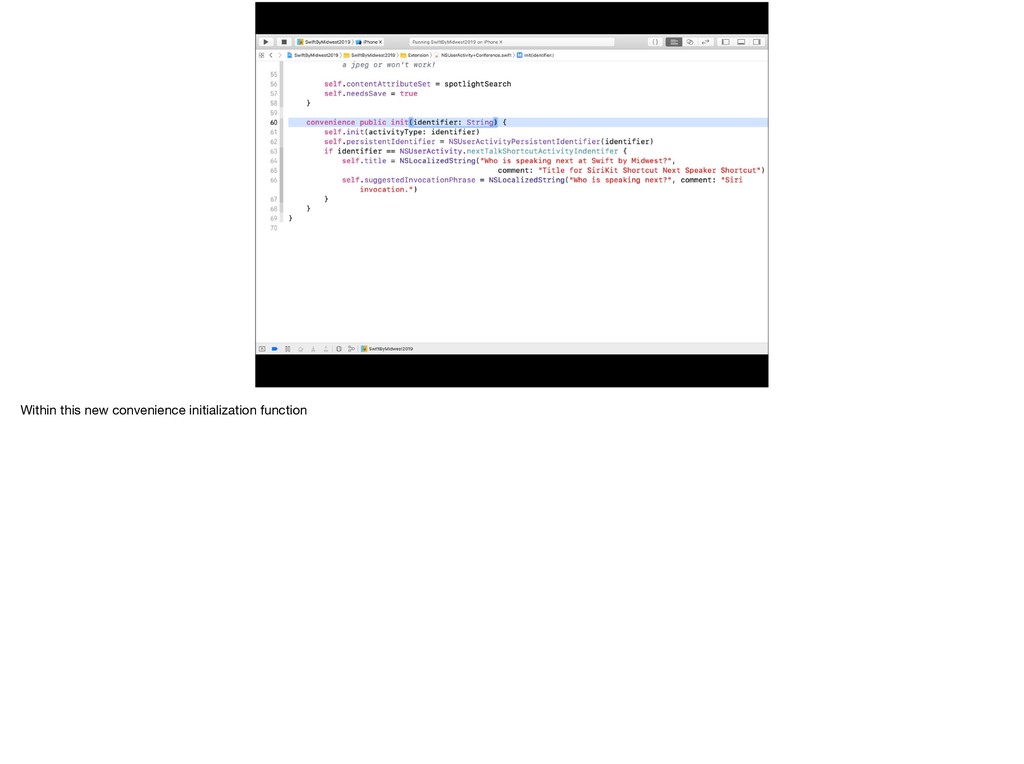
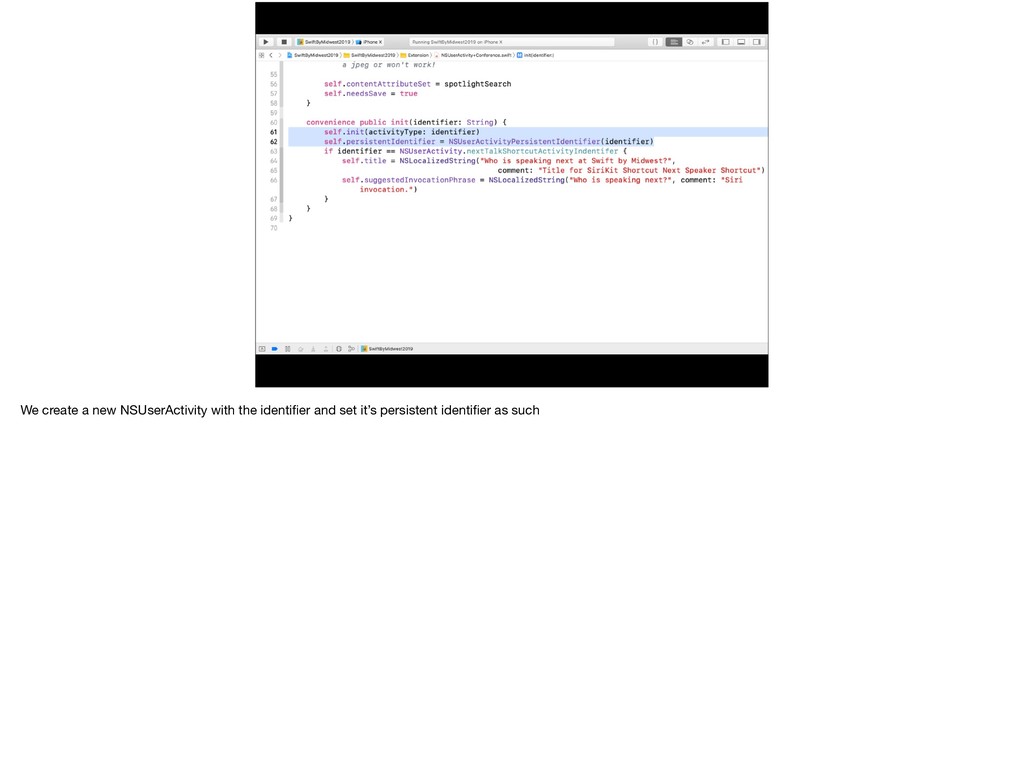
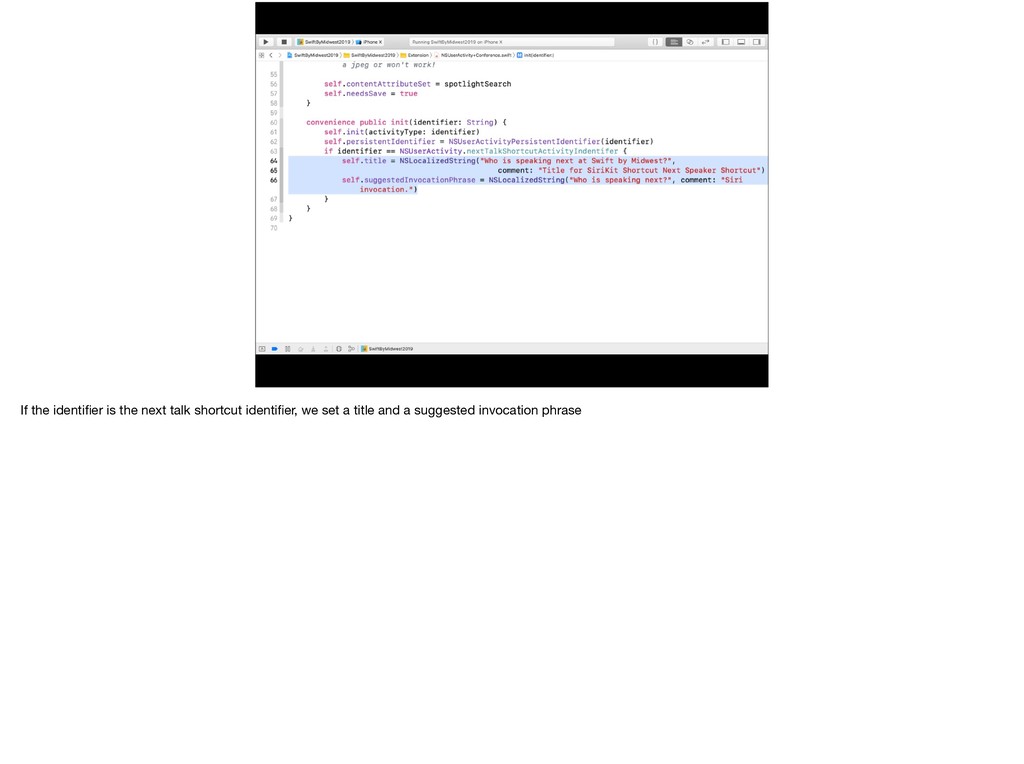
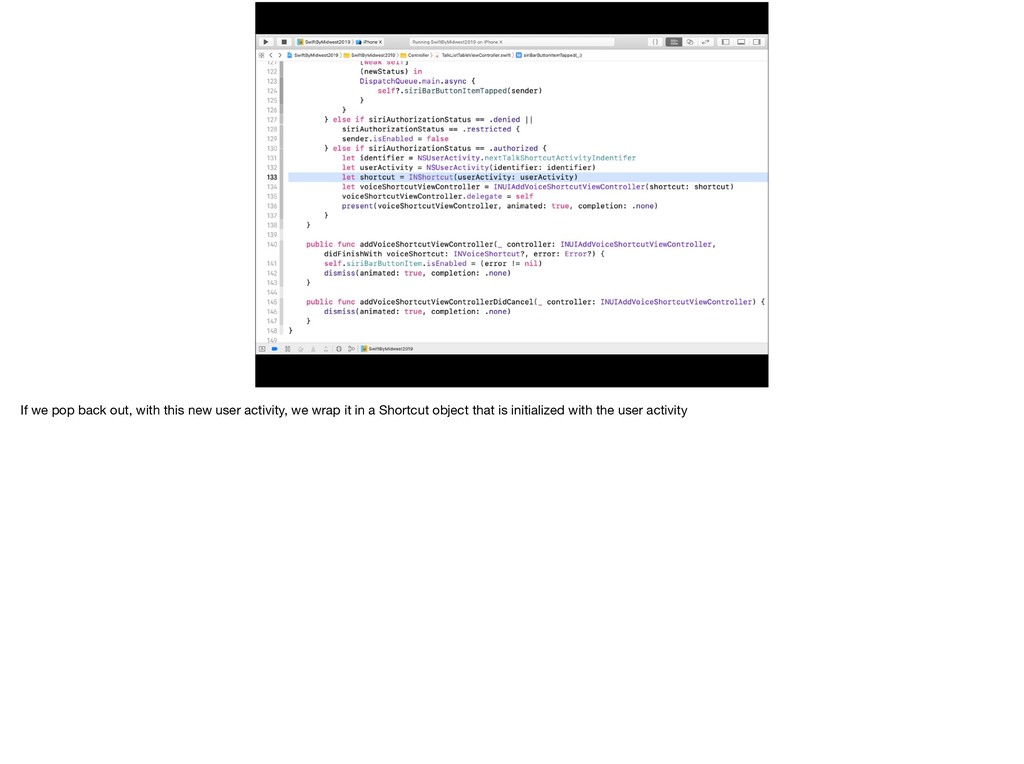
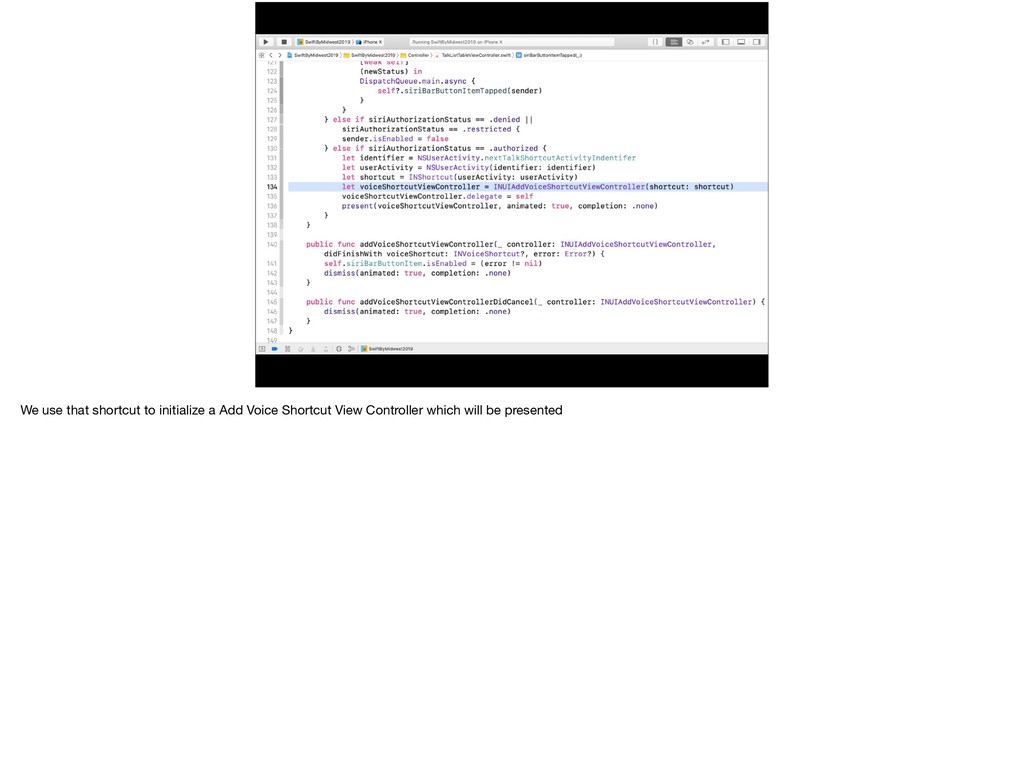
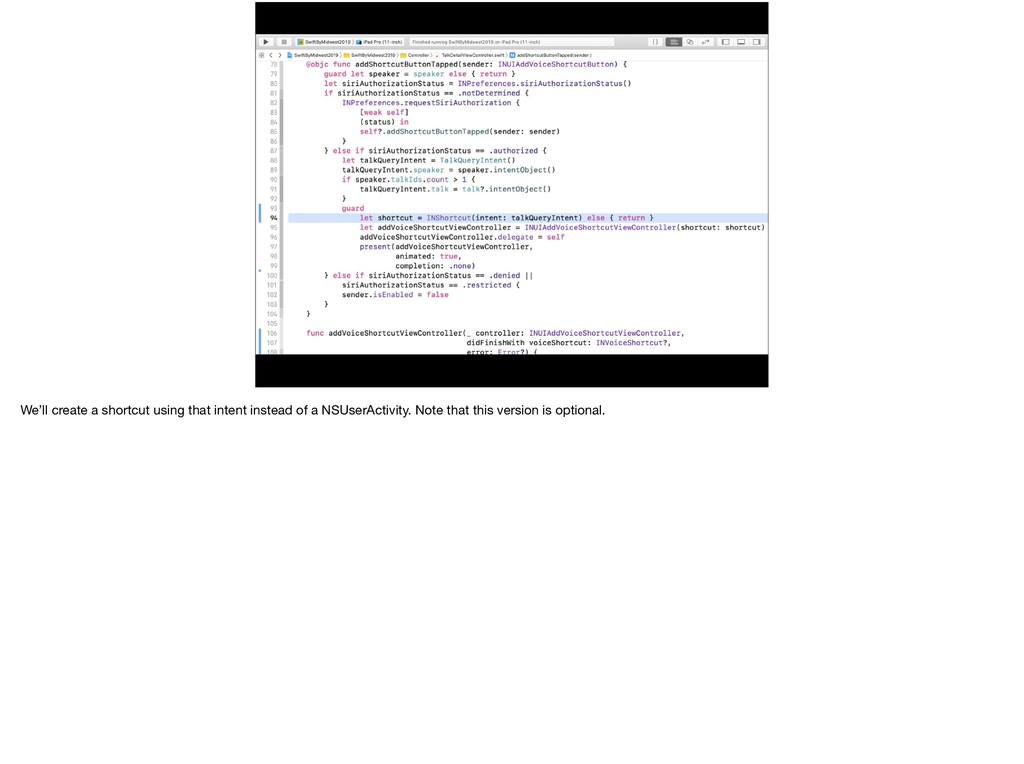
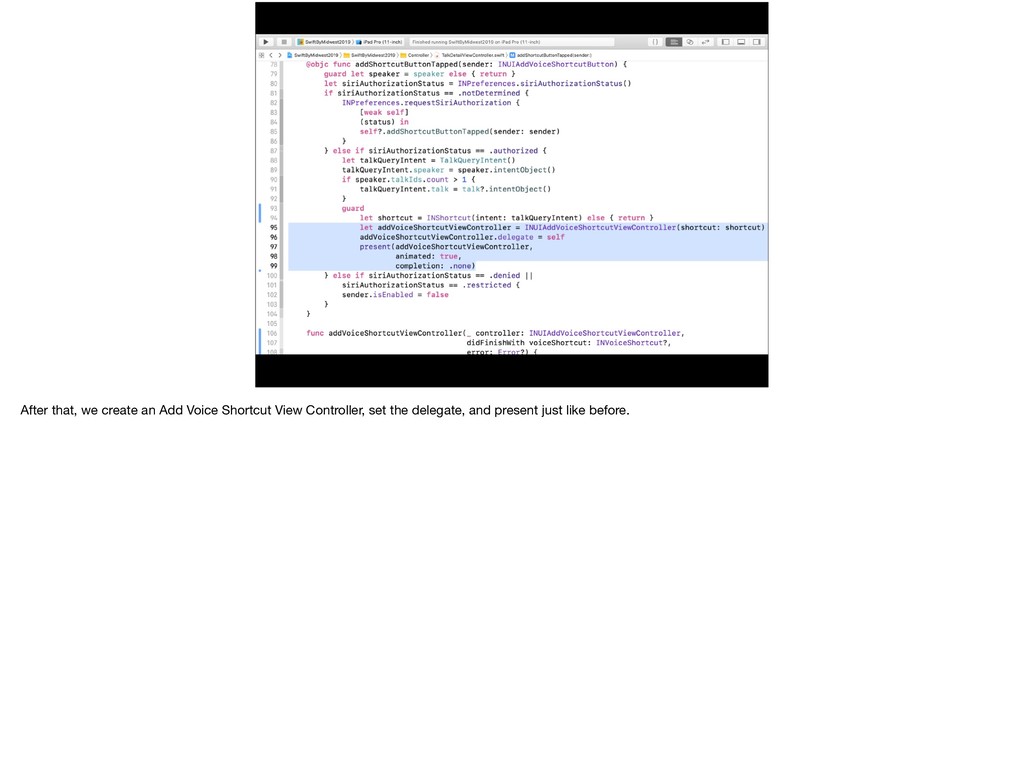
to info.plist • Add User Interface to initialize adding a Siri Shortcut • Create NSUserActivity • Wrap in INShortcut • Use INShortcut with INUIAddVoiceShortcutViewController • Handle the NSUserActivity like before but with new functionality
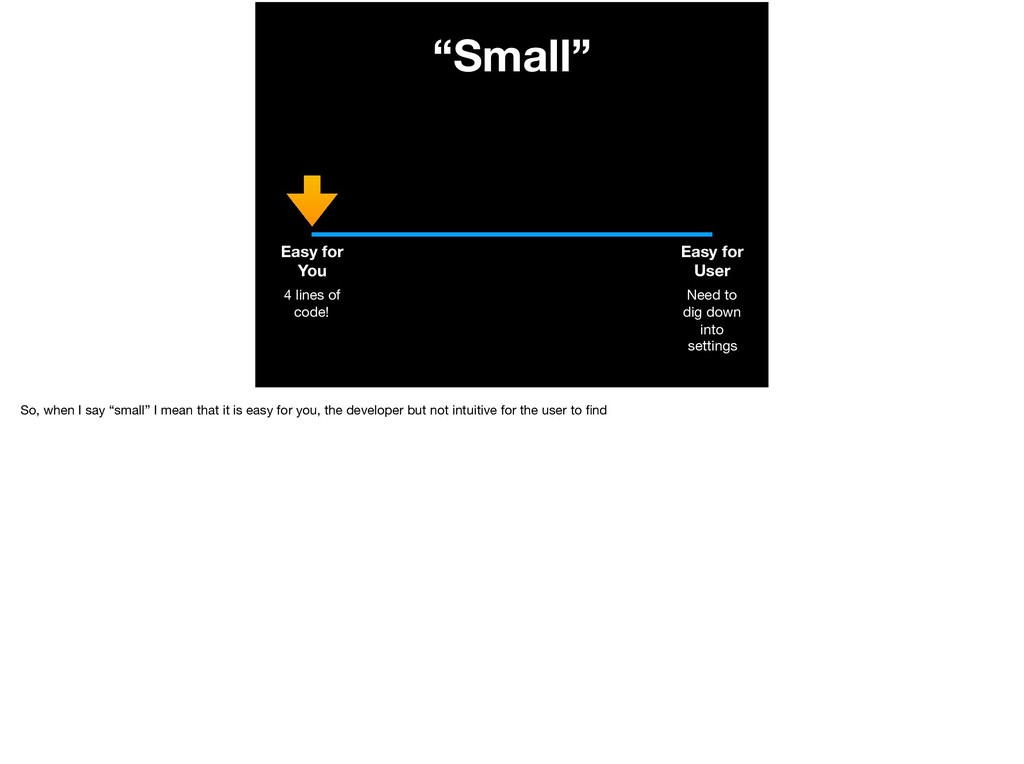
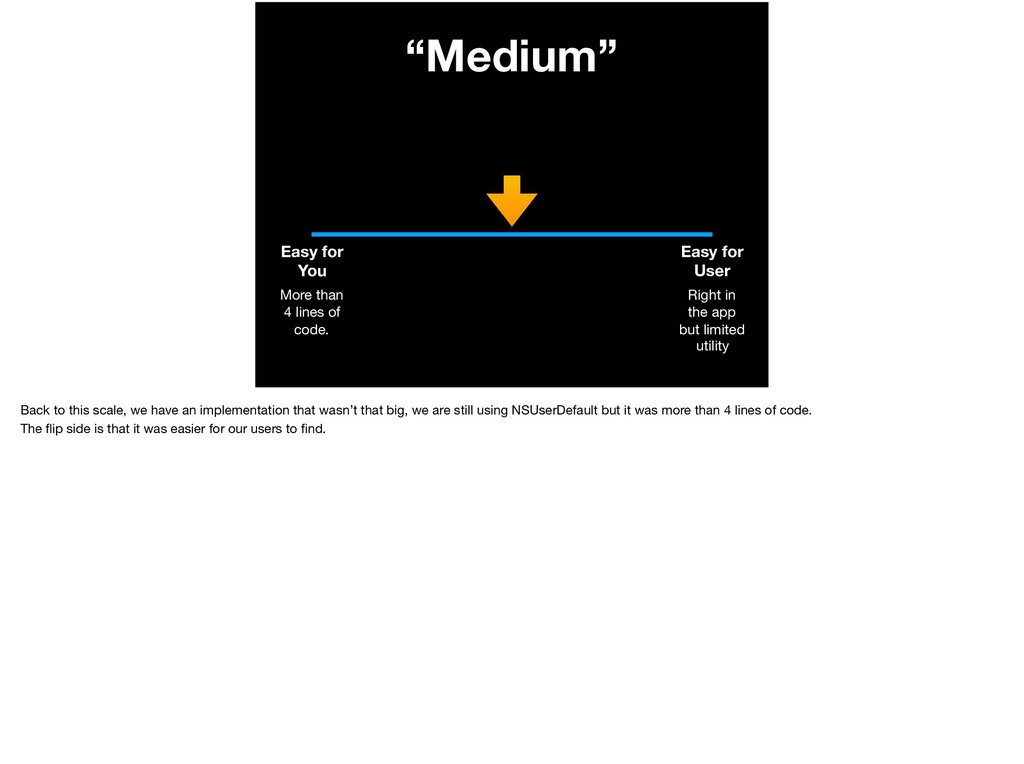
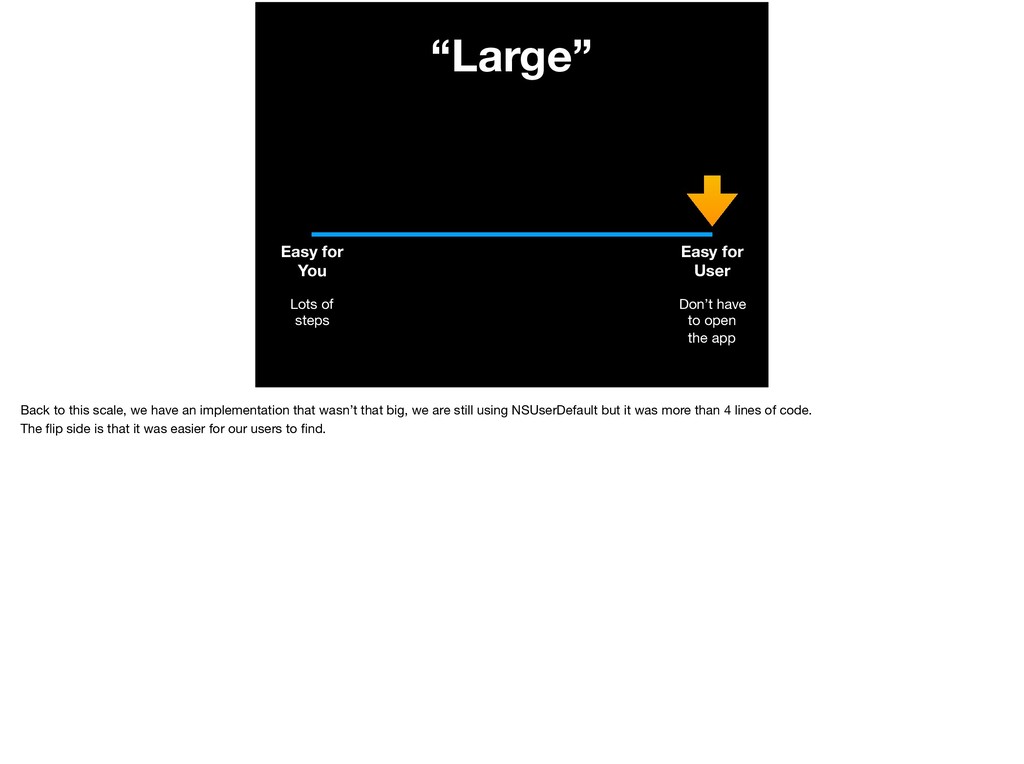
lines of code. Right in the app but limited utility Back to this scale, we have an implementation that wasn’t that big, we are still using NSUserDefault but it was more than 4 lines of code. The flip side is that it was easier for our users to find.
disease and cancer. Water helps flush toxins out of your body, and the fewer toxins that come into contact with your colon, bladder, and other organs, the less chance that critical ailments can develop. https://culligan.com/home/solution-center/resources/drinking-water-fun-facts
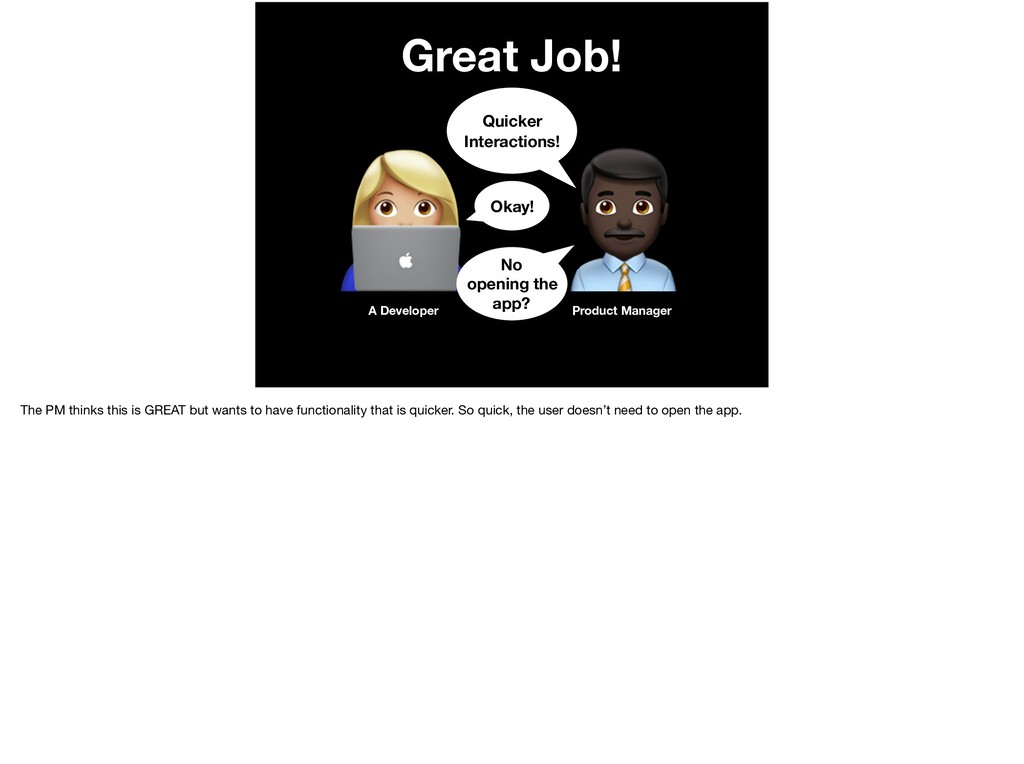
Okay! No opening the app? The PM thinks this is GREAT but wants to have functionality that is quicker. So quick, the user doesn’t need to open the app.
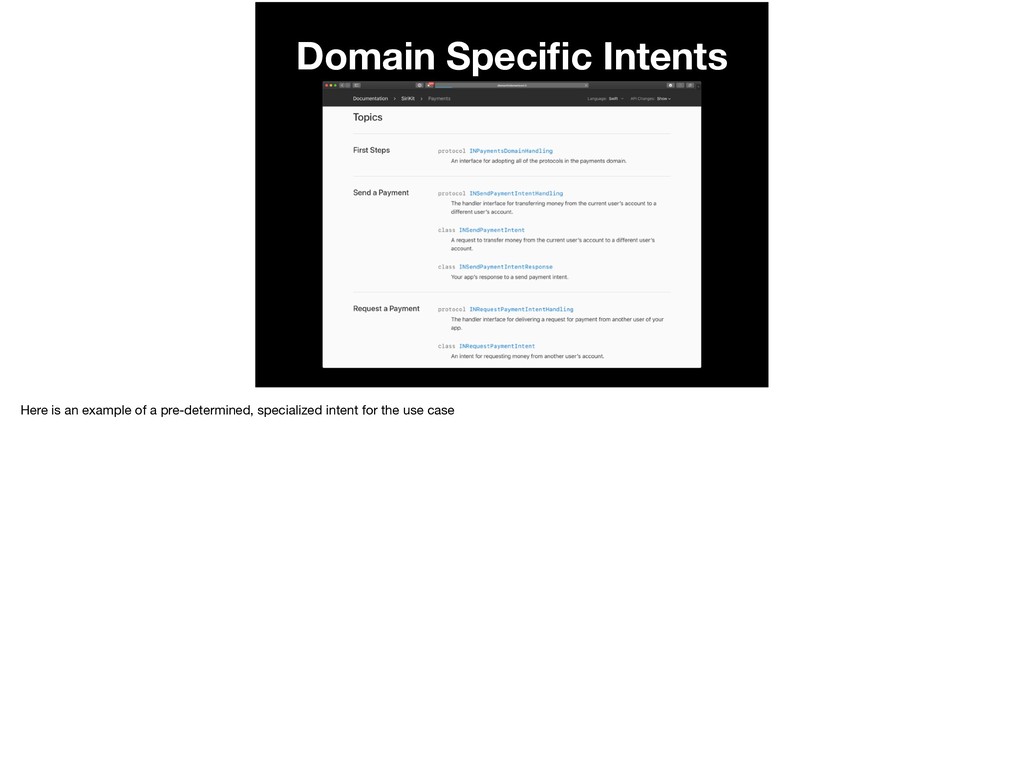
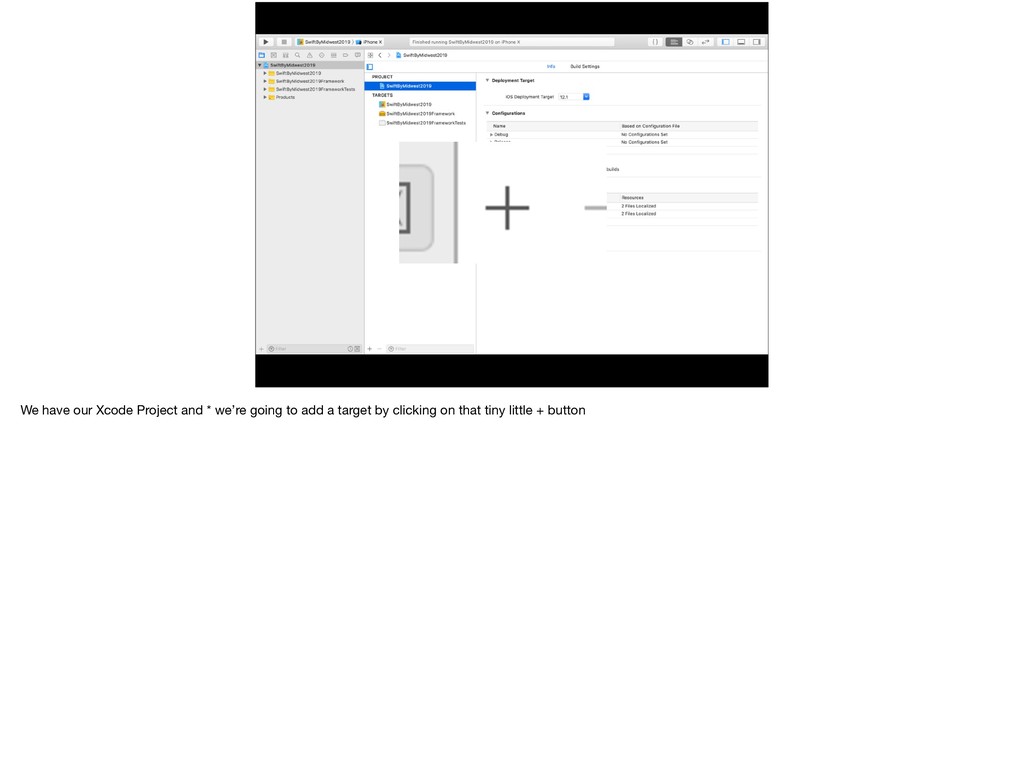
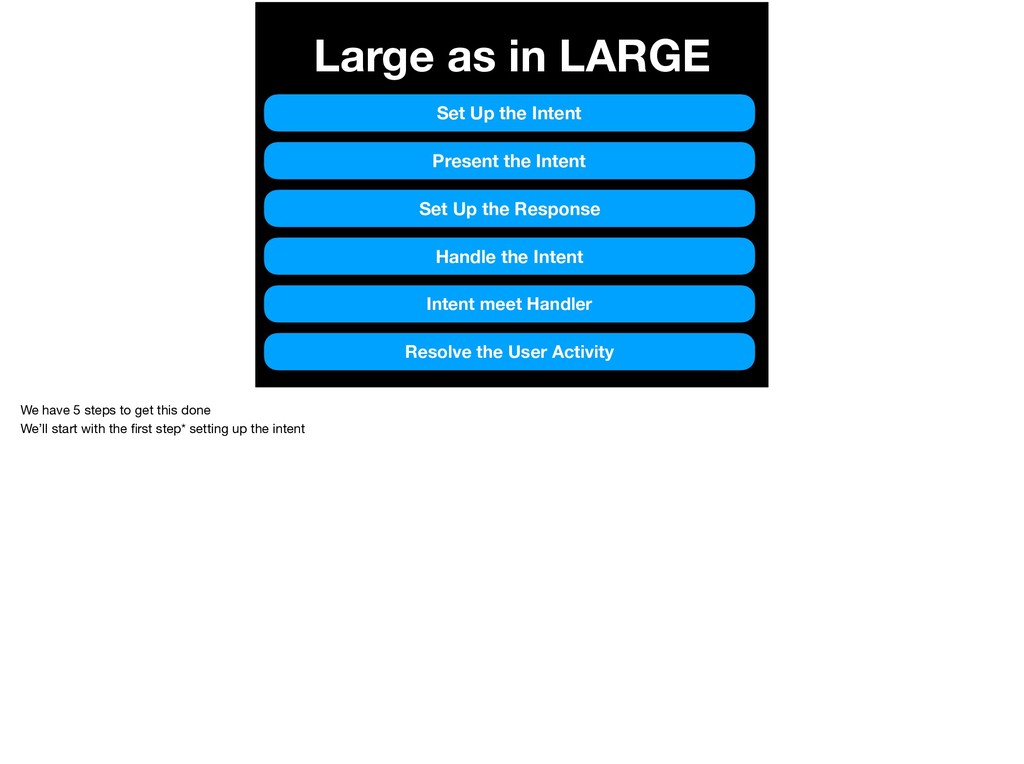
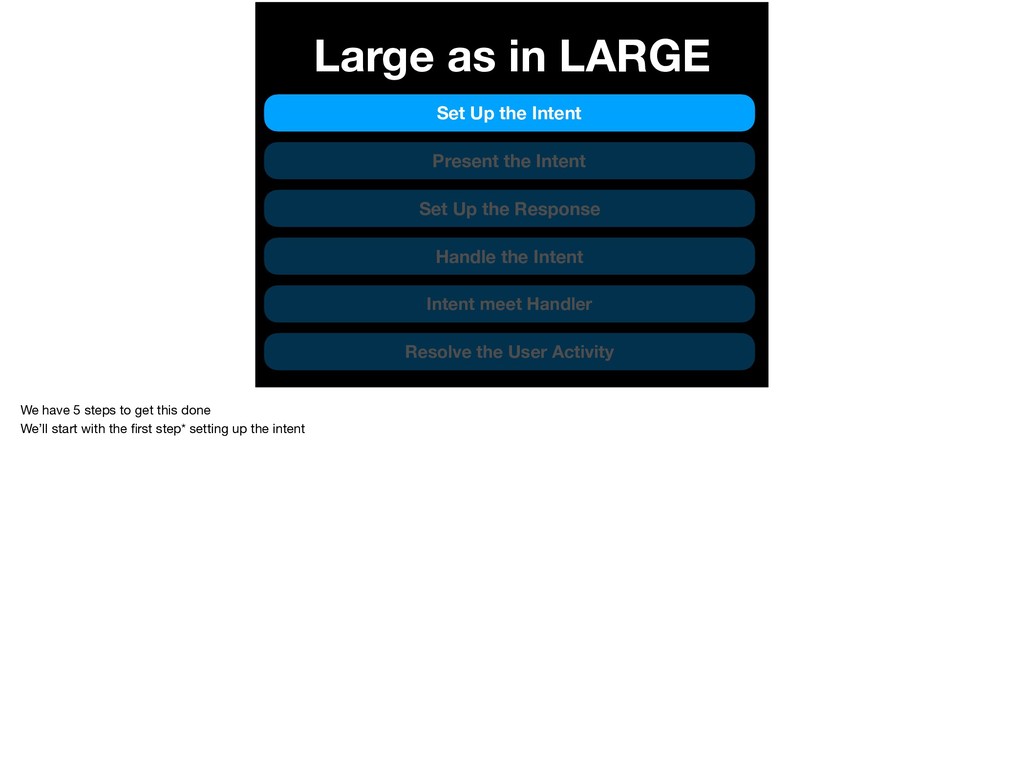
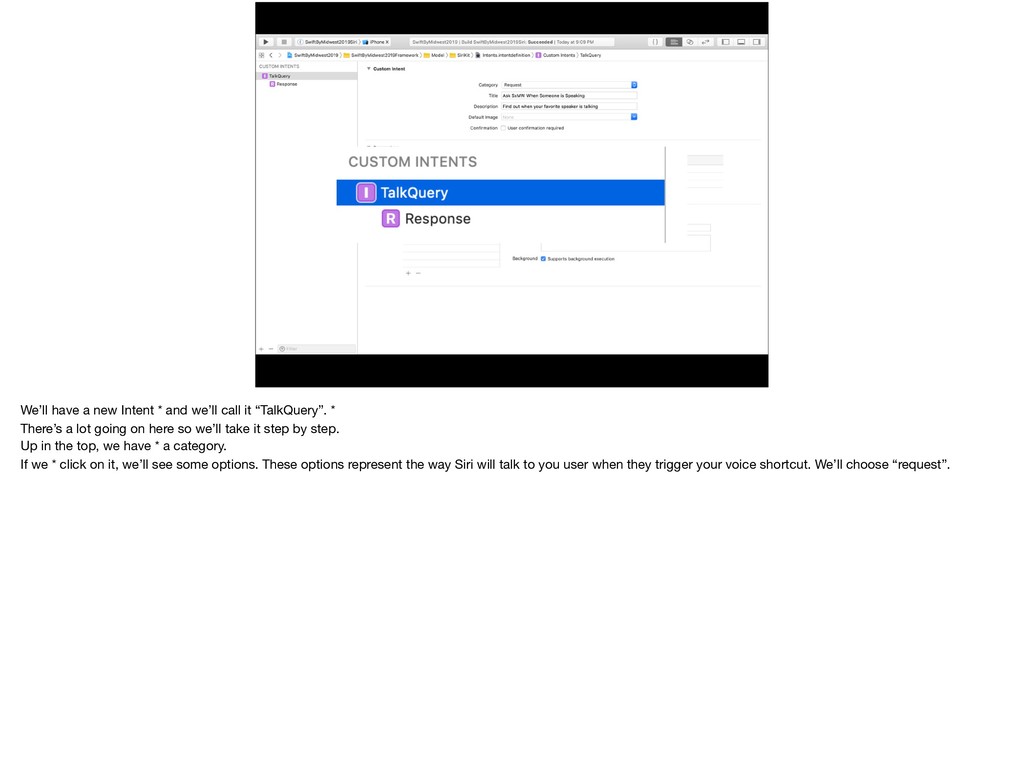
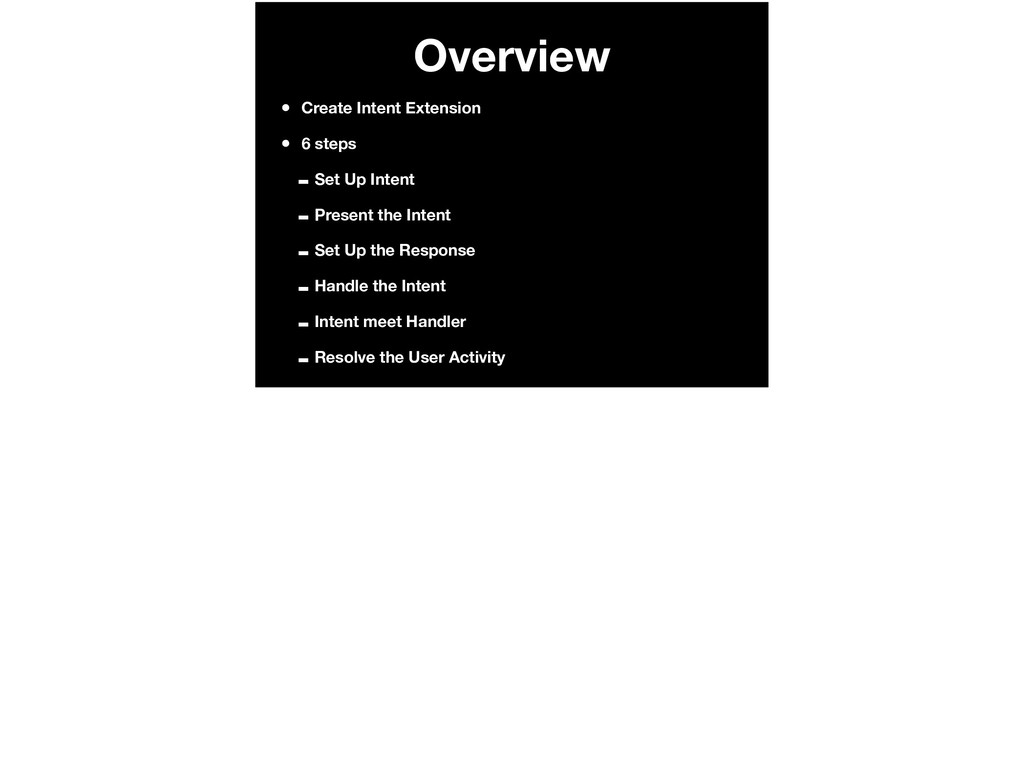
Intent Set Up the Response Handle the Intent Intent meet Handler Resolve the User Activity We have 5 steps to get this done We’ll start with the first step* setting up the intent
Intent Set Up the Response Handle the Intent Intent meet Handler Resolve the User Activity We have 5 steps to get this done We’ll start with the first step* setting up the intent
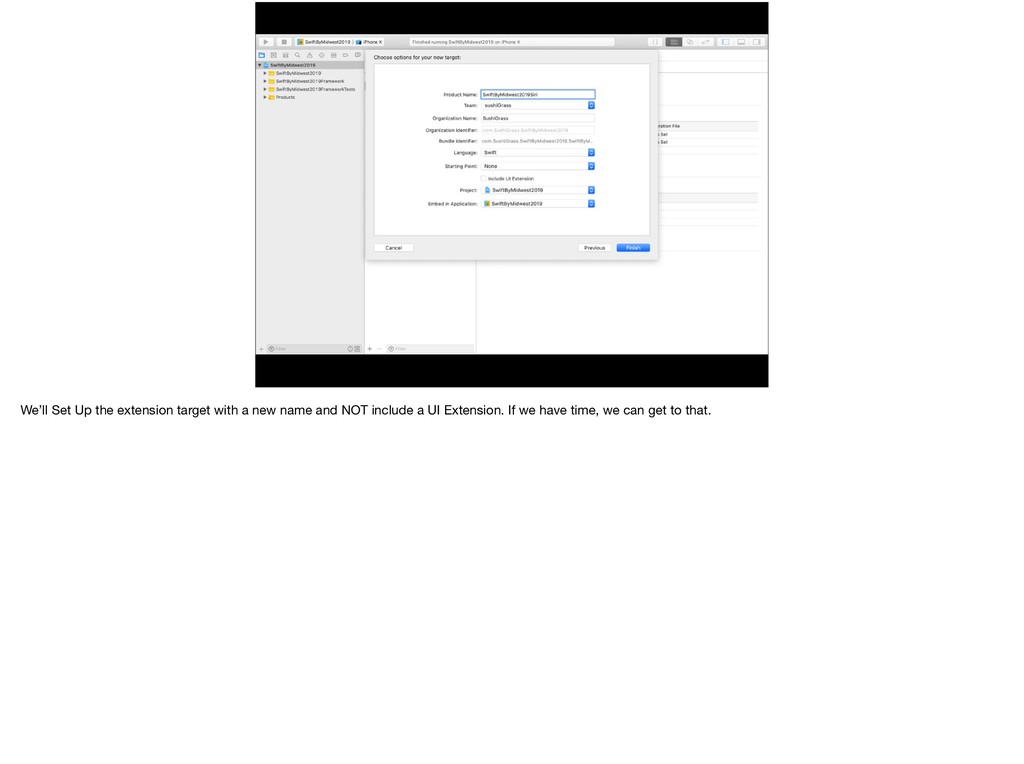
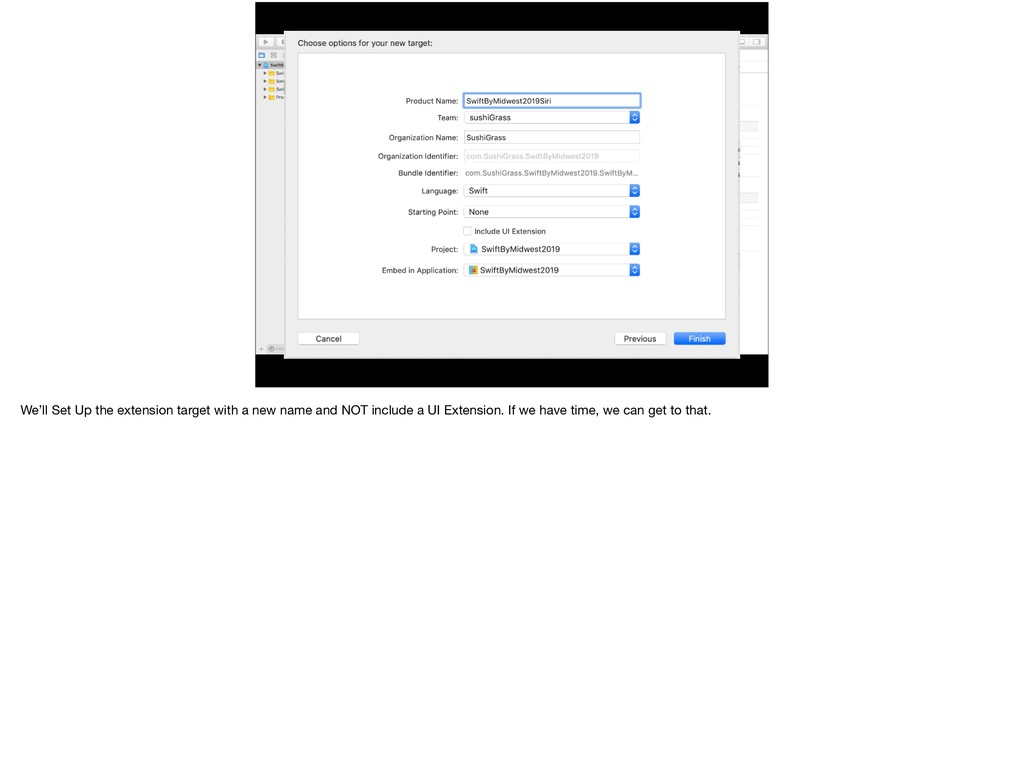
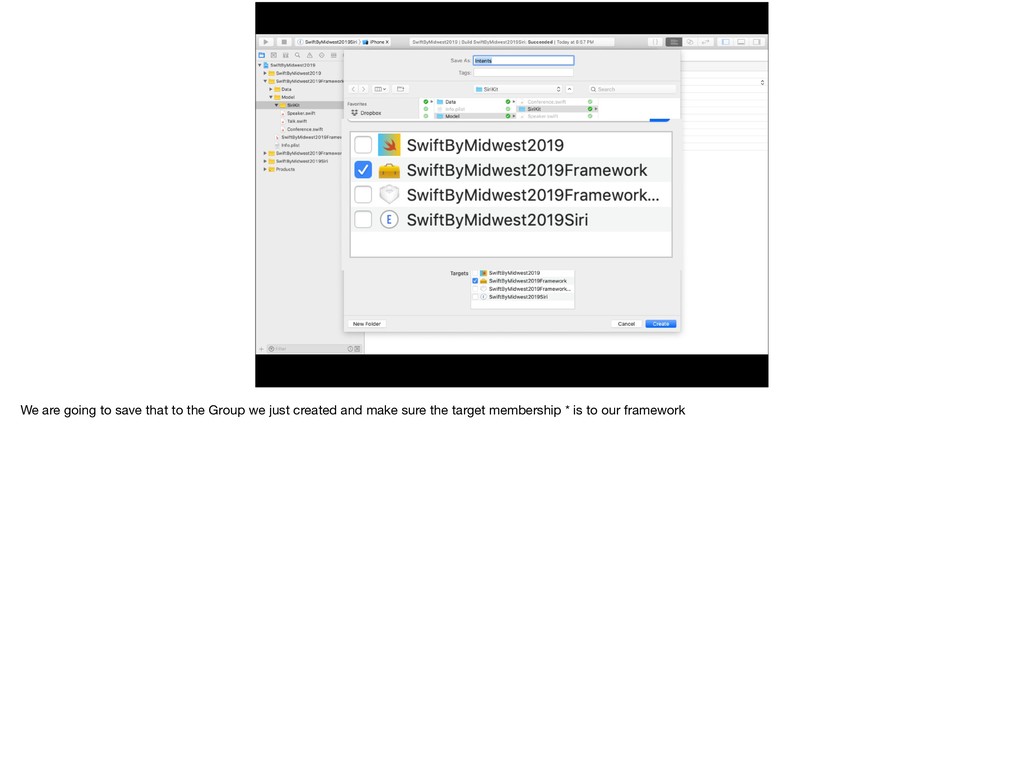
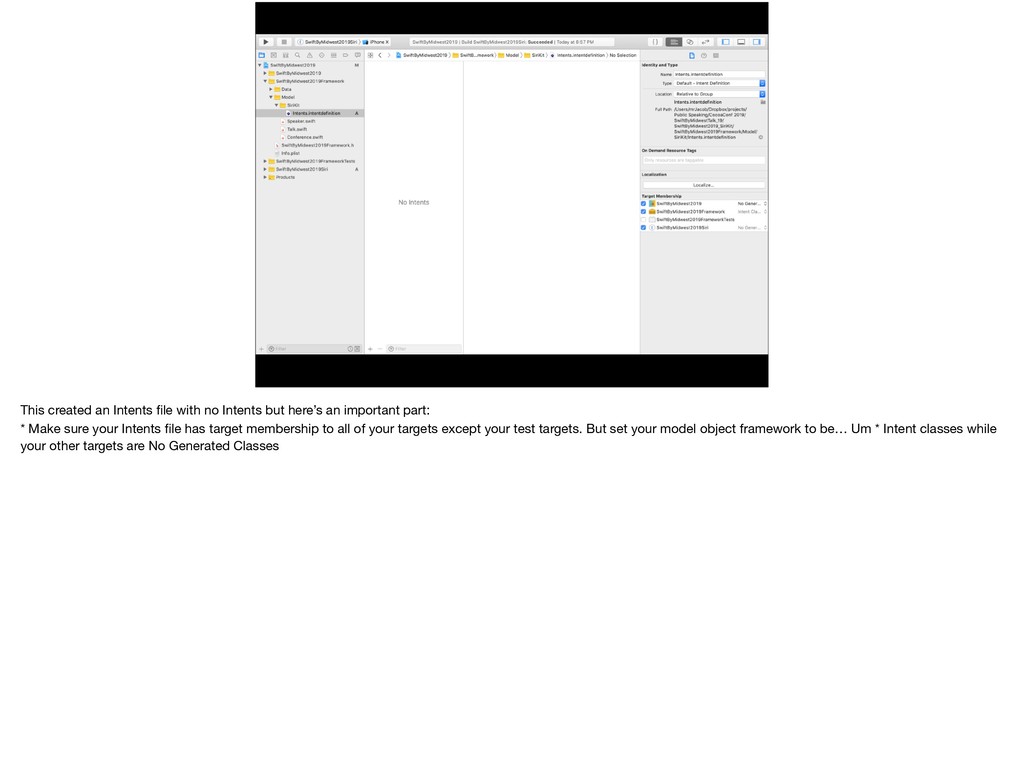
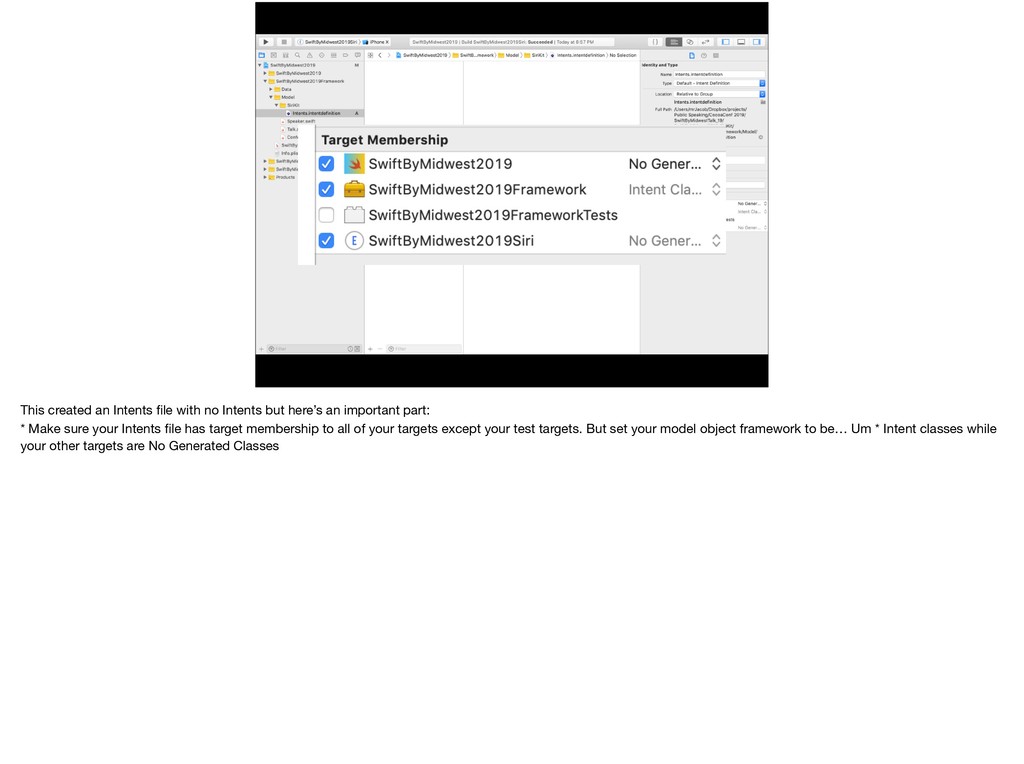
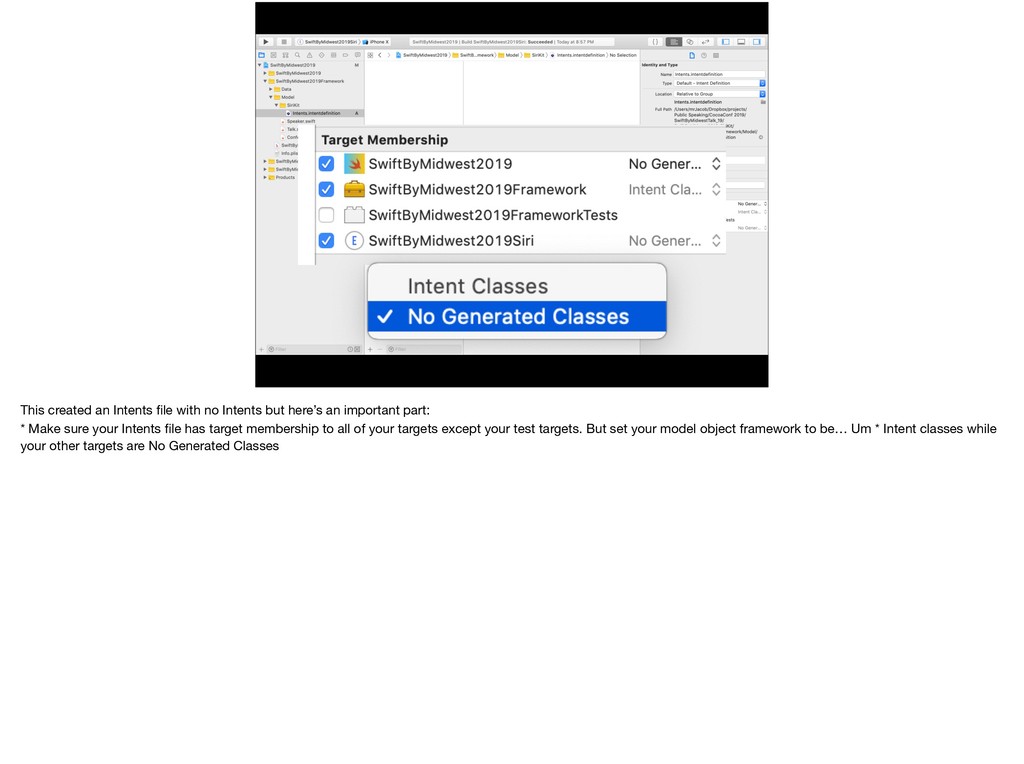
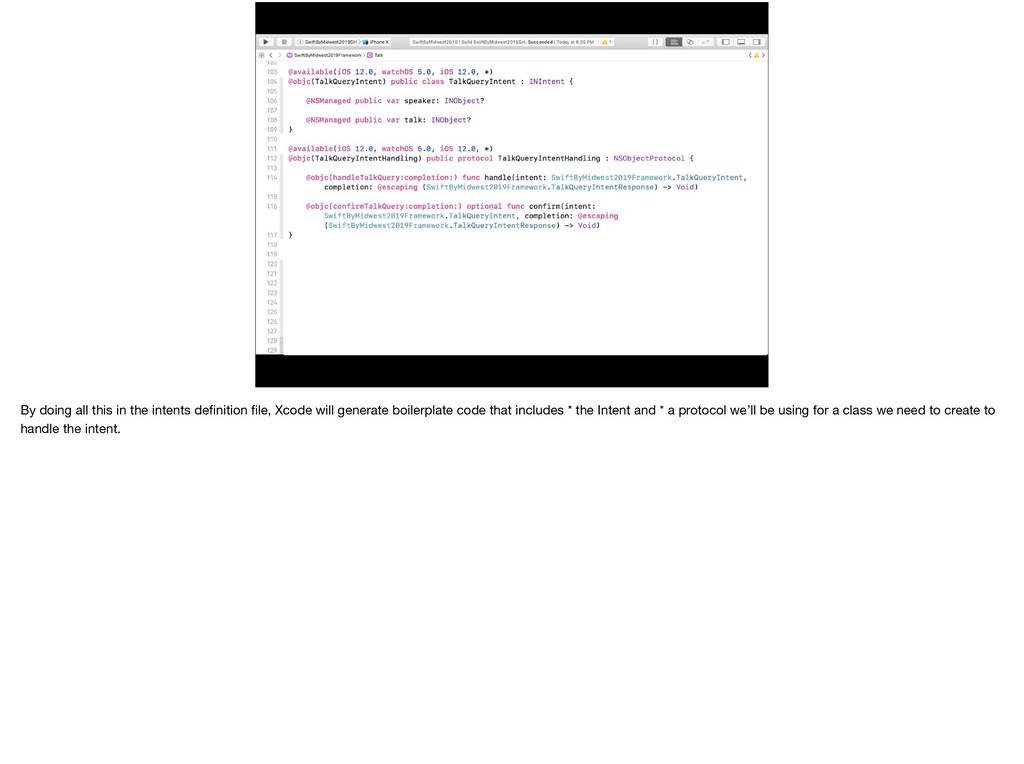
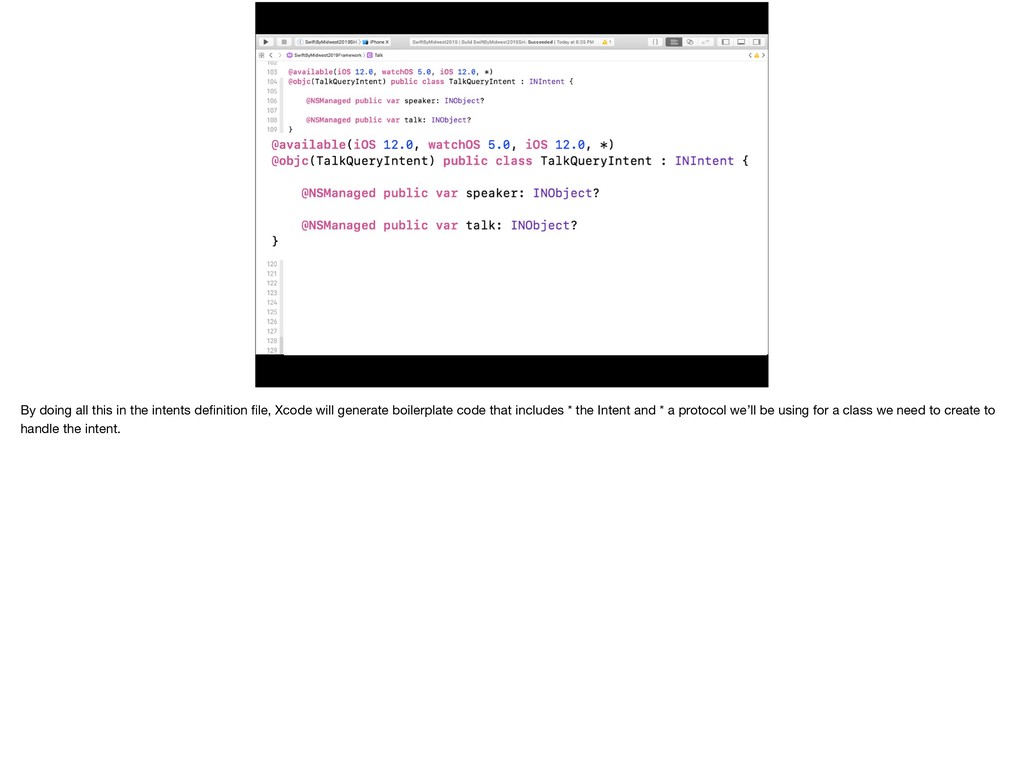
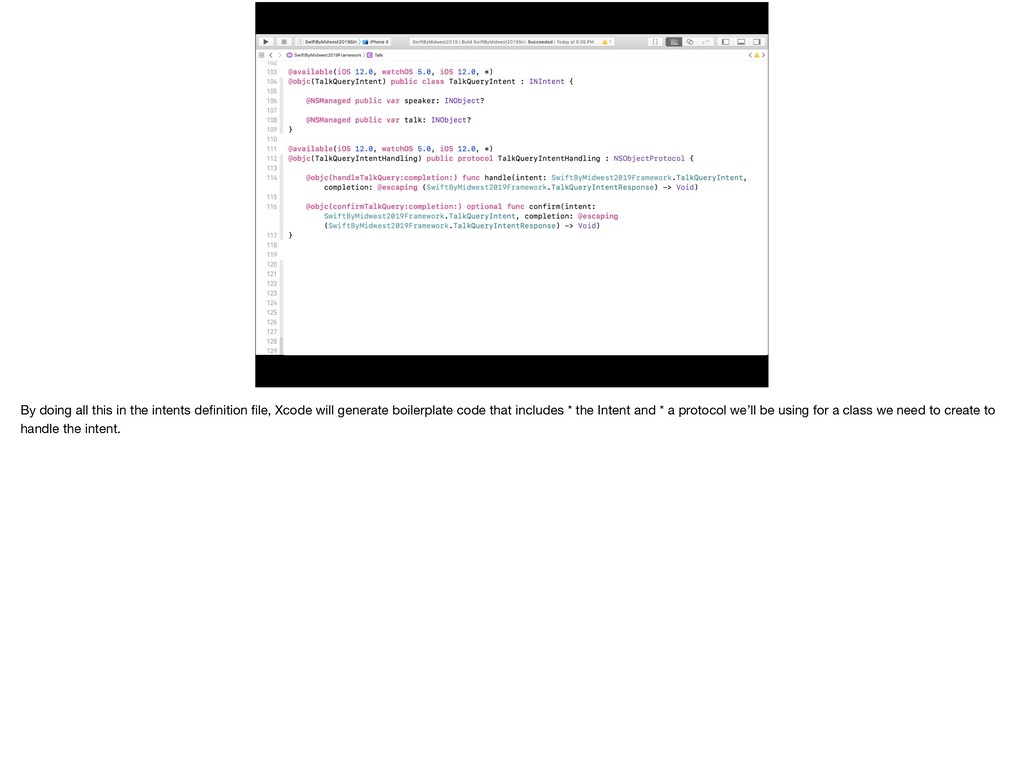
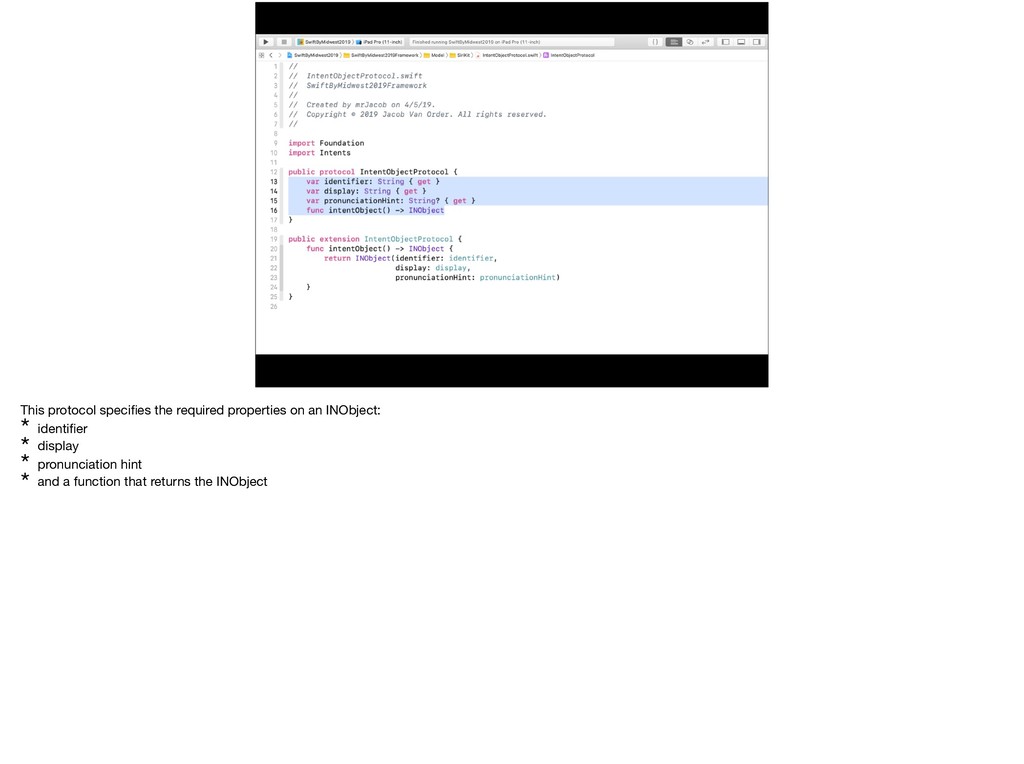
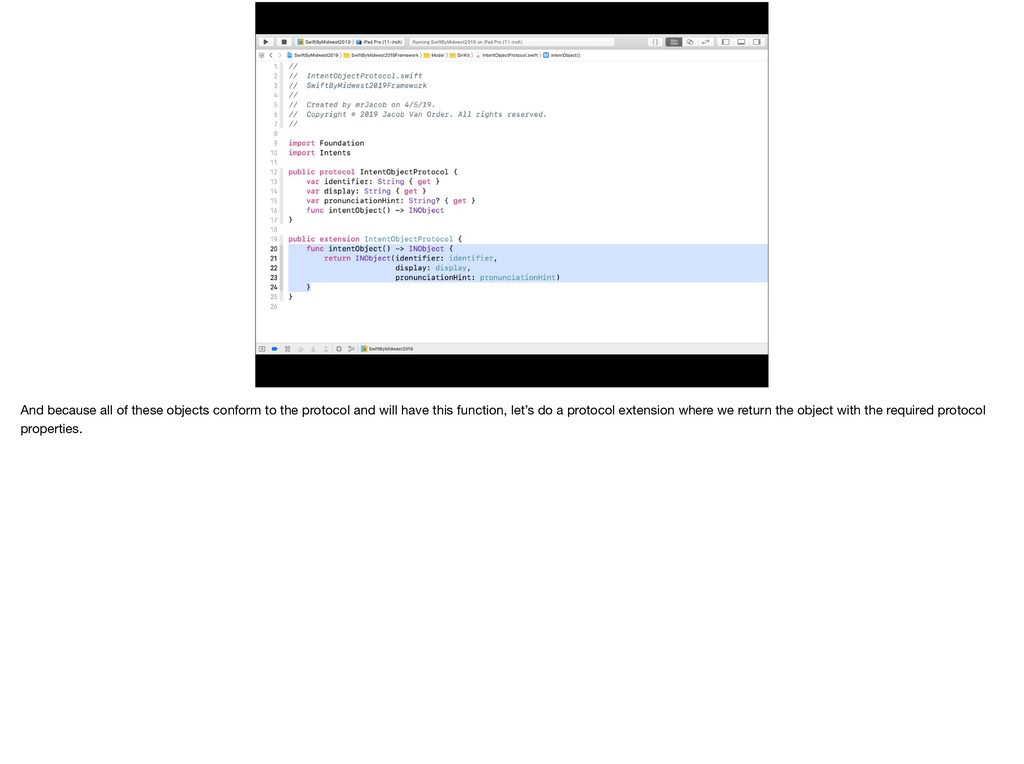
an important part: * Make sure your Intents file has target membership to all of your targets except your test targets. But set your model object framework to be… Um * Intent classes while your other targets are No Generated Classes
an important part: * Make sure your Intents file has target membership to all of your targets except your test targets. But set your model object framework to be… Um * Intent classes while your other targets are No Generated Classes
an important part: * Make sure your Intents file has target membership to all of your targets except your test targets. But set your model object framework to be… Um * Intent classes while your other targets are No Generated Classes
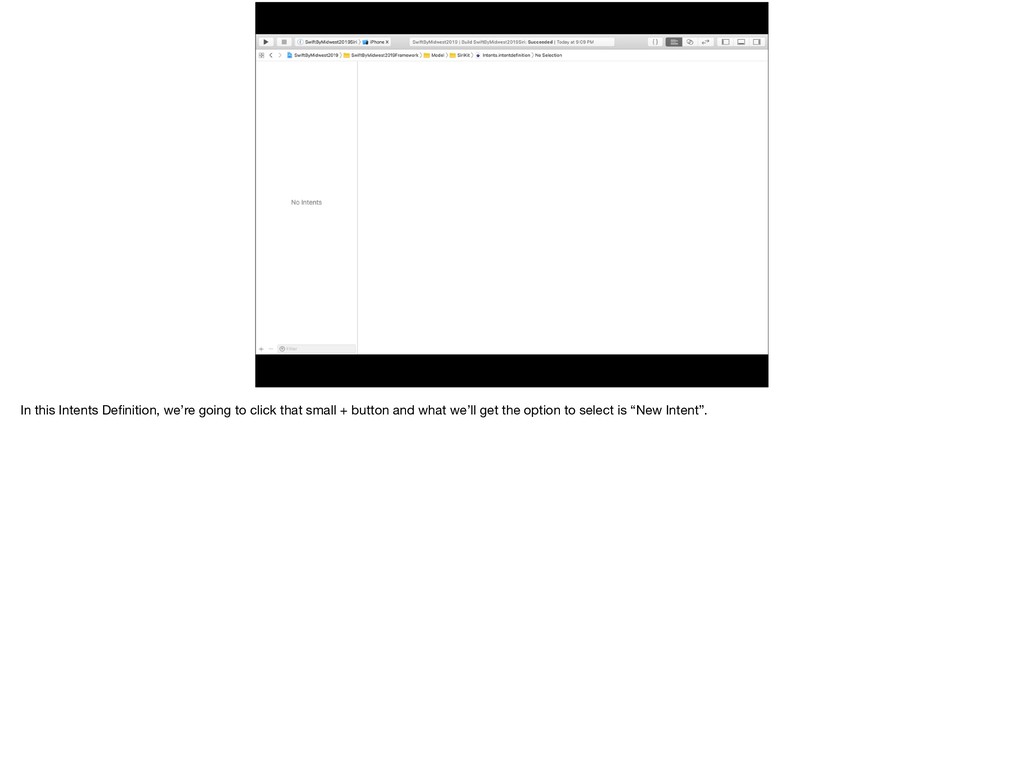
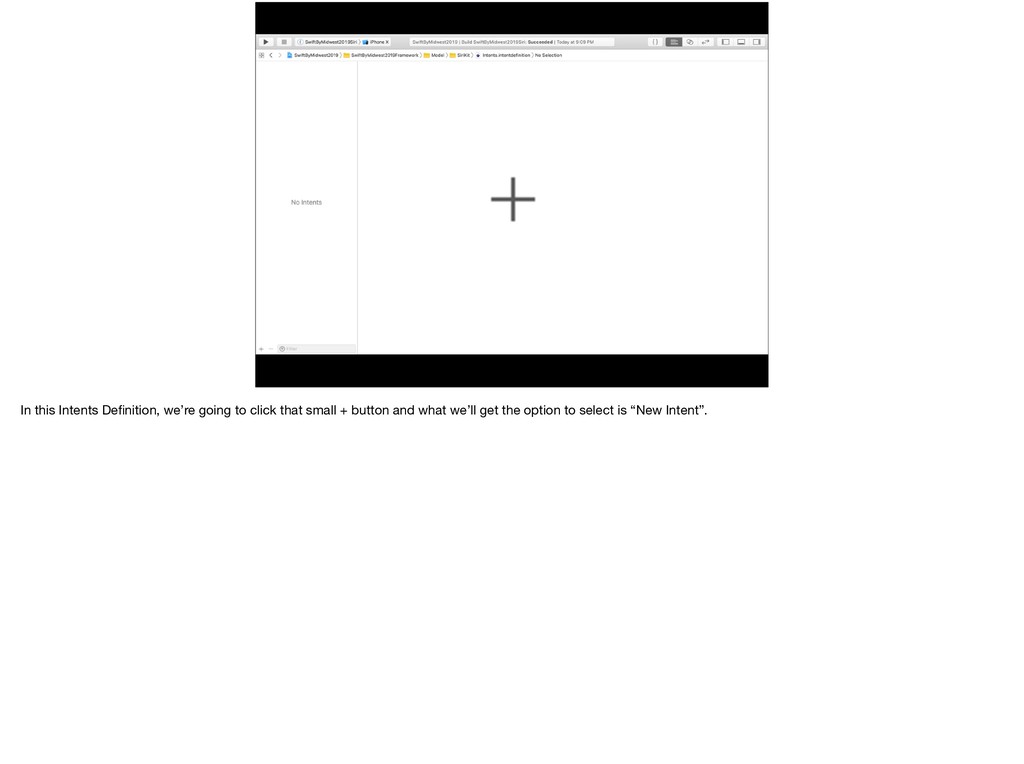
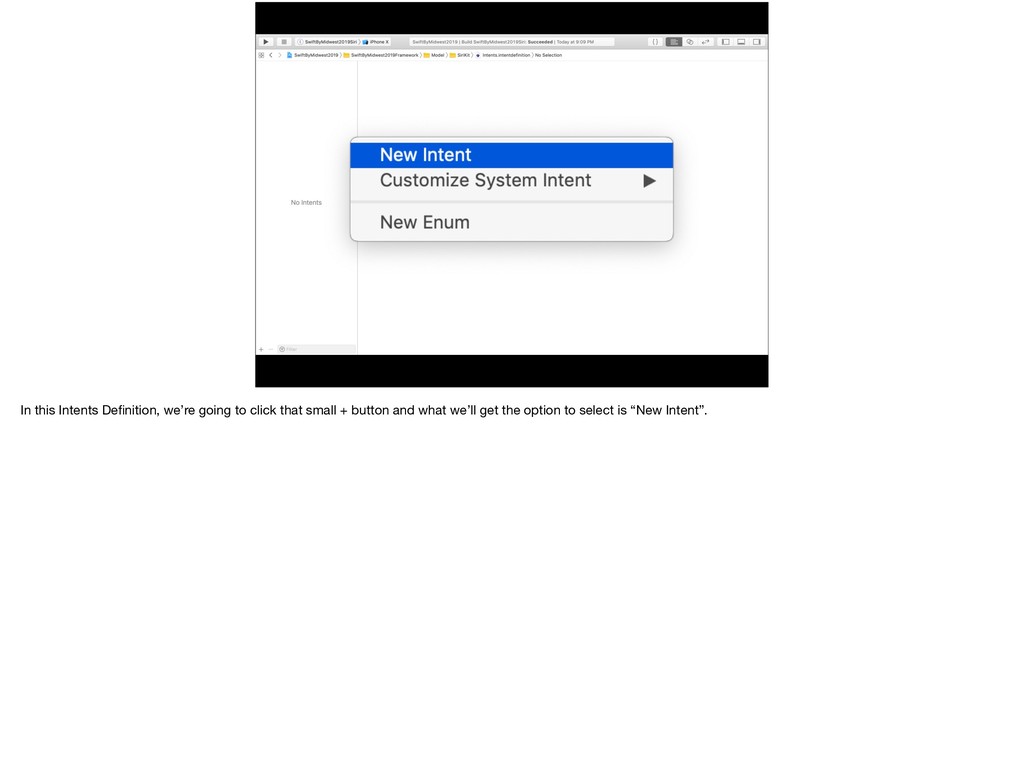
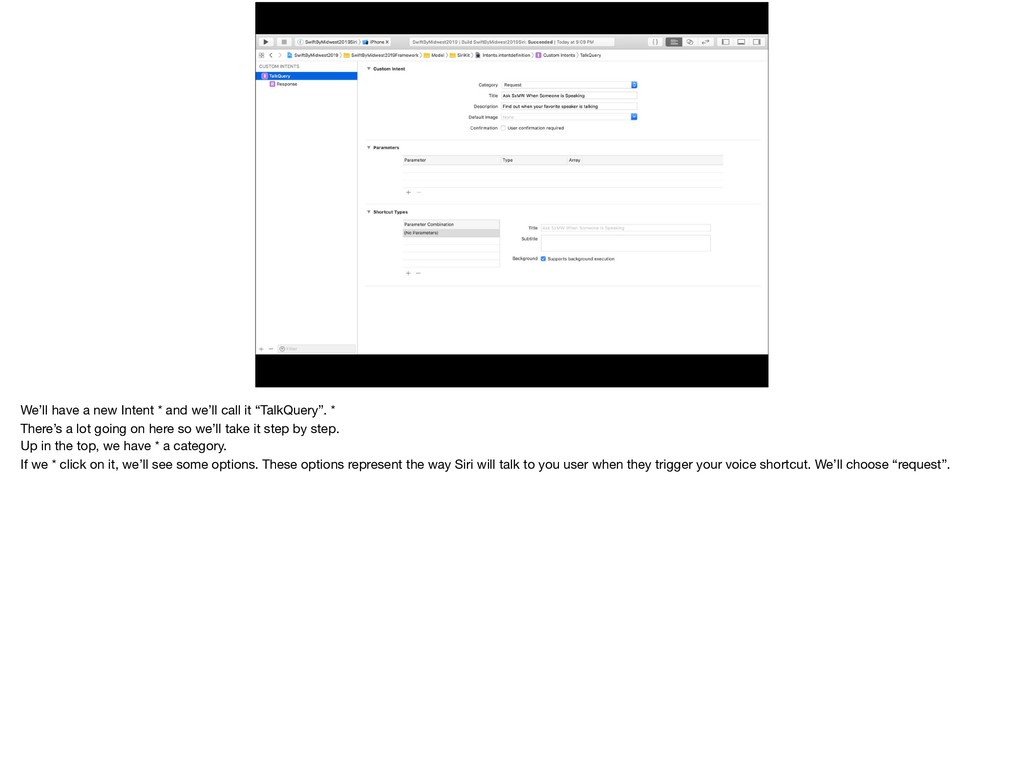
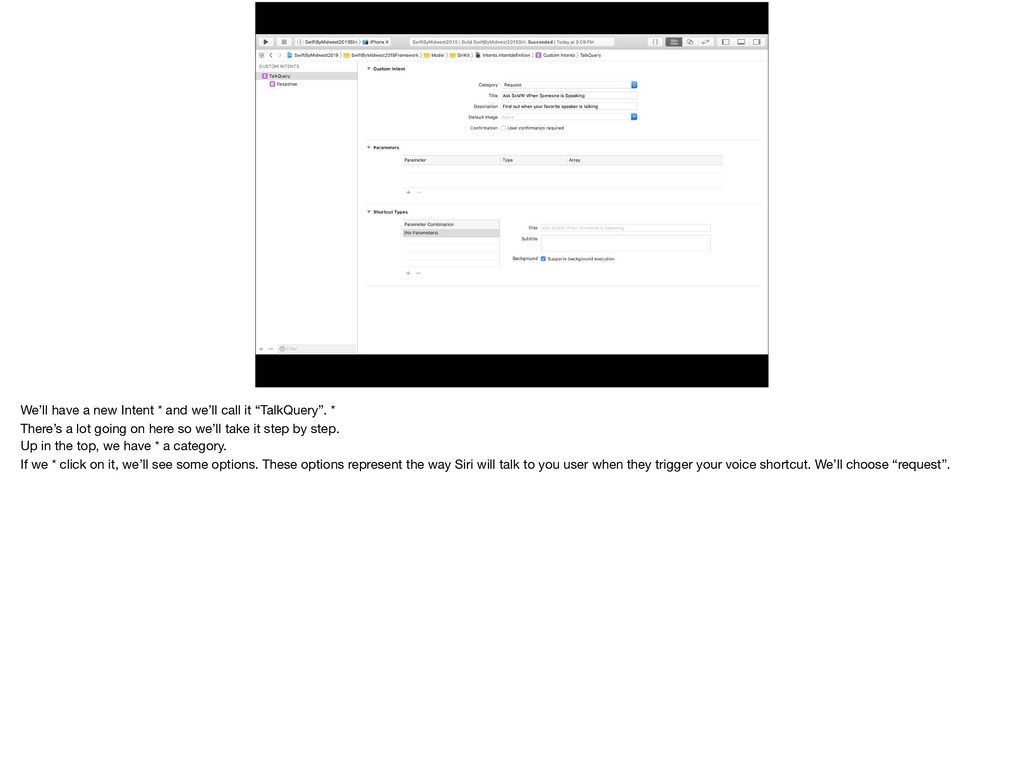
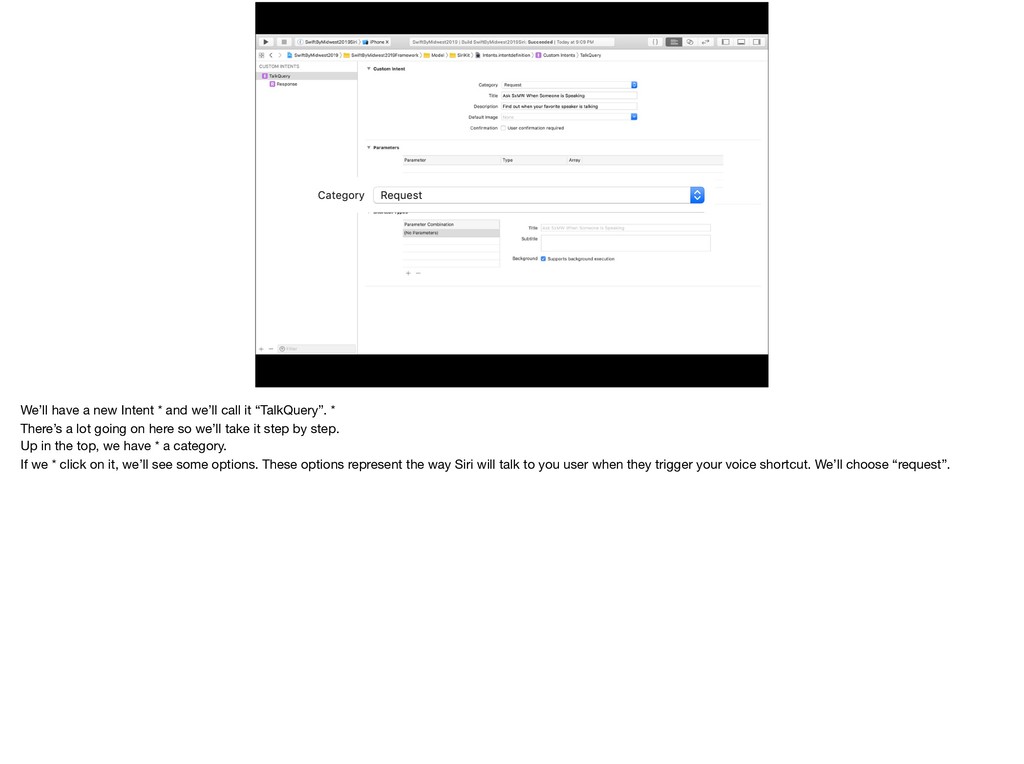
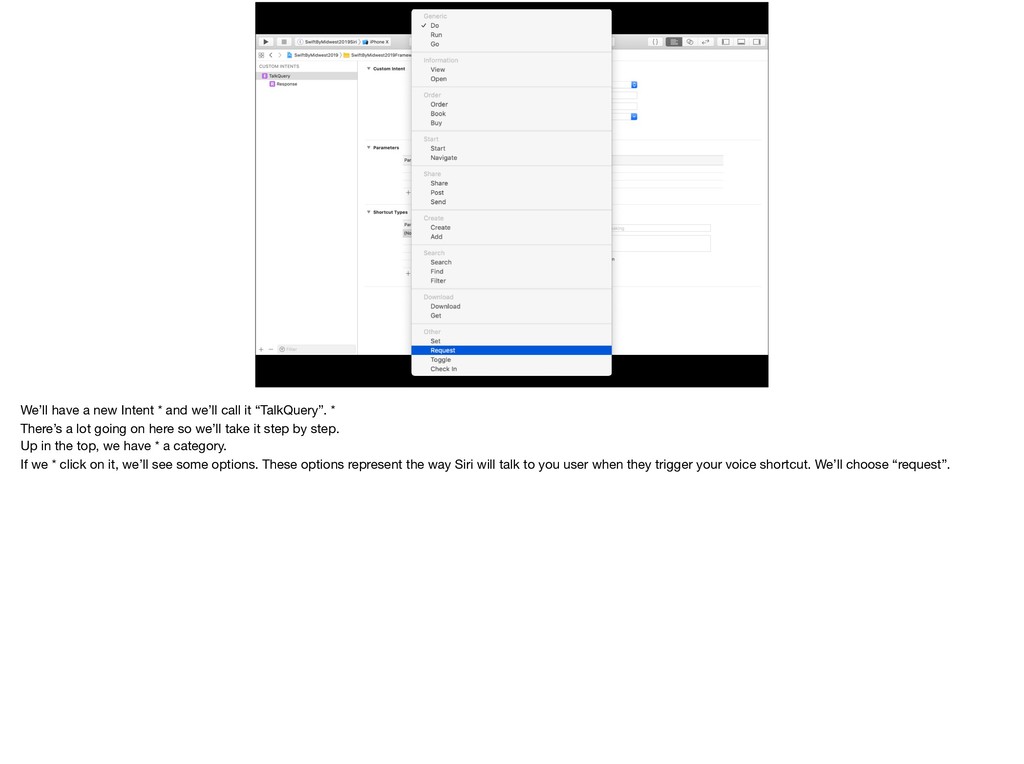
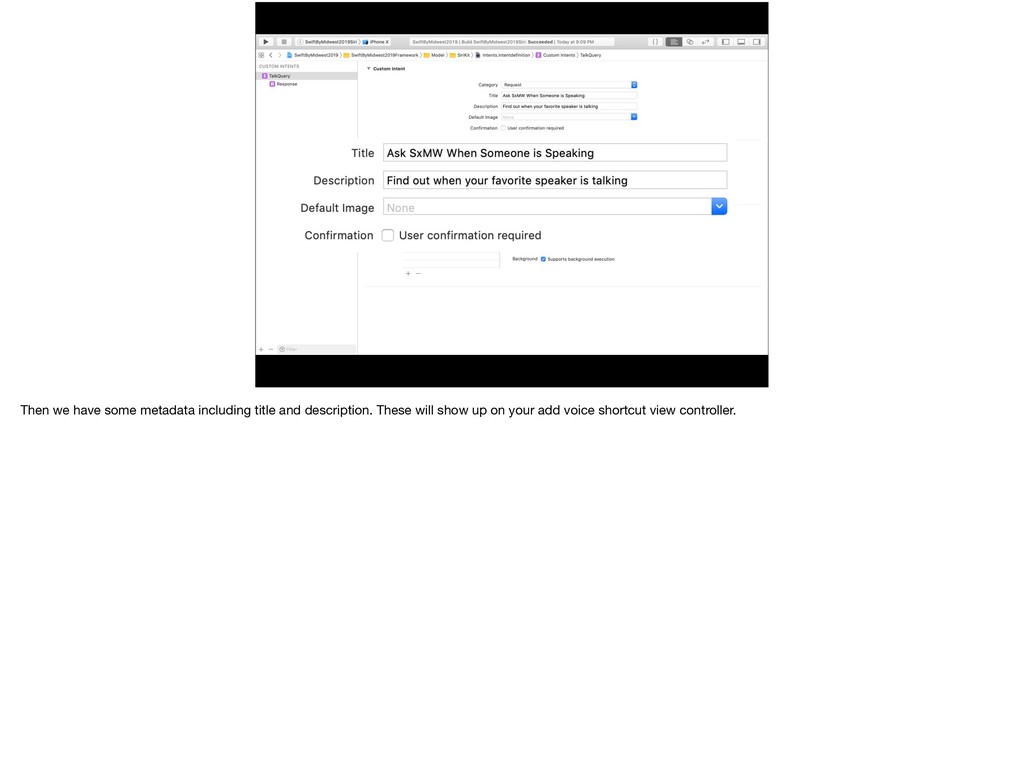
“TalkQuery”. * There’s a lot going on here so we’ll take it step by step. Up in the top, we have * a category. If we * click on it, we’ll see some options. These options represent the way Siri will talk to you user when they trigger your voice shortcut. We’ll choose “request”.
“TalkQuery”. * There’s a lot going on here so we’ll take it step by step. Up in the top, we have * a category. If we * click on it, we’ll see some options. These options represent the way Siri will talk to you user when they trigger your voice shortcut. We’ll choose “request”.
“TalkQuery”. * There’s a lot going on here so we’ll take it step by step. Up in the top, we have * a category. If we * click on it, we’ll see some options. These options represent the way Siri will talk to you user when they trigger your voice shortcut. We’ll choose “request”.
“TalkQuery”. * There’s a lot going on here so we’ll take it step by step. Up in the top, we have * a category. If we * click on it, we’ll see some options. These options represent the way Siri will talk to you user when they trigger your voice shortcut. We’ll choose “request”.
“TalkQuery”. * There’s a lot going on here so we’ll take it step by step. Up in the top, we have * a category. If we * click on it, we’ll see some options. These options represent the way Siri will talk to you user when they trigger your voice shortcut. We’ll choose “request”.
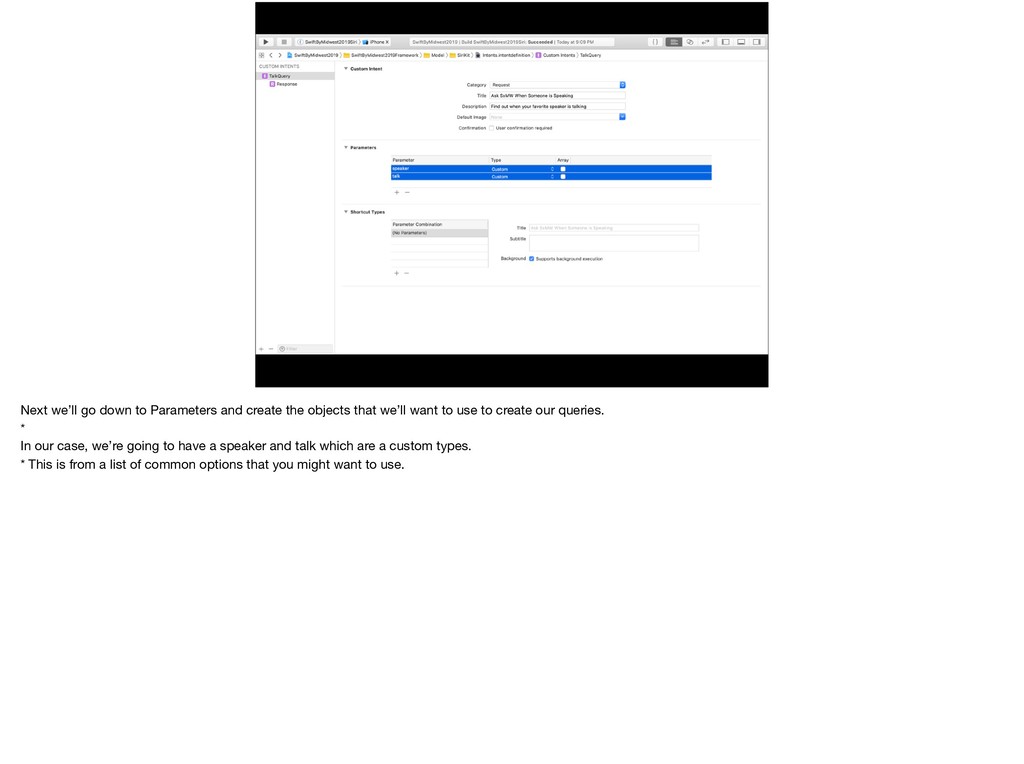
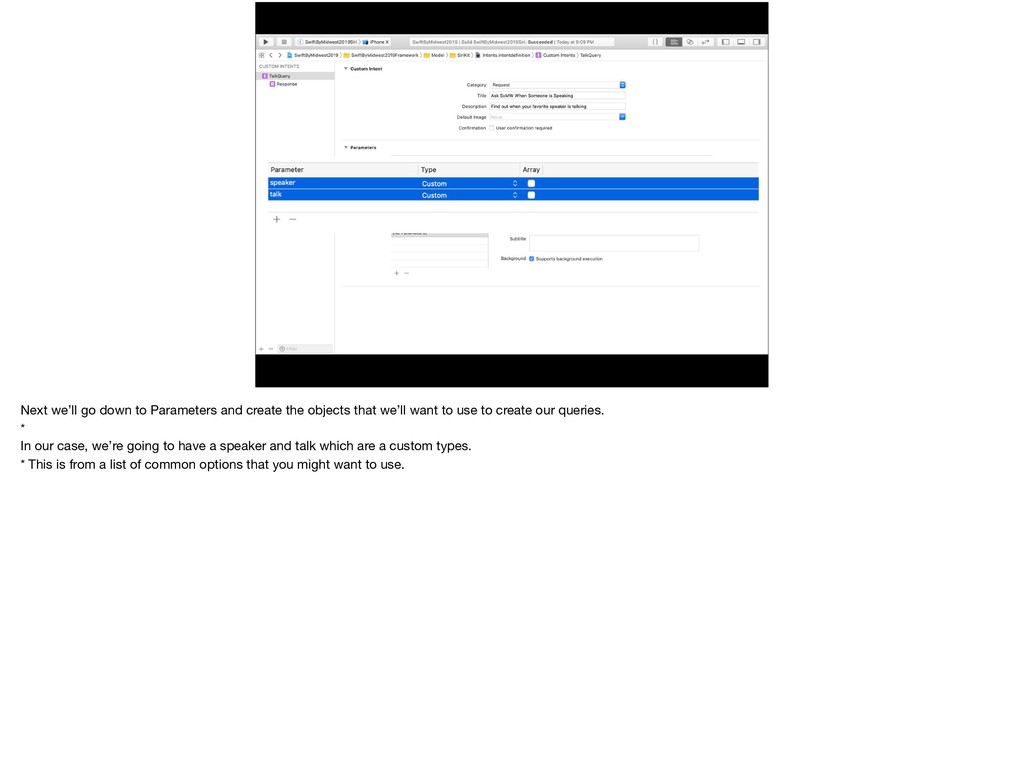
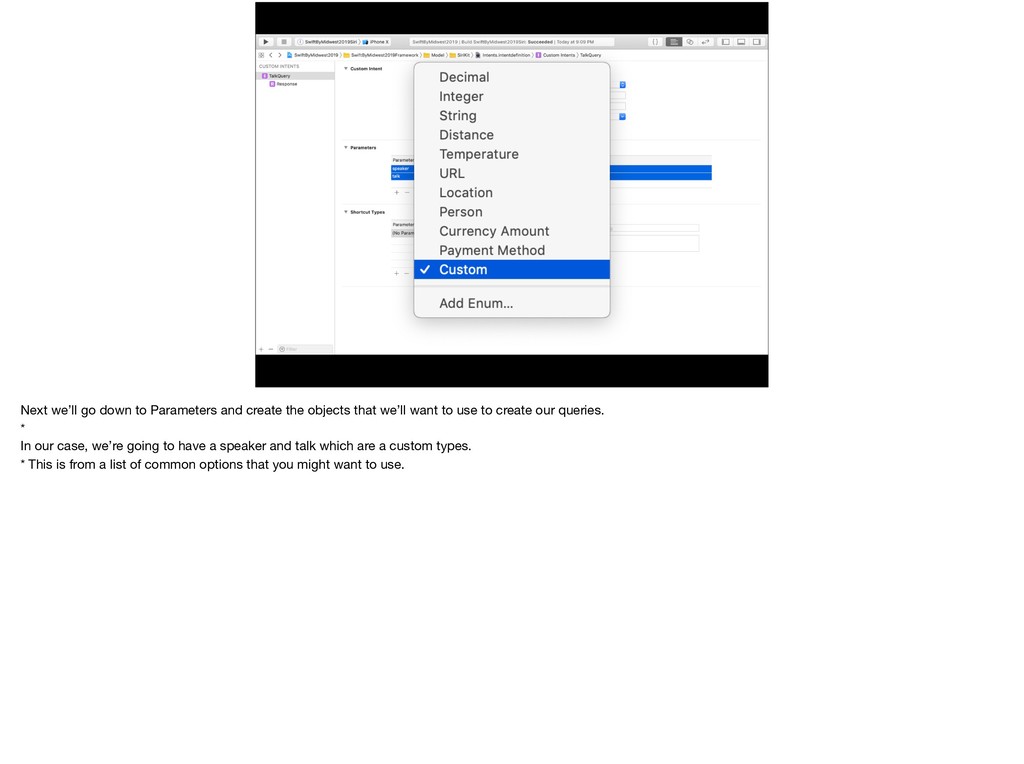
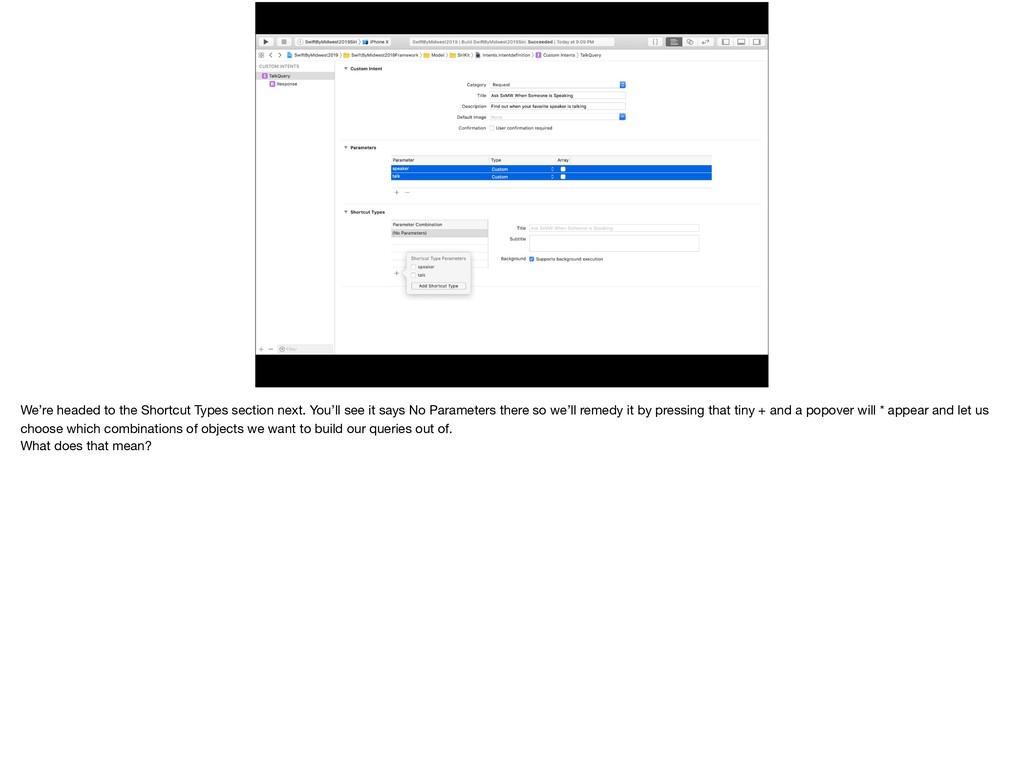
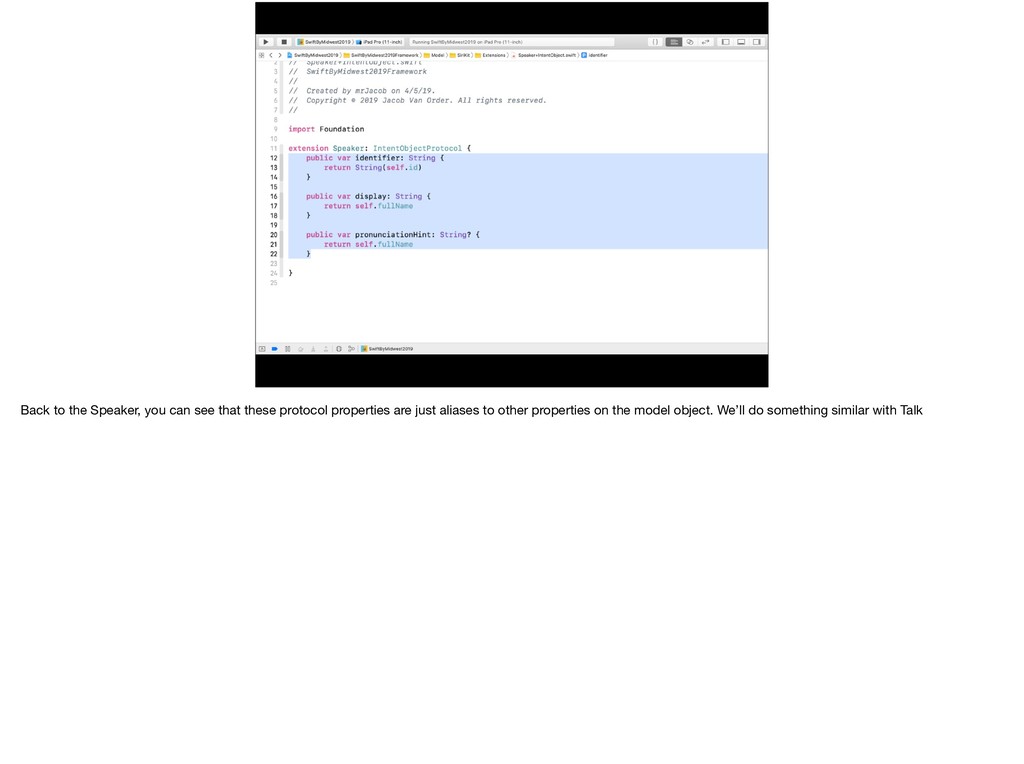
that we’ll want to use to create our queries. * In our case, we’re going to have a speaker and talk which are a custom types. * This is from a list of common options that you might want to use.
that we’ll want to use to create our queries. * In our case, we’re going to have a speaker and talk which are a custom types. * This is from a list of common options that you might want to use.
that we’ll want to use to create our queries. * In our case, we’re going to have a speaker and talk which are a custom types. * This is from a list of common options that you might want to use.
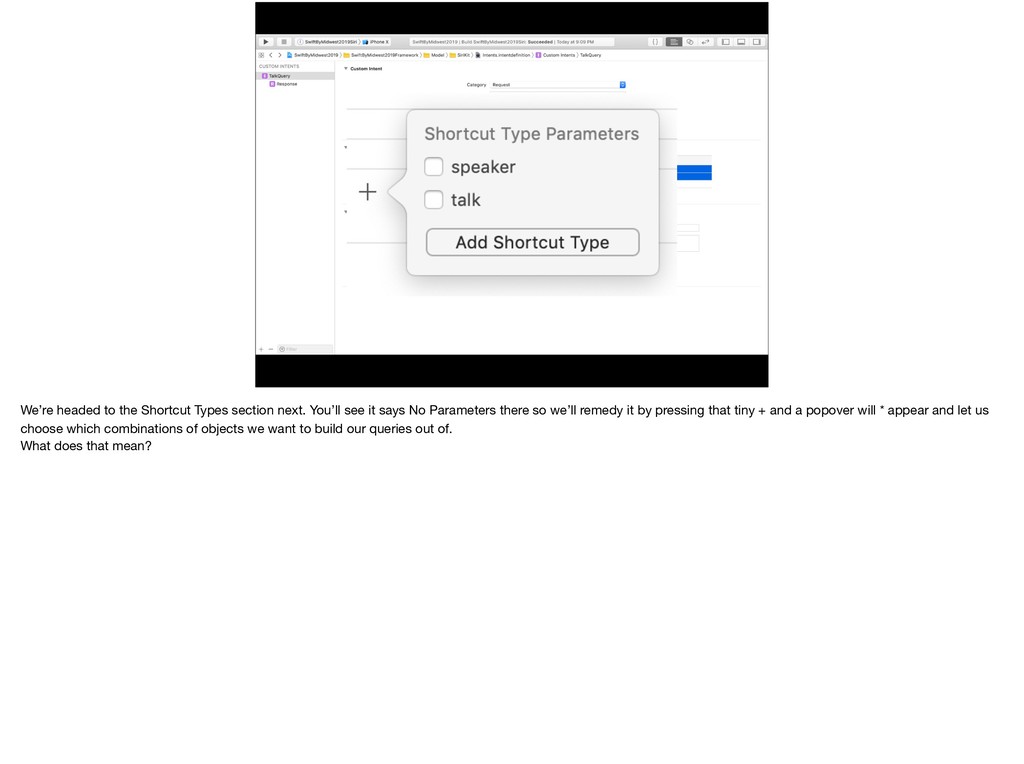
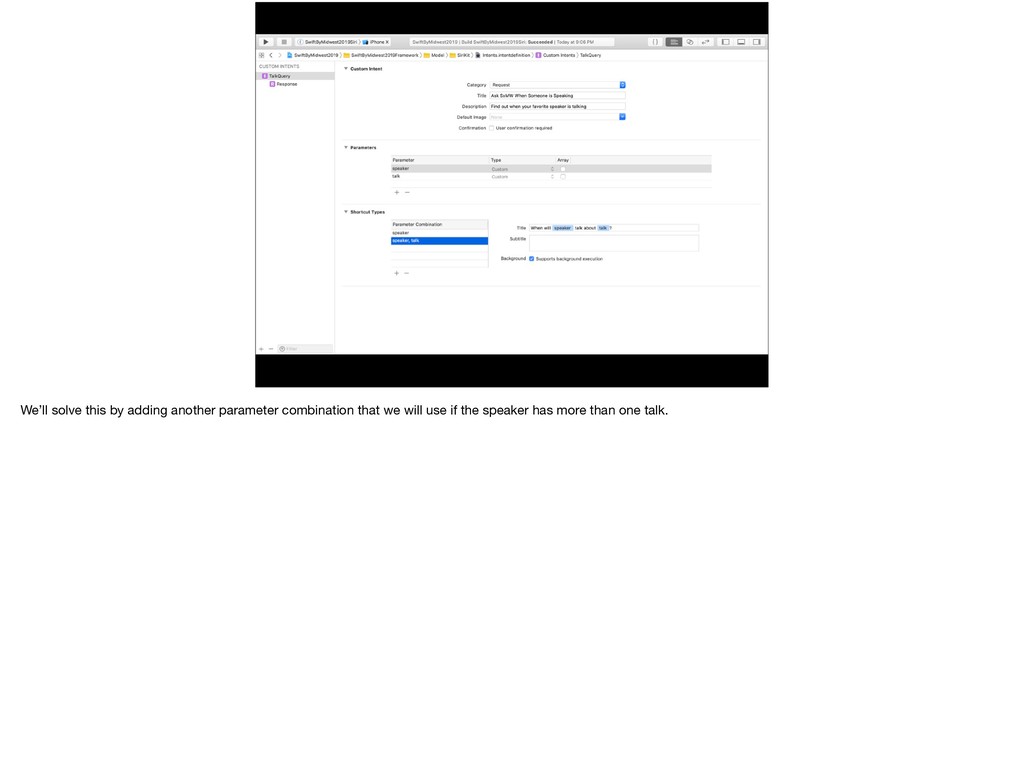
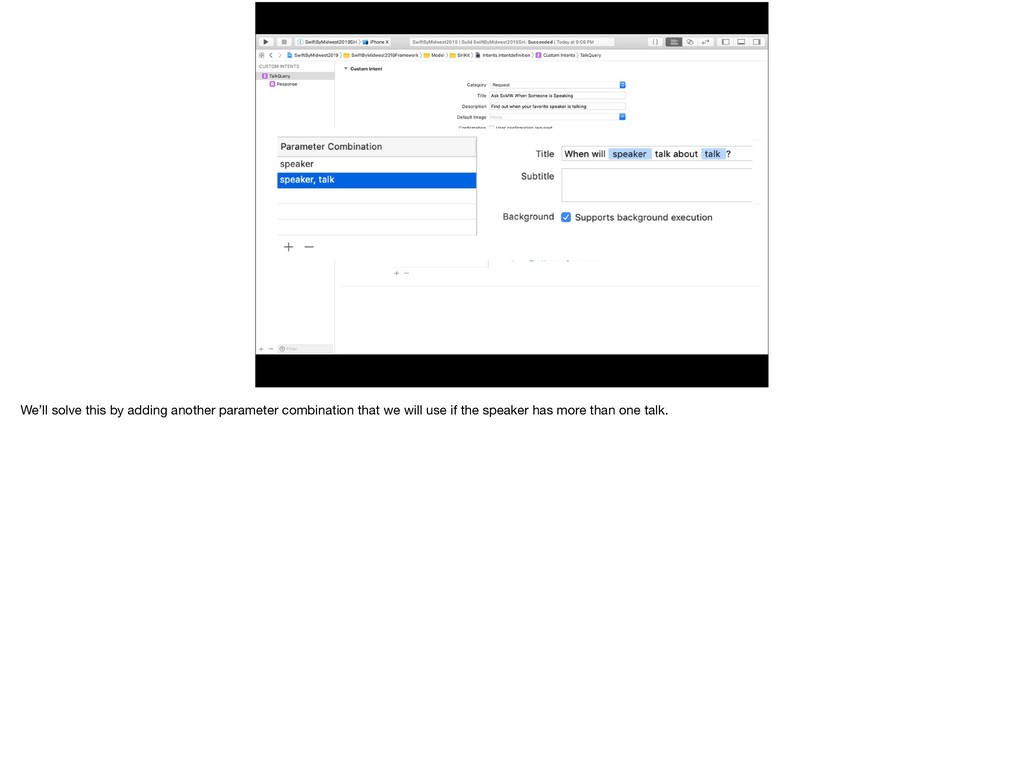
it says No Parameters there so we’ll remedy it by pressing that tiny + and a popover will * appear and let us choose which combinations of objects we want to build our queries out of. What does that mean?
it says No Parameters there so we’ll remedy it by pressing that tiny + and a popover will * appear and let us choose which combinations of objects we want to build our queries out of. What does that mean?
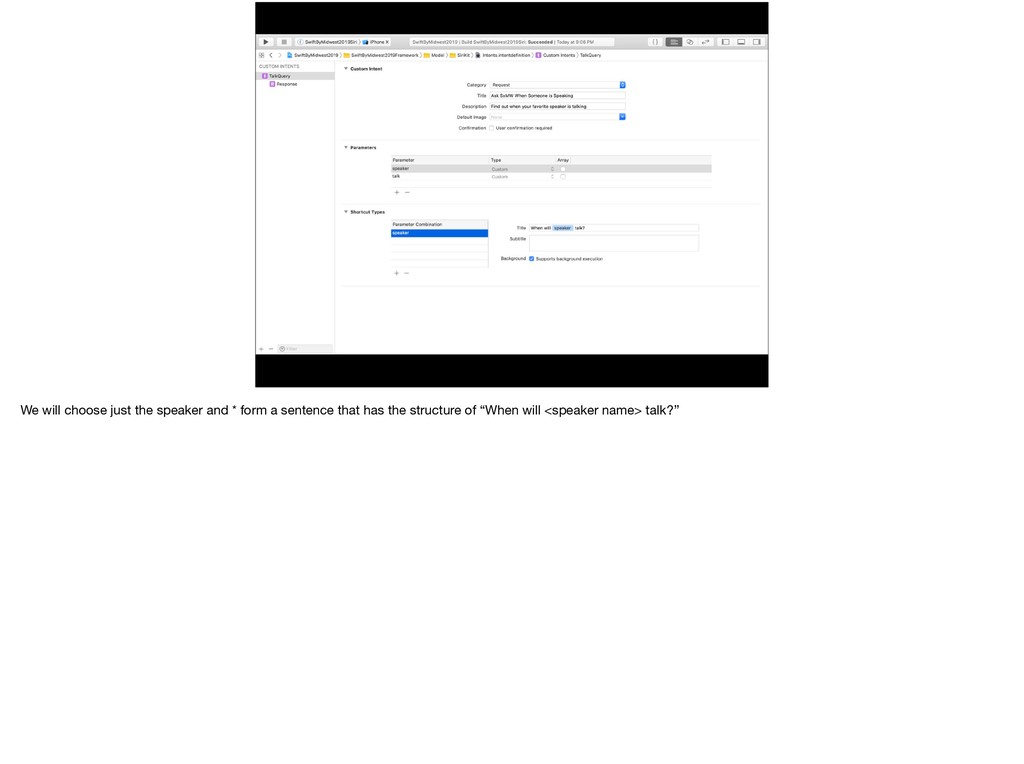
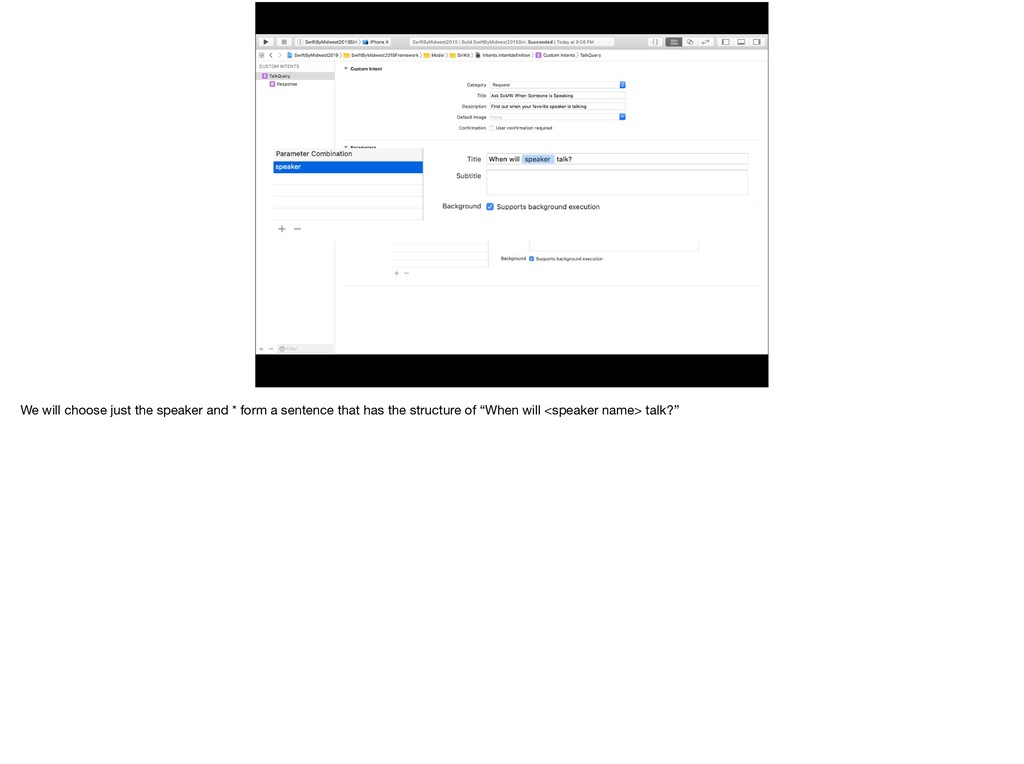
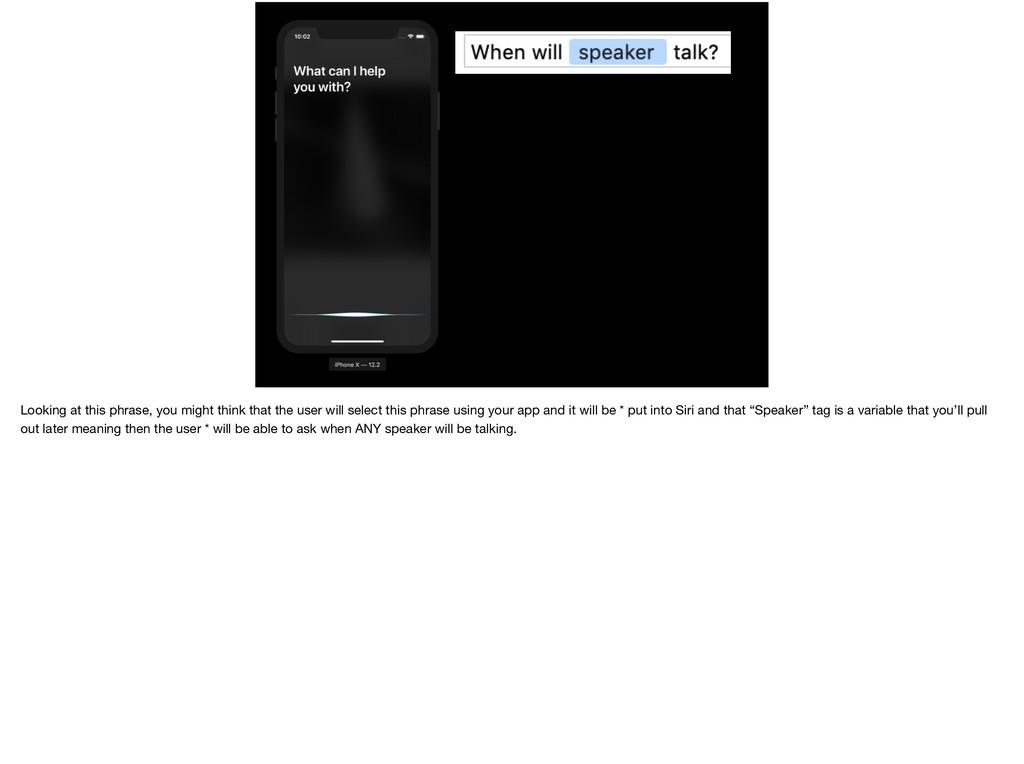
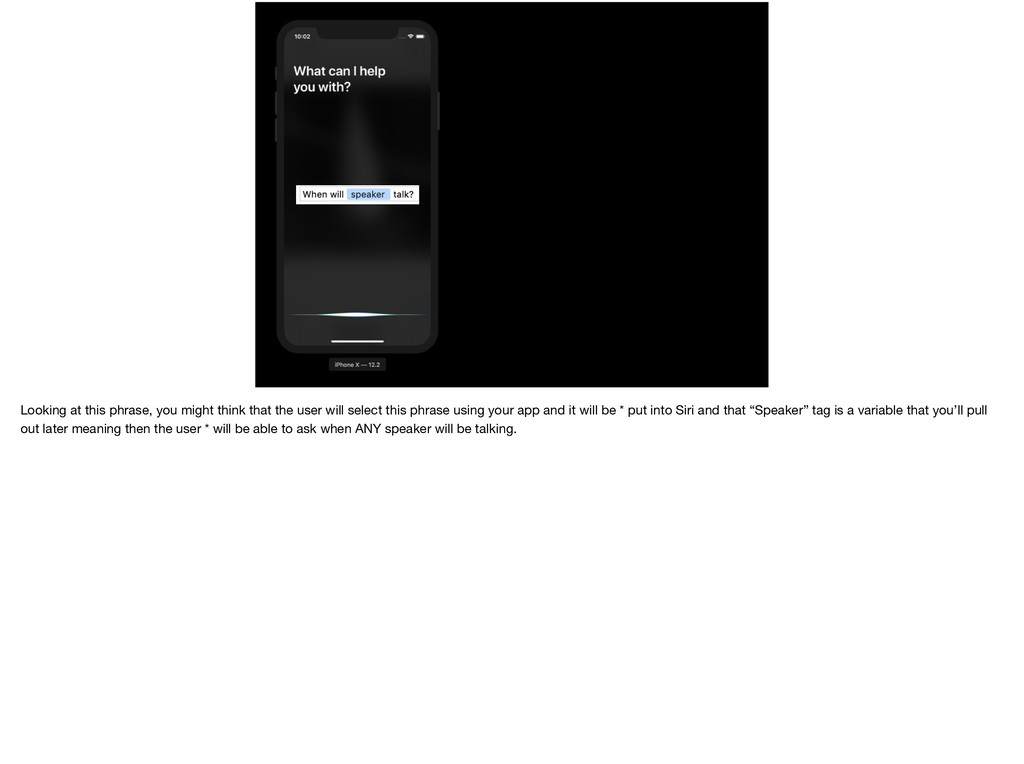
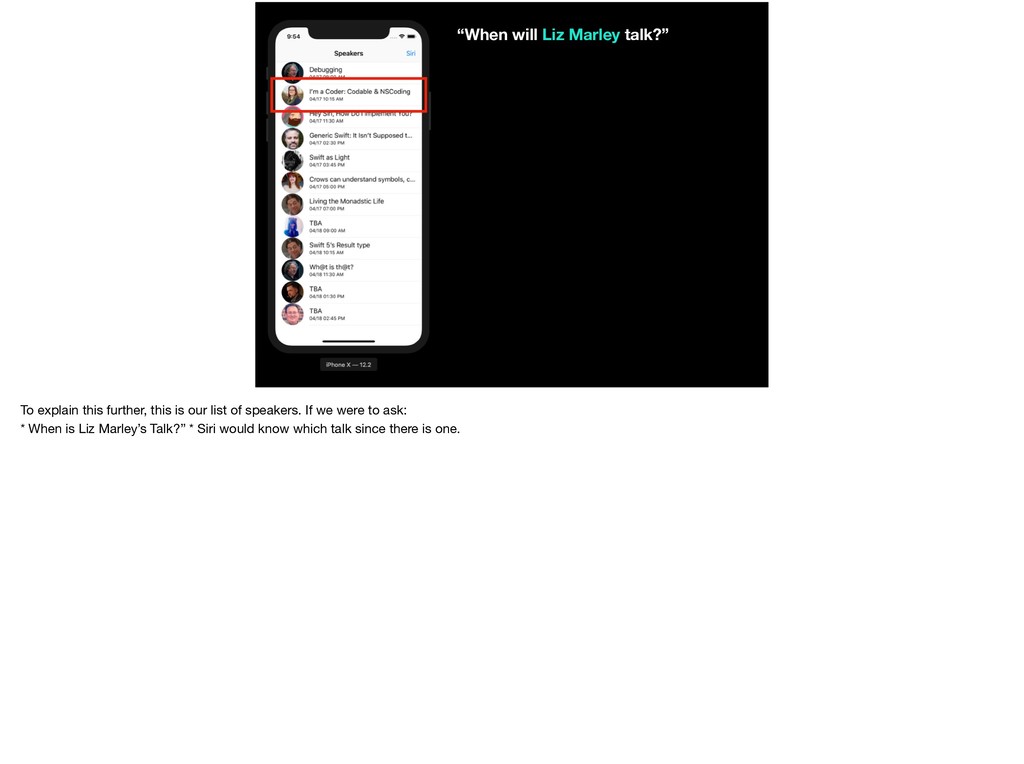
will select this phrase using your app and it will be * put into Siri and that “Speaker” tag is a variable that you’ll pull out later meaning then the user * will be able to ask when ANY speaker will be talking.
will select this phrase using your app and it will be * put into Siri and that “Speaker” tag is a variable that you’ll pull out later meaning then the user * will be able to ask when ANY speaker will be talking.
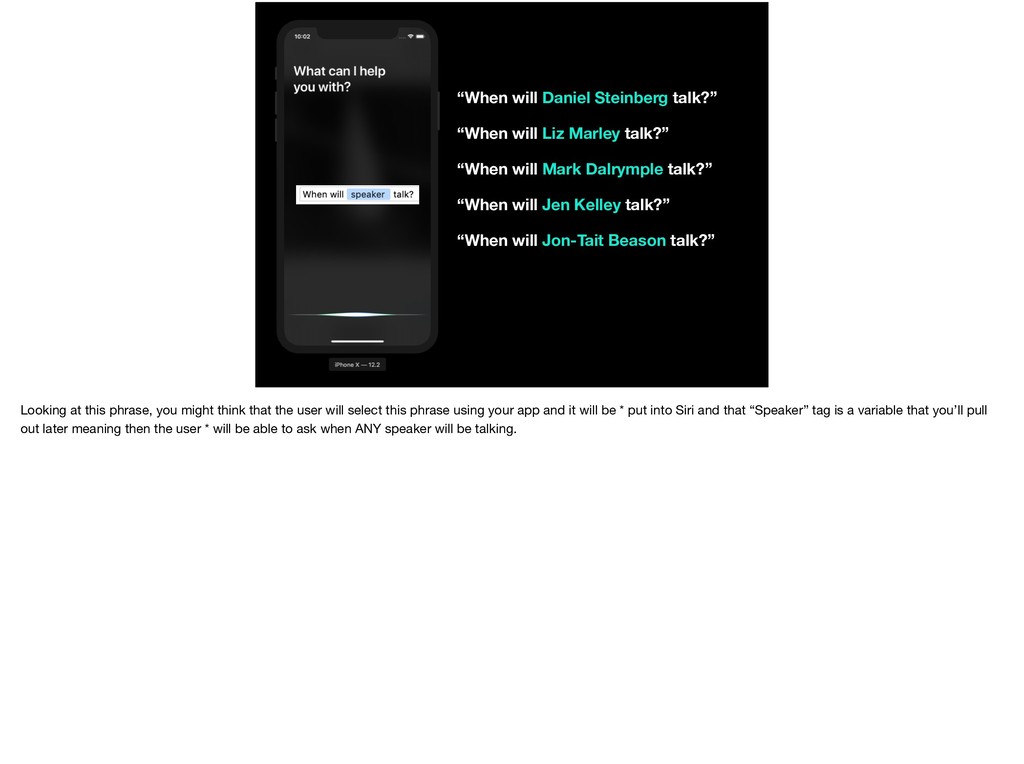
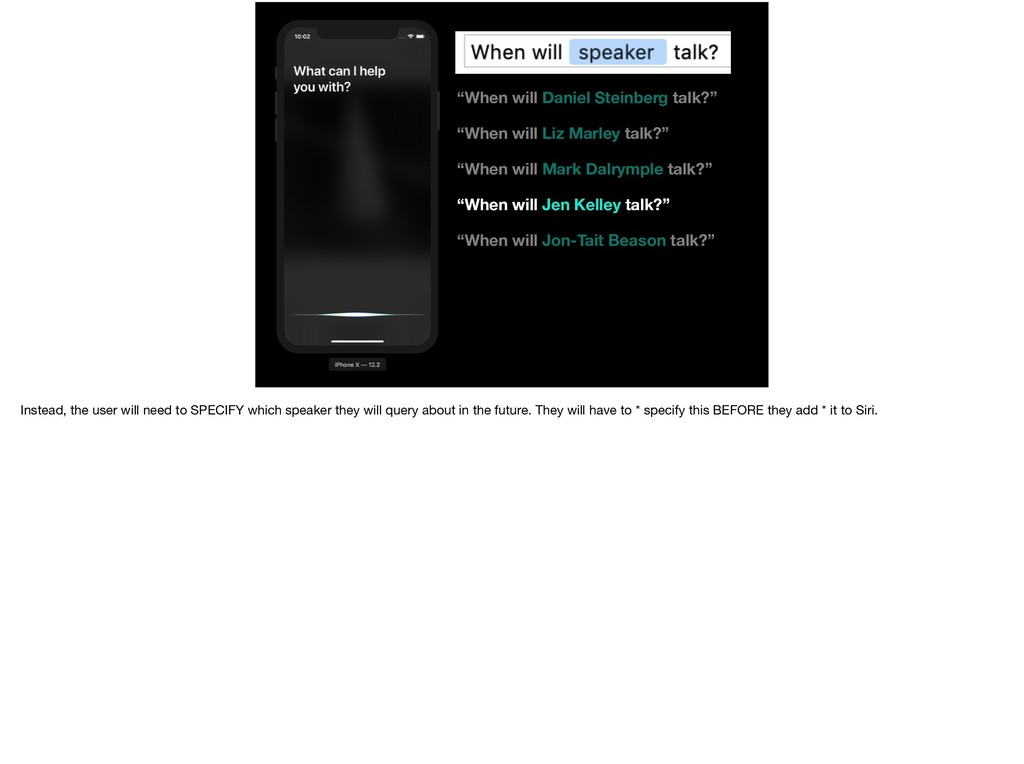
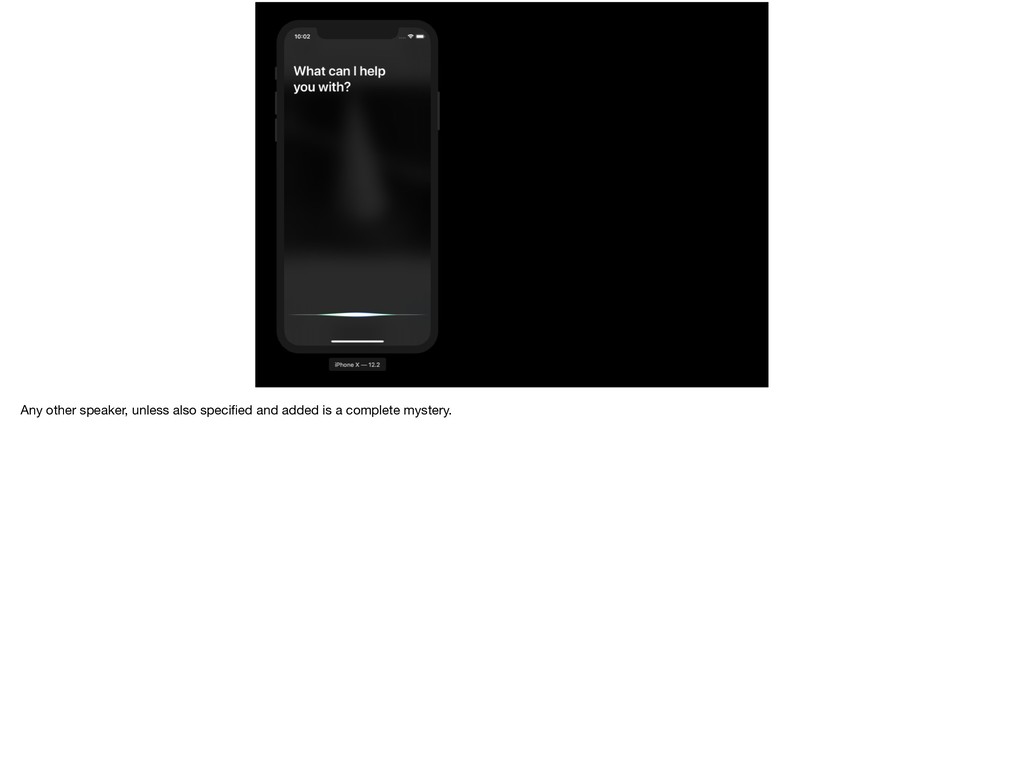
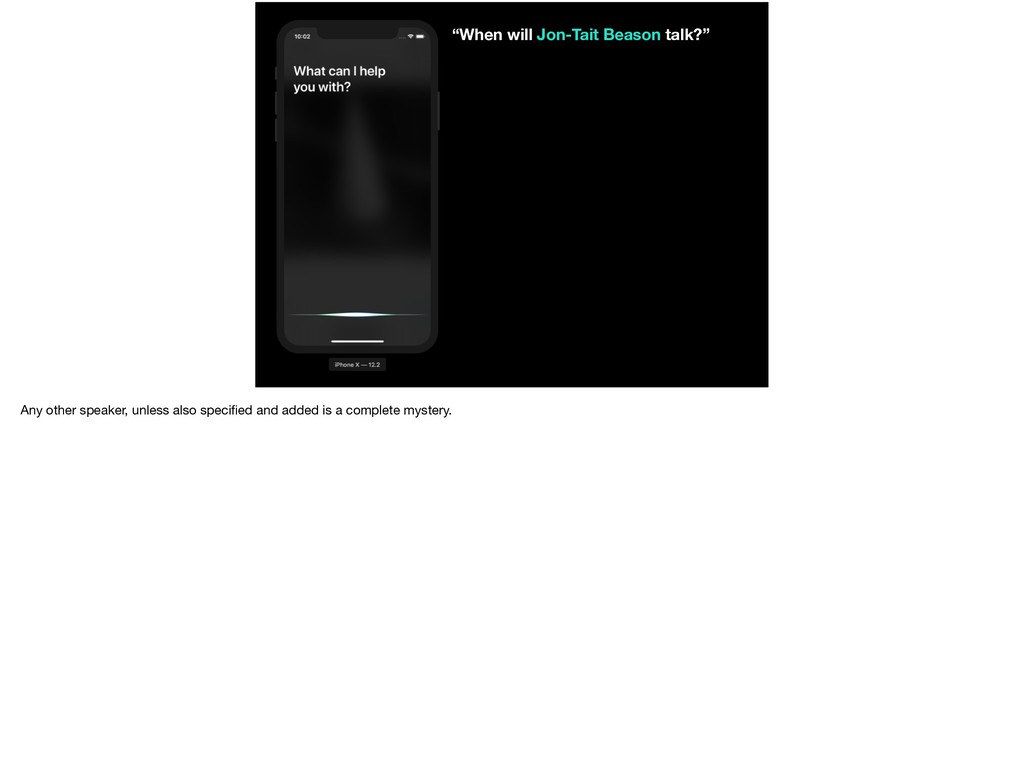
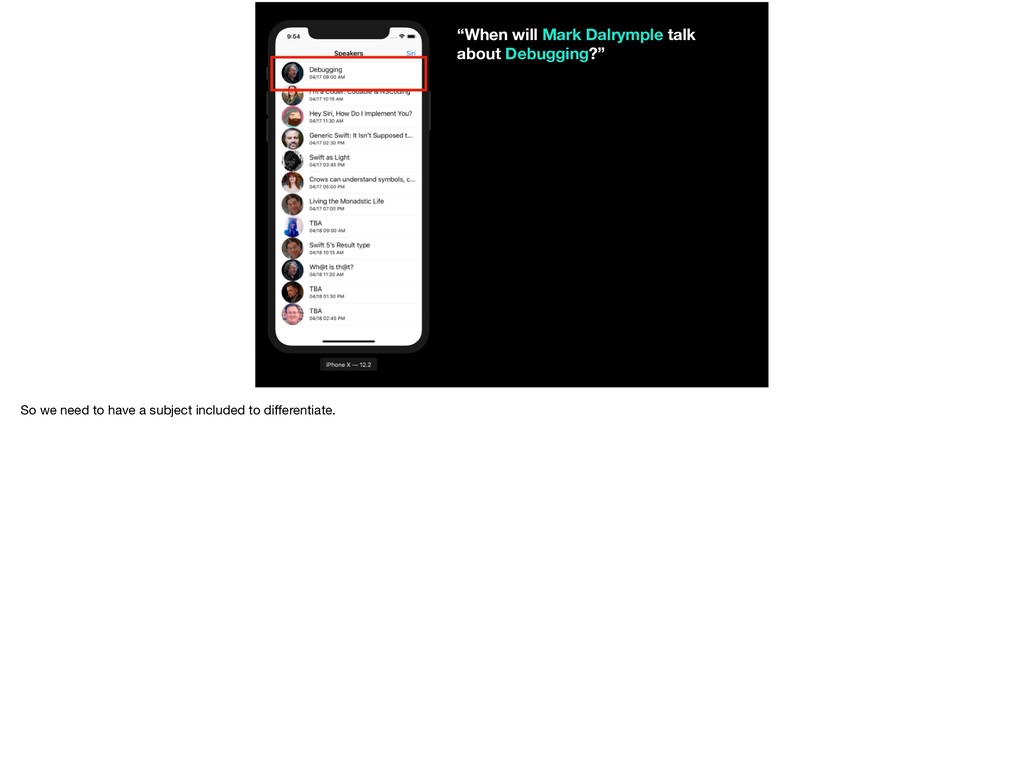
“When will Mark Dalrymple talk?” “When will Jen Kelley talk?” “When will Jon-Tait Beason talk?” Looking at this phrase, you might think that the user will select this phrase using your app and it will be * put into Siri and that “Speaker” tag is a variable that you’ll pull out later meaning then the user * will be able to ask when ANY speaker will be talking.
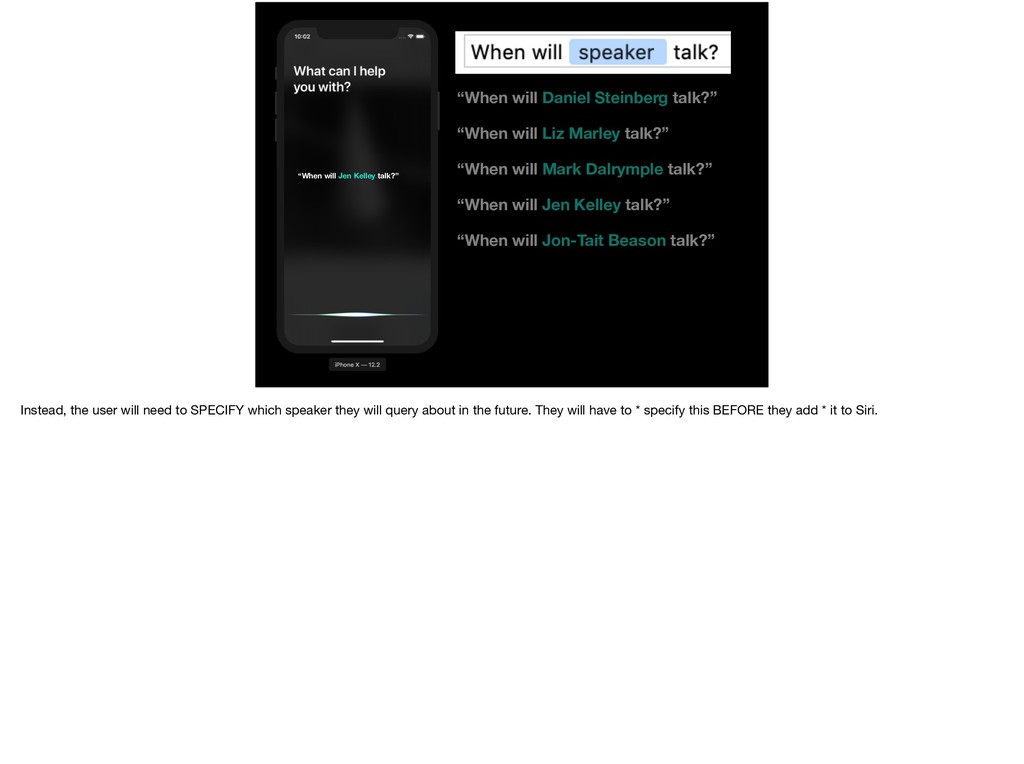
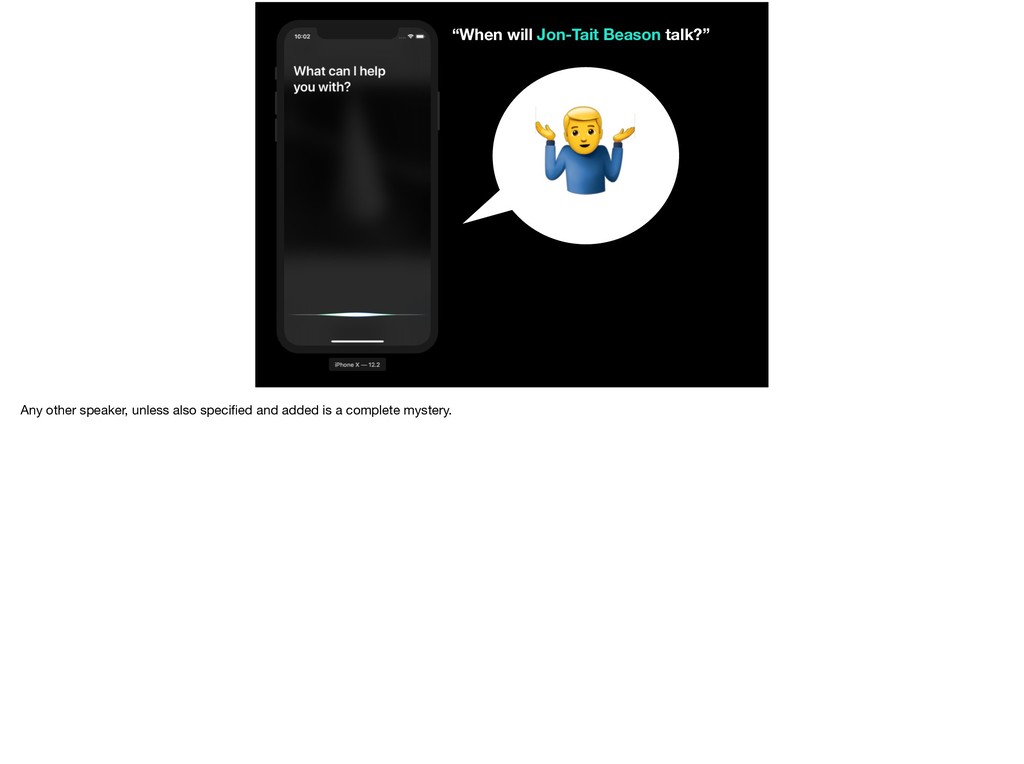
“When will Mark Dalrymple talk?” “When will Jen Kelley talk?” “When will Jon-Tait Beason talk?” “When will Jen Kelley talk?” Instead, the user will need to SPECIFY which speaker they will query about in the future. They will have to * specify this BEFORE they add * it to Siri.
“When will Mark Dalrymple talk?” “When will Jen Kelley talk?” “When will Jon-Tait Beason talk?” “When will Jen Kelley talk?” Instead, the user will need to SPECIFY which speaker they will query about in the future. They will have to * specify this BEFORE they add * it to Siri.
“When will Mark Dalrymple talk?” “When will Jen Kelley talk?” “When will Jon-Tait Beason talk?” “When will Jen Kelley talk?” Instead, the user will need to SPECIFY which speaker they will query about in the future. They will have to * specify this BEFORE they add * it to Siri.
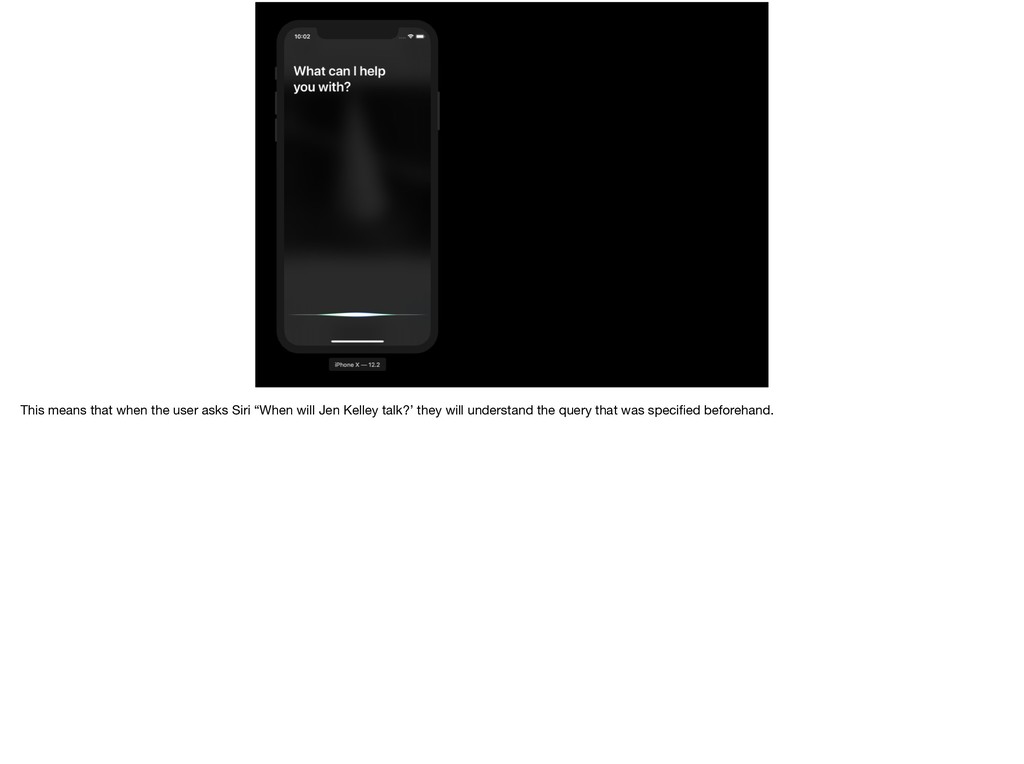
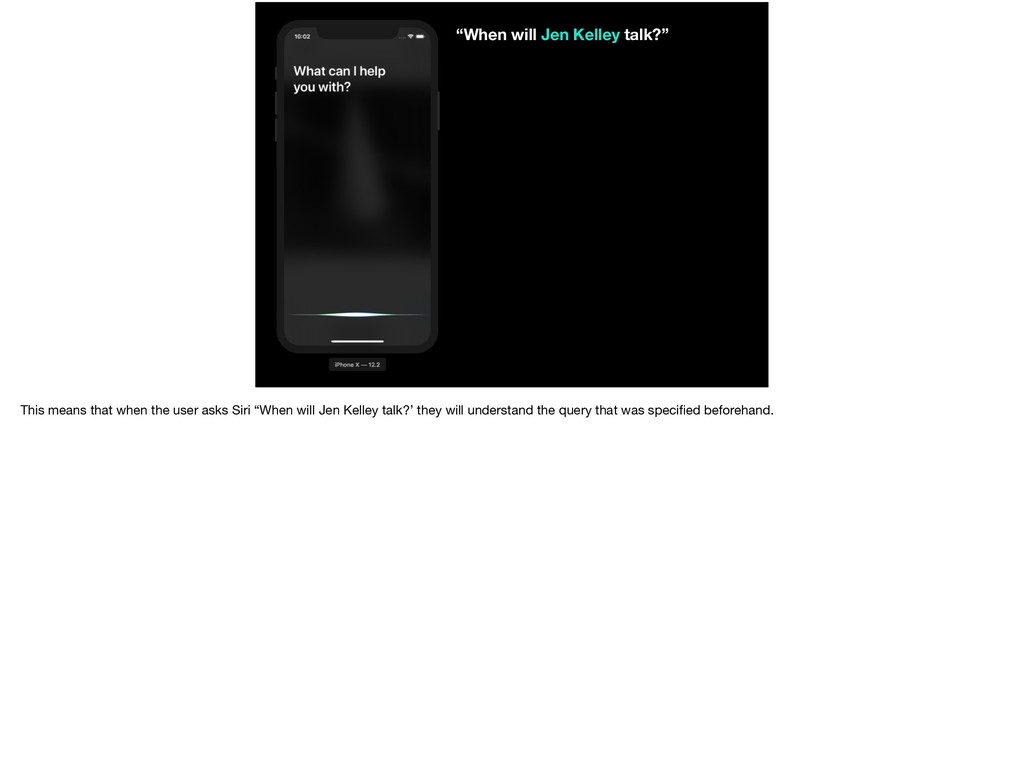
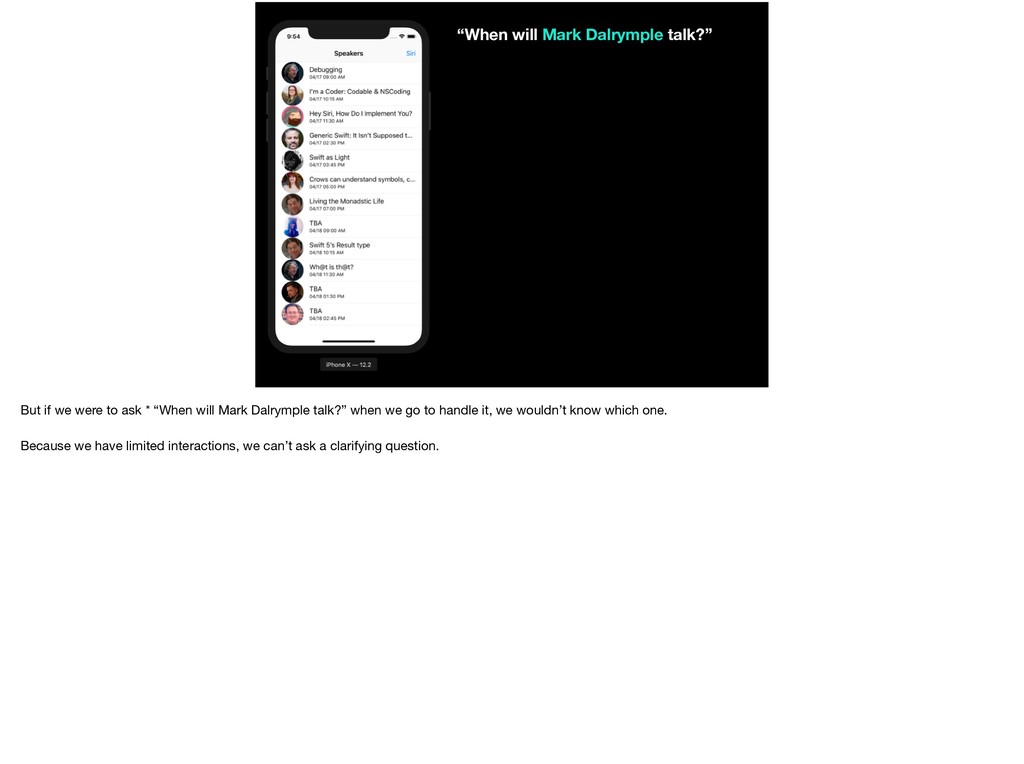
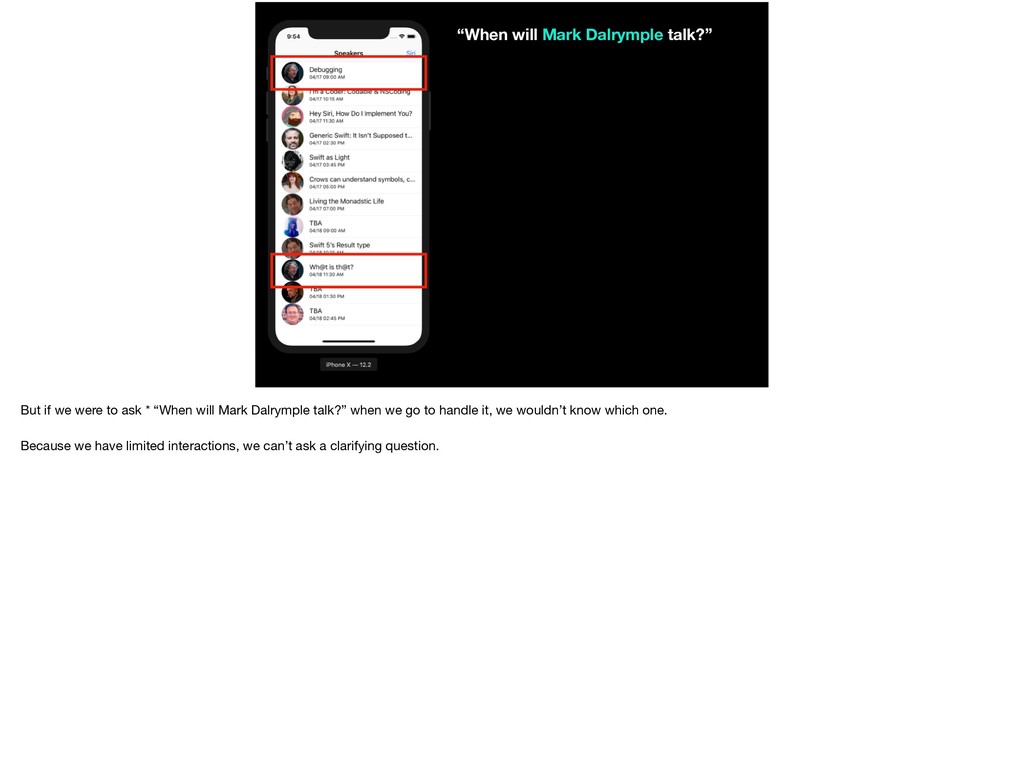
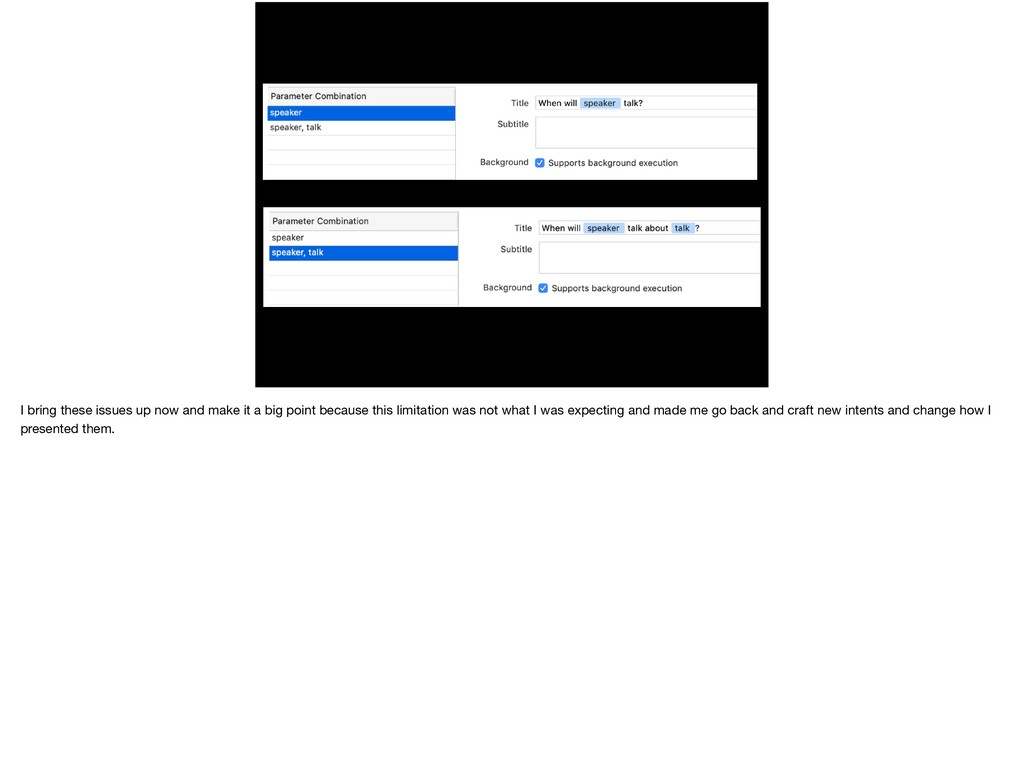
ask * “When will Mark Dalrymple talk?” when we go to handle it, we wouldn’t know which one. Because we have limited interactions, we can’t ask a clarifying question.
ask * “When will Mark Dalrymple talk?” when we go to handle it, we wouldn’t know which one. Because we have limited interactions, we can’t ask a clarifying question.
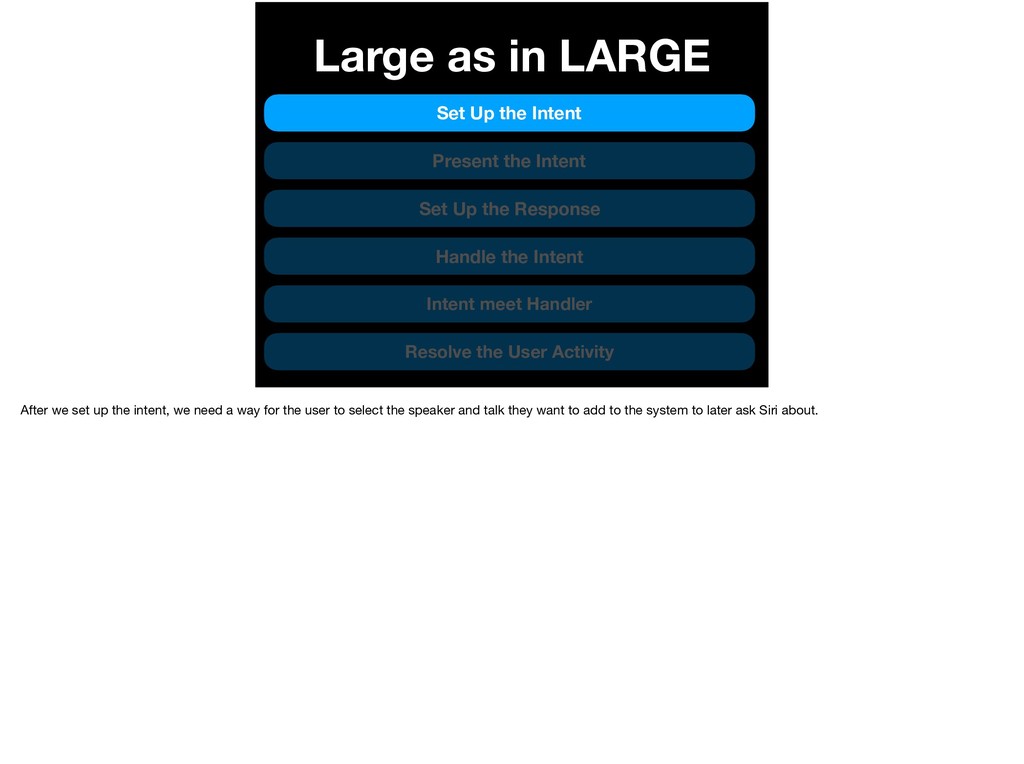
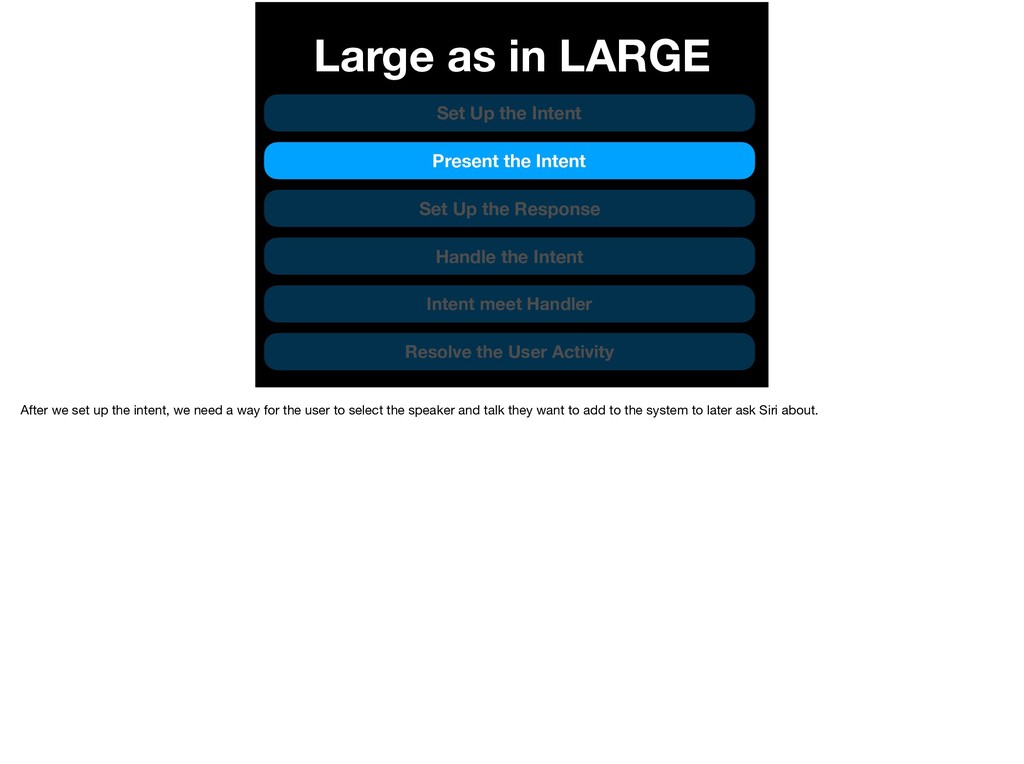
Intent Set Up the Response Handle the Intent Intent meet Handler Resolve the User Activity After we set up the intent, we need a way for the user to select the speaker and talk they want to add to the system to later ask Siri about.
Intent Set Up the Response Handle the Intent Intent meet Handler Resolve the User Activity After we set up the intent, we need a way for the user to select the speaker and talk they want to add to the system to later ask Siri about.
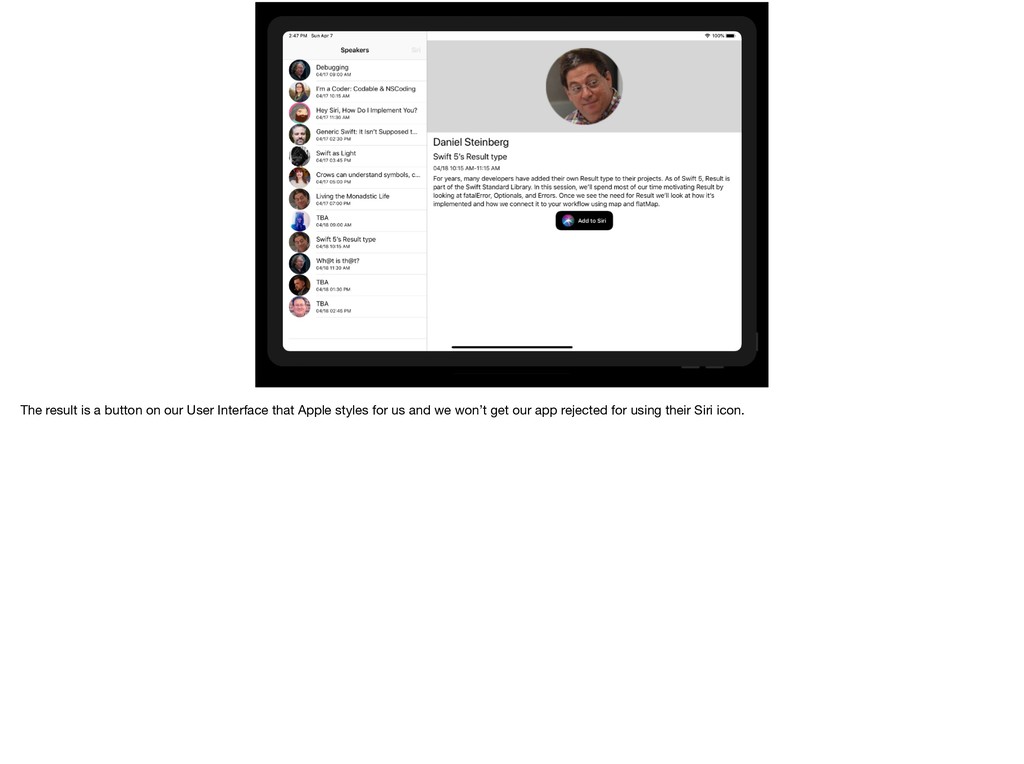
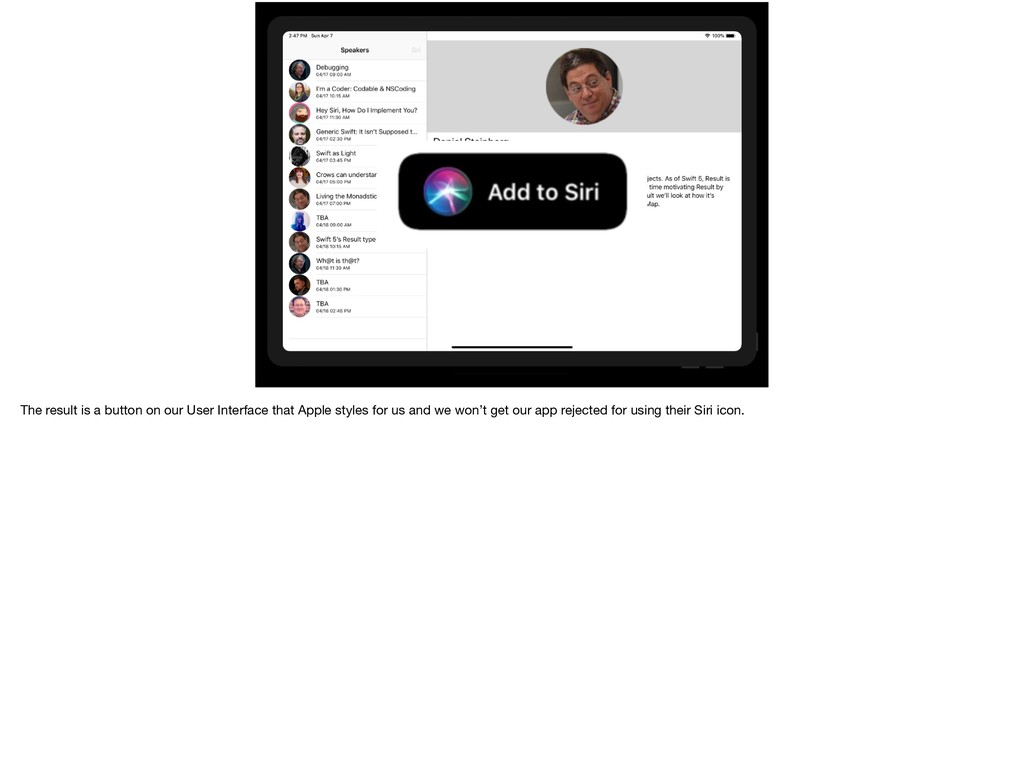
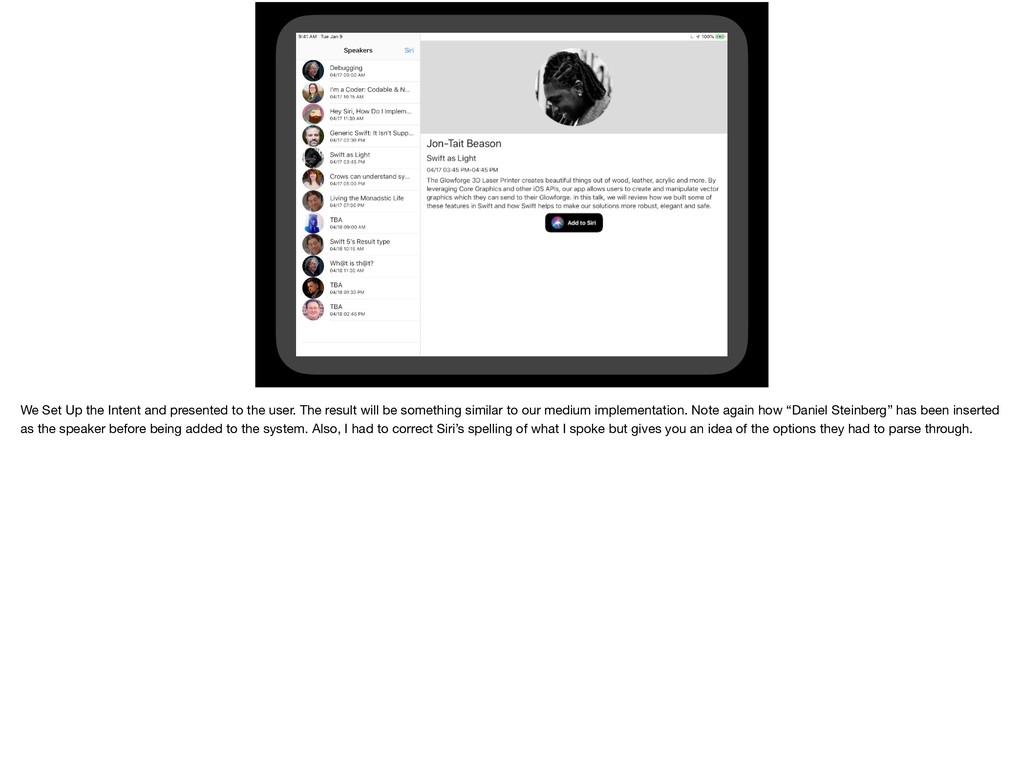
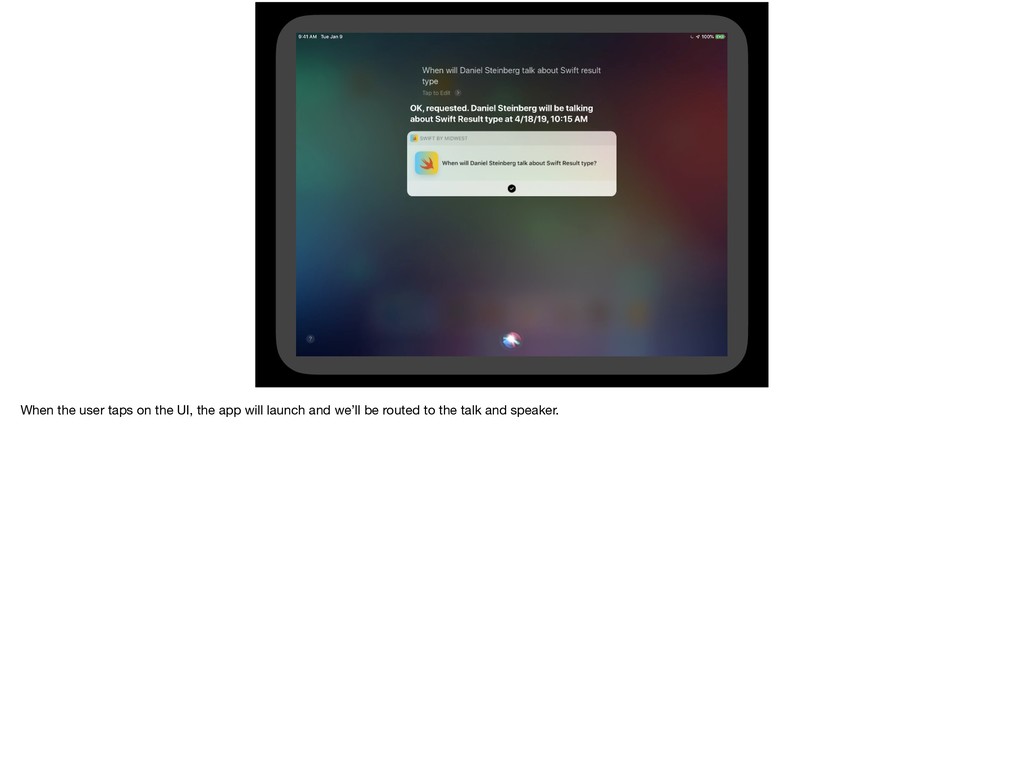
The result will be something similar to our medium implementation. Note again how “Daniel Steinberg” has been inserted as the speaker before being added to the system. Also, I had to correct Siri’s spelling of what I spoke but gives you an idea of the options they had to parse through.
The result will be something similar to our medium implementation. Note again how “Daniel Steinberg” has been inserted as the speaker before being added to the system. Also, I had to correct Siri’s spelling of what I spoke but gives you an idea of the options they had to parse through.
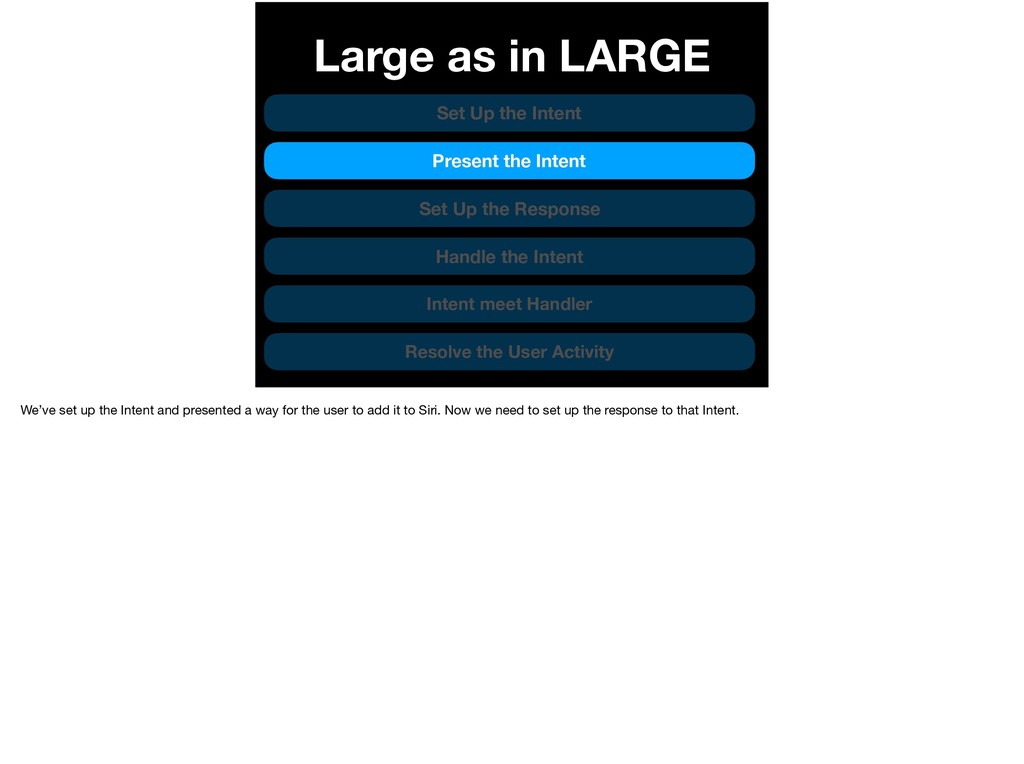
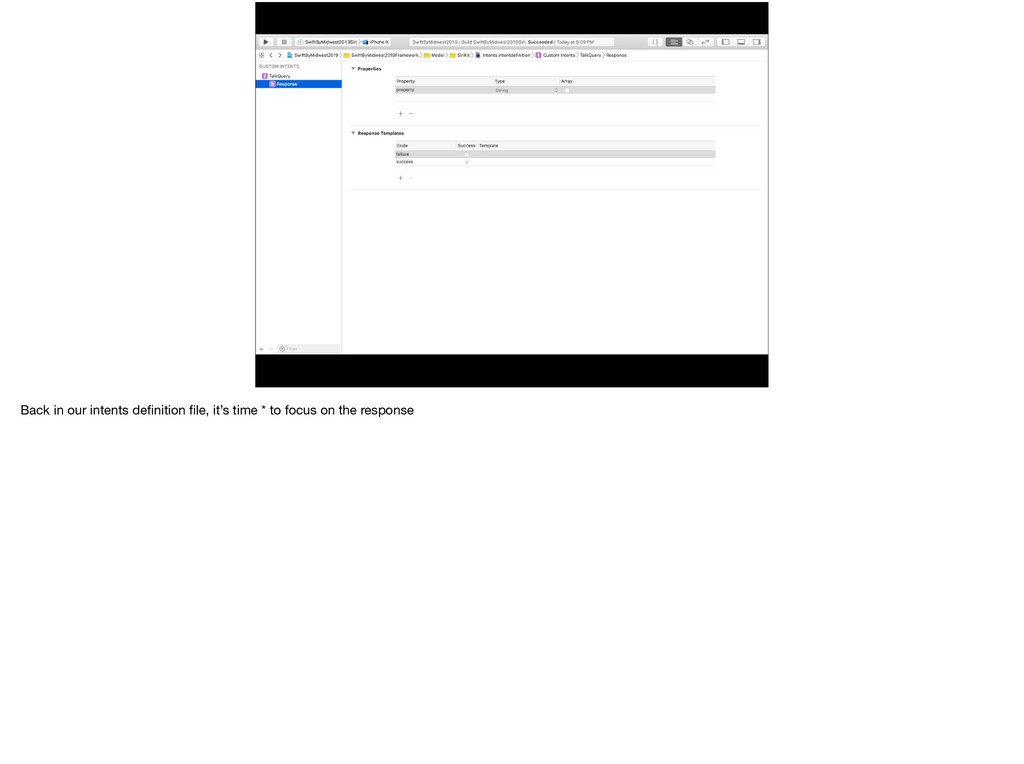
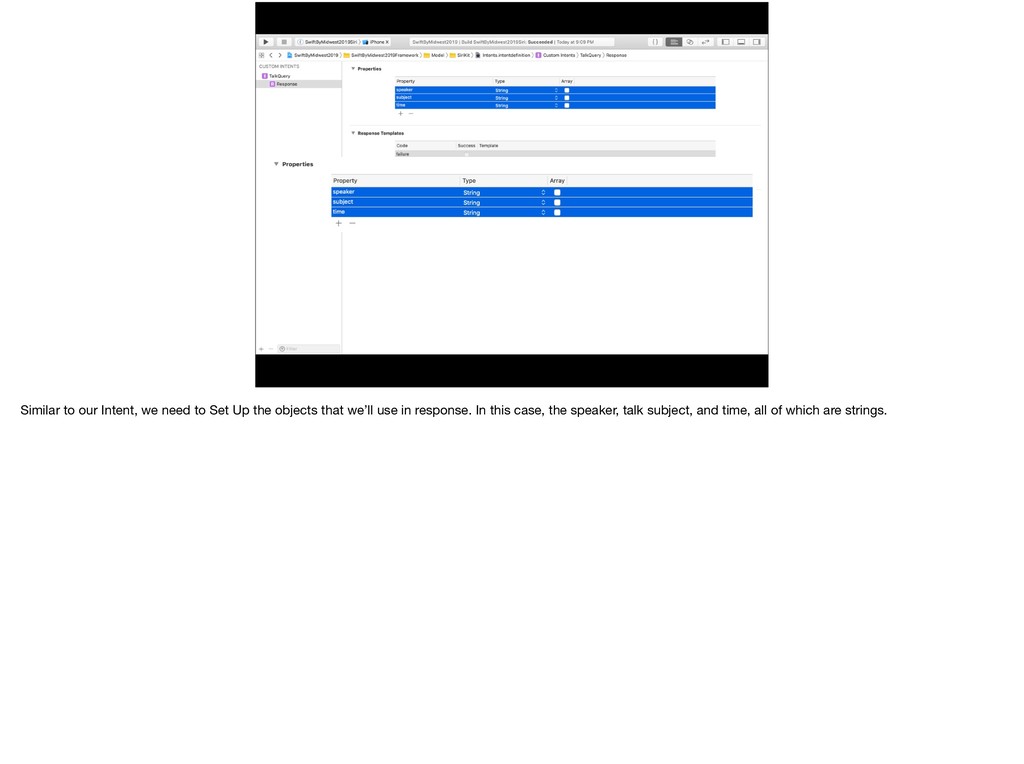
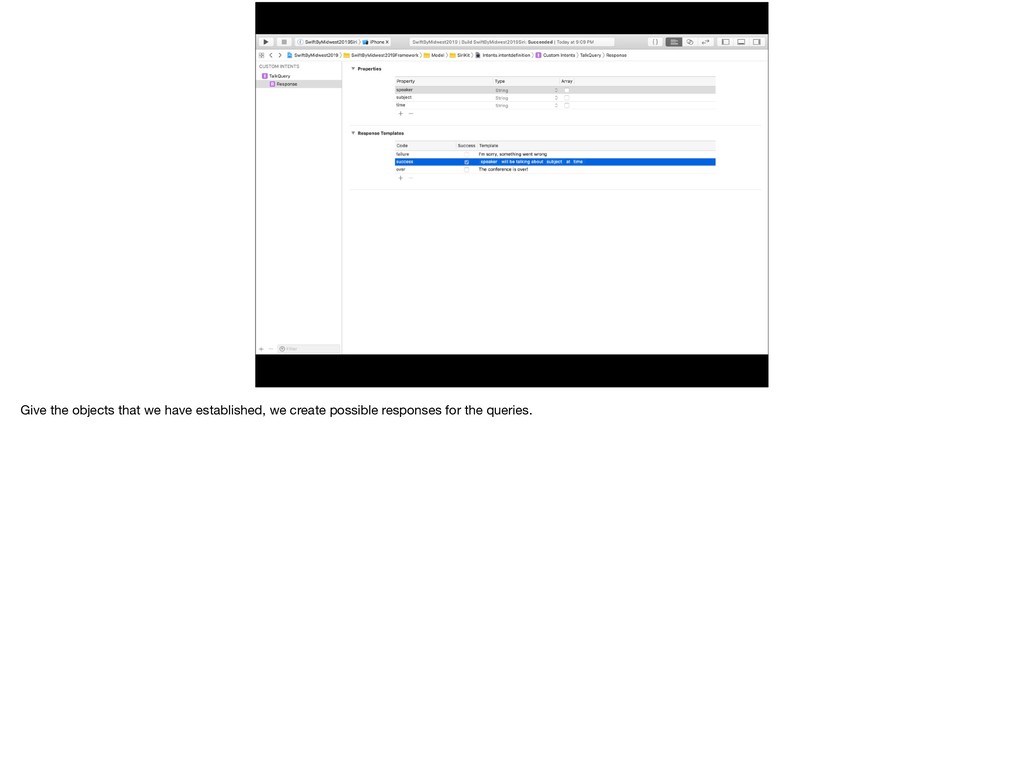
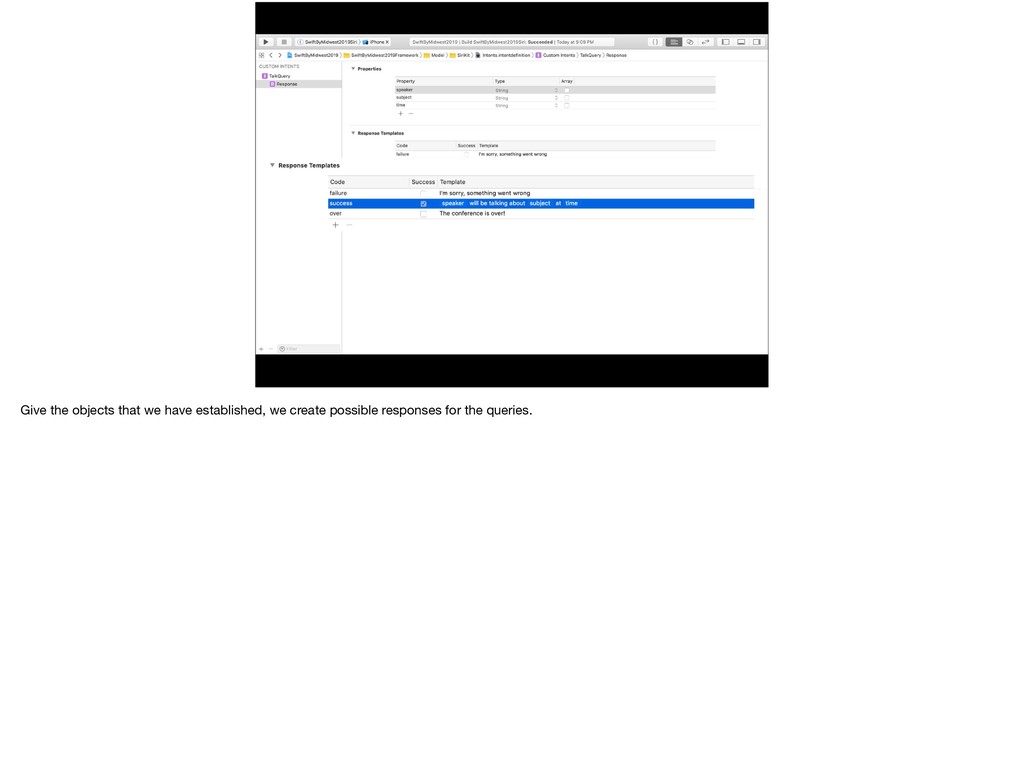
Intent Set Up the Response Handle the Intent Intent meet Handler Resolve the User Activity We’ve set up the Intent and presented a way for the user to add it to Siri. Now we need to set up the response to that Intent.
Intent Set Up the Response Handle the Intent Intent meet Handler Resolve the User Activity We’ve set up the Intent and presented a way for the user to add it to Siri. Now we need to set up the response to that Intent.
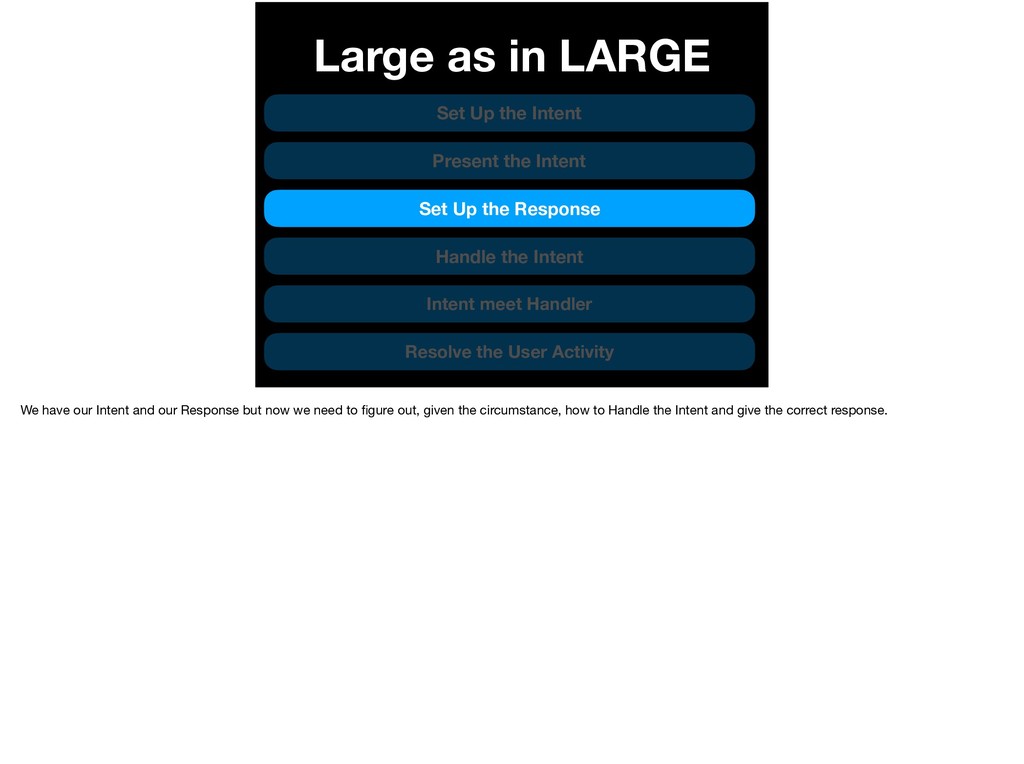
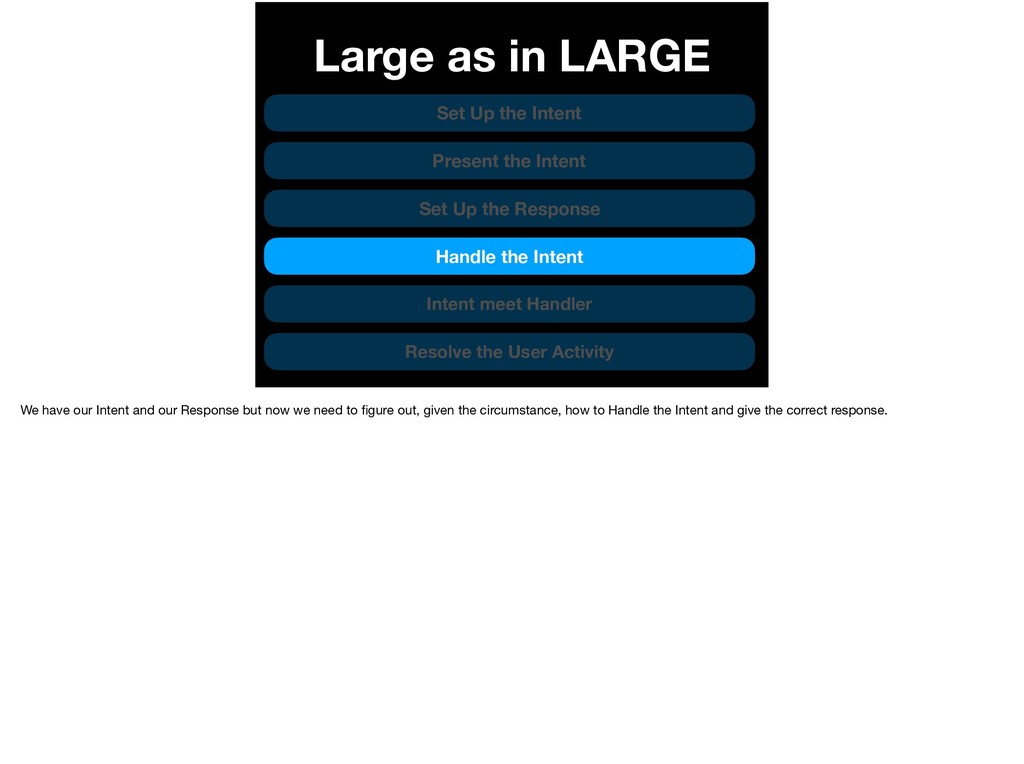
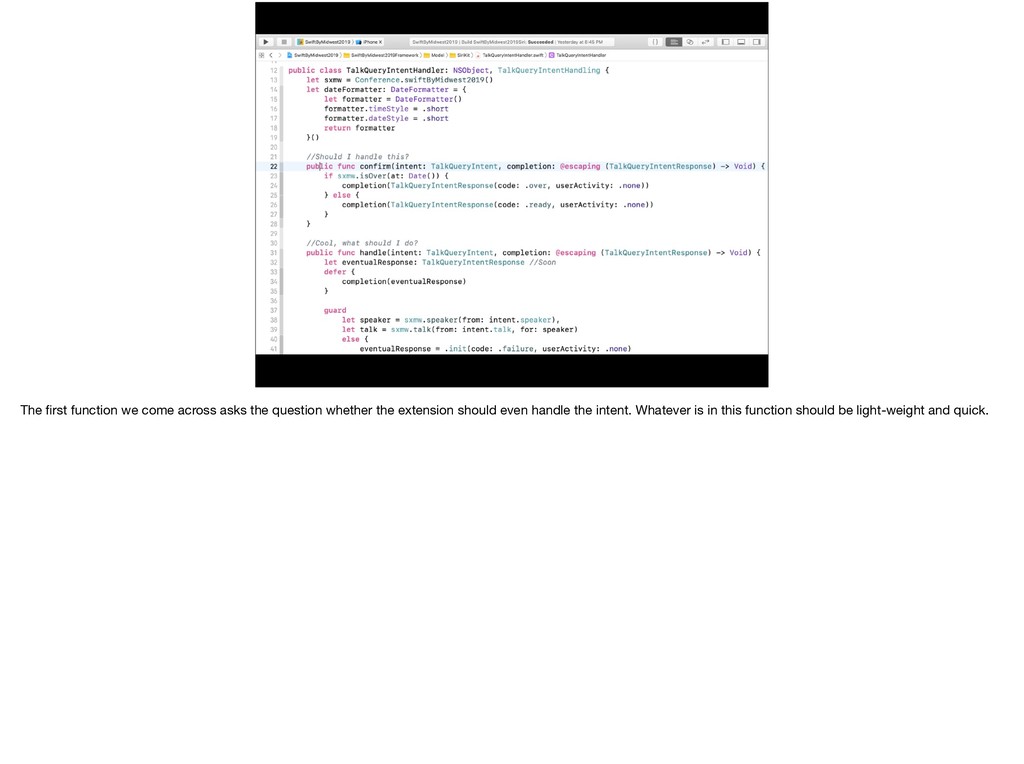
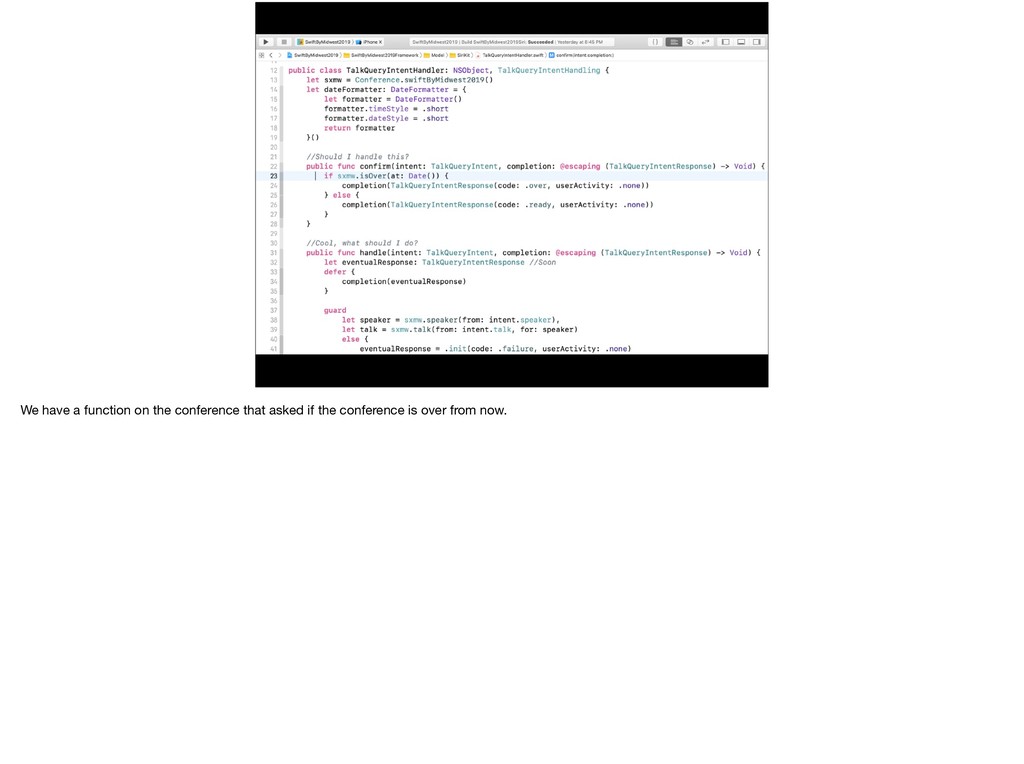
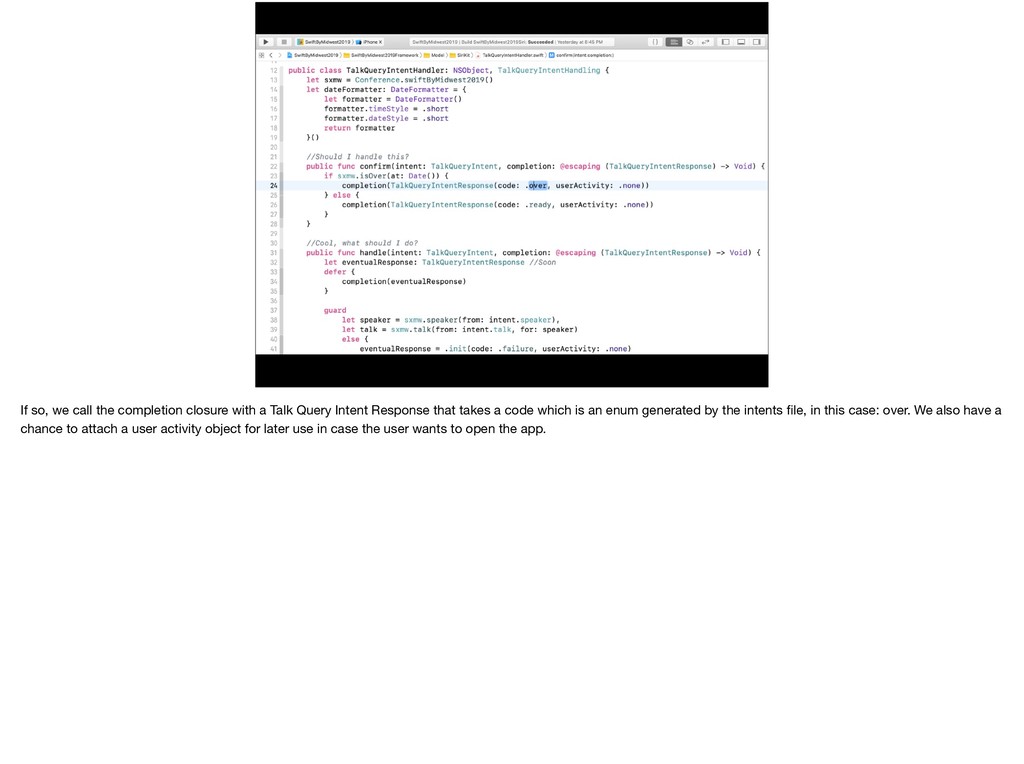
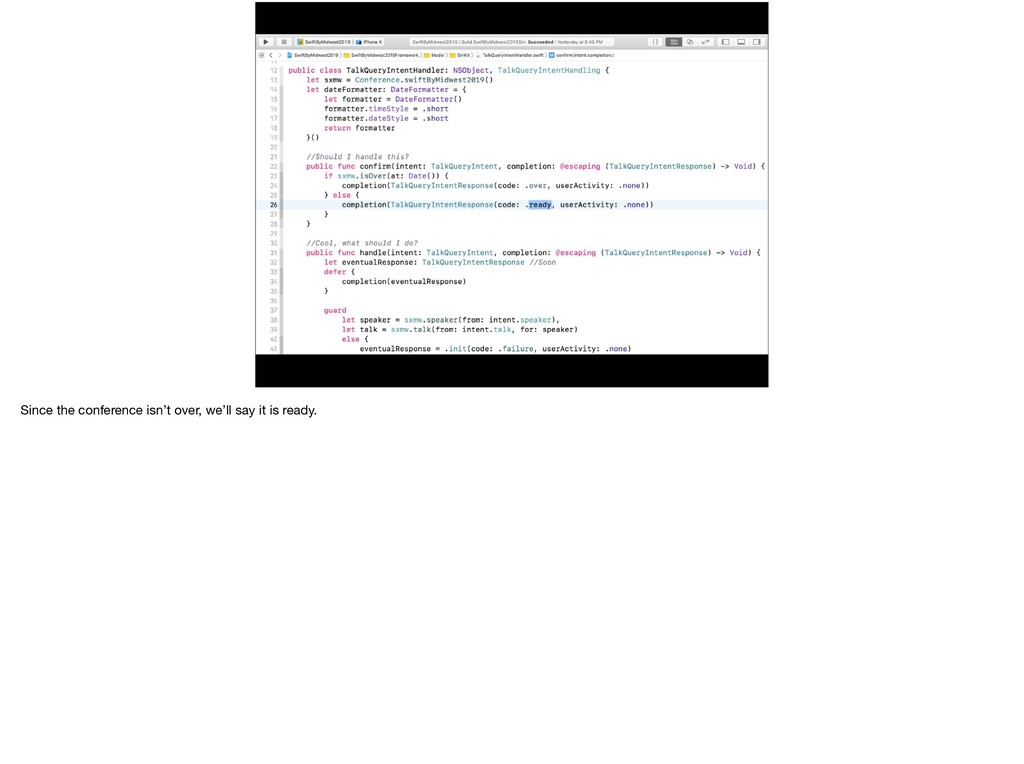
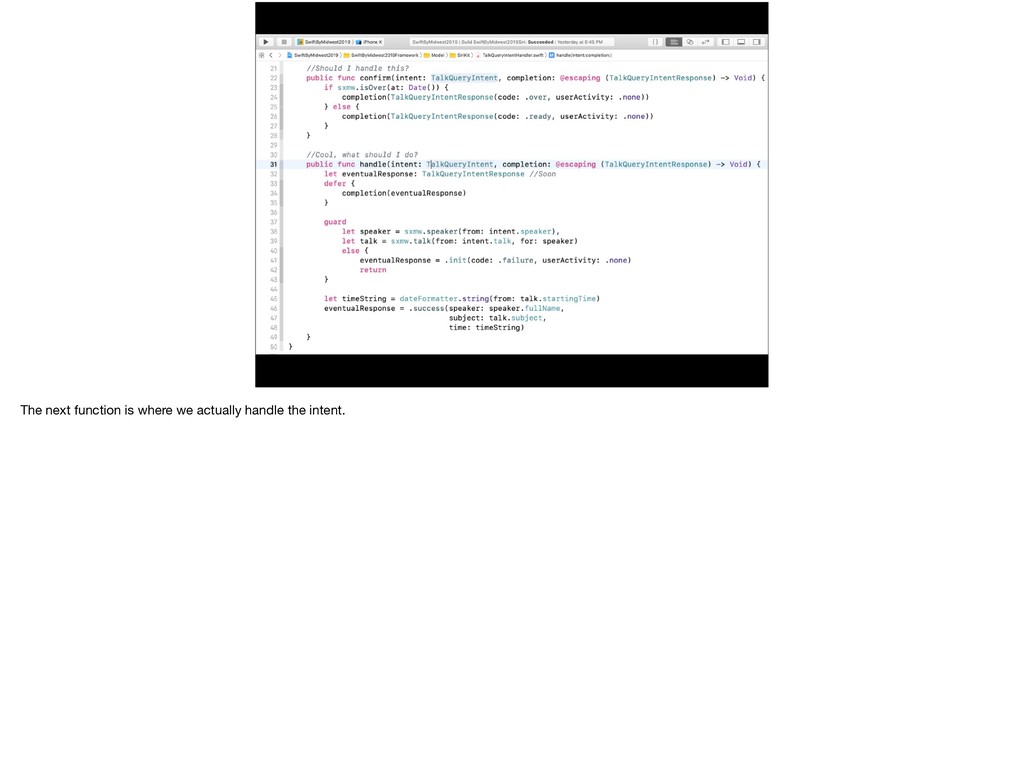
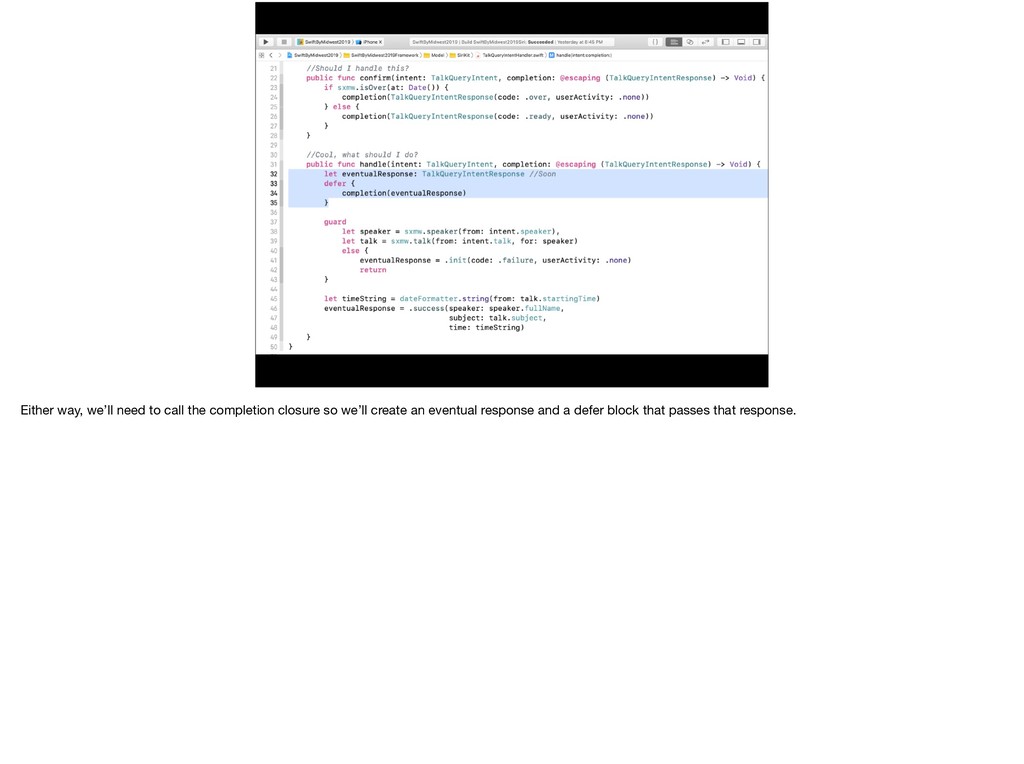
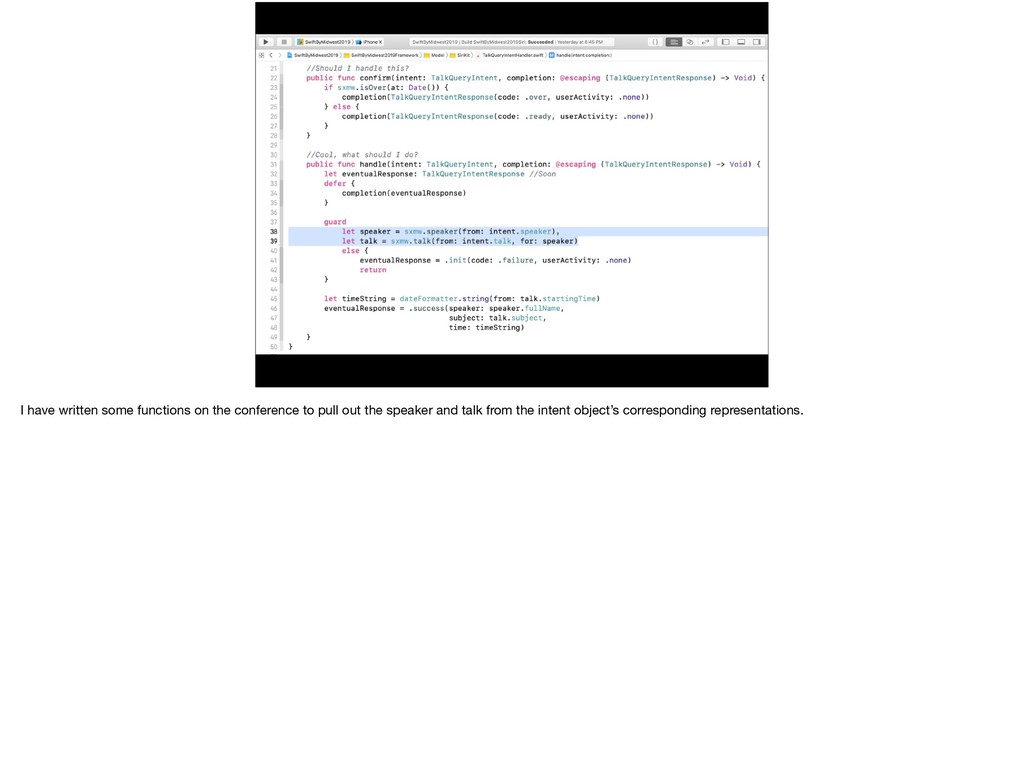
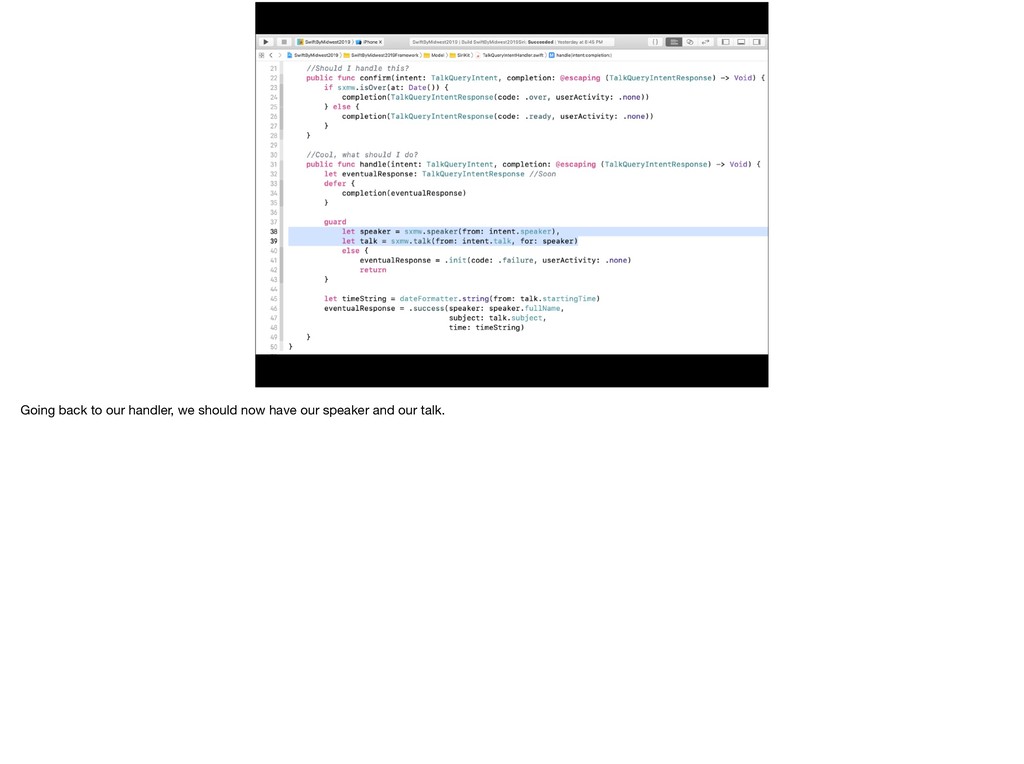
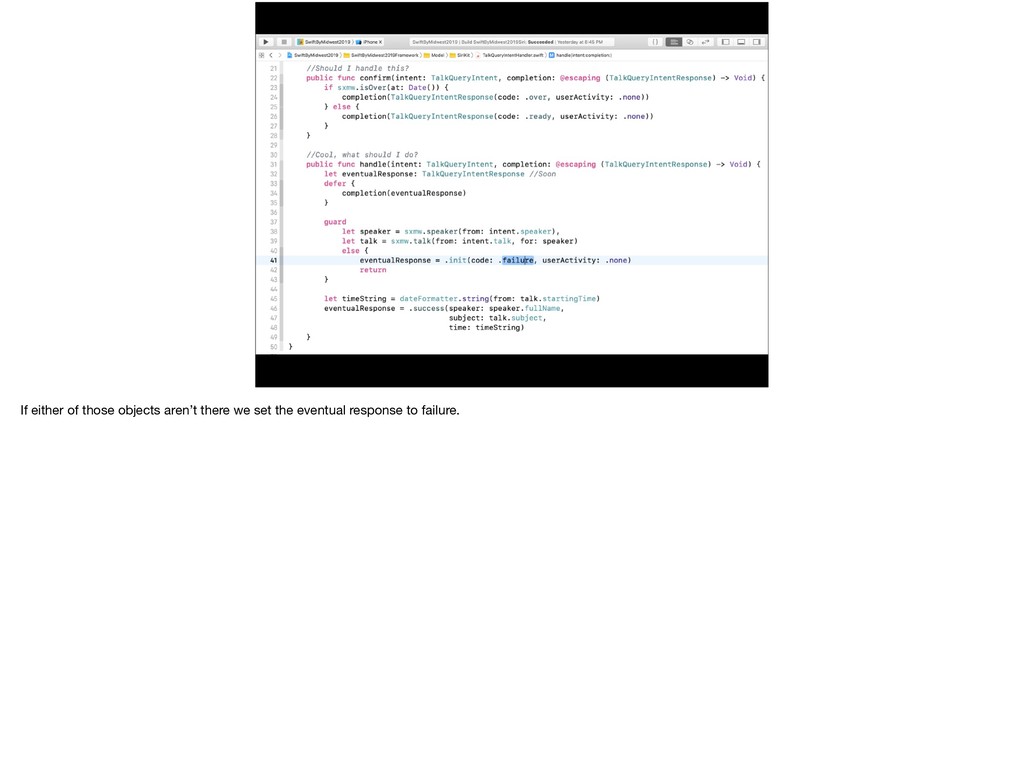
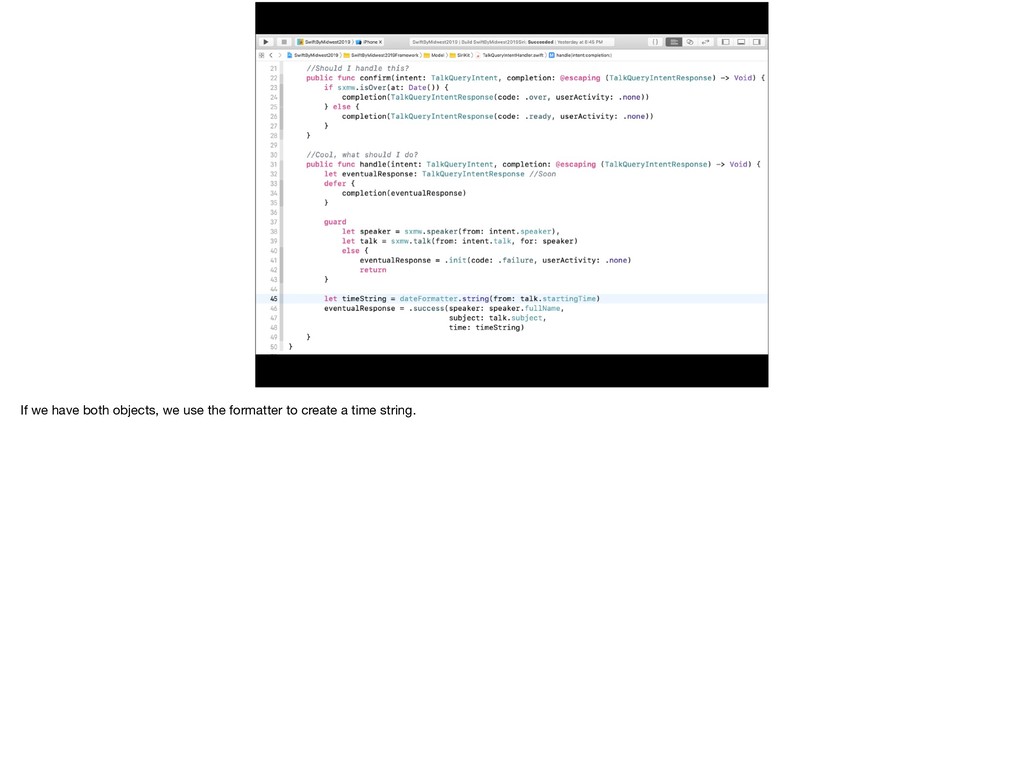
Intent Set Up the Response Handle the Intent Intent meet Handler Resolve the User Activity We have our Intent and our Response but now we need to figure out, given the circumstance, how to Handle the Intent and give the correct response.
Intent Set Up the Response Handle the Intent Intent meet Handler Resolve the User Activity We have our Intent and our Response but now we need to figure out, given the circumstance, how to Handle the Intent and give the correct response.
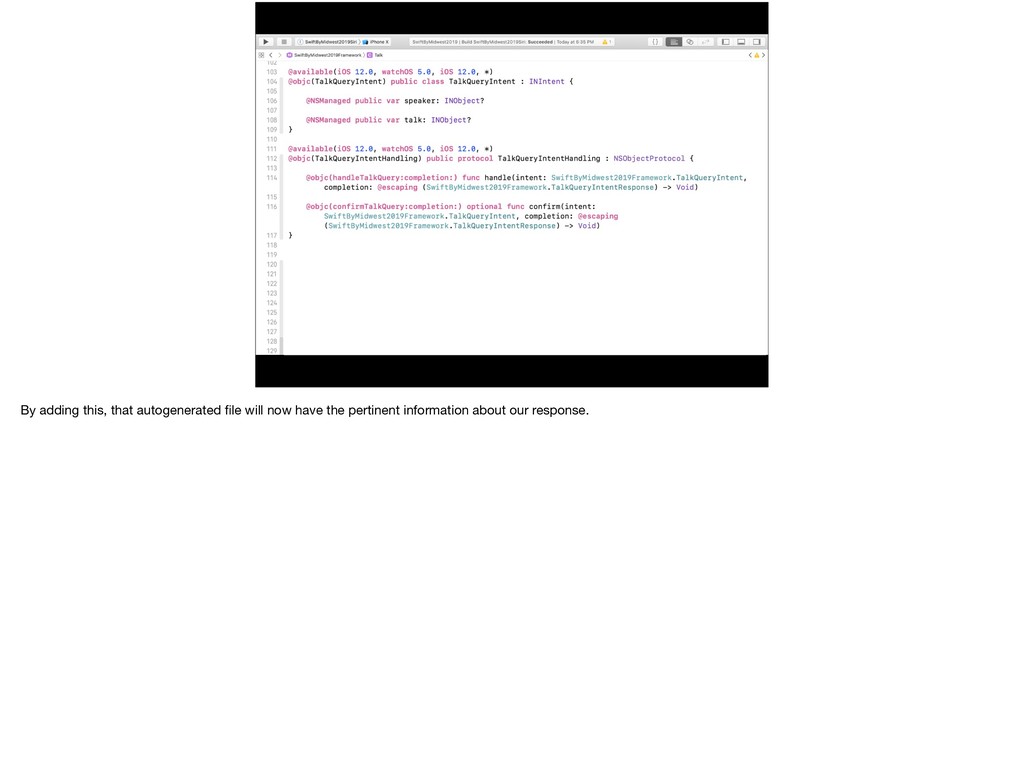
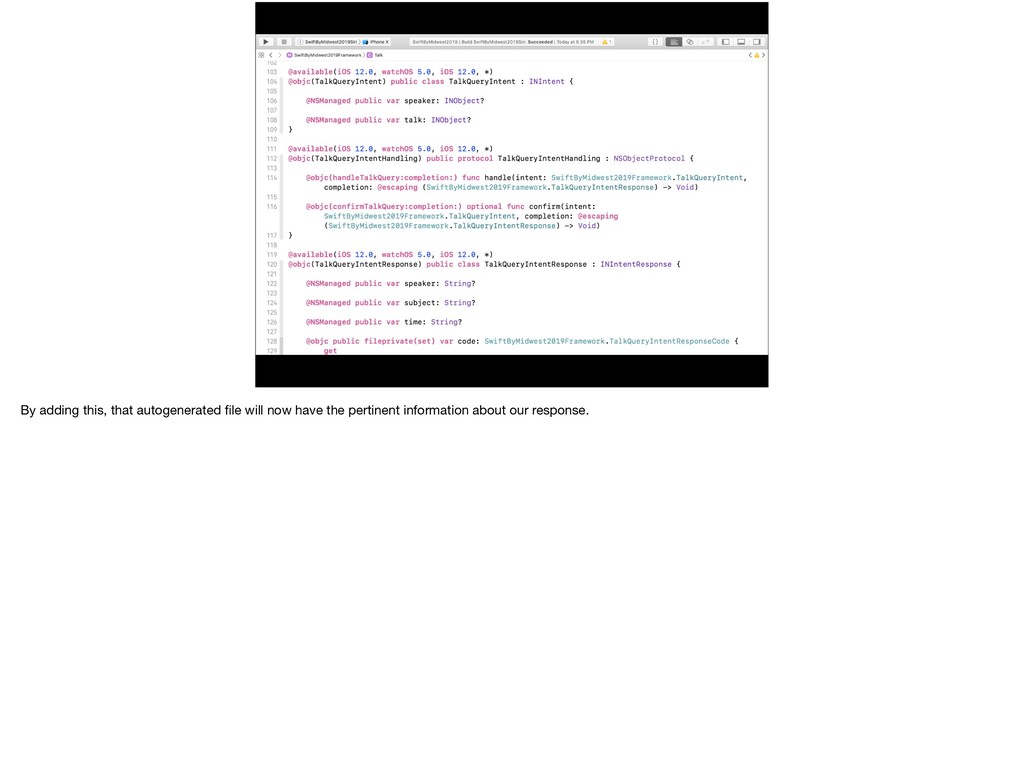
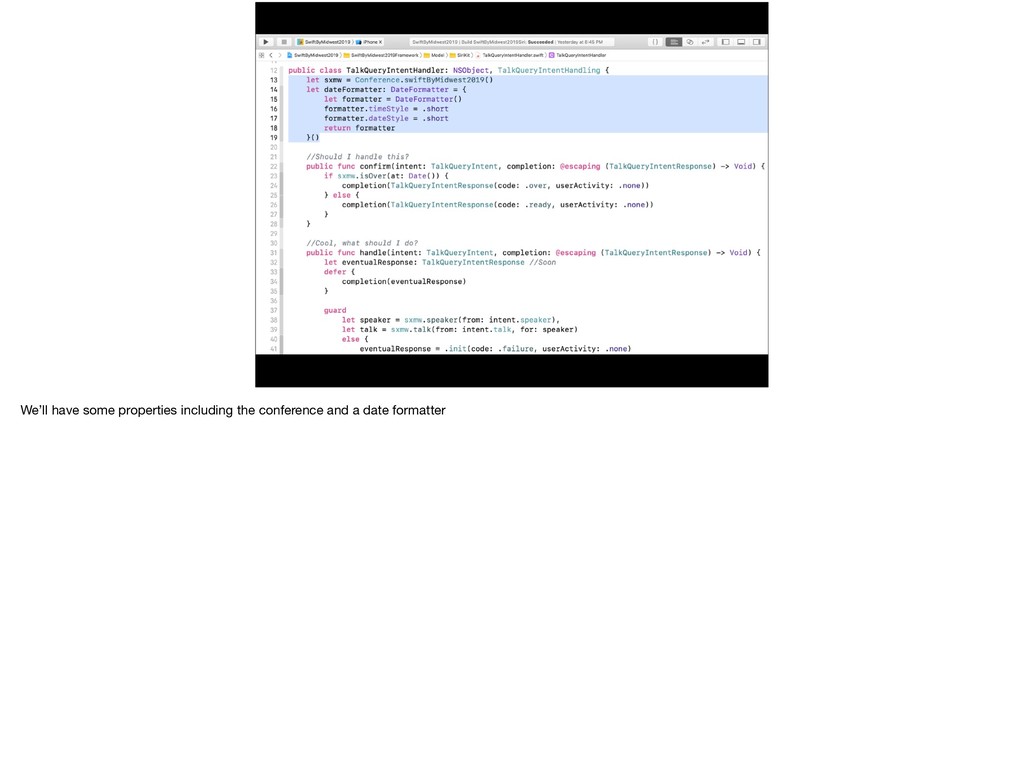
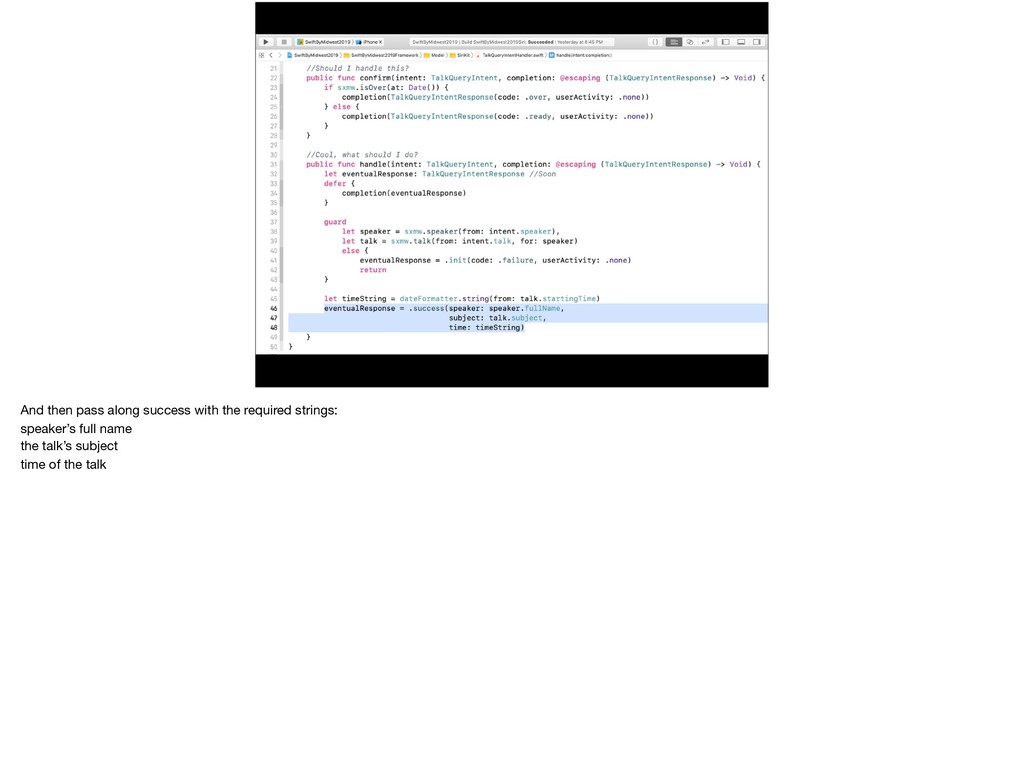
Query Intent Response that takes a code which is an enum generated by the intents file, in this case: over. We also have a chance to attach a user activity object for later use in case the user wants to open the app.
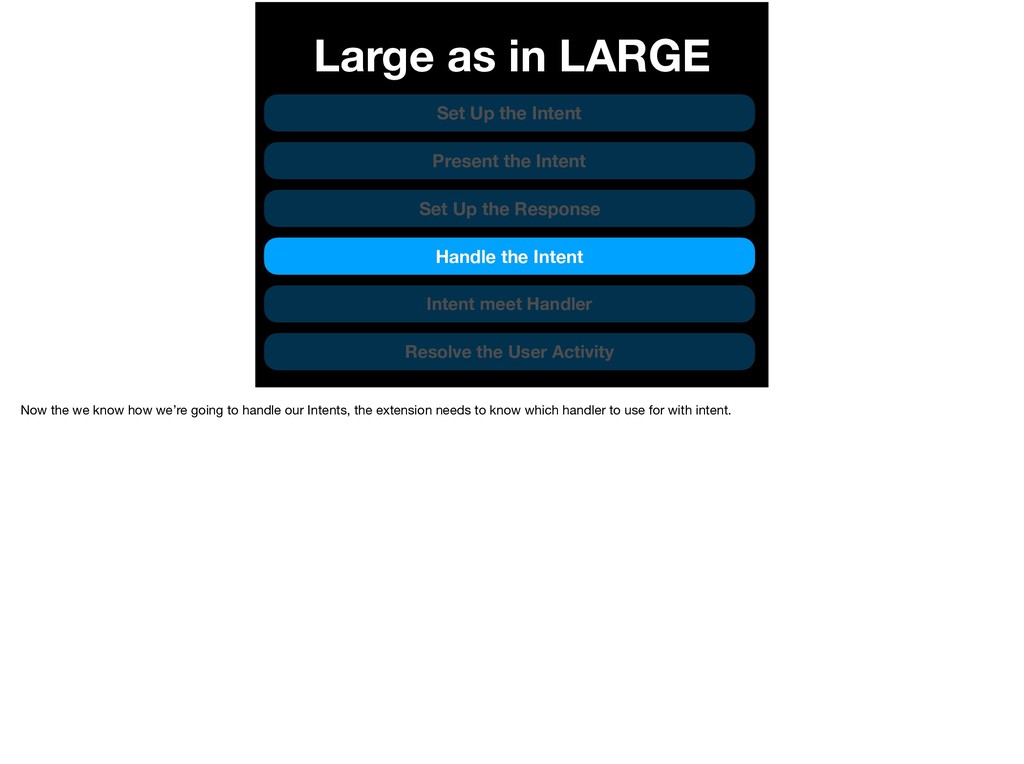
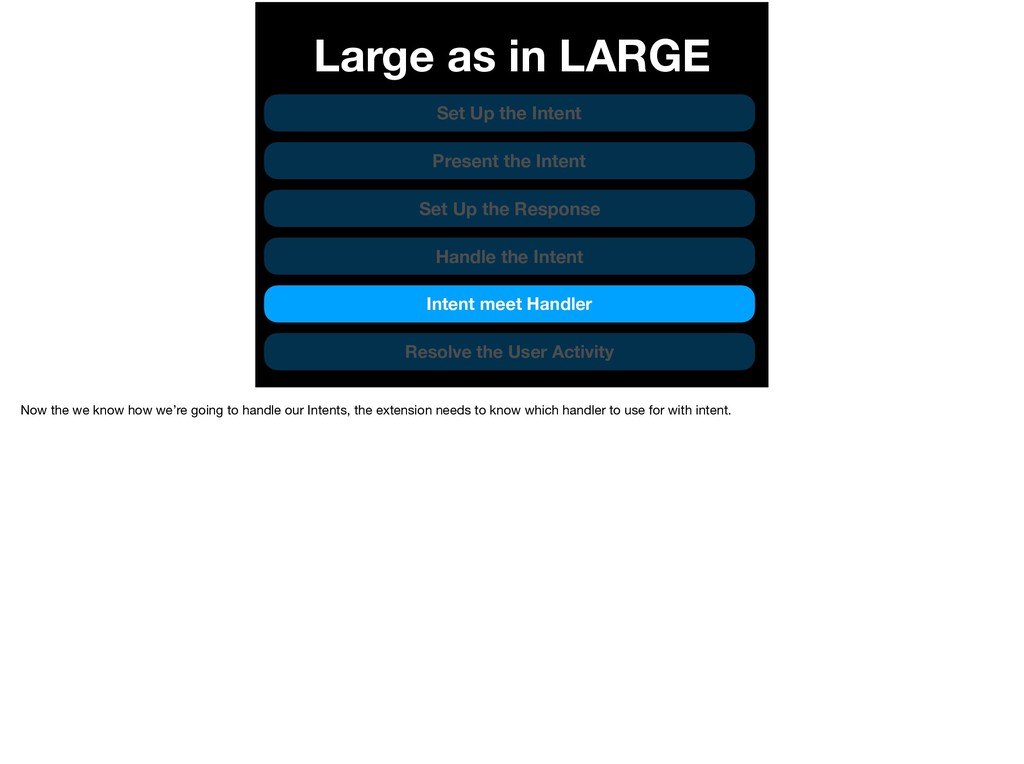
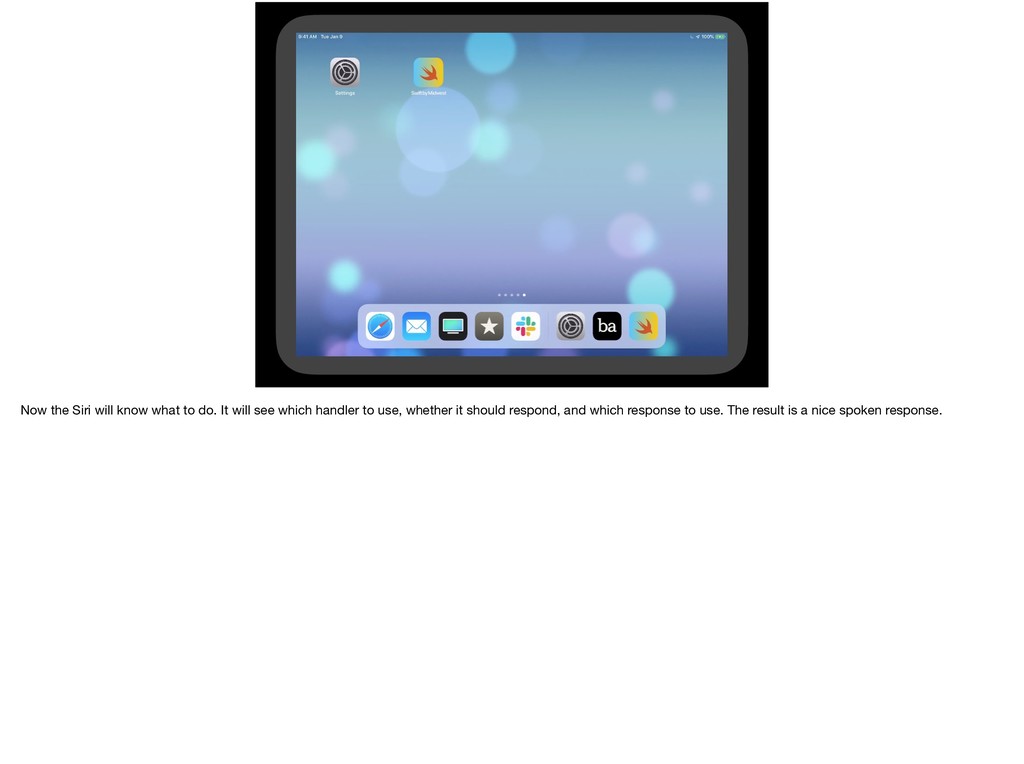
Intent Set Up the Response Handle the Intent Intent meet Handler Resolve the User Activity Now the we know how we’re going to handle our Intents, the extension needs to know which handler to use for with intent.
Intent Set Up the Response Handle the Intent Intent meet Handler Resolve the User Activity Now the we know how we’re going to handle our Intents, the extension needs to know which handler to use for with intent.
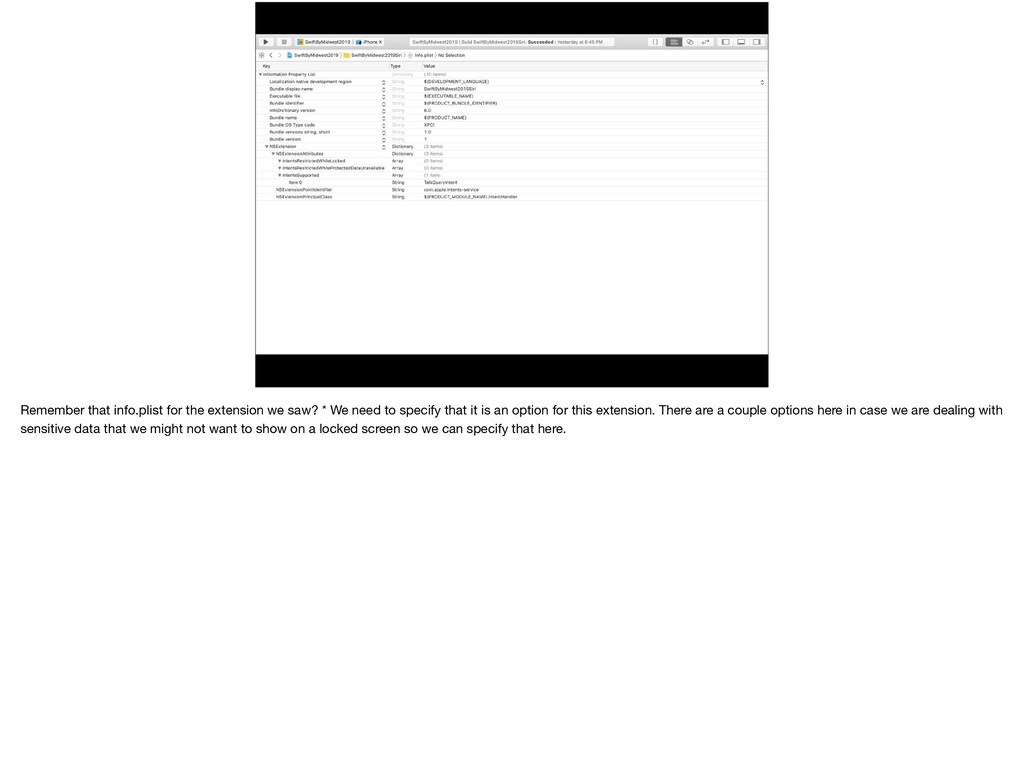
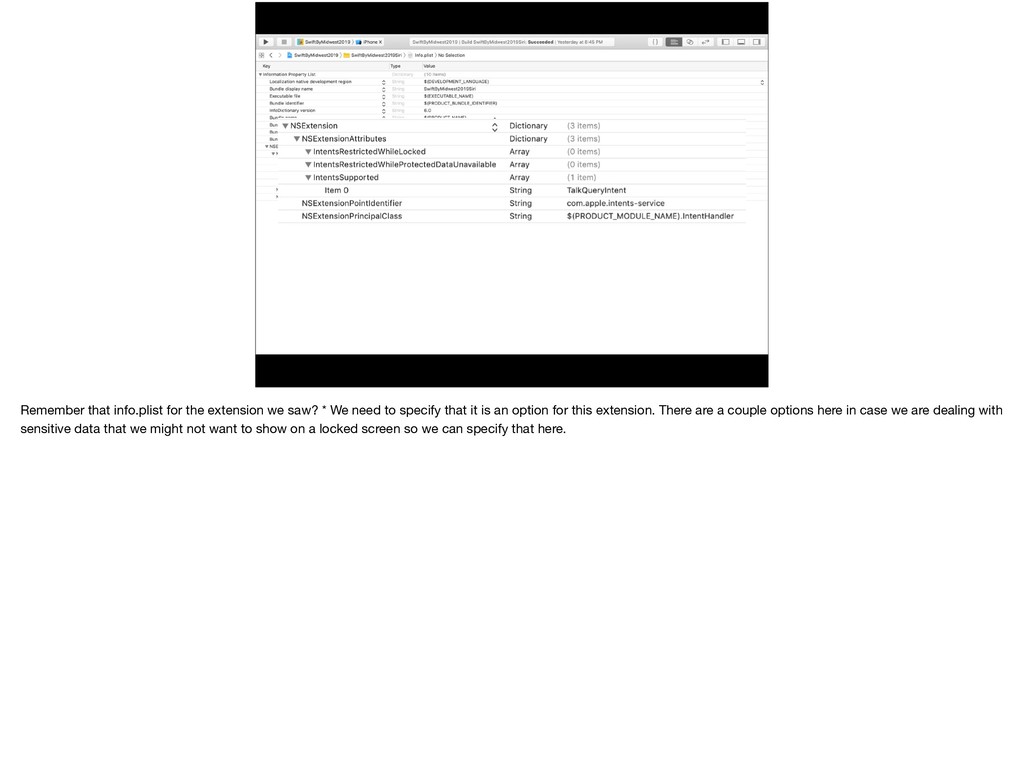
need to specify that it is an option for this extension. There are a couple options here in case we are dealing with sensitive data that we might not want to show on a locked screen so we can specify that here.
need to specify that it is an option for this extension. There are a couple options here in case we are dealing with sensitive data that we might not want to show on a locked screen so we can specify that here.
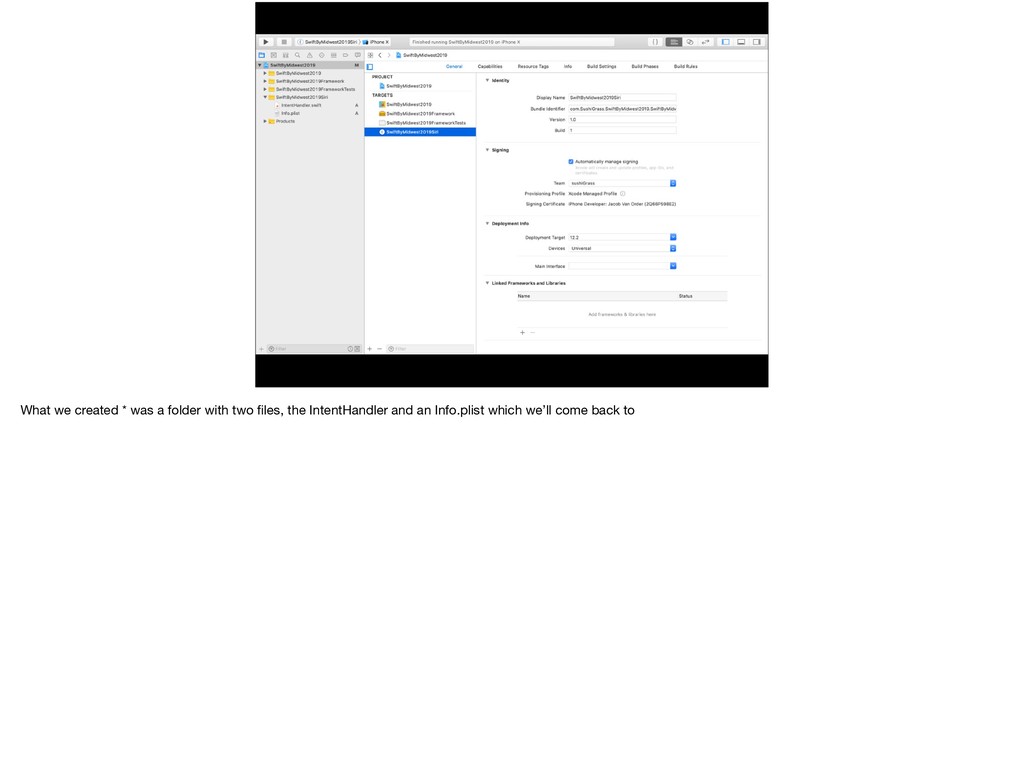
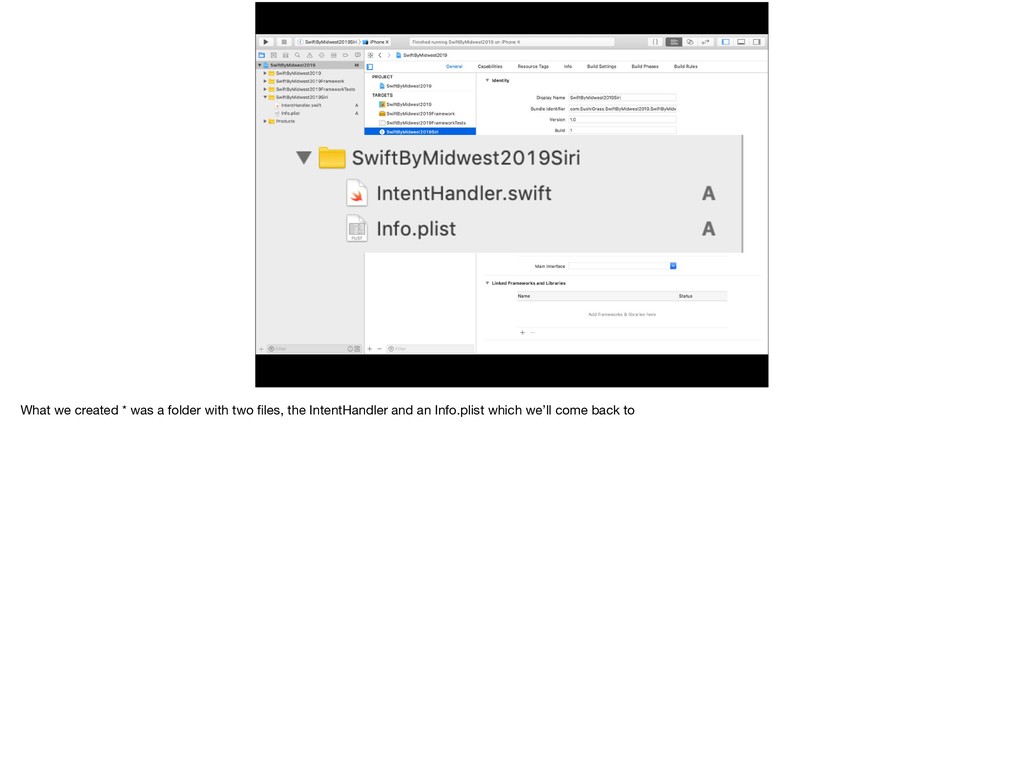
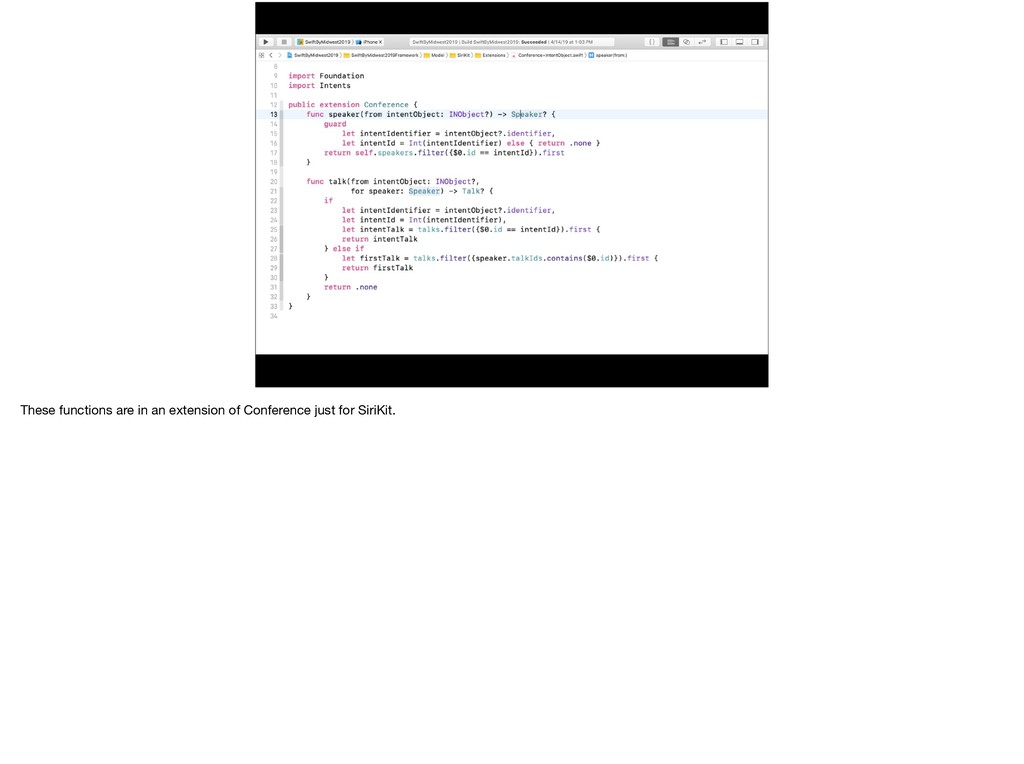
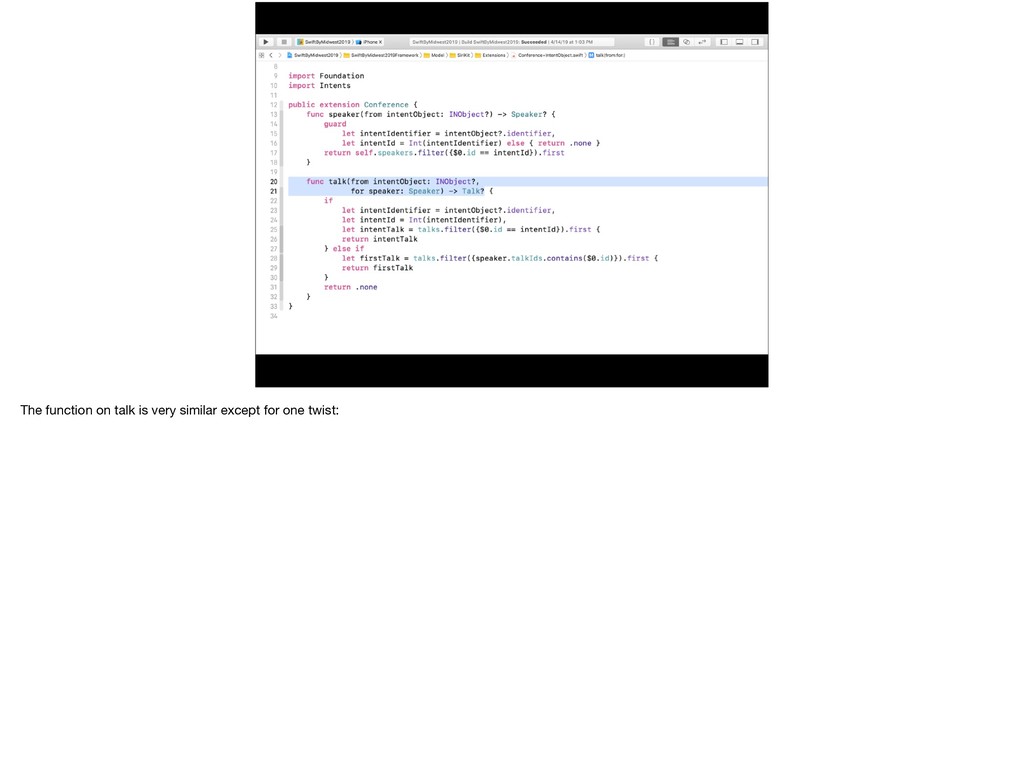
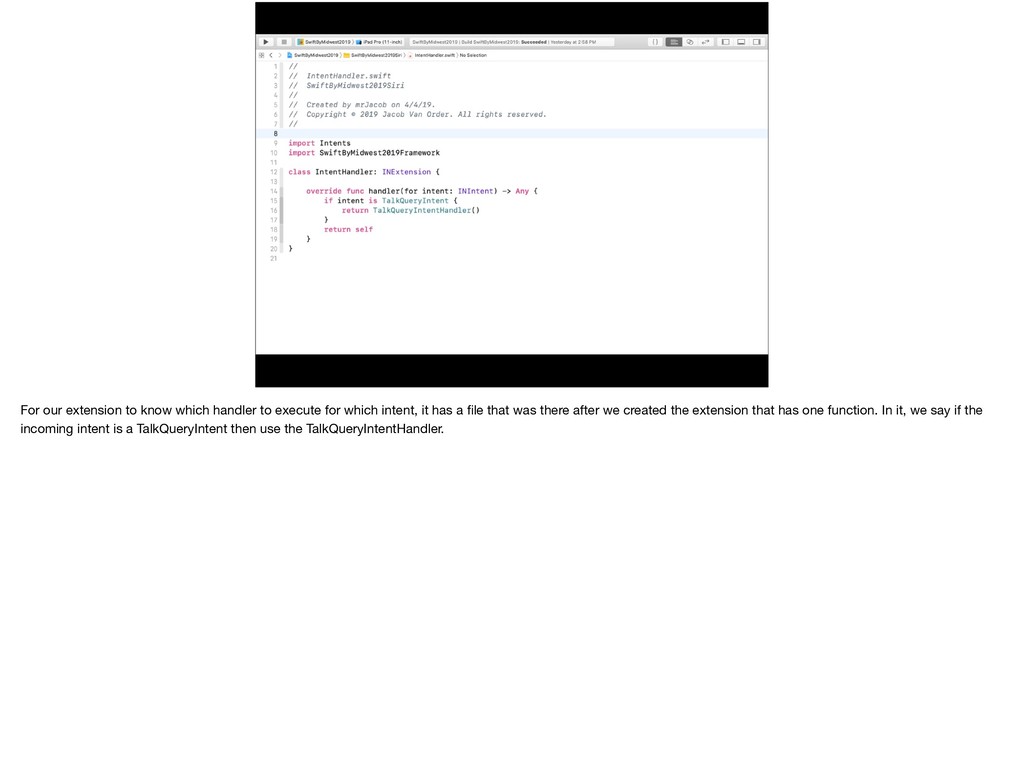
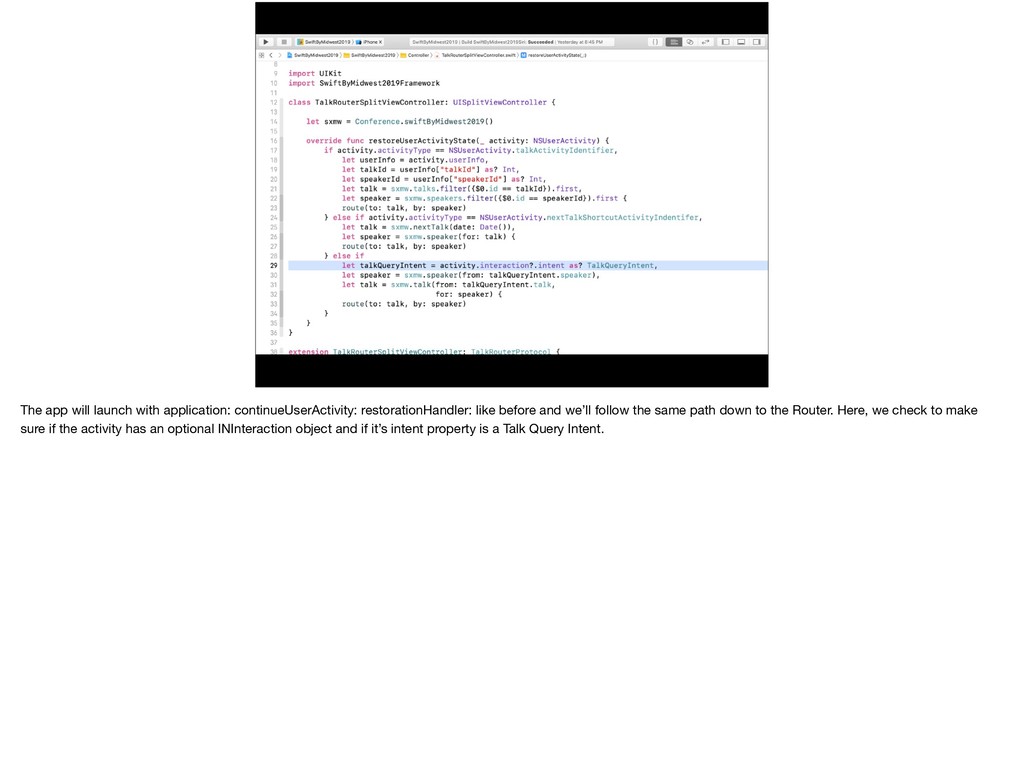
which intent, it has a file that was there after we created the extension that has one function. In it, we say if the incoming intent is a TalkQueryIntent then use the TalkQueryIntentHandler.
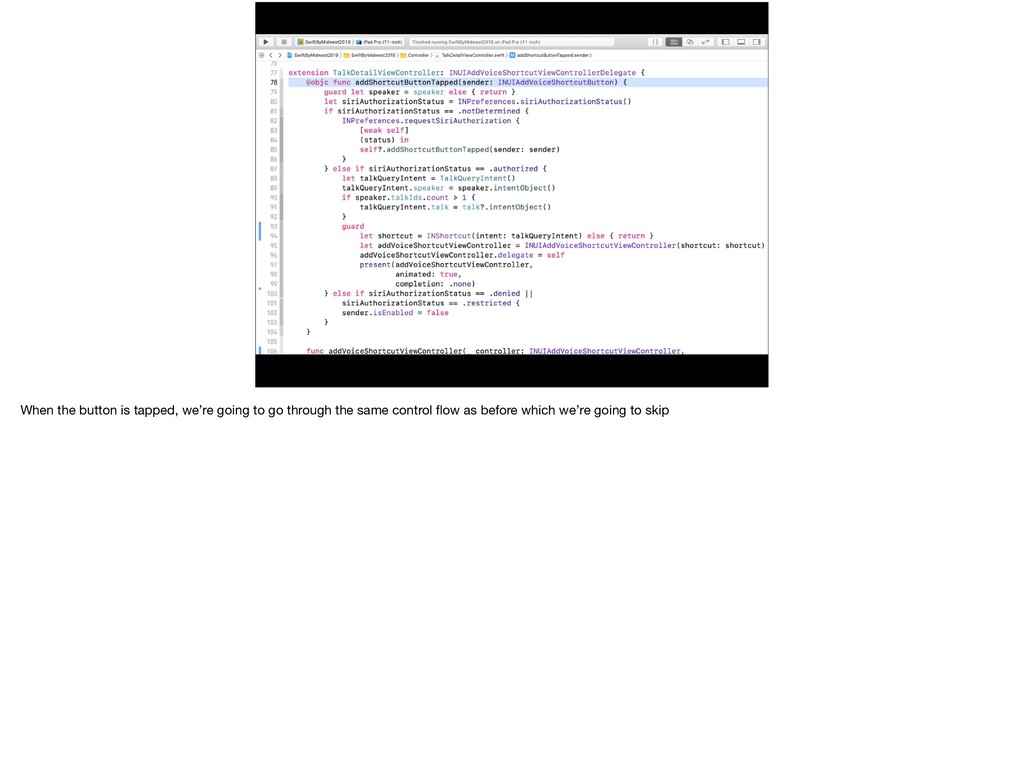
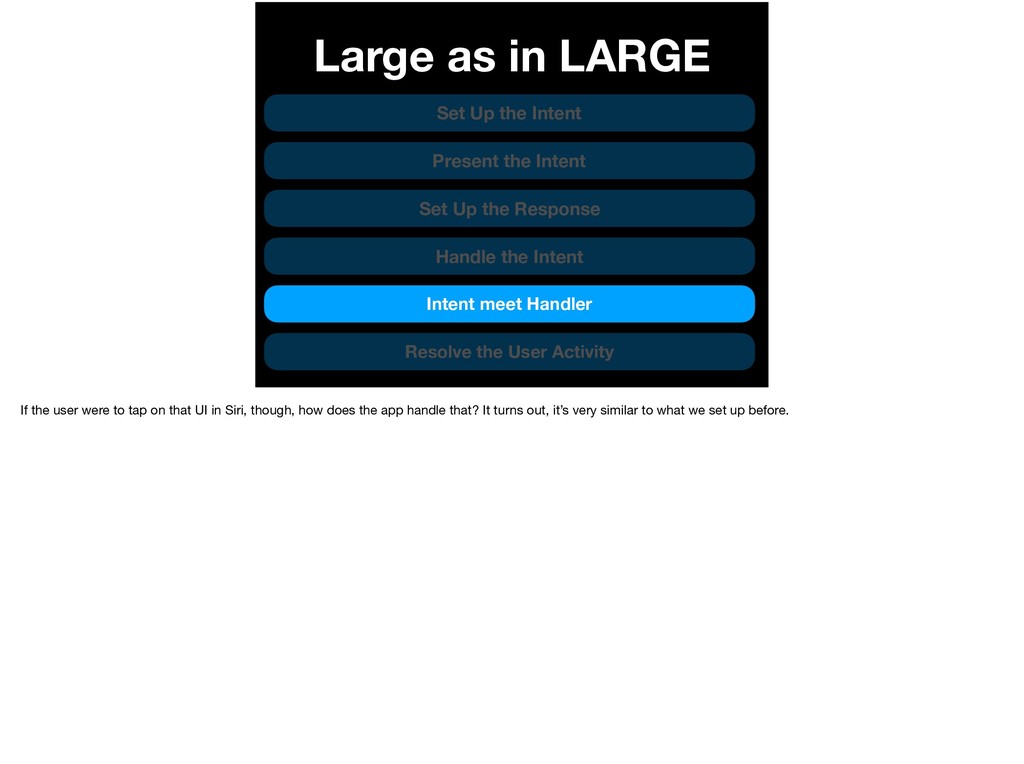
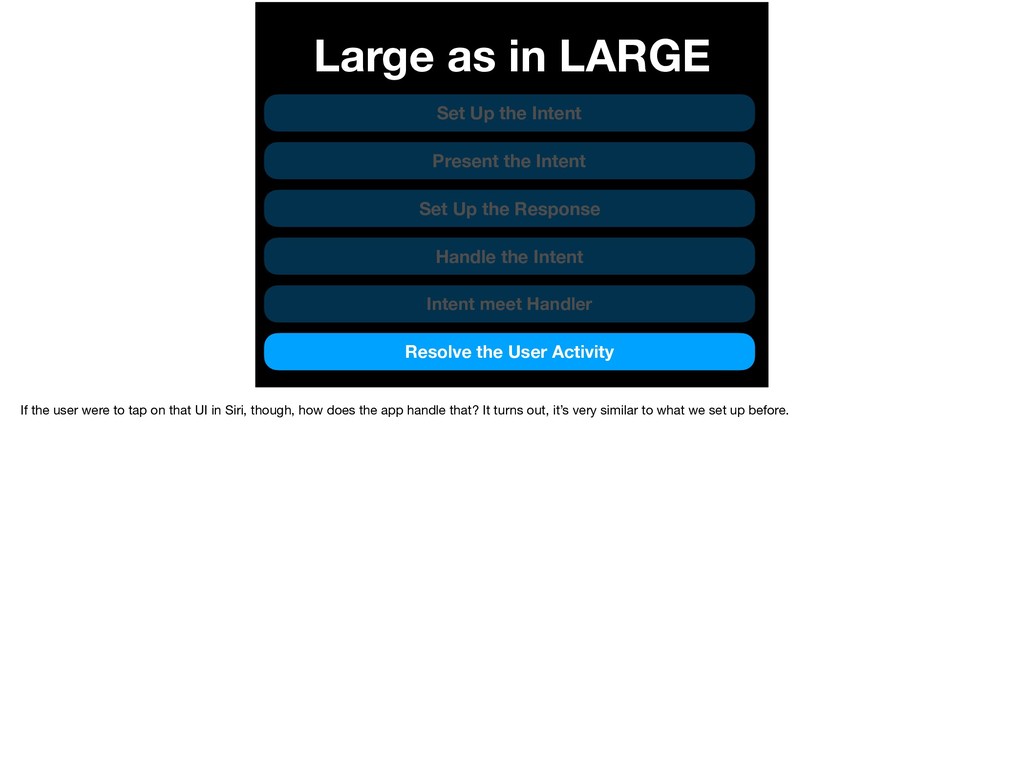
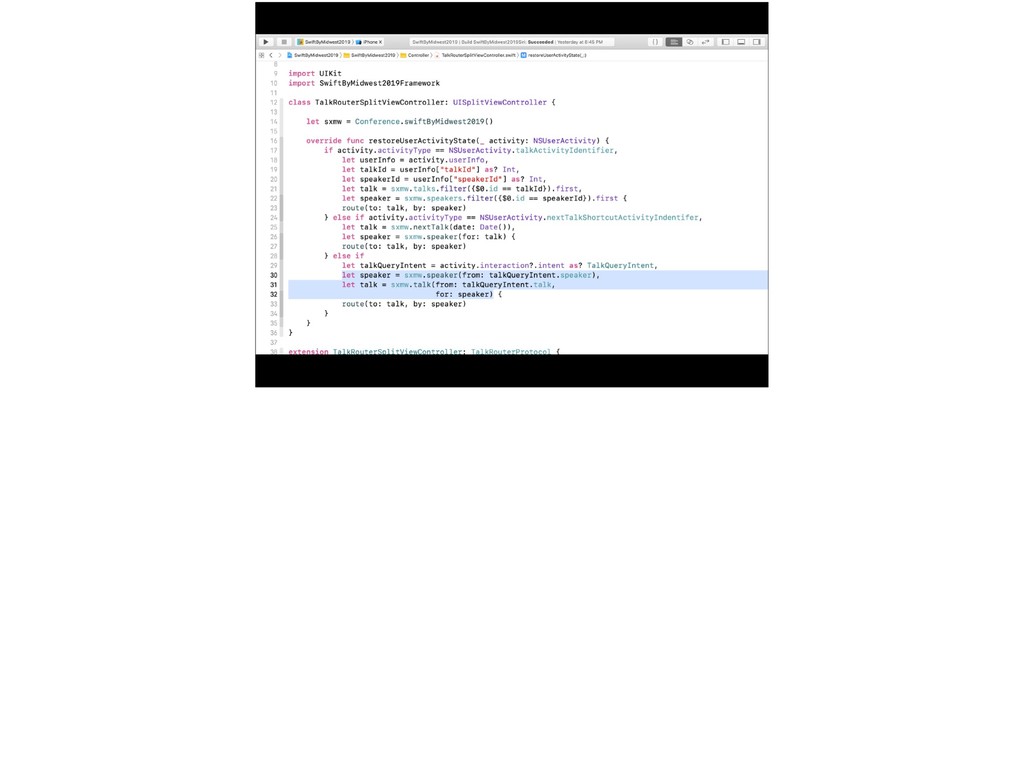
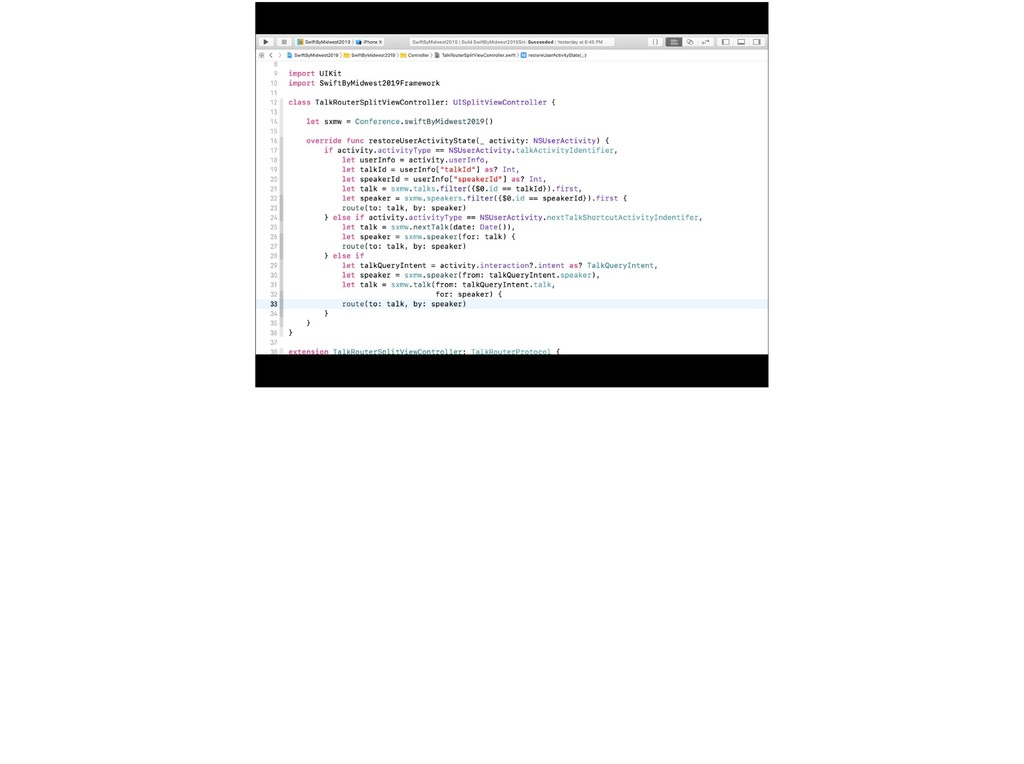
Intent Set Up the Response Handle the Intent Intent meet Handler Resolve the User Activity If the user were to tap on that UI in Siri, though, how does the app handle that? It turns out, it’s very similar to what we set up before.
Intent Set Up the Response Handle the Intent Intent meet Handler Resolve the User Activity If the user were to tap on that UI in Siri, though, how does the app handle that? It turns out, it’s very similar to what we set up before.
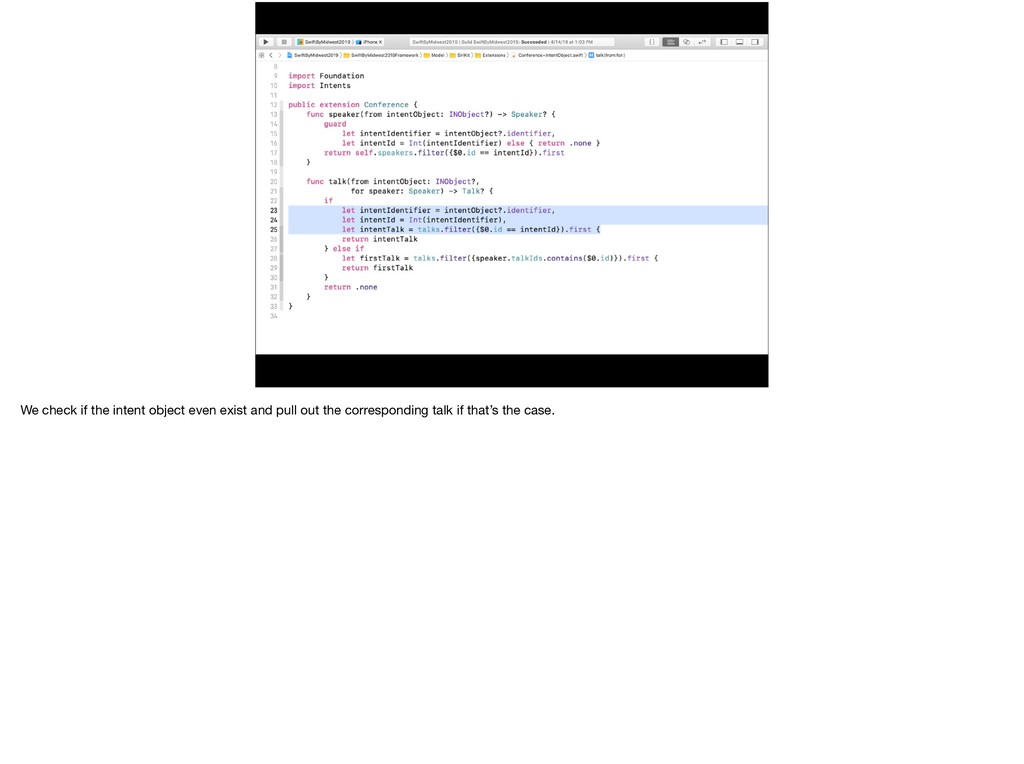
and we’ll follow the same path down to the Router. Here, we check to make sure if the activity has an optional INInteraction object and if it’s intent property is a Talk Query Intent.
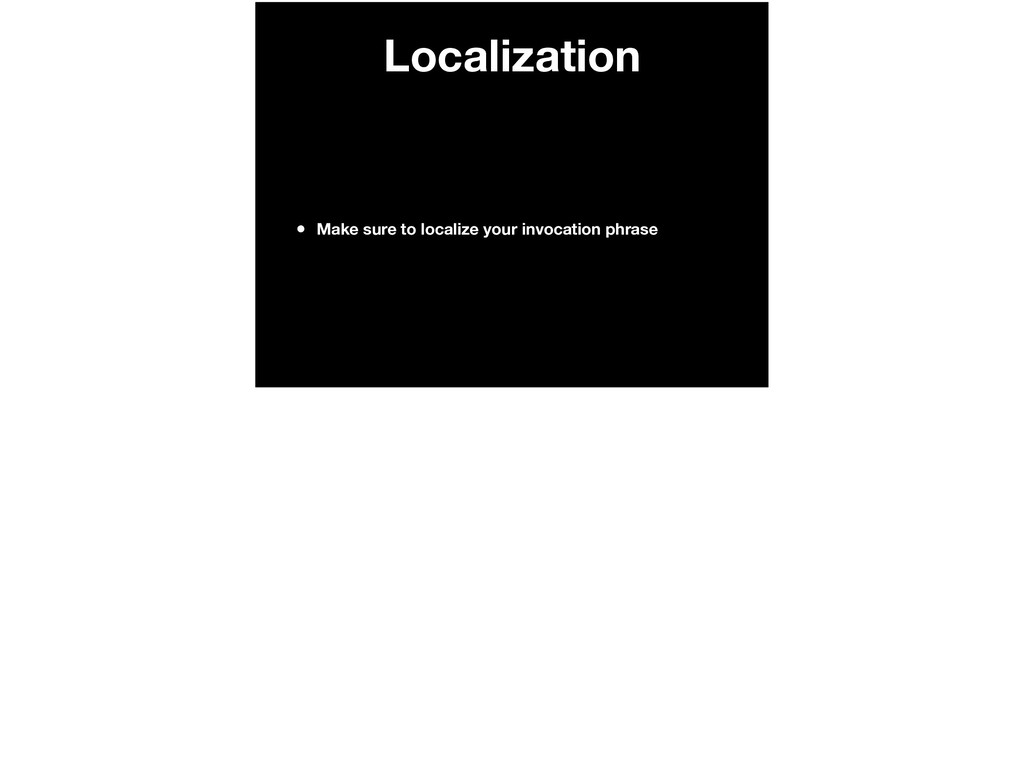
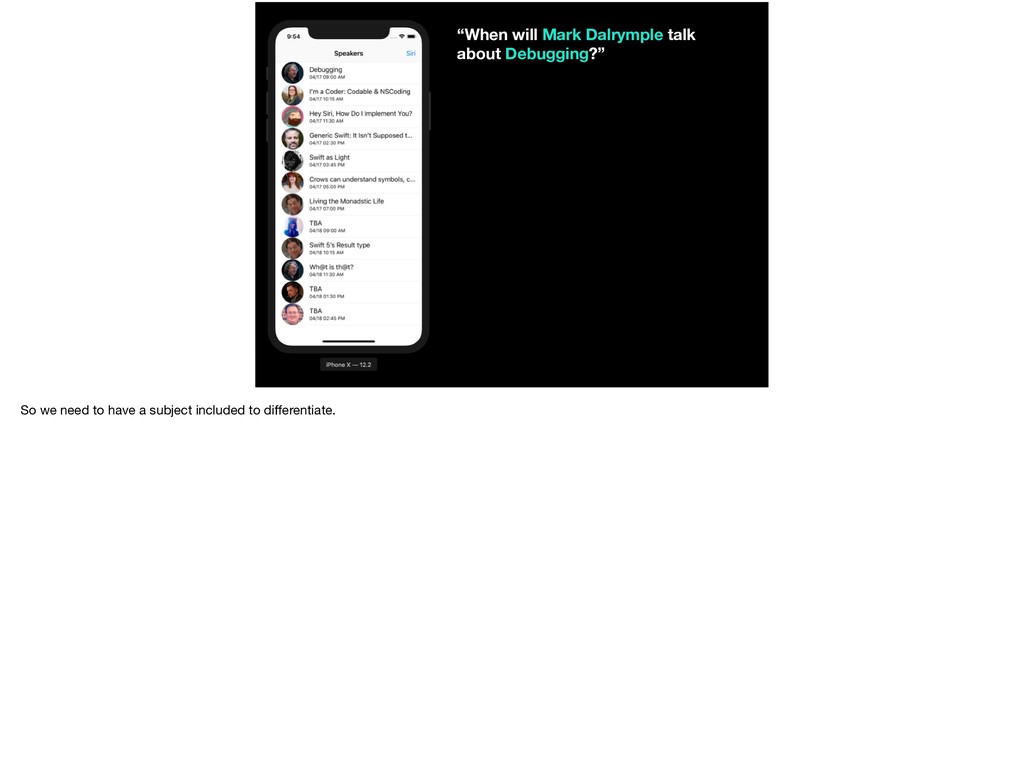
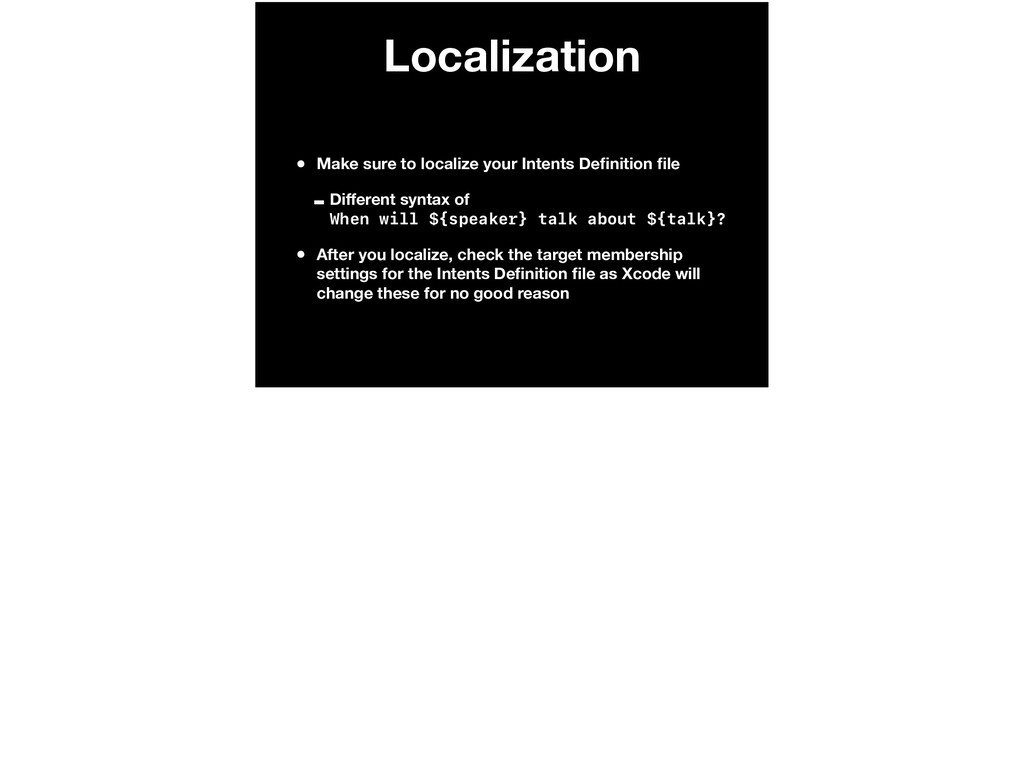
-Different syntax of When will ${speaker} talk about ${talk}? • After you localize, check the target membership settings for the Intents Definition file as Xcode will change these for no good reason
Don’t have to open the app Back to this scale, we have an implementation that wasn’t that big, we are still using NSUserDefault but it was more than 4 lines of code. The flip side is that it was easier for our users to find.
more complex tasks than a dehydrated body. It helps in improving the mood, boosting memory, reducing the frequency of headaches, and improving brain function. If the body experiences fluid loss, it can lead to anxiety and excessive fatigue. https://www.organicfacts.net/health-benefits/other/health-benefits-of-drinking-water.html
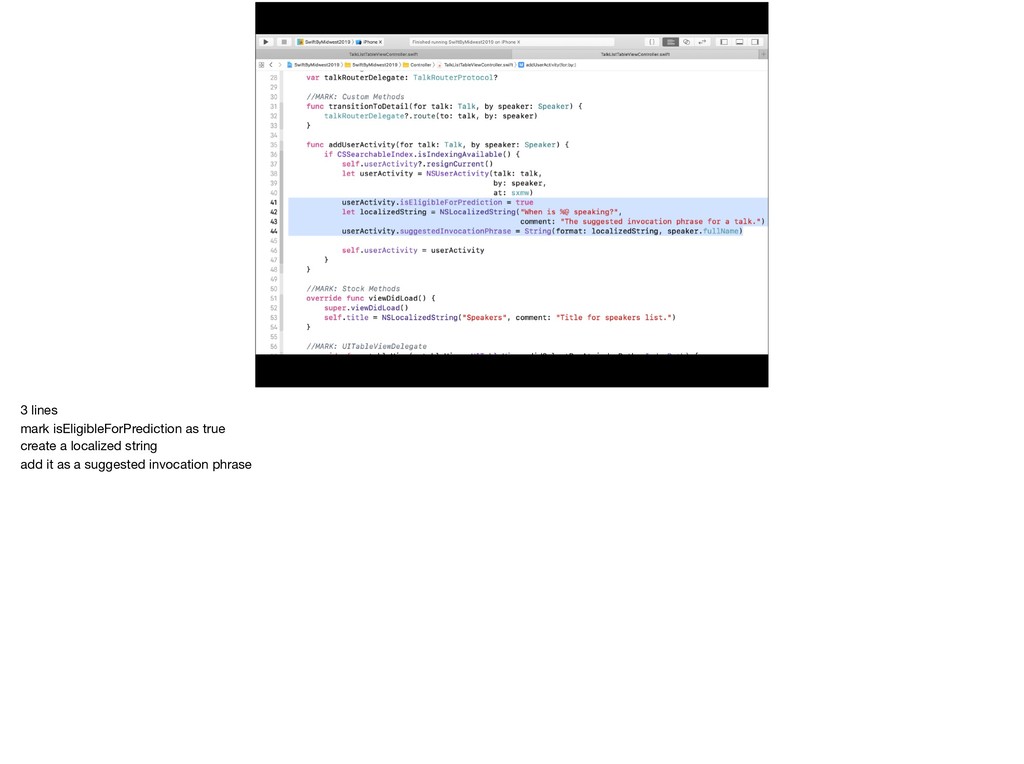
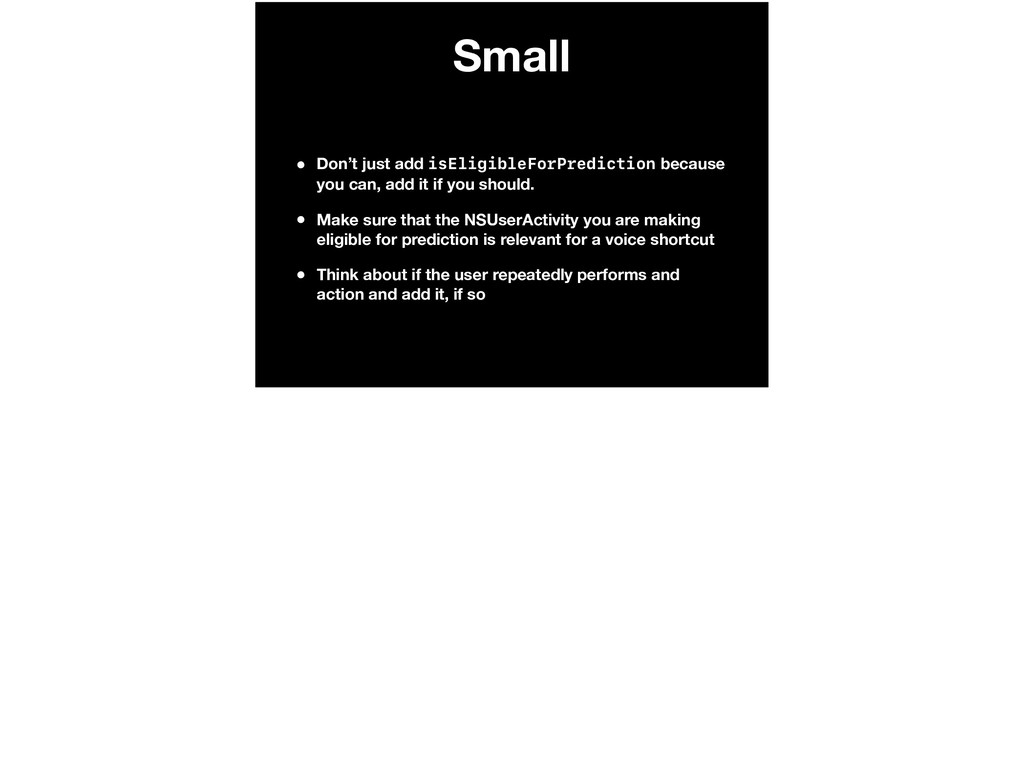
it if you should. • Make sure that the NSUserActivity you are making eligible for prediction is relevant for a voice shortcut • Think about if the user repeatedly performs and action and add it, if so
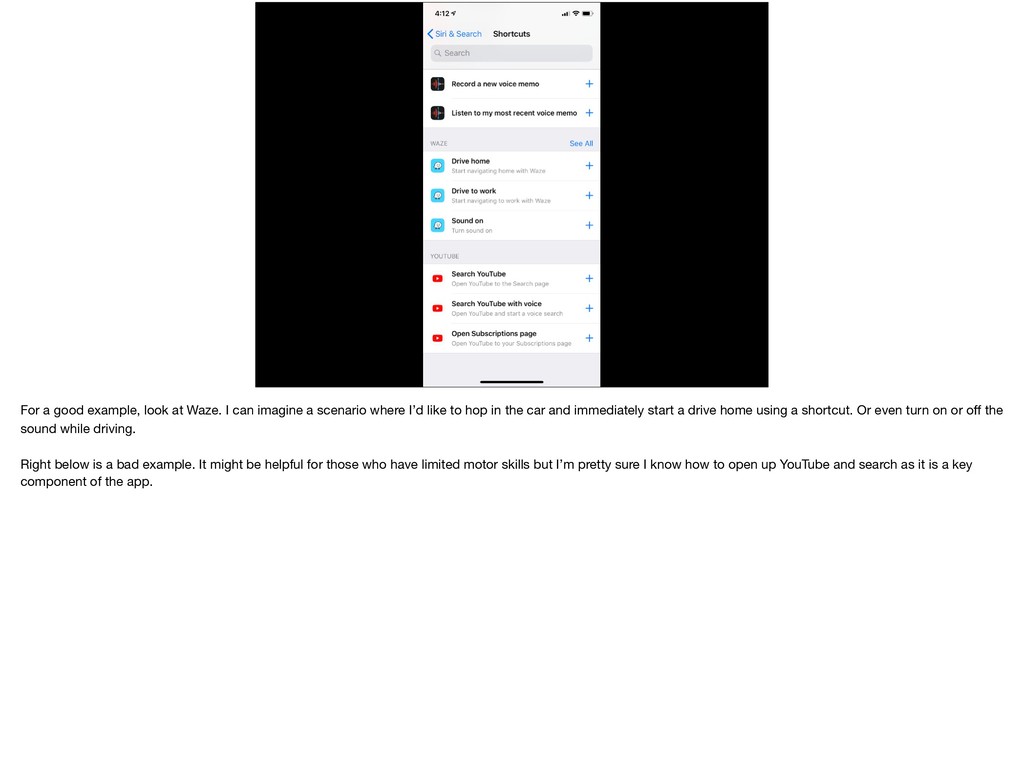
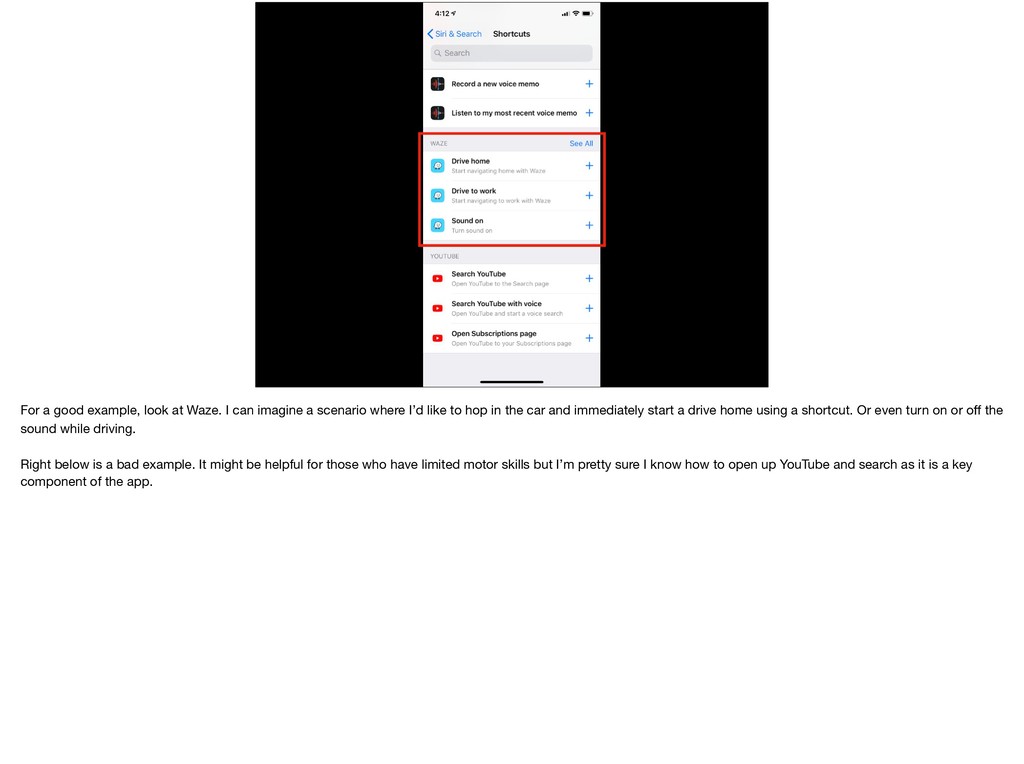
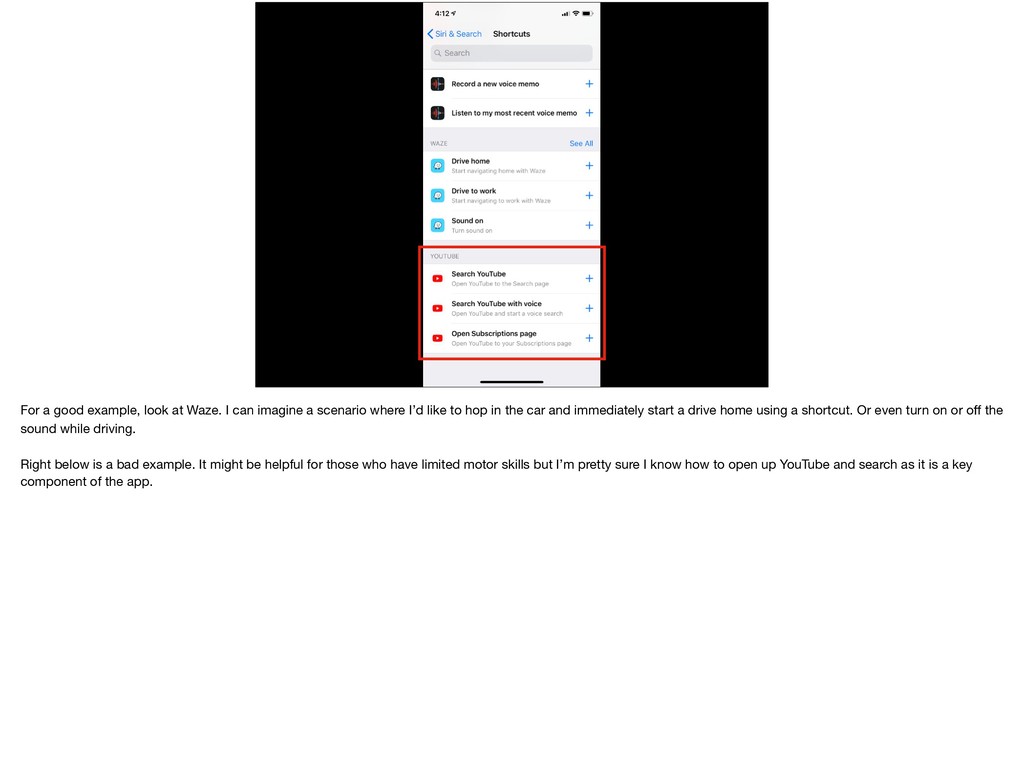
a scenario where I’d like to hop in the car and immediately start a drive home using a shortcut. Or even turn on or off the sound while driving. Right below is a bad example. It might be helpful for those who have limited motor skills but I’m pretty sure I know how to open up YouTube and search as it is a key component of the app.
a scenario where I’d like to hop in the car and immediately start a drive home using a shortcut. Or even turn on or off the sound while driving. Right below is a bad example. It might be helpful for those who have limited motor skills but I’m pretty sure I know how to open up YouTube and search as it is a key component of the app.
a scenario where I’d like to hop in the car and immediately start a drive home using a shortcut. Or even turn on or off the sound while driving. Right below is a bad example. It might be helpful for those who have limited motor skills but I’m pretty sure I know how to open up YouTube and search as it is a key component of the app.
app’s User flow diagram and is widely loved. Try to create a shortcut to that. • Be clear in your explanation of why you need SiriKit permissions in your info.plist
• Think about asking Siri on a HomePod a question and what kind of response you’d get with no visual indicators • In your handler, you may use asynchronous calls (network, location, database queries, etc…) but keep them limited
to add really benefits the user or if this is a feature checkbox that you’re checking off -Would you see yourself using it? -Does it really save time? -Could you see yourself saying this in public? • Keep the invocation phrases as short as possible
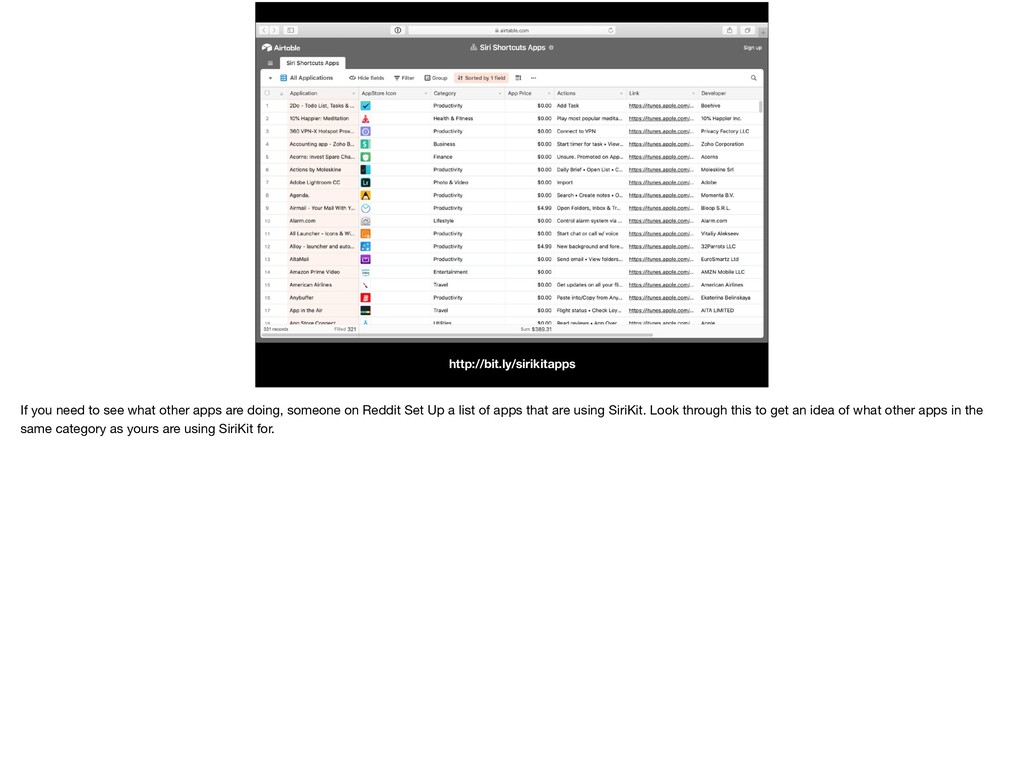
doing, someone on Reddit Set Up a list of apps that are using SiriKit. Look through this to get an idea of what other apps in the same category as yours are using SiriKit for.
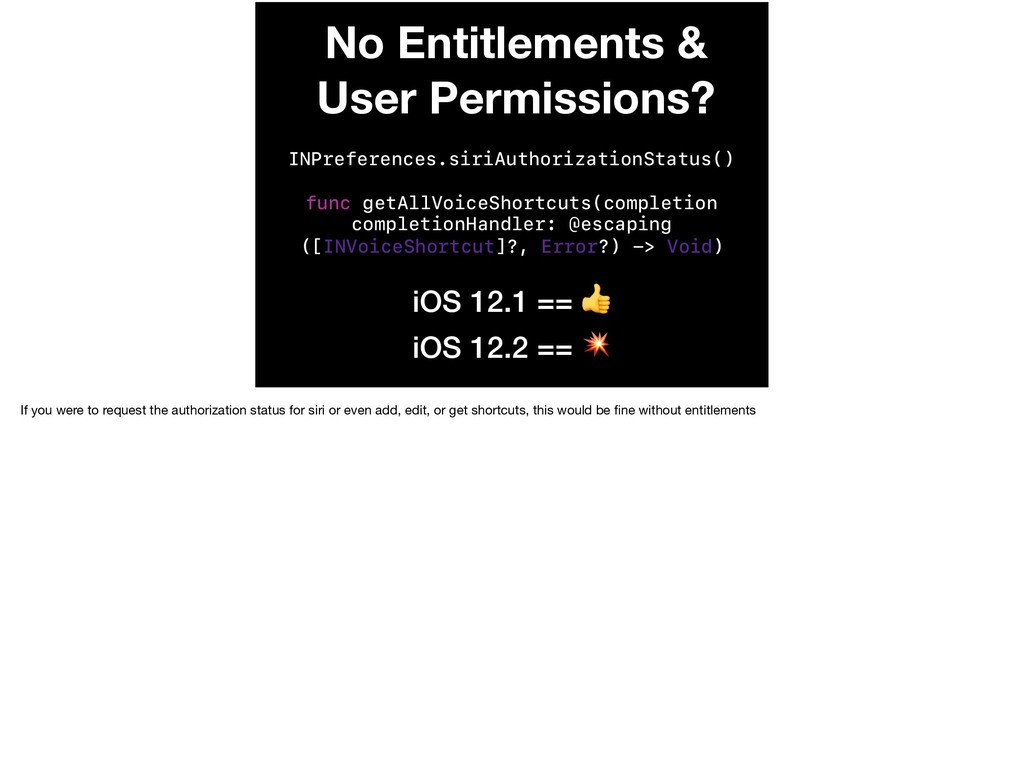
@escaping ([INVoiceShortcut]?, Error?) -> Void) No Entitlements & User Permissions? If you were to request the authorization status for siri or even add, edit, or get shortcuts, this would be fine without entitlements
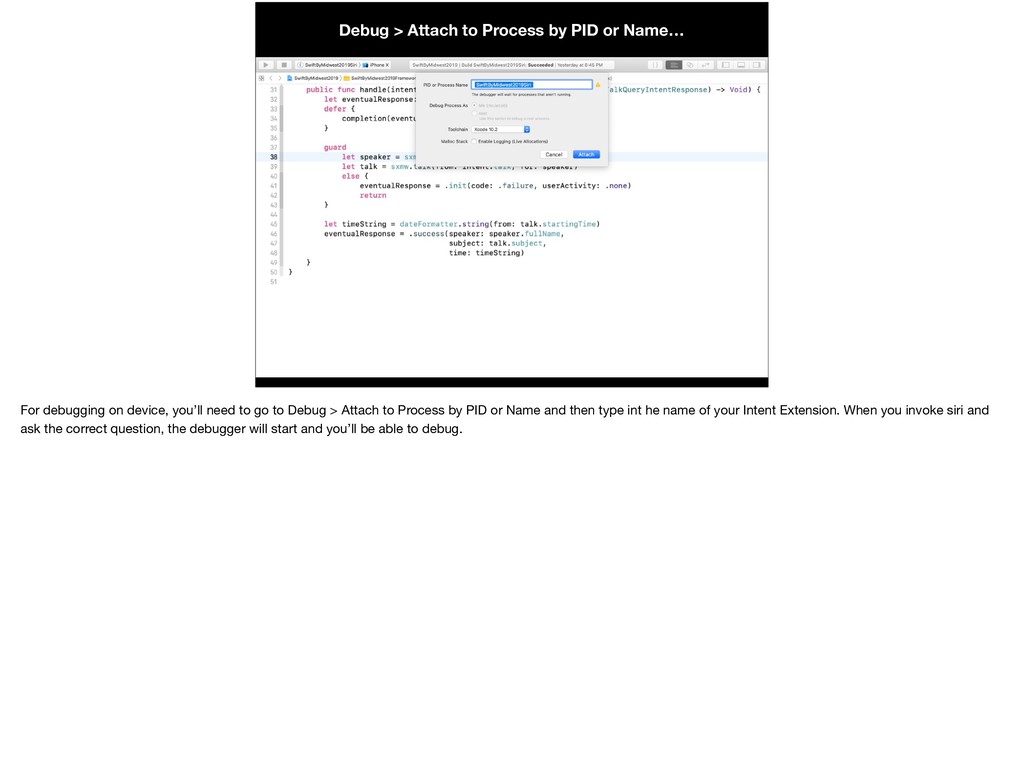
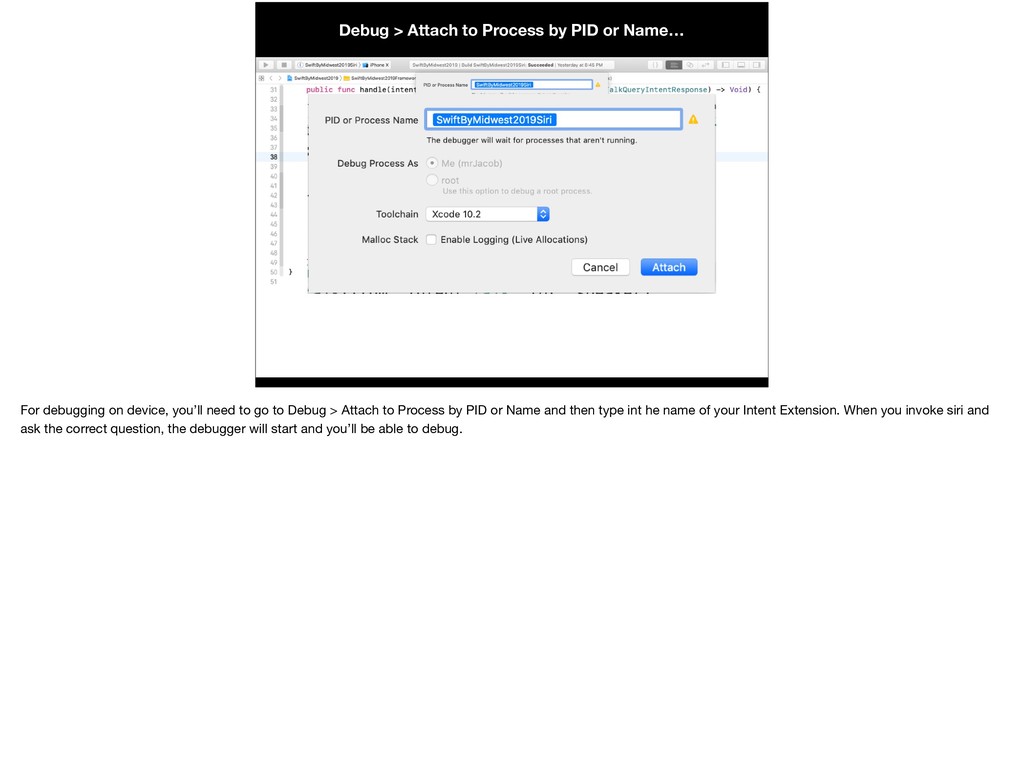
debugging on device, you’ll need to go to Debug > Attach to Process by PID or Name and then type int he name of your Intent Extension. When you invoke siri and ask the correct question, the debugger will start and you’ll be able to debug.
debugging on device, you’ll need to go to Debug > Attach to Process by PID or Name and then type int he name of your Intent Extension. When you invoke siri and ask the correct question, the debugger will start and you’ll be able to debug.
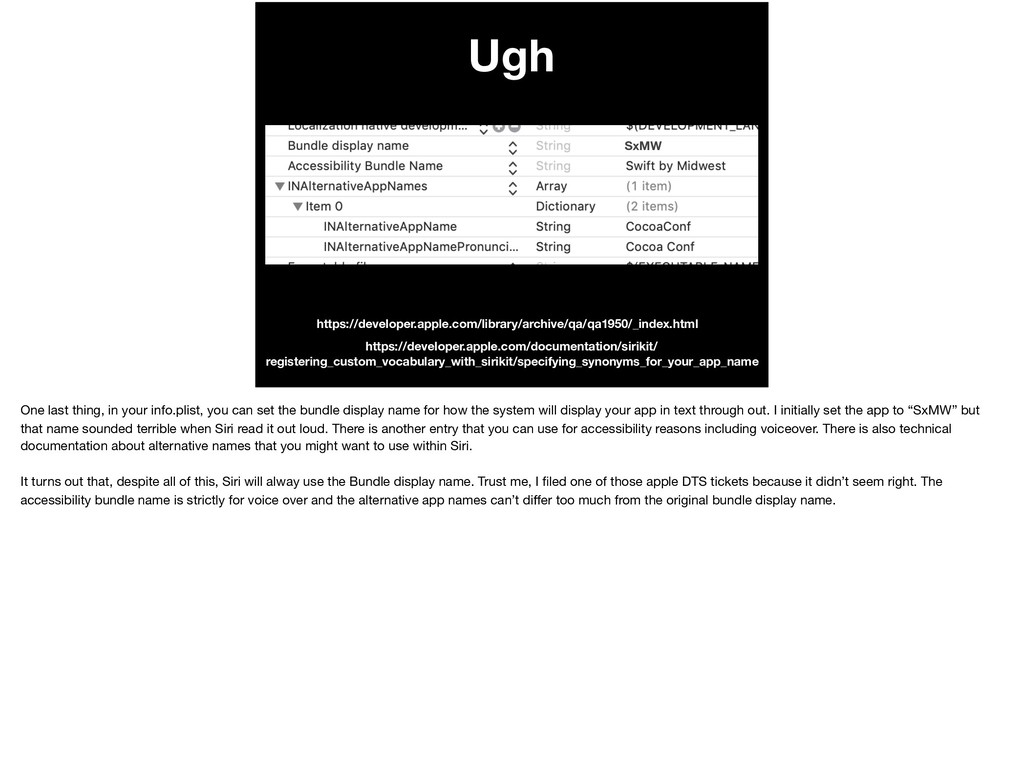
info.plist, you can set the bundle display name for how the system will display your app in text through out. I initially set the app to “SxMW” but that name sounded terrible when Siri read it out loud. There is another entry that you can use for accessibility reasons including voiceover. There is also technical documentation about alternative names that you might want to use within Siri. It turns out that, despite all of this, Siri will alway use the Bundle display name. Trust me, I filed one of those apple DTS tickets because it didn’t seem right. The accessibility bundle name is strictly for voice over and the alternative app names can’t differ too much from the original bundle display name.
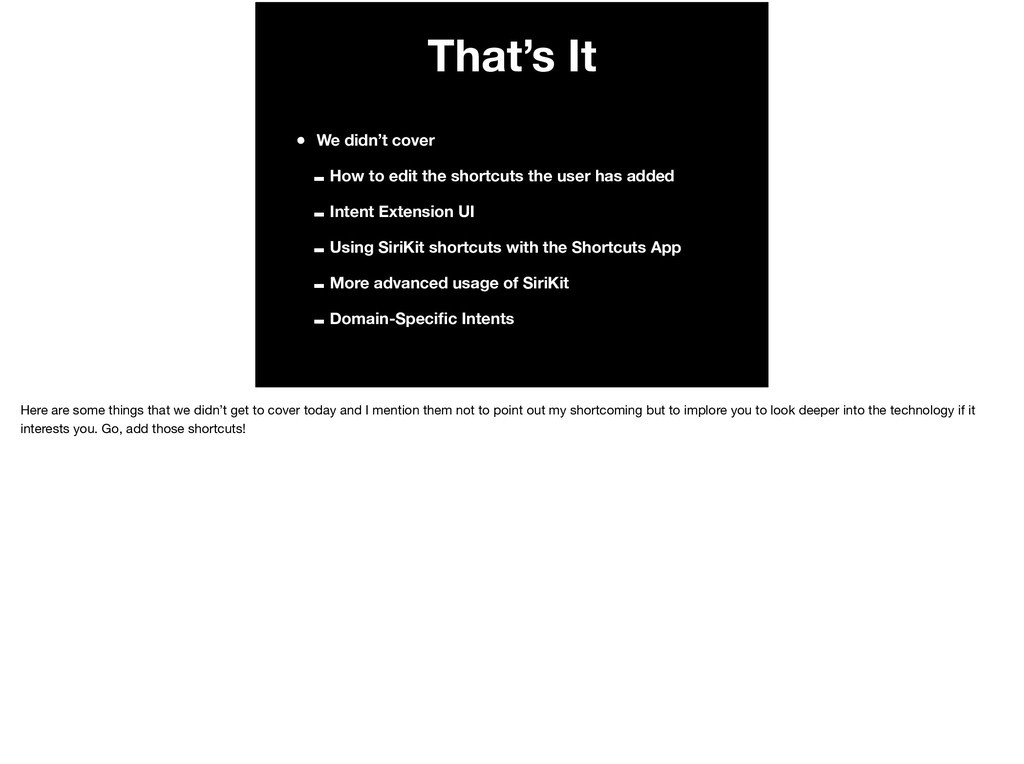
shortcuts the user has added -Intent Extension UI -Using SiriKit shortcuts with the Shortcuts App -More advanced usage of SiriKit -Domain-Specific Intents Here are some things that we didn’t get to cover today and I mention them not to point out my shortcoming but to implore you to look deeper into the technology if it interests you. Go, add those shortcuts!
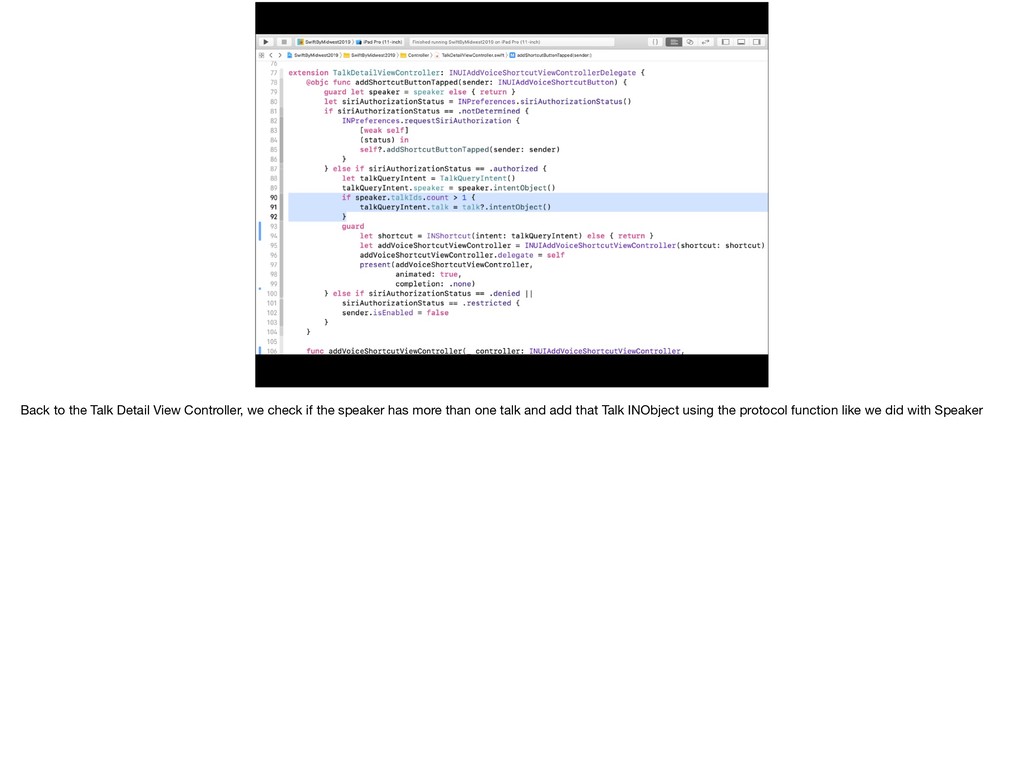
![Architecture Conference Talk [] Speaker [] Because we don’t know](https://files.speakerdeck.com/presentations/aca0b68b97294014946c7ab3b86ccd6f/slide_38.jpg)
![Thank you! [email protected] It’s true](https://files.speakerdeck.com/presentations/aca0b68b97294014946c7ab3b86ccd6f/slide_299.jpg)