Upgrade to Pro — share decks privately, control downloads, hide ads and more …

改造 ReSpeaker 2-MIC HAT

改造 ReSpeaker 2-MIC HAT

一天七小時工作坊,介紹
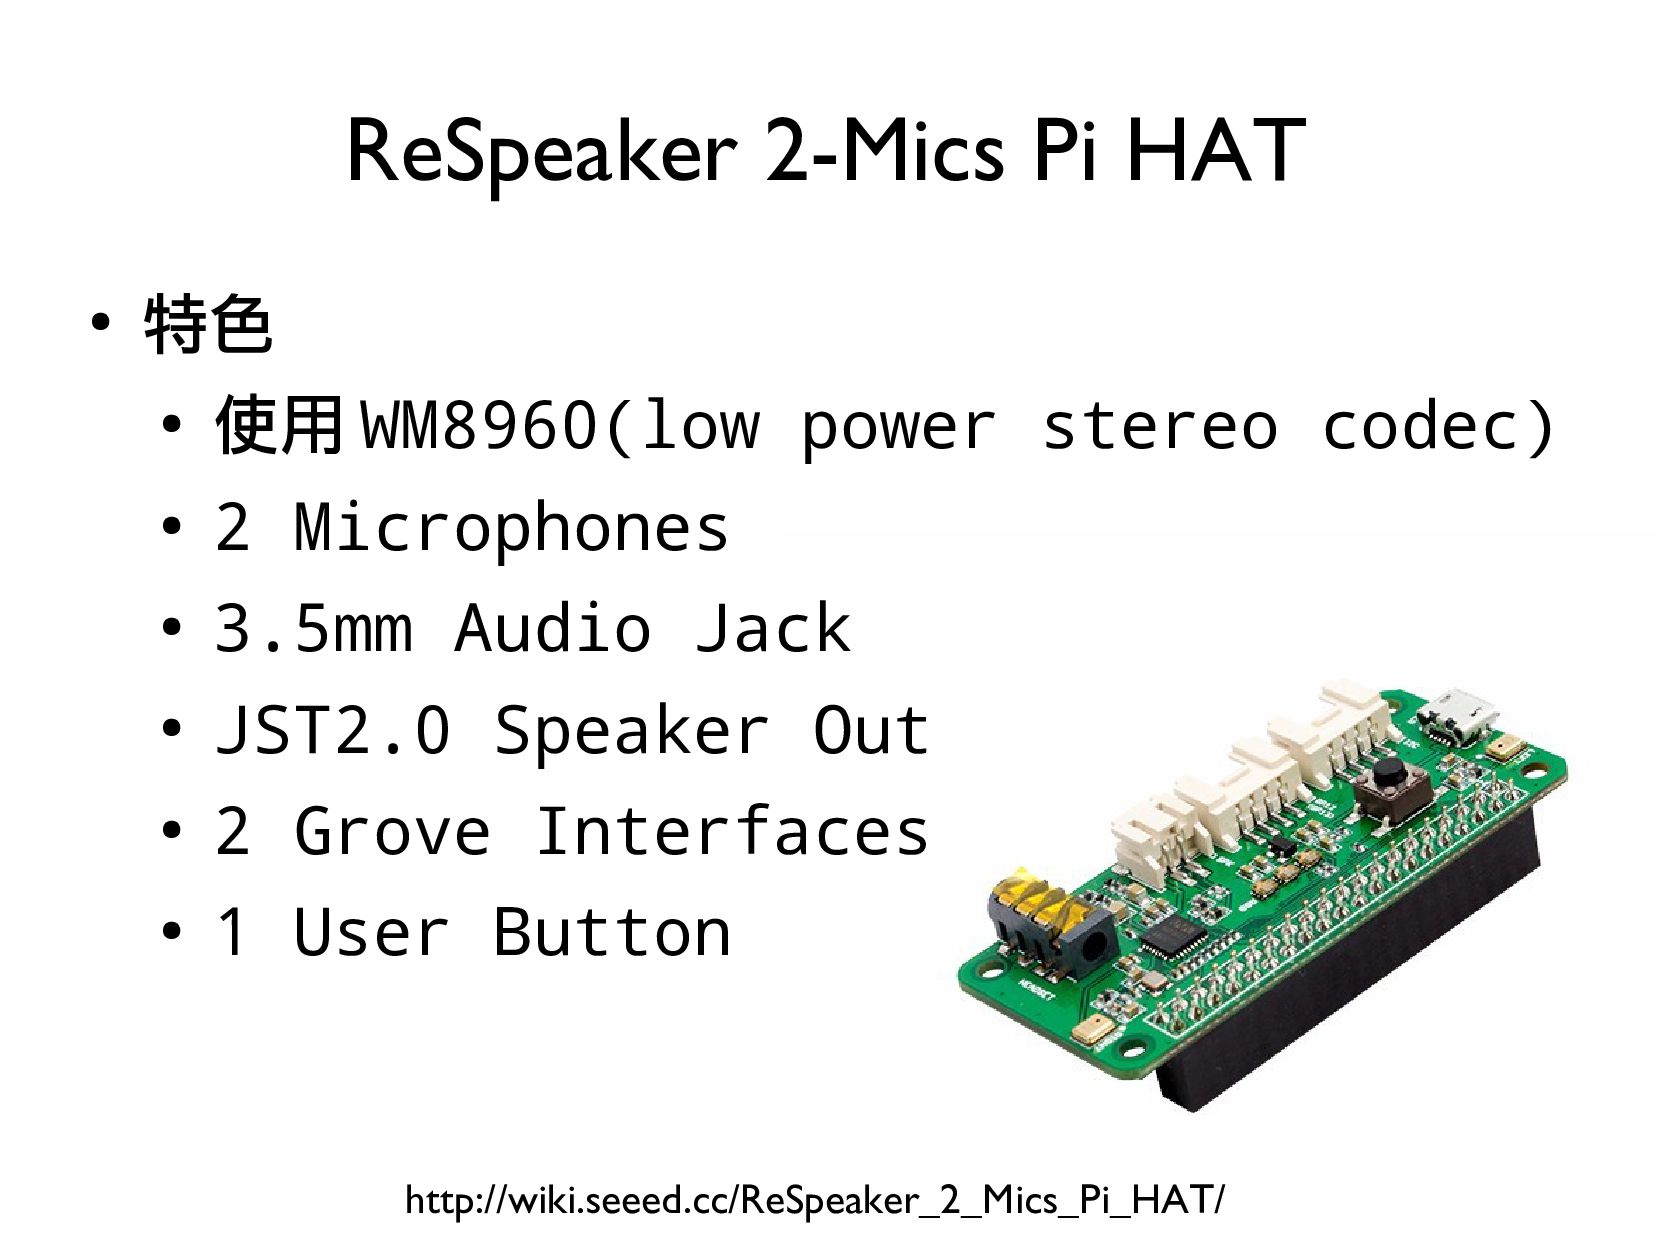
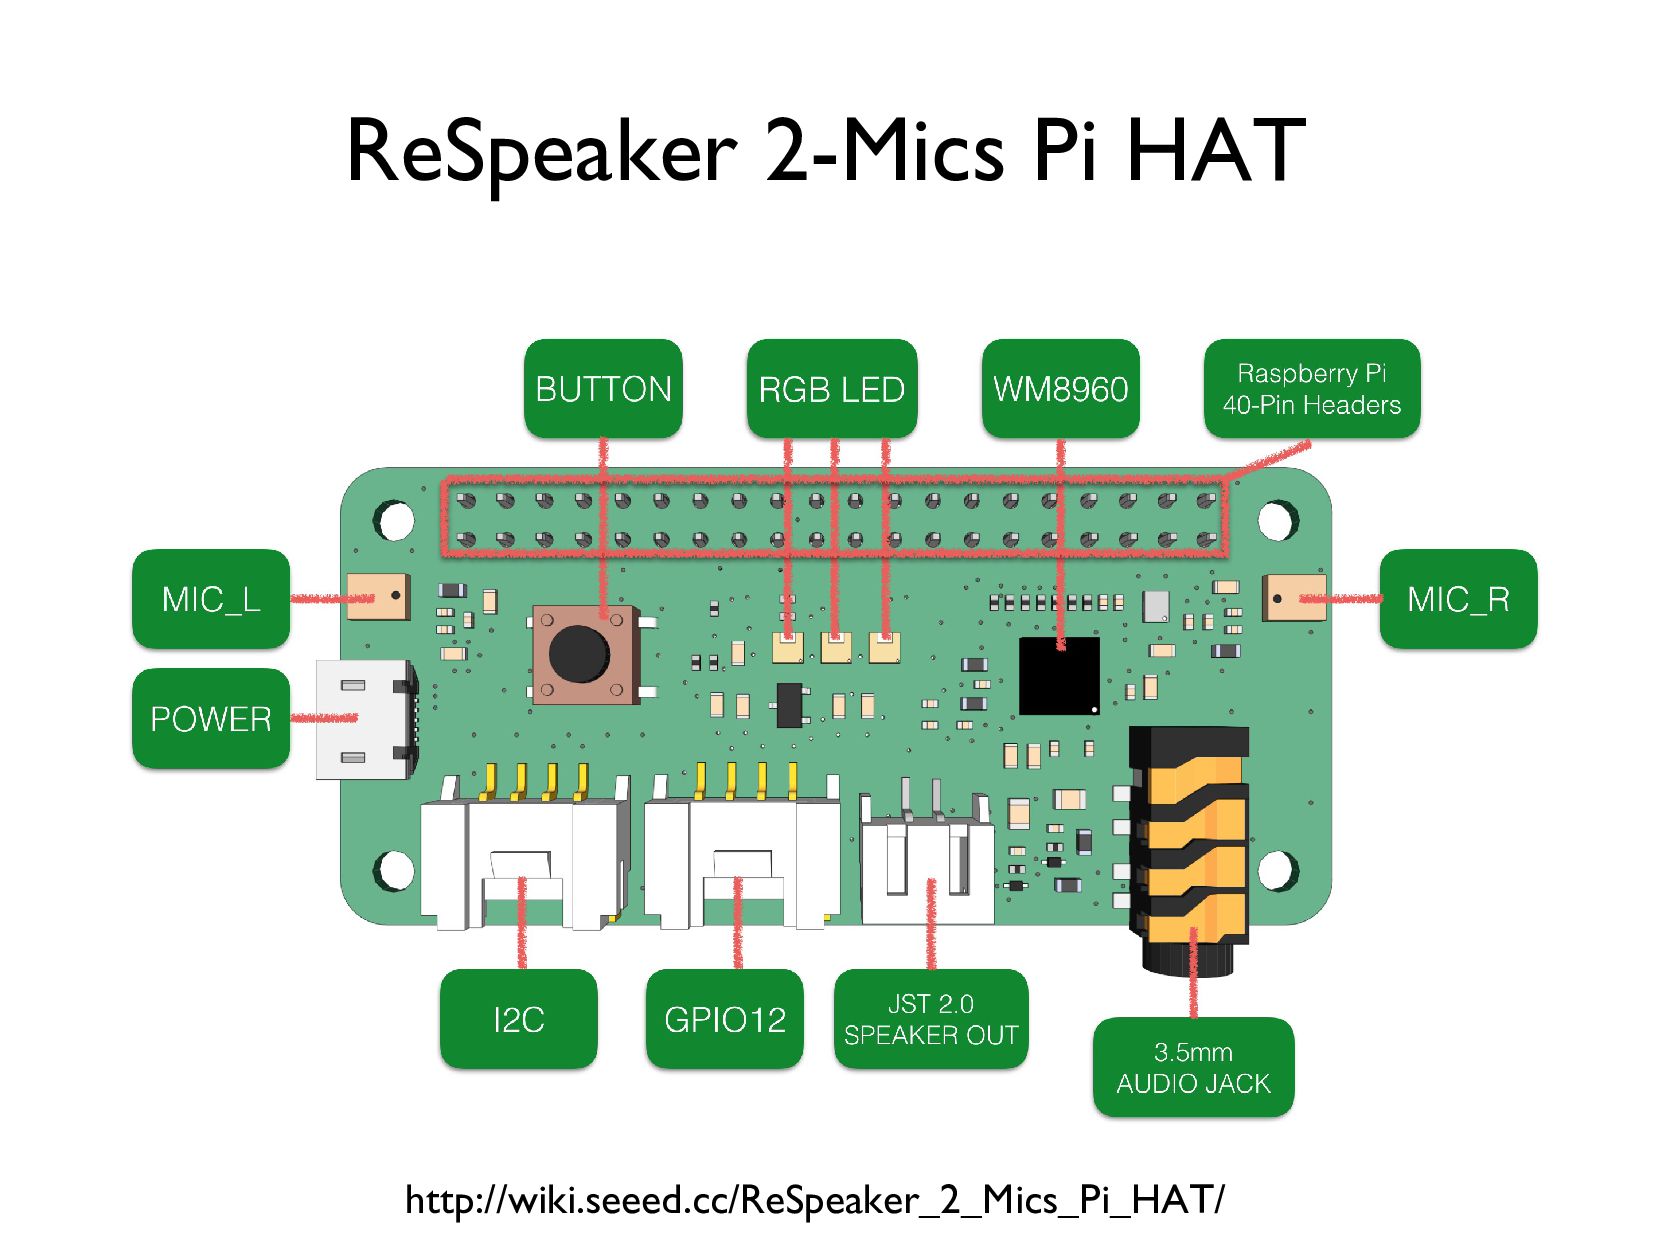
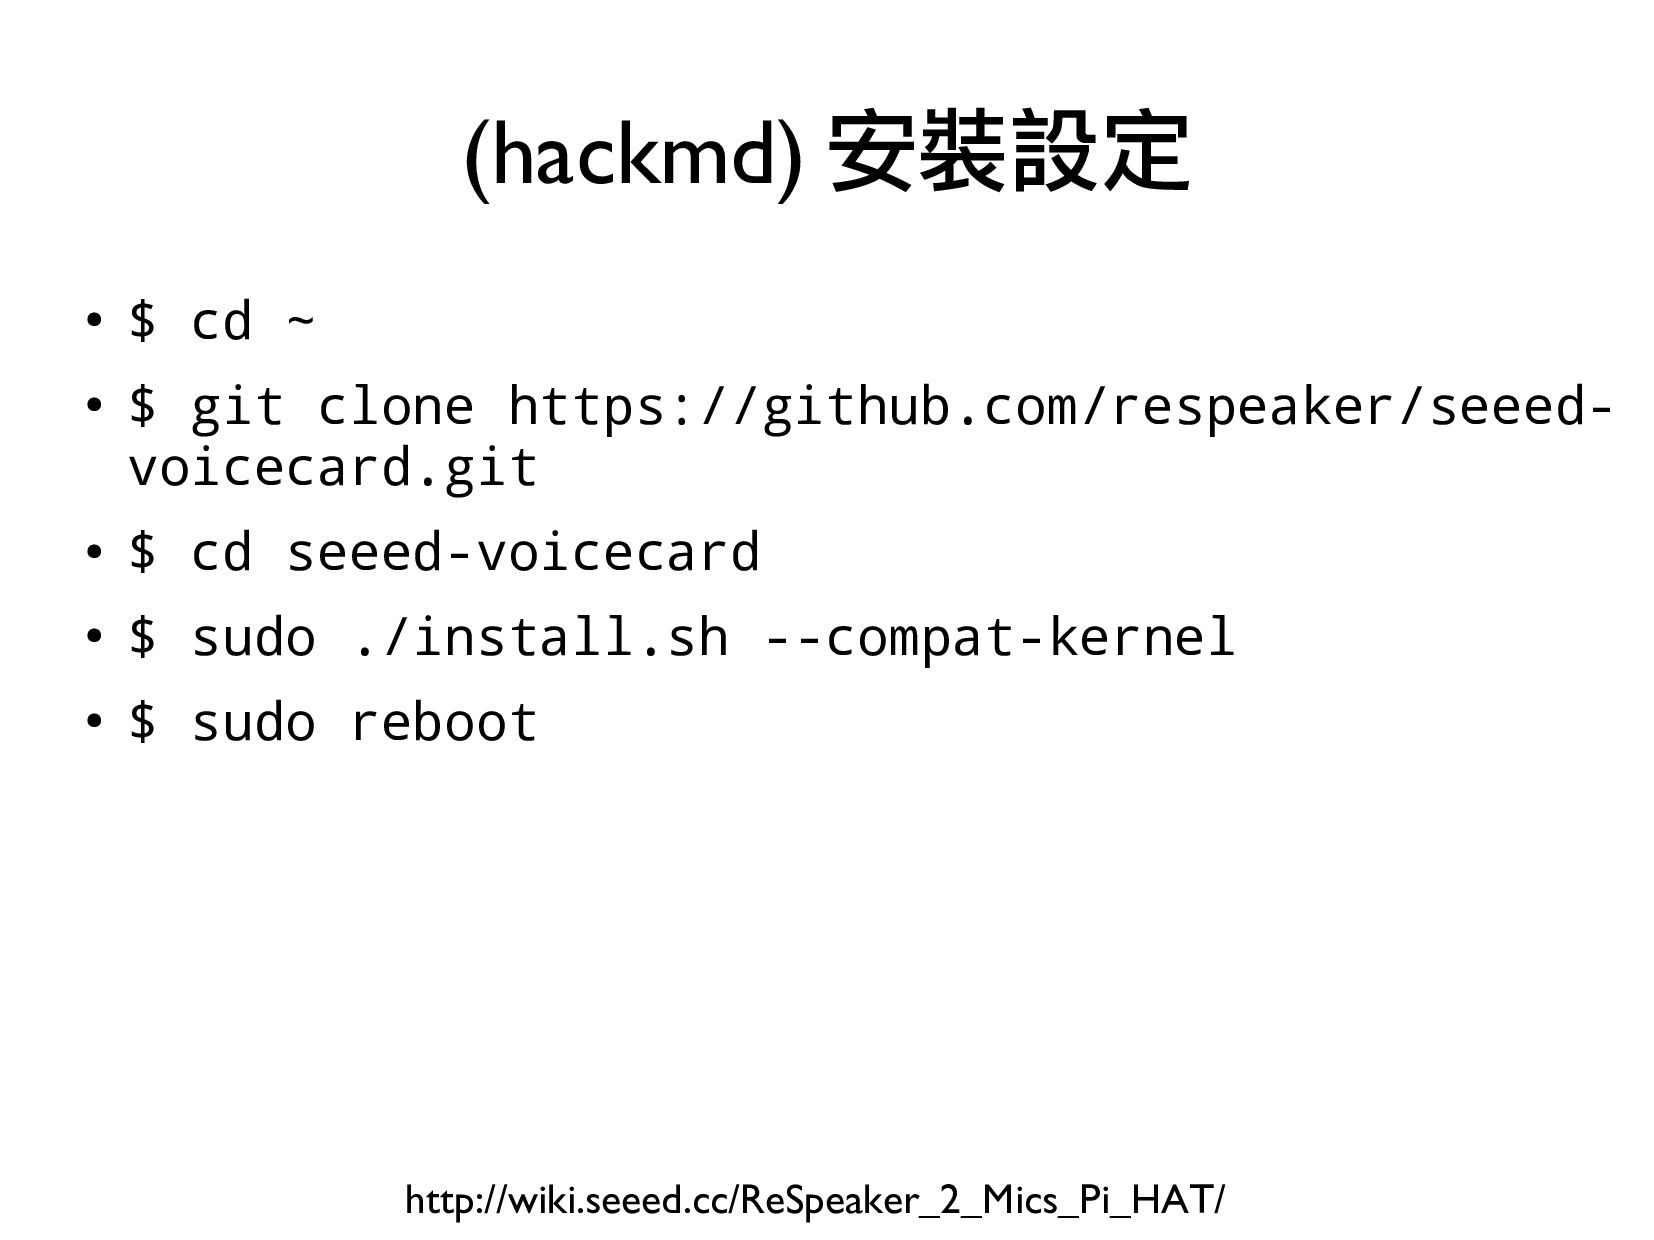
1.ReSpeaker 2-Mic HAT使用(1小時)
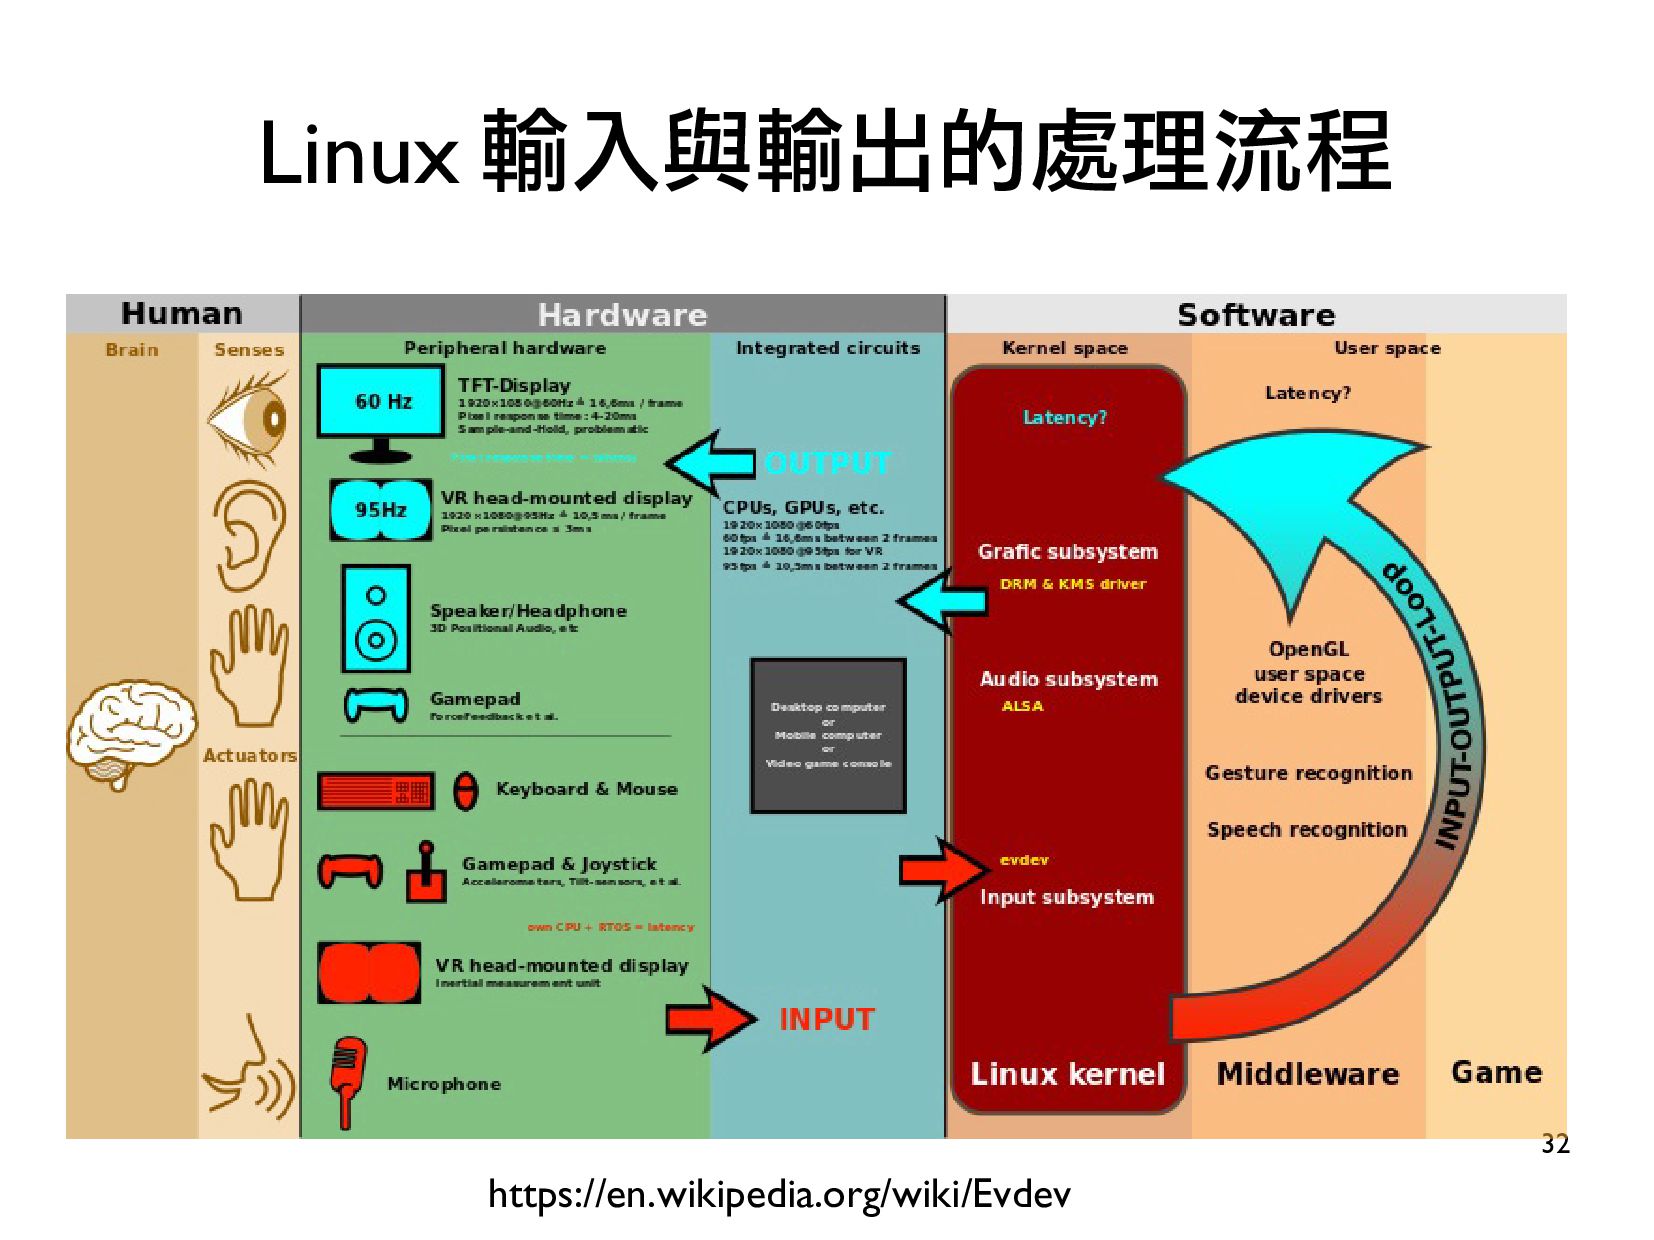
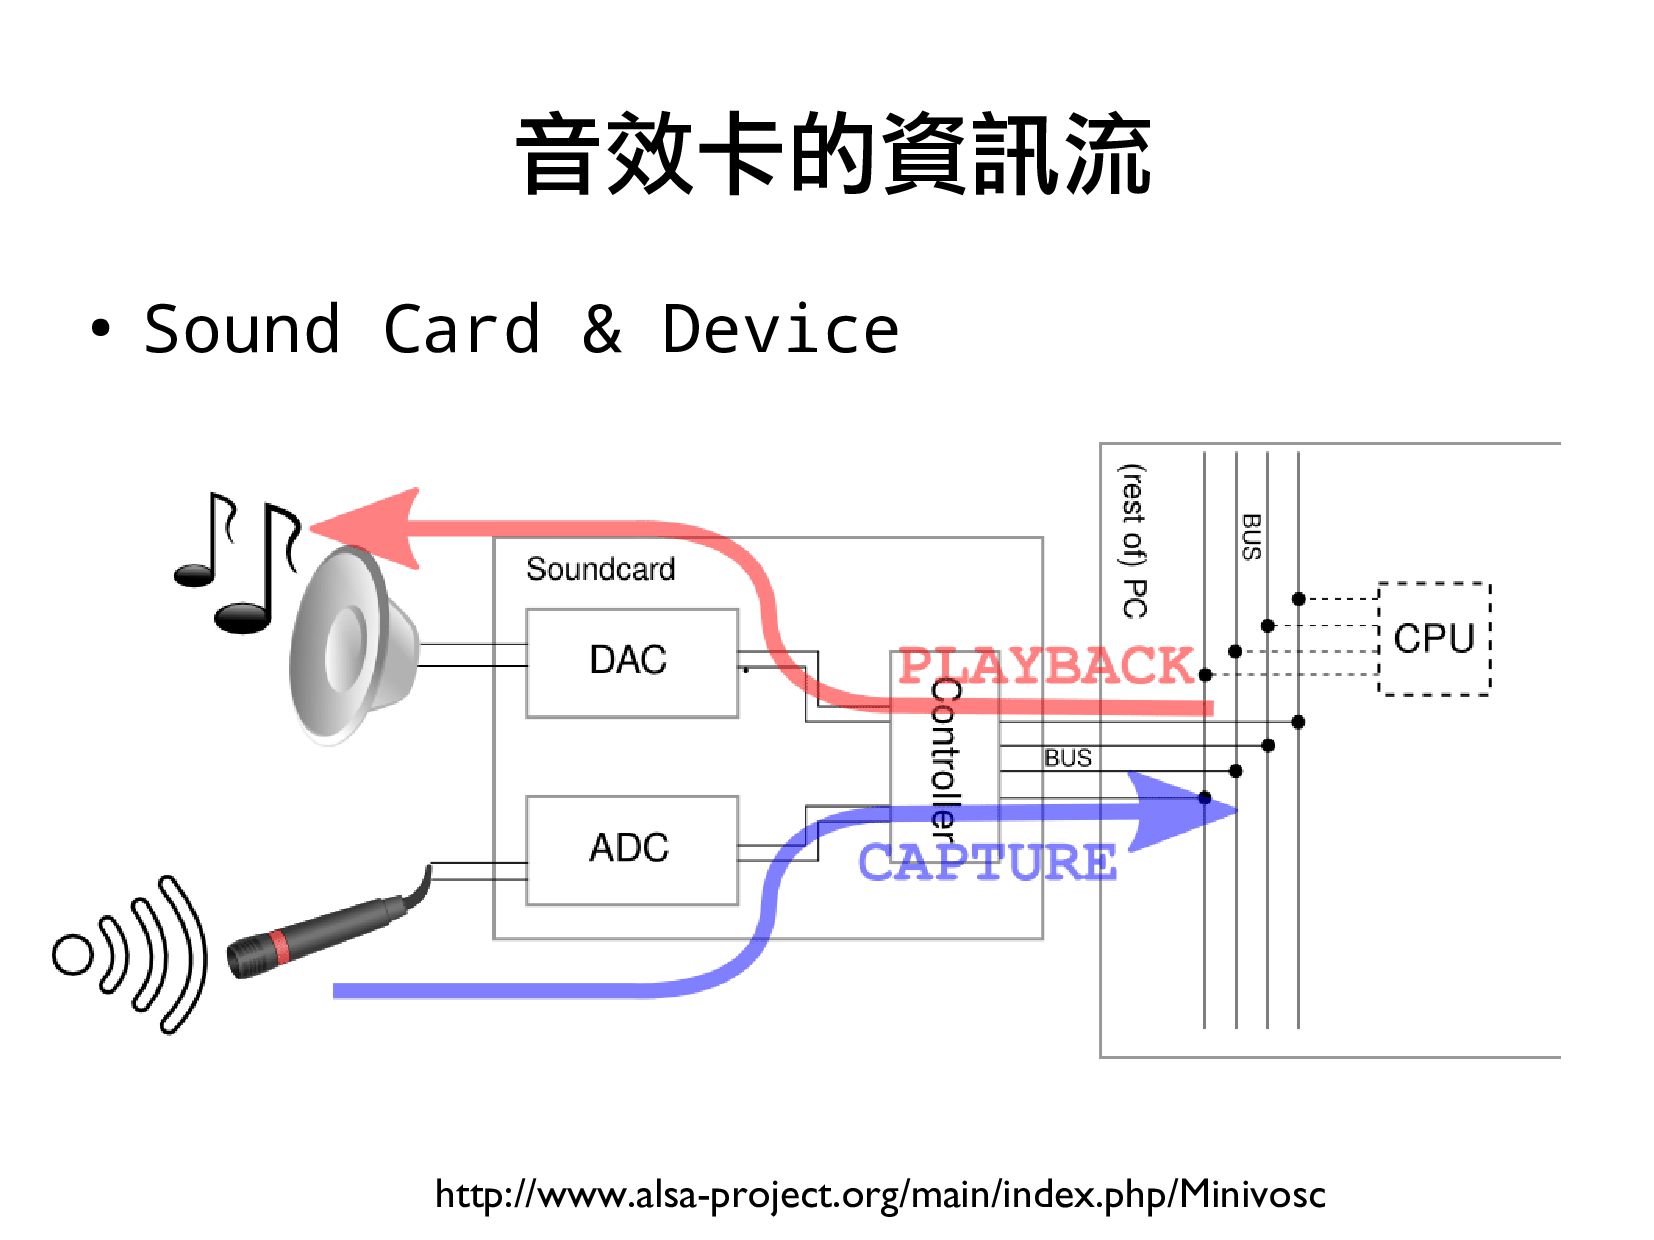
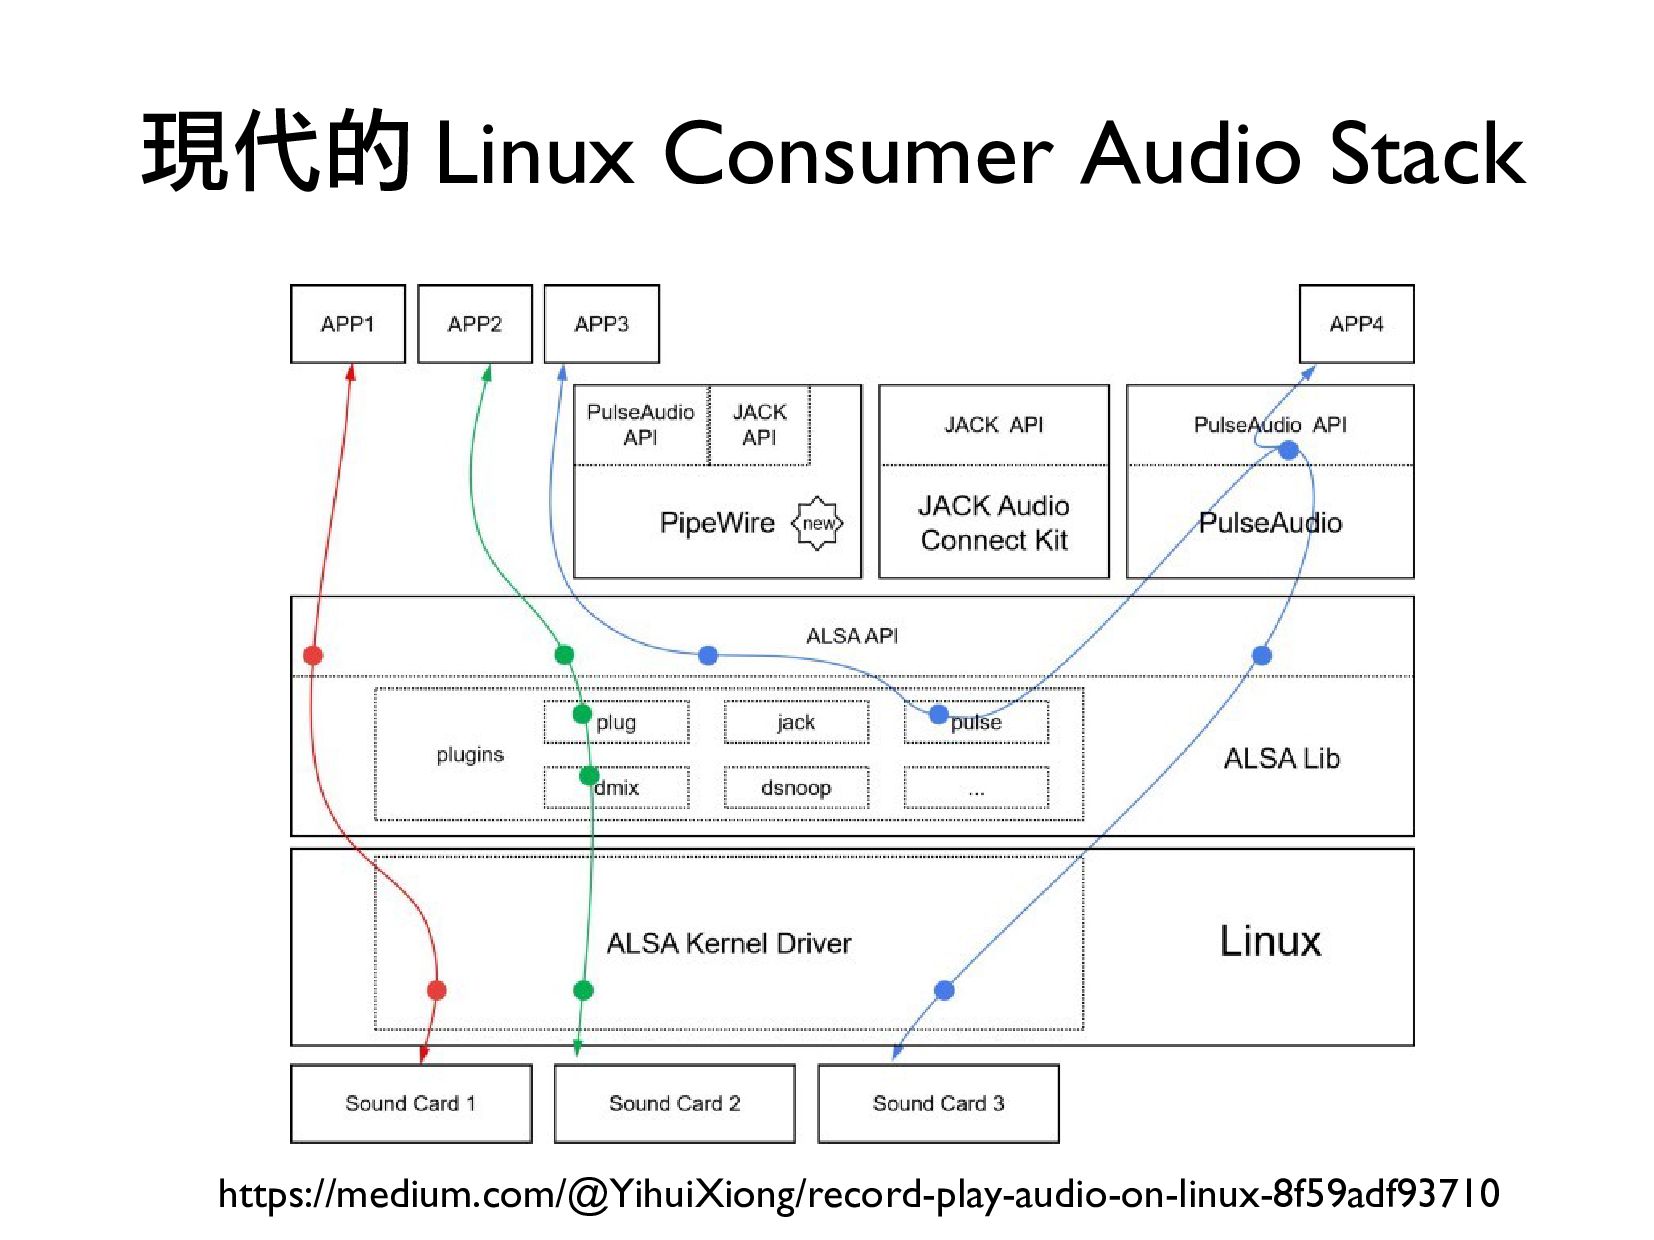
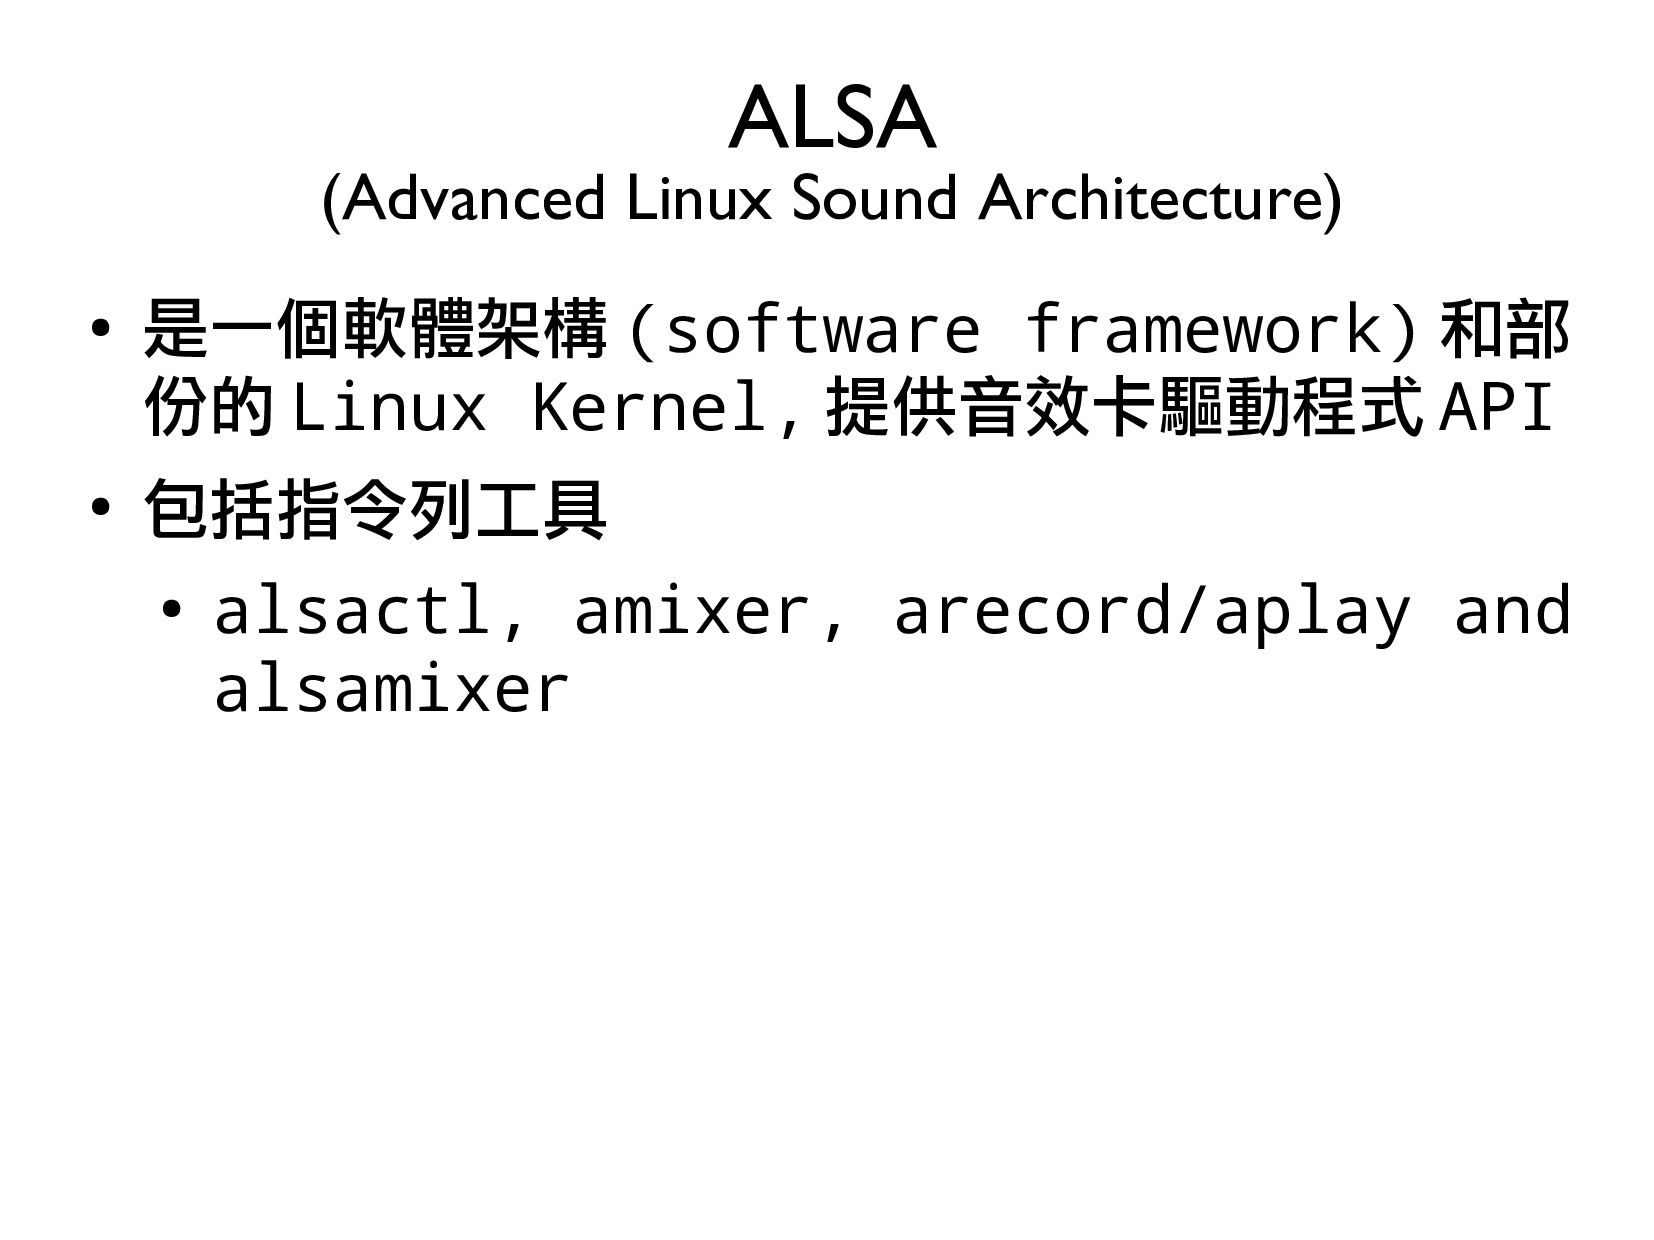
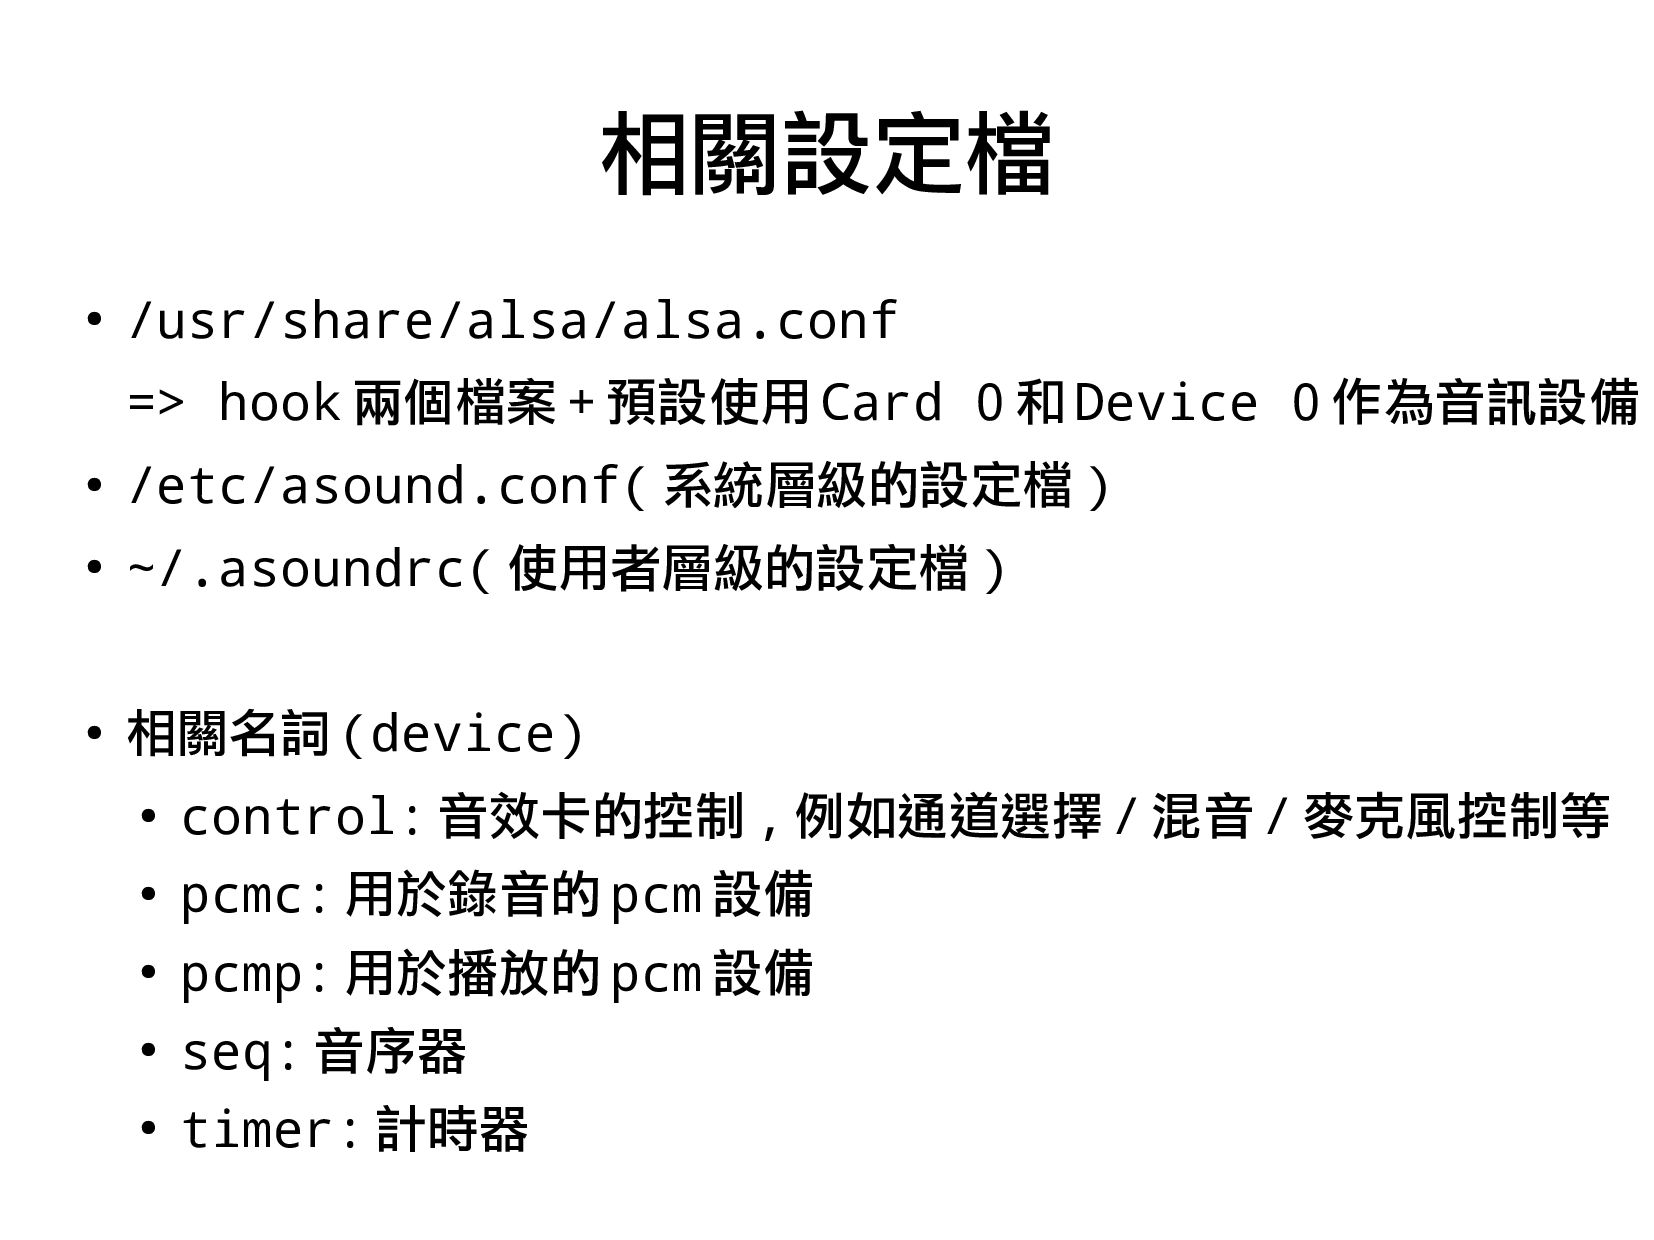
2.Linux ALSA介紹(1小時)
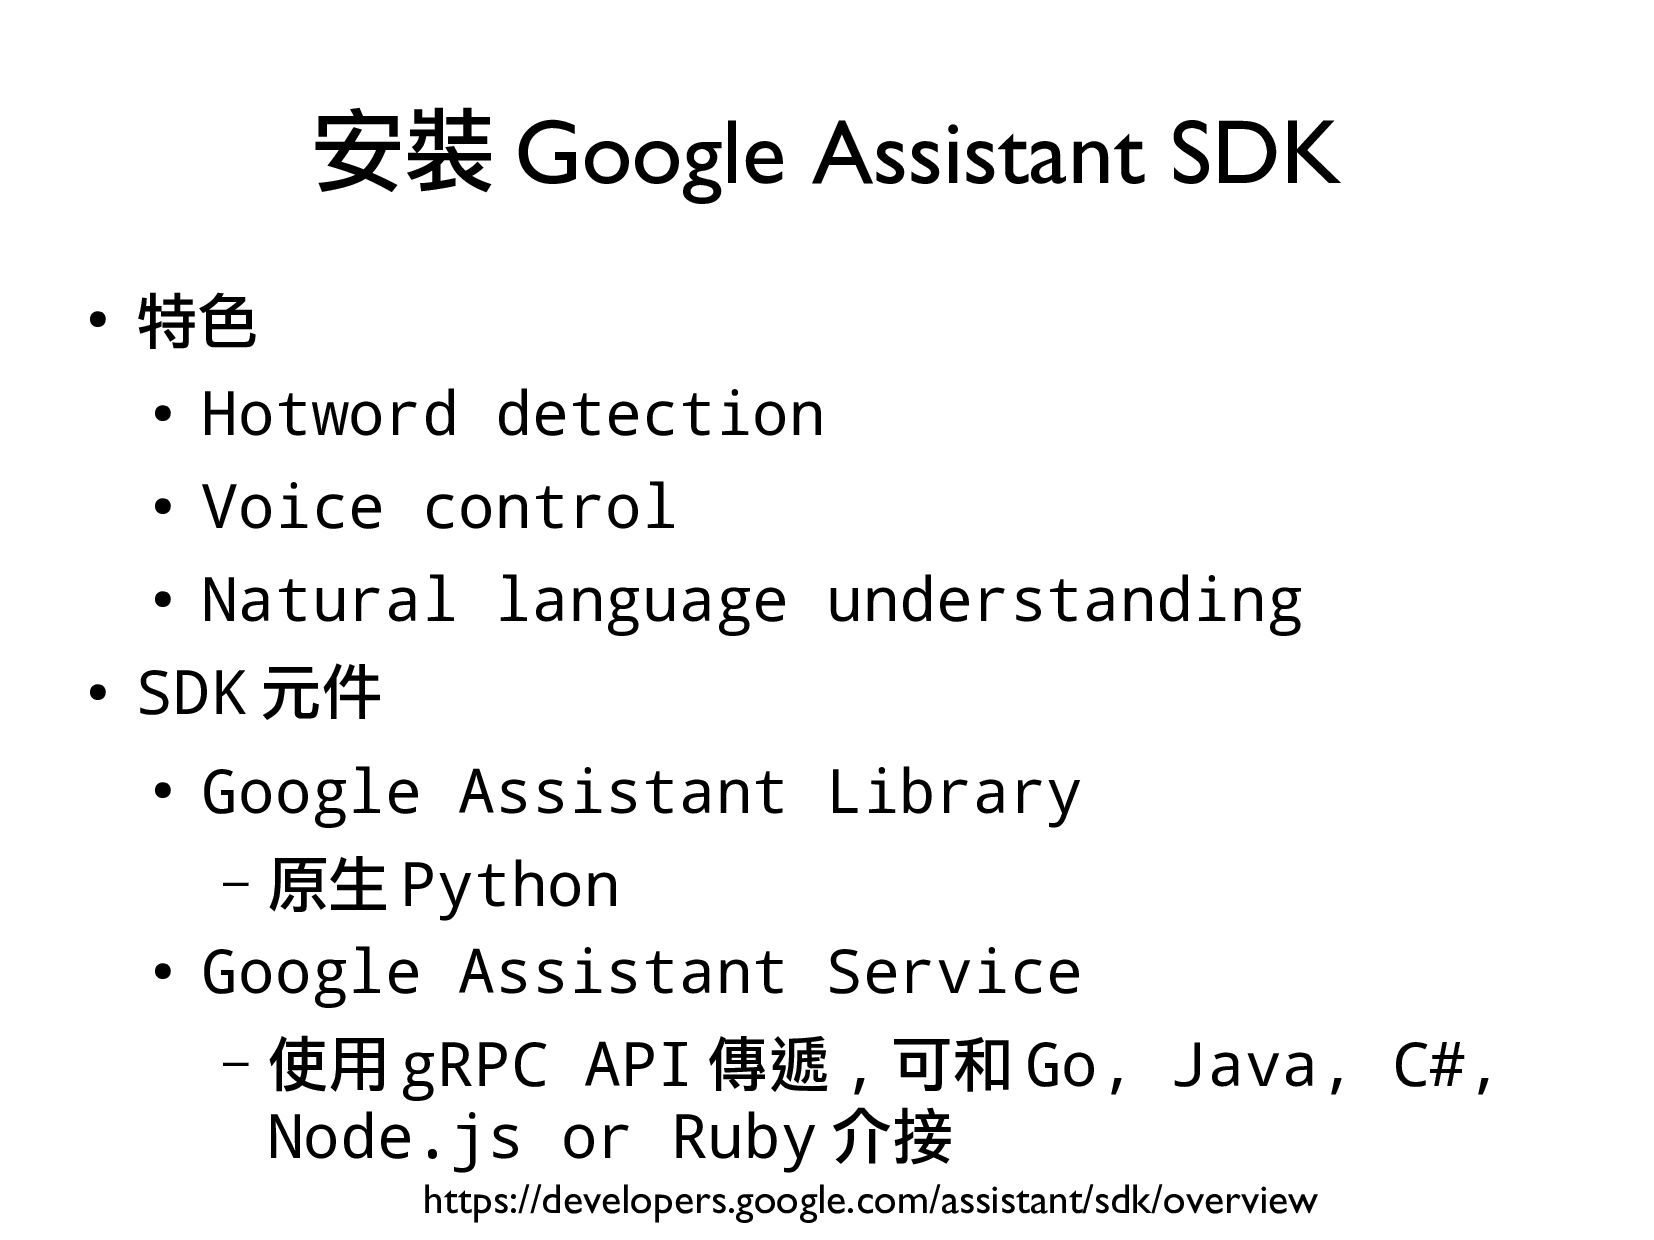
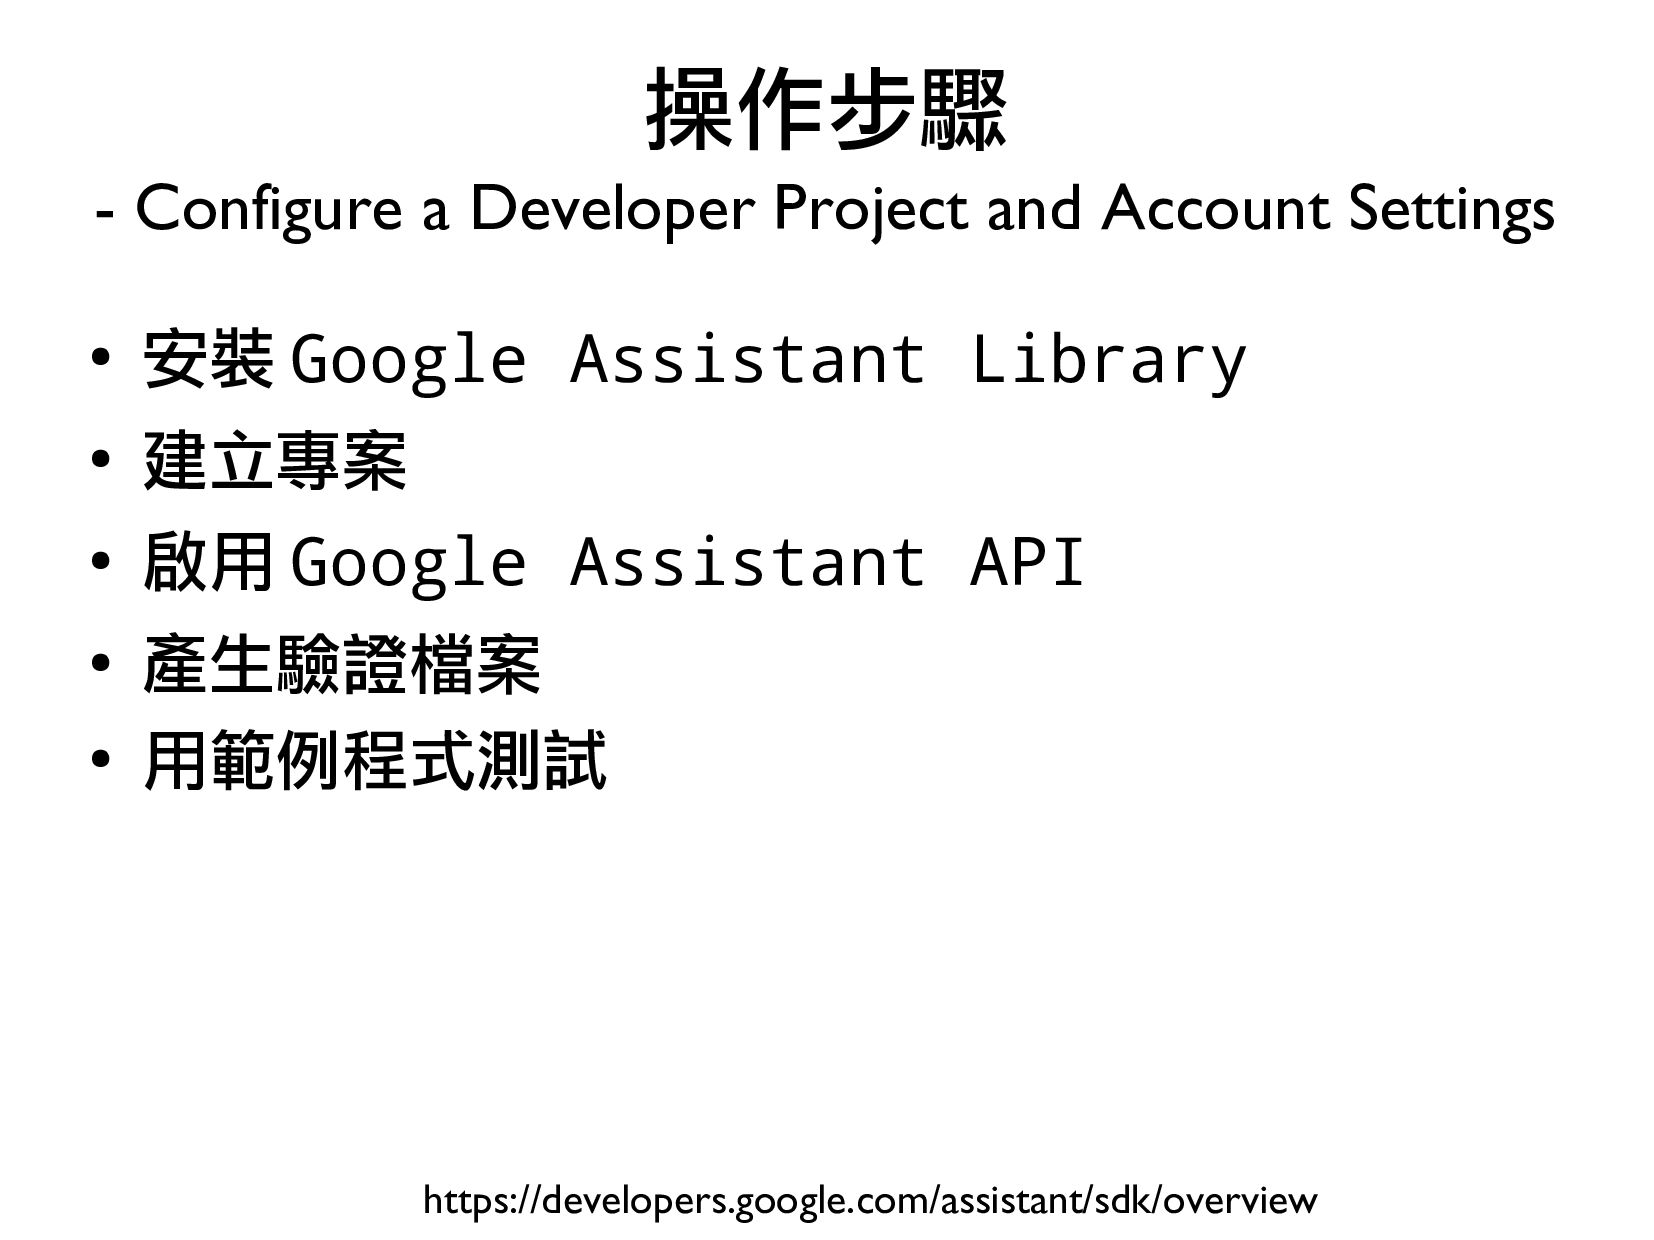
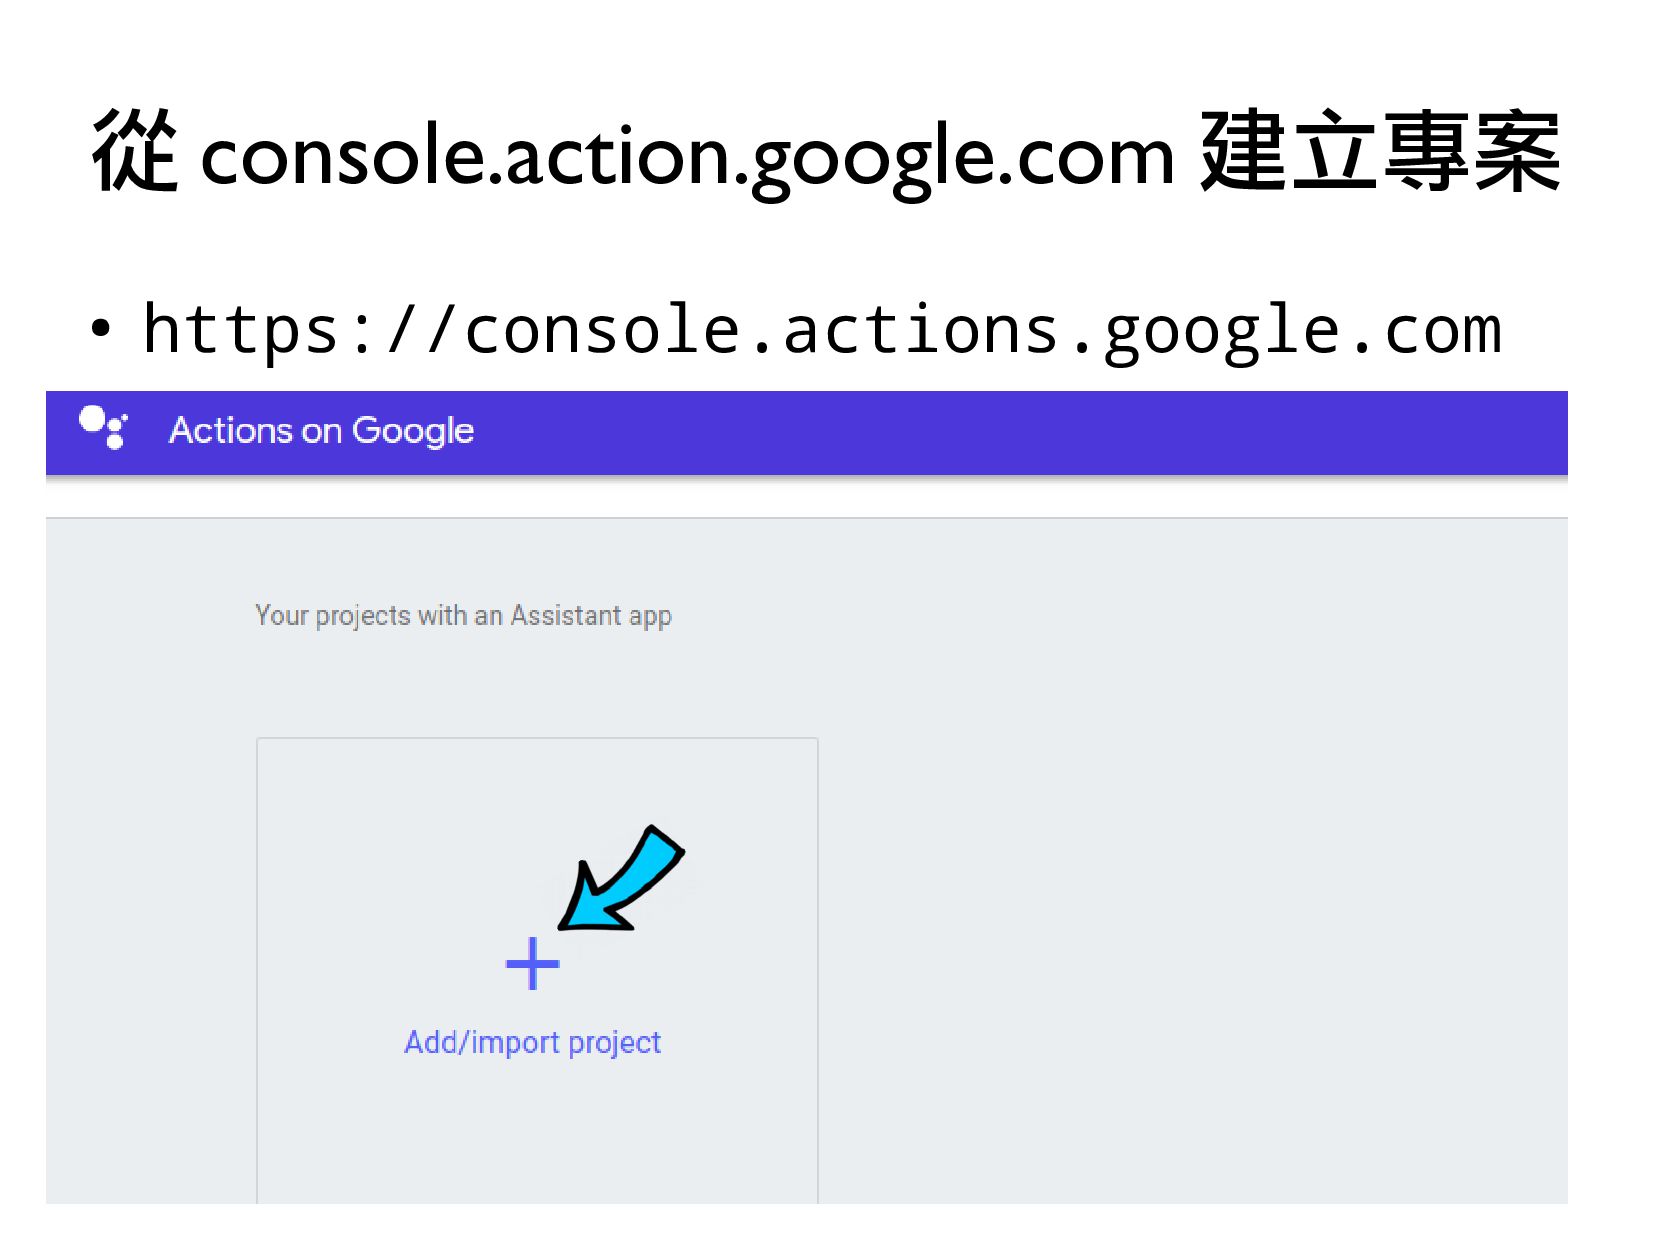
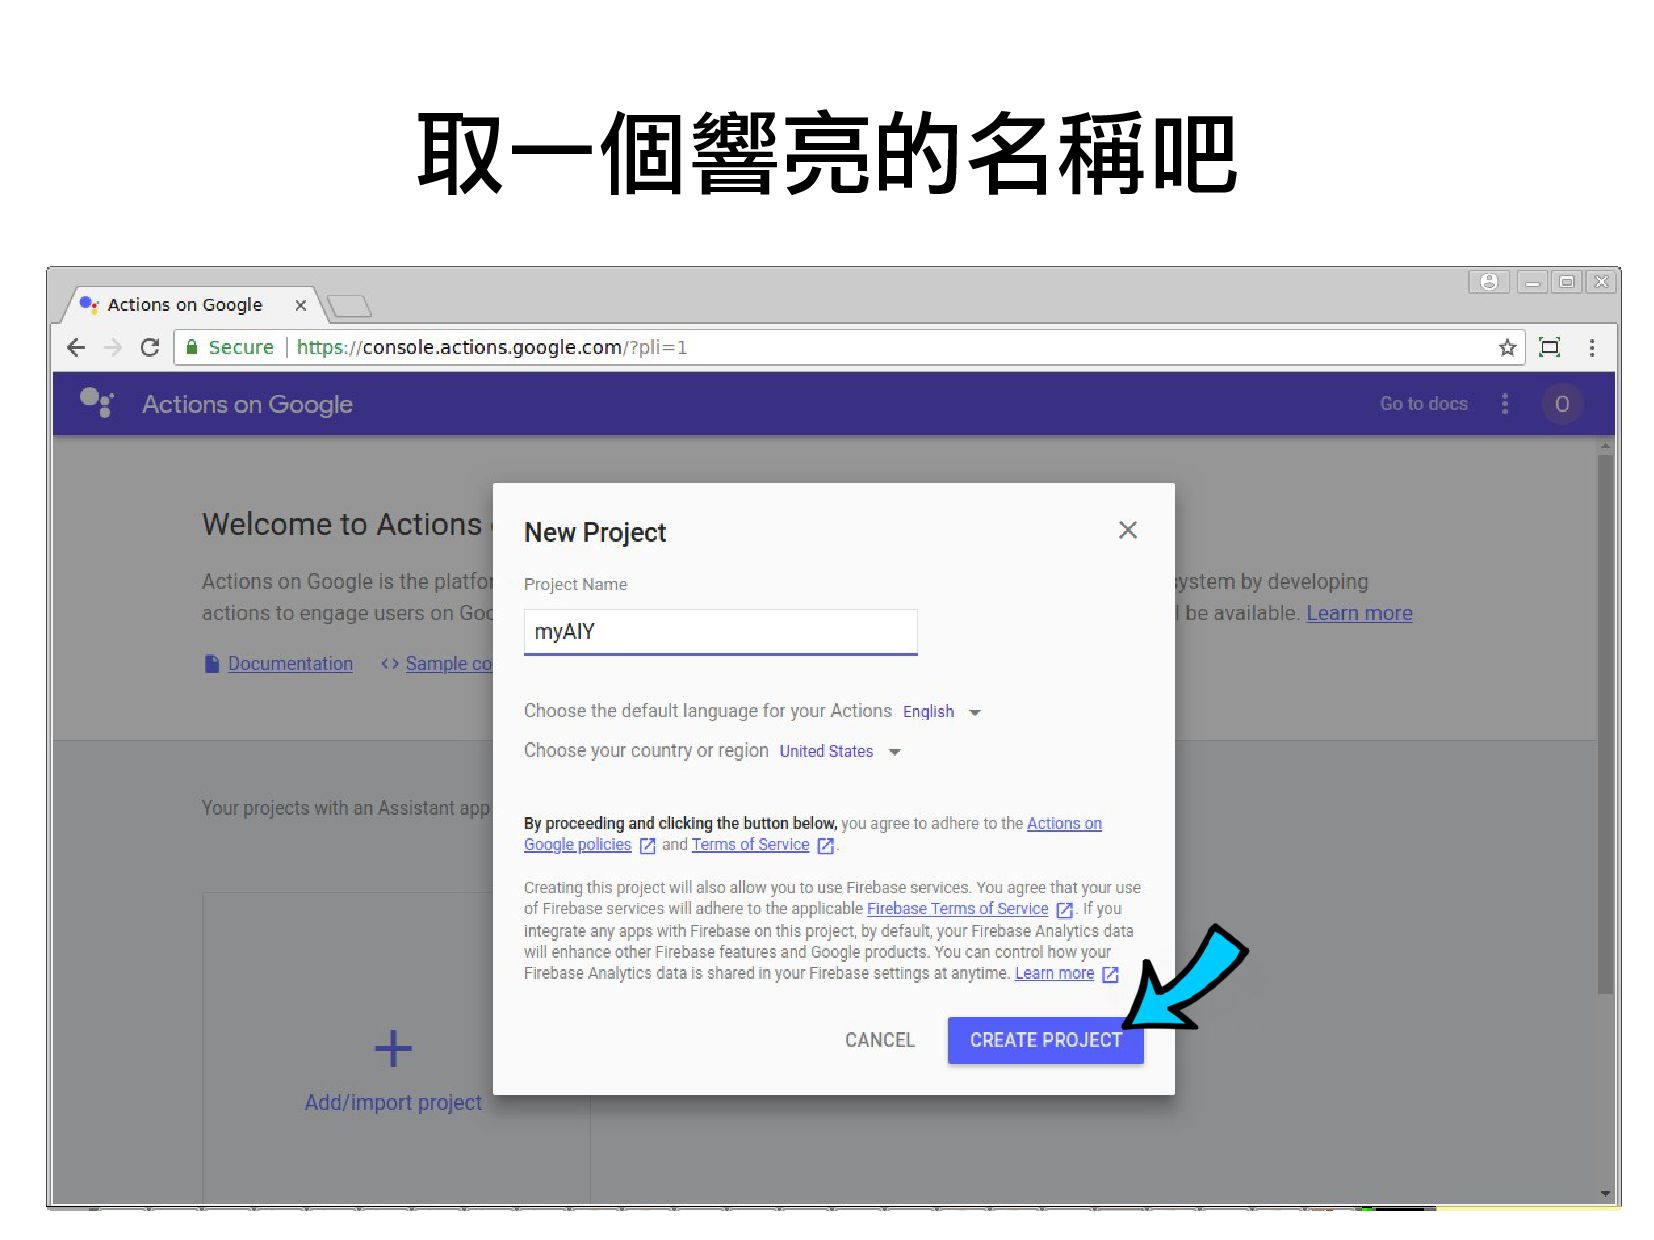
3.Google Assistant介紹(0.5小時)
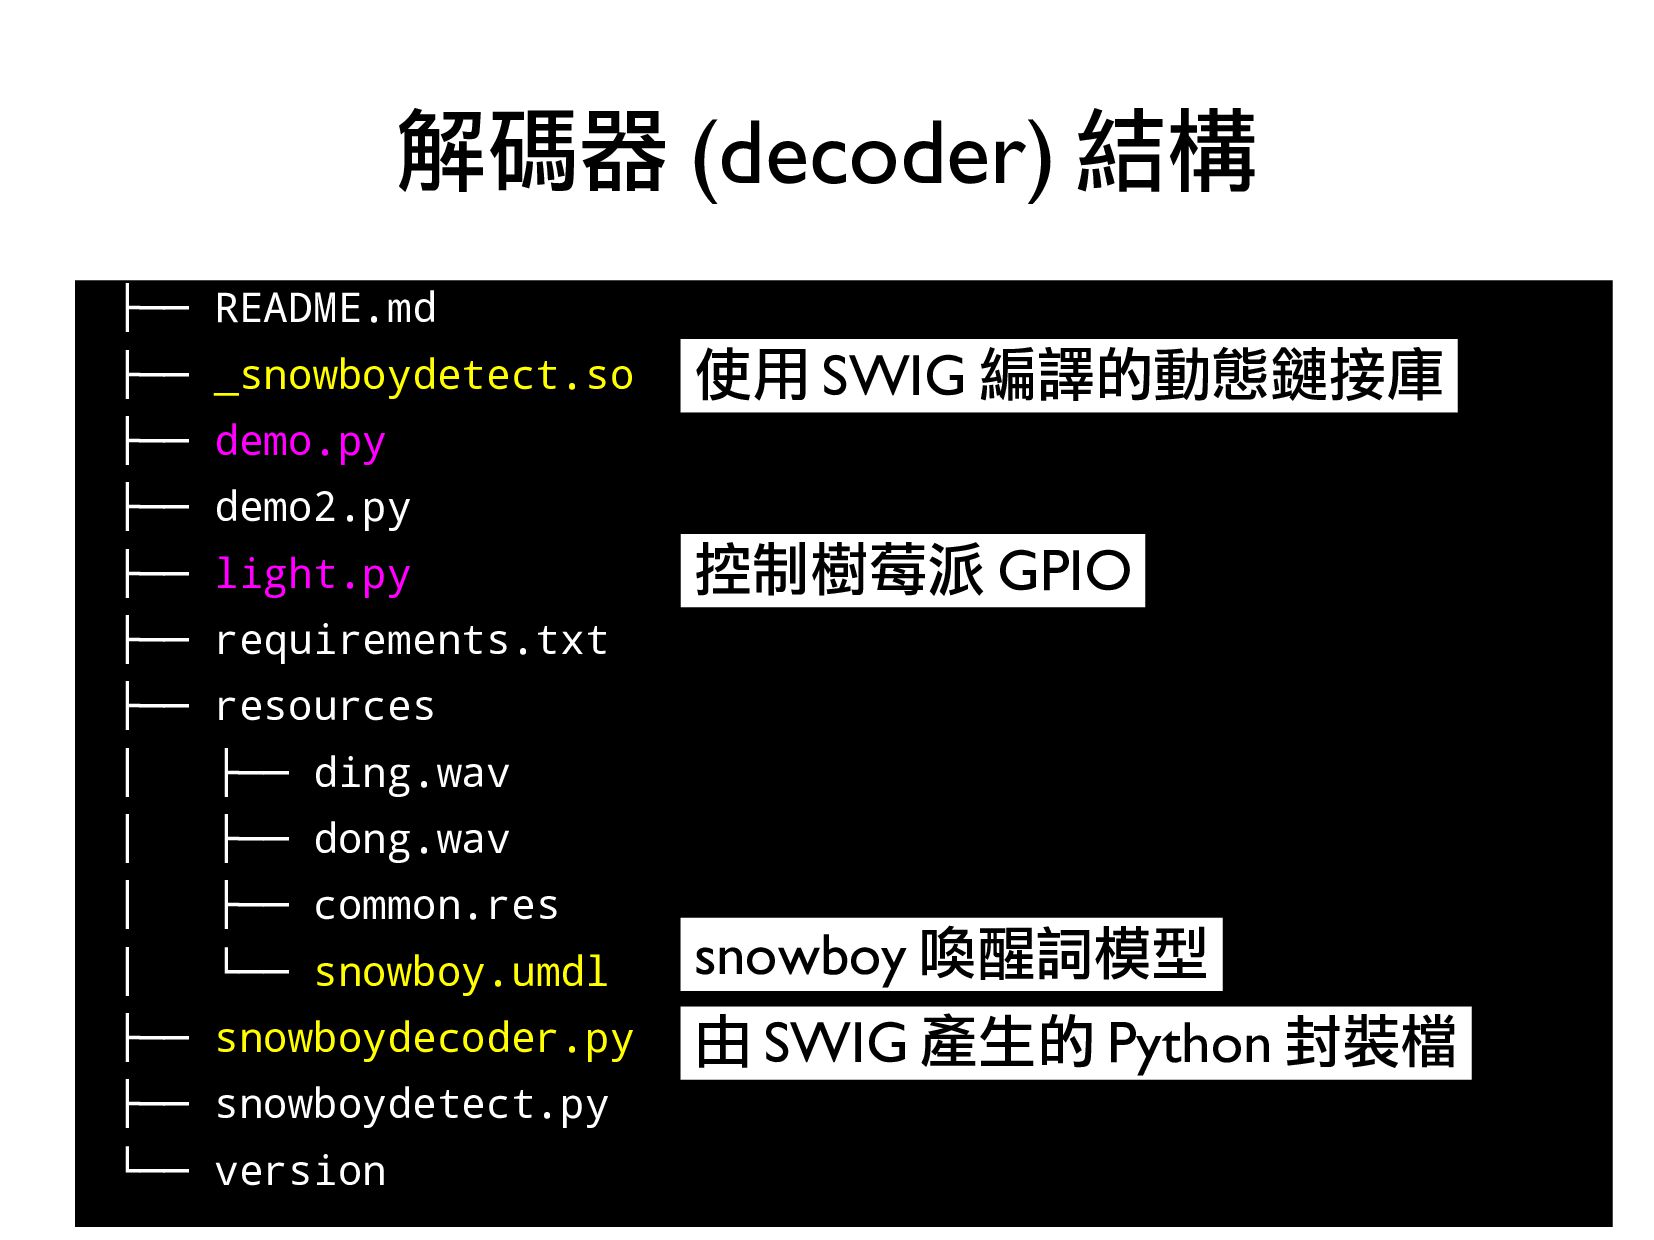
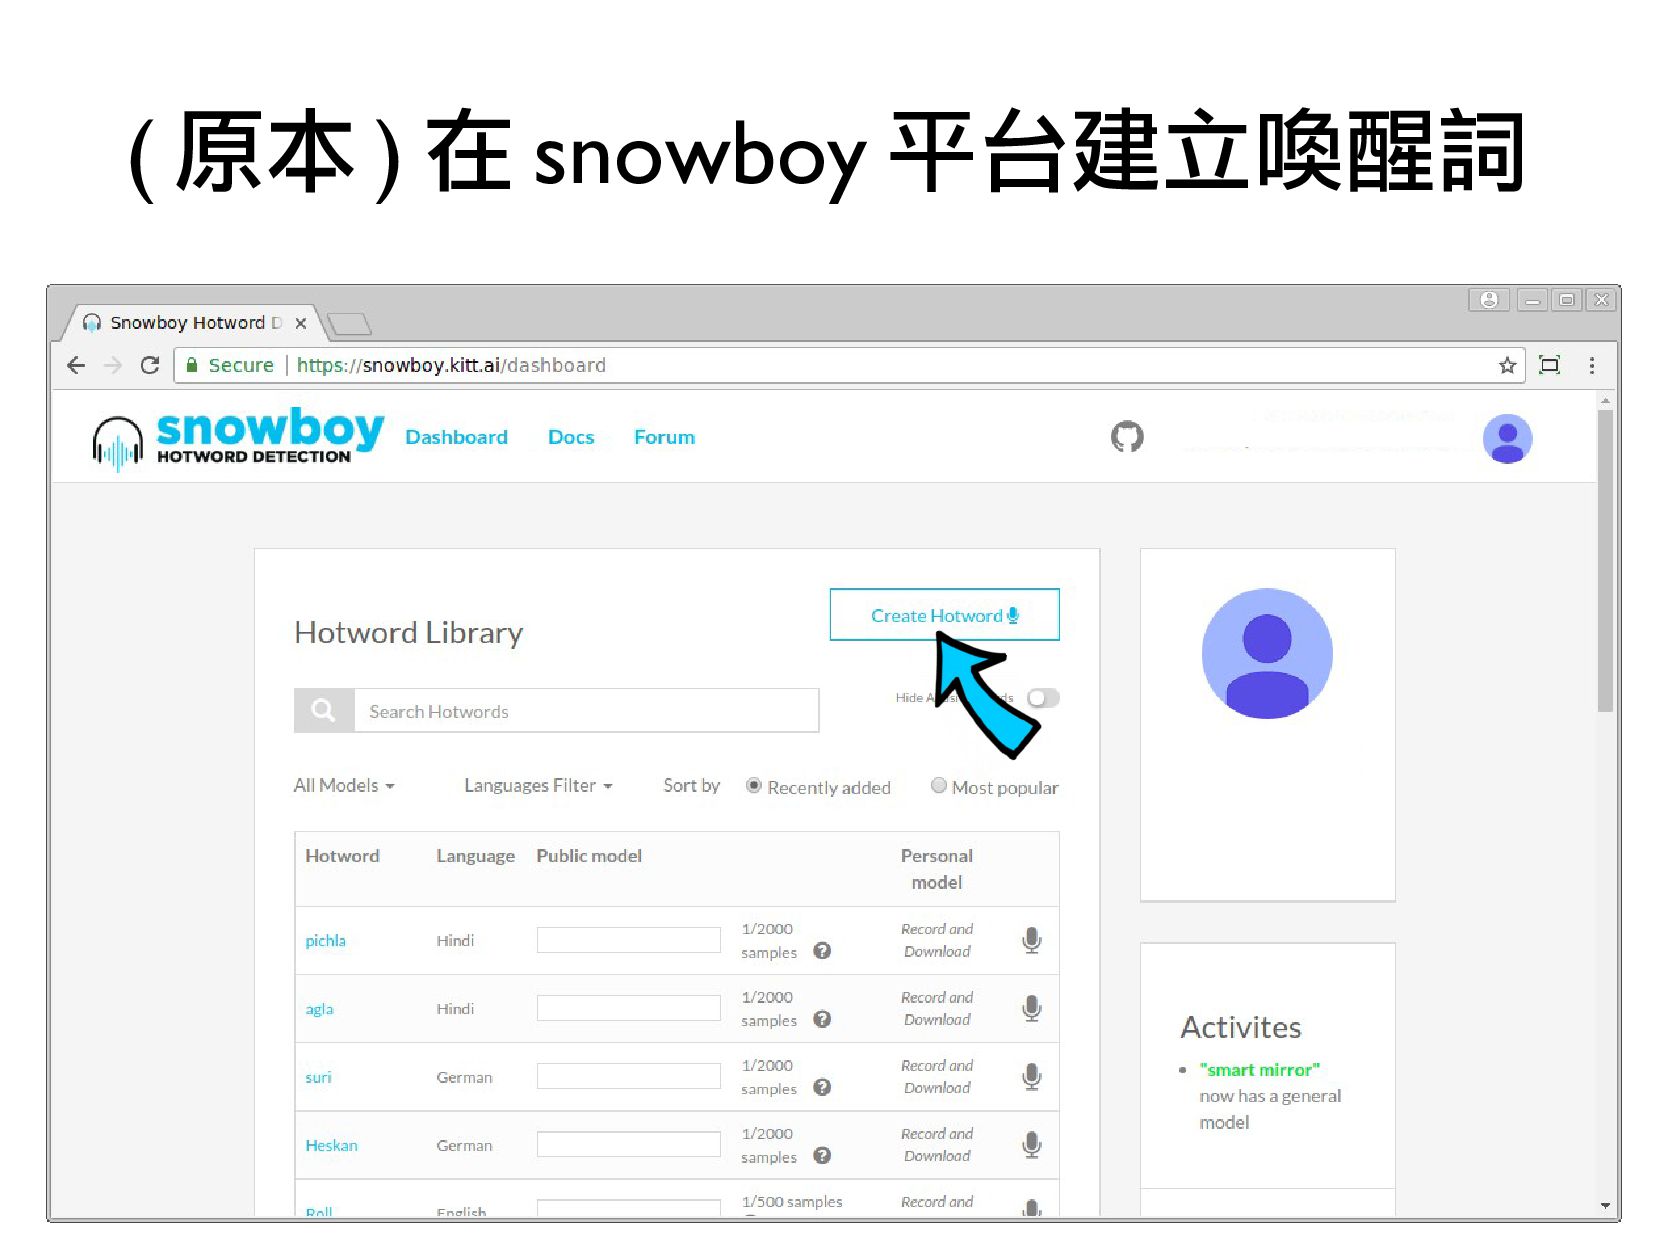
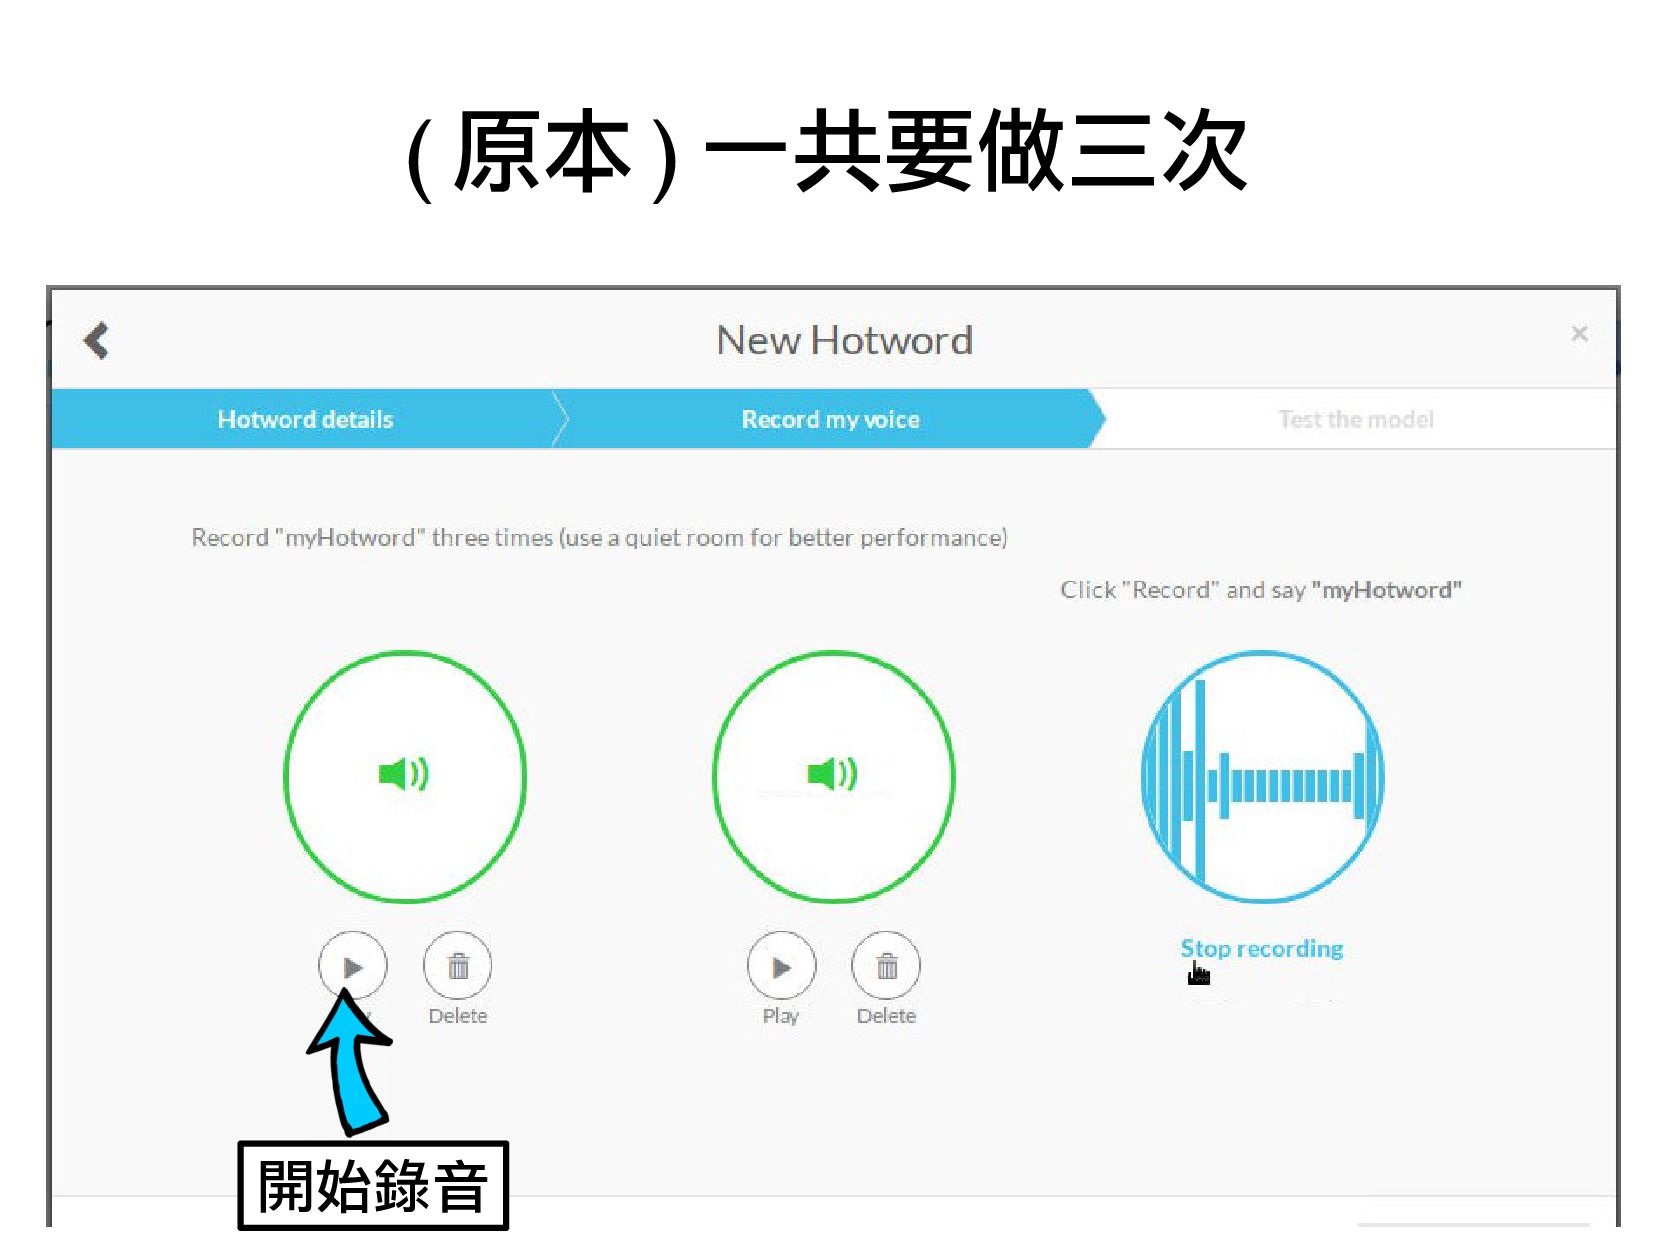
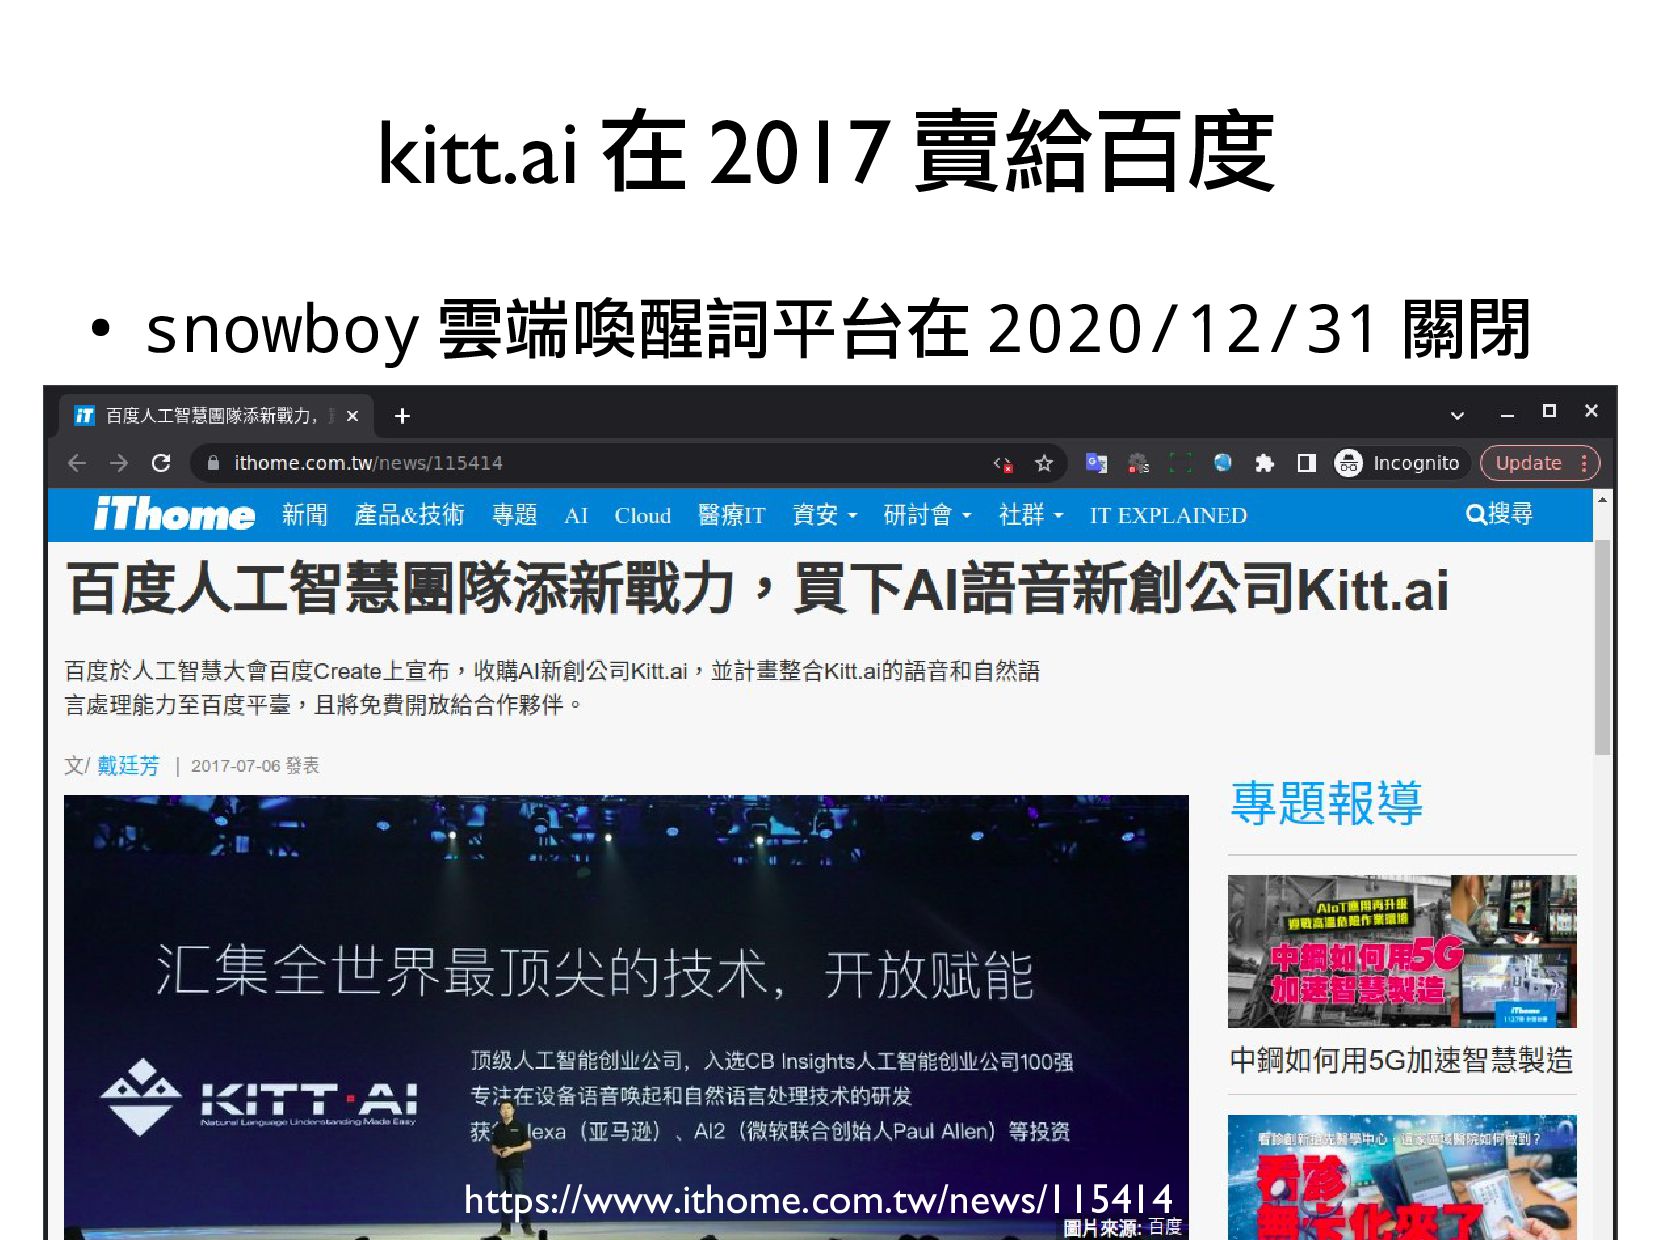
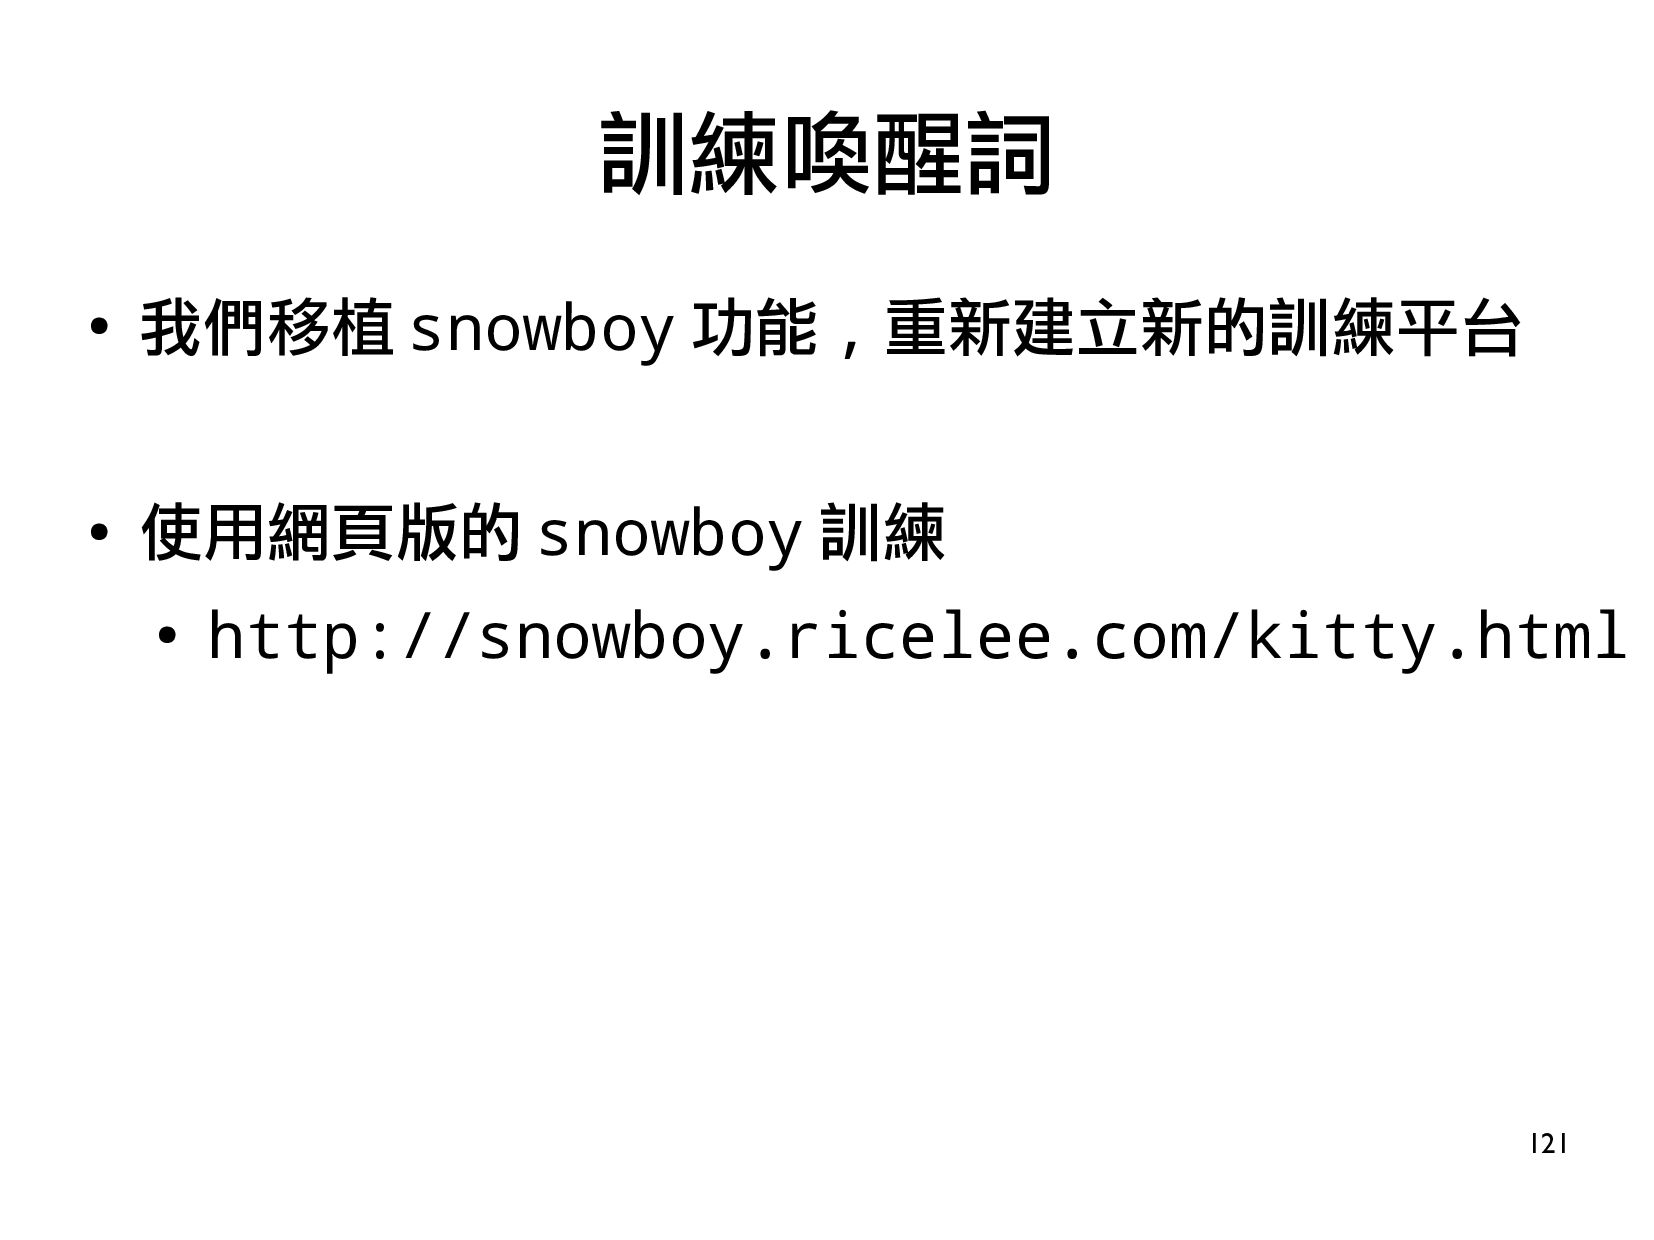
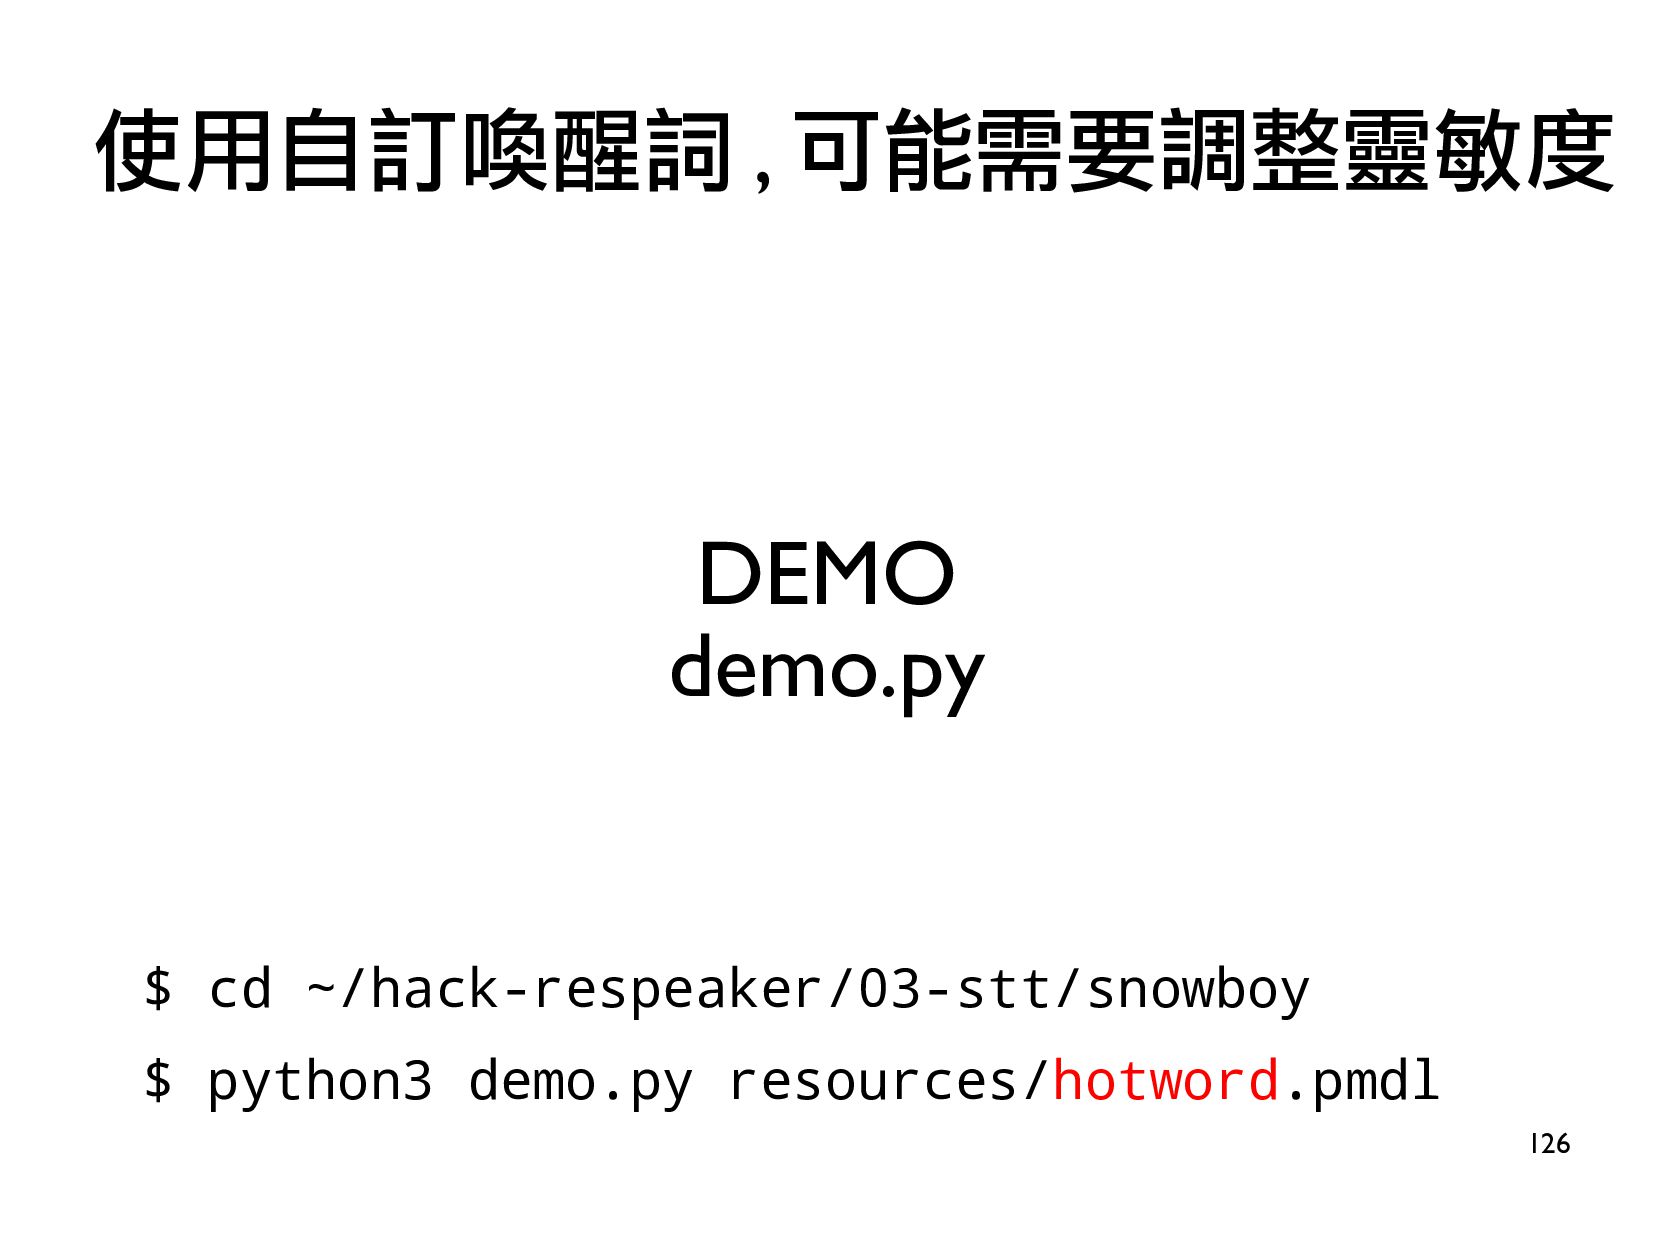
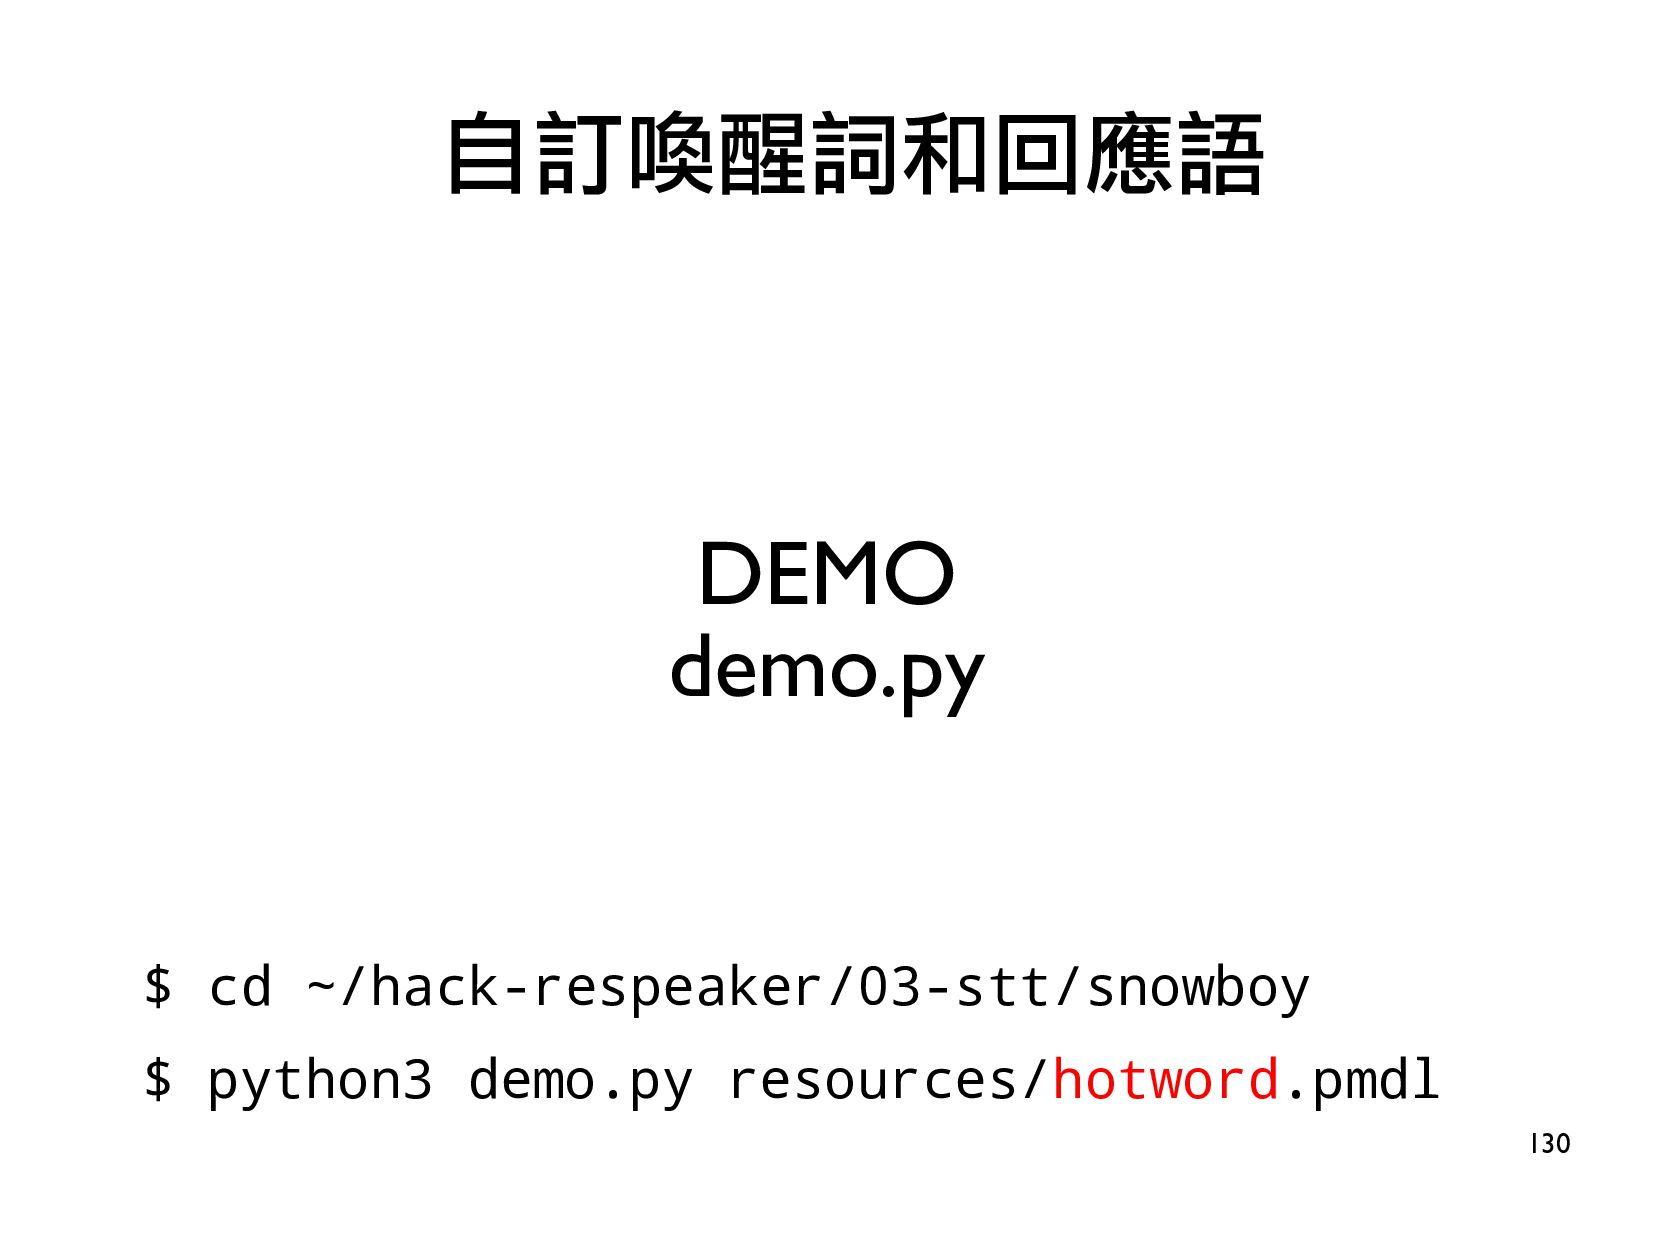
4.ReSpeaker 2-Mic HAT改造/自訂喚醒詞(1小時)
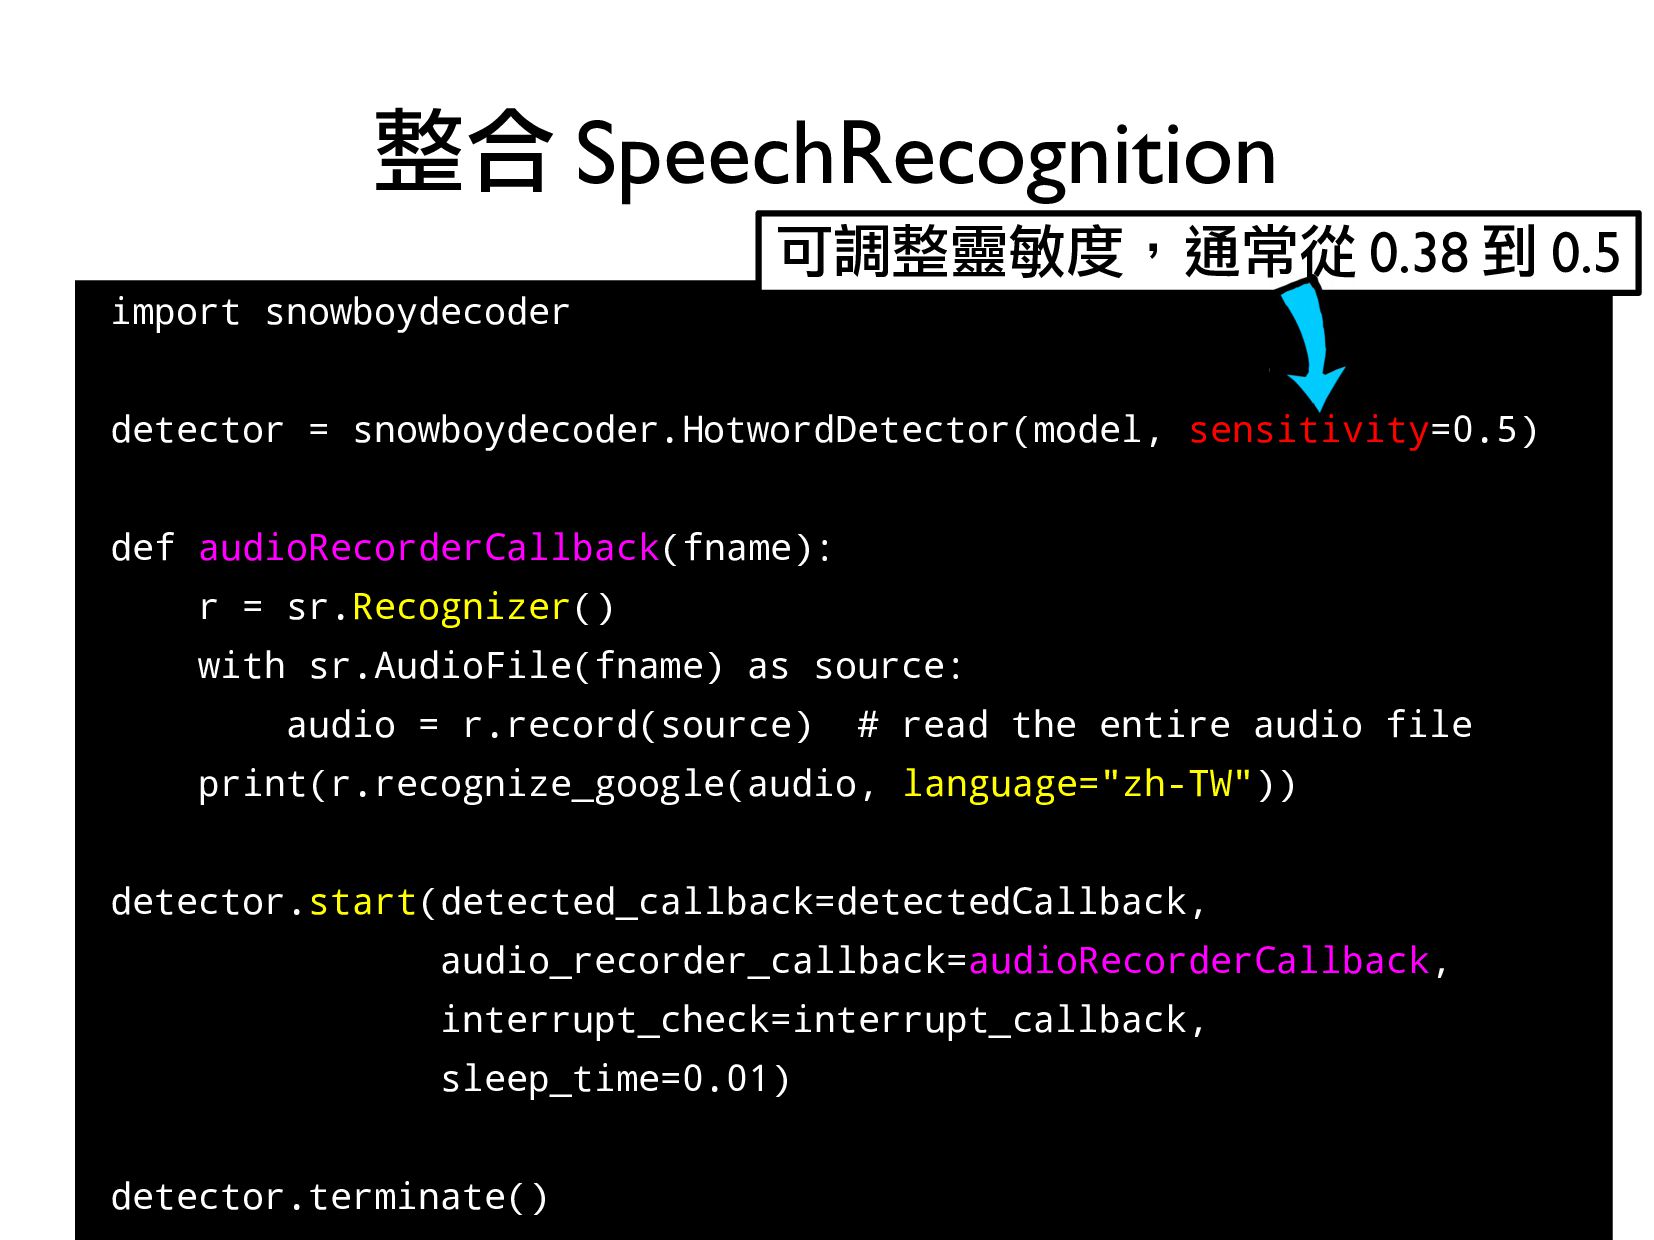
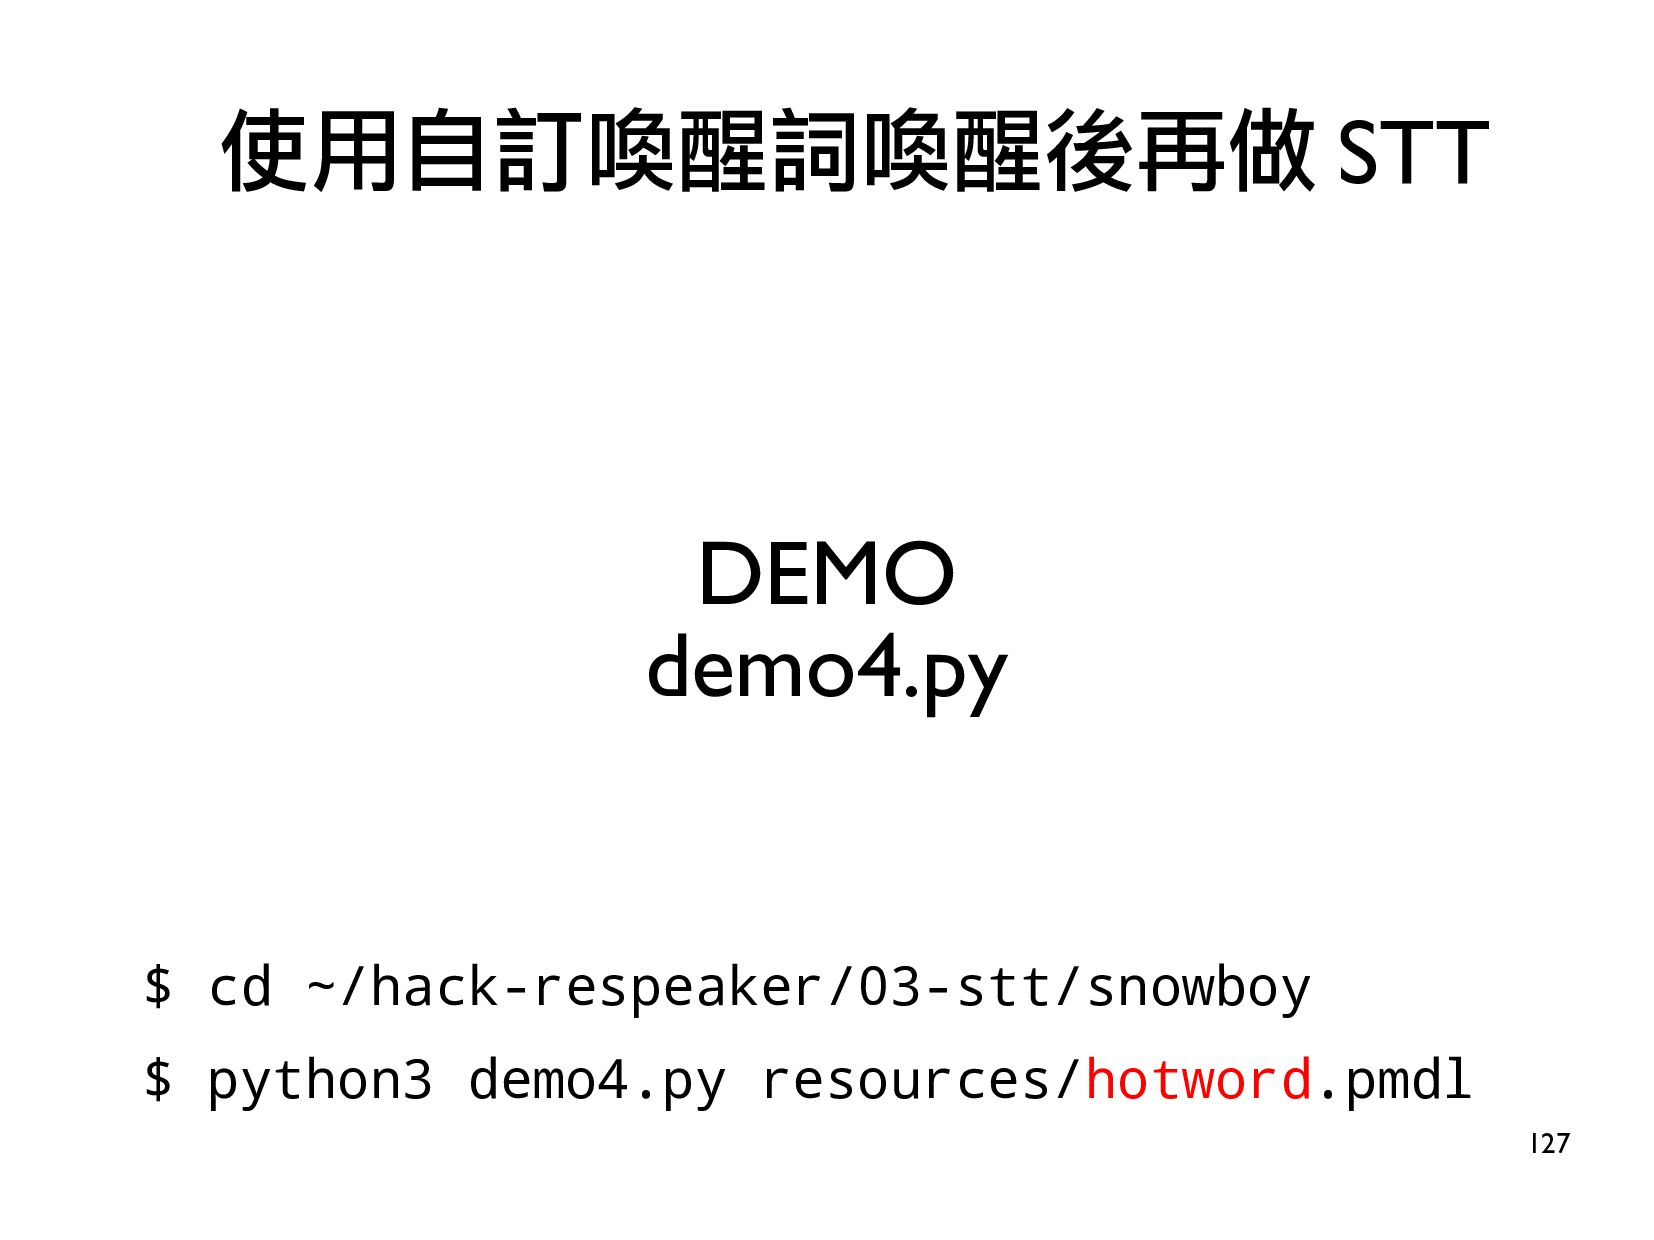
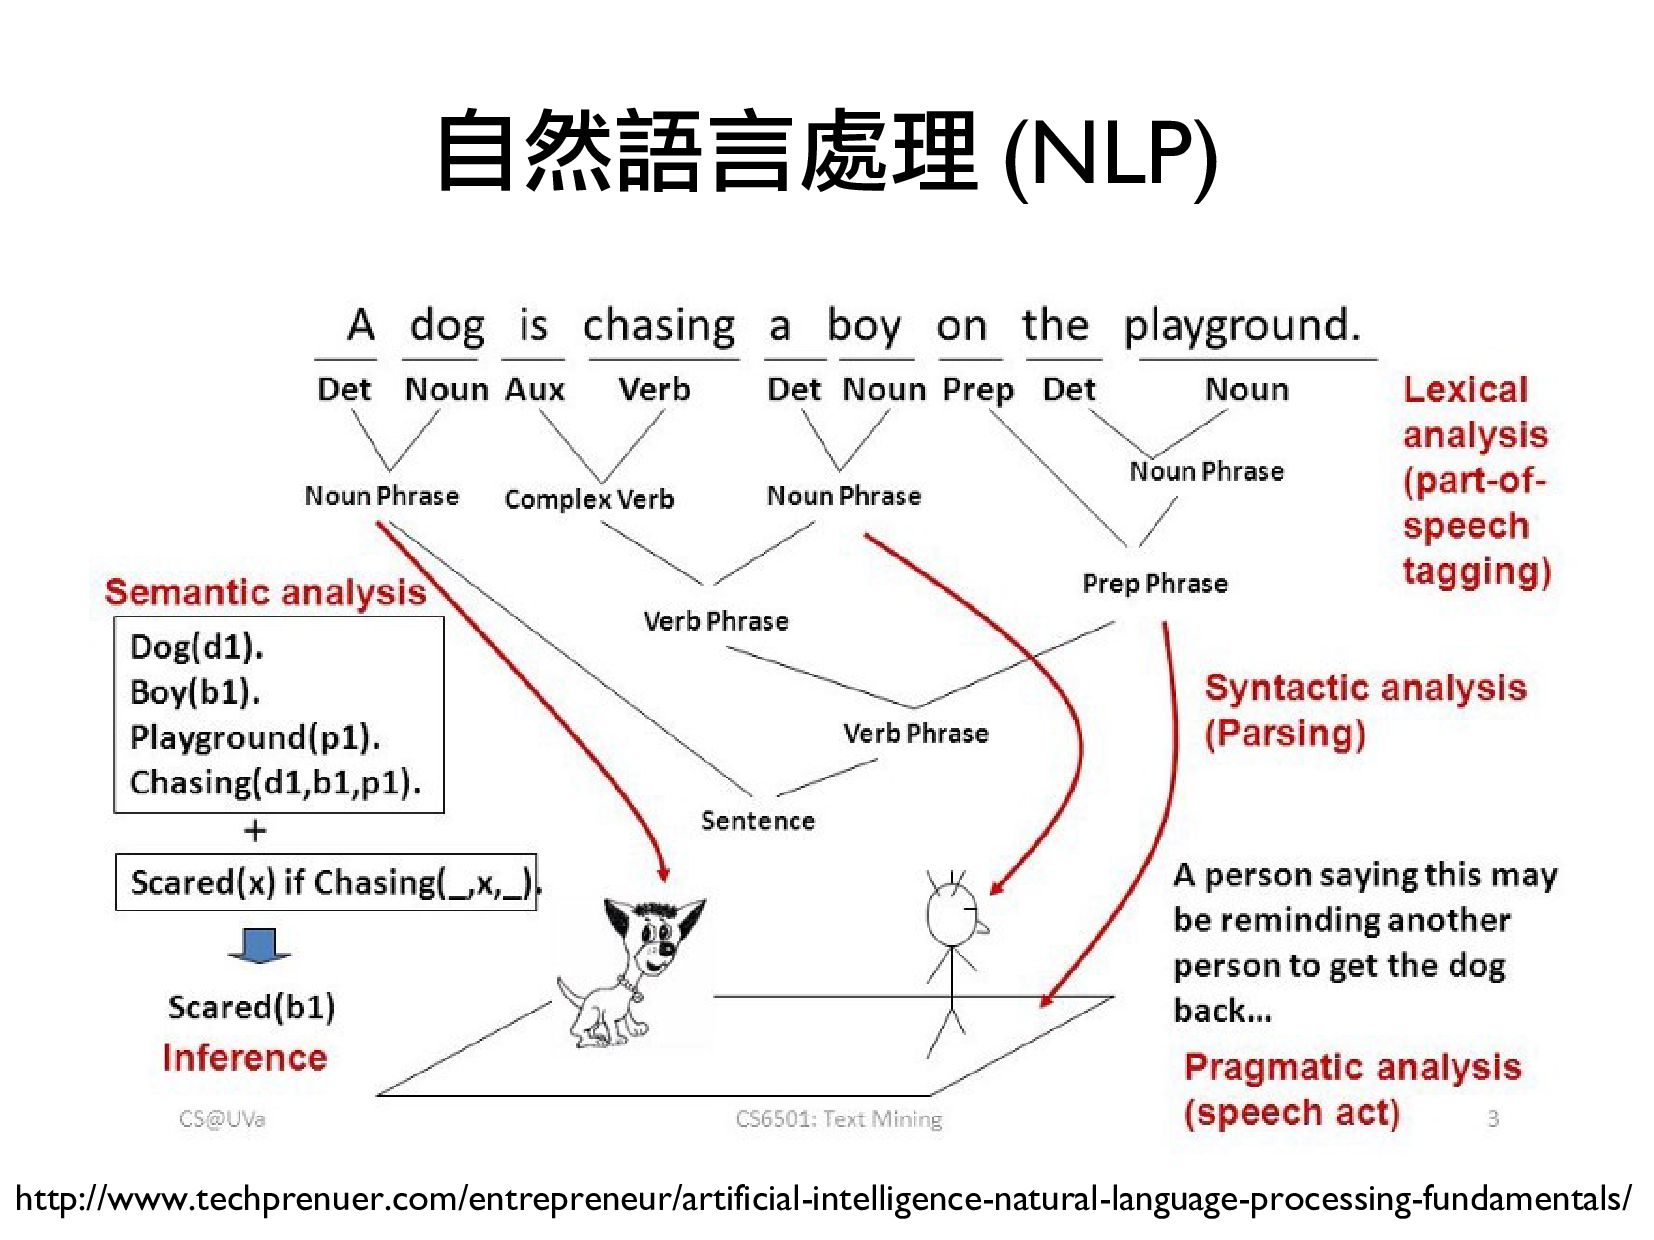
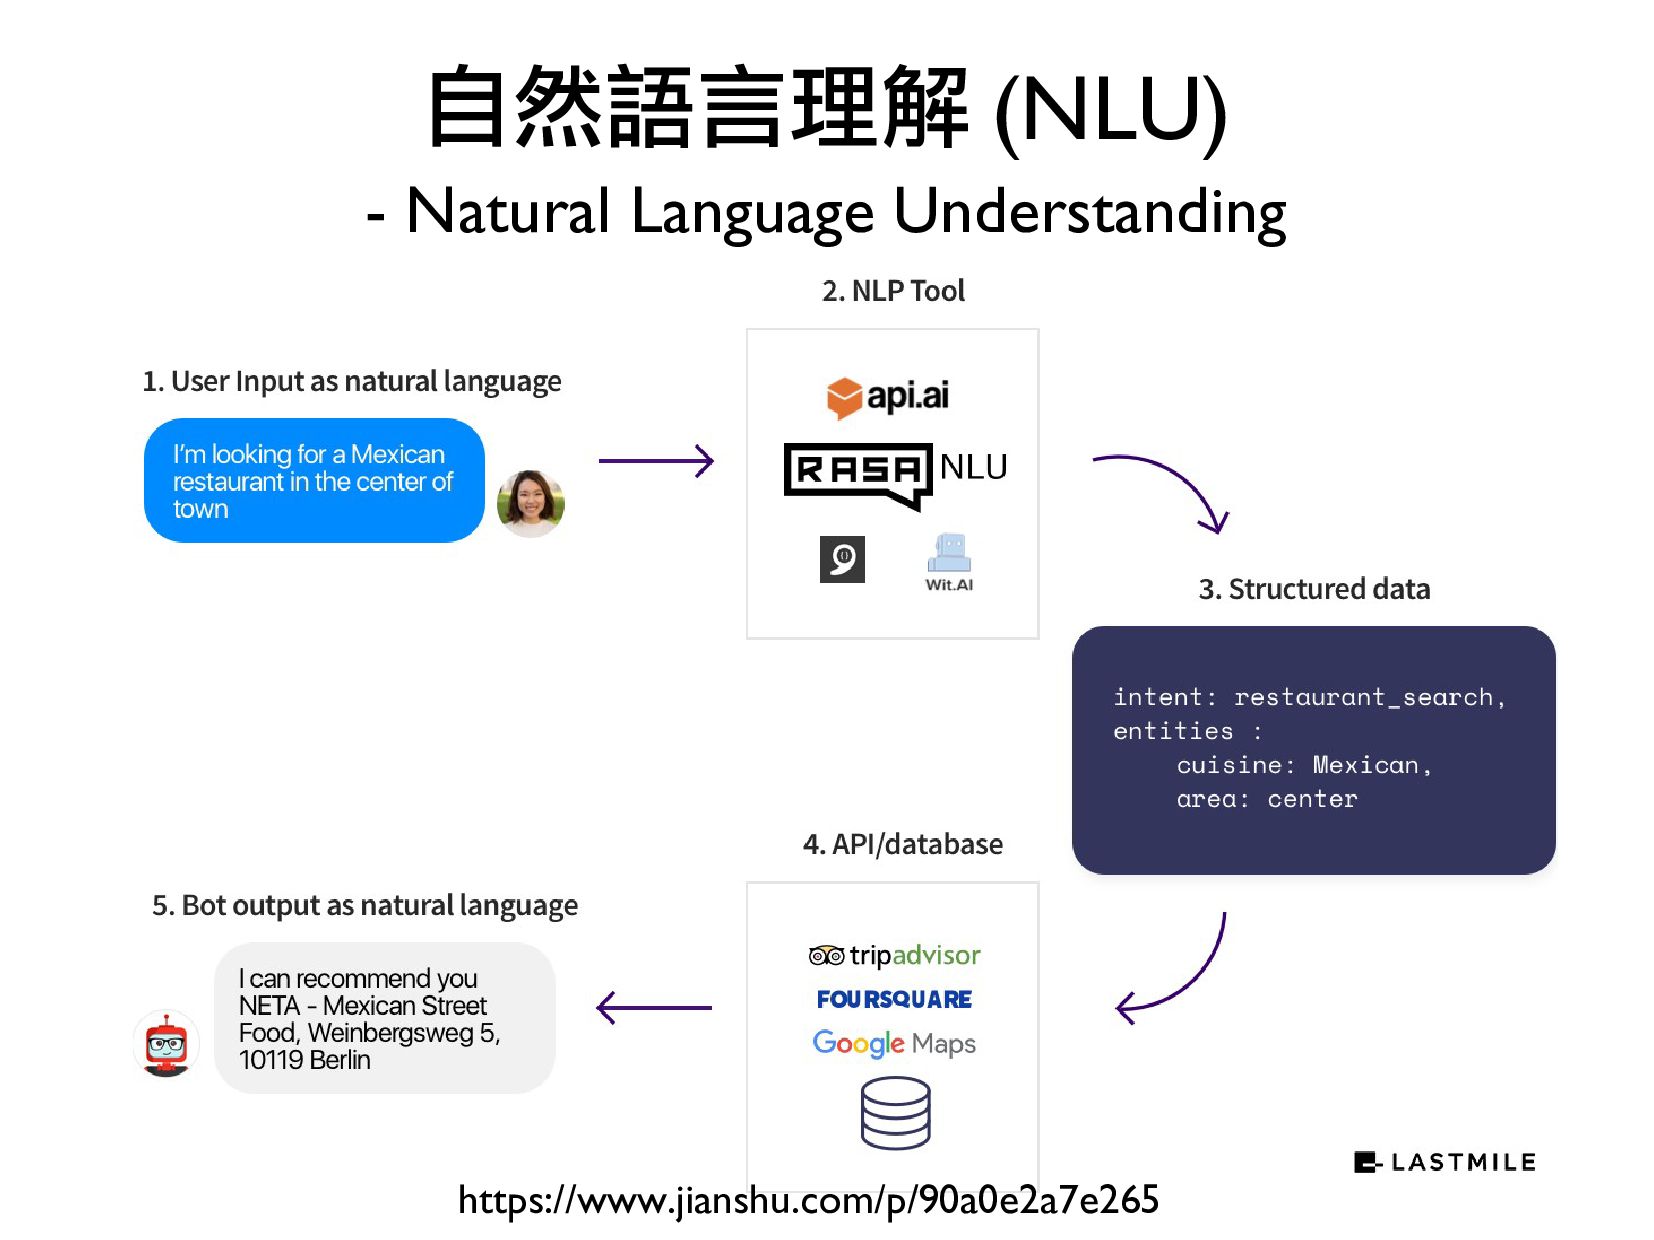
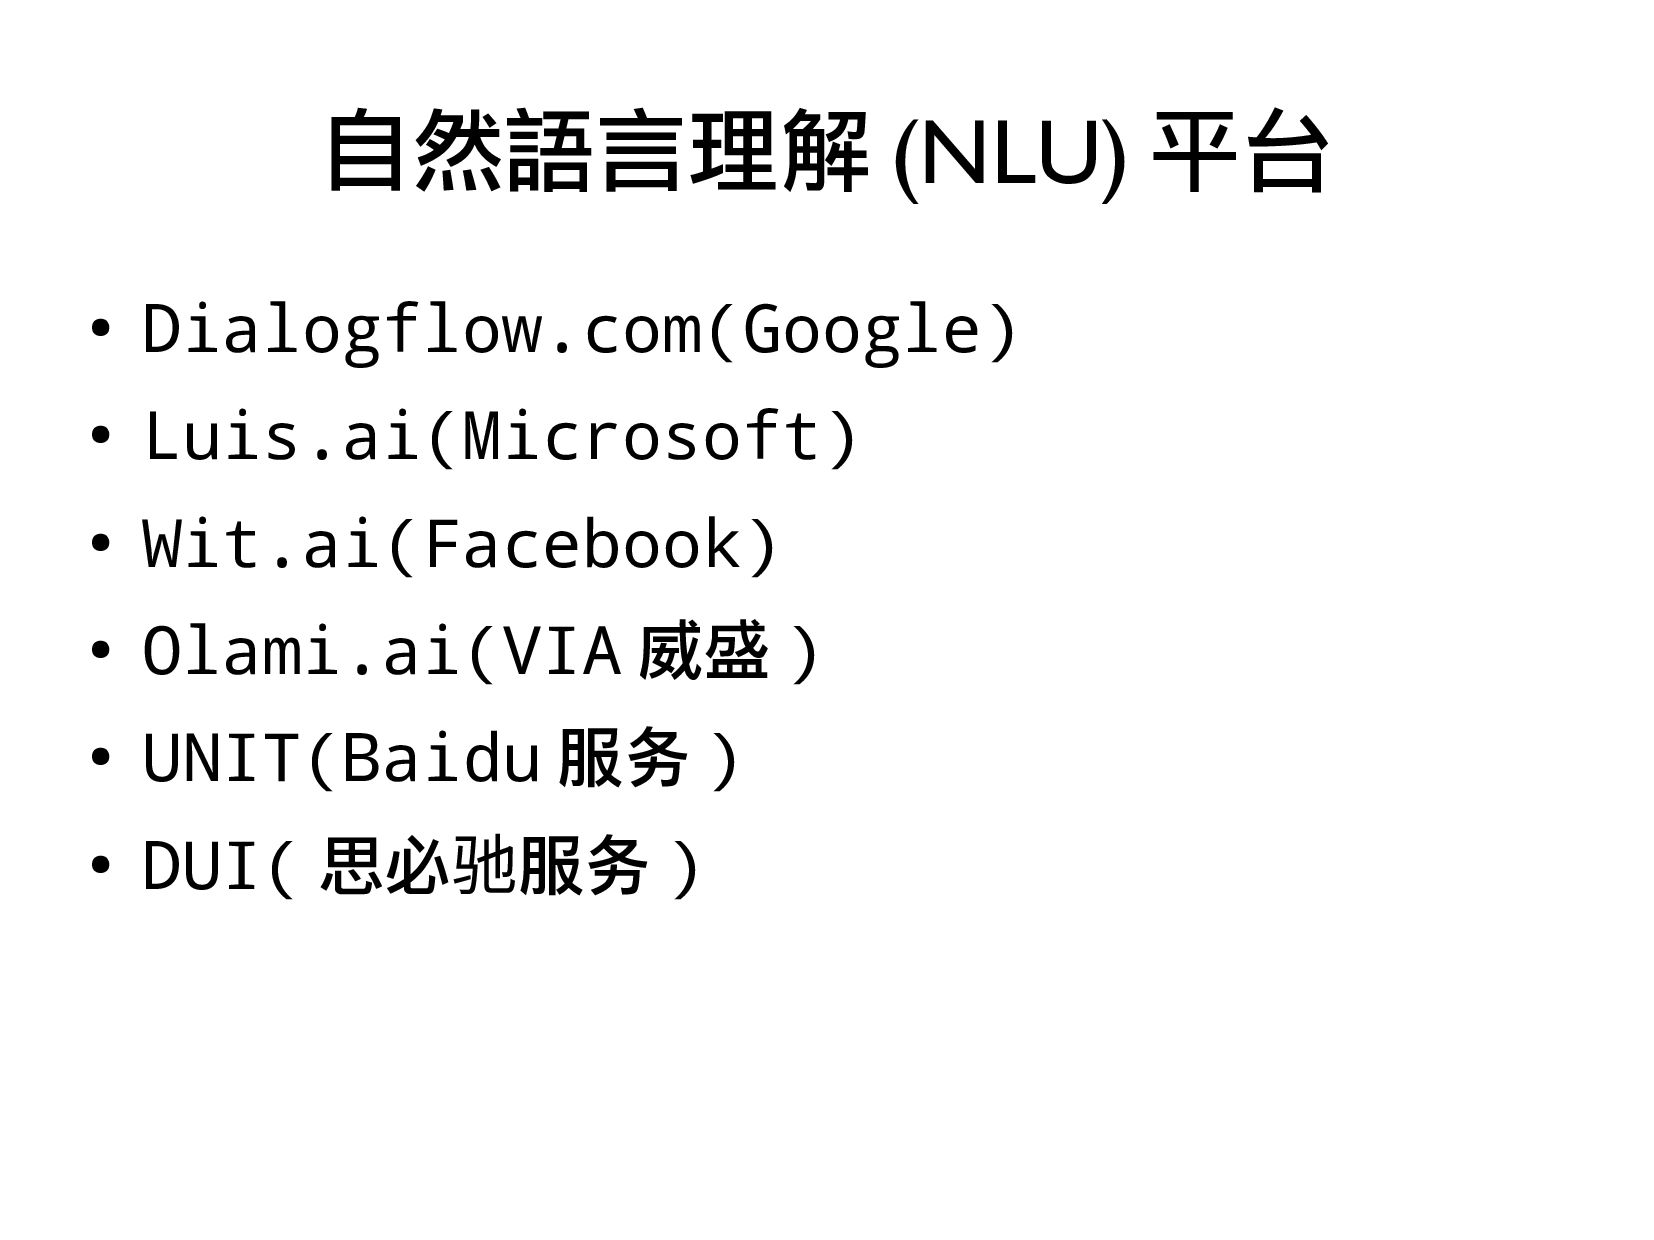
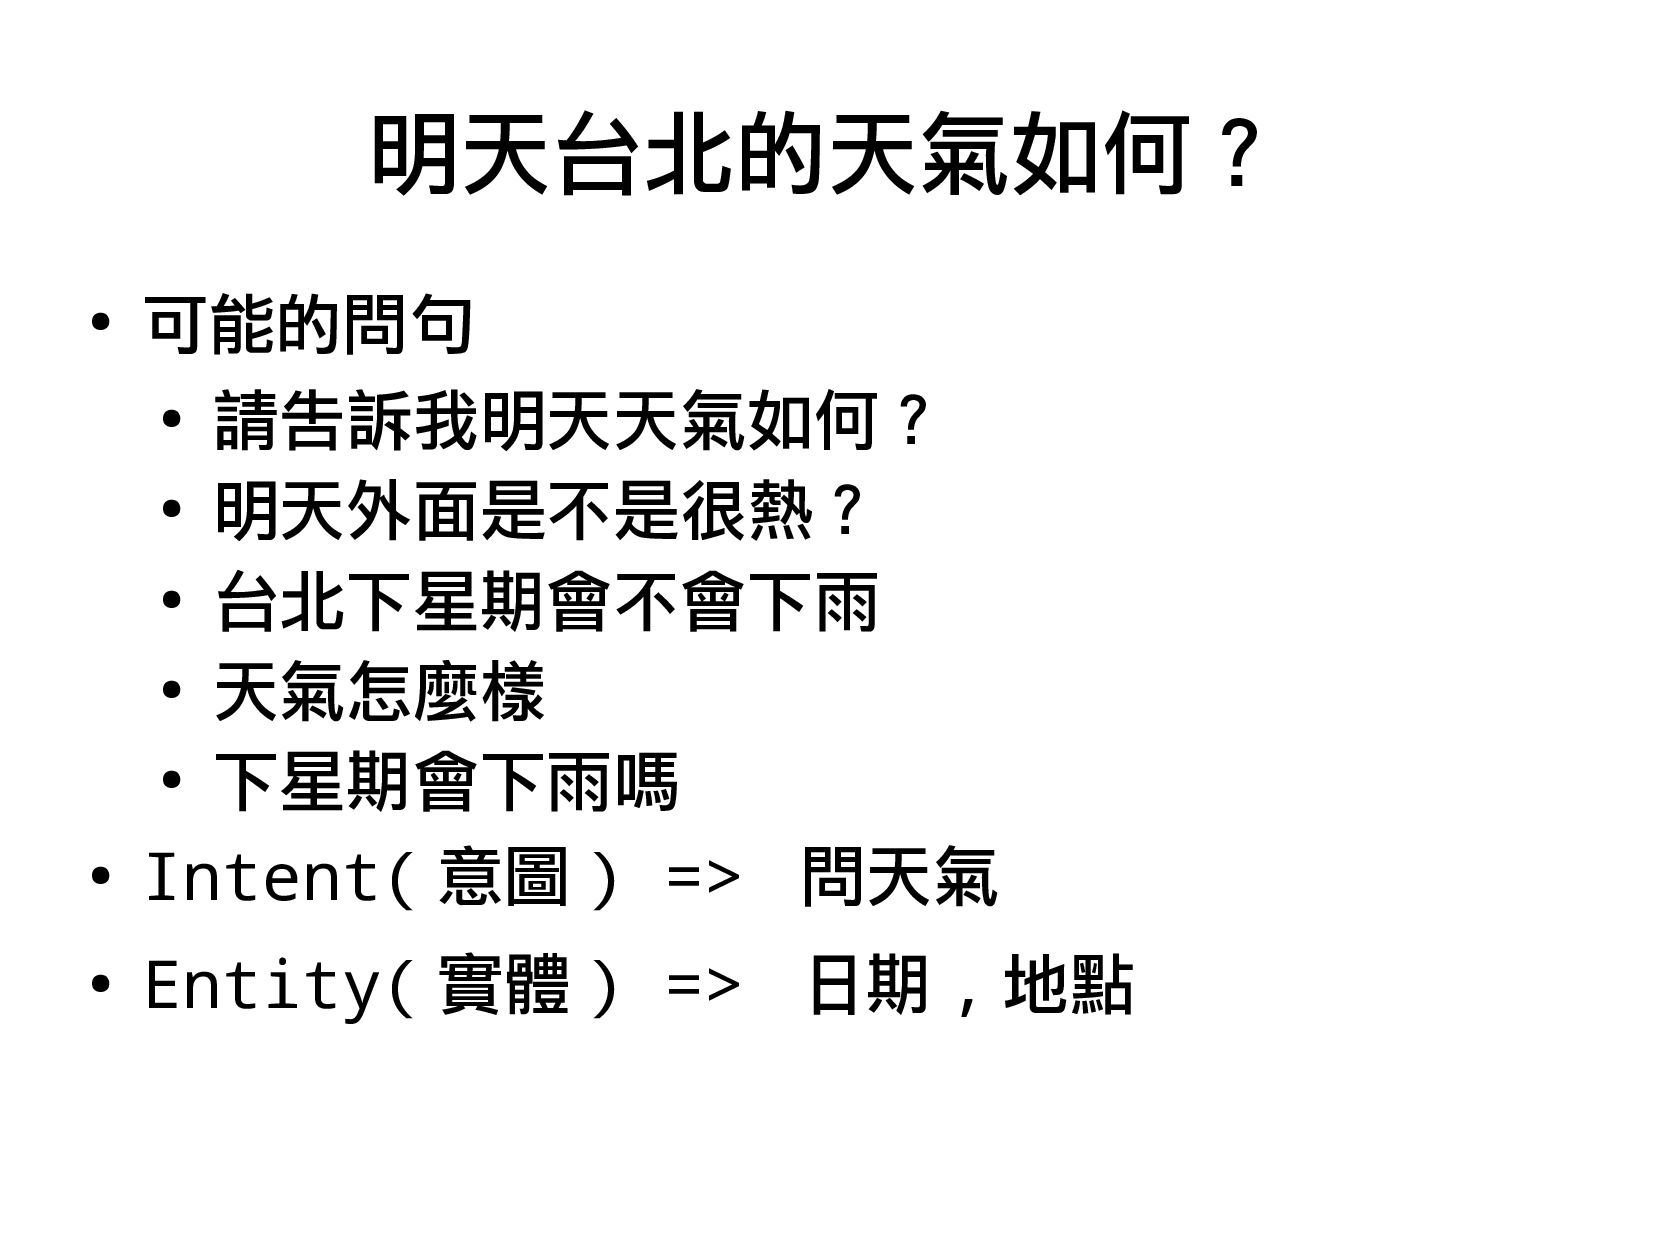
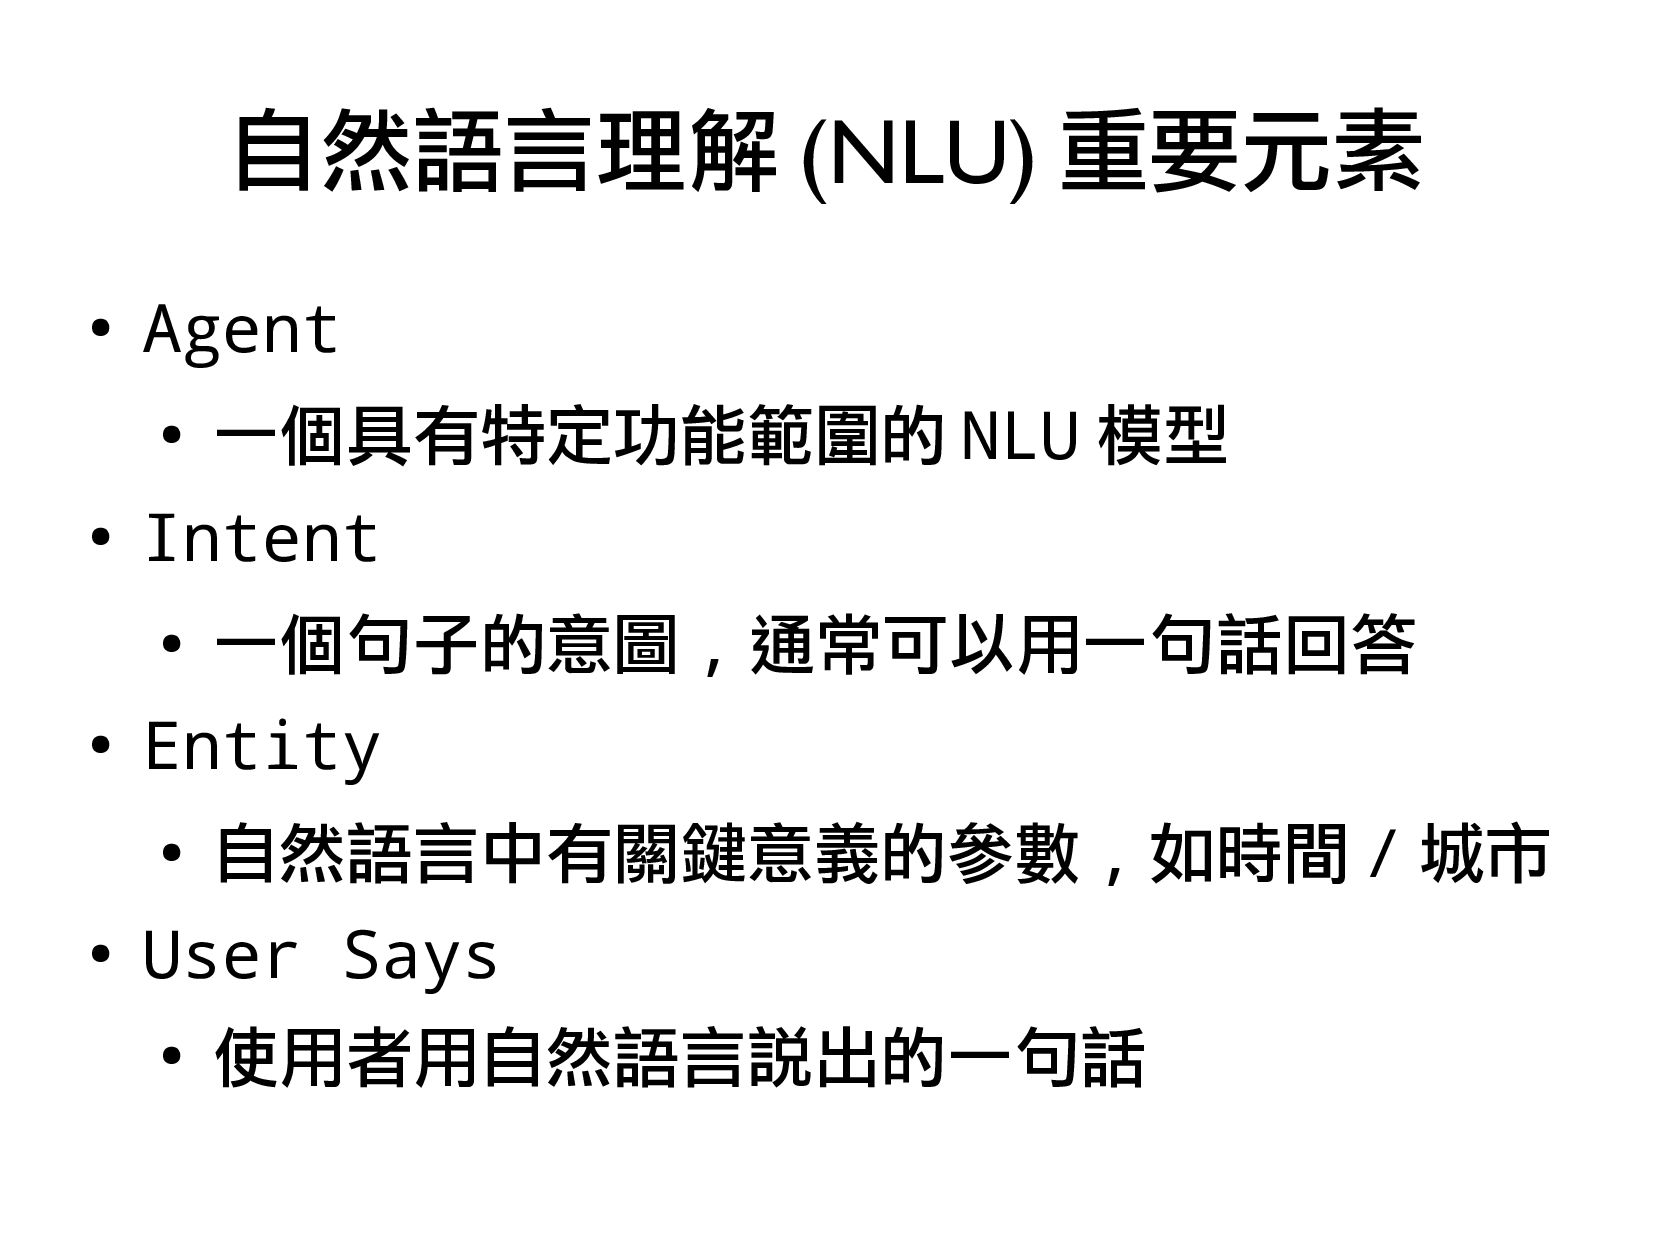
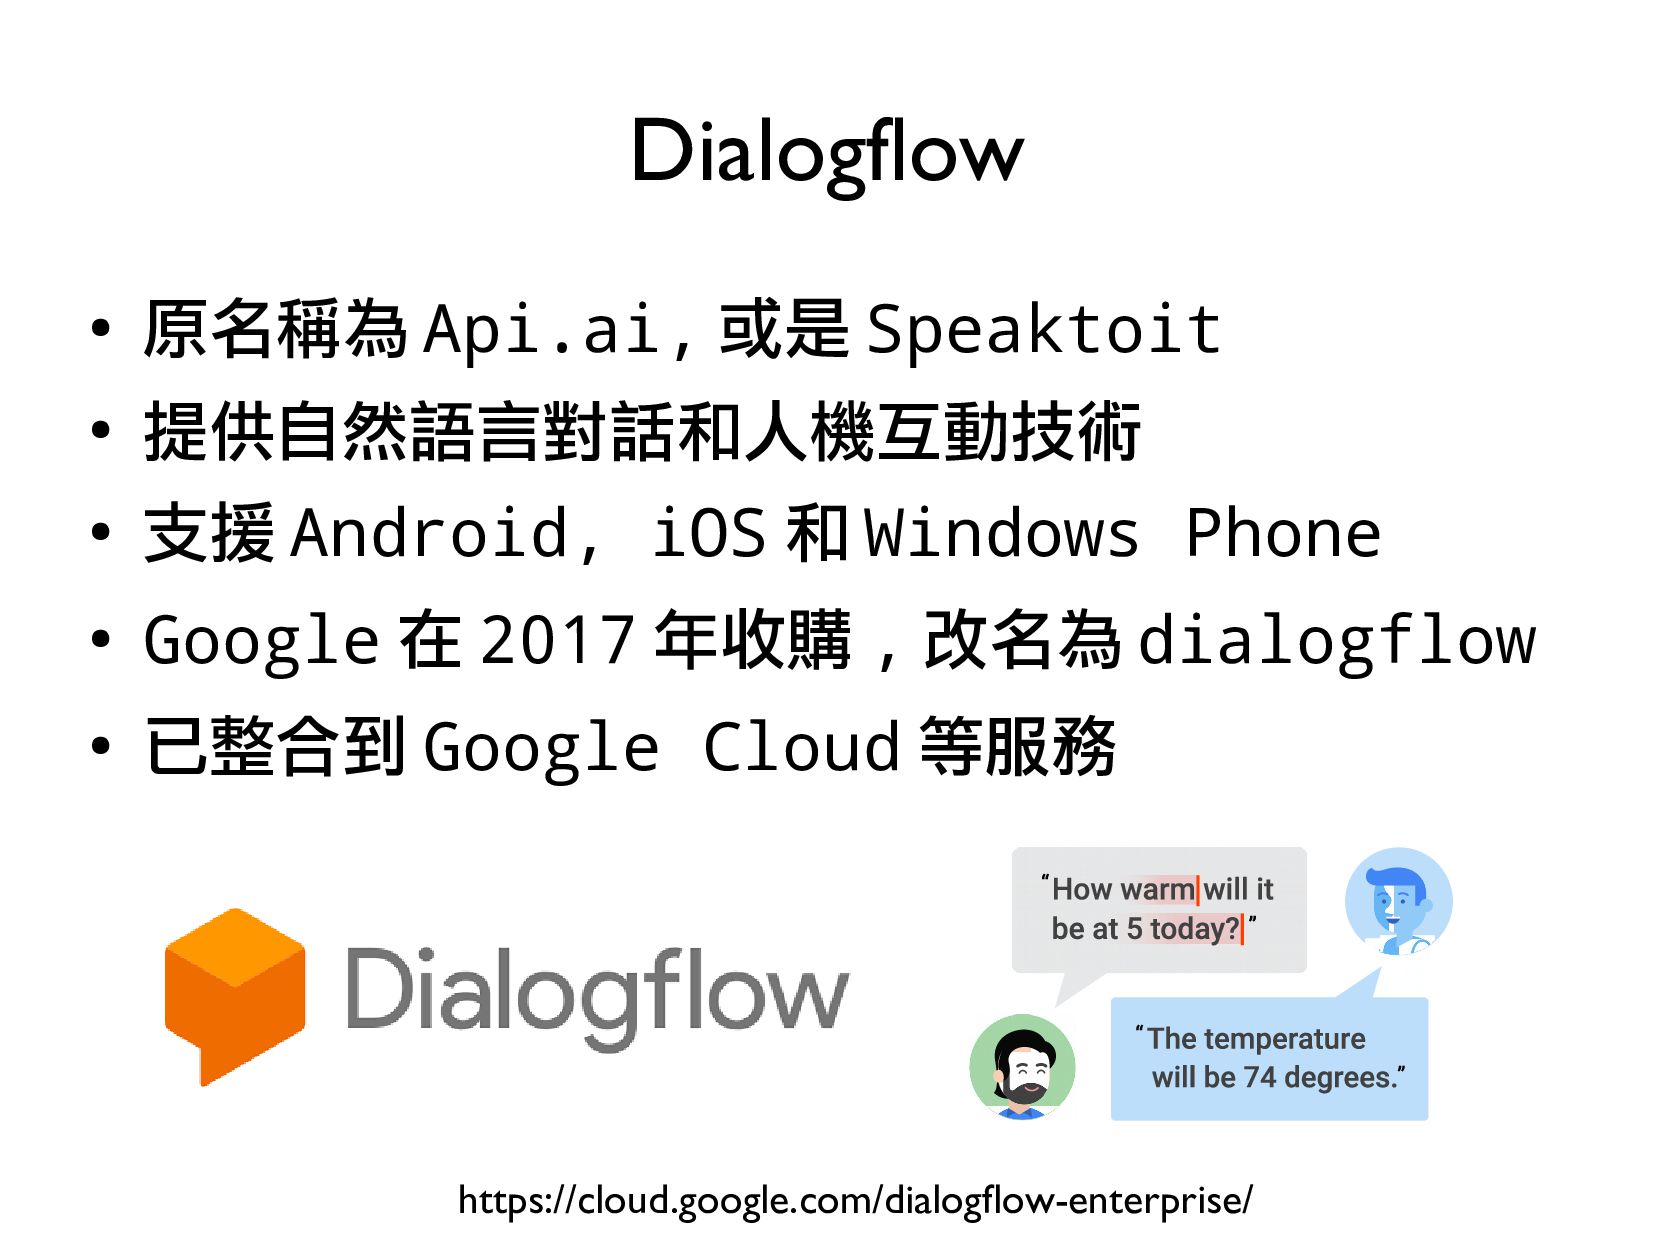
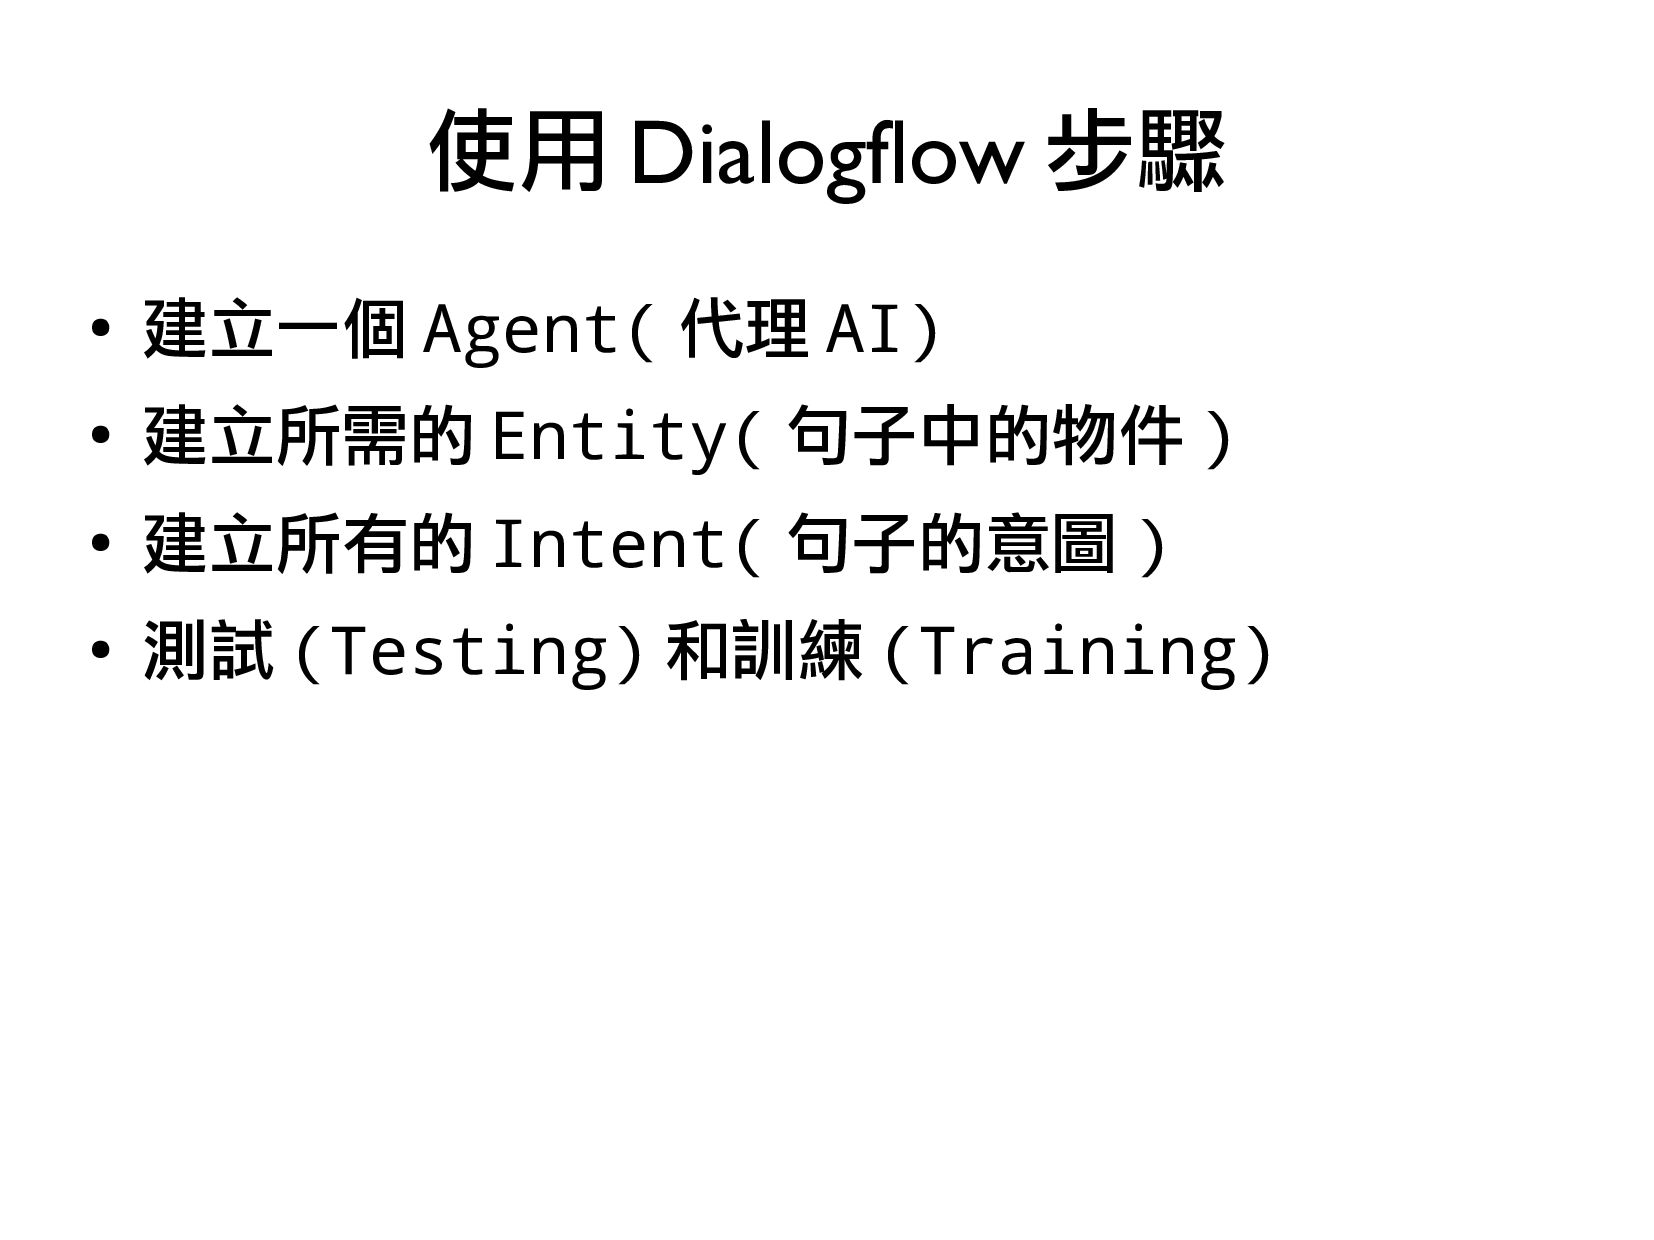
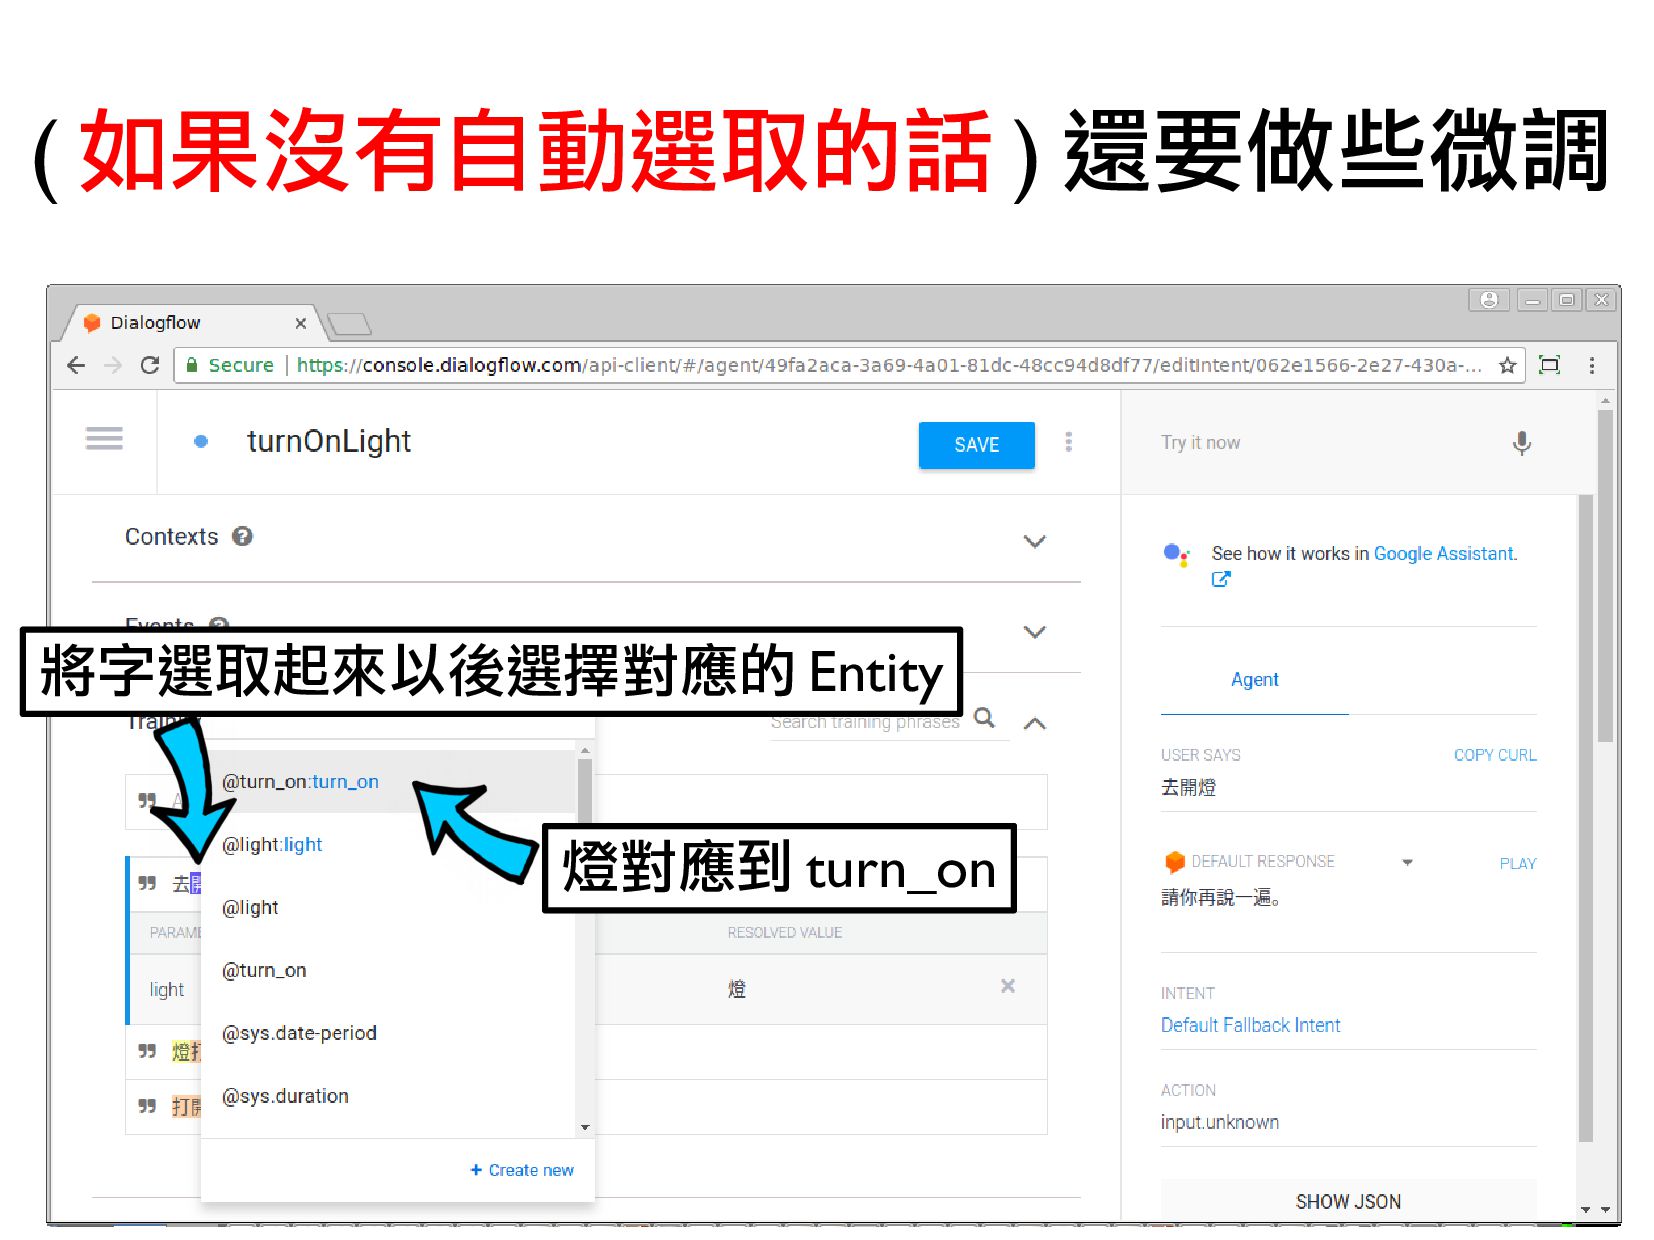
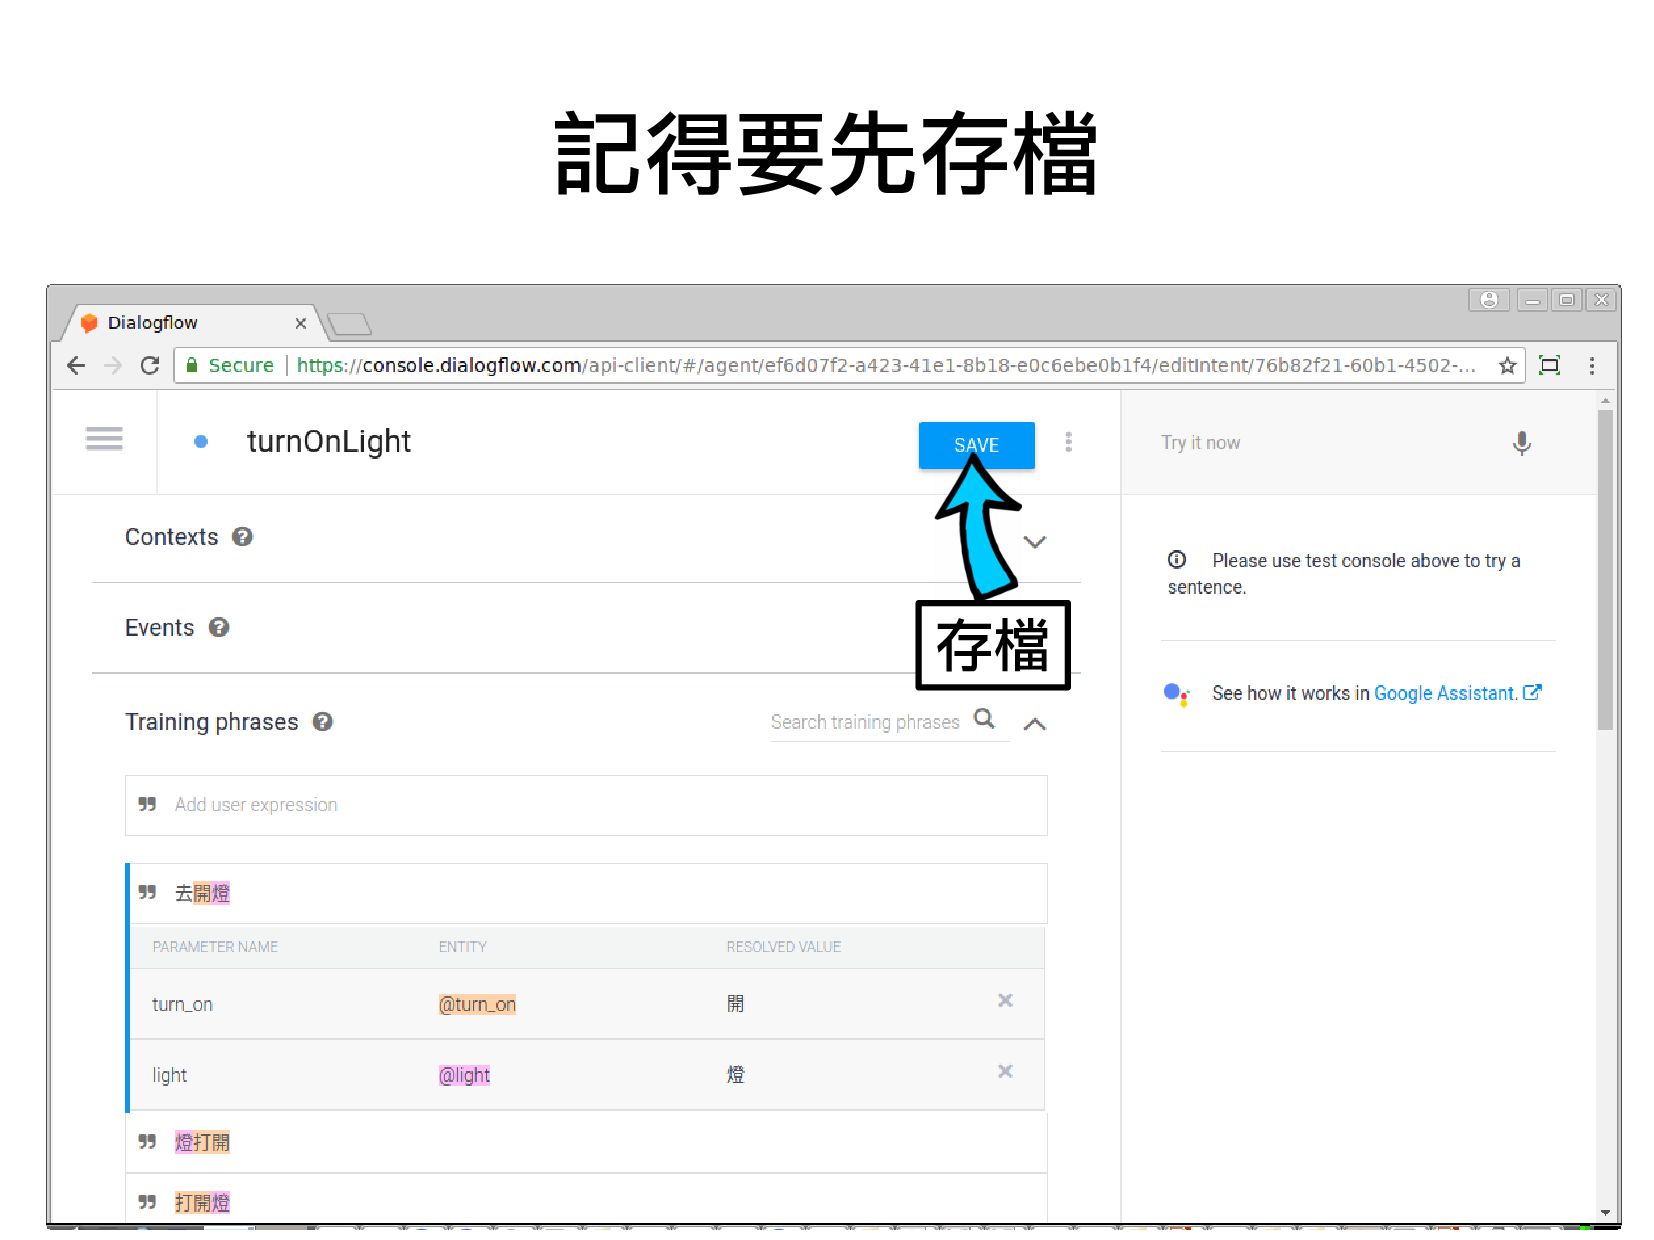
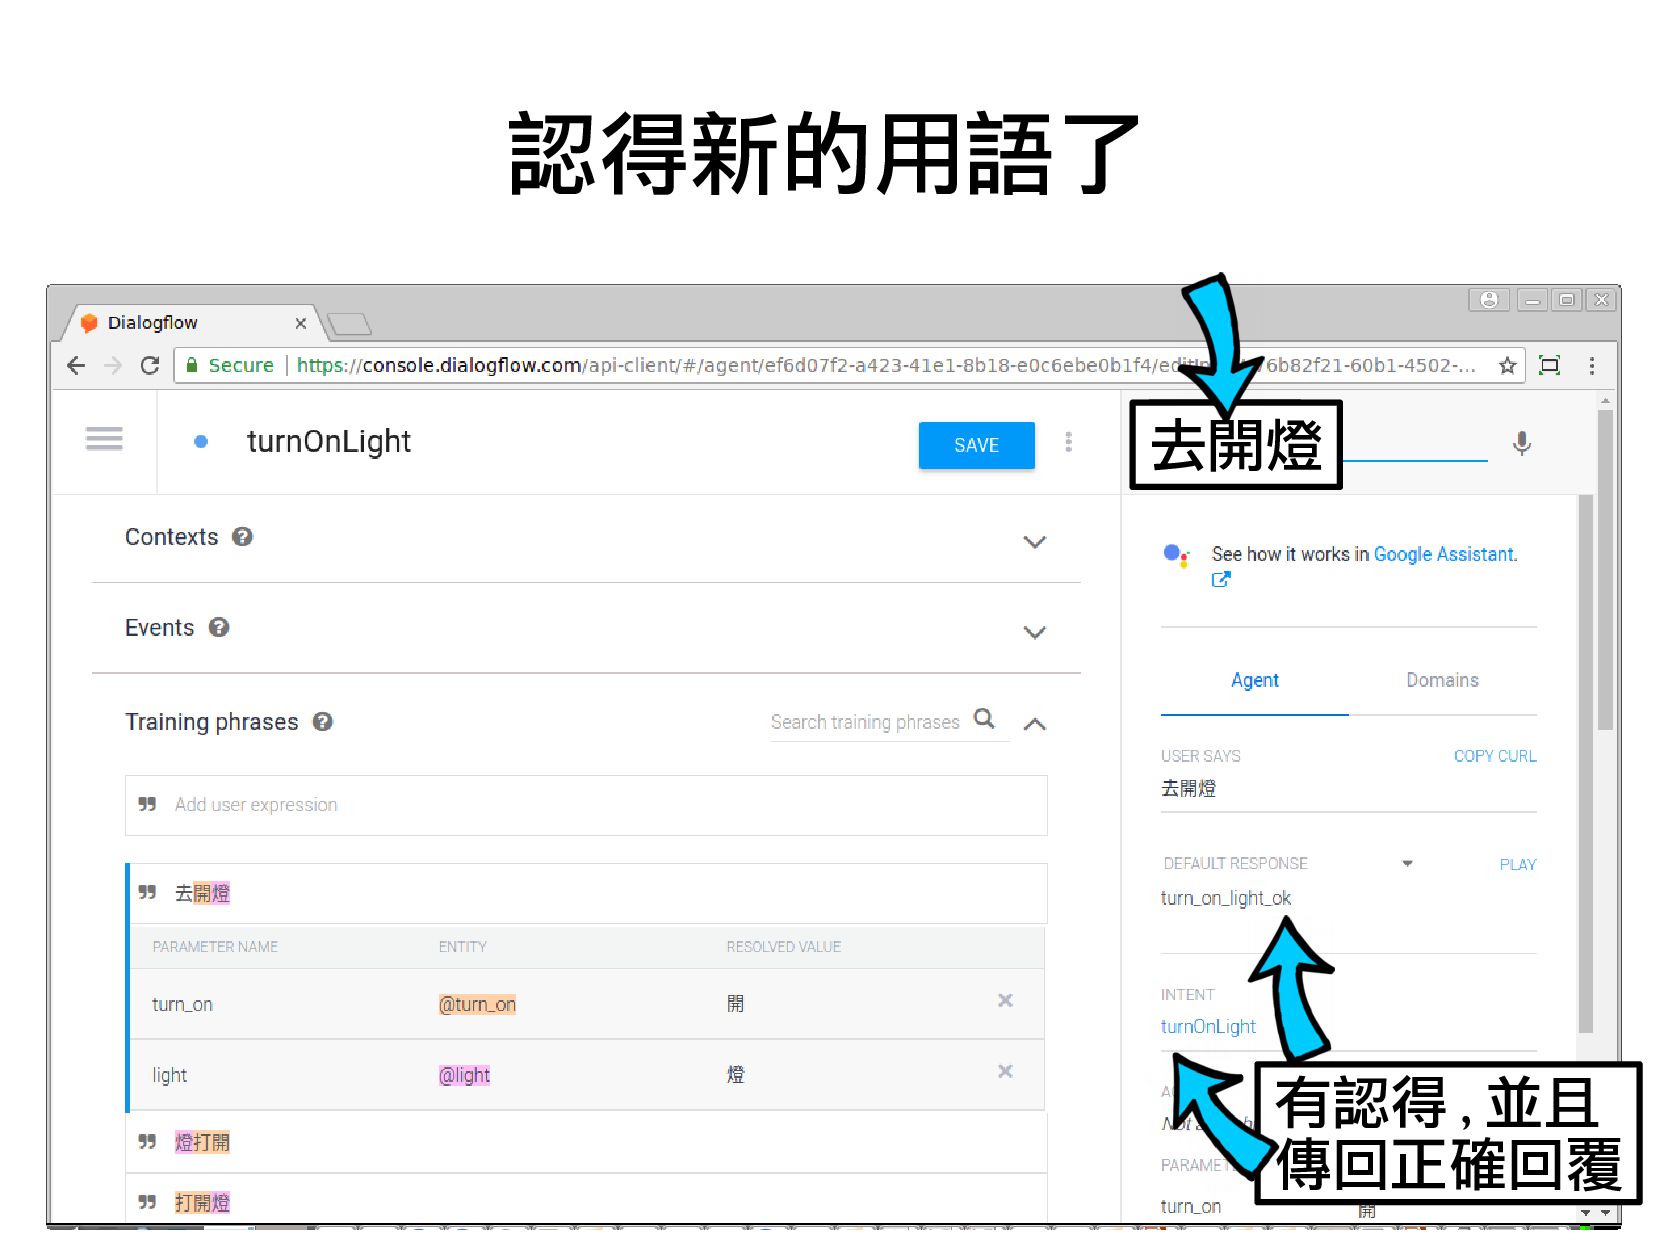
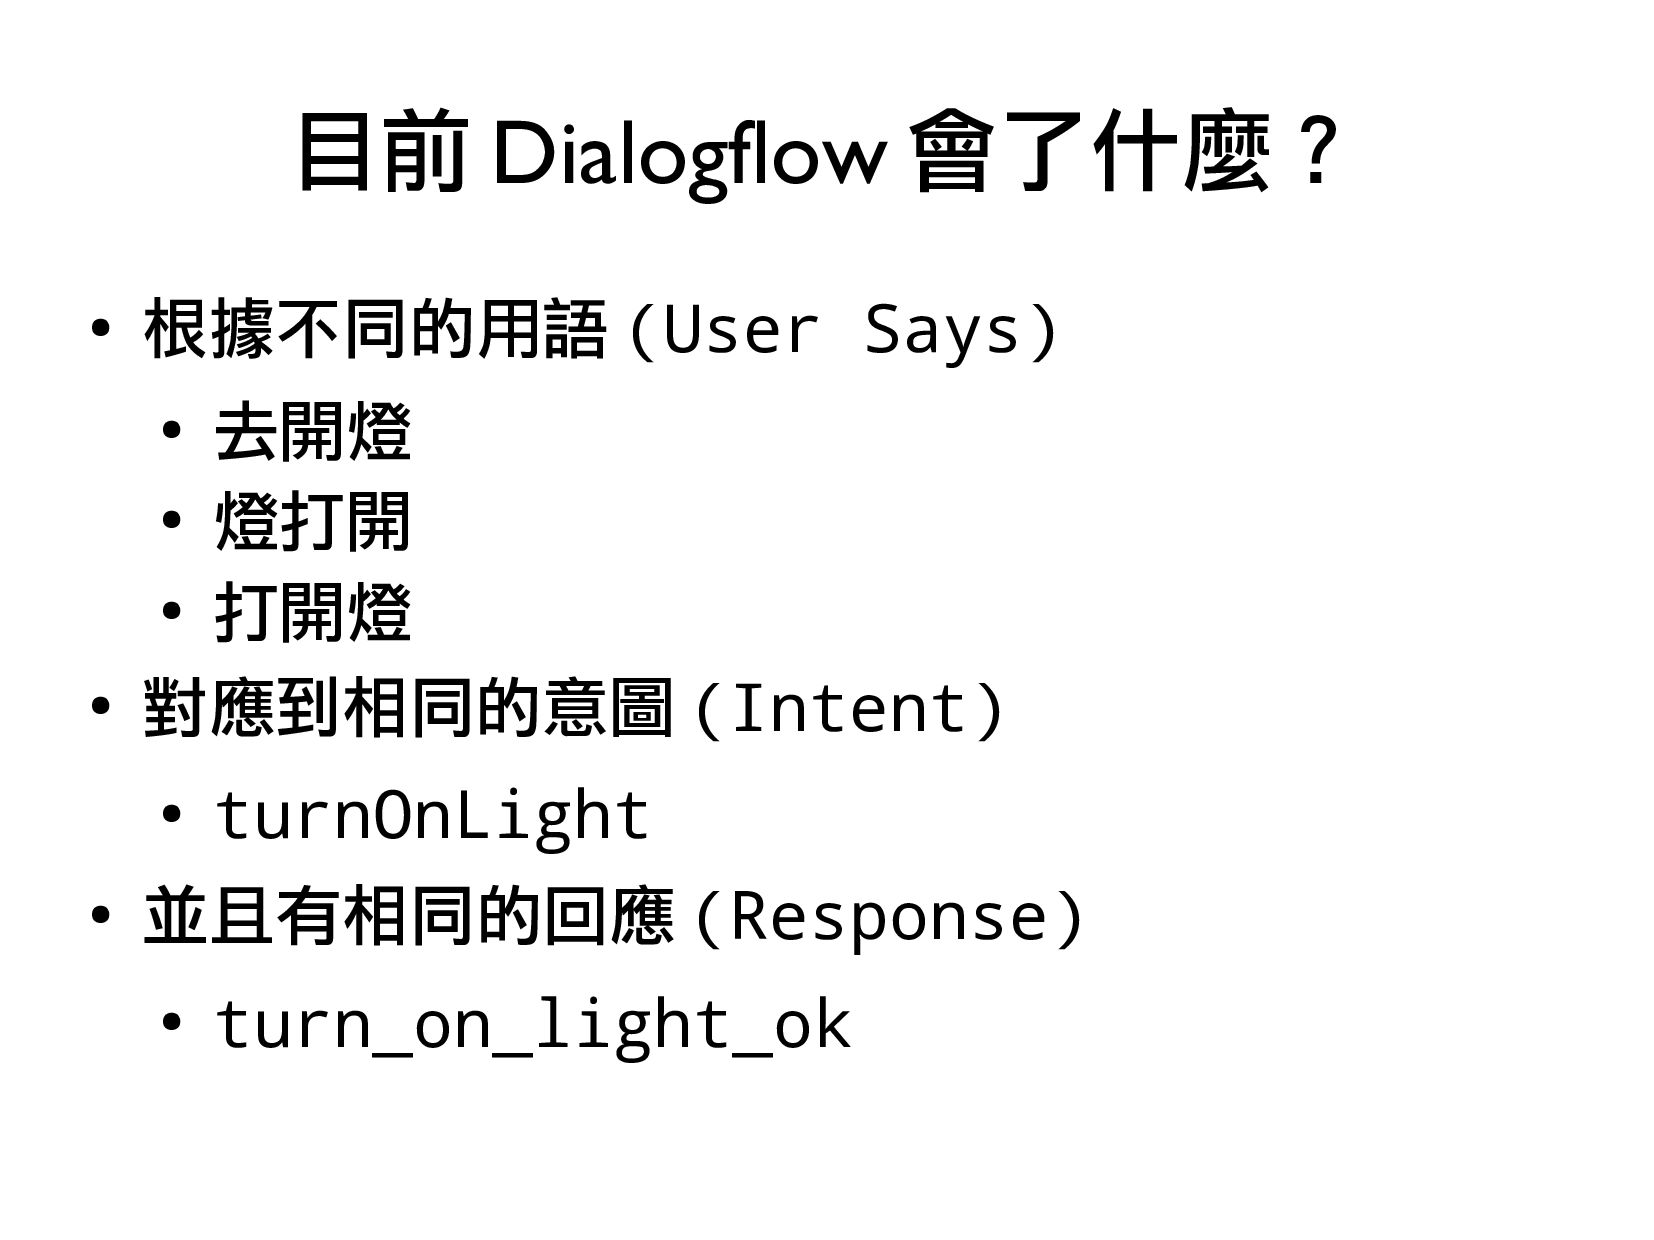
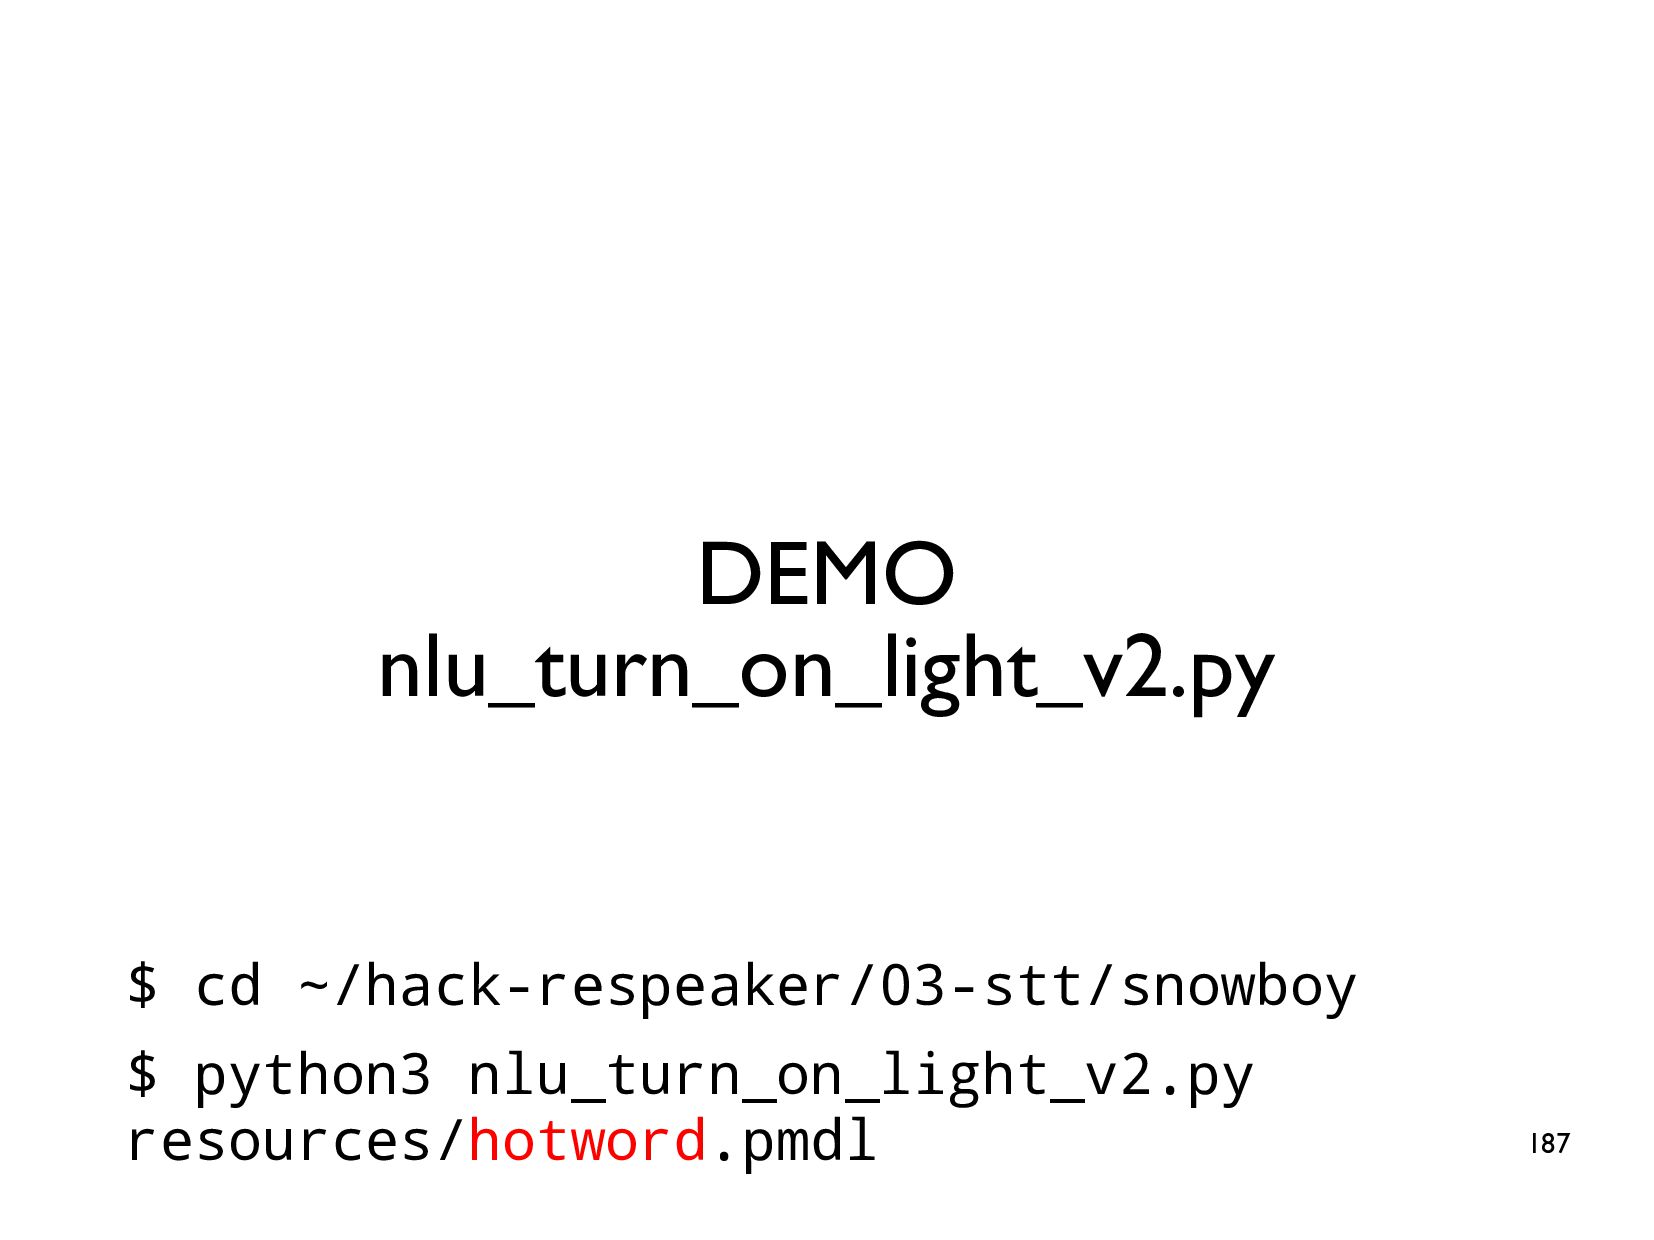
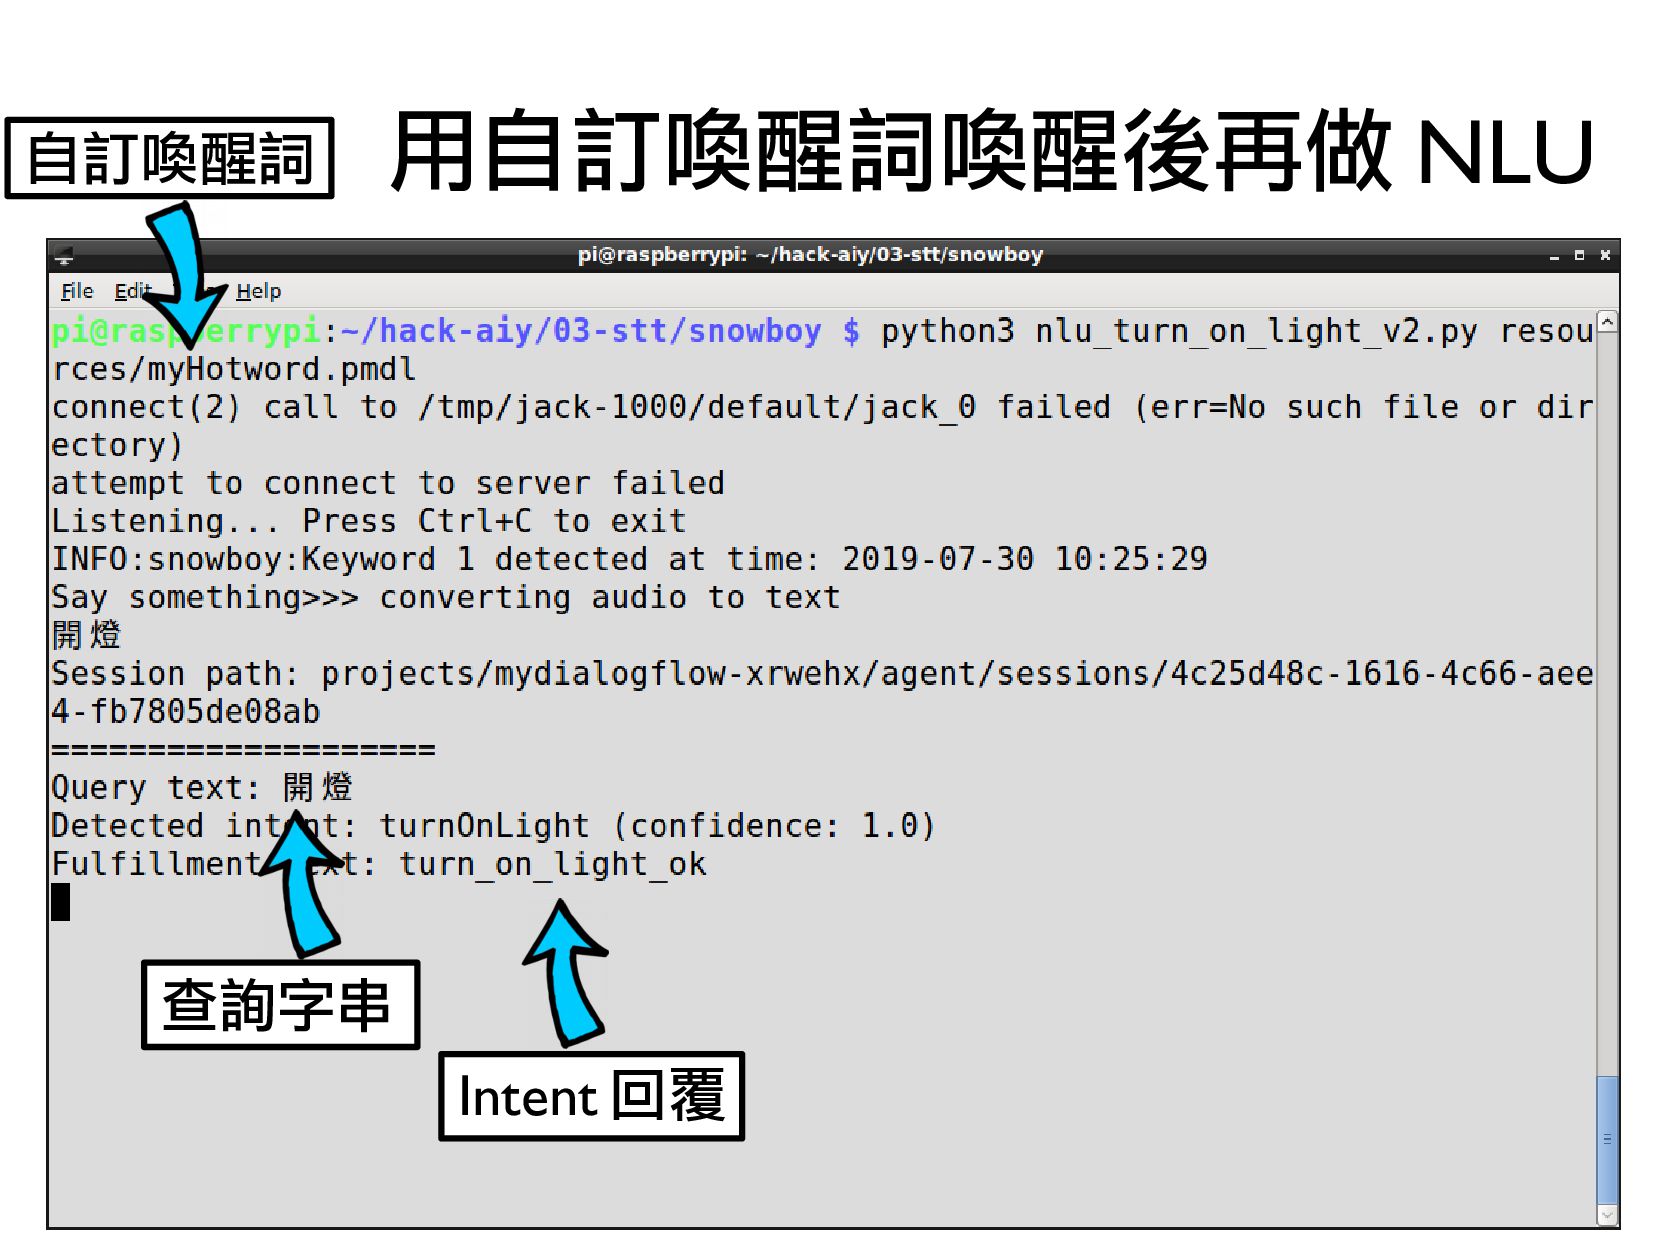
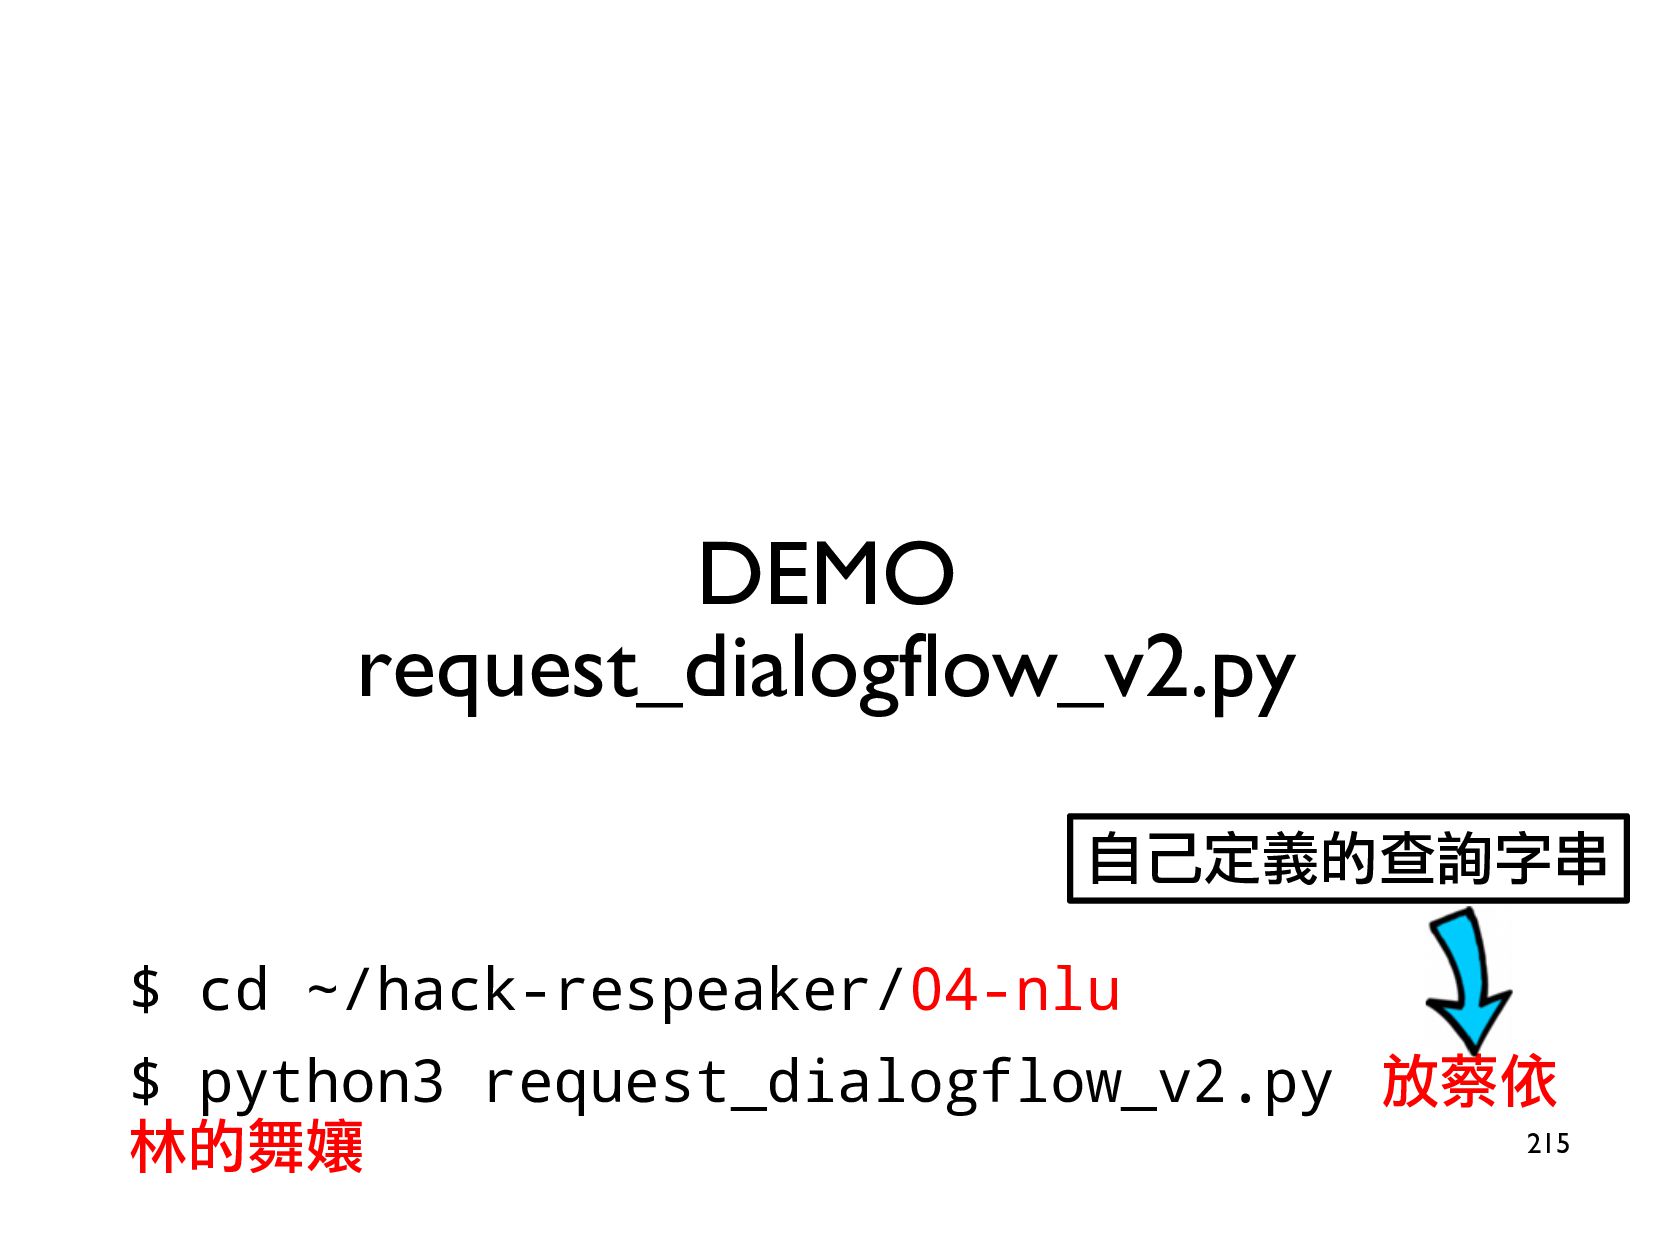
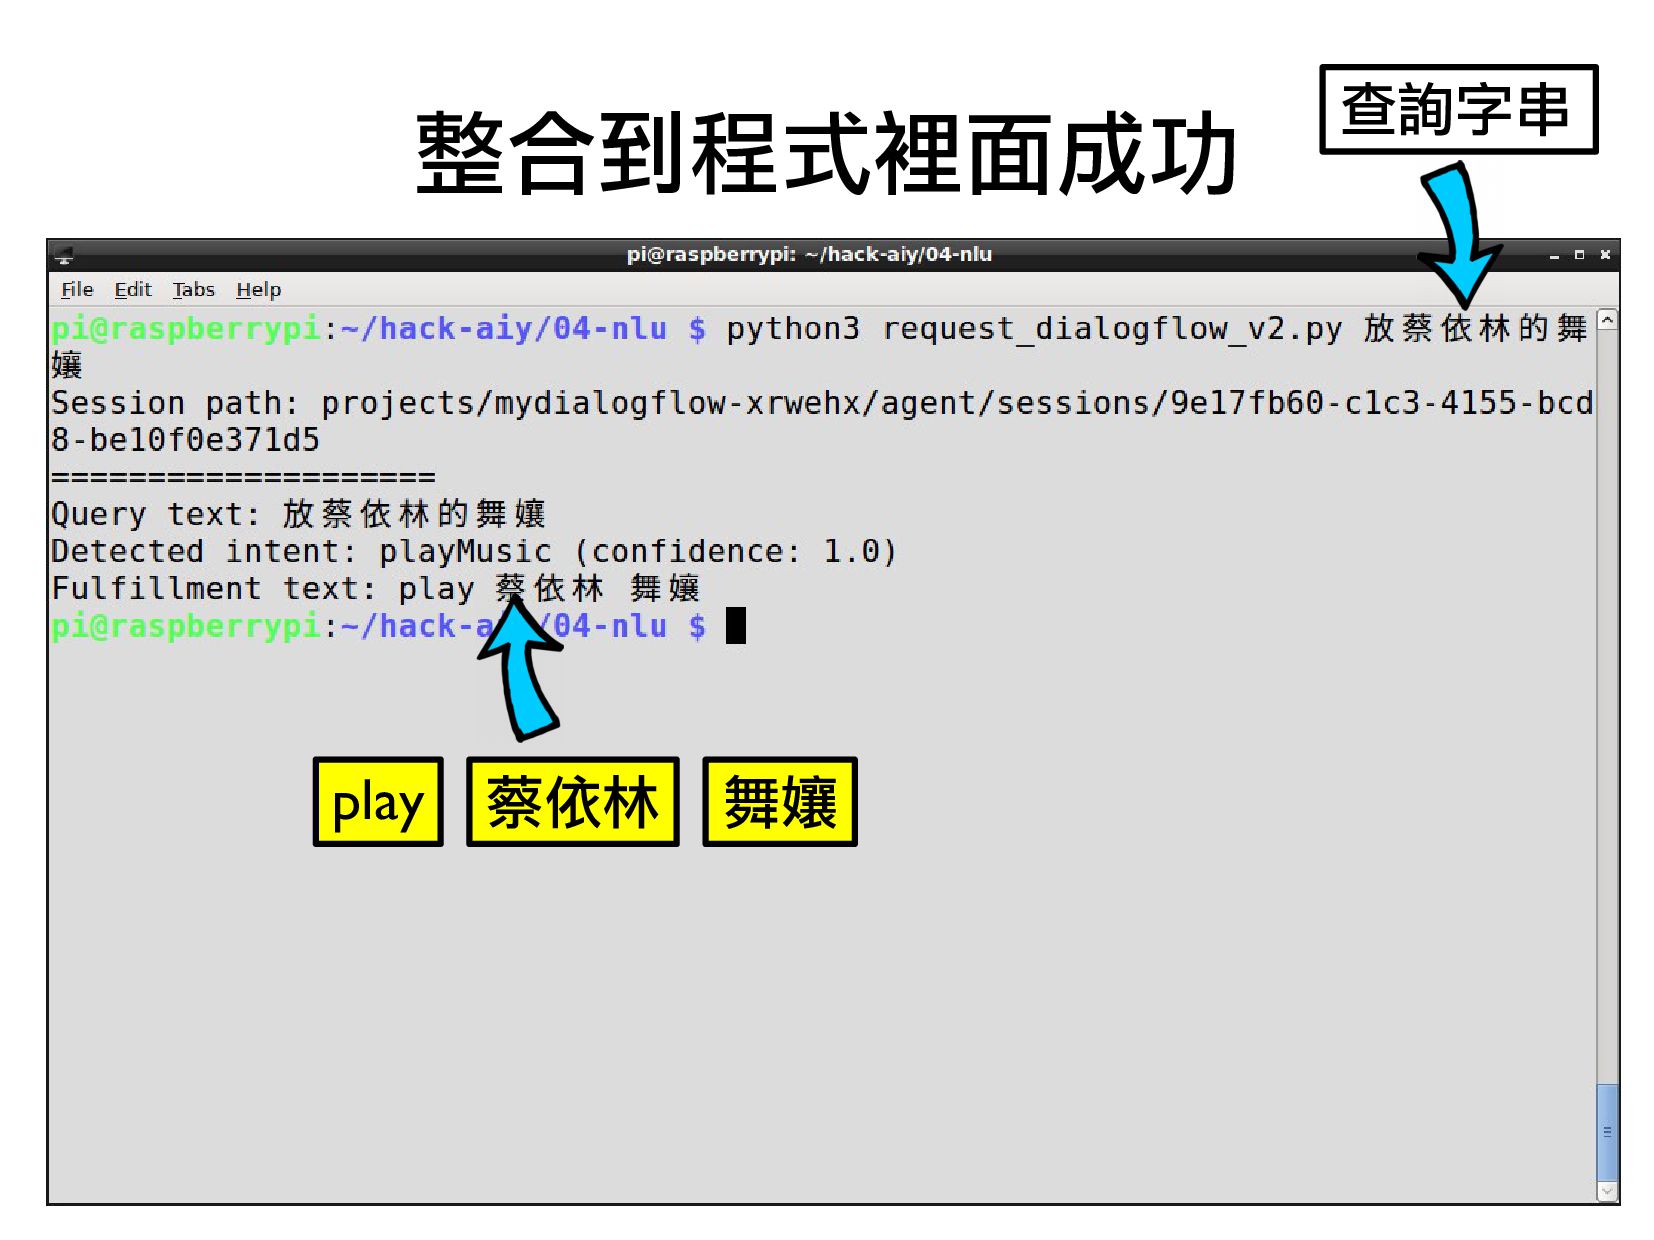
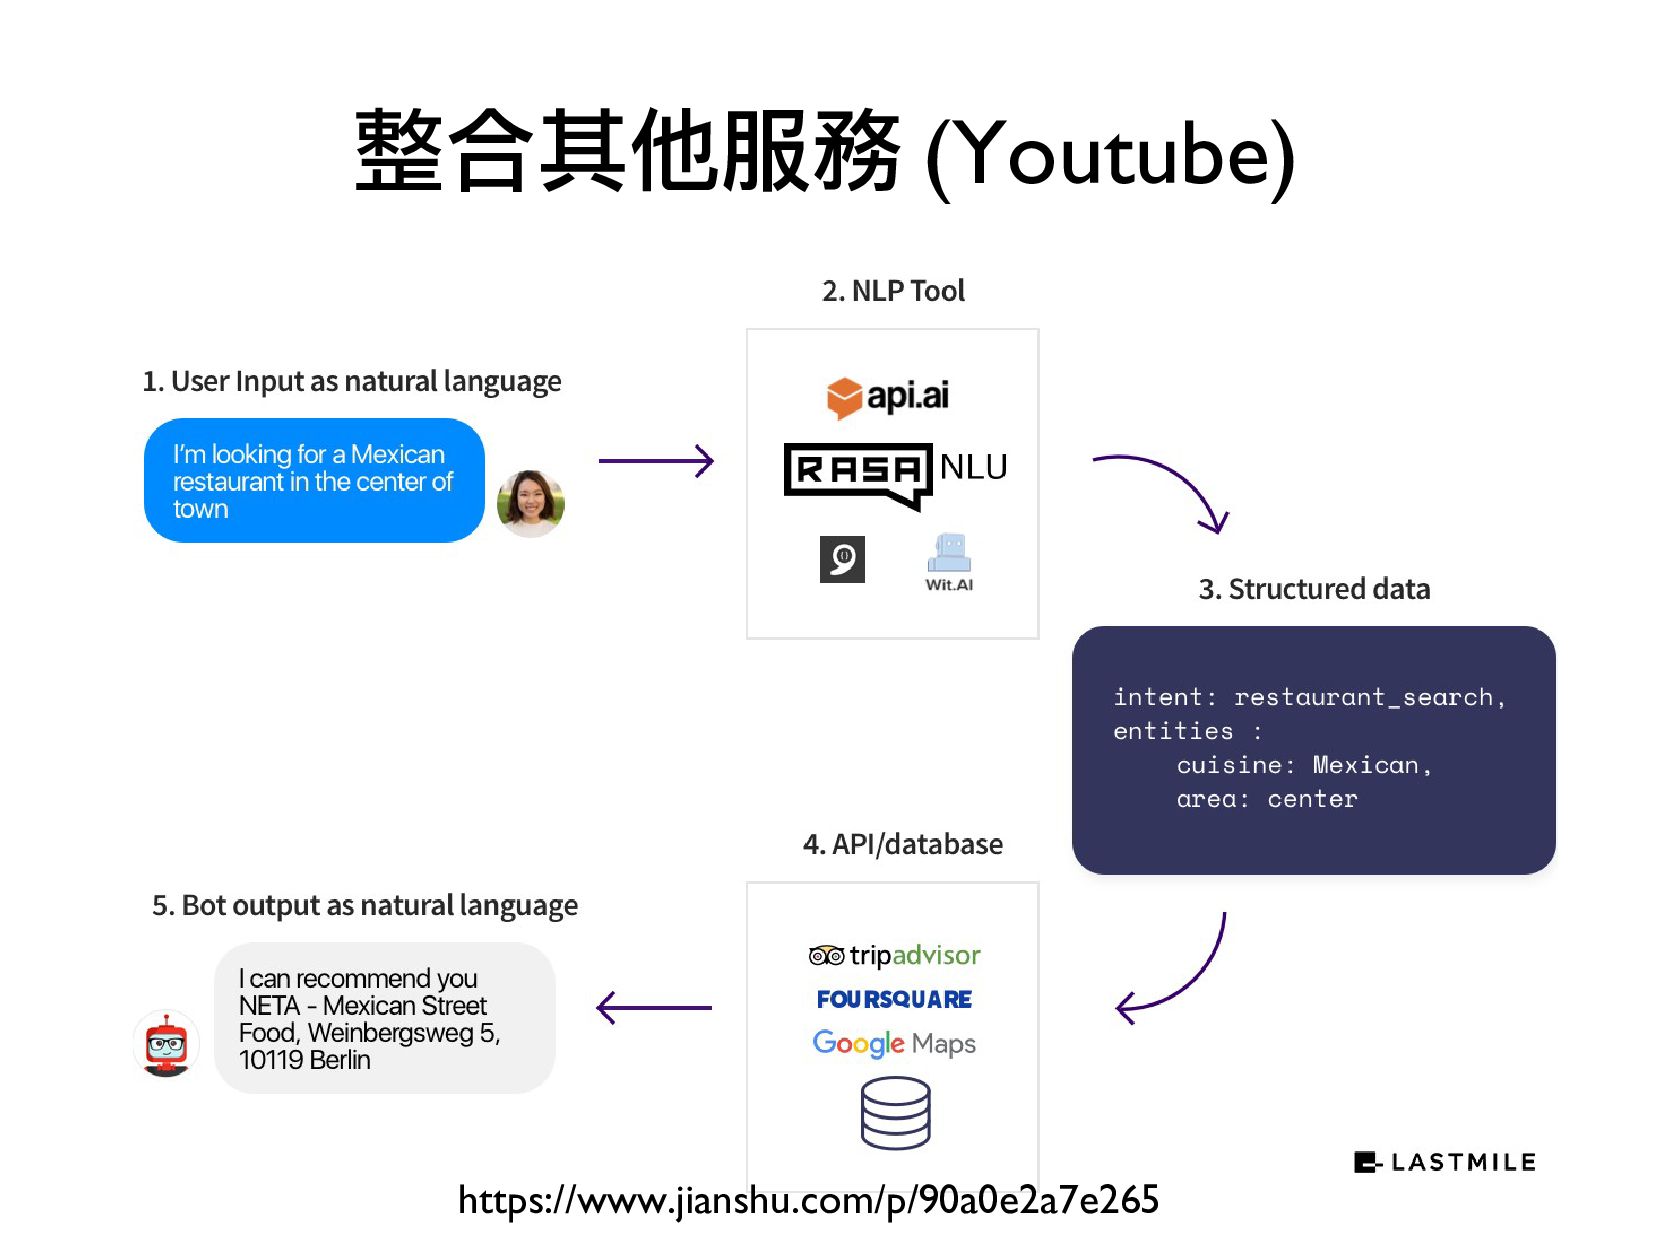
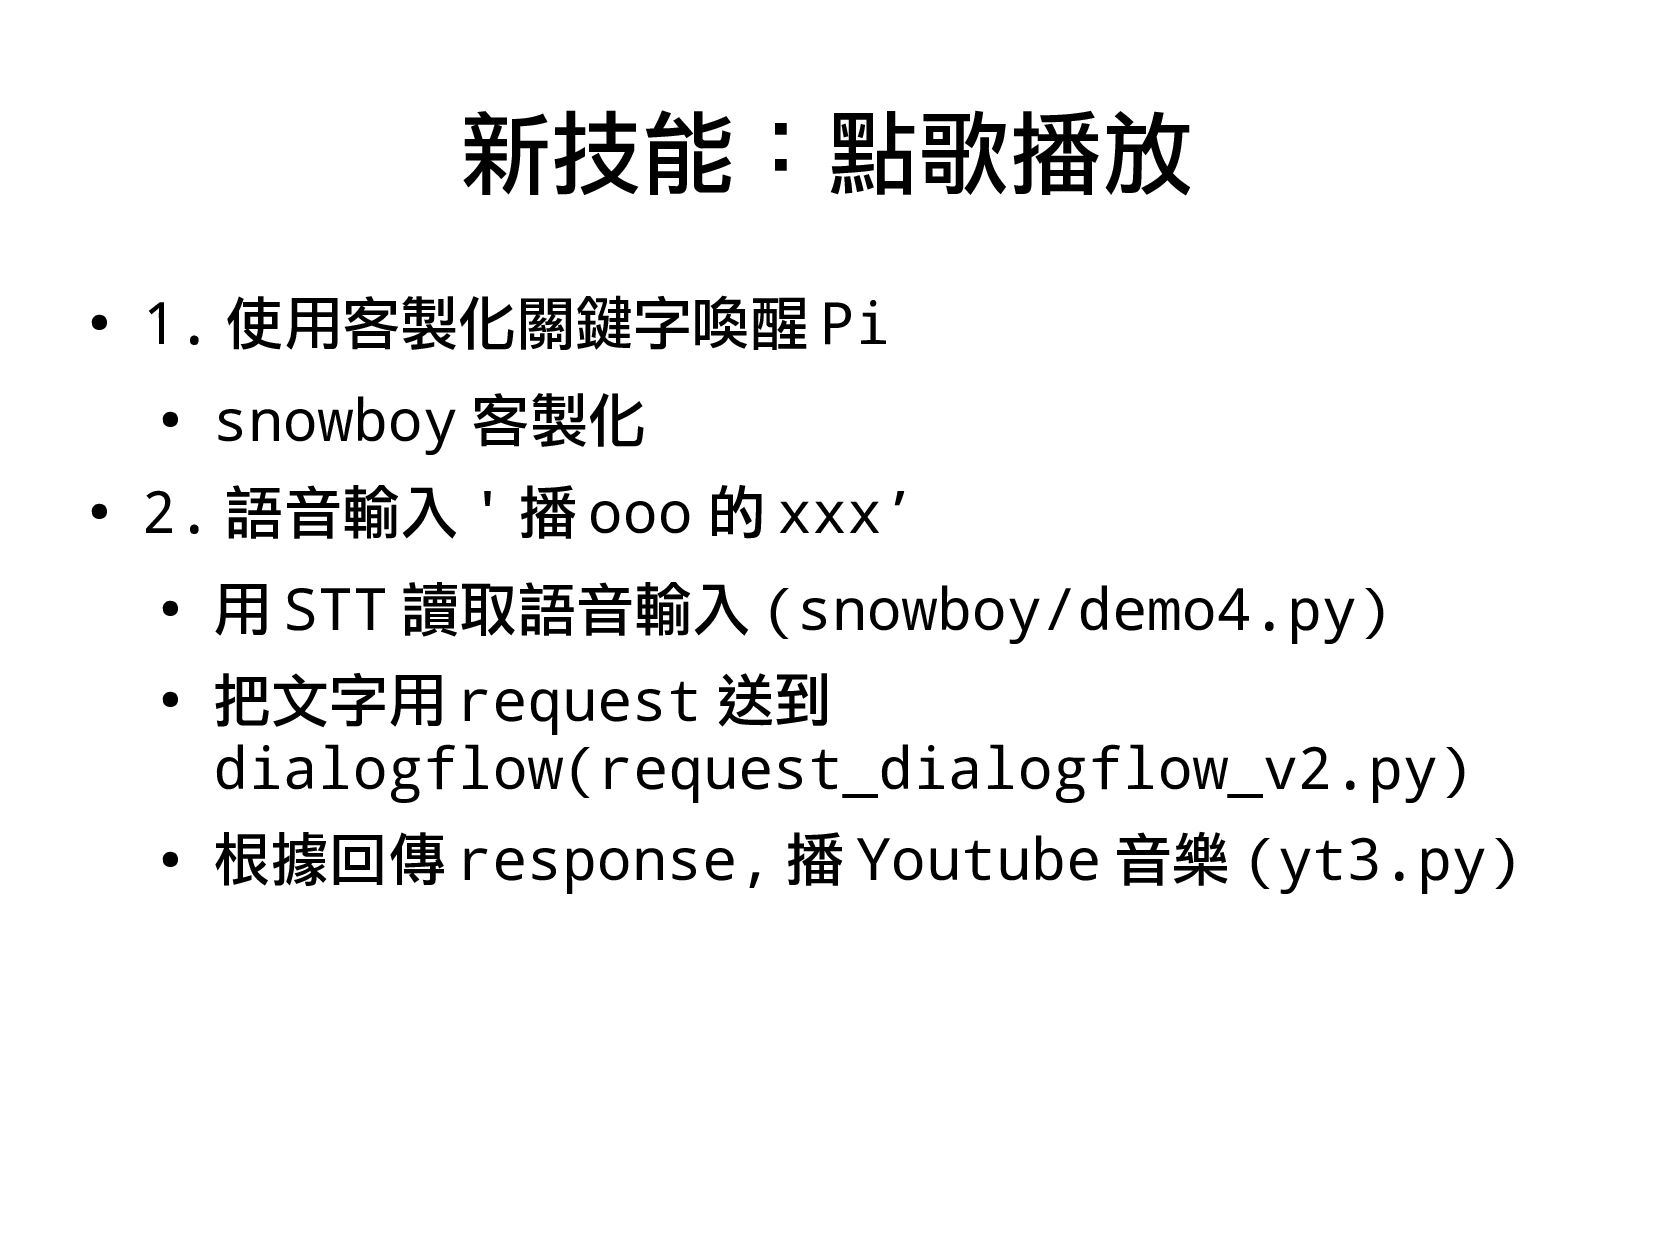
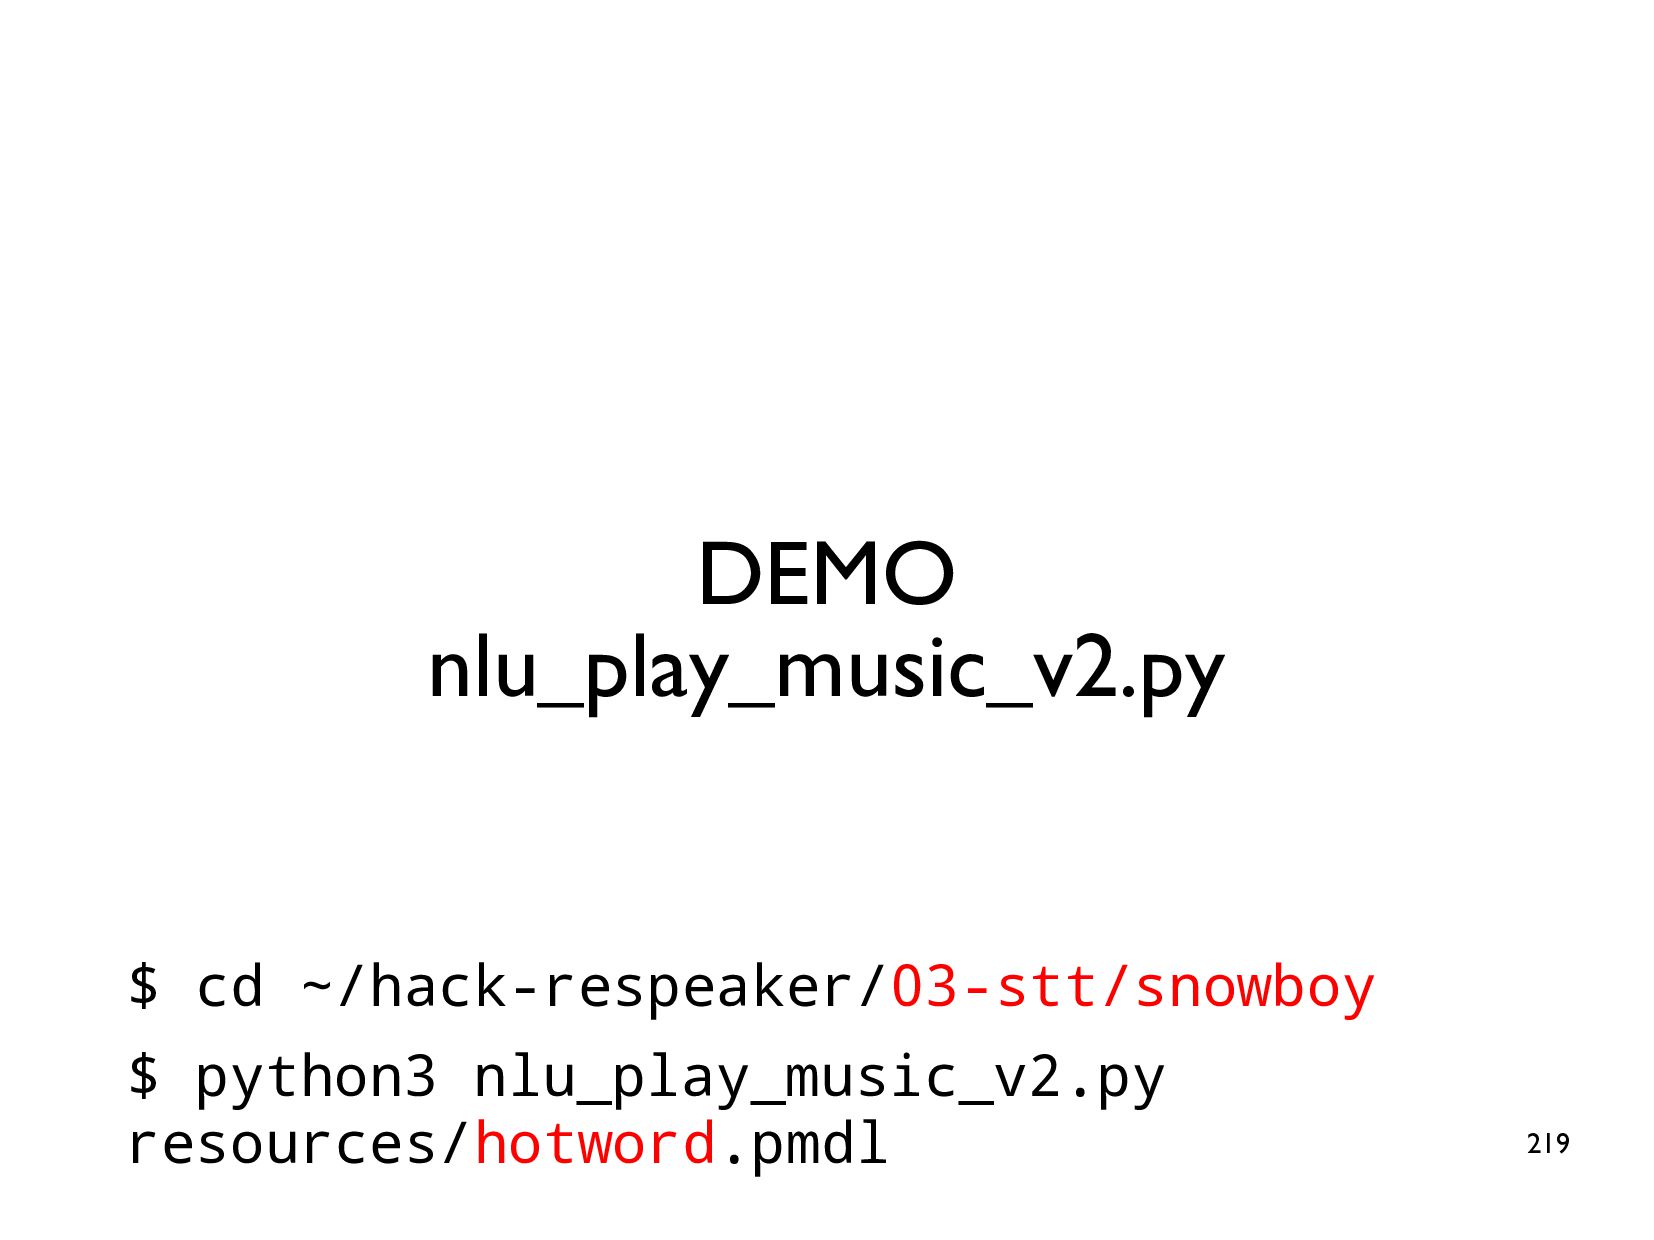
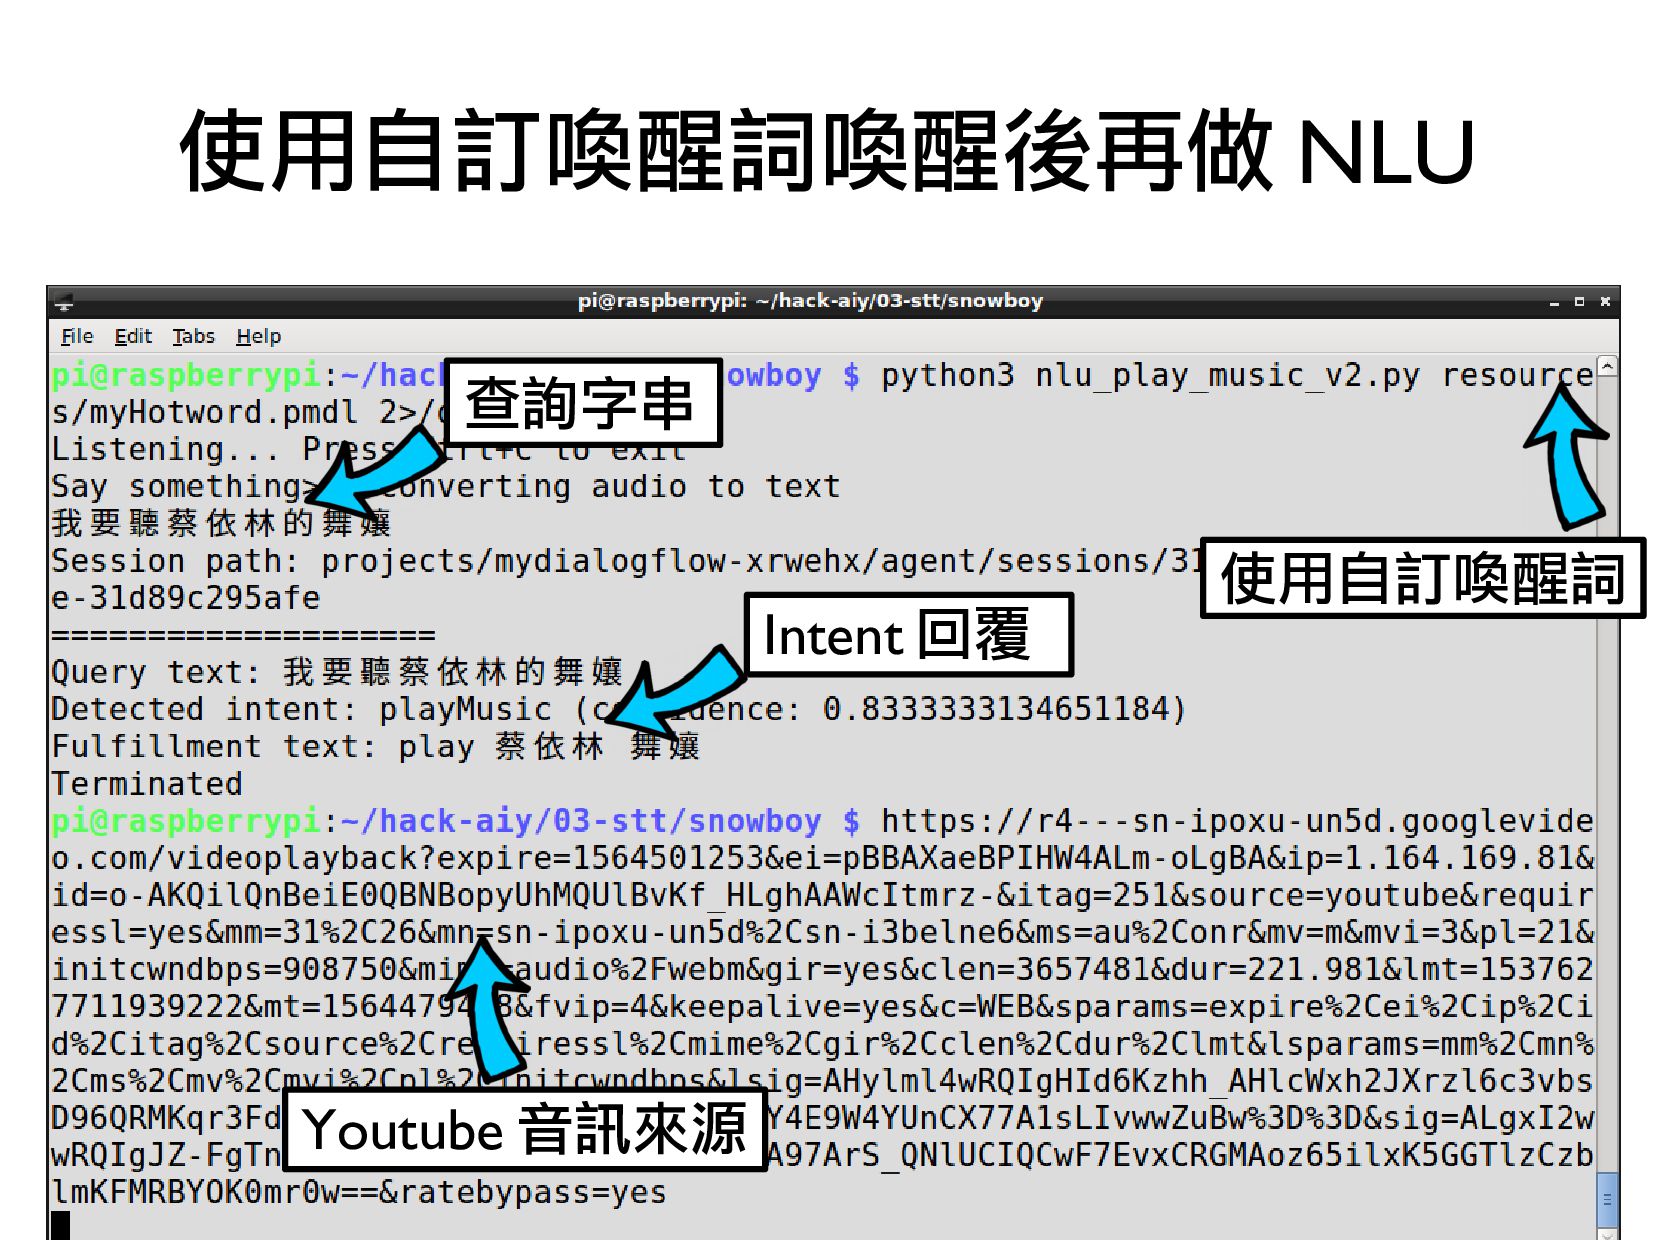
5.ReSpeaker 2-Mic HAT改造/自然語言理解(3.5小時)

購買 Raspberry Pi 4/2G 超值組
https://piepie.com.tw/product/raspberry-pi-4-model-b-2g-value-pack-pi-4-case-power-supply-microsd-case-hdmi

購買智慧喇叭語音學習套件
https://www.piepie.com.tw/30038/pi-smart-speaker-kit-v2

範例程式:
https://github.com/piepie-tw/hack-respeaker

hackmd:
https://hackmd.io/66rhYfscTFazn5wZzH3Uhg?view

台灣樹莓派

August 09, 2018
Tweet

More Decks by 台灣樹莓派

Other Decks in Technology

Transcript

  1. 姓名標示 — 非商業性 — 相同方式分享 CC (Creative Commons) 姓名標示 —

    你必須給予 適當表彰、提供指向本授權 條款的連結,以及 指出(本作品的原始版本)是否已 被變更。你可以任何合理方式為前述表彰,但不得以 任何方式暗示授權人為你或你的使用方式背書。 非商業性 — 你不得將本素材進行商業目的之使 用。 相同方式分享 — 若你重混、轉換本素材,或依本 素材建立新素材,你必須依本素材的授權條款來 散布你的貢獻物。
  2. 6 • ReSpeaker 2-Mic HAT 使用 • Linux ALSA 介紹

    • Google Assistant 介紹 • ReSpeaker 2-Mic HAT 改造 本次主題
  3. 7 • 硬體:Raspberry Pi 4B • 作業系統:2021-05-07-raspios-buster-armhf.img (https://bit.ly/42iddHA) • 為了可以使用USB轉TTL傳輸線

    • 修改/boot/config.txt, 新增三行 – dtoverlay=pi3-miniuart-bt – core_freq=250 – enable_uart=1 • 修改/boot/cmdline.txt, 將quiet splash的quiet移除 今日環境 刪除 quiet 新增三行
  4. • $ sudo apt-get update --allow-releaseinfo- change • $ sudo

    apt-get install -y vim git • $ sudo apt-get install -y python3-pyaudio • $ sudo apt-get install -y sox flac libatlas- base-dev espeak mpg123 • $ sudo pip3 install -U SpeechRecognition python-vlc gtts openai • $ sudo ln -s /usr/lib/arm-linux- gnueabihf/libpython3.7m.so.1.0 /usr/lib/arm- linux-gnueabihf/libpython3.5m.so.1.0 • $ sudo pip3 install -U yt-dlp (hackmd) 安裝所需軟體
  5. • # 安裝新版 Dialogflow • $ sudo pip3 install -U

    google-cloud-dialogflow • $ sudo pip3 install grpcio-tools • $ sudo pip3 install -I --force-reinstall grpcio (hackmd) 安裝所需軟體
  6. • # 安裝 Voice Engine + Echo Cancellation • $

    sudo apt-get install -y libspeexdsp-dev speex • $ sudo apt-get install swig3.0 • $ sudo ln -s /usr/bin/swig3.0 /usr/bin/swig • $ sudo pip3 install -U speexdsp (hackmd) 安裝所需軟體
  7. • 特色 • 使用 WM8960(low power stereo codec) • 2

    Microphones • 3.5mm Audio Jack • JST2.0 Speaker Out • 2 Grove Interfaces • 1 User Button ReSpeaker 2-Mics Pi HAT http://wiki.seeed.cc/ReSpeaker_2_Mics_Pi_HAT/
  8. • $ cd ~ • $ git clone https://github.com/respeaker/seeed- voicecard.git

    • $ cd seeed-voicecard • $ sudo ./install.sh --compat-kernel • $ sudo reboot (hackmd) 安裝設定 http://wiki.seeed.cc/ReSpeaker_2_Mics_Pi_HAT/
  9. • 列出目前可 record 的音訊裝置 • $ arecord -l • 錄音

    (mono, stereo) • $ arecord -D plughw:2,0 -d 3 -f dat -c 1 mono.wav • $ arecord -D plughw:2,0 -r 16000 -f S16_LE 16k.wav • $ arecord -D plughw:2,0 -f dat stereo.wav 測試錄音 (arecord)
  10. • 列出目前可 playback 的音訊裝置 • $ aplay -l • 播放音訊

    • $ aplay -D plughw:2,0 mono.wav • $ aplay -D plughw:2,0 16k.wav • $ aplay -D plughw:2,0 stereo.wav 播放 (aplay)
  11. • 列出PulseAudio 的Audio 輸出: • $ pactl list short sinks

    0 alsa_output.platform-bcm2835_audio.digital-stereo 1 alsa_output.platform-bcm2835_audio.analog-stereo 2 alsa_output.platform-soc_sound.stereo-fallback • 設定PulseAudio 的Audio 預設輸出 • $ pactl set-default-sink 1 # 1 是3.5mm Audio Jack • $ pactl set-default-sink 2 # 2 是ReSpeaker 設定 PulseAudio Sound Server 預設輸出
  12. • $ aplay stereo.wav Playing WAVE 'stereo.wav' : Signed 16

    bit Little Endian, Rate 48000 Hz, Stereo 聲音格式 https://www.aiseesoft.com/resource/what-is-mono-audio.html mono stereo
  13. • 儲存 ALSA 設定到 ~/.config/asound.state • $ alsactl --file ~/.config/asound.state

    store • 將 ALSA 設定載入 • $ alsactl --file ~/.config/asound.state restore 儲存和載入 ALSA 設定
  14. • 是一個軟體架構 (software framework) 和部 份的 Linux Kernel, 提供音效卡驅動程式 API

    • 包括指令列工具 • alsactl, amixer, arecord/aplay and alsamixer ALSA (Advanced Linux Sound Architecture)
  15. • /usr/share/alsa/alsa.conf => hook 兩個檔案 + 預設使用 Card 0 和

    Device 0 作為音訊設備 • /etc/asound.conf( 系統層級的設定檔 ) • ~/.asoundrc( 使用者層級的設定檔 ) • 相關名詞 (device) • control: 音效卡的控制 , 例如通道選擇 / 混音 / 麥克風控制等 • pcmc: 用於錄音的 pcm 設備 • pcmp: 用於播放的 pcm 設備 • seq: 音序器 • timer: 計時器 相關設定檔
  16. 將喇叭插到 Pi 上的 3.5mm Audio Jack 改成預設 audio 從 3.5mm

    jack 輸出 , 打以下指令 $ pactl set-default-sink 1
  17. • espeak( 支援多國語言 ) • festival( 不支援中文 ) • zhspeak(

    支援中文 ) • gtts-cli( 支援多國語言 , 需要連網 ) Text to Speech(TTS) on Linux https://elinux.org/RPi_Text_to_Speech_(Speech_Synthesis)
  18. • $ pactl set-default-sink 1 • $ espeak "hello world"

    • $ espeak -p90 "hello world" • $ espeak -vzh " 你好 " • $ echo " 你好帥 " > words.txt • $ espeak -vzh+m2 -s 150 -f words.txt -p: 音調 ( 預設 50) -vzh: 中文 m2: 第二種男生聲音 f2: 第二種女生聲音 -s: 速度 espeak
  19. • 需要下載安裝執行檔和 ogg 音訊檔 • $ cd ~ • $

    wget http://bit.ly/3iWvTpP -O zhspeak_4.3.0.tar.gz • $ tar zxvf zhspeak_4.3.0.tar.gz • $ cd ~/zhspeak/bin • $ ./zhspeak 你好帥 zhspeak https://www.eguidedog.net/zhspeak.php
  20. • 英文 • $ gtts-cli 'hello' --output hello.mp3 • $

    mpg123 hello.mp3 • 中文 • $ gtts-cli 'Taipei 現在溫度是 31 度 ' -l zh-TW --output hello.mp3 • $ mpg123 hello.mp3 gtts-cli ( 需要聯網 ) https://pypi.org/project/gTTS/
  21. 44 import RPi.GPIO as GPIO import time GPIO.setmode(GPIO.BOARD) BTN_PIN =

    11 GPIO.setup(BTN_PIN, GPIO.IN) def mycallback(channel): print("Button pressed") try: GPIO.add_event_detect(BTN_PIN, \ GPIO.FALLING, \ callback=mycallback, \ bouncetime=200) while True: time.sleep(10) finally: GPIO.cleanup() 測試按鍵 ( 實體腳位 11)
  22. Grove 接頭 • 由 seeedstudio 設計的 grove system • 數位輸出

    / 輸入由四根 pin 控制 http://www.seeedstudio.com/blog/2016/03/09/tutorial-intro-to-grove-connectors-for-arduinoraspberry-pi-projects/
  23. 47 • LED_PIN = 32 GPIO.setup(LED_PIN, GPIO.OUT, initial=GPIO.LOW) • try:

    while True: print("LED is on") • GPIO.output(LED_PIN, GPIO.HIGH) time.sleep(2) print("LED is off") • GPIO.output(LED_PIN, GPIO.LOW) time.sleep(2) except KeyboardInterrupt: print("Exception: KeyboardInterrupt") finally: GPIO.cleanup() 測試 GPIO12( 實體腳位 32)
  24. • 特色 • Hotword detection • Voice control • Natural

    language understanding • SDK 元件 • Google Assistant Library – 原生 Python • Google Assistant Service – 使用 gRPC API 傳遞 , 可和 Go, Java, C#, Node.js or Ruby 介接 安裝 Google Assistant SDK https://developers.google.com/assistant/sdk/overview
  25. • 設定 Google Assistant 的順序 • 專案 (project)> 模型 (model)>

    設備 (device) • 在 console.actions.google.com 建立專案 • 在 console.cloud.google.com 設定功能與權限 設定 Google Assistant 基本概念 https://developers.google.com/assistant/sdk/overview
  26. • 安裝 Google Assistant Library • 建立專案 • 啟用 Google

    Assistant API • 產生驗證檔案 • 用範例程式測試 操作步驟 - Configure a Developer Project and Account Settings https://developers.google.com/assistant/sdk/overview
  27. 71 • $ scp /path/to/file [email protected]:/path • 範例 ( 以下為同一行

    ) • $ scp /home/sosorry/Downloads/client_secret_x xx.apps.googleusercontent.com.js [email protected]:/home/pi/Downloads/cre dentials.json 在 Mac 上使用 scp Pi 的 IP
  28. • 安裝授權工具 (authorization tool) • 產生驗證資訊 (credentials.json) • 開啟瀏覽器到驗證頁面得到驗證碼 •

    在終端機輸入驗證碼 建立驗證資訊 (Generate Credentials) https://developers.google.com/assistant/sdk/guides/library/python/embed/run-sample
  29. • $ cd ~/AIY-projects-python • $ source env/bin/activate • (env)

    $ google-oauthlib-tool --scope https://www.googleapis.com/auth/assistant-sdk-prototype --save --headless --client-secrets /path/to/credentials.json • 範例 • (env) $ google-oauthlib-tool --scope https://www.googleapis.com/auth/assistant-sdk-prototype --save --headless --client-secrets /home/pi/Downloads/credentials.json (hackmd) 產生 OAuth2 驗證資訊 https://developers.google.com/assistant/sdk/guides/library/python/embed/install-sample
  30. • 測試預設喇叭和麥克風功能 • > audio_helpers.py • 使用文字輸入和 Google Assistant 交談

    • > textinput.py • 按下 Enter 後 , 使用語音和 Google Assistant 交談 • > pushtotalk.py 測試其他範例程式 https://github.com/googlesamples/assistant-sdk-python
  31. • 語言系統由發音 (phonetics), 音韻 (phonology), 形態 (morphology), 詞彙 (lexicon), 句法

    (syntax), 語義 (semantics), 語用學 (pragmatics) 等所組成 https://www.slideshare.net/zelandiya/kiwipycon-2014-nlp-with-python-tutorial
  32. • STT(Speech to Text) 含訊號處理 (Signal), 聲學處理 (Acoustic) 和語言處理 (Language)

    語音訊號處理 + 自然語音處理 https://ithelp.ithome.com.tw/articles/10195970
  33. • 支援多種語音辨識引擎 • CMU Sphinx (works offline) • Google Speech

    Recognition • Google Cloud Speech API • Wit.ai • Microsoft Bing Voice Recognition • Houndify API • IBM Speech to Text • Snowboy Hotword Detection (works offline) 使用 SpeechRecognition 套件 https://pypi.python.org/pypi/SpeechRecognition/
  34. 試試看 Google 的 STT 吧 #!/usr/bin/python3 • import speech_recognition as

    sr r = sr.Recognizer() with sr.Microphone() as source: r.adjust_for_ambient_noise(source, duration=1) print('Say something>>> ') audio = r.listen(source, timeout=10) print('Google Speech Recognition thinks you said:') sent = r.recognize_google(audio, language="zh-TW") print("{}".format(sent))
  35. 104 • r = sr.Recognizer() • # 停止動態門檻值 • r.dynamic_energy_threshold

    = False • # 停止多少秒數後視為結束語句 • r.pause_threshold = 1 • # 最小語句秒數 • r.phrase_threshold = 0.3 • # 開始和結束的等待秒數 • r.non_speaking_duration = 0.5 speech_recognition 常用參數
  36. 105 Text-to-Speech(TTS) https://en.wikipedia.org/wiki/Speech_synthesis https://slideplayer.com/slide/4846056/ Linguistic * 正規化 * 斷詞斷句 *

    字轉音 * 標記詞性 Acoustic * 音量 * 音頻 * 語速 Synthesis * 疊加合成 * 共振峰合成 * 線性編碼預測合成
  37. 試試看 Google 的 TTS 吧 #!/usr/bin/python3 from gtts import gTTS

    from pygame import mixer def speak(sentence, lang, loops=1): with tempfile.NamedTemporaryFile(delete=True) as fp: tts = gTTS(text=sentence, lang=lang) tts.save('{}.mp3'.format(fp.name)) mixer.init() mixer.music.load('{}.mp3'.format(fp.name)) mixer.music.play(loops) sentence = 'Hello World' speak(sentence, 'en') time.sleep(2)
  38. • 在一段音訊中 , 可針對特定喚醒詞被觸發的演算法 • 好的喚醒詞檢測引擎 • 低的錯誤接收率 (FAR, false

    acceptance rate) • 低的錯誤拒絕率 (FRR, false rejection rate) • 低的資源利用率 喚醒詞檢測引擎 C 比 A 好
  39. 解碼器 (decoder) 結構 ├── README.md ├── _snowboydetect.so ├── demo.py ├──

    demo2.py ├── light.py ├── requirements.txt ├── resources │ ├── ding.wav │ ├── dong.wav │ ├── common.res │ └── snowboy.umdl ├── snowboydecoder.py ├── snowboydetect.py └── version snowboy 喚醒詞模型 由 SWIG 產生的 Python 封裝檔 使用 SWIG 編譯的動態鏈接庫 控制樹莓派 GPIO
  40. demo.py import snowboydecoder model = sys.argv[1] signal.signal(signal.SIGINT, signal_handler) detector =

    snowboydecoder.HotwordDetector(model, sensitivity=0.5) print('Listening... Press Ctrl+C to exit') detector.start(detected_callback=snowboydecoder.play_audio_file, interrupt_check=interrupt_callback, sleep_time=0.03) • detector.terminate()
  41. 整合 SpeechRecognition import snowboydecoder detector = snowboydecoder.HotwordDetector(model, sensitivity=0.5) def audioRecorderCallback(fname):

    r = sr.Recognizer() with sr.AudioFile(fname) as source: audio = r.record(source) # read the entire audio file print(r.recognize_google(audio, language="zh-TW")) detector.start(detected_callback=detectedCallback, audio_recorder_callback=audioRecorderCallback, interrupt_check=interrupt_callback, sleep_time=0.01) detector.terminate() 可調整靈敏度,通常從 0.38 到 0.5
  42. 121 • 我們移植 snowboy 功能 , 重新建立新的訓練平台 • 使用網頁版的 snowboy

    訓練 • http://snowboy.ricelee.com/kitty.html 訓練喚醒詞
  43. 122 • 錄製喚醒詞 , 取名 record1.wav, 結束按 ctrl+c • pi$

    cd ~ • pi$ rec -r 16000 -c 1 -b 16 -e signed-integer -t wav record1.wav (hackmd) 錄製三次喚醒詞
  44. • # 語音合成英文以後用 mpg123 播放 • $ gtts-cli 'hello' --output

    hello.mp3 • $ mpg123 hello.mp3 • # 轉成 wave 檔以後用 aplay 播放 • $ mpg123 -w ding.wav hello.mp3 • $ aplay ding.wav 使用 mpg123 將 MP3 轉成 wav
  45. • 預設的回應語檔名為 ding.wav, 檔案路徑 在 /path/to/snowboy/resources 下 • 將做好的 ding.wav

    放到 resources 下 ( 先備份 ) • $ cd ~/hack-audio/03-stt/snowboy • $ mv resources/ding.wav resources/ding.wav.bak • $ mv ding.wav resources/ 換掉回應語 ding.wav
  46. • Dialogflow.com(Google) • Luis.ai(Microsoft) • Wit.ai(Facebook) • Olami.ai(VIA 威盛 )

    • UNIT(Baidu 服务 ) • DUI( 思必 服务 驰 ) 自然語言理解 (NLU) 平台
  47. • 可能的問句 • 請告訴我明天天氣如何? • 明天外面是不是很熱? • 台北下星期會不會下雨 • 天氣怎麼樣

    • 下星期會下雨嗎 • Intent( 意圖 ) => 問天氣 • Entity( 實體 ) => 日期 , 地點 明天台北的天氣如何?
  48. • Agent • 一個具有特定功能範圍的 NLU 模型 • Intent • 一個句子的意圖

    , 通常可以用一句話回答 • Entity • 自然語言中有關鍵意義的參數 , 如時間 / 城市 • User Says • 使用者用自然語言說出的一句話 自然語言理解 (NLU) 重要元素
  49. • 原名稱為 Api.ai, 或是 Speaktoit • 提供自然語言對話和人機互動技術 • 支援 Android,

    iOS 和 Windows Phone • Google 在 2017 年收購 , 改名為 dialogflow • 已整合到 Google Cloud 等服務 Dialogflow https://cloud.google.com/dialogflow-enterprise/
  50. • 建立⼀個 Agent( 代理 AI) • 建立所需的 Entity( 句⼦中的物件 )

    • 建立所有的 Intent( 句⼦的意圖 ) • 測試 (Testing) 和訓練 (Training) 使用 Dialogflow 步驟
  51. • 根據不同的用語 (User Says) • 去開燈 • 燈打開 • 打開燈

    • 對應到相同的意圖 (Intent) • turnOnLight • 並且有相同的回應 (Response) • turn_on_light_ok 目前 Dialogflow 會了什麼?
  52. • v1 的 API 比較簡單 , 但安全性弱 (2021 已停用 )

    • v2 的 API 要設定 Google Cloud Platform 該如何整合到程式裡?
  53. • $ nano ~/hack-respeaker/smart_speaker.conf [dialogflow] google_app_credential = FIXME • project_id

    = FIXME print(response.text) 將儲存路徑寫在設定檔 將 google_app_credential 換成自己的 例如 : /home/pi/ 檔名 .json
  54. config = configparser.ConfigParser() config.read('../smart_speaker.conf') os.environ["GOOGLE_APPLICATION_CREDENTIALS"] = config.get('dialogflow', 'google_app_credential') project_id =

    config.get('dialogflow', 'project_id') query = sys.argv[1] def detect_intent_texts(project_id, session_id, texts, language_code): import dialogflow_v2 as dialogflow session_client = dialogflow.SessionsClient() session = session_client.session_path(project_id, session_id) text_input = dialogflow.types.TextInput( text=texts, language_code=language_code) query_input = dialogflow.types.QueryInput(text=text_input) response = session_client.detect_intent( session=session, query_input=query_input) • detect_intent_texts(project_id, session_id, query, language_code) Python 程式串接
  55. • ImportError: /lib/arm-linux- gnueabihf/libc.so.6: version `GLIBC_2.33' not found (required by

    /usr/local/lib/python3.7/dist- packages/grpc/_cython/cygrpc.cpython-37m-arm- linux-gnueabihf.so) • 解決方法: # 再裝一次 grpcio 和 grpcio-tools • $ sudo pip3 install -I --force-reinstall grpcio • $ sudo pip3 install grpcio-tools 如果遇到錯誤如下
  56. • 1. 使用客製化關鍵字喚醒 Pi • snowboy 客製化 • 2. 利用

    ' 開燈 ' 或是 ' 燈打開 ' 等句子讓 LED 亮或是暗 • 用 STT 讀取語音輸入 (snowboy/demo4.py) • 把文字用 request 送到 dialogflow(request_dialogflow_v1.py) 改造 Google AIY Voice Kit
  57. • 1. 給予搜尋字串回傳影片列表 • 2. 解析 HTML 找出視訊來源 (yt-dlp) •

    需先安裝套件 $ sudo pip3 install -U yt-dlp • 3. 使用多媒體播放器播放音訊串流 (vlc) 用程式播 Youtube 裡面的音樂
  58. • 因為 youtube_dl 在 2020/10 美國唱片業協會 (RIAA) 控 訴 ,

    因此專案被 github 下架 , 之後更新不頻繁且不穩定 • yt-dlp 是 youtube-dl 的分支 , 主要在添加新功能和打 patch, 並維持和 youtube_dl 同步 • 使用的 function 和 youtube_dl 完全一樣 ! 使用 yt-dlp 原因 https://techtalk.ithome.com.tw/news/140720
  59. 從 yt_dlp 找來源再用 vlc 播放 • import yt_dlp as youtube_dl

    ydl_opts = {音訊參數} • def play_music(name): with youtube_dl.YoutubeDL(ydl_opts) as ydl: meta = ydl.extract_info(name, download=False) if meta: info = meta['entries'][0] playurl = info['url'] print(playurl) Instance = vlc.Instance() player = Instance.media_player_new() Media = Instance.media_new(playurl) Media.get_mrl() player.set_media(Media) player.play()
  60. • 修改第四行 , 將 yt_dlp 更名為 youtube_dl • import youtube_dl

    改為 import yt_dlp as youtube_dl 修改 yt3.py 4 4 將 yt_dlp 取別名 , 名稱為 youtube_dl https://github.com/yt-dlp/yt-dlp
  61. • AttributeError: module 'vlc' has no attribute 'Instance' • 解決方法:

    # 先移除 • $ sudo apt-get remove -y --purge vlc* libvlc* • $ sudo pip uninstall -y vlc python-vlc • $ sudo pip3 uninstall -y vlc python-vlc • $ sudo apt-get clean # 再重新安裝 • $ sudo apt-get install -y vlc • $ sudo pip3 install -U python-vlc 如果遇到錯誤如下
  62. • 1. 建立新的 Entity( 播 , 歌手 , 曲名 )

    • 2. 建立新的 Intent( 解析播音樂自然語言 ) • 3. 回傳 Response 分析出的歌手和曲名 再用 Dialogflow 分析吧
  63. • 根據不同的用語 (User Says) • 播張學友的雪狼湖 • 放蔡依林的舞孃 • 對應到相同的意圖

    (Intent) • playMusic • 根據使用者輸入回應帶有變數的結果 (Response) • play 蔡依林 舞孃 • play 張學友 雪狼湖 目前 Dialogflow 會了什麼?
  64. • JSON(JavaScript Object Notation) 是一種資料結構 • 物件 (object) 以 {

    } 表示 • 鍵 / 值 (collection) 以 : 表示 • 陣列 (array) 以 [ ] 表示 • 最外層用 {} 包起來 資料使用 JSON 結構傳送 https://www.ssaurel.com/blog/parse-and-write-json-data-in-java-with-gson/
  65. • 1. 使用客製化關鍵字喚醒 Pi • snowboy 客製化 • 2. 語音輸入

    ' 播 ooo 的 xxx’ • 用 STT 讀取語音輸入 (snowboy/demo4.py) • 把文字用 request 送到 dialogflow(request_dialogflow_v2.py) • 根據回傳 response, 播 Youtube 音樂 (yt3.py) 新技能:點歌播放
  66. • OpenAI 開發的 AI 聊天機器人程式 , 於 2022/11 推出 •

    基於 GPT-3.5 和 GPT-4 的大型語言模型 (LLM) 並以強化 學習訓練 ChatGPT Chat Generative Pre-trained Transformer https://openai.com/blog/chatgpt
  67. 串接 GhatGPI API( 需付費 ) import openai • • openai.api_key

    = config.get('dialogflow', 'openai_api_key') • • messages = [] • message = "樹莓派可以吃嗎?" • • if message: • messages.append( • {"role": "user", "content": message}, • ) • chat = openai.ChatCompletion.create( • model="gpt-3.5-turbo", messages=messages • ) • • reply = chat.choices[0].message.content • print(f"ChatGPT: {reply}") 向 ChatGPT 問問題 ChatGPT 使用的模型