Share
Embed
pushState to the Future
Managing state on the client has been a pain point for developers since the early days of AJAX-driven applications. pushState (part of the HTML 5 History API) provides a near-complete set of built-in tools for managing state in the browser. And the browser support for pushState makes it easier than ever to speed up in-site navigation using Progressive AJAX (PJAX) without having to redesign your frontend architecture around client-side rendering. Of course, like all DOM APIs, the History API is also imperfect. But then, what's a talk about DOM APIs without mentioning shortcomings and workarounds?

Todd Kloots
April 01, 2013
Transcript
81 slides
-
Todd Kloots @todd Dan Webb @danwrong Kenneth Kufluk @kpk I
was just one of the contributors to Twitter’s pushState() implementation. -
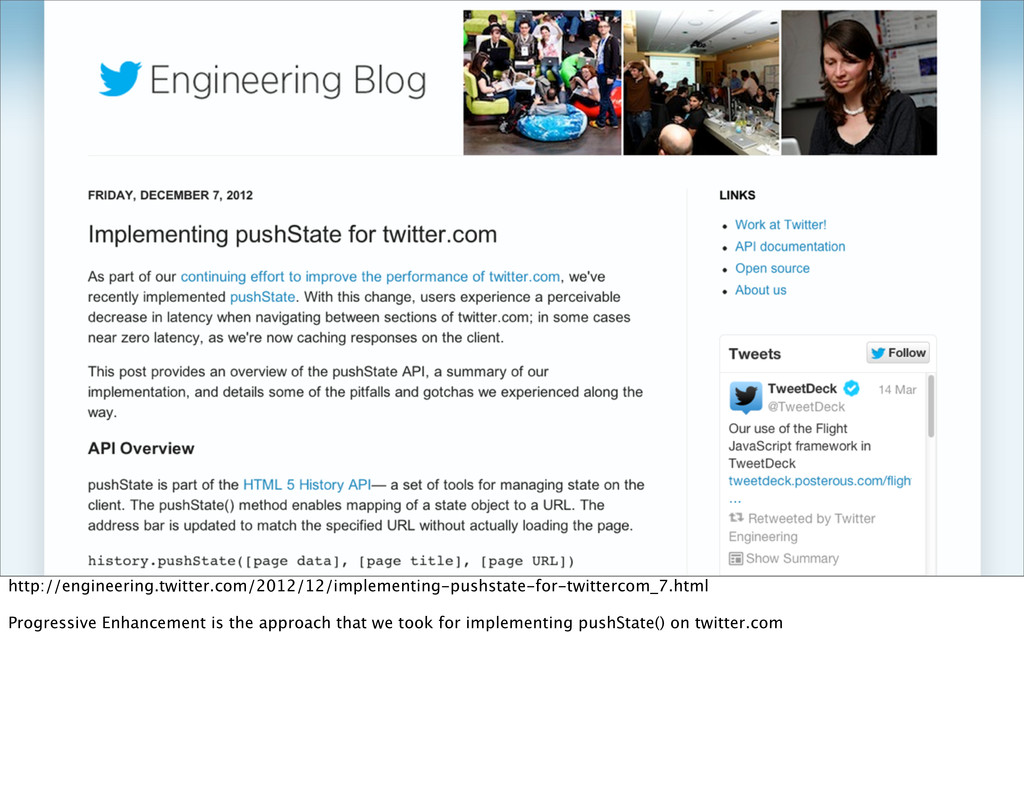
http://engineering.twitter.com/2012/12/implementing-pushstate-for-twittercom_7.html The details of our pushState() implementation are available in
this blog post. Our implementation can be summarized as Progressive Ajax using server-side rendering, meaning regardless of how the user navigates between sections of our site, we render our views on the server. For browsers that support the HTML 5 History API, we facilitate navigation between sections via XHR and use pushState() to update browser history. -
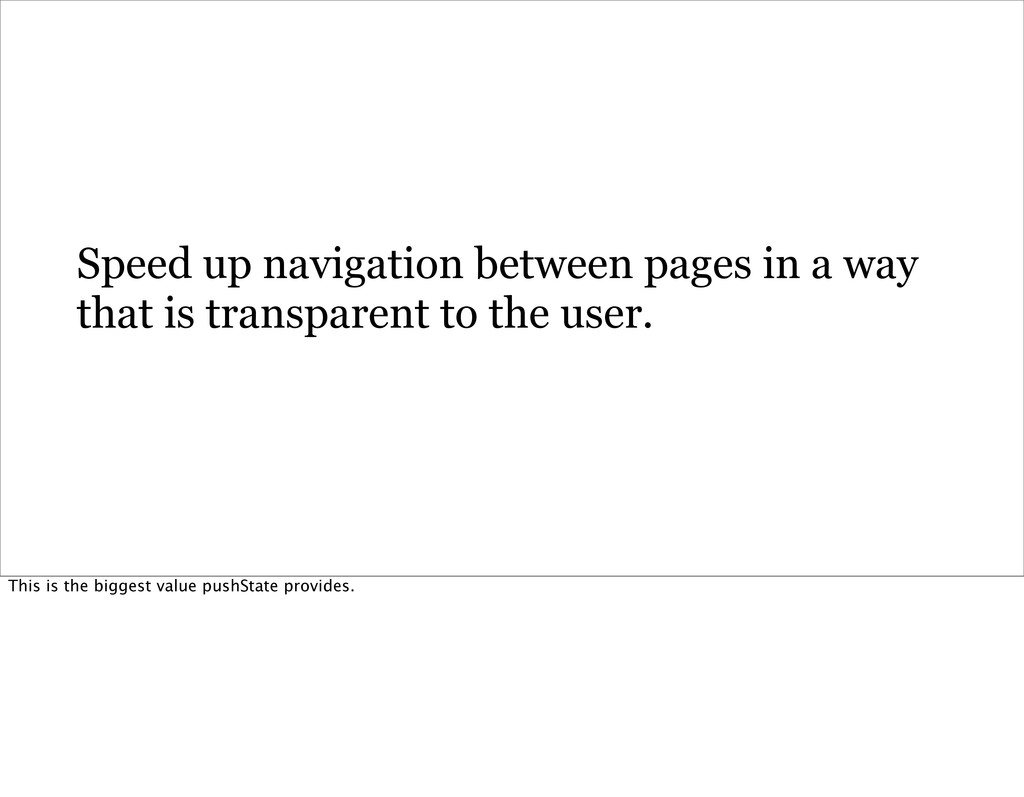
Speed up navigation between pages in a way that is
transparent to the user. This is the biggest value pushState provides. -
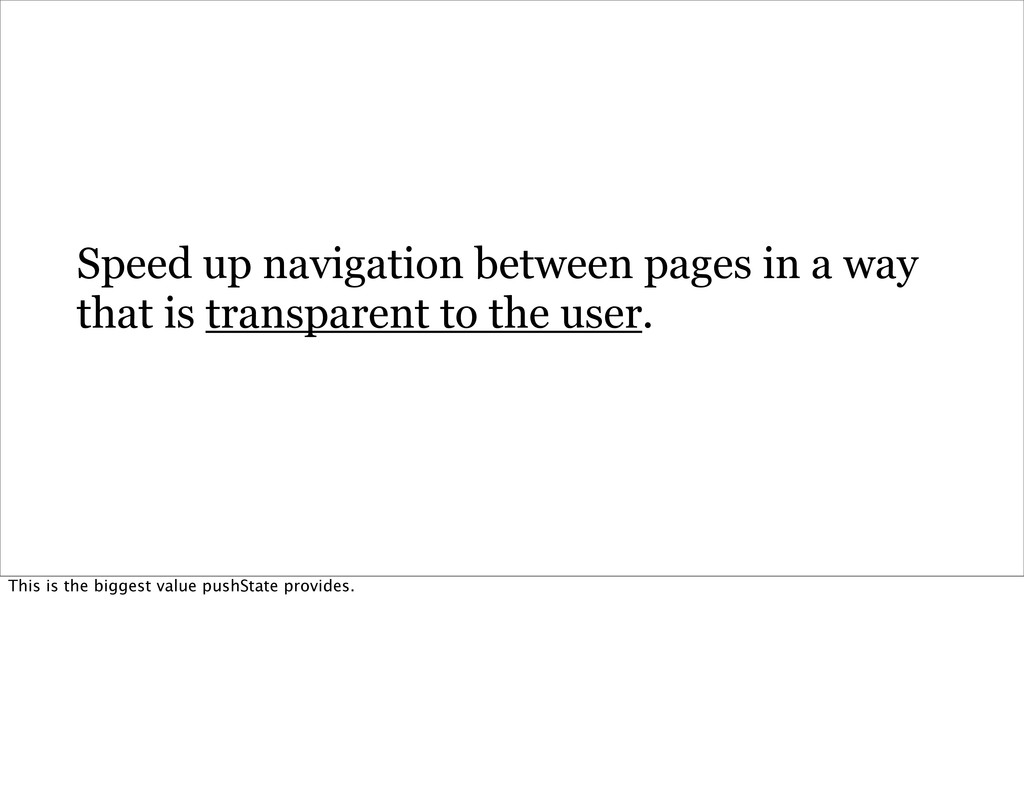
Speed up navigation between pages in a way that is
transparent to the user. This is the biggest value pushState provides. -
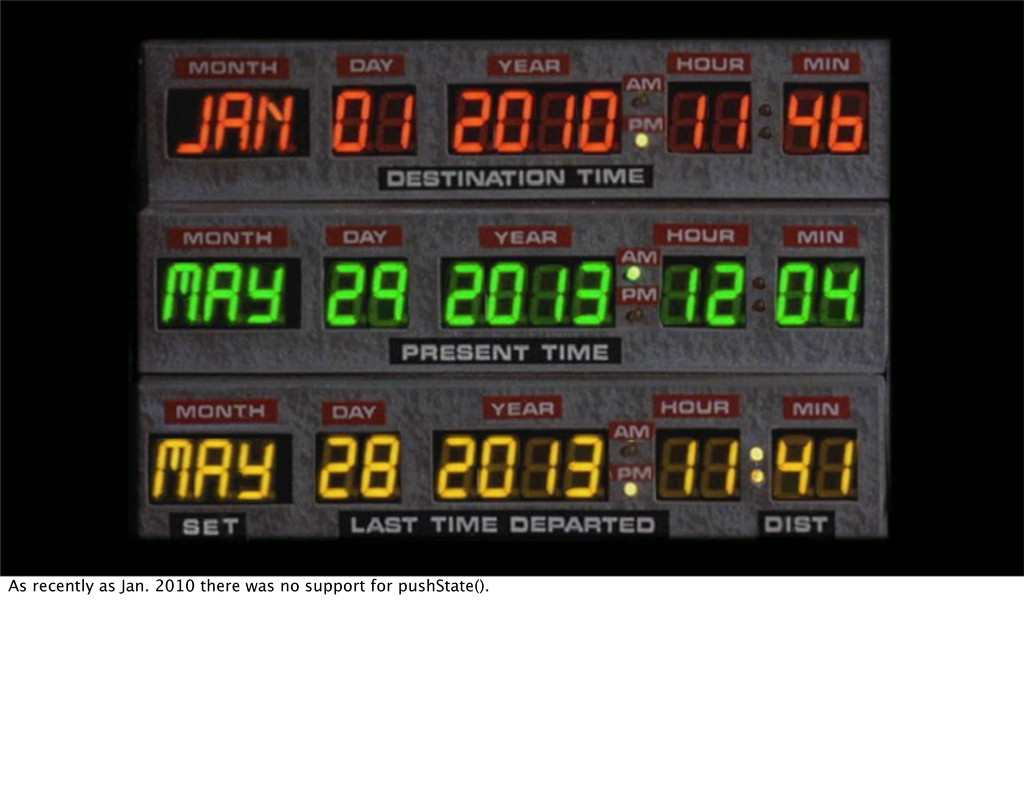
As recently as Jan. 2010 there was no support for
pushState(). -
1. XHR for /i/connect 2. location.hash = “#/i/connect”; twitter.com twitter.com/#/i/connect
A sketch of the typical flow for using XHR and hashes to navigate between subpages prior to pushState(): 1. JavaScript hijacks click on a link 2. XHR for the path specified by the link 3. onSuccess, DOM is updated with the new view 4. New state placed behind the hash to give the user a stateful URL without triggering a reload of the page -
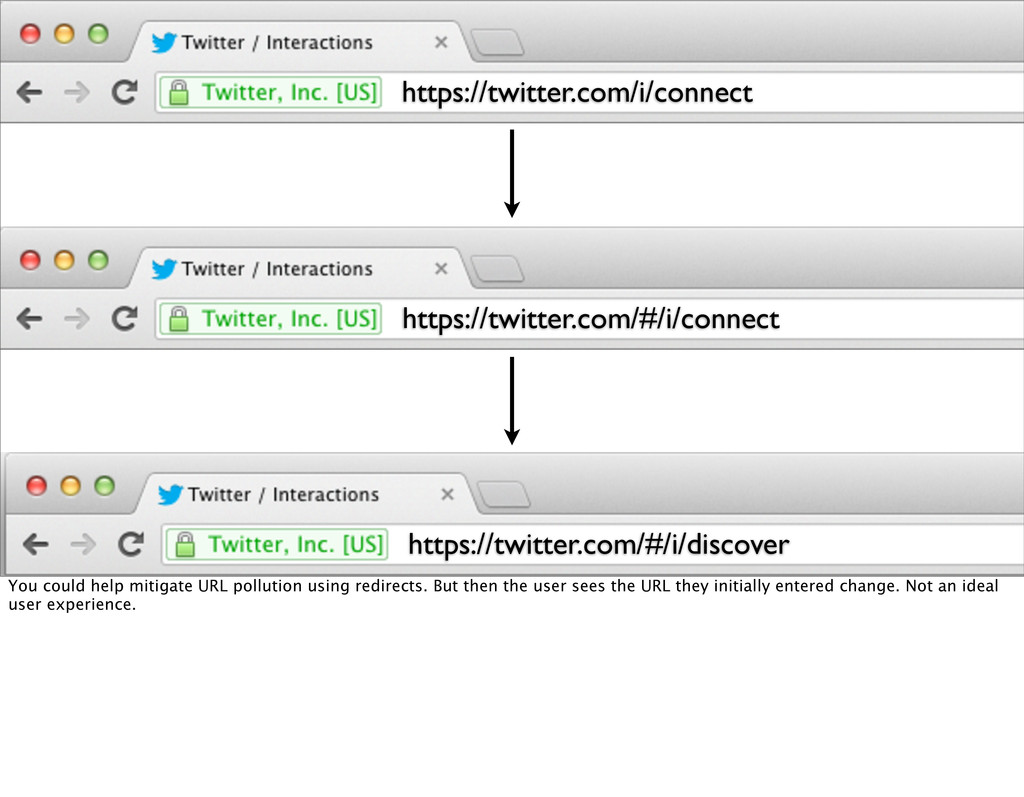
https://twitter.com/#/i/connect https://twitter.com/i/connect While this approach improves speed of navigation between
pages, its downside is that it introduces two URLs for every route that supports this style of navigation. -
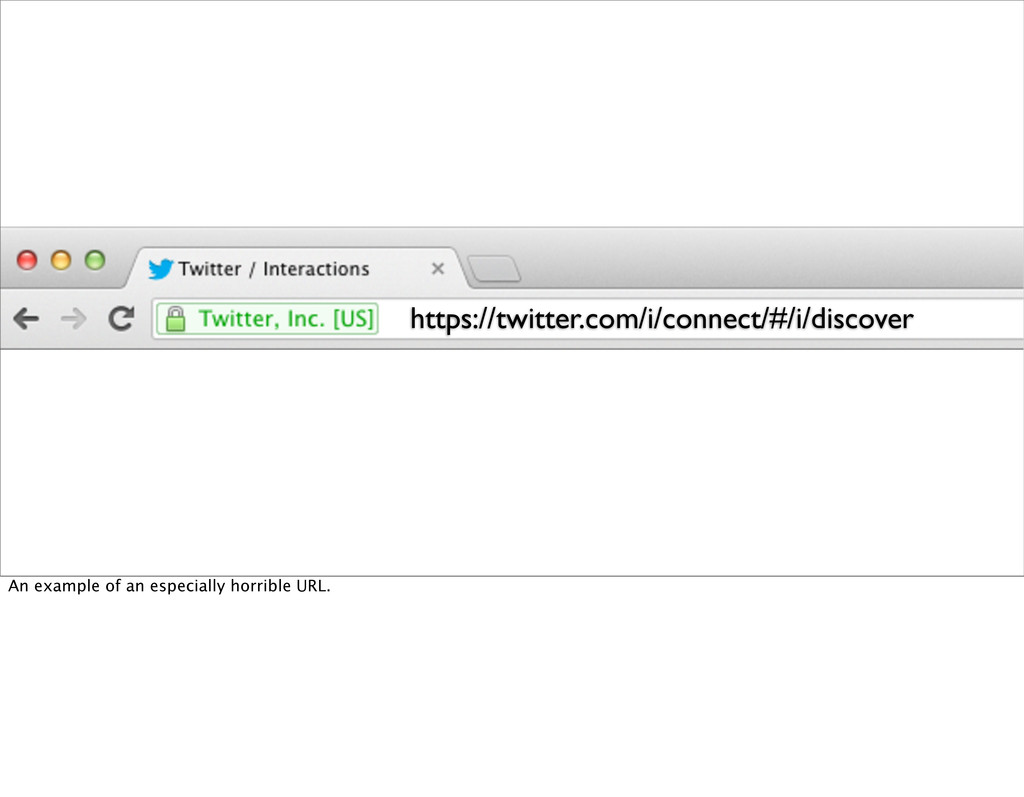
twitter.com/i/connect twitter.com/i/connect/#/i/discover 1. User starts on /i/connect 2. XHR for
/i/discover 3. location.hash = “#/i/discover”; When you’re using hashes to reflect state, URLs can get even uglier if the user doesn’t start on your home page. -
https://twitter.com/#/i/connect https://twitter.com/i/connect https://twitter.com/#/i/discover You could help mitigate URL pollution using
redirects. But then the user sees the URL they initially entered change. Not an ideal user experience. -
https://github.com/browserstate/history.js/wiki/Intelligent-State-Handling All of the historical problems associated with hashes are
nicely detailed in this article on GitHub by Benjamin Lupton. -
Let’s head back to the future so we can take
advantage of the HTML5 History API. -
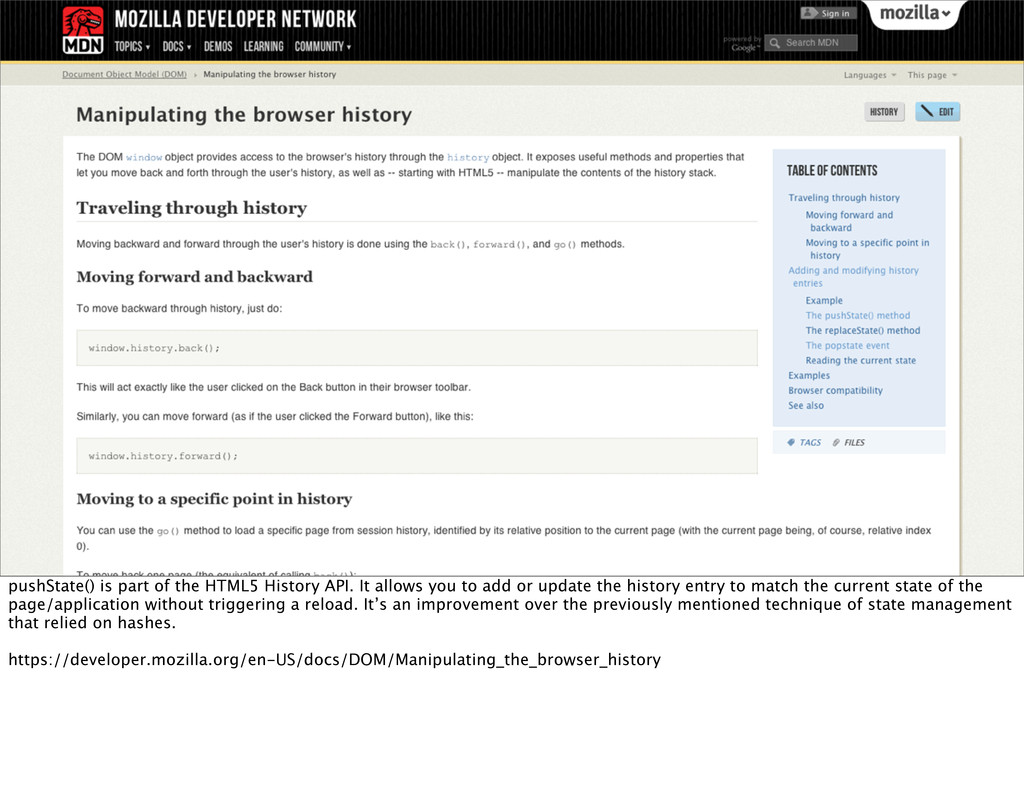
pushState() is part of the HTML5 History API. It allows
you to add or update the history entry to match the current state of the page/application without triggering a reload. It’s an improvement over the previously mentioned technique of state management that relied on hashes. https://developer.mozilla.org/en-US/docs/DOM/Manipulating_the_browser_history -
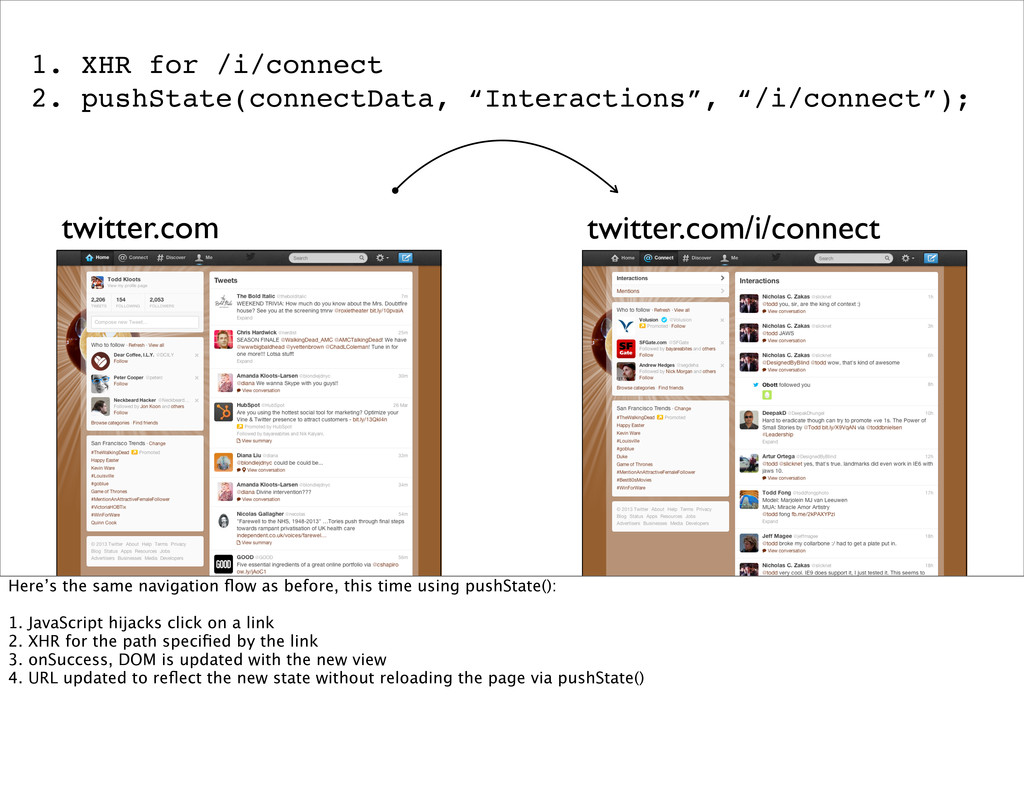
twitter.com twitter.com/i/connect 1. XHR for /i/connect 2. pushState(connectData, “Interactions”, “/i/connect”);
Here’s the same navigation flow as before, this time using pushState(): 1. JavaScript hijacks click on a link 2. XHR for the path specified by the link 3. onSuccess, DOM is updated with the new view 4. URL updated to reflect the new state without reloading the page via pushState() -
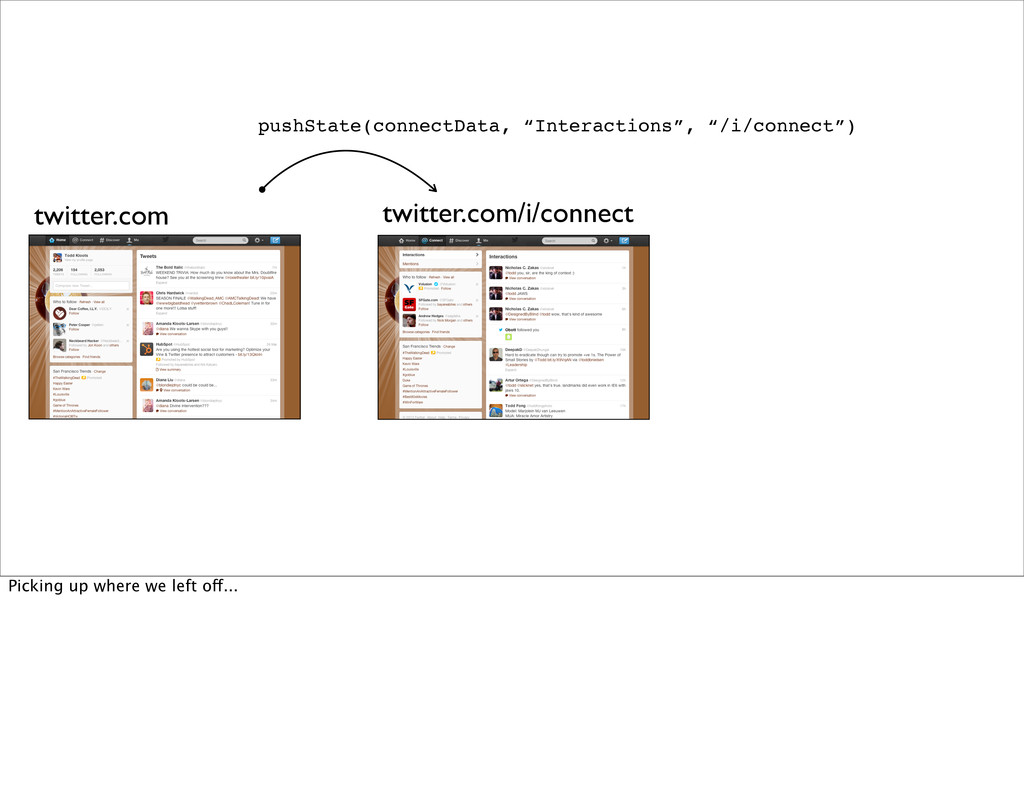
pushState([state], [title], [path]) The pushState method requires three arguments. Use
it to add an entry to the browser history and update the URL to reflect that state. -
“Because Firefox saves state objects to the user's disk so
they can be restored after the user restarts her browser, we impose a size limit of 640k characters on the serialized representation of a state object.” https://developer.mozilla.org/en-US/docs/DOM/Manipulating_the_browser_history -
Safari 6 Opera 12 Chrome 27 Firefox 21 IE 10
Yes Yes No No No Title Param Support Safari and Opera use the title param to title the history entries in the browser. The other browsers currently don’t do anything with the title argument passed to history.pushState() and history.replaceState(). -
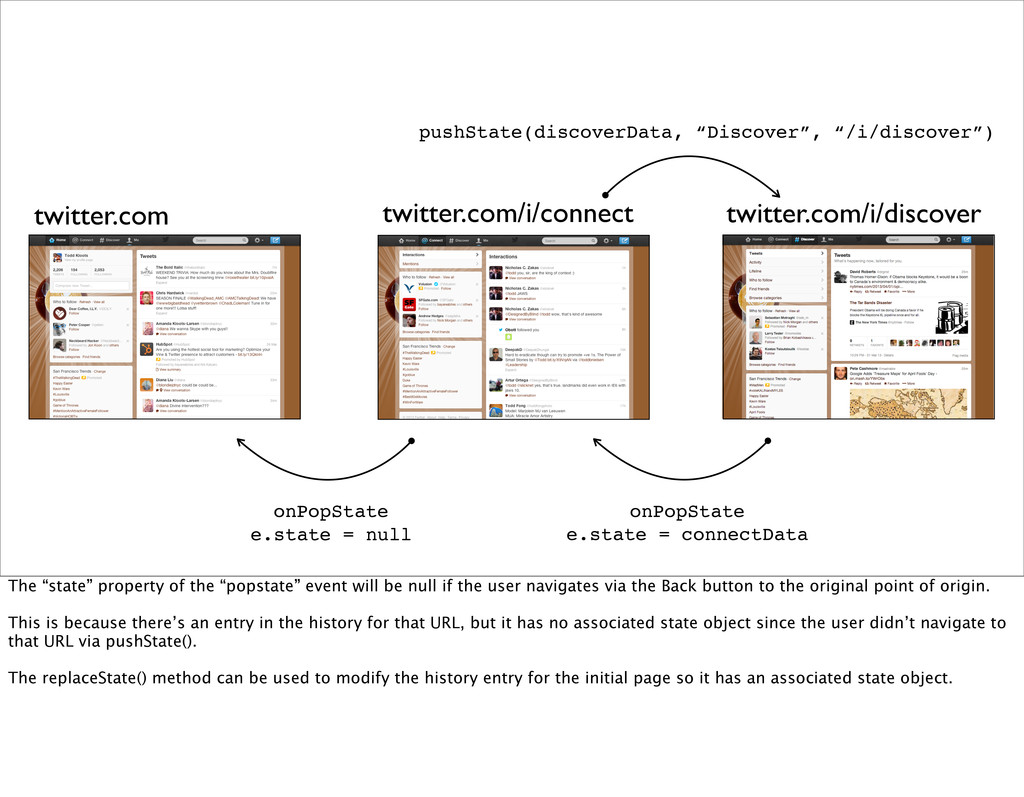
pushState(discoverData, “Discover”, “/i/discover”) twitter.com twitter.com/i/connect twitter.com/i/discover The user can continue
to navigate to other sections via pushState(). For example, on twitter.com from the Connect tab to Discover. -
twitter.com twitter.com/i/connect twitter.com/i/discover onPopState e.state = connectData When the user
presses the Back button, the browser fires a “popstate” event with a state property that is a reference to the state object written to the history when the user navigated to that URL via pushState(). -
twitter.com twitter.com/i/connect twitter.com/i/discover onPopState e.state = connectData pushState(connectData, “Interactions”, “/i/connect”)
Further illustration of how the “popstate” event works. -
history.pushState({ foo: true }, "Foo", "/foo"); window.addEventListener("popstate", function (e) {
// e.state == { foo: true } }, false); And another illustration of how the “popstate” event works. -
pushState(discoverData, “Discover”, “/i/discover”) twitter.com twitter.com/i/connect twitter.com/i/discover onPopState e.state = connectData
onPopState e.state = null The “state” property of the “popstate” event will be null if the user navigates via the Back button to the original point of origin. This is because there’s an entry in the history for that URL, but it has no associated state object since the user didn’t navigate to that URL via pushState(). The replaceState() method can be used to modify the history entry for the initial page so it has an associated state object. -
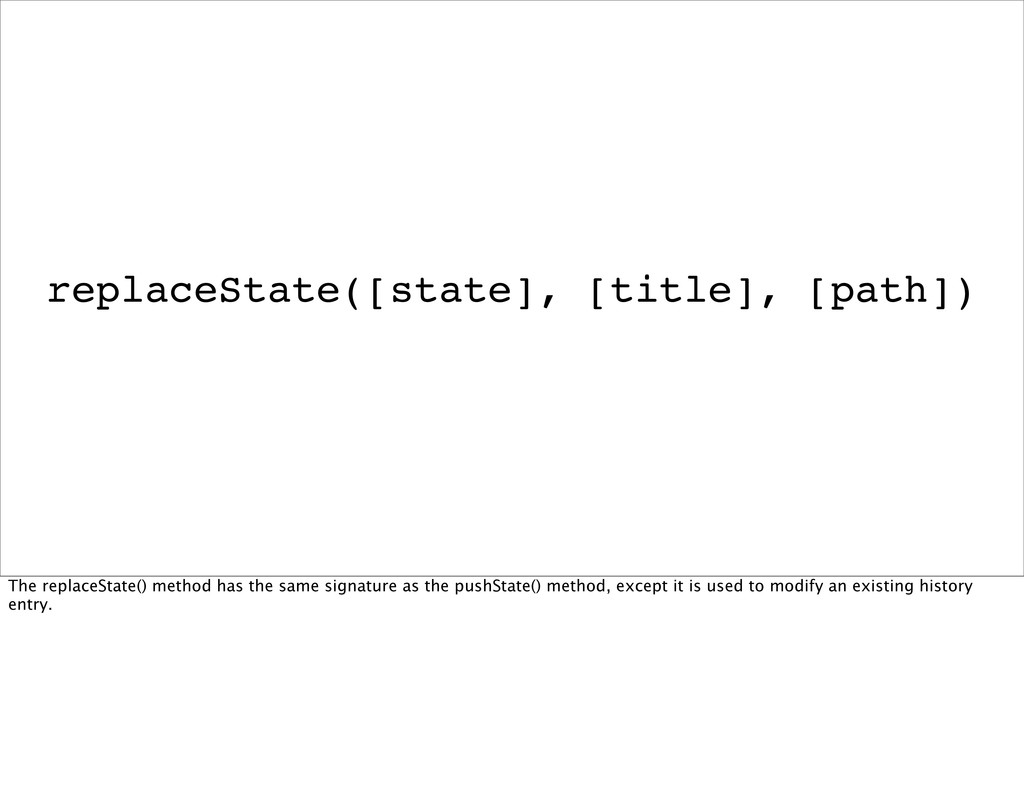
replaceState([state], [title], [path]) The replaceState() method has the same signature
as the pushState() method, except it is used to modify an existing history entry. -
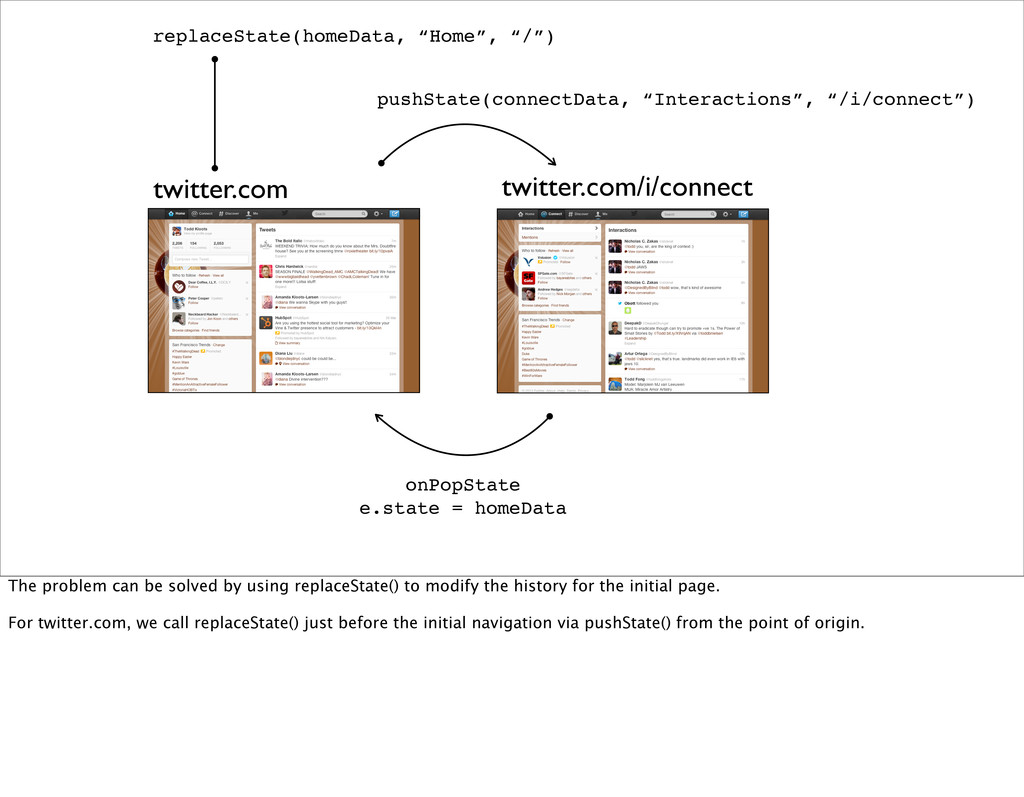
twitter.com twitter.com/i/connect twitter.com/i/discover onPopState e.state = connectData onPopState e.state =
homeData replaceState(homeData, “Home”, “/”) pushState(connectData, “Interactions”, “/i/connect”) For twitter.com, we call replaceState() just before the initial navigation via pushState() from the point of origin. -
Speed up navigation between pages in a way that is
transparent to the user. So, transparency is part of the value of pushState(). -
Speed up navigation between pages in a way that is
transparent to the user and without re-architecting your entire application. There is another value. -
As I said earlier, our pushState() implementation doesn’t use client-side
rendering. And yours doesn’t have to either. -
To show you how this can be done, let’s go
back to the 90s. -
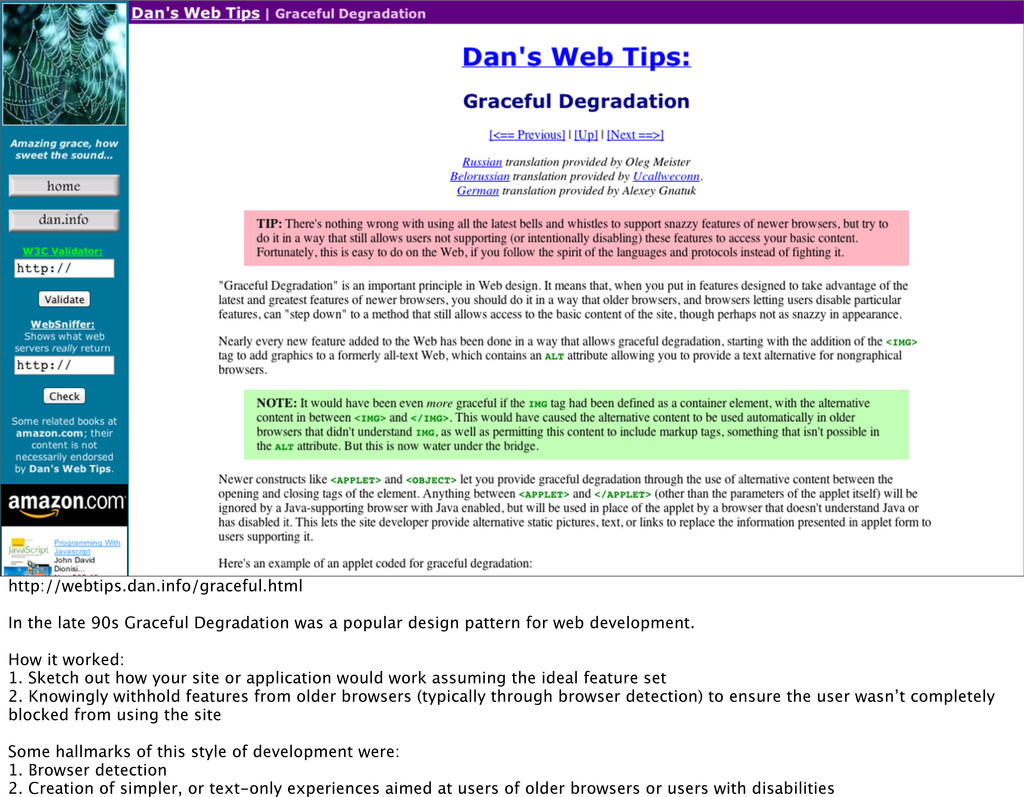
http://webtips.dan.info/graceful.html In the late 90s Graceful Degradation was a popular
design pattern for web development. How it worked: 1. Sketch out how your site or application would work assuming the ideal feature set 2. Knowingly withhold features from older browsers (typically through browser detection) to ensure the user wasn’t completely blocked from using the site Some hallmarks of this style of development were: 1. Browser detection 2. Creation of simpler, or text-only experiences aimed at users of older browsers or users with disabilities -
pushState() Browser Support https://developer.mozilla.org/en-US/docs/DOM/Manipulating_the_browser_history When using the Graceful Degradation design
pattern you’re often very acutely aware of browser support upfront. -
http://www.hesketh.com/thought-leadership/our-publications/inclusive-web-design-future Graceful Degradation was later replaced by the Progressive Enhancement
design pattern. This pattern was very much an inversion of Graceful Degradation. How it works: 1. You begin by explicitly defining the core features of your site or application—those that should work regardless of the client’s abilities 2. All other features are layered on top of the core experience (usually via feature detection) in a way that is purely additive -
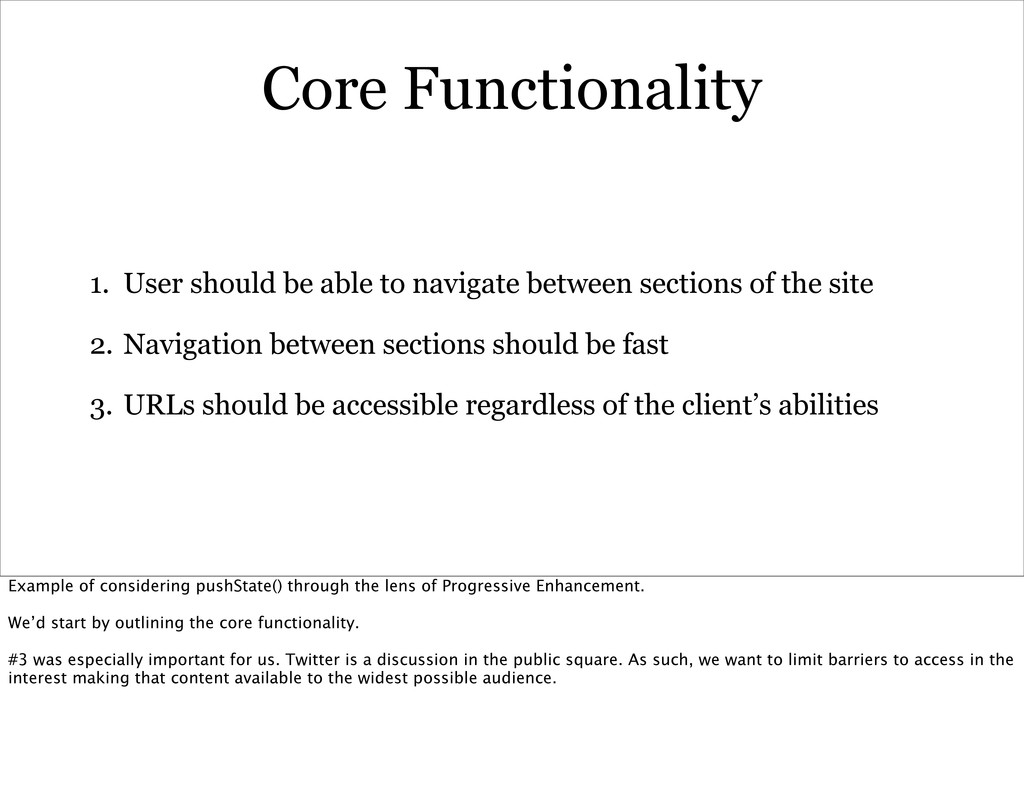
Core Functionality 1. User should be able to navigate between
sections of the site 2. Navigation between sections should be fast 3. URLs should be accessible regardless of the client’s abilities Example of considering pushState() through the lens of Progressive Enhancement. We’d start by outlining the core functionality. #3 was especially important for us. Twitter is a discussion in the public square. As such, we want to limit barriers to access in the interest making that content available to the widest possible audience. -
pushState() Browser Support When pushState() is considered through the lens
of Progressive Enhancement, browser compatibility for the feature is mostly irrelevant. -
Progressive Enhancement as a design pattern helps you curb your
enthusiasm for new features so that you avoid architecting exclusively for them, but rather maintain a broader perspective that treats features as discrete supplemental tools that can be used either together or separately for achieving a goal. -
http://engineering.twitter.com/2012/12/implementing-pushstate-for-twittercom_7.html Progressive Enhancement is the approach that we took for
implementing pushState() on twitter.com -
Benefits • Reuse existing software stack • Code reuse via
additive changes that are limited in scope • Meets content accessibility requirements -
http://www.youtube.com/watch?v=EvNy1y7lhDc Bruce Lee's schtick about water is a good metaphor
for Progressive Enhancement. -
Speed up navigation between pages in a way that is
transparent to the user and without re-architecting your entire application. -
Speed up navigation between pages in a way that is
transparent to the user and without re-architecting your entire application. -
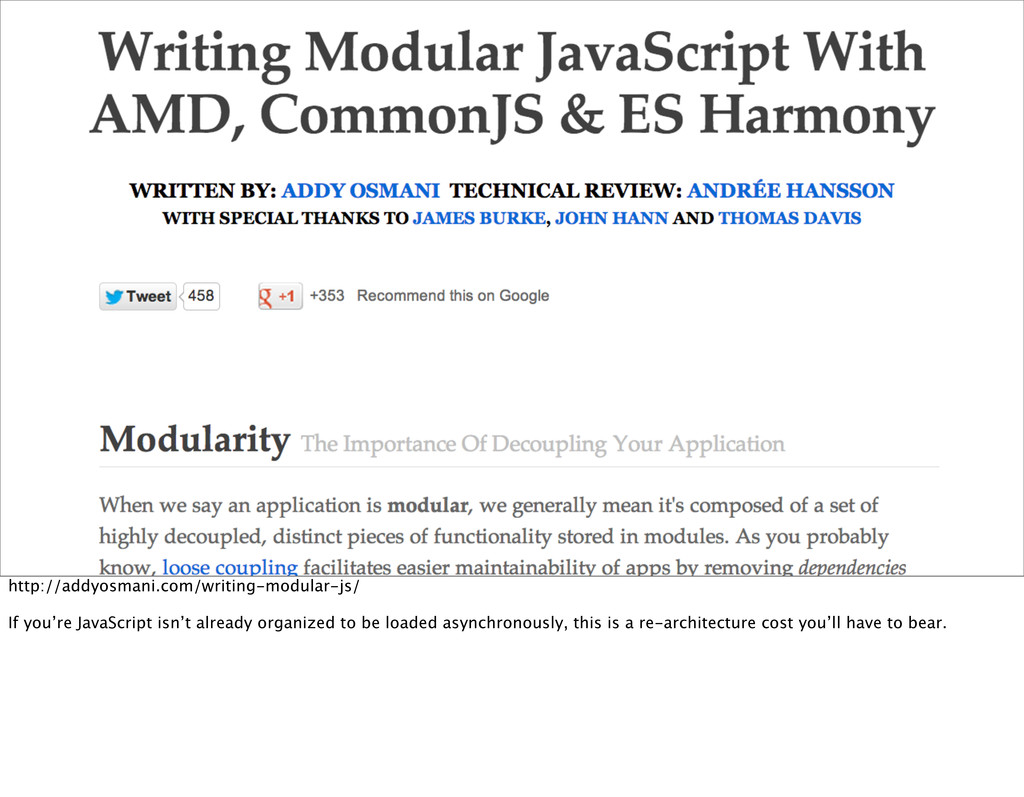
http://addyosmani.com/writing-modular-js/ If you’re JavaScript isn’t already organized to be loaded
asynchronously, this is a re-architecture cost you’ll have to bear. -
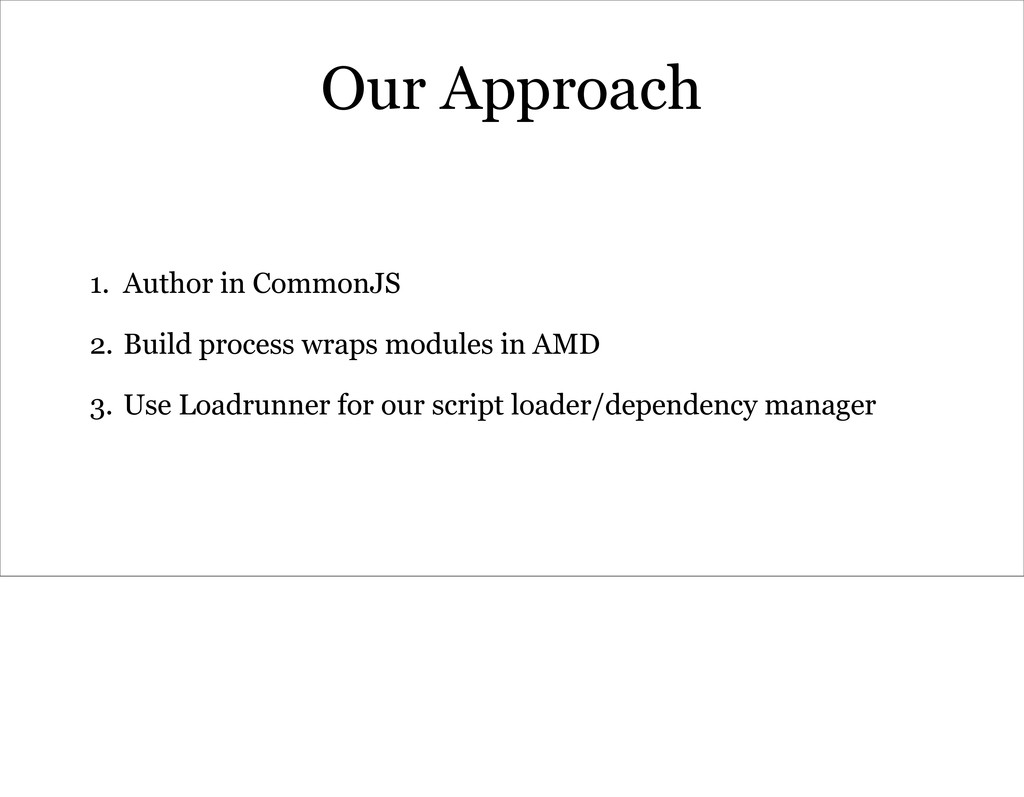
Our Approach 1. Author in CommonJS 2. Build process wraps
modules in AMD 3. Use Loadrunner for our script loader/dependency manager -
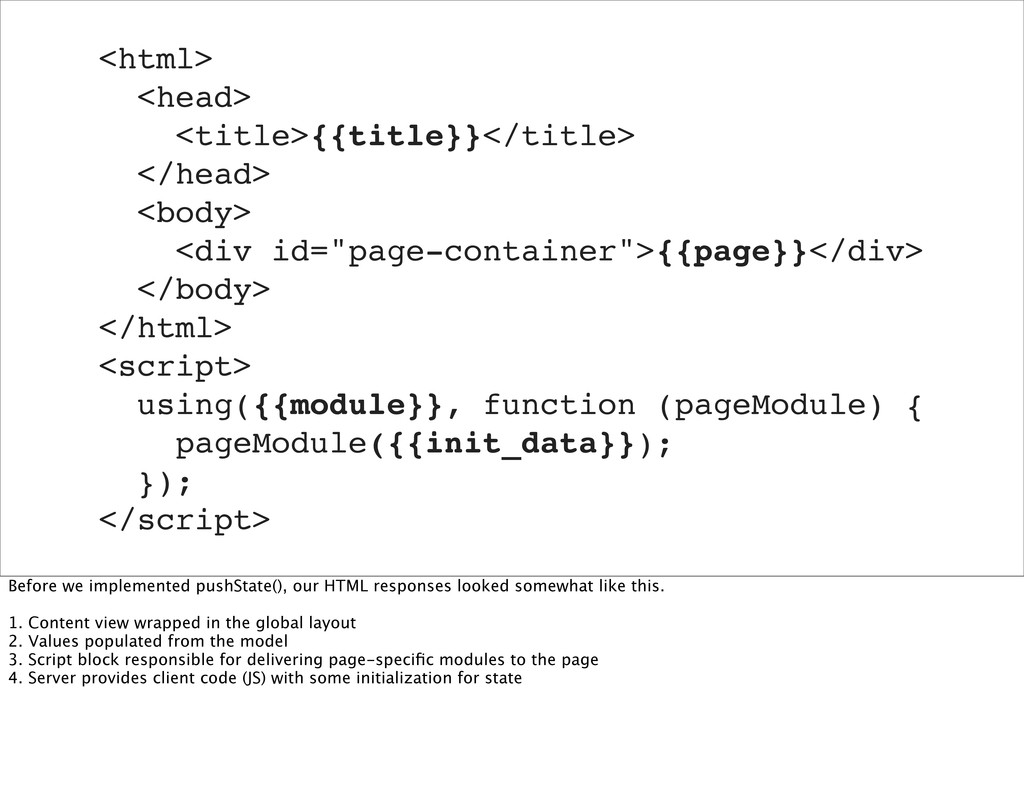
<html> <head> <title>{{title}}</title> </head> <body> <div id="page-container">{{page}}</div> </body> </html> <script>
using({{module}}, function (pageModule) { pageModule({{init_data}}); }); </script> Before we implemented pushState(), our HTML responses looked somewhat like this. 1. Content view wrapped in the global layout 2. Values populated from the model 3. Script block responsible for delivering page-specific modules to the page 4. Server provides client code (JS) with some initialization for state -
// Check the request for pushState, can use // 1)
Check the ACCEPTS header for “application/json” // 2) Check X-Requested-With header // 3) Custom header (X-Push-State-Request) if ( isPushState ) { // pushState request, render the content view wrapped in JSON this.sendJson({ 'content': template_html }); } else { // Render the content view with the page layout this.sendHTML() } On the server, we configured each endpoint to return either full-page responses, or a JSON payload containing a partial, server- side rendered view, along with its corresponding JavaScript components. The decision of what response to send is determined by checking the Accept header and looking for "application/json." -
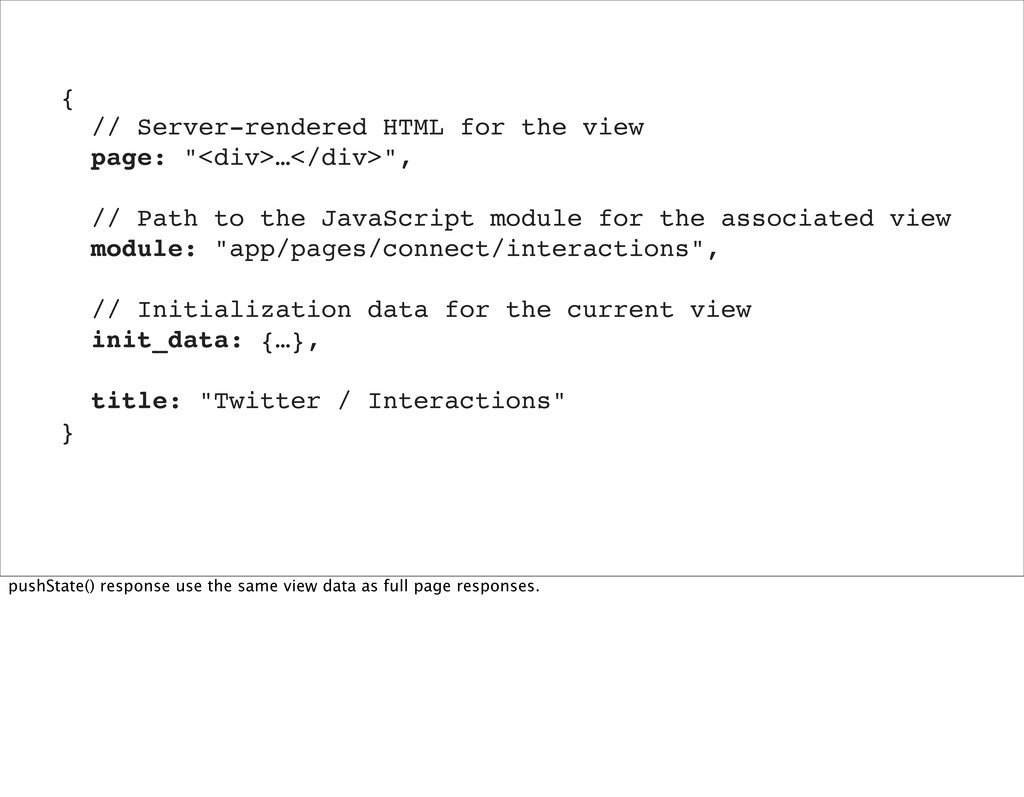
{ // Server-rendered HTML for the view page: "<div>…</div>", //
Path to the JavaScript module for the associated view module: "app/pages/connect/interactions", // Initialization data for the current view init_data: {…}, title: "Twitter / Interactions" } pushState() response use the same view data as full page responses. -
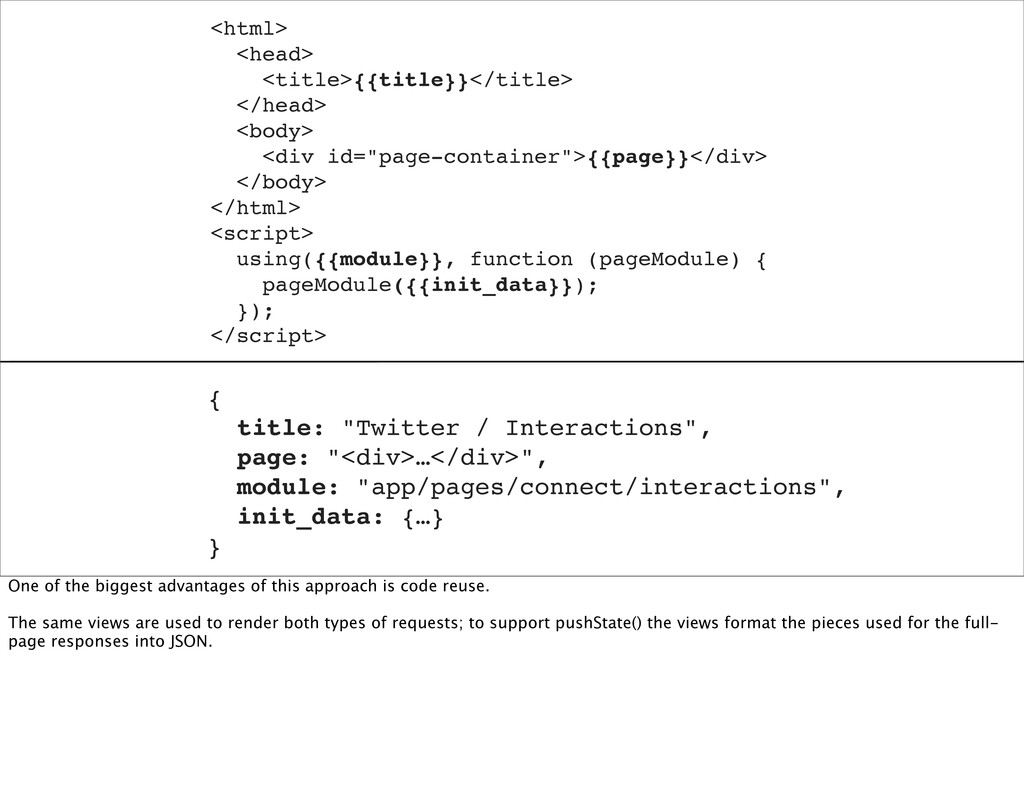
{ title: "Twitter / Interactions", page: "<div>…</div>", module: "app/pages/connect/interactions", init_data:
{…} } <html> <head> <title>{{title}}</title> </head> <body> <div id="page-container">{{page}}</div> </body> </html> <script> using({{module}}, function (pageModule) { pageModule({{init_data}}); }); </script> One of the biggest advantages of this approach is code reuse. The same views are used to render both types of requests; to support pushState() the views format the pieces used for the full- page responses into JSON. -
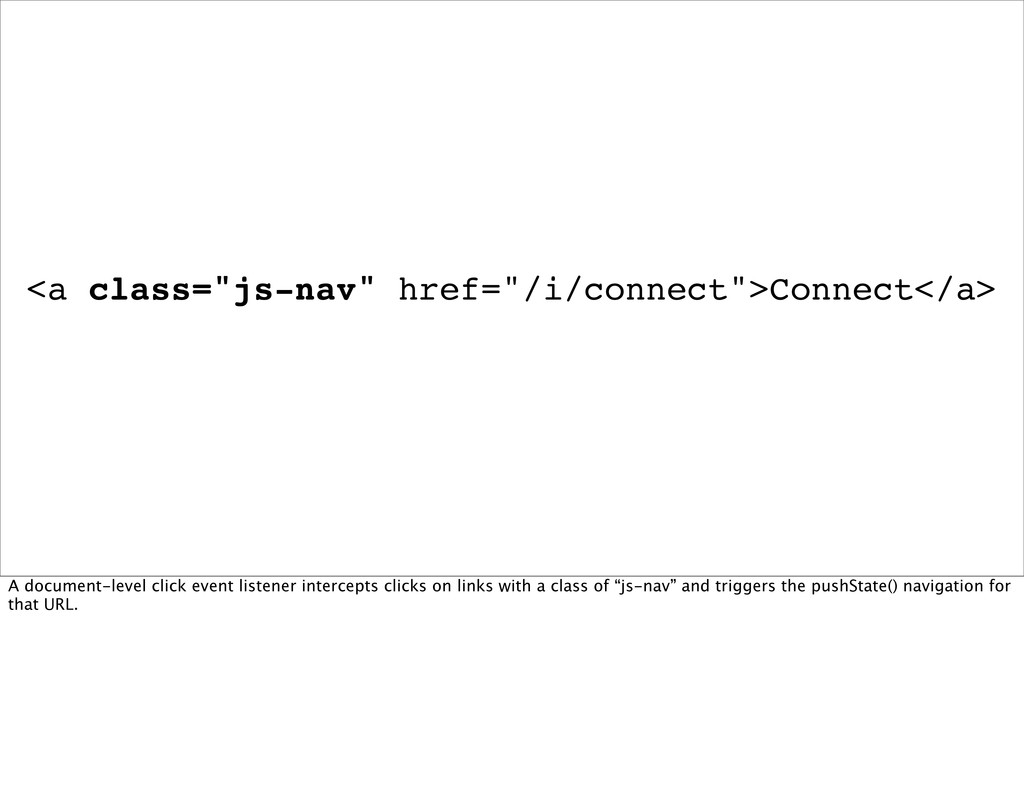
<a class="js-nav" href="/i/connect">Connect</a> The last change we made was to
add a class of “js-nav” to links we wanted to trigger pushState() navigation. -
<a class="js-nav" href="/i/connect">Connect</a> A document-level click event listener intercepts clicks
on links with a class of “js-nav” and triggers the pushState() navigation for that URL. -
this.navigate = function(e) { var $target, $link; $target = $(e.target);
$link = $target.closest('.js-nav'); if ($link.length && !e.isDefaultPrevented()) { e.preventDefault(); $link.trigger('uiNavigate', [{ href: $link.attr('href') }]) } }; UI Component To implement pushState(), we introduced two additional components: one responsible for managing the UI, the other data. Both are attached to the document, listen for events across the entire page, and broadcast events available to all components. Here’s an example of our click event listener. We use jQuery to trigger a custom event (“uiNavigate”). -
this.navigate = function(e) { var $target, $link; $target = $(e.target);
$link = $target.closest('.js-nav'); if (e.shiftKey || e.ctrlKey || e.metaKey || (e.which != undefined && e.which > 1)) { return; } if ($link.length && !e.isDefaultPrevented()) { e.preventDefault(); $link.trigger('uiNavigate', [{ href: $link.attr('href') }]) } }; UI Component It’s important to author your click event listener to preserve clicks other than standard left mouse button clicks. -
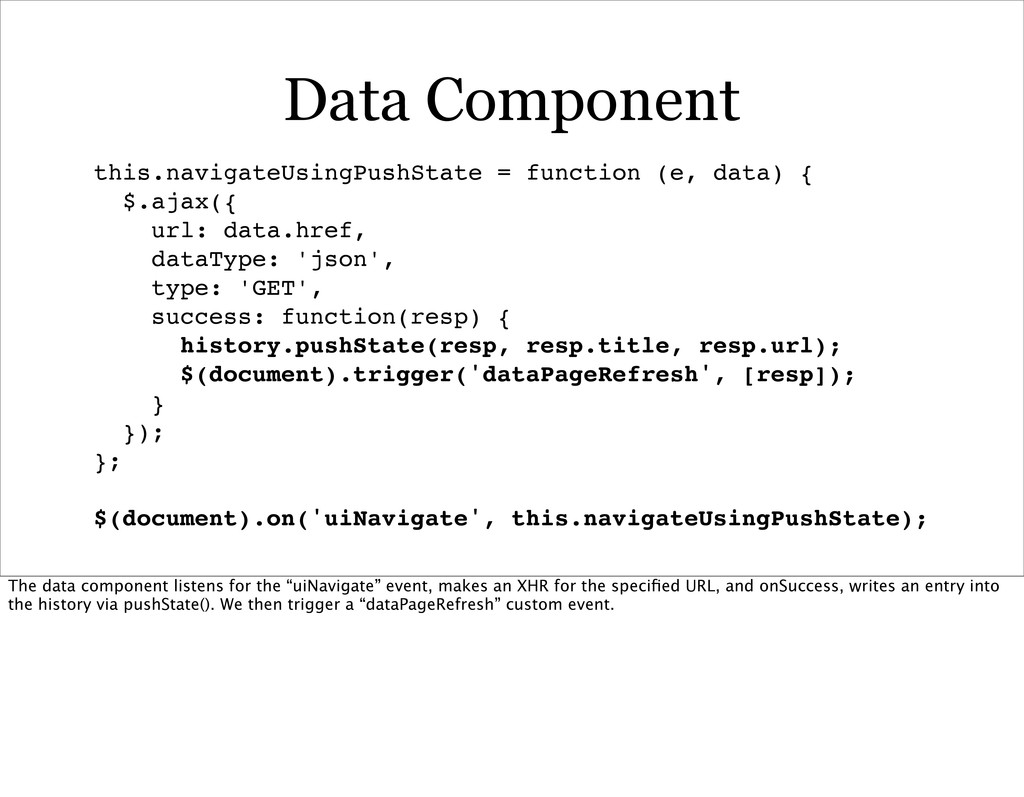
Data Component this.navigateUsingPushState = function (e, data) { $.ajax({ url:
data.href, dataType: 'json', type: 'GET', success: function(resp) { history.pushState(resp, resp.title, resp.url); $(document).trigger('dataPageRefresh', [resp]); } }); }; $(document).on('uiNavigate', this.navigateUsingPushState); The data component listens for the “uiNavigate” event, makes an XHR for the specified URL, and onSuccess, writes an entry into the history via pushState(). We then trigger a “dataPageRefresh” custom event. -
UI Component this.updatePage = function(e, data) { $(data.viewContainer).html(data.page); using(data.module, function(page)
{ page(data.init_data); $(document).trigger('uiPageChanged', [data]); }.bind(this)); }; $(document).on('dataPageRefresh', this.updatePage); The UI component updates the view in response to the “dataPageRefresh” event. Another custom event (“uiPageChanged”) is then fired to notify all other components that the UI has been completely updated. -
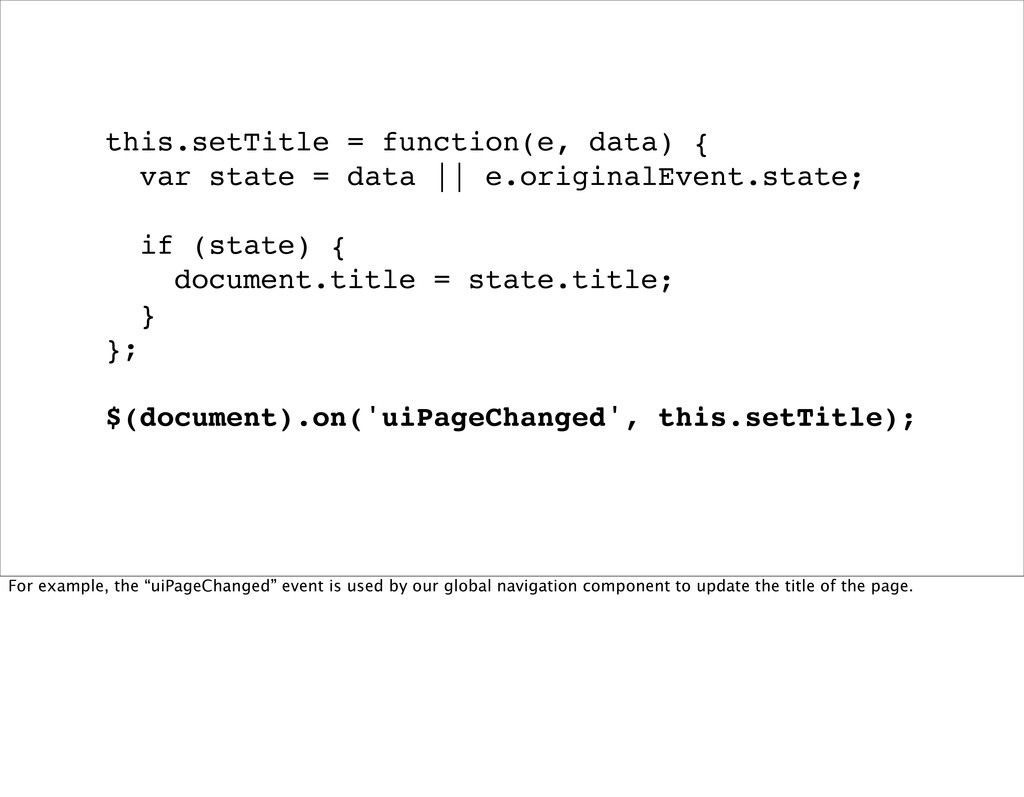
this.setTitle = function(e, data) { var state = data ||
e.originalEvent.state; if (state) { document.title = state.title; } }; $(document).on('uiPageChanged', this.setTitle); For example, the “uiPageChanged” event is used by our global navigation component to update the title of the page. -
onPopState e.state = null pushState(connectData, “Interactions”, “/i/connect”) twitter.com twitter.com/i/connect Recall
the problem of getting a “popstate” event with a “state” property set to null when navigating back to the original point of origin via the Back button. -
onPopState e.state = homeData pushState(connectData, “Interactions”, “/i/connect”) twitter.com twitter.com/i/connect replaceState(homeData,
“Home”, “/”) The problem can be solved by using replaceState() to modify the history for the initial page. For twitter.com, we call replaceState() just before the initial navigation via pushState() from the point of origin. -
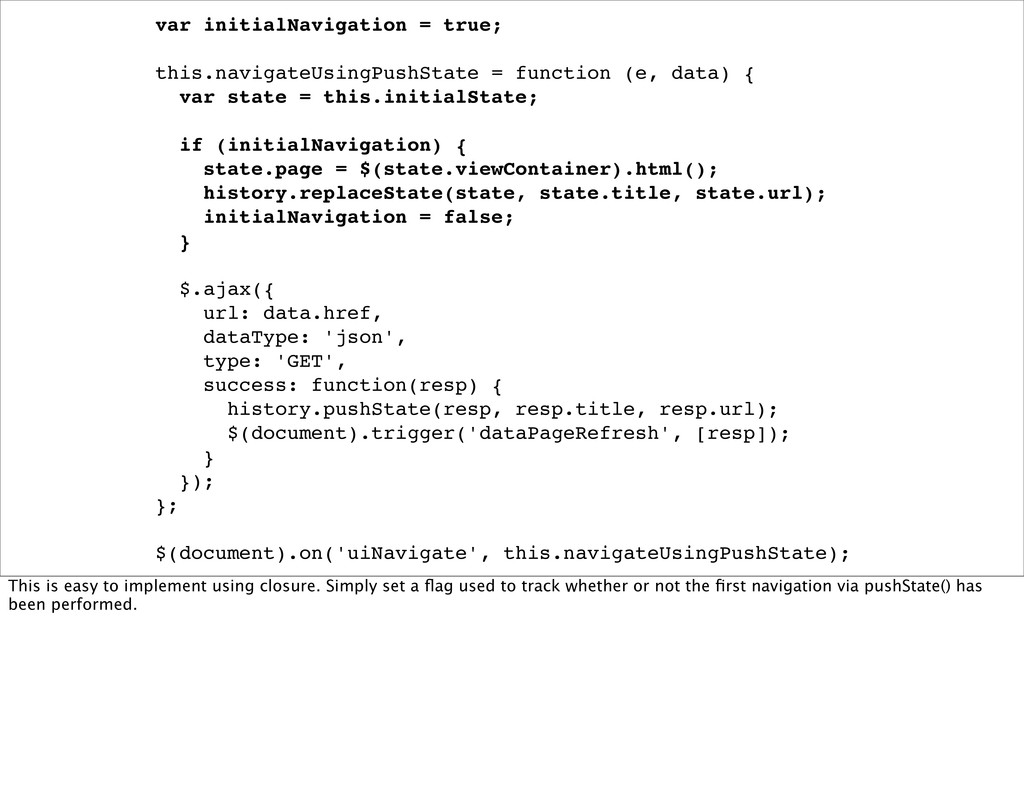
var initialNavigation = true; this.navigateUsingPushState = function (e, data) {
var state = this.initialState; if (initialNavigation) { state.page = $(state.viewContainer).html(); history.replaceState(state, state.title, state.url); initialNavigation = false; } $.ajax({ url: data.href, dataType: 'json', type: 'GET', success: function(resp) { history.pushState(resp, resp.title, resp.url); $(document).trigger('dataPageRefresh', [resp]); } }); }; $(document).on('uiNavigate', this.navigateUsingPushState); This is easy to implement using closure. Simply set a flag used to track whether or not the first navigation via pushState() has been performed. -
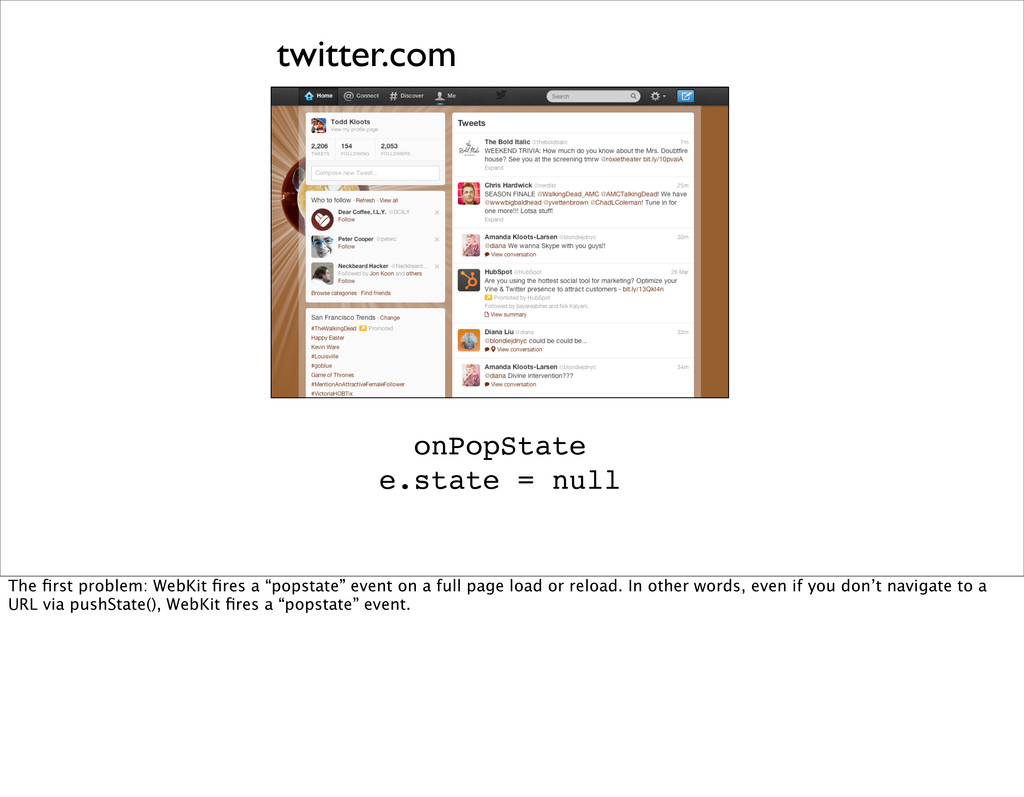
twitter.com onPopState e.state = null The first problem: WebKit fires
a “popstate” event on a full page load or reload. In other words, even if you don’t navigate to a URL via pushState(), WebKit fires a “popstate” event. -
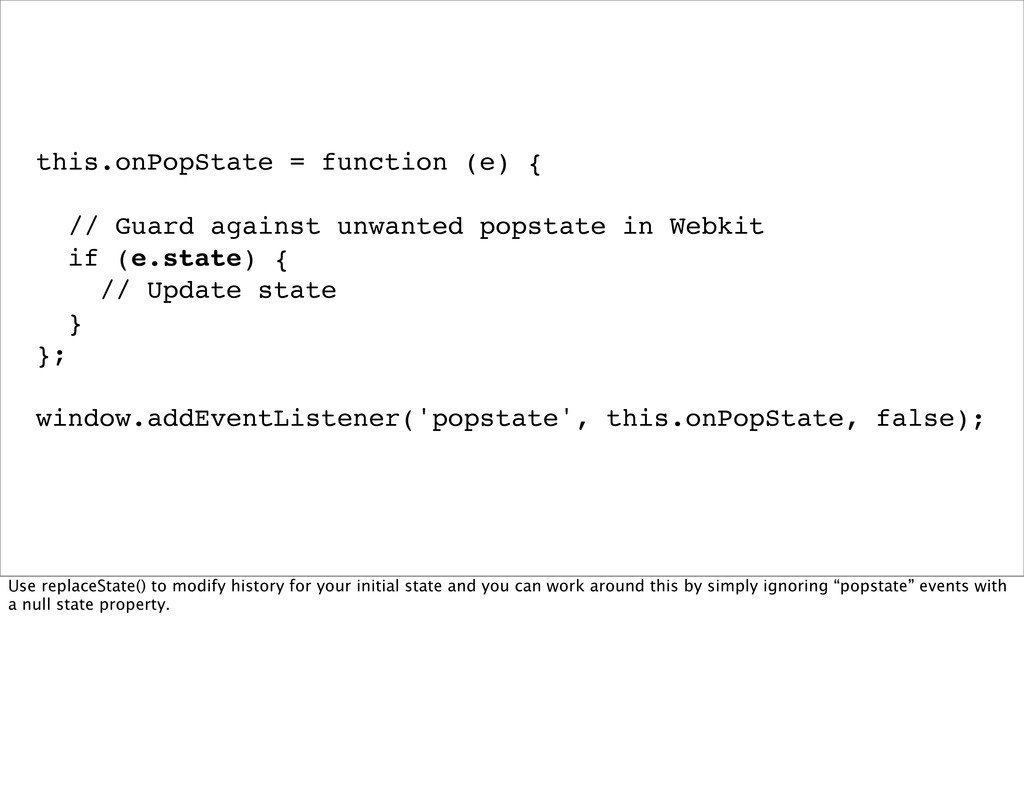
this.onPopState = function (e) { // Guard against unwanted popstate
in Webkit if (e.state) { // Update state } }; window.addEventListener('popstate', this.onPopState, false); Use replaceState() to modify history for your initial state and you can work around this by simply ignoring “popstate” events with a null state property. -
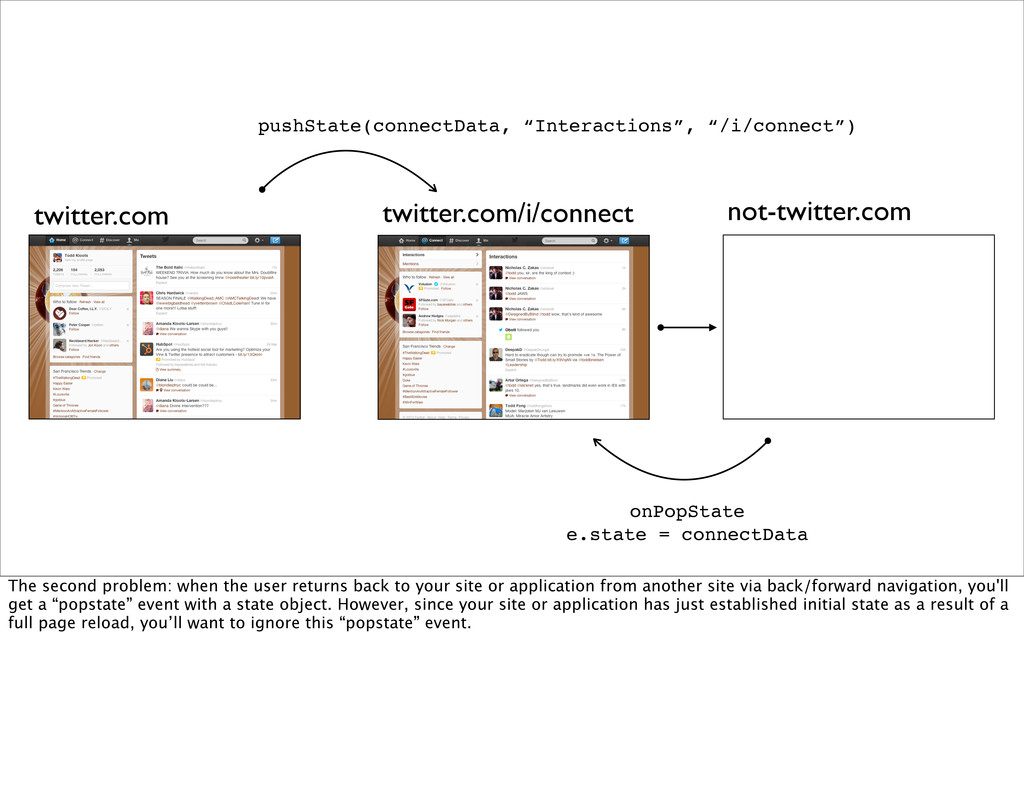
pushState(connectData, “Interactions”, “/i/connect”) onPopState e.state = connectData twitter.com twitter.com/i/connect not-twitter.com
The second problem: when the user returns back to your site or application from another site via back/forward navigation, you'll get a “popstate” event with a state object. However, since your site or application has just established initial state as a result of a full page reload, you’ll want to ignore this “popstate” event. -
this.destroyState = function (e) { history.replaceState(null, document.title, currentURL); }; window.addEventListener('beforeunload',
this.destroyState, false); This problem is easy to work around: add a listener for the “beforeunload” event that uses replaceState to remove the state associated with the current URL. This way when the user hits the back button, the “popstate” event will fire with a “state” property of null, and the aforementioned “popstate” event listener will just ignore it. -
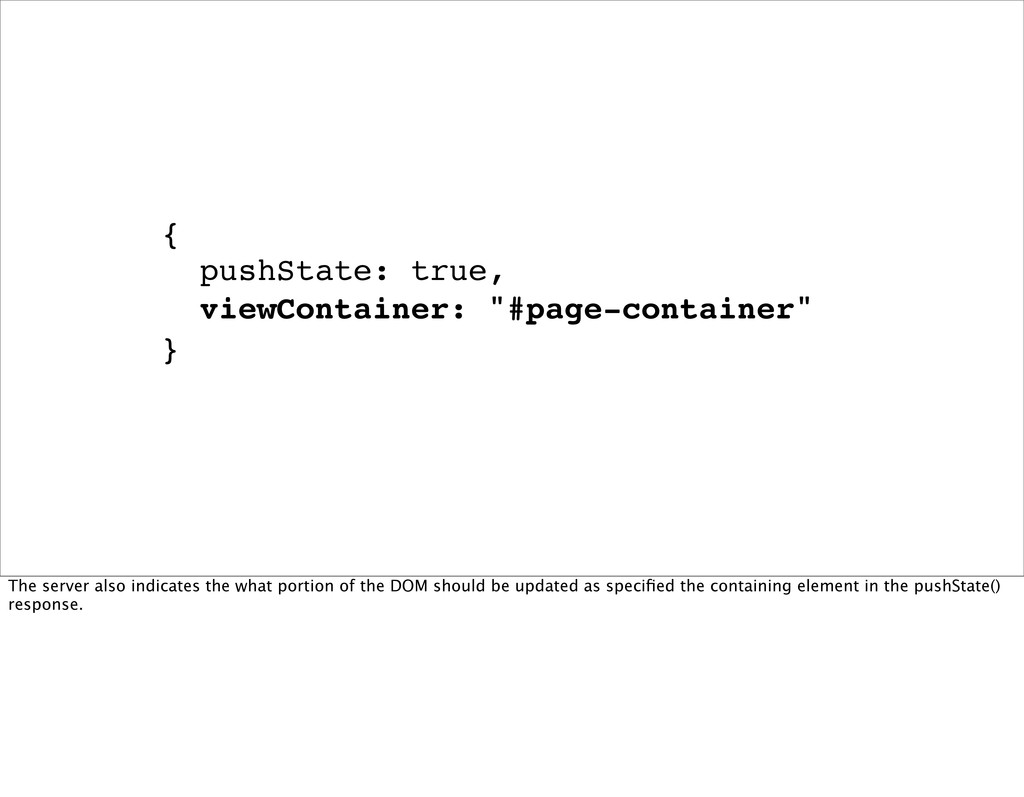
{ pushState: true, viewContainer: "#page-container" } For pushState() responses, we
send the client some additional data. -
if (options.pushState && window.history && history.pushState) { // Initialize pushState
components } The first is a directive to enable/disable pushState(). The client’s decision to enable pushState() is based first on the directive from the server, followed by capability detection on the client. -
$.ajax({ url: data.href, dataType: 'json', type: 'GET', success: function(resp) {
if (!resp.pushState) { location.href = resp.url; } history.pushState(resp, resp.title, resp.url); $(document).trigger('dataPageRefresh', [resp]); } }); The server can disable pushState() support at any time by setting the value of the “pushState” key to false in the response. The client then forcibly reloads the page to return the user to full page reloads. -
{ pushState: true, viewContainer: "#page-container" } The server also indicates
the what portion of the DOM should be updated as specified the containing element in the pushState() response. -
By default the view container is the area just below
the global navigation. -
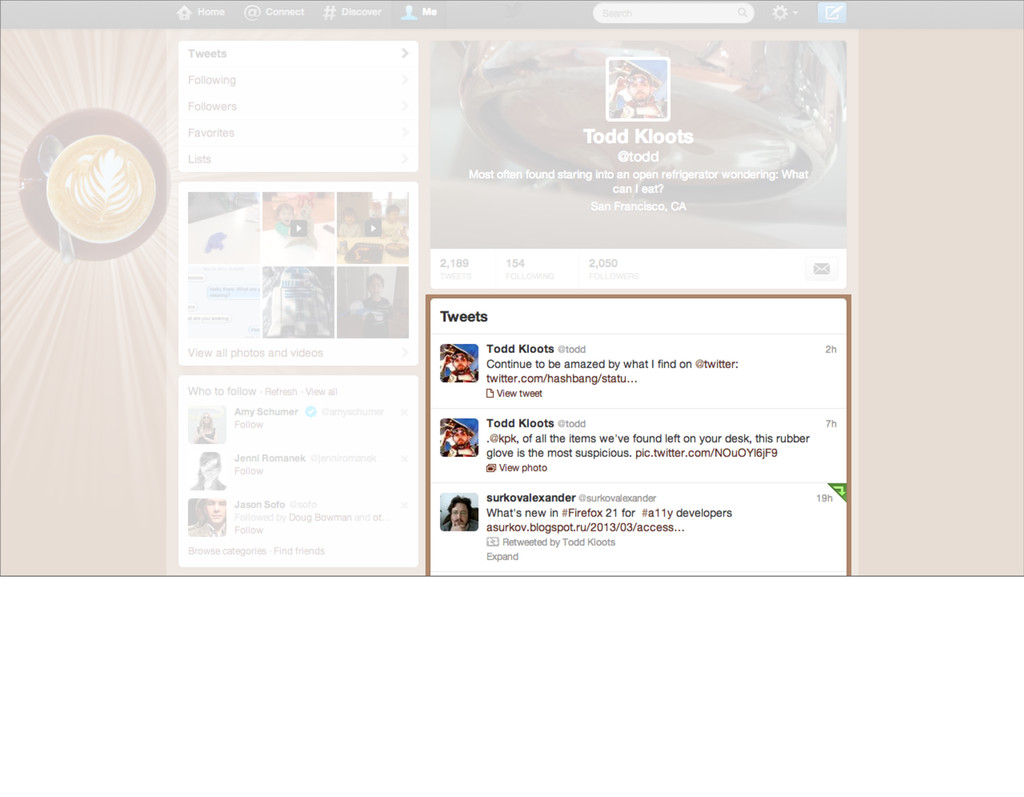
For views like the profile page, where there is more
persistent content, the view container can be scoped more narrowly. -
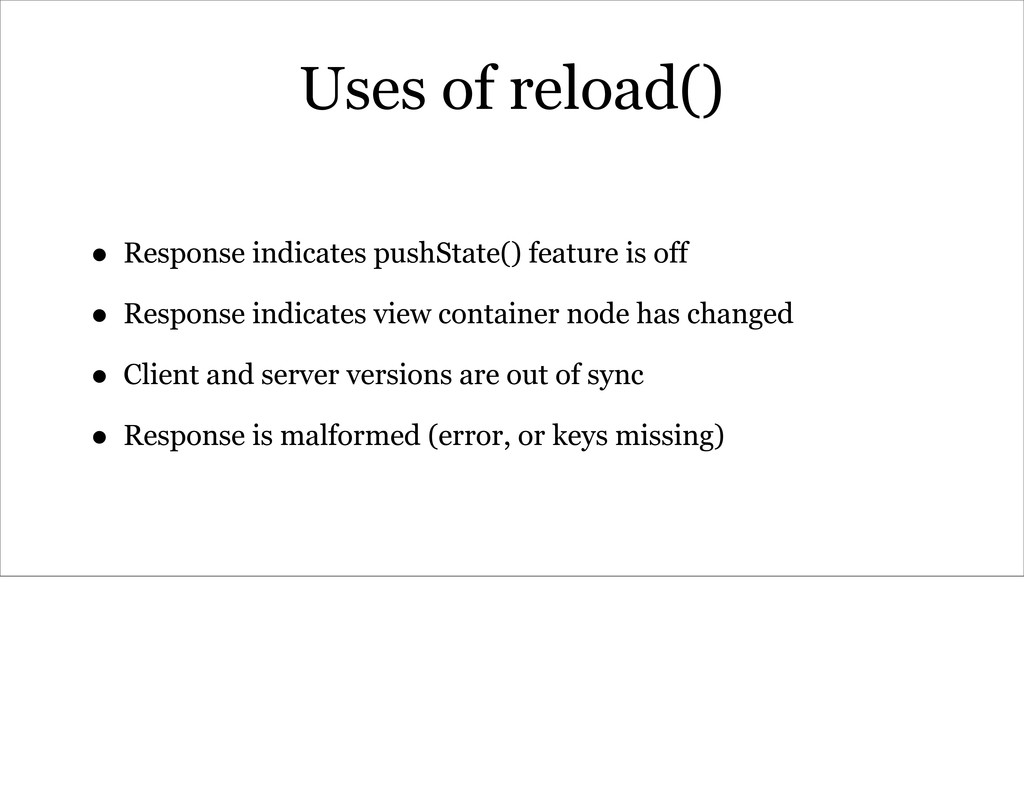
Uses of reload() • Response indicates pushState() feature is off
• Response indicates view container node has changed • Client and server versions are out of sync • Response is malformed (error, or keys missing) -
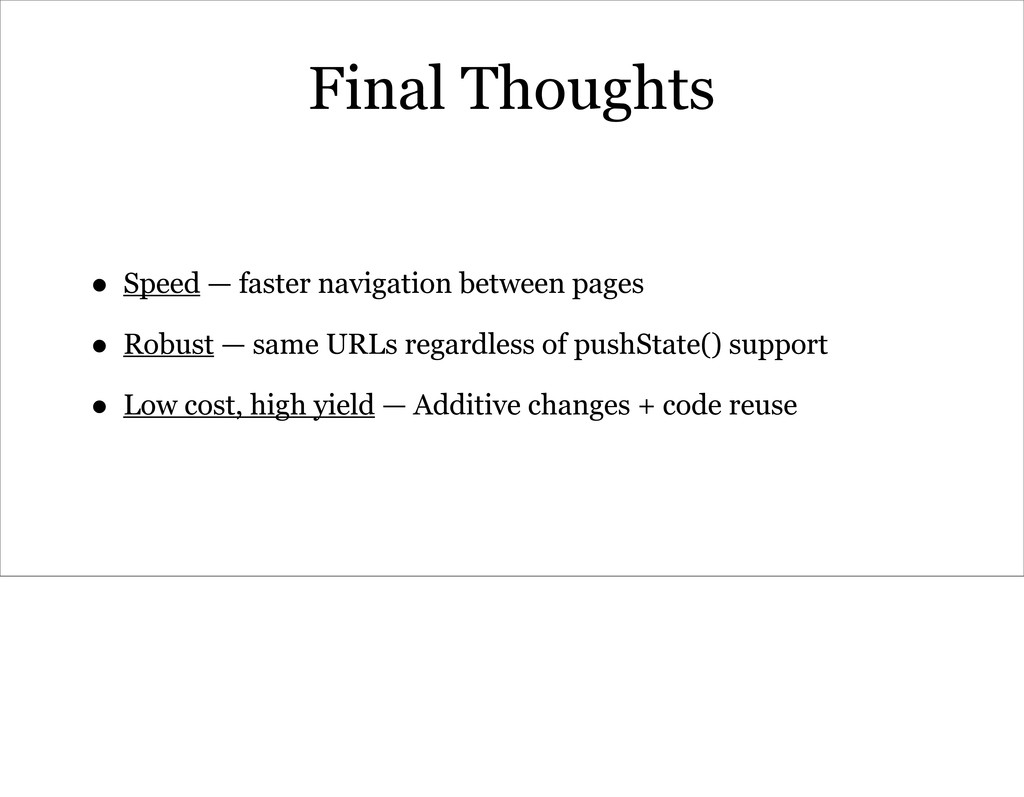
Final Thoughts • Speed — faster navigation between pages •
Robust — same URLs regardless of pushState() support • Low cost, high yield — Additive changes + code reuse
 todd
 takahirosunaga
 dalinaum
 giljongyu
 vivion
 kumaiu
 raeminkang
 steliosf
 yuzneri
 l2hyunwoo
 dayeon
 kinakomoti321
 ryanjones
 chriscoyier
 eitanlees
 mkilby
 lauravandoore
 apolaine
 popppiees
 schlessera
 smashingmag
 oripsolob
 coloredviolet
 reverentgeek