Upgrade to Pro
— share decks privately, control downloads, hide ads and more …
Speaker Deck
Features
Speaker Deck
PRO
Sign in
Sign up for free
Search
Search
モバイルページを爆速に ~Laravelで実現するAMP対応の自動化~ #PHPcon2017
Search
Sponsored
·
SiteGround - Reliable hosting with speed, security, and support you can count on.
→
yaizuuuu
October 08, 2017
Programming
6.1k
3
Share
Embed
Copy iframe code
Copy JS code
Copy link
Start on current slide
モバイルページを爆速に ~Laravelで実現するAMP対応の自動化~ #PHPcon2017
PHPcon2017で発表を行ったスライドです。
#PHPcon2017
#PHPカンファレンス2017
yaizuuuu
October 08, 2017
Other Decks in Programming
See All in Programming
JAWS-UG横浜 #102 AWSサ終供養LT会 成仏できない AWS サービスたち 〜本日、三体供養します〜
maroon1st
0
140
「なぜそう決めたのか」を残し続ける仕組み ― Notion AI カスタムエージェント × Slack連携による設計判断の自動記録 - NIKKEI Tech Talk #47
niftycorp
PRO
0
260
気圧・高度・GPSを記録&可視化するアプリ「Koudo」を作った話
hjmkth
1
350
Generative UI & AI-Assistants for Your Angular Solutions
manfredsteyer
PRO
1
170
スマートグラスで並列バイブコーディング
hyshu
0
290
ビデオ通話が繋がる0.2秒で何が起きているのか
supurazako
2
140
えっ!!コードを読まずに開発を!?
hananouchi
0
190
エンジニア向け会社紹介/Findy Company Profile
findyinc
6
360k
「正の参照」と 「負の導出」で組む ハーネスエンジニアリング
cottpan
1
140
【やさしく解説 設計編 #1】「ドメイン駆動」と「実装駆動」ってなに? 〜設計の考え方を、たとえ話で学ぼう〜
panda728
PRO
1
120
【SRE NEXT 2026 Lunch Session】一人目専任SREの立ち上げを加速する ― AIと進めたオンボーディングで2分を0.04秒にした話
pkshadeck
PRO
0
2.4k
継続モナドとリアクティブプログラミング
yukikurage
3
560
Featured
See All Featured
Unlocking the hidden potential of vector embeddings in international SEO
frankvandijk
0
870
Sharpening the Axe: The Primacy of Toolmaking
bcantrill
46
2.9k
Chrome DevTools: State of the Union 2024 - Debugging React & Beyond
addyosmani
10
1.3k
Navigating Algorithm Shifts & AI Overviews - #SMXNext
aleyda
1
1.4k
Chasing Engaging Ingredients in Design
codingconduct
0
240
Redefining SEO in the New Era of Traffic Generation
szymonslowik
1
360
Rails Girls Zürich Keynote
gr2m
96
14k
ラッコキーワード サービス紹介資料
rakko
1
3.9M
Building Flexible Design Systems
yeseniaperezcruz
330
40k
Digital Ethics as a Driver of Design Innovation
axbom
PRO
1
340
Groundhog Day: Seeking Process in Gaming for Health
codingconduct
0
240
Music & Morning Musume
bryan
47
7.3k
Transcript
モバイルページを爆速に 〜Laravelで実現するAMP対応の自動化〜 株式会社イノベーション 小柳津裕真
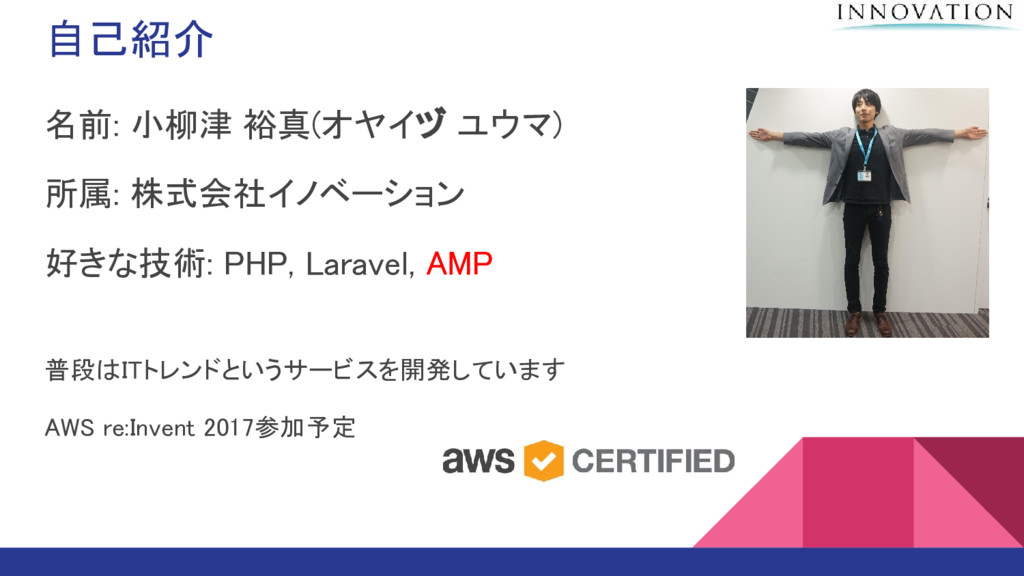
自己紹介 名前: 小柳津 裕真(オヤイヅ ユウマ) 所属: 株式会社イノベーション 好きな技術: PHP, Laravel,
AMP 普段はITトレンドというサービスを開発しています AWS re:Invent 2017参加予定
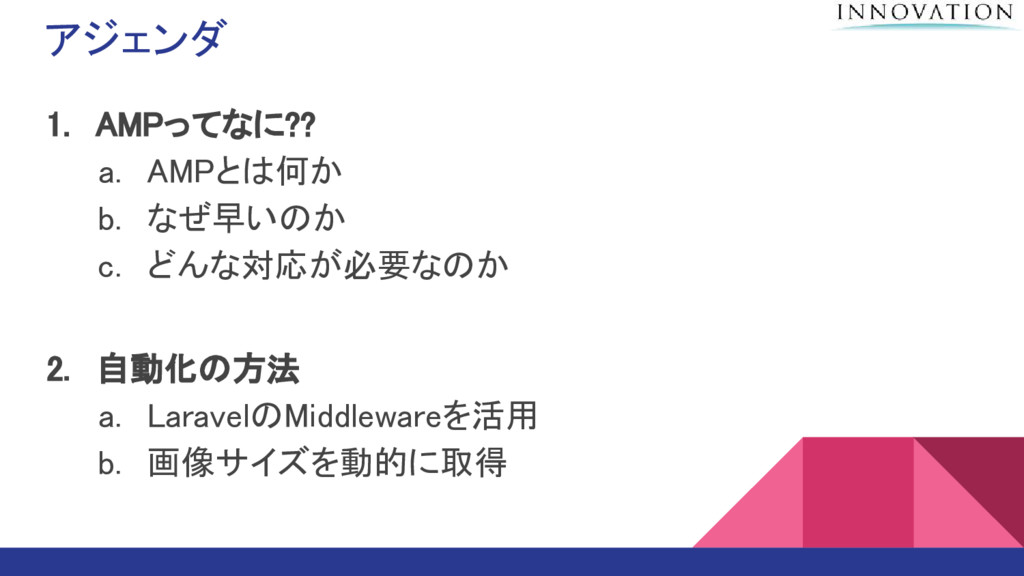
アジェンダ 1. AMPってなに?? a. AMPとは何か b. なぜ早いのか c. どんな対応が必要なのか 2.
自動化の方法 a. LaravelのMiddlewareを活用 b. 画像サイズを動的に取得
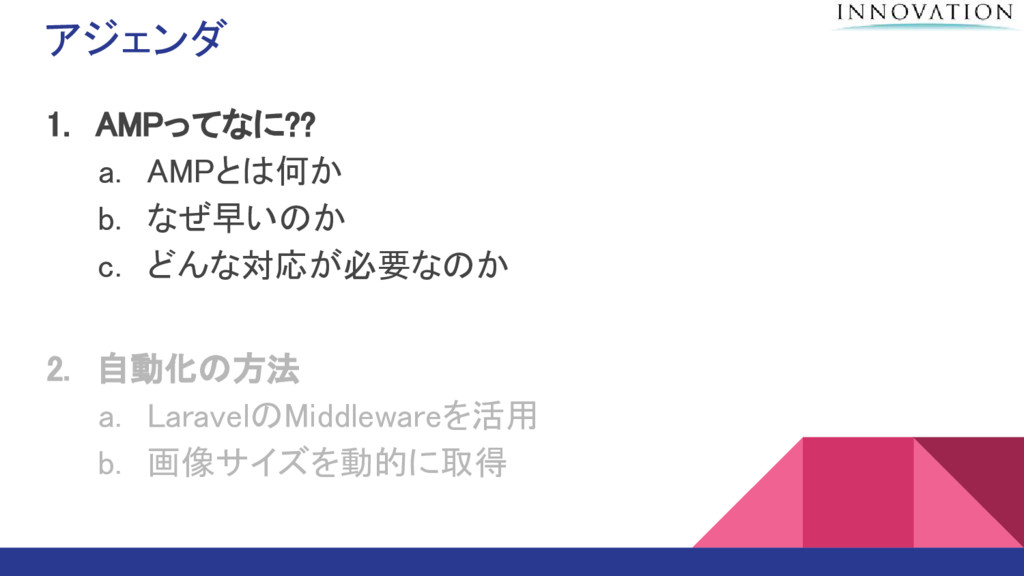
アジェンダ 1. AMPってなに?? a. AMPとは何か b. なぜ早いのか c. どんな対応が必要なのか 2.
自動化の方法 a. LaravelのMiddlewareを活用 b. 画像サイズを動的に取得
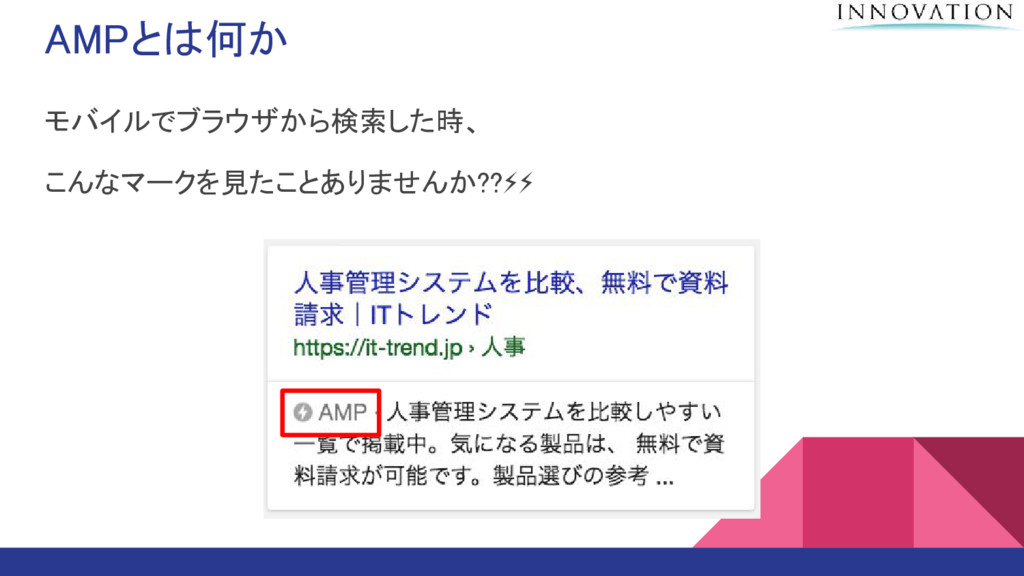
AMPとは何か モバイルでブラウザから検索した時、 こんなマークを見たことありませんか??⚡⚡
AMPとは何か モバイルでブラウザから検索した時、 こんなマークを見たことありませんか??⚡⚡
AMPとは何か Q:AMPとは何か A:めっちゃ早いモバイルページ A:Accelerated Mobile Pages A:の略
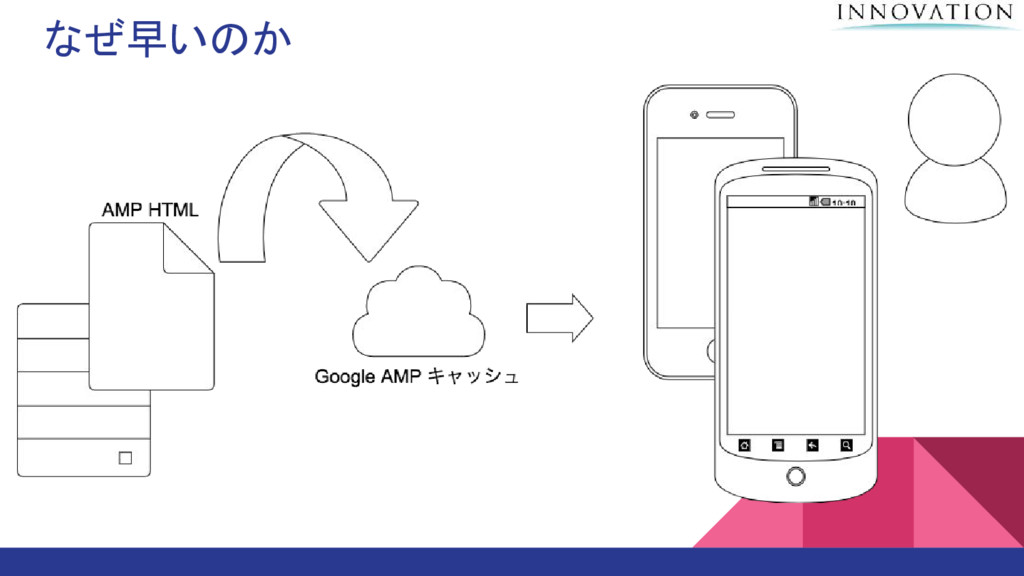
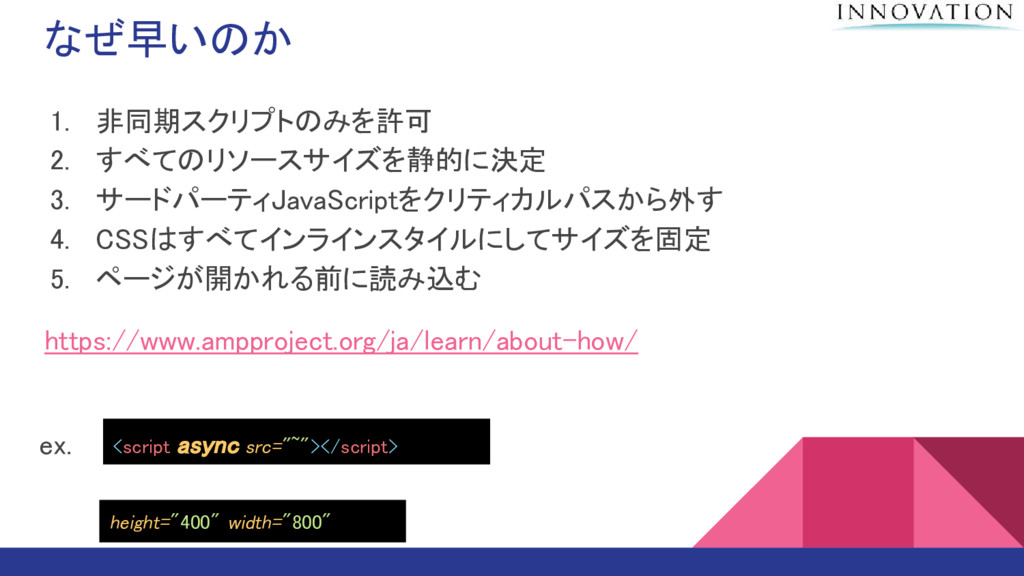
なぜ早いのか
なぜ早いのか 1. 非同期スクリプトのみを許可 2. すべてのリソースサイズを静的に決定 3. サードパーティJavaScriptをクリティカルパスから外す 4. CSSはすべてインラインスタイルにしてサイズを固定 5.
ページが開かれる前に読み込む https://www.ampproject.org/ja/learn/about-how/ <script async src="~"></script> height="400" width="800" ex.
なぜ早いのか ex. 検索結果が開かれる前に レンダリングが開始
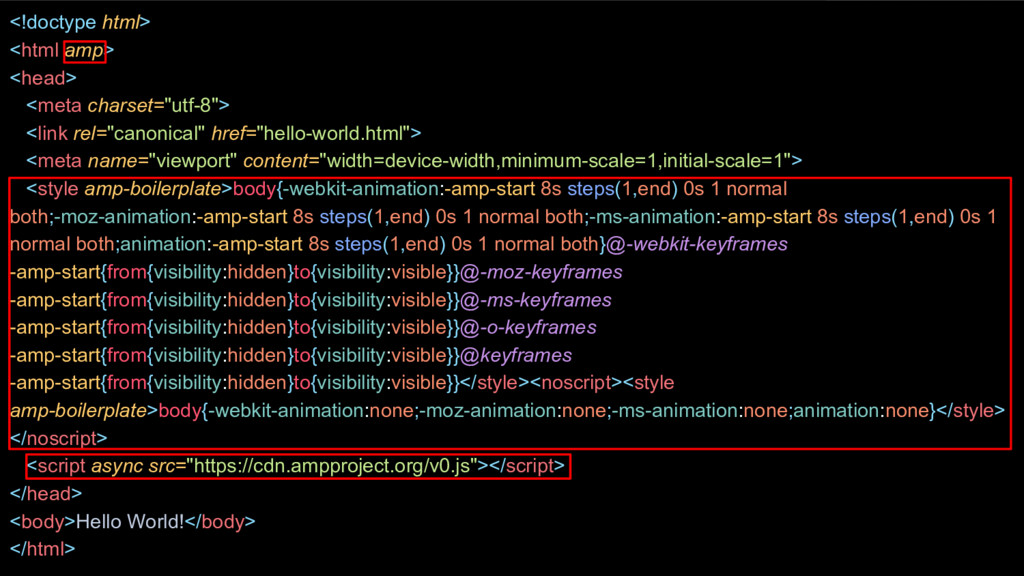
どんな対応が必要なのか 必須マークアップ
<!doctype html> <html amp> <head> <meta charset="utf-8"> <link rel="canonical" href="hello-world.html">
<meta name="viewport" content="width=device-width,minimum-scale=1,initial-scale=1"> <style amp-boilerplate>body{-webkit-animation:-amp-start 8s steps(1,end) 0s 1 normal both;-moz-animation:-amp-start 8s steps(1,end) 0s 1 normal both;-ms-animation:-amp-start 8s steps(1,end) 0s 1 normal both;animation:-amp-start 8s steps(1,end) 0s 1 normal both}@-webkit-keyframes -amp-start{from{visibility:hidden}to{visibility:visible}}@-moz-keyframes -amp-start{from{visibility:hidden}to{visibility:visible}}@-ms-keyframes -amp-start{from{visibility:hidden}to{visibility:visible}}@-o-keyframes -amp-start{from{visibility:hidden}to{visibility:visible}}@keyframes -amp-start{from{visibility:hidden}to{visibility:visible}}</style><noscript><style amp-boilerplate>body{-webkit-animation:none;-moz-animation:none;-ms-animation:none;animation:none}</style> </noscript> <script async src="https://cdn.ampproject.org/v0.js"></script> </head> <body>Hello World!</body> </html>
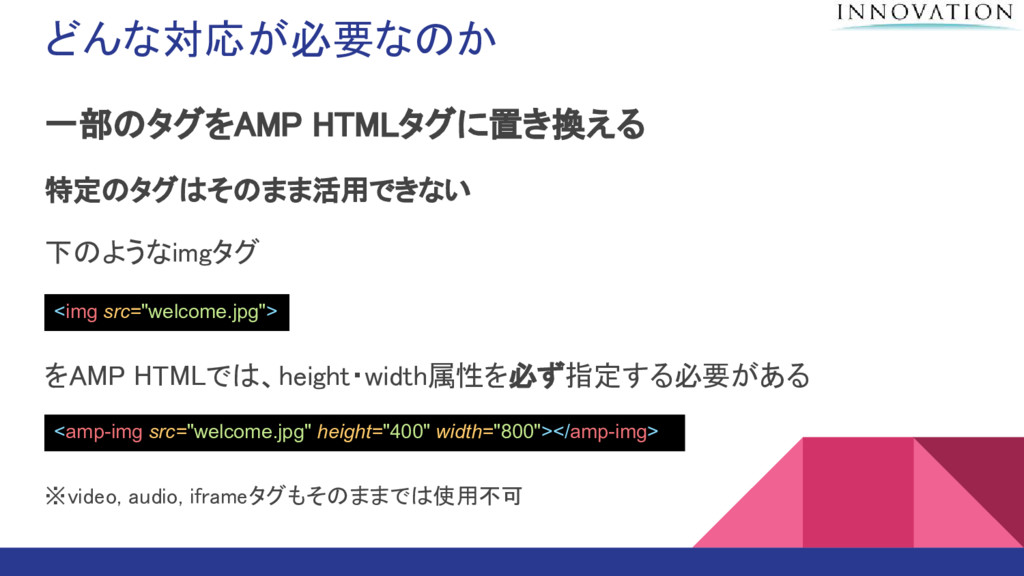
どんな対応が必要なのか 一部のタグをAMP HTMLタグに置き換える https://www.ampproject.org/ja/docs/tutorials/create/include_image ほとんどの HTML タグは、そのまま AMP HTML でも使用できますが、
中には <img> タグのように同等か少し高機能のカスタム AMP HTML タグに置き換えなくてはいけないものがあります
どんな対応が必要なのか 一部のタグをAMP HTMLタグに置き換える 特定のタグはそのまま活用できない 下のようなimgタグ をAMP HTMLでは、height・width属性を必ず指定する必要がある ※video, audio,
iframeタグもそのままでは使用不可 <img src="welcome.jpg"> <amp-img src="welcome.jpg" height="400" width="800"></amp-img>
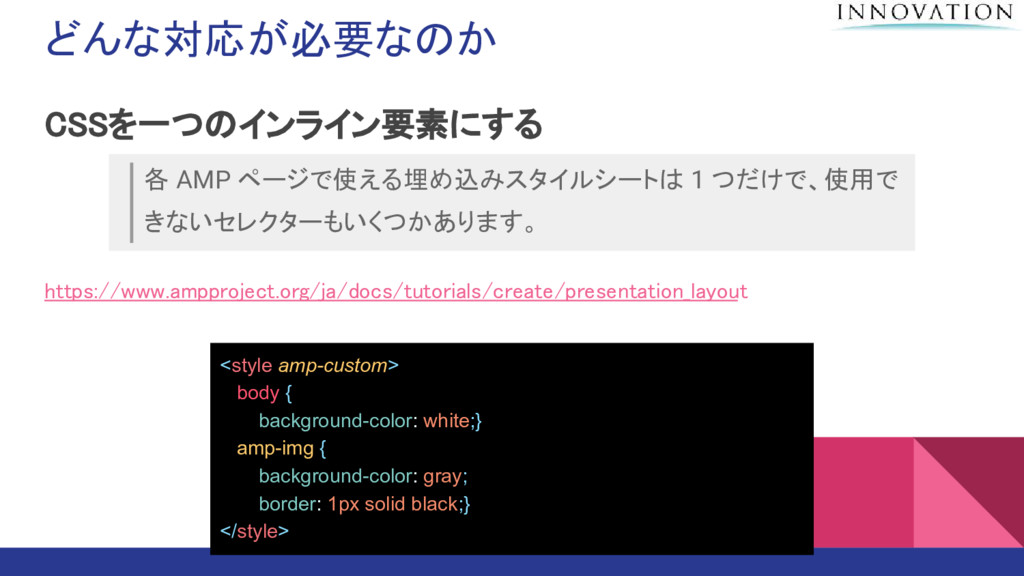
どんな対応が必要なのか CSSを一つのインライン要素にする https://www.ampproject.org/ja/docs/tutorials/create/presentation_layout <style amp-custom> body { background-color: white;} amp-img
{ background-color: gray; border: 1px solid black;} </style> 各 AMP ページで使える埋め込みスタイルシートは 1 つだけで、使用で きないセレクターもいくつかあります。
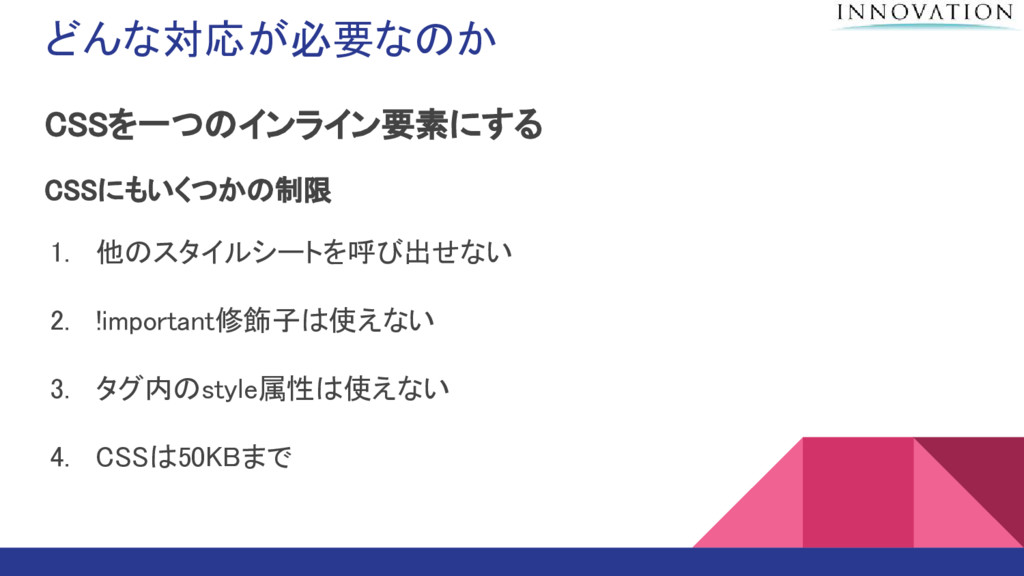
どんな対応が必要なのか CSSを一つのインライン要素にする CSSにもいくつかの制限 1. 他のスタイルシートを呼び出せない 2. !important修飾子は使えない 3. タグ内のstyle属性は使えない 4.
CSSは50KBまで
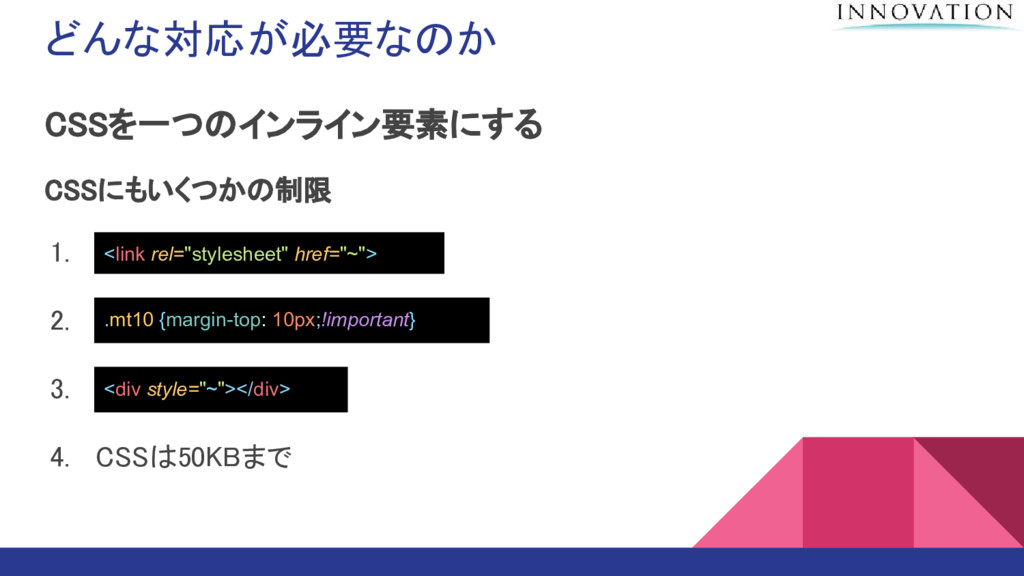
どんな対応が必要なのか CSSを一つのインライン要素にする CSSにもいくつかの制限 1. l 2. ! 3. 4. CSSは50KBまで
<link rel="stylesheet" href="~"> .mt10 {margin-top: 10px;!important} <div style="~"></div>
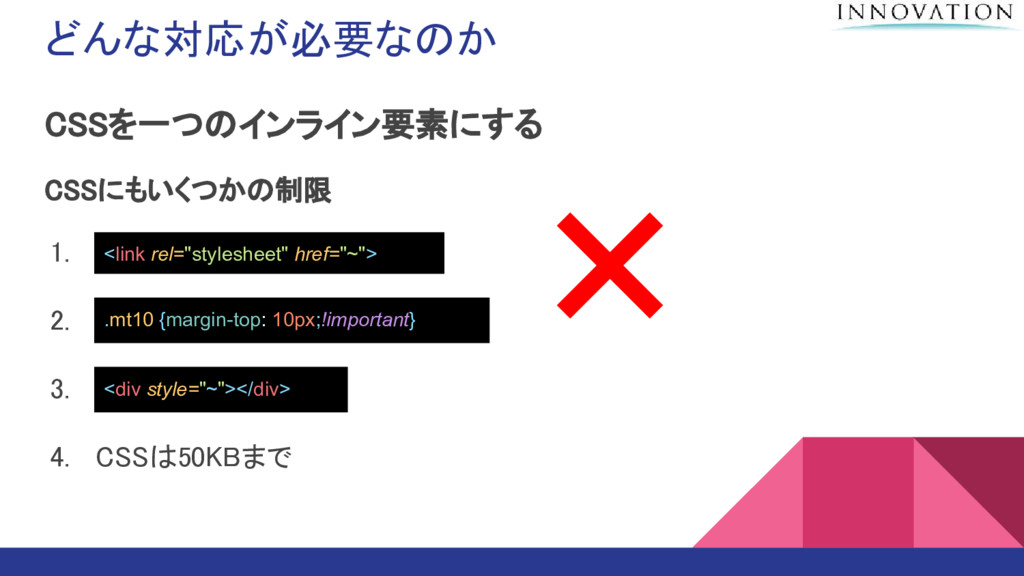
どんな対応が必要なのか CSSを一つのインライン要素にする CSSにもいくつかの制限 1. l 2. ! 3. 4. CSSは50KBまで
<link rel="stylesheet" href="~"> .mt10 {margin-top: 10px;!important} <div style="~"></div>
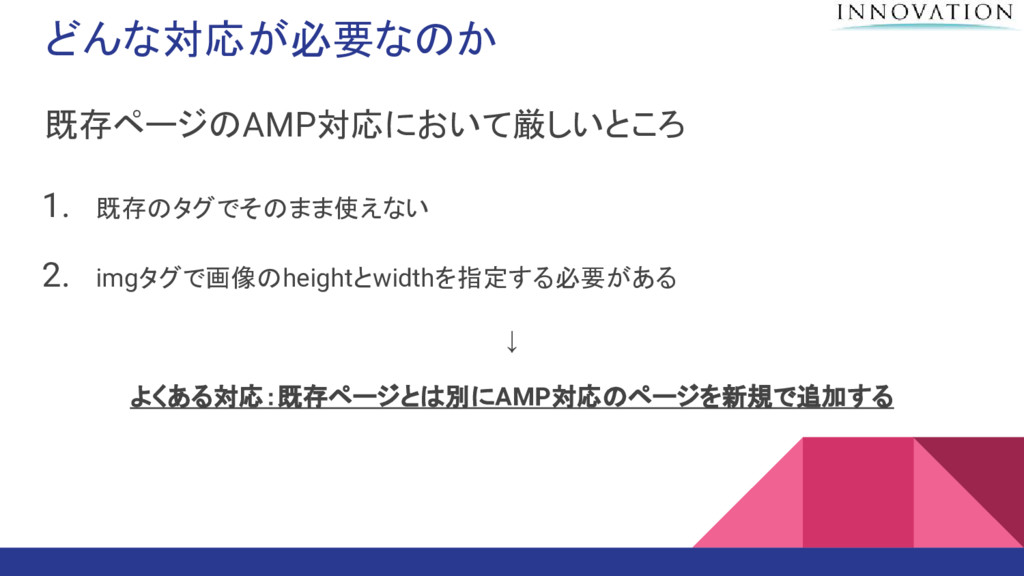
どんな対応が必要なのか 既存ページのAMP対応において厳しいところ 1. 既存のタグでそのまま使えない 2. imgタグで画像のheightとwidthを指定する必要がある ↓ よくある対応:既存ページとは別にAMP対応のページを新規で追加する
どんな対応が必要なのか 既存ページとは別にAMP対応のページを新規で追加する 非AMPページをコピーして 手動でAMP対応に修正する
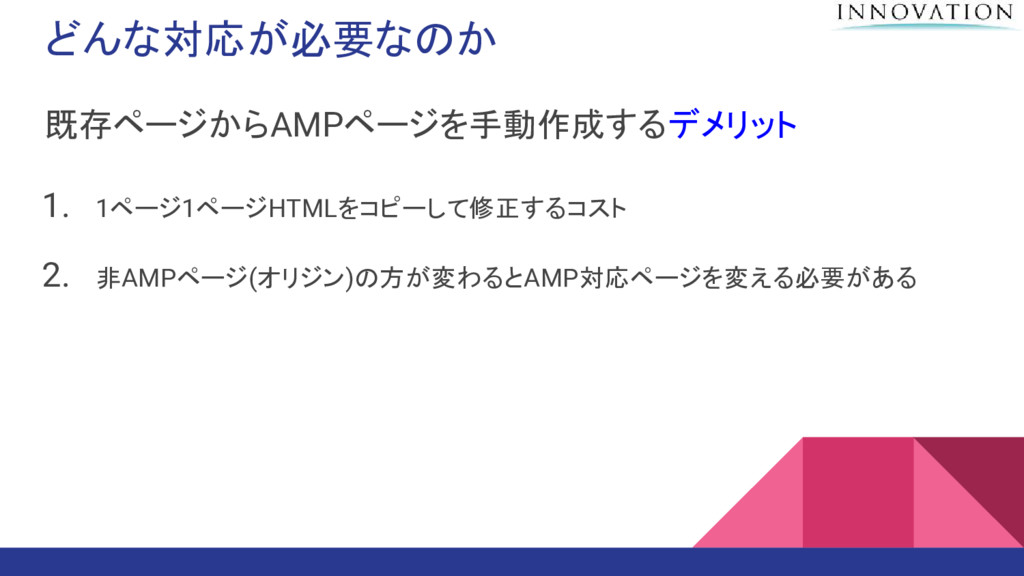
どんな対応が必要なのか 既存ページからAMPページを手動作成するデメリット 1. 1ページ1ページHTMLをコピーして修正するコスト 2. 非AMPページ(オリジン)の方が変わるとAMP対応ページを変える必要がある
それはめんどくさい
自動でAMP HTMLに置き換えたい
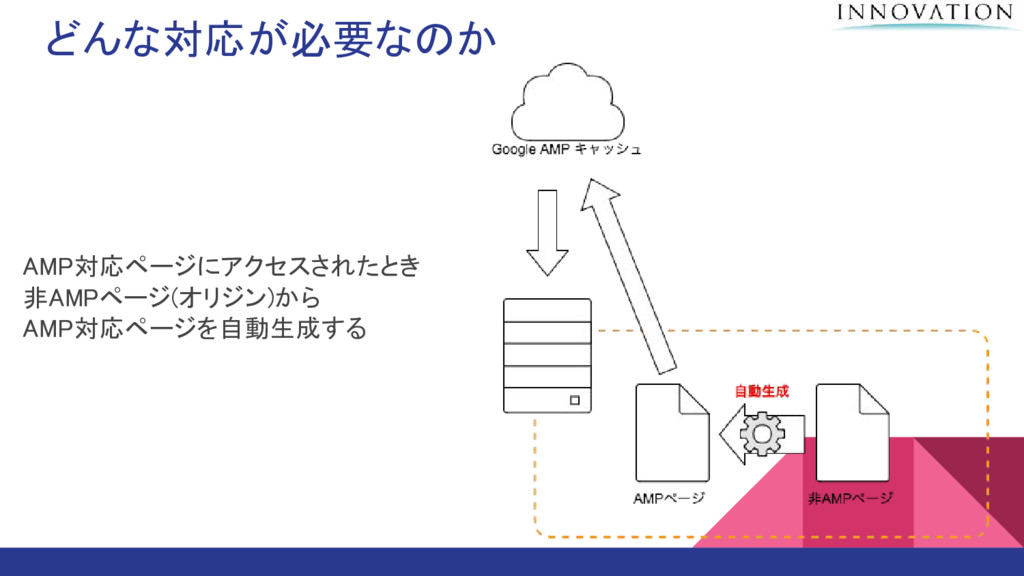
どんな対応が必要なのか AMP対応ページにアクセスされたとき 非AMPページ(オリジン)から AMP対応ページを自動生成する
アジェンダ 1. AMPってなに?? a. AMPとは何か b. なぜ早いのか c. どんな対応が必要なのか 2.
自動化の方法 a. LaravelのMiddlewareを活用 b. 画像サイズを動的に取得
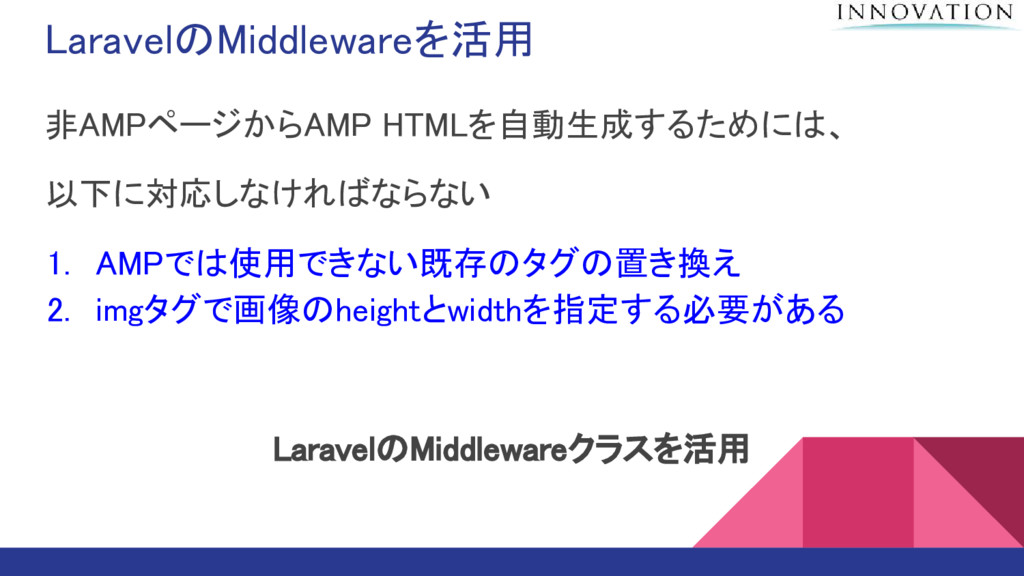
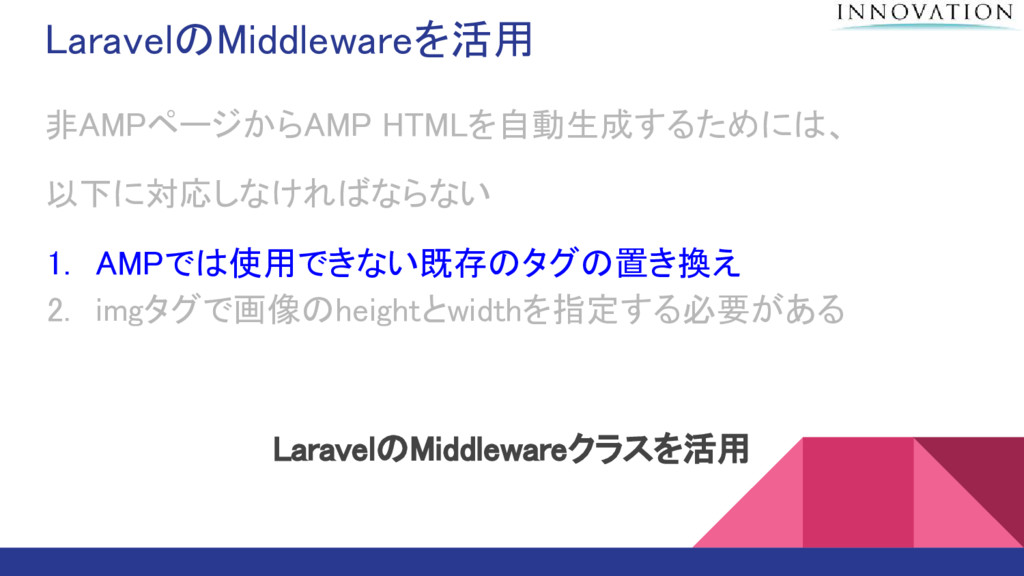
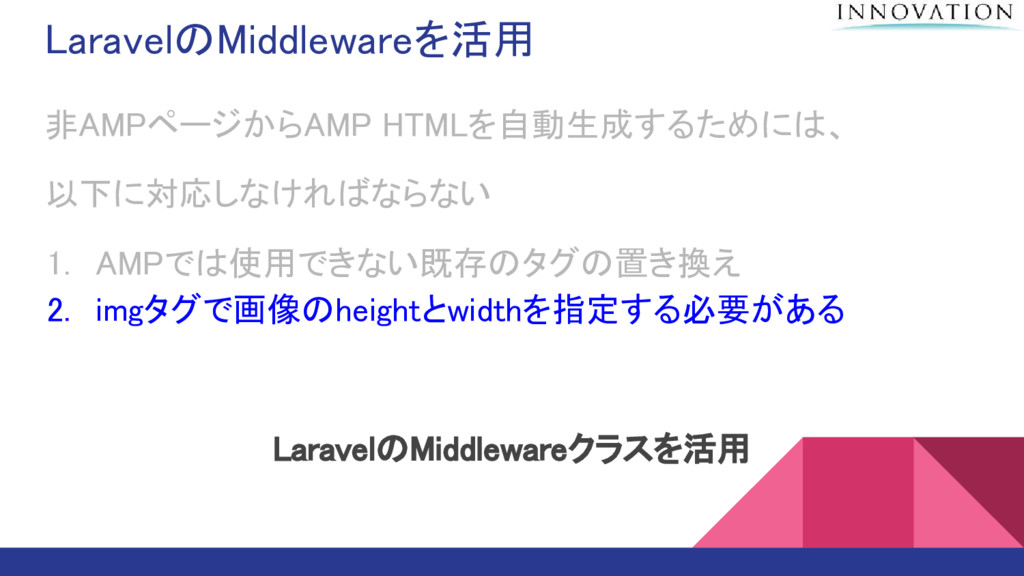
LaravelのMiddlewareを活用 非AMPページからAMP HTMLを自動生成するためには、 以下に対応しなければならない 1. AMPでは使用できない既存のタグの置き換え 2. imgタグで画像のheightとwidthを指定する必要がある LaravelのMiddlewareクラスを活用
LaravelのMiddlewareを活用 非AMPページからAMP HTMLを自動生成するためには、 以下に対応しなければならない 1. AMPでは使用できない既存のタグの置き換え 2. imgタグで画像のheightとwidthを指定する必要がある LaravelのMiddlewareクラスを活用
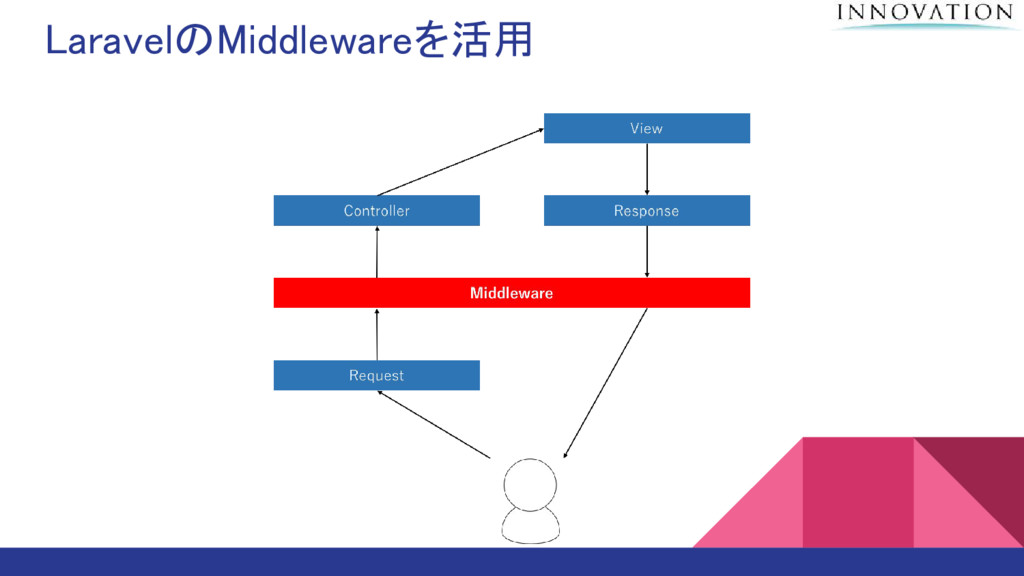
LaravelのMiddlewareを活用
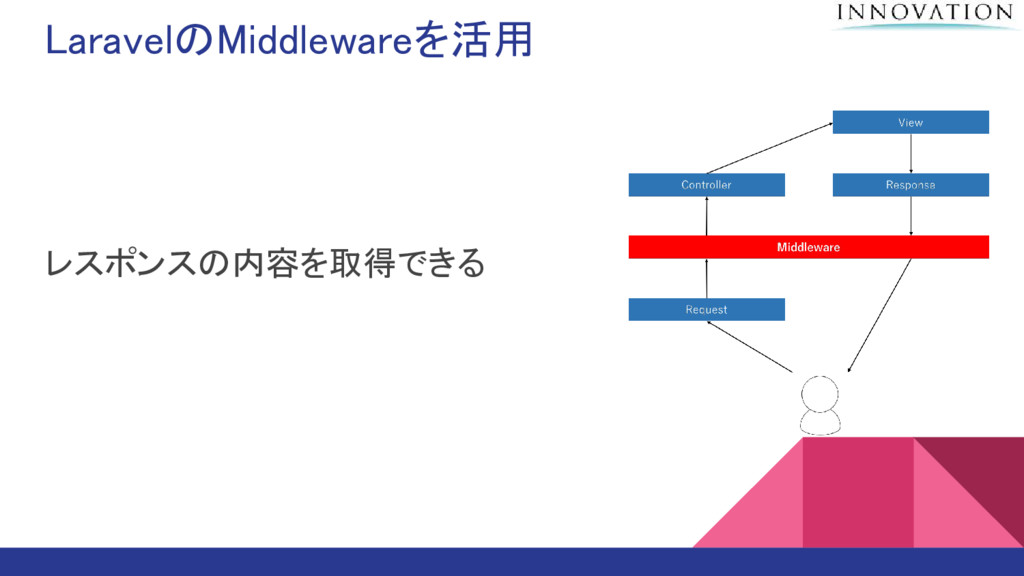
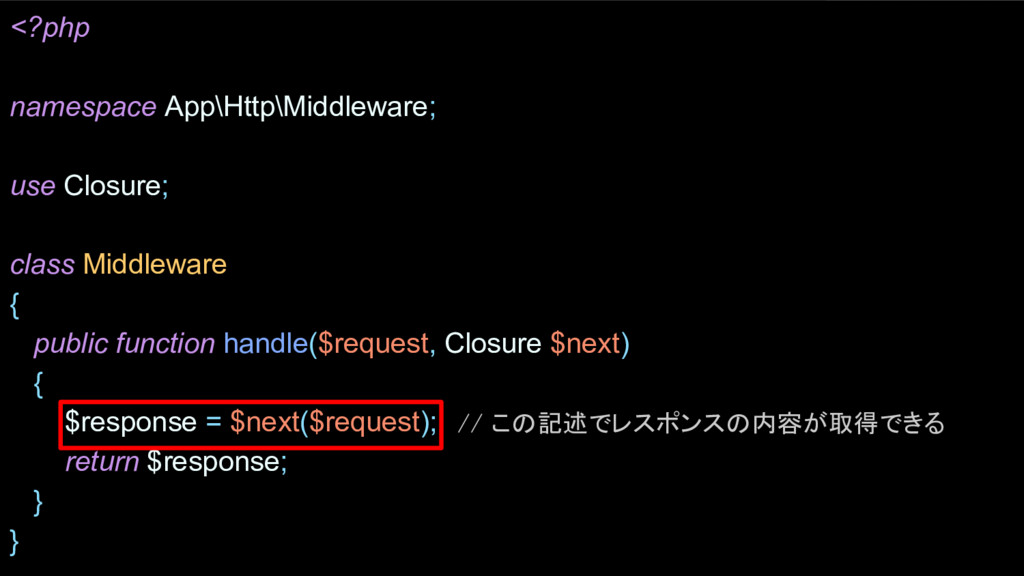
LaravelのMiddlewareを活用 レスポンスの内容を取得できる
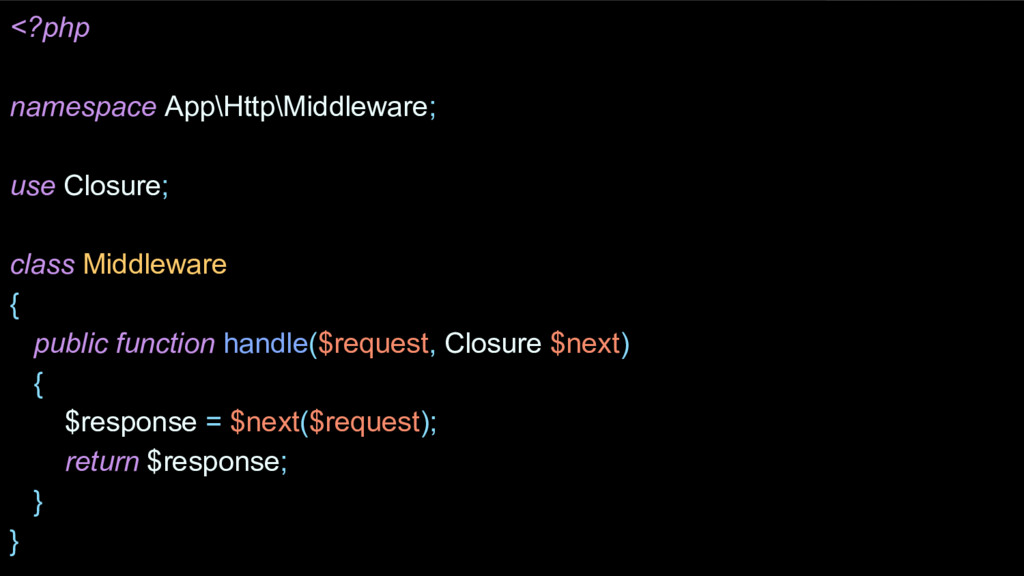
LaravelのMiddlewareを活用 <?php namespace App\Http\Middleware; use Closure; class Middleware { public
function handle($request, Closure $next) { $response = $next($request); return $response; } }
LaravelのMiddlewareを活用 <?php namespace App\Http\Middleware; use Closure; class Middleware { public
function handle($request, Closure $next) { $response = $next($request); return $response; } } // この記述でレスポンスの内容が取得できる
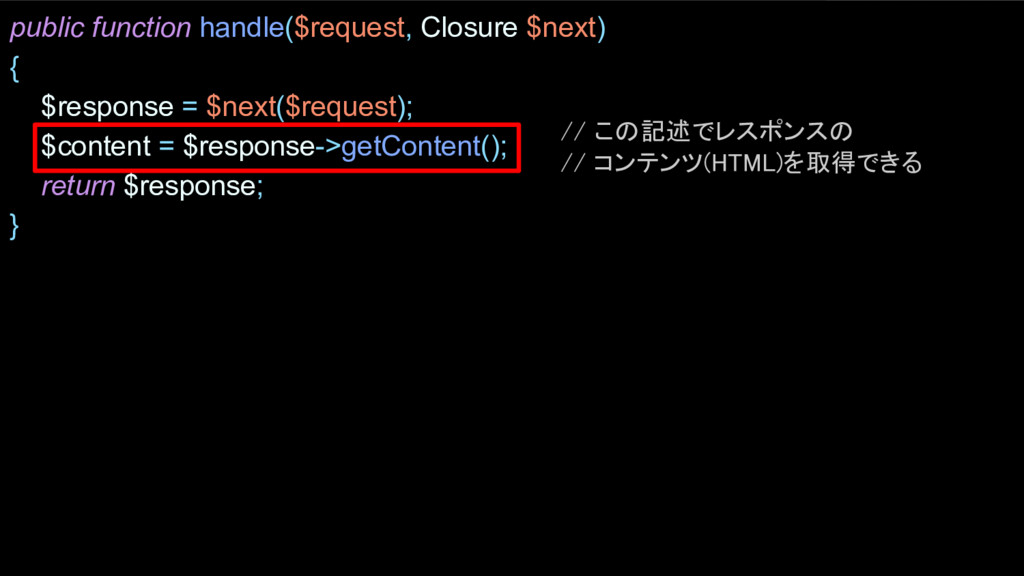
LaravelのMiddlewareを活用 public function handle($request, Closure $next) { $response = $next($request);
$content = $response->getContent(); return $response; } // この記述でレスポンスの // コンテンツ(HTML)を取得できる
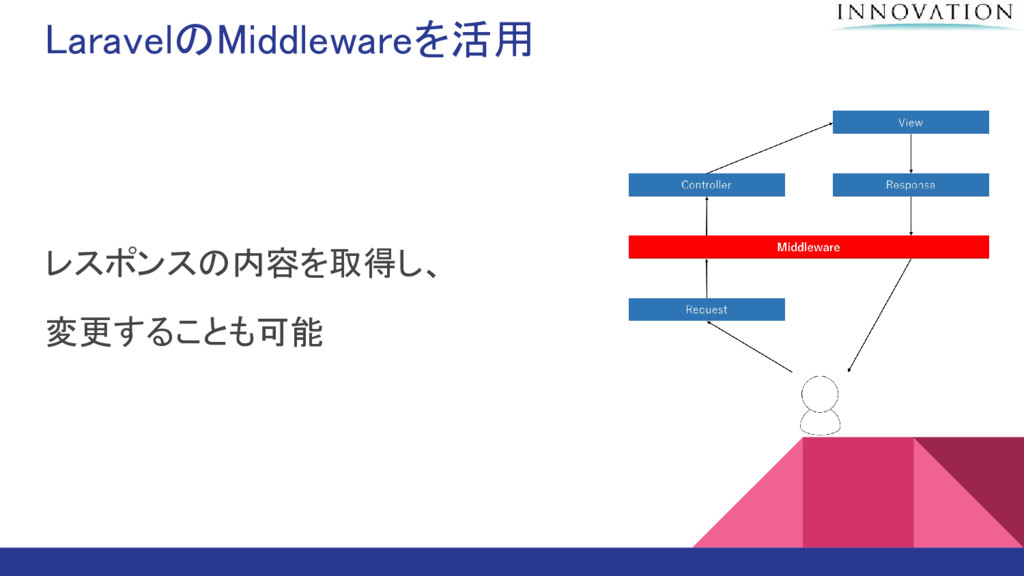
LaravelのMiddlewareを活用 レスポンスの内容を取得し、 変更することも可能
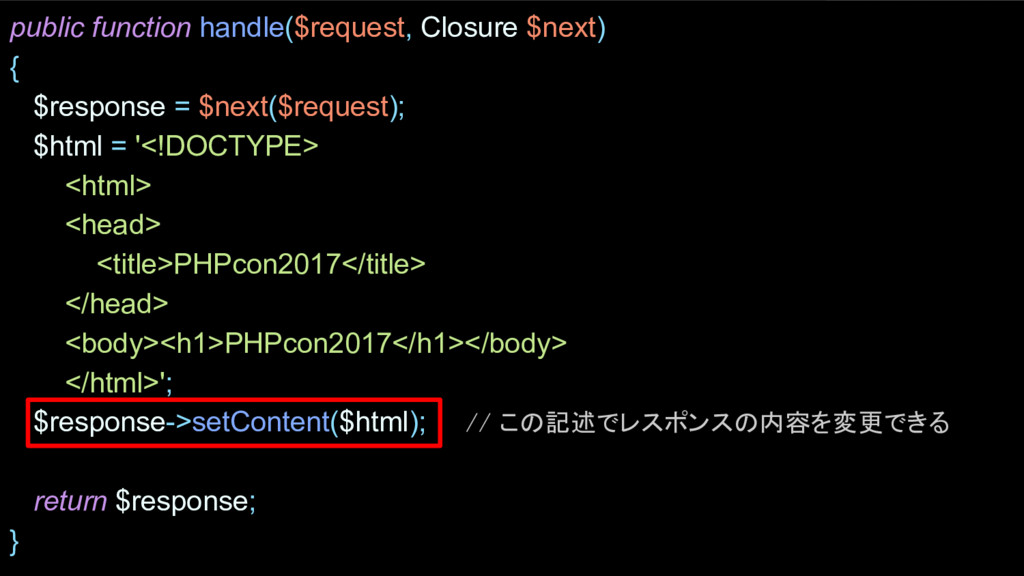
LaravelのMiddlewareを活用 public function handle($request, Closure $next) { $response = $next($request);
$html = '<!DOCTYPE> <html> <head> <title>PHPcon2017</title> </head> <body><h1>PHPcon2017</h1></body> </html>'; $response->setContent($html); return $response; } // この記述でレスポンスの内容を変更できる
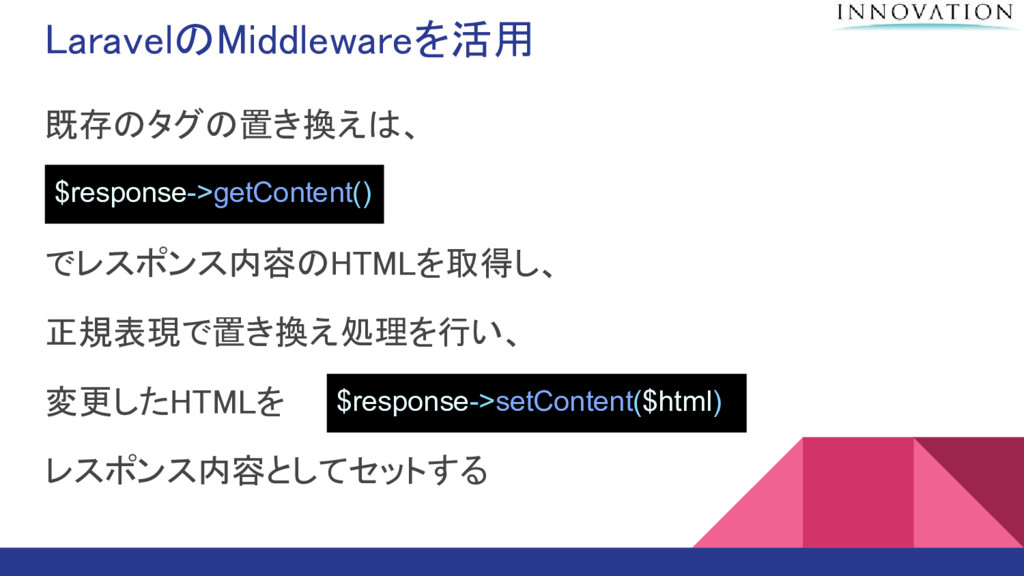
LaravelのMiddlewareを活用 既存のタグの置き換えは、 でレスポンス内容のHTMLを取得し、 正規表現で置き換え処理を行い、 変更したHTMLを で レスポンス内容としてセットする $response->getContent() $response->setContent($html)
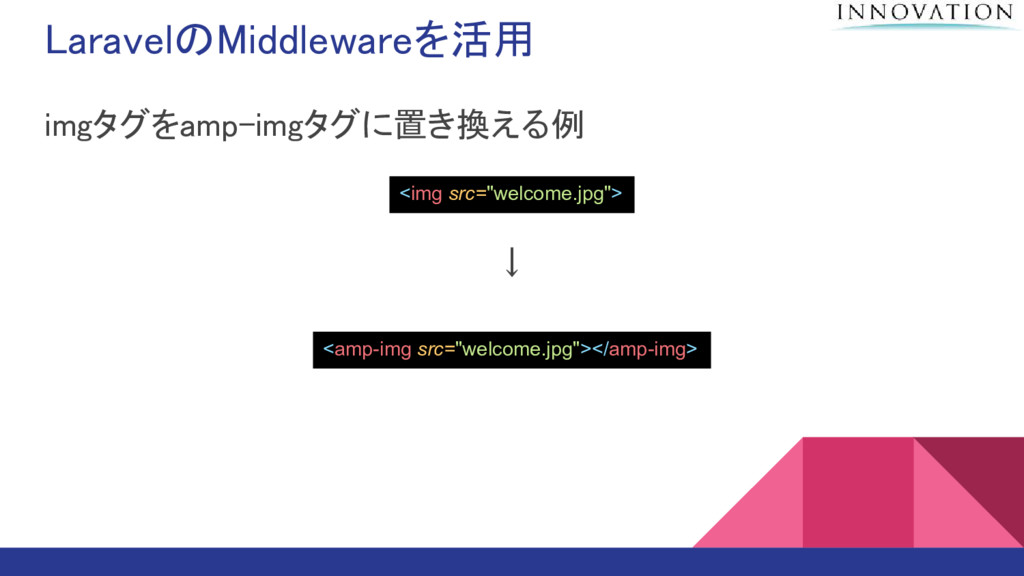
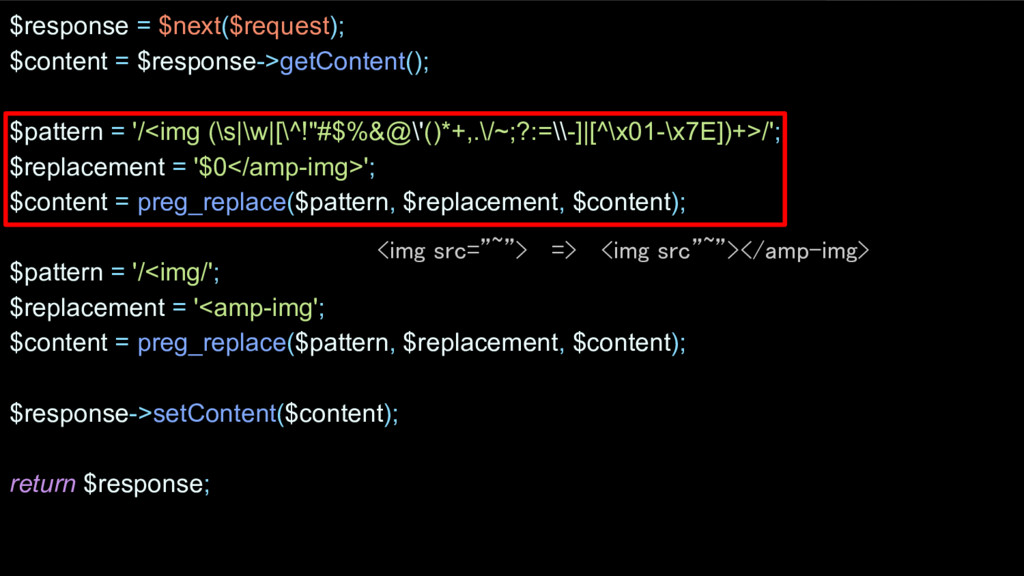
LaravelのMiddlewareを活用 imgタグをamp-imgタグに置き換える例 ↓ <img src="welcome.jpg"> <amp-img src="welcome.jpg"></amp-img>
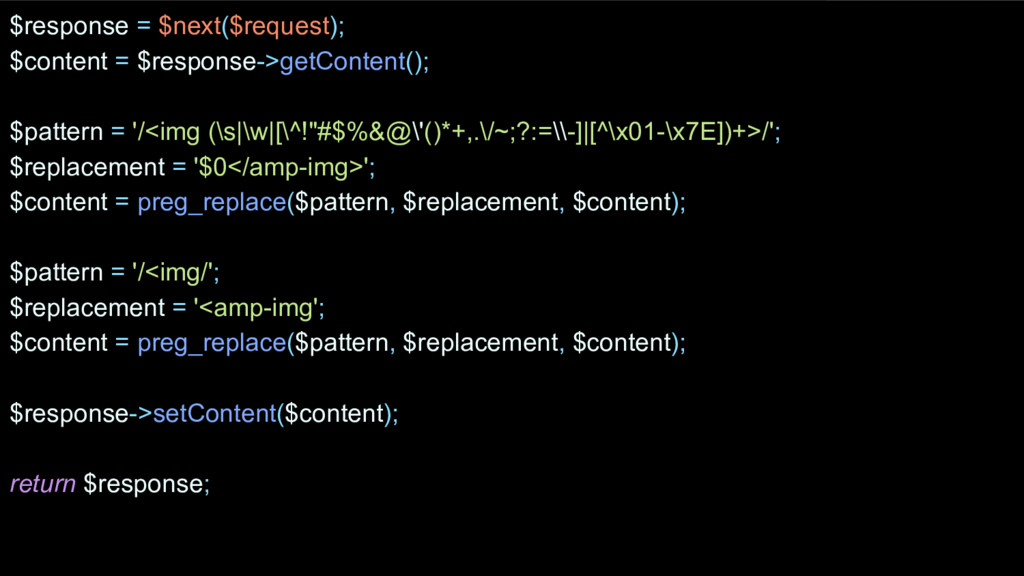
LaravelのMiddlewareを活用 $response = $next($request); $content = $response->getContent(); $pattern = '/<img
(\s|\w|[\^!"#$%&@\'()*+,.\/~;?:=\\-]|[^\x01-\x7E])+>/'; $replacement = '$0</amp-img>'; $content = preg_replace($pattern, $replacement, $content); $pattern = '/<img/'; $replacement = '<amp-img'; $content = preg_replace($pattern, $replacement, $content); $response->setContent($content); return $response;
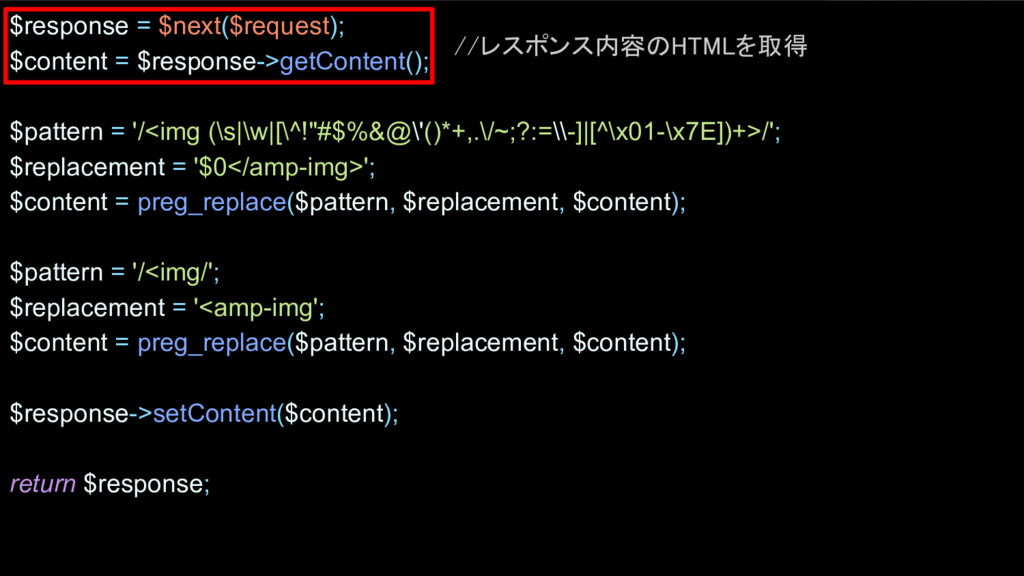
LaravelのMiddlewareを活用 $response = $next($request); $content = $response->getContent(); $pattern = '/<img
(\s|\w|[\^!"#$%&@\'()*+,.\/~;?:=\\-]|[^\x01-\x7E])+>/'; $replacement = '$0</amp-img>'; $content = preg_replace($pattern, $replacement, $content); $pattern = '/<img/'; $replacement = '<amp-img'; $content = preg_replace($pattern, $replacement, $content); $response->setContent($content); return $response; //レスポンス内容のHTMLを取得
LaravelのMiddlewareを活用 $response = $next($request); $content = $response->getContent(); $pattern = '/<img
(\s|\w|[\^!"#$%&@\'()*+,.\/~;?:=\\-]|[^\x01-\x7E])+>/'; $replacement = '$0</amp-img>'; $content = preg_replace($pattern, $replacement, $content); $pattern = '/<img/'; $replacement = '<amp-img'; $content = preg_replace($pattern, $replacement, $content); $response->setContent($content); return $response; <img src=”~”> => <img src”~”></amp-img>
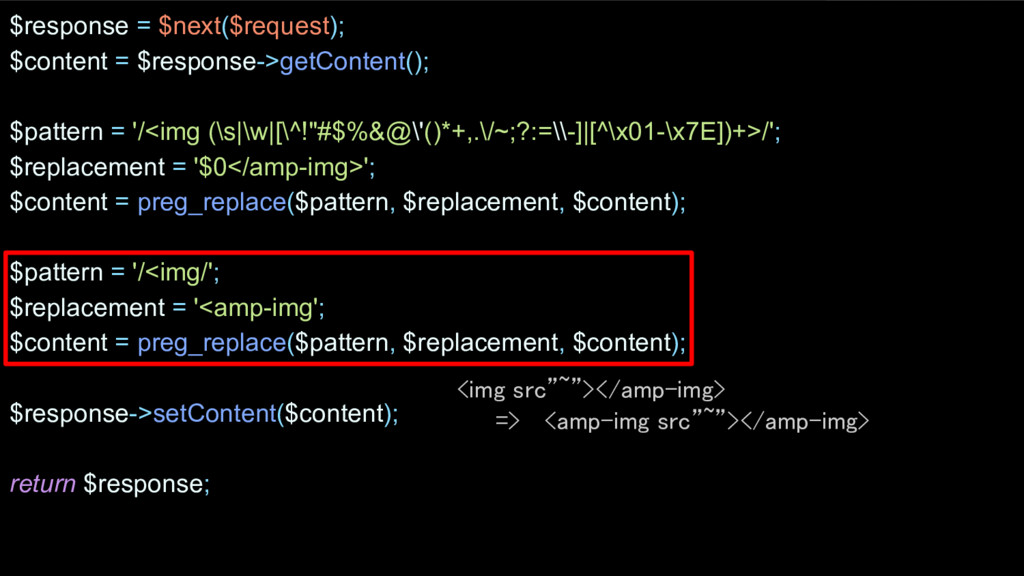
LaravelのMiddlewareを活用 $response = $next($request); $content = $response->getContent(); $pattern = '/<img
(\s|\w|[\^!"#$%&@\'()*+,.\/~;?:=\\-]|[^\x01-\x7E])+>/'; $replacement = '$0</amp-img>'; $content = preg_replace($pattern, $replacement, $content); $pattern = '/<img/'; $replacement = '<amp-img'; $content = preg_replace($pattern, $replacement, $content); $response->setContent($content); return $response; <img src”~”></amp-img> => <amp-img src”~”></amp-img>
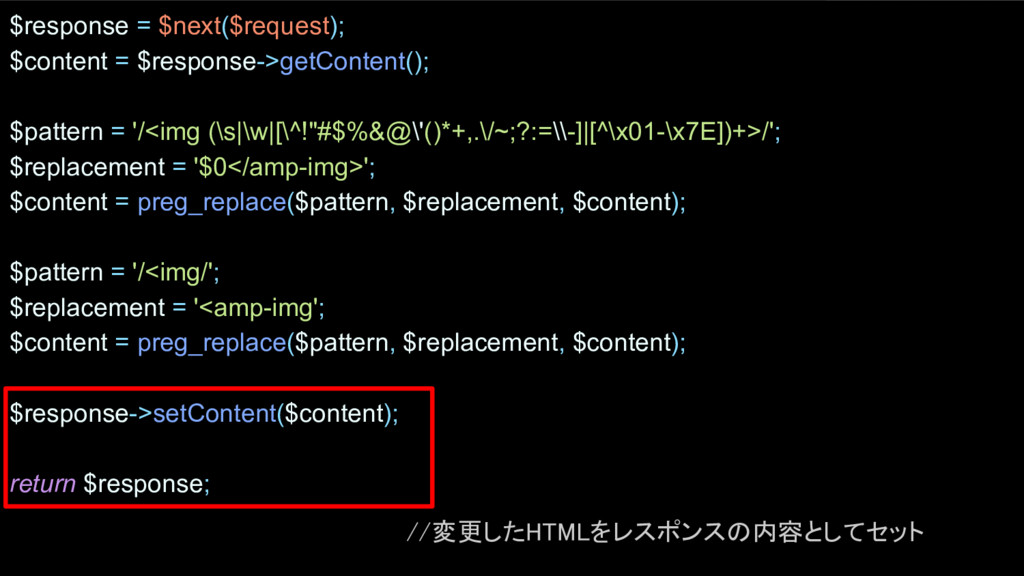
LaravelのMiddlewareを活用 $response = $next($request); $content = $response->getContent(); $pattern = '/<img
(\s|\w|[\^!"#$%&@\'()*+,.\/~;?:=\\-]|[^\x01-\x7E])+>/'; $replacement = '$0</amp-img>'; $content = preg_replace($pattern, $replacement, $content); $pattern = '/<img/'; $replacement = '<amp-img'; $content = preg_replace($pattern, $replacement, $content); $response->setContent($content); return $response; //変更したHTMLをレスポンスの内容としてセット
LaravelのMiddlewareを活用 imgタグの置き換え以外も
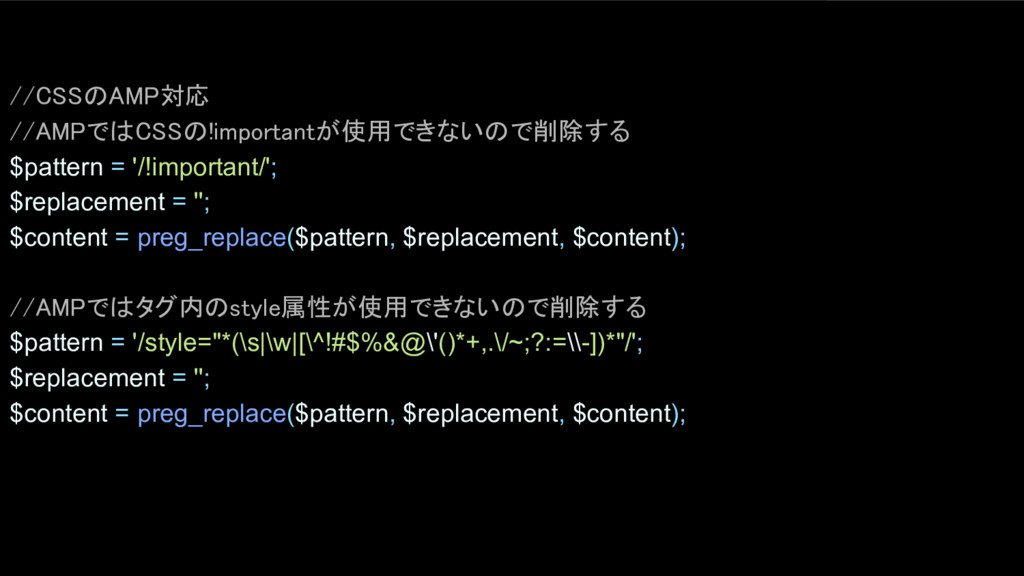
LaravelのMiddlewareを活用 //CSSのAMP対応 //AMPではCSSの!importantが使用できないので削除する $pattern = '/!important/'; $replacement = ''; $content
= preg_replace($pattern, $replacement, $content); //AMPではタグ内のstyle属性が使用できないので削除する $pattern = '/style="*(\s|\w|[\^!#$%&@\'()*+,.\/~;?:=\\-])*"/'; $replacement = ''; $content = preg_replace($pattern, $replacement, $content);
LaravelのMiddlewareを活用 非AMPページからAMP HTMLを自動生成するためには、 以下に対応しなければならない 1. AMPでは使用できない既存のタグの置き換え 2. imgタグで画像のheightとwidthを指定する必要がある LaravelのMiddlewareクラスを活用
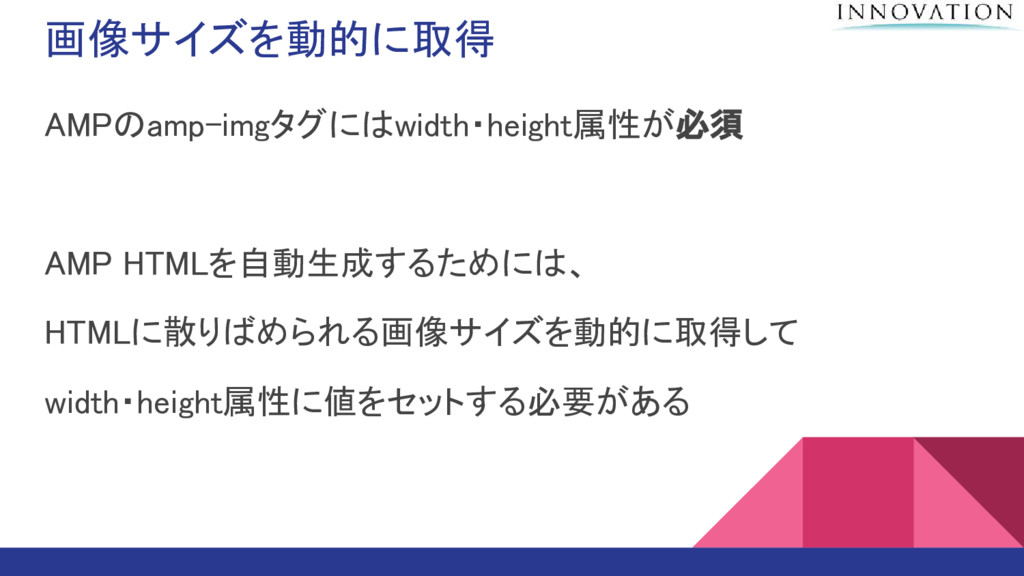
画像サイズを動的に取得 AMPのamp-imgタグにはwidth・height属性が必須 AMP HTMLを自動生成するためには、 HTMLに散りばめられる画像サイズを動的に取得して width・height属性に値をセットする必要がある
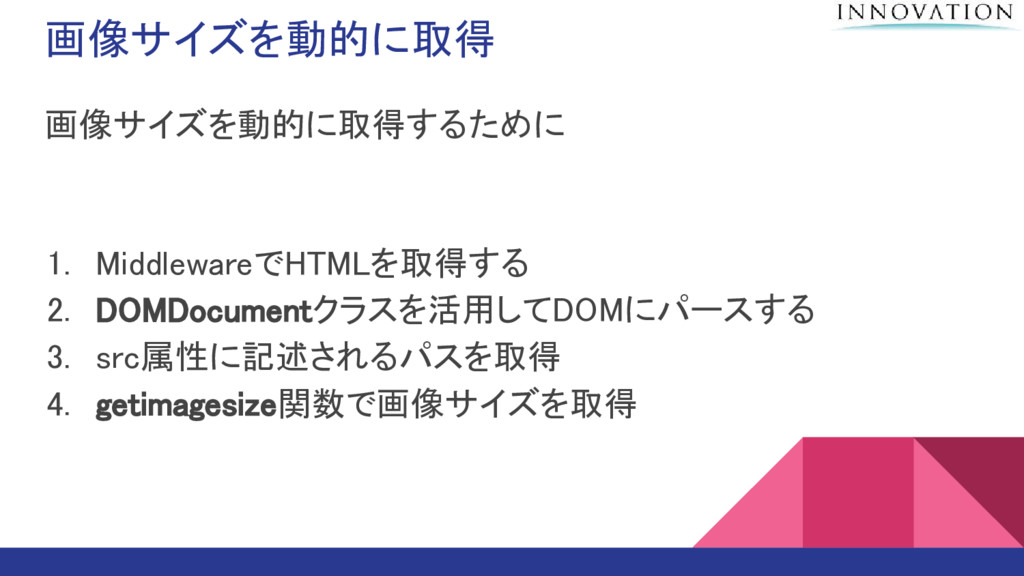
画像サイズを動的に取得 画像サイズを動的に取得するために 1. MiddlewareでHTMLを取得する 2. DOMDocumentクラスを活用してDOMにパースする 3. src属性に記述されるパスを取得 4. getimagesize関数で画像サイズを取得
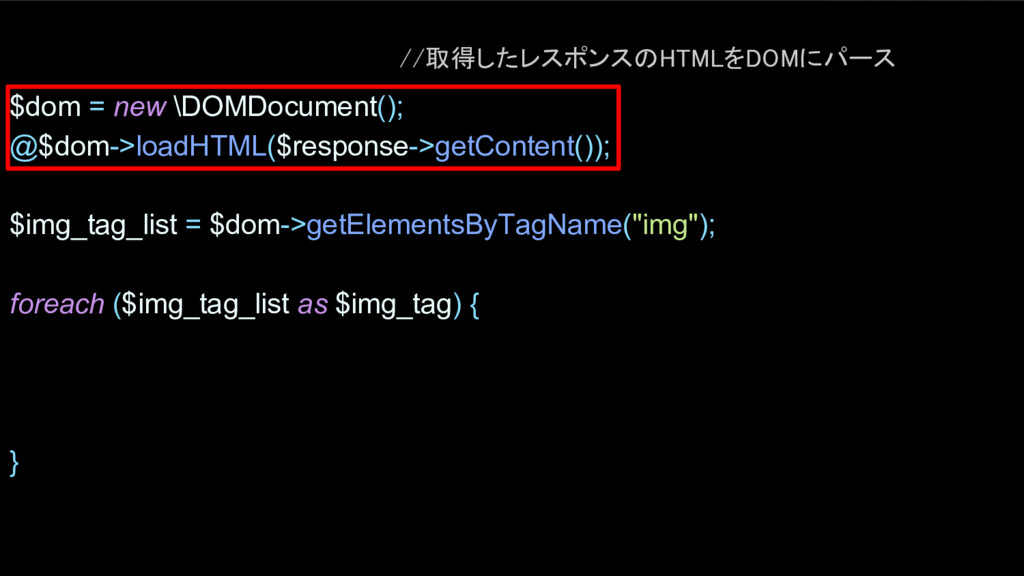
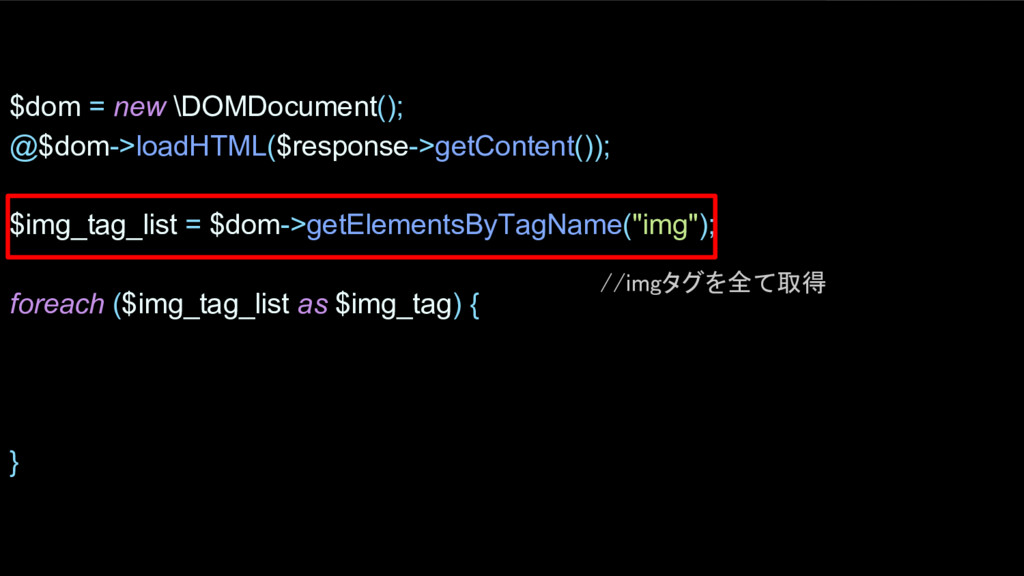
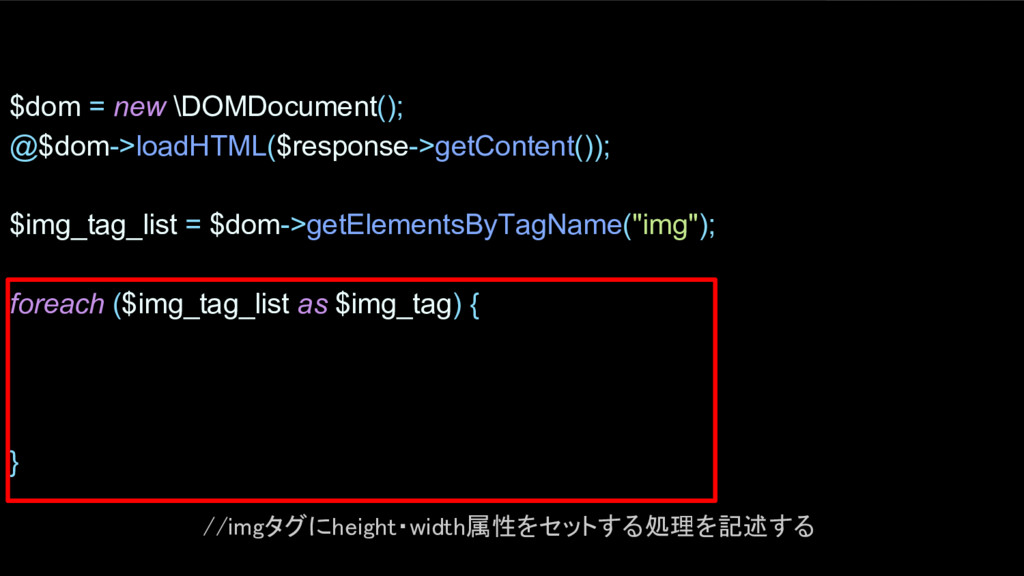
LaravelのMiddlewareを活用 $dom = new \DOMDocument(); @$dom->loadHTML($response->getContent()); $img_tag_list = $dom->getElementsByTagName("img"); foreach
($img_tag_list as $img_tag) { } //取得したレスポンスのHTMLをDOMにパース
LaravelのMiddlewareを活用 $dom = new \DOMDocument(); @$dom->loadHTML($response->getContent()); $img_tag_list = $dom->getElementsByTagName("img"); foreach
($img_tag_list as $img_tag) { } //imgタグを全て取得
LaravelのMiddlewareを活用 $dom = new \DOMDocument(); @$dom->loadHTML($response->getContent()); $img_tag_list = $dom->getElementsByTagName("img"); foreach
($img_tag_list as $img_tag) { } //imgタグにheight・width属性をセットする処理を記述する
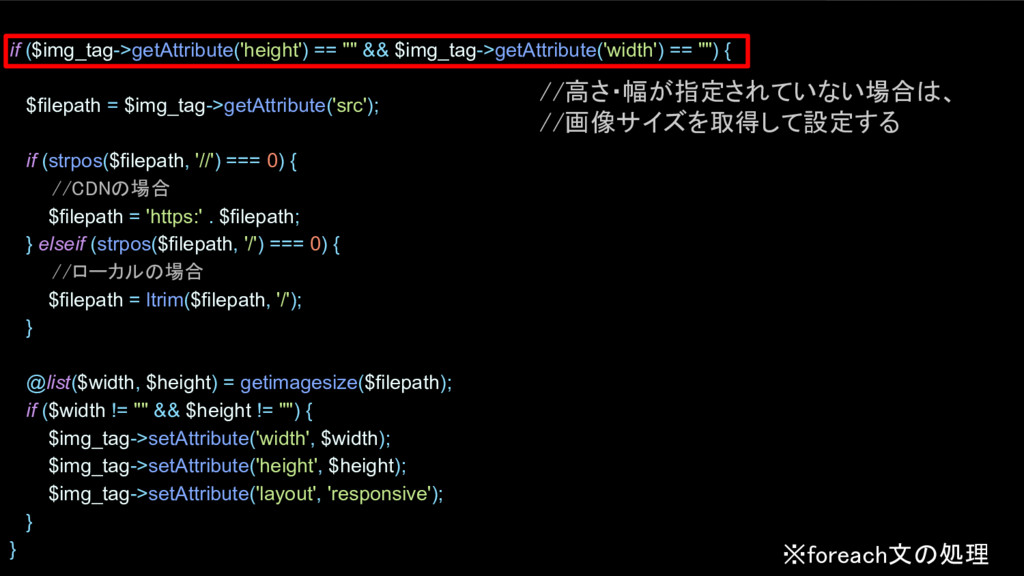
LaravelのMiddlewareを活用 if ($img_tag->getAttribute('height') == "" && $img_tag->getAttribute('width') == "") {
$filepath = $img_tag->getAttribute('src'); if (strpos($filepath, '//') === 0) { //CDNの場合 $filepath = 'https:' . $filepath; } elseif (strpos($filepath, '/') === 0) { //ローカルの場合 $filepath = ltrim($filepath, '/'); } @list($width, $height) = getimagesize($filepath); if ($width != "" && $height != "") { $img_tag->setAttribute('width', $width); $img_tag->setAttribute('height', $height); $img_tag->setAttribute('layout', 'responsive'); } } //高さ・幅が指定されていない場合は、 //画像サイズを取得して設定する ※foreach文の処理
LaravelのMiddlewareを活用 if ($img_tag->getAttribute('height') == "" && $img_tag->getAttribute('width') == "") {
$filepath = $img_tag->getAttribute('src'); if (strpos($filepath, '//') === 0) { //CDNの場合 $filepath = 'https:' . $filepath; } elseif (strpos($filepath, '/') === 0) { //ローカルの場合 $filepath = ltrim($filepath, '/'); } @list($width, $height) = getimagesize($filepath); if ($width != "" && $height != "") { $img_tag->setAttribute('width', $width); $img_tag->setAttribute('height', $height); $img_tag->setAttribute('layout', 'responsive'); } } //画像のパスを取得 ※foreach文の処理
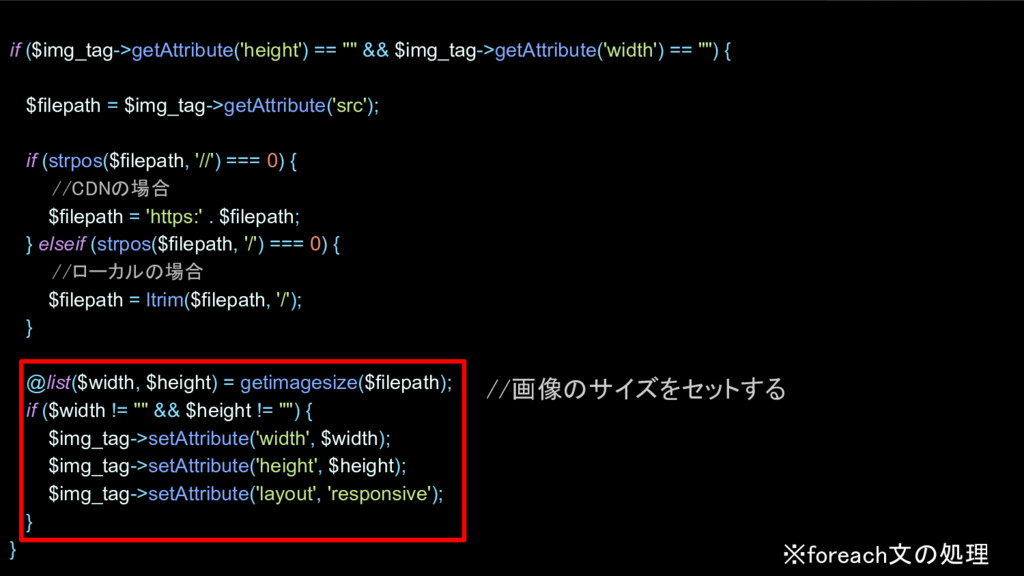
LaravelのMiddlewareを活用 if ($img_tag->getAttribute('height') == "" && $img_tag->getAttribute('width') == "") {
$filepath = $img_tag->getAttribute('src'); if (strpos($filepath, '//') === 0) { //CDNの場合 $filepath = 'https:' . $filepath; } elseif (strpos($filepath, '/') === 0) { //ローカルの場合 $filepath = ltrim($filepath, '/'); } @list($width, $height) = getimagesize($filepath); if ($width != "" && $height != "") { $img_tag->setAttribute('width', $width); $img_tag->setAttribute('height', $height); $img_tag->setAttribute('layout', 'responsive'); } } //画像のサイズをセットする ※foreach文の処理
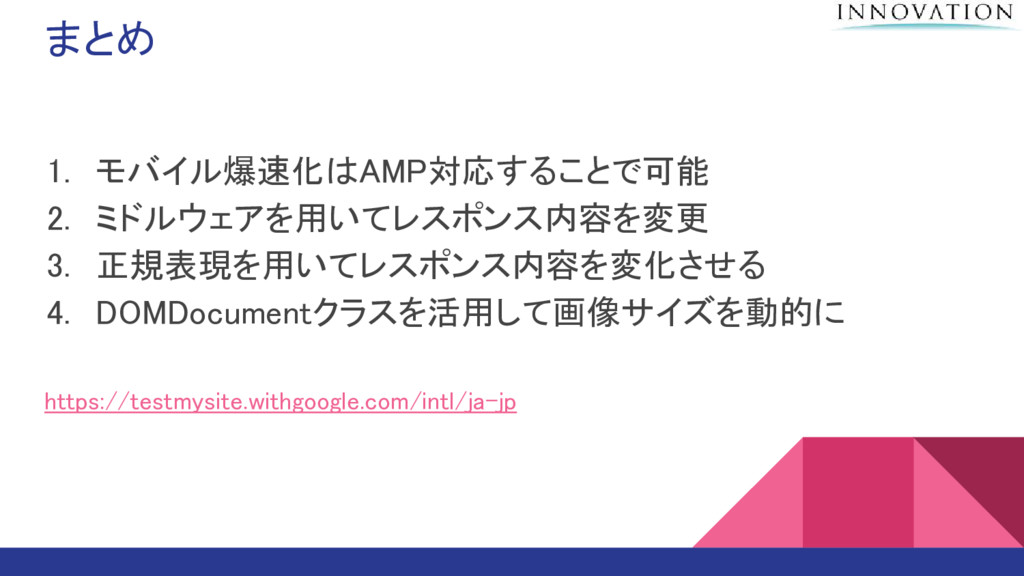
まとめ 1. モバイル爆速化はAMP対応することで可能 2. ミドルウェアを用いてレスポンス内容を変更 3. 正規表現を用いてレスポンス内容を変化させる 4. DOMDocumentクラスを活用して画像サイズを動的に https://testmysite.withgoogle.com/intl/ja-jp
エンジニアブログやってます! http://tech.innovation.co.jp/