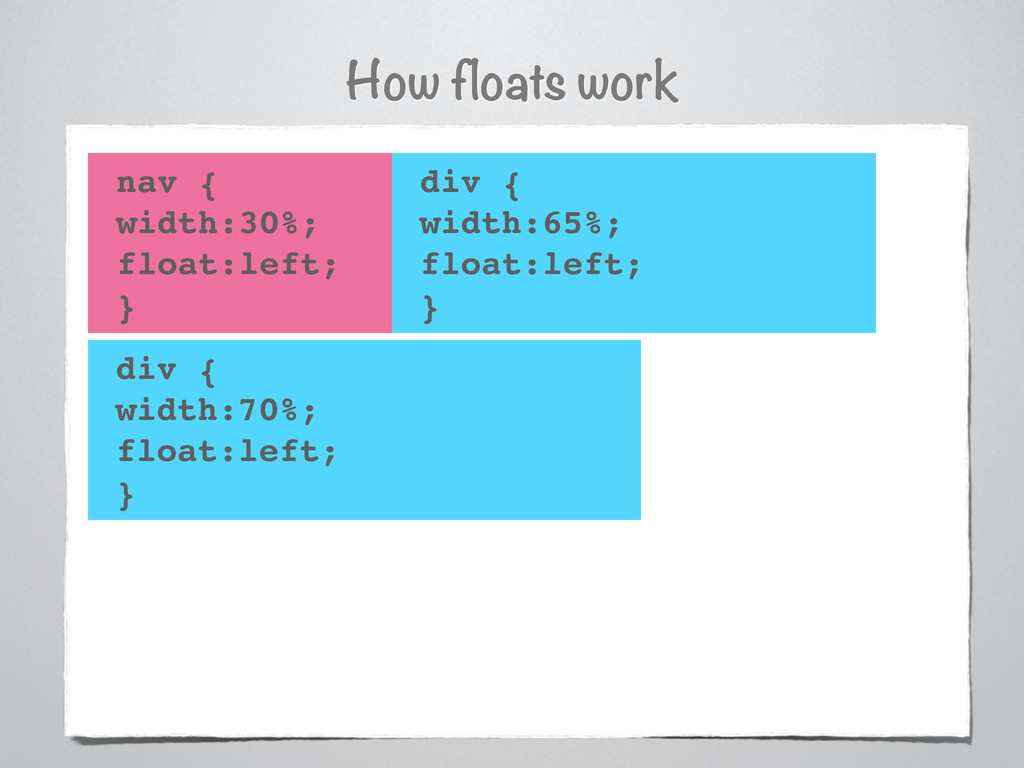
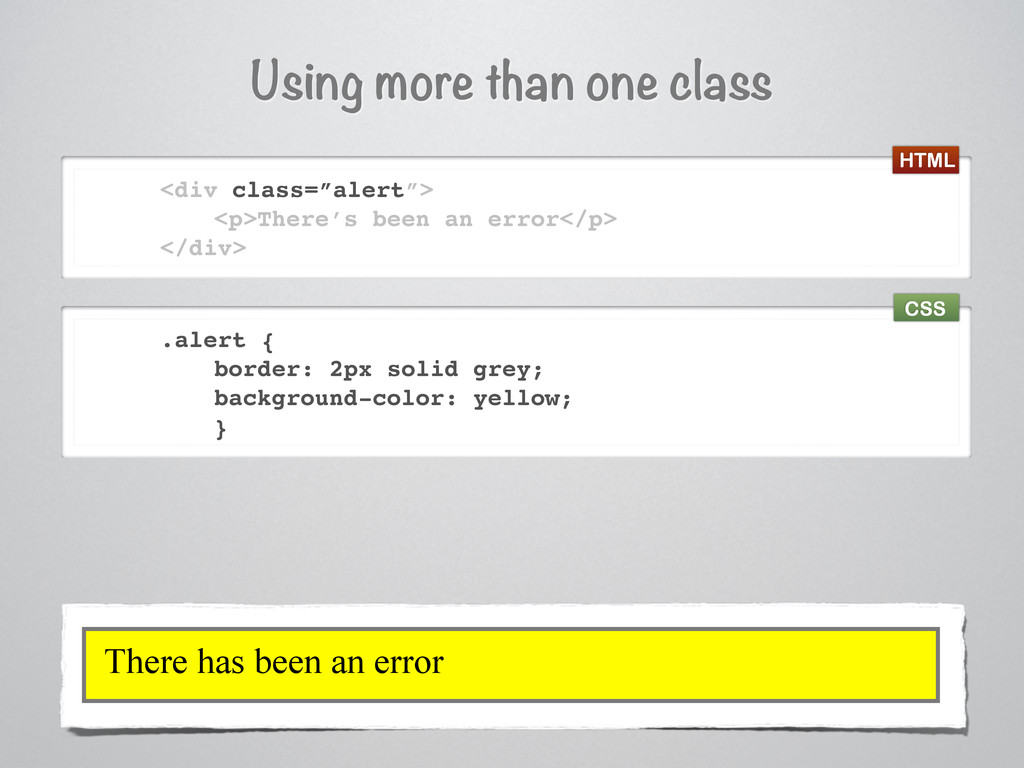
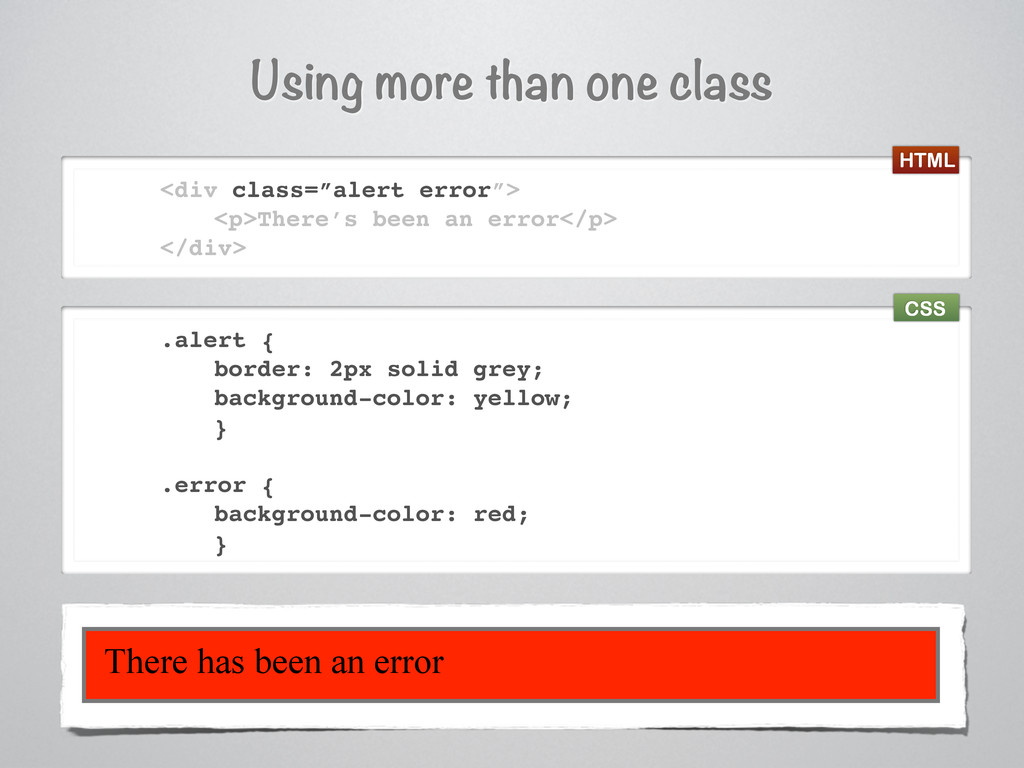
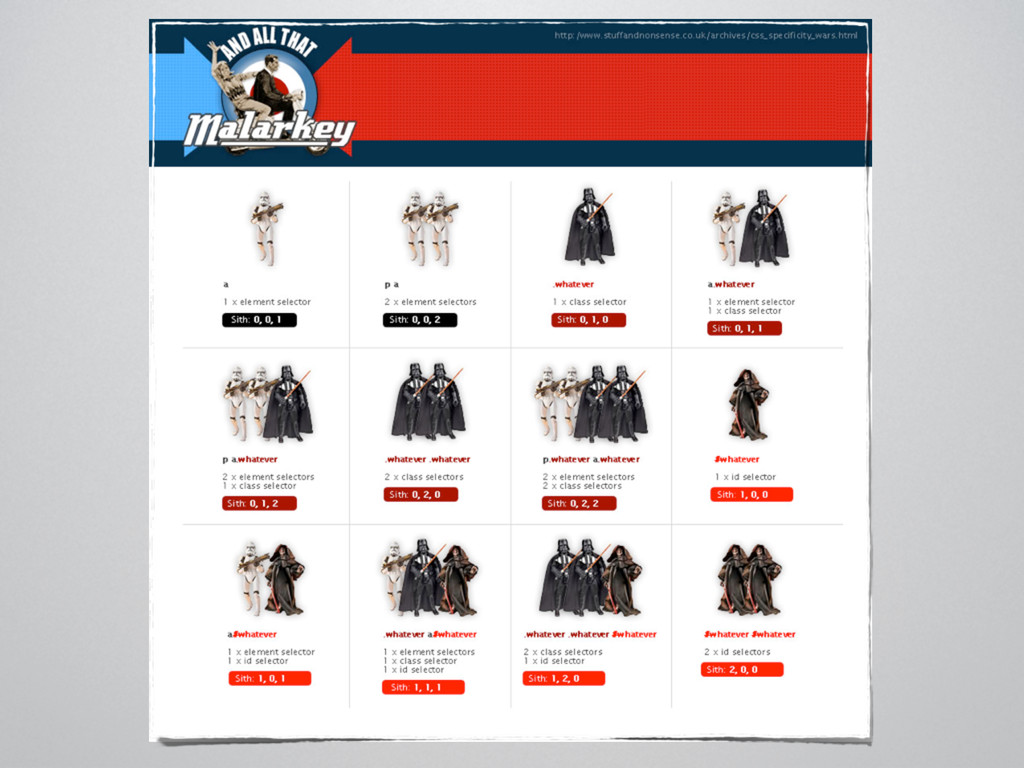
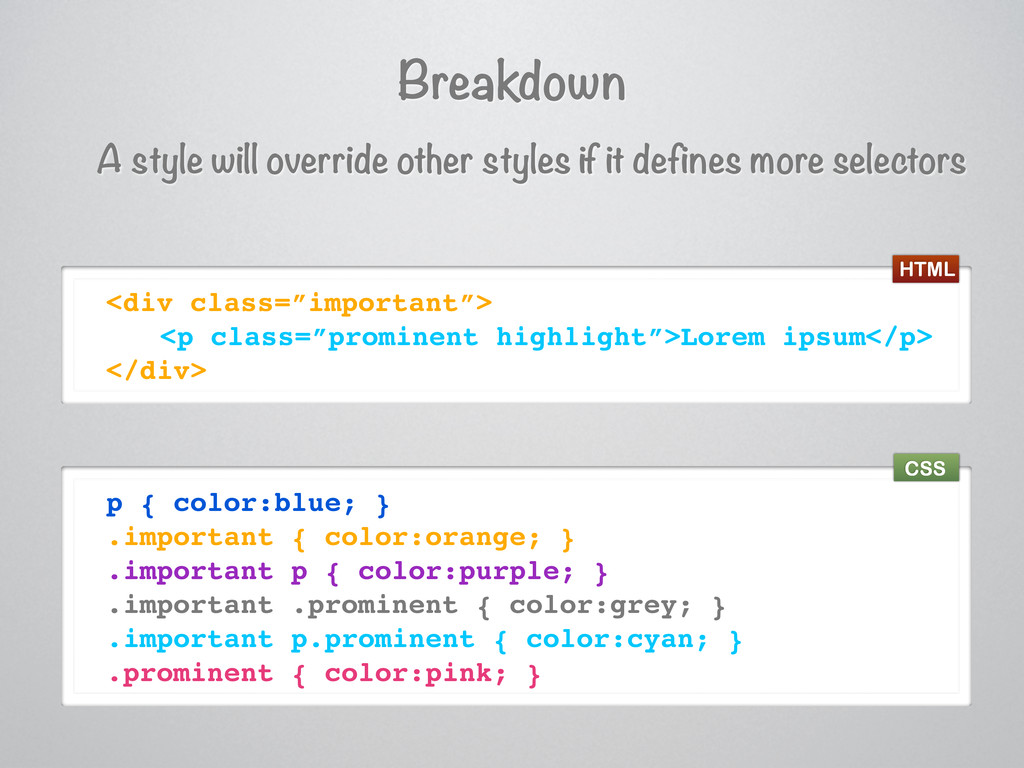
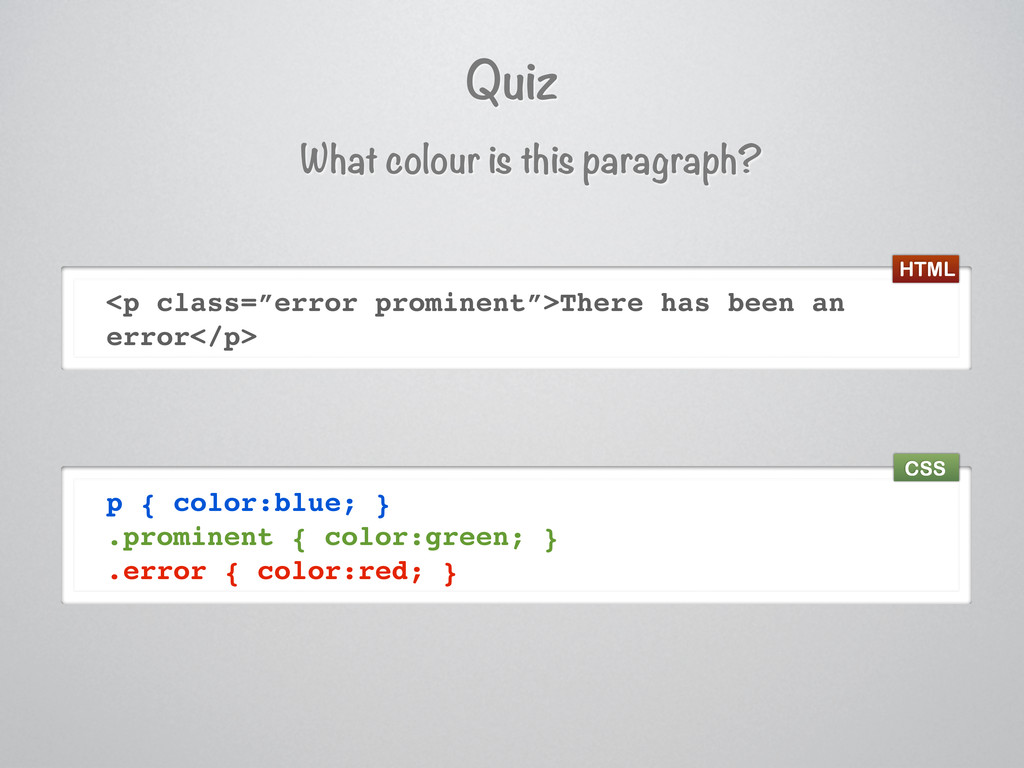
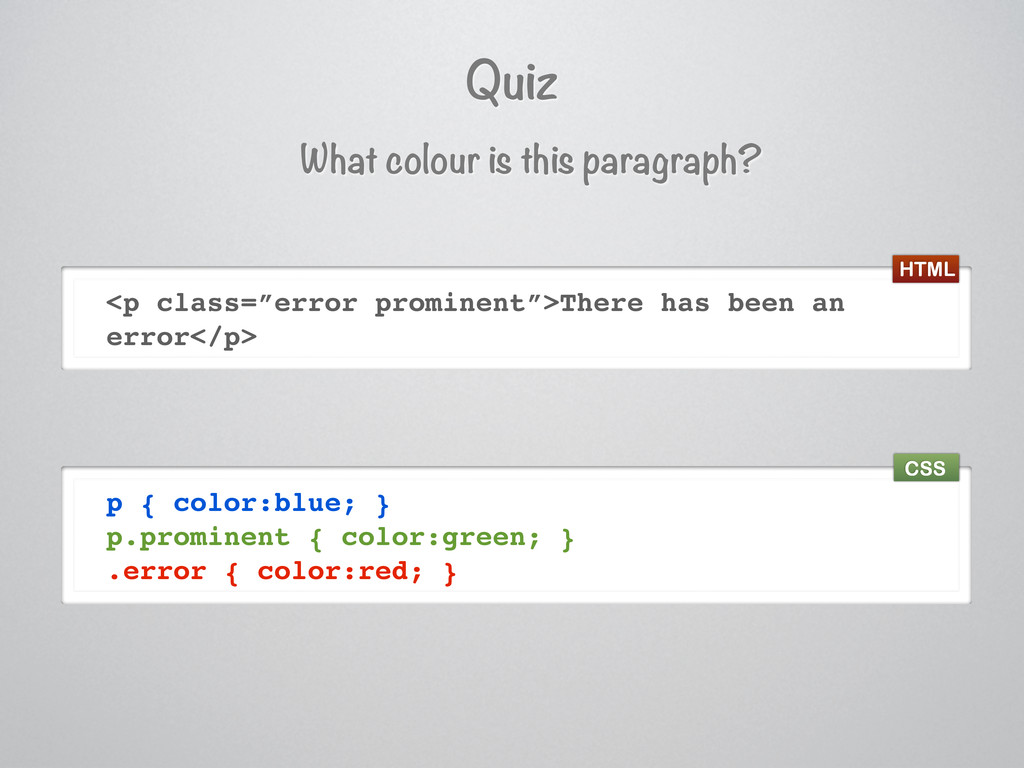
it is rather than how it looks • Don’t start with a numeral or symbol • You can use a class more than once, and have different styles for it depending on where it’s nested.
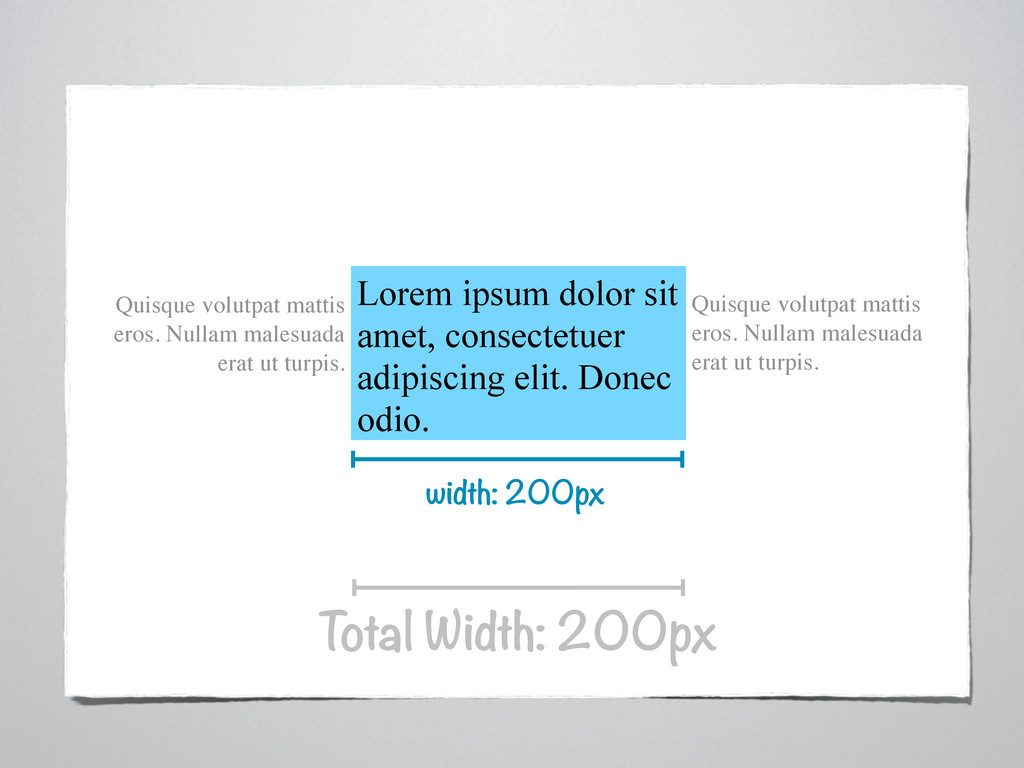
width: 200px Total Width: 200px Quisque volutpat mattis eros. Nullam malesuada erat ut turpis. Quisque volutpat mattis eros. Nullam malesuada erat ut turpis.
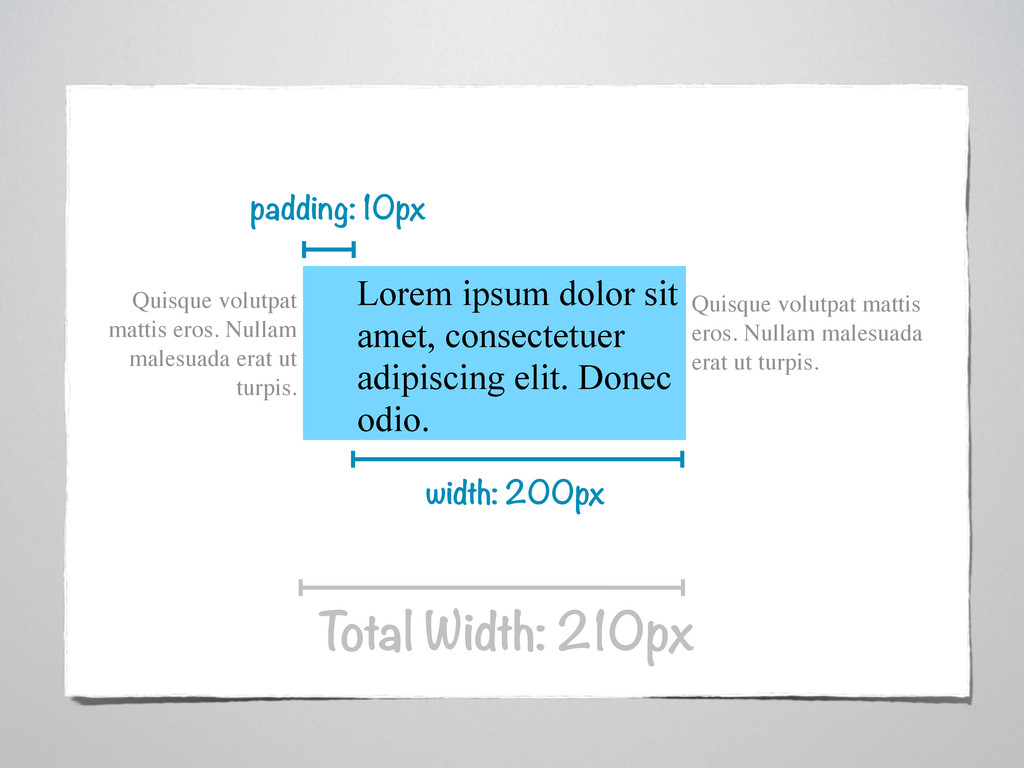
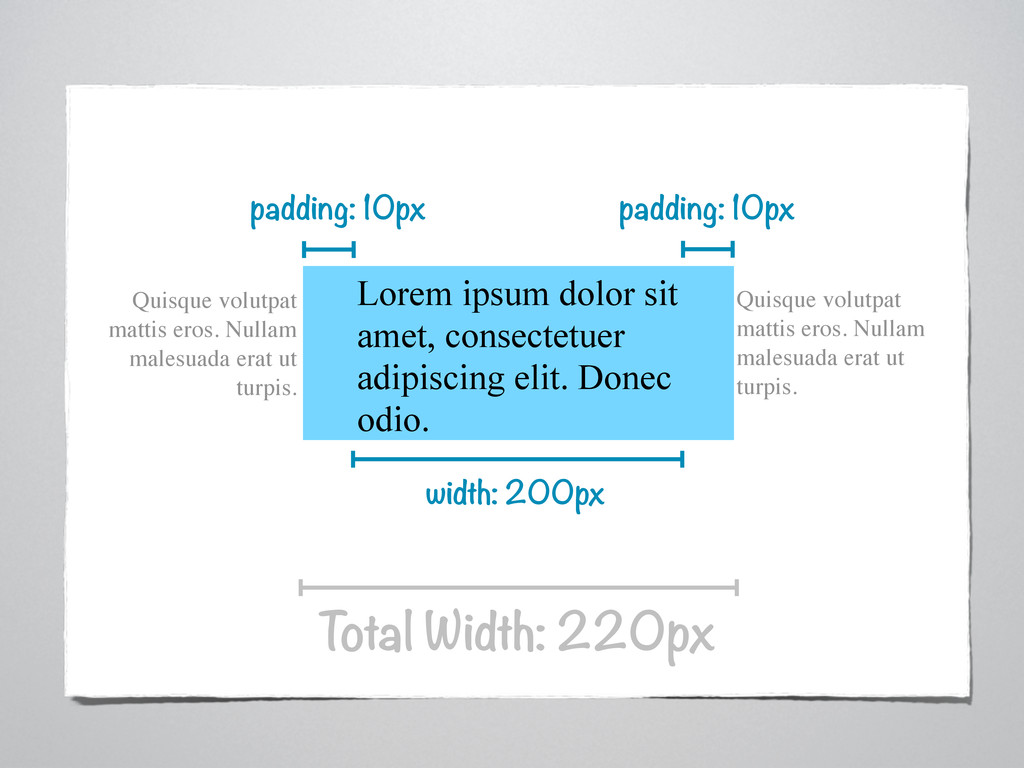
width: 200px Total Width: 210px padding: 10px Quisque volutpat mattis eros. Nullam malesuada erat ut turpis. Quisque volutpat mattis eros. Nullam malesuada erat ut turpis.
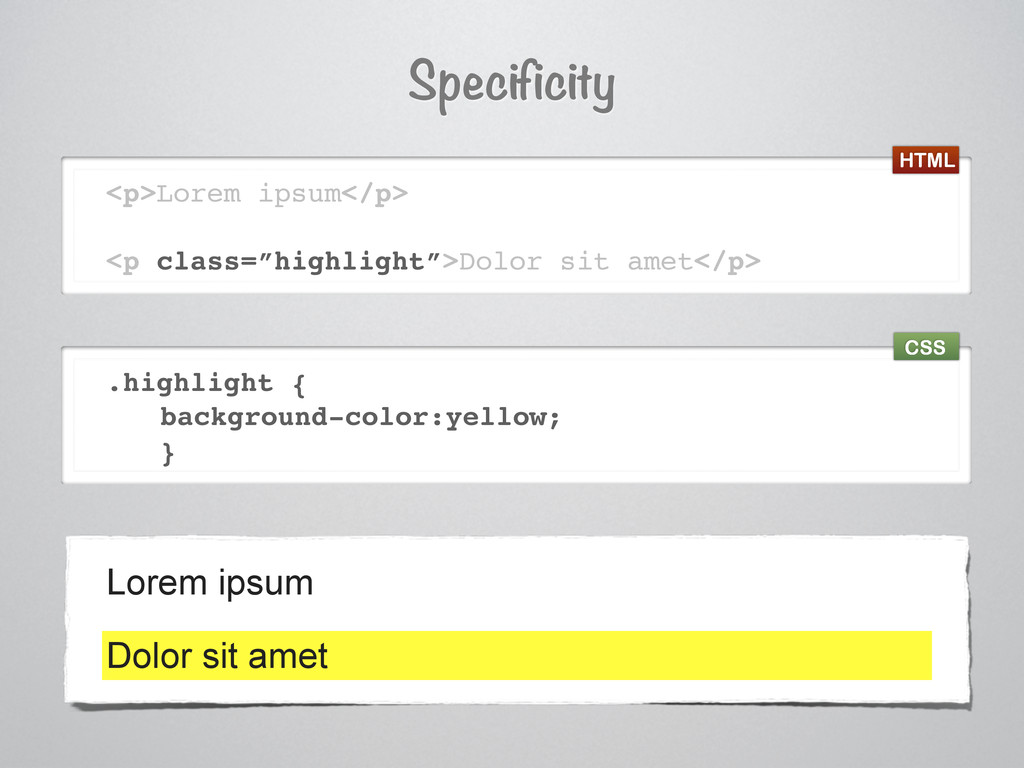
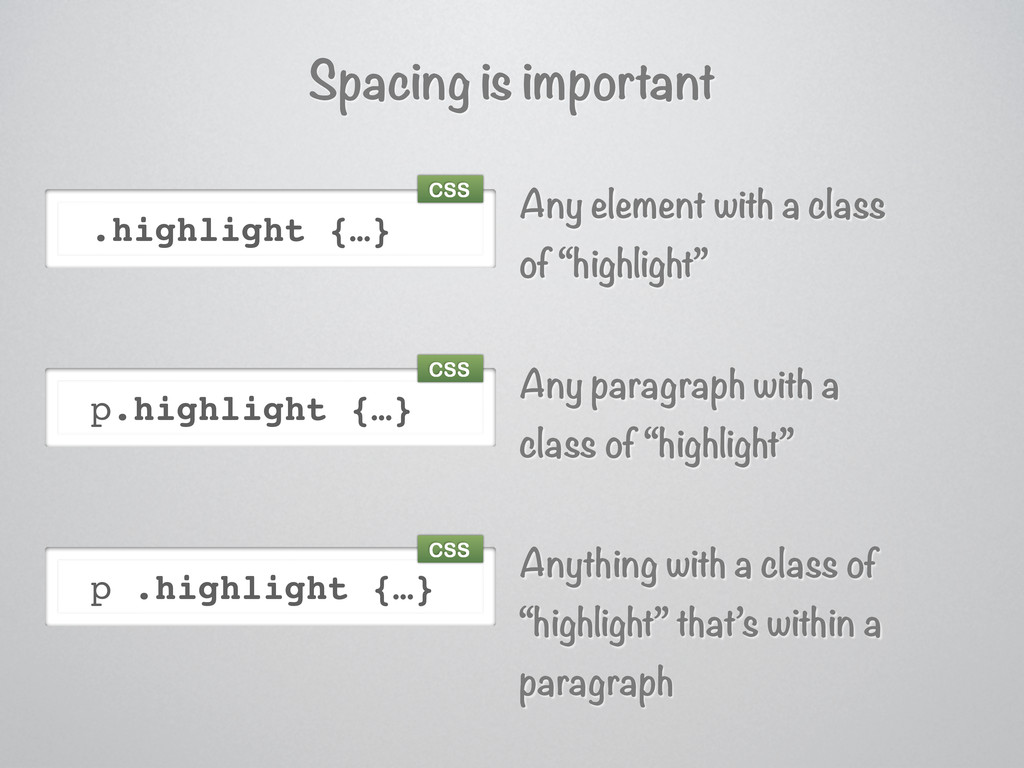
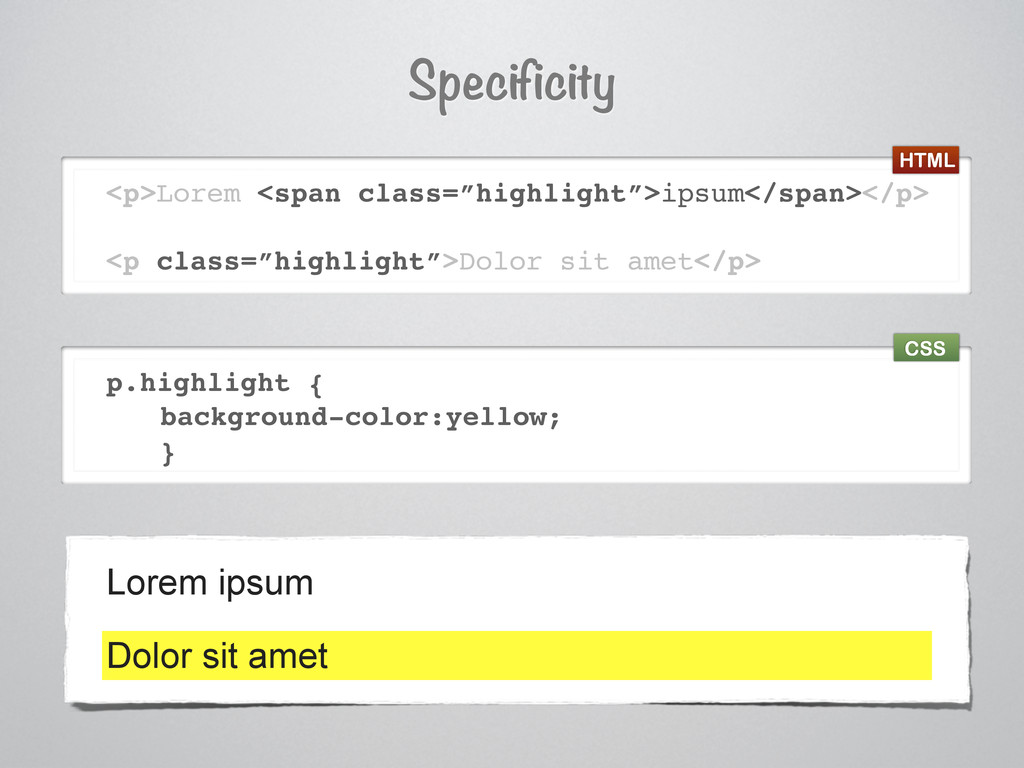
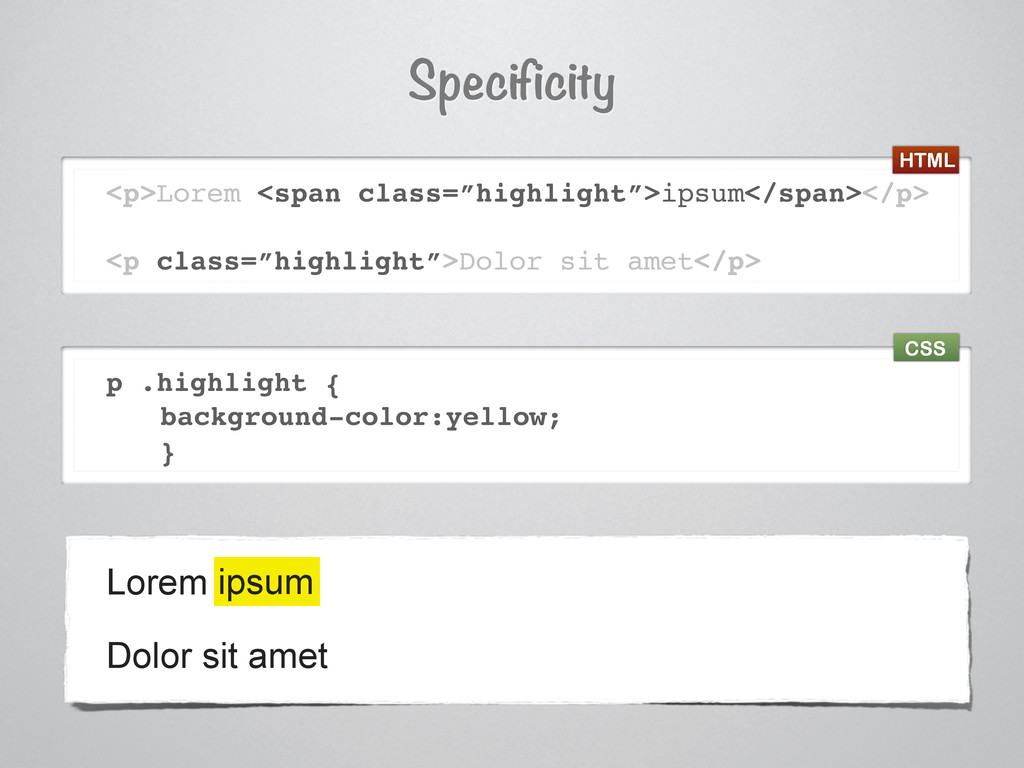
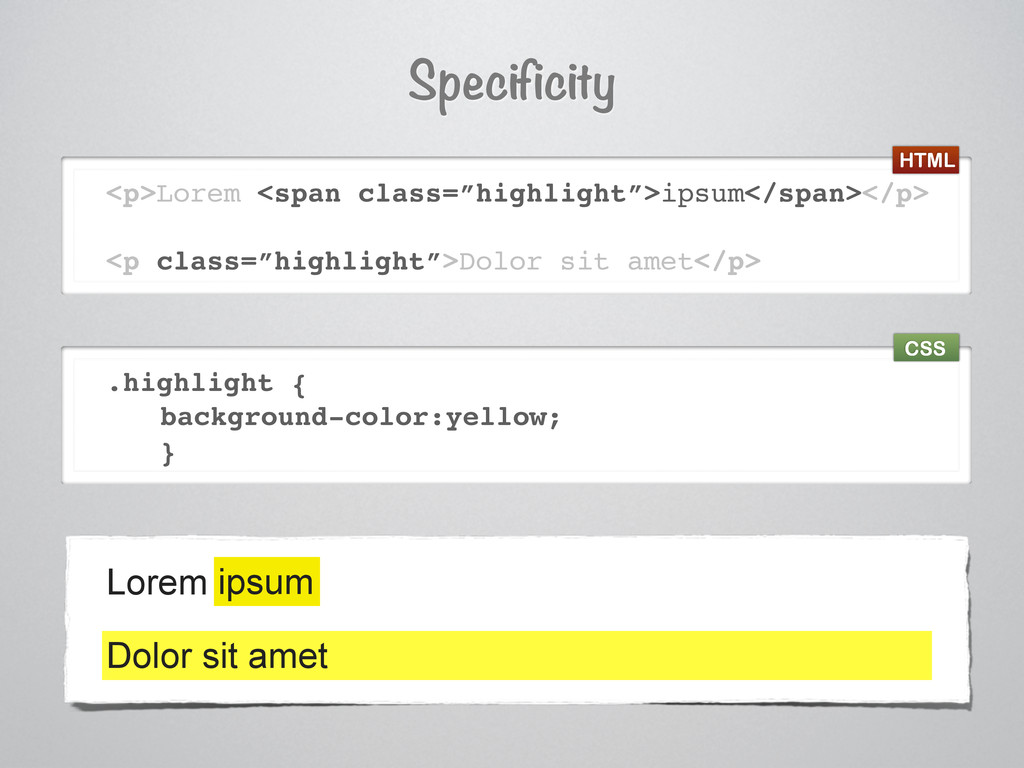
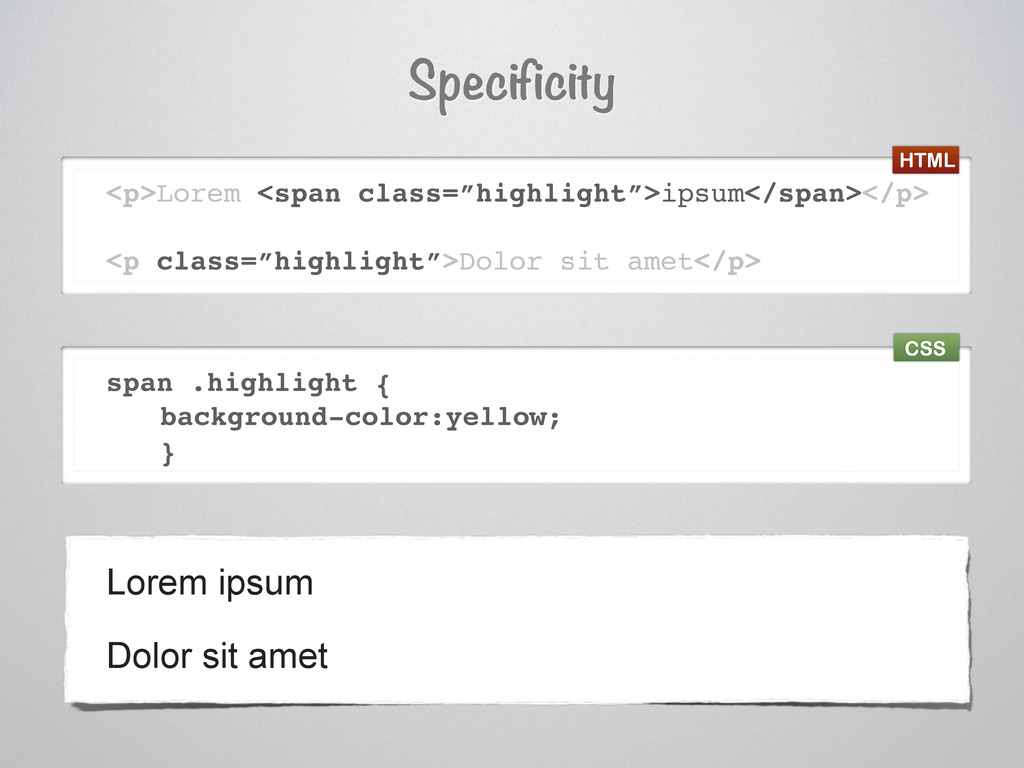
Any element with a class of “highlight” Any paragraph with a class of “highlight” Anything with a class of “highlight” that’s within a paragraph CSS CSS CSS
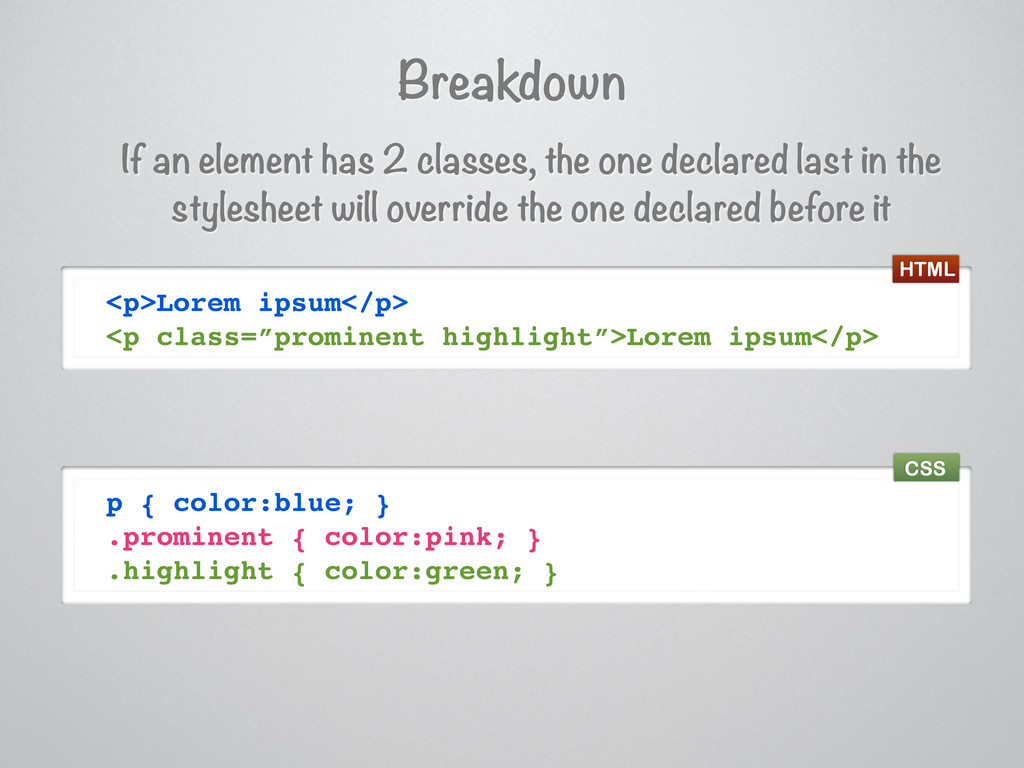
last in the stylesheet will override the one declared before it <p>Lorem ipsum</p> <p class=”prominent highlight”>Lorem ipsum</p> p { color:blue; } .prominent { color:pink; } .highlight { color:green; } HTML CSS
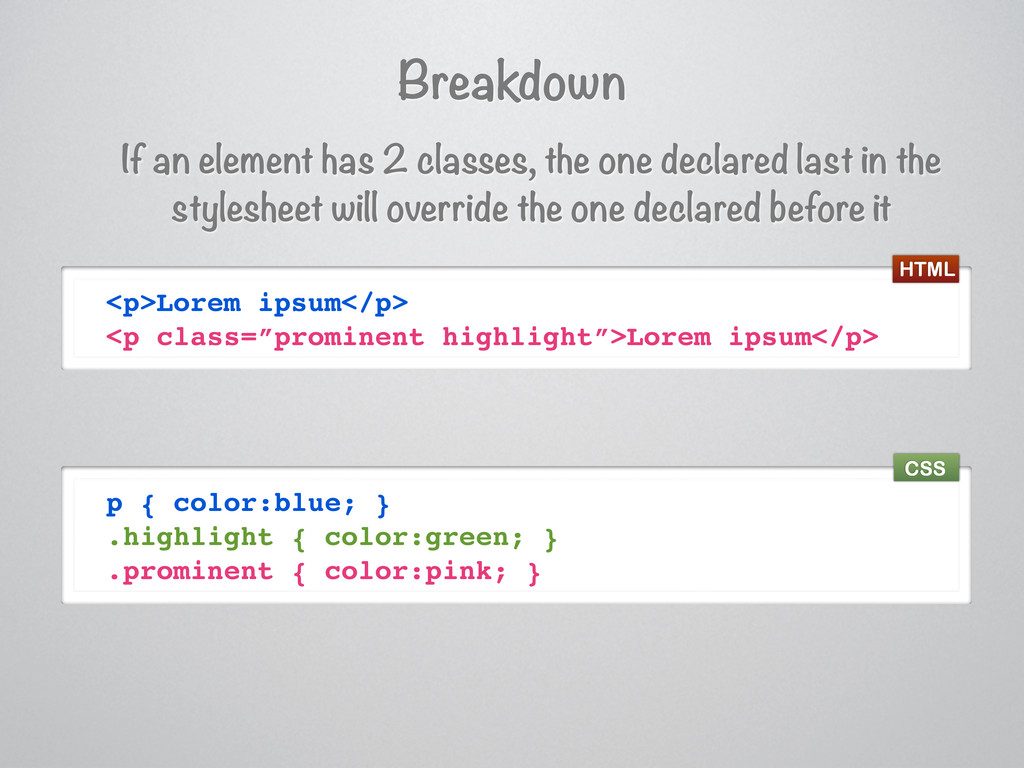
last in the stylesheet will override the one declared before it <p>Lorem ipsum</p> <p class=”prominent highlight”>Lorem ipsum</p> p { color:blue; } .highlight { color:green; } .prominent { color:pink; } HTML CSS
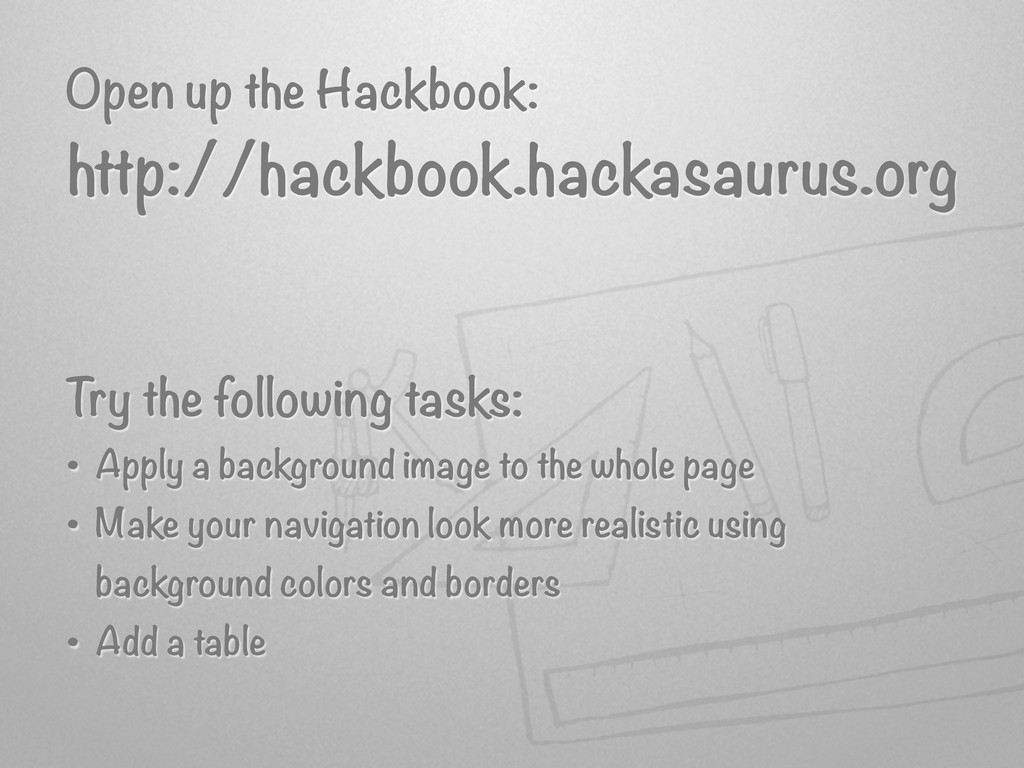
a background image to the whole page • Make your navigation look more realistic using background colors and borders • Add a table http://hackbook.hackasaurus.org
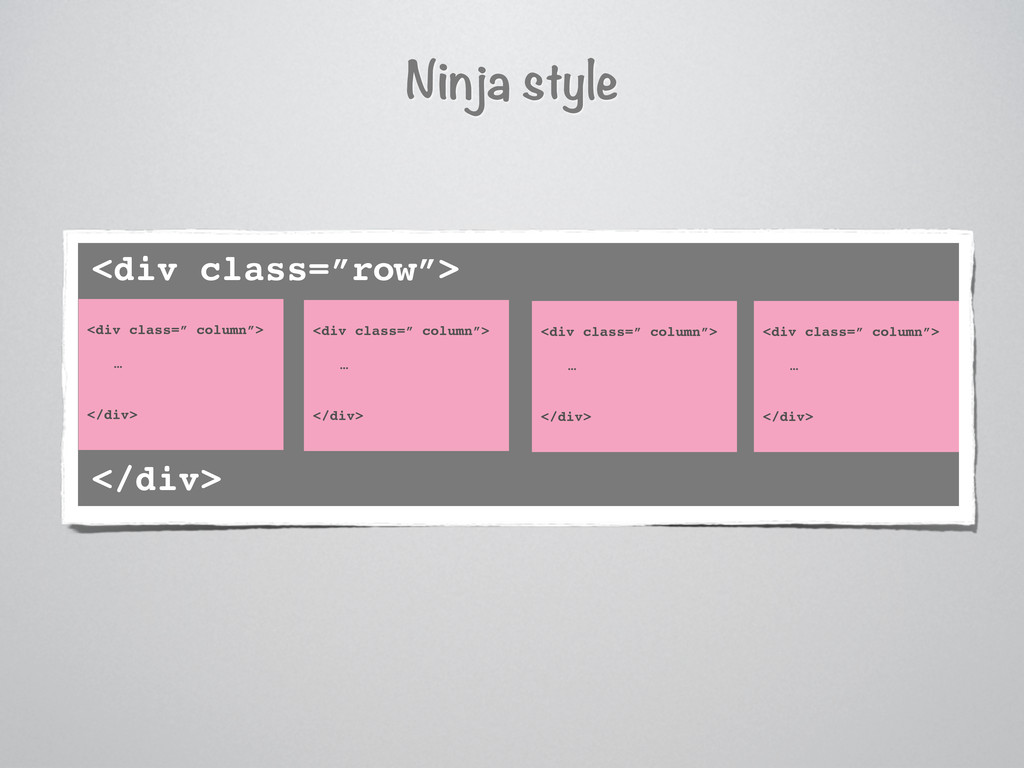
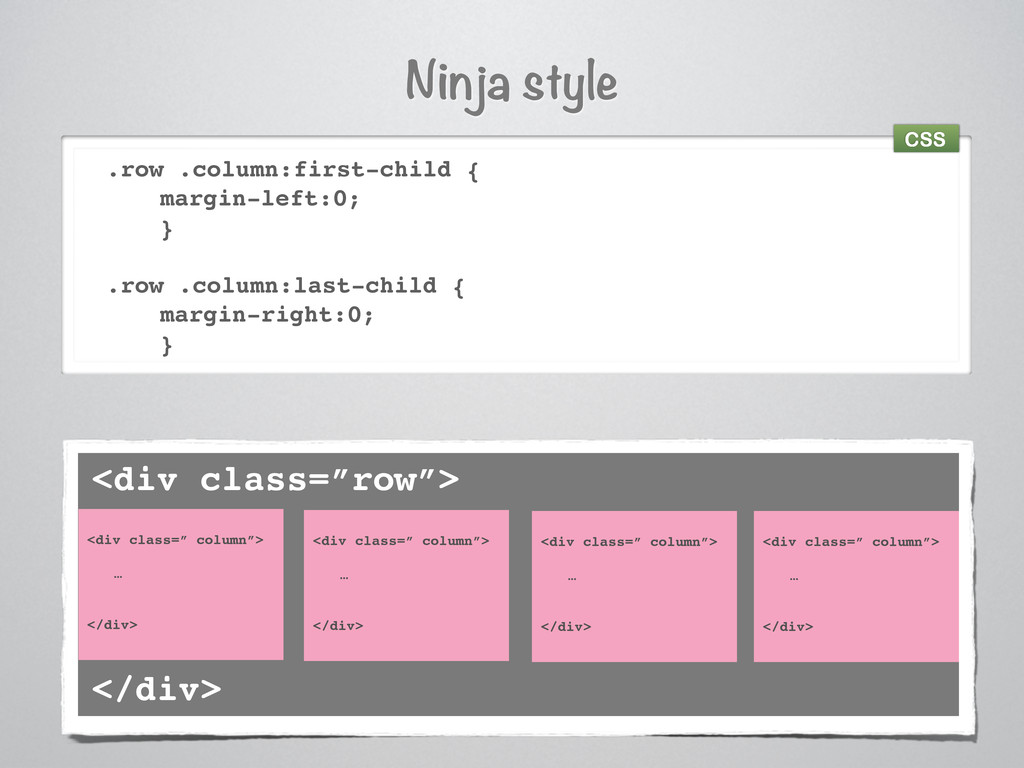
![Ninja Style div.last-child {…} a[href$=.pdf] div:nth-child(3) {…} T argets the](https://files.speakerdeck.com/presentations/4e8103a616acd80060001a9e/slide_149.jpg)